

Hot pink stiletto nails are the ultimate power move—bold, unapologetic, and instantly commanding attention. There’s something about the combination of that vibrant, confidence-boosting color paired with the sharp, elongated silhouette that transforms your entire look. Whether you’re heading to a night out, a special event, or just want to elevate your everyday aesthetic, hot pink stilettos deliver that statement-making edge without needing anything else to do the heavy lifting.
The beauty of hot pink stiletto nails is their incredible versatility. This shade works across every season, skin tone, and personal style—from minimalist and sleek to maximally decorated with embellishments, patterns, and finishes. You can go classically chic with a glossy single color, dive into intricate nail art, experiment with textures like matte or metallic, or blend hot pink with complementary colors for something unexpected. The stiletto shape itself elongates your fingers and creates that distinctive fierce silhouette that makes hot pink even more impactful.
The real magic happens when you take hot pink as your base and explore the endless directions you can go with it. Maybe you layer it with glitter, pair it with gold accents, matte it down, or use it as just one element in a more complex design. Each approach creates a completely different vibe while keeping that core hot pink energy. Let’s explore 15 distinct hot pink stiletto nail ideas that span the full spectrum—from understated elegance to full glamour.
1. Classic Glossy Hot Pink
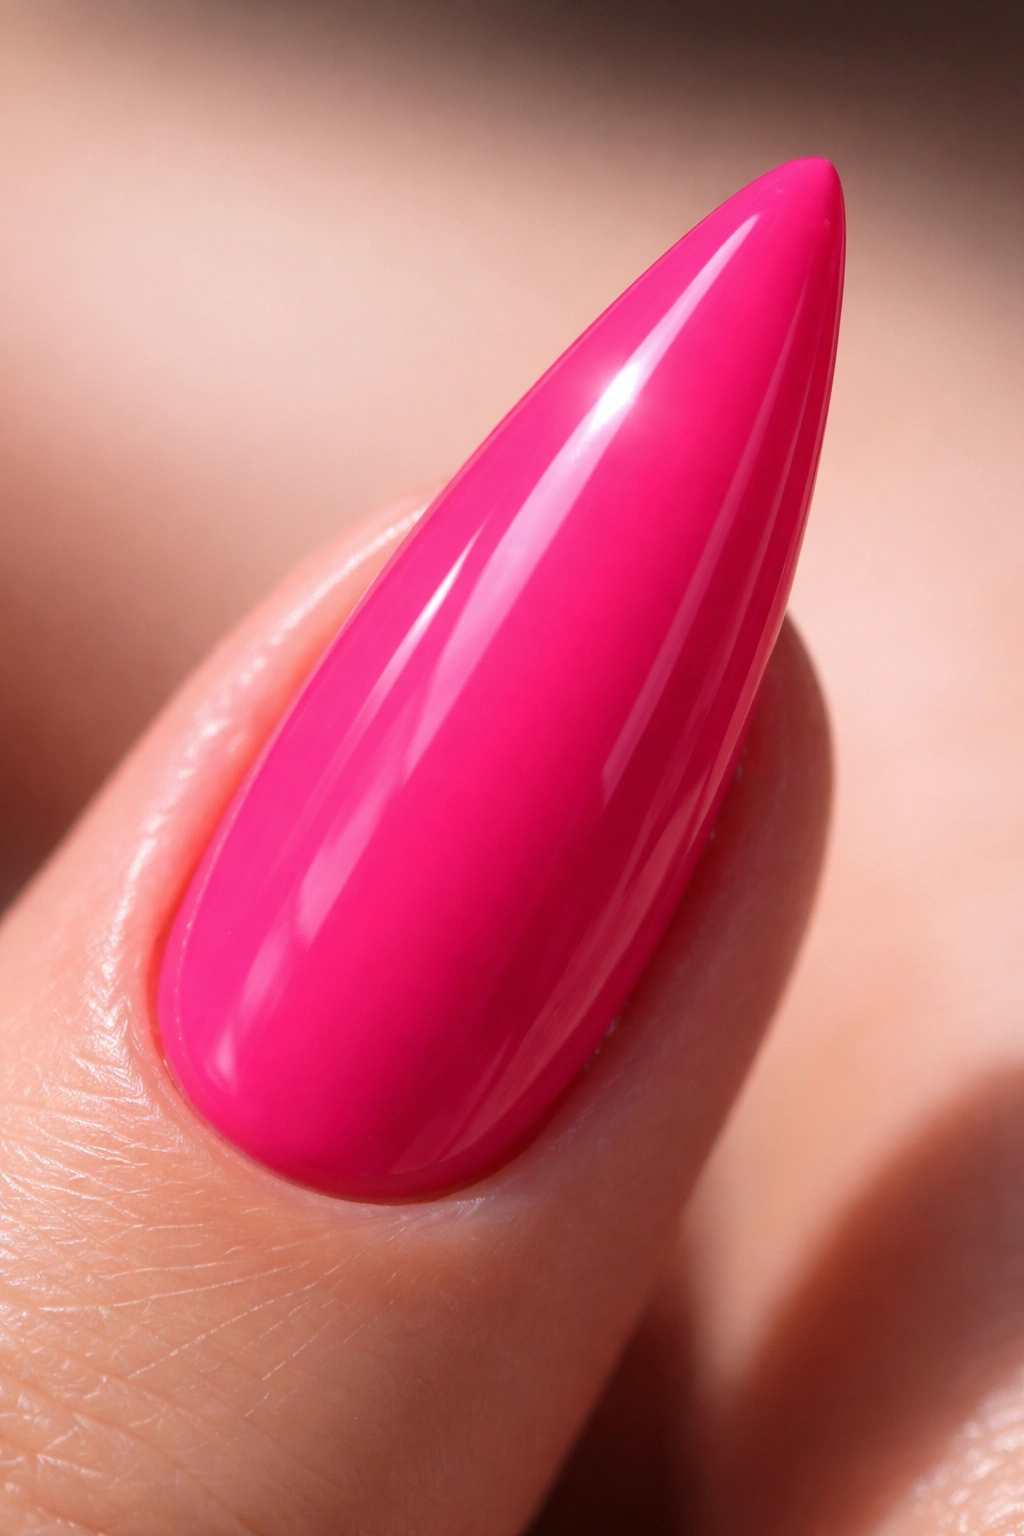
Pure, unadorned hot pink with a high-shine finish is the gold standard for a reason. This is the nail design that works everywhere—boardroom meetings, casual weekend brunches, date nights, formal events. The key to nailing this look is choosing the right shade of hot pink (one that leans slightly cool rather than orange), applying two thin coats rather than one thick coat, and finishing with a quality glossy topcoat that delivers genuine shine without bubbling or streaking.
Why Simple Works Best
The reason this look endures is that it’s confident without trying too hard. A single, vibrant color on a well-maintained stiletto shape says everything it needs to say. There’s no distraction, no pattern to pull focus—just pure color impact. The glossy finish amplifies the vibrancy and creates that eye-catching shine that catches light beautifully, making your nails appear longer and more elegant.
Pro Tips for Maximum Impact
- Use a base coat specifically formulated for bright colors to prevent staining and ensure even opacity
- Choose a hot pink with slight cool undertones rather than coral or orange-pink for a more sophisticated finish
- Apply topcoat in thin, even strokes to avoid bubbles and cloudiness
- Invest in a high-quality topcoat—drugstore versions often look plastic-y compared to professional formulas
- Keep your cuticles pushed back and your nail edges smooth; the simplicity of this look means imperfections show immediately
The longevity of hot pink can depend on the specific formula, so if your polish chips quickly, it might be worth upgrading to a more durable brand or considering gel polish for longer wear.
2. Hot Pink With Gold Leaf Accents
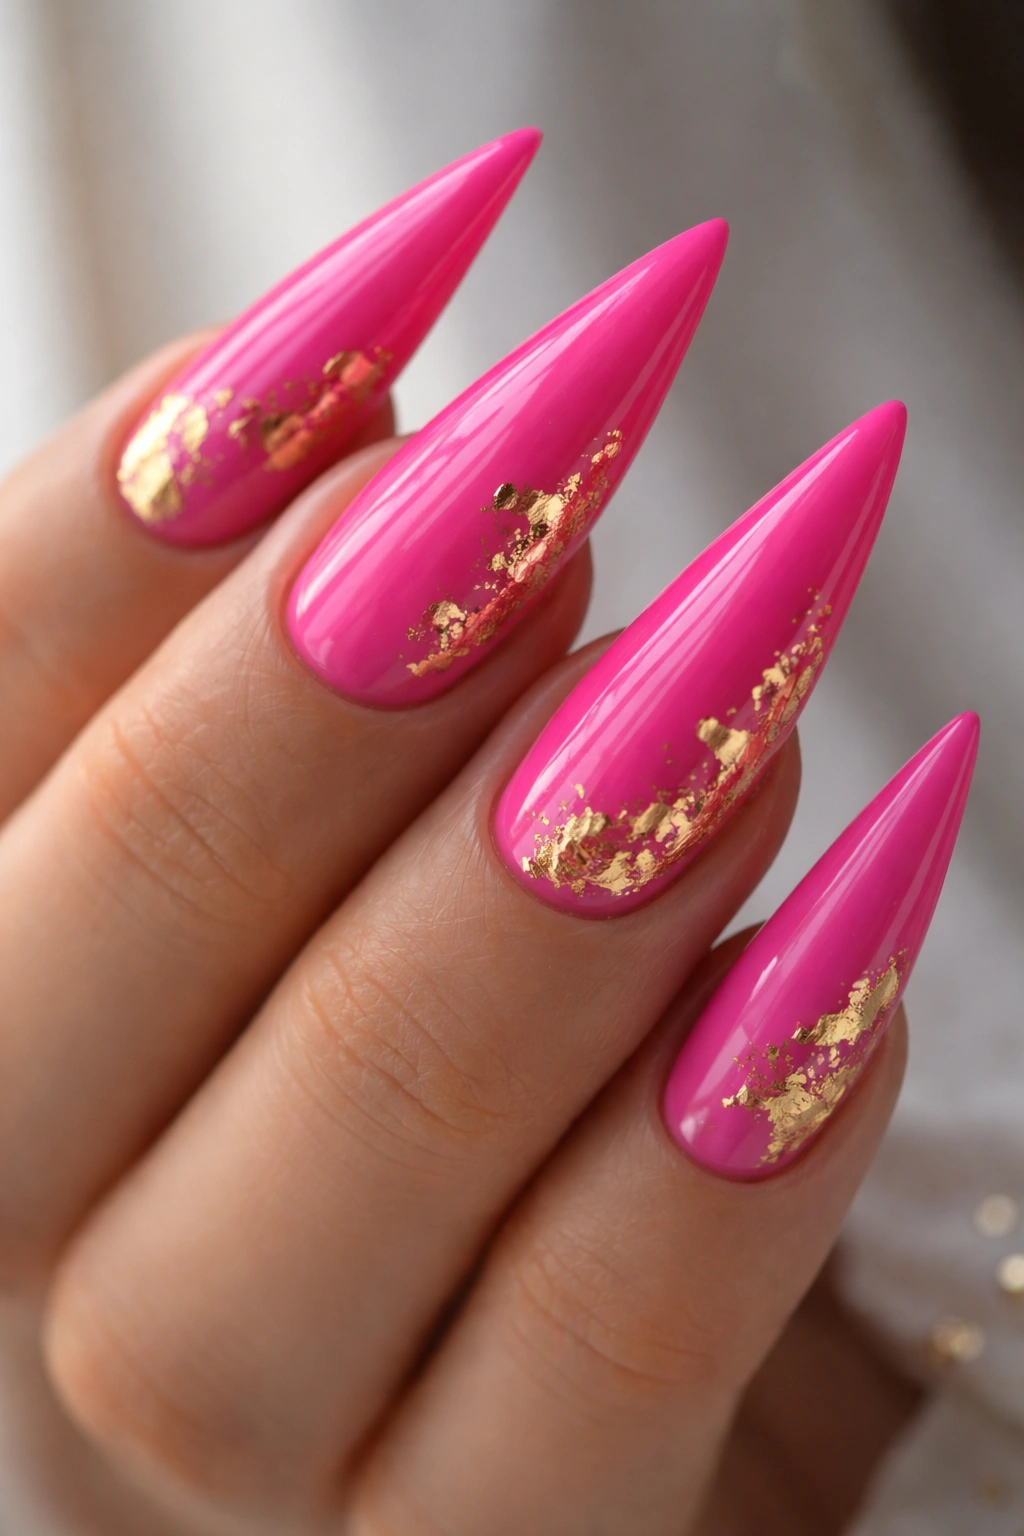
This design takes the classic hot pink and adds understated luxury through strategically placed gold leaf. You’re creating a look that’s glam without being over-the-top—perfect for someone who wants presence but prefers elegance over sparkle. The gold leaf catches light just enough to draw attention to your nails while the hot pink remains the dominant color.
The Art of Balanced Embellishment
Gold leaf works beautifully on hot pink because the metals complement the vibrancy rather than competing with it. The key is restraint—place the gold leaf on the nail in abstract patterns, thin lines, or small accents rather than covering large portions of the nail. You might add gold leaf to the upper corner, create a diagonal swipe, or do scattered fragments that look intentional rather than random.
Application and Styling Tips
- Apply gold leaf after your hot pink base polish has dried completely; sticky polish underneath will help the leaf adhere
- Use a top coat immediately after placing the leaf to seal it and prevent flaking
- Gold leaf works especially well on stilettos pointed at the tip—you can place a small accent right at the point for visual interest
- Pair this with minimalist jewelry to let the nails be the statement piece
- Works beautifully for weddings, anniversaries, or any event where you want subtle glamour
If you’re doing this at home, buy proper nail art gold leaf (not the craft store version) and practice the application technique first on practice nails or nail wheels. Professional application ensures the leaf sits perfectly flat and lasts through washing and daily wear.
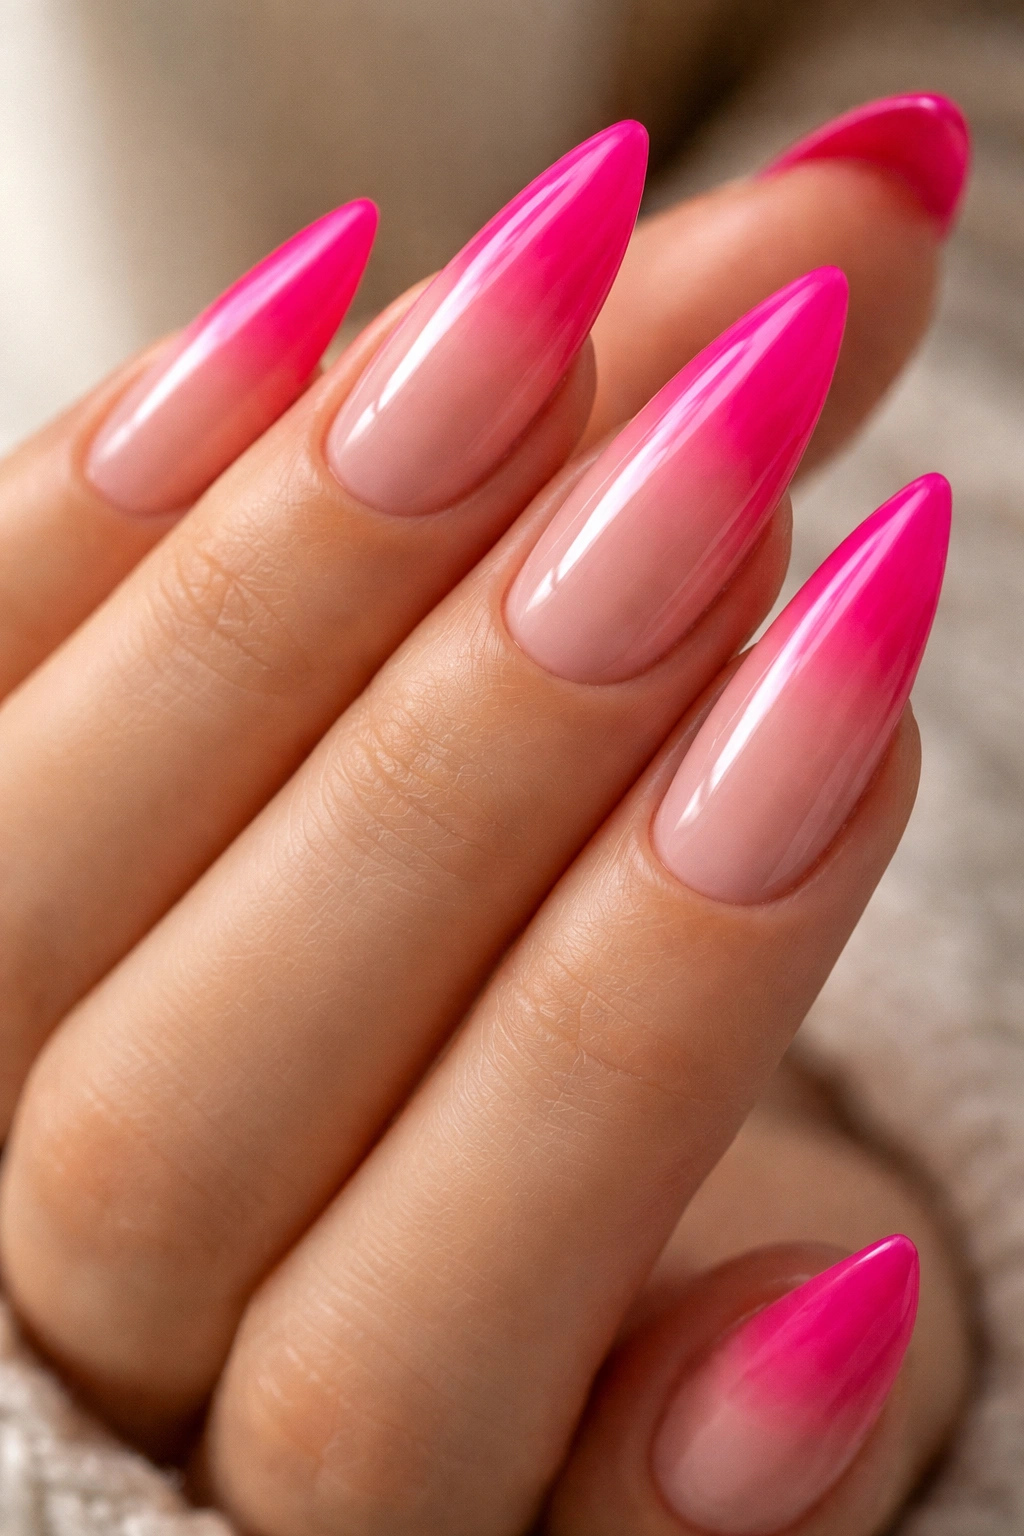
3. Hot Pink Ombré to Nude
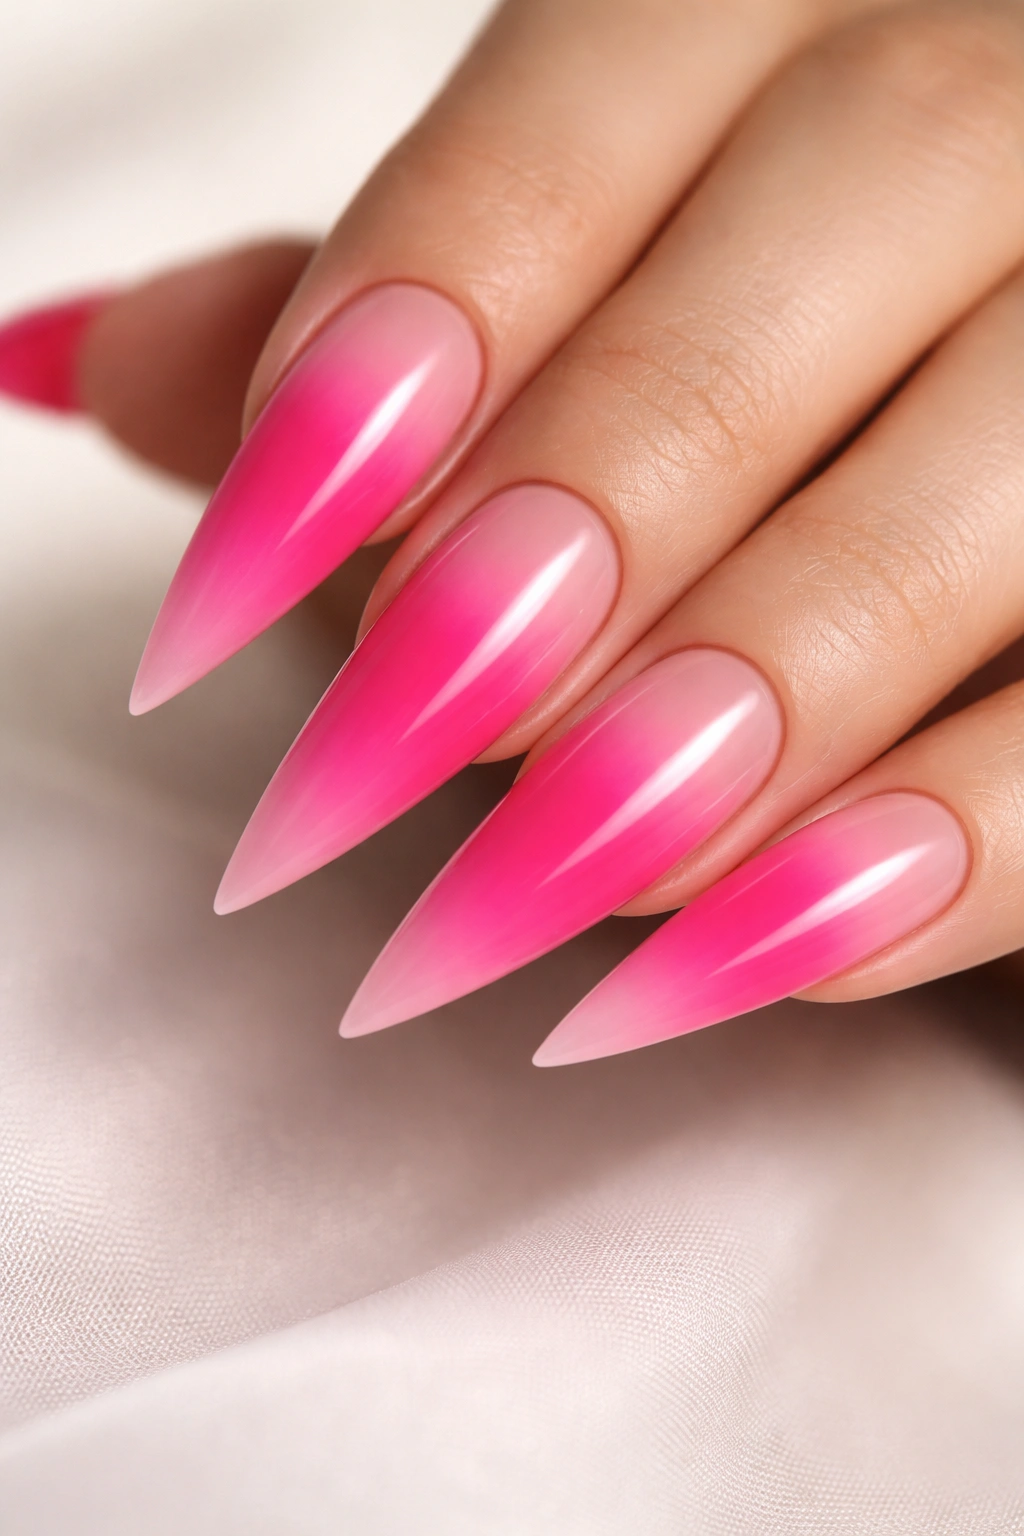
An ombré gradient that transitions from hot pink at the base to nude or pale flesh tone at the tips is a sophisticated take on the hot pink stiletto. This design elongates your fingers even further—the gradient creates visual length—while the fade to nude keeps the look refined and wearable for professional settings where full hot pink might read as too bold.
Creating the Gradient Effect
The gradient works best when it’s smooth rather than patchy. You can achieve this by blending two shades on a makeup sponge and pressing it onto your nail in a bouncing motion, or by using a nail artist’s blending brush with multiple thin layers. The key is starting with very light pressure and building opacity gradually rather than trying to create the effect in one or two applications. The transition should be subtle and gradual, not a harsh line.
Why This Works So Well
- The nude-to-hot-pink gradient flatters every skin tone because the nude portion echoes your natural nail bed
- It reads as more professional than solid hot pink while maintaining the color’s impact
- The gradient adds visual interest without requiring patterns, embellishments, or multiple colors
- Works equally well on the stiletto or other nail shapes, though stilettos do showcase the gradient beautifully
- The neutral fade makes this design work across seasons and with any wardrobe
Consider matte versus glossy finishes on this design—a matte finish creates a softer, more blended appearance while glossy emphasizes the gradient more sharply. Either can work depending on your preference.
4. Hot Pink With Negative Space Design

Negative space nail art uses the bare nail (or a sheer base) as part of the design itself. With hot pink stilettos, you might create geometric cutouts, lines, or abstract shapes that leave portions of the nail bare while hot pink fills in around them. This creates a modern, minimalist look that’s architectural and eye-catching.
Design Possibilities With Negative Space
Geometric negative space designs work best on stilettos—try triangles pointing downward from the tip, clean lines running horizontally across the nail, or abstract angular shapes that follow the stiletto’s natural lines. You could also do a thin line of hot pink at the tip with open space in the middle, or scattered cutout shapes that create an intentional pattern. The key is precision—wobbly lines or uneven shapes read as mistakes rather than intentional design.
Execution and Style Considerations
- Use striping tape to create perfectly straight lines and prevent polish from seeping into negative space areas
- Negative space designs require a very clean application and steady hand
- Apply a sheer nude or clear base if you want the design to feel finished; bare nail can look unfinished depending on your natural nail bed color
- This works beautifully with chrome or metallic accents filling the hot pink portions for extra dimension
- Negative space designs are trend-forward without being trendy—they read as intentionally modern
If you’re not confident with hand-painting lines, stencils designed for nail art can help you create perfectly clean negative space designs. The finished result looks very professional and intentional.
5. Hot Pink Chrome With Holographic Powder
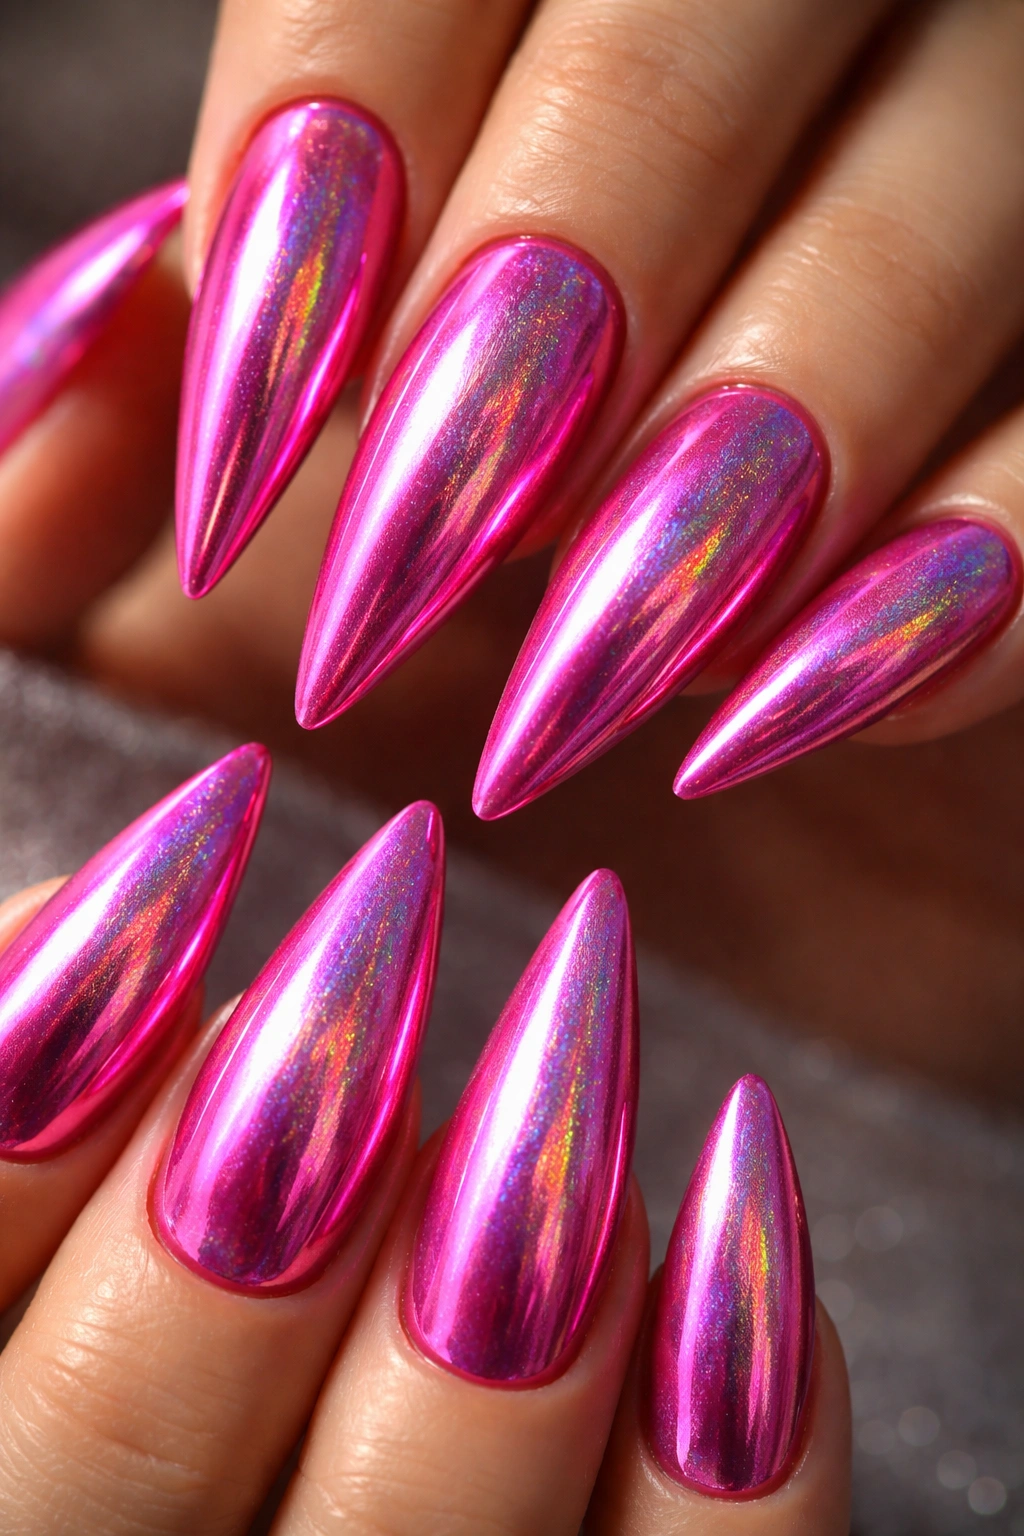
Chrome and holographic effects have revolutionized nail art, and hot pink is the perfect base for both. When you apply holographic or chrome powder over hot pink polish, you create an otherworldly, multidimensional effect that shifts color as light hits it. The result is nails that seem to change from hot pink to purple to blue to green depending on the angle and lighting.
Achieving That Chrome Effect
Chrome requires a specific topcoat formulated to work with chrome powder, and the application technique matters. After your hot pink base and topcoat, you apply chrome powder with a velvet applicator in circular motions, building the effect gradually. Don’t press too hard or you’ll disturb the shine. Holographic powder creates a similar effect but with more of a rainbow sheen. Both require a final seal coat to lock everything in place.
The Wow Factor of Chrome Stilettos
- The effect is genuinely eye-catching and shifts visibly as your hands move
- Chrome and holographic finishes work particularly well on stilettos because the nail shape catches light from multiple angles
- The effect can last as long as regular polish if sealed properly, though it may dull slightly over a week or two
- The vertical lines of the stiletto enhance the dimensional effect of chrome
- Pairs beautifully with minimalist jewelry since the nails themselves are the statement
This finish requires investment in specific products designed for chrome application—generic topcoats won’t create the same effect. However, once you have the right supplies, the application becomes straightforward.
6. Hot Pink With White Marble Veining
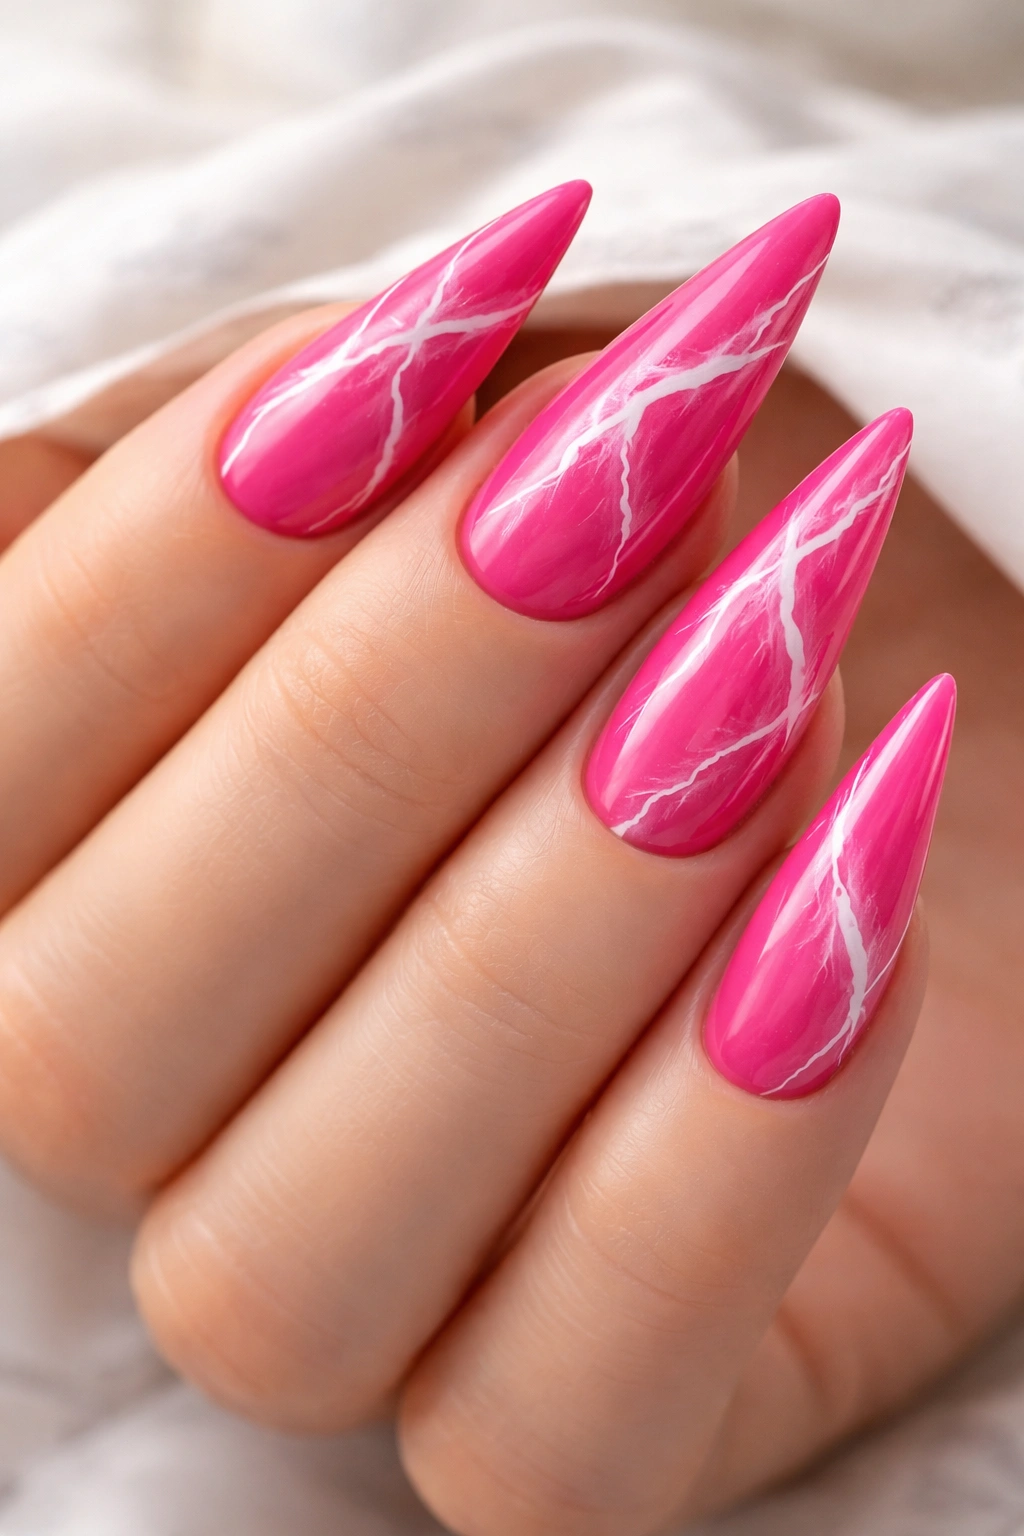
Marble nail art uses thin white lines to create the appearance of marble stone across your nail. On hot pink, white marble veining creates a look that’s both elegant and naturally striking. The veining patterns mimic real marble, giving your nails a sophisticated, almost spa-like quality while keeping hot pink as the dominant color.
Creating Realistic Marble Effects
Marble veining works best when you use very thin strokes in slightly irregular patterns rather than perfectly geometric lines. You want the lines to cross and connect organically, the way actual marble veining does. A thin detail brush, a long-haired nail brush, or even a toothpick can create these lines using white or cream polish. The key is keeping lines mostly thin with occasional thicker sections for dimension.
Design Flexibility and Wearability
- Marble effects work on every skin tone because they’re essentially neutral
- White marble on hot pink reads as elevated and intentional, not matchy or overdone
- You can do full marble coverage or focus marbling on just the tip or upper portion of the nail
- The irregular nature of marble means slight imperfections actually strengthen the design
- This look works for both casual and formal settings
Consider the finish when planning marble nails—glossy marble reads as more polished, while matte creates a softer, more organic appearance. A combination (glossy hot pink with matte veining or vice versa) adds even more visual interest.
7. Hot Pink Stilettos With Rhinestone Nail Art
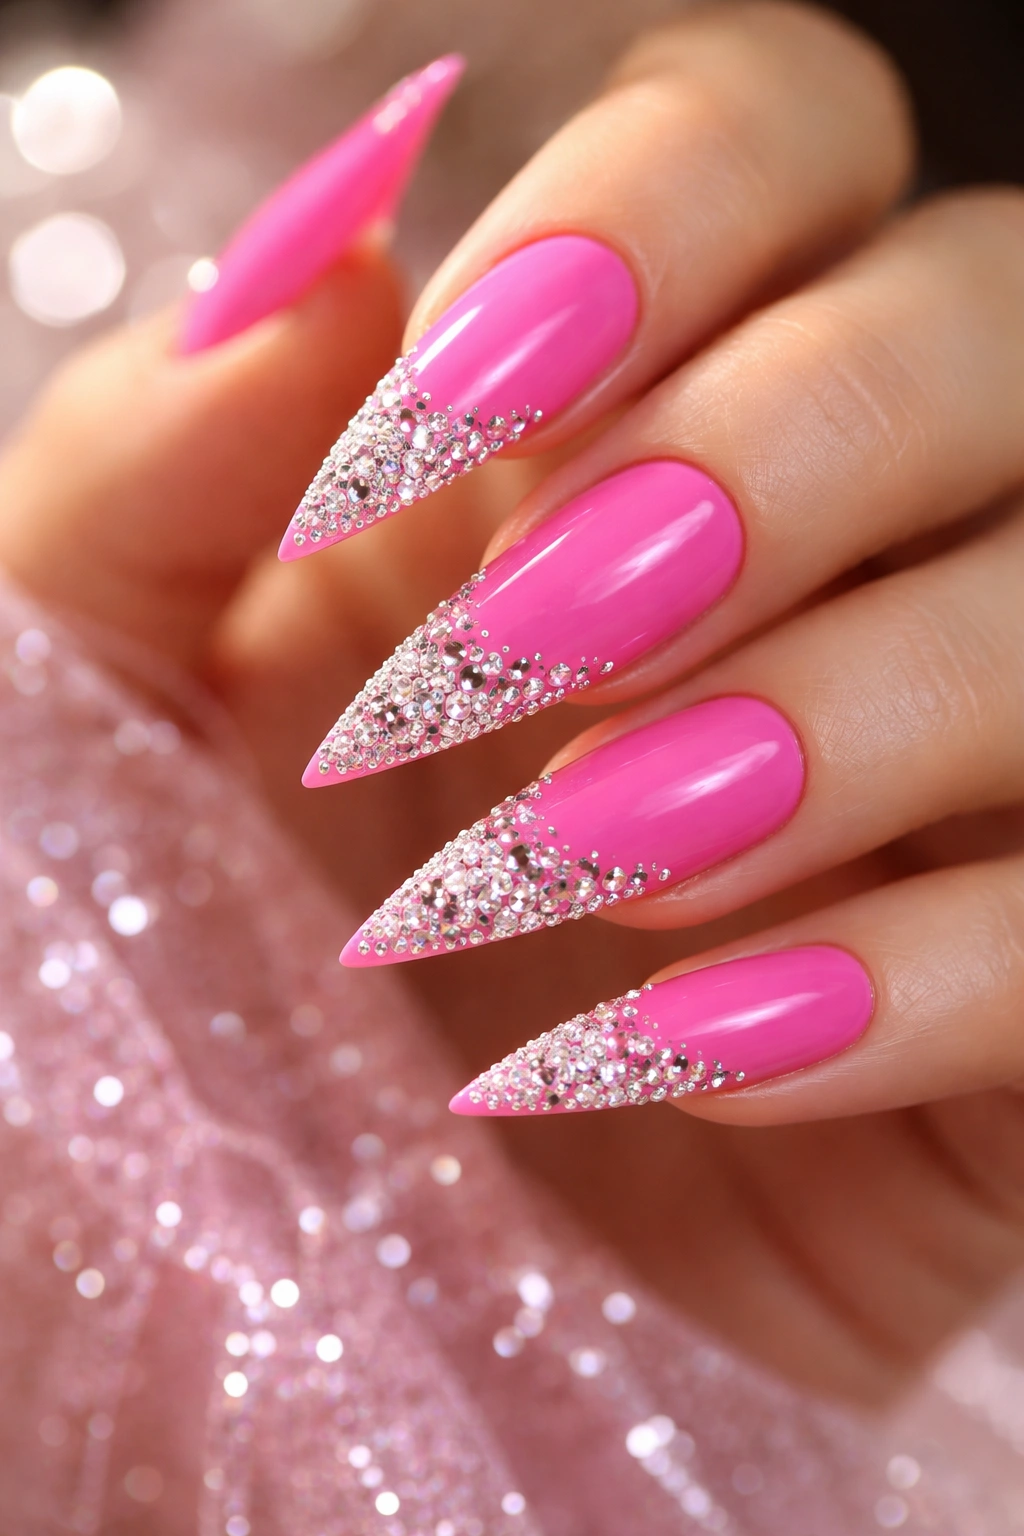
Rhinestones add glamour and sparkle beyond what glitter can achieve. When you place rhinestones strategically on hot pink stiletto nails—perhaps scattered across the nail in a pattern, clustered at the tip, or creating a geometric design—you create true luxury nail art. Each individual stone catches and reflects light, creating a three-dimensional sparkle effect.
Applying and Styling Rhinestones
Quality matters significantly with rhinestone nails. Use nail art rhinestones (which have flat backs and can be set onto the polish) rather than jewelry rhinestones. Apply them using nail glue or gel polish that stays sticky—never attempt to glue them onto dried polish as they won’t stay secure. Place each stone deliberately, building your design from a simple arrangement (scattered across the nail) to complex geometric patterns if you’re feeling artistic.
When Rhinestone Nails Work Best
- Perfect for special occasions, evening events, or any time you want maximum glamour
- The shimmer can be overwhelming in professional office settings but stunning everywhere else
- Rhinestones add texture and dimension that photographs beautifully
- Works especially well on stiletto tips, where the point provides a natural visual focus
- Can be combined with other elements—try rhinestones on an ombré or marble design for ultra-glamorous results
Rhinestone nails do have a lifespan shorter than unadorned polish—stones can catch on clothing or hair and pop off—so plan accordingly and be aware that you’ll likely need touch-ups or replacement stones within a couple of weeks.
8. Matte Hot Pink With Glossy Accent Nails
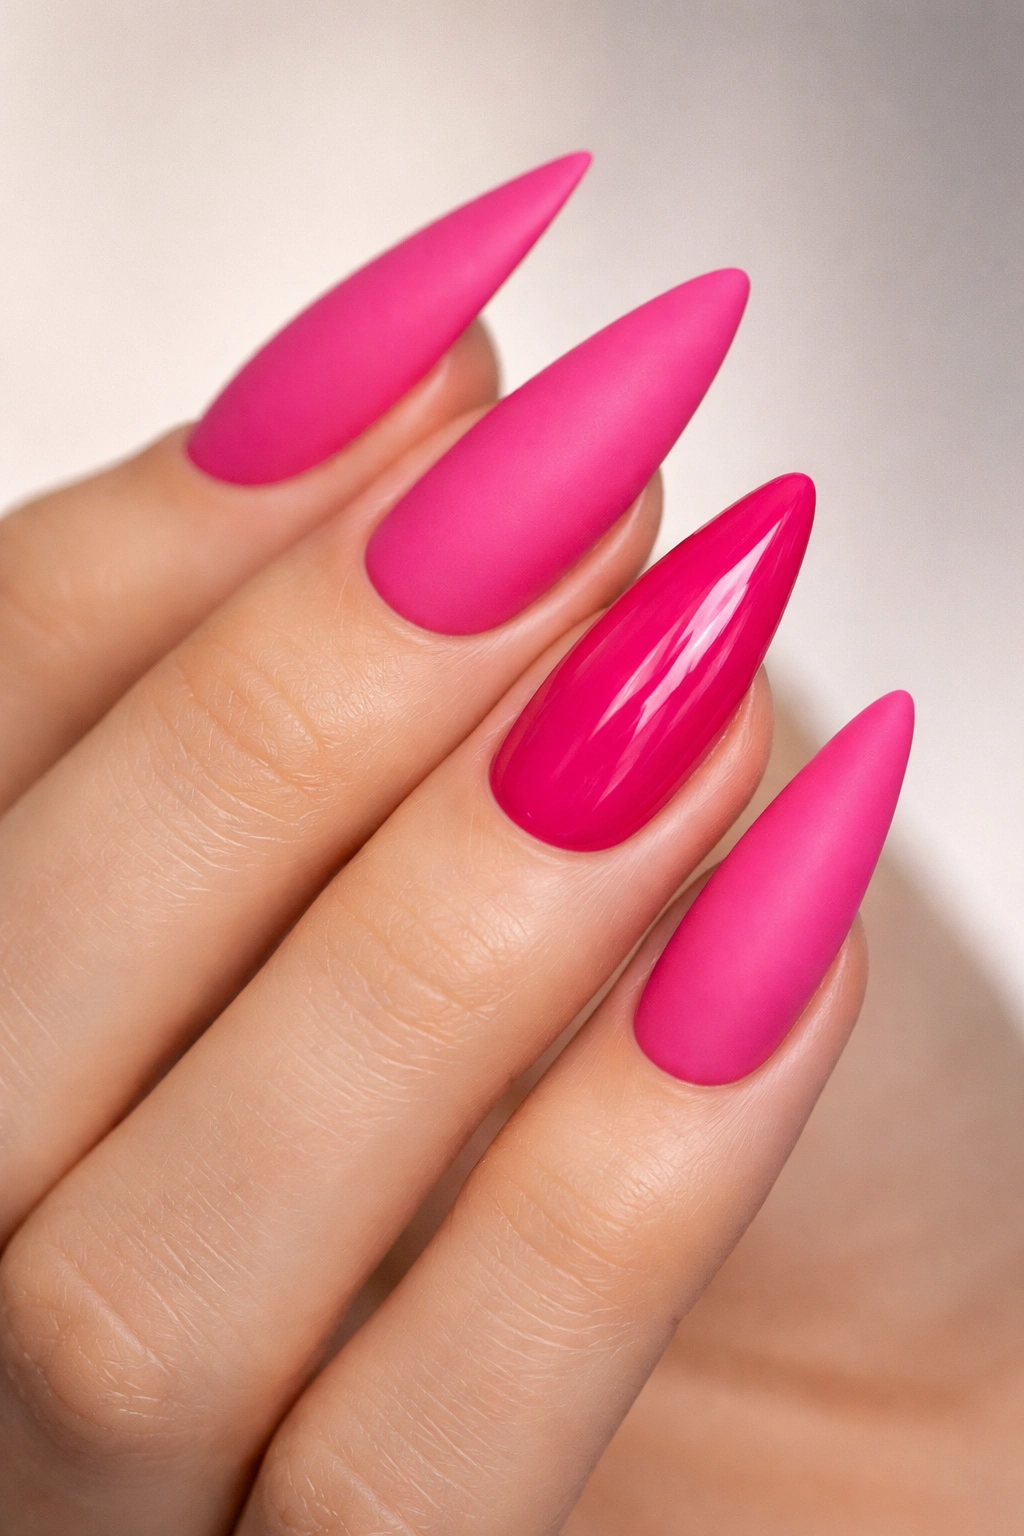
A mix of matte and glossy finishes on the same set creates textural interest and allows you to highlight specific nails. Most of your nails might be matte hot pink while your accent nails (typically the ring finger or pinky) stay glossy—creating a visual break and adding sophistication through contrast. The matte finish feels modern and slightly less formal, while the glossy accent feels elegant.
Playing With Finish Contrast
The contrast between matte and glossy surfaces is subtle but immediately noticeable when you look at your own nails or when they catch light. Matte hot pink has a velvety quality that softens the vibrancy slightly, while glossy intensifies and reflects the color. By mixing both finishes, you’re creating visual rhythm and allowing different nails to draw focus at different angles. This works beautifully on stilettos because the different finishes emphasize the nail shape differently.
Styling Tips for Mixed Finishes
- The textural contrast means even a simple single-color manicure feels more complex and designed
- Matte finish requires more careful handling as it shows smudges and fingerprints more readily than glossy
- This works on any nail shape but is particularly striking on stilettos where the finish contrast is visible
- Consider topcoat choices—some finishes look better with specific topcoats
- Works beautifully for day and evening looks
If you prefer the matte look but want something more practical, consider a semi-matte or satin topcoat that gives you some of the matte aesthetic while being more durable. These hybrid finishes are more forgiving than true matte while still offering that textured appearance.
9. Hot Pink Stilettos With Thin Black Striping

Black stripes or thin black geometric lines on hot pink create bold, graphic nail art that reads as intentional and modern. Whether you’re doing thin vertical stripes, diagonal lines, geometric blocks, or artistic freehand patterns in black, the contrast between hot pink and black is strong and sophisticated. This design keeps nails feeling edgy rather than strictly feminine.
Creating Precise Black Patterns
Thin stripes require a steady hand or a striping brush (which has fine bristles specifically designed for lines). Striping tape can help you create perfectly parallel lines without hand-painting at all. The tape method gives you clean edges and perfect spacing, while hand-painted stripes have more personality but require practice. Thin black lines read as more sophisticated than thick ones, so invest in a quality thin brush if you’re hand-painting.
Design Ideas and Applications
- Thin vertical stripes running down each nail create length and an elegant aesthetic
- Diagonal stripes are more playful and contemporary
- Geometric blocks or sections filled with black create bold, architectural designs
- Horizontal striping works but can visually shorten nails, so use thinner lines
- This design pairs beautifully with matte topcoat for a modern finish
Black and hot pink is a timeless color combination that works across all seasons and occasions. The contrast is high enough that this design reads clearly even when your nails are in motion or partially visible.
10. Hot Pink Ombré to White
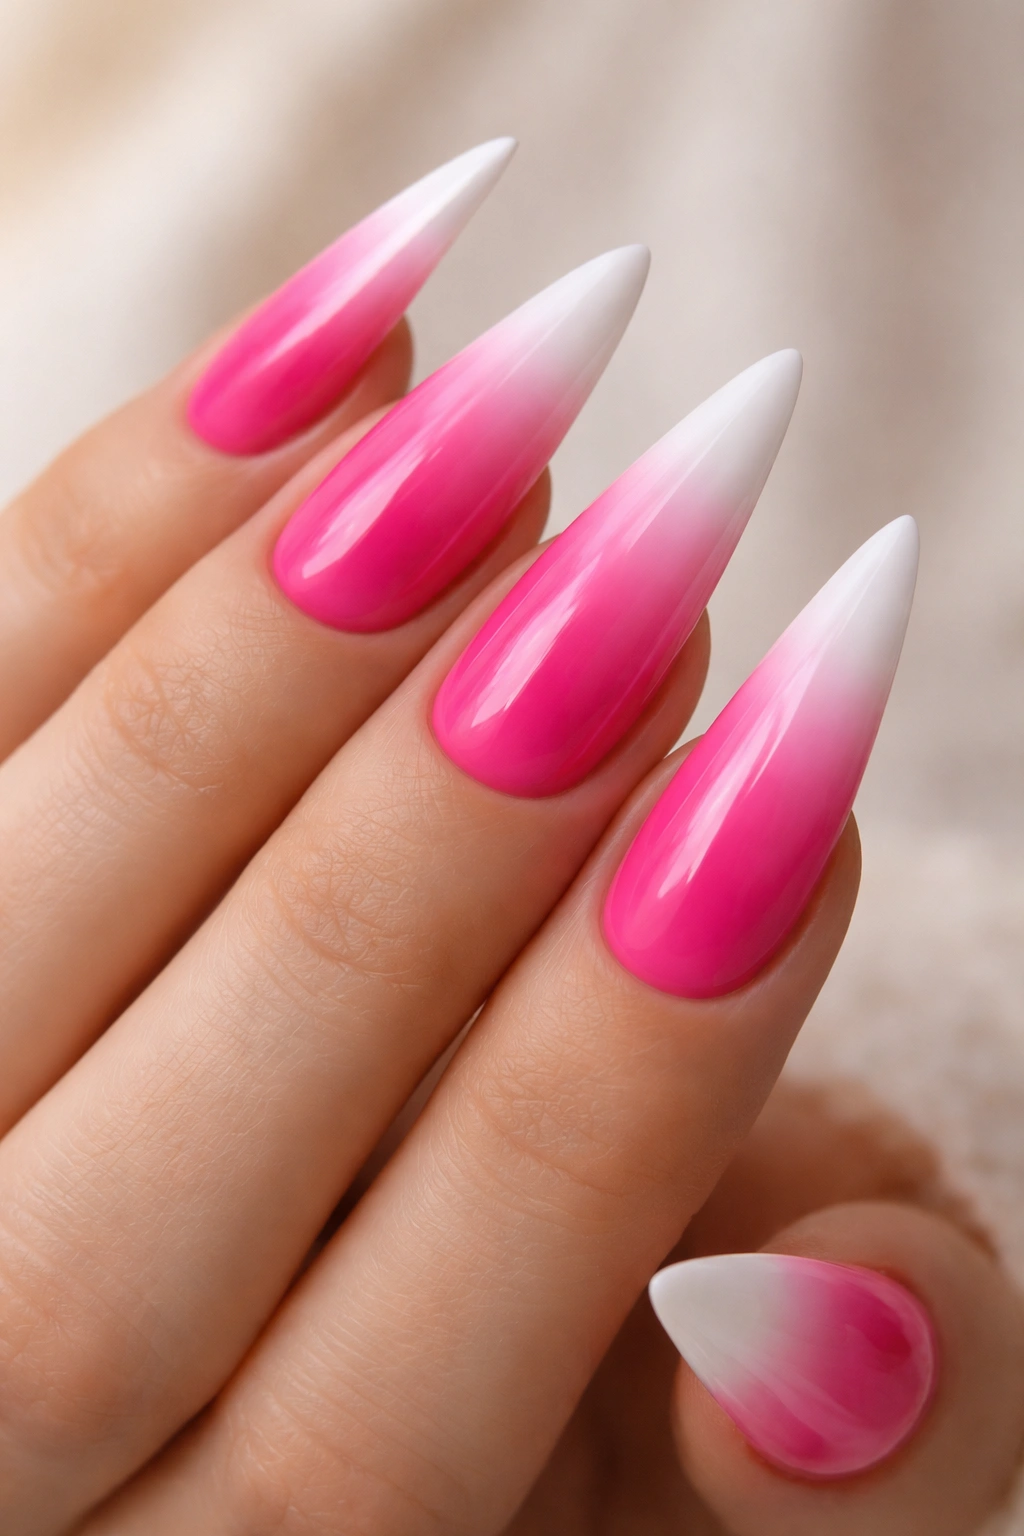
A gradient fade from hot pink to white is a softer alternative to the hot pink-to-nude ombré. This creates an almost translucent appearance as the color fades, giving an airbrushed quality that’s both modern and elegant. The white tip draws focus to the point of the stiletto while the hot pink base maintains color saturation.
Blending Hot Pink to White
This gradient is easier to achieve than some other ombré styles because white and hot pink blend relatively smoothly with the right technique. You can use a makeup sponge for a bouncing application, building the gradient in thin layers, or use a specialized nail blending brush. The transition should be gradual—ideally, there’s a middle section where the two colors blend into a lighter pink shade before transitioning fully to white.
Why This Gradient Reads Beautifully
- The white tip creates an elegant, clean appearance that works for professional settings
- The color fade is visually interesting without requiring patterns or multiple colors
- Works on every skin tone and with any wardrobe color
- The ombré effect makes the gradient feel intentional and designed rather than like the color faded from wear
- Particularly striking on very long stilettos where the gradient has more space to transition
Consider a gloss topcoat that emphasizes the gradient or a matte finish that softens it. Both create different effects—glossy is more striking while matte is more subtle and sophisticated.
11. Hot Pink With Nude Reverse Ombré
A reverse ombré (where color is concentrated at the tip and fades toward the base) is a less common but striking approach. Start with hot pink at the very tip of your stiletto, then gradually fade to nude or clear toward the base. This creates the opposite visual effect of a traditional ombré—instead of the color fading out, it intensifies toward the point, drawing even more focus to the tip of the nail.
Execution and Impact
Reverse ombré requires the same blending techniques as traditional ombré but working in the opposite direction. You’re essentially building color from tip to base rather than base to tip. The effect is more subtle than a full hot pink nail but still delivers hot pink impact. The fade to nude or clear at the base creates a graduated effect that can feel very modern or very elegant depending on your approach.
When This Design Shines
- Reverse ombré is perfect if you want hot pink impact without full coverage
- The design emphasizes the stiletto tip beautifully
- Works well for professional settings where you still want color but slightly less intensity
- The fade-to-clear version gives an almost natural appearance while delivering the hot pink statement
- Particularly striking on extra-long stilettos where the gradient has room to develop
This style requires confidence in your application, but the result feels very intentional and designed. If you’re not comfortable creating the gradient yourself, this is worth paying for professional application as the effect relies entirely on smooth, even blending.
12. Hot Pink With Holographic Glitter
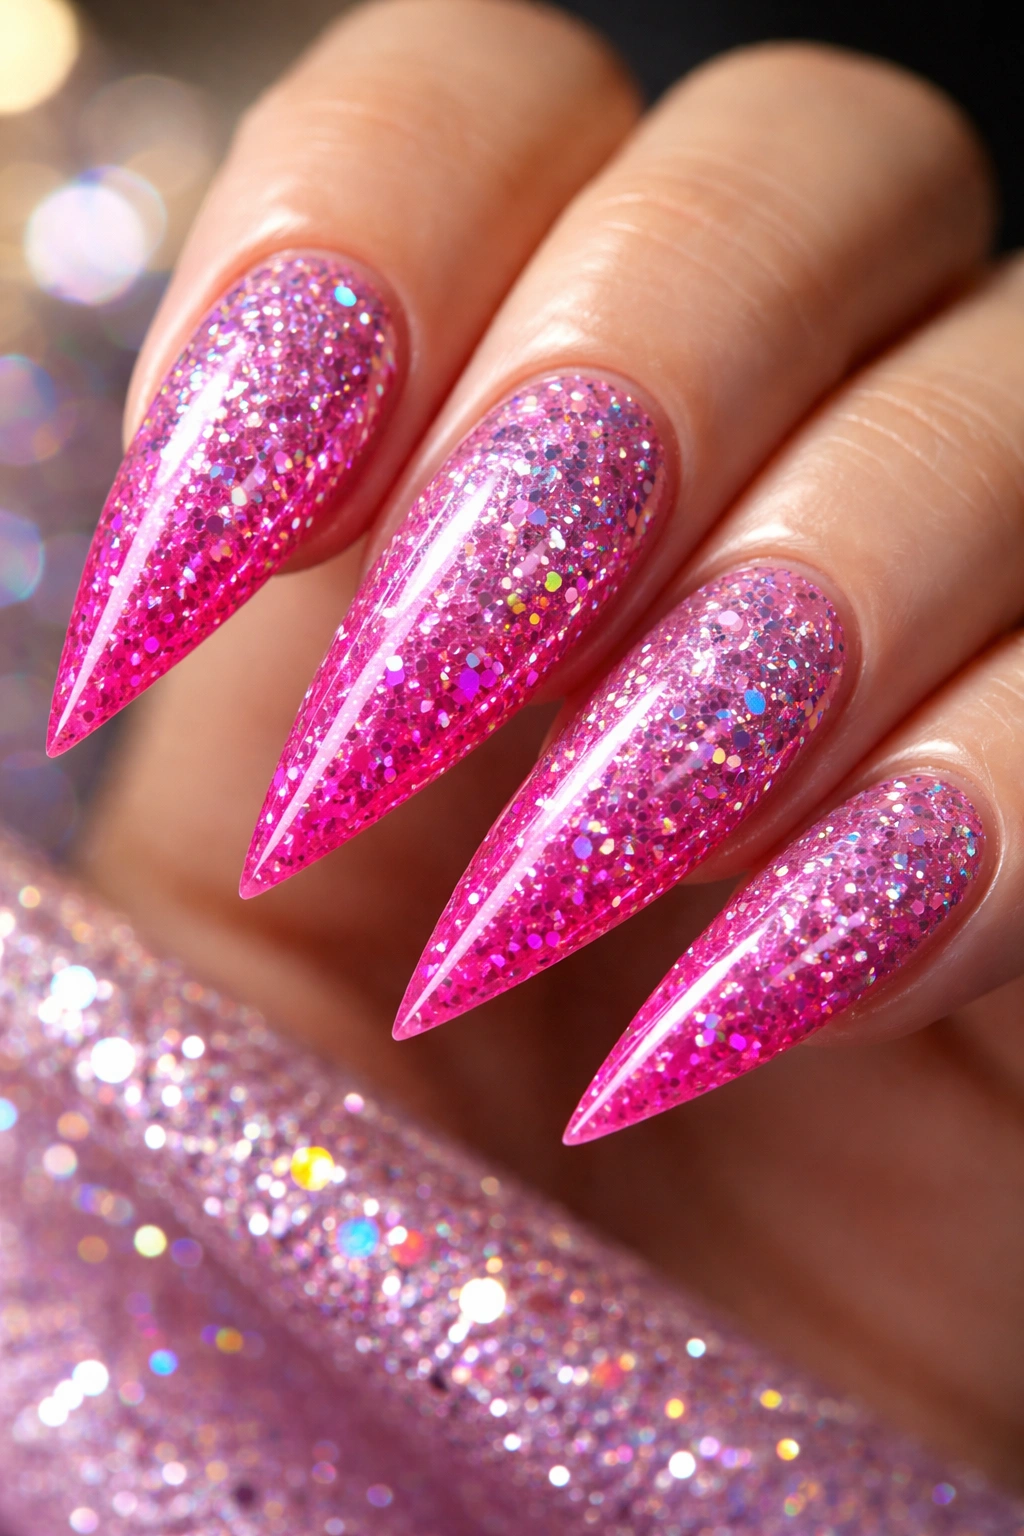
Holographic glitter particles suspended in clear topcoat over hot pink create a sparkling, prismatic effect. Unlike fine glitter that sits flat, holographic glitter seems to float within the topcoat layer, creating depth and dimension. The effect is less formal than rhinestones but more defined than regular glitter polish, landing somewhere in the middle of the glamour spectrum.
Layering Glitter Effectively
Apply your hot pink base, let it dry completely, then carefully apply a sticky topcoat (one specifically designed for holding glitter) before sprinkling holographic glitter or using a holographic glitter topcoat. If you’re using loose glitter, apply it generously, let it settle, then seal everything with a final topcoat. The seal coat is critical—it locks everything in place and creates that 3D effect where the glitter appears suspended rather than sitting on the surface.
The Versatility of Glitter
- Holographic glitter works for casual and dressy occasions
- The sparkle is visible in most lighting conditions, making it work for day wear unlike some glitter styles
- You can do full coverage glitter or apply it just to the tips for a different effect
- Holographic glitter comes in various sizes—finer particles feel more elegant while larger flakes feel more playful
- Pairs beautifully with matte hot pink for unexpected texture contrast
Removing glitter nails requires patience—soak and gently peel rather than scraping, as aggressive removal can damage your nails. Some people prefer to avoid the removal hassle by using glitter topcoats designed to peel off cleanly.
13. Hot Pink With Nude Half-Moon Design
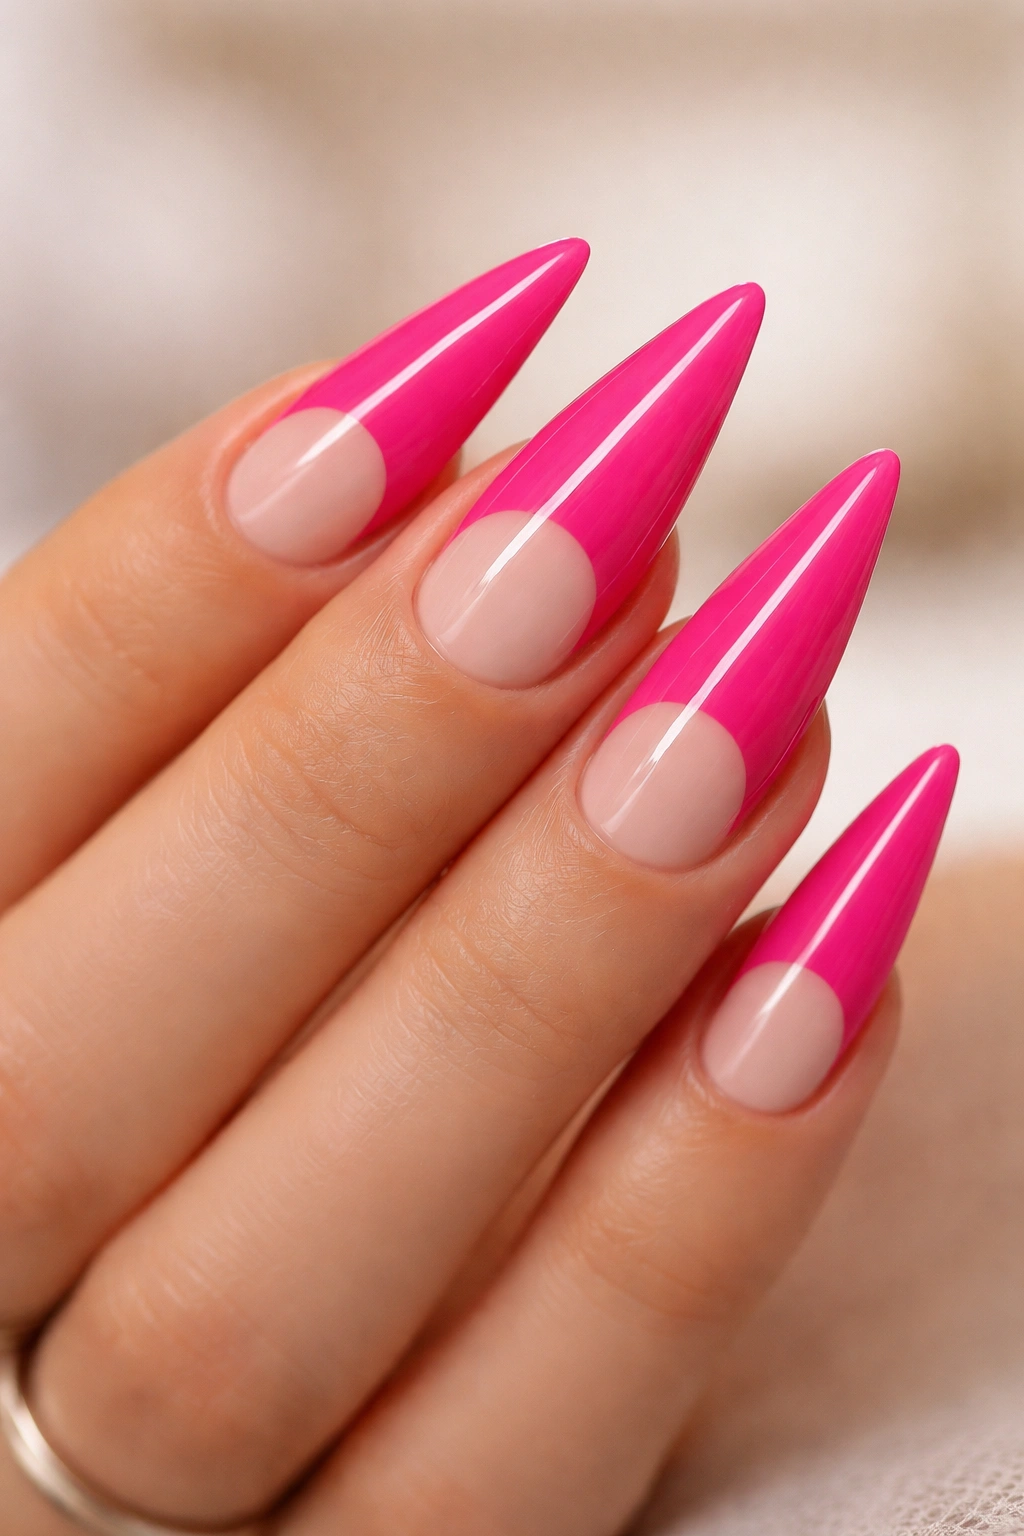
A half-moon design places a contrasting color (like nude, white, or champagne) in a curved section at the nail base or tip, creating a geometric, elegant look. On hot pink stilettos, nude half-moons positioned at the base create a French manicure variation that’s sophisticated and less expected than traditional French tips. The curved line flatters the nail shape beautifully.
Creating Clean Half-Moon Designs
You can create half-moons using specialized half-moon guides that stick to your nail, or freehand with a curved brush. The guides make this much easier and ensure symmetry across all nails. Apply your hot pink to the entire nail, let it dry, position your guide, apply nude polish to the exposed area, then carefully remove the guide to reveal the clean line. The result should be a perfectly curved transition between colors.
Why Half-Moons Work on Stilettos
- The curved line of the half-moon echoes the cuticle line beautifully on stilettos
- This design reads as intentionally retro and sophisticated
- Works for any occasion from casual to formal
- The geometric precision of the design makes even simple colors feel designed
- Less common than French tips, so your nails will feel unique
Nude and hot pink together create a very balanced aesthetic—the hot pink isn’t diluted by a neutral tone since the neutral only occupies a small portion of the nail. The contrast is high enough that the design reads clearly without overwhelming the overall effect.
14. Hot Pink With Gold Geometric Patterns
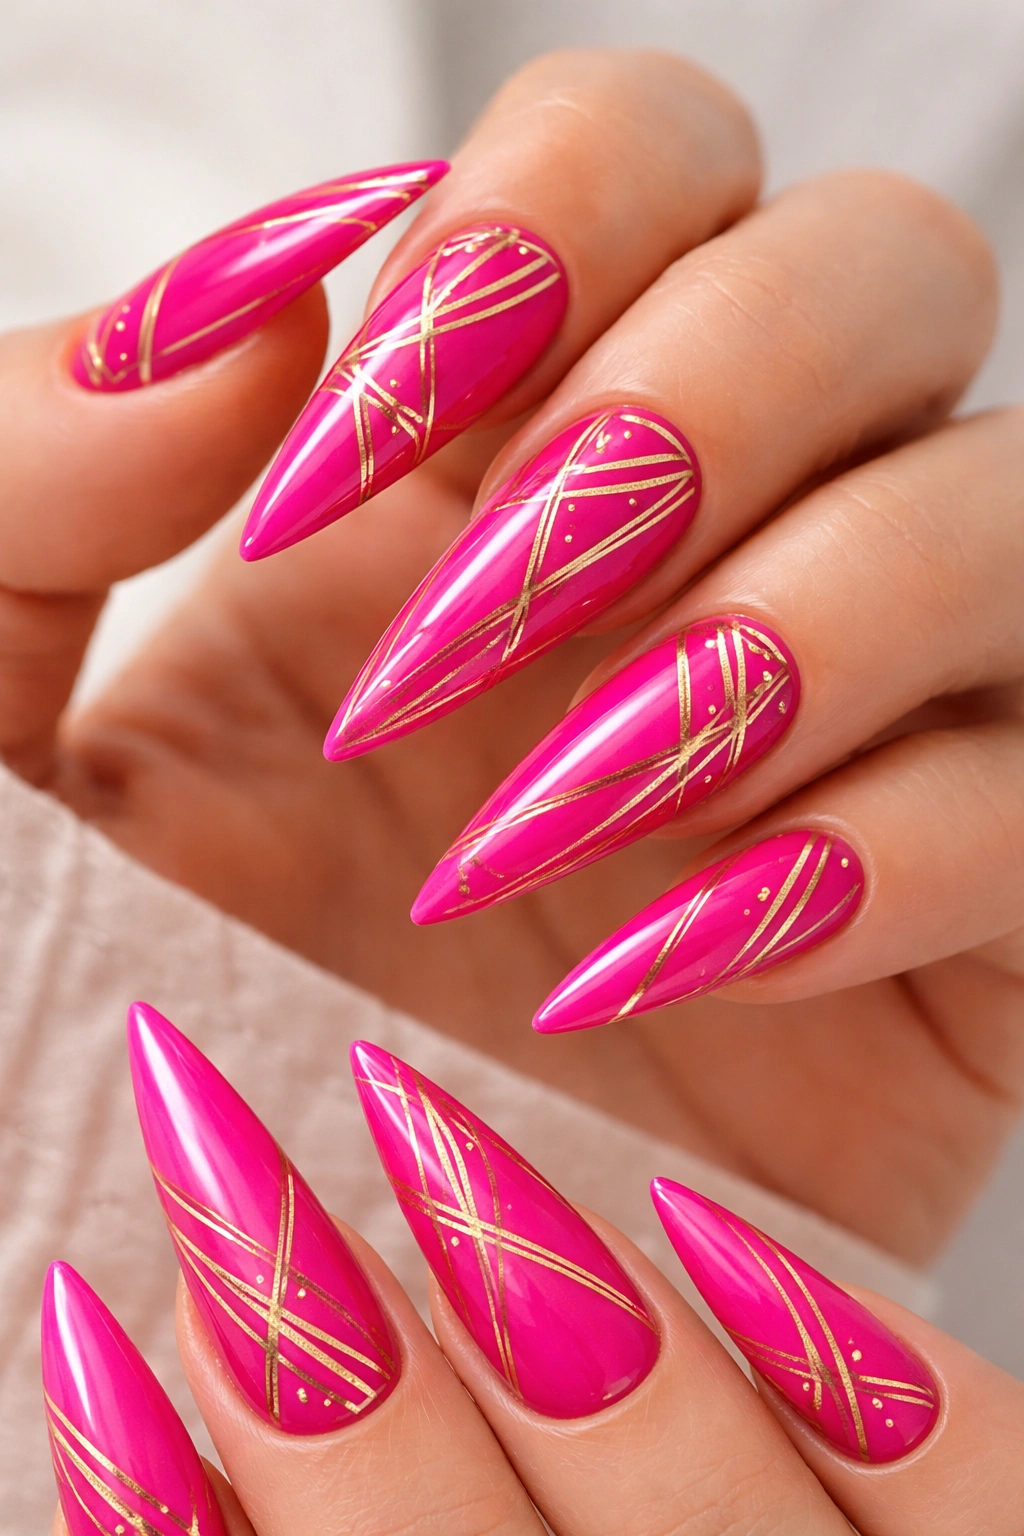
Beyond simple accents, you can create larger geometric patterns in gold on your hot pink stilettos. This might include gold triangles, abstract geometric shapes, Art Deco-inspired patterns, or structured design elements that cover portions of the nail while leaving hot pink visible. Gold geometric designs feel modern, sophisticated, and intentional.
Designing Geometric Patterns
Start with pencil sketches on a nail wheel or practice surface to refine your pattern before applying it to your actual nails. You’ll want the pattern to work with the stiletto’s shape—perhaps a geometric shape centered on the nail, patterns concentrated at the tip, or structures that run along the edges. Gold metallic polish makes fine detail work visible, so even complex patterns read clearly.
Professional-Looking Results
- Geometric patterns feel intentional and designed rather than random
- Gold adds luxury and sophistication to geometric designs
- These patterns work for dressy occasions but are striking enough for everyday wear
- You can achieve this look with a thin detail brush or specialized nail art pens designed for fine lines
- Pairs beautifully with matte hot pink for modern contrast
If freehand geometric design feels intimidating, practice with a thin liner pen on paper first to get comfortable with the patterns. Alternatively, geometric stencils designed for nails can help you create perfect shapes every time.
15. Hot Pink With Mirror or Foil Effect
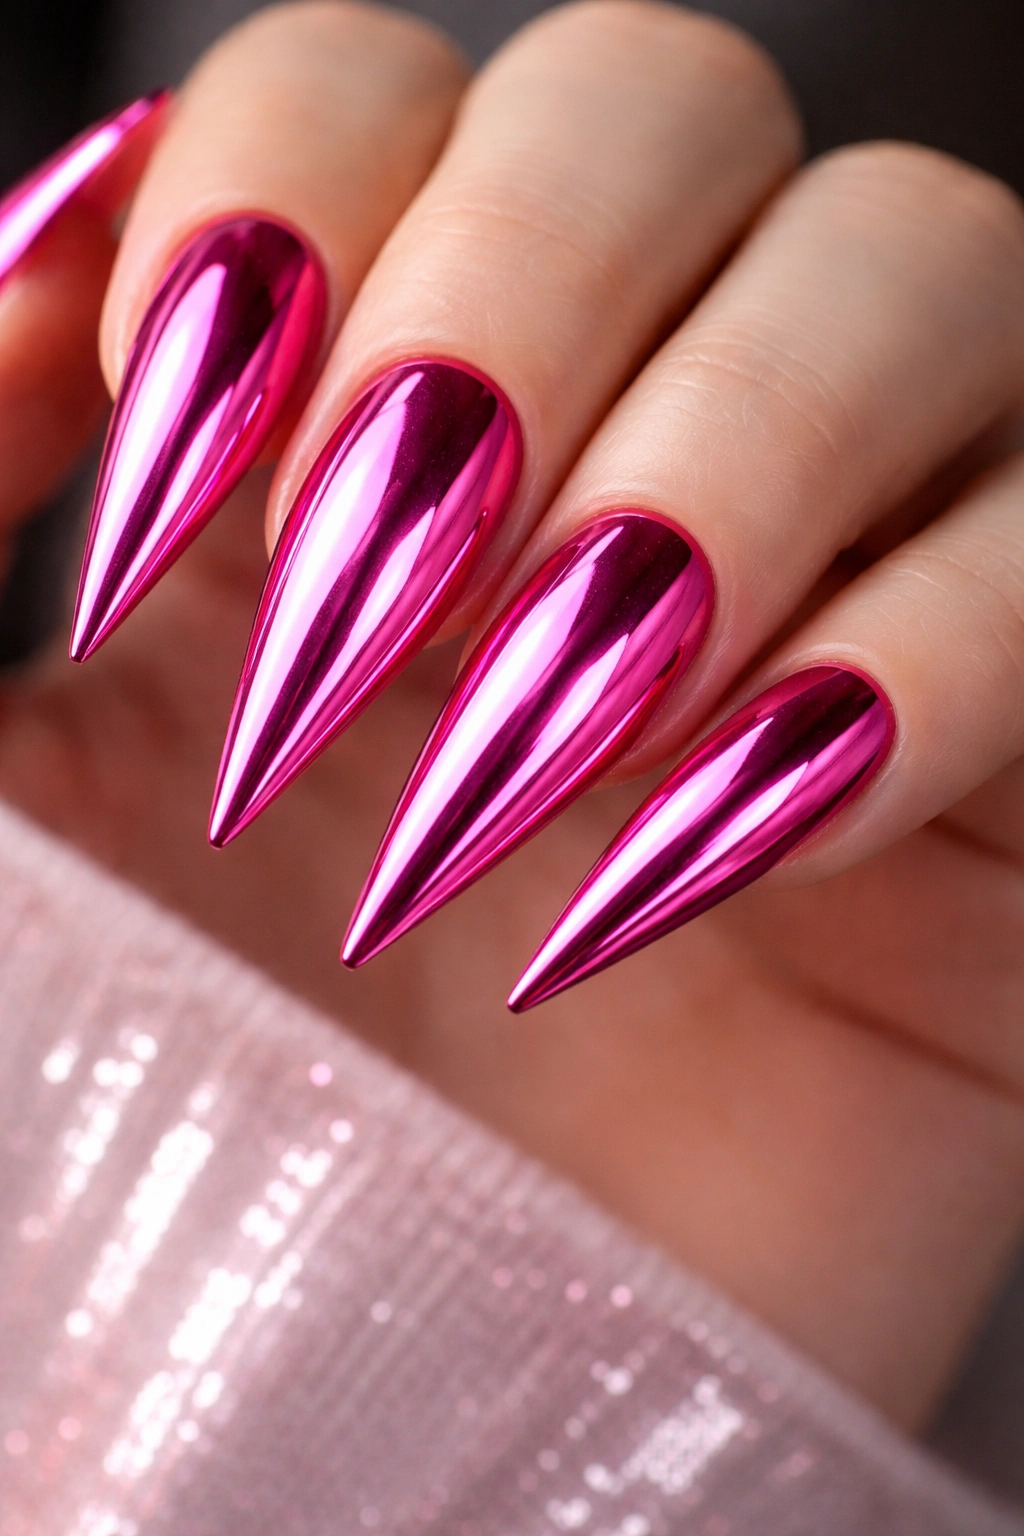
Mirror or chrome foil effects create a reflective, metallic appearance that’s distinctly different from regular metallic polish. When applied over hot pink, foil creates almost a mirrored surface that reflects your surroundings, making your nails feel futuristic and ultra-glamorous. This is the most dramatic finish on this list and definitely earns the title of statement nail.
Achieving the Mirror Effect
Mirror foil requires specific products—typically a foil sheet and special adhesive or sticky topcoat. You apply a sticky base layer (usually gel polish or a specific adhesive), press the foil sheet onto the nail (shiny side out), let it set, then carefully peel away the foil sheet, leaving the reflective layer behind. The result is surprisingly durable for something so unusual-looking.
Why Mirror Nails Deserve a Moment
- The effect is completely unique and instantly eye-catching
- Mirror foil works beautifully on stilettos where the reflective surface catches light from multiple angles
- Perfect for special events, clubs, or anywhere you want maximum impact
- The effect lasts surprisingly well if applied correctly, typically lasting 1-2 weeks
- The tech-forward aesthetic feels fashion-forward and confident
This finish is definitely statement-level, so reserve it for occasions where you want your nails to be the focal point of your entire look. The reflective effect is so striking that it will dominate any outfit, which works beautifully for specific occasions but might be too much for everyday wear.
Final Thoughts
Hot pink stiletto nails are endlessly adaptable—whether you’re drawn to minimalist elegance or maximum glamour, there’s a hot pink stiletto aesthetic that matches your personality and occasions. The beauty of this color and shape combination is that they work equally well as a simple, confident single shade or as the foundation for intricate nail art. The stiletto shape elongates and flatters while hot pink makes a statement that’s unmistakably bold and intentional.
The best approach is to start with a style that resonates with you and feel empowered to evolve from there. Maybe you begin with classic glossy hot pink and later experiment with matte finishes, gradients, or embellishments. Your nails should feel like an extension of your confidence and personal style. The designs here offer a full spectrum from subtle to sensational, giving you options for every mood, occasion, and comfort level with nail art.
Remember that the longevity and quality of any nail design depends partly on the products you use and partly on how you care for your nails. Keep your nails moisturized, avoid using them as tools, and wear gloves when cleaning—these simple habits extend the life of any manicure. Whether you’re doing your nails at home or visiting a professional, choosing quality products and taking the time to apply them carefully makes a real difference in how polished and long-lasting your hot pink stilettos look.
