

Stiletto nails are the ultimate power move — long, sharp, and unapologetically bold. But when you combine that architectural drama with gothic aesthetics, you get something truly magnetic: a statement that’s dark, moody, and undeniably sophisticated. Whether you’re drawn to witchy vibes, romantic darkness, or edgy minimalism, gothic stiletto nails give you a canvas to express an entire mood on your fingertips.
The beauty of goth nail design is that it works at every level of commitment. You can go full theatrical with elaborate details, or keep it refined with a single perfectly-placed element. Black might be the obvious starting point, but genuine gothic style goes deeper — mixing deep jewel tones, unexpected metallics, textures, and symbols that whisper rather than shout. The length and shape of stilettos actually enhance gothic designs; the elongated silhouette creates dramatic negative space that makes even minimal designs feel impactful.
This isn’t just about painting your nails dark and calling it done. Real gothic nail art combines technical skill with aesthetic intention. You’re working with contrast, layering different finishes, and understanding how light plays across matte, glossy, and metallic surfaces. The best goth stiletto designs feel like they belong in a mood board alongside vintage jewelry, occult literature, and architectural photography — there’s a coherence to them that makes them feel intentional rather than random.
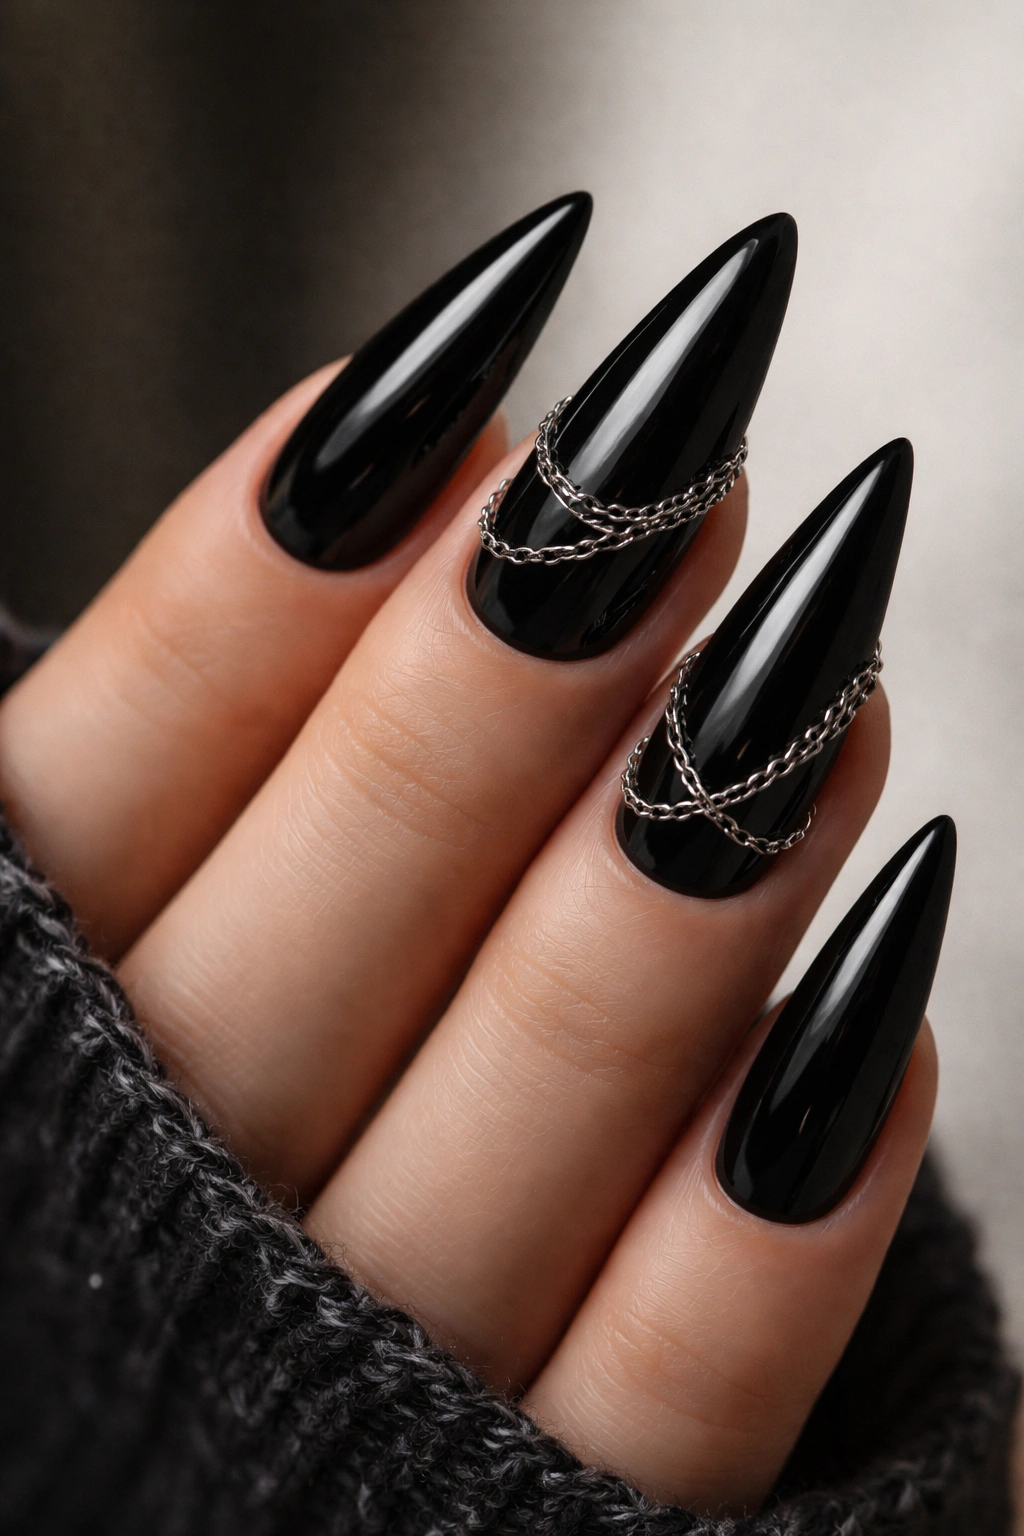
1. Black with Silver Chain Details
This design bridges minimalism and drama with effortless elegance. Start with a glossy black base that feels luxurious and deep — not flat, but richly reflective. Once fully cured, paint thin silver chains draped delicately across one or two nails, typically the ring finger and middle finger. The chains don’t need to be perfectly geometric; slight irregularity makes them feel more organic and authentic.
Why This Design Works for Gothic Style
The contrast between matte black and shimmering silver creates the exact visual tension that defines gothic aesthetics. Silver chains carry heavy symbolic weight in alternative fashion — they reference both luxury and bondage, elegance and edge. On stiletto nails, the elongated shape lets the chain pattern stretch and flow naturally, like real jewelry draped across your hand. The negative space of the black background makes the metallic details pop without feeling chaotic.
How to Execute It Perfectly
- Use a base color that’s genuinely glossy — not a matte black that reads as incomplete
- Thin your silver gel or polish with a touch of base coat if needed, so lines stay crisp and delicate
- Use a fine liner brush or a detail pen for precision; shaky lines can read as unintentional
- Layer silver designs on just 1-2 accent nails rather than all ten for balanced impact
- Seal everything with a sturdy topcoat to protect those delicate lines from chipping
Pro tip: If hand-painting feels intimidating, pre-made chain nail stickers in silver work beautifully — they’re a legitimate shortcut that delivers professional results.
2. Deep Burgundy and Gold Filigree
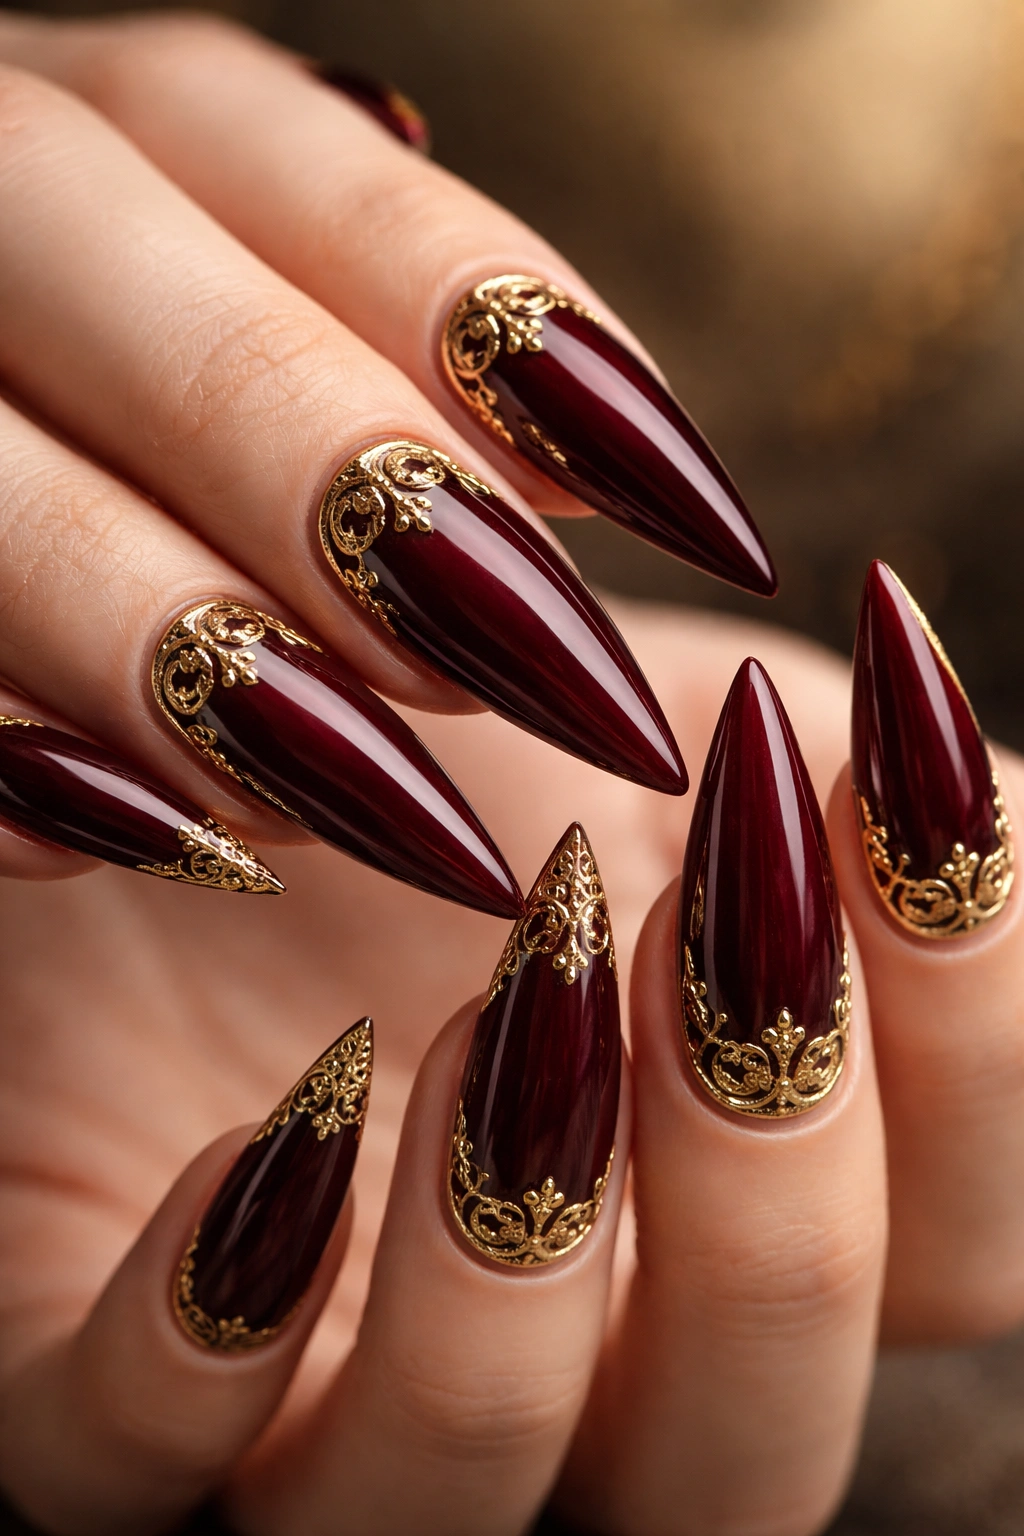
Burgundy is the underrated gothic power player. It reads as deeply moody without being as obvious as pure black, and it photographs with stunning richness. Apply a deep wine or oxblood burgundy as your base — the kind that’s almost black in low light but glows ruby-red when sunlight hits it. Once set, add delicate gold filigree patterns: ornate Victorian-inspired scrollwork, tiny flourishes, and lace-like details concentrated around the cuticle and along the edge.
Why This Design Stands Out
Burgundy and gold is an unexpectedly romantic color pairing that still reads as completely gothic. It references Dracula-era aesthetics, Victorian mourning fashion, and luxury wine culture simultaneously. The filigree (intricate decorative metalwork pattern) adds visual complexity and feels hand-crafted, which elevates the whole look. This design works especially well on stilettos because the length gives you actual surface area for detailed patterns without feeling cramped or overwhelming.
Gold Filigree Application Tips
- Let your burgundy base cure completely before attempting gold details
- Gold gel liner or thin metallic polish works best; it should have just enough pigment to cover in one stroke
- Practice the filigree pattern on paper first if you’re new to detail work
- Less is actually more — concentrated detail on half the nail looks intentional; scattered detail everywhere feels accidental
- A toothpick or dotting tool can help you place tiny flourishes with precision
Worth knowing: If your filigree feels too delicate after curing, you can strengthen it with a thin line of clear gel on top for durability without changing the appearance.
3. Matte Black with Dimensional Spikes

This design brings literal edge to stiletto nails. Create a matte black base — the flat finish is essential to the aesthetic here, as glossy black would compete with whatever dimension you’re adding. Once cured, strategically place small metallic spikes or studs. They should cluster at specific points: along the nail edge, scattered across the tips, or in a deliberate pattern down the center of a few accent nails. The spikes catch light and create actual three-dimensional texture.
What Makes This Design Fearlessly Gothic
Spikes are unquestionably gothic. They reference punk aesthetics, armor, danger, and controlled aggression. On matte black, each spike becomes a tiny sculpture that catches light in unexpected ways. The contrast between the flat matte surface and shiny dimensional elements creates visual interest that reads as intentional and expertly executed. This design is especially striking on stilettos because the length makes spikes more noticeable and impactful than they’d be on shorter nails.
Spike Placement and Application
- Pre-glued studs or hand-applied metal spikes work equally well; choose whichever you prefer
- Apply spikes to cured matte black base using a strong nail adhesive or builder gel
- Concentrate spikes on 1-3 accent nails rather than every finger for balanced drama
- Seal everything with a matte topcoat to keep the matte finish unified and cohesive
- Avoid excessive contact on the spikes for the first 24 hours to ensure they’re fully set
Pro tip: If you’re worried about spikes catching on fabric, opt for flatter studs or rhinestones instead — they deliver visual impact with less risk of snagging.
4. Dark Purple with Constellation Details
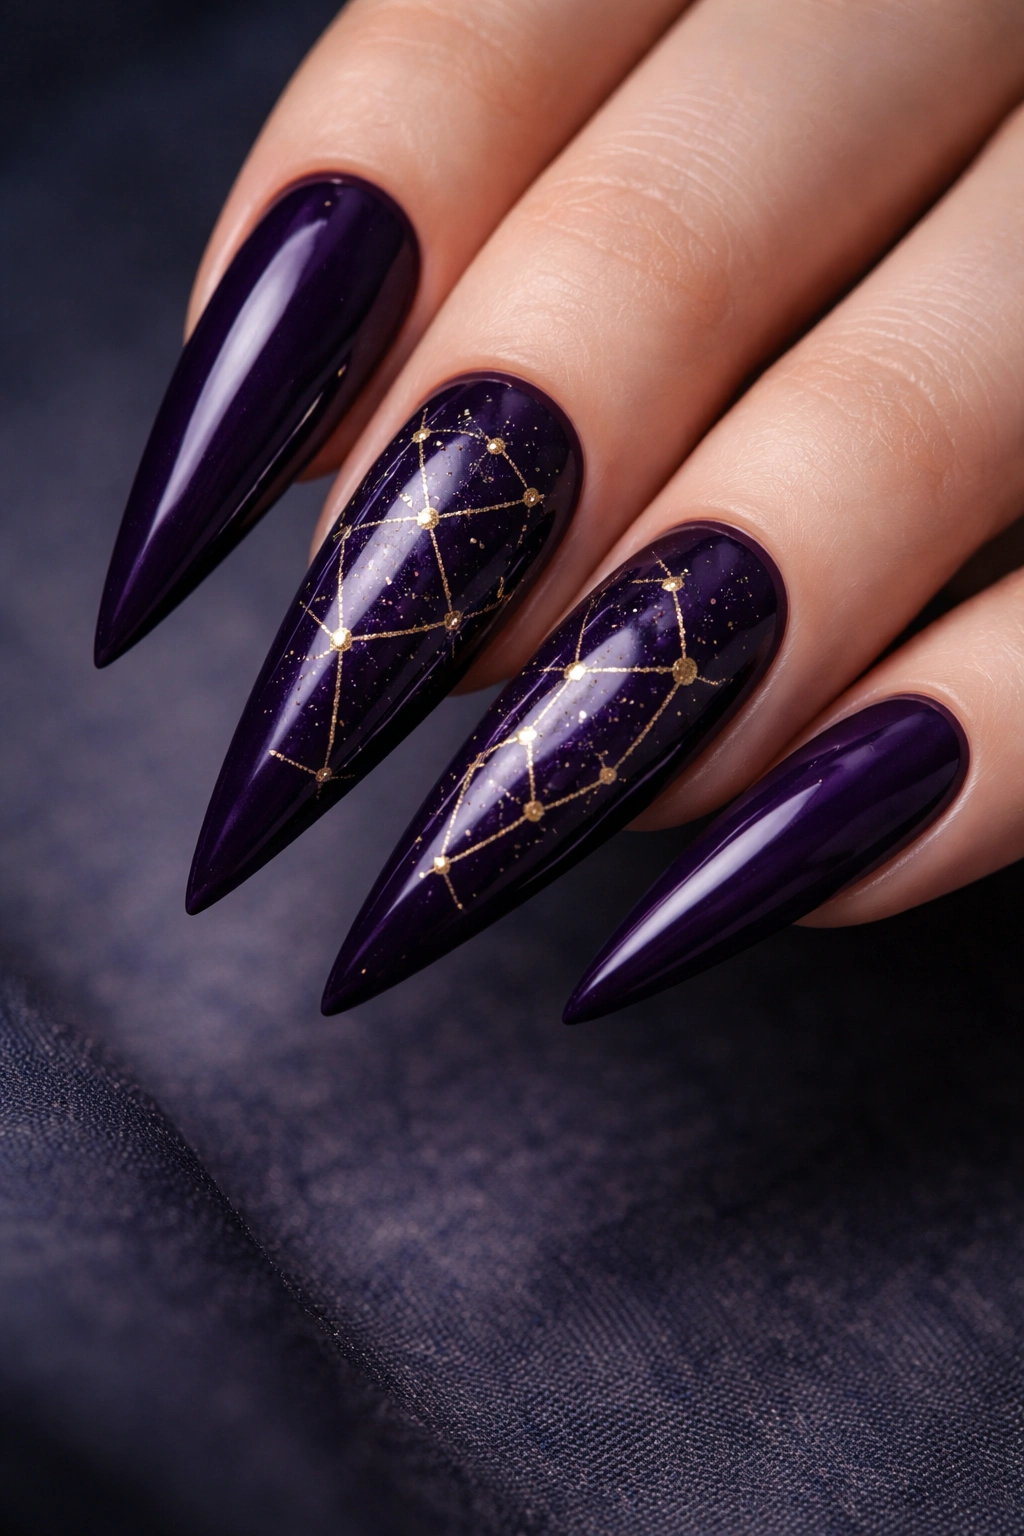
This design blends gothic mystery with celestial themes for something that feels both dark and dreamy. Use a deep, rich purple base — the kind that looks nearly black in dim light but reveals its purple undertones in natural daylight. Once cured, add tiny dots in gold or silver to create constellation patterns. Connect some dots with impossibly thin lines, like you’re mapping the stars across your nail. Concentrate constellations on 2-3 accent nails for focused impact.
Why Celestial Elements Enhance Gothic Style
The night sky is inherently gothic. Constellations reference magic, astronomy, mysticism, and the unknown — all themes that resonate deeply with gothic aesthetics. Purple itself bridges darkness and richness; it’s the color of bruises and royalty, mourning and mystery simultaneously. The gold or silver dots provide sparkle without feeling cheerful or frivolous; they’re cold, distant light rather than warm engagement. This design works beautifully on stiletto nails because the elongated shape accommodates multiple constellation patterns without crowding.
Constellation Design Execution
- Research actual constellation maps if you want accuracy, or create abstract patterns if you prefer artistic freedom
- Use a fine liner brush or thin detail brush for stars; dots should be tiny but noticeable
- Connect stars with lines so delicate they’re barely visible — this creates pattern without heaviness
- Keep constellations to 1-2 nails maximum for a focused accent rather than overall pattern
- Seal with a glossy topcoat to make metallic details shine against the matte purple
Insider note: If constellations feel too complicated, simple scattered stars without connecting lines deliver similar cosmic vibes with less technical difficulty.
5. Blood Red with Black Drip
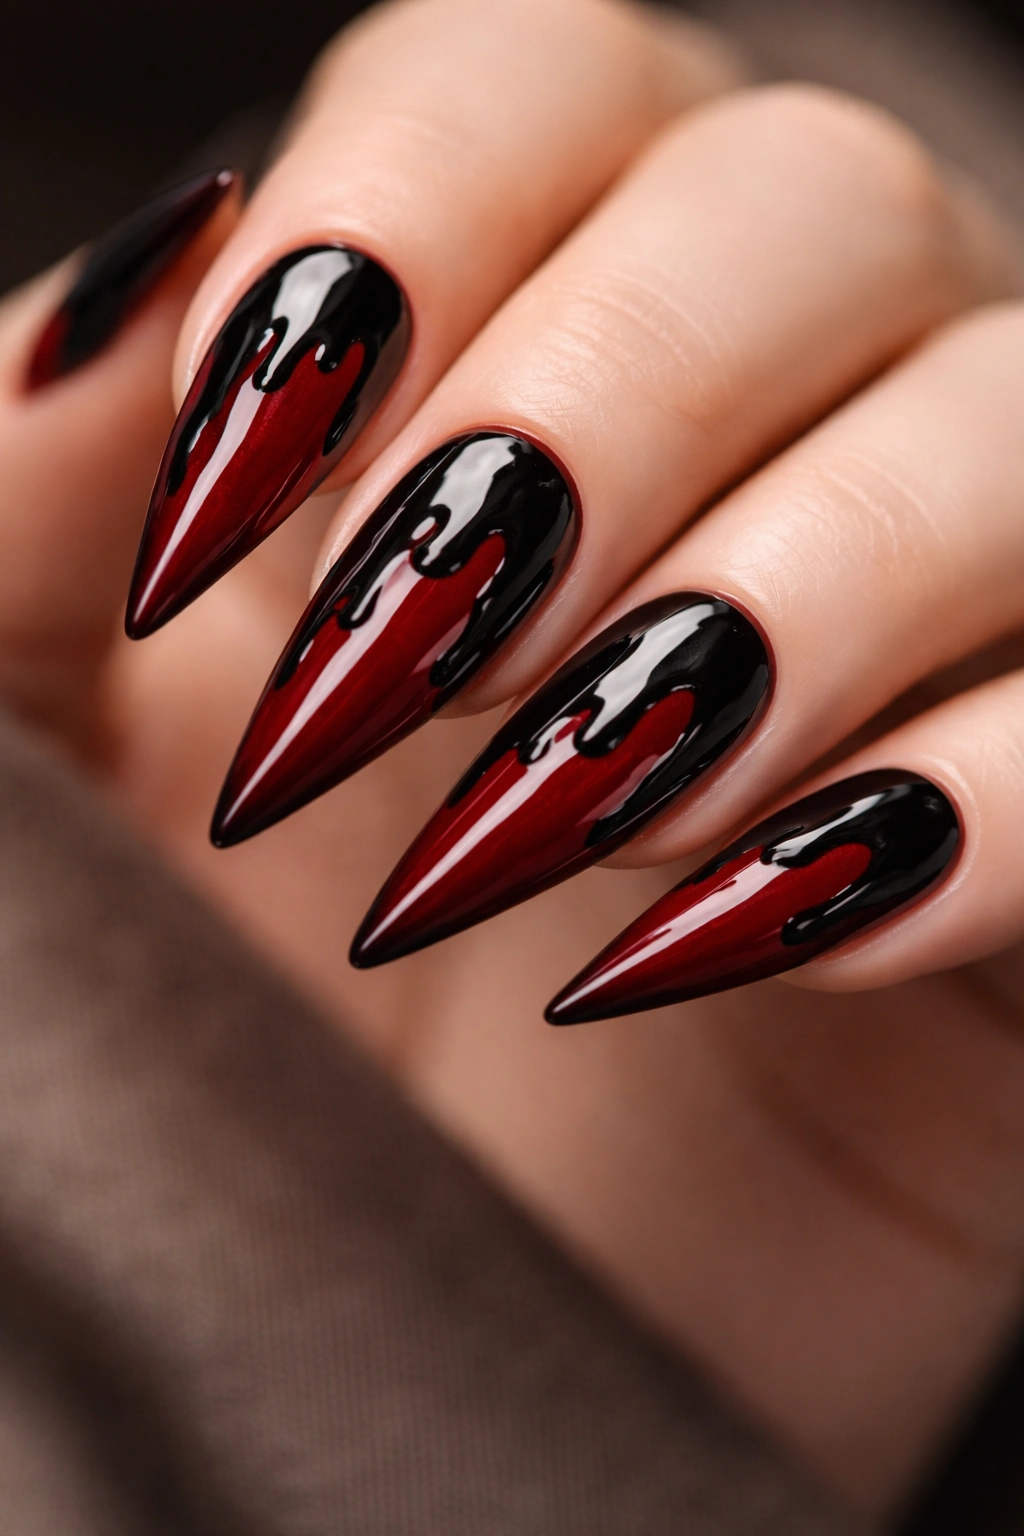
This design is theatrical and unabashedly bold. Apply a rich blood-red or crimson base that’s absolutely glossy and reflective. Once fully cured, add black gel or polish in a dripping pattern — like liquid is slowly running down from the tips toward the cuticles. The drips should look somewhat organic, maybe slightly irregular, as if gravity is genuinely pulling them downward. This works beautifully as an ombré where red fades to black toward the tips, creating the illusion of actual dripping.
The Visual Impact of Drip Design
Dripping reads as gothic instantly. It references blood, darkness, melting, decay, and controlled chaos. The contrast between bright crimson and black is stark and visually powerful. On stilettos, the elongated shape gives the drips room to stretch and flow; they look more dramatic and intentional than they would on shorter nails. This design toes the line between edgy and glamorous — it’s eye-catching without feeling costume-y.
Creating Believable Drips
- Apply your red base and let it cure completely before adding black
- Use a thinner consistency of black gel or polish for realistic flow
- Start black at the tips and allow it to fade and thin as it travels toward the cuticle
- Create irregular lines rather than perfectly straight ones; real drips aren’t symmetrical
- Experiment on paper first to develop a dripping motion that feels natural to your hand
Worth knowing: A matte black top combined with glossy red creates even more visual contrast — the matte absorbs light where black is, while glossy red reflects it, making the transition more striking.
6. Black with Mirror Metallic Accents
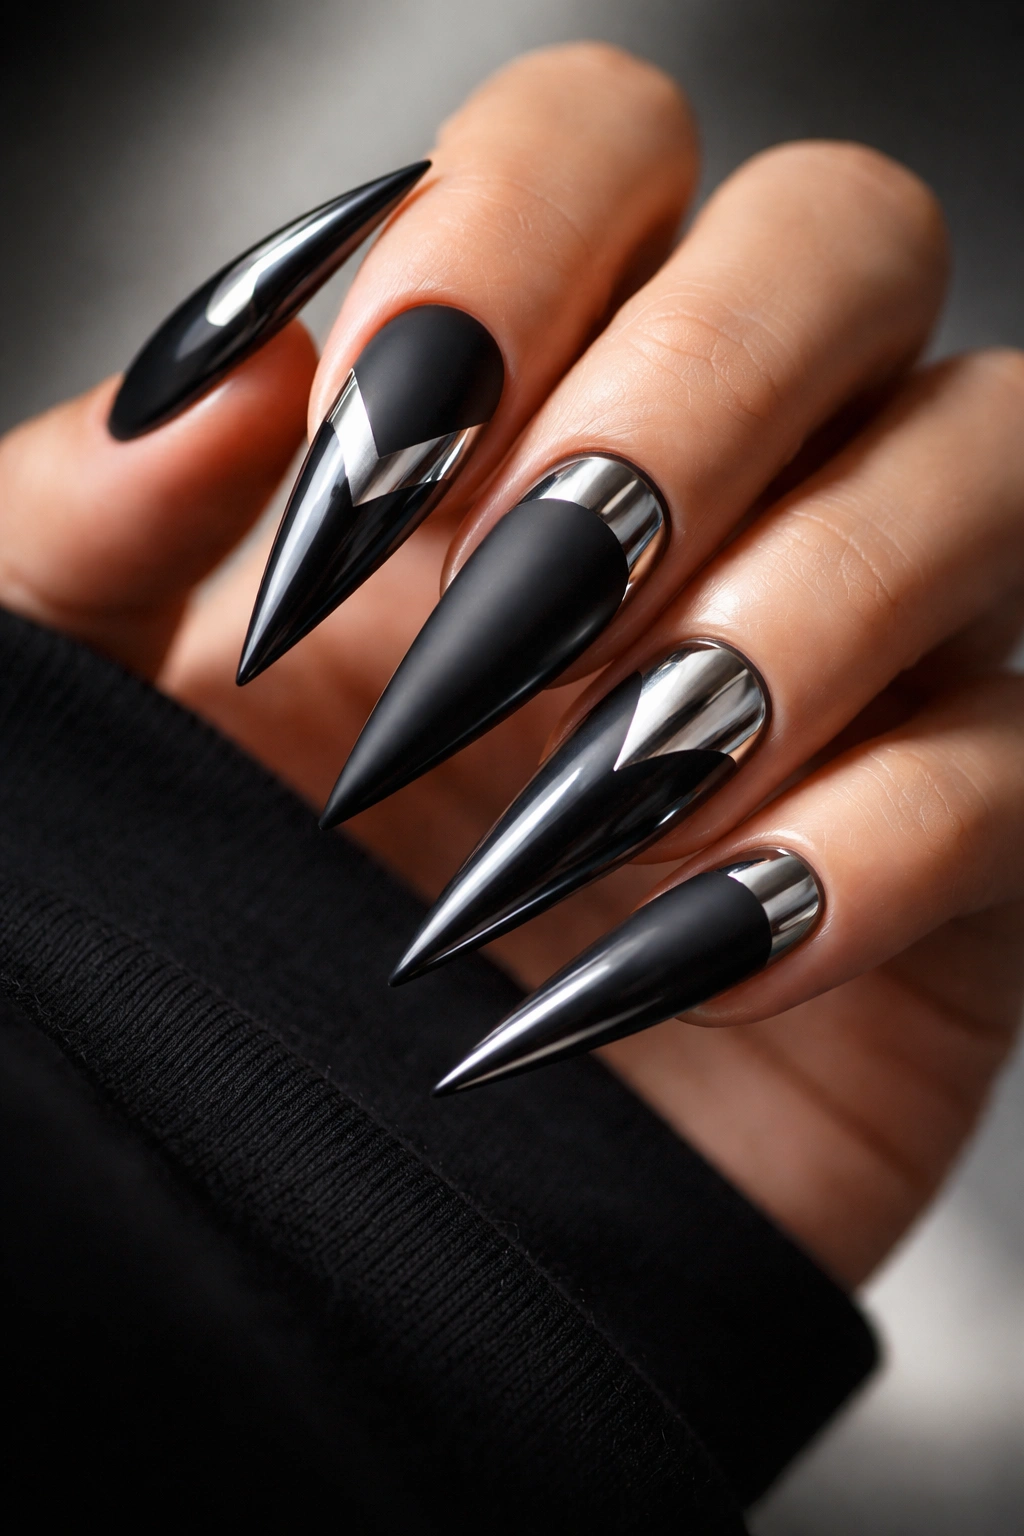
Mirror finishes are having a moment in high-end nail art, and they’re perfect for gothic aesthetics. Create a matte or satin black base — the subtle texture contrasts beautifully with what’s coming. Once cured, apply mirror chrome or metallic foil accents to specific areas: a thick band near the tips on 2-3 nails, geometric shapes scattered across the design, or a full ombré that transitions from black to silver-mirror. The mirror finish catches light dramatically and creates an almost liquid appearance.
Why Mirror Details Elevate Gothic Nails
Mirror finishes reference futurism, technology, and sci-fi aesthetics when paired with black — which is an unexpected but incredibly effective pairing. The mirror catches light in ways that standard metallic can’t, creating actual visual movement and depth. It feels luxury and expensive without being garish. On stilettos, mirror accents create focal points that draw the eye across the elongated shape of the nail. This design reads as thoroughly modern while maintaining gothic darkness.
Mirror Finish Application
- Mirror chrome products require specific application and sealing methods — follow your product’s instructions carefully
- Some mirror finishes need a special powder, while others use foil; choose whichever method you’re comfortable with
- Keep mirror accents to strategic areas rather than covering entire nails; this maintains the gothic darkness
- A glossy topcoat seals everything and maintains shine, though some finishes prefer matte topcoats
- Avoid excessive water exposure in the first 24 hours to protect the mirror finish
Pro tip: You don’t need professional mirror powder to achieve this effect — metallic adhesive foils designed for nail art work beautifully and are simpler to apply.
7. Deep Emerald with Witchy Details
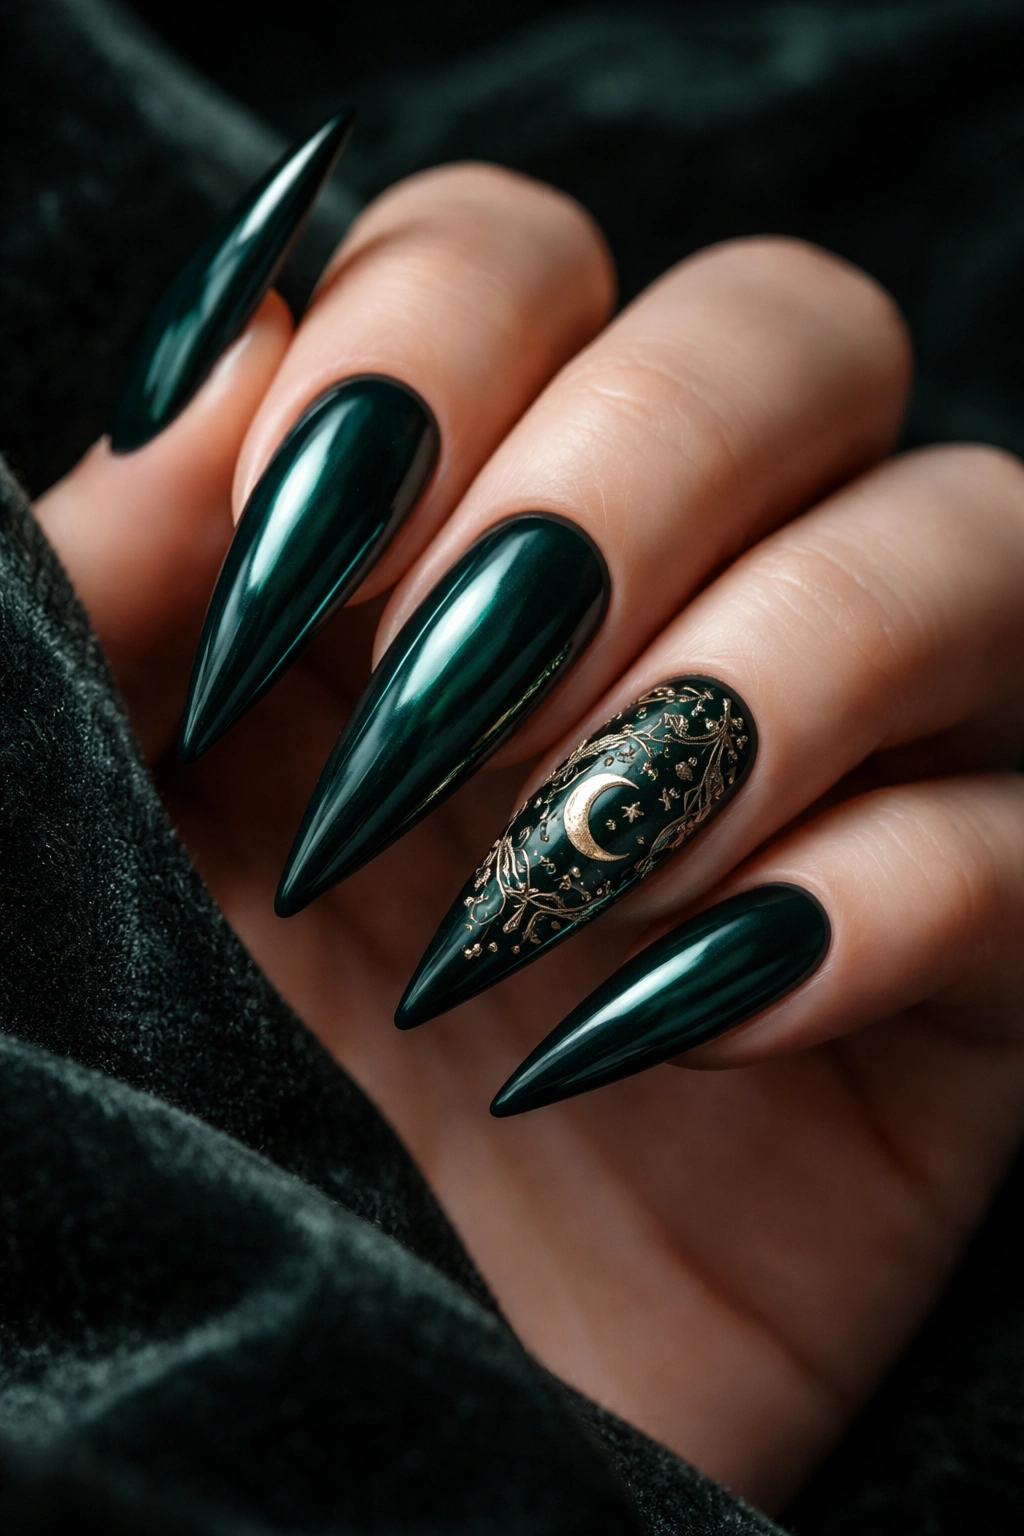
Emerald green is the secret gothic weapon. It’s rich enough to feel moody without being obviously dark, and it references nature, poison, magic, and luxury simultaneously. Apply a deep forest or jewel-tone emerald as your base. Once cured, add witchy symbols: tiny moons in gold, stars scattered across the nail, delicate botanical elements like leaves or vines, or occult symbols that resonate with you. Concentrate details on accent nails rather than covering every finger.
The Unexpected Power of Emerald Green
Most people default to black for gothic nails, which means emerald feels fresh and sophisticated while absolutely delivering gothic vibes. Emerald references alchemy, witchcraft, ancient magic, and luxury — it’s the color of emeralds in jewelry, poison in fairy tales, and forests at night. On stiletto nails, emerald creates a jewel-tone richness that photographs beautifully and catches light in intriguing ways. The depth of the color means that even delicate detail work reads as impactful and intentional.
Adding Witchy Elements
- Research occult or witchy symbols that genuinely resonate with you rather than using random imagery
- Moon phases in gold work beautifully on emerald; they’re instantly recognizable and load with meaning
- Botanical elements like herbs, thorns, or leaves add nature-witchy vibes without feeling costume-y
- Keep details delicate and placed on 1-2 accent nails for focused, intentional impact
- Gold or silver metallic details contrast sharply against emerald and read as elegant
Worth knowing: If you’re not comfortable hand-painting symbols, pre-made witchy nail stickers in metallic finishes deliver professional results with zero painting required.
8. Matte Black Ombré to Deep Purple
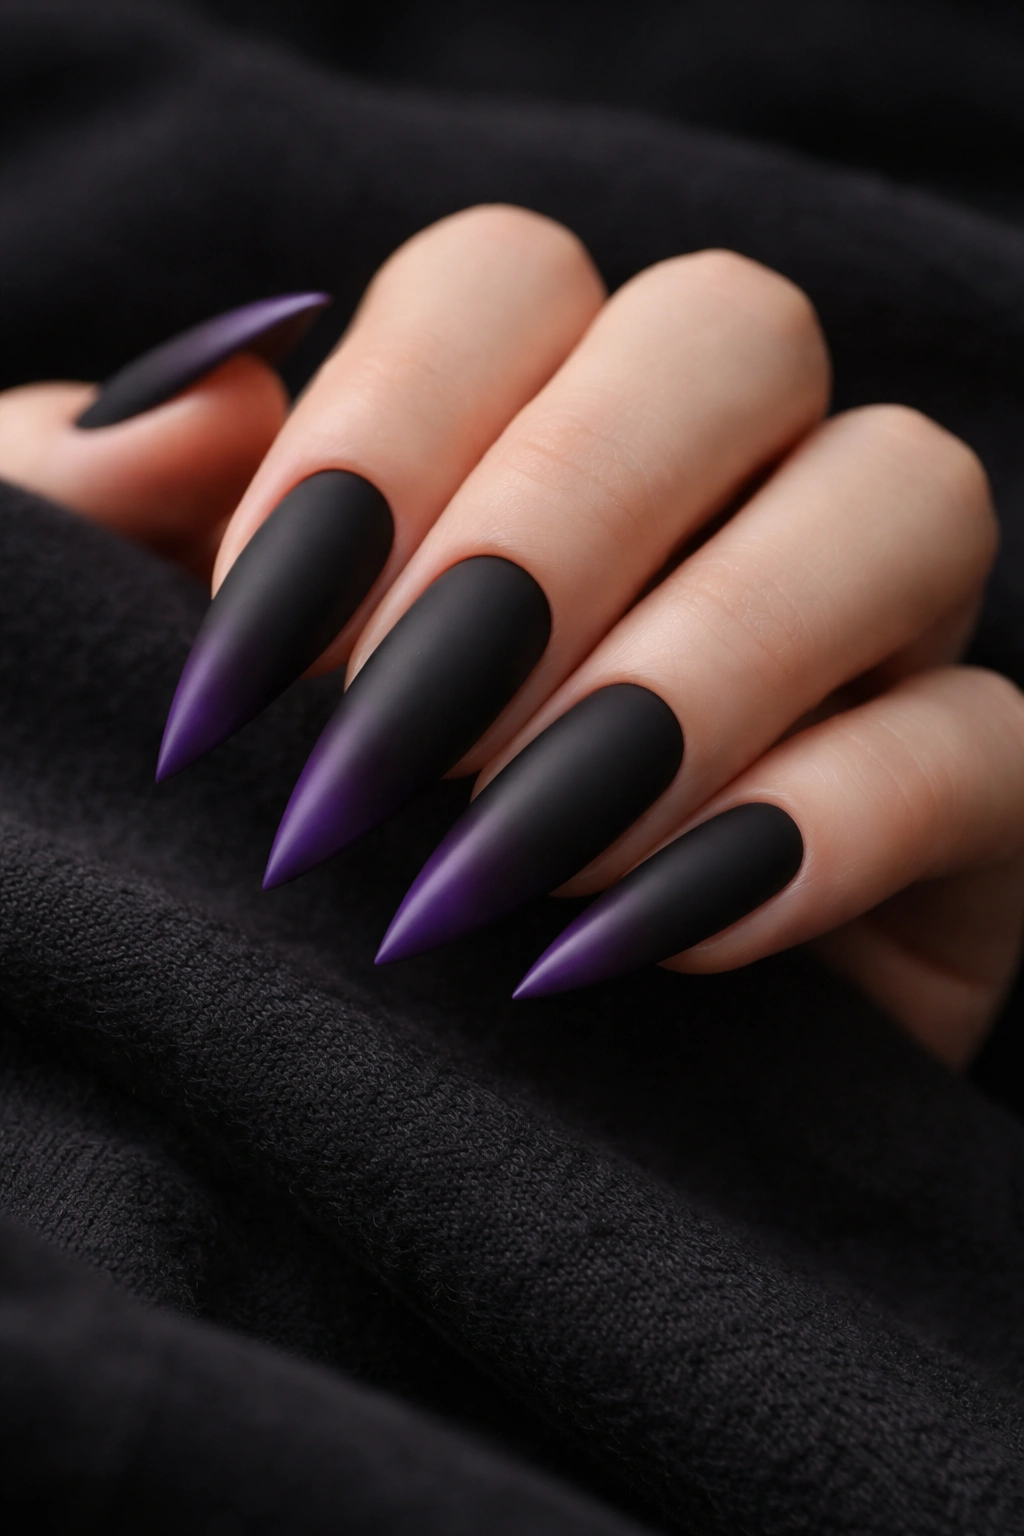
This design creates gradient sophistication with just enough color to break from pure black while maintaining gothic depth. Apply black as your base and let it cure. Then, gradually introduce deep purple — starting at the tips and blending upward toward the cuticle, creating a seamless ombré transition. The matte finish keeps everything looking refined and moody. The purple should be visible at the tip but nearly invisible by the time you reach the nail bed; the gradient should be subtle, not obvious.
Why Ombré Elevates the Look
Ombré creates dimension and visual movement without adding complexity. The transition from black to purple feels mysterious and intentional. Matte finishes make the gradient feel sophisticated rather than playful. On stilettos, the elongated shape gives the ombré room to fully develop from tip to cuticle without feeling cramped. This design reads as incredibly polished and professional while maintaining complete gothic integrity.
Creating Seamless Ombré
- Use a makeup sponge or blending brush to create transition areas between black and purple
- Start with concentrated purple at the tips and gradually decrease pigment as you move toward the base
- Build the gradient with thin layers rather than trying to blend heavy application at once
- A matte topcoat seals everything while maintaining the muted, sophisticated finish
- Practice on paper first to develop a blending technique that feels natural to you
Pro tip: If hand-blending feels difficult, apply solid purple tips and use a sponge to feather black upward into it — this creates a subtler gradient with less technical demand.
9. Black Lace and Sheer Base
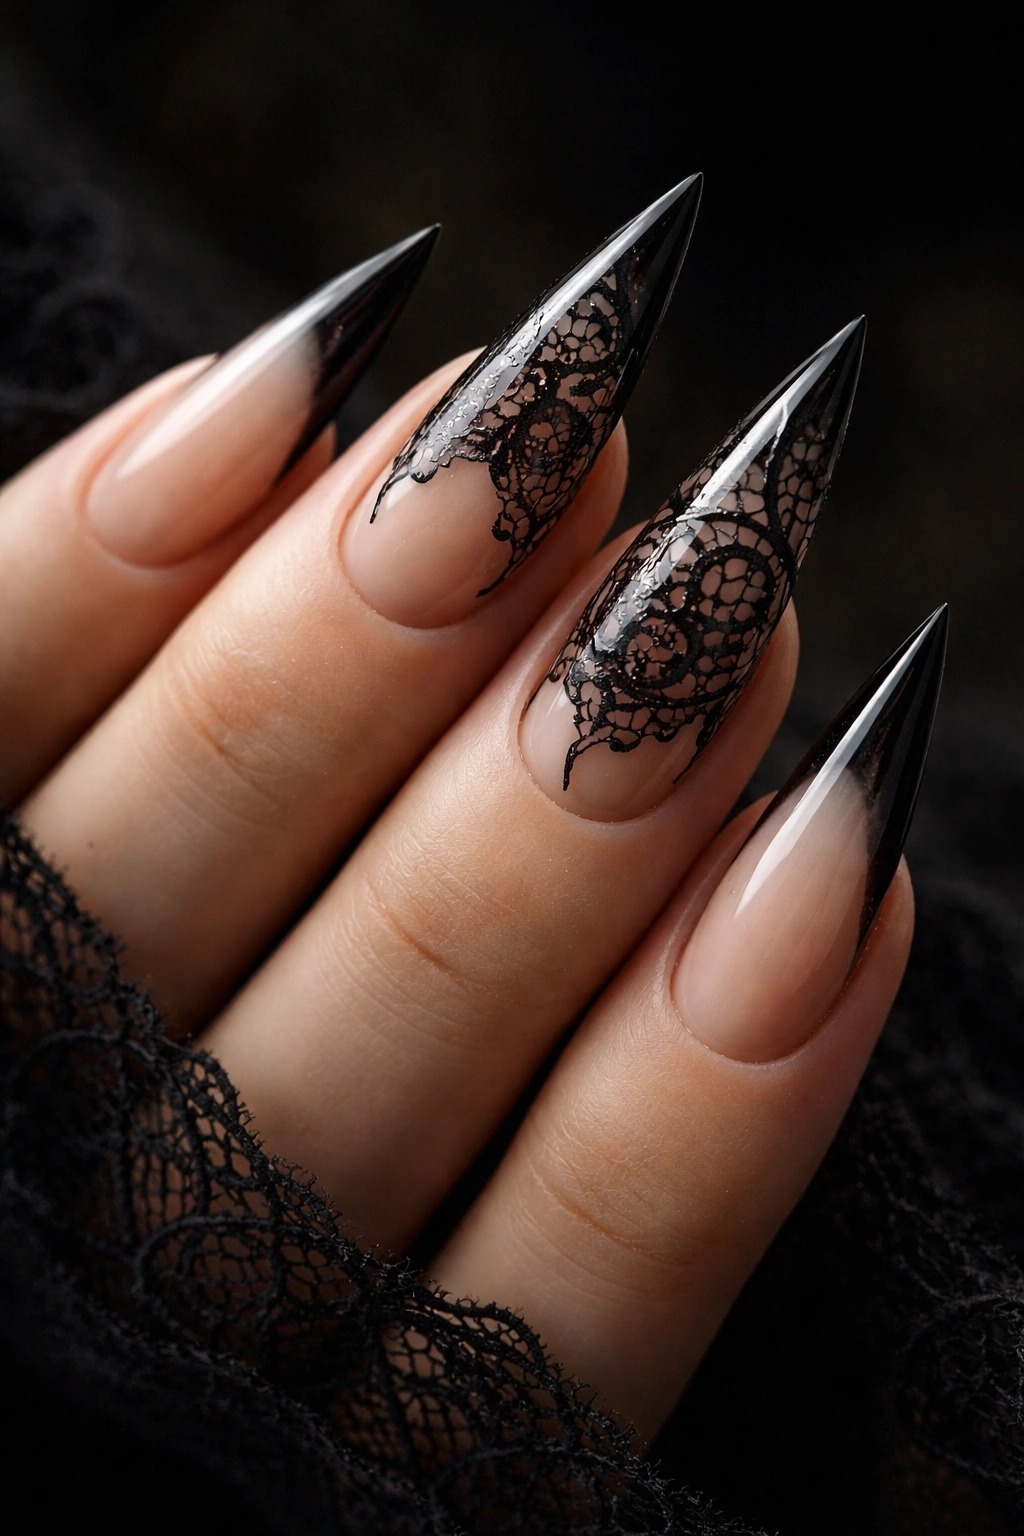
This design brings romantic gothic energy with its foundation in sheer, delicate materials. Instead of opaque black, use a nude or translucent base that lets your skin tone show through slightly. Once cured, add black lace patterns across the nail — like you’re wearing actual lace over your nails. The lace should be intricate enough to read as detailed but sparse enough that you see skin tone through the pattern. Concentrate lace details on 2-3 accent nails, leaving some nails with just the sheer base.
Why Lace Defines Romantic Gothic
Lace is inherently gothic. It references Victorian fashion, intimacy, delicacy, and darkness all at once. The semi-sheer base prevents the design from feeling heavy or costume-y while the black lace adds genuine darkness. On stilettos, the elongated shape gives lace patterns room to extend without crowding. This design feels sophisticated and wearable for everyday situations while maintaining distinct gothic character.
Executing Lace Details
- Thin black gel or polish works best for creating fine lace patterns
- Use a detail brush or needle tool to create delicate linear patterns that resemble actual lace
- Draw connected loops and lines rather than solid shapes to capture authentic lace texture
- Pre-made lace nail stickers offer a professional shortcut if hand-painting feels intimidating
- A glossy topcoat maintains the elegant, refined finish
Insider note: You can achieve intricate lace patterns using actual lace stickers designed for nails — they’re affordable and deliver authentic textile texture that’s impossible to hand-paint.
10. Dark Blue with Mystical Moon Details
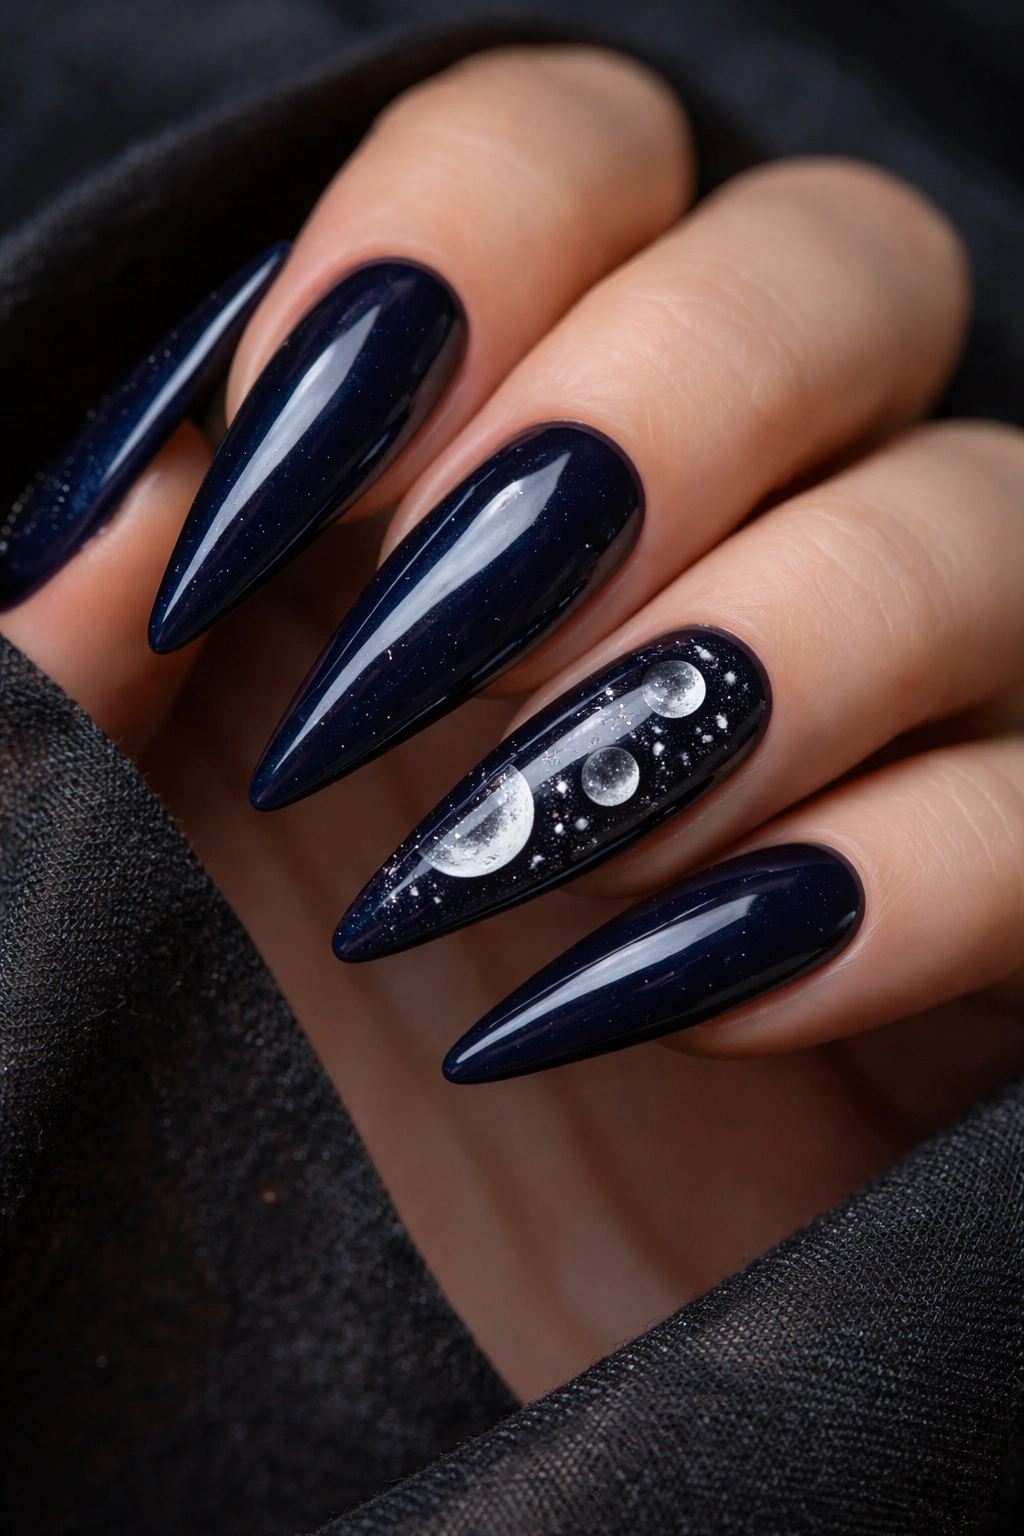
This design captures gothic mystery with a color that’s less expected than pure black. Use a deep, rich navy or midnight blue base — darker enough to read as moody but distinct from black. Once cured, add moon phases in white, silver, or pale gold across one or two accent nails. Include some crescent moons, full moons, half moons, and tiny crescents in various sizes for visual interest. The moons should feel scattered and celestial rather than rigidly placed.
The Appeal of Dark Blue Gothic
Dark blue bridges black and color; it’s moody without being absolute. Blue references night sky, water, mystery, and the unknown — all deeply gothic themes. Moon imagery adds mysticism and femininity without softening the overall darkness. On stilettos, the elongated shape accommodates multiple moon variations without feeling cluttered. This design feels sophisticated and personal rather than costume-y.
Moon Phase Application
- Research actual moon phases if you want accuracy, or create abstract moon imagery if you prefer artistic freedom
- White or pale metallic creates striking contrast against dark blue without the coldness of silver
- Vary moon sizes and add tiny stars or dots for celestial context
- Concentrate moons on 1-2 accent nails for balanced, intentional design
- A glossy topcoat makes metallic moons shimmer beautifully against the darker base
Pro tip: If moon phases feel complex, simple crescent moons scattered across the nail deliver similar mystical vibes with significantly less technical demand.
Final Thoughts
Gothic stiletto nails are about creating a complete aesthetic statement on your fingertips. Whether you choose pure black with metallic chains, unexpected jewel tones with celestial details, or theatrical drips and spikes, the goal is coherence — every element should work together to reinforce a mood or theme rather than feeling random or scattered.
The length and shape of stilettos actually make gothic design more impactful. You have enough surface area to include meaningful details without crowding, and the elongated silhouette naturally enhances drama and elegance. The key is choosing elements that genuinely resonate with you rather than defaulting to obvious choices.
Real gothic style is about intention and depth — understanding why you’re choosing each color, symbol, and detail rather than simply decorating your nails. Whether you’re expressing something witchy, romantic, edgy, or mysterious, your nails become a conversation about your aesthetic vision. You’re not just painting them dark; you’re creating a miniature artwork that reflects how you see yourself and the darkness you embrace as beautiful.
