

Yellow stiletto nails have a way of instantly elevating your entire look without requiring a dramatic style overhaul. Whether you’re drawn to bold, sunshine brights or softer, buttery pastels, yellow is surprisingly versatile — it works for professional settings, casual occasions, and everything in between. The key is finding the right shade and design that resonates with your personal aesthetic and skin tone, because not all yellows are created equal.
The beauty of yellow stiletto nails lies in their ability to make a statement while remaining fundamentally wearable. Stilettos themselves are inherently eye-catching, with their elongated shape and pointed tip creating an instantly polished, confident silhouette. Add yellow to that equation, and you’ve got a nail style that commands attention in the best possible way. The color brings warmth, energy, and optimism to your fingertips — qualities that definitely translate into how people perceive you.
What makes yellow such a smart choice for stiletto nails is the sheer range of directions you can take it. You can go all-in with a solid, glossy sunshine yellow that practically glows. You can layer it with patterns, metallics, or nail art details that transform it into something more intricate and personalized. You can pair it with negative space designs, ombre effects, French tips in unexpected colors, or three-dimensional embellishments that catch the light. Each approach creates a completely different vibe, so you’ve got plenty of room to experiment and find what genuinely makes you feel confident and comfortable.
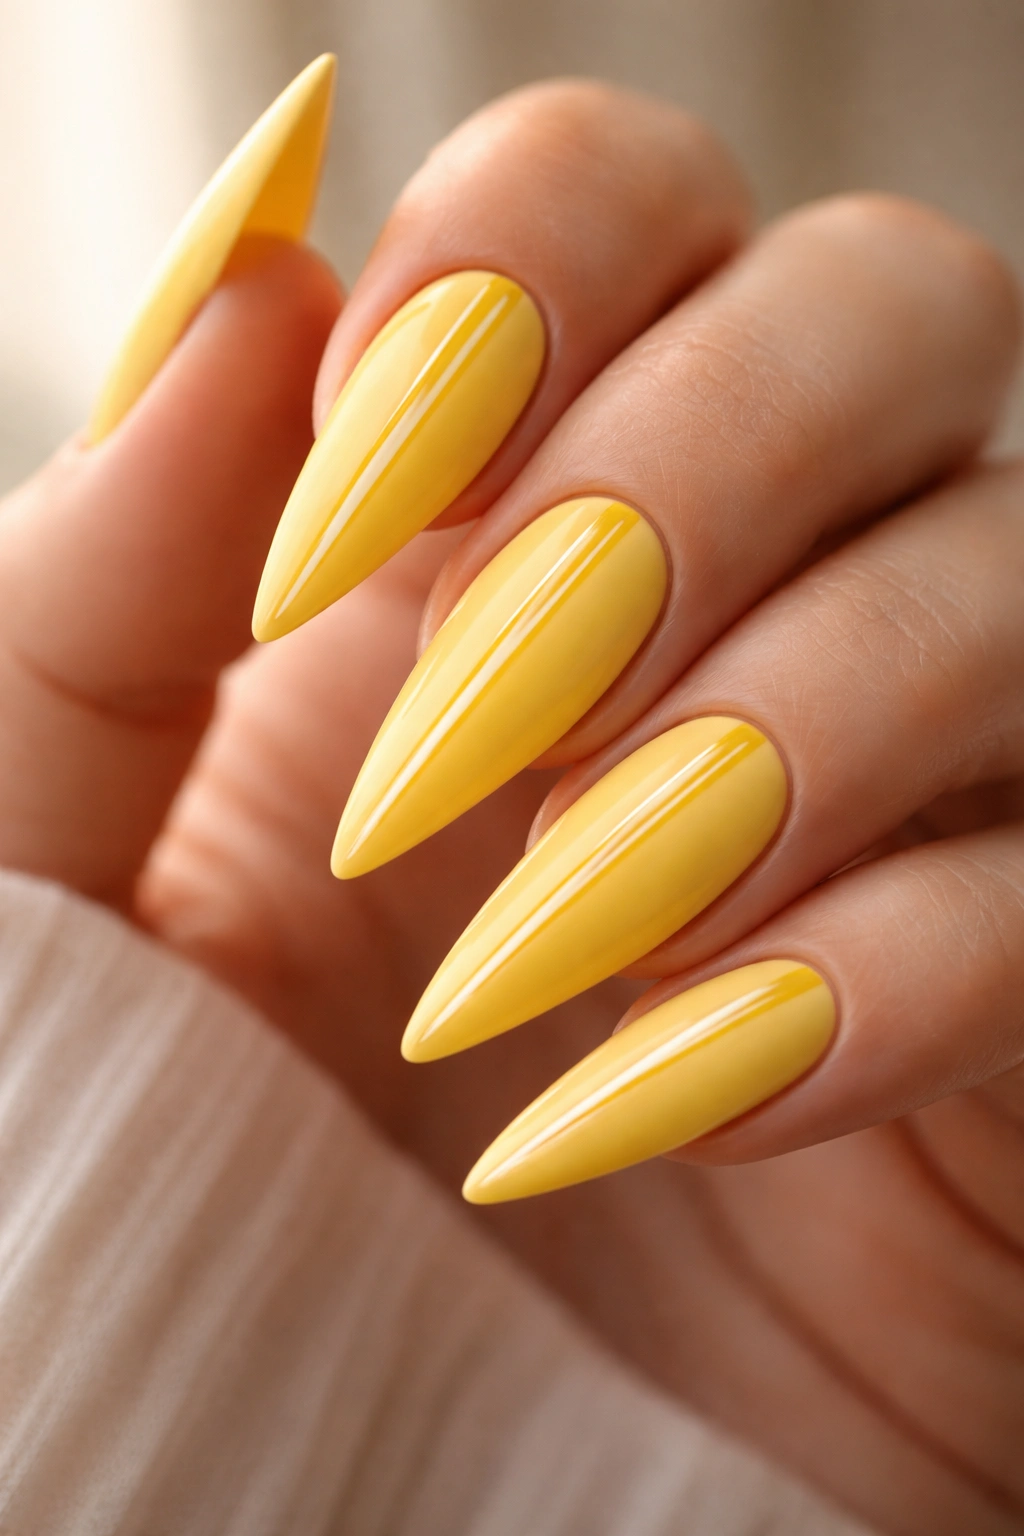
1. Classic Sunshine Yellow
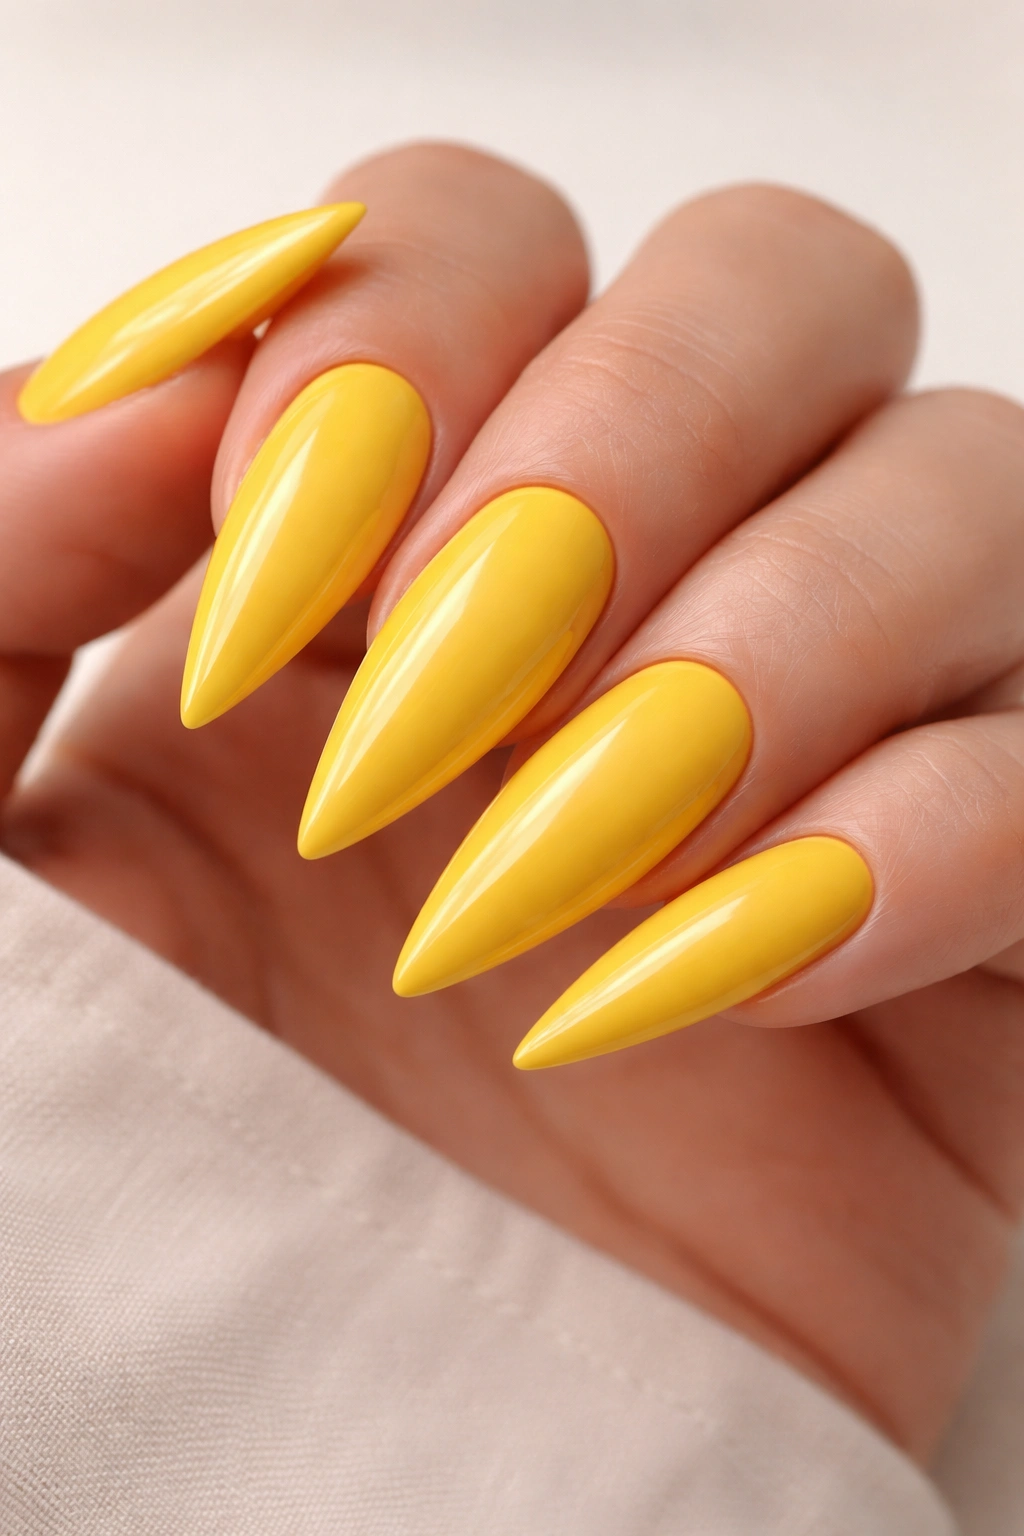
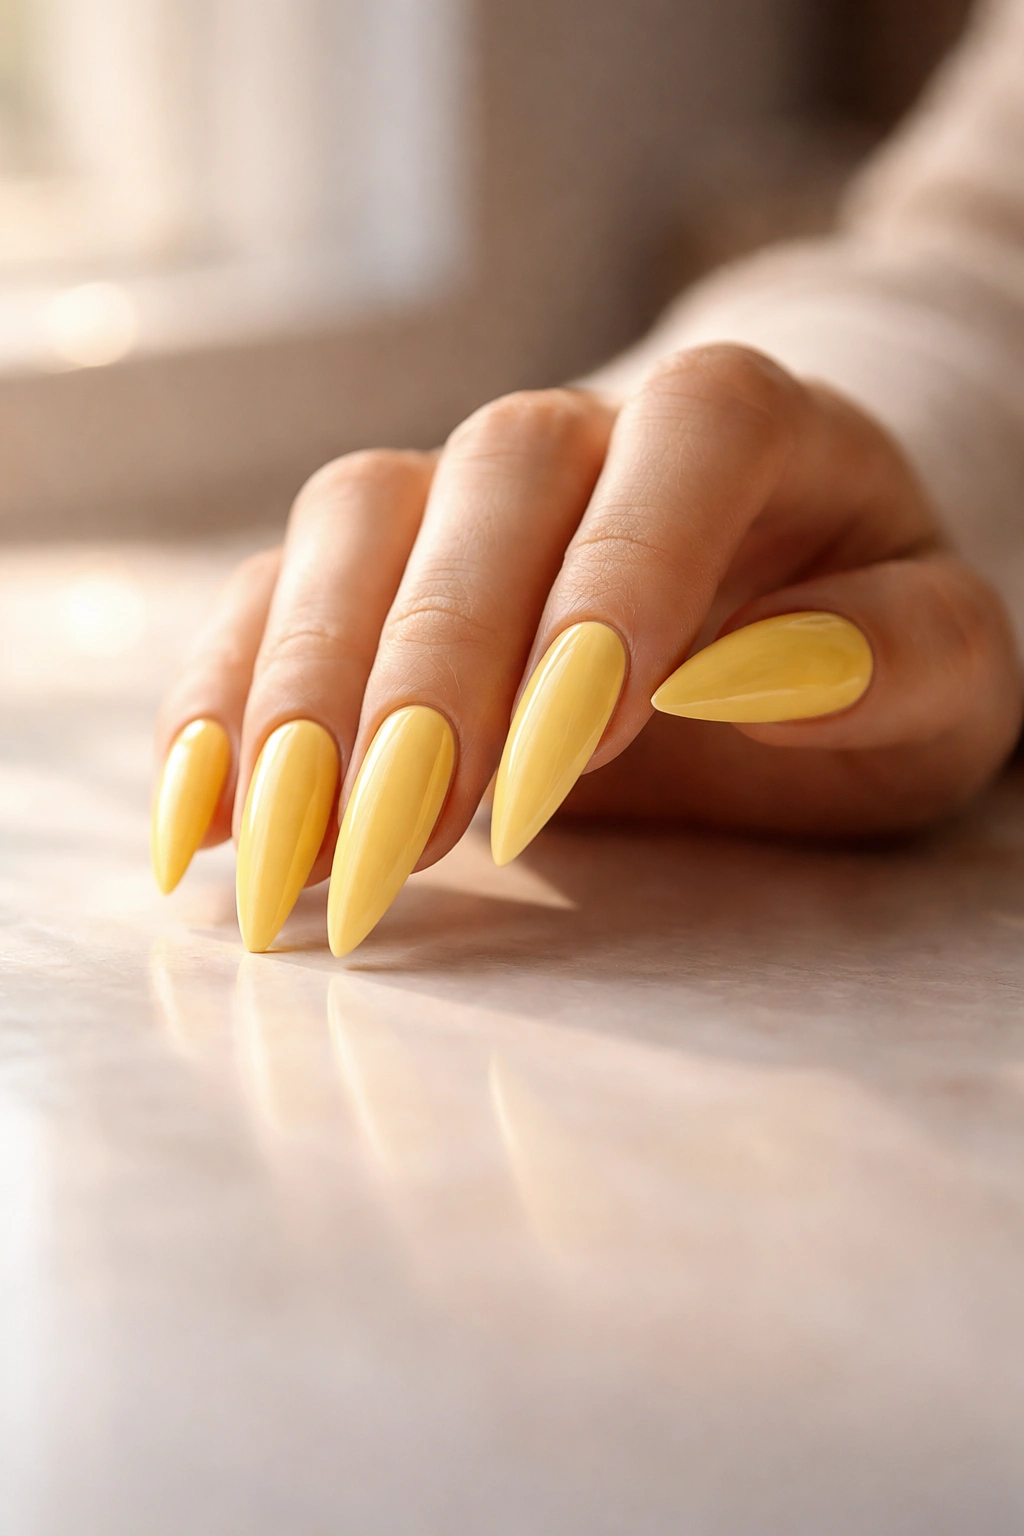
A timeless solid yellow stiletto nail is the foundation that makes all the other designs possible. This is your clean, no-fuss look — a single coat of bright, saturated yellow lacquer across the entire nail surface, usually sealed with a glossy top coat for maximum shine and durability. The simplicity is actually what makes it so striking; there’s nothing to distract from the beautiful color and the elegant silhouette of the stiletto shape itself.
Why This Works as a Statement Look
The classic sunshine yellow creates an instantly polished appearance that reads as intentional and confident. The color is cheerful without being childish, and it photographs beautifully in natural light or under indoor lighting. This design works year-round, though it feels especially fitting during warmer months when bright, warm tones are more naturally visible in your wardrobe and accessories.
Application and Longevity Tips
- Apply a base coat first to prevent staining and ensure even color distribution across all nails
- Use two thin coats rather than one thick coat — this prevents pooling at the cuticle and creates a more professional finish
- Seal with a high-quality glossy top coat that will maintain shine for at least two weeks
- Yellow yellows can sometimes appear slightly uneven on the nail; a slightly opaque formula tends to look more vibrant than a sheer one
Pro tip: Pair this look with metallic gold jewelry or rose gold accents to let the nails be the focal point without creating color chaos.
2. Ombre Fade From Yellow to White
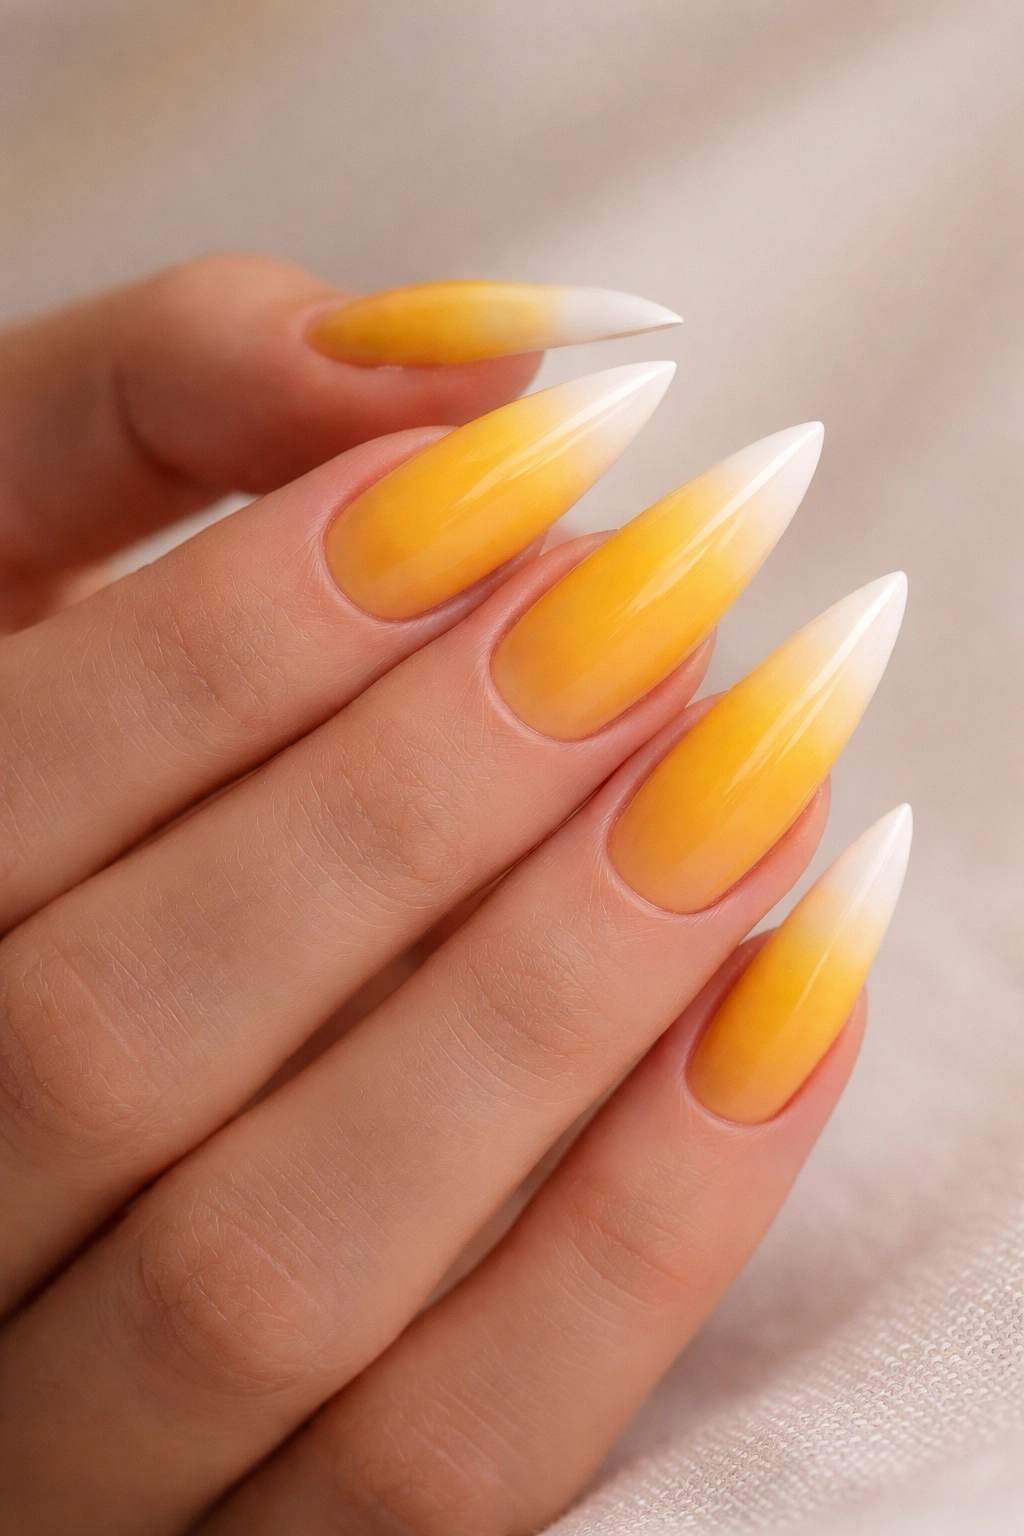
This gradient design starts with deep yellow at the base of the nail and gradually fades to white or cream at the tip, creating a soft, sophisticated ombre effect that’s more interesting than a solid color but still maintains the clean, polished aesthetic. The transition happens gradually across the middle section of the nail, giving the illusion of depth and dimension.
How to Achieve the Ombre Effect
An ombre fade requires either a sponge-blending technique or an airbrush, depending on how professional you want the finished look to be. The sponge method involves applying yellow and white to a makeup sponge in separate zones, then dabbing it repeatedly against the nail until the colors blend and the transition softens. Airbrush gives you more control over where the color transitions happen and creates a more seamless gradient, though it requires specific equipment.
Design Variations That Elevate It
- Add a thin line of gold glitter along the transition zone for subtle sparkle
- Include a delicate white stiletto tip outline to frame the ombre effect
- Layer the ombre with a nude or nude-pink base underneath for a warmer, skin-tone-friendly version
- Reverse the gradient so white is at the base and yellow is at the tip for a different energy
Worth knowing: Ombre designs typically require professional application or serious practice with a sponge, so budget accordingly or be prepared for a learning curve if you’re DIY-ing.
3. Yellow Base With Metallic Gold Stiletto Tips
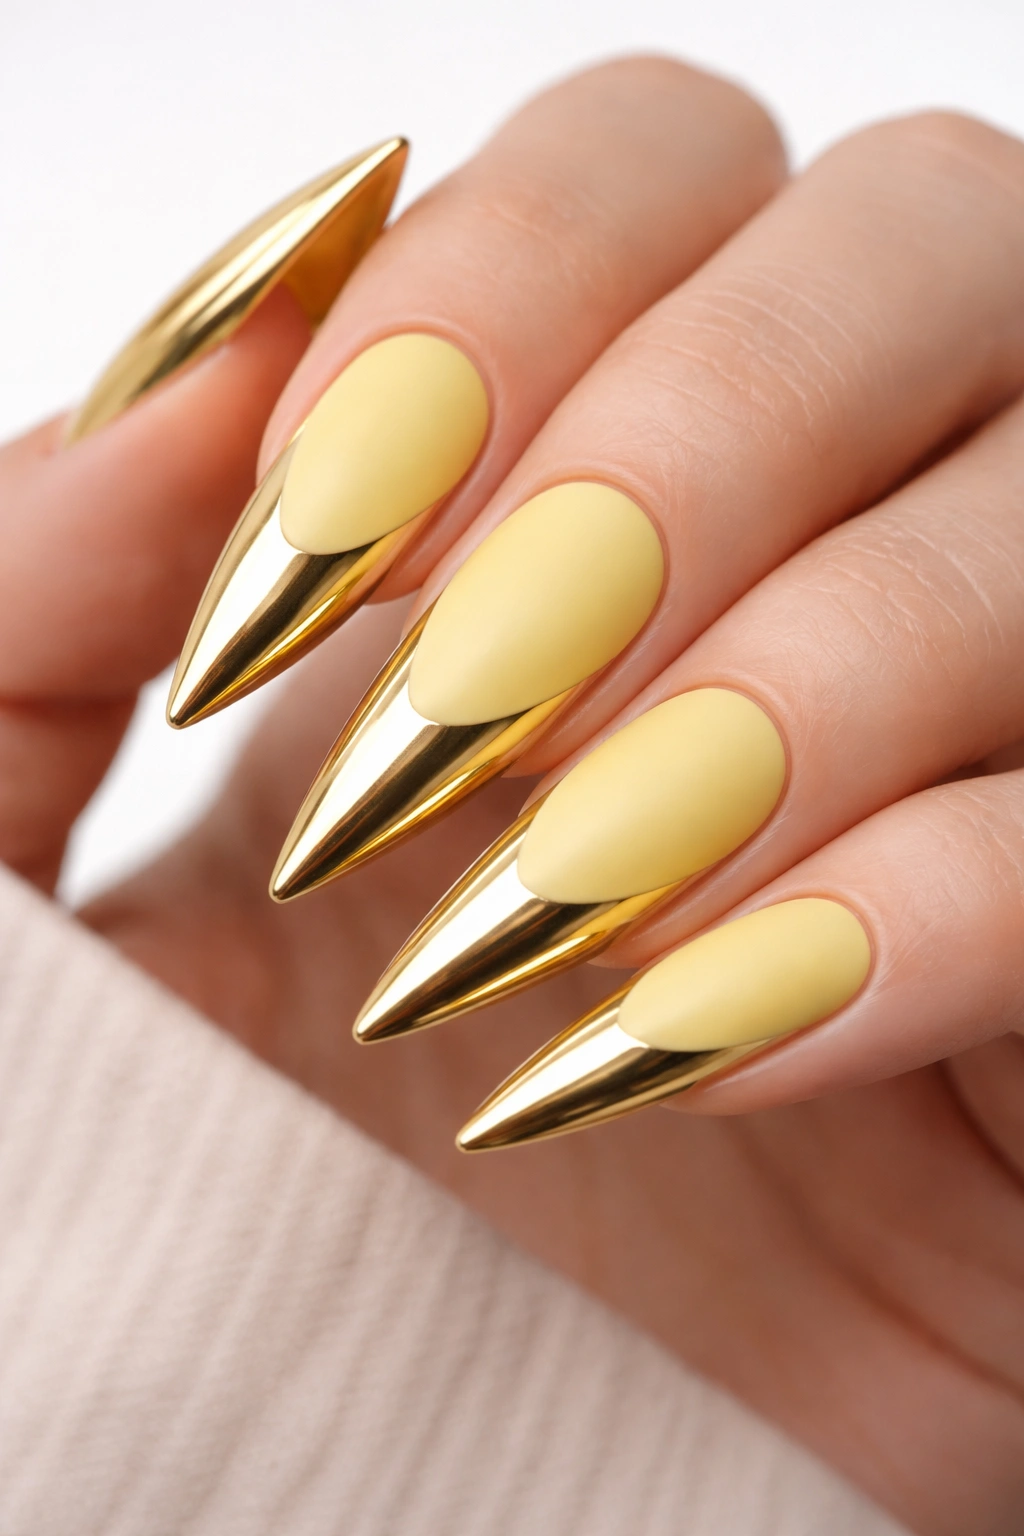
This design combines the brightness of yellow with the sophisticated shimmer of metallic gold by keeping the base of the nail in yellow and painting just the stiletto tip portion in gold or champagne metallic. The contrast between the matte or satin yellow and the reflective gold creates visual interest without feeling busy.
Why Gold Metallics Complement Yellow
Gold and yellow are neighbors on the color wheel, so they naturally harmonize together without clashing. The metallic finish catches light differently than the matte yellow base, which prevents the design from feeling flat or one-dimensional. This combination reads as intentional and elevated rather than accidental.
Execution Details for Best Results
- Use a thin brush or even a toothpick to maintain a clean line where the yellow meets the gold
- Apply gold metallic polish in thin coats so it doesn’t appear gummy or overly thick compared to the yellow base
- Consider adding a matte top coat to the yellow portion and a glossy top coat to the gold for textural contrast
- If you struggle with the brush, gold nail tape applied before sealing can create an ultra-clean geometric division
Insider note: Champagne or rose gold metallics work better than straight yellow gold if you have cooler undertones; warm-toned metallics look best on warm-toned skin.
4. Yellow With Black Geometric Patterns
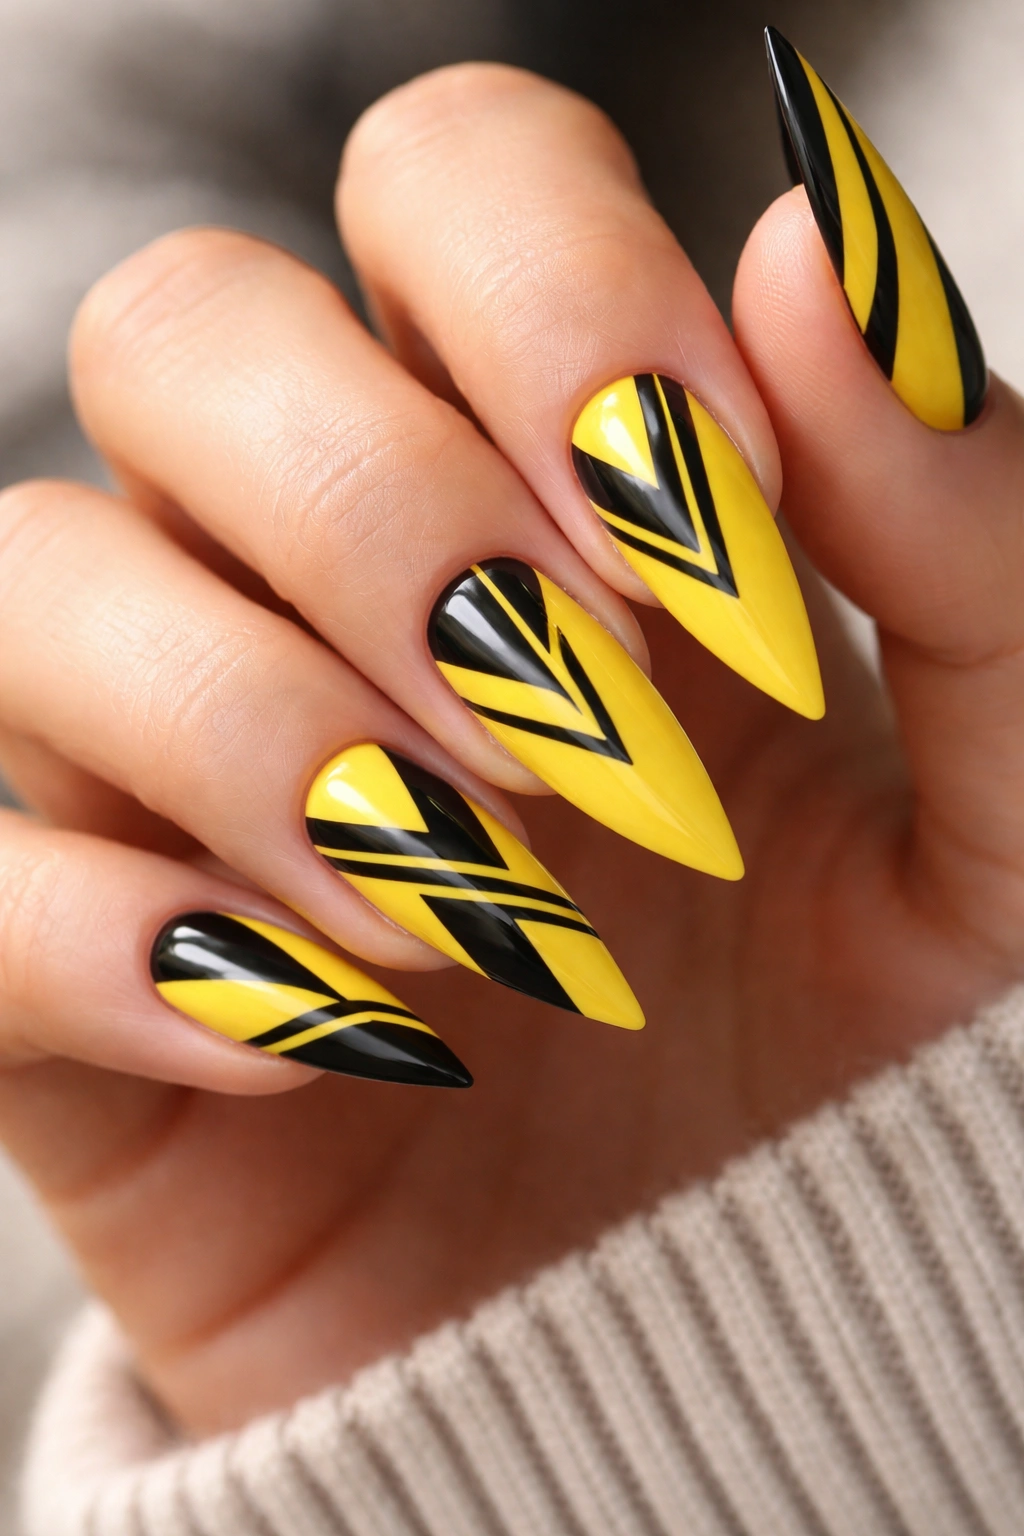
Bold geometric shapes in black — triangles, stripes, chevrons, or modern angular designs — layered over a yellow base create a striking, contemporary look that feels fashion-forward and artistic. The high contrast between bright yellow and black makes even simple geometric shapes pop visually.
Design Patterns That Look Sharp
- Thin horizontal stripes across the yellow for a mod, retro-inspired vibe
- A single large triangle pointing toward the tip for a minimalist geometric aesthetic
- Chevron or zigzag patterns running down the center of each nail
- Scattered smaller geometric shapes (squares, rectangles, circles) arranged asymmetrically across the nail
Technical Tips for Clean Execution
- Use a thin striping brush for precise lines, or nail tape for perfectly straight edges
- A black gel polish or acrylic paint provides more opacity and durability than regular lacquer
- Seal the design with a glossy top coat to protect the black lines from chipping
- Practice your geometry on paper first so you know exactly where shapes should land on the nail
Pro tip: Pair geometric designs with minimalist outfits to let the nails be the artistic centerpiece; too many competing patterns elsewhere risks the look becoming chaotic.
5. Yellow Stilettos With Rhinestone or Crystal Embellishments
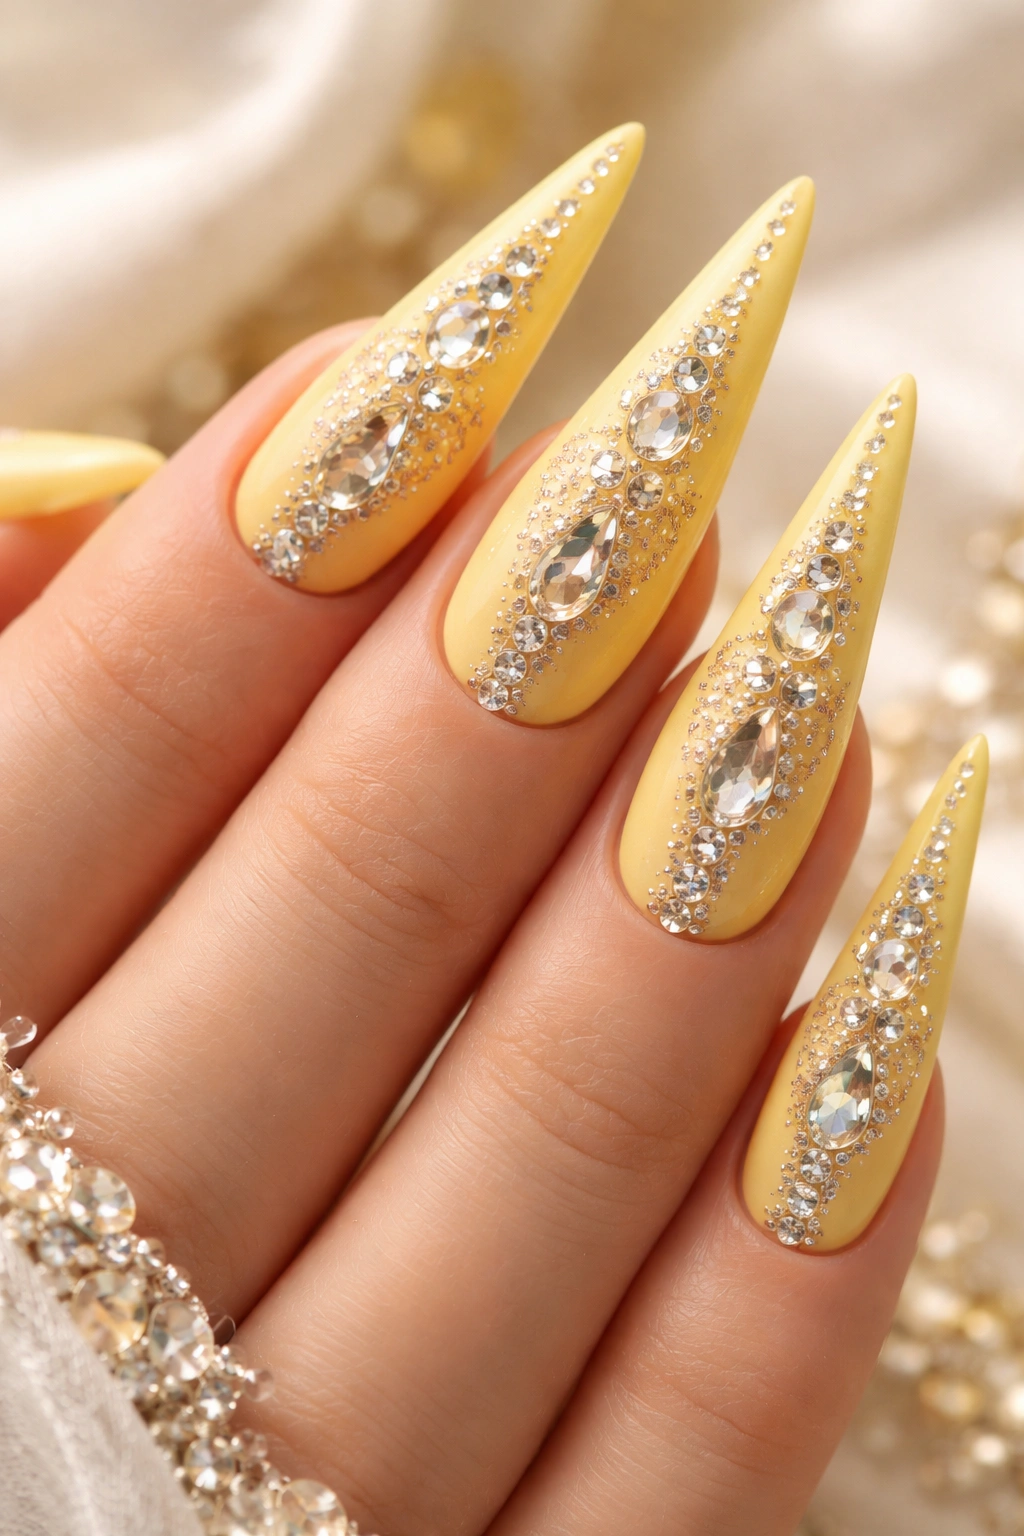
Adding sparkle through rhinestones, Swarovski crystals, or decorative gems transforms yellow stiletto nails into glamorous, occasion-ready statement pieces. You can apply crystals across the entire nail surface, create a gradient of density (more stones at the tip, fewer at the base), or focus them along a single stripe or design element.
Where to Place Stones for Maximum Impact
- A full coverage crystal coating across all five nails creates ultra-glam bridal or special-event nails
- A gradient starting sparse at the base and becoming dense toward the tip creates visual movement
- Stones concentrated along the center stripe of each nail with clean yellow sides creates balance
- A scattered, asymmetrical pattern feels more modern and artistic than uniform coverage
Durability and Application Concerns
- Crystals adhere best to a gel base rather than traditional lacquer, as gel provides a stronger, stickier surface
- Use nail-specific adhesive or a thin gel top coat to secure stones firmly
- Expect reduced durability compared to smooth nails — stones can snag and loosen, especially on longer stilettos
- For event nails, apply stones the day of wear rather than days in advance to maximize staying power
Worth knowing: Rhinestones and crystals add considerable weight to the nail, which can cause discomfort on very long stilettos; consider your comfort tolerance before committing to full coverage.
6. Sunny Yellow With Delicate Floral Nail Art
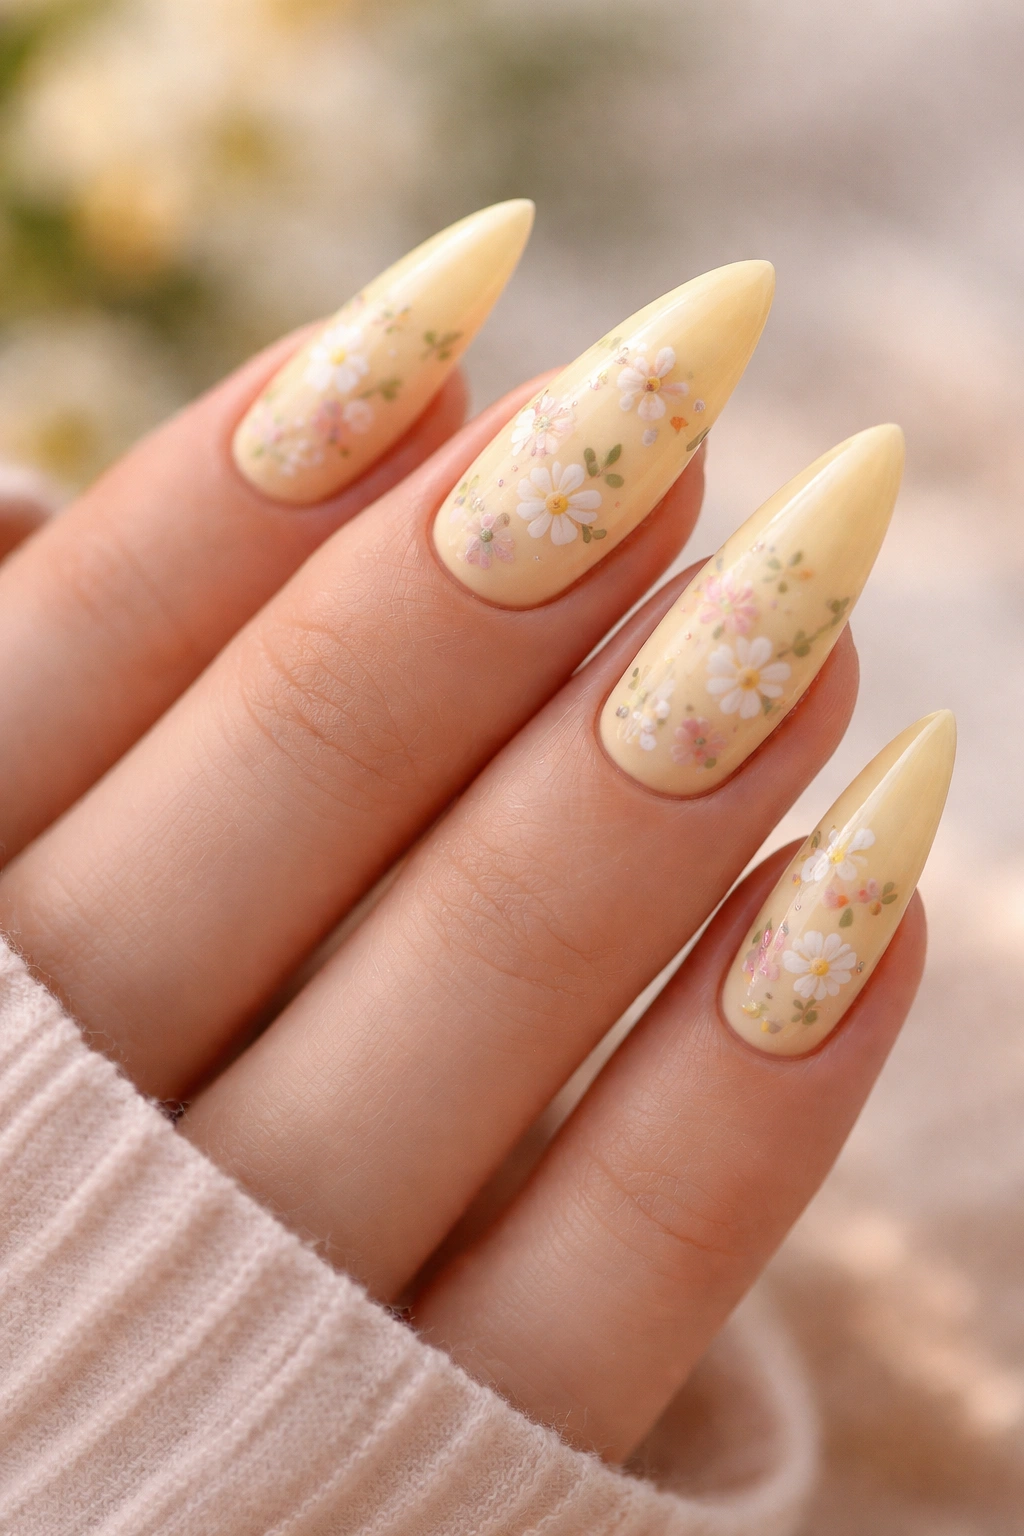
Tiny flowers painted or applied to a yellow base create a cheerful, feminine, garden-inspired design that feels fresh and sophisticated. Florals can range from delicate watercolor-style flowers to precise, detailed botanical illustrations, or even dried flowers and floral decals applied under clear topcoat.
Floral Design Options for Yellow Bases
- Tiny white or cream daisies scattered across all five nails for a coordinated garden feel
- A single larger floral illustration on each nail (a rose, a sunflower, a wildflower cluster)
- Hand-painted watercolor florals with soft edges and a dreamy, organic quality
- Pressed dried flowers sealed under clear topcoat for a boho-luxe aesthetic
Application Methods and Skill Requirements
- Hand-painted florals require either professional application or significant freehand painting practice
- Floral nail decals or stickers offer easier DIY application but less customization
- Watercolor florals are forgiving of imprecision because the style embraces soft edges and color blending
- Dried flowers require careful sealing and are better suited to shorter nail lengths where snagging is less likely
Pro tip: Pair floral designs with simple jewelry and natural makeup to keep the overall look feeling cohesive and intentional rather than overdone.
7. Sunny Yellow Base With White French Tip
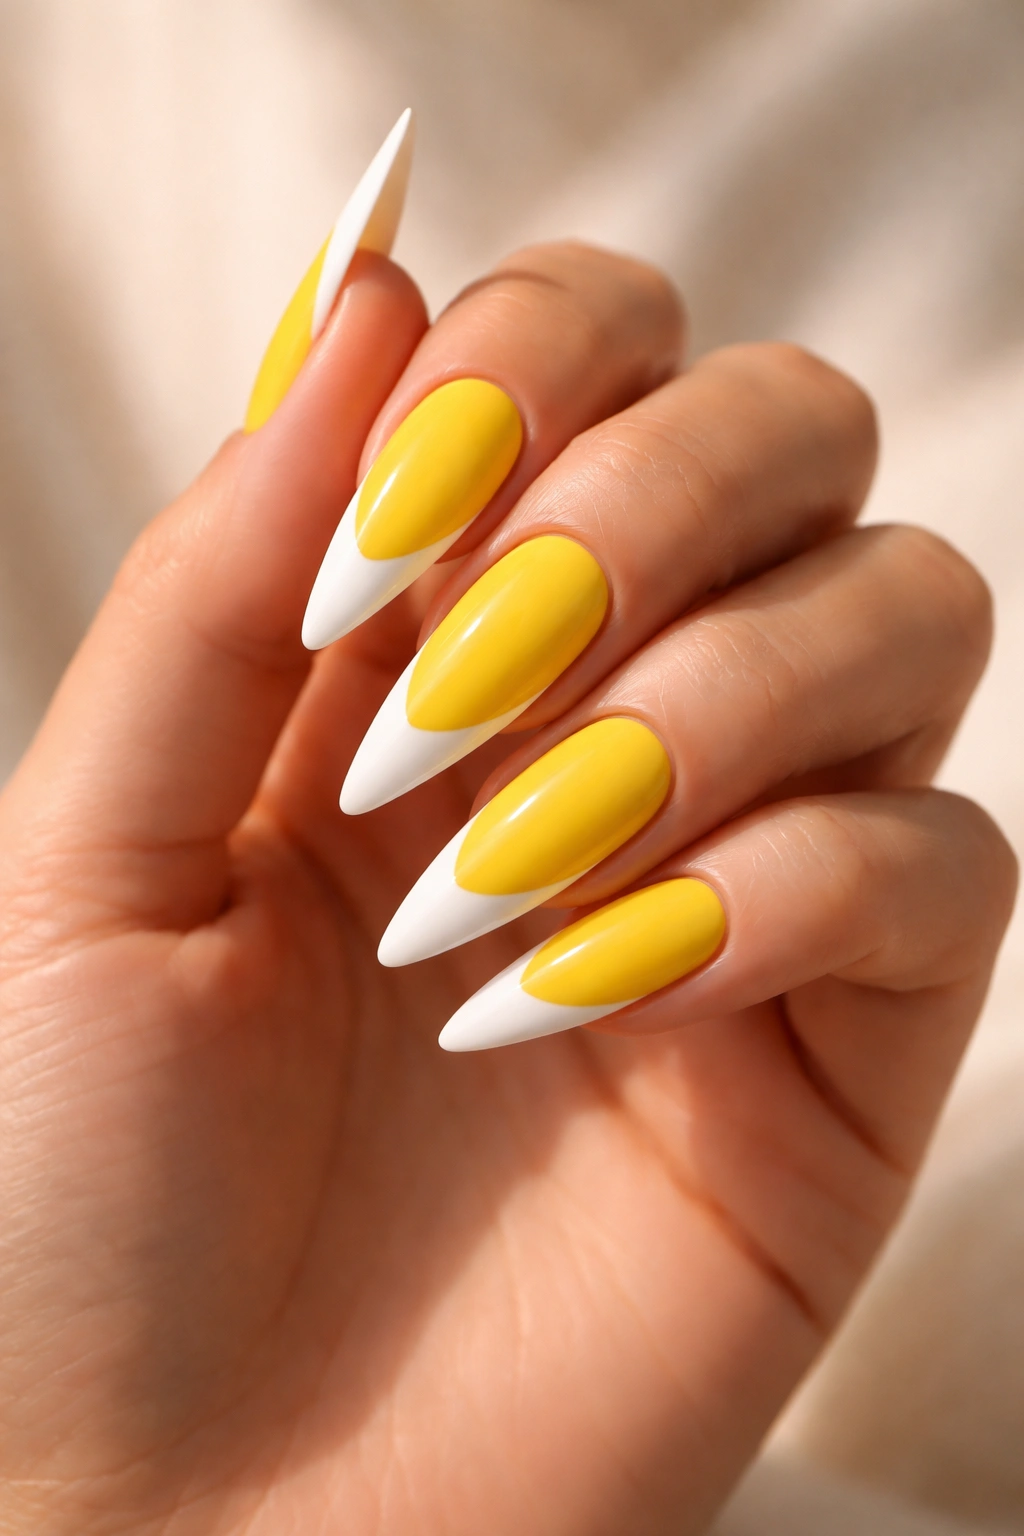
A traditional French manicure reimagined with yellow as the base and clean white stiletto tips creates a fresh, preppy take on a classic. This design is inherently balanced — the bright yellow base keeps things contemporary, while the French tip silhouette maintains sophistication and polish.
Why French Tips Feel So Timeless
French tips work on any nail shape because the white outline on the tip creates a visual frame that feels intentional and designed. On stilettos specifically, that white tip echoes the pointed shape and makes the nail look even longer and more dramatic. The contrast between yellow and white is high enough to create definition without feeling jarring.
Getting the White Tip Line Perfect
- Use a thin striping brush and white gel or acrylic for the most control and precision
- White nail tape applied before polishing and removed afterward creates a perfect line every time
- A white gel pen designed for nail art offers a quick alternative if your hand-eye coordination isn’t perfect
- Slightly thicker white tips (1/16 inch or more) look more intentional and modern than hair-thin lines
Worth knowing: The French tip line will show growth and look less polished after about two weeks, so plan touch-ups accordingly if you’re wearing this design long-term.
8. Buttery Pale Yellow With Negative Space Design
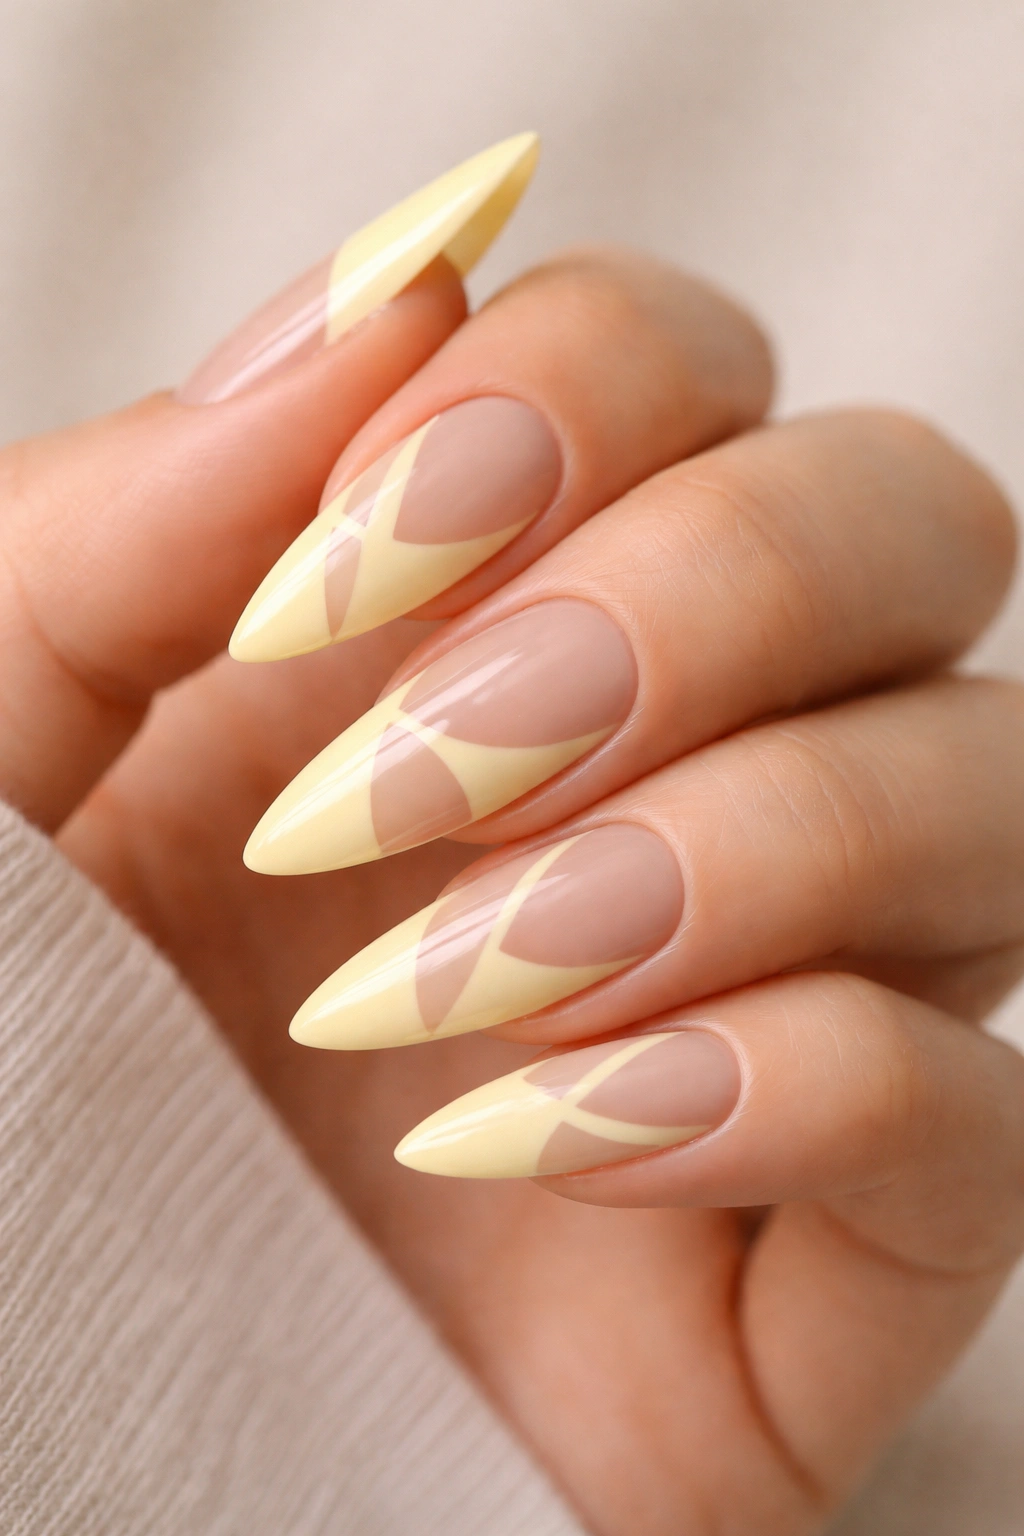
Negative space nails use the natural nail or a nude base to create patterns by leaving sections unpainted. A pale, creamy yellow combined with strategic negative space — where the natural nail shows through in designs like stripes, geometric shapes, or cutouts — creates an understated, artistic look that feels more fashion-forward than a solid color.
Negative Space Design Ideas for Yellow
- Horizontal negative space stripes alternating with pale yellow stripes for a modern, striped effect
- A large triangle or geometric shape in negative space on each nail with yellow as the background
- Negative space outlining the tip of the stiletto while pale yellow fills the rest
- Scattered small shapes in negative space scattered across a pale yellow base for a constellation effect
Technical Approach to Negative Space
- Begin with a nude or translucent base coat that matches your skin tone
- Apply pale yellow only to the areas you want colored, leaving the base coat exposed
- Use nail tape or guides to maintain clean edges where yellow meets negative space
- The nail must be perfectly clean and prepped for negative space to look intentional rather than accidental
Pro tip: Negative space designs photograph beautifully and work especially well if you have warm, olive, or medium skin tones where nude and pale yellow create visible contrast.
9. Yellow Gradient Ombre With Glitter Fade
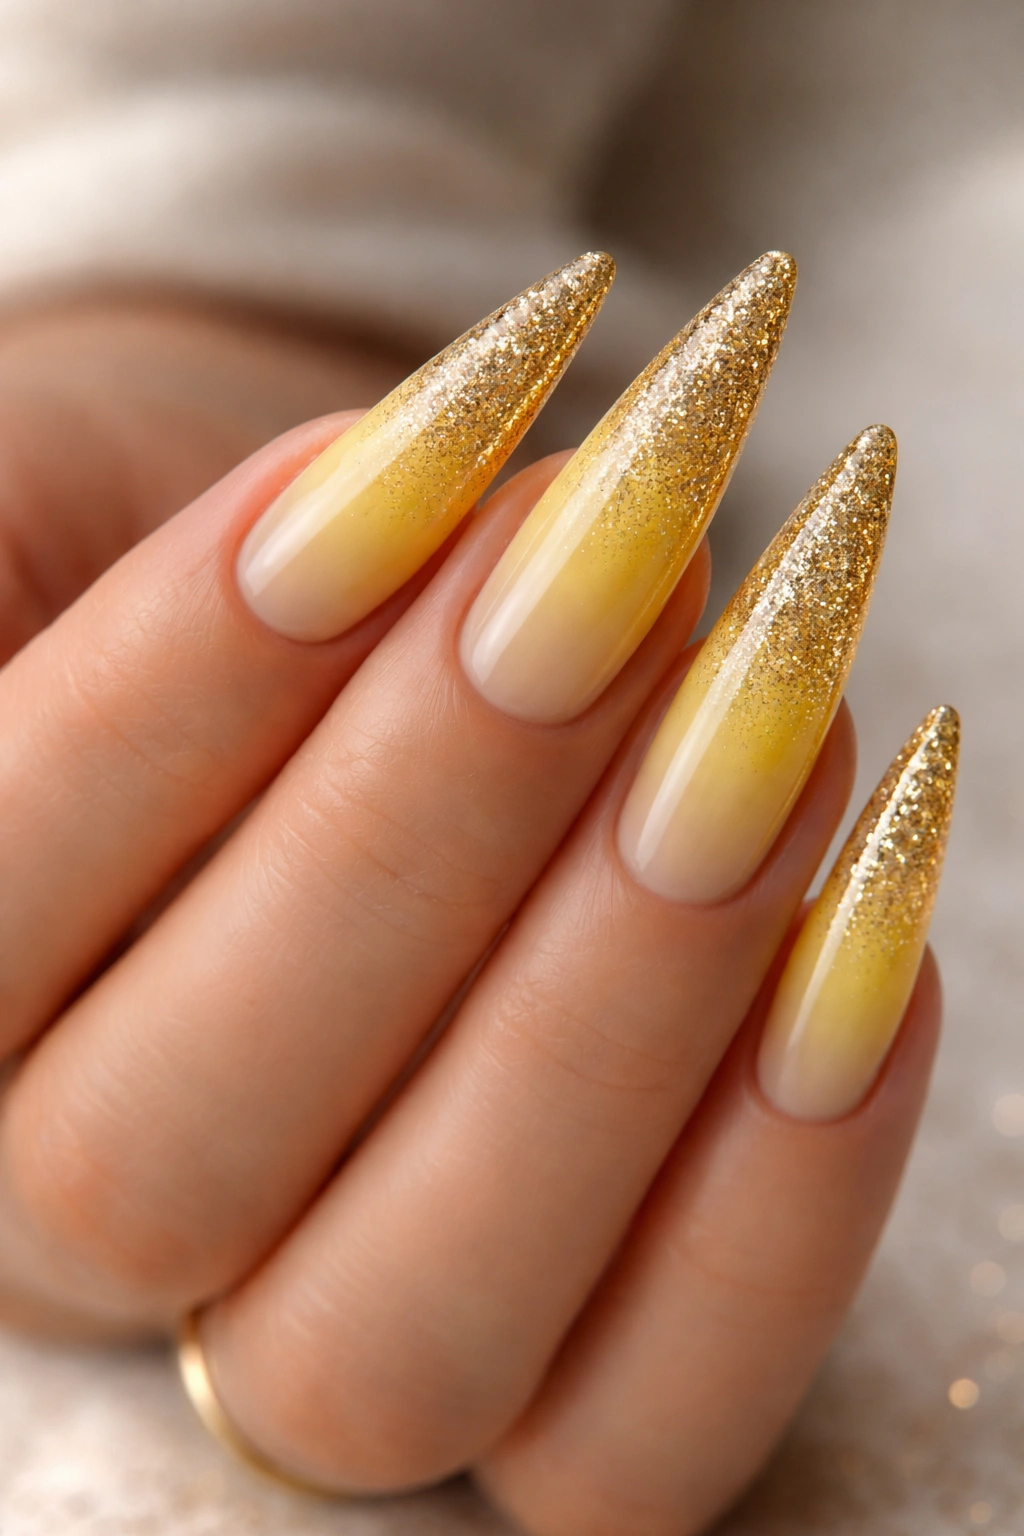
This design layers a glitter ombre effect on top of a yellow base, starting with fine, scattered glitter at the base and becoming denser toward the tip. The glitter catches light and adds movement, while the yellow underneath provides warmth and cohesion.
Building a Glitter Gradient Effectively
- Apply a full yellow base coat first and let it set completely
- Use a fine gold or yellow glitter in a clear gel or top coat applied sparse near the base
- Apply progressively more glitter as you move toward the tip, creating density gradient
- Alternatively, use a pre-made glitter gradient gel that goes from sparse to dense
- Seal with a glossy top coat to smooth the glitter and prevent catching on anything
Glitter Choices That Complement Yellow
- Fine gold or champagne glitter for subtle, sophisticated sparkle
- Yellow glitter matching the base for a monochromatic sparkly version
- Mix gold and silver glitter in the gradient for dynamic, multi-tonal shimmer
- Holo or iridescent glitter that shifts color under different lighting conditions
Worth knowing: Glitter ombre requires a gel or stronger top coat to stay put; regular lacquer top coat won’t hold fine glitter securely enough for daily wear.
10. Bold Yellow With Dark Accent Nail
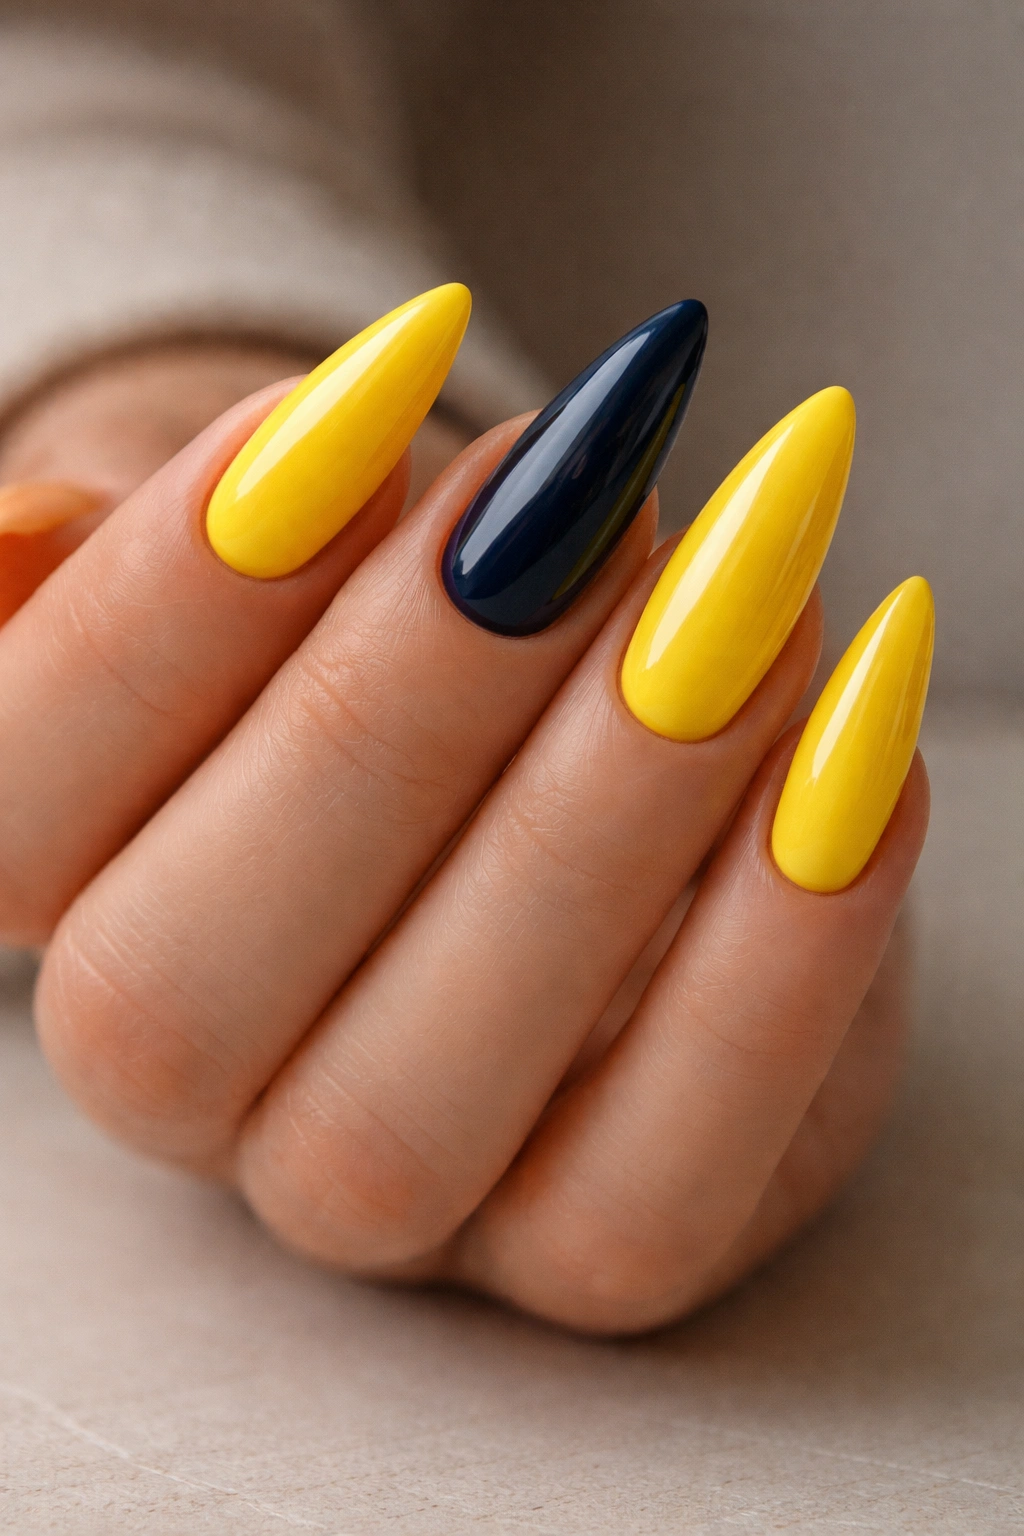
This design keeps four nails in a bright, clean yellow while designating one accent nail (usually on the middle or ring finger) in a contrasting color or pattern. Dark navy, deep burgundy, black, or even a metallic like bronze creates drama and visual balance while keeping the overall look from feeling one-note.
Accent Nail Color Pairings With Yellow
- Deep navy or midnight blue for a sophisticated, nautical-inspired contrast
- Rich burgundy or oxblood for a warm, dramatic complement
- Jet black for maximum contrast and a striking, modern aesthetic
- Metallic bronze or gunmetal for understated glamour without darkening the overall look
- Deep forest green for a nature-inspired pairing that’s unexpected but harmonious
Design Variations for the Accent Nail
- Solid color in the contrasting shade for simple, clean impact
- A patterned design using the accent color and the yellow (geometric shapes, stripes, florals)
- An ombre or gradient on the accent nail that includes both the contrasting color and the yellow
- Glitter or sparkle exclusively on the accent nail while the other four stay matte
Pro tip: An accent nail lets you add an artistic design to one nail that might be too much if repeated on all five, so this is your opportunity to try something bold.
11. Matte Yellow With Glossy Accent Details
Texture contrast creates visual interest without changing color — keep the primary yellow in a matte, velvety finish while adding glossy accents like a shiny stripe, glossy tip, or decorative details in shine. The matte-glossy contrast makes each element stand out more than it would if everything were the same finish.
Matte-Glossy Contrast Ideas
- Matte yellow base with a glossy white or metallic stripe down the center
- Fully matte yellow with a glossy gold or silver tip for geometric contrast
- Matte yellow with glossy rhinestones or gems scattered across the surface
- Matte base with glossy floral details or nail art elements for texture and light-play
Application for Matte and Glossy Finishes
- Apply the matte color first, seal it with a matte top coat, and allow to cure completely
- Then carefully apply glossy accents on top, using guides or thin brushes to maintain clean separation
- Alternatively, use pre-made matte and glossy products designed for layering
- A matte top coat requires proper buffing before application; uneven buffing creates dull spots
Worth knowing: Matte finishes are less durable than glossy ones, so expect slightly shorter wear time between touch-ups; consider your lifestyle before committing to mostly matte nails.
12. Sunny Yellow With Abstract Watercolor Design
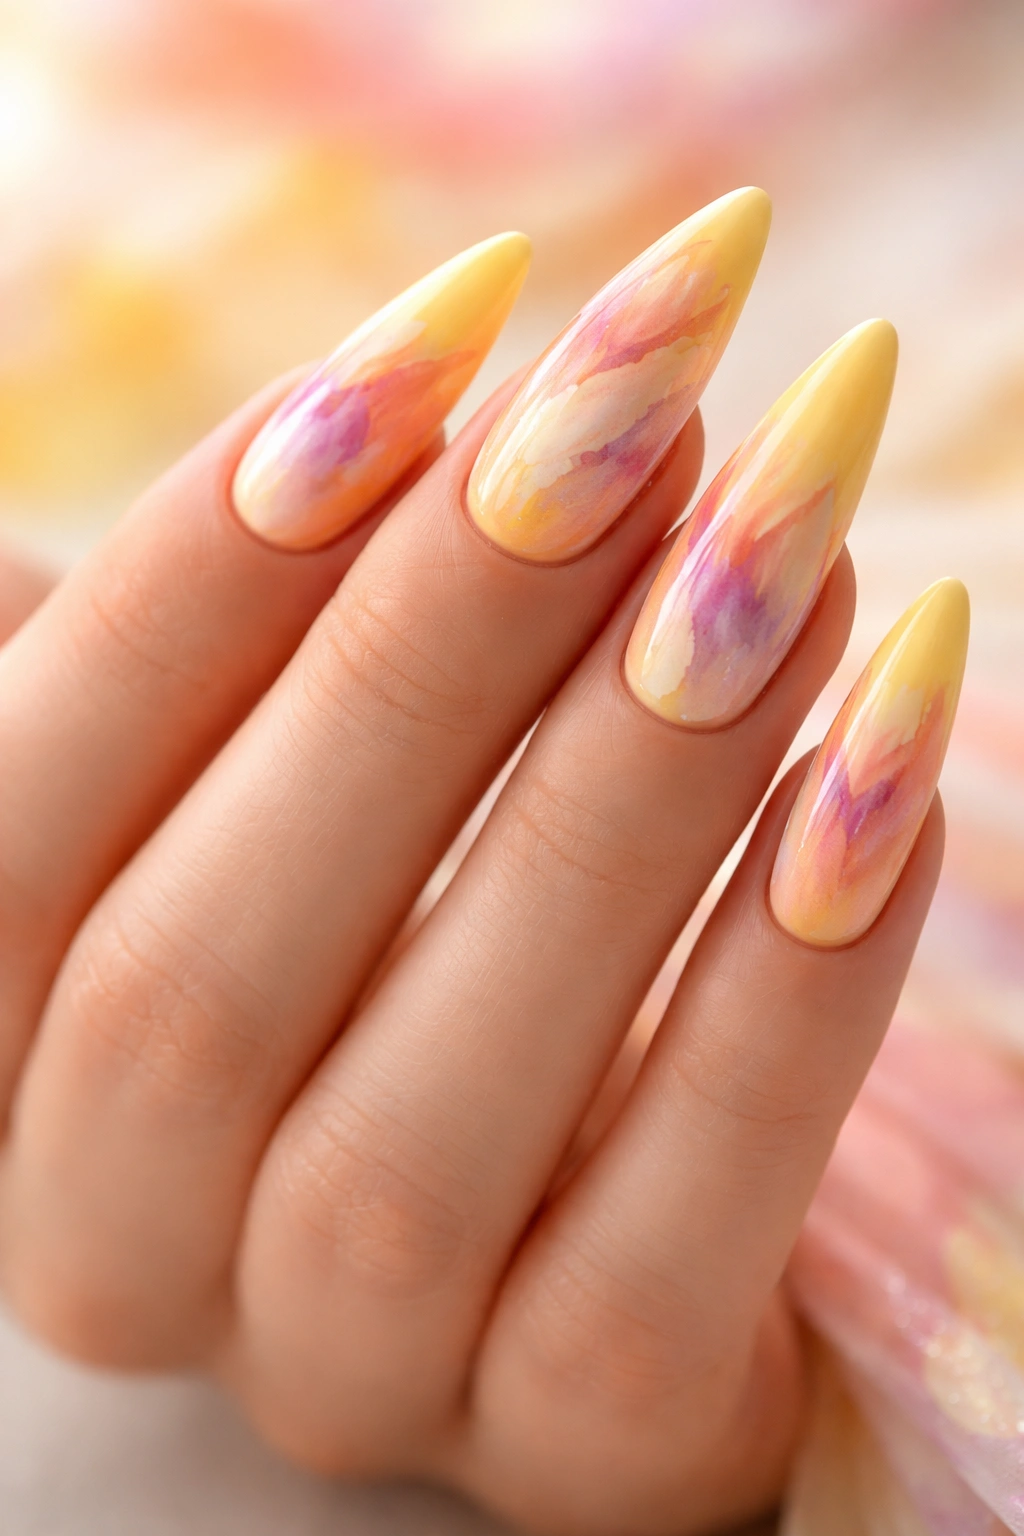
Free-form watercolor-style brushstrokes in complementary colors — soft pinks, peachy tones, burnt orange, or even shades of purple — splashed across a sunny yellow base create an artistic, unique look that feels creative and individual. Watercolor naturally embraces imperfection, so there’s no pressure for precision.
Creating Watercolor Effects on Nails
- Use a mix of gel polishes or acrylic paints that blend easily on the nail surface
- Apply yellow base first, then drop or brush complementary colors onto it while still slightly tacky
- Allow colors to blend naturally rather than blending with a brush for authentic watercolor feel
- Work quickly before the base sets, or apply watercolor effects after the base fully cures using a gel medium
Color Combinations That Work With Yellow
- Peachy orange, coral, and warm pink for a sunset-inspired palette
- Soft lavender, dusty purple, and mauve for an unexpected color harmony
- Burnt orange, rust, and deep yellow for an autumnal, warm feeling
- Pale pink, light blue, and cream for a soft, pastel watercolor aesthetic
Pro tip: Watercolor designs look most authentic when colors actually blend and blend, not when they’re kept rigidly separate — embrace the organic bleeding and blending of colors for the most authentic effect.
Final Thoughts
Yellow stiletto nails are endlessly adaptable, and the design you choose should reflect your personal style, the occasion, and how much maintenance you’re willing to commit to. A simple, solid sunshine yellow works beautifully if you prefer low-key elegance, while more elaborate designs with patterns, embellishments, or texture contrast let you showcase your creativity and artistic side.
The color itself already communicates confidence and optimism, so even a minimal design carries impact. What matters most is choosing a shade of yellow that complements your skin tone and a design approach that genuinely excites you — because the best nail design is one you’ll feel amazing wearing.
Whether you’re heading to a professional setting, a special event, or just want to brighten your everyday look, there’s a yellow stiletto nail design on this list that fits your vibe perfectly. The key is taking time with application, using quality products that will actually last two weeks between fills, and touching up as needed to keep your nails looking as vibrant as the moment you had them done.
