

Purple french tip stiletto nails are having a serious moment right now, and honestly, there’s good reason. The combination of elongated stiletto points with the sophisticated elegance of french tips in rich purple tones hits that perfect sweet spot between dramatic and wearable. Whether you’re drawn to soft, dreamy pastels or deep, moody jewel tones, purple french tips give you the best of both worlds — that signature clean french aesthetic with a personality-forward color twist that feels fresher than traditional white or nude versions.
The magic of purple french tips lies in how versatile they are. They work for formal events, professional settings where you want to add a subtle edge, weekend brunch with friends, or just because you woke up feeling like expressing yourself through your nails. The elongated stiletto shape amplifies the elegance factor, making even a simple two-tone design feel intentional and polished. And here’s something most people don’t realize: purple actually flatters nearly every skin tone. Cool undertones? Jewel purples are your friend. Warm undertones? The right mauve or plum shade will make your skin glow. It’s one of those rare colors that has range.
The nail designs we’re exploring below each bring something different to the table. Some lean into maximalist drama with rhinestones and metallic accents. Others embrace minimalist sophistication. A few blur the line between nail art and wearable sculpture. The common thread is that they all showcase how purple can transform the classic french tip from a everyday neutral into something that actually makes a statement. Let’s explore ten distinct purple french tip stiletto designs that prove this color deserves way more screen time in your nail rotation.
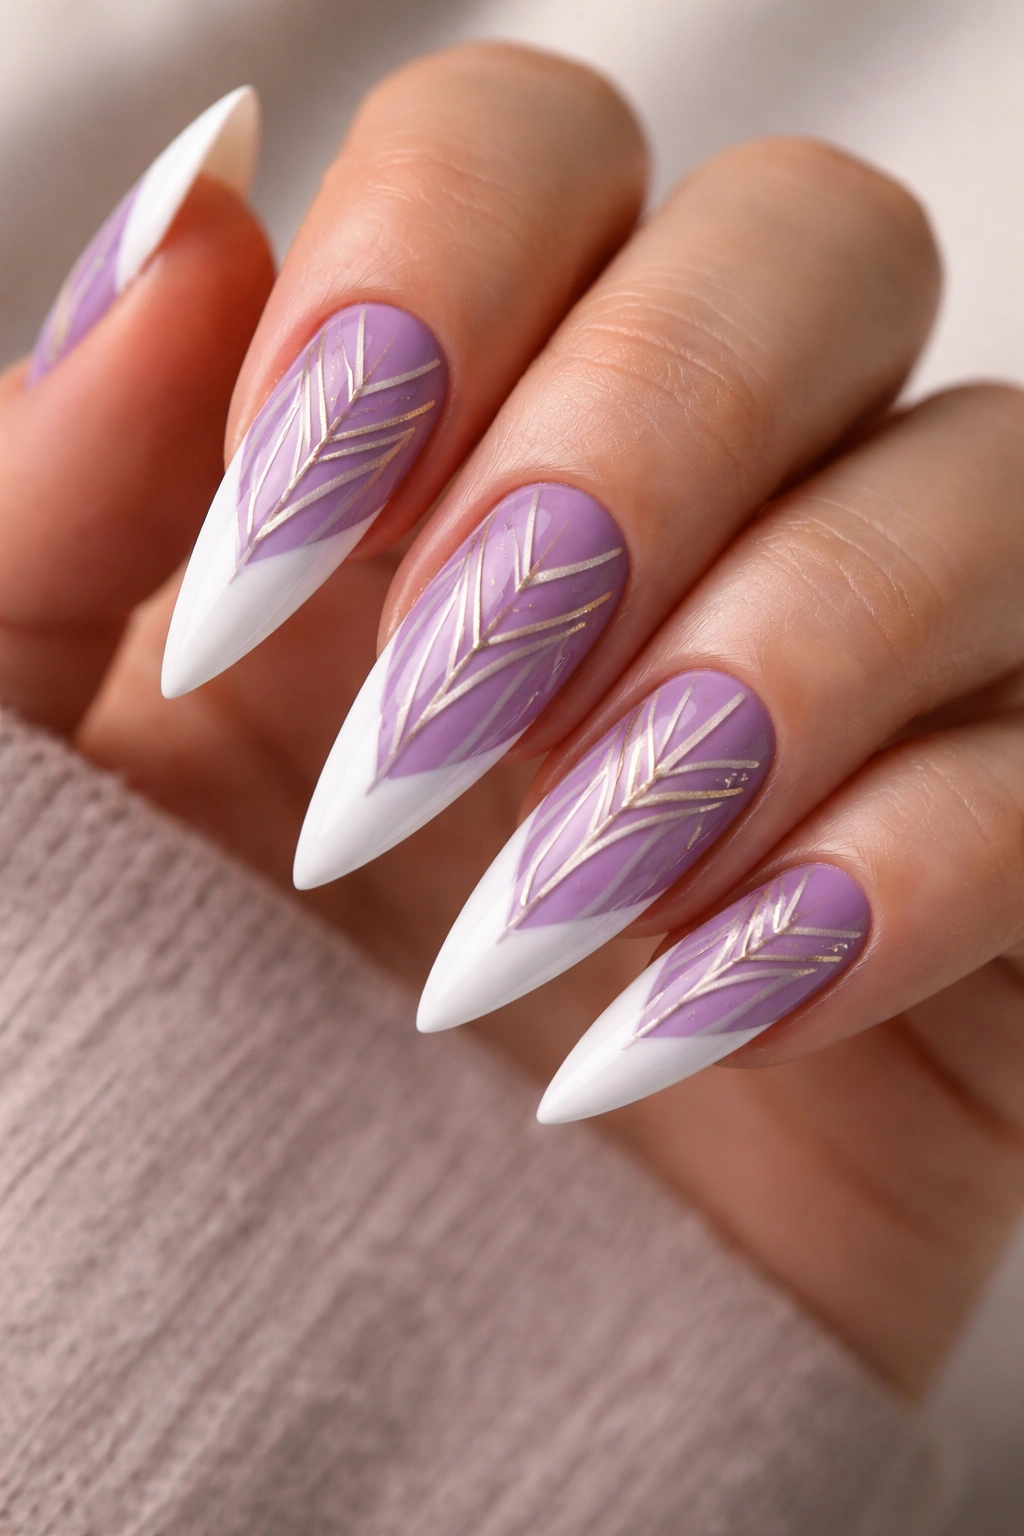
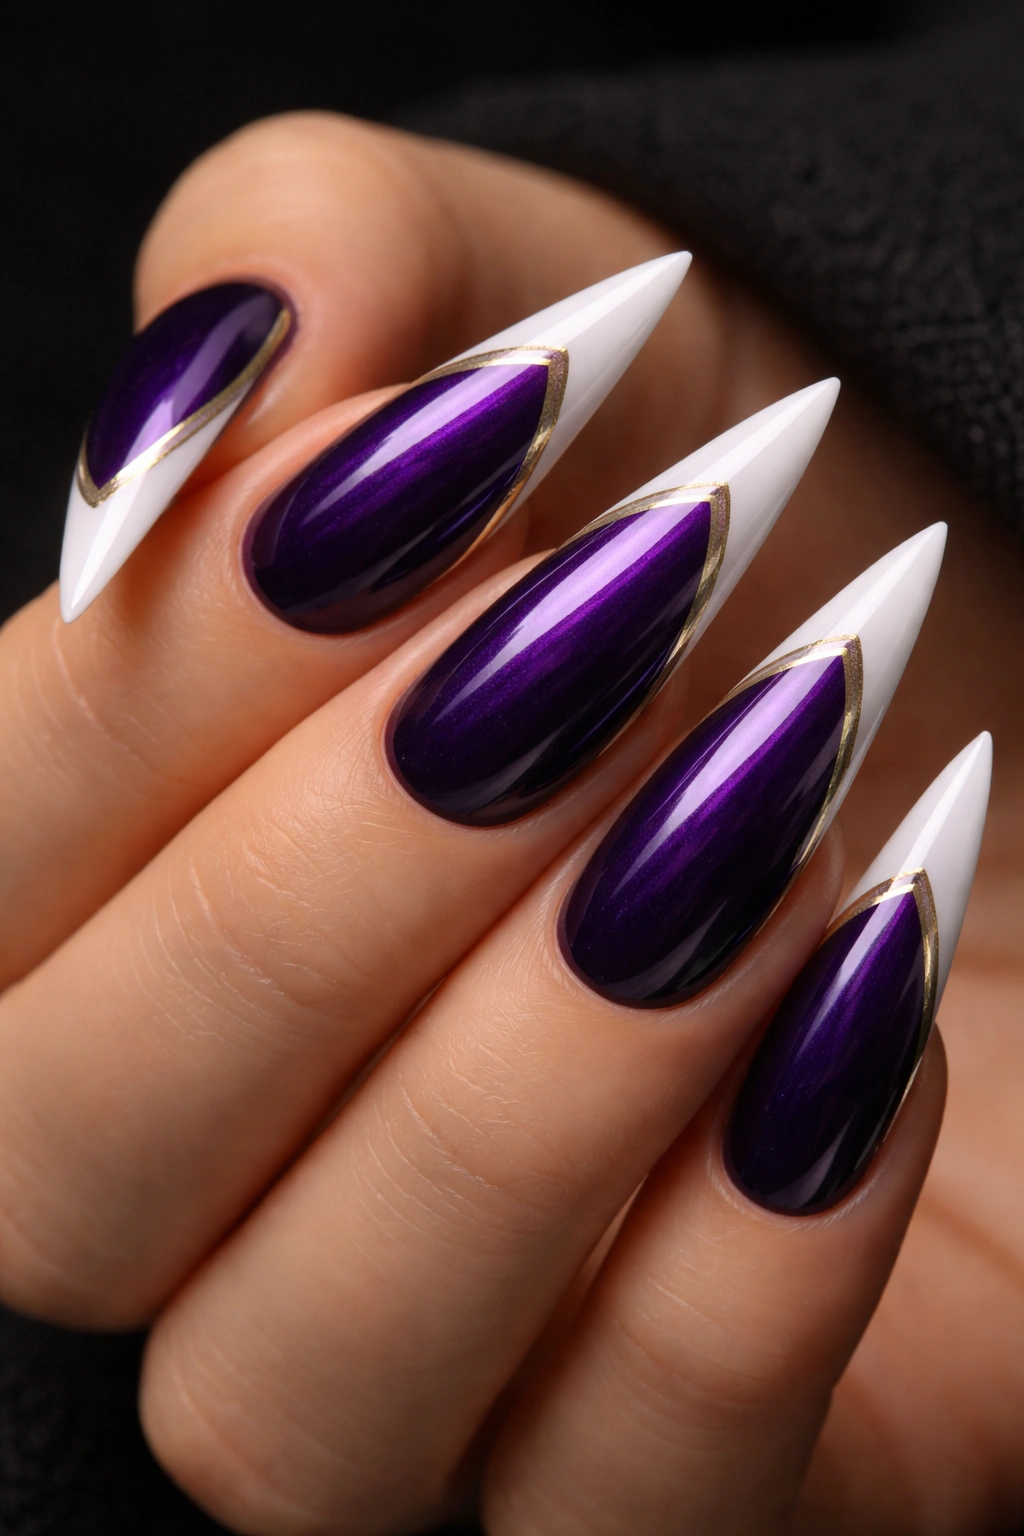
1. Classic Lavender with Gold Foil Tips
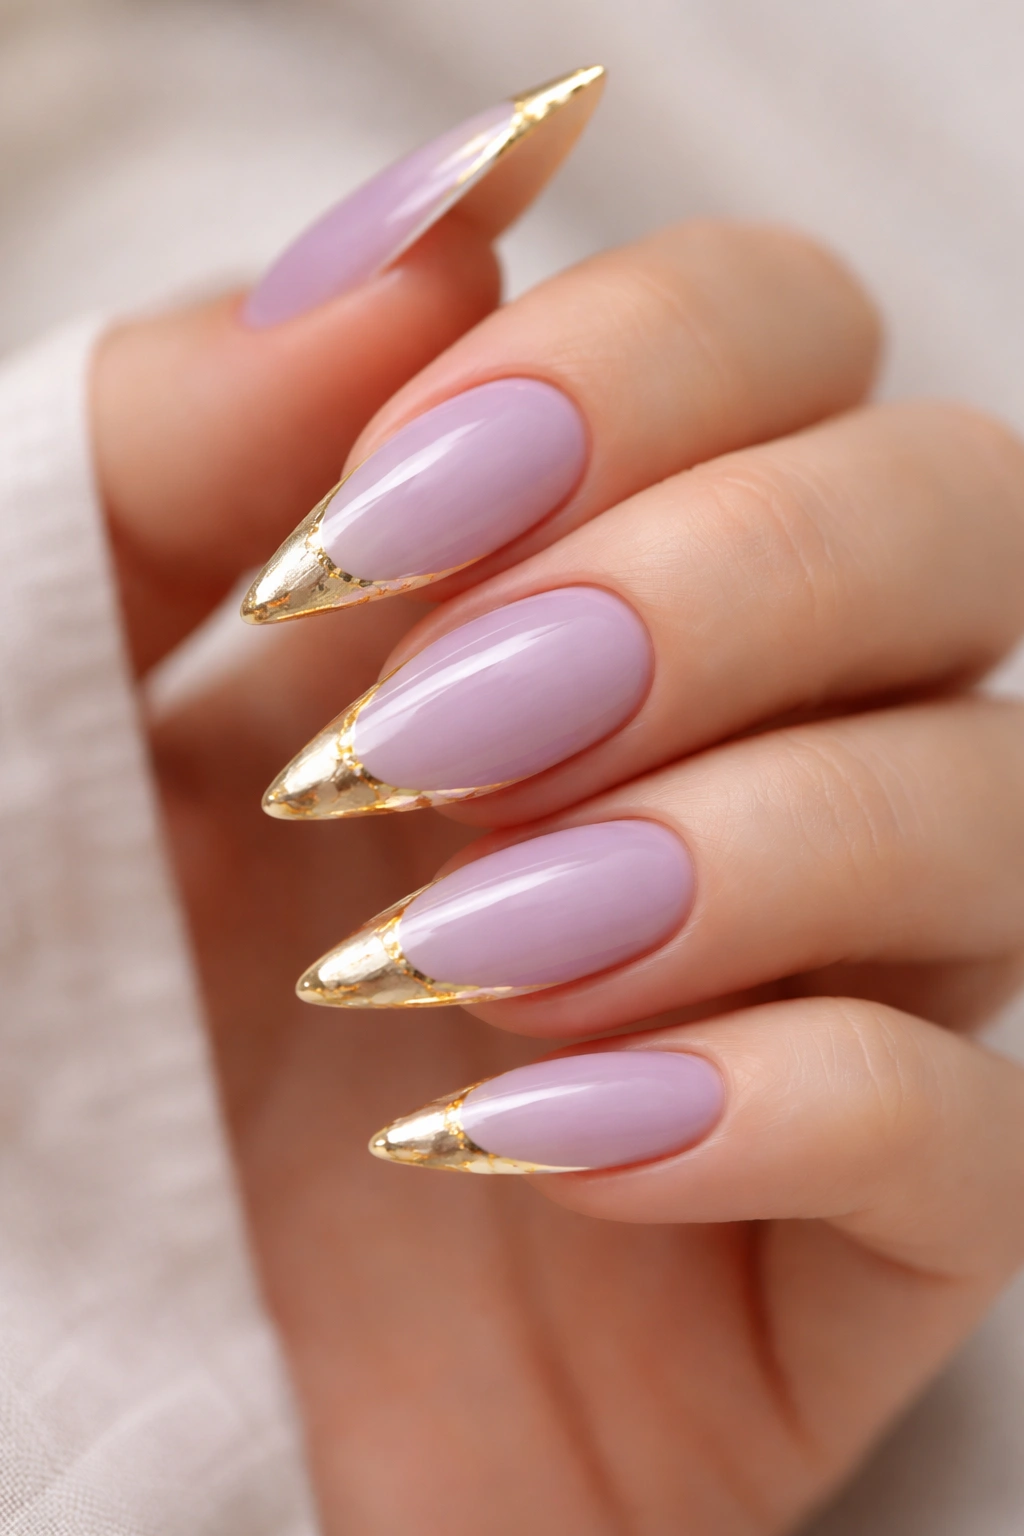
This design strips things back to basics while maintaining undeniable elegance. The base is a soft, creamy lavender — pale enough to feel romantic but with enough saturation that it doesn’t wash out against any skin tone. The tips are a crisp white french line, but here’s where it gets interesting: a thin line of gold foil runs right along the edge of the french tip, creating a delicate frame that catches light with every hand movement.
Why This Design Works
The gold foil element transforms what could feel dated back into something modern and refined. It’s subtle enough that you can wear it to professional settings, yet the metallic shimmer signals that this isn’t your grandmother’s french manicure. The lavender provides a soft, calming backdrop that makes the gold pop without looking over-the-top. On stiletto nails, this design creates an elongated optical illusion that makes your fingertips look incredibly graceful.
How to Achieve This Look
- Start with a perfectly filed stiletto shape using a nail file or electric file
- Apply a smooth base coat to prevent staining from the lavender polish
- Paint two coats of a quality lavender shade, letting each coat dry completely
- Create a precise white french line using either a thin brush or a french tip guide sticker
- While the white is still slightly tacky (not fully dry), apply the gold foil carefully along the edge using a small brush and foil adhesive, or use pre-cut gold foil strips designed for nails
- Seal everything with a thick glossy topcoat that will protect the foil and create shine
Pro tip: If you’re nervous about foil application, swap it for a thin gold gel line instead — it’s easier to control and achieves a similar effect with less risk of the foil peeling.
2. Deep Plum with Gradient Ombre Tips
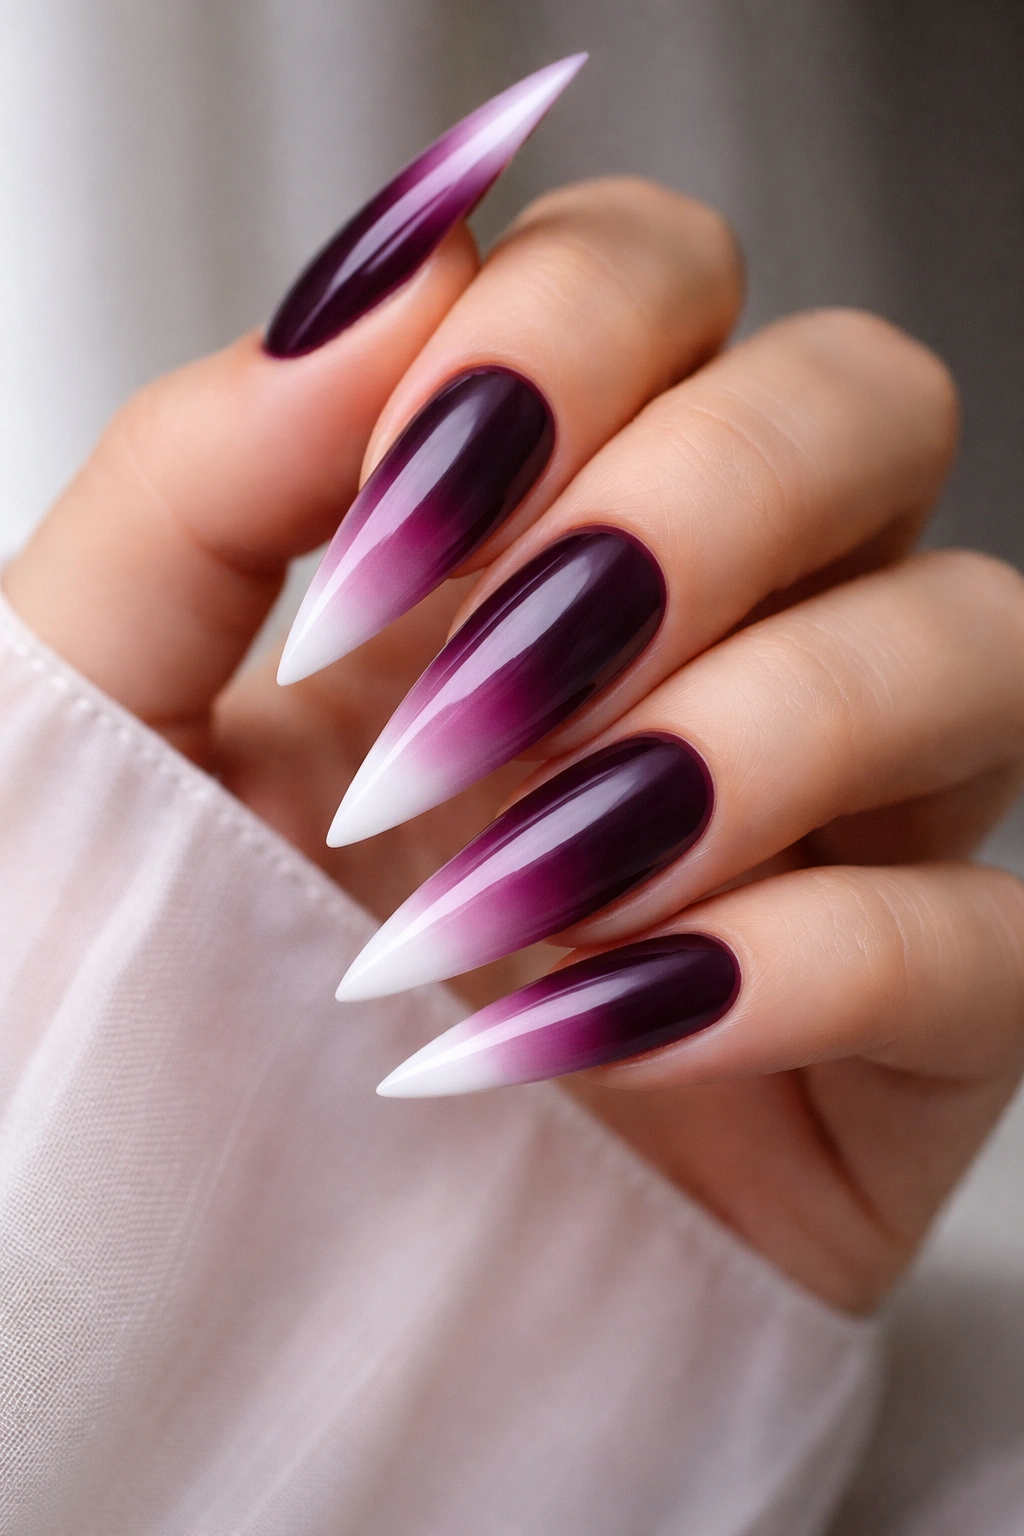
This design plays with depth and dimension in a way that feels completely luxurious. The base color is a rich, almost blackened plum — deep enough to feel dramatic but with enough purple undertone that it reads as intentional rather than just dark. The french tips transition from white at the very edge to a dusty rose, then into the plum base color, creating a gradient effect that flows seamlessly.
The Visual Impact on Stiletto Shape
Gradient designs naturally elongate the nail visually because the color transition draws your eye up the length of the stiletto point. The white at the extreme tip acts like a highlighter, emphasizing the nail’s length. By the time your eye reaches the base, the deep plum grounds the whole design. It’s a masterclass in using color theory to enhance nail shape.
Step-by-Step Application Process
- File nails into stiletto shape with a slightly flexible file to prevent breaking
- Apply base coat and two coats of deep plum, curing between coats if using gel
- Create your french line using a guide or steady hand with white polish
- Using a makeup sponge or gradient brush, dab dusty rose polish onto a makeup sponge
- Press the sponge gently over the white tip and slightly into the transition zone, working upward
- Blend the colors by dabbing with a slightly damp sponge or using a blending brush with a drop of gel top coat
- Seal with glossy topcoat — multiple thin layers create better shine than one thick layer
Worth knowing: This design is easier with gel polish because the colors don’t dry as quickly, giving you more time to blend without harsh lines showing up.
3. Pastel Lilac with Holographic Glitter
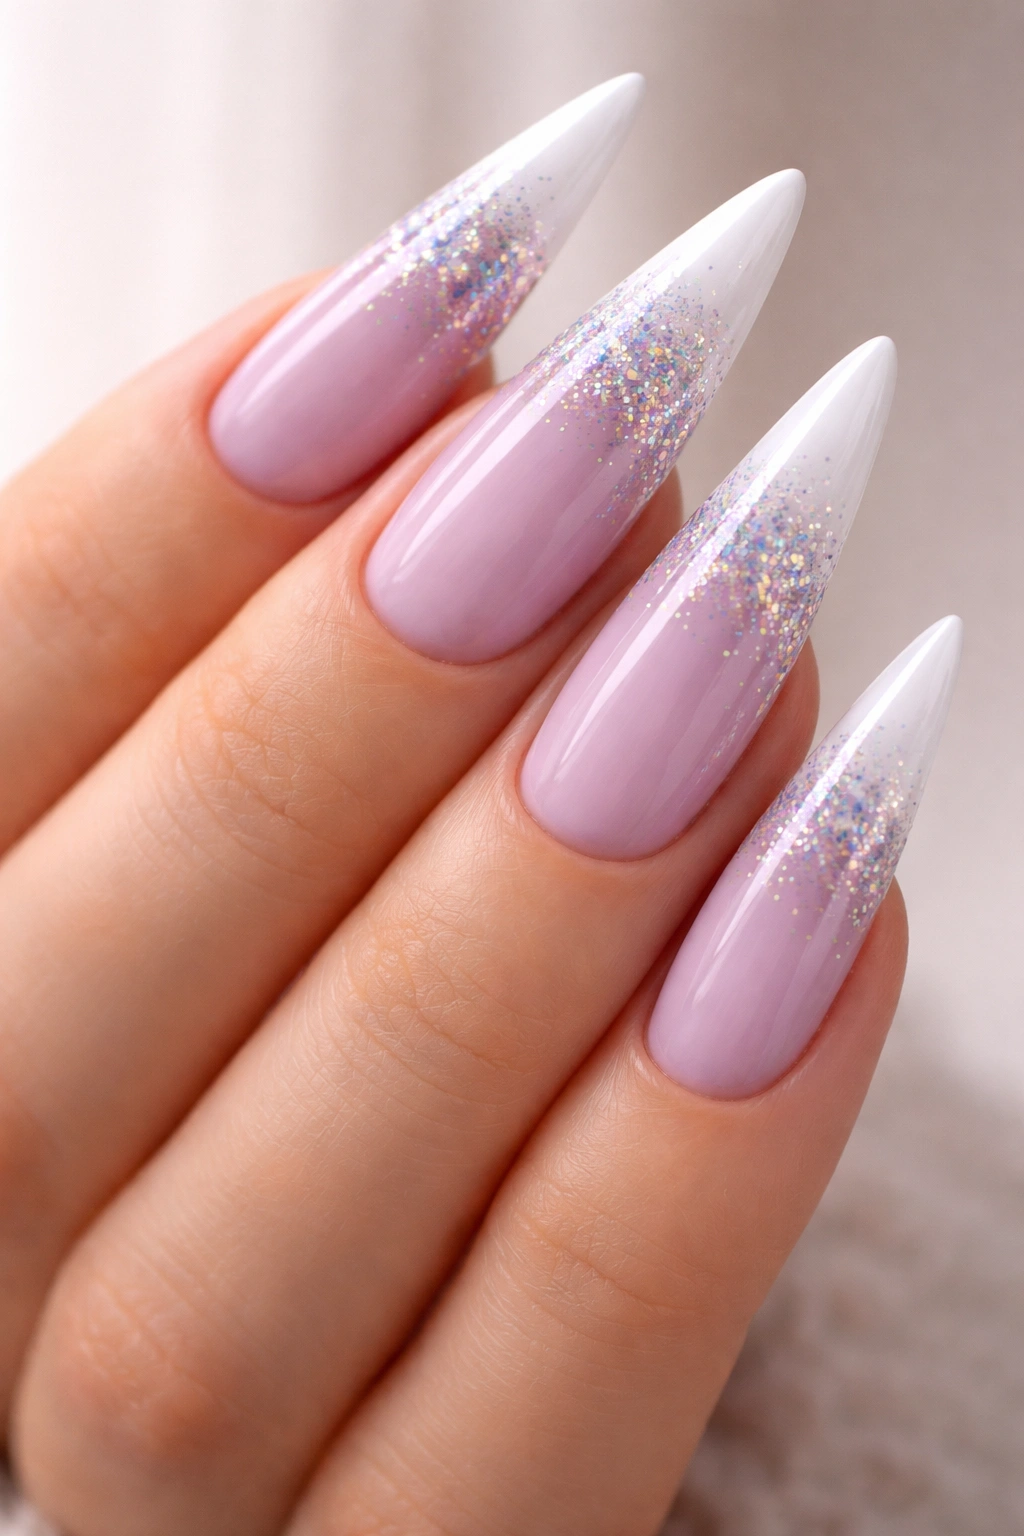
If you want something that catches light from every angle while maintaining that french tip sophistication, this is it. The base is a pale, almost powdery lilac that feels airy and romantic. The french tips are pure white, but the transition zone is loaded with holographic glitter — the kind that throws rainbow sparkles rather than just shimmer. The glitter is concentrated at the tip but gradually tapers toward the base, creating depth without clutter.
Why Holographic Matters
Regular glitter sits on top of your nails and can look flat or one-dimensional. Holographic glitter refracts light differently depending on the angle, which means your nails look different — and beautiful — whether you’re in natural sunlight, under indoor lighting, or in nightlife settings. On stiletto nails, the geometry of the point itself naturally catches light, so adding holographic elements means multiple light sources are bouncing off your hands simultaneously.
Creating the Glitter Gradient
- Paint base coat and two coats of pale lilac polish
- Apply your crisp white french tip line
- Mix holographic glitter pieces with clear gel or sticky topcoat in a small dish
- Using a thin brush, apply the glitter mixture densely at the very tip of the nail
- Blend downward with a damp or slightly sticky brush, making the glitter gradually sparser as you move toward the base
- Seal with clear topcoat — this locks the glitter in place and adds extra shine
Pro tip: Store your glitter-topcoat mixture in a small container between manicure sessions. You can reuse the same batch multiple times, and it becomes easier to work with as it sits.
4. Ombré Purple to White Tips
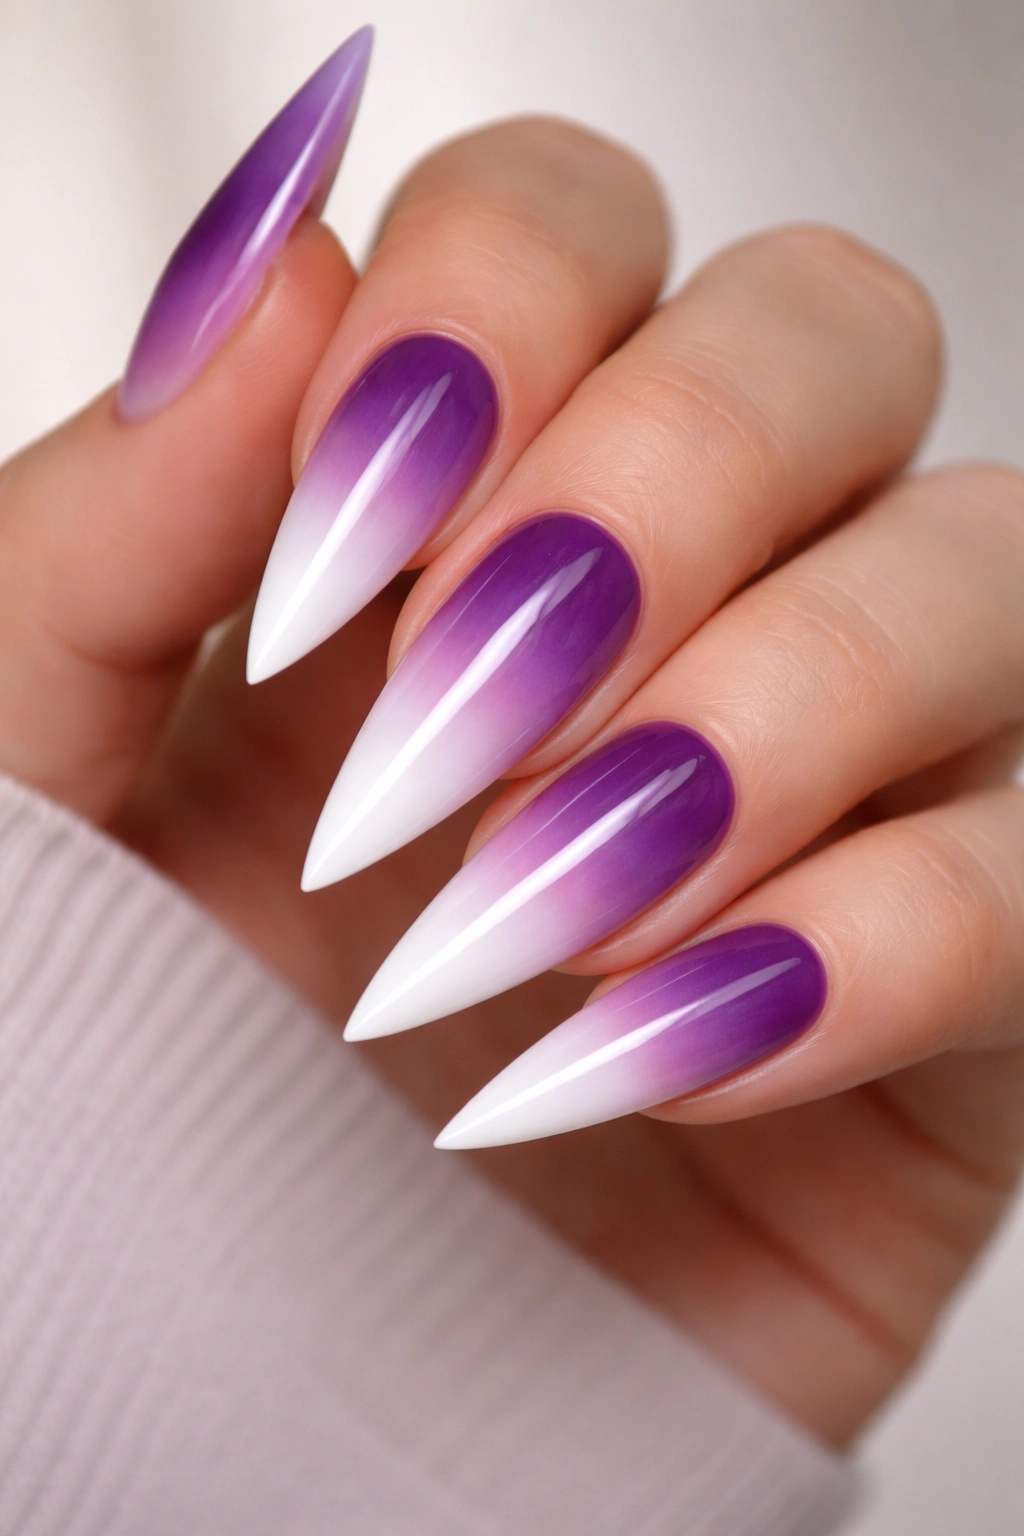
This is the sophisticated cousin of the gradient design — instead of multiple color transitions, you’re working with a clean ombré that moves from deep purple at the base to pure white at the tip. The transition zone is where the magic happens, with the purple slowly fading through mauve, then lavender, then finally white. On stiletto nails, this creates the illusion of light hitting the tip of your nail, making the whole hand look luminous.
The Psychology of This Design
Our brains are trained to read white or light areas as highlights — places where light is hitting most intensely. By creating an ombré that ends in white, you’re essentially creating a light source emanating from your fingertips. This makes your hands look more elegant, more refined, and makes the stiletto shape feel even more pronounced. It’s a subtle psychological trick that works every single time.
Application Technique for Perfect Ombré
- File into stiletto shape and apply base coat with two coats of deep purple
- Use a makeup sponge or specialized ombre brush to apply the gradient
- Dab pure white onto one end of the sponge and deep purple on the other
- Gently press and roll the sponge across the nail in the direction of the ombré
- Repeat the pressing motion multiple times, gradually building the blend
- Switch to a clean, damp sponge and press gently over the entire gradient to smooth and blend harsh lines
- Apply topcoat — use at least two thin layers rather than one thick layer for best results
Real talk: This design is genuinely easier with gel polish because the colors don’t dry as you’re blending, but it’s absolutely achievable with traditional polish if you work quickly and keep your sponge slightly damp.
5. Royal Purple with Rhinestone Accent Details
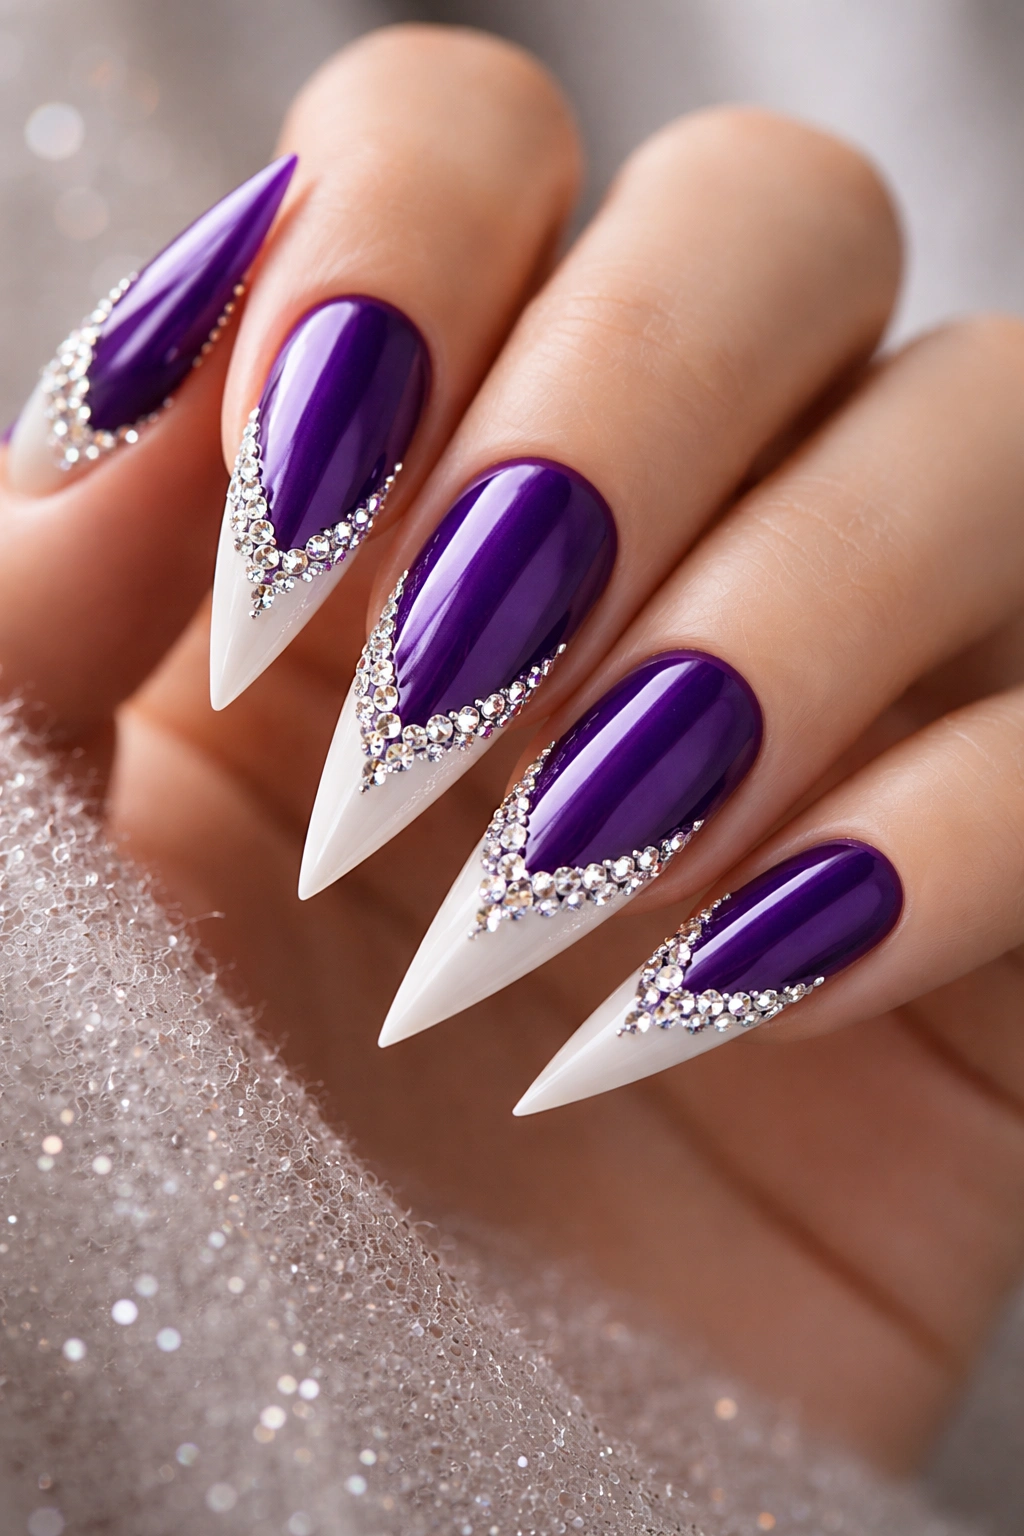
When you want to go full glamour, rhinestones are your answer. This design starts with a rich royal purple base — saturated, jewel-toned, and unapologetically bold. The french tips are white, but instead of being a simple line, they’re decorated with small crystal rhinestones placed in a deliberate pattern. Some designs do a scattered placement, others create a geometric arrangement, and some place the densest concentration of rhinestones at the outer corners of the tips.
Choosing the Right Rhinestones
Not all rhinestones are created equal, and cheap ones will fall off within days. Look for glass rhinestones with a proper flat bottom designed for nail application. Swarovski crystals are the gold standard but also the most expensive. Mid-range brands like Crystalpixie or brand-specific nail rhinestones offer better durability than ultra-budget options. The size matters too — mixing several rhinestone sizes (3mm, 4mm, and 5mm) creates more visual interest than using just one size.
Securing Rhinestones for Longevity
- Apply your royal purple base and white french tips using a base coat, color coats, and a thin layer of topcoat
- Before the topcoat fully hardens, use a rhinestone picking pen or toothpick to apply small dots of clear gel or rhinestone adhesive exactly where you want stones to sit
- Pick up each rhinestone and press it gently into the adhesive, making sure it’s secure
- Once all stones are placed, apply a final topcoat to seal and protect them
- If using traditional polish, apply a thick, sticky topcoat layer before placing rhinestones, then seal with another layer once they’re secure
Important: Don’t submerge your nails in water immediately after applying rhinestones. Wait at least 24 hours for the adhesive to fully cure, and try not to use your nails to open things or apply pressure to the tips for the first few days.
6. Matte Purple with Chrome Accents on Tips
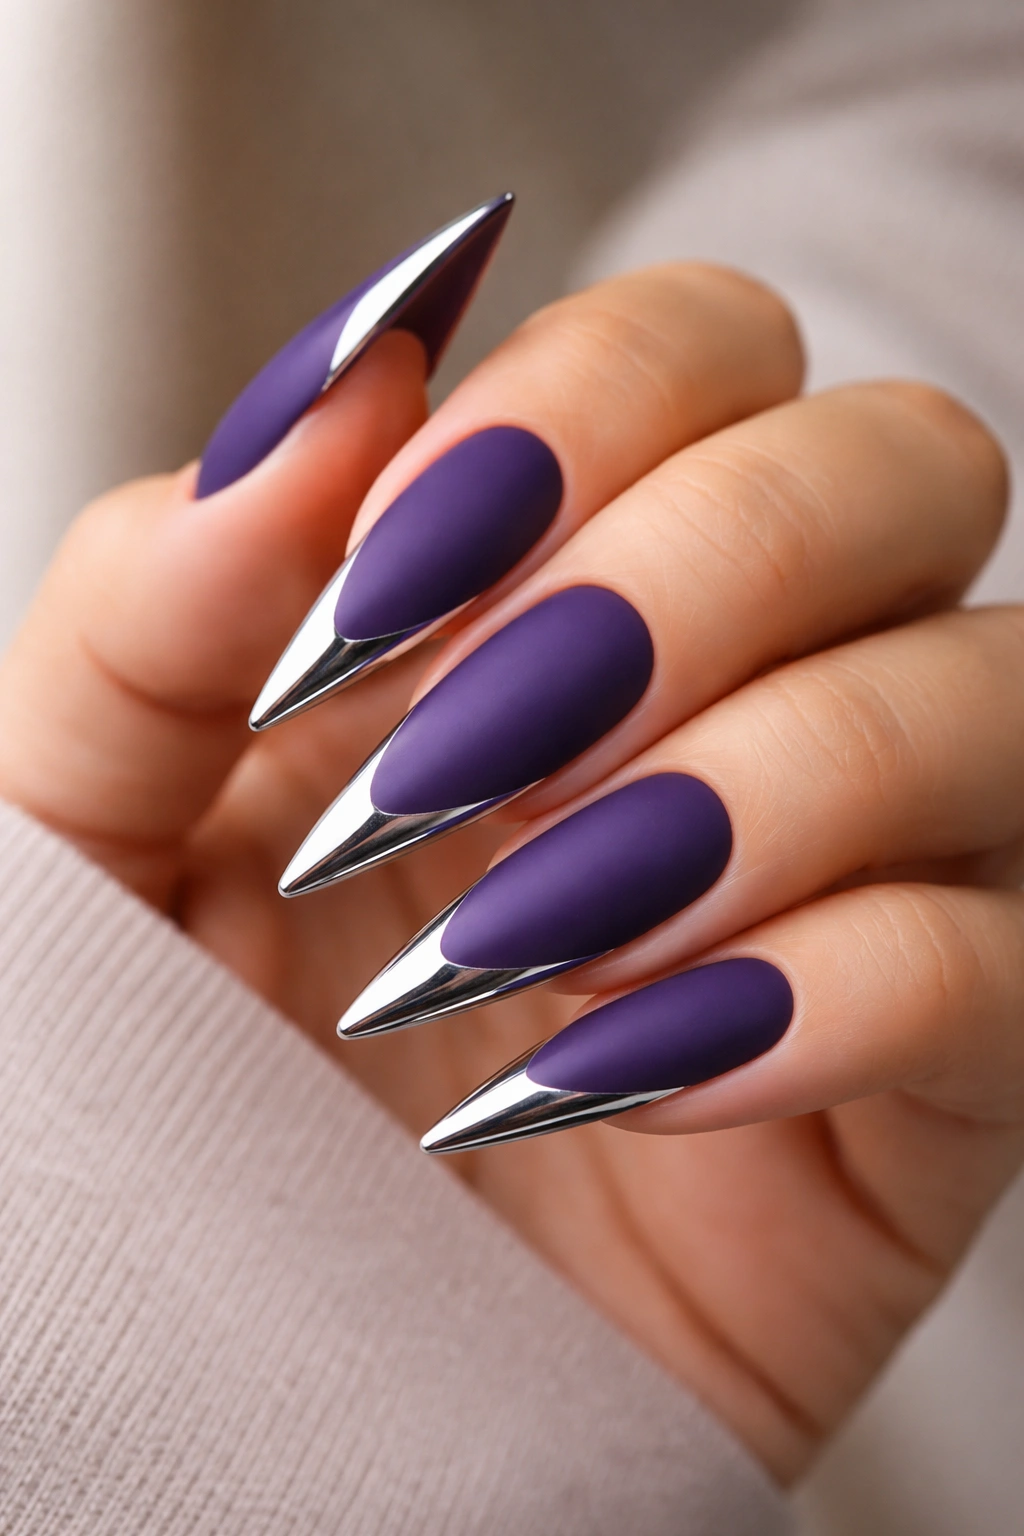
Matte finishes have become increasingly popular because they feel modern and sophisticated, and they’re excellent at showing off nail shape without the distraction of shine. This design pairs a matte deep purple base with shiny chrome accents right along the french tip line. The contrast between matte and glossy creates dimension and draws attention to the tip of the nail, emphasizing that beautiful stiletto length.
Understanding Chrome vs Matte Contrast
Matte finishes flatten color, making the purple appear richer and deeper. Chrome has reflective qualities that almost make it look metallic. Together, they create visual tension that’s aesthetically pleasing — your eye moves between the two finishes, which naturally guides attention around your hand. On stiletto nails specifically, this contrast makes the tip feel like it’s floating or glowing slightly compared to the base of the nail.
Getting Perfect Matte and Chrome Layers
- Apply base coat and two coats of deep purple polish
- Create your white french tip line using a thin brush or guide
- Once the white is completely dry, apply a matte topcoat over the entire nail, including the white tips
- Let the matte topcoat fully cure
- Using a thin brush or detail brush, carefully paint chrome or mirror effect polish along the edge of the french tip — the chrome line should sit on top of the matte white, so brush it on carefully rather than pressing down
- Seal only the chrome areas with a glossy topcoat (leave the rest matte) — use a very thin brush to be precise
- Optional: apply matte topcoat again over any glossy areas to return the entire nail to matte, except for the chrome accent line
Pro tip: Chrome polish can be tricky to apply because it’s usually thin. Use a thin brush and let it dry slightly between thin coats rather than trying to get full coverage in one application.
7. Purple with Geometric Nail Art Design
This is where you can get genuinely creative while maintaining the french tip silhouette. The base is a soft to medium purple — a shade that will show off your artwork without competing. The french tips remain clean and white, but the nail beds feature geometric designs: could be triangles stacked along the sides, a geometric pattern that frames the center, thin lines creating sections, or abstract angular shapes.
Design Ideas That Work on Stiletto Nails
- Striped frames: Thin lines that run vertically or diagonally, creating a framed effect on the nail bed
- Triangular accents: Small or medium triangles placed at specific points, often using contrasting colors like gold, white, or a darker purple
- Checkerboard patterns: Small checked designs that can be concentrated at the base or sides rather than filling the entire nail
- Abstract linework: Freehand or guided lines that create an artistic composition without being perfectly symmetrical
- Negative space designs: Using the purple as the design element against a white or nude background, creating an inverted optical effect
Executing Geometric Designs
- Paint your purple base with two coats and allow to dry completely
- Apply white french tips
- Using a thin detail brush and black, white, or contrasting polish, carefully paint your geometric design onto the purple nail bed
- Steady your hand by resting your pinky on a table and using your opposite hand to guide the brush hand
- If precision is challenging, use a thin striping tape or create a template on the nail with a pencil first
- Seal everything with topcoat
Insider note: Geometric designs photograph beautifully, which is great if you love sharing your nails on social media — the clean lines and high contrast between colors photograph crisply and look even more impressive in photos than in person.
8. Holographic Purple Tips with Gradient Base

This flips the script by using holographic effects on the tips themselves rather than as accents. The base is a creamy, pale purple, and the french tips are pure holographic purple — that amazing material that throws rainbow sparkles at every angle. The transition between the pale base and the holographic tips is smooth, creating a gradient effect that feels sophisticated rather than chaotic.
Why Holographic Tips Stand Out
Standard chrome or mirror effects are cool, but they only reflect what’s directly in front of them. Holographic materials are engineered to refract light across the entire visible spectrum, throwing actual rainbow colors. On stiletto nails, this effect is genuinely show-stopping because the point of the nail catches light as you move your hand. People will ask about your nails constantly.
Achieving the Holographic Tip Effect
- Apply base coat and two coats of pale purple
- Using a makeup sponge or gradient brush, create a smooth transition zone in the middle of the nail using a medium purple shade
- Once the gradient is blended, apply holographic purple polish to the tips, starting from where you want the color to become fully holographic and moving toward the white tip line
- Blend the holographic color into the gradient zone using a clean, slightly damp sponge
- Seal with a clear topcoat that enhances rather than dulls the holographic effect (check reviews before buying — some topcoats kill the holographic shimmer)
Worth knowing: Holographic polishes and products can be pricey, but a little goes a long way. One bottle will last through many manicures because you’re using such a small amount per nail.
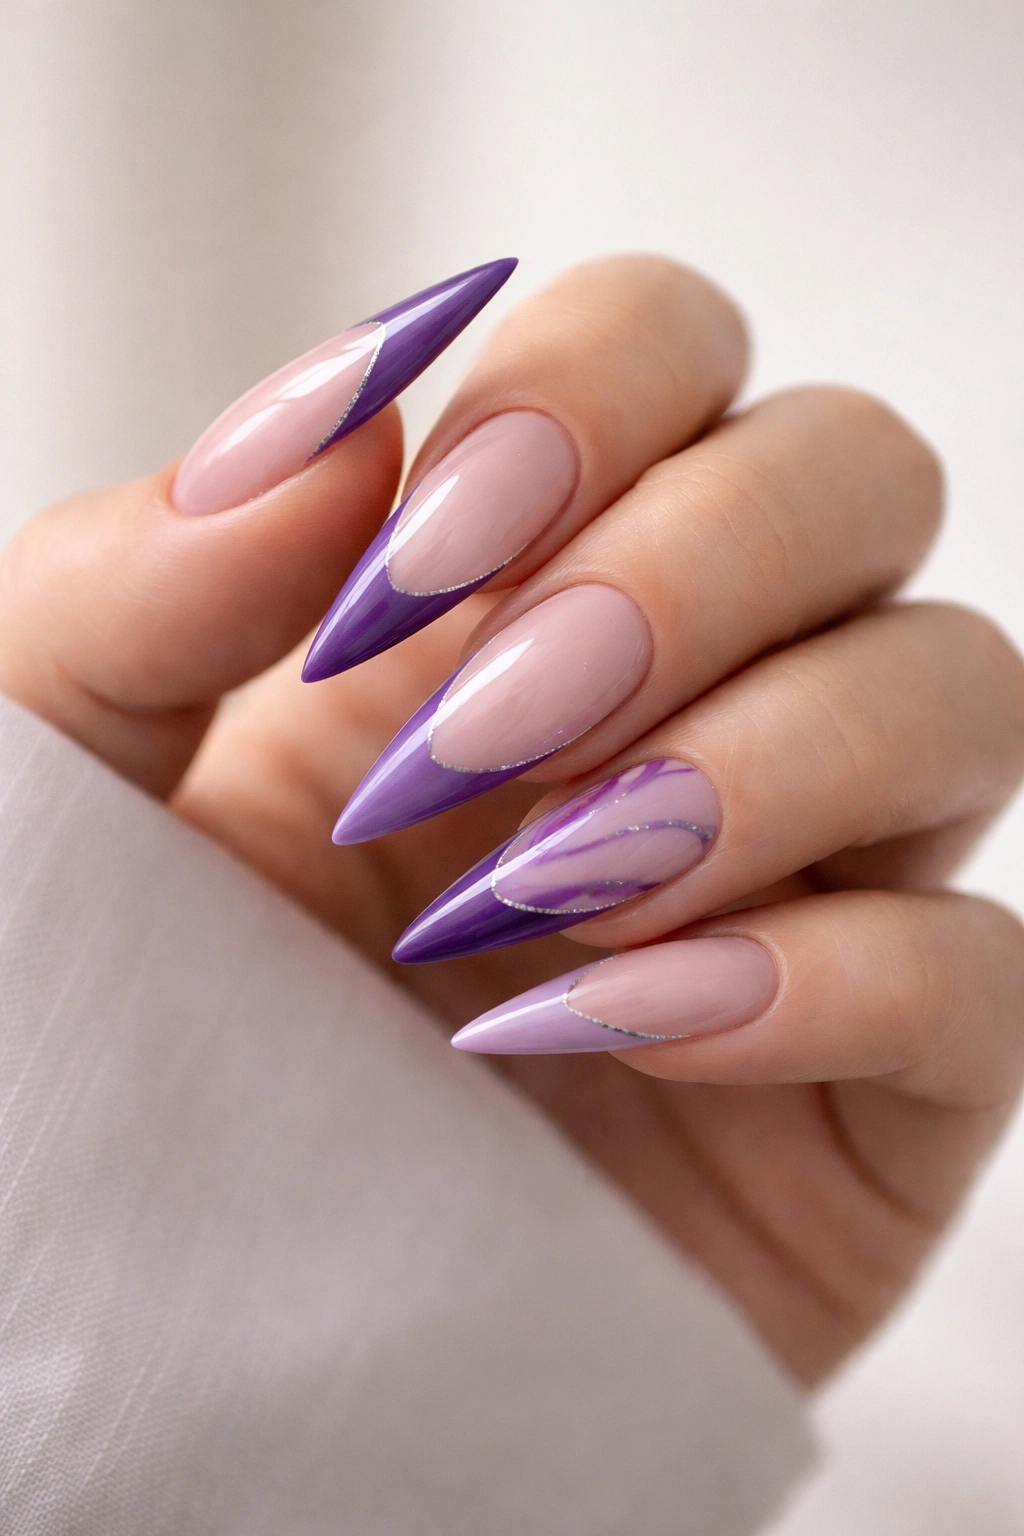
9. Purple Marble Swirl Design with White Tips
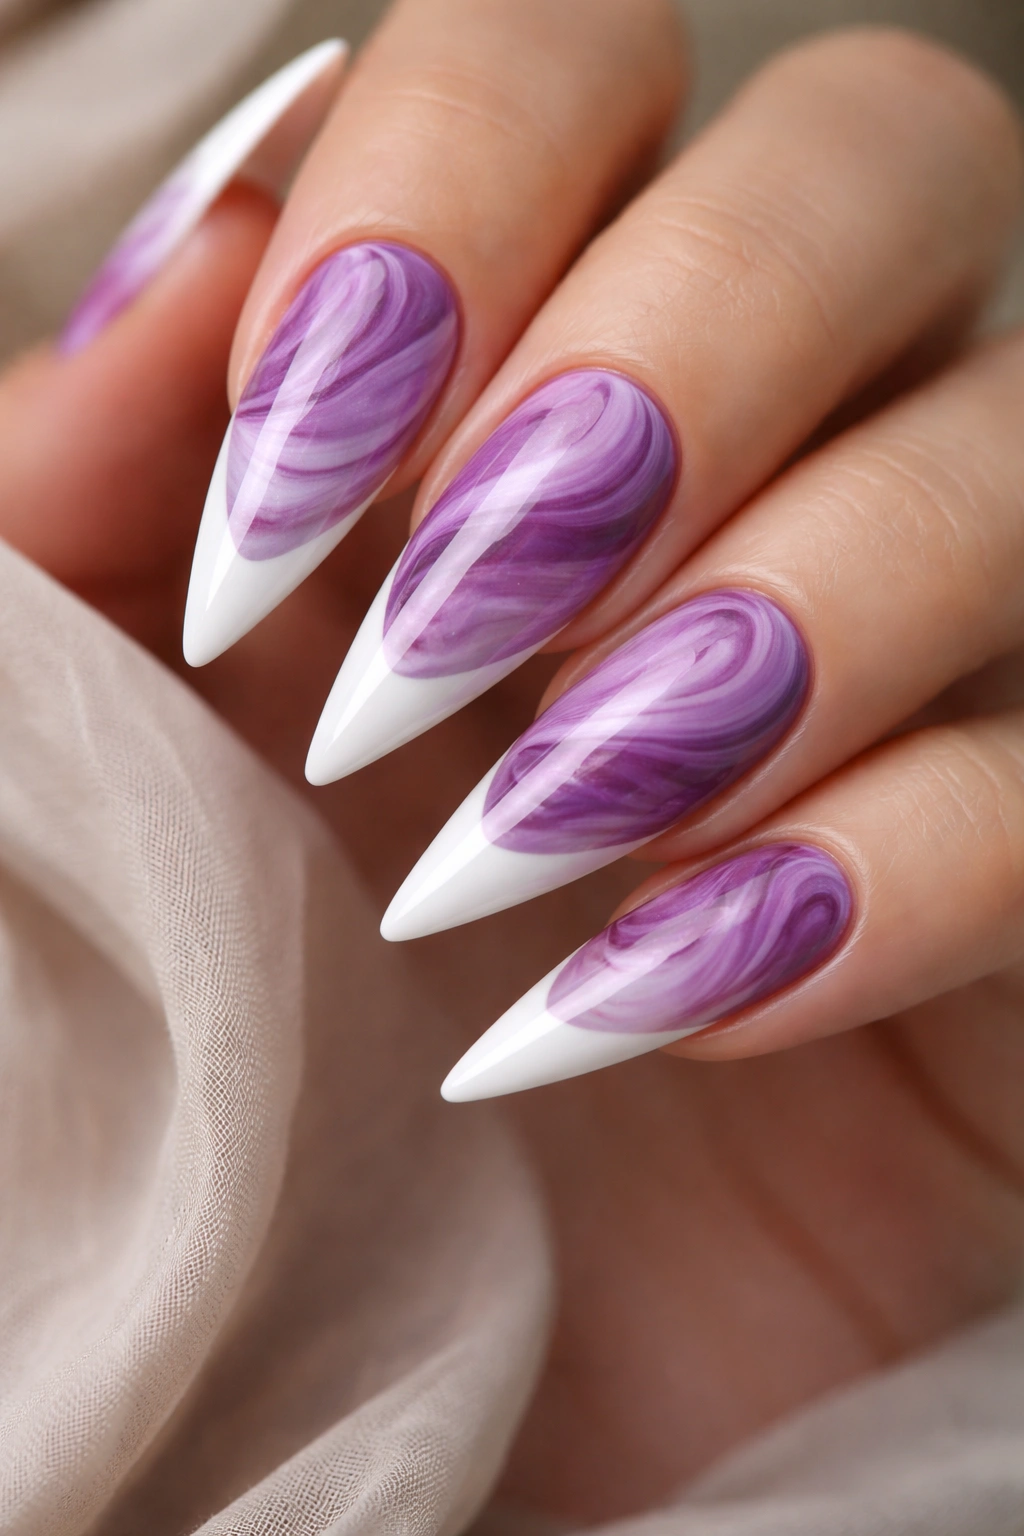
Marble effects are incredibly forgiving and always look intentional, even when they’re semi-accidental. This design uses white and various shades of purple (pale lavender to deep plum) swirled throughout the nail bed, with clean white french tips that provide visual balance and structure. The marble effect adds movement and dimension without feeling busy because the clean white tips ground the design.
Creating Believable Marble Patterns
Marble nails should look organic, like actual stone, rather than perfectly symmetrical. Use at least three shades of purple — a pale shade, a medium shade, and a deep shade — plus white. The base is typically one of the lighter purples, and then you drop in the other colors somewhat randomly and swirl them together. The key is not overworking it. A few careful swirls look intentional. Too many swirls look muddy.
Marble Technique Step-by-Step
- Apply base coat and one coat of pale lavender base color
- While the base is still slightly wet or tacky, drop small dots of medium purple and deep plum onto the nail in a random pattern
- Using a thin brush or toothpick, gently swirl these colors together — don’t blend completely, keep some definition between the shades
- Allow to dry completely
- Apply white french tips using a thin brush or guide
- Seal with topcoat
Real talk: Marble nails are actually easier than they look. Even slight imperfections read as “natural marble variation” rather than mistakes, which is why this technique is perfect for improving confidence in nail art.
10. Midnight Purple with Metallic Stripe Details
This is the design for when you want maximum drama with restraint. The base is midnight purple — so dark it’s almost black, but with enough purple undertone that it reads as intentional color choice rather than just dark. White french tips provide the classic contrast, but thin metallic stripes (usually gold or silver) run down the sides of the nails or create subtle lines along the nail bed, adding just enough sparkle without tipping into costume territory.
Why Metallic Stripes Work on Deep Purple
When your base color is very dark, metallic accents become the focal point. They don’t compete with the color because the color is so saturated. Gold metallics warm up the midnight purple, giving it richness. Silver metallics cool it down and add an edgy feel. Either direction works, but the choice changes the overall vibe of the design significantly.
Applying Metallic Stripe Details
- Paint your base with midnight purple — this color usually requires two coats for full coverage
- Create clean white french tips using a brush or guide, and allow to dry completely
- Decide on your stripe pattern: vertical lines down the sides, diagonal lines across the nail, or thin lines along the base
- Using a thin striping brush and metallic polish, carefully paint your lines
- If you make mistakes, a tiny brush dipped in pure acetone can clean up the edges while the polish is still wet
- Allow metallic stripes to dry fully before applying topcoat
- Apply a glossy topcoat to add shine and protect the design
Pro tip: Practice your stripe lines on a piece of paper first to get your hand steady and test the polish flow. Metallic polishes sometimes have different consistency than regular polish, so a test run helps.
Wrapping Up
Purple french tip stiletto nails represent something important: the willingness to take a classic, timeless design and make it your own. The french tip will never go out of style because it’s fundamentally elegant and flattering. But by playing with purple — whether you choose soft pastels, rich jewel tones, or something in between — you’re signaling that you understand elegance doesn’t have to mean boring.
The designs above each showcase a different aspect of what makes purple work for french tips: the sophistication of gold accents, the modern appeal of matte finishes, the boldness of holographic effects, and the artistic expression of marble and geometric patterns. More importantly, they’re all absolutely achievable at home with patience and decent tools. You don’t need professional-level skill to create any of these designs. You need a steady hand, quality products, and willingness to practice.
Pick the design that speaks to you most, gather your supplies, and give yourself time to execute it without rushing. Your nails deserve that attention, and you deserve the confidence boost that comes from wearing a design you genuinely love.
