

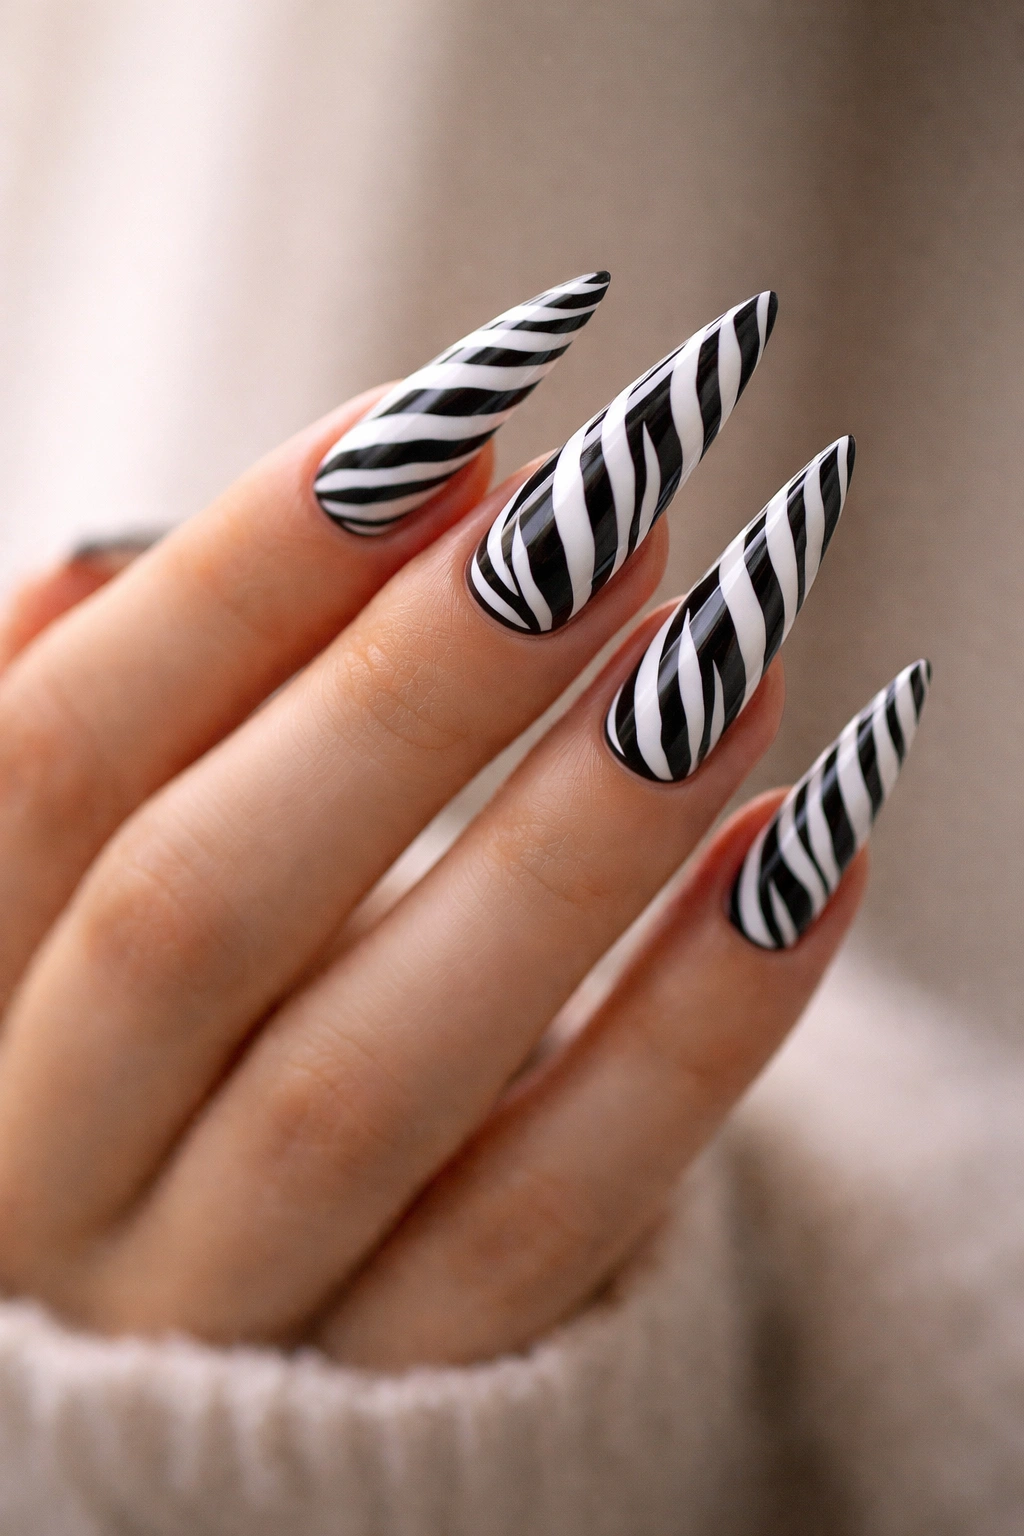
Zebra print is one of those classic patterns that never quite goes out of style, and when you pair it with the elongated drama of stiletto nails, you get something seriously striking. The contrast between the bold black and white stripes and the sharp points of the nail shape creates an edgy, sophisticated look that works for everything from night-out glamour to everyday confidence. What makes zebra print so versatile is that it’s not limited to traditional black-and-white — you can adapt it with metallics, neons, pastels, or even chrome accents to match your personal aesthetic and the occasion.
The beauty of zebra print stilettos is that the design sits perfectly on the long canvas that stiletto nails provide. The elongated shape actually makes the stripe pattern more visually interesting since the lines have more space to flow and create rhythm down the nail. Plus, stilettos have an inherent boldness that matches the attitude of animal print — they’re not a subtle choice, so going all-in with creative zebra variations just feels right.
Whether you’re drawn to the classic monochromatic look or want to experiment with unexpected color combinations, there’s a zebra print stiletto design that fits your style. Below are twelve distinct approaches to this iconic pattern, each with specific technique notes, styling suggestions, and creative twists you can try.
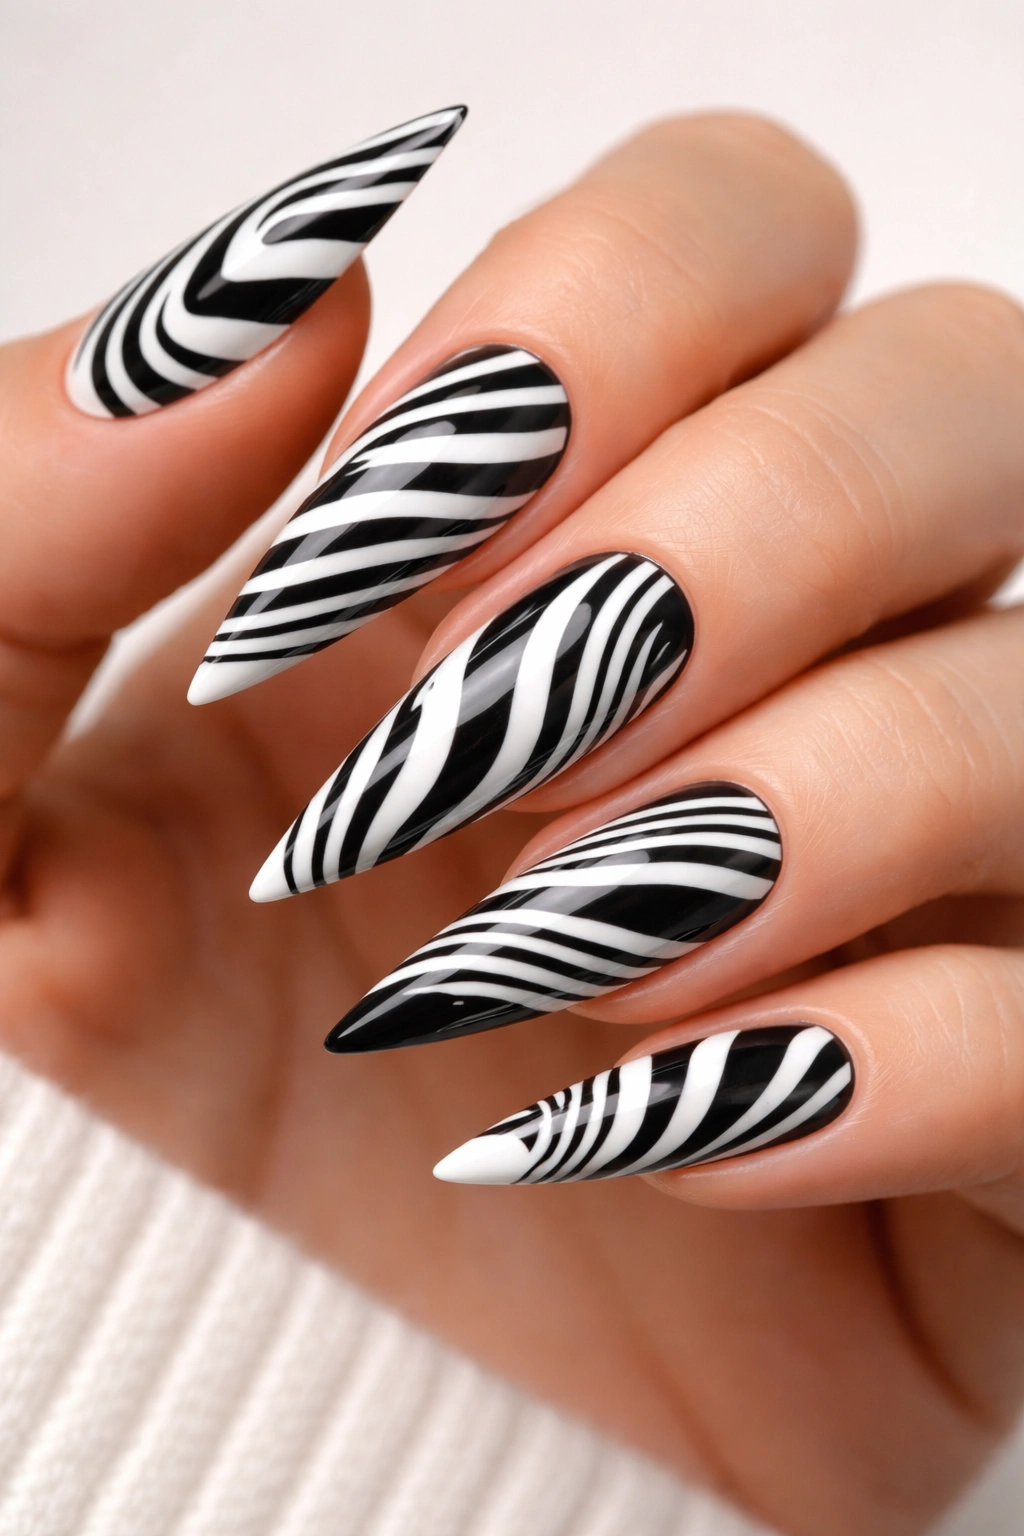
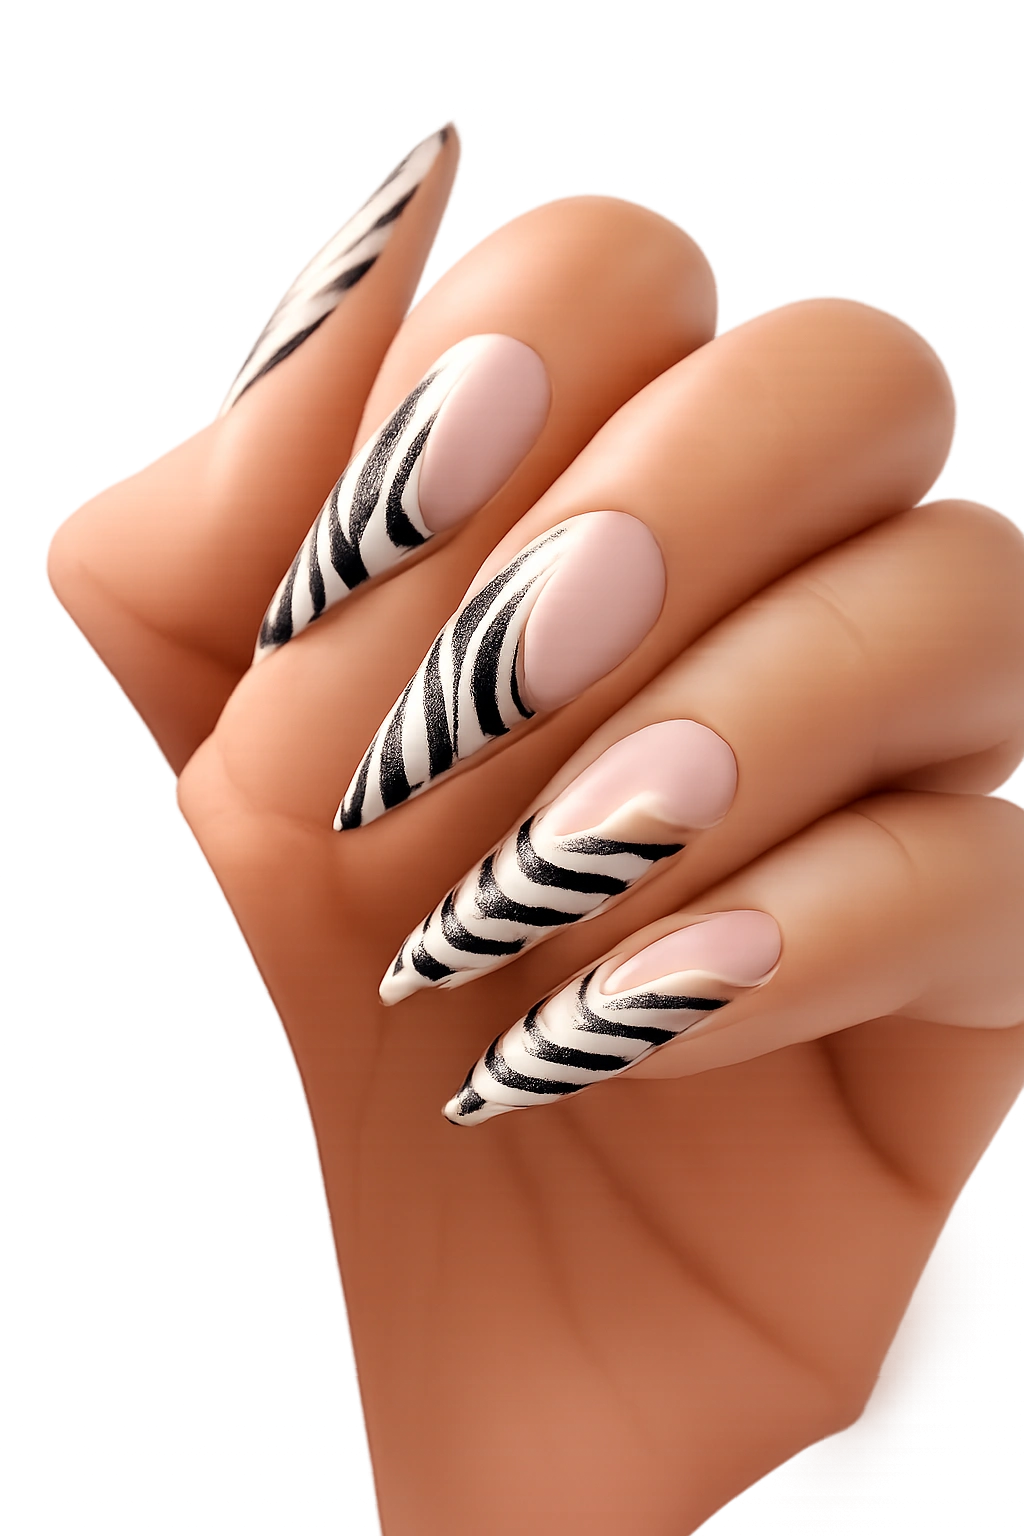
1. Classic Black and White Zebra Stripes
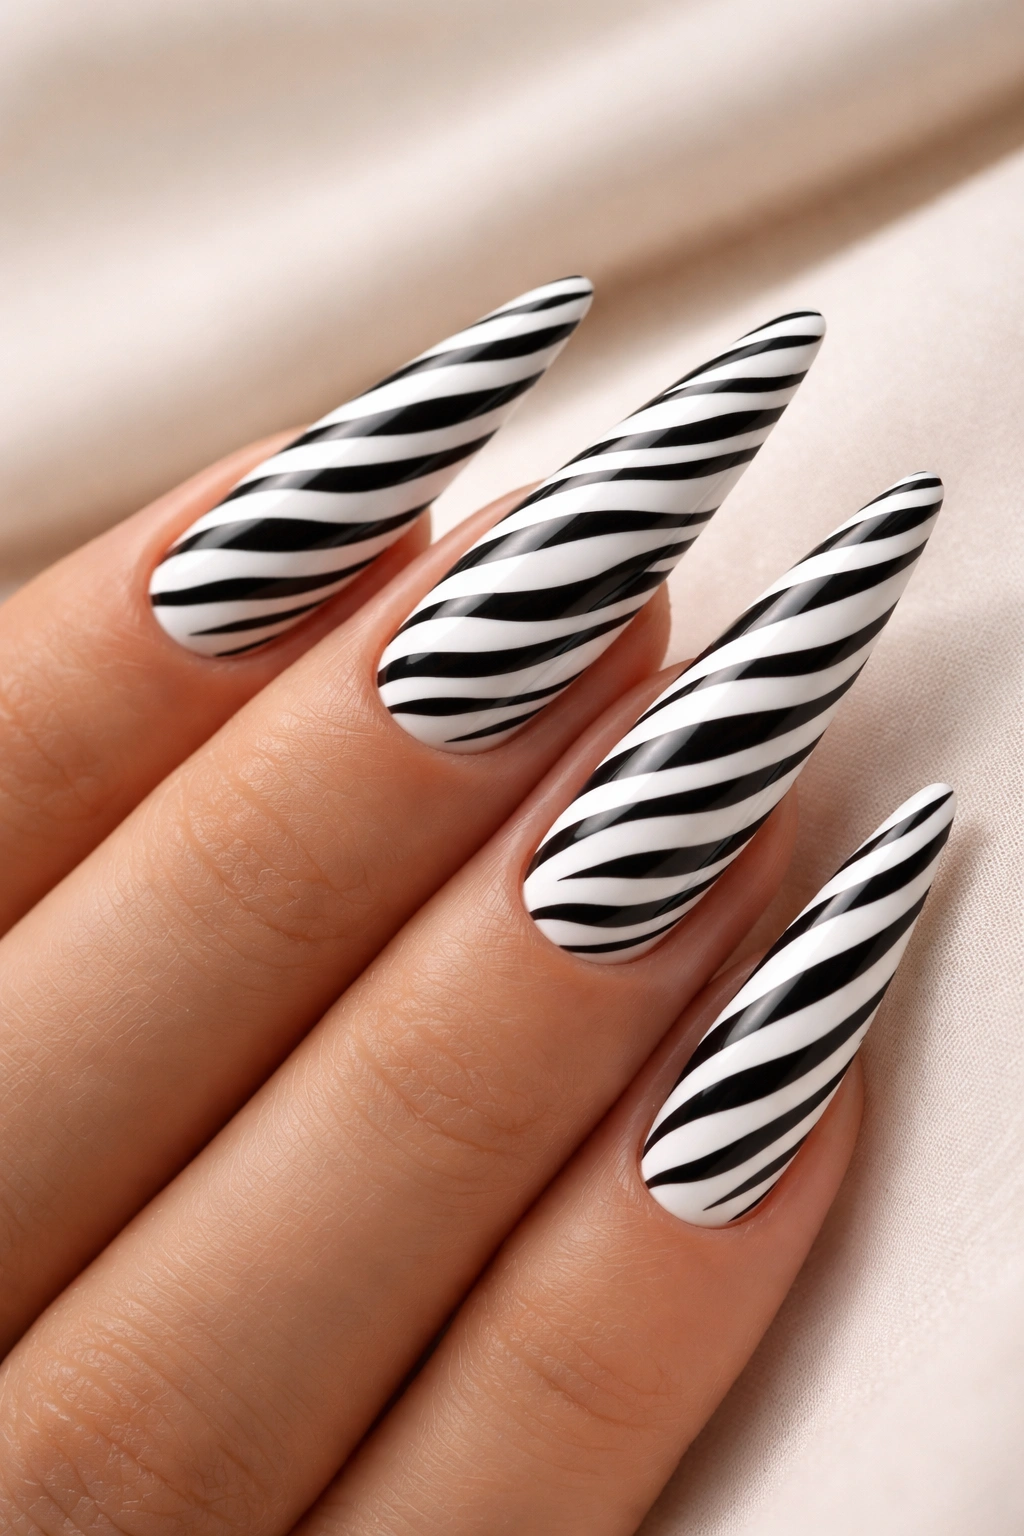
The timeless version that started it all — pure black stripes on a white or cream base. This is your foundation, the design that looks polished in literally any setting. The key to making classic zebra work is getting the stripe thickness right: not too thin (they disappear on longer nails) and not too thick (they overwhelm the design). Aim for stripes that are roughly 2-3 millimeters wide on stilettos, which creates good visual balance on the elongated surface.
Execution and Perfecting the Stripe Pattern
The most reliable method is to use thin nail art brushes — a striping brush or even a fine detail brush works beautifully. Start by painting your base coat in white or a soft cream, then use black gel or polish to paint the stripes freehand at slight angles. The slight angle (about 20-30 degrees from vertical) is what makes it read as zebra rather than just vertical lines. Some stripes should cross over the entire nail width, while others can be shorter and interrupted — this randomness is what makes zebra look natural rather than geometric.
If freehand feels intimidating, you can use thin striping tape as a guide, though true zebra doesn’t have perfectly uniform stripes, so embrace the organic imperfection. The contrast between pure white and pure black is the sharpest, most dramatic option, but if that feels too stark for your skin tone, try cream with charcoal gray, or even white with a very dark navy for a slightly softer vibe that still reads as classic zebra.
Application Tips and Variations
- Use a matte top coat for a more sophisticated, less glossy finish
- Add a thin glossy clear coat just on the tips for a two-tone finish effect
- Try starting the stripes midway up the nail for a half-zebra, half-solid look
- Paint the tips in solid white or cream and zebra only the nail bed
- Use white stripes on a black base for a high-contrast inversion
Pro tip: Seal your stripe work with a non-sticky top coat immediately after to prevent smudging, especially if you’re freehanding.
2. Metallic Gold Zebra on White
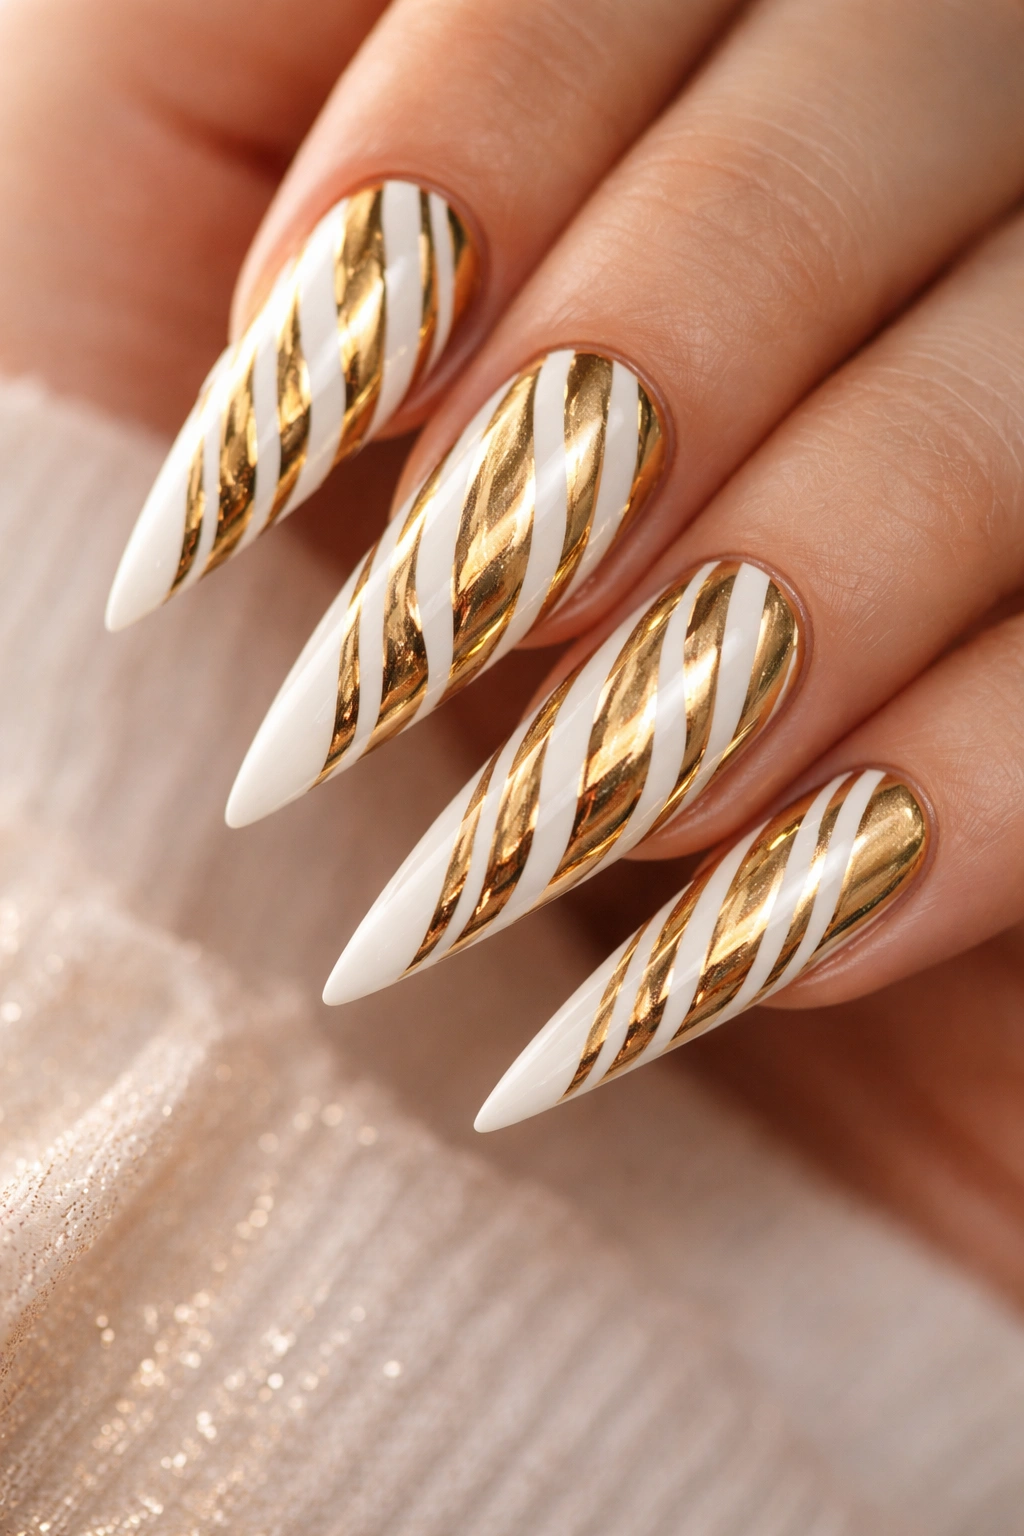
Swap the black for a rich, warm gold and suddenly your zebra feels luxe and sophisticated rather than edgy. Gold metallic paint or gel creates a completely different vibe — it catches light, it’s warmer, and it pairs beautifully with any skin tone. The white base remains clean and crisp, providing the contrast, but the gold brings an elegance that pure black sometimes lacks.
Why Gold Changes the Entire Feel
Gold is inherently associated with luxury, so even though you’re still using a bold animal print, the metallic material elevates the entire design. Gold also photographs beautifully — the way it reflects light makes these nails look dimensional in photos, which is a bonus if you’re posting or using these for special occasions. The warmth of gold also works better for people with warm undertones who find black-and-white slightly harsh against their skin.
Application Tips and Styling Ideas
- Use a gel-based metallic gold for the richest color and best light reflection
- Pair this design with rose gold jewelry for a cohesive warm-toned aesthetic
- Try this on just the ring finger and pinky with solid white on the others for a subtle zebra accent
- Add a single line of gold foil down the center of each nail for extra shimmer
- Combine gold zebra with a glitter or sparkle accent nail for evening wear
Insider note: If your metallic gold is too thin on the first coat, you might see white peeking through the stripes. Go for opacity by doing two coats of gold, allowing it to dry between applications, then adding the stripes.
3. Neon Pink and Black Zebra
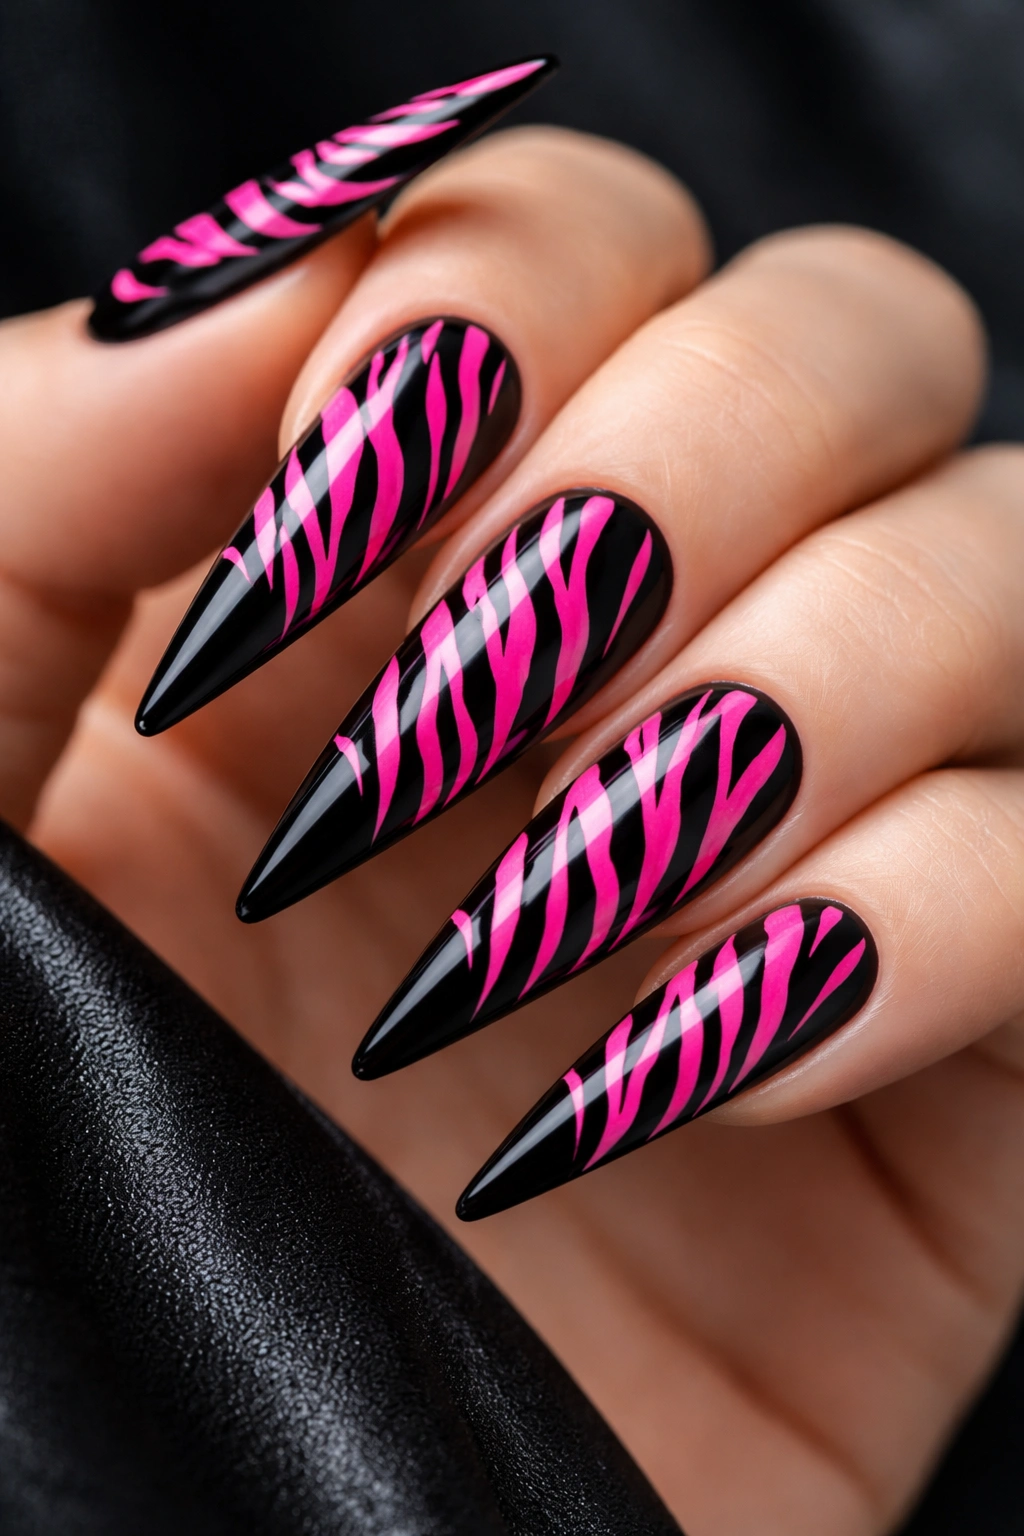
For anyone who loves to make a statement, neon pink stripes on black (or neon on white) is absolutely fearless. Neon pink reads as young, bold, and fashion-forward — it’s the choice of someone who’s confident in their style. The high contrast between deep black and electric neon pink creates an almost 3D effect on the nail, making the design pop visually.
Getting Neon Color Right Without It Looking Cheap
Quality matters here more than in many other designs. Cheap neon pigments can look washed out or slightly murky. Invest in a true neon gel or premium neon polish — brands that specialize in neon typically have much better color saturation. The black base should be a pure, deep black (not a very dark gray) to maximize the contrast with the neon pink. Some artists add a thin layer of white between the black base and the neon to make the pink even brighter.
Occasions and Styling Context
- Perfect for nightlife, festivals, or anyone wanting major visual impact
- Pairs with minimalist outfits to let the nails be the statement piece
- Works beautifully with metal jewelry — silver or gold both complement this boldness
- Consider doing a half-accent approach: full neon zebra on ring and pinky, solid black on others
- Ombré neon pink fade (from deep pink to neon) between the stripes for extra dimension
Worth knowing: Neon colors can stain your nail bed if left on for very long without a proper base coat. Always use a thick, protective base coat between the nail and neon pigment.
4. Ombré Zebra With Color Gradient
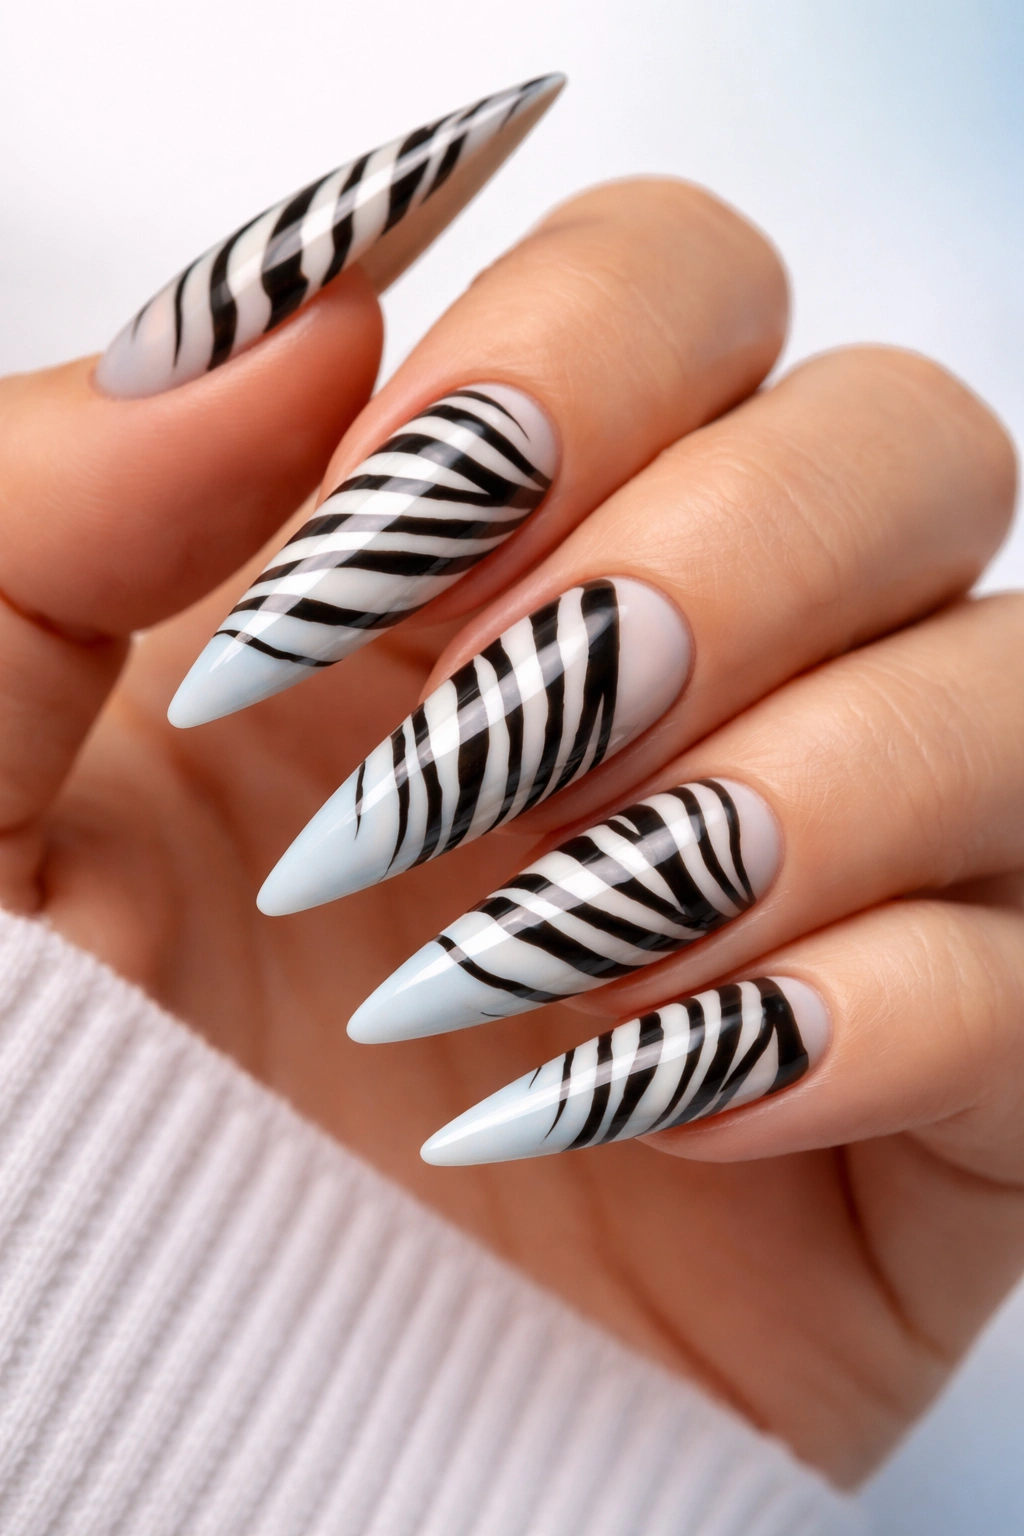
Instead of a solid base, create a gradient background — maybe from white to soft blue, or cream to pale pink — and then stripe the zebra pattern over the gradient. The gradient adds a dreamy, sophisticated layer while the zebra pattern grounds it with bold structure. This approach gives you the best of both worlds: the soft, artistic quality of an ombré plus the graphic strength of animal print.
Blending the Gradient and Maintaining the Stripe Pattern
Create your ombré using a damp sponge technique: apply two colors to the sponge with a gap between them, then tap the sponge onto the nail while the polish is slightly tacky. The overlap creates a soft blend. Once the ombré is fully dry and sealed, you can paint your zebra stripes over the top. The stripes might be black, white, or even a metallic shade that bridges the two colors of your gradient.
Creative Color Combination Ideas
- Cream to soft lavender ombré with black or dark purple stripes
- White to pale pink gradient with black or gold stripes
- Beige to warm tan with chocolate brown stripes for an earthy feel
- Pale blue to white with navy or silver stripes
- Blush pink to white with rose gold metallic stripes
The ombré gradient gives these nails a more editorial, intentional feel — they’re not your everyday zebra print, they’re a designed, composed version.
5. Reverse Zebra: White Stripes on Black Base
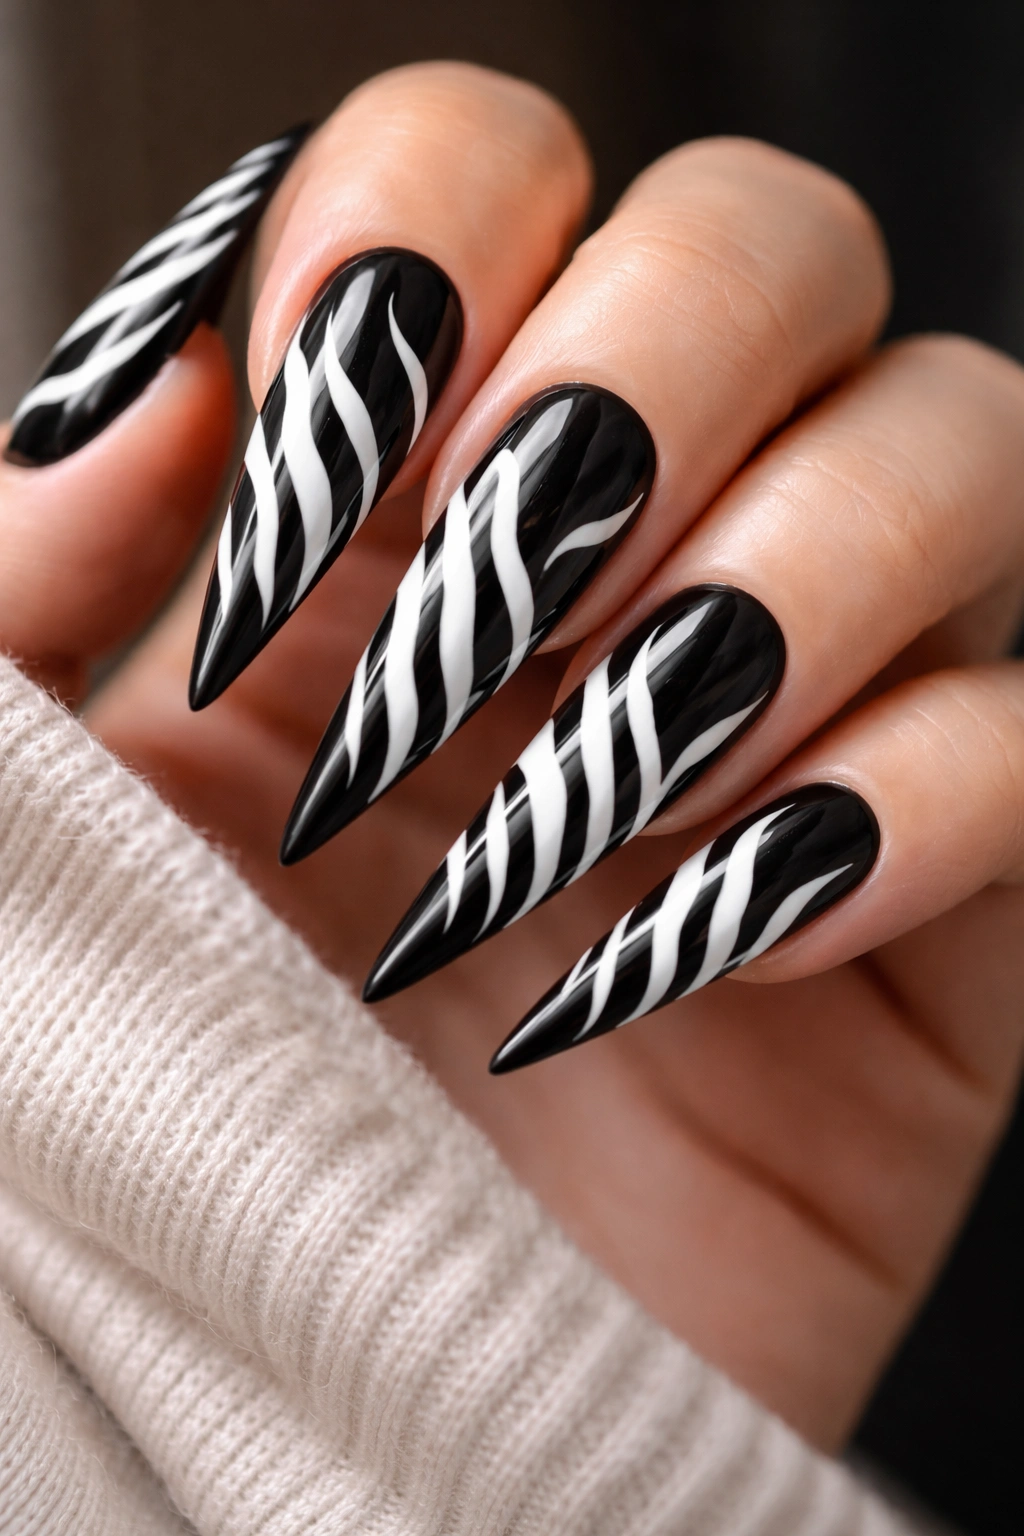
Flip the traditional formula entirely and use white stripes on a black base instead. This creates a completely different visual impact — it reads as bolder, edgier, and more dramatic. The white pops intensely against the black, and psychologically, leading with black and striping in white feels more modern than the traditional reverse.
Why the Reverse Reads Differently
Your eye is drawn to the lighter element, so white stripes against black make the stripes feel like the main event rather than the background pattern. There’s something almost neon-like about white stripes on pure black — they practically glow. This version photographs especially well under low light or in photos with flash because the contrast is so stark.
Perfect for Bold Style Aesthetics
- Pairs beautifully with all-black outfits for a monochromatic, high-fashion look
- Excellent choice for gothic or alternative aesthetics
- Works as a strong base for adding accent details like rhinestones or thin gold lines
- Try pure white stripes for maximum contrast, or off-white for something slightly softer
- Consider matte black base with glossy white stripes for a textured, dimensional effect
The reverse approach is favored by nail artists who want maximum impact — it’s the difference between a whisper and a shout.
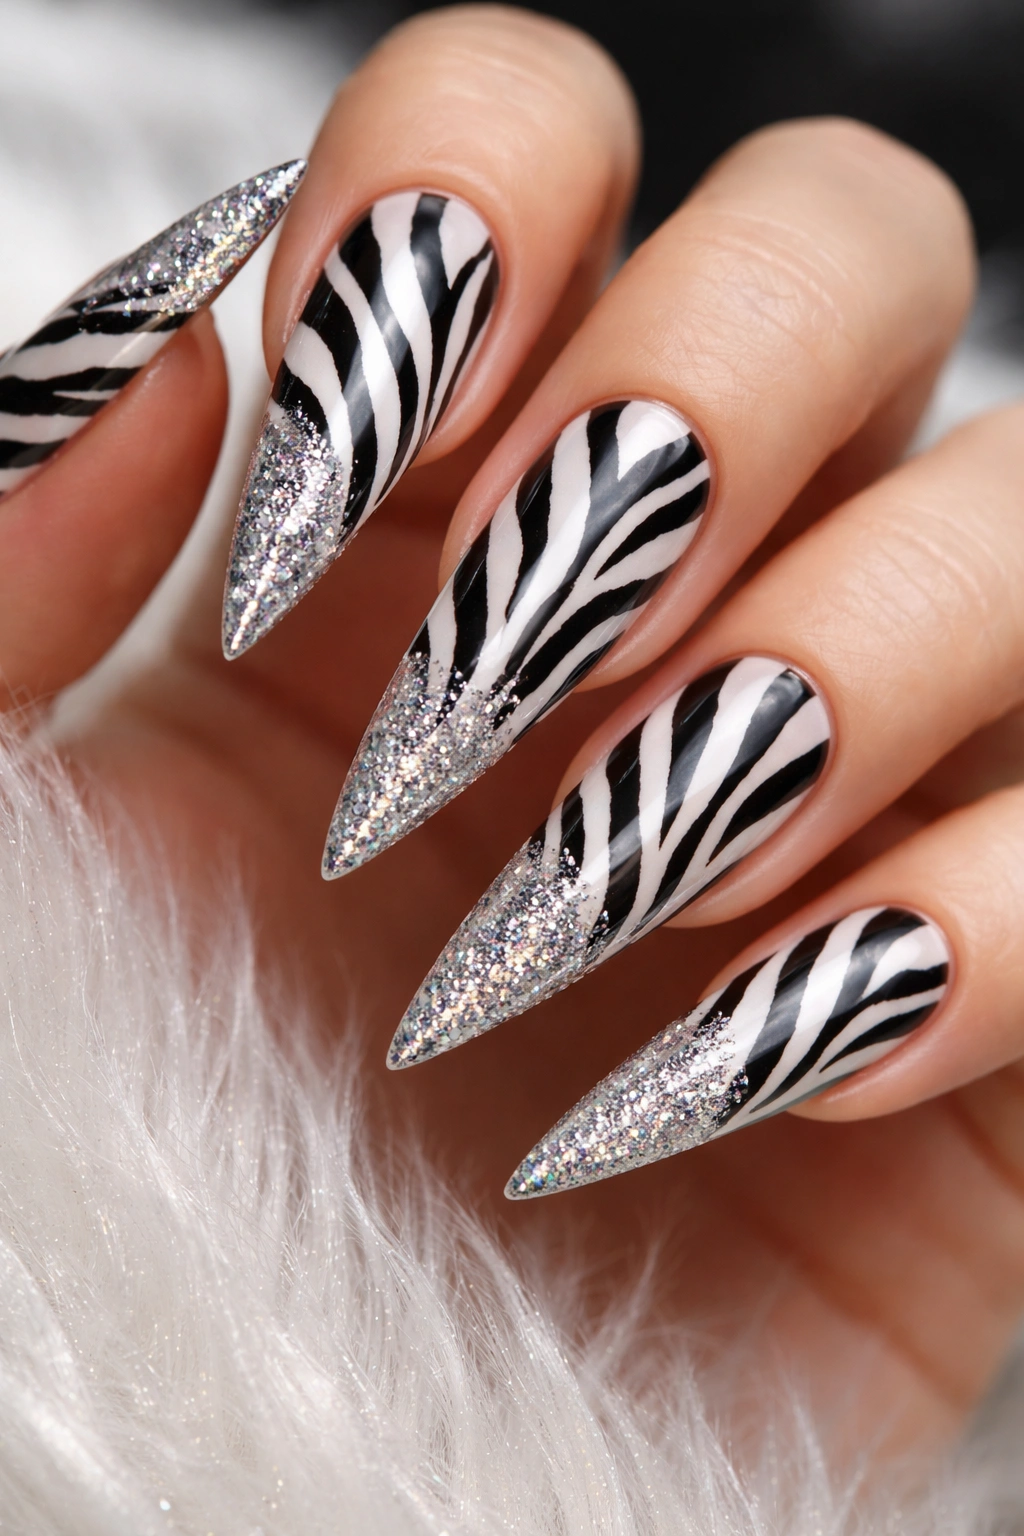
6. Holographic Glitter Zebra Mix
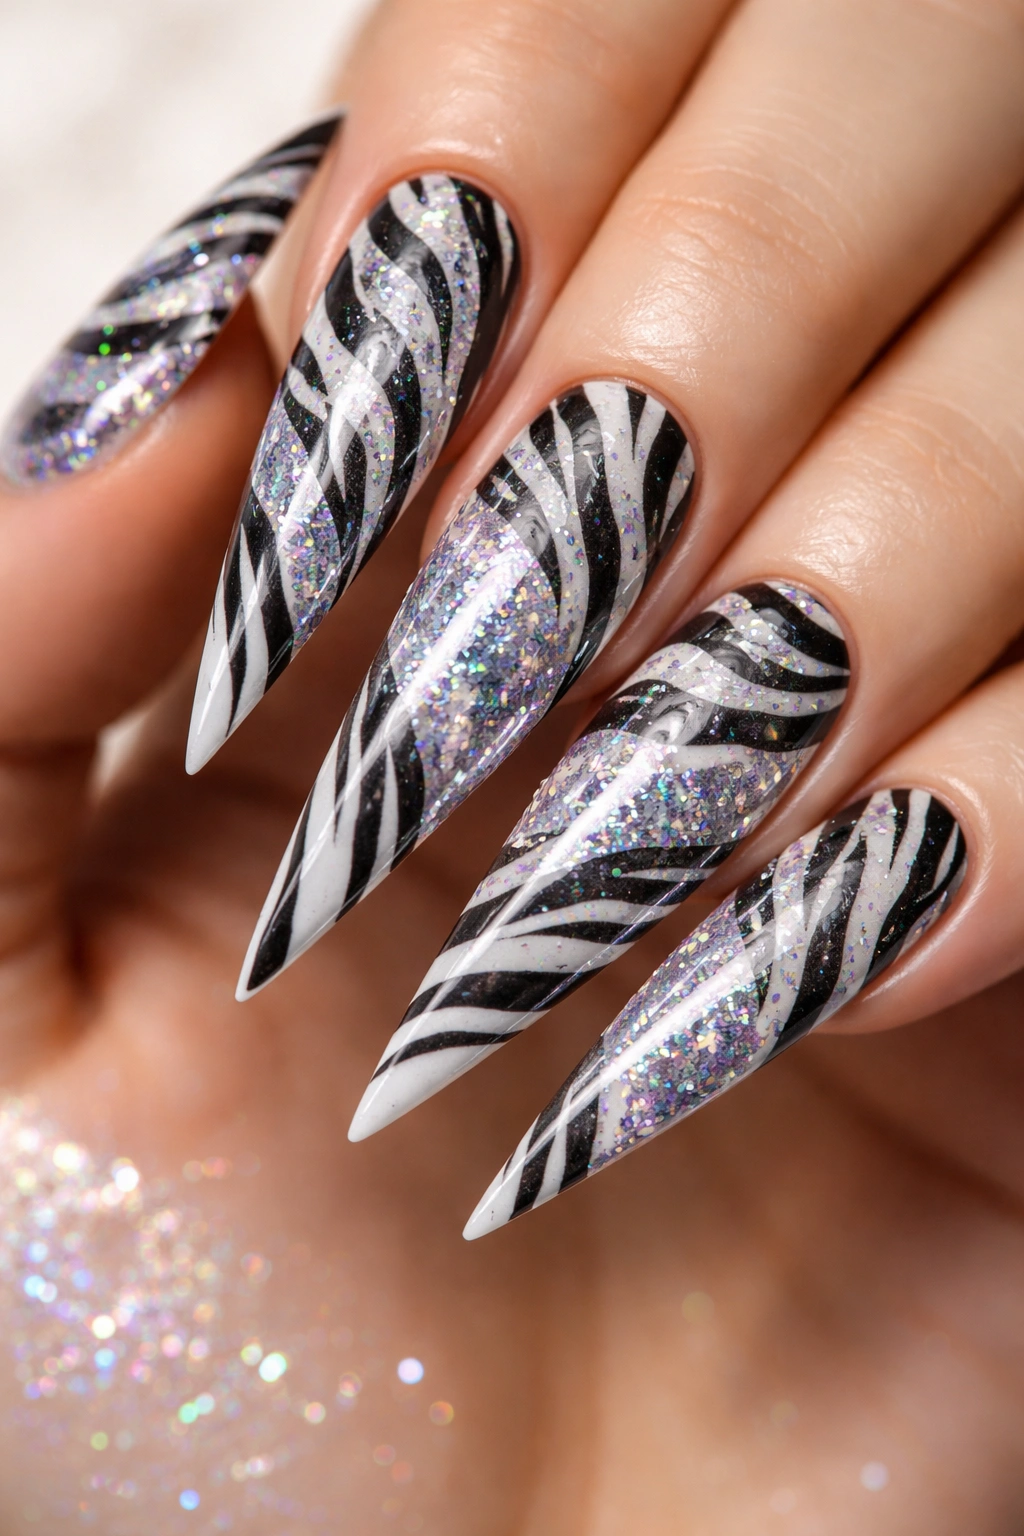
Layer holographic glitter or chrome powder into the zebra design for an iridescent effect. Paint your black and white base as usual, then use a holographic gel or dust to create a shimmering, rainbow-reflective layer over portions of the design. The stripes remain visible but now have this magical, light-shifting quality that makes the nails feel almost cosmic.
Incorporating Glitter Without Overwhelming the Pattern
The key is restraint — you want glitter as an accent that enhances the zebra design, not an avalanche that obscures it. Options include: applying holographic dust just to the white stripes, adding glitter only to the tips while keeping the base solid, or creating a thin glitter gradient that transitions from one side of the nail to the other. A gel-based holographic glitter typically gives better results than loose glitter because it stays put and creates a more refined finish.
Application Techniques for Shimmer Details
- Apply holographic powder to a sticky gel layer, then seal with top coat
- Use a holographic striping brush to paint individual glittery lines
- Mix holographic flakes into clear gel and use this as your “white” stripes for subtle sparkle
- Apply chrome powder selectively to just the tips in a ombré effect
- Use a holographic top coat over the entire design for an all-over shimmer
Pro tip: Let the black base fully cure before applying glitter accents, otherwise the glitter particles can sink into the not-quite-set gel and lose their dimensional sparkle.
7. Thick and Thin Stripe Variation
Instead of trying to keep all stripes relatively uniform, intentionally vary the stripe thickness — some thick and bold, some thin and delicate. This creates more visual interest and feels less like a pattern and more like intentional art. Thick stripes give a bolder statement while thin stripes add elegance and sophistication.
Creating Dynamic Rhythm With Varied Line Weight
Thick stripes (4-5mm) read as modern and confident, while thin stripes (1-2mm) feel more refined. By mixing them on the same nail, you get a design that feels contemporary and considered. The variation also masks minor imperfections better than uniform stripes — if one thin stripe isn’t perfectly straight, the eye can forgive it because not all stripes are supposed to be uniform.
Design Approaches Using Line Weight
- Paint all thick stripes first, then add thin stripes in the gaps for a filled effect
- Alternate: thick, thin, thick, thin in a deliberate rhythm
- Use thick stripes only on the tip area and thin stripes on the lower nail
- Create thick stripes in black and thin stripes in a complementary color (like rose gold)
- Combine thick white stripes on a black base with thin gold accent lines
This variation technique is especially effective on stilettos because the length gives you room to play with the stripe widths across the entire nail.
8. Two-Tone Zebra: Color on Each Nail
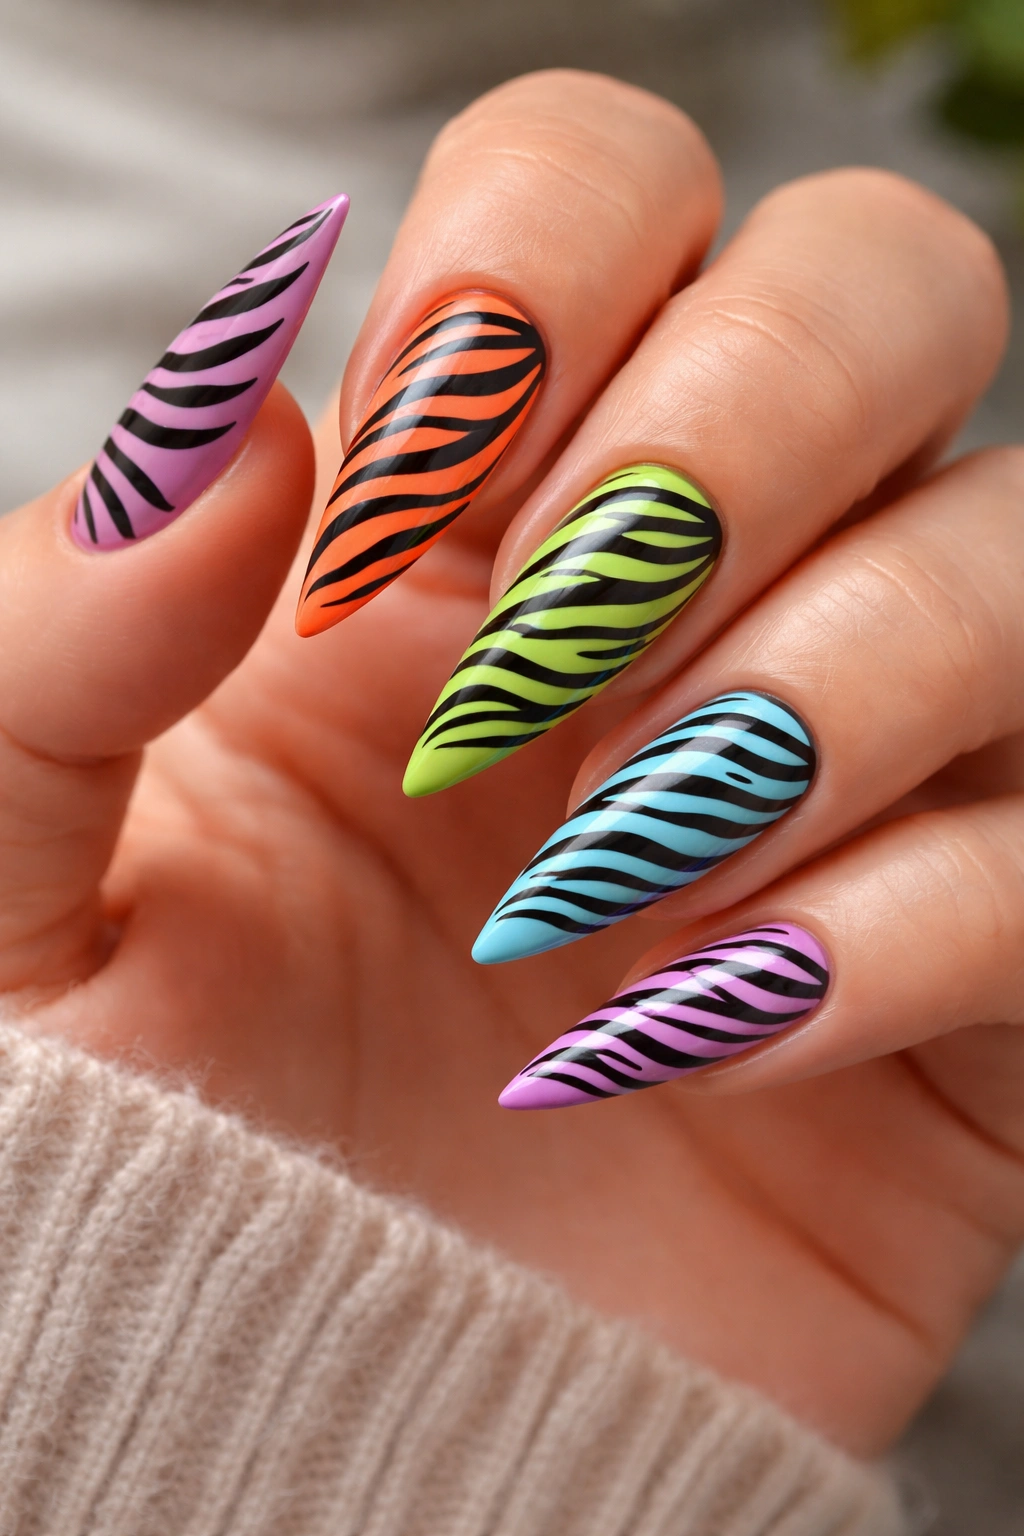
Paint each nail a different color (white, cream, pale pink, soft blue, black, gray) and apply zebra stripes that complement the base. One nail might be white with black zebra, while the adjacent nail is pale pink with darker pink or burgundy stripes. The multi-color approach across your hand creates a cohesive set while each nail has its own personality.
Creating Harmony Across Multiple Color Combinations
The key to making this work without looking chaotic is choosing a color palette. Stick to either warm tones (cream, blush, gold, rose gold) or cool tones (white, pale blue, silver, lavender). All colors should be in the same saturation level — all pastels, all jewel tones, all neutrals — not mixing baby pink with deep emerald on the same hand.
Multi-Color Stiletto Combinations
- Soft neutral palette: cream, beige, white, and gray bases with black or brown stripes
- Cool palette: white, pale blue, silver, and light gray with navy or black stripes
- Warm palette: cream, blush, peach, and pale gold with chocolate, burgundy, or rose gold stripes
- Jewel tone approach: pale lavender, soft teal, light amethyst, and ivory with deep purple or navy stripes
- Include one accent nail in the group with slightly different treatment (glitter, metallic, or solid color)
This approach works beautifully when you want your nails to feel coordinated as a set while maintaining visual interest across all ten nails.
9. Negative Space Zebra With Sheer Base
Instead of a solid or white base, use a sheer, milky base that’s slightly transparent and lets your actual nail show through. Apply the zebra stripes on top so they’re bold but the overall effect is lighter and more airy. The transparent base creates a nail-on-nail effect that feels modern and less graphic than a fully opaque base.
The Psychology of Negative Space in Design
Negative space makes busy designs feel less overwhelming. Even though you’re using a bold pattern, the sheer base and the natural nail peeking through create breathing room. This approach is especially good if you worry that full zebra print might feel too intense — the transparency softens it while keeping the boldness of the stripes intact.
Sheer Base Variations and Effects
- Use a milky white or pink translucent base for an ethereal feeling
- Apply thinner stripes on the sheer base so they’re more delicate
- Leave portions of the nail completely bare (no stripes) for maximum breathing room
- Use black stripes on a sheer white or sheer pink base for a sophisticated, editorial look
- Combine with a glitter or gradient tip for an ombré effect that transitions from sheer to more opaque
Negative space designs photograph beautifully and look especially elegant in professional or formal settings.
10. Glitter Gradient Zebra
Blend glitter density into the zebra design — perhaps starting with sparse glitter near the cuticle and building to dense, sparkly glitter at the tip. The zebra stripes remain the dominant pattern, but the glitter adds dimension and catches light. This is the version for anyone who loves a little sparkle but wants the zebra design to remain the star.
Layering Glitter Without Muddying the Pattern
Use fine or micro glitter rather than chunky pieces — smaller glitter particles don’t obscure the stripe pattern. Apply your solid black and white base, then use a glitter gel or a clear gel mixed with fine glitter to create the gradient effect. The densest glitter application should be at the nail tip, fading to minimal or no glitter near the cuticle.
Glitter Gradient Techniques
- Use black or white glitter that matches your stripes for a monochromatic sparkly effect
- Try holographic or iridescent glitter for a rainbow shimmer
- Apply glitter only to the tip (the last third or half of the nail)
- Create a vertical glitter fade from one side of the nail to the other
- Use a denser, chunkier glitter on just the tips while the base has fine micro-glitter
Worth knowing: Glitter can be harder to remove than regular gel, so use a proper acetone soak and avoid picking at it — let the acetone do the work.
11. Chrome Zebra Stripes
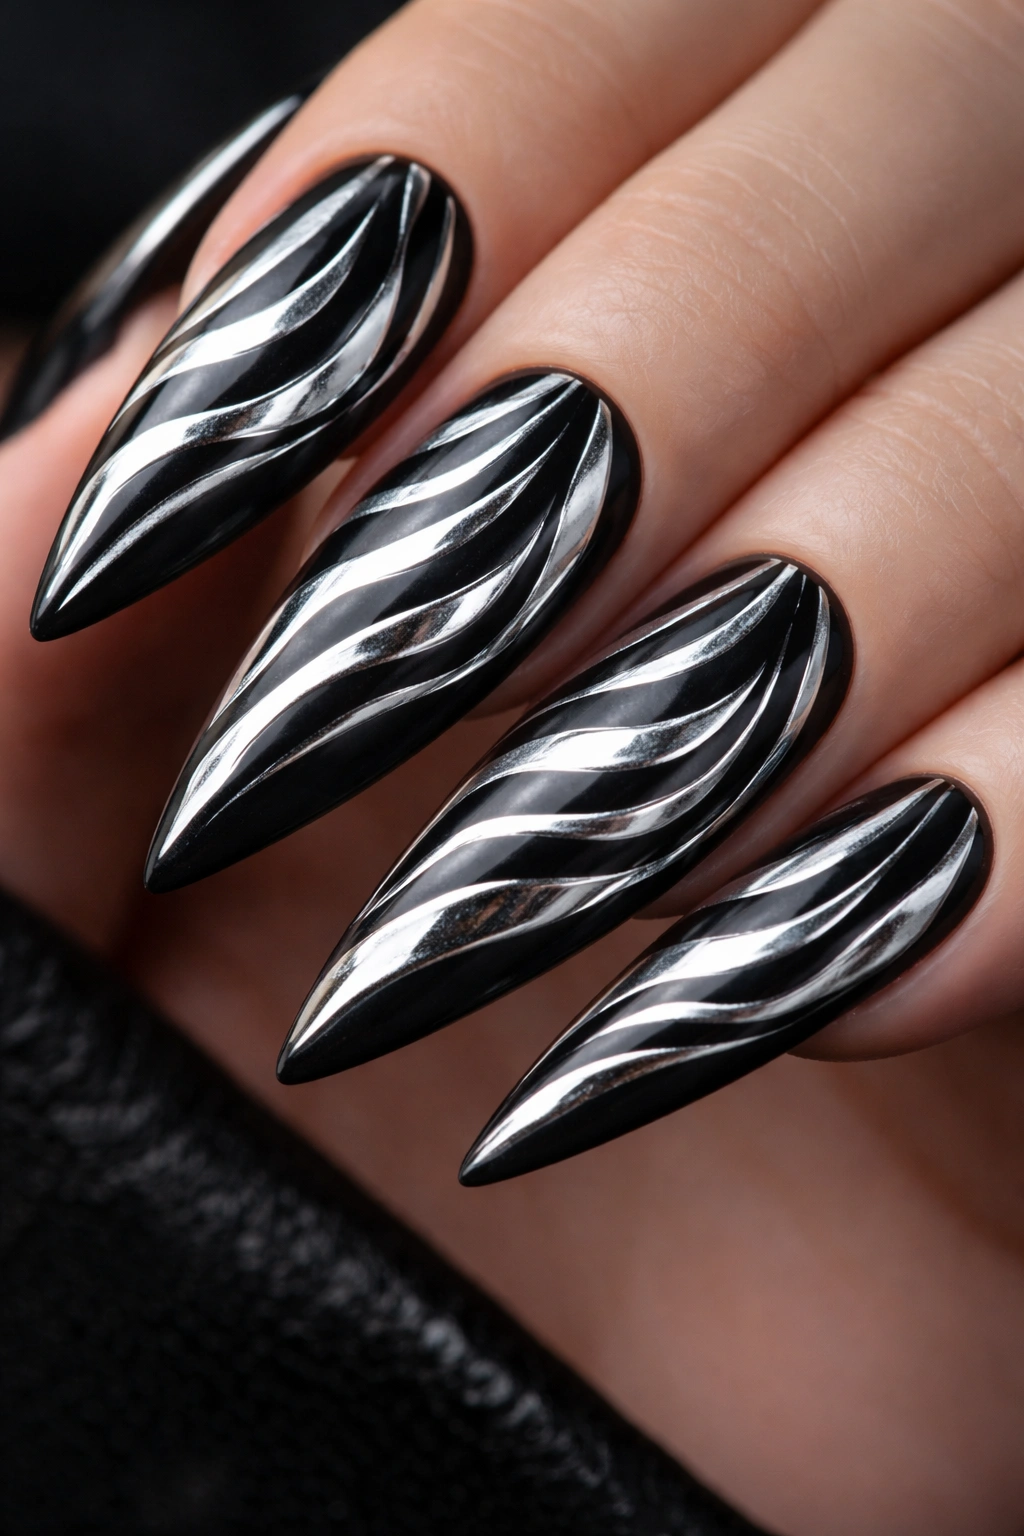
Use chrome or mirror powder to create the stripes instead of traditional polish or gel. Chrome stripes are reflective and create an ultra-metallic, almost liquid-looking effect. The chrome stripes can be applied over a matte black base for a dramatic contrast, or over a colored base like white, nude, or pink for something more subtle but still eye-catching.
Achieving Perfect Chrome Stripe Application
Chrome powder requires a specific technique: apply a sticky or semi-set gel layer to the nail, then apply the chrome powder by rubbing it on with a soft applicator or brush in the direction of the stripes. The powder will stick only to the tacky gel, so you have complete control over where the chrome goes. Seal it with a non-wipe top coat to lock it in place and prevent the powder from rubbing off.
Chrome Stripe Styling Ideas
- Black matte base with chrome mirror stripes for maximum contrast and shine
- Soft blush or nude base with rose gold chrome stripes for romantic elegance
- White base with holographic chrome stripes that shift colors in different light
- Combine chrome stripes with a matte or velvet base for textured contrast
- Use chrome just on the tips in a gradient effect while keeping the base traditional
Chrome has an ultra-modern, high-tech vibe — it’s the choice for anyone who wants nails that look futuristic and fashion-forward.
12. Reverse Negative Space: Solid Tips With Striped Base
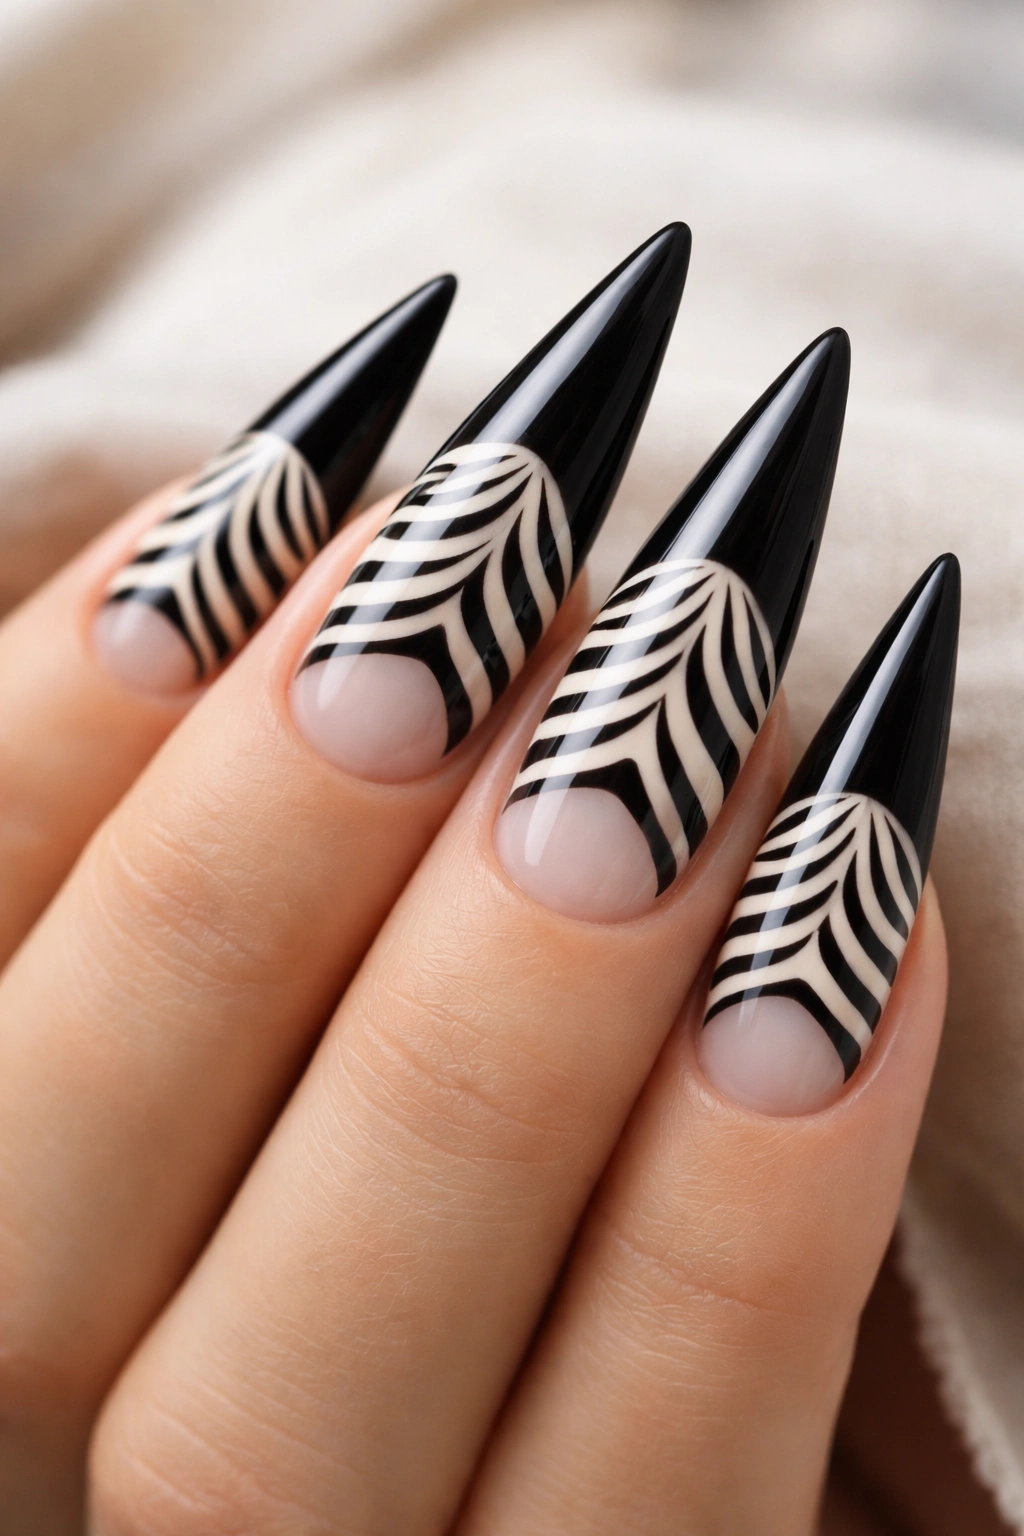
Rather than the typical approach of zebra covering the entire nail, reverse it by keeping the bottom and middle portions clear or lightly striped, then making the tip area a solid, bold color (black, chrome, or glitter). The striping happens on the translucent or sheer section, creating a peek-a-boo effect. This creates a more subtle, elegant interpretation of zebra print.
Balancing Pattern and Solid Areas
The trick is making the striped section feel intentional rather than like an accident. This works best when you create a clear visual transition — perhaps the stripes occupy the lower two-thirds of the nail, then fade to negative space, then the tip is a solid, opaque color. Or, do a full striped base up to about mid-nail, then transition to a solid color for the tip.
Execution Approaches
- Striped lower nail with a solid black or deep burgundy tip
- Zebra pattern fading into a glitter tip for a subtle glamour effect
- Transparent base with thin stripes, transitioning to a chrome or mirror-effect tip
- White and black zebra stripes on the base, transitioning to a nude or skin-tone tip
- Use ombré color in the solid tip area that echoes colors from the striped base
This approach is perfect if you want zebra print but prefer a more understated look — it’s sophisticated, editorial, and feels intentionally designed rather than just covered in pattern.
Final Thoughts
Zebra print stiletto nails are endlessly adaptable, which is exactly why they’ve stayed relevant across decades. Whether you’re drawn to the classic black-and-white version or want to play with metallics, neons, gradients, or glitter, the foundational pattern remains bold and striking. The length and sharpness of stilettos actually give you more room to be creative — you can experiment with stripe thickness, incorporate color gradients, mix in sparkle, or play with negative space in ways that would feel cluttered on shorter nails.
The best zebra print design is the one that matches your personal style and the context where you’ll be wearing your nails. If you’re still building confidence with nail art, start with the classic black-and-white version and master the stripe technique — once you nail that fundamental skill, all the variations become possible. If you’re already comfortable with freehand design, this is your playground to experiment with metallics, ombré effects, and unexpected color combinations.
Whatever version you choose, remember that the confidence you wear your nails with matters as much as the design itself. Zebra print is about making a bold, unapologetic statement, and that confidence is what truly makes these nails striking.
