

Curved stiletto nails are the ultimate statement nail shape — they’re sharp, elegant, and inherently dramatic, and the slight curve of the stiletto creates a flattering line that elongates your fingers while adding serious edge to any look. The beauty of this shape is that it’s forgiving in some ways and demanding in others; the curve helps distribute visual weight differently than traditional straight stilettos, and because of that geometry, certain designs and color combinations absolutely sing on curved stilettos in ways they might not on other nail shapes.
If you’ve ever looked at a nail design and thought “that would be perfect on a stiletto,” you’ve probably realized that not every design photographs the same way or photographs as beautifully on different shapes. Curved stilettos change the game. The arc creates negative space that can amplify certain visual effects — think metallic gradients that catch light differently as your nail curves, or nail art that uses the curve itself as part of the design composition rather than fighting against it.
Whether you’re prepping for an event, looking to refresh your regular manicure, or searching for the exact design idea that will finally justify booking that gel appointment, having a solid collection of curved stiletto inspiration is genuinely helpful. Not every design works on every hand or every lifestyle, but somewhere in this list should be something that makes you want to call your nail artist immediately.
Understanding Curved Stilettos vs. Traditional Stilettos
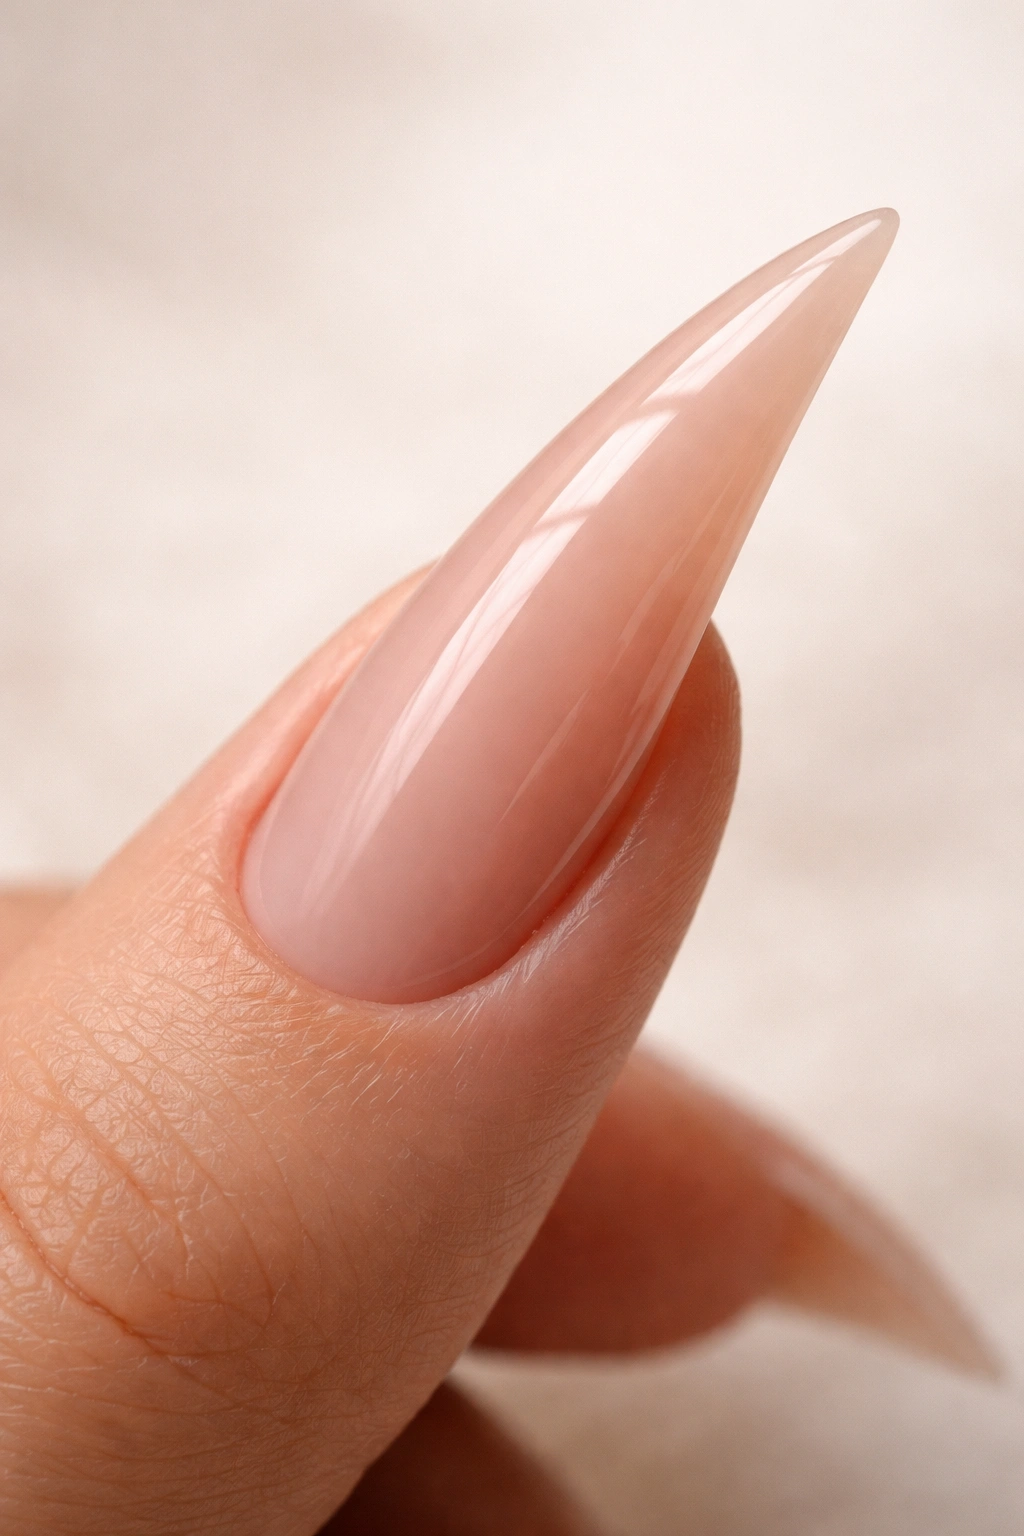
Before we dive into specific designs, it helps to understand what makes curved stilettos unique. A traditional straight stiletto has a clean, aggressive point with no curve to the sides — it’s all sharp lines and geometric precision. A curved stiletto, by contrast, has a subtle arc along the sides as it tapers to the point. This curve is usually most pronounced along the outer edge, creating a more fluid, almost blade-like appearance.
The curve isn’t just aesthetic — it actually changes how light hits your nail art and how proportions read on your finger. A design that looks too bold or harsh on a straight stiletto can feel balanced on a curved version because that gentle arc softens the overall sharpness. Conversely, delicate designs that might feel lost on a traditional stiletto have more room to breathe on a curved stiletto’s slightly wider surface area.
This shape works particularly well if you have longer fingers or if you prefer a slightly less aggressive aesthetic than a full straight stiletto delivers. Many nail artists say curved stilettos are easier to balance and slightly more comfortable to wear than straight stilettos because the curve distributes pressure more naturally across your nail bed.
Why Curved Stilettos Are Perfect for Creative Nail Art
The geometry of a curved stiletto actually makes certain design categories look significantly better than they would on other shapes. Ombré effects, gradients, and color transitions follow the curve naturally and create a flowing movement that straight stilettos can’t quite replicate. Line work — whether it’s minimalist accent lines, geometric patterns, or detailed hand-painted art — benefits from the curve because it gives the artist more surface area to work with while maintaining elegance.
Negative space designs (where you deliberately leave parts of the nail unpainted or natural) look particularly sophisticated on curved stilettos because the curve itself becomes part of the visual composition. Even simple designs like a single accent nail or a basic two-color combination can feel more refined when the shape is curved rather than straight.
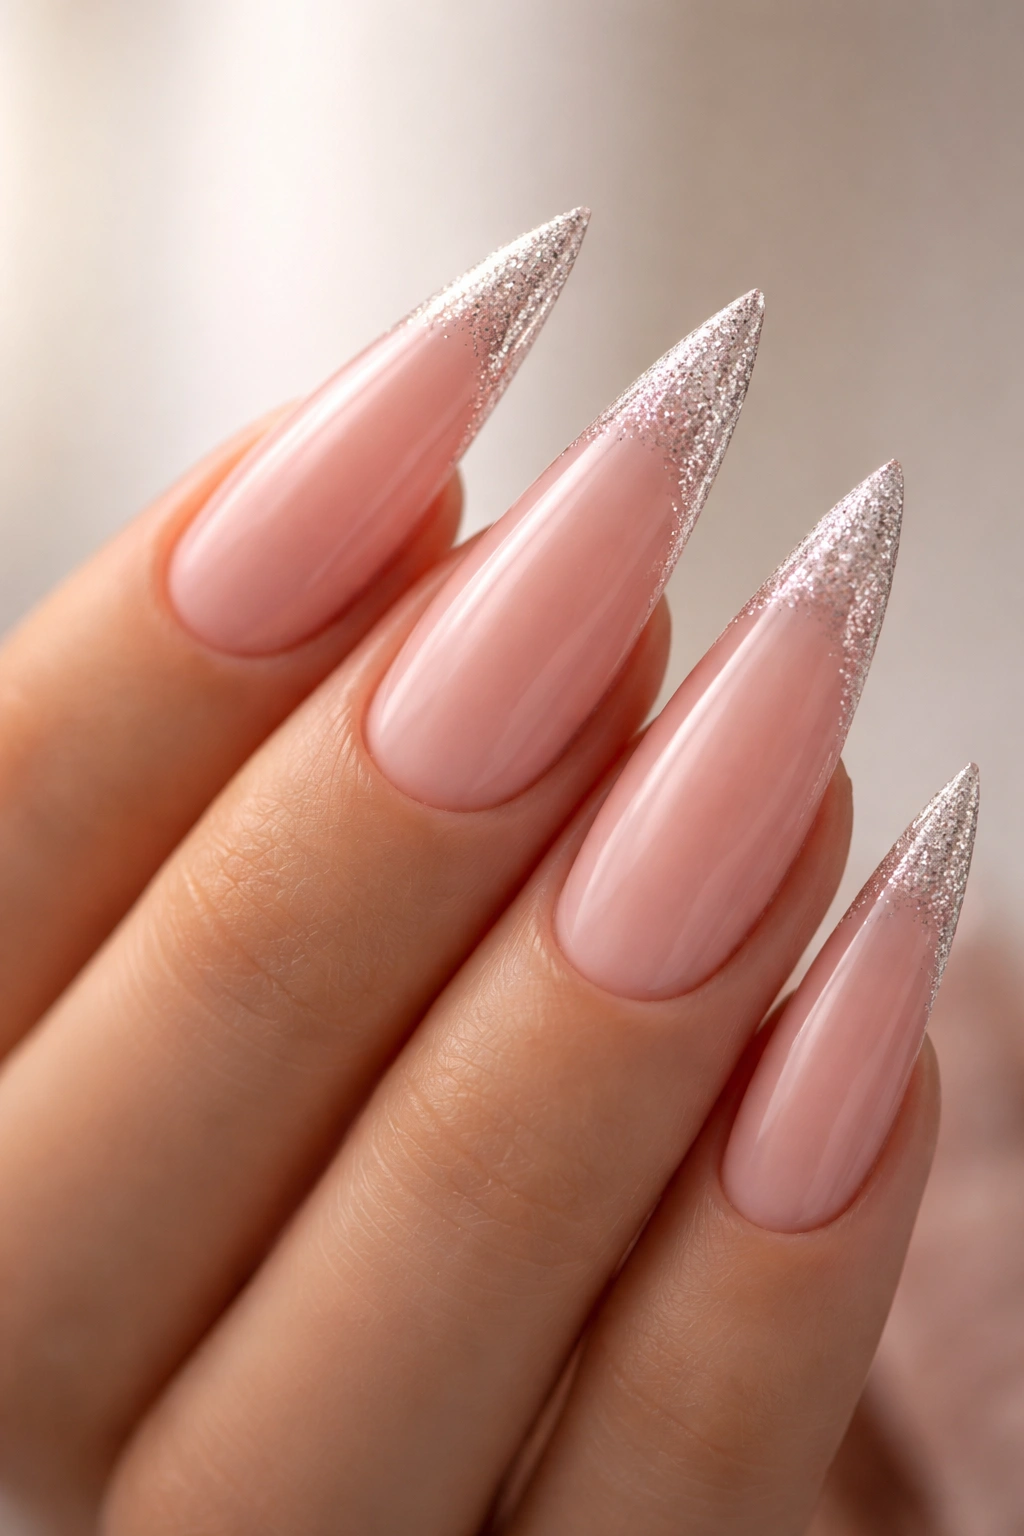
1. Nude Ombre With Sparkle Fade
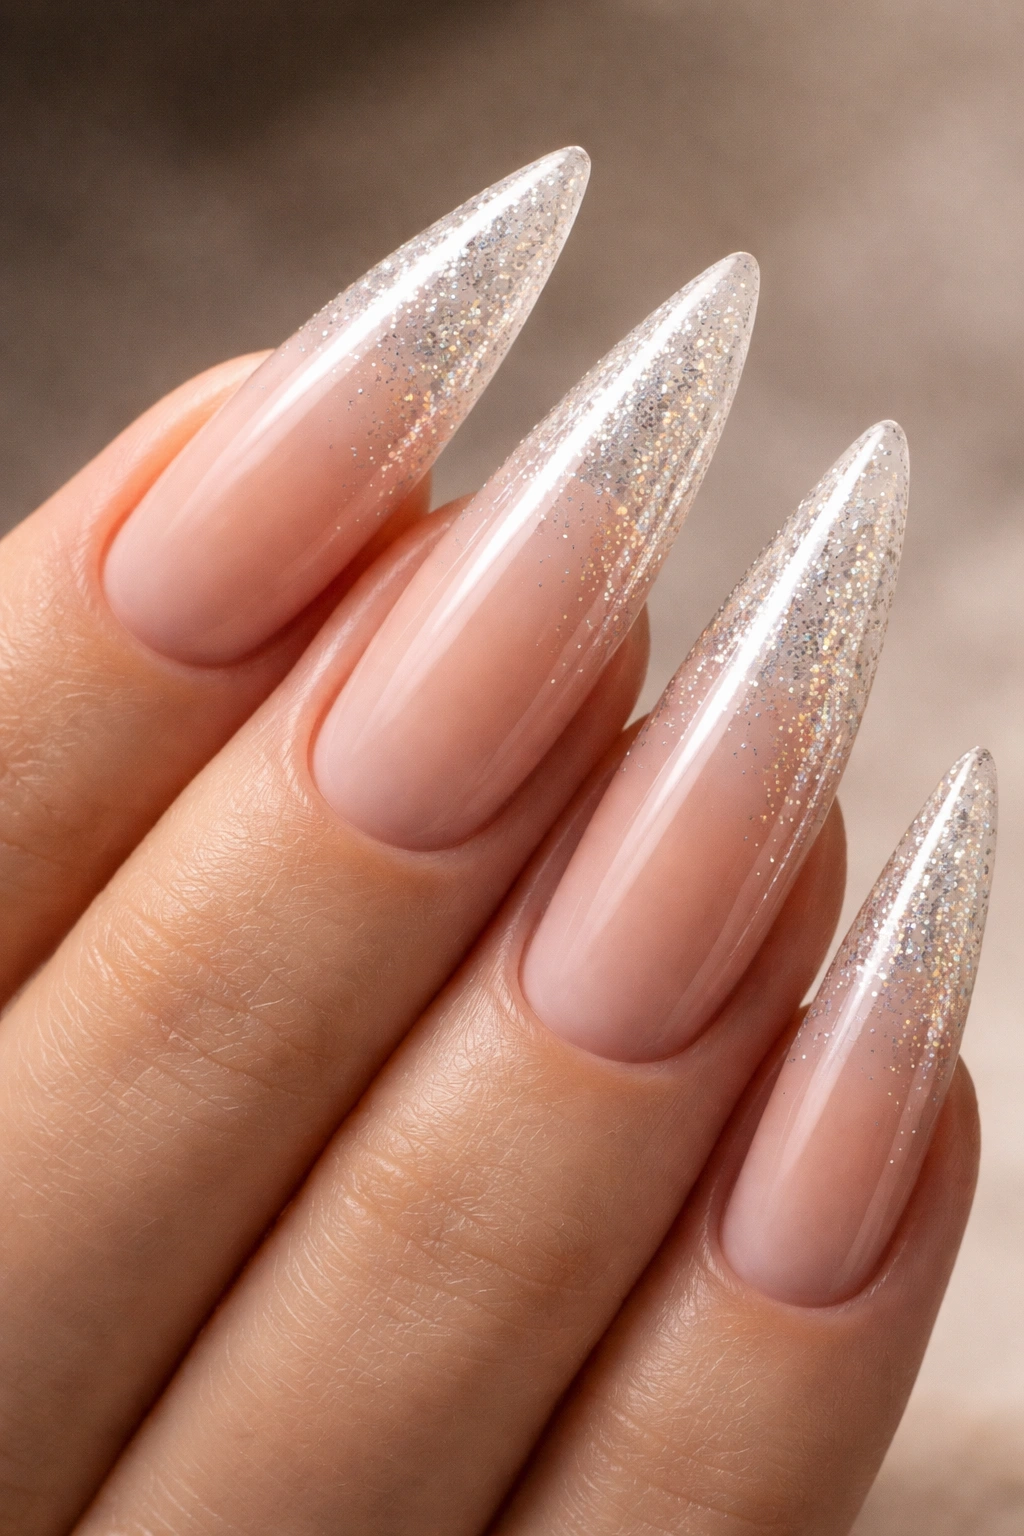
This is the gateway curved stiletto design — if you’ve never committed to this shape before, this is the one that will make you a believer. Start with a creamy nude base that matches your skin tone, then gradually layer translucent shimmers moving toward the tip, finishing with a concentrated sparkle effect right at the point. The curve of the stiletto makes that sparkle gradient feel like it’s melting down the nail naturally rather than sitting in harsh bands of color.
Why This Design Works on Curved Stilettos
The ombre effect on a curved stiletto creates movement that a straight version can’t quite achieve. The sparkle catches light as your nail curves, creating a multidimensional effect that makes your nails look more expensive and carefully considered than they actually are. This design works on every skin tone because nude is infinitely adjustable — warmer nudes for deeper skin, cooler nudes for fair skin, golden nudes for olive undertones.
How to Make It Your Own
- Use a nude that’s one shade lighter than your skin tone for maximum elongation effect
- Layer two different sparkle finishes if you want more depth — a finer shimmer first, then larger sparkle particles on top
- Extend the sparkle effect slightly onto the middle of the nail for a less dramatic transition
- Add a glossy topcoat for high shine or a matte topcoat for a more understated vibe
Pro tip: This design actually looks better if you don’t make the gradient too perfect or blended. A slightly visible transition between the nude and sparkle reads as more intentional and less like an accident.
2. Classic Red With Gold Foil Accent Line
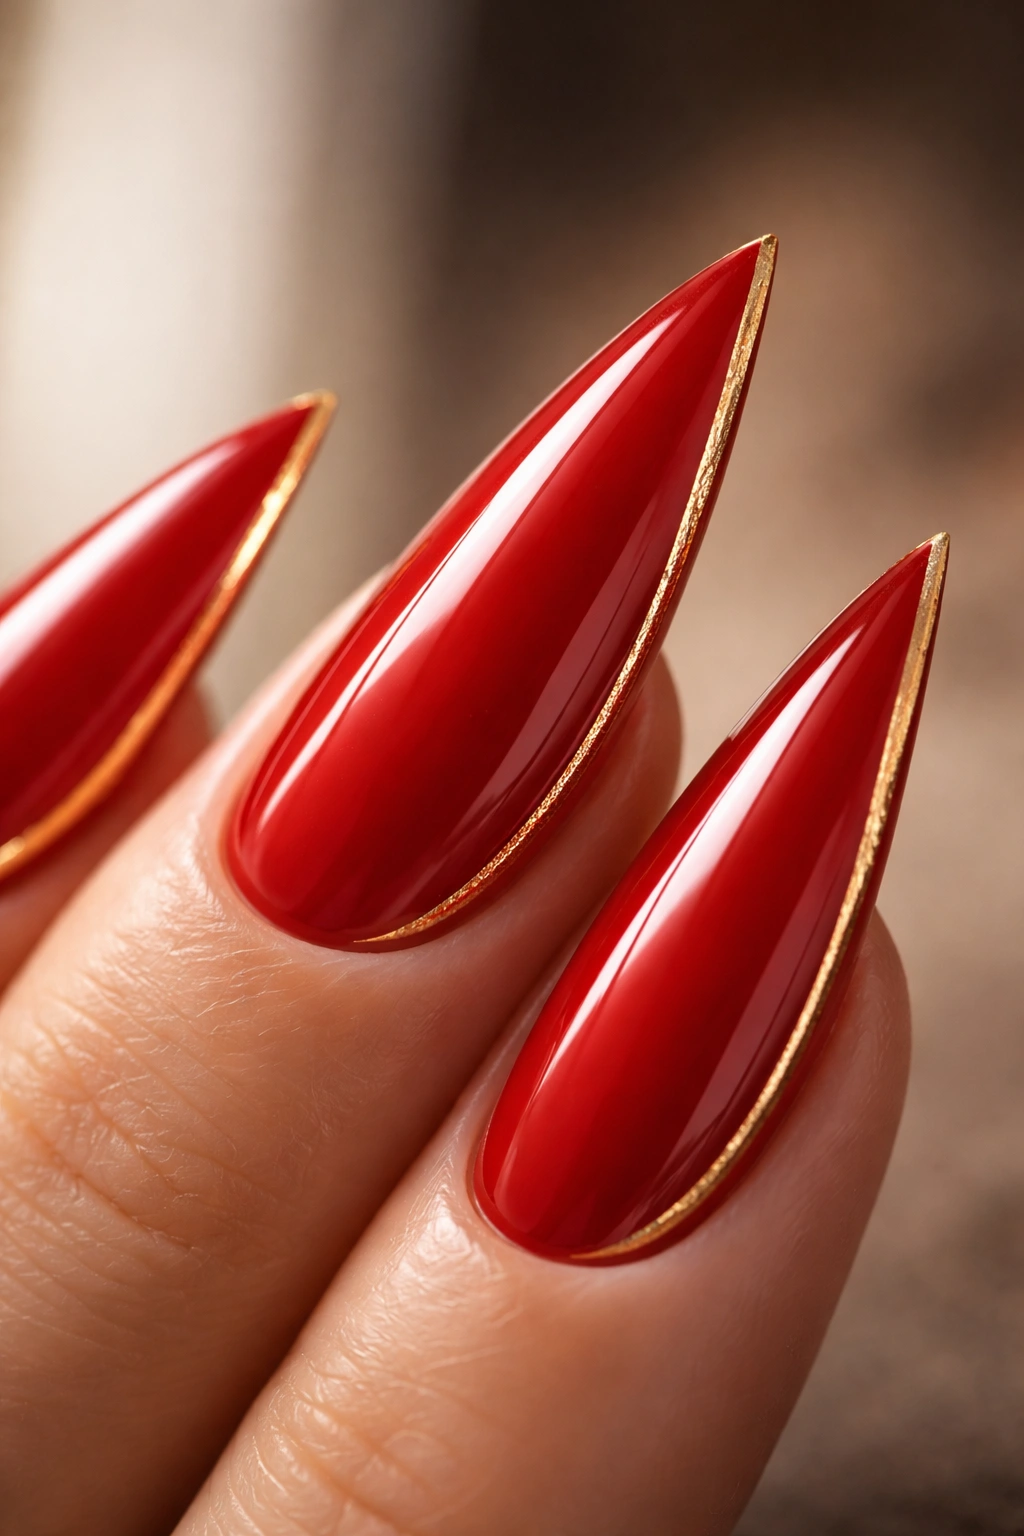
A red curved stiletto nail is an absolute power move, and adding a single precisely placed gold foil accent line along the outer edge elevates it from classic to editorial. The curve of the stiletto makes that accent line sit exactly where it’s meant to — following the natural arc and creating a frame within the frame. This design works equally well for everyday wear and for special occasions.
What Makes This Combination So Effective
Red on curved stilettos reads as more sophisticated than red on other shapes because the curve naturally draws the eye inward. The gold accent line doesn’t need to be wide or heavy — a whisper-thin line is actually more impactful than something bold. The metallic catches light as your hand moves, making the design feel dynamic even when you’re standing still.
Design Variations Worth Trying
- Double gold lines instead of a single accent — one along the outer edge and one down the center
- Switch the gold for a silver or copper foil for a different metal vibe
- Reverse it entirely with a gold base and red accent lines
- Add a small geometric shape at the tip (triangle, star, or simple stripe) in the metallic for extra personality
- Keep the red but swap the foil for a shimmery red glitter gradient instead
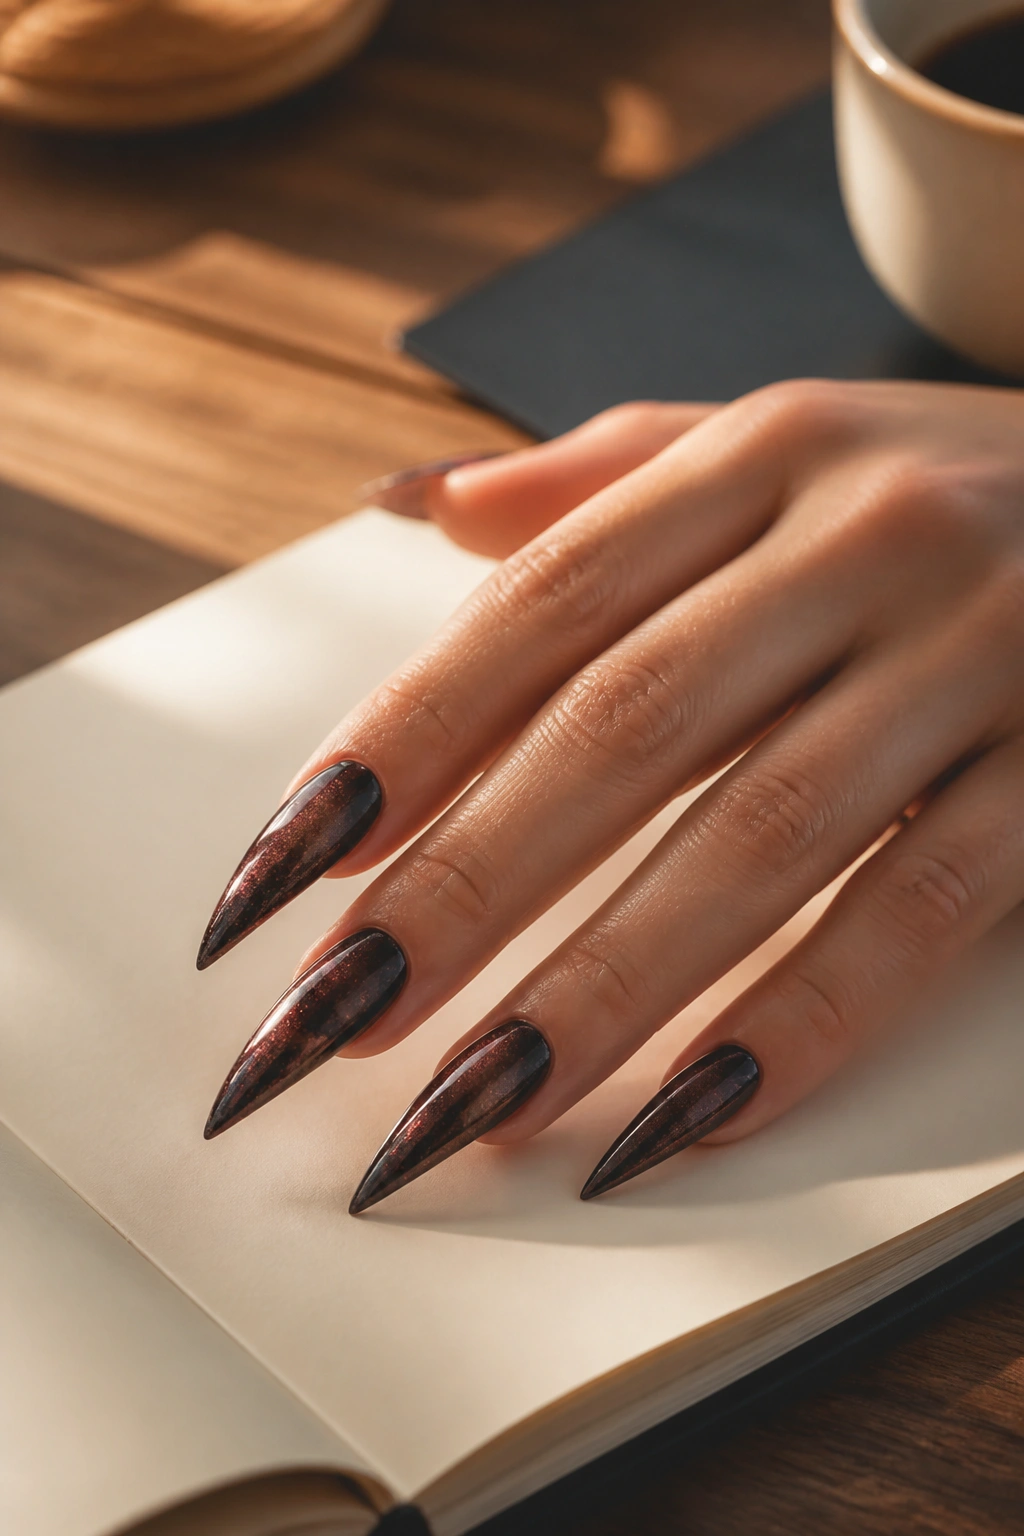
3. Deep Burgundy With Negative Space Half-Moon
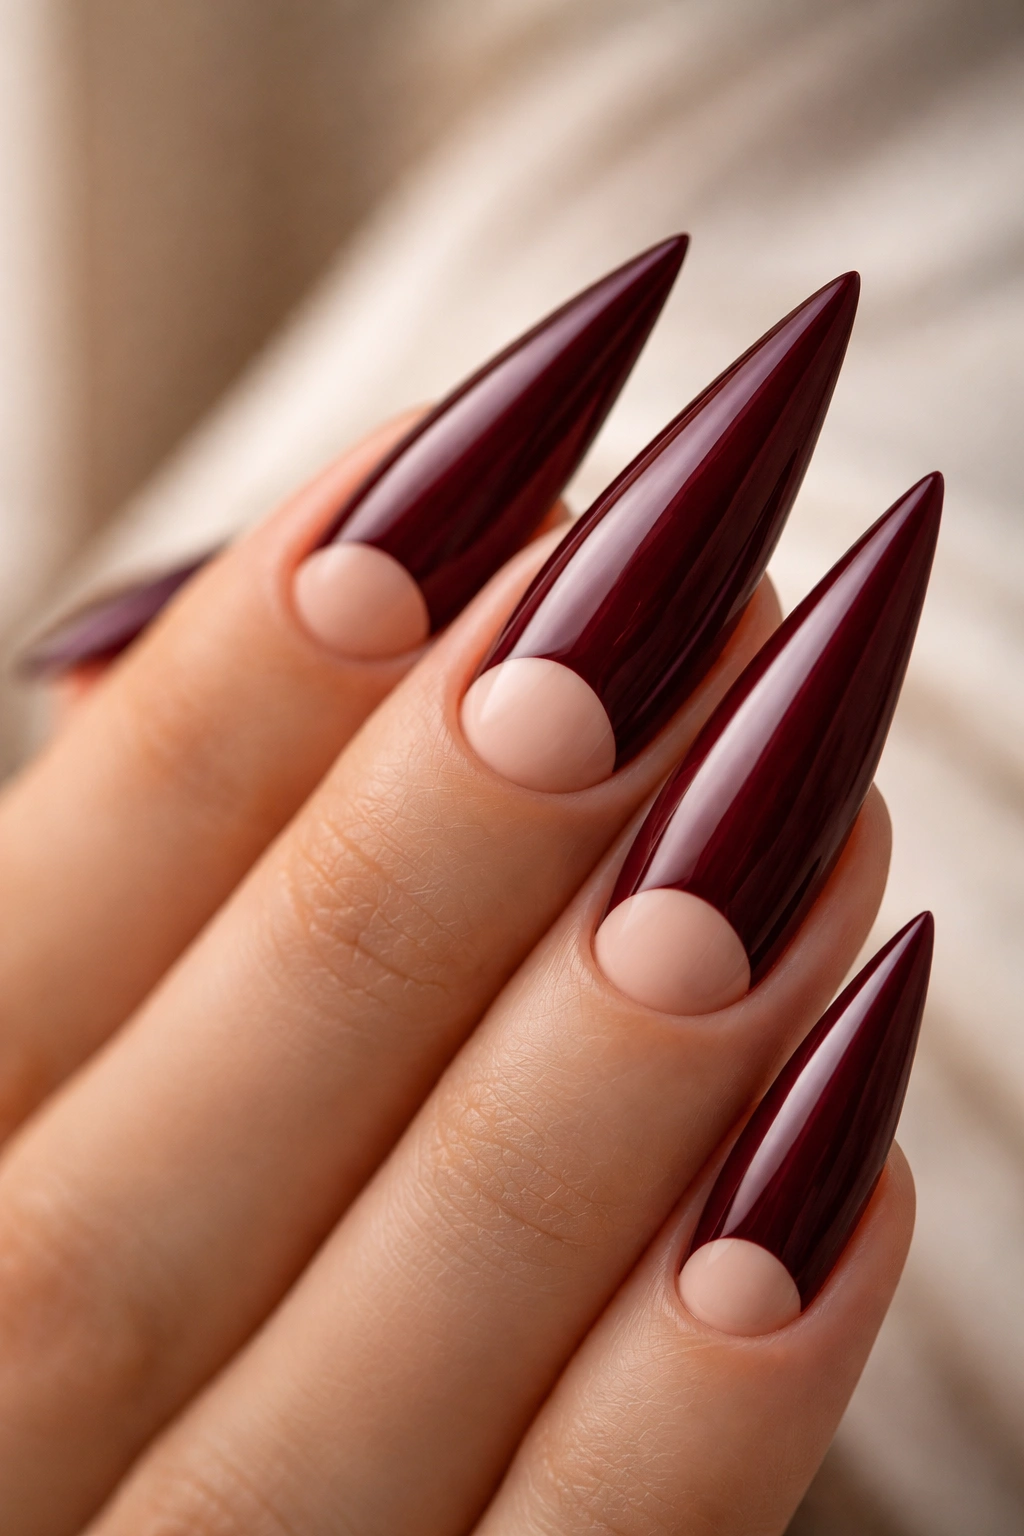
A deep burgundy curved stiletto with a negative space half-moon at the base creates a sophisticated, almost architectural look. The unpainted crescent of skin showing through that negative space emphasizes the curve of your nail and creates a visual break that keeps the design from feeling too heavy. This is the design you wear when you want to look intentional and cultured.
The Psychology Behind This Design
The half-moon design has been relevant for years because it’s inherently flattering — it visually shortens the nail slightly (which is helpful if you like the stiletto shape but find ultra-long nails impractical) while adding an intentional, designed quality. On a curved stiletto, the half-moon actually looks sharper and more defined than it would on a rounder or squarer shape because of the contrast between the curved nail and the perfect semicircle you’ve created.
Execution Tips for Crisp Results
- Use a striping brush or thin angled brush to create your half-moon edge — don’t use stencils, which can leave residue and won’t follow the curve perfectly
- Paint the half-moon freehand after the color has fully dried — trying to do it while the base is wet causes bleeding
- The half-moon should be about 2-3mm from the base of your nail; any closer to the cuticle and it looks unfinished, any further up and it reads as arbitrary
- Seal everything with a glossy topcoat to keep that negative space sharp-edged
Worth knowing: This design works on every curved stiletto length, but it’s particularly striking on medium-length curved stilettos (where the curve is most visible) rather than ultra-long ones.
4. Milky White With Delicate Gold Spider Web
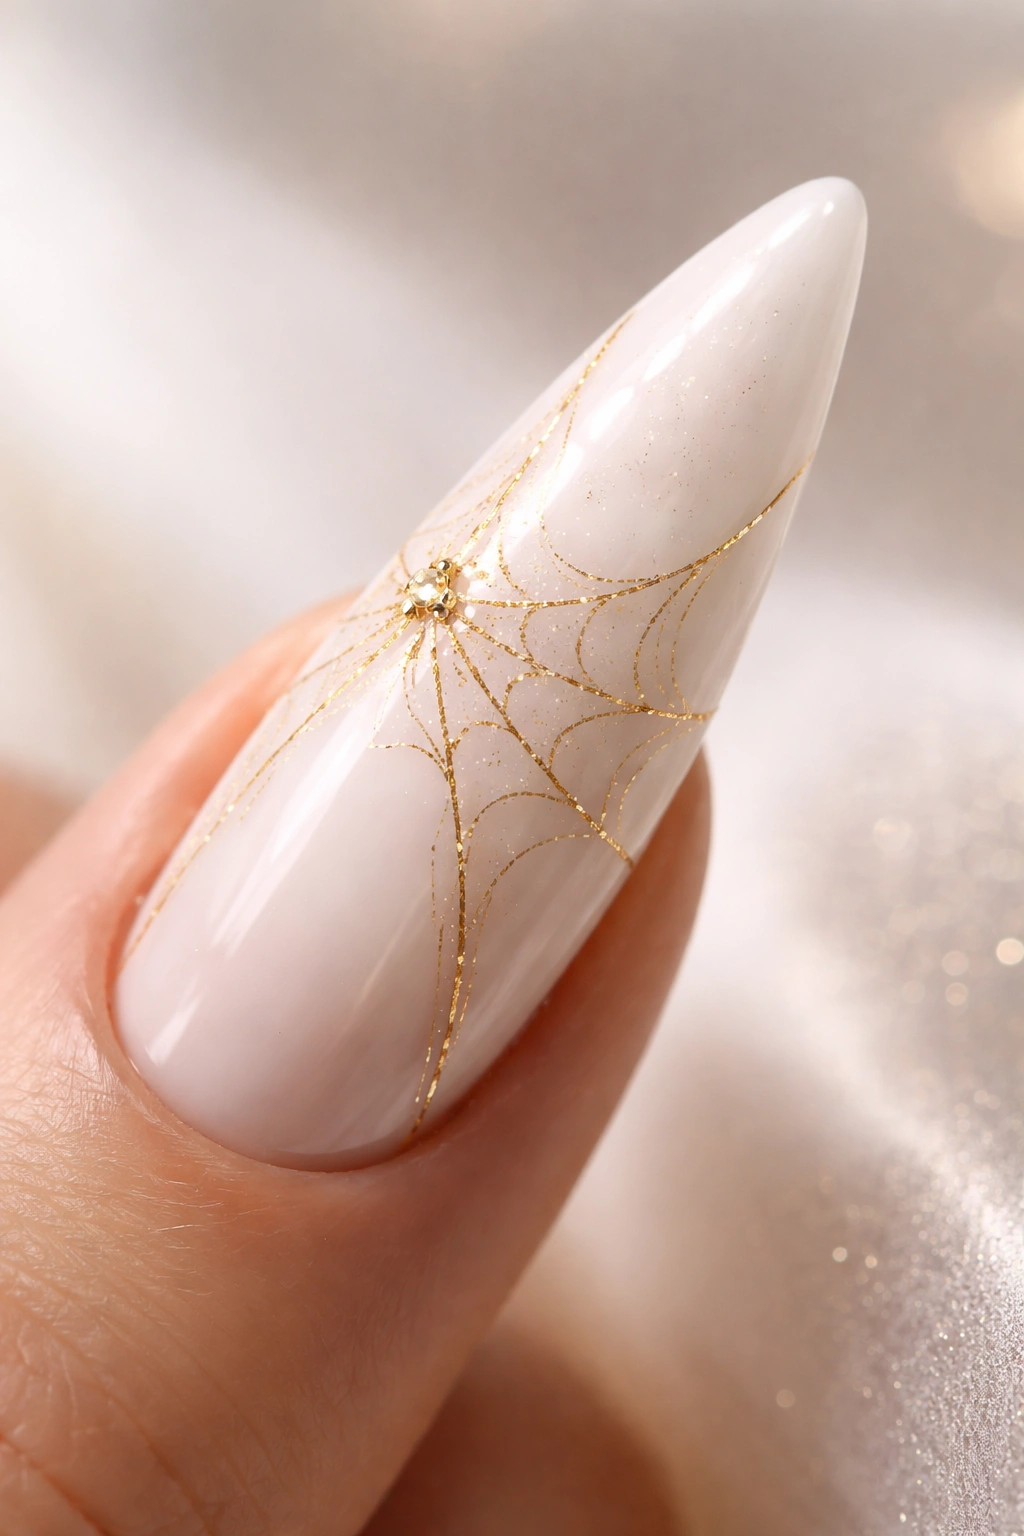
A milky white (not stark white, but soft and creamy) curved stiletto with a delicate gold spider web creates an ethereal, high-fashion aesthetic that’s somehow both edgy and elegant. The web works because it follows the curved lines naturally, creating a sense of intentional design rather than random decoration. This design is perfect for anyone who wants something eye-catching but still wearable for professional settings.
What Makes This Design Special
The spider web is traditionally seen as edgy or gothic, but on a milky white background it reads as artistic and contemporary instead of dark. The gold web on white creates enough contrast to be clearly visible without being loud or aggressive. The web pattern actually complements the curve of the stiletto — it’s organic, flowing, and doesn’t fight the shape.
How to Paint a Convincing Spider Web
- Use a very thin detail brush or a striping brush to draw the web lines freehand — straight lines that form a web pattern with irregular spacing (perfect grids look artificial)
- The web should cover roughly the middle and lower section of the nail, leaving the upper section and tip relatively clear
- Use a metallic gold that’s opaque enough to show up clearly but thin enough to not feel heavy
- Add 2-3 coats of gold paint to ensure full opacity and a professional finish
5. Soft Pink With 3D Rhinestone Crown Design
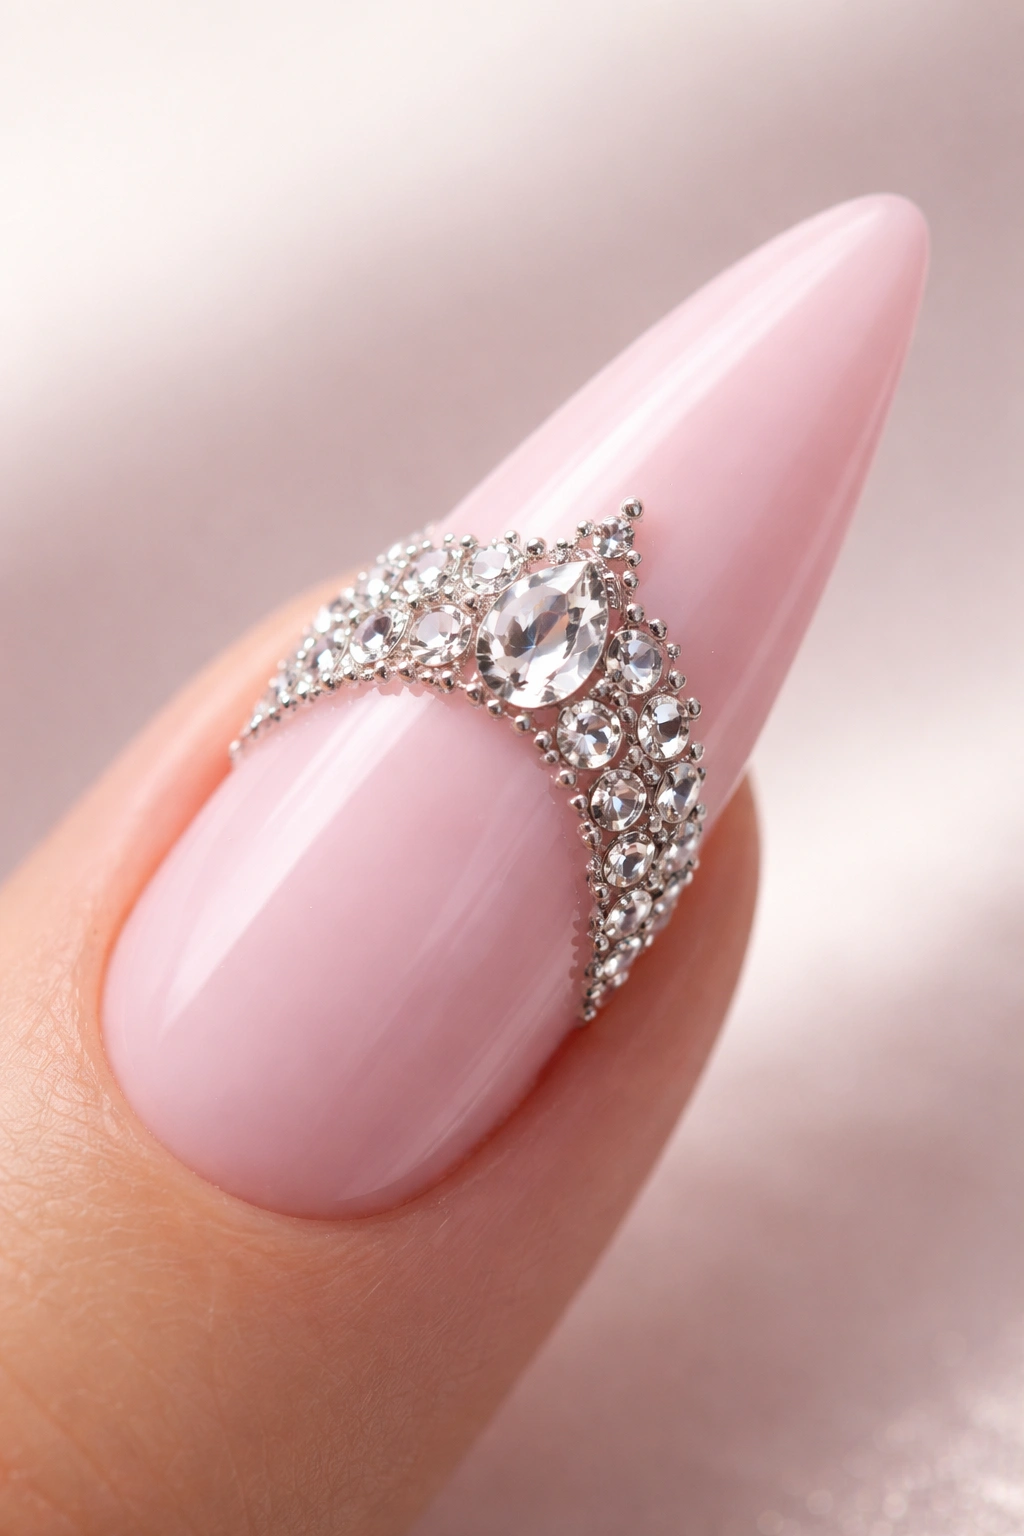
This is the design that makes a statement without needing words. A soft, almost baby pink base with a small crown accent made from individual rhinestones positioned around the middle of the nail reads as playful, feminine, and surprisingly luxe. The curve of the stiletto works perfectly with this design because the rhinestones sit in the center of the curved surface where they’re most visible and least likely to snag.
Why Rhinestones Actually Work Better on Curved Stilettos
The curve creates a natural center line where rhinestones sit perfectly stable and comfortable. On flatter nail shapes, rhinestones sometimes feel like they’re sitting on an uneven surface, but on a curved stiletto they nestle right into the peak of the curve. This means they’re less likely to catch on hair or fabric, and they catch light more consistently from multiple angles.
Assembly and Placement Guidelines
- Use a nail glue formulated specifically for rhinestones, not regular gel adhesive
- Place rhinestones in a loose crown or tiara pattern — aim for 5-7 stones arranged in a curve around the center or upper-middle of the nail
- Mix rhinestone sizes if you want more visual interest — a larger center stone with smaller stones flanking it creates a more dimensional look
- Let the glue dry completely (at least 2-3 minutes) before sealing with topcoat
- Use a thick, protective topcoat (at least 2 coats) to secure the rhinestones without shifting them
Insider note: Rhinestones last longer if you apply them after all your base color and design are completely cured and dry, rather than embedding them in wet polish.
6. Nude Base With Gradient Ombre to Black
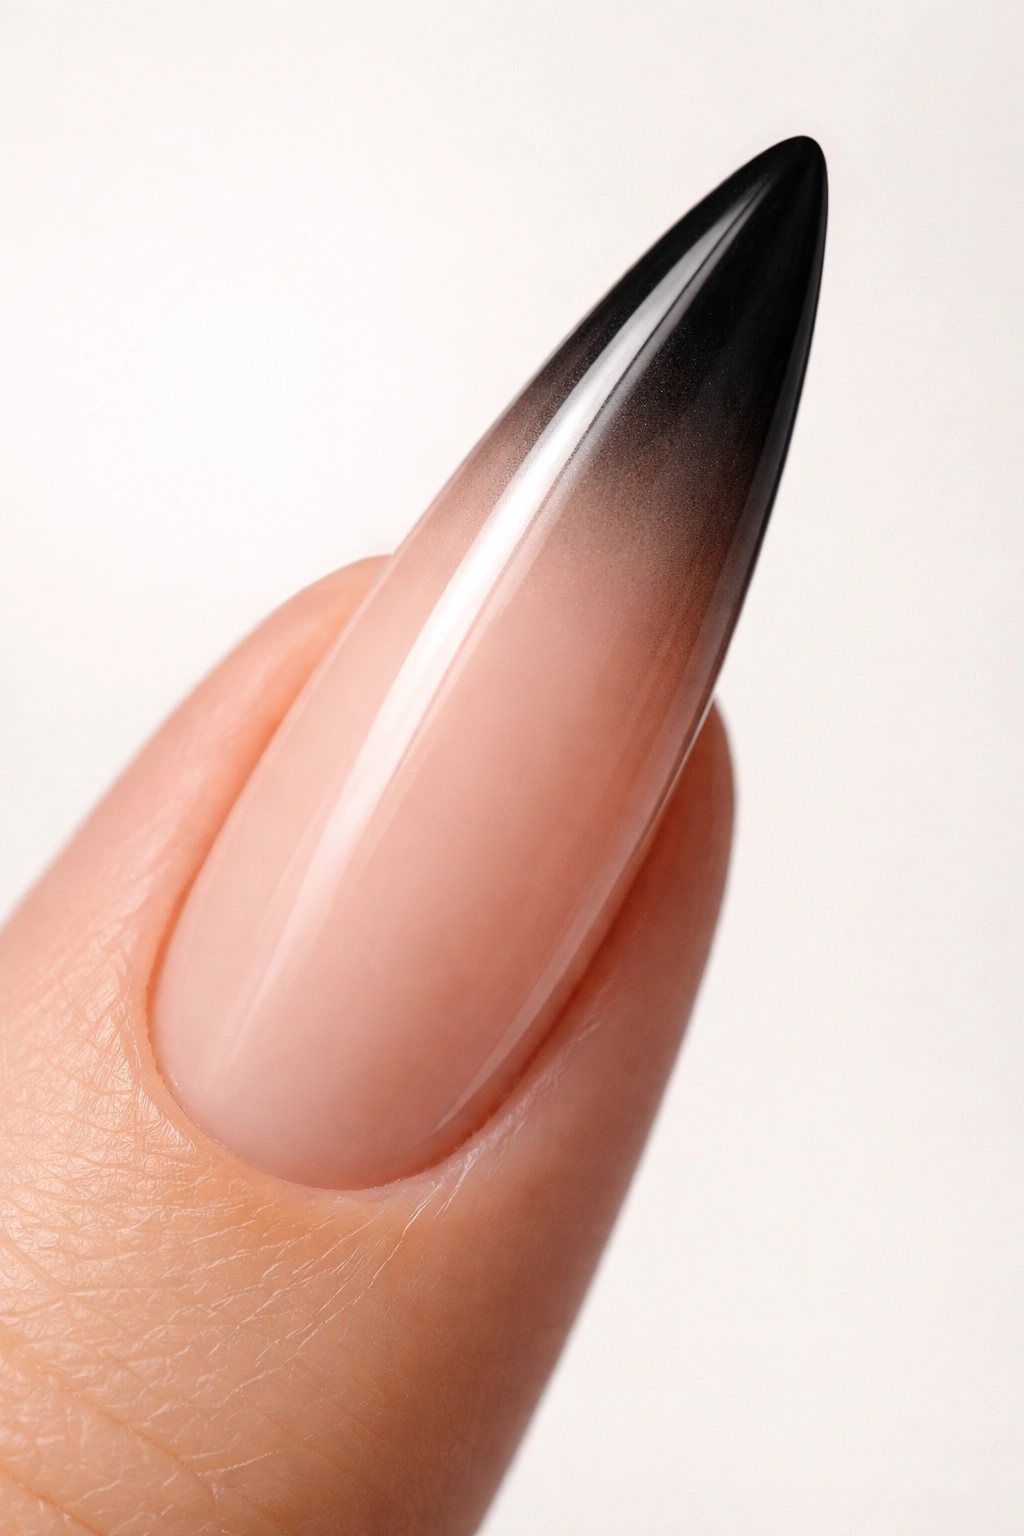
This is the design that started a thousand nail instagrams, and for good reason — it’s dramatic, it’s wearable, and it looks more complex than it actually is. A nude or beige base that gradually transitions to a dark charcoal or black at the tip creates an ombré that feels editorial and intentional. The curve of the stiletto makes this gradient feel organic and flowing rather than like a harsh color transition.
Why This Gradient Works on Curved Stilettos
The curve creates a natural flow for the gradient to follow — your eye naturally travels along that arc, which makes the transition feel seamless. On straighter shapes, gradients can sometimes feel like they’re sitting on top of the nail rather than integral to it. On curved stilettos, the gradient follows the shape, making it feel like a fundamental design element rather than something added on top.
Achieving a Flawless Gradient
- Use a makeup sponge to apply the gradient rather than a brush — dab the darker color onto the sponge first, then lightly dab the lighter color next to it, then blend by pressing the sponge onto your nail with a gentle bouncing motion
- Sponge the gradient over 2-3 coats to build it gradually and avoid harsh lines
- Place the darkest concentration of color right at the tip point of the stiletto — this emphasizes the shape and creates maximum visual impact
- Seal everything with a glossy topcoat to blend the colors further and create a seamless finish
7. Chrome Silver With Matte Finish
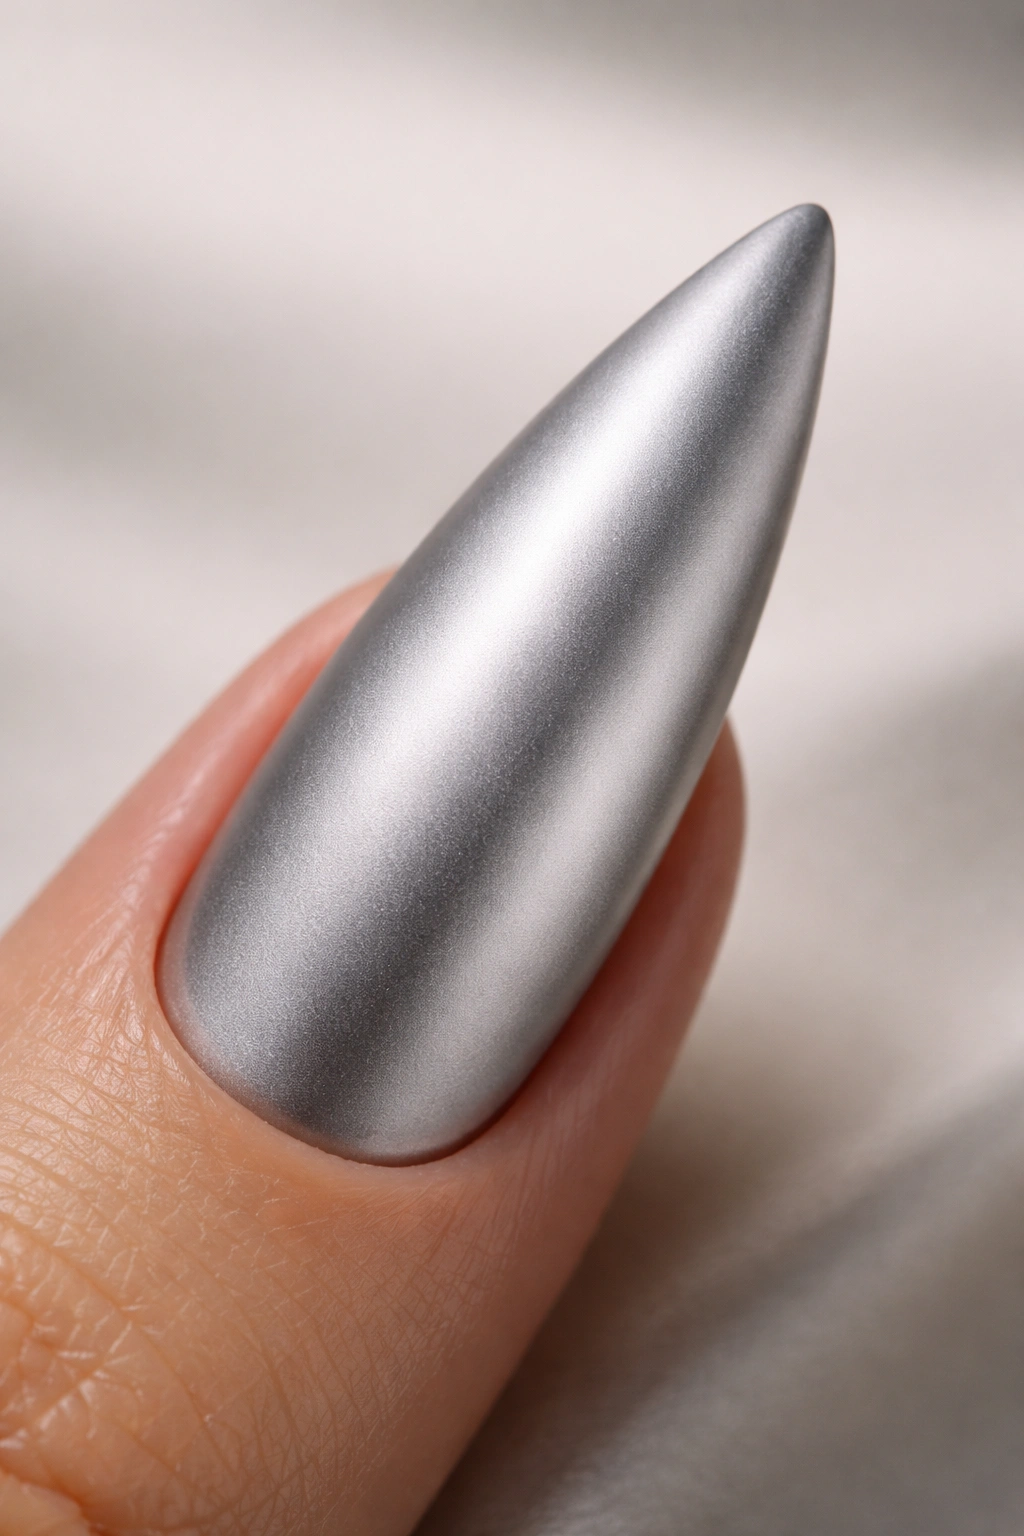
A chrome silver curved stiletto with a matte topcoat instead of a glossy one creates a modern, almost metallic-leather aesthetic that’s surprisingly wearable. Chrome is usually associated with super-shiny, almost liquid-looking polish, but a matte topcoat over chrome creates a soft, sophisticated metal look that’s more interesting than standard matte designs. This works particularly well on curved stilettos because the shape itself emphasizes the chrome’s light-catching properties.
The Science Behind Matte Chrome
Matte topcoats scatter light differently than glossy ones, which changes how metallic pigments read on the nail. Instead of creating a mirror-like reflection, matte chrome looks more like brushed metal or gunmetal. It’s still metallic and interesting, but in a more subtle, refined way. This design works for people who want something metallic and modern but not so shiny it draws attention every time your hand moves.
Achieving the Perfect Matte Chrome Effect
- Start with a true chrome polish (not just a shimmer) — brands known for chrome (like ILNP or Cirque) have pigments specifically designed for this effect
- Apply 2 coats of the chrome polish for full opacity and that classic chrome shine
- Apply a quality matte topcoat (avoid cheap ones that leave texture or look streaky) — one thick coat is usually enough
- The matte finish will slightly dull the chrome, so resist the urge to add extra coats — you want that soft metallic look, not an opaque matte
Pro tip: This design photographs beautifully but the effect is hard to see in indoor artificial light. It’s best appreciated in natural daylight.
8. Blush Pink With Micro Glitter Tips
A soft blush pink curved stiletto with just the tips dusted in micro glitter creates an ethereal, romantic design that’s not as over-the-top as full glitter nails but still has plenty of sparkle. The glitter concentration stays right at the pointed tip, which is exactly where you want the visual weight — it emphasizes the stiletto shape and makes the point feel even sharper. This design is perfect for anyone who wants sparkle without commitment.
Why Micro Glitter Works on Curved Stilettos
The curve means the tip naturally catches more light, so even a light coating of micro glitter reads as sparkly and dimensional. On flatter nails, glitter sometimes looks pasted on; on curved stilettos, it sits in the natural highlight zone of the nail. This positioning makes the glitter feel intentional and part of the overall design rather than an afterthought.
Application Technique for Even Glitter Distribution
- Apply the blush pink base with 2 coats and let it cure completely
- Mix a small amount of micro glitter into clear topcoat rather than trying to apply loose glitter (this is easier and lasts longer)
- Apply the glitter-infused topcoat only to the tip section of the nail, starting about 1/3 of the way down the nail and concentrating the glitter as you move toward the tip
- Seal with a regular clear topcoat to secure all the glitter particles
9. Black Base With Negative Space Triangle Design
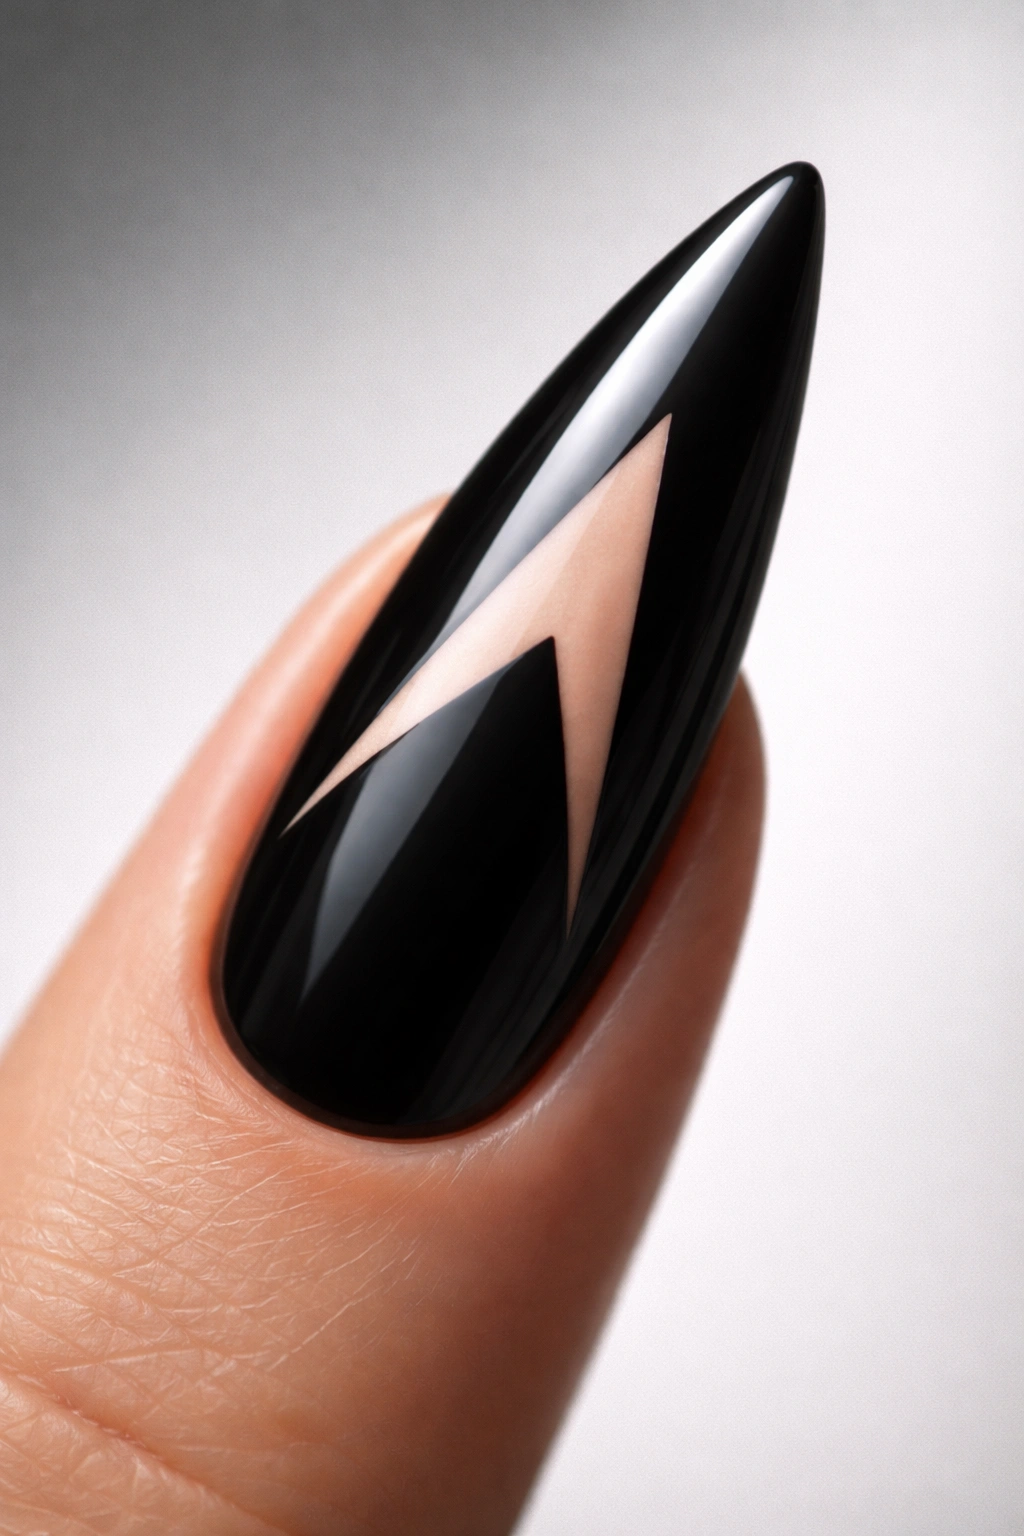
A black curved stiletto with a clean negative space triangle cut out from the tip creates a bold, geometric look that’s architectural and modern. The triangle emphasizes the pointed tip of the stiletto while creating a visual break that prevents the design from feeling solid or heavy. This design works beautifully on curved stilettos because the shape of the stiletto itself creates natural geometric possibilities.
Why Geometric Negative Space Feels Fresh
Negative space designs automatically feel more intentional and designed than solid colors, and geometric shapes add an extra layer of sophistication. A triangle on a curved stiletto actually emphasizes the curve by contrast — the straight lines of the triangle make the curve of the nail even more noticeable. This design works on any skin tone and looks equally good for casual wear or professional settings.
Creating Sharp Negative Space Lines
- After your black base is completely cured, use a striping brush or angled brush to outline the triangle freehand
- The triangle should point toward the tip of the nail, with the base of the triangle roughly 2-3mm from the actual tip
- Leave the triangle completely unpainted to show your natural nail (this is what creates the negative space effect)
- Seal everything with topcoat, being careful not to drag product into the negative space area — you want the natural nail to remain clearly visible
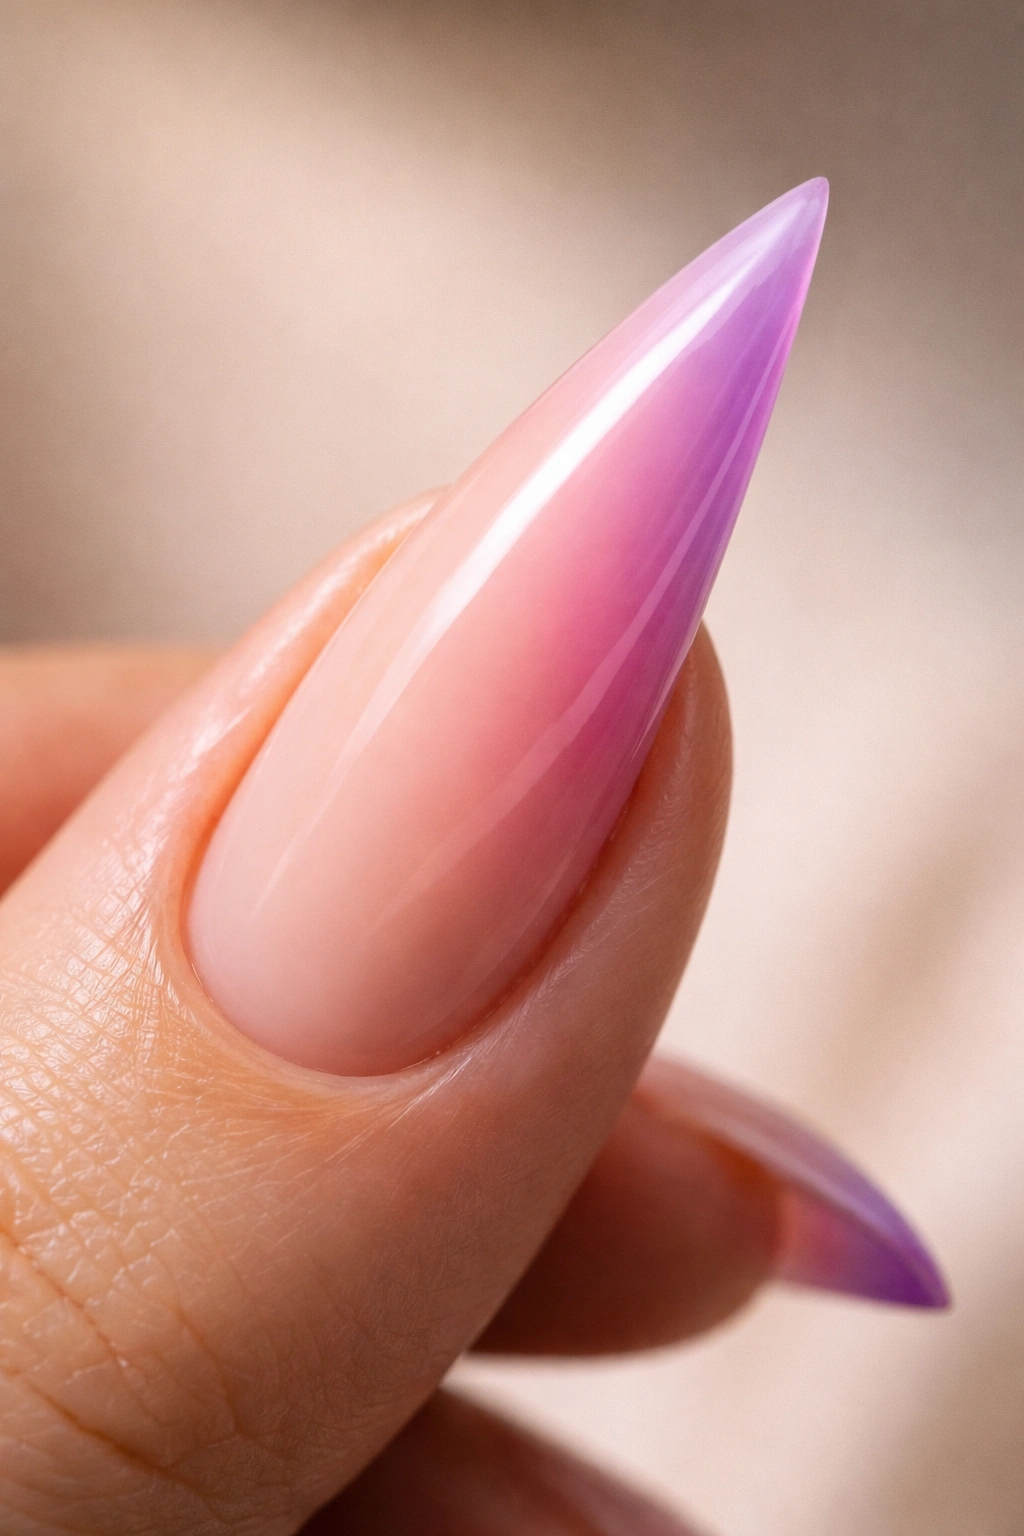
10. Soft Lavender With Holographic Shimmer
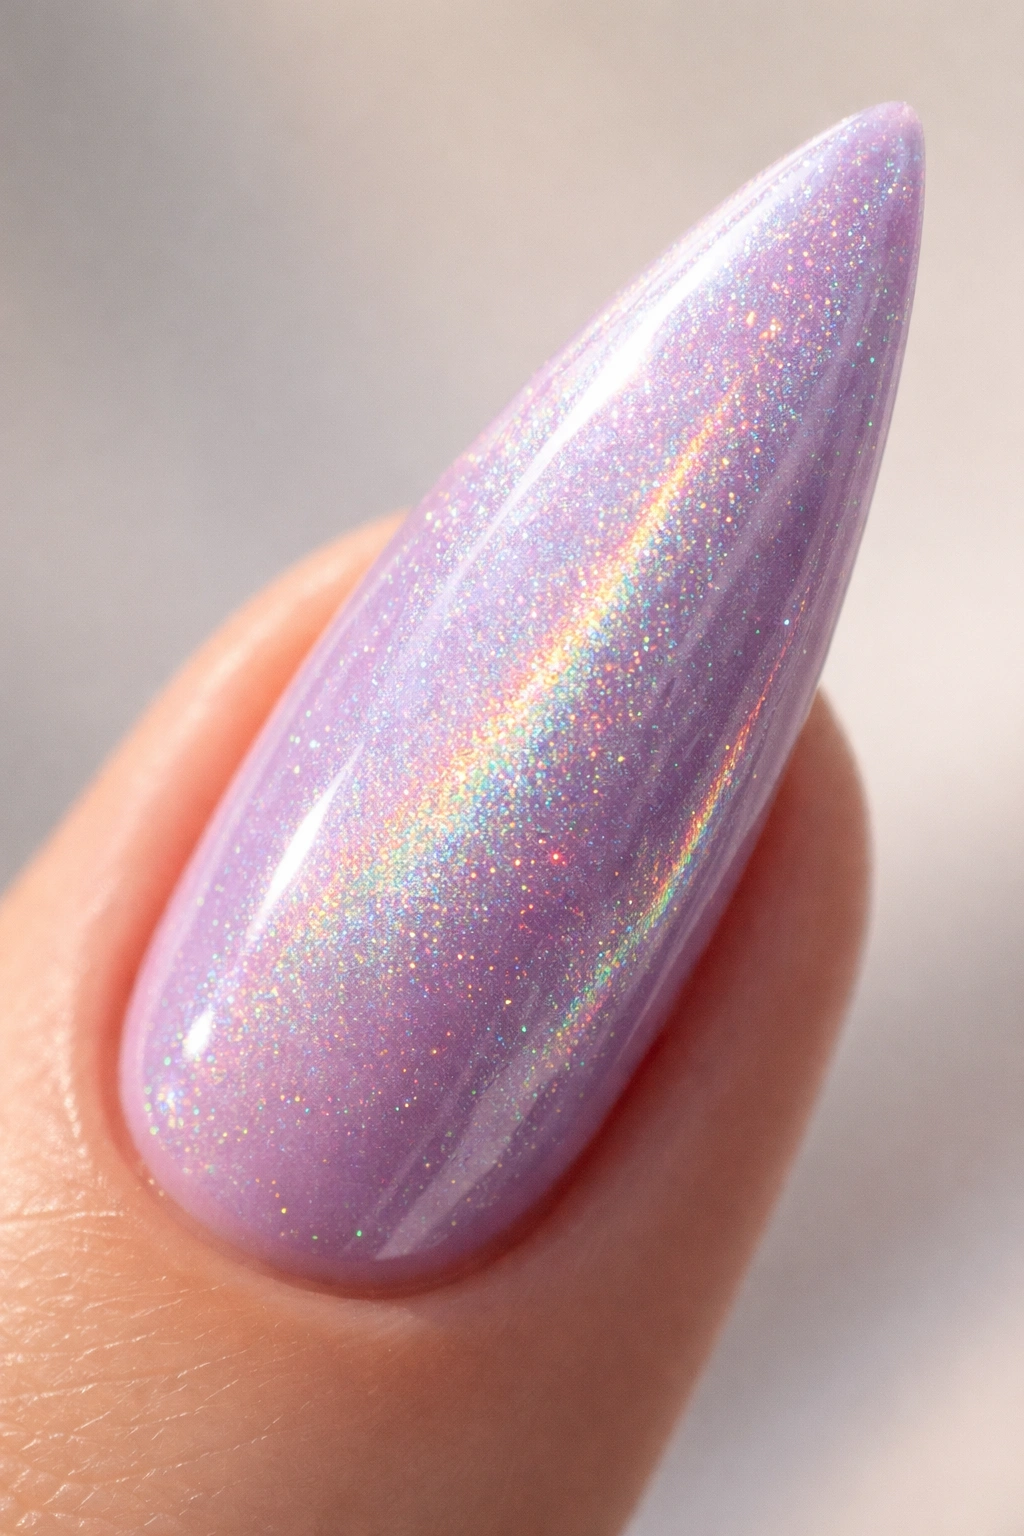
A soft lavender curved stiletto with holographic shimmer creates a dreamy, ethereal aesthetic that’s perfect for anyone who loves subtle color but wants serious dimension. Holographic shimmer catches light and creates rainbow effects as your hands move, making even a simple color design feel complex and interesting. On curved stilettos, holographic shimmer looks even more dynamic because the curve creates different angles for light to refract from.
The Magic of Holographic Pigments
Holographic pigments contain specialized particles that bend light in multiple directions, creating rainbow effects. Unlike regular shimmer (which looks the same from every angle), holographic shimmers change color depending on the angle and light source. On curved stilettos, this means the shimmer is never static — it’s constantly revealing different colors and reflections as your hand moves.
Maximizing the Holographic Effect
- Use a true holographic polish (not just a iridescent shimmer) — the effect is worth seeking out
- Apply 2 coats for full coverage and maximum color intensity
- The holographic effect is most visible in natural daylight, so this design is best suited for daytime wear or outdoor events
- Skip the topcoat or use a matte topcoat to prevent the holographic effect from being dulled by glossy shine
11. Deep Emerald With Gold Geometric Accent
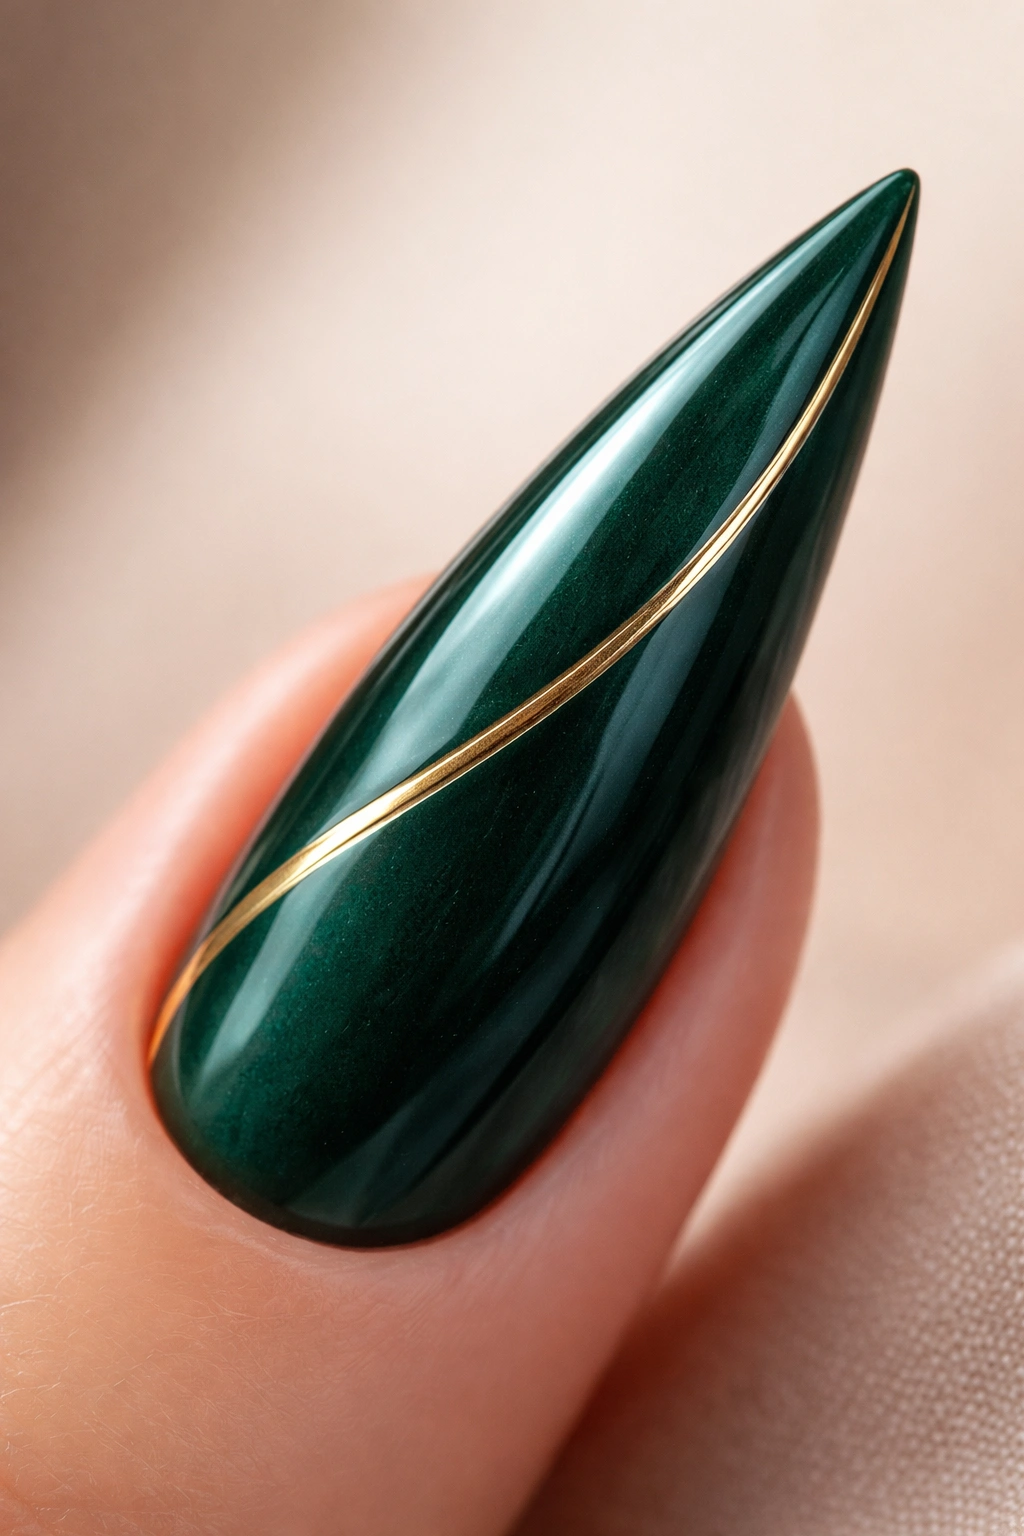
A deep, jewel-toned emerald curved stiletto with a gold geometric accent creates a rich, luxurious aesthetic that feels expensive and intentional. The emerald provides the color drama while the gold geometric accent (a simple stripe, triangle, or hexagon) adds visual interest without overwhelming the design. This combination works on curved stilettos because the emerald shows off the curve’s shape beautifully, and the gold accent can follow the nail’s natural lines.
Why Jewel Tones Excel on Curved Stilettos
Deep, saturated colors like emerald create automatic luxury and sophistication, and the curved shape adds an elegant arc that complements the richness of the color. The curve makes jewel-toned colors look even more jewel-like — they catch light and create depth that flat colors sometimes can’t achieve. This design reads as intentional and high-end, making it perfect for events or anyone who wants their nails to feel like a luxury accessory.
Creating Precise Gold Accent Designs
- After the emerald base is completely cured, use a thin striping brush or detail brush to paint your geometric accent in gold
- Gold over deep emerald has excellent contrast, so even a thin line reads clearly and precisely
- Simple designs (a single vertical stripe, a small triangle at the tip, a thin horizontal line) look more sophisticated than overly complex patterns
- Apply 2-3 coats of gold for full opacity and rich color
Worth knowing: This combination works equally well as a full-color design or with the emerald as the accent and gold as the base — reverse it depending on whether you want the emerald or gold to dominate.
12. Nude With Scattered Wildflower Design
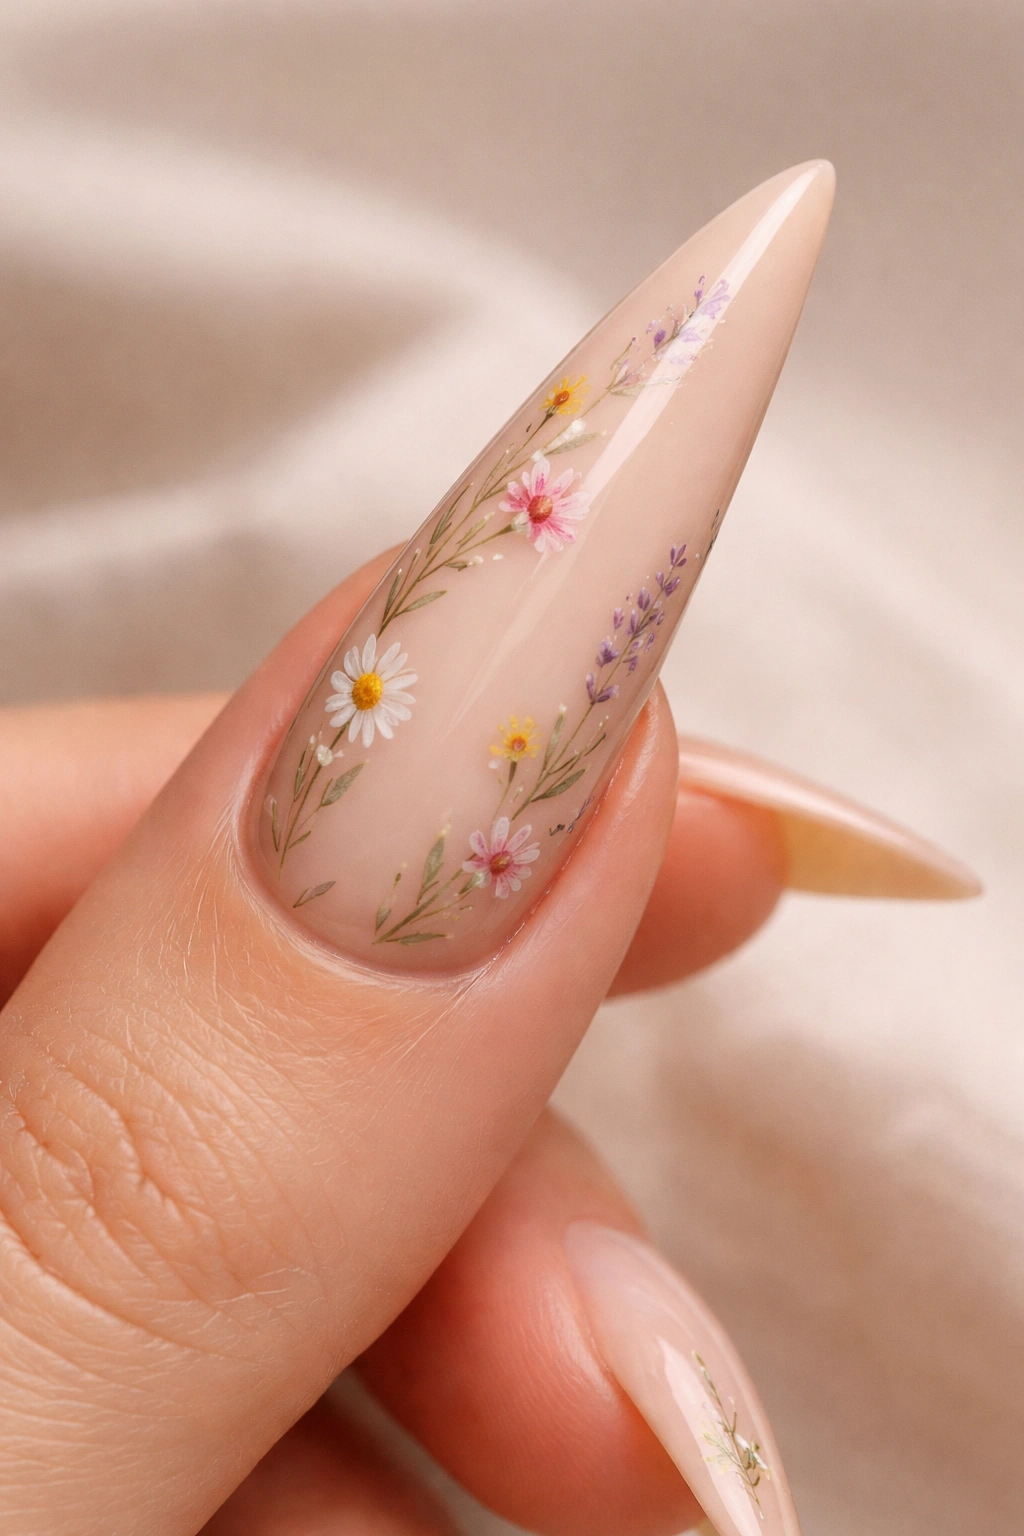
A creamy nude curved stiletto with hand-painted wildflowers scattered across the nail surface creates a natural, artistic aesthetic that feels personal and intentional. Wildflower designs are less structured than geometric patterns, which makes them more forgiving to paint and feel more organic. On curved stilettos, scattered wildflowers follow the natural contours of the nail, creating a composition that feels balanced and carefully considered.
Why Floral Designs Work on Curved Stilettos
Flowers are inherently curved and organic shapes, so they sit naturally on curved stilettos rather than fighting the shape. The curve of the nail becomes part of the composition — flowers can be positioned to follow the arc, creating movement and flow. A scattered floral design on a curved stiletto reads as more artistic and personal than the same design on a straighter shape.
Hand-Painting Wildflowers Without Advanced Skills
- You don’t need perfect painting skills for wildflowers to look good — they’re intentionally loose and informal
- Use a detail brush or thin liner brush to paint simple flower shapes: five dots arranged in a circle for petals, a center dot for the flower’s center
- Add simple curved lines for stems connecting the flowers
- Vary the flower sizes and spacing so the design feels natural rather than structured
- Use colors that complement your base — pale pinks, lavenders, and soft yellows work beautifully on nude
13. Glossy Black With White Negative Space French Tip
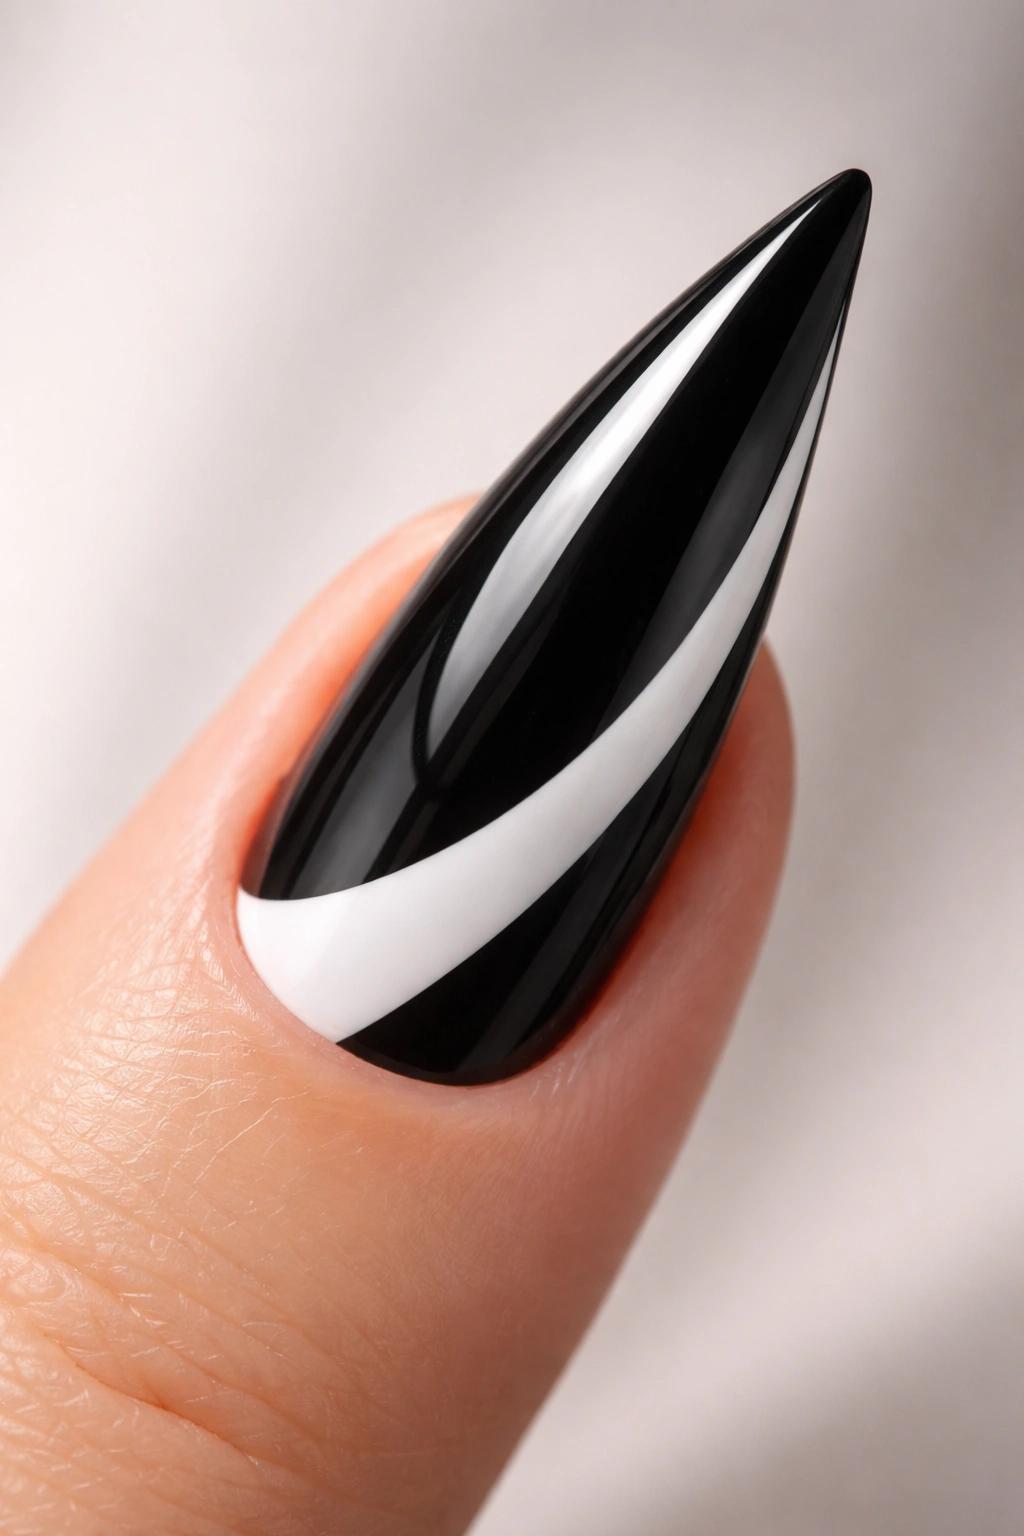
A classic glossy black curved stiletto with a white negative space French tip (where the tip is left unpainted to show your natural nail, creating a white line against the black) creates an understated, sophisticated design that’s somehow both bold and minimal. The contrast between the black and white is sharp enough to read as intentional while the negative space keeps it from feeling heavy. This design works particularly well on curved stilettos because the French tip naturally emphasizes the curve and the pointed shape.
Why This Twist on the Classic French Manicure Works
Traditional French manicures use a light base with white tips. Reversing it (dark base with white negative space tip) feels modern and intentional while maintaining the sophistication of the original concept. On curved stilettos, this design creates maximum visual impact because the white tip line follows the curve perfectly, creating a sharp, elegant frame for the point.
Achieving Perfectly Sharp Negative Space Edges
- Apply your black base with 2-3 coats, ensuring full opacity
- Once completely cured, use a detail brush or angled brush to outline where your white tip will be — a sharp line that follows the natural curve of your nail, positioned about 1/4 inch from the tip
- Leave the outlined area completely unpainted to show your natural nail (this is your negative space)
- Apply a glossy topcoat carefully without dragging product into the negative space area
14. Soft Peach With Ombré Shimmer Transition
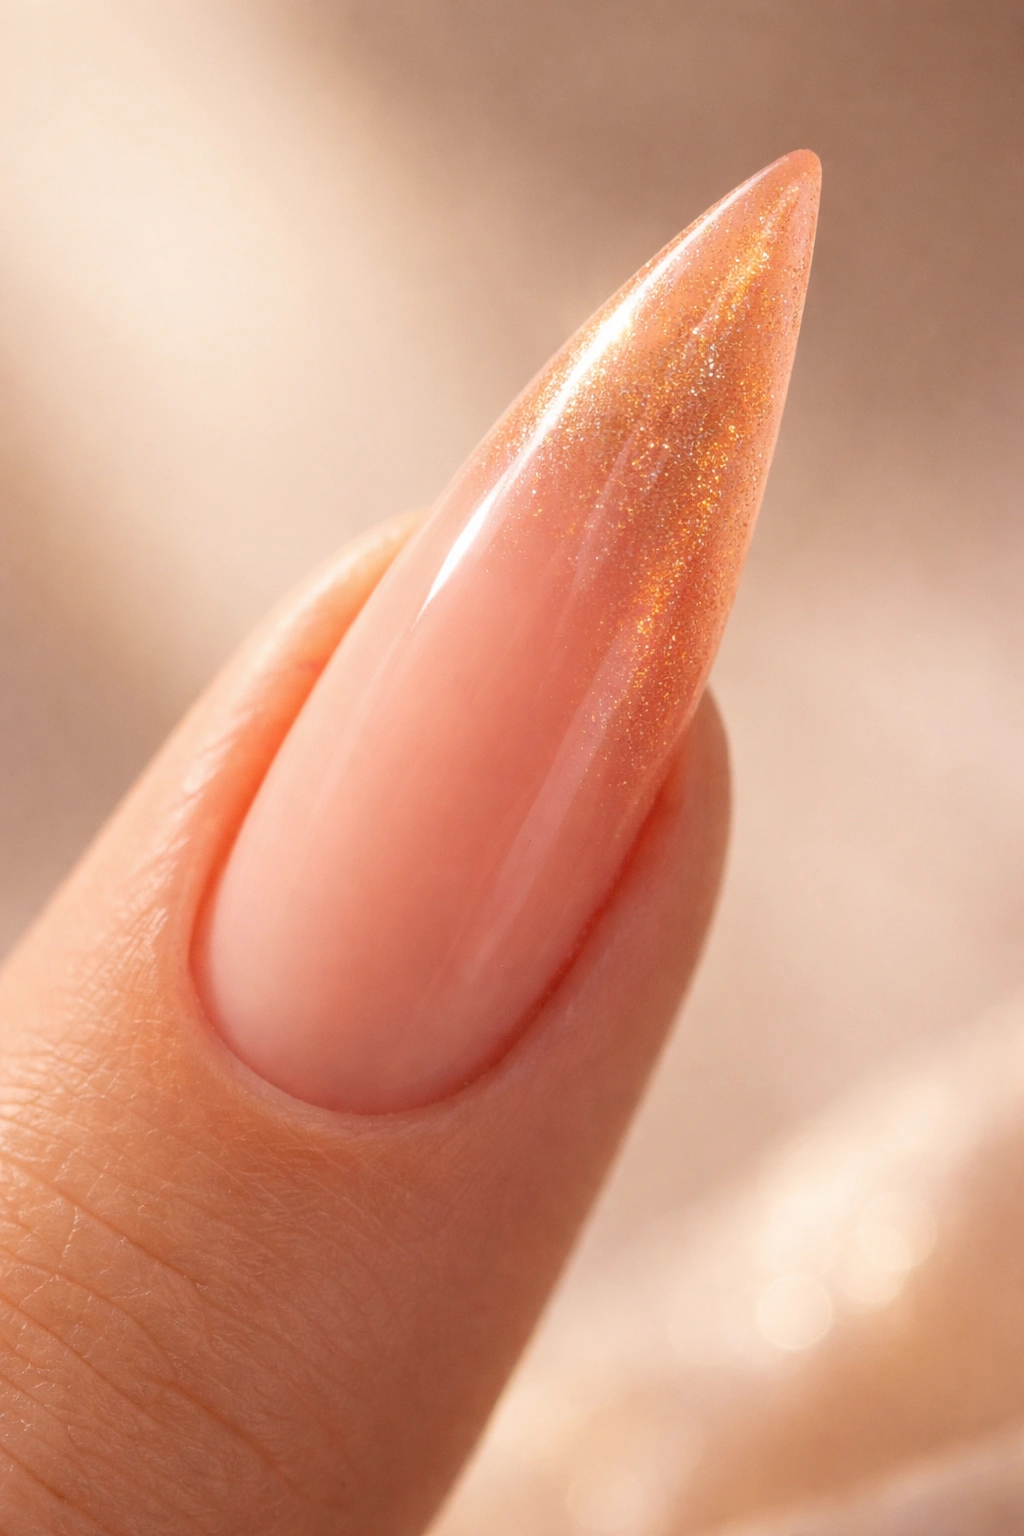
A soft peach curved stiletto that transitions to a warm peachy-gold shimmer creates a warm, glowing aesthetic that’s flattering on most skin tones and feels simultaneously simple and complex. The peach base is calming and wearable while the shimmer transition adds depth and dimension. This design works beautifully on curved stilettos because the curve allows the shimmer to catch light from multiple angles, creating a luminous effect.
Why Warm Tones Feel More Luxe on Curved Stilettos
Warm peach and gold tones naturally complement most skin tones, and on curved stilettos they appear even more luminous because the shape catches warm light beautifully. The shimmer doesn’t need to be heavy or obvious — even a subtle peachy shimmer adds enough dimension to make the design feel intentional and thoughtfully composed. This is the design for anyone who wants something pretty and wearable without being too matchy-matchy.
Building a Natural Peach-to-Shimmer Transition
- Start with a creamy peach base applied in 2 coats
- Mix a separate peachy-gold shimmer polish (or add shimmer particles to a clear topcoat)
- Using a makeup sponge, apply the shimmer starting from the tip and fading back toward the middle of the nail, creating a gradient effect
- Layer the shimmer over 2-3 applications, building it gradually rather than going heavy on the first coat
- Seal everything with a glossy topcoat that will blend the transition further
15. Burgundy Wine With Glitter Gradient Tips
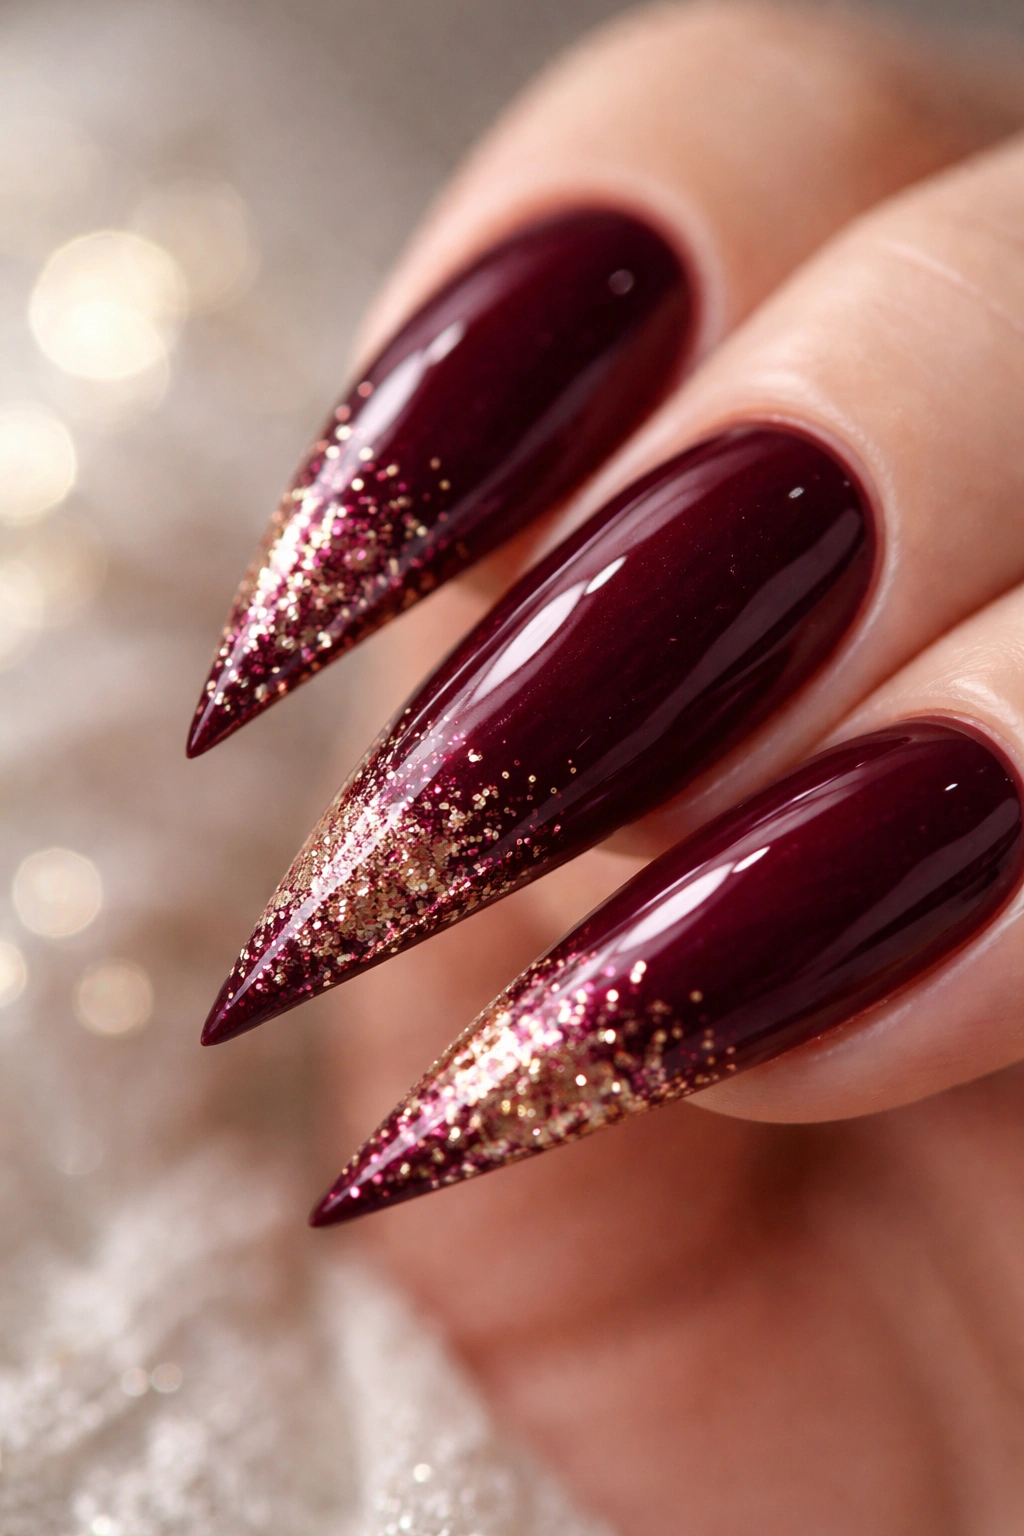
A rich burgundy wine curved stiletto that transitions to burgundy-and-gold glitter at the tips creates a luxurious, celebratory aesthetic that’s perfect for special occasions or anyone who wants to feel fancy. The burgundy base provides the sophistication while the glitter at the tips adds just enough sparkle to feel festive without being over-the-top. On curved stilettos, the glitter concentration at the tip emphasizes the point while the gradient creates a sense of movement and flow.
Why Glitter Gradients Feel More Elevated Than Full Glitter
A full glitter nail can feel heavy or costume-like, but a gradient that concentrates glitter at the tips reads as more intentional and refined. The burgundy base provides a luxurious foundation while the glitter adds personality and sparkle. This design works for anyone who wants sparkle without commitment, plus it’s surprisingly versatile — it dresses up for events but works for everyday wear too.
Creating a Smooth Glitter Gradient
- Apply your burgundy base with 2 coats for full opacity and rich color
- Make a glitter mix by combining burgundy or gold glitter (loose glitter or glitter polish) with clear topcoat — aim for a loose, sprayable consistency
- Using a makeup sponge, apply the glitter mixture starting from the tip and fading back toward the middle of the nail
- Build the gradient gradually over 2-3 applications, concentrating more glitter at the very tip
- Seal with a thick protective topcoat (2 coats) to keep all the glitter secured and smooth
Getting Your Curved Stiletto Nails
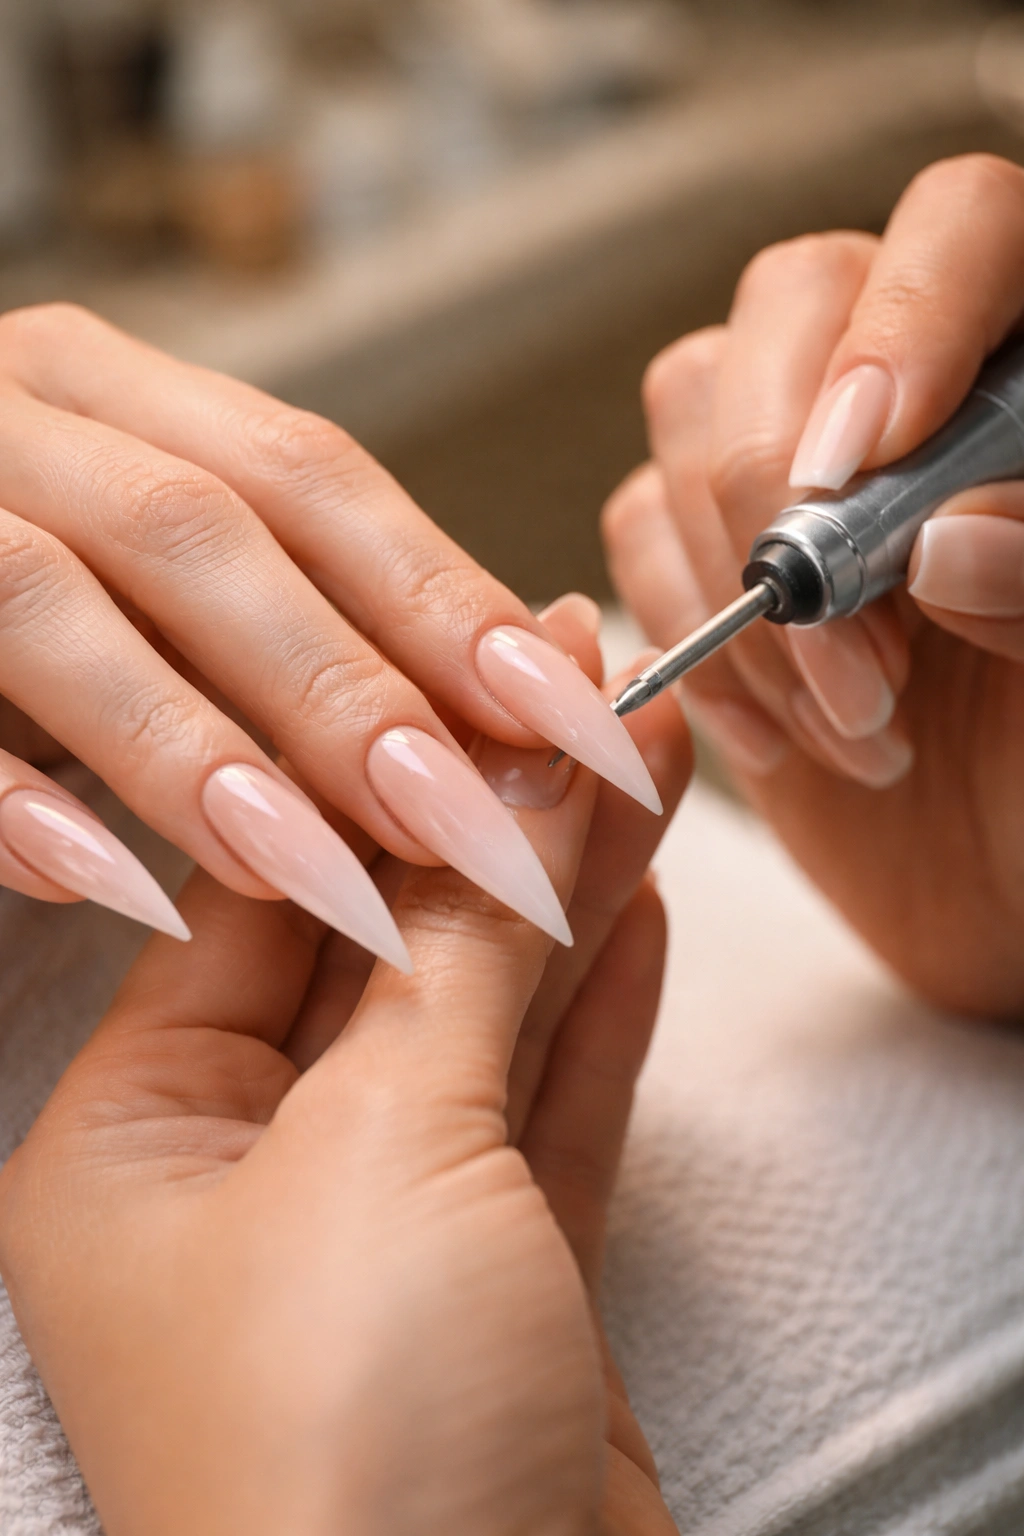
If you’ve decided on a design, the next step is actually getting them done. Curved stilettos require a nail artist with steady hands and good understanding of nail geometry — not every tech is comfortable with this shape, so it’s worth asking specifically if they’ve done curved stilettos before. Bring a reference image to your appointment to make sure you and your artist are on the same page about the curve’s placement and intensity.
The maintenance on curved stilettos is relatively straightforward. They’re durable if they’re applied correctly, though the pointed tip does require some care to avoid breakage. Many people find curved stilettos feel less fragile than straight stilettos because the curve distributes stress more naturally. Expect to need fills every 3-4 weeks depending on your nail growth rate.
Final Thoughts
Curved stilettos are having a serious moment, and for good reason — they offer the dramatic impact of a traditional stiletto with a slightly softer, more elegant aesthetic. Whether you choose something classic like a red and gold combination, something playful like a pink crown design, or something artistic like hand-painted wildflowers, curved stilettos give you a shape that elevates whatever design you choose.
The 15 designs above represent a range of aesthetics, color palettes, and complexity levels, so there’s something here whether you’re a nail minimalist or someone who loves bold, complex designs. The real magic of curved stilettos is that they make nearly every design look more intentional and refined — the shape does half the work for you.
Start with a design that feels exciting to you, book your appointment, and bring a clear reference image. Your nail artist will handle the technical details, but knowing what look you’re going for makes the whole experience smoother. And if you fall in love with curved stilettos (which most people do), you’ll find yourself coming back for new design ideas every time your nails grow out.
