

Lavender has become one of the most versatile and flattering nail colors on the market—it’s sophisticated without being stark, playful without feeling juvenile, and it photographs beautifully under virtually any lighting. When you pair that soft, dreamy color with the dramatic geometric lines of duck nails, you get a design approach that’s truly hard to mess up. Duck nails (also called stiletto-edge nails or coffin-edge nails with an exaggerated center point) create a striking silhouette that turns heads, and lavender tones complement that boldness perfectly by softening the overall aesthetic.
The thing about lavender duck nails is that they work across skill levels. Whether you’re booking an appointment at a salon or doing your own nails at home, there’s a version that fits your experience and confidence level. From simple one-color manicures to intricate nail art involving multiple techniques, the combinations are essentially endless—and we’re going to walk through the ones that actually translate beautifully onto the duck nail shape.
What makes lavender special compared to other pastels is its universal flattering quality. It works with cool skin tones, warm skin tones, and everything in between. It’s seasonal in the sense that it peaks during spring and summer, but it’s honestly gorgeous year-round for anyone who loves softer, more understated nail aesthetics. Let’s dive into 11 distinct approaches to lavender duck nails that showcase exactly why this combination has become such a popular choice.
1. Solid Lavender with Glossy Finish
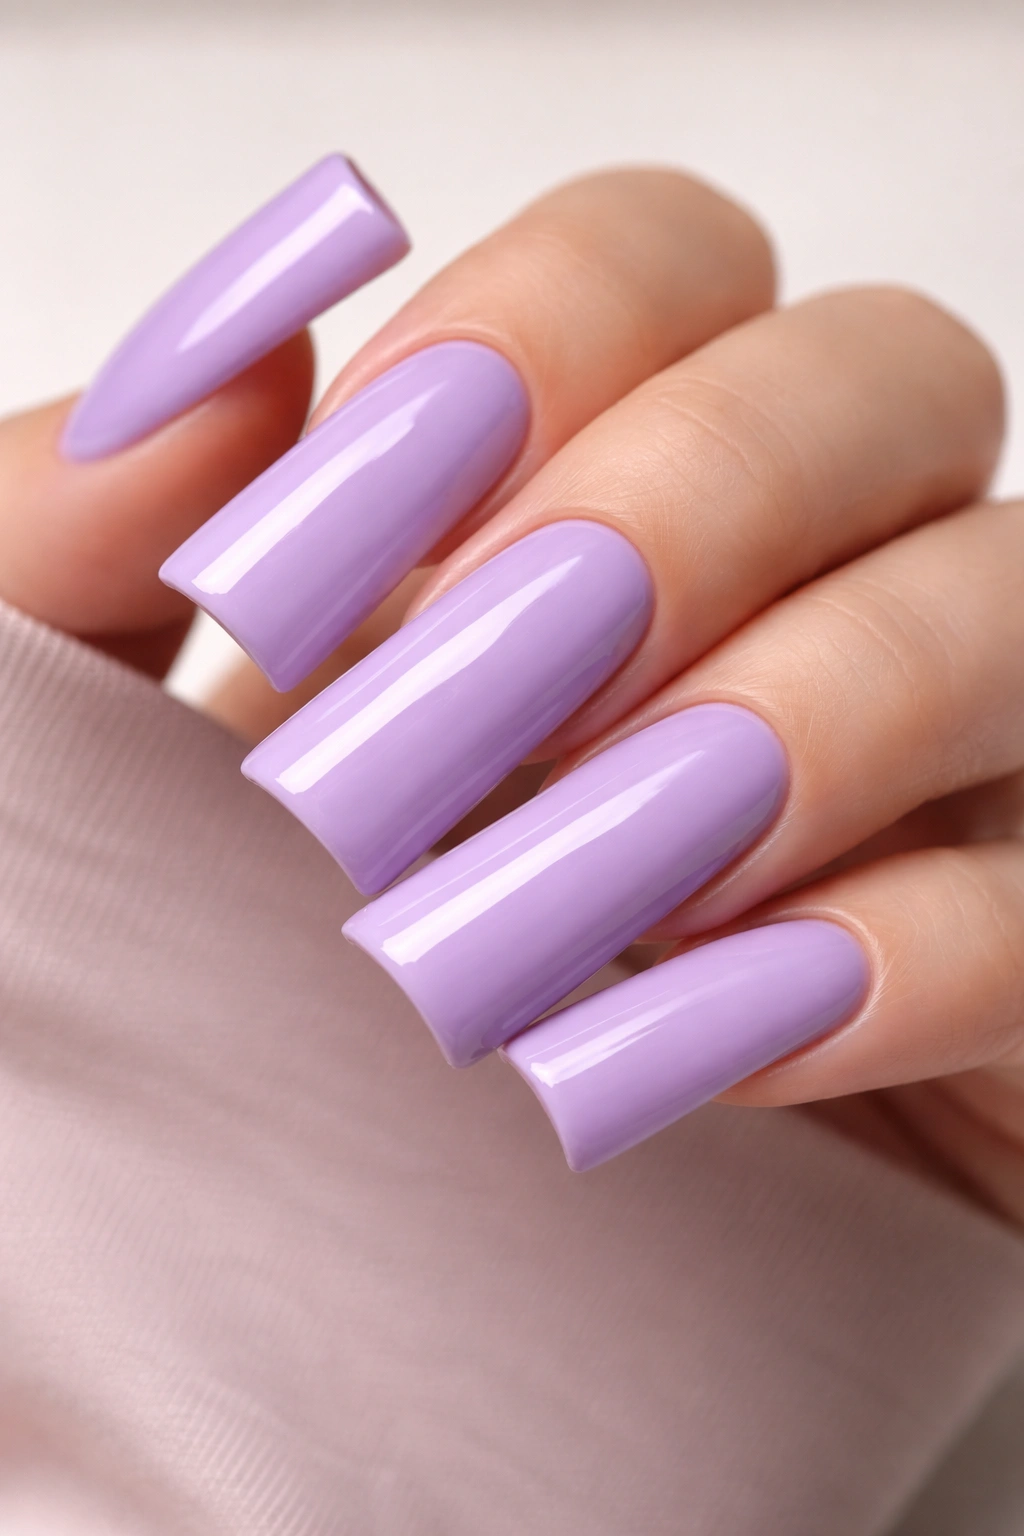
The simplest approach is often the most elegant, and a solid lavender duck nail with a high-shine gel or glossy topcoat is proof of that. This is the design to choose if you want drama from the nail shape alone, letting the clean lines and elongated profile do the heavy lifting. The duck nail silhouette is naturally eye-catching—it doesn’t need embellishment to make a statement.
Why This Works for Every Occasion
A solid lavender is a chameleon color that adapts to context. Wear it to the office with professional styling and it reads as sophisticated. Wear it to a wedding as a bridesmaid and it feels romantic. The glossy finish amplifies the color slightly, making it richer and more polished than a matte version would be. Lavender with shine has a modern, almost glass-like quality that feels fresh without looking costume-y.
Application Tips and Durability
- A solid color requires only 2-3 thin coats to achieve full opacity—never apply thick, gloppy layers as they’re more prone to chipping
- Use a quality base coat to prevent staining, particularly important with lighter purples and pinks that can sometimes tint lighter nails
- Glossy finishes tend to show dust and oil more readily than mattes, so you’ll notice if maintenance is needed
- Gel polish typically lasts 3-4 weeks without visible chipping when applied on duck nails, thanks to their strength and stability
- For regular polish, expect a solid week of wear before noticeable wear at the edges and nail line
The beauty of this approach is that it requires zero artistic skill—you’re relying entirely on the color and finish quality to look intentional and polished.
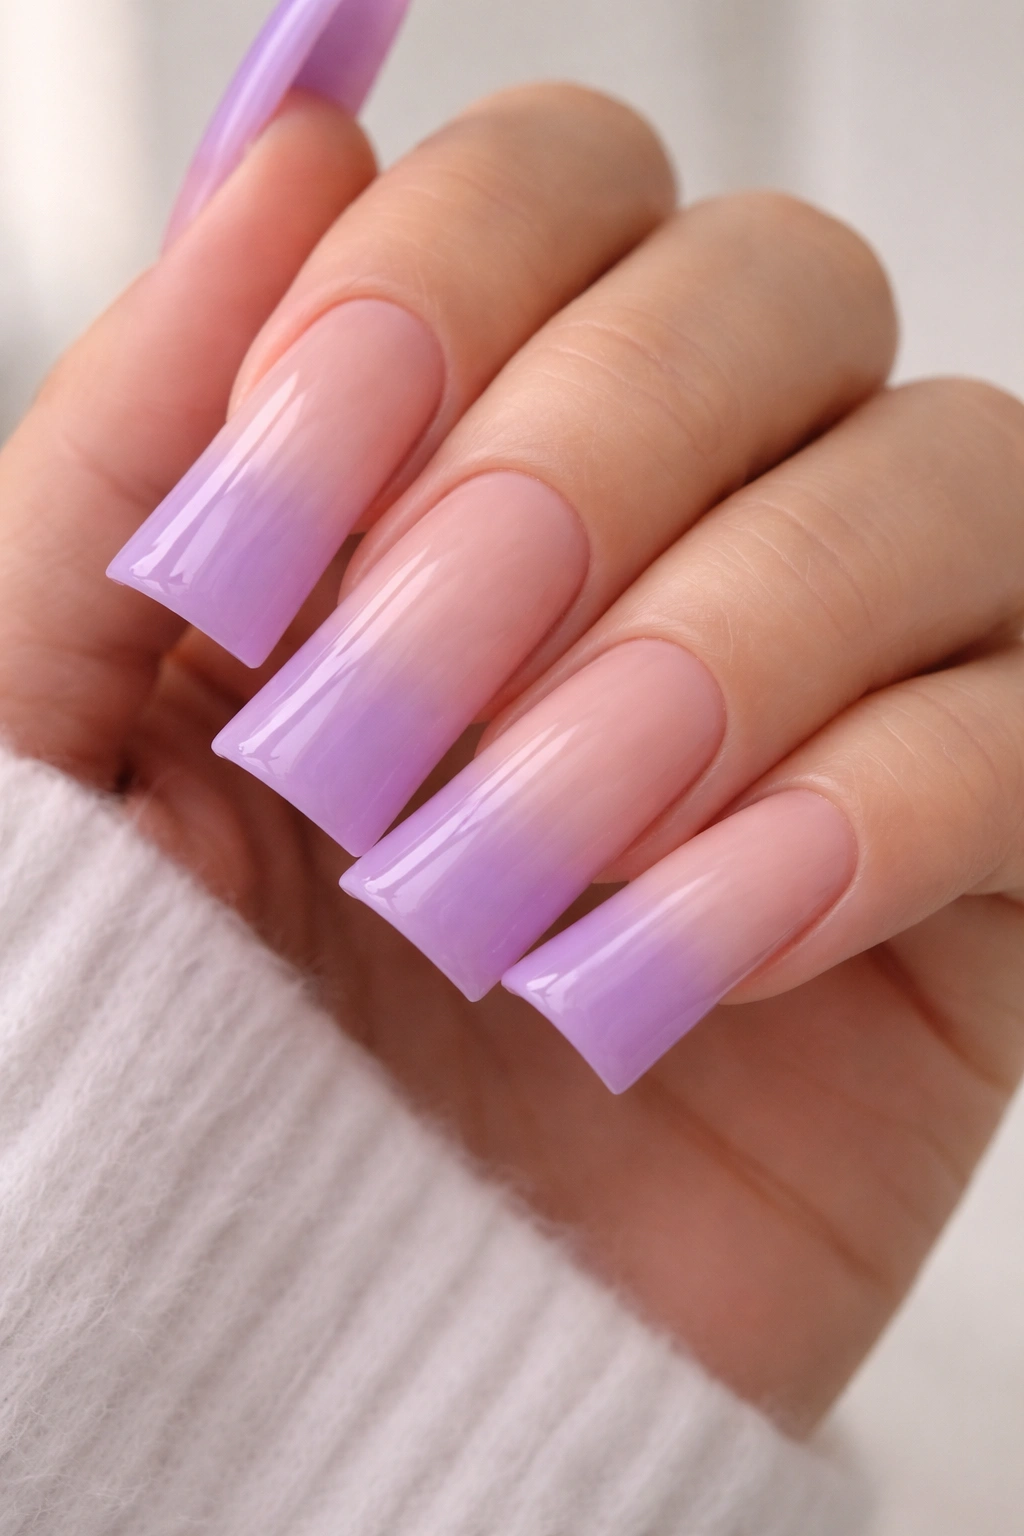
2. Lavender Ombre Gradient Effect
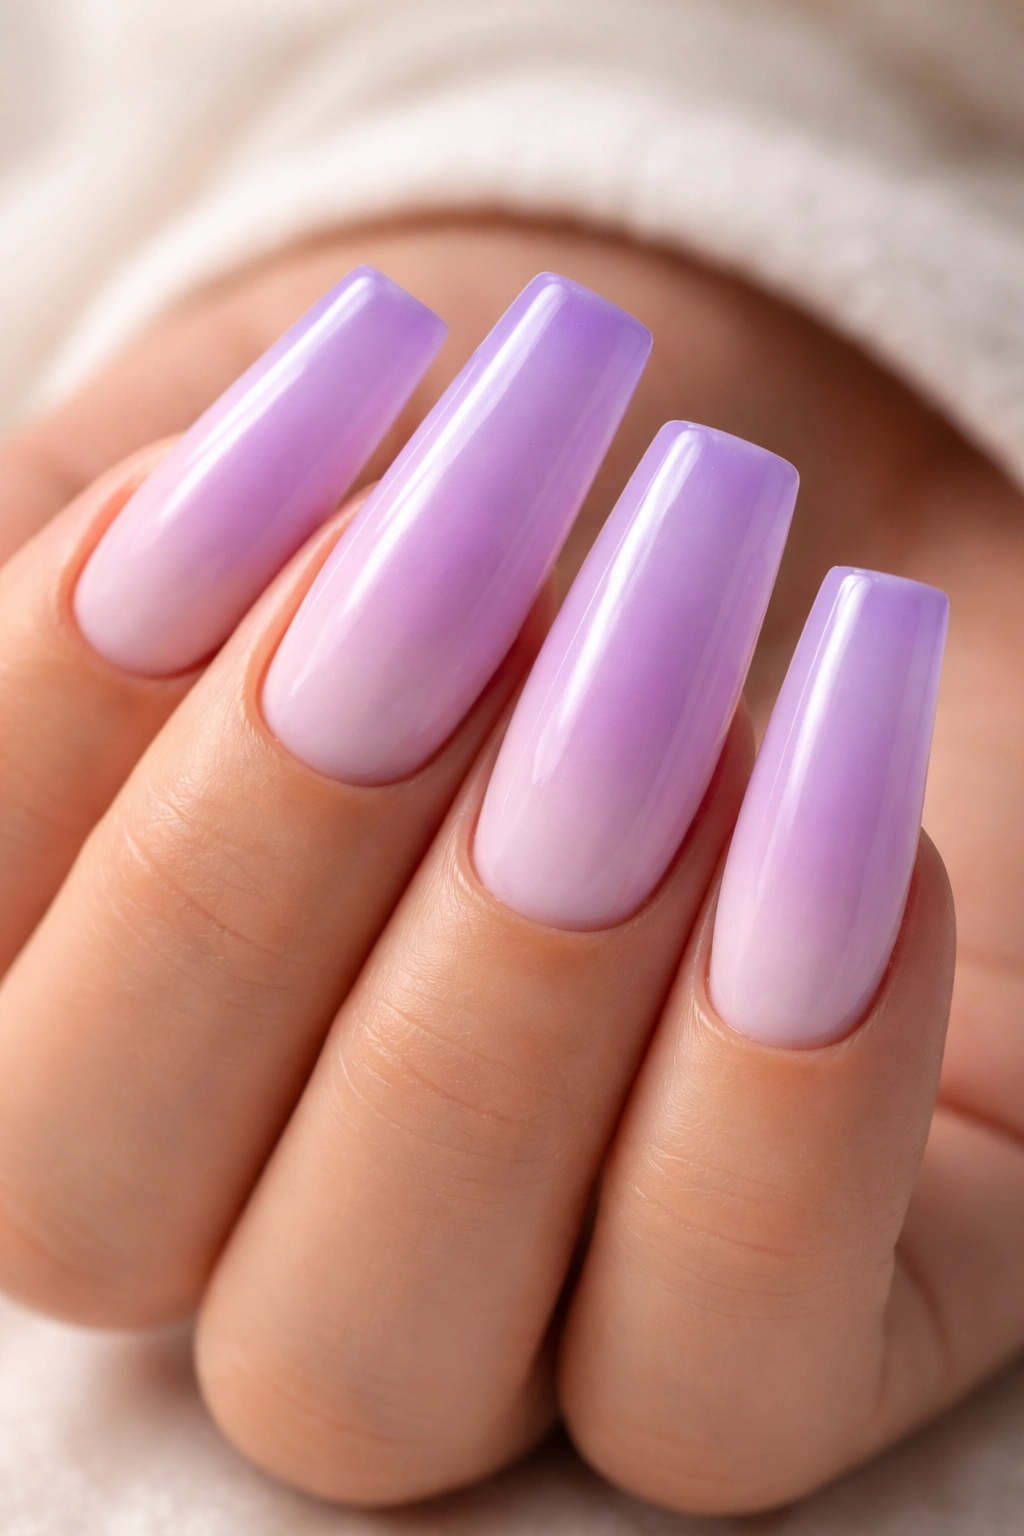
An ombre effect takes a single solid color approach and adds depth by blending it with white, creating a gradient from deeper lavender at the tip to pale lavender or nearly-white at the base. This creates visual interest while maintaining the softness and elegance that makes lavender such an appealing choice.
Creating the Ombre on Duck Nails
The duck nail shape is actually ideal for ombre effects because the elongated center point naturally draws the eye downward—so fading the color towards the tip emphasizes that visual journey. You can create this effect using the sponge-and-polish method (dabbing polish onto a makeup sponge and stippling it onto the nail) or by using an airbrush if you’re working with a professional nail technician.
What Makes This Technique Readable
- Ombre works best when there’s genuine color contrast—avoid blending two shades that are too similar in tone, or the effect reads as unfinished rather than intentional
- The gradient should be gradual enough that it looks deliberate, not like the polish faded in the sun
- Keeping the base color (the deeper lavender) concentrated near the base and middle of the nail ensures the tip’s paleness creates the “fading” effect
- Seal the entire design with a glossy topcoat to blend the individual layers into a seamless finish
- This technique photographs particularly well and has a more editorial, thoughtfully-designed feel than a solid color
The ombre gradient is more labor-intensive than solid color but doesn’t require any freehand artistic ability—it’s a technique-driven approach rather than an art-driven one.
3. Lavender with White Negative Space Design
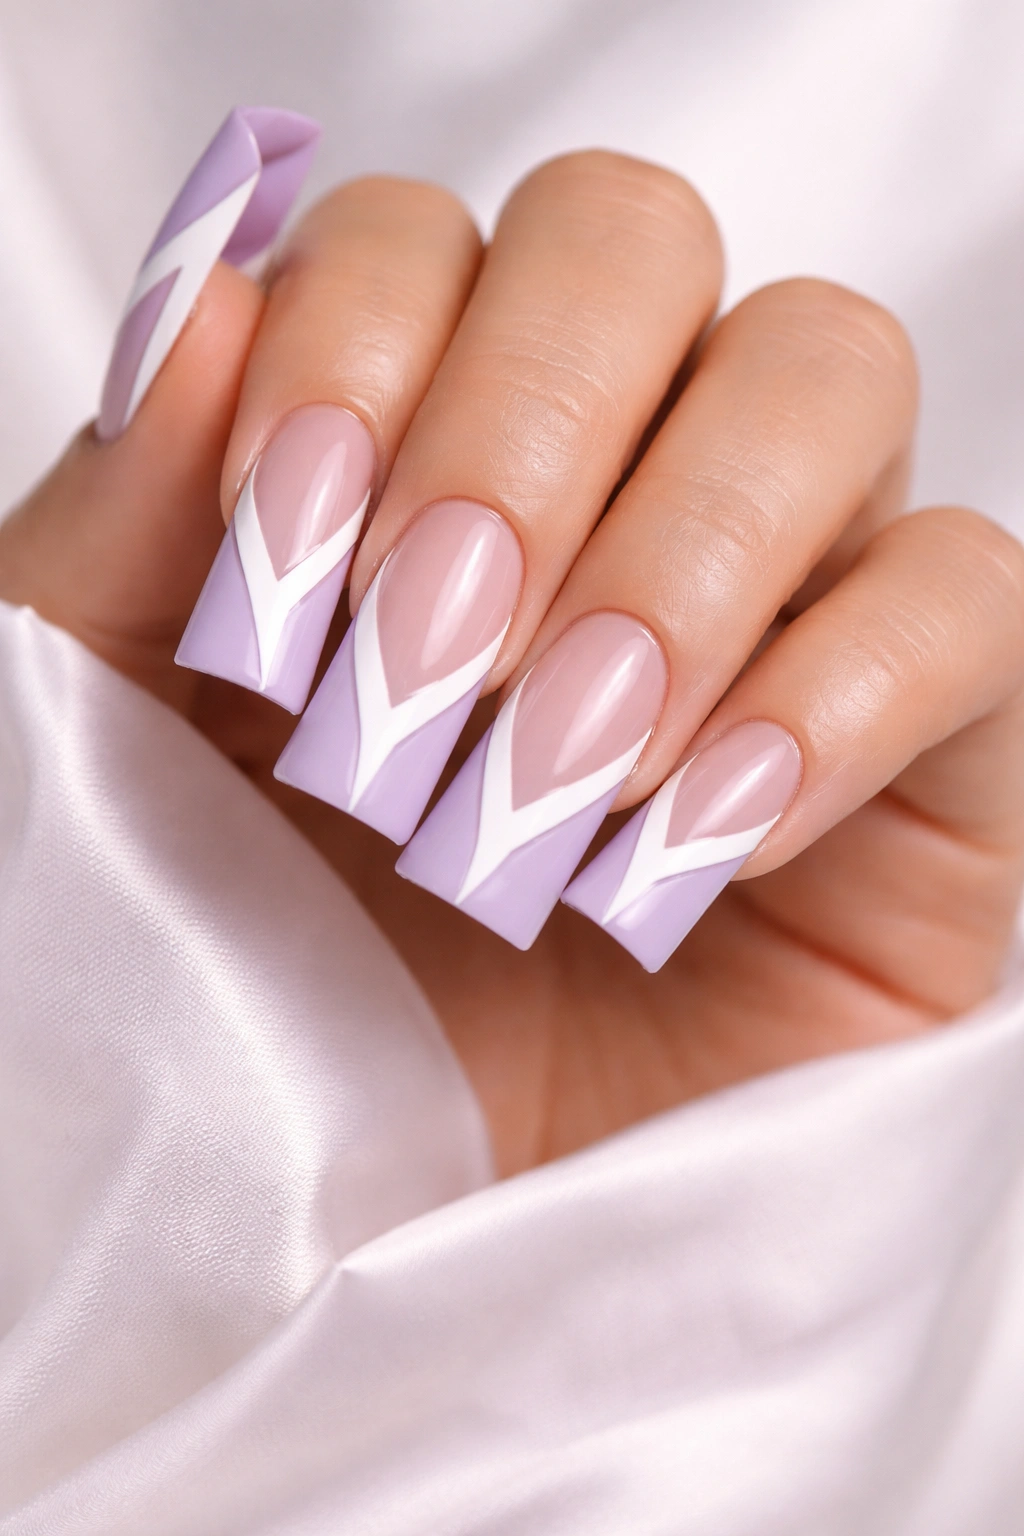
Negative space designs use the natural nail or a lighter base color to create intentional patterns or shapes. On lavender duck nails, white negative space creates striking geometric contrast while maintaining overall softness. Think stripes, chevrons, geometric sections, or abstract white lines cutting through the lavender.
Design Options and Execution
- Vertical stripes: Thin white lines running the length of the nail create an elongating effect that complements duck nails’ already-dramatic length
- Horizontal blocking: Dividing the nail into sections of lavender and white creates a more graphic, modern feel
- Geometric cutouts: Small white triangles, circles, or squares placed strategically across the nail feel contemporary and artistic
- Asymmetrical lines: Freehand or tape-guided white lines that cross diagonally or at odd angles create visual interest without symmetry
White negative space against lavender is particularly readable—there’s enough contrast that the design reads clearly from a distance, which is important for a statement nail design like duck nails.
Technique Considerations
- Use a thin striping brush, a nail art pen, or tape (like Freddy Beauty striping tape) to create clean lines
- If you’re not confident in your freehand drawing, tape is your friend—apply it to create guide lines, apply the white polish directly over the tape, let it dry, then remove the tape
- Ensure all edges are crisp and intentional; fuzzy lines make geometric designs read as sloppy rather than artistic
- Seal the design well, as white polish can sometimes be fragile on its own
This approach is great if you want visual complexity and artistic intent without needing to blend colors or use glitter or rhinestones.
4. Lavender Duck Nails with Glitter Accent Tips
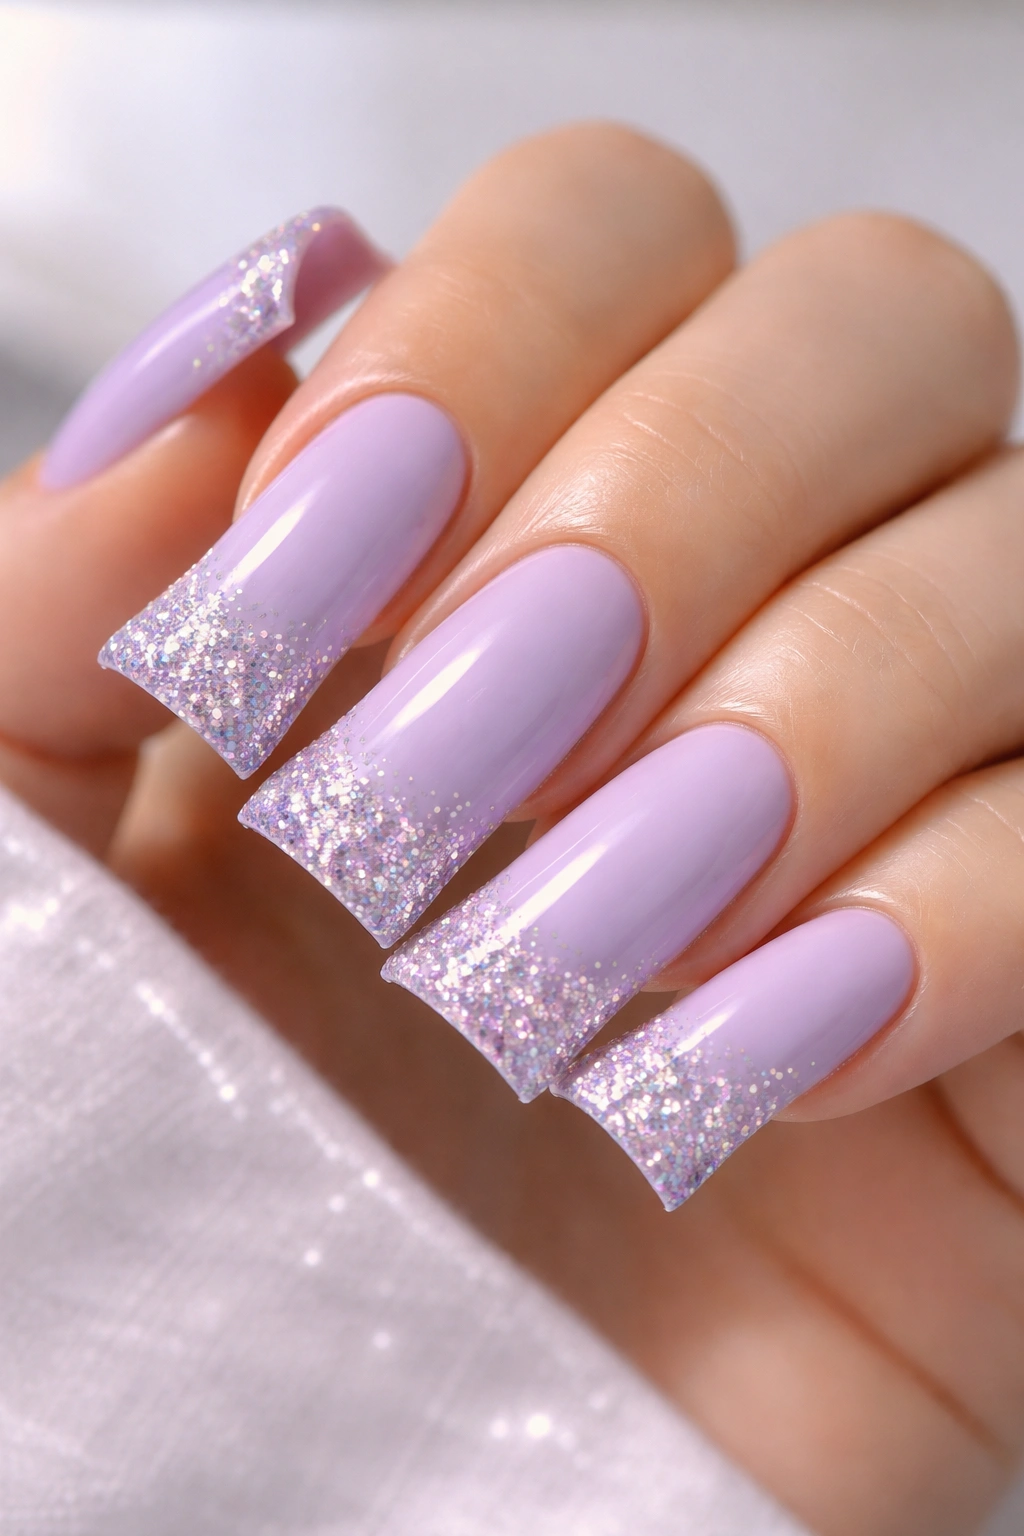
Adding glitter to just the tip (roughly the bottom third or half of the nail where the tip extends beyond the quick) creates a glamorous accent while maintaining the softness of the base lavender color. This is a popular salon approach that’s easy to replicate at home and looks significantly more polished than all-over glitter would.
Glitter Types and Application
- Fine glitter or diamond dust: Creates a sparkly effect with subtlety; blends beautifully with lavender and catches light without overwhelming
- Chunky holographic glitter: Reads more dramatic and statement-making; creates a disco-ball effect in certain lighting
- Ombré glitter gradient: Start with sparse glitter near the top of the tip section and increase density toward the end of the nail for a fading sparkle effect
- Single-glitter-shade accent: Use one specific glitter color (silver, gold, or rose gold) for intentional cohesion
The key to making glitter look high-end rather than craft-project is application. Use a dedicated glitter topcoat or builder gel specifically formulated to hold glitter particles suspended—this prevents them from sinking or settling unevenly.
Why Glitter Works on Duck Nails
The extended tip of a duck nail creates more surface area for the glitter accent, making it more visible and impactful. A glitter accent on a shorter, rounder nail might feel overwhelming; on a duck nail, it reads as intentional and balanced. The lavender base keeps the overall aesthetic from feeling too costume-y or over-the-top.
5. Lavender with Gold Foil Accents
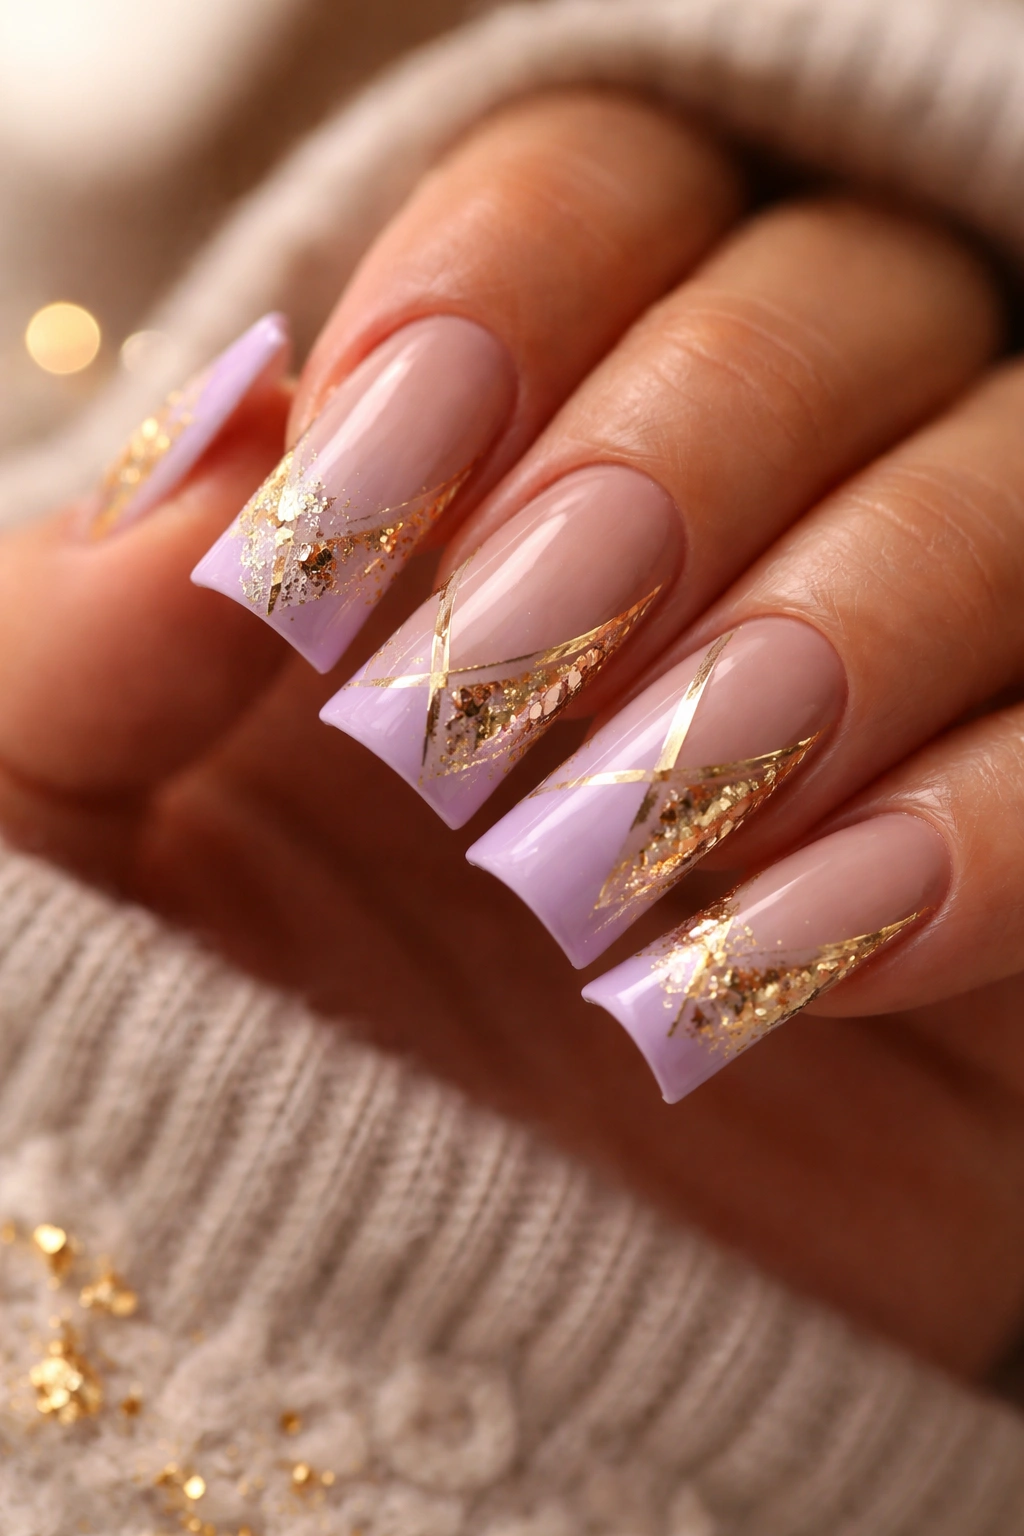
Foil is a thin metallic layer that adheres to the nail with adhesive and creates an ultra-shiny, reflective finish. Gold foil against lavender is inherently elegant—the warmth of gold complements the cool tones of lavender without clashing. This creates a sophisticated, almost jewelry-like quality.
Foil Application Methods
- Full-tip foil: Cover the lower half or entire tip section with gold foil for maximum impact
- Partial foil placement: Place foil in specific areas—on one side of the nail, in a geometric shape, or along the edges to frame the lavender
- Broken foil effect: Tear the foil into small, irregular pieces and apply them in scattered clusters for a more organic, artistic feel
- Gradient with foil: Combine foil with the ombre technique—fade lavender to white, then add gold foil to the tips for a three-layer color story
Foil requires a specific adhesive designed to hold it; regular polish won’t grip it securely. Most nail technicians use a foil adhesive or tacky builder gel followed by a topcoat to seal the foil in place and prevent peeling.
Durability and Longevity
- Foil can be slightly more fragile than solid polish, particularly at the edges where the foil might lift if the topcoat isn’t carefully sealed
- High-quality salon applications with professional-grade products tend to last the full 3-4 week cycle
- At-home application is possible but requires patience and precision—rushing the sealing step is where most foil applications fail
Gold foil creates a more luxurious, intentional aesthetic than solid glitter, though both work beautifully on lavender duck nails.
6. Lavender with Delicate Floral Line Art

Floral designs are eternally popular, and delicate line work—minimalist flowers drawn with fine lines in white, pink, or darker purple—creates a romantic, garden-inspired aesthetic that pairs perfectly with lavender’s soft tone. This approach requires more artistic skill than some other designs, but it’s doable if you’re patient and practice.
Floral Design Ideas
- Tiny wildflowers: Small, simple three-petal flowers scattered across the nail create a whimsical, meadow-like feeling
- Single focal flower: One larger flower (perhaps a rose or peony) on each nail, or distributed across just one or two nails for emphasis
- Minimalist stem designs: Long, curving stems with minimal leaves or blooms feel modern rather than traditional
- Botanical line drawings: Detailed line work (not filled-in) of leaves, petals, and stems feels sophisticated and artistic
Line art works best on duck nails because the extended surface area gives you more room to draw detail. Short nails can accommodate simple designs; longer duck nails can showcase more intricate artwork.
Tools and Technique
- Use a very thin striping brush (size 0 or 00) or a nail art pen for control
- Practice the design on paper or a nail wheel first—floral designs benefit enormously from planning
- Darker accent colors (navy, forest green, deep plum) show up better against lavender than lighter colors do
- Seal carefully with topcoat to protect the fine details
This design option is perfect if you enjoy artistic pursuits and want your nails to feel like wearable art.
7. Lavender Duck Nails with Chrome or Metallic Finish
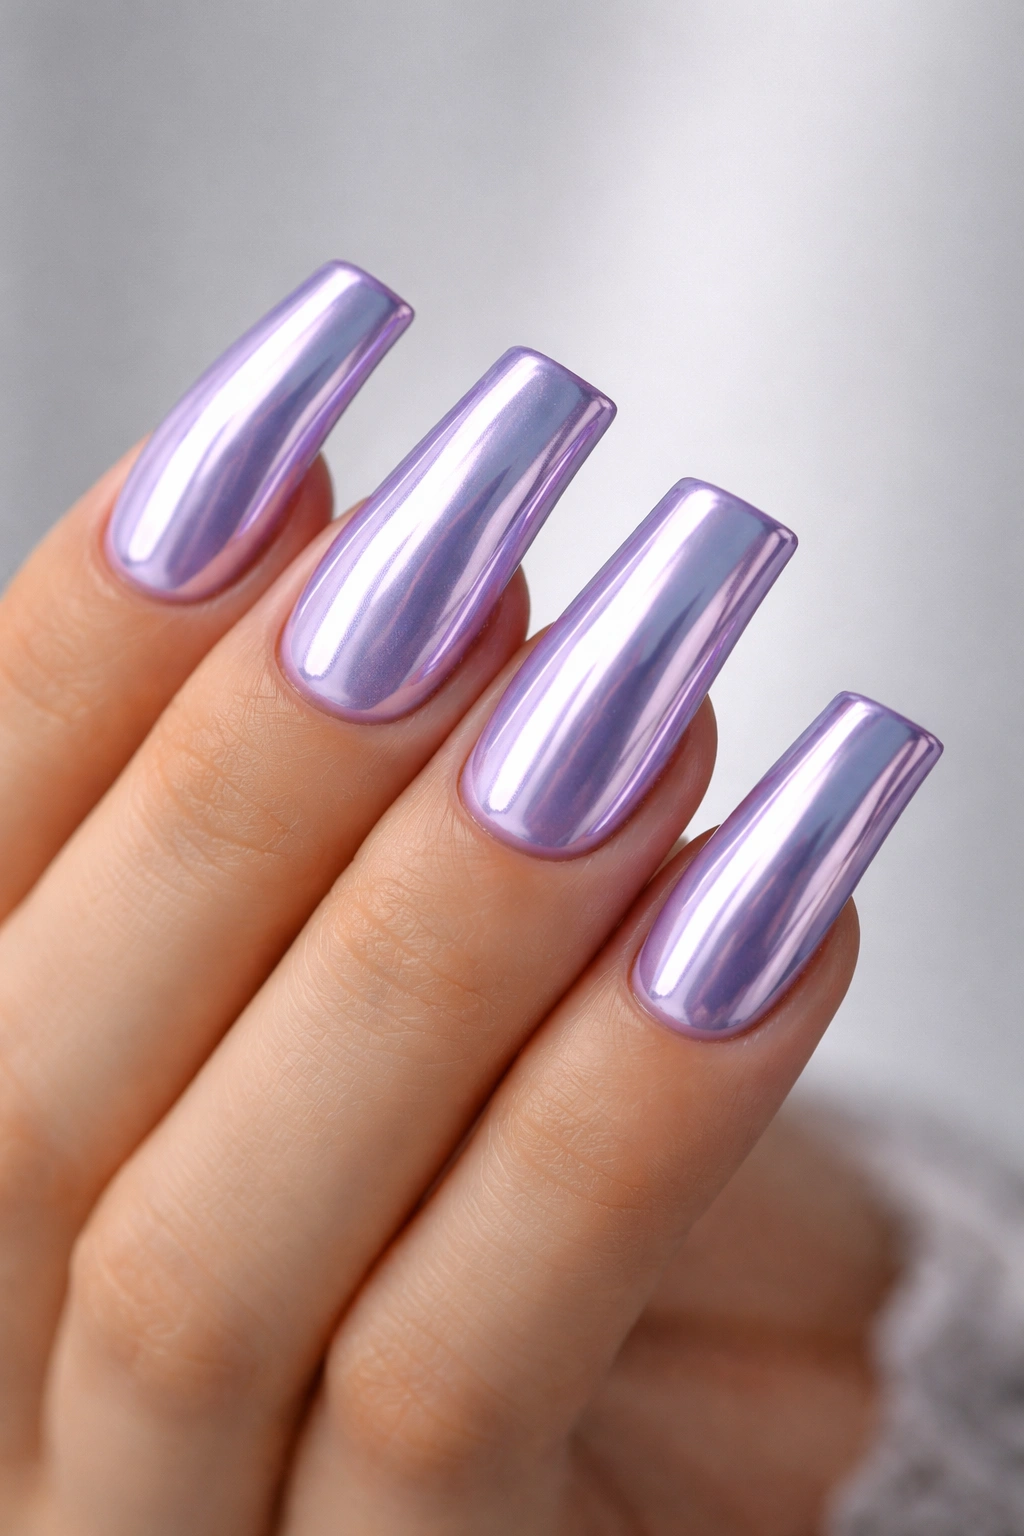
Chrome powder creates a mirror-like, reflective metallic finish that’s unlike anything else available in nail polish. Applied over a lavender base, chrome creates a pearlescent, almost otherworldly effect—lavender takes on new dimension and visual depth.
How Chrome Overlay Works
- Chrome is a powder that’s pressed onto tacky gel topcoat and sealed with a clear topcoat
- The lavender base color shows through the chrome, creating a unified look rather than chrome sitting on top of the nail like a separate layer
- The effect is highly reflective and catches light differently depending on the angle and lighting conditions
Chrome Variations on Lavender
- Full chrome coverage: The entire nail becomes a shimmering, reflective surface
- Partial chrome: Chrome applied only to the tip section creates a gradient from solid lavender to mirrored chrome
- Chrome accent areas: Chrome dust applied in specific geometric shapes (stripes, geometric sections, or patterns) creates visual interest
- Holographic chrome: Some chrome powders have iridescent, rainbow-like properties that shift colors in different light
Chrome finishes are relatively durable when properly sealed and are considered a premium salon service because the application requires specific materials and skill.
Visual Impact of Chrome on Duck Nails
Duck nails with chrome create an undeniably dramatic, fashion-forward aesthetic. The shape is bold, the reflective finish is striking, and the color is still soft enough that the overall effect is modern and intentional rather than purely costume-like.
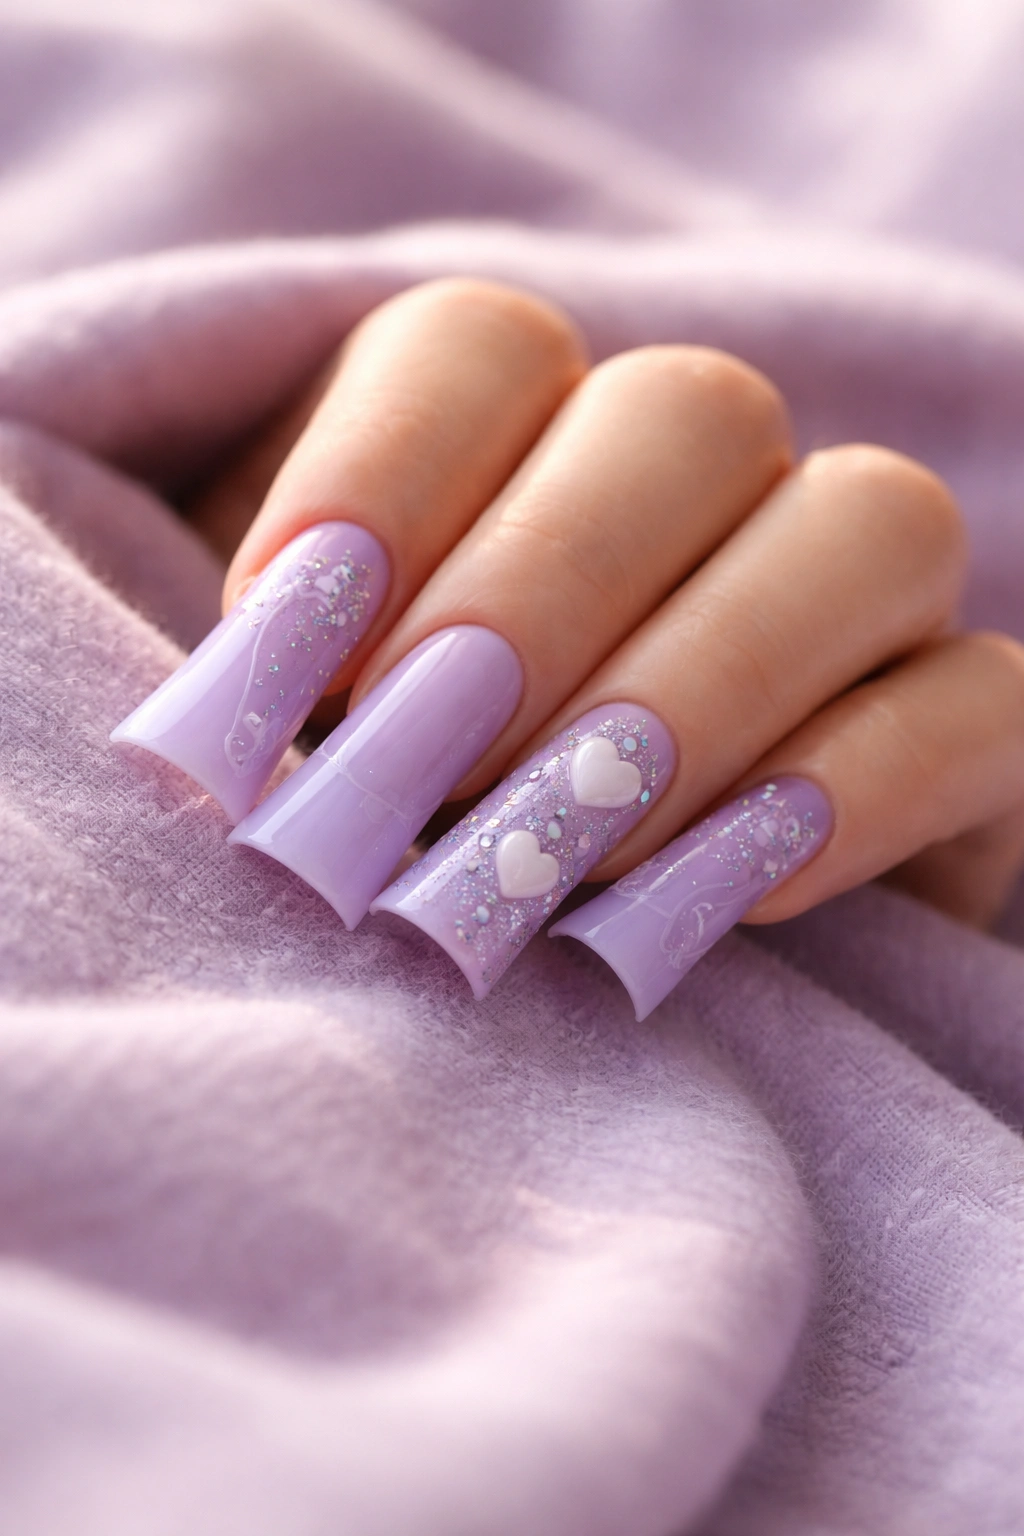
8. Lavender with Rhinestone or Crystal Embellishments
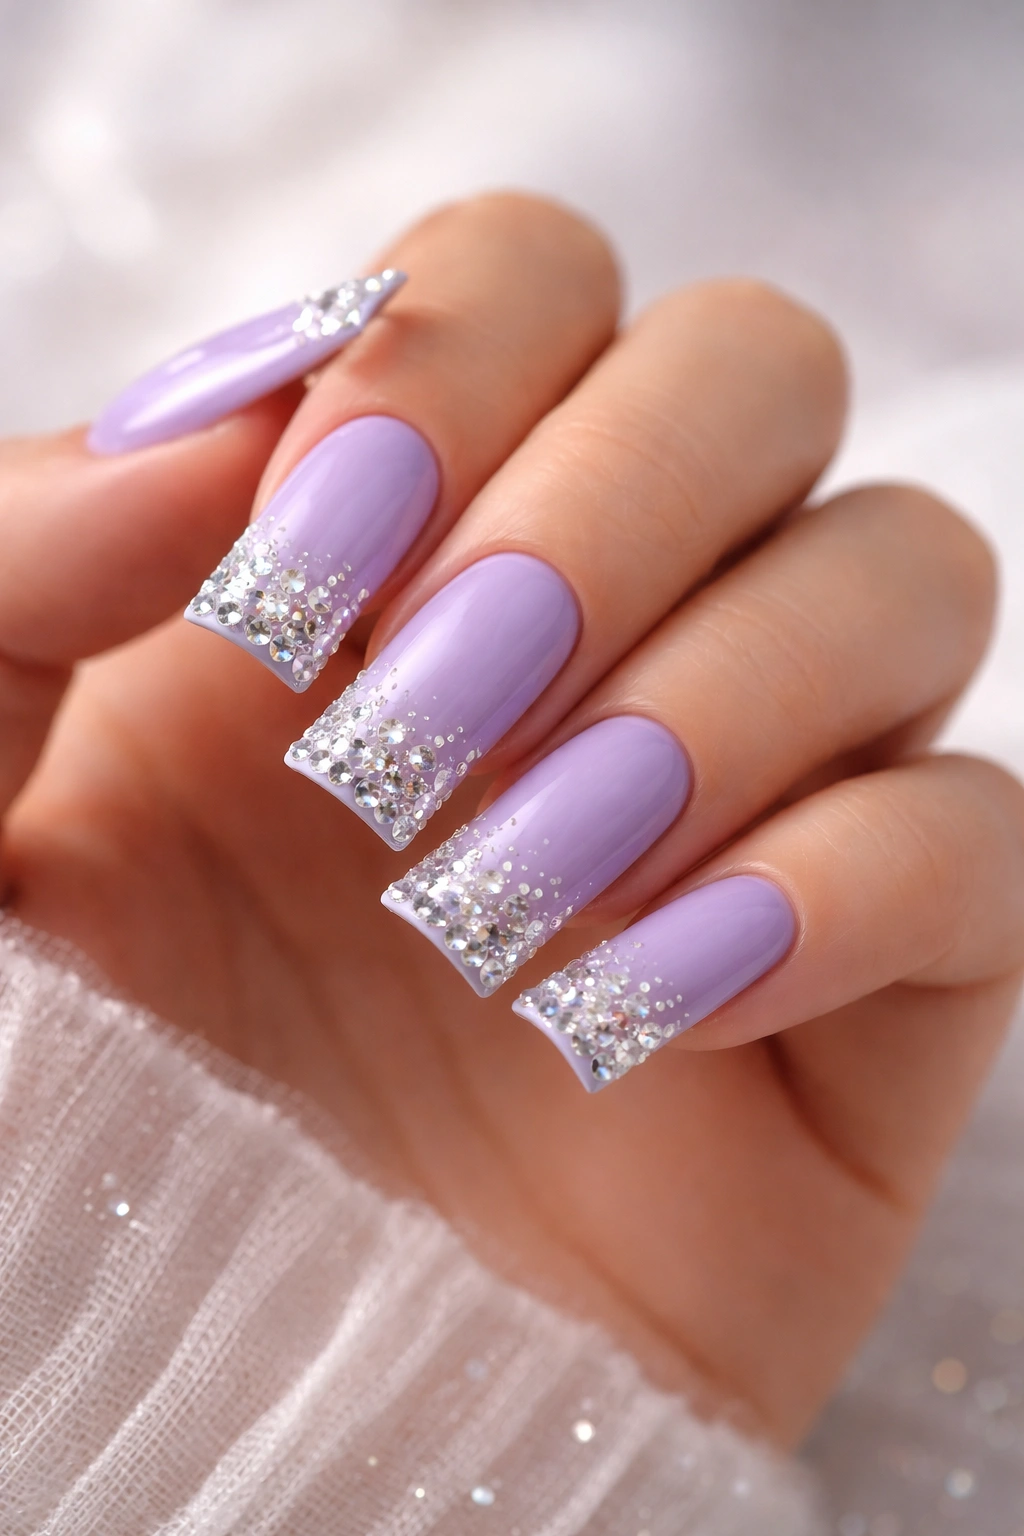
Hand-placed rhinestones and crystals create dimension and texture on the nail. On lavender, they catch light and create a glamorous, elegant effect—particularly if you use clear crystals or ones that match the lavender tone.
Rhinestone Placement Strategies
- Full coverage: Gems scattered across the entire nail surface for maximum sparkle (though this approach can feel busy on duck nails, which are already visually interesting)
- Tip coverage: Concentrate rhinestones on just the extended tip portion of the duck nail, leaving the base solid lavender
- Gradient application: More rhinestones at the tip, fewer near the base, creating a gradient of sparkle
- Geometric patterns: Arrange rhinestones in intentional shapes—lines, stripes, or abstract geometric designs
- Single statement stone: One large rhinestone per nail positioned on the center of the nail or at the tip
The size of rhinestones matters significantly. Very tiny gems (1-2mm) create a subtle sparkle. Medium stones (3-4mm) read as elegant. Large statement stones (5mm+) create drama but can look costume-y on nails unless paired with restraint in placement.
Application and Durability
- Rhinestones are applied with a specialized adhesive (like a gel-based rhinestone glue) and pressed firmly into place
- Allow adhesive to cure fully before sealing with topcoat
- With proper application, rhinestones hold reliably for the full 3-4 week gel polish cycle
- Natural nail polish with rhinestones is less durable—expect some loss after about a week
Lavender with strategically placed rhinestones feels more refined than all-over glitter and photographs beautifully.
9. Lavender Marble or Watercolor Effect
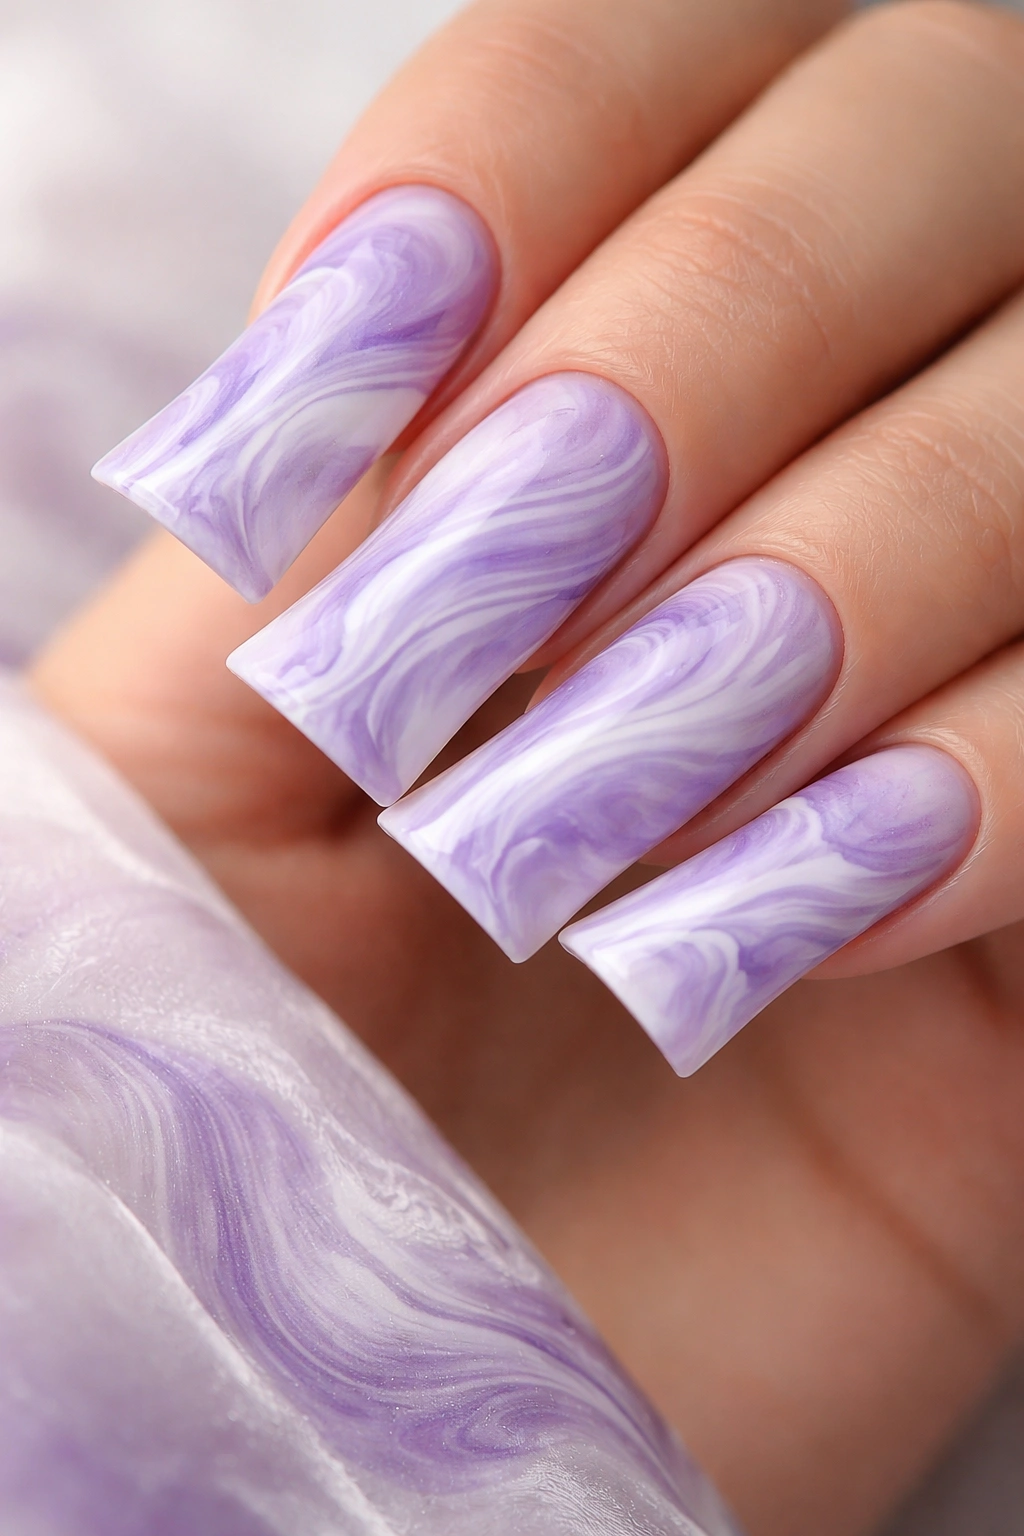
Marbling creates organic, flowing patterns by dropping multiple colors (typically white or darker purples with lavender) onto the nail and swirling them together before the polish sets. The result is a one-of-a-kind, artistic design with movement and visual interest.
Marble Technique on Duck Nails
- Apply a base coat of solid lavender and let it dry completely
- Drop small amounts of white, pale purple, or darker purple polish onto the wet topcoat in a random pattern
- Use a thin brush or a tool (even a toothpick works) to swirl and drag the colors together, creating organic patterns
- The longer duck nail provides more space for the swirling effect to be visible and dramatic
- Seal quickly once you’re happy with the pattern—the design sets as polish dries
The benefit of marble is that it’s truly one-of-a-kind; no two marbled nails are exactly identical. This creates a personalized, artistic quality that feels intentional and high-effort even if the technique itself isn’t difficult.
Watercolor Alternative
A watercolor effect uses similar color combinations but applies them more subtly—think of thin washes of color bleeding into each other rather than bold swirls. This approach is slightly more forgiving and creates a softer, more delicate aesthetic that enhances lavender’s natural softness.
10. Lavender with Nude or Sheer Base and Ombré
This approach combines multiple colors in a more complex way: start with a sheer, almost nude base, then build toward deeper lavender at the tips, creating a sophisticated ombré that feels elegant rather than trendy. This works particularly well on duck nails because the elongated tip can showcase the color progression beautifully.
Color Progression Strategies
- Barely-there to rich: Start at the base with nearly transparent, skin-toned sheer polish, then build through pale lavender to richer, more saturated lavender at the tip
- Warm to cool: Combine peachy or pink-nude undertones at the base with cool-toned deeper lavender at the tips for a color journey
- Monochromatic progression: Use three or four different saturation levels of the same lavender tone (pale lavender, standard lavender, dusty lavender, deep lavender)
This approach requires layering and blending, making it slightly more technical than a simple solid color but more achievable than some other multi-color designs.
Why This Works
The result feels high-end and editorial—like something from a professional nail magazine rather than a simple DIY application. The nudity at the base creates a subtle, elongating effect that makes even modest nail length look elegant.
11. Lavender with 3D Nail Art or Encapsulated Elements
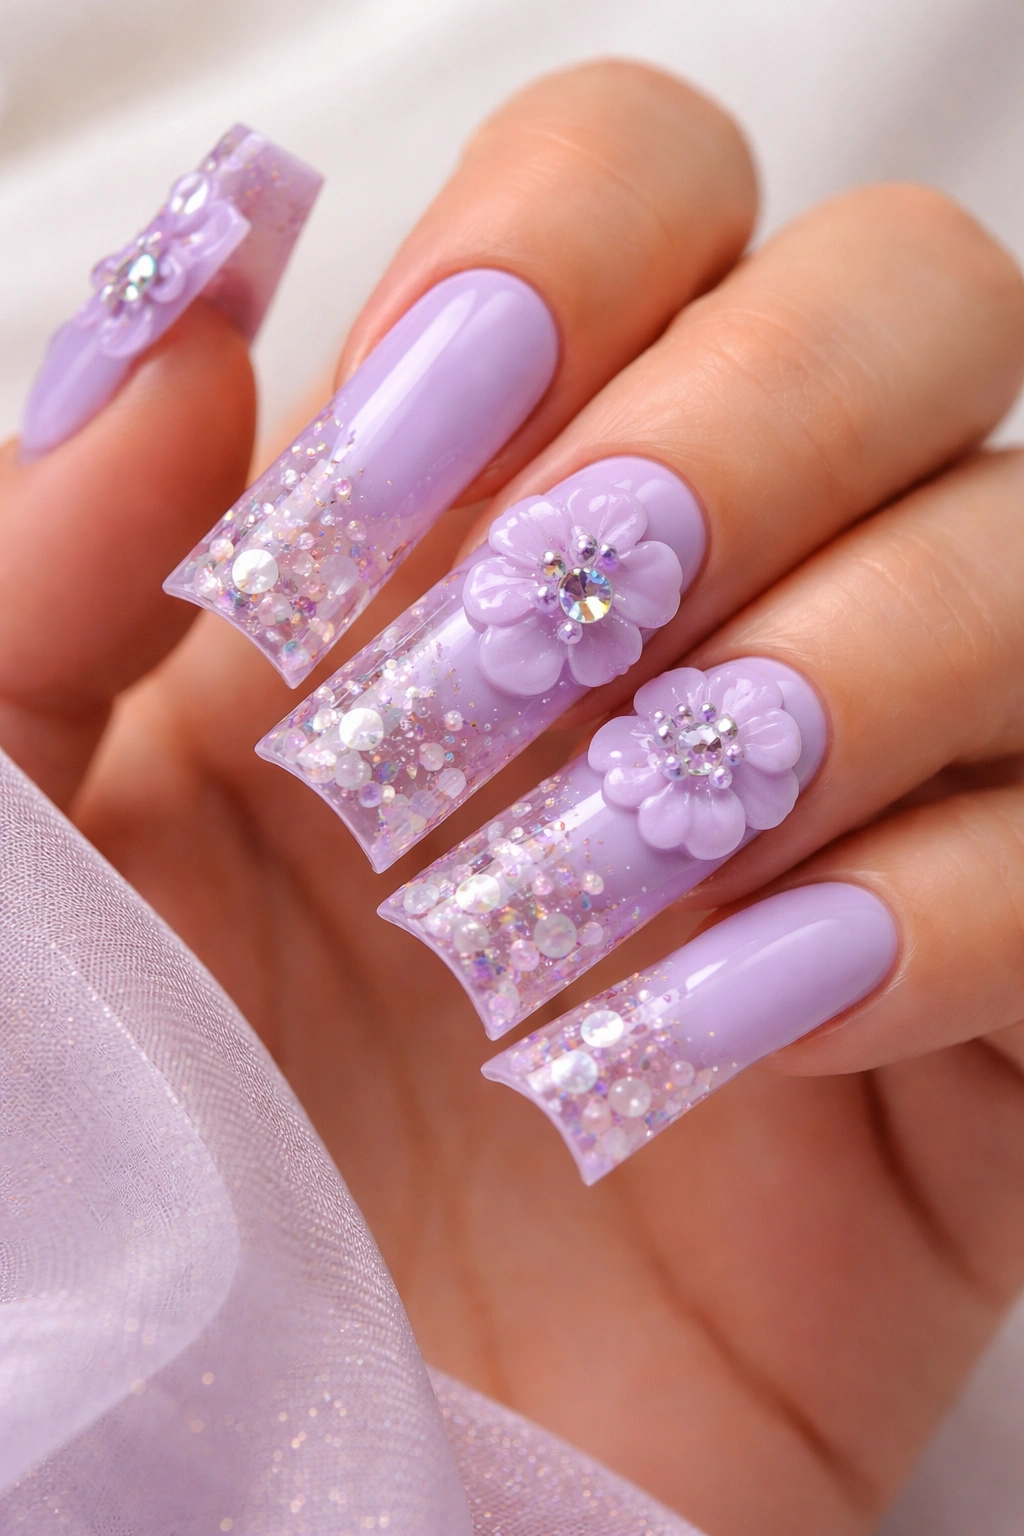
Three-dimensional nail art—raised elements like hand-sculpted flowers, beads, or encapsulated objects suspended inside clear gel—creates a tactile, jewelry-like quality. On lavender, this approach creates a truly unique, conversation-starting look.
3D Element Options
- Sculptured flowers: Hand-sculpted gel flowers (roses, peonies, or abstract blooms) in white, pink, or deeper purple sitting on top of or partially embedded in the lavender base
- Encapsulated gems or beads: Small beads or gemstones suspended inside gel layers, creating depth beneath a clear topcoat
- Textured elements: Raised patterns created with thick gel, creating a tactile surface that’s beautiful to look at and interesting to touch
- Mixed media: Combining 3D elements with line art, glitter, or other flat techniques for a layered, complex design
This approach requires professional skill—DIY 3D nail art is challenging and requires a light-curing gel system and steady hands.
Durability and Care
- 3D elements are durable when properly sealed and cured, lasting the full gel cycle
- The main risk is catching the raised elements on fabric, which can cause stress at the attachment point
- These designs require more careful handling and are best suited if you’re not doing heavy manual labor
3D nail art is truly statement-making and creates an impression that lasts long after the appointment—this is the most labor-intensive and technically advanced approach on this list, suited for special occasions or if you simply love dramatic nail art.
Final Thoughts
Lavender duck nails work because they combine two complementary design elements—a flattering color and a bold shape—that enhance rather than compete with each other. Whether you choose simple solid color, complex multi-color designs, or ornamental embellishments, the foundation remains elegant and intentional.
The actual design you choose depends entirely on your comfort level, the occasion, and how much visual drama you’re aiming for. A solid glossy lavender is the go-to for everyday wear and every professional setting. Glitter, foil, and ombre designs suit occasions where you want slightly more presence without venturing into costume territory. Marble, floral art, chrome, and 3D elements are the realm of special occasions or if you simply love having your nails be a wearable art project.
What makes lavender such a reliable choice is its psychological quality—it reads as calming and sophisticated simultaneously. It’s assertive without being aggressive, pretty without being precious, and works across nearly every context and aesthetic. Combined with the strength and visual impact of duck nails, lavender creates a look that actually earns the head-turns it gets. Start with whichever design resonates most with how you want to express yourself, and remember that these aren’t permanent—trying different designs is genuinely half the fun.
