

Duck nails—those adorable, curved tips that curl upward like a duck’s bill—might seem impossible to pull off on short nails. But here’s the thing: short nail bases actually force you to get creative with design placement, color blocking, and minimalist details. The best freestyle duck nails on shorter lengths are bold, punchy, and proof that you don’t need maximum length to make a statement. What makes these designs work is understanding that short duck nails demand precision, contrast, and personality compressed into a smaller canvas. If you’ve been skipping this trend because your nails don’t grow past your fingertip, these 20 freestyle designs prove that short nails and duck nails are a genuinely winning combination.
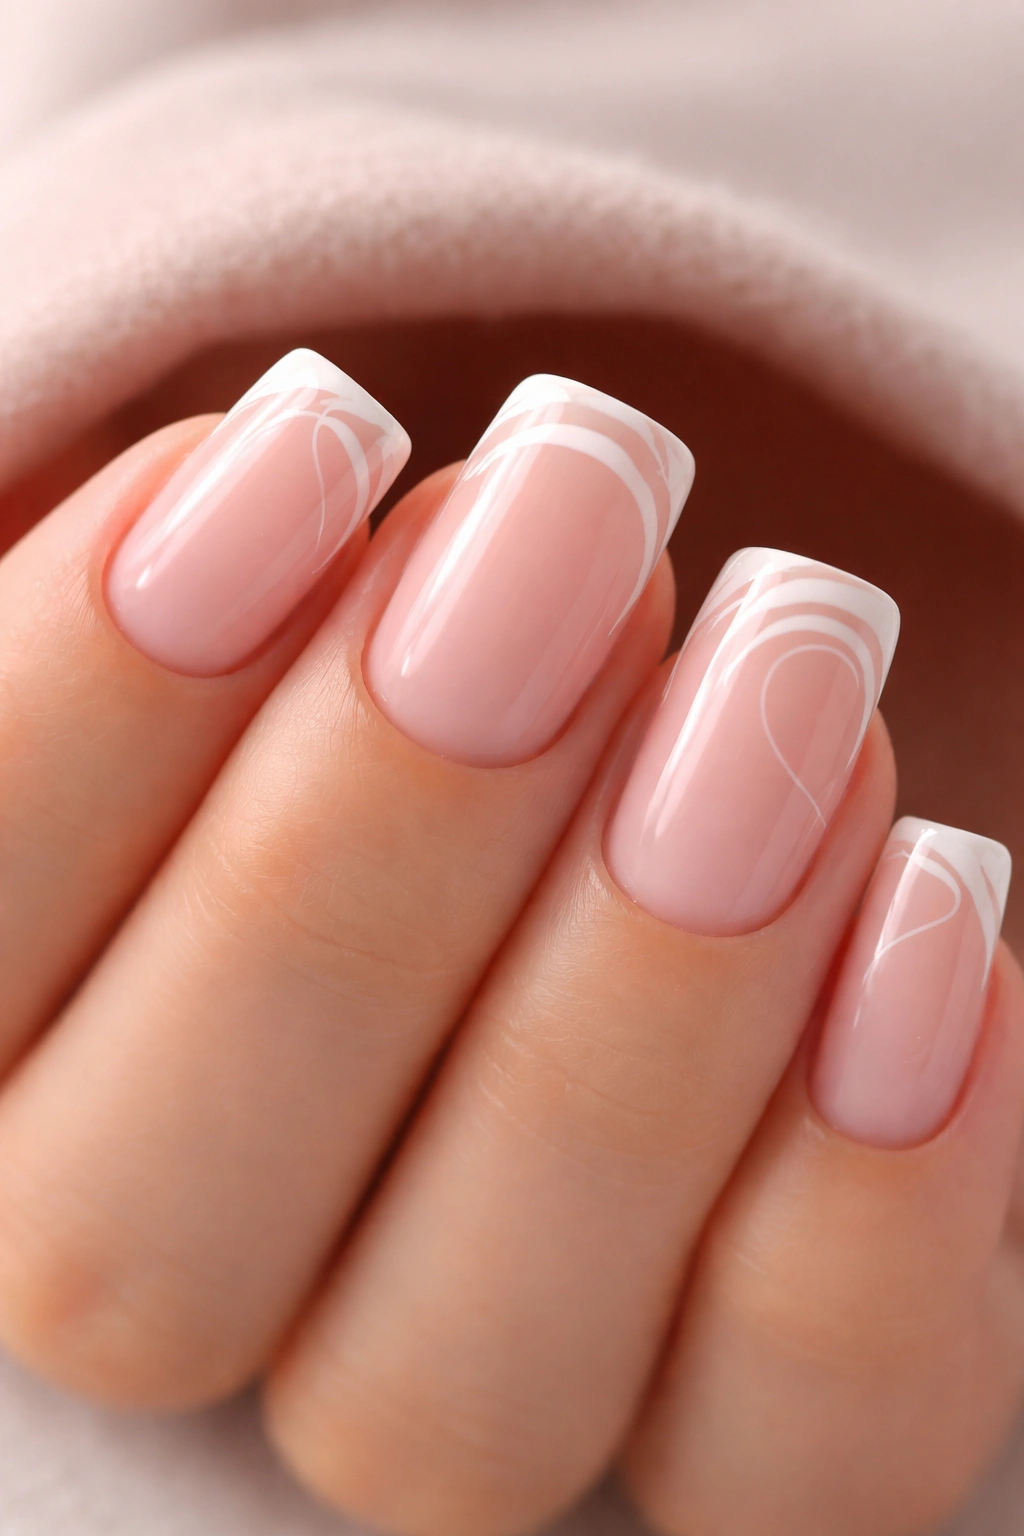
1. Minimalist White Tips with Gold Accent Line
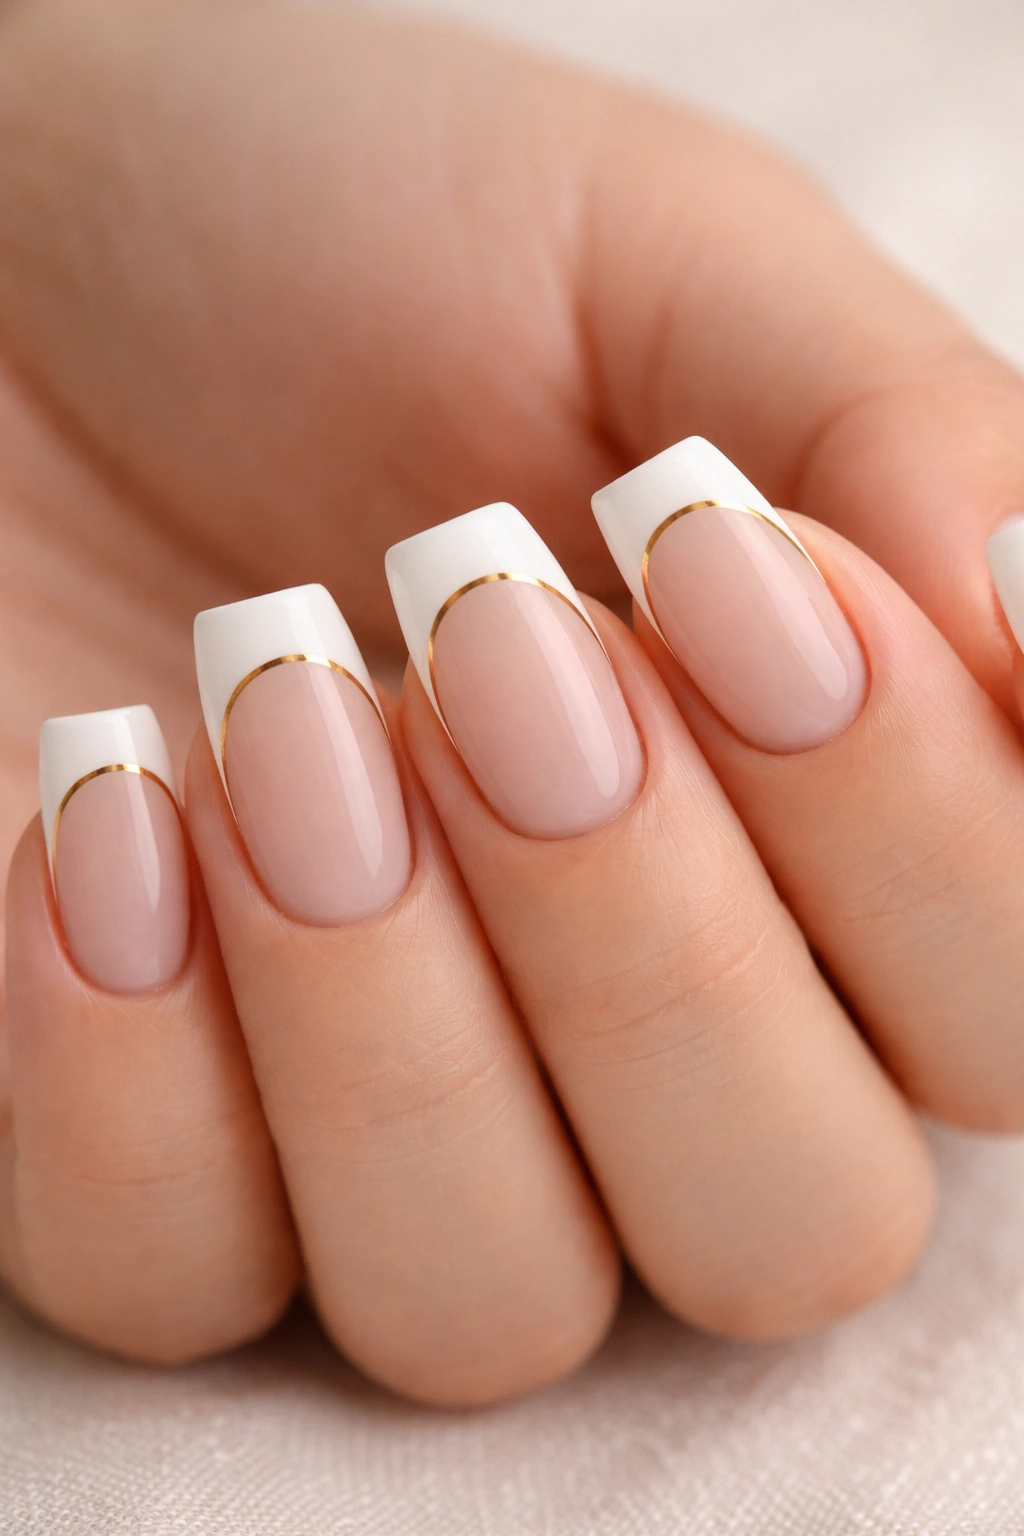
This design strips duck nails down to their purest form by using a sheer nude or skin-tone base with crisp white curved tips. A single fine gold line runs along the inside curve of each tip, creating definition without heaviness. On short nails, this minimal approach prevents the duck shape from feeling too cartoonish.
Why It Works on Short Nails
The white tip-against-nude base creates immediate contrast that reads beautifully at any length. The gold accent adds sophistication without adding visual bulk. This design relies on clean shape and negative space rather than coverage, which is exactly what short nails can deliver with precision.
Execution Tips for Best Results
- Use a thin detailing brush or nail art pen for the gold line—freehand works, but a thin angled brush gives steadier control
- Apply white in two thin coats rather than one thick coat to avoid bubbling and lumps on the curved edge
- The gold line should sit about 1mm inside the white curve, following the natural ridge of the tip
- Seal everything with a glossy topcoat for that polished jewelry-like finish
Pro tip: A white gel base with a regular nail polish gold line actually photographs better than all-gel because the matte undertone makes the gold pop.
2. Reverse French with Matte Black Base
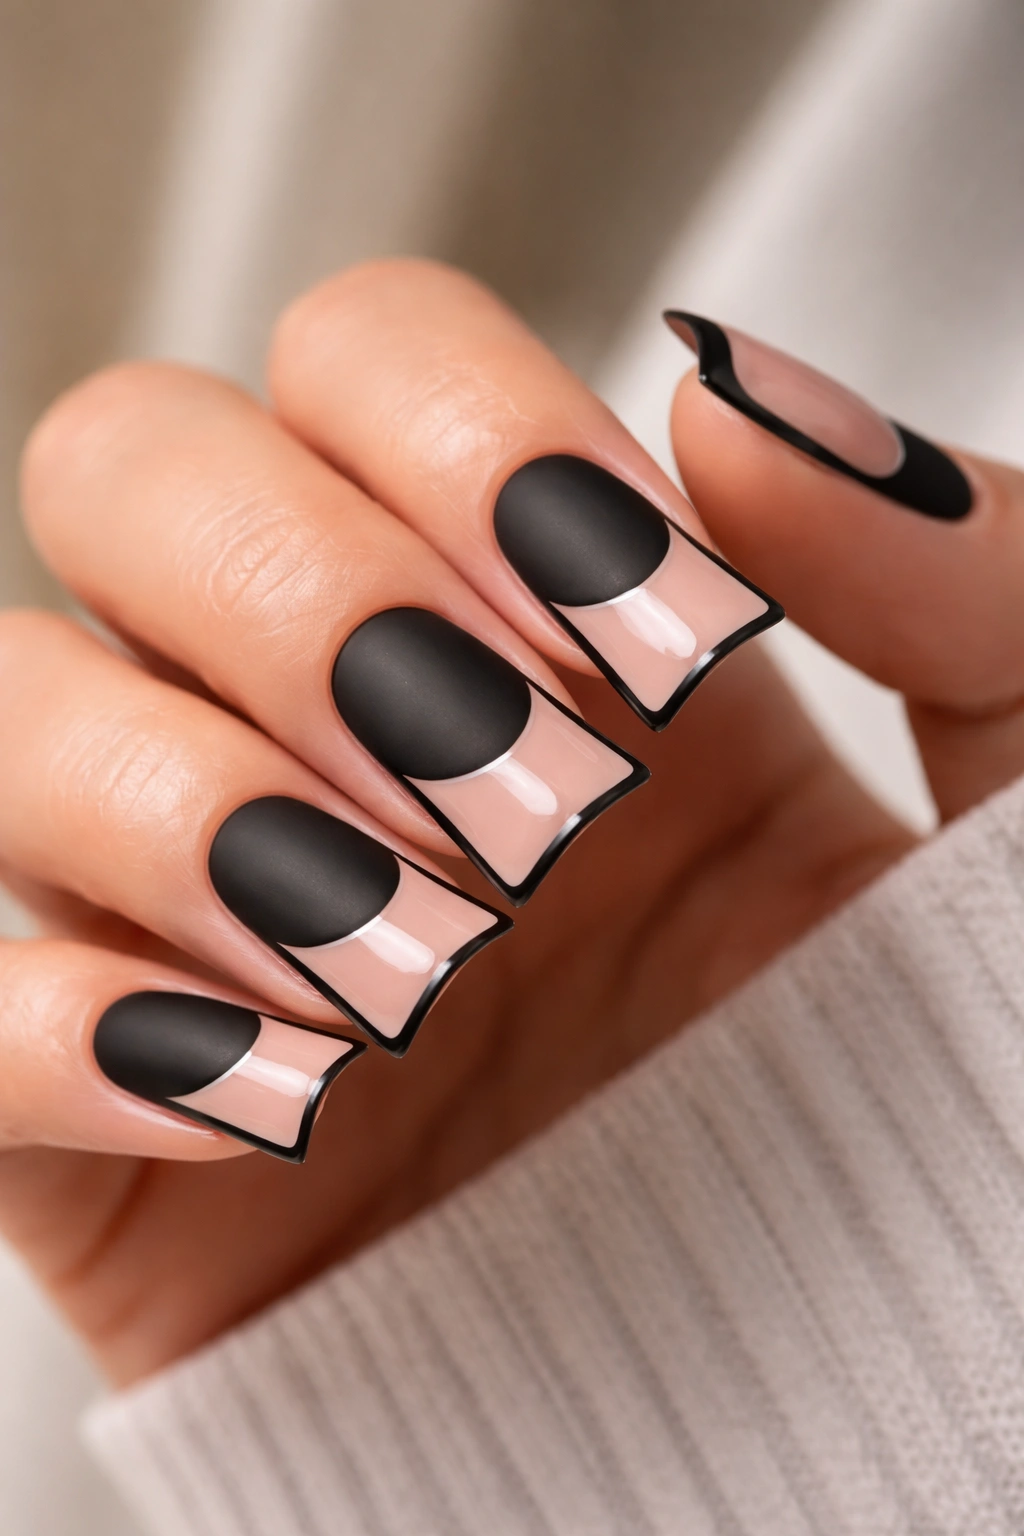
Flip the traditional French by keeping the base glossy and matte and making the curved duck tip a high-shine nude or blush. A thin black outline separates the base from the tip, creating a graphic, editorial look that feels modern and unexpected.
The Visual Impact
Short nails with this design read as intentional rather than limited. The matte-to-glossy contrast draws attention upward toward the tips, and the black outline adds definition that elongates the perception of the nail. This works beautifully on warm, cool, and neutral skin tones.
How to Build This Design
- Start with a matte black or very dark charcoal base coat (two coats for opacity)
- Once set, apply a thin black outline around the nail’s perimeter and define the duck curve with a thin brush
- Fill the curved tip area with a glossy nude or warm blush tone
- Seal with a gloss topcoat on just the tip area, leaving the base matte, or apply a selective glossy topcoat with a thin brush
3. Ombré Gradient from Blush to White Duck Tips
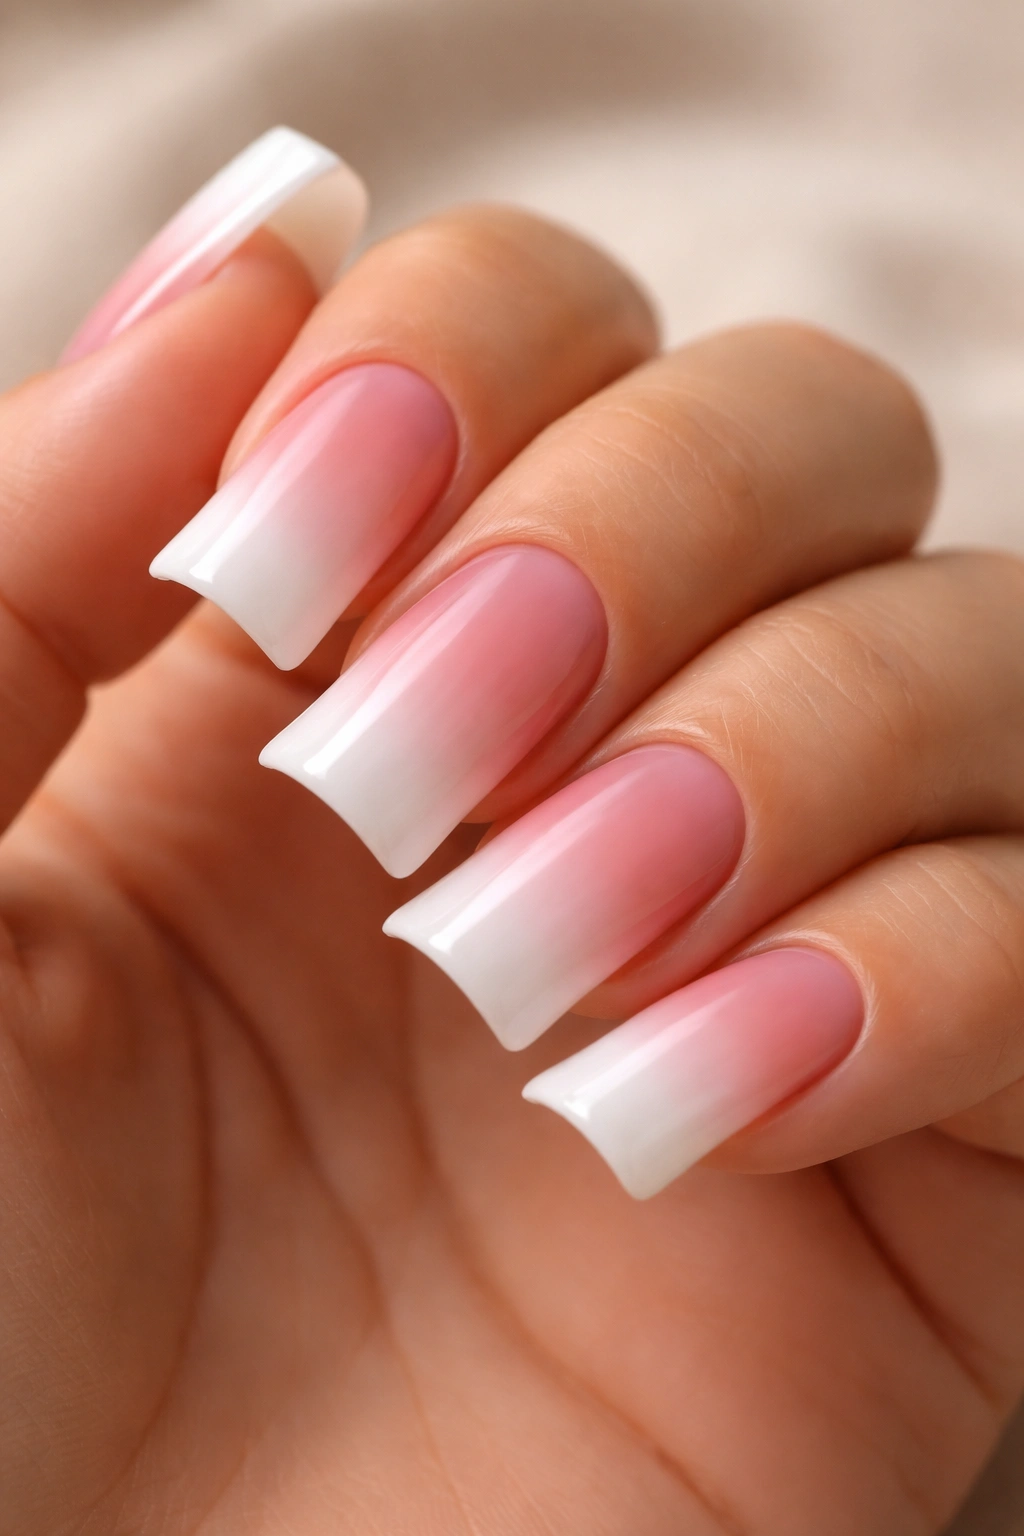
Create a soft ombré that transitions from a deep blush or mauve at the base, through ballet pink in the middle, and into pure white at the duck tips. The gradient should feel like a sunset compressed into the curved shape.
What Makes Gradients Shine on Short Nails
Gradients work exceptionally well on shorter nail beds because they create movement and visual depth across a smaller area. The ombré draws the eye along the length of the nail, making it feel more elongated than it actually is.
Ombré Application Technique
- Apply your darkest shade (blush or mauve) to the base two-thirds of the nail
- Sponge a mid-tone pink into the overlapping zone where the dark and light would meet
- Sponge white into the curved tip area
- Use a damp makeup sponge with a dabbing motion rather than dragging—this blends the colors seamlessly
- Finish with a glossy topcoat to soften any harsh transitions
Worth knowing: Gel polishes blend gradient transitions better than regular polish because you can work with them longer before they set.
4. Tortoiseshell Duck Nails in Warm Browns and Creams
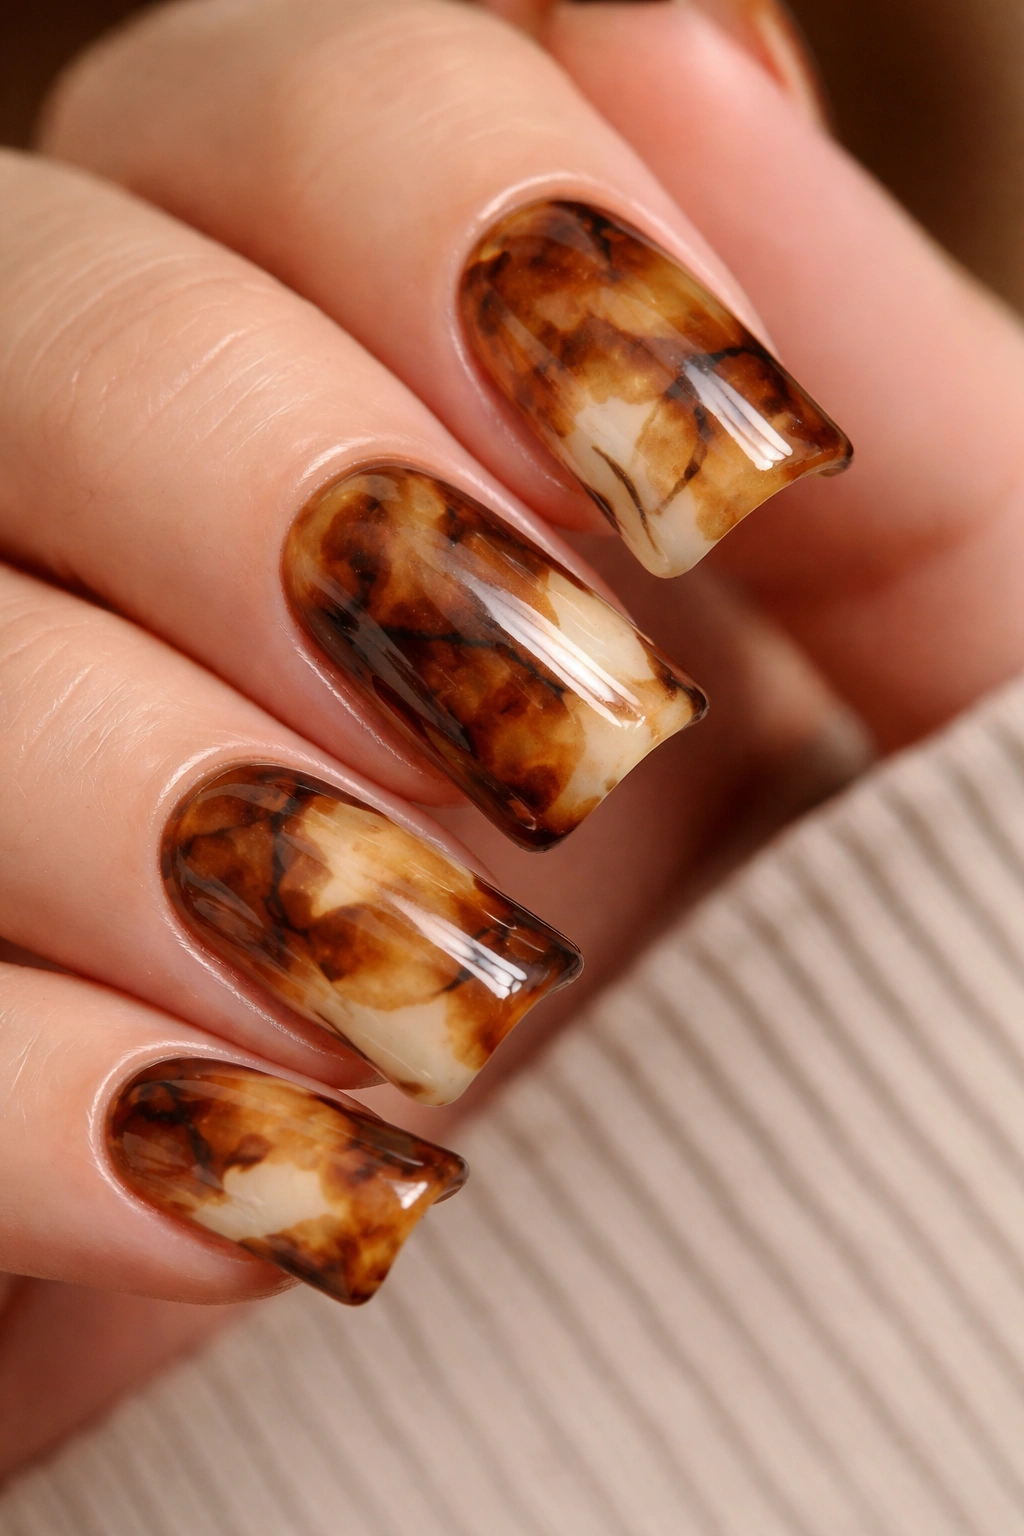
Layer warm browns, caramels, and creams in an organic tortoiseshell pattern that wraps around the entire duck nail, including the curved tip. Use browns for the darker patches, cream for the light areas, and thin black lines to mimic real tortoiseshell veining.
Why Tortoiseshell Works at Every Length
Tortoiseshell thrives on short nails because the pattern itself is small and detailed—it’s naturally suited to a smaller canvas. The busy-ness of the design makes length irrelevant; it’s all about the pattern complexity and color harmony.
Building a Believable Tortoiseshell
- Base coat in a warm cream or champagne
- Drop small irregular patches of warm brown across the surface
- Add darker espresso or black in the corners and where colors meet
- Use a thin brush to draw veining—short, deliberate lines that connect the different color patches
- Don’t aim for perfect symmetry; real tortoiseshell is organic and asymmetrical
5. Solid Glossy Red Duck Nails with Black Outline
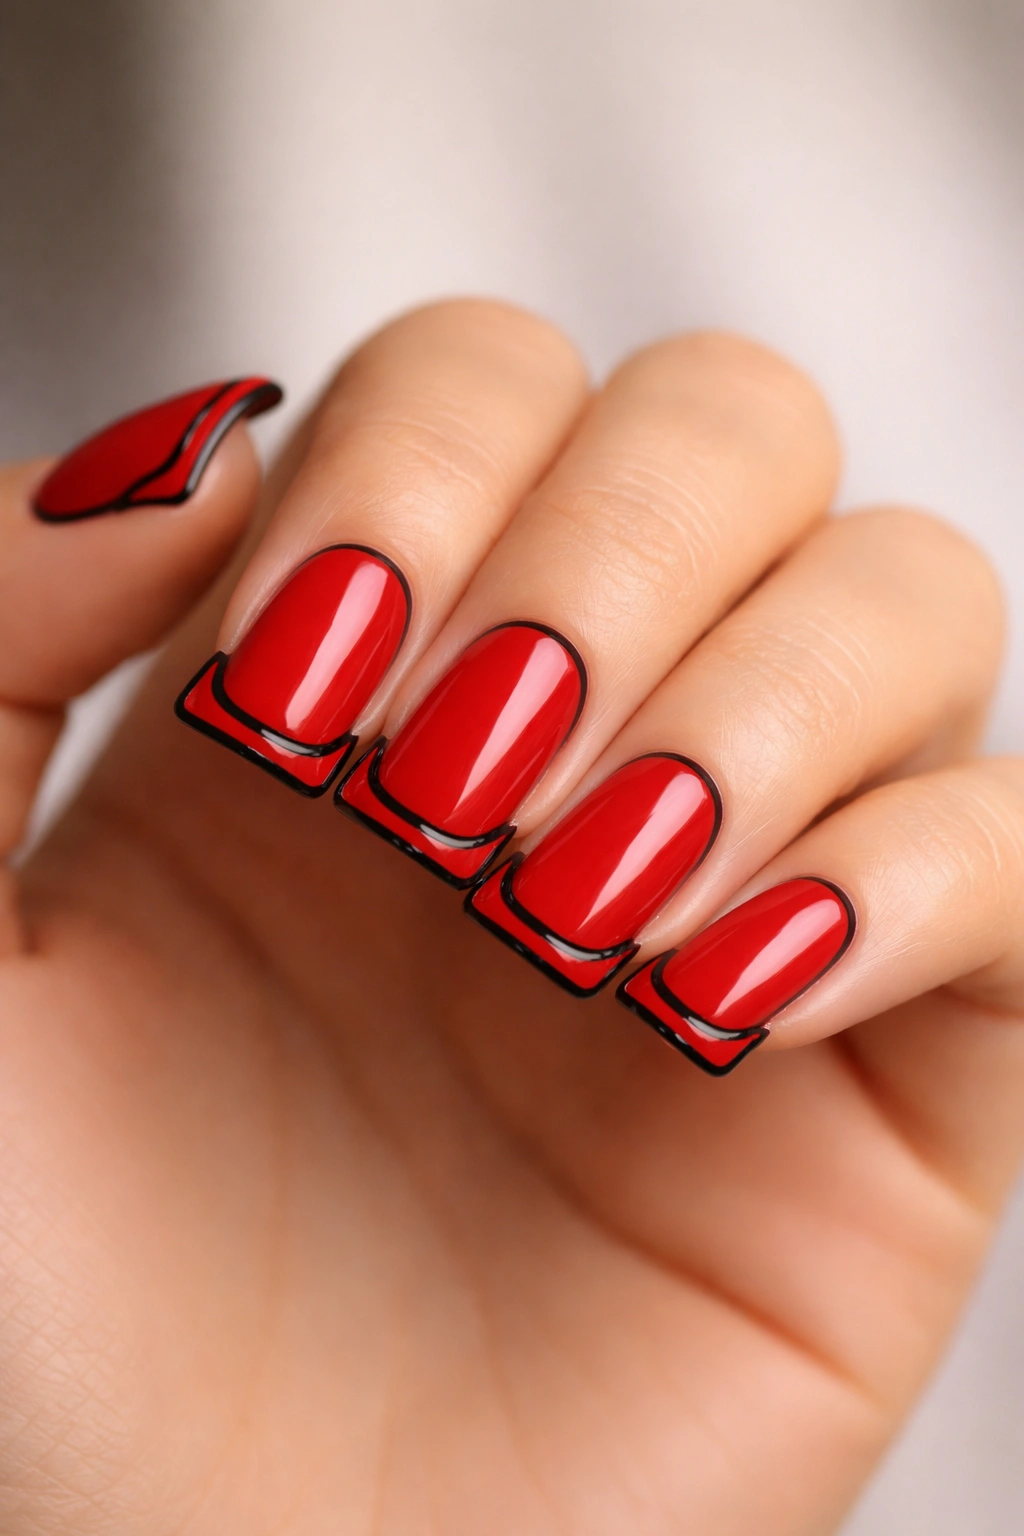
A bold, unapologetic red fill with a thin or medium-thickness black outline that emphasizes the entire duck shape, especially the curved tip edge. This graphic, retro approach reads as vintage-inspired and confident on any nail length.
The Power of Simplicity and Contrast
Short nails don’t need complexity to look complete. A solid color with a defining outline is actually more striking on short nails than on long ones because there’s nowhere for the eye to get lost. The red-and-black combination is inherently graphic.
Outline Placement for Maximum Impact
- Apply a thin outline around the entire perimeter of the nail—this defines the nail shape itself
- Add a second outline directly on the curve of the duck tip to emphasize that signature shape
- The outline should be thin enough to look intentional, not thick enough to dominate the design
- Black gel outline pen or a thin brush with black gel gives the steadiest hand
Pro tip: Use a bright cherry or true red rather than a blue-leaning red—this makes the shape more apparent and the design feel bolder.
6. Pastel Rainbow Gradient with Duck Tip Detail
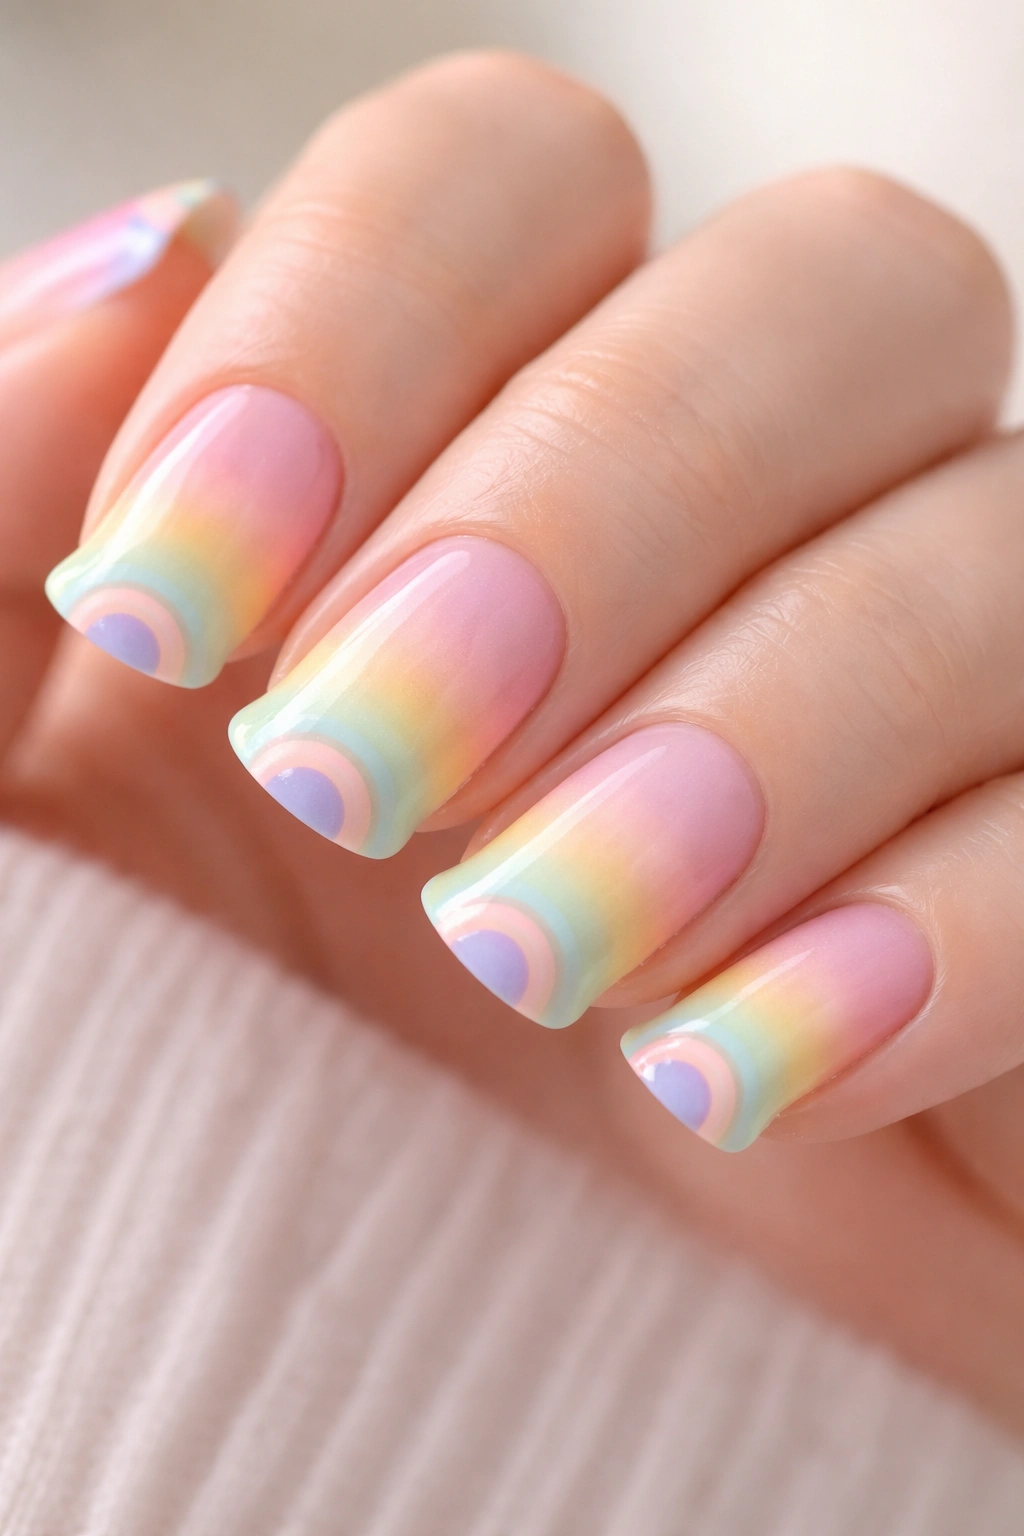
A horizontal gradient that moves from pale peach through soft yellow, mint, lavender, and pale pink, with the duck tip featuring a tiny rainbow gradient that mirrors the base. This playful design is perfect for those who want color without maximalism.
Pastel Rainbow on Petite Nails
Pastels work beautifully on short nails because they read as delicate and intentional rather than cartoonish. The small nail space actually forces you to focus on a tighter color progression, which creates a more sophisticated look than a full-spectrum rainbow would.
Creating Smooth Pastel Transitions
- Use a makeup sponge and very thin layers of each pastel shade
- Work from one end of the nail to the other in small, overlapping applications
- Blend the edges of each color with a sponge dampened in clear gel or a color-blending base
- Use ultra-soft pastels in gel form rather than regular polish—pastels in regular polish can look chalky
7. Nude Base with Metallic Gold Duck Tip and Rhinestone Accent
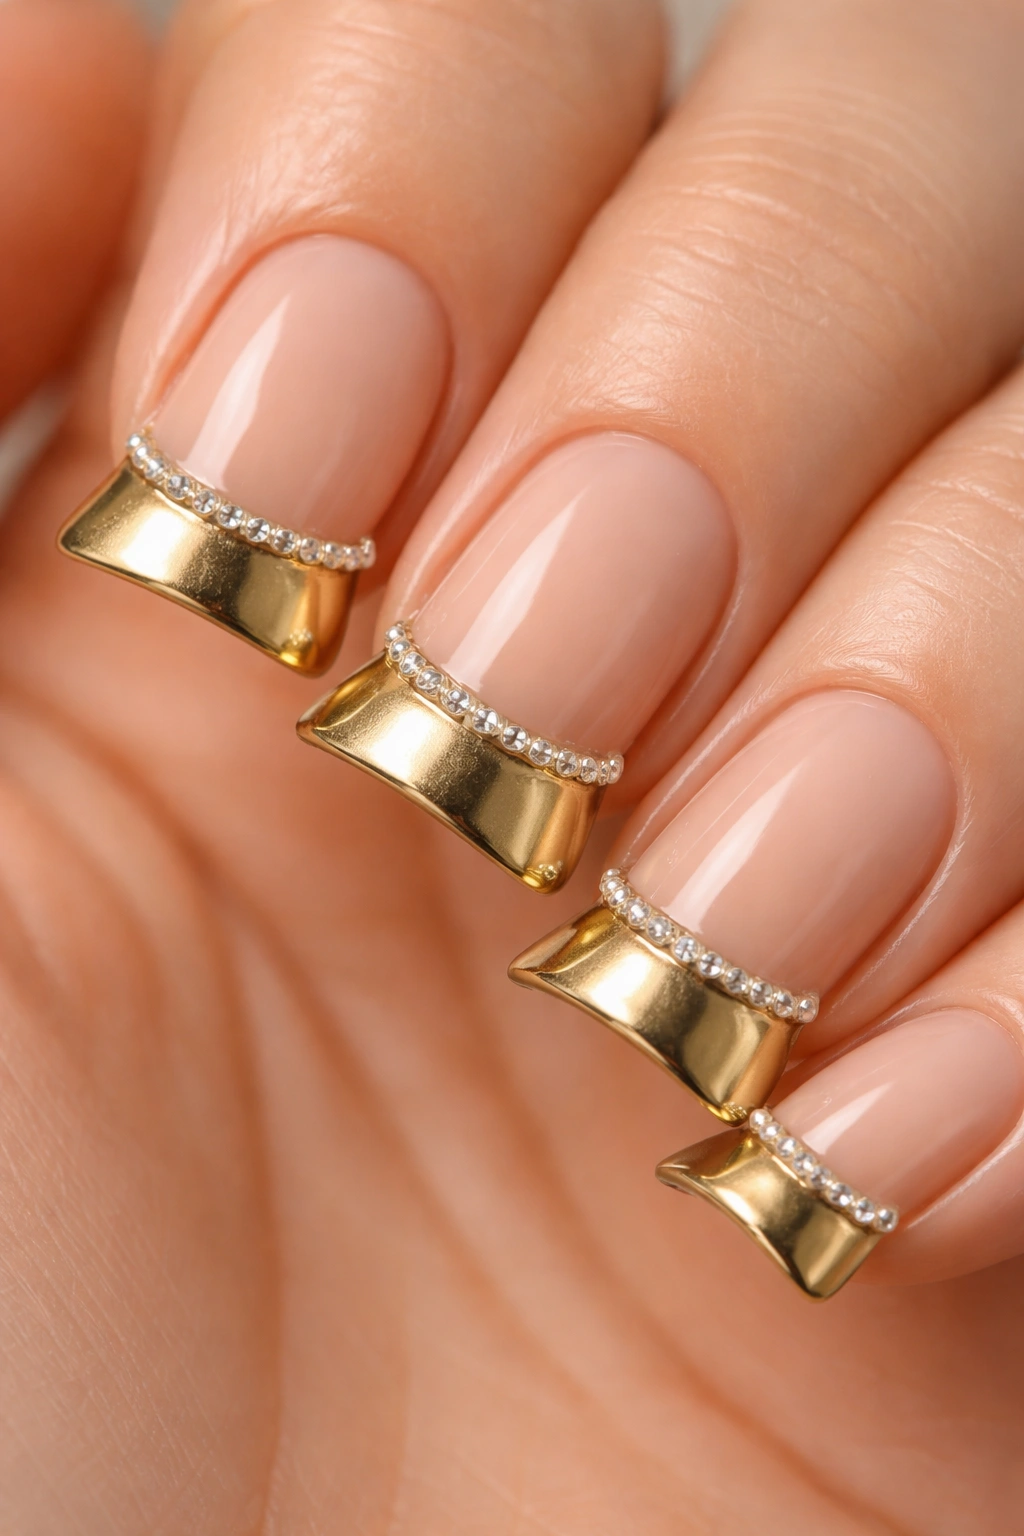
A simple nude or warm beige base with the curved duck tip filled entirely in metallic gold. A single line of micro rhinestones runs down the center of the gold tip, catching light and adding dimension without overwhelming the small space.
Glamour at Minimal Scale
Short nails benefit from strategic embellishment. A single line of crystals on a metallic background creates a focal point that makes the nail feel luxe without being costume-y. This works for everyday wear or special occasions.
Stone Placement and Adhesion
- Fill the duck tip area with metallic gold (gel or regular polish)
- While the topcoat is sticky or still wet, place individual micro rhinestones in a center line using a crystal picker tool
- Leave a tiny gap between each stone for visual rhythm
- Seal with one more layer of glossy topcoat to secure the stones permanently
8. Deep Plum Base with Silver Marbling on Duck Tips
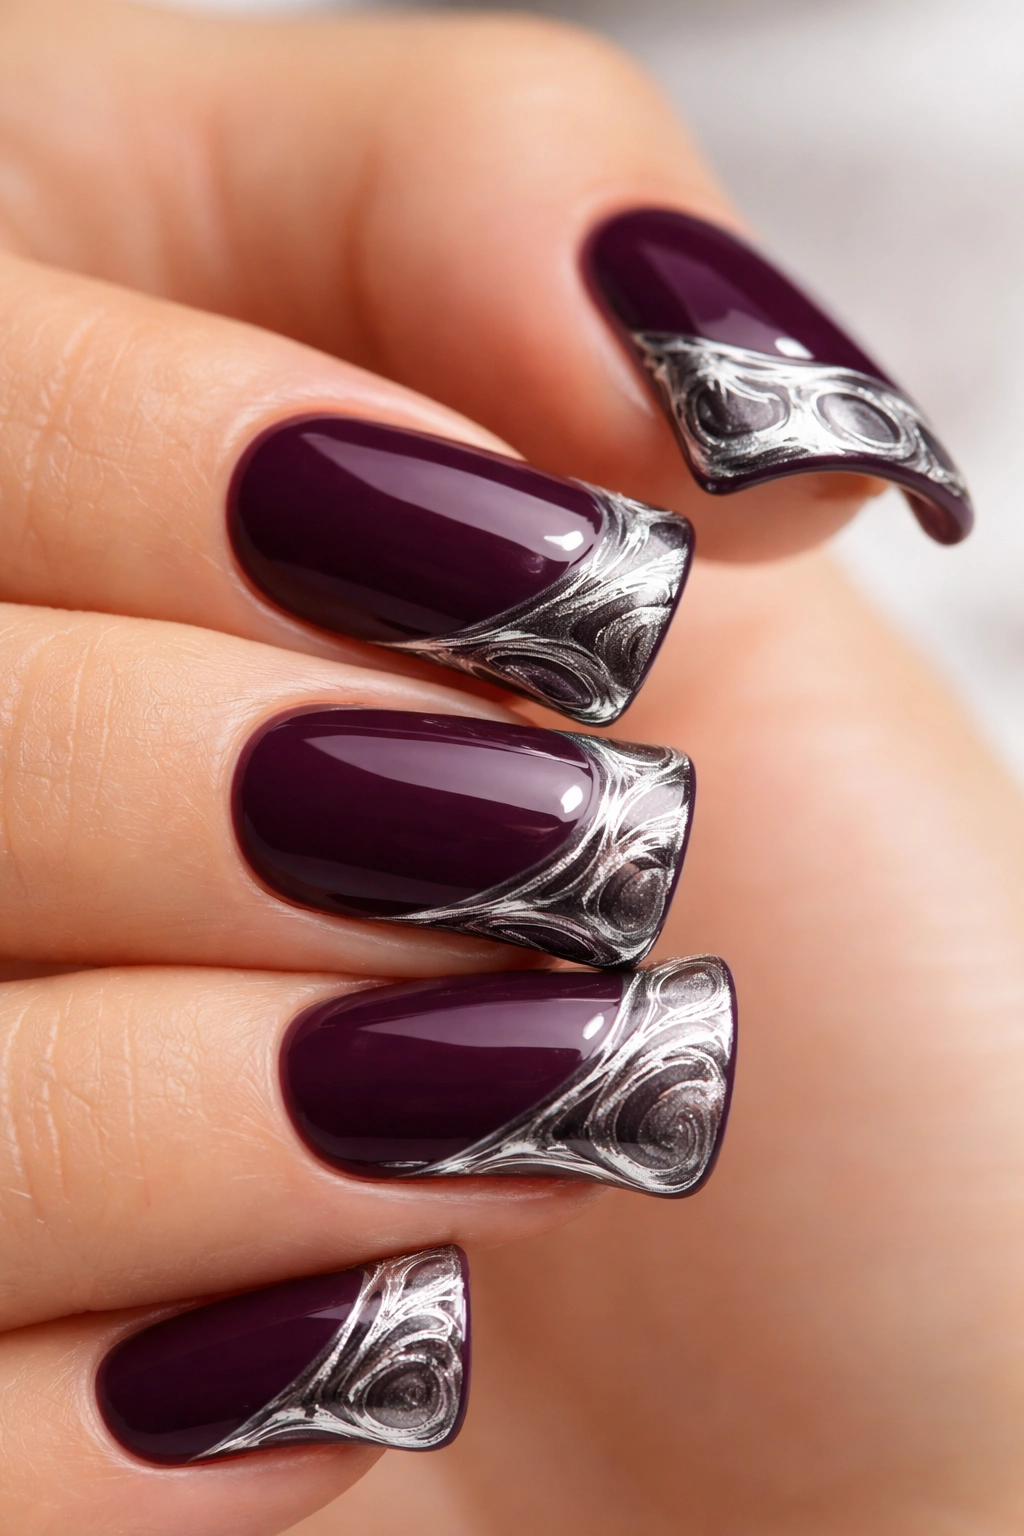
A rich, jewel-tone plum base with silver metallic paint applied in organic, marbled swirls across the curved duck tip area. The silver should look like liquid metal pooled naturally on the surface rather than intentionally placed.
Marbling’s Magic on Short Nails
Marbling creates visual interest and movement in a compact space. On short nails, marbling prevents the design from feeling flat or one-dimensional. The organic, unstructured nature of marbling means there’s no “right” way to do it—imperfection is the point.
Liquid Metal Marbling Technique
- Apply a thick layer of glossy topcoat on the duck tip area while it’s still tacky
- Drop small amounts of silver metallic gel into the wet topcoat
- Use a thin brush or toothpick to drag and swirl the silver through the clear topcoat, creating natural-looking pools and streaks
- The silver should be translucent enough to show the underlying plum base through the swirls
- Let it dry completely—don’t touch or manipulate it once you’ve created your pattern
Pro tip: Work on one nail at a time—topcoat sets quickly under UV light, so you need to create your marbling pattern fast.
9. Milky White Base with Neon Pink Duck Tip and Micro Dots
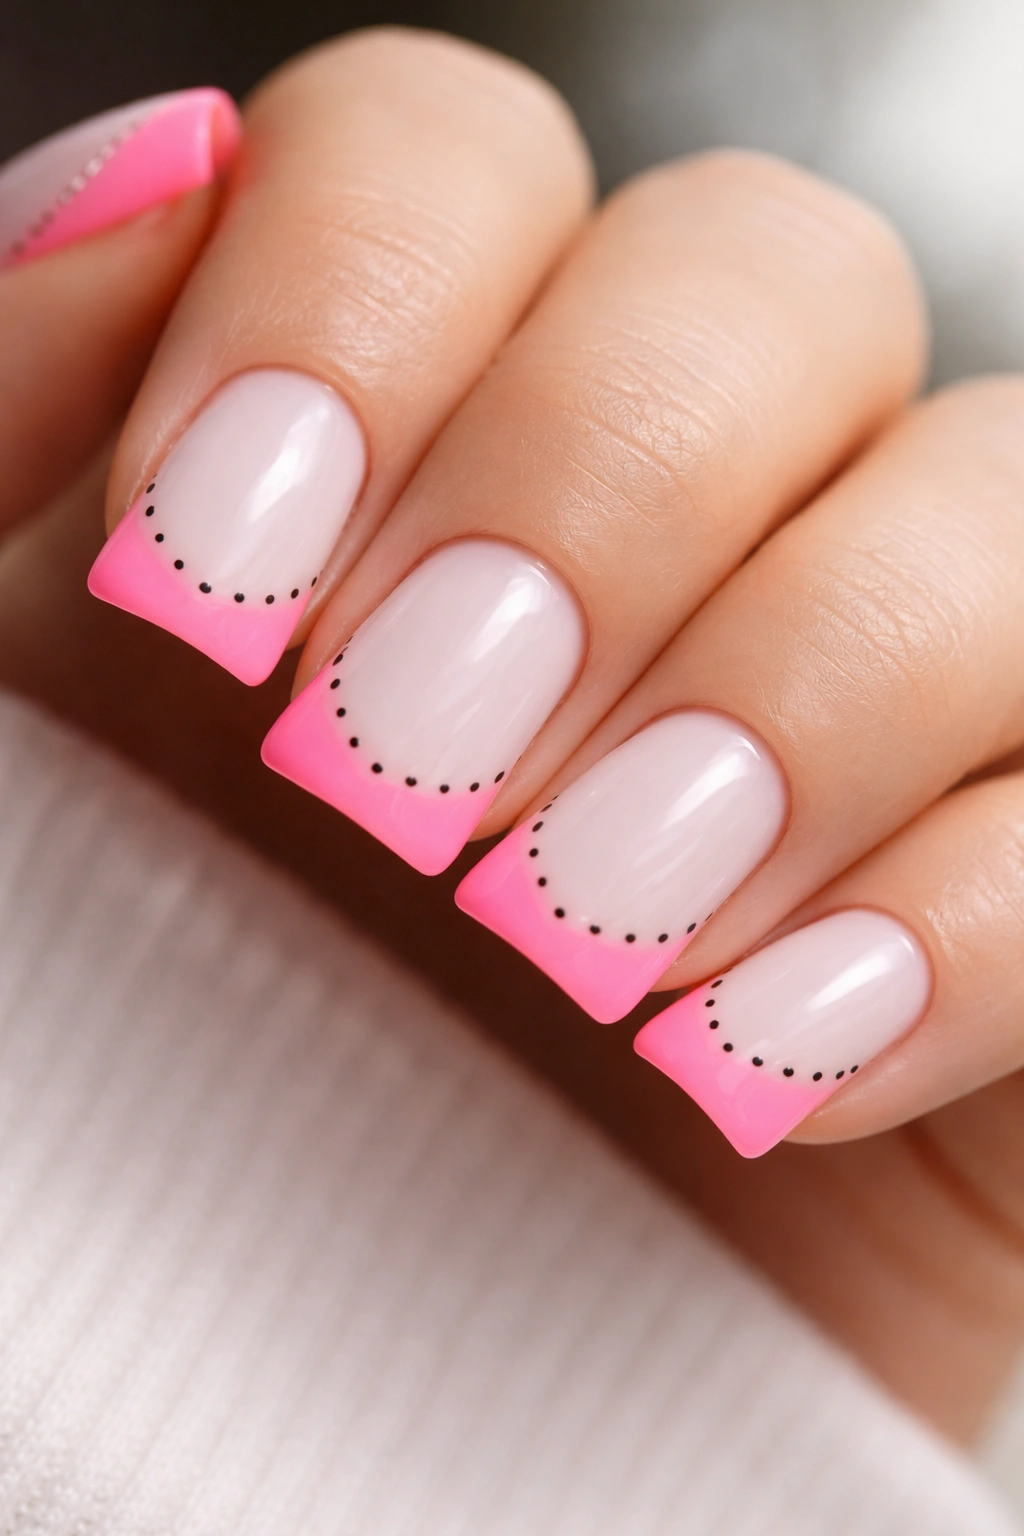
A soft, milky white or barely-there nude base with a vibrant neon pink curved tip. Tiny black dots form a line or scattered pattern along the edge where the white meets the pink, creating texture and visual interest.
Neon Impact on Short Nails
Neon thrives on short nails because the smaller surface area makes the color feel bold and intentional rather than overwhelming. The color-blocking here—white versus neon—creates immediate contrast that reads clearly even from a distance.
Dotting and Color Blocking
- Start with your milky white base (two coats for opacity)
- Using a thin brush or nail art pen, draw a clean curved line where the duck tip begins
- Fill the tip area with neon pink (this may take 2-3 thin coats because neons are often translucent)
- Use a dotting tool or a thin brush to apply tiny black dots along the white-to-pink border
- Space the dots consistently or scatter them randomly—both work depending on the vibe you want
10. Sage Green Base with Cream Swipe on Duck Tip
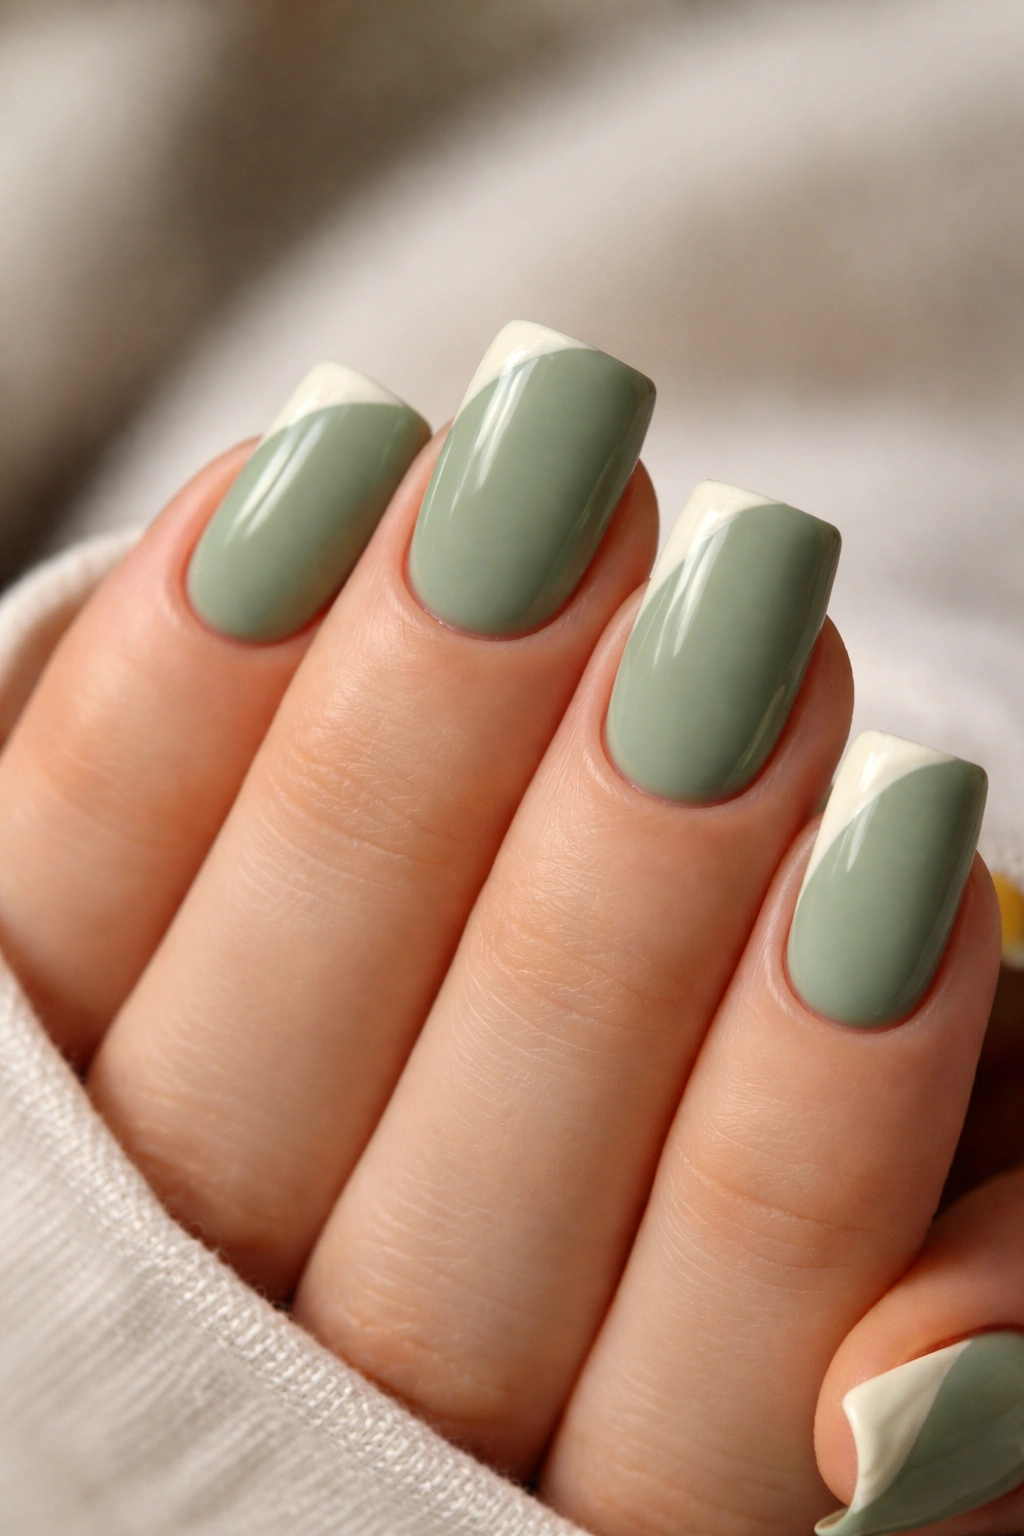
A muted sage green base with a soft cream or off-white color applied as a curved swipe that follows the natural duck tip line. The swipe should look like a brushstroke—organic and not perfectly straight.
Earthy Elegance at Any Length
This color combination feels natural and sophisticated. On short nails, this design reads as intentional and artistic rather than like you’re hiding something. The two-tone approach creates dimension without adding complexity.
Creating a Smooth Color Swipe
- Apply sage green base in 2-3 coats for full opacity
- Using a slightly wider flat brush or angled brush, apply cream color in one confident stroke along the duck tip curve
- The swipe should start thin at the sides and slightly thicker in the center, following the natural curve
- Let the edges be slightly organic rather than razor-sharp—this creates movement
- Topcoat with a matte finish for a softer look, or glossy for more shine
11. Chrome Base with Holographic Flip on Duck Tips
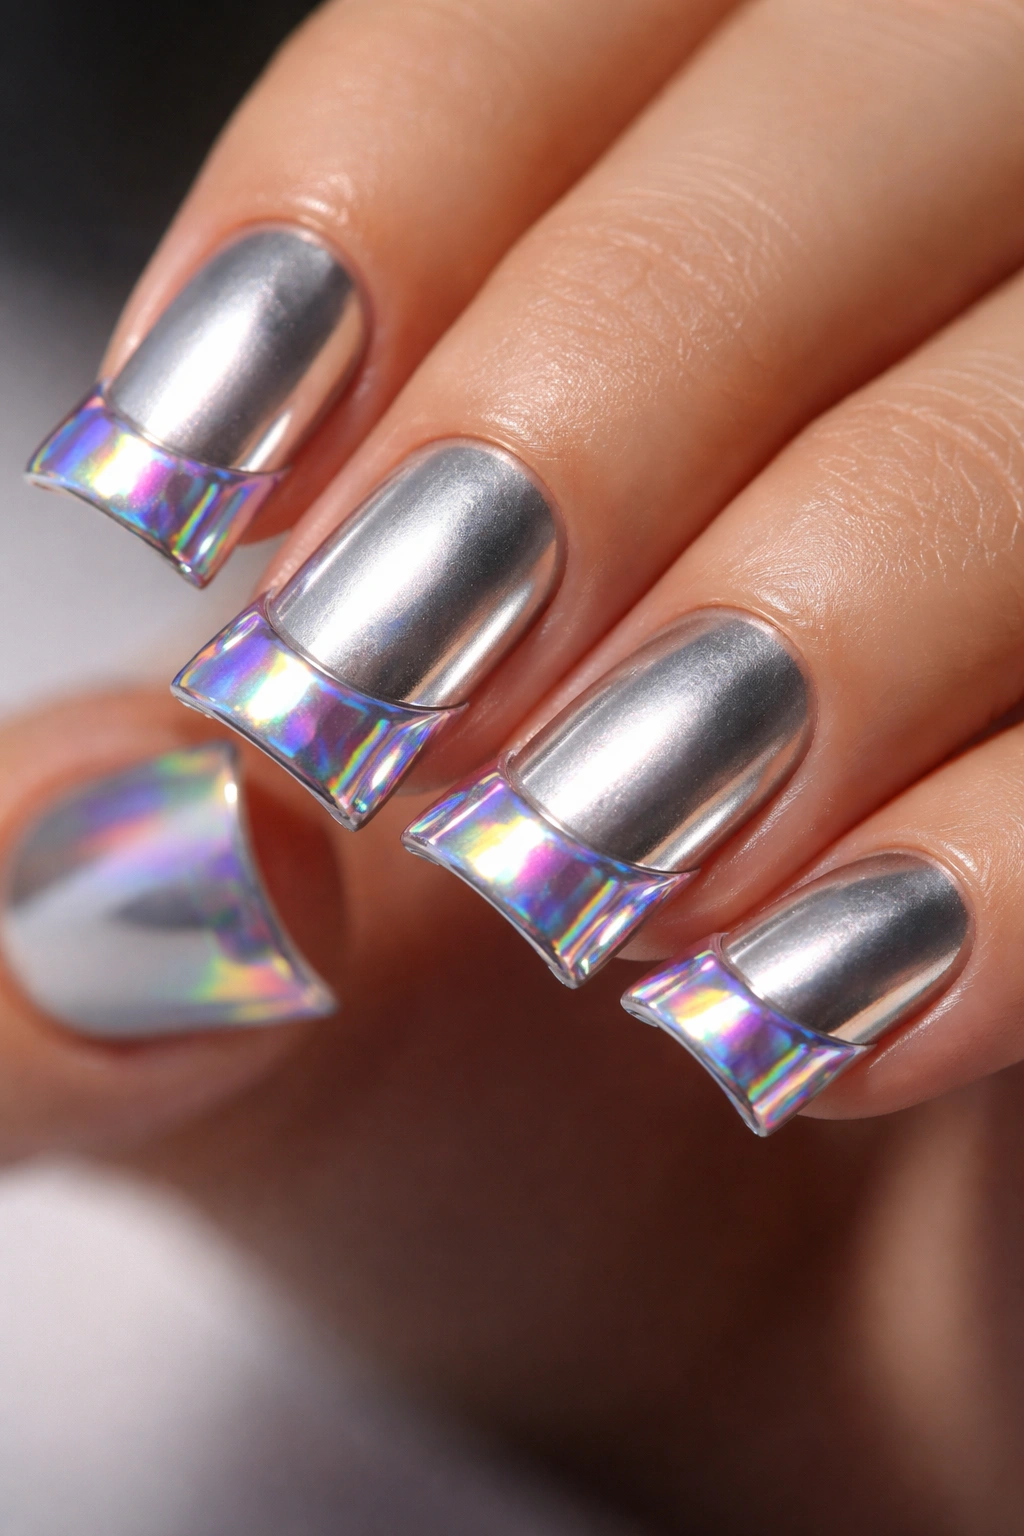
A reflective chrome silver base coat with the curved duck tip area featuring a holographic shift. The holo should flash subtle rainbow tones when the nail moves in different light angles.
Futuristic Minimalism
Chrome and holographic effects are eye-catching but feel modern and clean rather than busy. On short nails, this creates an “expensive” aesthetic—the base looks like liquid metal, and the holo tip catches light beautifully.
Applying Chrome and Holographic Effects
- Chrome requires a chrome powder and a sticky base coat—apply in thin layers and buff with a soft brush
- Once the chrome base is set and sealed, apply a thin layer of sticky topcoat on the duck tip area
- Sprinkle holographic powder onto the sticky topcoat in the curved tip region
- Use a soft brush to blend the holo powder into the topcoat until it looks like it’s floating suspended in the gel
- Seal with a clear glossy topcoat to lock everything in place
Pro tip: Holographic powder is finicky—buy a quality brand and apply it in a well-lit space so you can see the effect building.
12. Blush Pink Base with White Paint Pen Minimalist Art
A soft blush pink base with simple white line art on the duck tip—think thin geometric shapes, delicate florals, or abstract lines. This approach lets you be creative within a structured minimalist framework.
Geometric Minimalism Suits Short Nails
Simple line art is perfect for short nails because it doesn’t require space to breathe. The small canvas actually forces you to choose only the most essential elements, which results in a more refined design. Thin white lines on soft pink reads as elegant, not childish.
Line Art Application
- Use a white nail art pen or gel pen with an ultra-fine tip (0.5mm or thinner is ideal)
- Sketch light pencil guidelines if you’re worried about placement (yes, regular pencil works on nail polish)
- Draw your design slowly and deliberately—a wobbled line is part of the charm, but confidence sells it
- Keep your design small and centered in the curved tip area
- Seal with a glossy or matte topcoat depending on the vibe—glossy for shine, matte for softness
13. Navy Blue Base with Metallic Gold Curved Accent Line
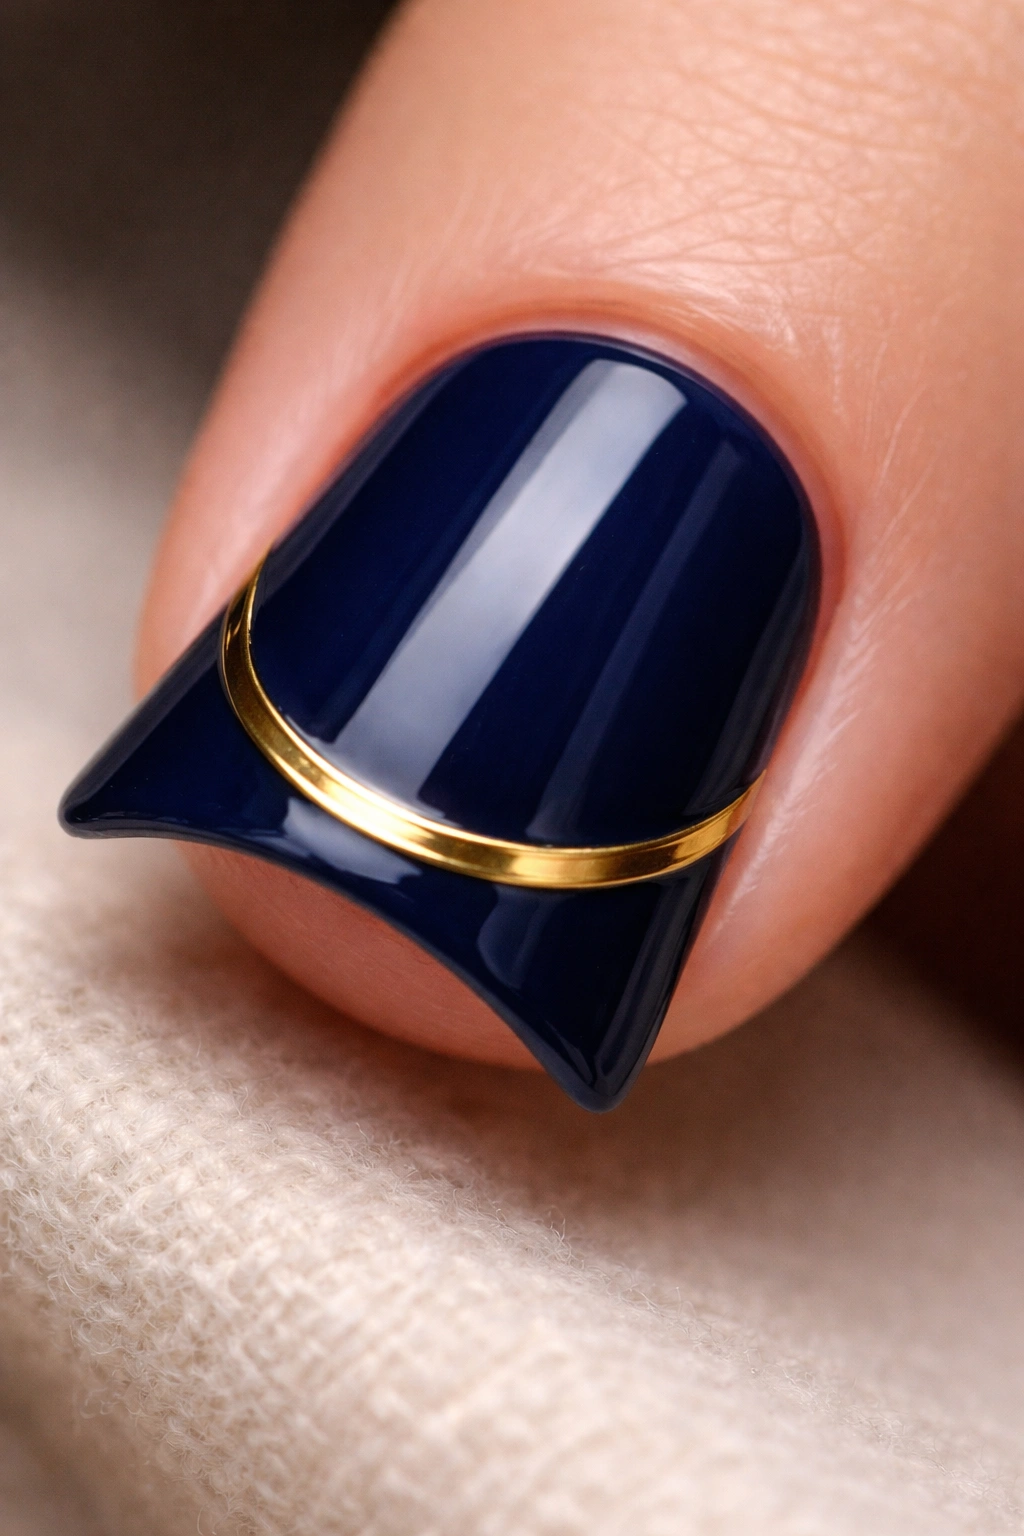
A deep navy blue base with a curved metallic gold line that traces the contour of the duck tip, following its shape. The gold should be applied with precision so it becomes the focal point and accent rather than coverage.
Elegant Contrast with Sharp Definition
Navy and gold is a time-honored color combination that feels sophisticated at any size. On short nails, this approach respects the shape rather than trying to hide or transform it. The gold line becomes like jewelry—a deliberate accent.
Precision Gold Lining
- Apply navy base in 2-3 thin coats for vibrant, even color
- Use a thin angled brush or a gold gel pen to trace the curve of the duck tip in one confident line
- The line should sit about 1-2mm inside the tip edge, creating a frame around the white or lighter nail underneath
- Seal with a glossy topcoat for shine and protection
Worth knowing: Gold metallic gel actually photographs better than gold regular polish because it has more depth and reflects light more richly.
14. Translucent Pink with Pressed Flowers on Duck Tips
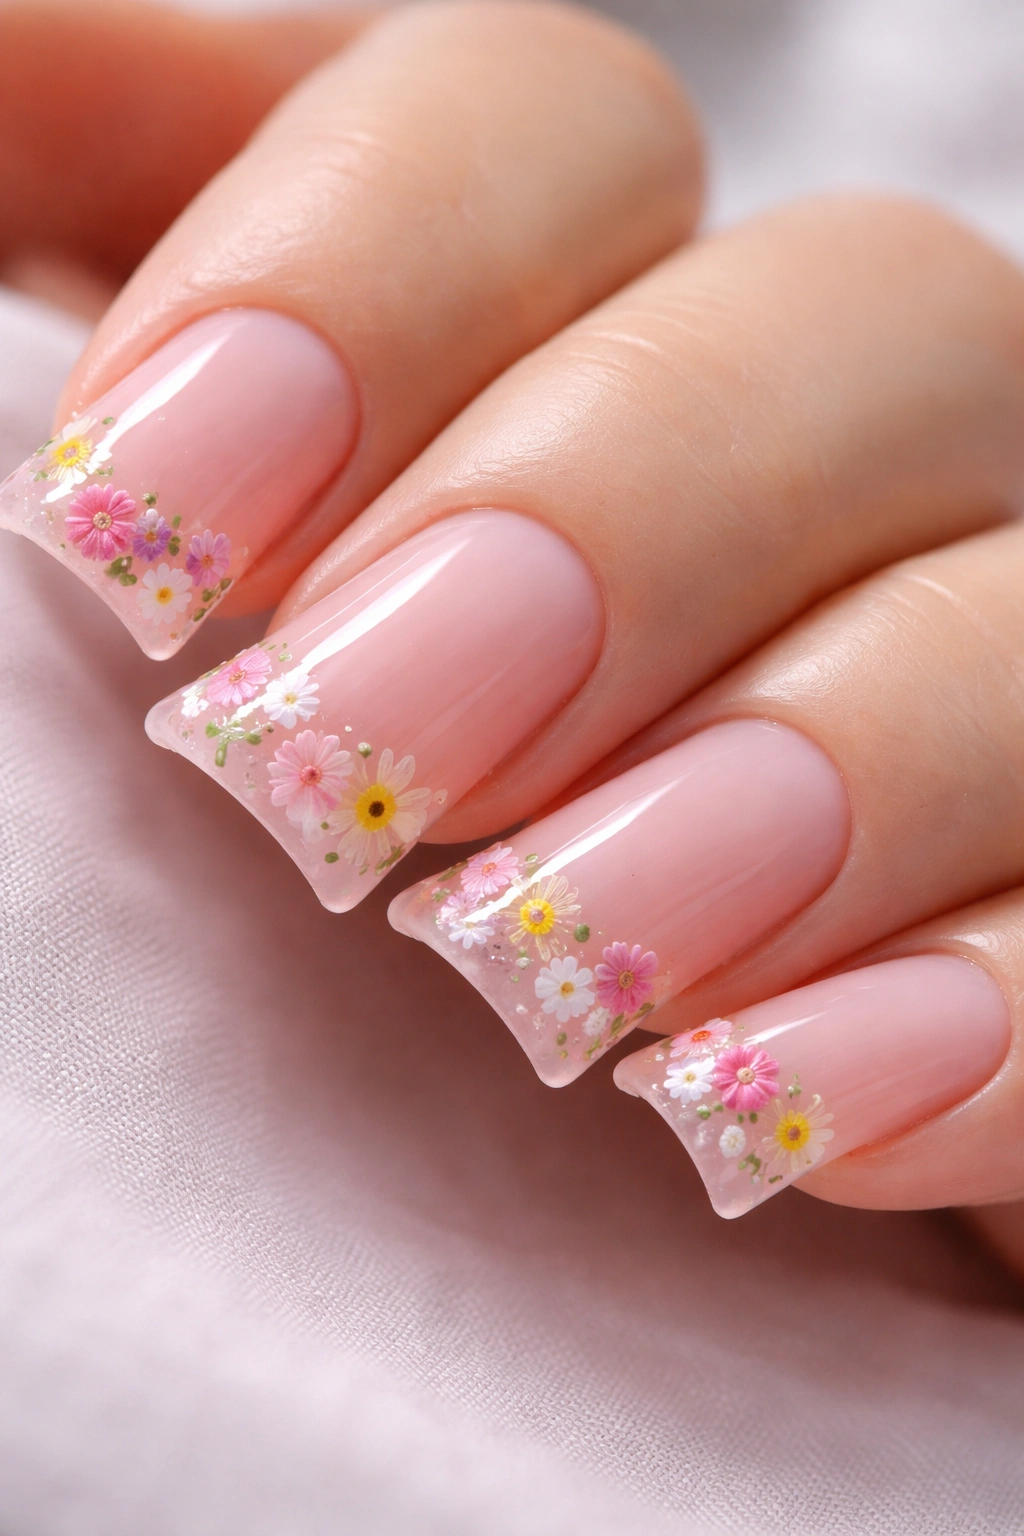
A barely-there pink or nude jelly base that lets your nail show through, with tiny pressed flowers (real or faux pressed flower stickers designed for nails) arranged on the curved duck tip area. This creates a delicate, romantic look.
Botanical Beauty on Petite Nails
Pressed flowers work wonderfully on short nails because they don’t require much real estate. The transparent base means the flowers appear to float on your nail, creating visual interest without bulk. This is high-impact-looking but surprisingly minimalist.
Applying Pressed Flowers
- Use a clear or milky pink jelly base as your foundation (one thin coat is often enough)
- Carefully place tiny pressed flowers or flower stickers on the duck tip while the base is still slightly sticky
- Press down gently with a soft tool to ensure full adhesion
- Seal with a glossy topcoat—you need several thin layers to secure the flowers and create a smooth finish
- The goal is for the flowers to be encapsulated under the gel/polish, not sitting on top
15. Matte Black Base with Glossy Clear Duck Tip and Fine Glitter Line
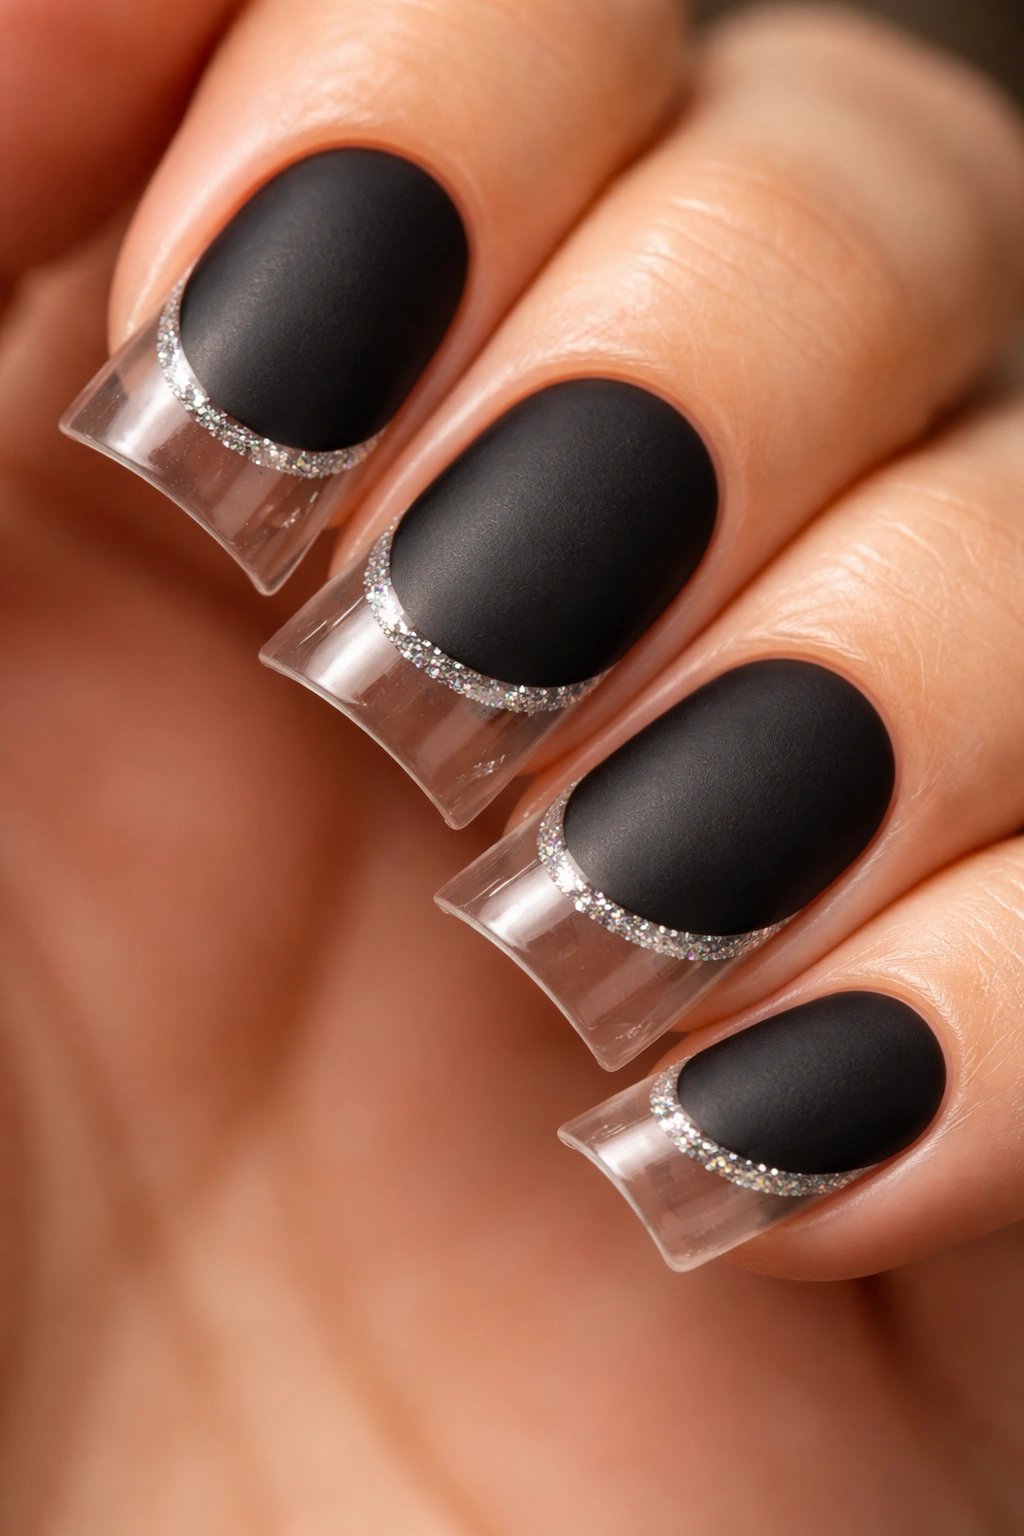
A velvety matte black base with the curved duck tip left clear or translucent, creating a window effect. A thin line of fine holographic or clear glitter runs along the inside of the duck curve, visible through the transparent tip.
Contrast Creates Visual Drama
The matte-to-glossy transition is inherently striking. On short nails, this contrast makes the duck shape pop and feel intentional. The hidden glitter detail feels like a secret—visible when light hits it right, subtle otherwise.
Building the Contrast Effect
- Apply matte black to the base two-thirds of the nail
- Leave the curved duck tip area bare or apply only a thin layer of clear base
- Use a thin brush to apply fine glitter in a line along the inside curve of the tip
- Seal with a glossy topcoat only on the tip area and the glitter line, leaving the base matte
- This creates a textural and visual contrast that elevates the whole design
16. Warm Caramel Base with Burnt Orange Duck Tip and Dark Brown Outline
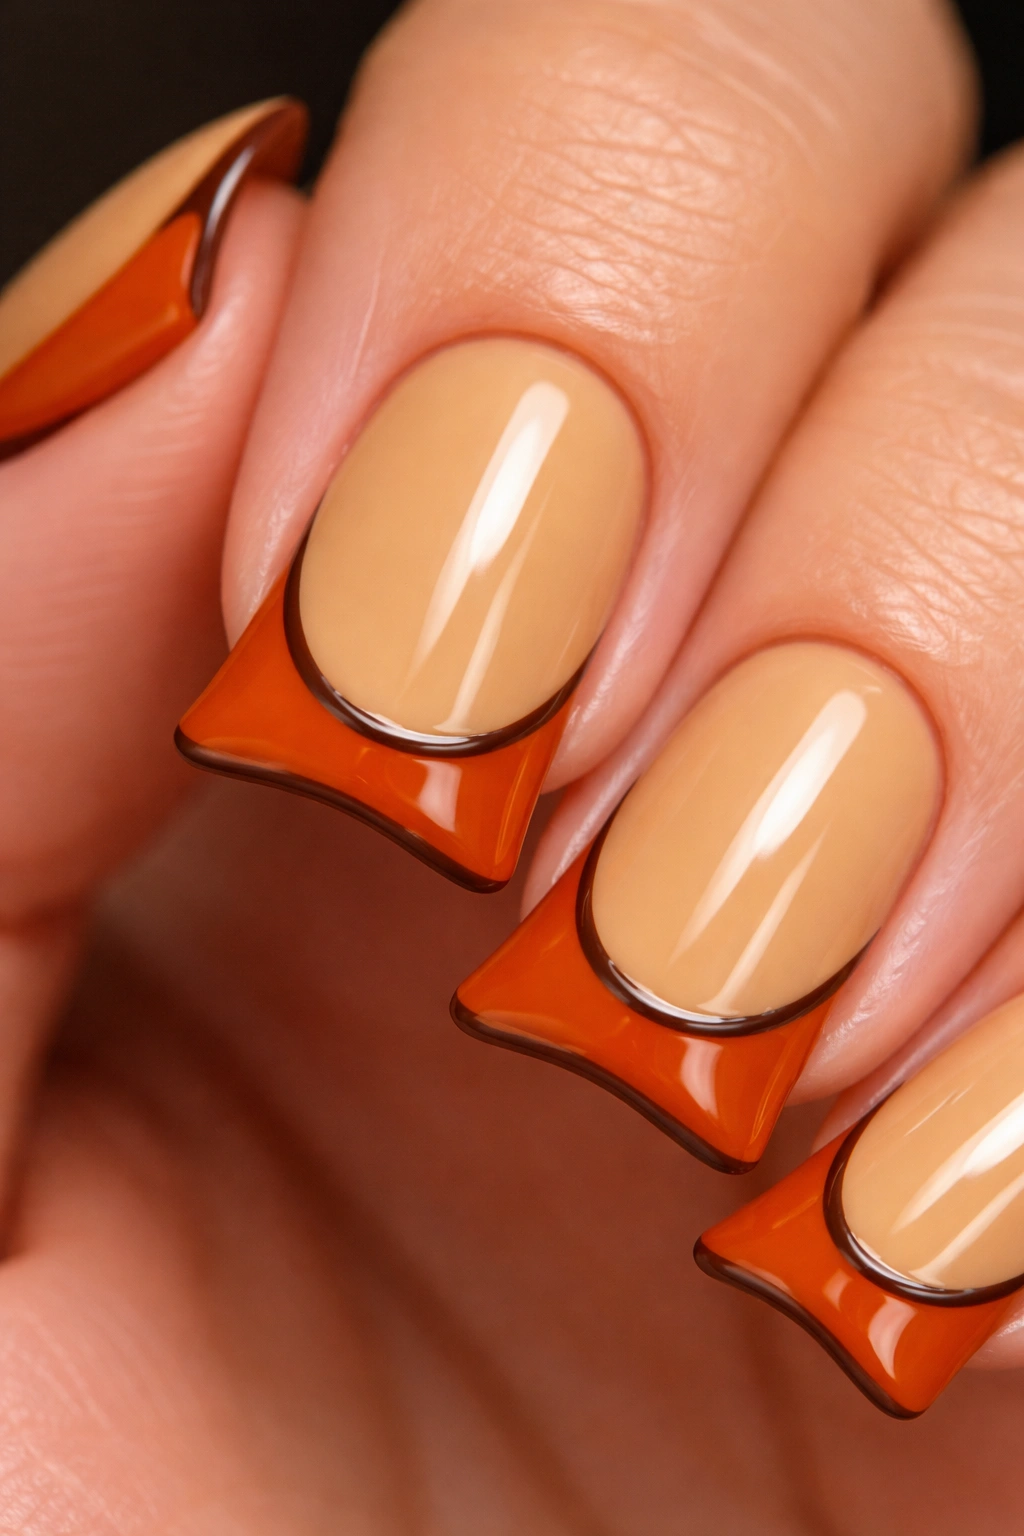
A warm, creamy caramel base with the curved duck tip in burnt orange. A thin dark brown outline separates the two colors and defines the entire duck shape, creating a graphic, warm-toned design.
Autumn-Inspired Without Being Seasonal
Warm color combinations feel naturally sophisticated. The caramel-to-burnt-orange gradient reads as intentional color theory rather than random. On short nails, this approach gives the impression of a carefully curated design.
Color Blocking with Outlines
- Apply caramel base in two coats
- Use a thin brush to outline the entire nail in dark brown (perimeter and the duck curve)
- Fill the curved tip area with burnt orange, staying within the brown outline
- The outline becomes both definition and design element
- Glossy topcoat makes the warm colors glow
Pro tip: Burnt orange can read as brownish-orange in some lighting. Choose one that leans distinctly orange so the color distinction from caramel reads clearly.
17. Soft Grey Base with Iridescent Pearl Dust on Duck Tips
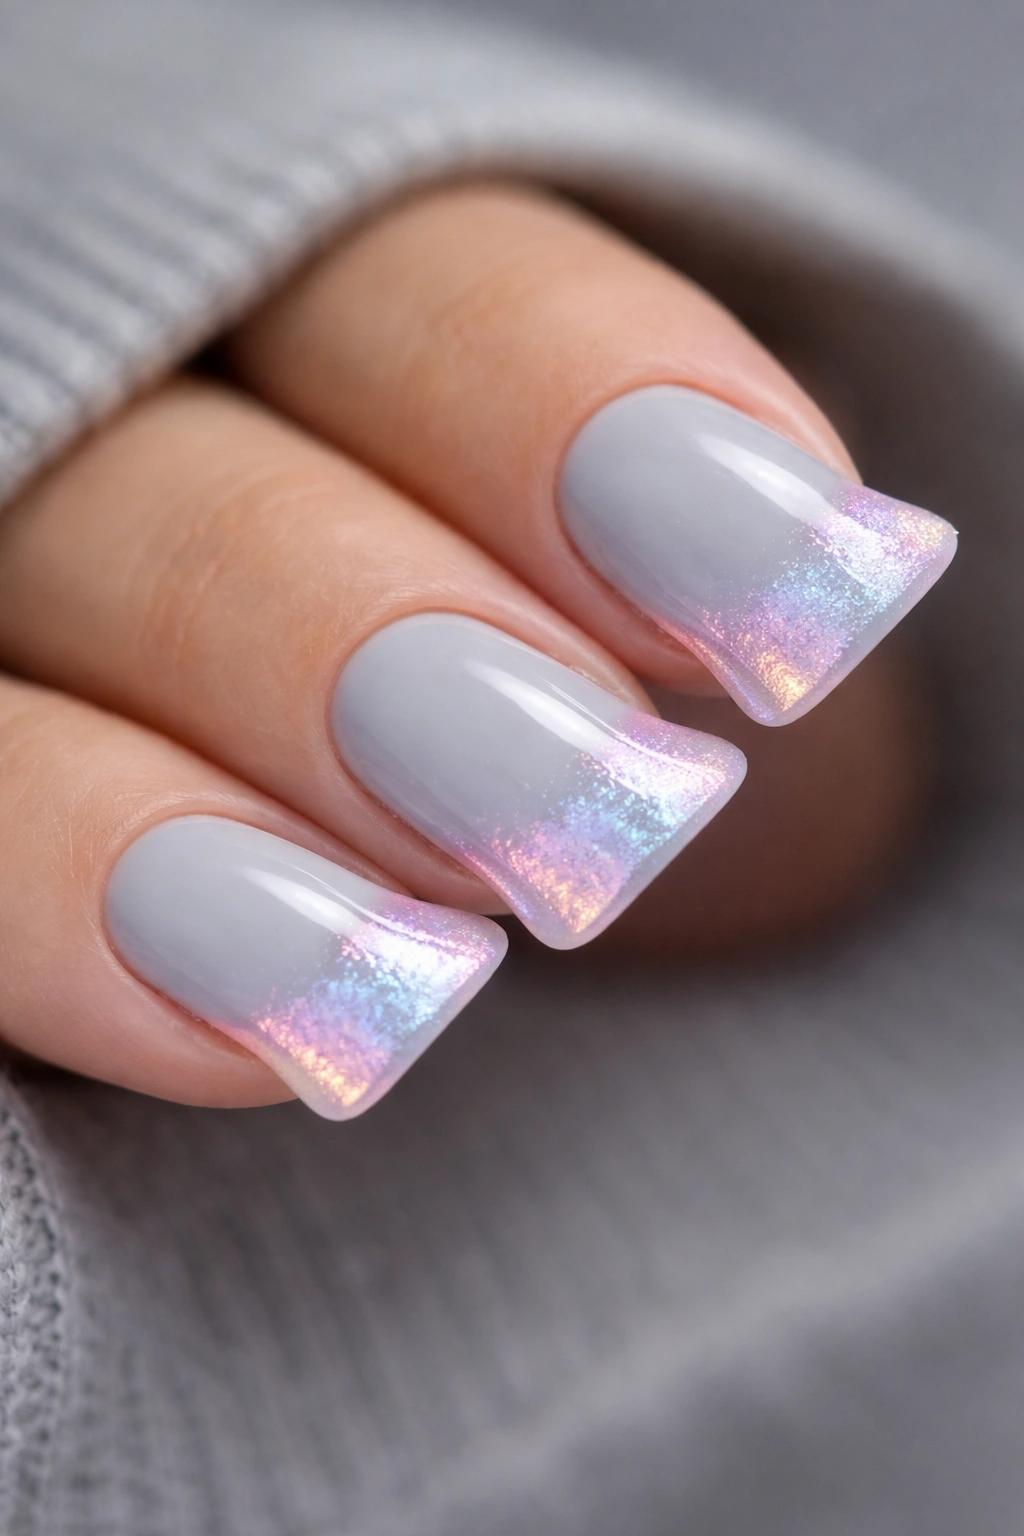
A cool, neutral grey base with iridescent pearl dust applied to the curved duck tip area. The pearl shifts subtly between soft pink, lavender, and blue depending on how light catches it, creating dimension without obvious color.
Sophisticated Subtlety
Pearl dust is one of the most elegant effects available to nail artists. On short nails, it creates luxury and sophistication through shimmer and shift rather than bold color. This design works for professional settings or everyday elegance.
Applying Pearl Dust for Maximum Shift
- Grey base in 2-3 coats (a cool dove grey works best for pearl shift)
- Apply a thin sticky topcoat just on the duck tip area
- Sprinkle iridescent pearl dust onto the tacky topcoat using a soft brush to distribute evenly
- The key is using a light hand—you want the grey to show through the dust, not be buried by it
- Seal with clear topcoat, applying thin layers so the shift effect stays visible
18. Cream Base with Burgundy Duck Tip and Negative Space Pattern
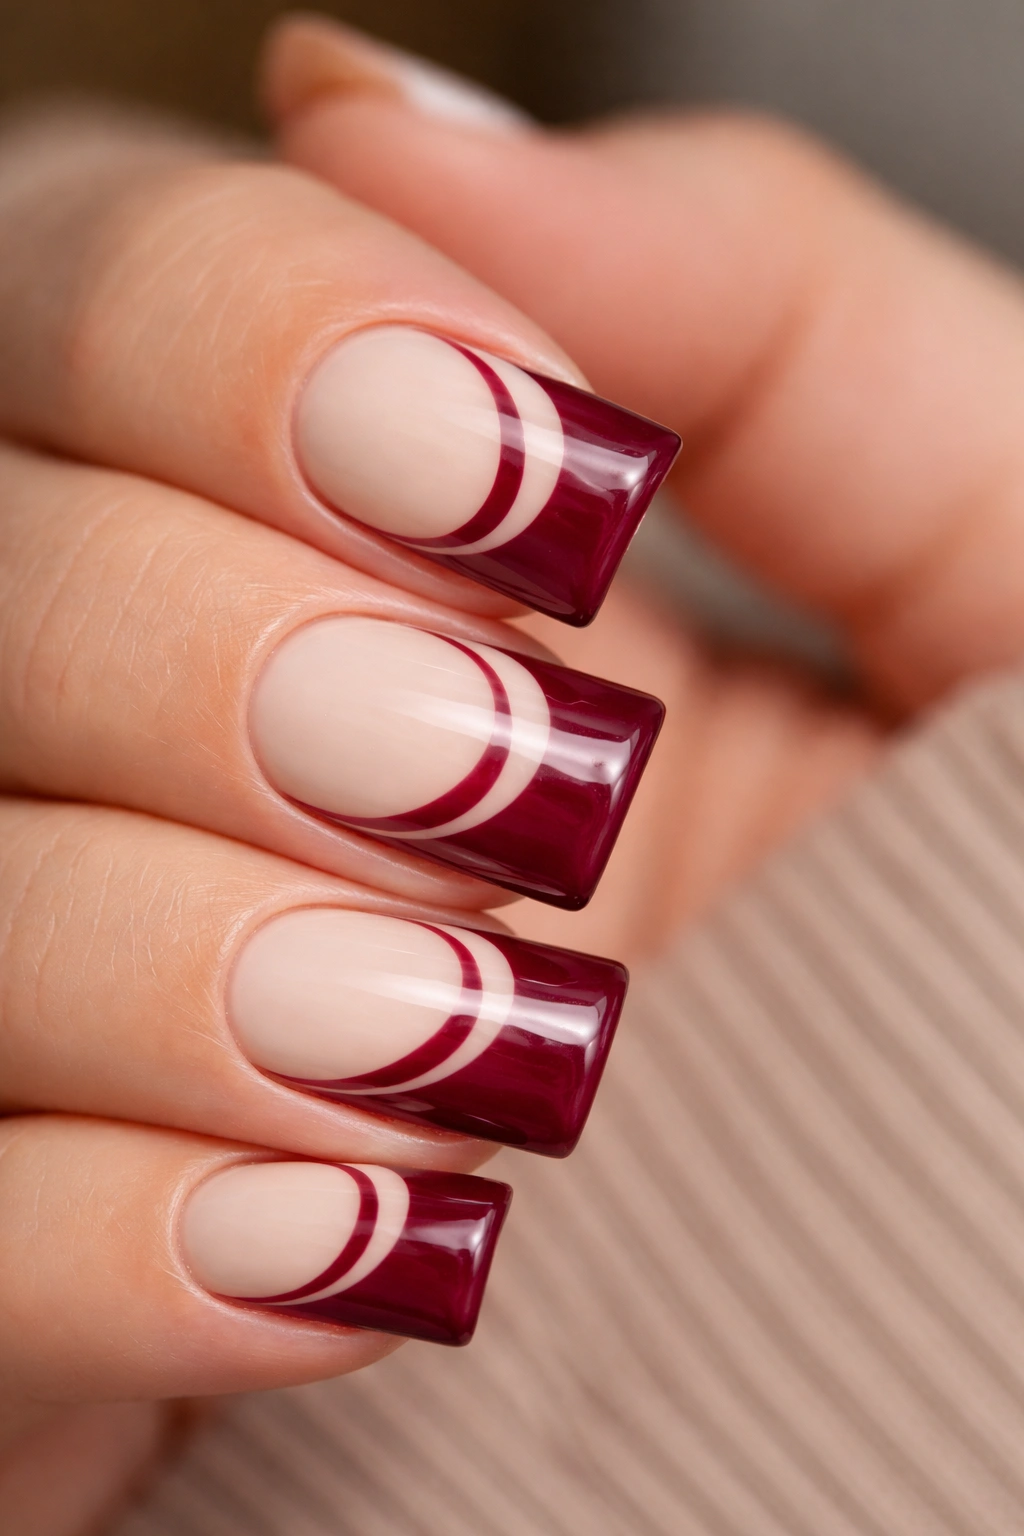
A soft cream base with deep burgundy on the curved duck tip. Negative space (intentional bare spots) creates a pattern—perhaps geometric shapes or organic abstract forms—where the cream nail shows through the burgundy.
Pattern Through Absence
Negative space is clever design because it works with the nail’s natural shape rather than fighting it. On short nails, this approach turns limitation into sophistication. The design reads as intentional and artistic.
Creating Negative Space Patterns
- Apply cream base as your foundation
- Paint burgundy on the duck tip area, then use a thin brush or nail art pen to define the areas you want to keep cream
- Carefully remove burgundy from those areas using a brush dampened in acetone or a cleanup pen
- The result should look like burgundy shapes with cream showing through in a deliberate pattern
- Seal with glossy topcoat
19. Lavender Base with White Smile Line and Tiny Rainbow Gradient in Curved Tip
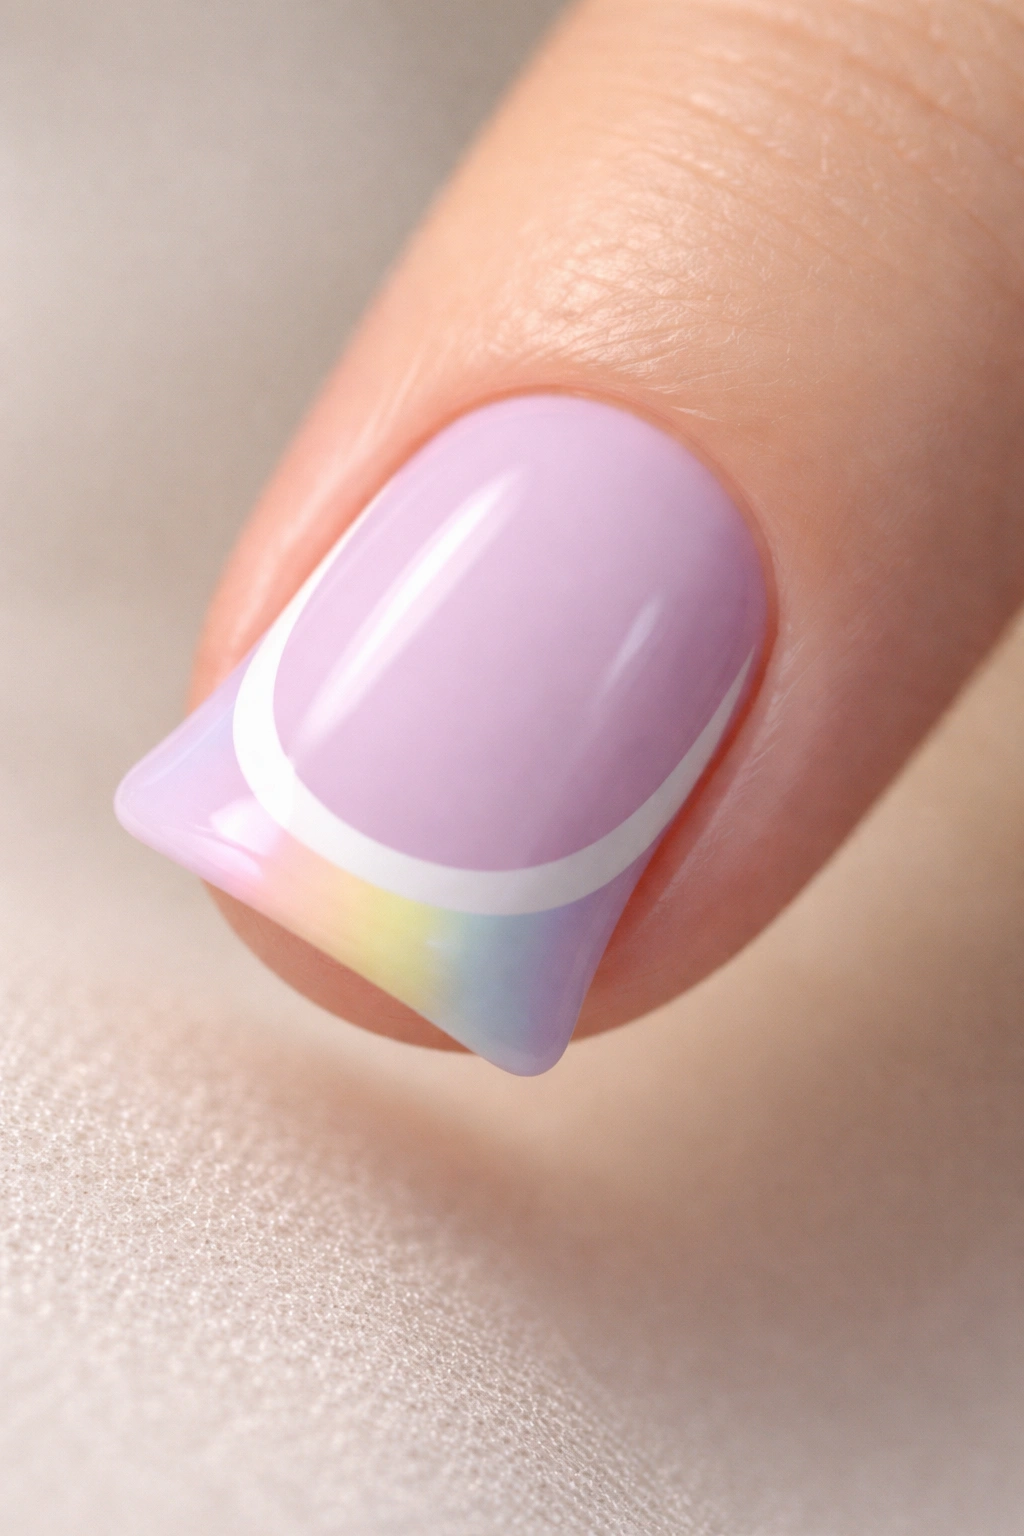
A soft lavender base with a thin white curved line drawn along the inside of the duck tip (like a smile line), and the very tip of the curved section filled with a micro rainbow gradient—just three tiny color blocks (pale yellow, pale pink, pale blue) creating a minimal spectrum.
Playful Sophistication
This design is whimsical but not childish. The white smile line grounds it in recognizable nail art tradition, while the tiny rainbow tip adds personality without overwhelming the small space. This design appeals to people who want fun without costume-vibes.
Building Smile Lines and Micro Gradients
- Lavender base in 2-3 coats
- Use a thin curved brush or nail pen to draw a clean white curved line inside the duck tip
- In the area above the white line (the very tip of the curve), apply three tiny sections of pale color using a small brush or dotting tools
- Keep each color block small and clearly separated
- Seal with glossy topcoat
Pro tip: Pale rainbow colors work better than saturated ones because they read as intentional and sophisticated rather than overly bright.
20. Clear Base with Embedded Gold Foil Flakes and Black Duck Tip Outline
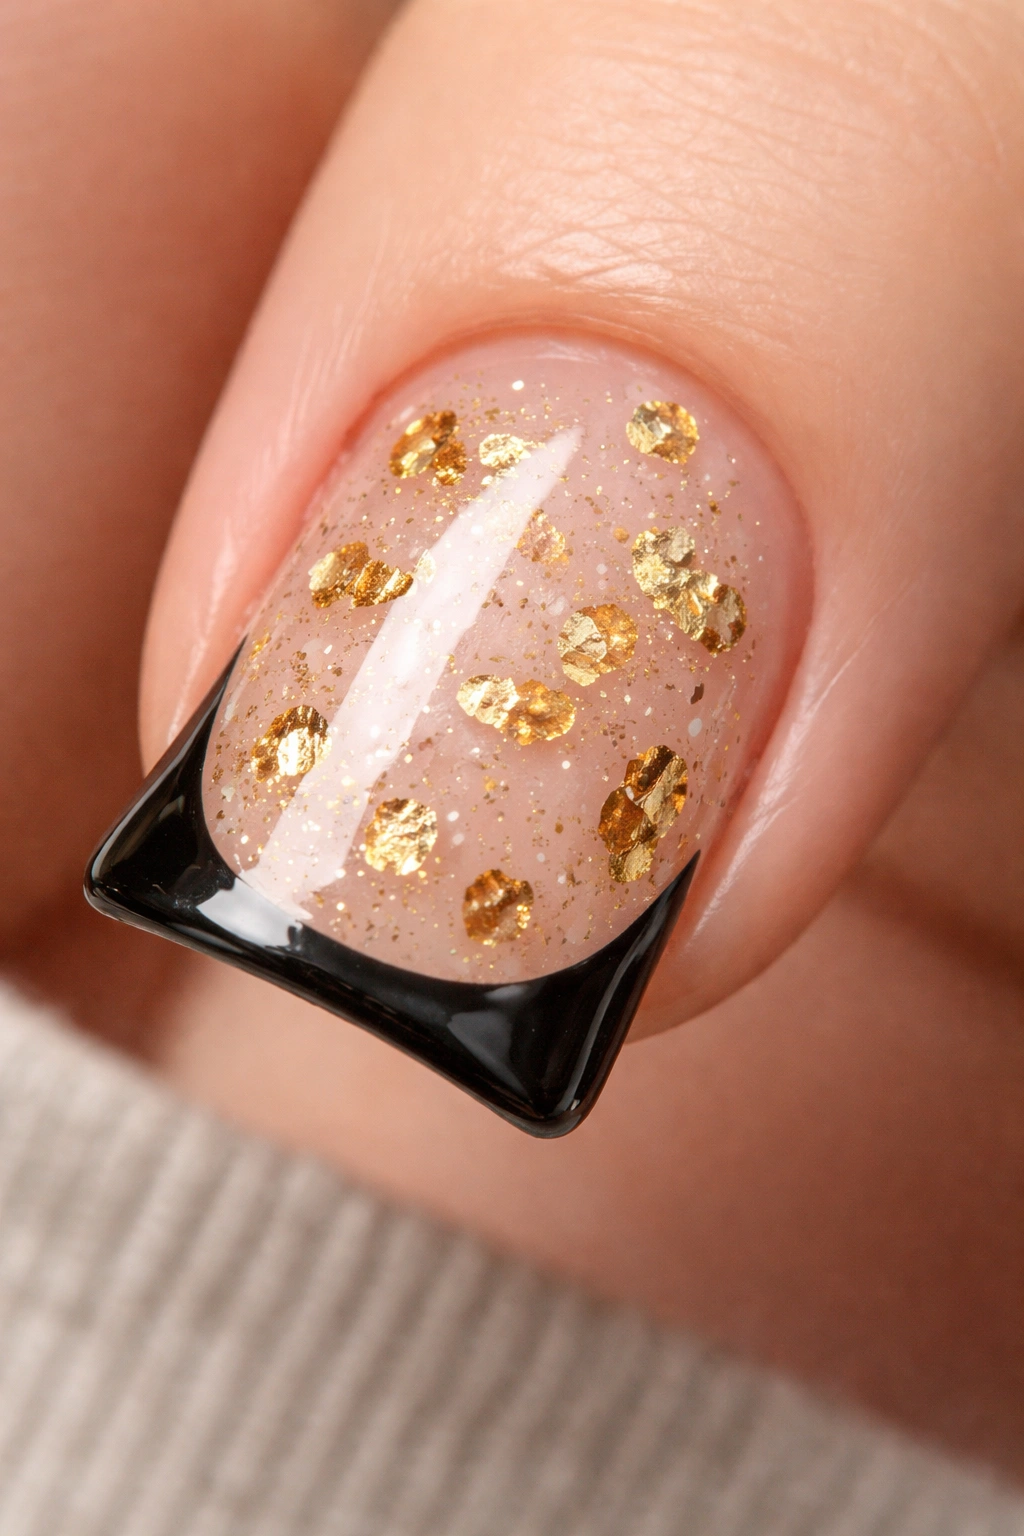
A clear or barely-tinted base with irregular gold foil flakes suspended throughout (like you’re looking into a snow globe filled with gold). The curved duck tip has a medium-thickness black outline that defines the shape and creates contrast against the glittery base.
Celestial Glam in a Small Space
Gold foil creates luxury and shine without requiring precision. The black outline gives it structure and prevents it from feeling chaotic. On short nails, this creates a high-impact, glamorous look that feels intentional.
Embedding Foil Flakes
- Apply a sticky base coat or clear gel base
- Tear gold foil into irregular small pieces
- Use a brush or tweezers to place foil flakes onto the sticky base, covering about 60-70% of the surface
- The flakes should be scattered unevenly—this creates a more natural, captured-moment feeling
- Apply a layer of clear topcoat to seal the flakes in place
- Add your black duck tip outline with a fine brush
- Seal with another layer of topcoat
This collection of freestyle duck nail designs proves that short nails are the perfect canvas for this playful, elegant trend. Each design works because it respects the shorter length while delivering personality and polish. Whether you lean toward minimalist elegance, bold color-blocking, or embellished glamour, there’s a duck nail design here that fits your style and your nail length.
Final Thoughts
Short nails paired with duck nail art creates a unique advantage: every design looks intentional and edited rather than compensatory. You’re not trying to fake length—you’re celebrating the canvas you have. The designs that work best on shorter nails are those that focus on shape definition, color contrast, and precise detail work rather than sprawling patterns that need real estate to breathe.
The key to pulling off any of these styles is commitment. A half-hearted nude base with a wishy-washy accent reads as unfinished. A bold, confident design—whether it’s a solid color with crisp outline or a detailed gradient—reads as polished and intentional. Your short nails are an asset, not a limitation. Pick a design that excites you, commit to precision in execution, and let the duck nail shape do what it does best: stand out and spark conversations about your impeccable taste.
