

Duck nails—those distinctive, fan-shaped curved tips that widen toward the edge—are having a moment, and vacation is absolutely the time to embrace them. There’s something about a destination getaway that makes you want to experiment with bolder, more playful nail designs, and duck nails give you the perfect canvas for creative color combinations and artistic detail work. Whether you’re heading to a tropical beach, a mountain retreat, or a cultural city break, the elongated shape and dramatic curve of duck nails make any design feel more vacation-ready, more intentional, and honestly, more fun.
The beauty of duck nails for travel is that they photograph beautifully (hello, vacation pics), they’re durable enough to last through multiple days of adventure, and they give you room to go as subtle or as bold as your mood allows. You can keep them elegant and understated or go full maximalist with glitter, chrome, and nail art that steals the show. The wide, flat top of the duck nail design also provides more real estate for intricate detail work, which means you can commission something truly special from a local nail artist at your destination if you want to make the trip part of your nail story.
Let’s explore ten duck nail ideas that’ll have you looking vacation-ready from the moment you arrive at your destination.
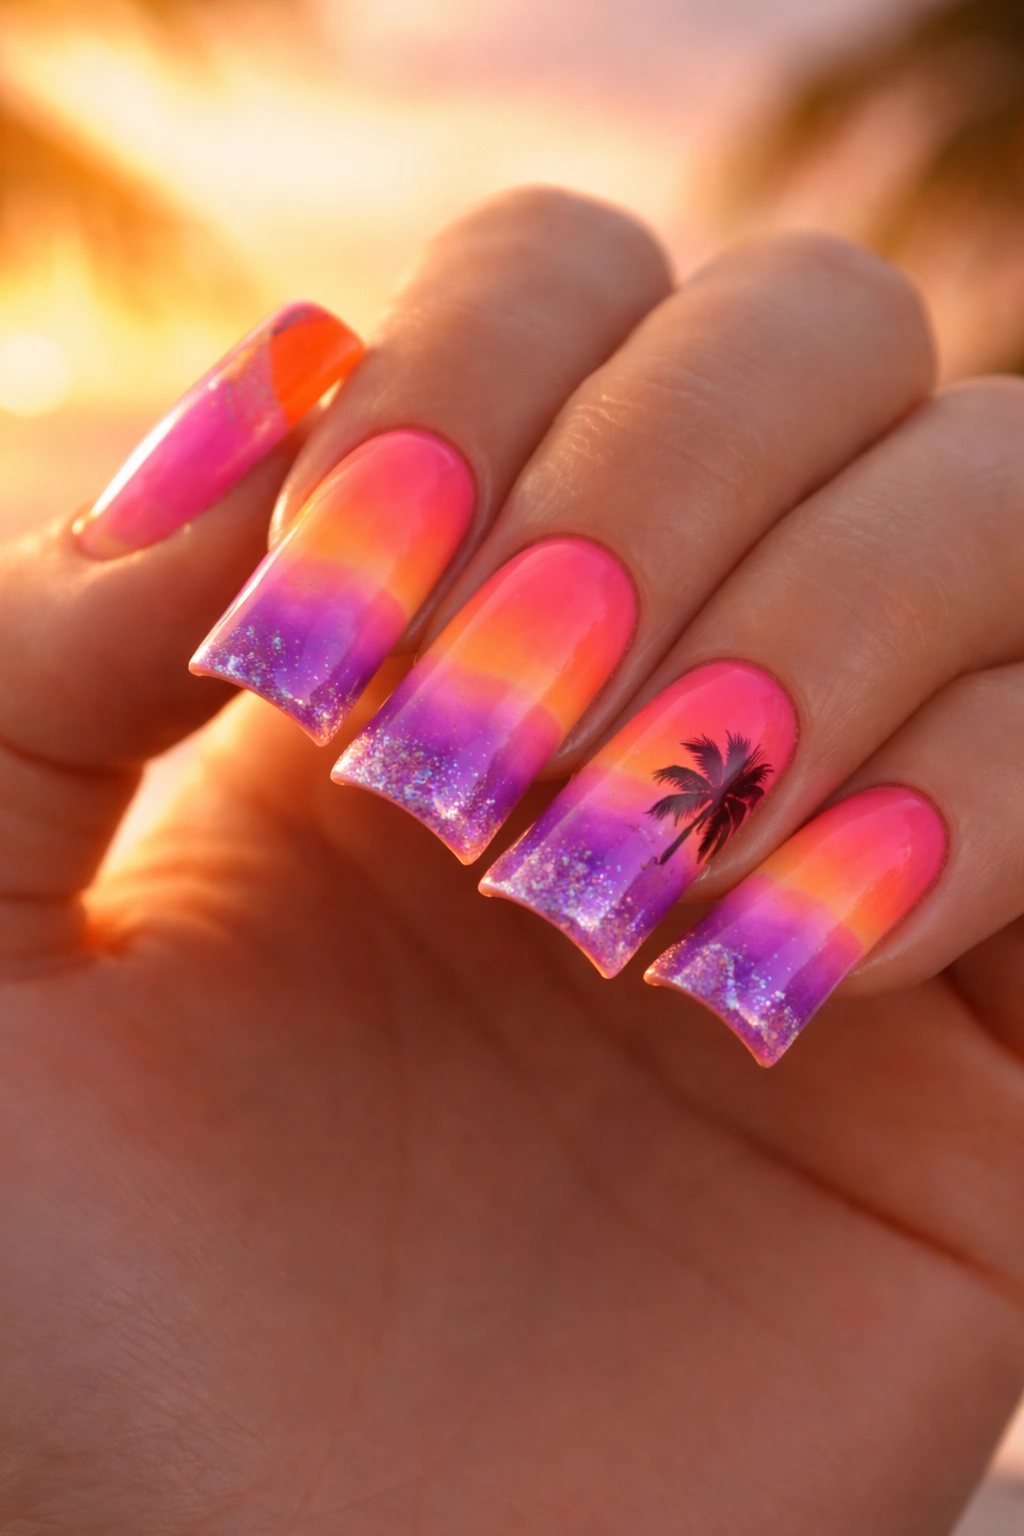
1. Tropical Sunset Duck Nails
A tropical sunset design captures that golden-hour magic that happens right as the sun dips below the horizon, painting the sky in shades of orange, pink, peach, and deep purple. This design works beautifully on duck nails because the curved shape mimics the slope of the horizon itself, creating a natural canvas for a gradient that flows from warm to cool tones.
Why This Design Steals the Show
The gradient pulls your eye across the entire nail in a way that feels almost three-dimensional. Most people associate sunset colors with relaxation and vacation energy, so your nails immediately signal that you’re in adventure mode. The colors are warm enough to feel summery and energetic, but the deeper purples and corals keep the look sophisticated rather than childish.
How to Make It Work
- Choose a quality gradient base: Use a gradient sponge to blend three to four sunset colors seamlessly rather than creating harsh lines between shades
- Play with placement: Reverse the gradient on a couple accent nails (put the purple at the base instead of the tip) to create visual interest without overwhelming the design
- Add dimension with shimmer: A barely-there holographic shimmer or duochrome topcoat catches light beautifully and makes the design feel more luxe and vacation-ready
- Seal with a thick topcoat: Multiple thin layers of topcoat protect the gradient from chipping during your trip
The duck nail shape means your gradient has maximum impact—the wider tip catches light from multiple angles, so every movement shows off your sunset colors.
2. Ocean Wave Duck Nails
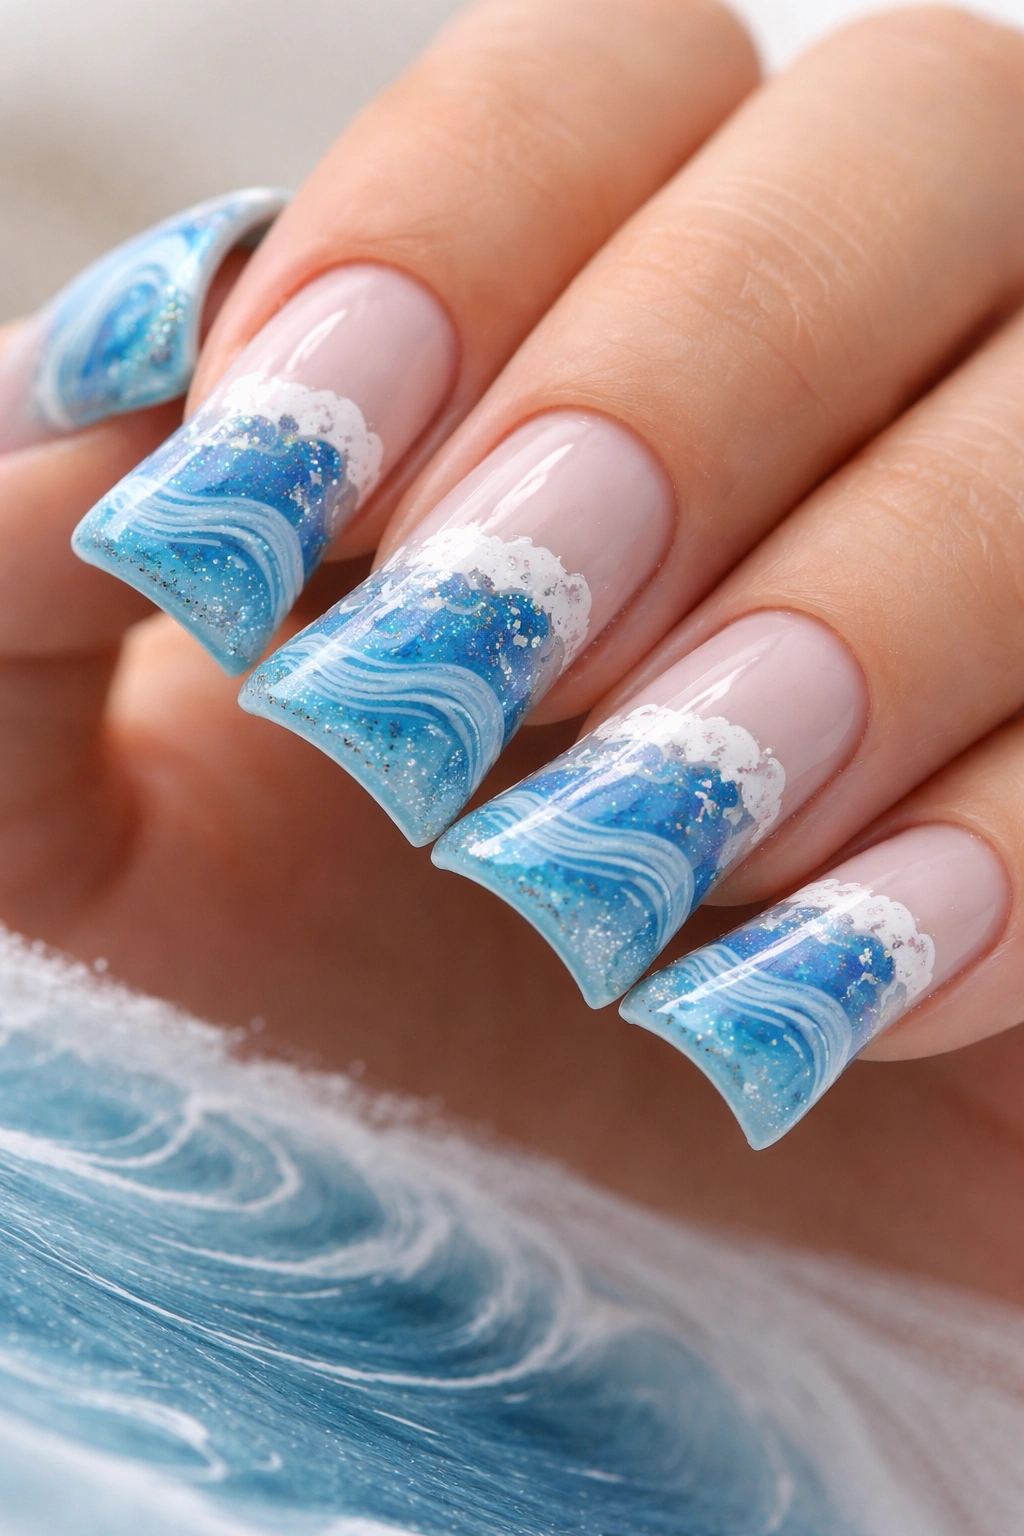
Ocean waves are the quintessential vacation imagery, and they translate beautifully to duck nails. Picture a soft blue base with white wave patterns that flow across the nails, evoking that calm, hypnotic feeling of watching water roll onto the shore. The curved shape of duck nails naturally suggests movement and flow, making wave designs feel organic rather than forced.
What Makes Waves Work on This Shape
The horizontal curve of the duck nail mimics the gentle arc of a rolling wave, so you’re not fighting the nail shape—you’re working with it. Your nails become miniature seascapes, complete with the illusion of depth and motion. The wider surface area of the duck tip gives you enough space to add realistic wave texture without the design feeling cramped or overly busy.
Design Details That Elevate It
- Layer your blues: Use at least two shades of blue (a lighter sky blue and a deeper ocean blue) to create depth and dimension
- Make waves with white gel or acrylics: Instead of just painting white lines, use slightly thicker white polish and apply it with a fine brush to create the foamy, dimensional look of actual wave crests
- Add sand or beach details: Paint tiny grains of golden or beige sand along the base of some nails, with small shells or starfish scattered throughout
- Use a matte topcoat on the sand portion: The contrast between glossy waves and a matte sand area makes the design feel more realistic and textured
This design photographs amazingly well against beach backgrounds and genuinely makes you feel like you’re bringing the ocean with you.
3. Metallic Gold Duck Nails
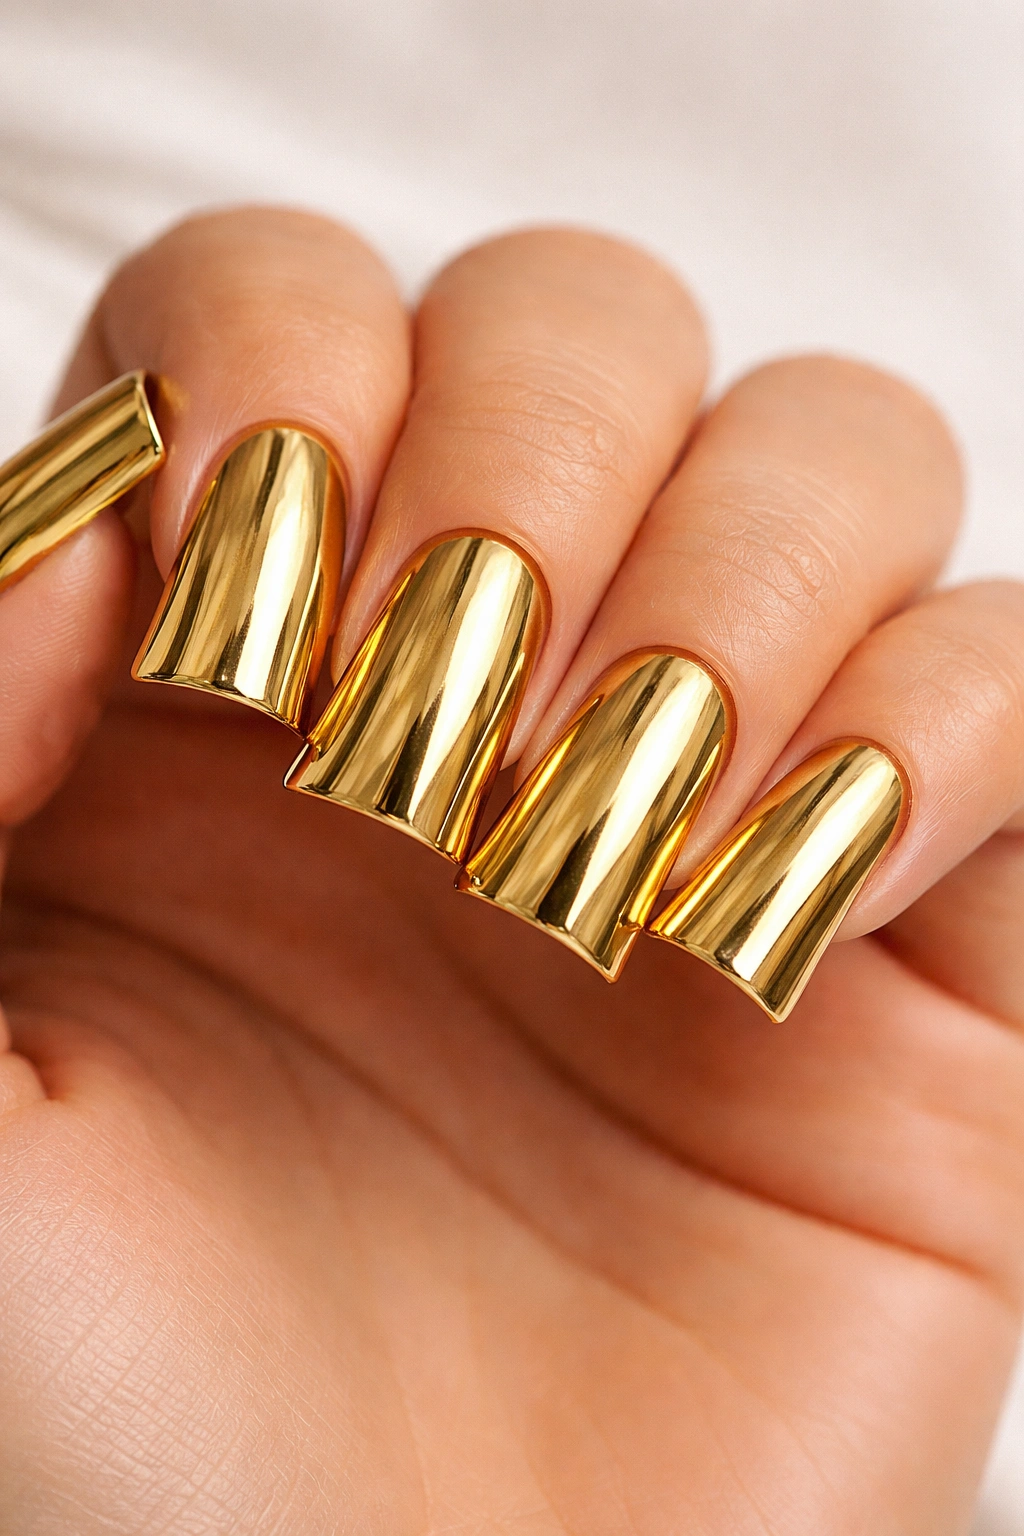
Sometimes simple is exactly what you need for vacation, and all-over metallic gold duck nails hit that sweet spot between effortless, elegant, and indulgent. Gold feels luxurious and glamorous while still working with virtually any vacation outfit, whether you’re dressing up for a nice dinner or keeping it casual for daytime exploring.
Why Gold Feels Like Vacation
There’s something inherently celebratory about gold—it reads as special occasion even when you’re wearing it casually. The metallic finish catches light beautifully, drawing attention to your hands without requiring any additional art or detail work. Gold also complements virtually every skin tone and works equally well with warm or cool-toned clothing, which means your nails will look intentional no matter what you throw on.
Making Gold Feel Premium
- Invest in quality gold polish or gel: Cheap metallic gold can look brassy and flat; a quality formula has depth and richness
- Apply in thin, even coats: Two to three thin coats of metallic polish look far better than one thick coat, which tends to look streaky
- Consider chrome gold: A chrome finish over a gold base creates an even more luxe, futuristic shimmer that feels distinctly vacation-worthy
- Add a glossy topcoat with UV protection: Metallic finishes can dull quickly with sun exposure, so seal it well
The beauty of this design is its versatility—gold duck nails feel equally at home at a beach resort, a mountain lodge, or exploring a city, which makes it perfect if your vacation involves multiple settings.
4. Coral and Cream Duck Nails
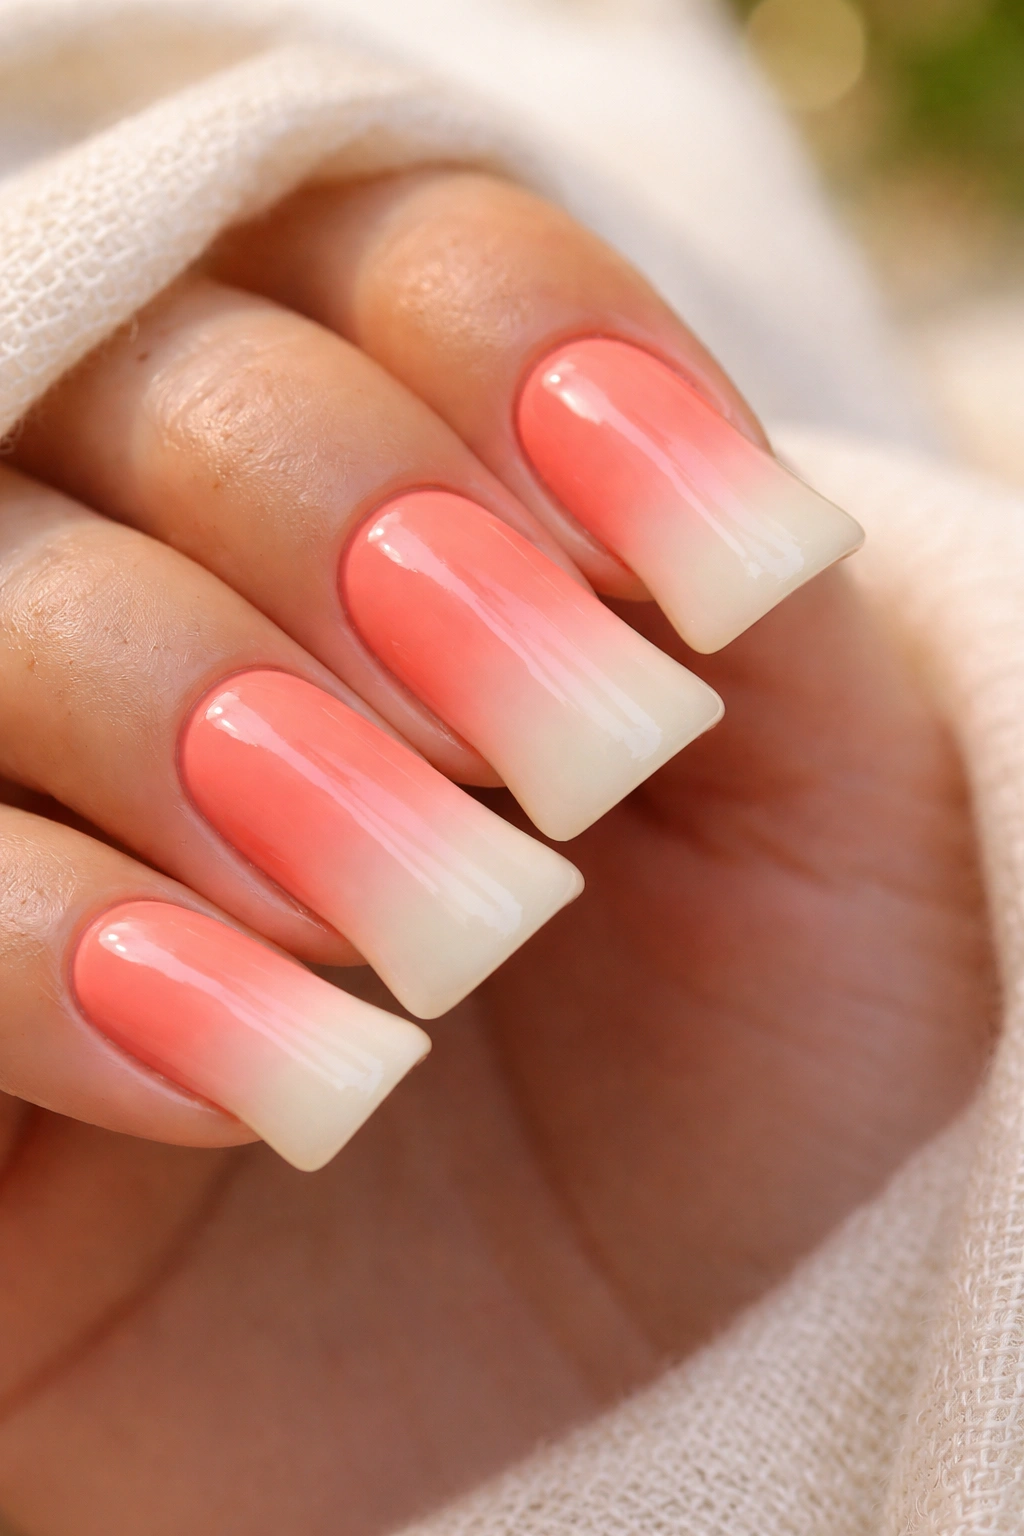
This design pairs a soft, warm coral with creamy white or pale pink in a way that feels organic and effortless, like a sunset reflected on the underside of a seashell. The combination reads as feminine and romantic without veering into costume territory, making it perfect for someone who wants impact without extremes.
The Psychology of Coral and Cream
Coral is energizing and playful, while cream is calming and sophisticated. Together, they create a balanced aesthetic that says “I’m relaxed but I put thought into this.” This combination is timeless enough that it won’t look dated in photos from your vacation, and it’s cheerful enough that it genuinely lifts your mood when you look at your hands.
Creating Depth with This Palette
- Use gradient or ombré between the colors: Rather than a harsh line dividing coral and cream, blend them together with a gradient sponge for a softer, more refined look
- Reverse the placement on alternating nails: Some nails can have coral bases with cream tips, while others go the opposite direction, creating visual rhythm
- Add subtle texture: A soft pearlescent finish in both colors catches light beautifully and feels more vacation-ready than flat polish
- Consider accent nails: Paint two or three nails in a delicate coral-and-cream geometric pattern or floral design while keeping others solid, creating a balanced focal point
The duck nail shape gives you enough room to work with both colors prominently without the design feeling cluttered or childish.
5. Galaxy Duck Nails
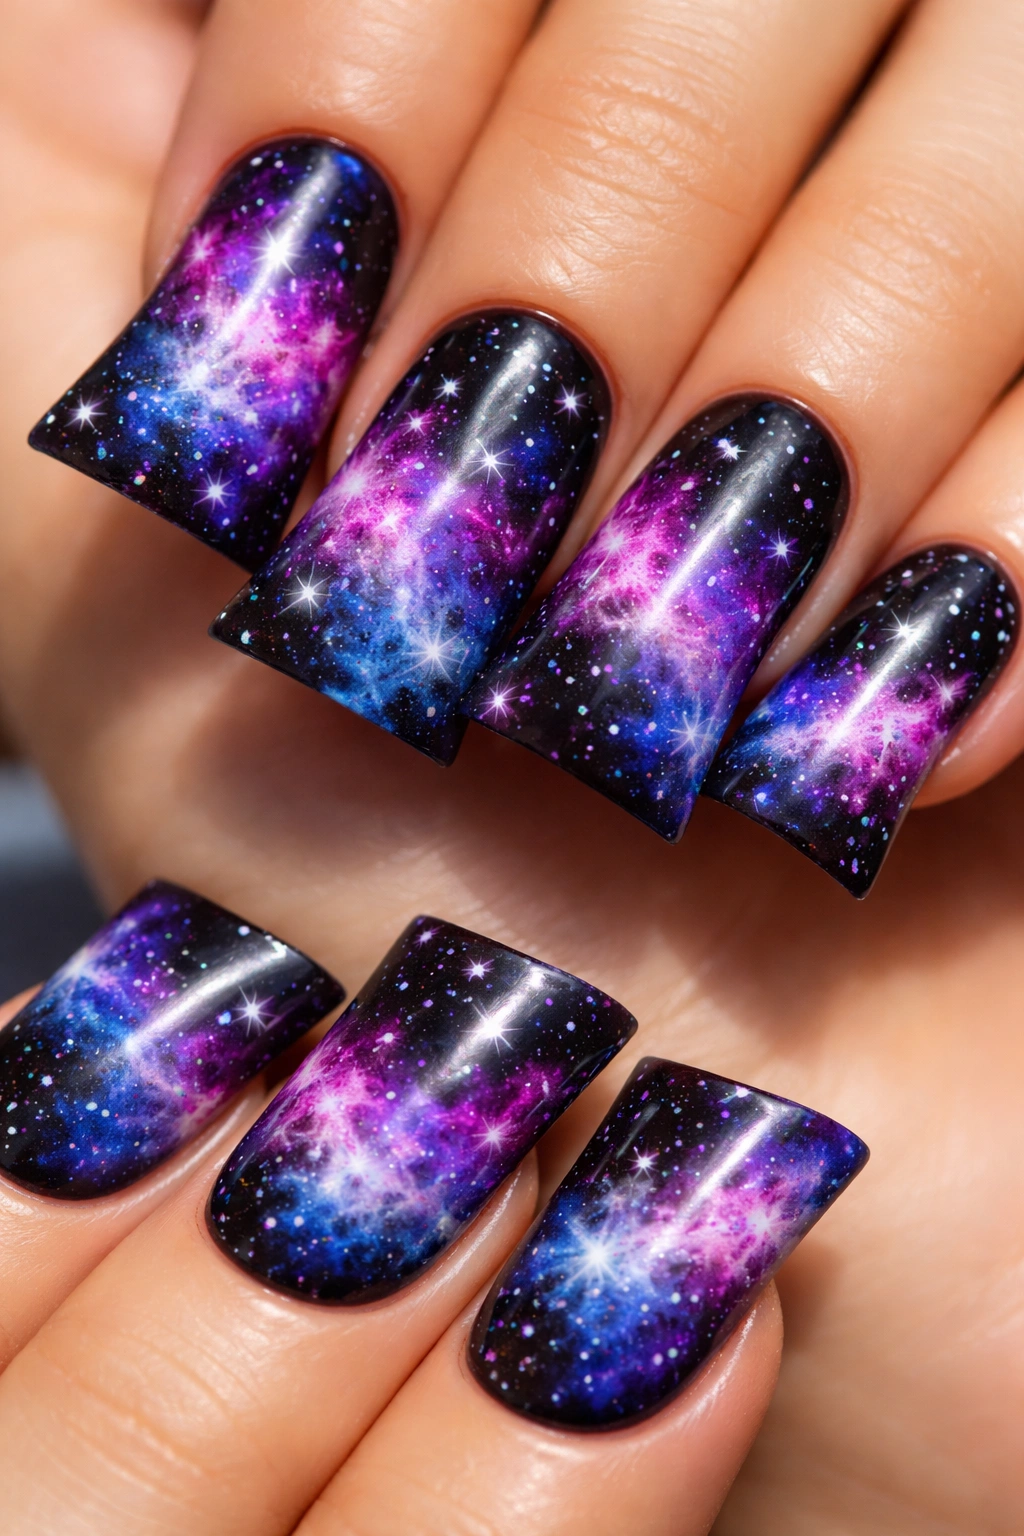
A galaxy design transforms your nails into miniature starry skies, complete with swirling nebulae in purples, pinks, blues, and blacks dotted with tiny white stars. This design is unapologetically bold and artistic, perfect for someone who wants their nails to be a conversation starter during vacation.
Why Galaxy Nails Make a Statement
There’s something inherently magical about gazing at a starry sky, and wearing that magic on your nails extends that feeling throughout your day. Galaxy designs evoke wonder and imagination, which aligns perfectly with vacation energy. The design works beautifully on duck nails because the wider tip gives you space to create visible nebula swirls and star clusters without everything blending into an incomprehensible mess.
The Technique and Execution
- Start with a dark base: A deep navy or black base makes the galaxy elements pop dramatically
- Sponge multiple colors onto each nail: Use a makeup sponge to layer purples, pinks, and blues in swirling, organic patterns rather than trying to recreate an actual galaxy map
- Splatter with white polish: Dip a fine brush or splatter tool into white polish and flick it across the nails to create star clusters
- Add tiny hand-painted stars: Use a very fine brush to paint individual stars in strategic spots, creating focal points and depth
- Consider glitter accents: A few tiny glitter particles scattered throughout the design catch light and make the galaxy feel even more magical
This design definitely requires more skill or a visit to a talented nail artist, but the impact is worth the effort.
6. Floral Tropical Duck Nails
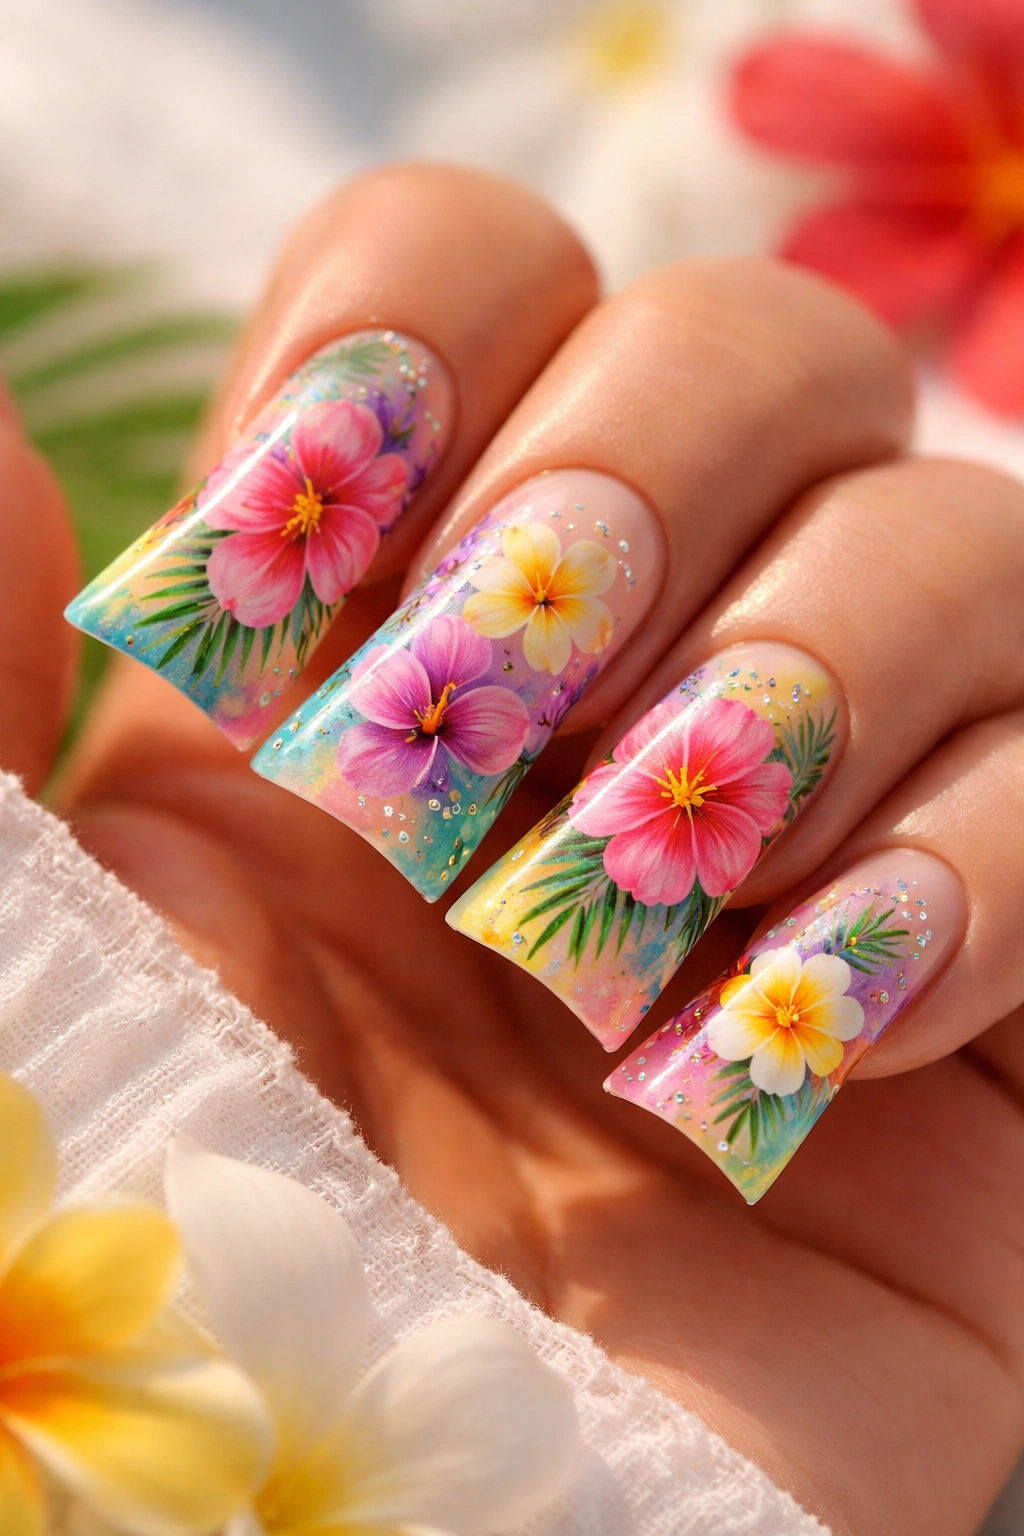
Tropical florals—think hibiscus, frangipani, orchids, and bird of paradise flowers—bring the essence of a destination getaway directly onto your nails. This design works beautifully on duck nails because the wider surface area gives you room to paint actual detailed flowers rather than abstract florals that suggest flowers without showing them.
How Florals Translate to Duck Nails
The curved shape of duck nails works beautifully as a backdrop for floral clusters. You can position a single large, stunning flower on the tip of the nail, or scatter smaller blooms across the entire surface. The flowers naturally follow the curve of your nail, creating a composition that feels intentional and artistic.
Painting Tropical Flowers Successfully
- Start with a background color: A soft cream, pale pink, or light turquoise provides a neutral backdrop that lets your flowers stand out
- Use a thin brush and real paint or gel: Regular polish can be too thick for detailed flower work; gel or professional nail paint gives you more control and better color coverage
- Focus on a few statement flowers: Rather than covering the entire nail with dozens of tiny flowers, paint three to five large, detailed blooms and scatter smaller buds and leaves around them
- Add greenery and texture: Delicate leaves, tendrils, and fern fronds add dimension and make the design feel lush and organic
- Consider hand-painted detail or a professional artist: If you’re not confident in your painting skills, this is an excellent design to have a professional create
Floral designs photograph beautifully and genuinely make you feel like you’re in a tropical paradise.
7. Pastel Ombré Duck Nails
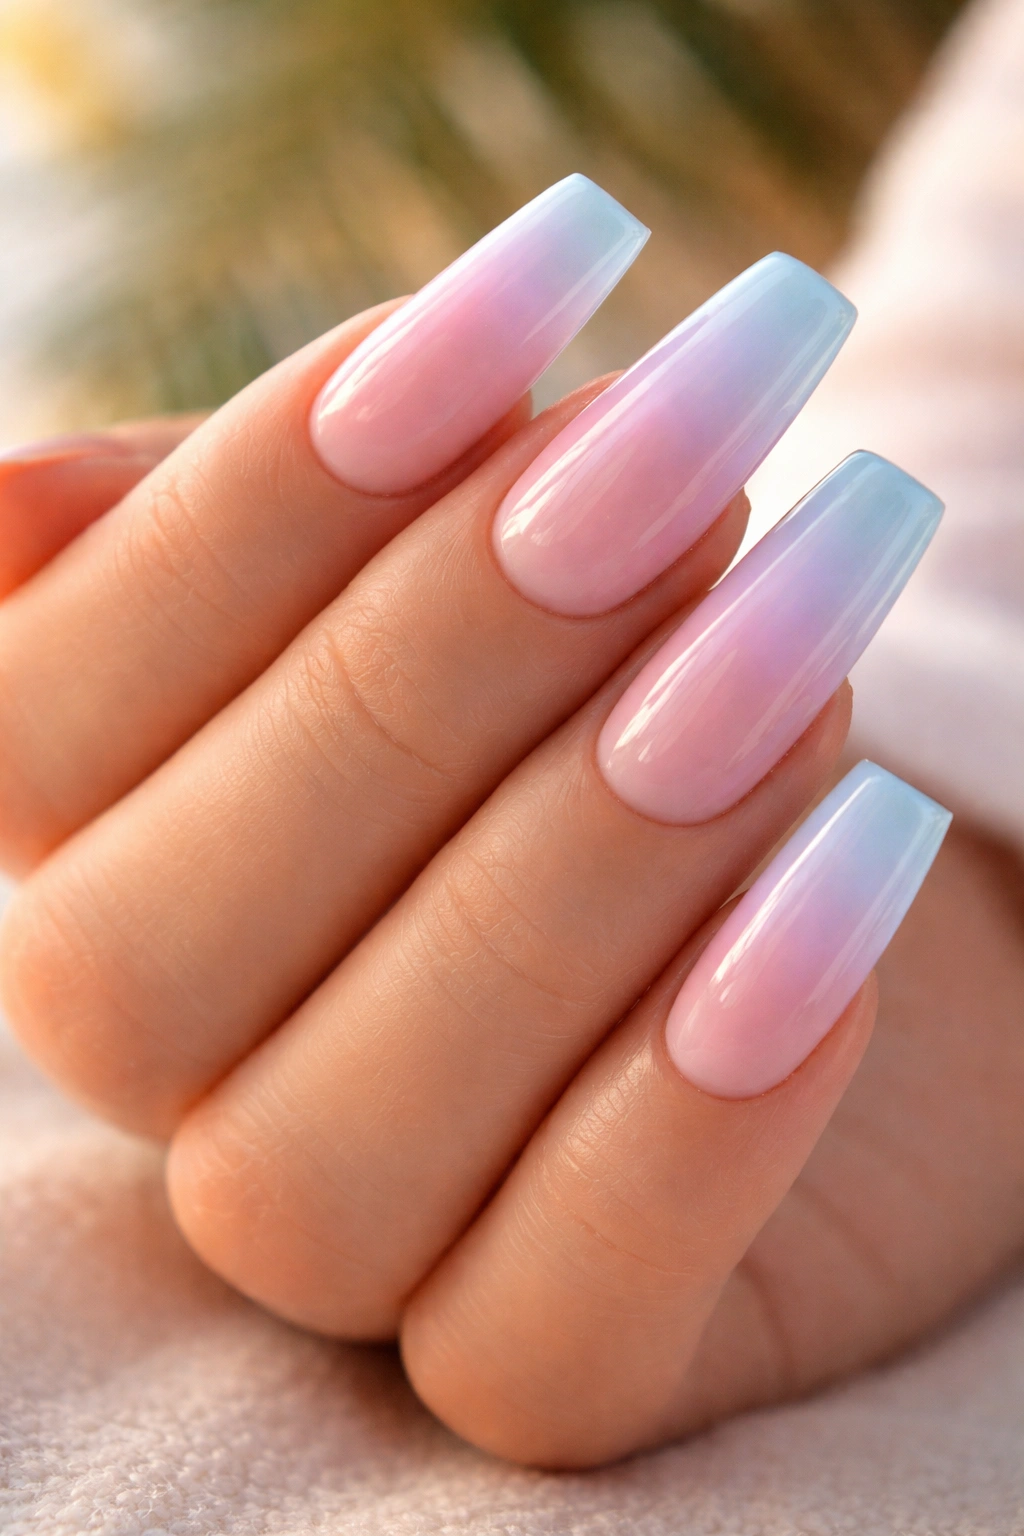
A soft gradient flowing from one pastel shade to another—maybe from pale pink to lavender to baby blue—creates an effect that’s dreamy, whimsical, and entirely vacation-appropriate. Pastel ombré works beautifully on duck nails because the wider tip gives you maximum surface area to showcase the gradient’s subtle color transitions.
Why Pastels Feel Vacation-Ready
Pastels read as soft, approachable, and optimistic. They suggest springtime and renewal, which aligns perfectly with the mental refresh that comes with vacation. Unlike bold, saturated colors, pastels feel sophisticated rather than loud, making them work with virtually any vacation wardrobe and occasion.
Creating a Smooth, Professional Gradient
- Choose pastels with similar undertones: A warm pastel pink, peach, and pale yellow flow better together than a random mix of pastels that fight against each other tonally
- Use a quality gradient sponge: A makeup sponge with fine pores creates smoother blends than a regular cosmetic sponge
- Blend thoroughly: Take time to sponge-blend the colors where they meet repeatedly, adding thin layers until the transition feels seamless
- Consider a translucent topcoat: A milky topcoat softens the overall effect and makes the gradient feel even more dreamy
- Skip the art and let the gradient speak for itself: This design is beautiful in its simplicity—don’t overload it with embellishments
The duck nail shape means your gradient has maximum visibility and impact with every hand movement.
8. Beach Sand and Shell Duck Nails
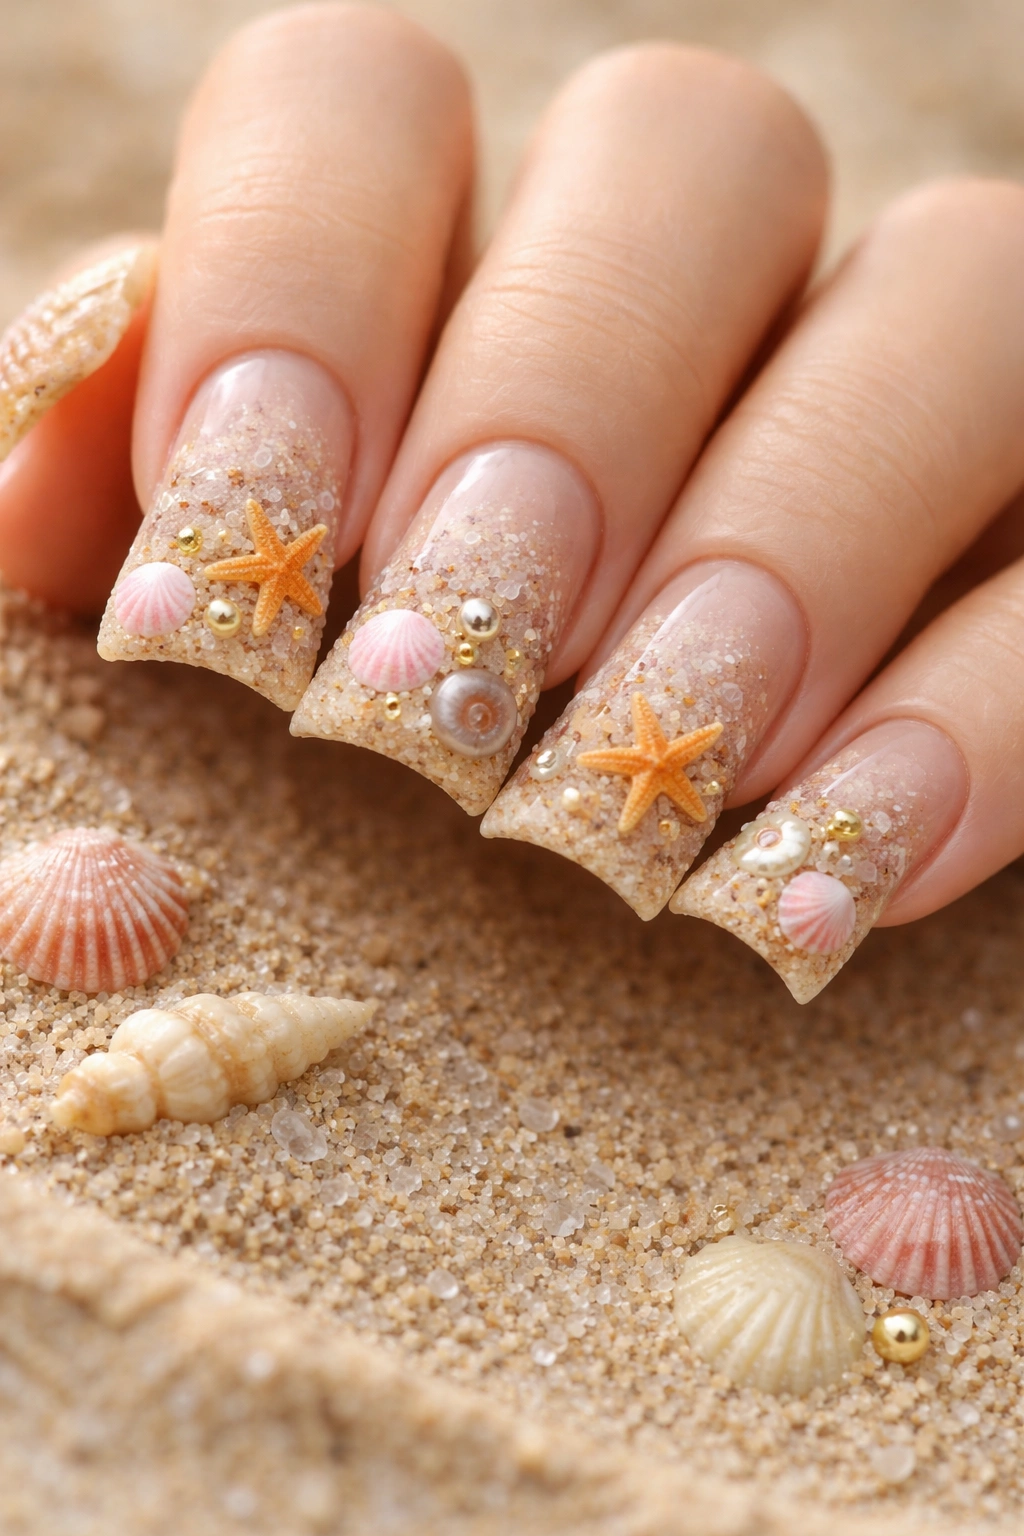
Create a design that literally looks like you’ve captured a beach in miniature—a sandy beige base with hand-painted shells, starfish, and tiny pebbles scattered across the surface. This design is perfect if you want something vacation-specific that won’t look dated once you’re back in regular life.
Designing a Beach Landscape on Nails
Duck nails give you enough surface area to paint multiple shell varieties, sand texture, and ocean details without the design feeling overwhelming. You can create an actual composition, with darker elements at the base (sand) and lighter elements toward the tip (sky or shallow water), creating actual depth and landscape perspective.
Making Beach Elements Look Realistic
- Use a textured base: Instead of flat beige polish, try a sandy texture polish or add actual fine sand to clear polish for a realistic sandy appearance
- Paint individual shells with detail: Use multiple colors for each shell—highlights, shadows, and shading make them look three-dimensional rather than cartoon-like
- Add tiny hand-painted starfish and sea creatures: Small, detailed illustrations are more charming than large, obvious ones
- Layer details gradually: Start with larger elements like shells, then add smaller details like sand texture and tiny pebbles once you can see how the composition is coming together
- Seal thoroughly: The textured elements need a thick, protective topcoat to last through vacation activities
This design is conversation-starting and genuinely captures vacation energy in a way that feels personal and thoughtful.
9. Glitter Gradient Duck Nails
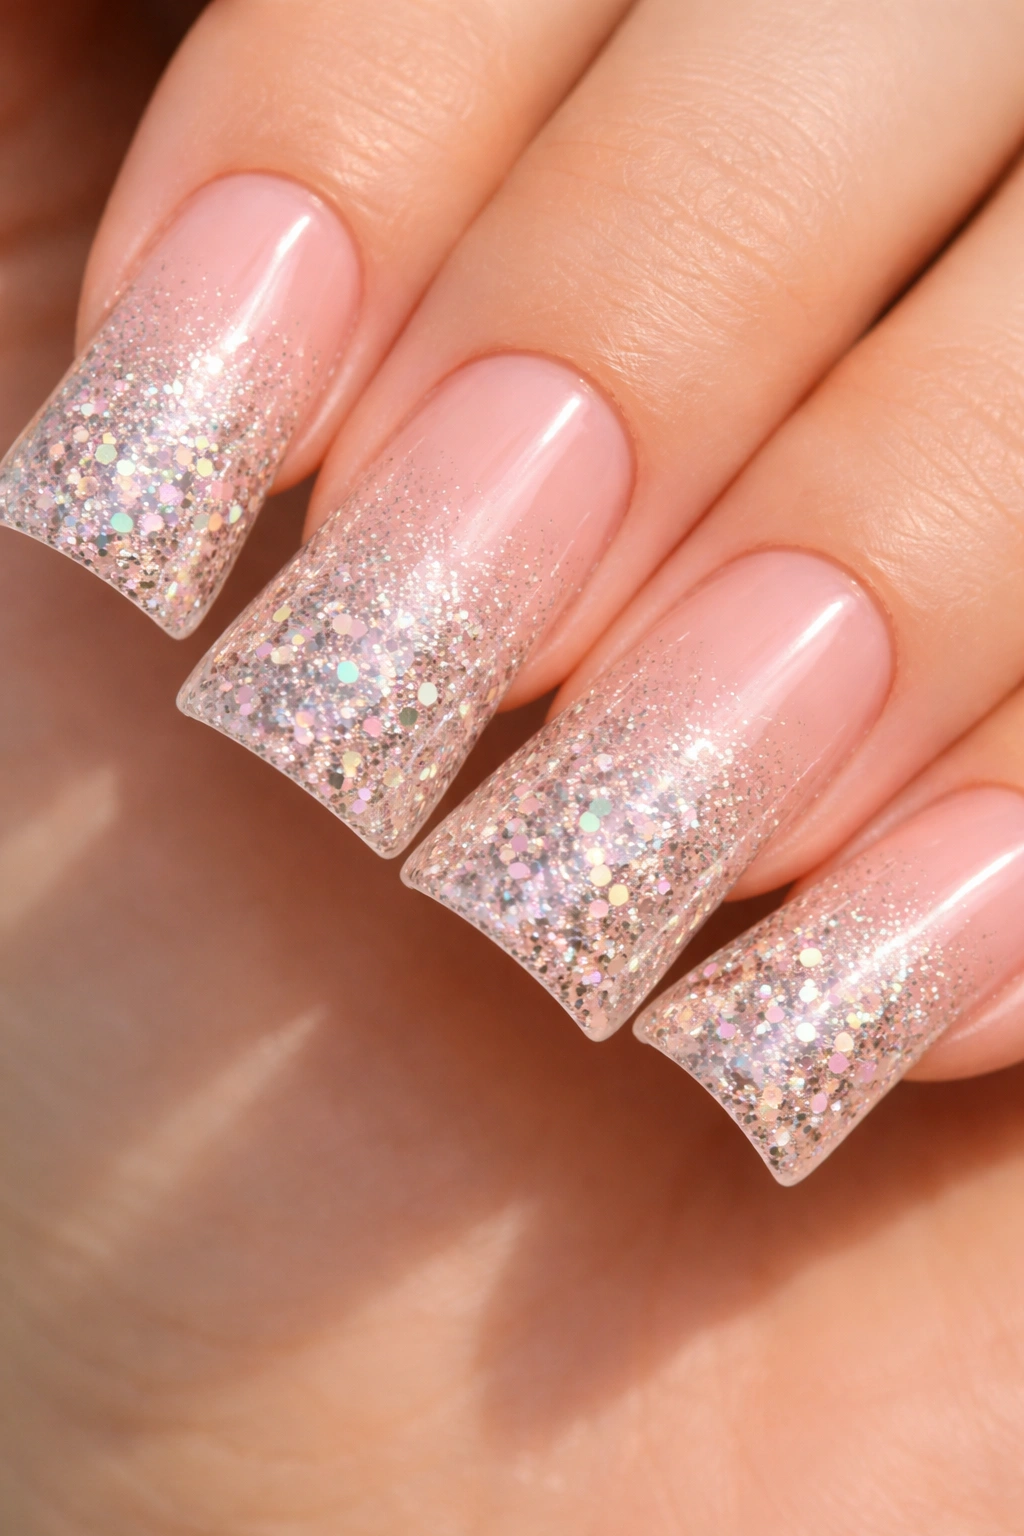
A glitter gradient starts with less glitter at the base and progressively more glitter toward the tip, creating a dazzling, eye-catching effect that’s pure vacation glamour. The duck nail shape makes this design particularly impactful because the wider tip shows off the glitter concentration beautifully.
Creating a Glitter Gradient That Works
Glitter gradients can easily look messy or overwhelming if they’re not executed thoughtfully. The key is progression—start with a solid color base, then gradually introduce glitter in increasing density as you move toward the tip. On duck nails, this creates a natural focal point at the widest part of the nail.
The Technique for Success
- Choose glitter sizes strategically: Use fine glitter near the base and larger, more dramatic glitter pieces toward the tip to create visual progression
- Layer glitter in a gradient: Apply glitter polish with increased density as you move toward the tip, or use a sponge to blend regular polish with scattered glitter particles
- Consider color coordination: Either choose glitter that matches your base color (monochromatic glitter gradient) or use contrasting glitter for more drama
- Use a heavy topcoat: Glitter benefits from thick, protective sealing to prevent pieces from popping off during vacation activities
- Try chrome or holographic glitter: These finishes catch light more dramatically than traditional glitter, creating even more visual impact
The duck nail shape means glitter catches light from multiple angles with every hand movement, making your nails literally sparkle.
10. Minimalist Geometric Duck Nails
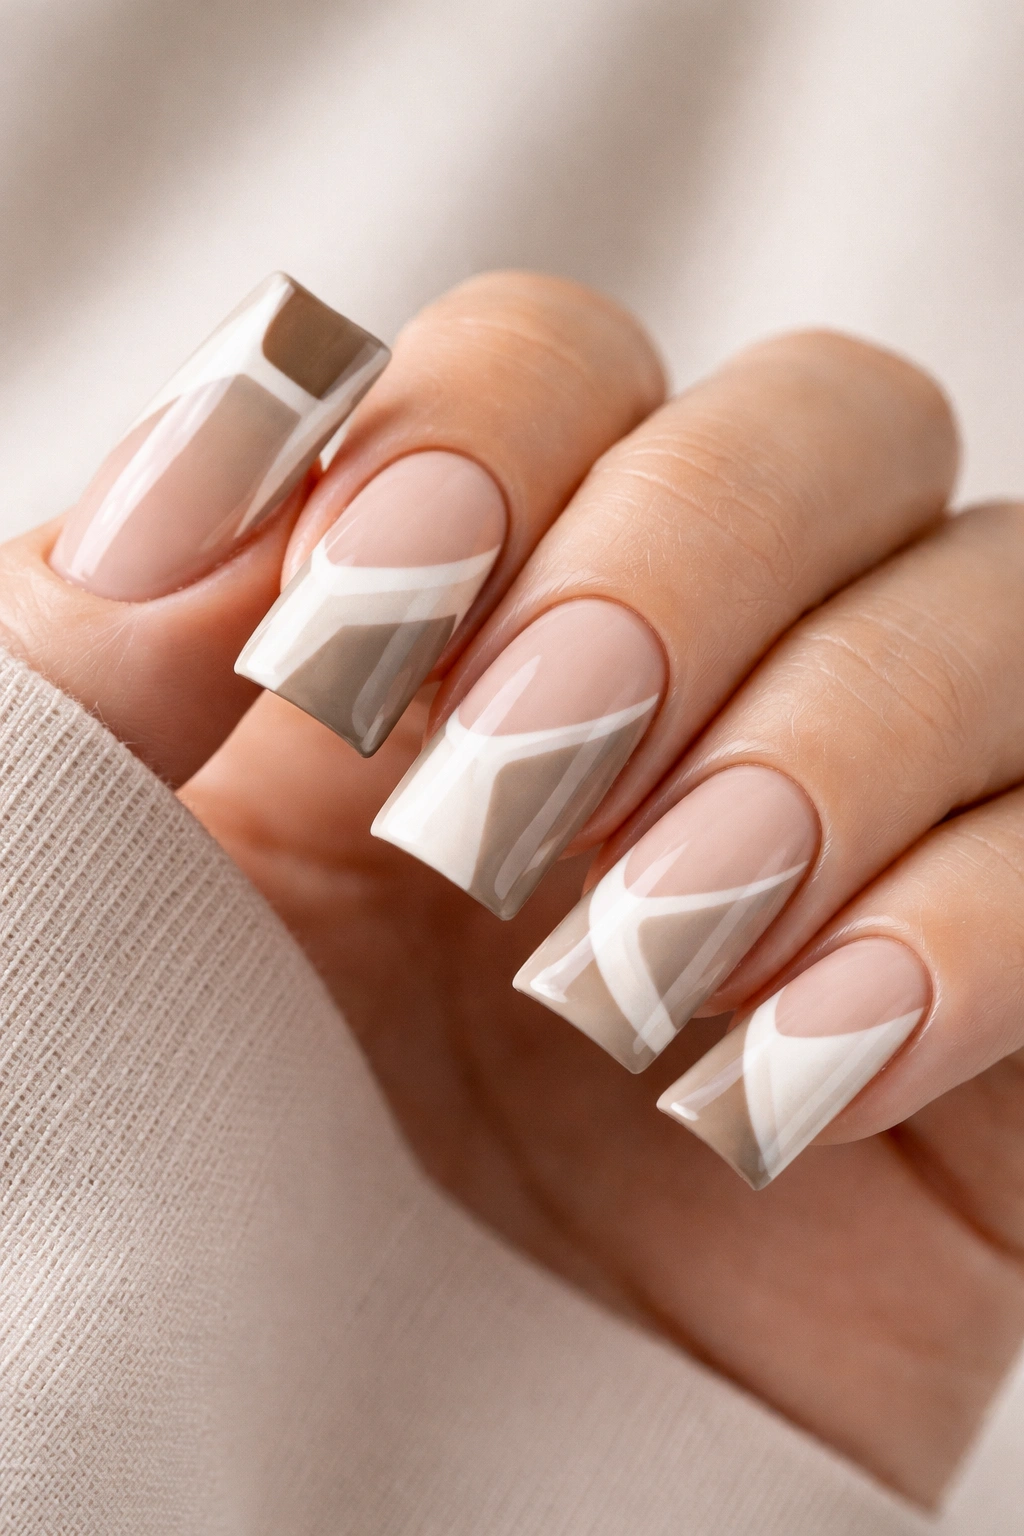
Not every vacation nail design needs to be maximalist—a clean, geometric design in two or three complementary colors proves that sometimes simple is the most sophisticated approach. Minimalist geometric designs work beautifully on duck nails because the clean lines of geometric shapes emphasize the nail’s unique curved shape.
Why Geometry Works on Duck Nails
The dramatic curve and width of duck nails create natural opportunities for geometric design. You might paint vertical stripes that follow the curve of the nail, or create a geometric pattern that flows across multiple nails as a cohesive design. The distinct shape of the nail actually makes geometric designs look more intentional and artistic.
Creating a Minimalist Geometric Design
- Choose a limited color palette: Two to three colors maximum—perhaps white, gold, and a single accent color like emerald or navy
- Use precise lines and shapes: Clean, crisp lines are more impactful than wobbly ones, so consider using tape or a fine brush for precision
- Create patterns that repeat across nails: Vertical stripes, diagonal lines, color blocks, or abstract geometric shapes that appear on all nails create visual cohesion
- Let negative space work for you: Bare nail showing between design elements often looks more sophisticated than fully covered nails
- Keep it timeless: Avoid trend-specific designs that might feel dated in vacation photos from a few months later
This design is perfect if you want something that feels intentional and editorial without being over the top. It photographs beautifully and works with virtually any vacation scenario.
Final Thoughts
Duck nails are the perfect vacation canvas because the shape itself is bold and intentional—you’re already making a statement just by choosing this shape, so you might as well have fun with the design. Whether you go for something that directly references your destination, like tropical florals for a beach trip or a galaxy design for an adventure mindset, or you choose something that simply feels celebratory and special, duck nails transform your hands into a deliberate style choice rather than an afterthought.
The key to making any duck nail design feel vacation-worthy is choosing colors and designs that genuinely excite you and align with the energy you want to bring to your trip. These designs are intended to hold up through multiple days of activities, sun exposure, and water—which means quality matters more than usual. Whether you’re painting them yourself or visiting a nail artist at your destination, taking the time to get them right pays off in both durability and visual impact.
Your nails are one of the first things people notice, and they’re absolutely the first thing you notice every time you pick up your phone to capture vacation memories. Make them count.
