

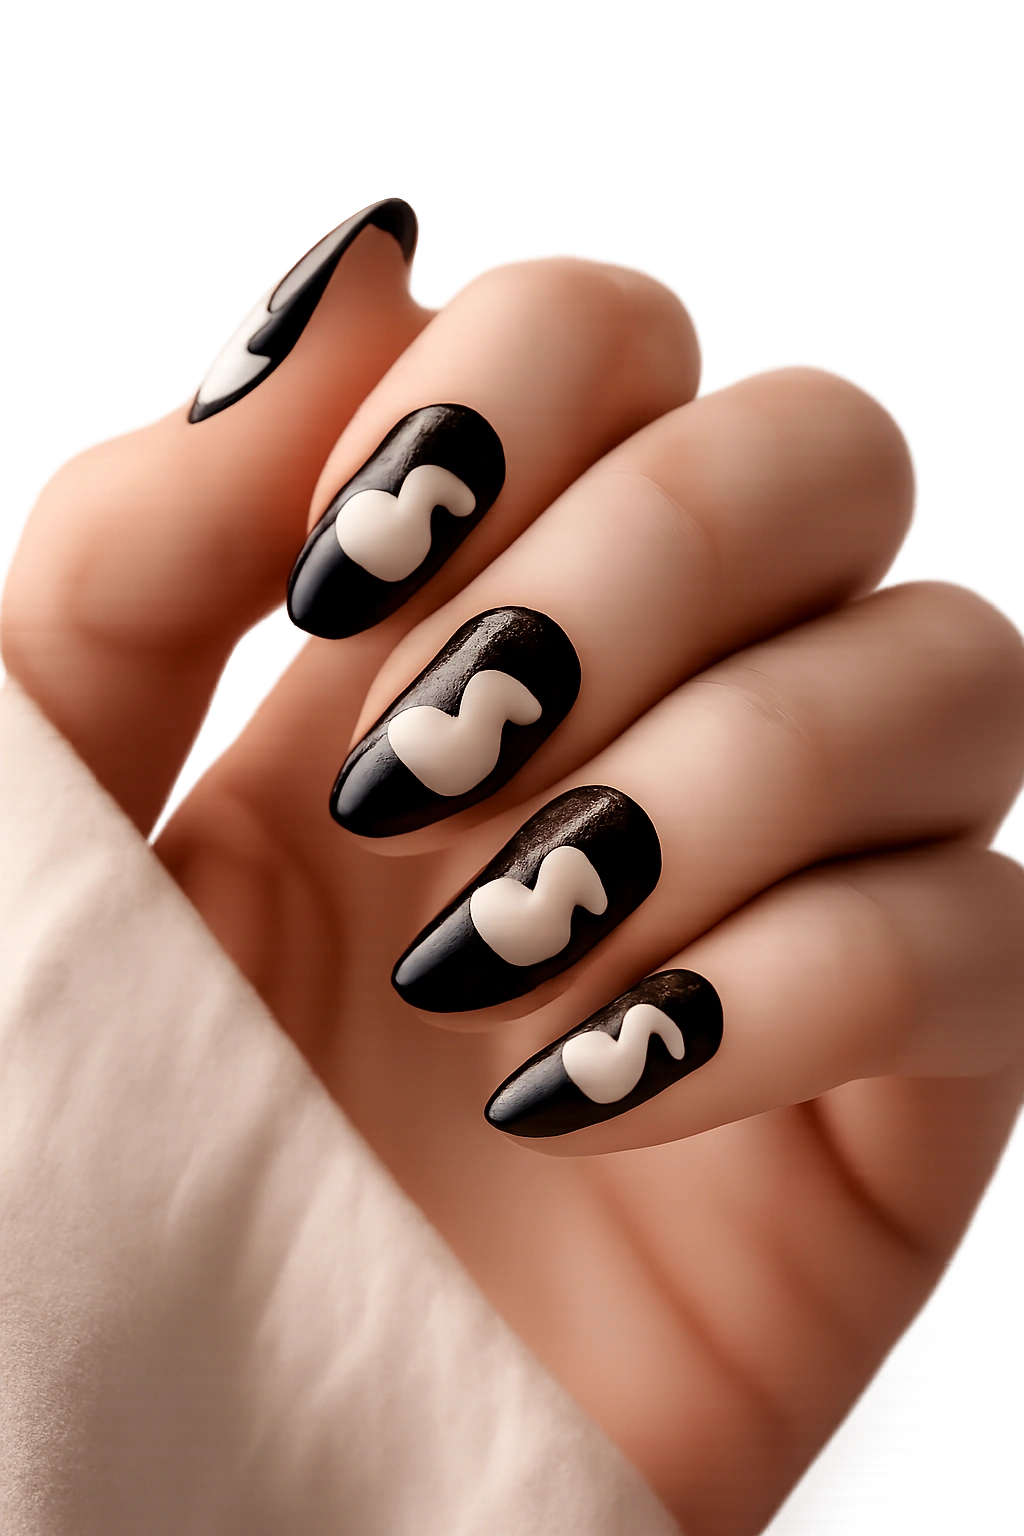
Black and white nail art is one of those deceptively versatile combinations — it’s clean and minimalist enough for boardroom meetings, but bold enough to make a serious creative statement when you want it to. Add ducks into the mix, and suddenly you’ve got something that’s equal parts whimsical, charming, and genuinely striking. Duck nails have exploded in popularity because they’re playful without being childish, and the black and white color palette keeps them sophisticated rather than costume-y.
The beauty of black and white duck nail designs is how adaptable they are to your skill level and the occasion. Whether you’re a freehand painting expert or someone who prefers working with stencils and decals, there’s a duck nail idea that’ll work for you. The monochrome palette also means you don’t need to worry about color matching or complex color theory — just nail it with contrast, and you’re golden.
I’ve pulled together twelve distinct approaches to black and white duck nails, each with its own personality and technique difficulty. Some of these lean toward minimalist elegance, others go full whimsical, and a few hit that sweet spot in between where they look harder to execute than they actually are. Let’s dive into some seriously cute duck nail inspiration.
1. Classic Tuxedo with Duck Nail Design
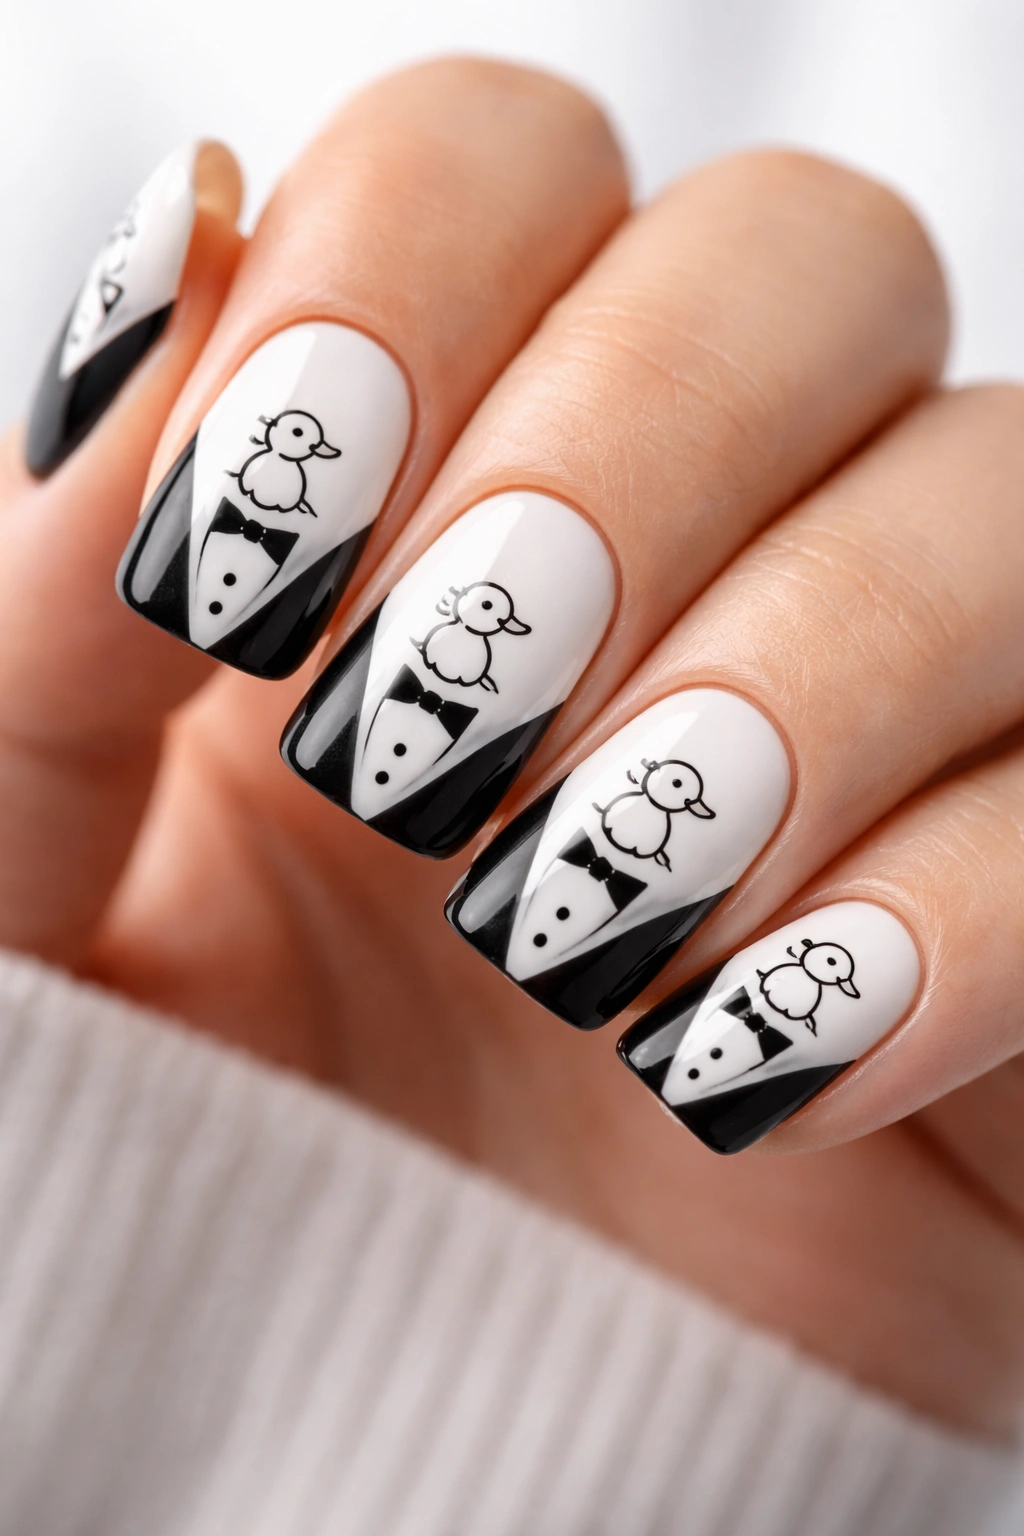
Imagine your nails dressed up in tiny formal wear — that’s the essence of the tuxedo duck design. Start with a white base on all nails, then use a thin black nail art brush to paint a precise black “jacket” that covers roughly the bottom two-thirds of the nail. The duck itself sits in the white “shirt” area at the nail tip, rendered in just a few elegant black lines: a small circle for the head, a curved line for the neck, and a simple triangular beak.
Why It Works So Well
The tuxedo design is genuinely genius because it uses negative space and positioning to make the duck look fancy and intentional, not accidental. The formality of the black tuxedo jacket contrasts beautifully with the cute, simple duck illustration, creating a design that reads as both sophisticated and playful. It’s the kind of manicure that makes people do a double-take when they notice it.
How to Execute It
- Paint all nails with two coats of bright white polish, allowing each coat to dry fully between applications
- Use a thin, angled brush (size 00 or smaller) with black polish to create the “jacket” line — this should be perfectly horizontal across the middle of the nail
- Fill in the black below that line cleanly, creating a sharp divide between jacket and shirt
- Once the black is completely dry, paint your duck in the white section with minimal strokes — less is more here
- Seal with a top coat for smoothness and longevity
Pro tip: Practice your jacket line on a piece of paper or a practice wheel first. The sharper and more precise that divide, the more polished the whole design looks.
2. Marble Black and White with Duck Silhouettes
Marble nail art and ducks are a match made in heaven. The organic, swirling patterns of marble create visual interest that frames duck silhouettes perfectly. Start with a white base, then use a thin black brush to create delicate marble veining — think spider web patterns, irregular lines, and flowing curves that don’t follow any strict geometry. Once your marble pattern is set, add small, simple black duck silhouettes scattered across the nail, positioned so they seem to sit naturally within the marble design.
The Visual Appeal
Marble designs instantly feel more upscale and artistic than solid colors, which elevates the entire manicure. When you layer duck silhouettes into a marble background, they become part of a larger artistic composition rather than just a cute decoration. The ducks almost feel like they’re emerging from or swimming through the marble pattern.
Technique Breakdown
- Paint two coats of crisp white polish, letting it dry completely
- Using a very thin black brush, paint delicate, meandering lines across the nail surface — don’t overthink this, natural-looking imperfection is the goal
- Create some connected lines and some isolated curves, varying their thickness slightly
- Paint 1-3 duck silhouettes per nail in simple profile (head, neck, body outline) — these should be recognizable but not detailed
- Add a matte top coat if you want the design to feel even more sophisticated, or go with glossy for extra shine
Worth knowing: If your marble lines feel too harsh, soften them slightly by buffing the edges with a makeup sponge while the black is still slightly tacky — don’t let it fully dry first.
3. Geometric Duck Pattern with Sharp Lines
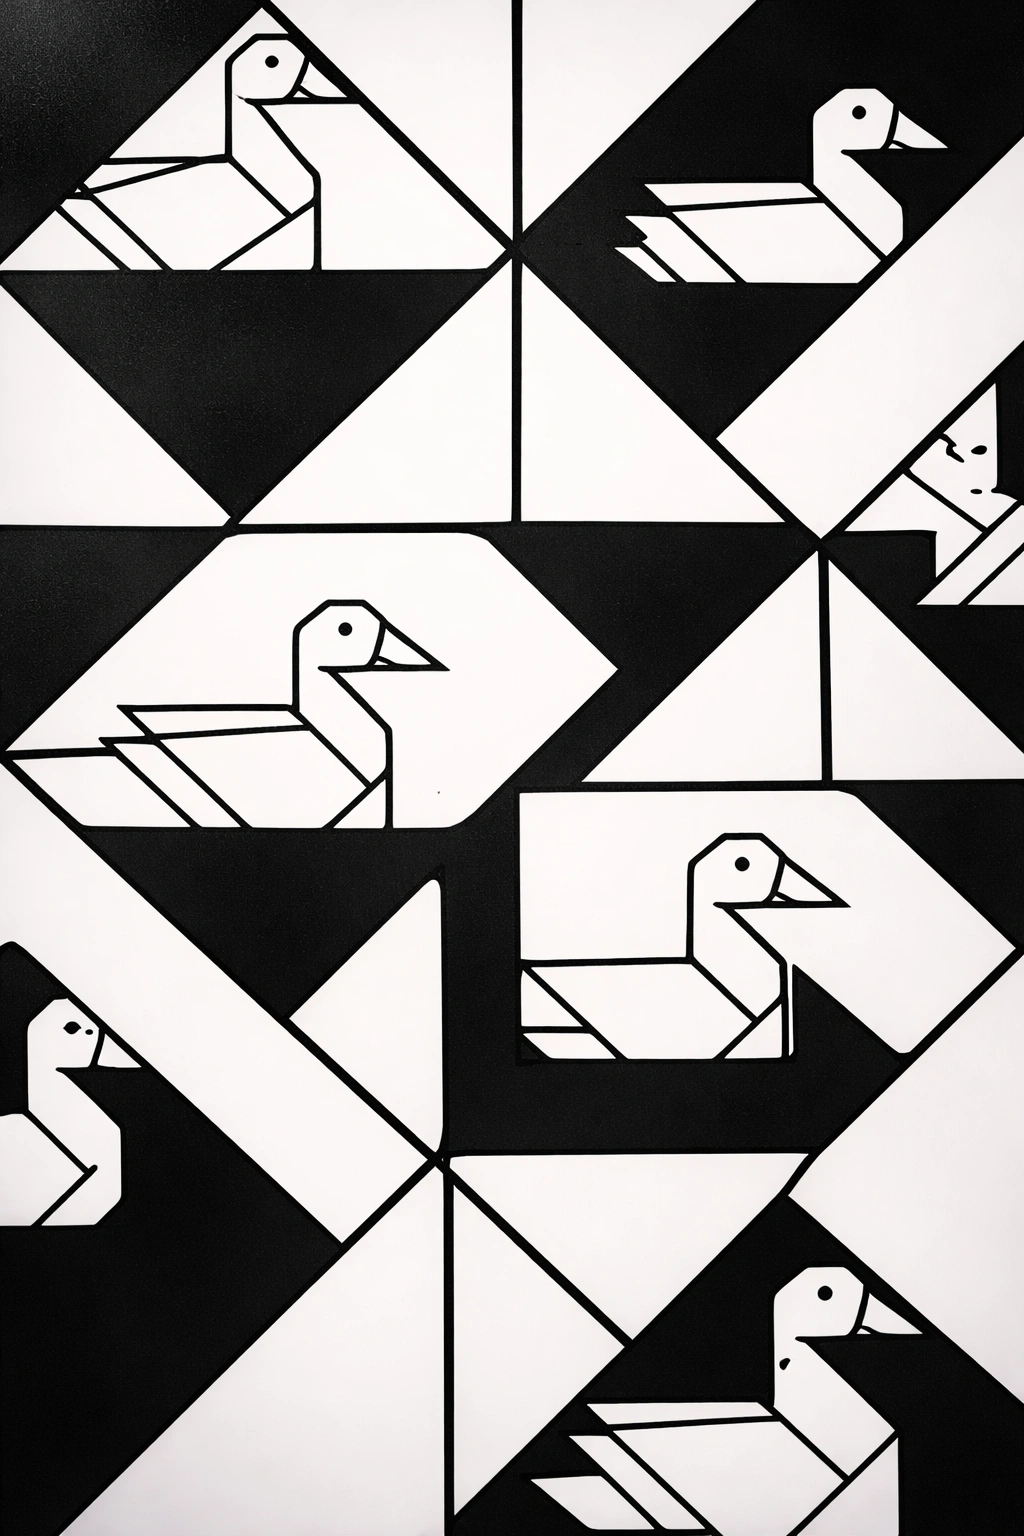
For the architecture-minded nail enthusiast, geometric duck design is where precision meets personality. This design uses clean, angular lines to break the nail into distinct sections — think triangles, rectangles, and hexagons in alternating black and white. Within some sections, you paint a simplified geometric duck (made entirely of straight lines and angular shapes), while other sections remain solid color. The result is a nail that looks like it belongs in an art gallery.
Why This Design Commands Attention
Geometric patterns are inherently eye-catching because our brains are wired to notice order, symmetry, and clean lines. When you combine that geometric framework with a recognizable duck shape, the design becomes a puzzle that people want to decode. It reads as intentional and artful rather than randomly decorative.
Building the Design Step by Step
- Paint a white base on all nails and let it cure completely
- Using a thin brush or striping tool, map out your geometric sections with light pencil marks (which you can wipe away later with a damp cotton swab) — plan which sections will be black and which will stay white
- Paint all black sections carefully, using a straightedge or guide if needed to keep lines perfectly sharp
- Within one or more black sections, paint a geometric duck using white polish — make it angular, angular, angular (no curves)
- Consider adding a geometric border or frame using lines of the opposite color for extra definition
- Finish with a high-gloss top coat to emphasize the crisp lines
Pro tip: Use thin striping tape to create perfectly straight dividing lines between sections, removing it after the polish dries but before you fill adjacent sections.
4. Minimalist Line Art Ducks in Black on White
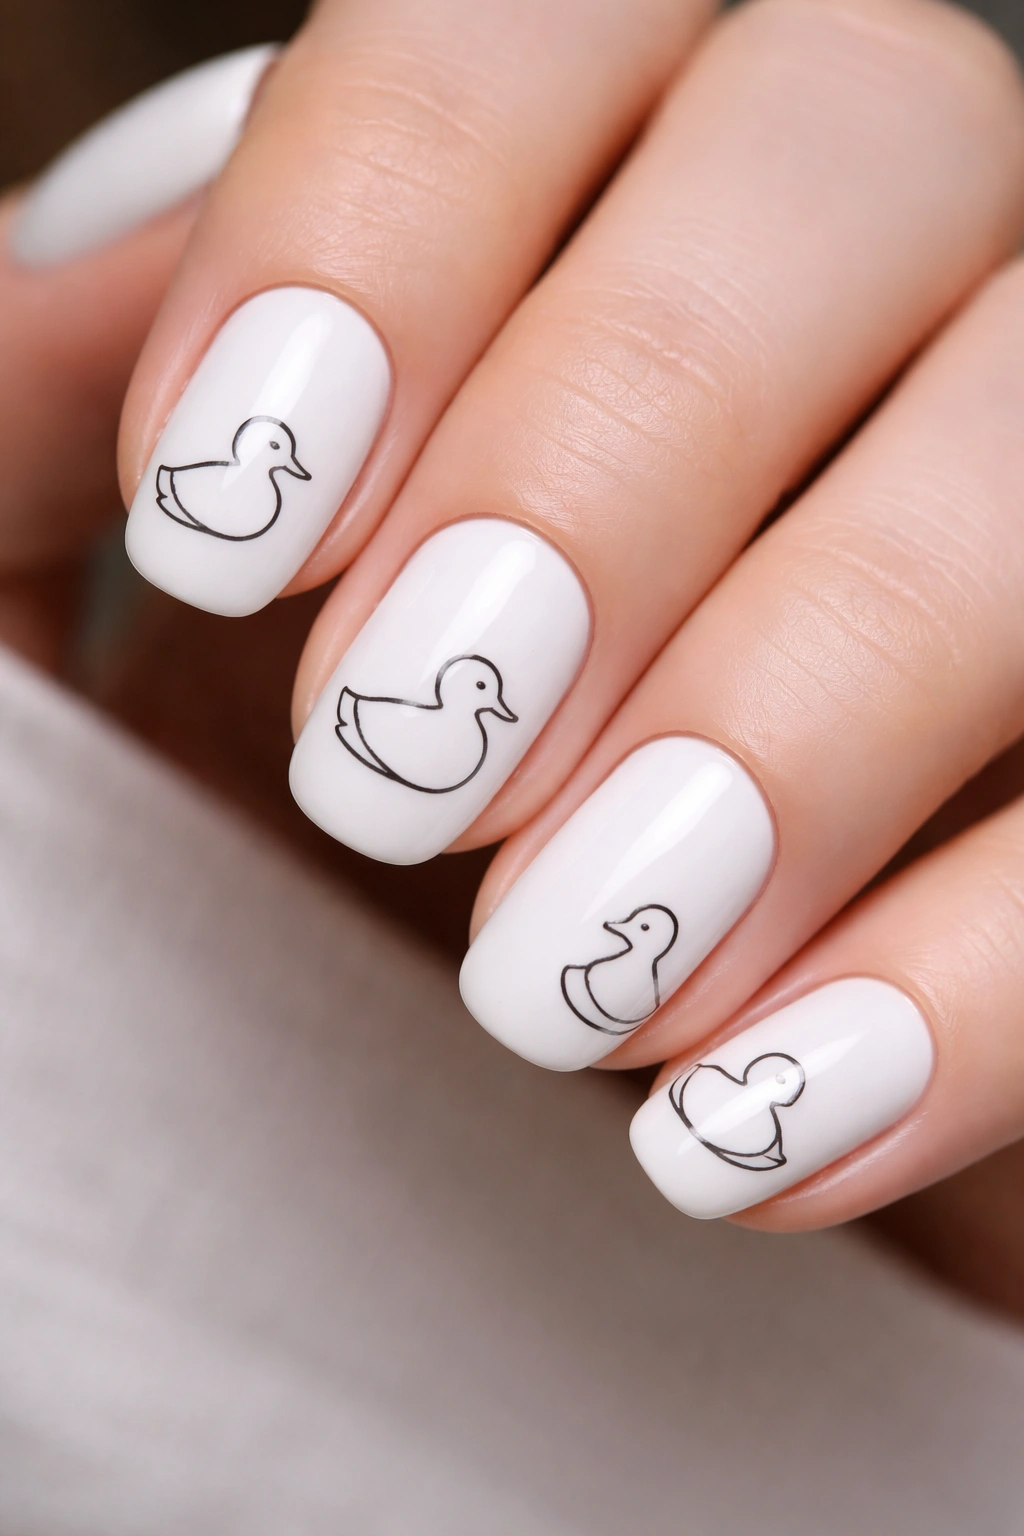
Sometimes less really is more, and minimalist line art ducks prove this beautifully. This is the design for you if you love the aesthetics of line drawing and want something that looks effortlessly chic. Paint white nails, then use an extremely fine brush (the thinnest one you own, or a technical pen designed for nail art) to paint a single continuous line creating a duck — one flowing line that traces the outline without lifting the brush. You might do one duck per nail or scatter them across just one or two accent nails.
The Sophistication Factor
Minimalist designs feel inherently sophisticated because they demonstrate restraint and intention. A single duck outline on a white nail says “I’m confident enough to know that elegance doesn’t require overdecorating.” It’s the nail art equivalent of a perfectly tailored blazer.
The Execution
- Apply two coats of pure white polish with good opacity and allow to fully dry
- Using the thinnest brush you can manage (size 000 or a technical pen), draw a single duck in profile — aim for a continuous or nearly continuous line without too many breaks
- Focus on capturing the duck’s essential shape: round head, long neck, plump body, tiny tail
- If you feel nervous about freehand, sketch it in pencil first, or use a reference image and trace it lightly before committing with black polish
- One duck per nail or 2-3 on accent nail (index finger or ring finger) looks perfect
- Finish with a glossy top coat
Insider note: This design works especially well on almond or stiletto-shaped nails because the elongated nail bed gives you more canvas for the duck outline to breathe.
5. White Ducks on Deep Black Background
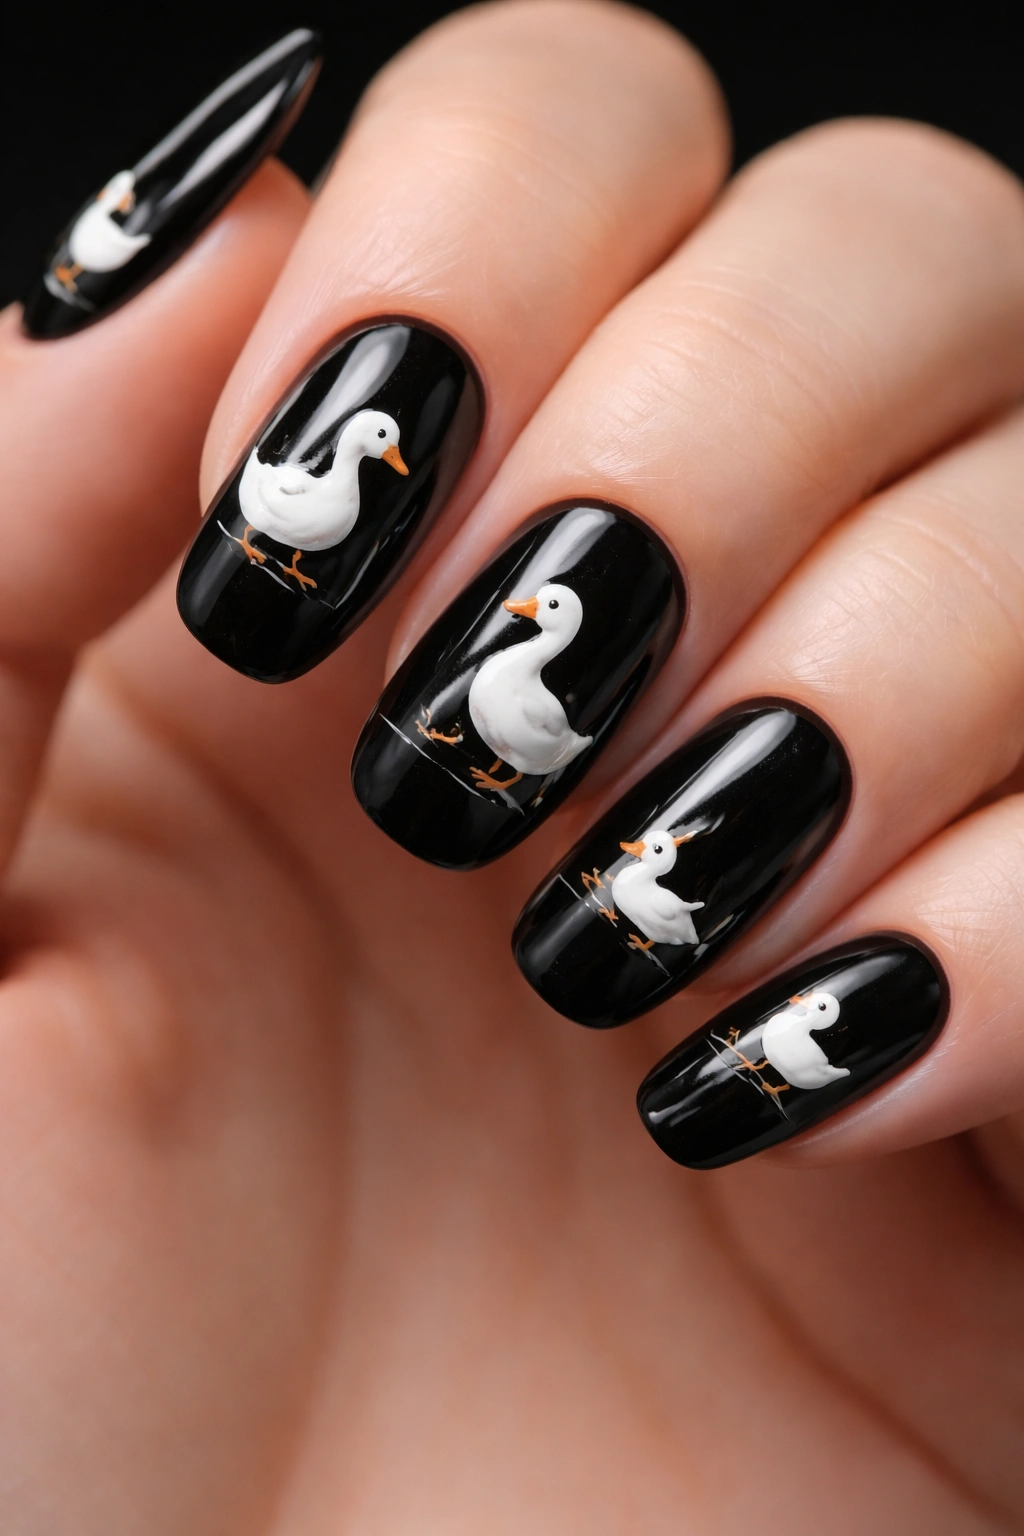
Flip the color scheme, and suddenly you have a dramatic, moody design that’s nothing short of stunning. This reverse approach uses black as the dominant color and makes white ducks the stars. Paint your nails with rich, opaque black polish (two to three coats for full coverage), then use white polish or a white gel pen to paint ducks and minimal water elements. The ducks can be detailed or simple, but the white-on-black contrast means every stroke is visible and impactful.
Why This Reversal Feels So Fresh
Black backgrounds are bold and modern, evoking elegance and drama. White ducks popping against black feel almost luminous, and the design has an unexpected nighttime or celestial quality to it. It’s a design that commands attention in a completely different way than the traditional white base.
Creating the Design
- Paint all nails with high-quality black polish, applying 2-3 coats until the color is completely opaque and rich
- Let dry thoroughly — rushing to the white design before the black is fully set will cause smudging
- Using white polish and a fine to medium brush, paint ducks with whatever level of detail you prefer — they can be silhouettes or include eyes, feathers, and shading details
- Add simple white lines to suggest water or ripples beneath the ducks (this is optional but adds context)
- Consider adding a tiny white dot or star pattern around the ducks if you want to create a whimsical, almost celestial vibe
- Apply a top coat to seal and protect
Fun fact: White polish can sometimes need 2-3 coats to look truly opaque over black, so be patient and let each layer dry before assessing coverage.
6. Ombré Fade from Black to White with Duck Details
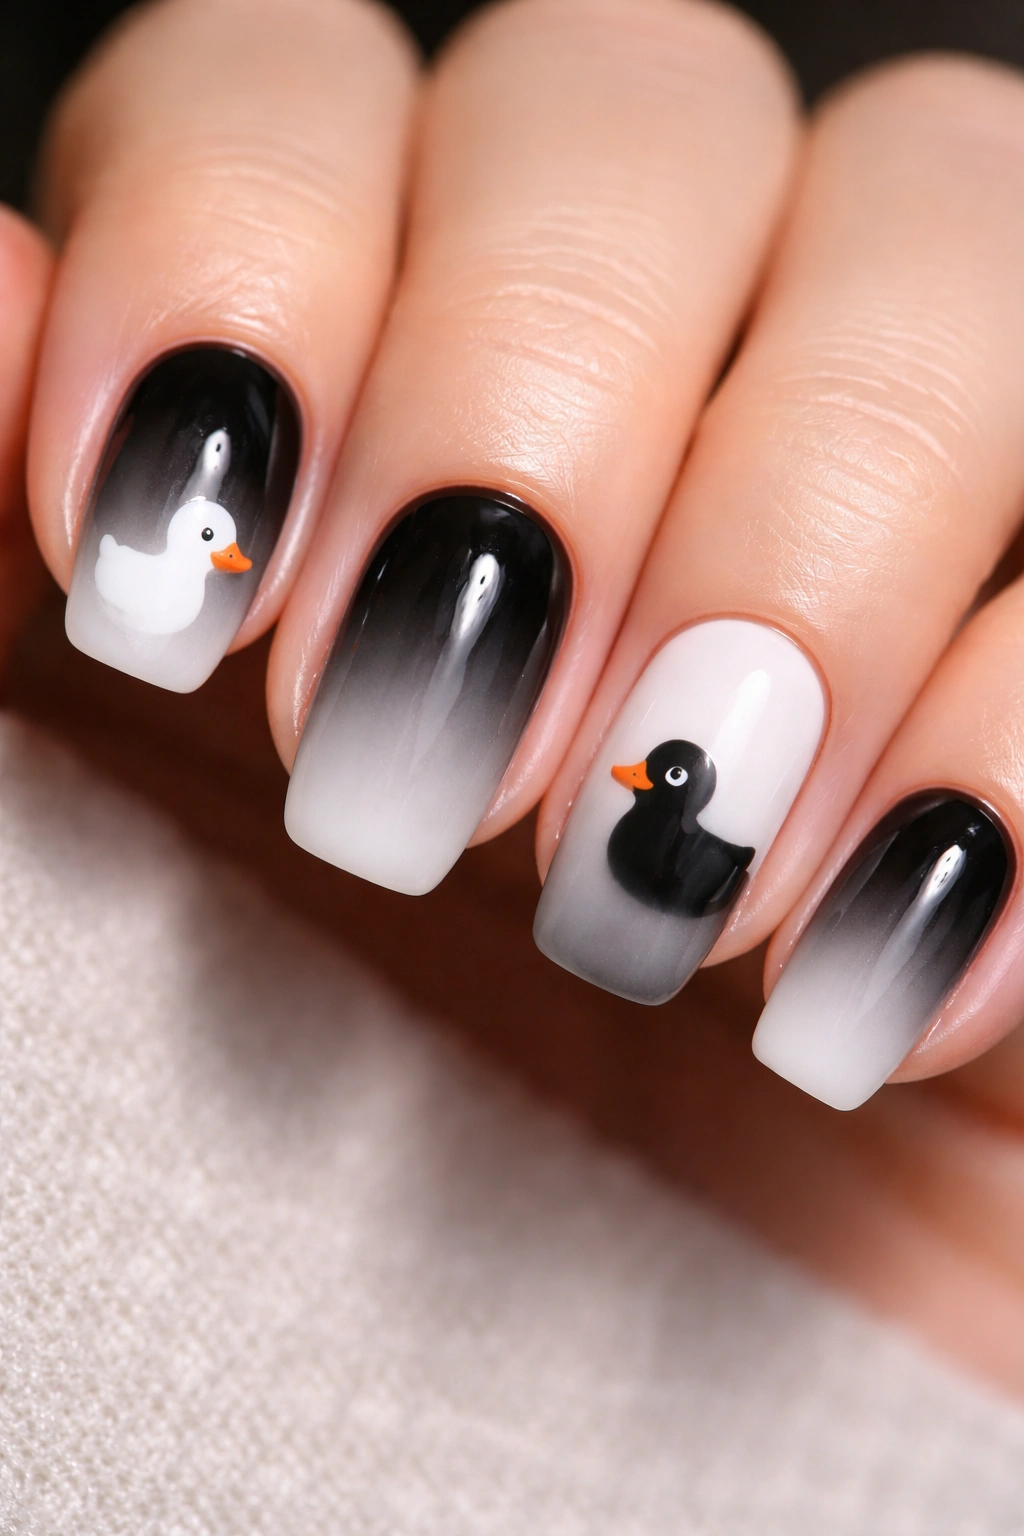
Ombré nails offer a gradient flow that’s visually sophisticated, and adding ducks transforms it into something unique. This design requires starting with black at the base of the nail and gradually fading to white at the tips. Use a makeup sponge and two or three shades of gray to create the transition, or invest in an ombré powder if you want the effect to be perfectly smooth. Once your ombre base is cured, add duck details in contrasting colors — black ducks in the white section, white ducks in the black section — so they stand out regardless of where they are on the gradient.
The Drama of Gradients
Ombré designs automatically feel more sophisticated and intricate than solid colors, even though they’re not necessarily harder to execute. The eye naturally follows the gradient flow, and strategically placed ducks become focal points that guide that visual journey.
Technique for Success
- Paint a base coat to protect your nails
- Apply black polish to the entire nail and let it dry
- Mix or gather gray polish shades that fall between your black and white — you need at least 2 intermediate shades, ideally 3
- Using a makeup sponge, dab the first gray shade from the middle-lower nail toward the black, blending as you go
- Add the second gray shade above that, overlapping slightly and blending the edges
- Finally, dab white at the tips and blend the transition between white and your lightest gray
- Once the ombré is fully set, paint duck silhouettes in whichever color provides the best contrast against the background where they’ll sit
- Top coat to seal everything
Worth knowing: Ombré works best with gel polish and a UV lamp, but it’s absolutely possible with traditional polish using the makeup sponge blending method — just expect it to take longer to dry fully.
7. Polka Dot Duck Accent with Monochrome Base

Polka dots are a timeless pattern, and duck nail art can play beautifully with this classic motif. Paint most of your nails with solid white, but dedicate one or two accent nails to a design that combines polka dots with ducks. One approach: paint the accent nail black with white polka dots scattered across, then tuck tiny duck silhouettes into some of the white dots so they’re integrated into the pattern rather than floating on top. Alternatively, use white polka dots as a base and paint black ducks emerging from or positioned around them.
Why Polka Dots Feel Special
Polka dots are vintage, playful, and automatically add visual interest without demanding perfection. The repetition of dots creates a rhythm, and when you incorporate ducks into that pattern, it feels whimsical and intentional. It’s the design that makes people smile when they see it.
Painting Polka Dot Ducks
- Paint most nails with white polish (2 coats) and let dry fully
- On 1-2 accent nails, paint black polish instead (2-3 coats for opacity)
- Using a dotting tool (or the end of a bobby pin in a pinch), dab white polish across the black nail to create polka dots — aim for roughly even spacing, but don’t obsess over perfection
- Allow the white dots to dry
- On some of the white dots, paint tiny duck profiles or faces in black — make them small and simple
- On solid white nails, you can add black polka dots and incorporate small black ducks into some of them for a coordinated look
- Finish with glossy top coat
Pro tip: Practice your polka dot spacing on a makeup sponge first. Once you find a rhythm you like, it becomes muscle memory.
8. Striped Duck Nail Art in Bold Black and White
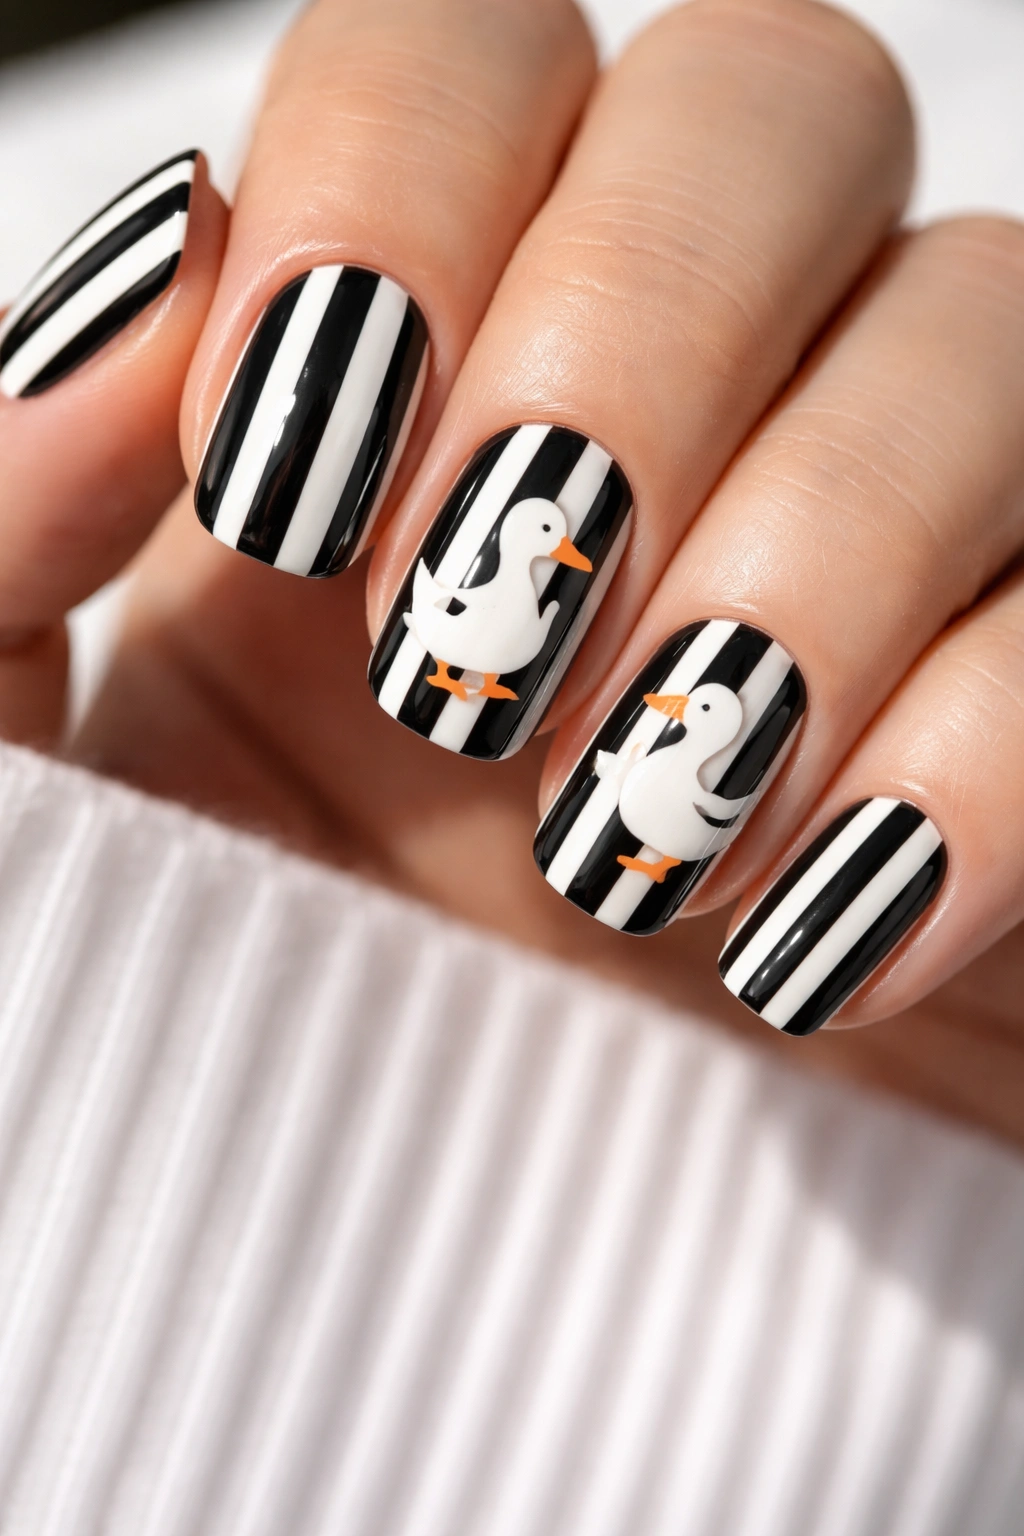
Stripes are clean, graphic, and surprisingly versatile. Paint alternating vertical stripes of black and white — you might do thick stripes or thin ones depending on your preference — across all your nails. On one or two accent nails, break the stripe pattern and paint ducks that cross over the stripes, positioned so the stripes show through parts of the duck outline. The duck should be drawn in one color (opposite to whatever stripe it’s crossing) so it pops visually against the striped background.
The Power of Breaking a Pattern
Striped designs are inherently orderly and structured, so when you interrupt that pattern with an organic duck shape, it creates visual tension and interest. Your eye lands on the duck because it’s the element that breaks the rule.
Creating Stripes Plus Ducks
- Paint a white base coat on all nails
- Using a striping brush or thin brush, paint vertical black stripes across all nails — decide your width (thick stripes are easier, thin stripes are more refined) and paint them with even spacing
- Allow the black stripes to dry completely
- Paint white stripes in the gaps between the black stripes to create a striped pattern across the nail
- On one or two accent nails, paint duck outlines that cross over the stripes — use whatever color contrasts best with the background where the duck sits (white duck on black stripe, black duck on white stripe)
- Add details like an eye to the duck for extra personality
- Seal with top coat
Worth knowing: Striping tape can help you maintain perfectly straight, even stripes if freehand feels intimidating — apply tape along the stripe lines, paint over them, then remove the tape to reveal clean edges.
9. Splatter Paint Duck Design
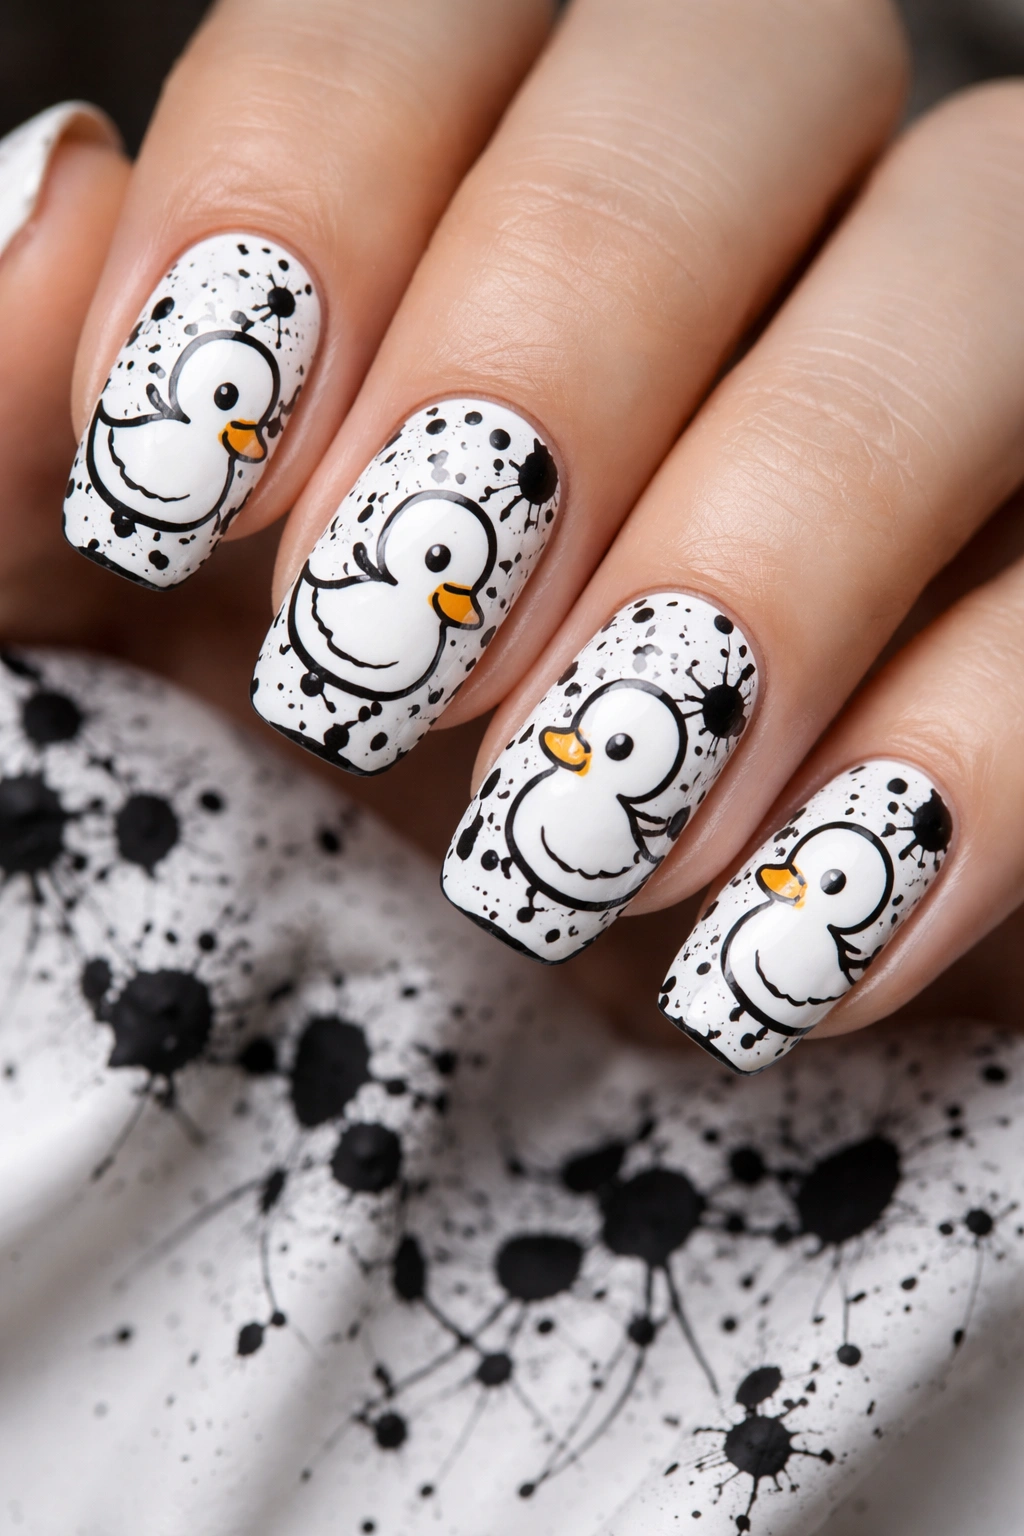
Splatter and abstract paint techniques feel artistic and modern, and ducks integrate surprisingly well. Paint a solid white or black base, then use a splatter technique to create random flecks of the opposite color across the nail (use an old toothbrush, flick black polish across a white base or white polish across black). Once your splatter base is dry, paint a duck or ducks in clean, precise lines that contrast with the chaotic splatter pattern around them. The contrast between the precise duck and the random splatters creates visual interest.
The Artistic Edge
Splatter designs automatically feel creative and less “perfect,” which gives permission to lean into the artistic, handmade quality of nail art. It reads as intentional artistry rather than trying to achieve technical perfection.
Splatter Technique Explained
- Paint all nails with solid black or white polish (let dry completely)
- Fill a small cup with your contrasting color polish diluted very slightly with a drop of acetone — you want it thin enough to splatter without being so thin it pools
- Using an old toothbrush, dip just the bristles in the polish, hold it over your nail, and flick the bristles toward the nail to create random splatter marks
- Alternatively, you can tap a brush handle against the toothbrush to send flecks flying
- Allow the splatter to dry completely before proceeding
- Using a clean, fine brush, paint a duck or two in neat, controlled lines — the precision of the duck against the chaos of the splatters is the whole point
- Make the duck detailed enough to be recognizable and distinct from the splatter pattern
- Top coat to seal
Insider note: Practice your splatter technique on a paper towel or practice nail first — it can be messy, and you’ll want to get a feel for the flick strength that gives you the splatter density you prefer.
10. Negative Space Duck Cutouts
Negative space design is trendy, sophisticated, and surprisingly easy to execute. Paint most of your nails with black polish, but leave the nail bed bare (unpainted) in the shape of a duck on one or two accent nails. Your actual nail becomes the “duck,” visible against the black polish background. You can enhance this by painting black polish around and under the duck outline, adding a bit of detail (an eye, some feather lines) in black to define the negative space duck more clearly.
Why Negative Space Feels So Current
Negative space designs feel high-fashion because they require confidence and an understanding of design principle — they’re less about adding color and more about strategic removal and contrast. It reads as intentional and artistic.
Executing Negative Space
- Paint all nails with a good base coat
- Paint black polish on all nails (2-3 coats for opacity)
- On one or two accent nails, use a toothpick or fine brush to carefully scrape away black polish in the shape of a duck before it fully cures — this creates a negative space reveal of your actual nude nail beneath
- Allow the polish to dry, then clean up any rough edges around the duck outline
- Optionally, paint a few fine black lines within the negative space duck (eye, beak, wing definition) to make the duck shape more recognizable
- Apply top coat
- Alternatively: paint a design on your nude nail, then apply black polish around it carefully, leaving the duck exposed
Pro tip: This design works best on naturally long nails or nail extensions, as you need enough bare nail space for the duck shape to be clearly recognizable.
11. Gradient Glitter Duck Nails
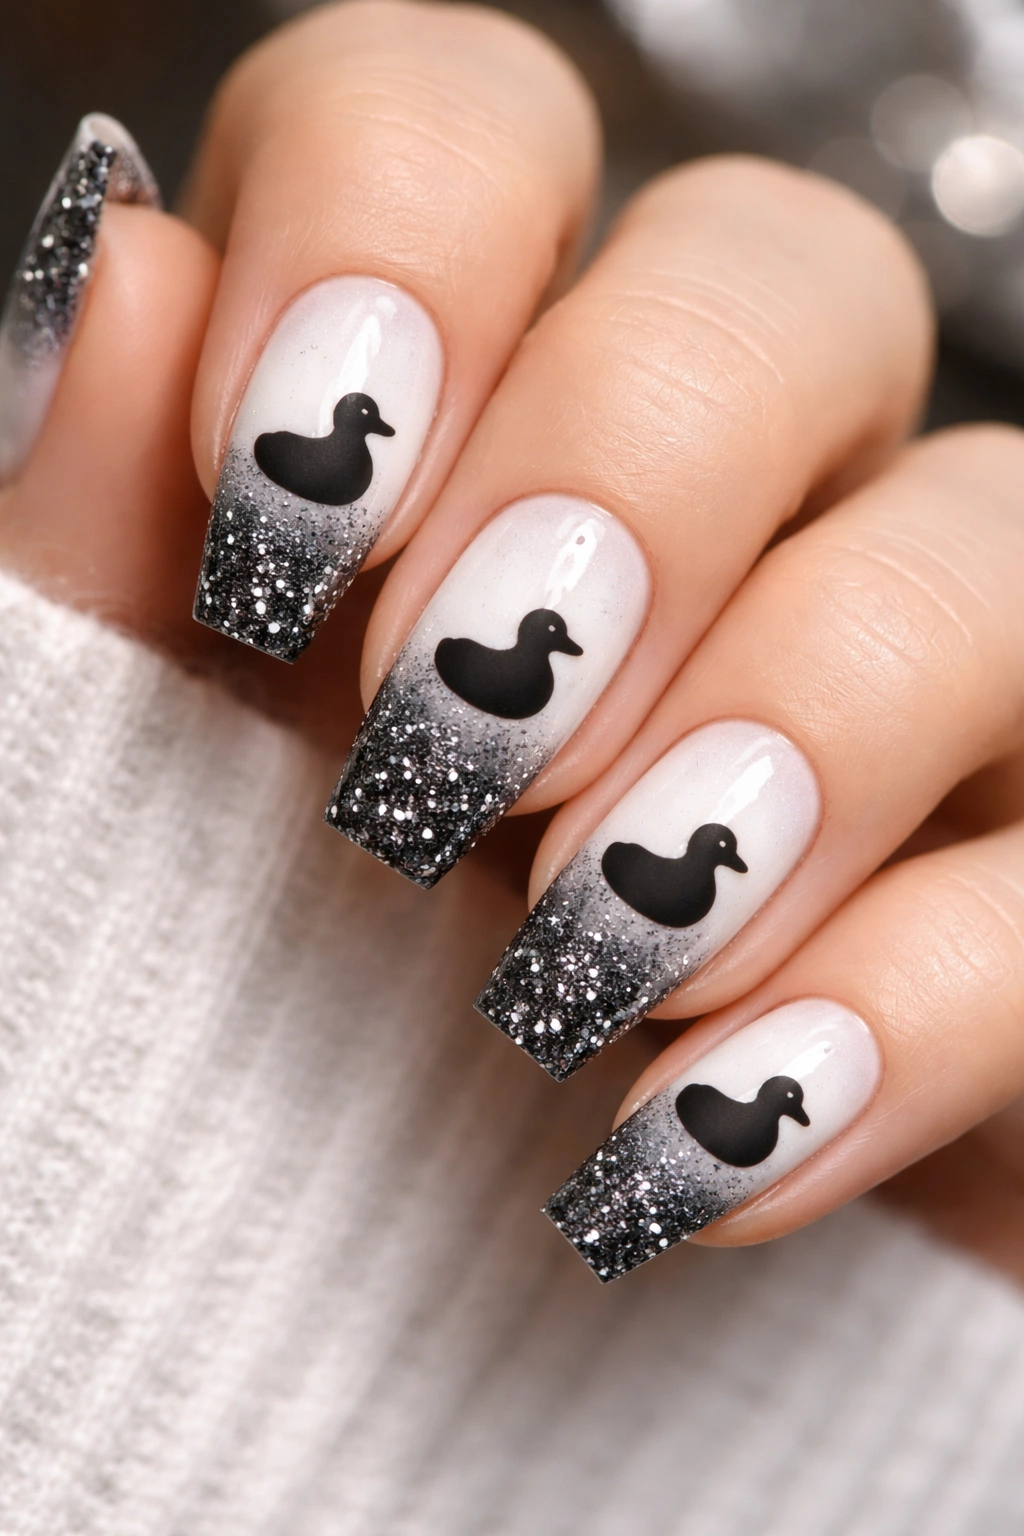
Add a touch of sparkle and dimension with glitter gradient duck designs. Start with a white base, then apply a gradient of black glitter (from dense to sparse moving from base to tip), creating a smooth transition. Once the glitter gradient is set, paint a duck or ducks in solid black or white polish — the duck should be solid and matte against the sparkly, glittery background for strong contrast and visual separation.
The Glamour Factor
Glitter automatically elevates a design, making it feel more celebratory and high-impact. Combined with the graphic simplicity of a duck illustration, you get something that’s both elegant and fun — perfect for nights out or special occasions.
Creating the Glitter Gradient
- Paint a white base coat on all nails
- Apply a matte black polish on the lower third of the nail
- In the middle section, use a makeup sponge to apply black glitter polish, creating a blend where the solid black transitions to the glitter
- In the upper third, apply finer or sparser glitter so it gradually fades toward the nail tip
- Allow everything to dry fully
- Using a fine brush and white or black solid polish (opposite to the glitter colors), paint a duck design across the gradient — the solid polish will show up sharply against the textured glitter background
- Add details like eyes and beak definition to the duck
- Top coat to seal (this creates a smooth finish over the glitter)
Worth knowing: Black glitter can be tricky to apply evenly. Use a sponge stippling motion rather than brushing, and don’t overload the brush — multiple thin layers look better than one thick coat.
12. Hand-Painted Detailed Duck Portraits

For the artist in you, detailed hand-painted duck portraits on a monochrome background are the ultimate expression of nail art skill and patience. Paint all nails white, then dedicate one or more nails to a detailed, realistic duck portrait rendered entirely in black. Include details like feather texture, shading, the duck’s eye, and distinctive markings. This is the design for someone who genuinely enjoys freehand painting and doesn’t mind spending time on the manicure.
When Less Is Not More
These detailed designs are stunning because they demonstrate mastery and commitment. A fully realized duck portrait on a single nail becomes a tiny work of art, transforming your nails into a gallery. It’s the kind of manicure that sparks conversations and genuine admiration.
Techniques for Detailed Duck Portraits
- Paint all nails with quality white polish (2-3 coats for opacity and brightness)
- Let dry completely
- Using reference images of ducks, sketch your design lightly in pencil on the accent nail
- Using progressively finer brushes, paint the duck using black polish — start with basic shapes, then add detail layers (eyes, feather texture, shading, highlights)
- Build depth by layering thin black lines for feather texture and shading
- Add a white highlight dot in the duck’s eye for extra realism
- Consider painting complementary small design elements on other nails (single feathers, water ripples, simple duck profiles) to tie the manicure together without overwhelming it
- Allow all paint to dry fully, then apply glossy top coat for a polished finish
Pro tip: Take your time and let each layer dry before adding the next — rushing causes colors to blend muddy. If mistakes happen, keep a fine brush with white polish nearby to paint over them and start that section again.
Final Thoughts
Black and white duck nails offer endless creative possibilities, whether you’re drawn to minimalist elegance, artistic detail, or playful whimsy. The monochrome palette keeps every design sophisticated and wearable across any setting, while the duck motif adds a layer of personality that feels fresh and specific. Start with whichever design speaks to you most — the ones with less detail if you’re building your freehand skills, or the more complex portraits if you’re already comfortable with a brush.
The best part about duck nails is how forgiving the color combination is. Black and white never clash, they never feel dated, and they always read as intentional. Mix and match techniques from different designs, combine elements (like adding polka dots to a striped design, or incorporating splatters into a geometric pattern), and make these ideas your own. Your next manicure is just a brush stroke away from being genuinely memorable.
