

Duck nails have become a go-to shape for anyone who wants a bold, architectural nail design that commands attention. The flared silhouette creates an eye-catching canvas that’s perfect for detailed art, and tropical themes amp up the drama even further. If you’re thinking about trying this trend or you already love duck nails but need fresh design inspiration, tropical-inspired looks are where things get genuinely exciting. The combination of the dramatic duck shape with vibrant island-inspired colors and motifs creates nails that feel like a miniature vacation on your fingertips.
Tropical duck nail designs work because they take advantage of the shape’s natural width at the tips — you get more space for intricate details, bold color gradients, and layered nail art techniques. Whether you’re drawn to sunset palettes, ocean-inspired hues, or botanical florals, there’s a tropical duck nail idea that’ll speak to your personal style. Let’s explore 11 stunning tropical duck nail designs that showcase exactly what’s possible when you combine this shape with island aesthetics.
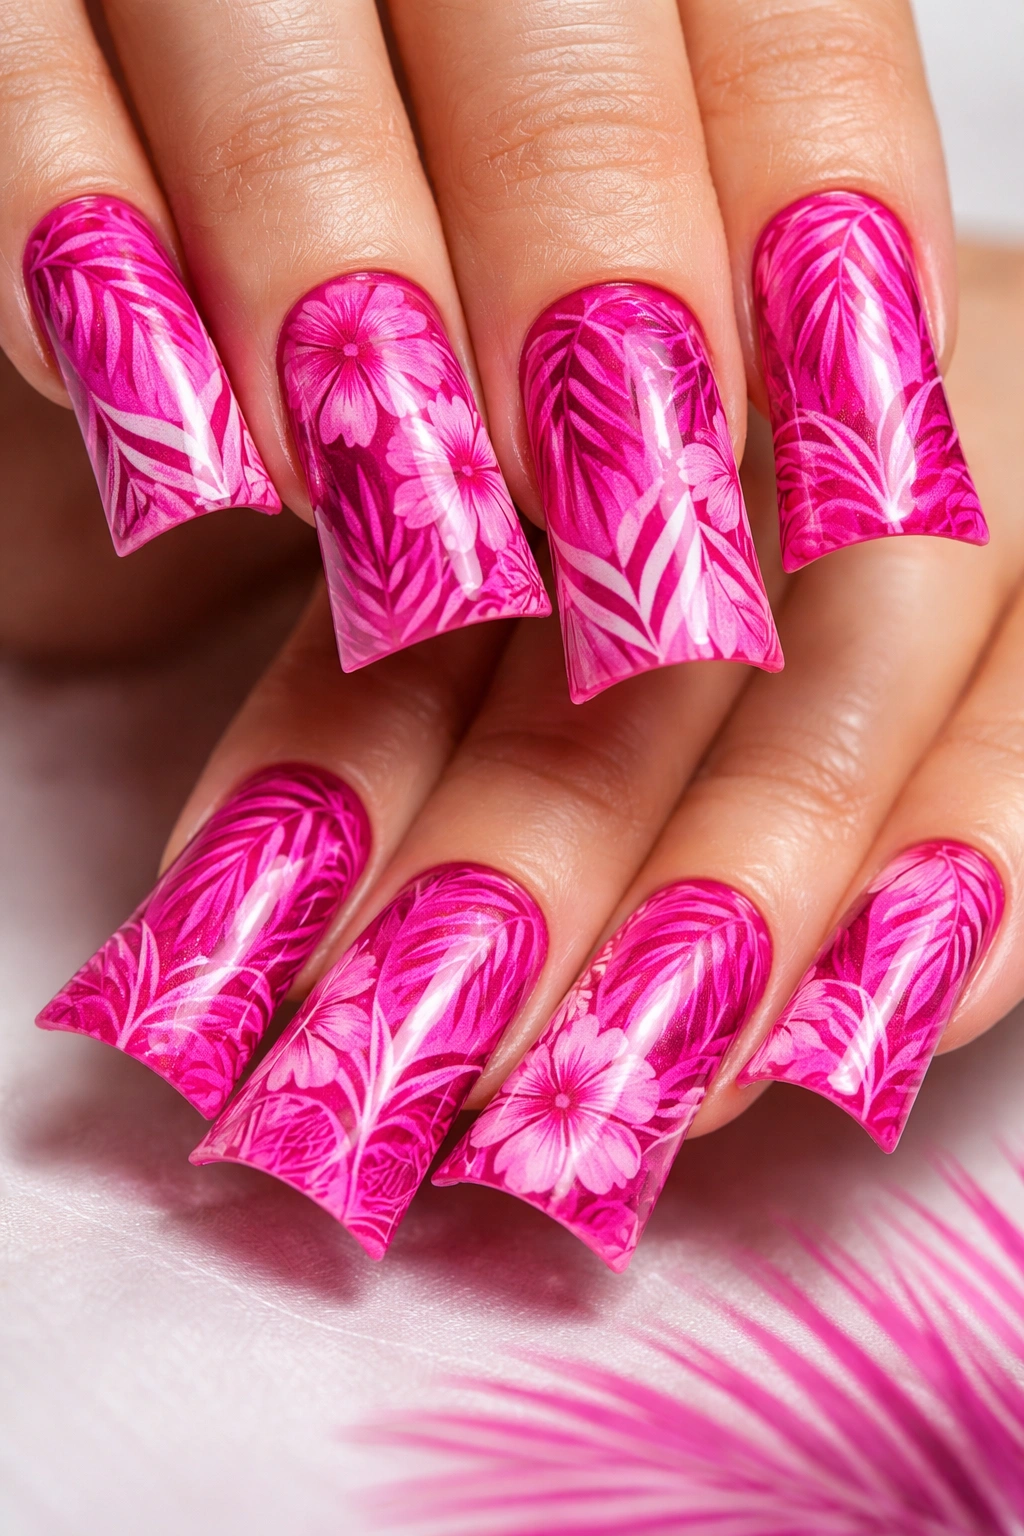
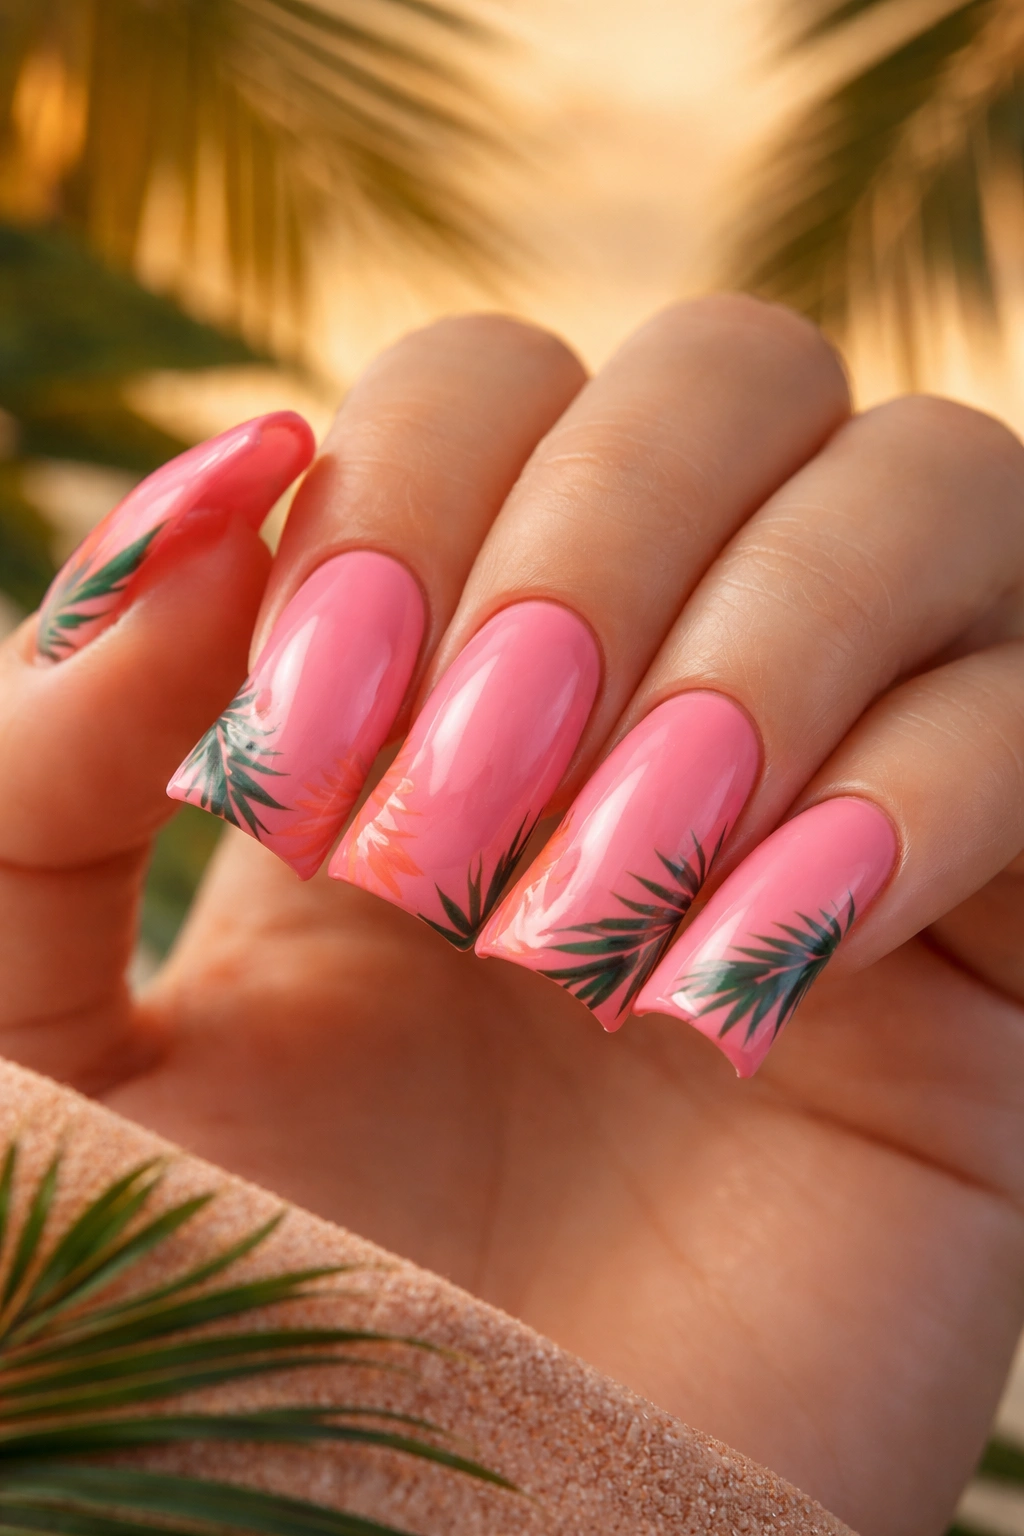
1. Flamingo Pink With Palm Leaf Details
Flamingo pink nails embody that carefree tropical energy better than almost any other color. Start with a warm, peachy pink base — think of the color of a sunset reflecting off shallow tropical water. The duck shape gives you the perfect canvas to showcase delicate hand-painted palm leaf silhouettes in darker coral or deep green along the sides and tips of each nail.
Why This Design Works So Well
The contrast between the bright base and the darker leaf details creates dimension without overwhelming the nail. Flamingo pink is flattering on nearly every skin tone, and the botanical element adds sophistication that keeps the look from feeling too cutesy. The palm leaves draw the eye along the flared width of the duck shape, emphasizing the architectural lines of the nail itself.
Application Tips for Best Results
- Use a thin brush or detail brush to paint palm fronds freehand, or apply palm leaf decals for a cleaner look if hand-painting isn’t your strength
- Seal everything with a high-shine top coat to make the pink luminous
- Add a single small rhinestone accent at the base of a few nails for subtle sparkle
- Keep cuticles pushed back and nail beds moisturized so the color appears more vibrant
Pro tip: Layer flamingo pink over a peachy nude base coat first — it adds depth and makes the color appear more dimensional than a solid pink alone.
2. Turquoise Ombre With Tropical Flowers
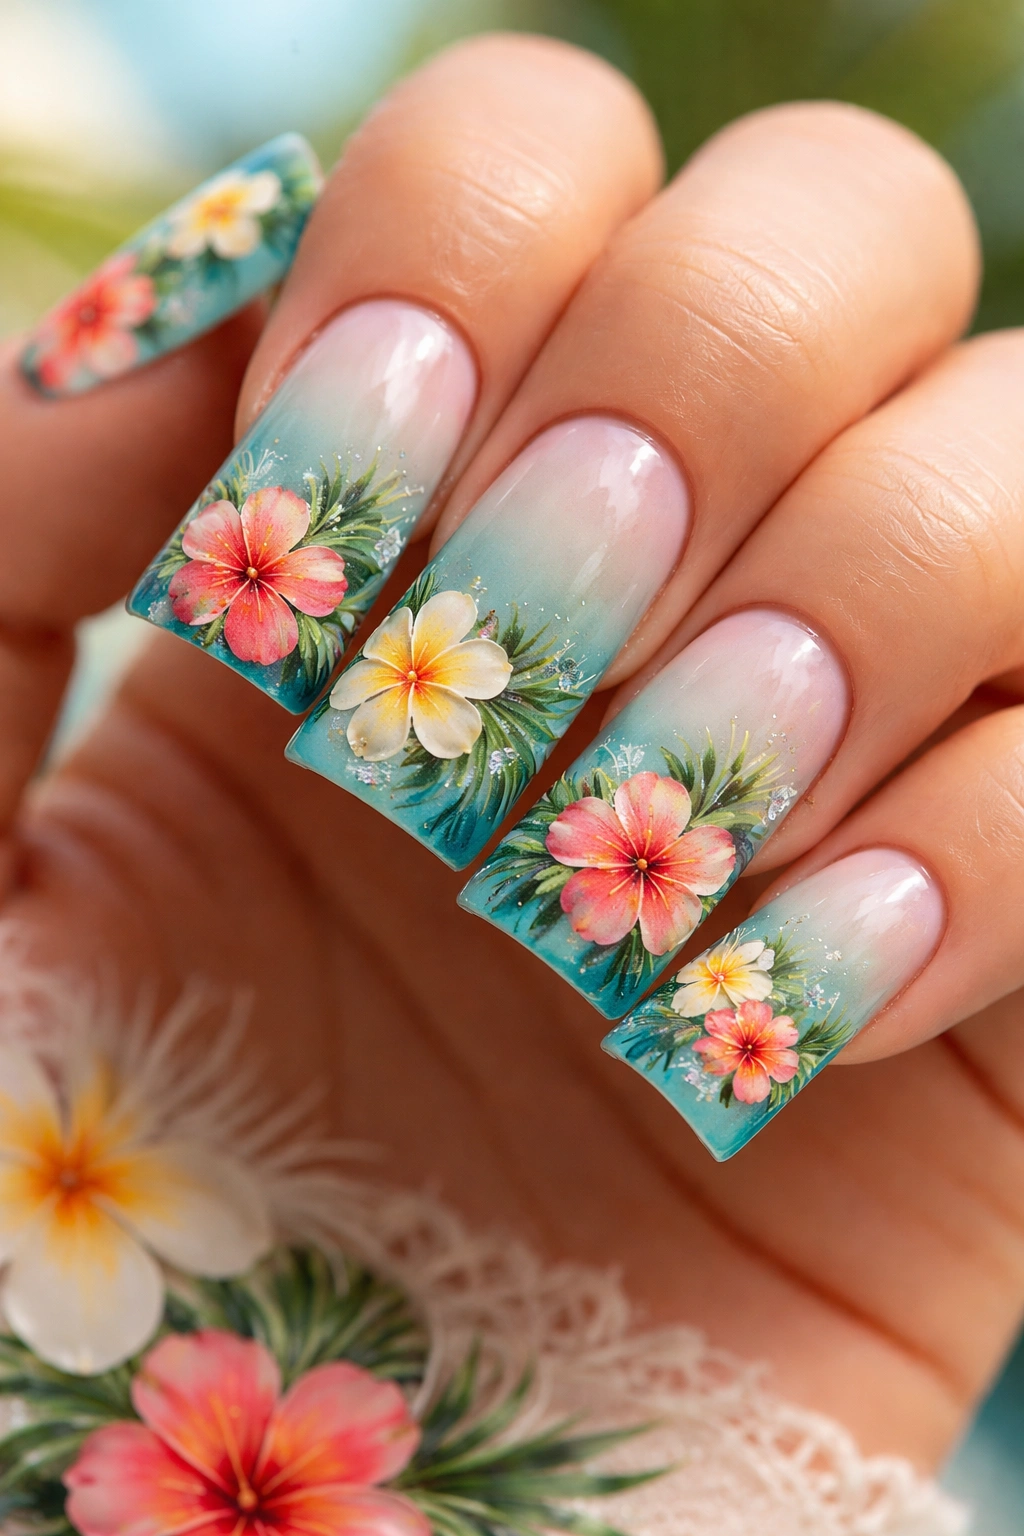
Turquoise instantly evokes tropical waters, and when you pair it with an ombre effect that darkens from the nail bed to the tips, you create a sunset-meets-ocean moment. Layered on top of this gradient, hand-painted tropical flowers in coral, yellow, and cream add the finishing touch that transforms it from a simple ombre into a complete island scene.
The Color Gradient Technique
Start with a pale turquoise or aqua at the base and gradually blend toward a deeper teal at the tips using a damp sponge and two polishes. This creates the effect of water getting deeper as you move away from shore. Once the base is set and sealed, add small flowers — think plumeria, hibiscus, or wild orchids — in clusters across the nail surface.
Small Details That Elevate the Design
- Use a very fine brush to add delicate green stems connecting the flowers
- Include tiny leaves in dusty sage or olive green between blooms
- Add one or two tiny white accent dots to each flower for dimension
- Top coat the entire nail with a semi-glossy or satin finish rather than high-shine, which photographs beautifully and feels sophisticated
Worth knowing: Turquoise can sometimes look washed out under certain lighting, so use a turquoise with warm undertones rather than cool blue ones if you have warmer skin.
3. Sunset Gradient With Ocean Wave Tips
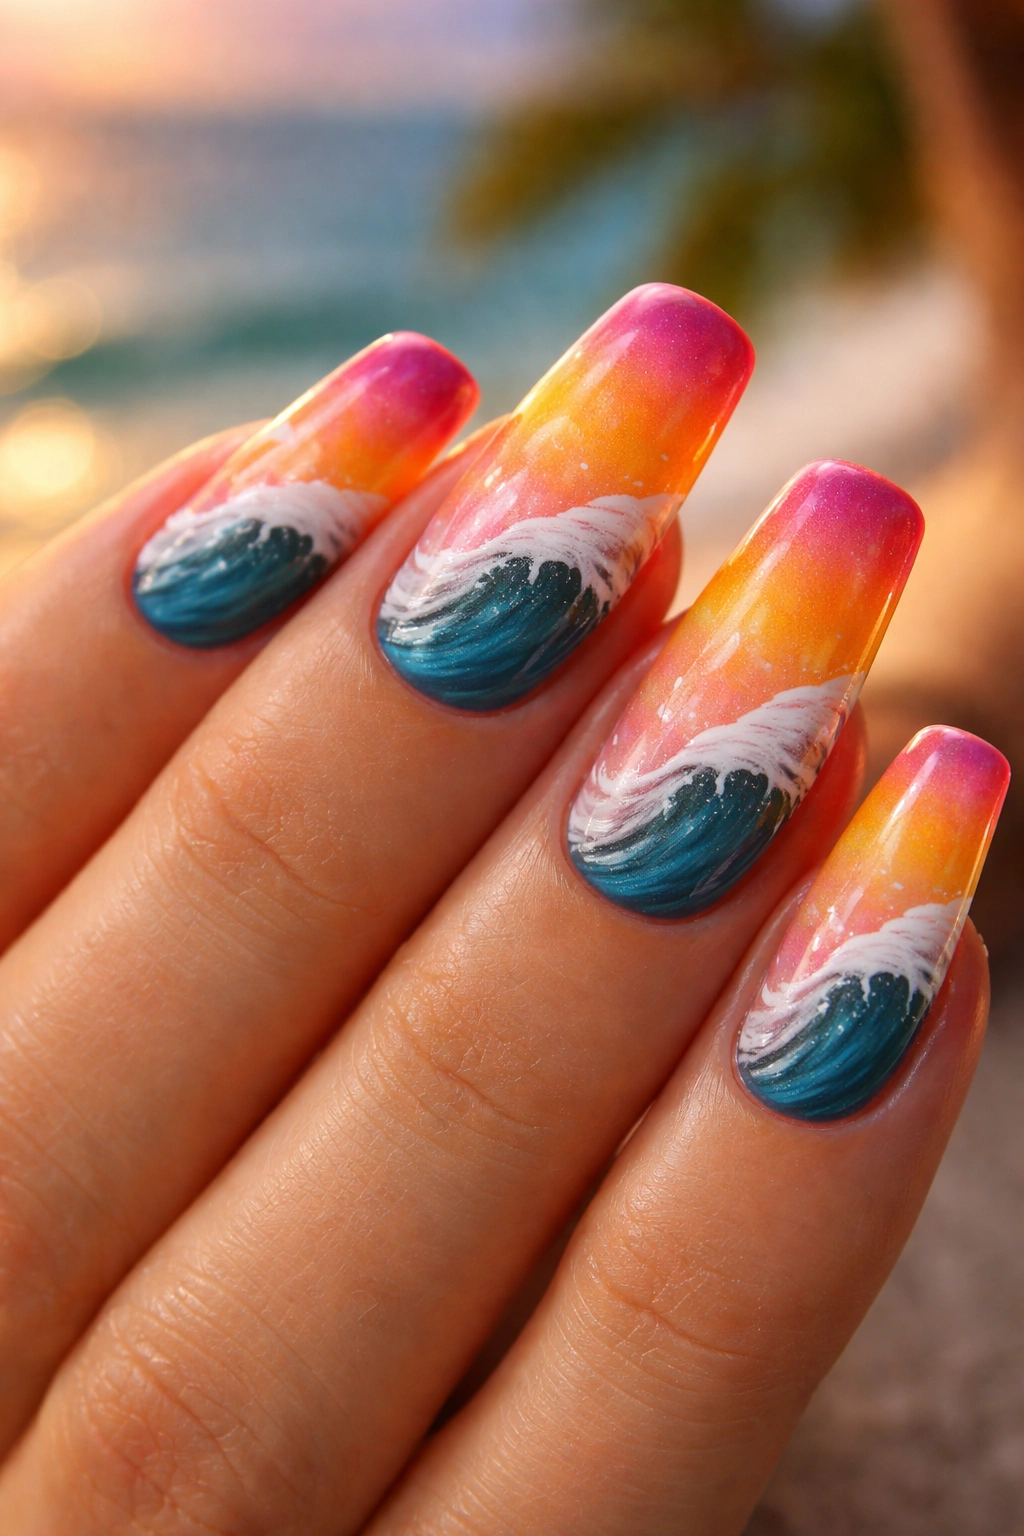
This design layers two complementary nature scenes into one nail. The base transitions from warm orange and pink at the cuticle through peachy tones to pale yellow in the middle, mimicking a tropical sunset. Then, the very tips of the nail feature tiny white wave designs painted over a deeper teal or navy blue, creating the visual transition from sky to sea.
Creating the Sunset-to-Ocean Effect
The gradient itself is the star here, so invest time in blending smoothly. Use a makeup sponge to blend at least three colors (coral, orange, yellow, and pale yellow) with a slight dampening of water. Once this base is perfect and sealed, add the waves to the tips using white gel polish and an ultra-fine brush, or use white nail polish with a thin detail brush.
Finishing Touches
- Add a matte top coat to the sunset portion and a glossy top coat to the wave tips for textural contrast
- Use a lighter peachy tone where the sunset meets the ocean to soften the color transition
- Paint waves at slightly different angles on each nail so they don’t look identical
- Consider adding a tiny palm silhouette in black against the sunset portion for a layered landscape
Quick facts about this design:
- Best executed by a nail artist with gradient experience, though advanced DIY-ers can absolutely master it
- Works better on longer nails where the sunset section has room to develop
- The transition from warm to cool tones is hardest to execute — practice blending on a nail wheel first
- Requires a very steady hand for the wave details
4. Mango Orange With Pineapple Designs
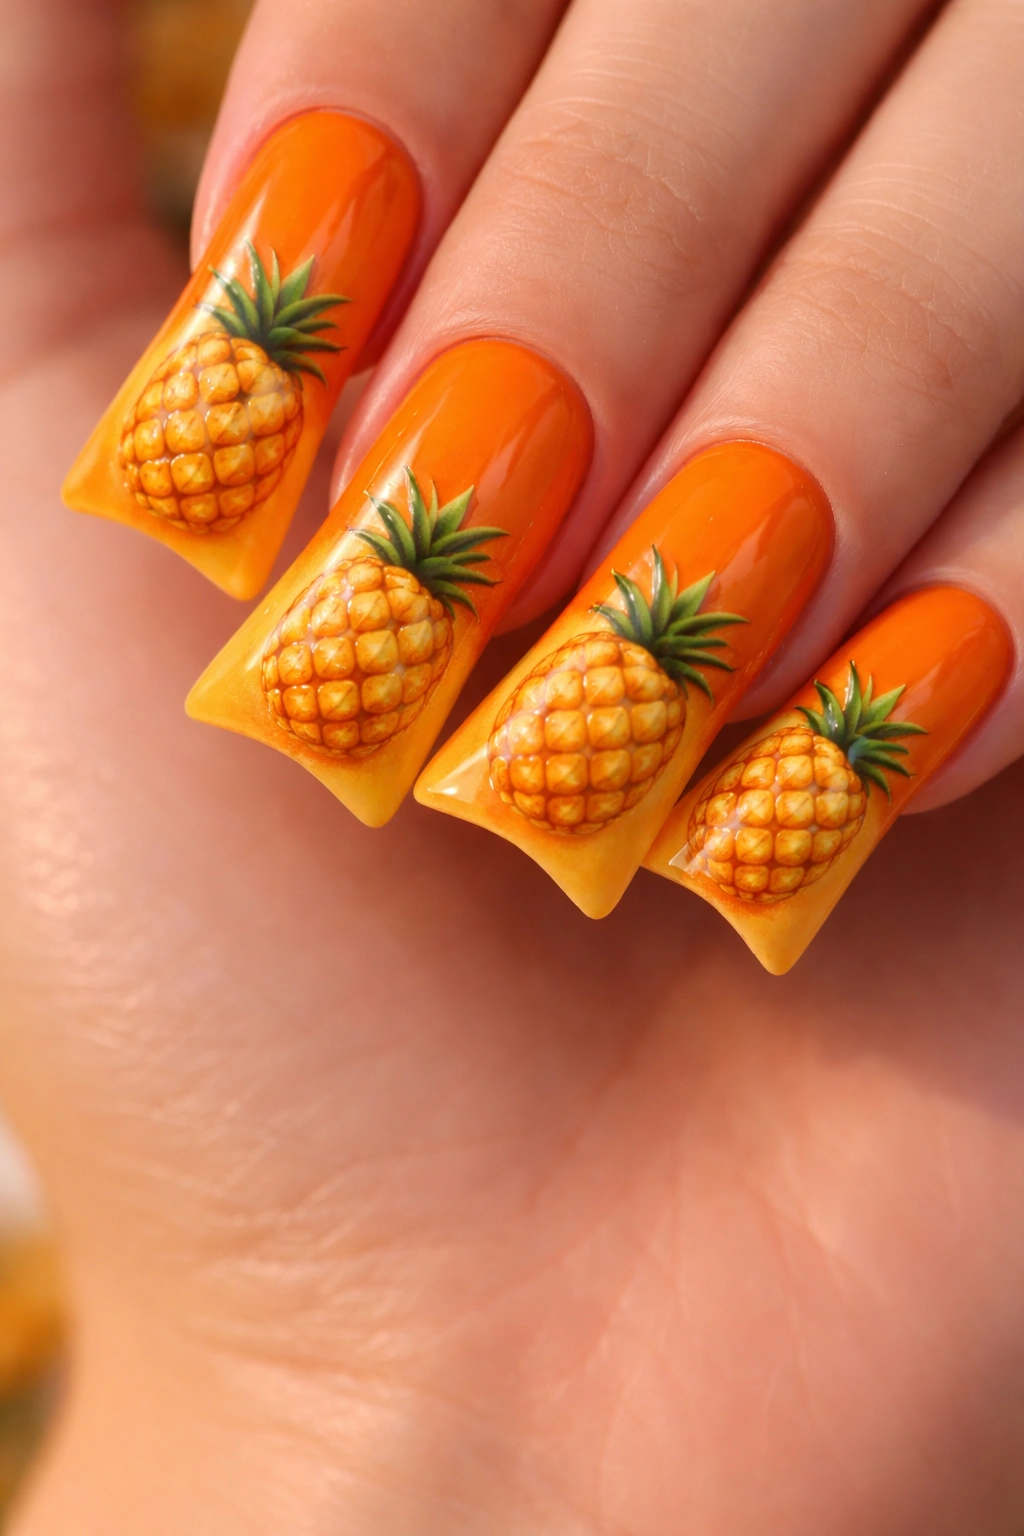
Mango orange is that warm, vibrant tropical fruit color that instantly feels festive and beachy. The duck nail shape gives you wide tips that are absolutely perfect for showcasing detailed, dimensional pineapple designs. The fruit becomes a focal point rather than a small accent, and you can play with different artistic styles — realistic, geometric, watercolor, or cartoonish.
Designing Realistic vs. Stylized Pineapples
Realistic pineapples require layering multiple shades of orange and yellow with curved cross-hatching for the texture of the fruit, plus a spiky green crown. For a watercolor style, simply apply loose washes of orange, yellow, and gold with minimal definition. Geometric pineapples use clean lines and flat shapes — perfect if you prefer a more modern aesthetic. Choose one style and execute it confidently rather than mixing styles on the same nail.
Making the Design Pop
- Use a deeper golden orange or rust tone for shadows on the pineapple fruit
- Paint the pineapple crown in a vibrant lime green or sage green
- Add highlights in pale yellow or even white for dimension
- Consider painting pineapples on 2-3 nails and solid mango on the others, rather than crowding every nail
Pro tip: If detailed fruit painting intimidates you, use pineapple nail decals or stencils and hand-paint just the background color. You’ll achieve a professional look without the pressure.
5. Coral Reef Inspired With Sea Creatures

Coral reef nails celebrate the underwater landscape of tropical destinations. Picture a gradient from pale turquoise at the base to deeper teal, with hand-painted coral formations, sea fans, anemones, and tiny sea creatures like fish, starfish, and seahorses scattered throughout. The wide duck nail tips give you plenty of real estate to create a genuinely detailed underwater scene.
Planning Your Underwater Scene
Sketch your design on paper first or look up reference photos of actual coral reefs. Map out where your main coral formations will go, then place smaller details around them. The composition should feel balanced and layered — foreground elements overlapping with background ones to create depth. This isn’t one single painted image; it’s a composition of many tiny elements working together.
Techniques for Underwater Realism
- Use matte and glossy top coats in different areas to suggest depth — matte coral looks closer while glossy teal in the background feels more distant
- Layer colors slightly translucently so colors blend where elements overlap
- Add tiny white dots throughout to suggest light filtering through water or sand stirring
- Paint darker shadows under coral formations and creatures for dimensionality
Worth knowing: Coral reef designs benefit hugely from a skilled nail artist’s hand, but experienced DIY nail artists with fine brush control can execute this successfully. Start with fewer creatures and simpler coral shapes if you’re newer to nail art.
6. Lime Green With Hibiscus Accents
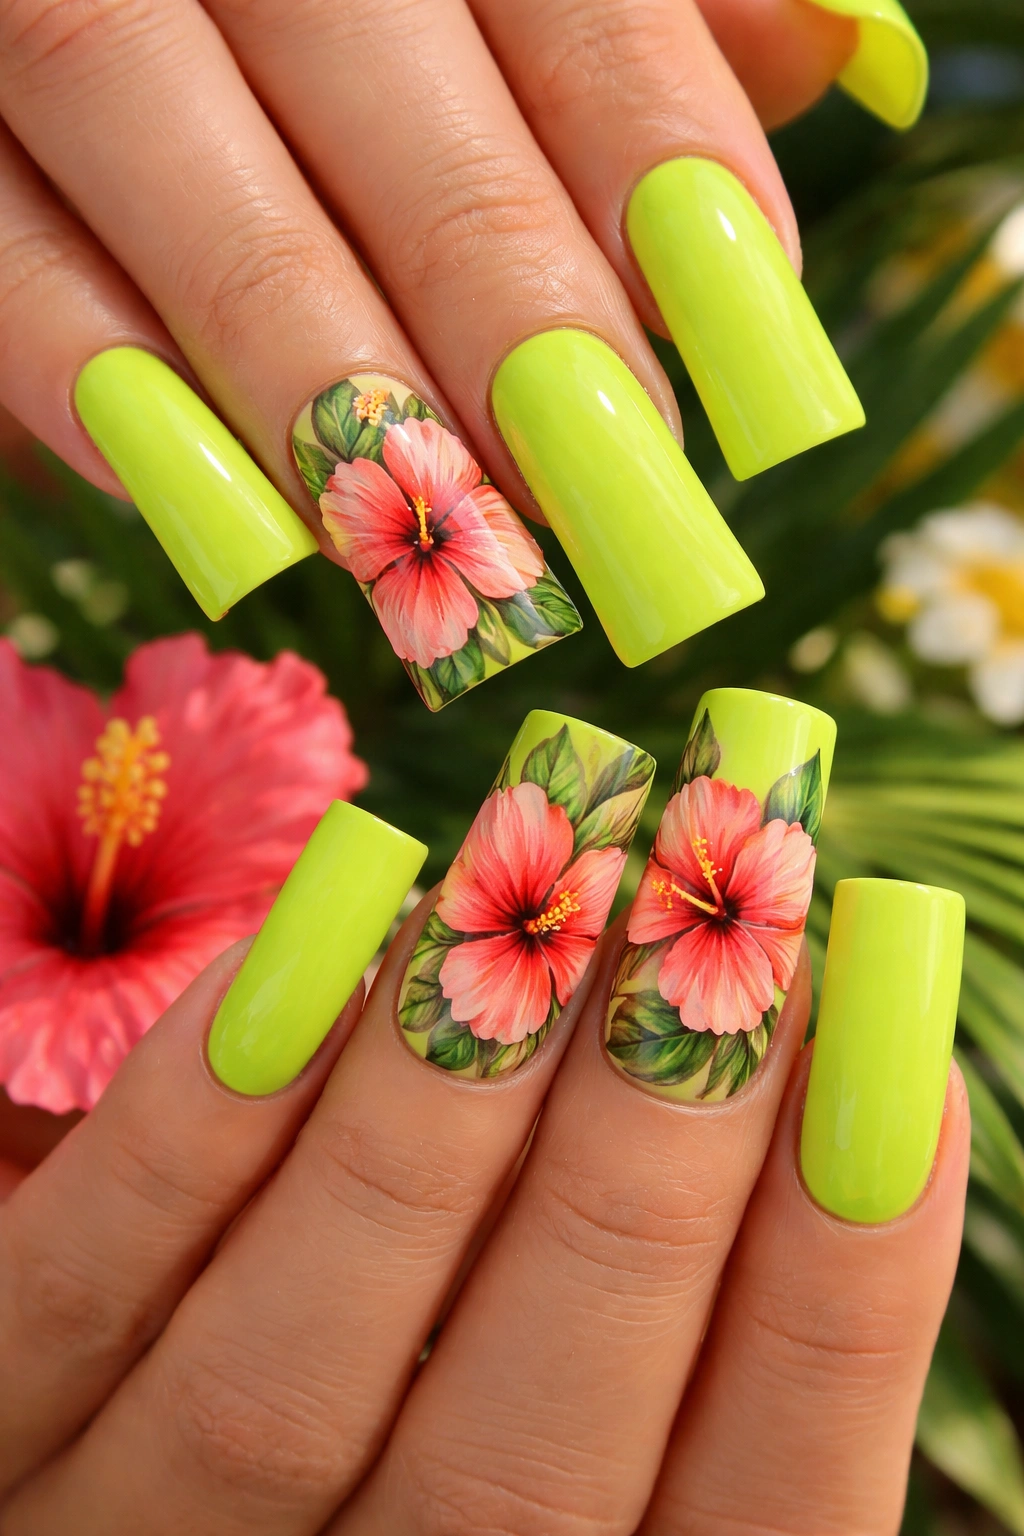
Lime green is pure tropical energy. It’s bold, unapologetic, and when paired with delicate hibiscus flowers, it strikes the perfect balance between playful and elegant. The duck shape allows you to go bold with the green without the nails feeling overwhelming — the architectural shape keeps the eye moving and the design feeling intentional rather than chaotic.
Choosing the Right Lime Green
Not all lime greens read the same way. A slightly more muted lime with yellow undertones feels more sophisticated than a neon lime that skews chartreuse. Test a few options on a nail wheel to see which feels more “tropical vacation” and less “artificial.” One or two coats will give you opacity and a rich color without looking artificial.
Placing Hibiscus Flowers for Maximum Impact
Rather than scattering flowers randomly, place larger hibiscus blooms on 2-3 nails and smaller accent flowers on the remaining nails. Each hibiscus should have multiple layers — a large bloom in coral or magenta, darker inner details, and pale stamen and stamens. Green leaves tucked behind the blooms add botanical authenticity. The high contrast between lime and coral creates visual drama that looks stunning in photos and in person.
Quick tips:
- Paint hibiscus flowers in reds, magentas, pinks, oranges, or even white for variety
- Use lime green as a border at the very edge of the nail as well as the base for additional visual interest
- Avoid making every nail identical — vary the flower placement and flower colors
- Add thin black lines to define petals for more dimensional, detailed-looking blooms
7. Tropical Fruit Mix With Watercolor Effect
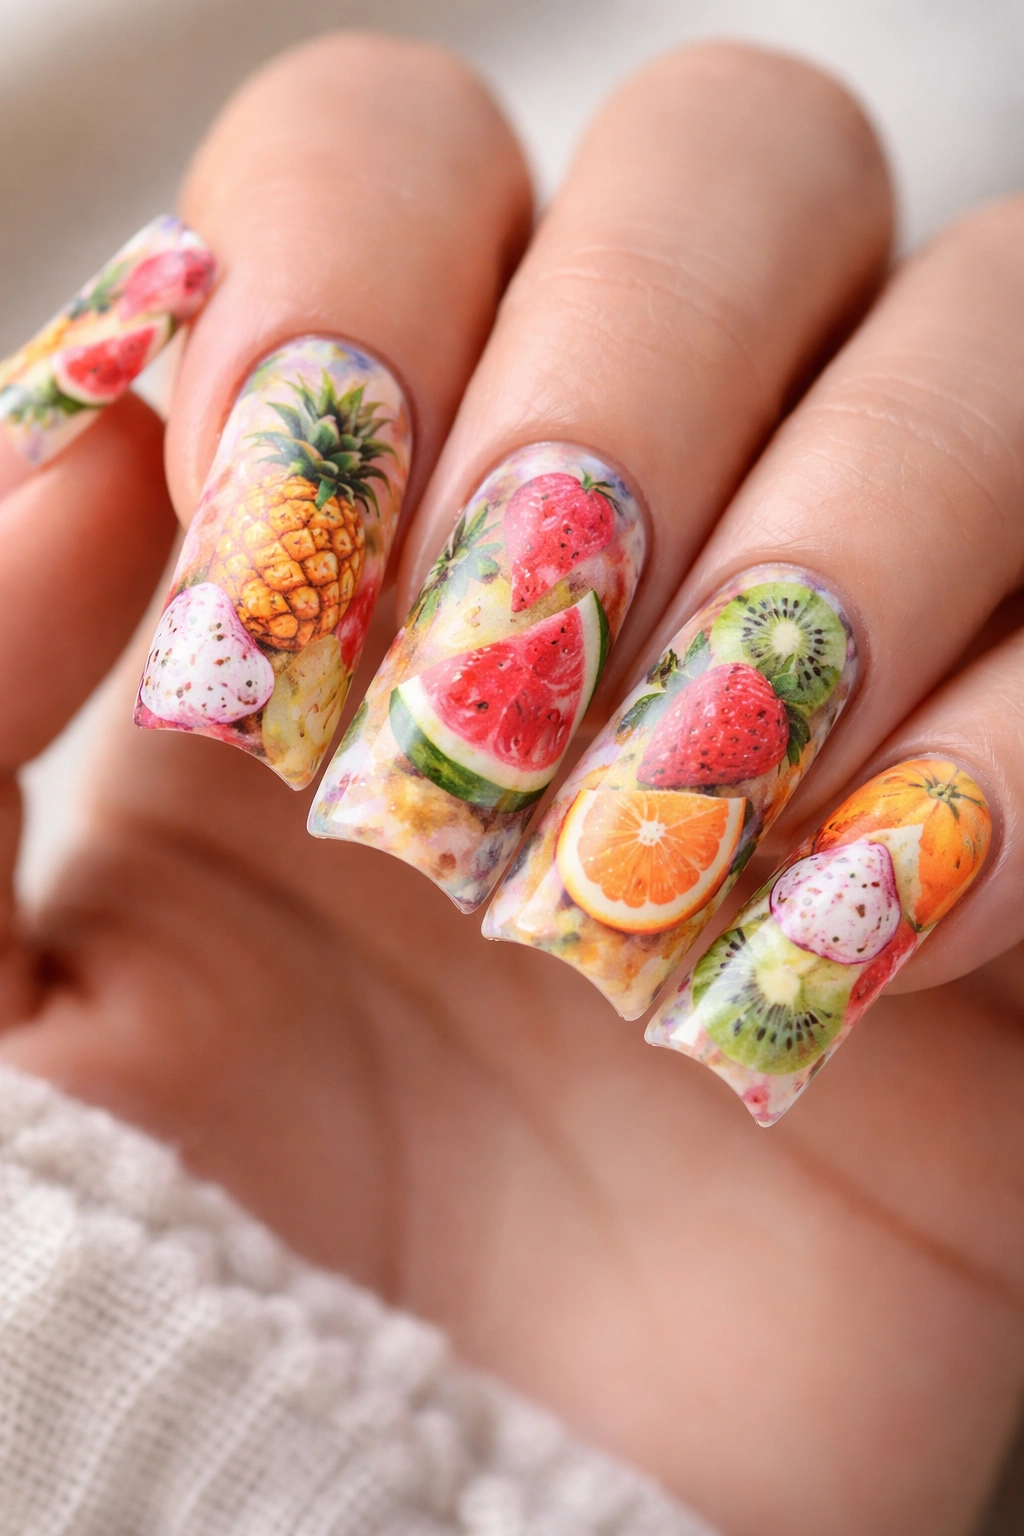
This design celebrates the abundance of tropical fruit — pineapples, mangoes, passion fruit, coconuts, papayas, all rendered in a dreamy watercolor style. Rather than painting precise, realistic fruits, watercolor nails use loose pigment, water, and soft edges to suggest fruits and create an impressionistic, artistic vibe. The duck shape allows each fruit to be large enough to be recognizable while still feeling part of a cohesive composition.
The Watercolor Technique on Nails
Start with a clean, moisturized nail surface. Apply very diluted nail polish or specialized watercolor nail polish in fruit colors — warm oranges, yellows, pinks, and deep reds. Work quickly before the polish dries, using a damp brush to push colors around and create soft transitions. The key is embracing imperfection — watercolor nails are intentionally loose and organic-looking. Let colors blend into each other rather than keeping them separated.
Building the Fruit Composition
- Begin with the brightest, warmest colors (yellows, oranges, reds)
- Add darker tones for shadows and definition while the lighter colors are still slightly wet
- Use green for leaves and stems once the base is dry
- The fruits shouldn’t be perfectly detailed; suggestion and implication are the whole appeal
Pro tip: Practice the watercolor technique on a ceramic tile or nail wheel several times before committing to your actual nails. It’s intuitive once you understand how diluted polish behaves, but it takes a few tries to feel confident.
8. Deep Teal With Gold Foil Palms
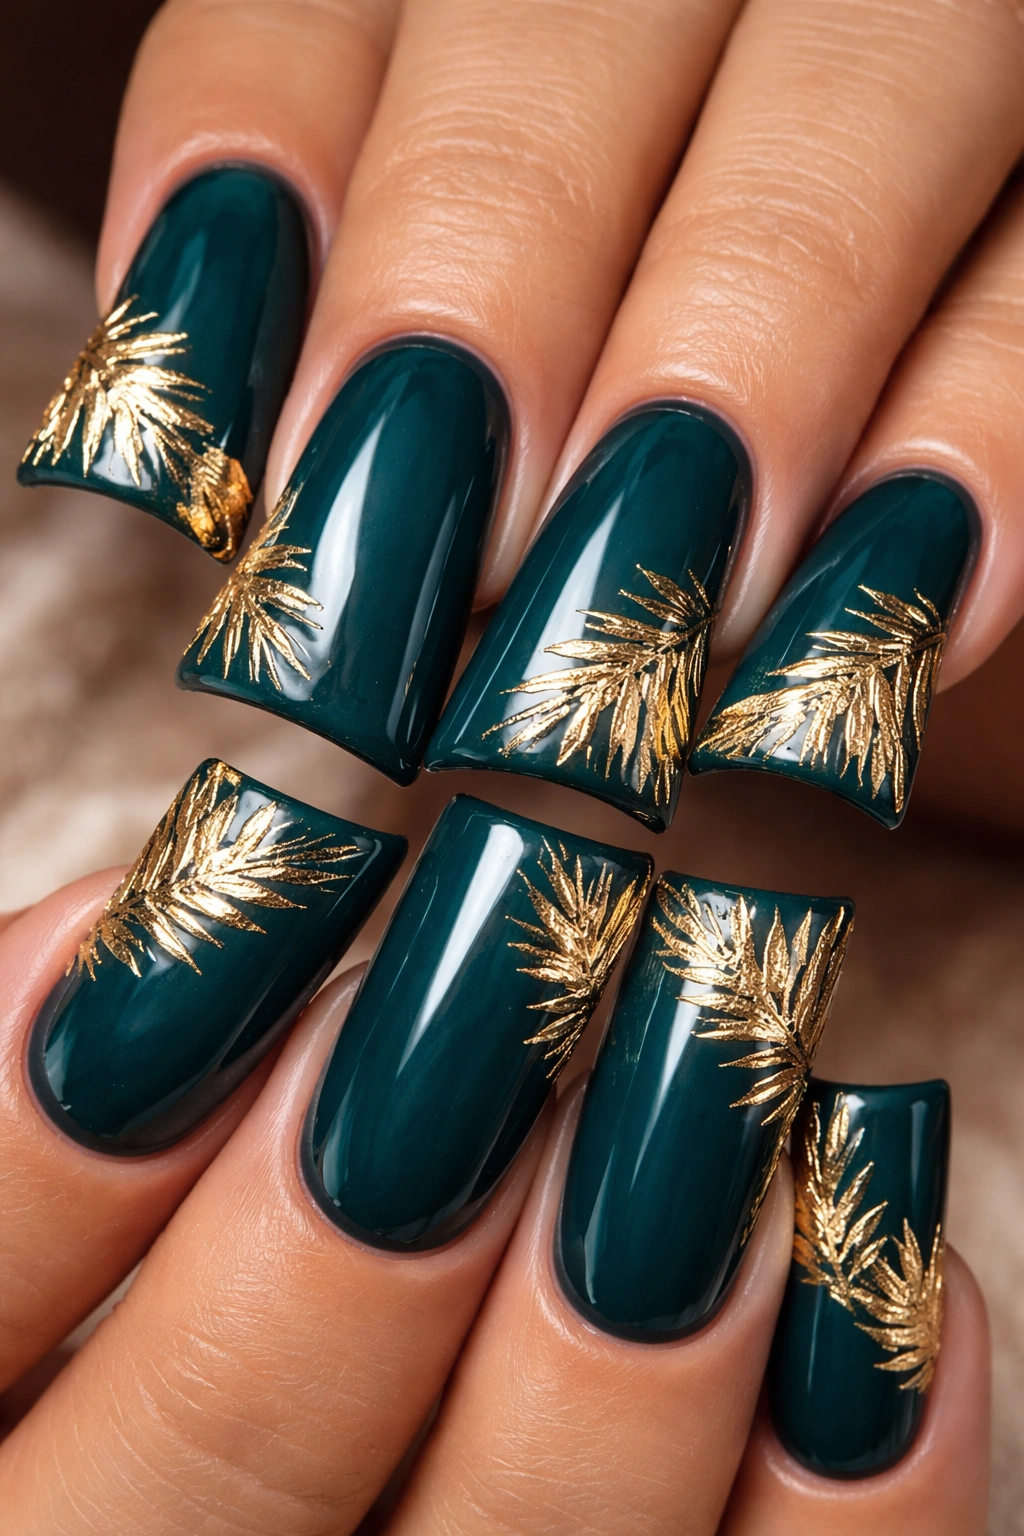
Deep teal is sophisticated and distinctly tropical — it’s the color of shallow tropical waters where you can see straight to the bottom. Paired with real gold foil accents forming palm tree silhouettes, this design feels luxe and elevated. The metallic foil catches light beautifully and prevents the deep teal from feeling heavy, while the palm motif anchors everything in tropical imagery.
Applying Gold Foil Details
After your base teal coat is fully cured, apply a thin layer of gel adhesive (the sticky layer before top coat) or a specialized foil glue exactly where you want the gold foil to stick. Press the gold foil onto the glue using a foil application tool or your finger. Once the foil is on, apply a careful top coat without moving the foil around. The foil should look like it’s embedded in the nail rather than floating on top.
Design Placement for Palm Trees
Create symmetrical palm silhouettes along opposite sides of the nail, with thin trunk lines and feathery fronds fanning outward. Alternatively, place a single large palm in the center with smaller palm accents at the edges. The negative space of the teal background is just as important as the gold — don’t crowd the nail with too many palms.
Making the Foil Look Intentional
- Use foil on only 2-3 nails and leave the others solid teal for balance
- Match the gold foil tone to your other accessories and jewelry for a coordinated look
- Apply a generous final top coat that fully envelops the foil so it doesn’t snag or peel
- The foil should feel smooth when you run your finger across it, not raised or textured
Worth knowing: Real gold foil is more durable than imitation foil, but both look gorgeous. If foil feels like too much maintenance, try gold gel polish lines instead for a similar effect.
9. Coconut White With Beach Scene

Coconut white is a warm, creamy off-white that feels tropical and organic — like actual coconut flesh or white sand. Using this as your base creates a beach scene that includes tiny parasols, lounging figures, palm trees, ocean waves, and a sunset sky reflected in wet sand. The duck shape’s width becomes your panoramic window onto a tiny beach paradise.
Painting a Narrative Scene
This design works because it tells a story. Map out the horizon line, sky above it, sand below it. Add simple elements: small triangular umbrellas, stick-figure sunbathers, wavy ocean with waves, palm trees along the edges. Keep figures small and slightly cartoonish rather than hyperrealistic — it feels more whimsical and works better in miniature. Use thin brushes and steady hands for fine details, or embrace a slightly naive, charming style where precision isn’t the goal.
Color Palette for Beach Scenes
- Pale blue or turquoise for sky and water
- Peachy or coral tones for sunset
- Tiny touches of orange, yellow, and pink in the sky
- Deep brown or green for palm trunks and coconut fronds
- Pale pink or coral for beach umbrellas and sunbathers
Quick tips:
- Paint the background colors first (sky and ocean), then add detailed elements on top
- Use a toothpick or the back of a thin brush to create little dots for sand texture
- Keep the scene simple enough that it reads as “beach” at a glance, not cluttered
- Seal everything with a glossy top coat so the tiny details shine
10. Vibrant Monochrome Tropical Patterns
Monochromatic doesn’t mean boring — it means using different shades and tints of a single color to create depth, pattern, and visual interest without introducing multiple hues. For tropical monochromatic duck nails, choose a vibrant base color like hot pink, electric orange, or vivid purple, then use lighter tints and darker shades to paint geometric patterns, organic shapes, floral designs, or abstract art inspired by tropical textiles and tribal patterns.
Creating Depth With a Single Color Family
Start with your medium base shade. Add patterns using a shade or two darker (for definition and shadow) and a shade or two lighter (for highlights and lightness). The key is using enough contrast between the shades that each element reads clearly. Three tones within a single color family is the sweet spot — too many and it loses the monochromatic impact; too few and everything looks flat.
Pattern Ideas for Monochromatic Tropical
- Tropical florals with layered petals in different shades
- Geometric tribal-inspired patterns mixing solid shapes with line work
- Striped or gradient effects moving from light to dark across the nail
- Organic wave and dot patterns inspired by tropical bark and plant textures
- Negative space designs where the lighter base peeks through darker painted patterns
Pro tip: Monochromatic designs are more forgiving than multi-color ones because any shade of your chosen color will look good together. This makes them perfect for DIY manicures if you’re not confident mixing multiple colors.
11. Sunset Paradise With Glitter Accents
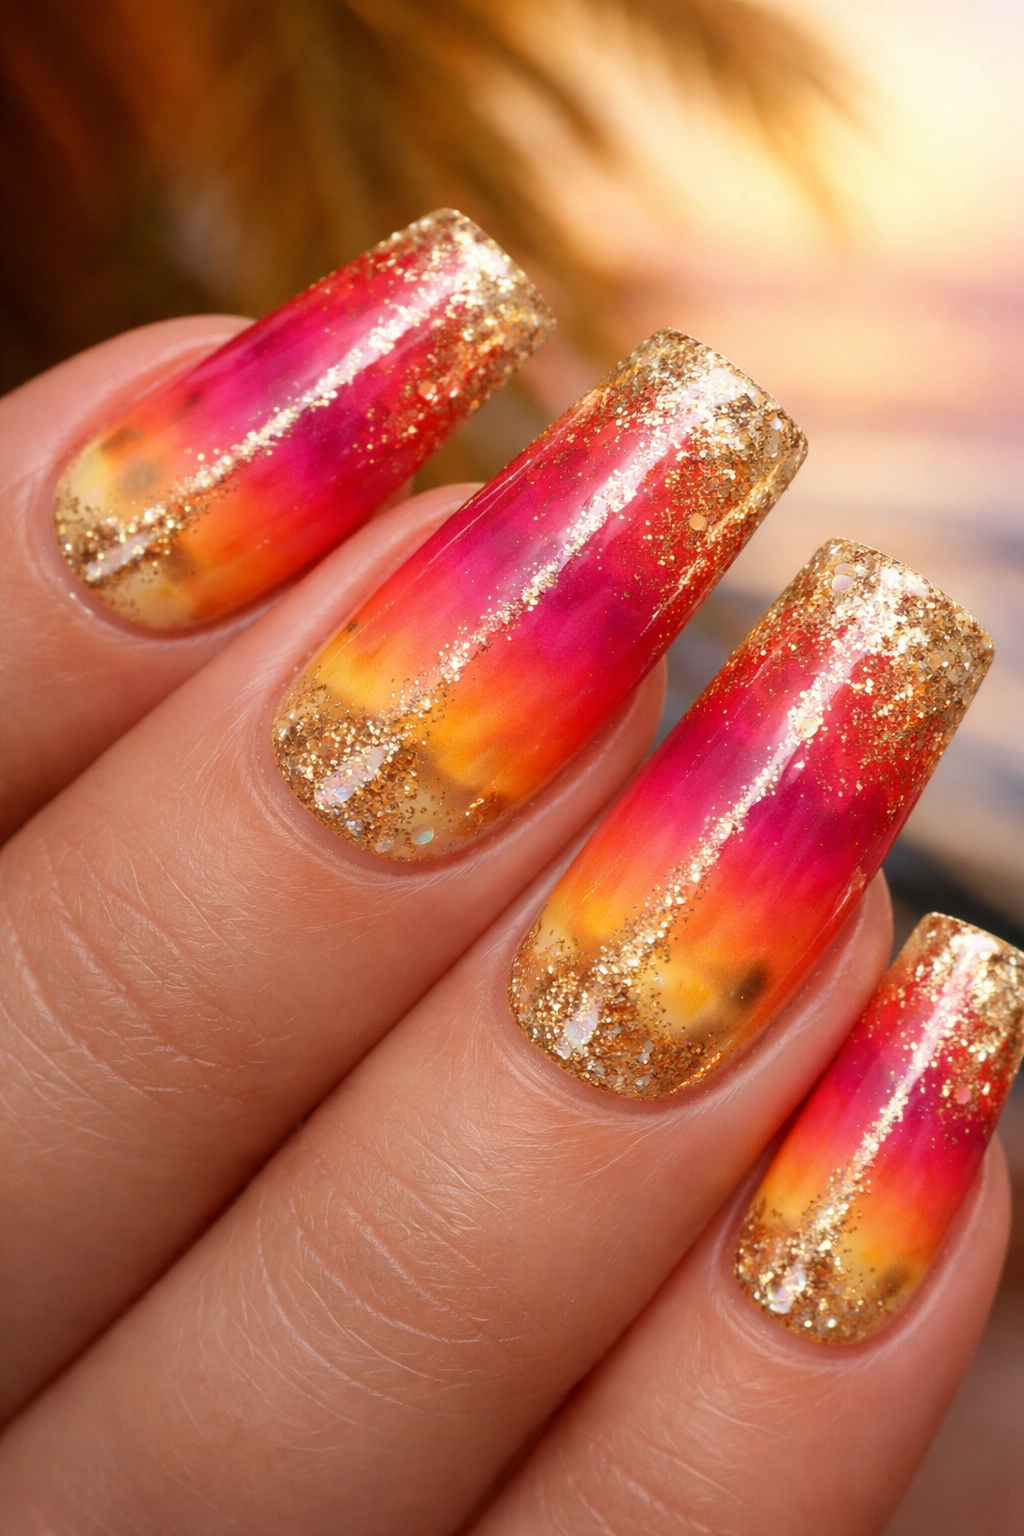
This final design is pure celebration. A rich gradient base moves from deep magenta at the cuticle through hot pink and coral to golden yellow at the tips — a full tropical sunset concentrated on your nails. Strategic glitter accents in gold, rose gold, or iridescent finishes add shimmer and sparkle without overwhelming the gradient. The result is nails that look like they’re glowing from within.
Building the Perfect Sunset Gradient
This requires patient sponging and blending. Lay down your first color (deep magenta), then use a damp sponge to blend the next shade (hot pink) into it. Continue with coral, then golden yellow. The transitions should be gradual and organic, not harsh lines between colors. Once the gradient is set and sealed, add a very light layer of non-sticky top coat before applying glitter so the glitter adheres properly.
Strategic Glitter Placement
Don’t cover the entire nail with glitter — reserve it for specific areas. Place glitter along the tips where they’re brightest and most golden. Add a vertical line of glitter down the center of a few nails. Or create a subtle glitter gradient that’s densest at the tips and fades toward the cuticle. The restraint makes the sparkle feel intentional rather than chaotic.
Execution for Maximum Wow Factor
- Use a glitter gel or a regular polish mixed with loose glitter encapsulated in a clear top coat
- Consider mixing glitter sizes — some tiny micro-glitter with slightly larger sparkle pieces creates dynamic shimmer
- Allow the gradient to fully cure before adding any glitter so the colors don’t muddy
- The final glossy top coat should encapsulate the glitter completely for a smooth, snag-free finish
Worth knowing: Sunset gradients can be tricky because the color transition from cool tones (magenta) to warm tones (yellow) is naturally jarring. Take your time with the middle tones and blend thoroughly for a professional result.
Final Thoughts
Tropical duck nails combine two of the most visually arresting nail trends into one powerful statement. The shape itself is architecture; the tropical theme is artistry. Whether you go for realistic pineapples, an entire coral reef underwater scene, or simply a vibrant ombre with subtle botanical accents, tropical duck nails work because they respect both the shape and the theme equally.
The 11 designs above barely scratch the surface of what’s possible. The real magic happens when you take these ideas as inspiration and adapt them to match your personal style, skin tone, and confidence level. If hand-painted details intimidate you, nail decals exist for almost every tropical motif. If you’re comfortable with detail work, push yourself to layer colors, add dimension, and create genuinely unique designs that you won’t see exactly replicated on someone else’s hands.
Duck nails are bold — there’s no way around it. But that’s precisely why they’re so rewarding. You’re not trying to blend in; you’re creating miniature art installations that express personality and creativity. Combined with tropical colors, patterns, and imagery, they become conversation starters. Whether you’re heading to an actual tropical location or just bringing island vibes into your everyday life, these nail designs deliver exactly that energy.
