

Duck nails have become one of the most playful and eye-catching nail trends for people who want to make a bold statement on their special day. If you’re celebrating a birthday and looking for a fun twist on your usual nail look, duck nails—those adorable, bulbous nail shapes that curl slightly upward at the tip—offer the perfect canvas for creative designs that’ll have everyone asking about your manicure. The beauty of duck nails for birthday celebrations is that they naturally draw attention to your hands and create extra surface area for intricate designs, patterns, and embellishments that flat nails simply can’t accommodate.
What makes birthday duck nails so special is their ability to showcase personality while maintaining that polished, intentional appearance. Unlike trendy shapes that come and go, duck nails have staying power, and when you layer on birthday-themed designs—whether that’s shimmery confetti effects, metallic accents, jeweled embellishments, or whimsical illustrations—you get something that feels celebratory without being over-the-top. The curved edge of each nail creates a natural frame for designs, making them look almost like tiny pieces of wearable art.
The key to pulling off birthday duck nails is understanding which designs work best with this specific shape, how to balance visual weight with the already-bold silhouette, and which color palettes and techniques will photograph beautifully for all those birthday celebration pictures you’ll be taking. Whether you’re going for glamorous, cute, minimalist, or totally wild, duck nails give you the freedom to express your style while keeping the focus on your hands throughout your birthday festivities.
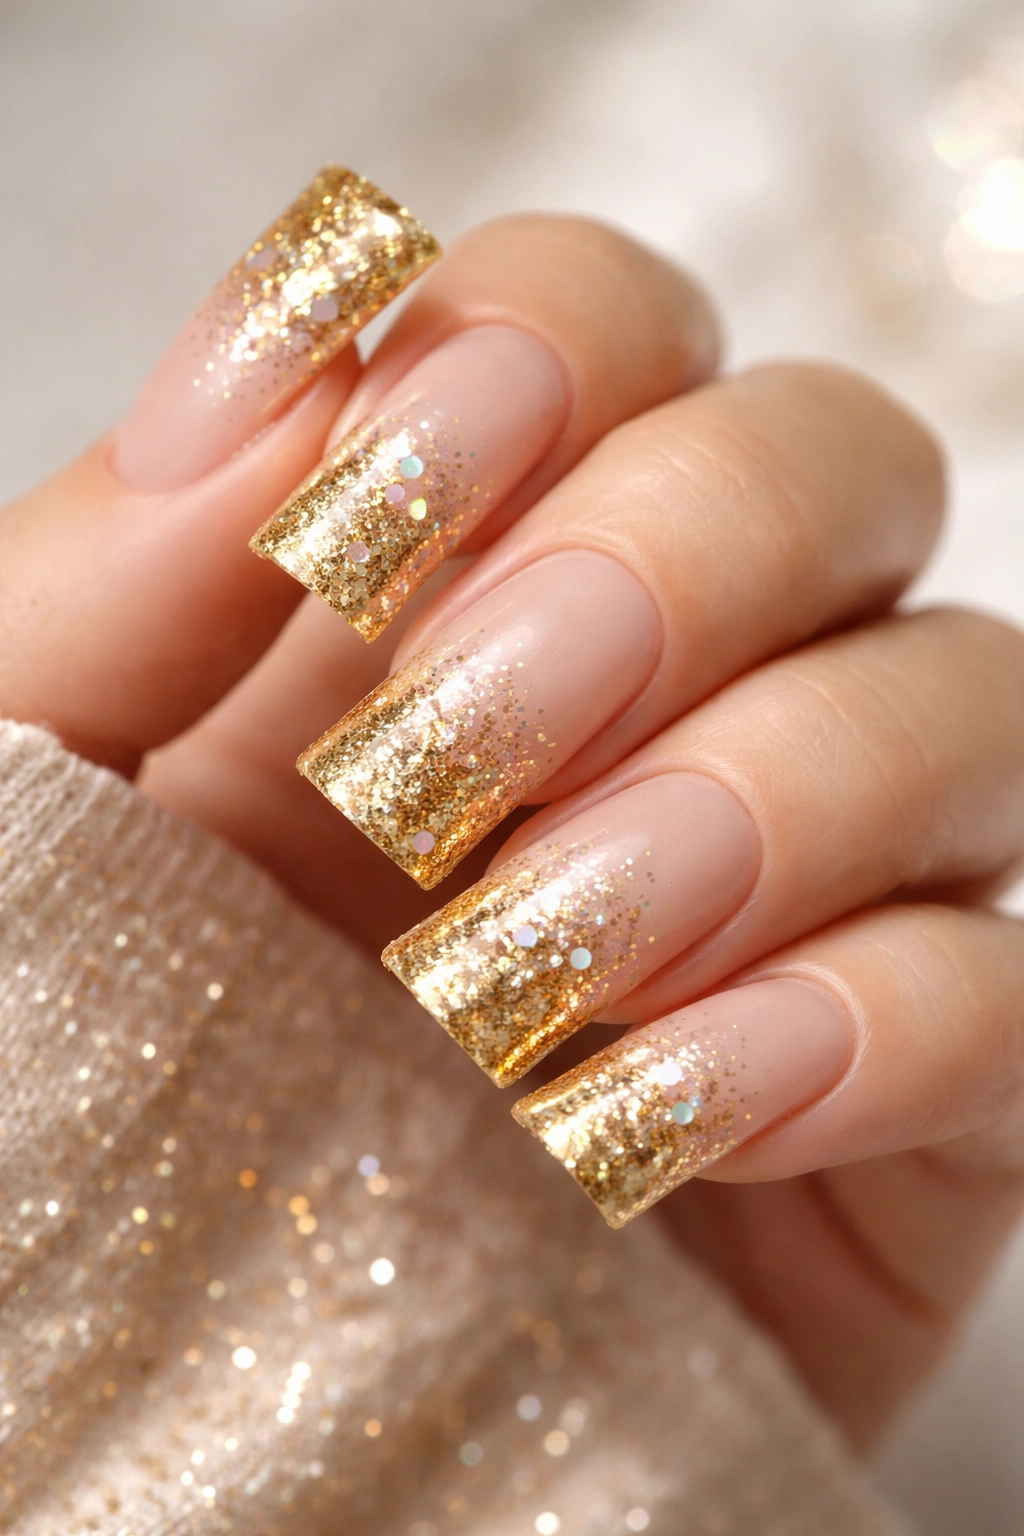
1. Glittery Gold Ombre With Confetti Accents
Gold ombre on duck nails creates an instantly luxe look that feels perfect for a birthday celebration. Start with a pale cream or nude base on the nail bed, then gradually transition into rich gold tones toward the tip, creating that sought-after ombre effect that catches light beautifully. The curved edge of duck nails is ideal for showcasing this gradient because the depth allows the color transition to feel dimensional and sophisticated rather than flat.
Why This Design Stands Out
The ombre technique on duck nails naturally creates visual depth that emphasizes the nail’s shape without overwhelming it. Add tiny multicolored confetti specks—bits of holographic or metallic foil scattered across the gold gradient—and you’ve got a design that reads as celebratory without being cartoonish. The confetti catches light from different angles, adding movement and sparkle that makes your nails genuinely dazzling in photos and in person.
How to Execute It Perfectly
- Use a sponge to blend nude, champagne, and gold polish together in overlapping sections for the ombre base
- Once dry, seal with a glossy topcoat
- Place tiny confetti pieces (holo glitter confetti or foil confetti flakes) while the topcoat is still slightly tacky
- Seal everything with another glossy coat for a smooth, finished appearance
- The confetti will sit slightly raised on the nail, creating texture and catching light from multiple angles
Pro tip: If you’re worried about the confetti looking messy, choose pieces that coordinate with your gold palette—rose gold, champagne, or iridescent confetti all work beautifully together.
2. Rainbow Gradient With Birthday Cake Illustration
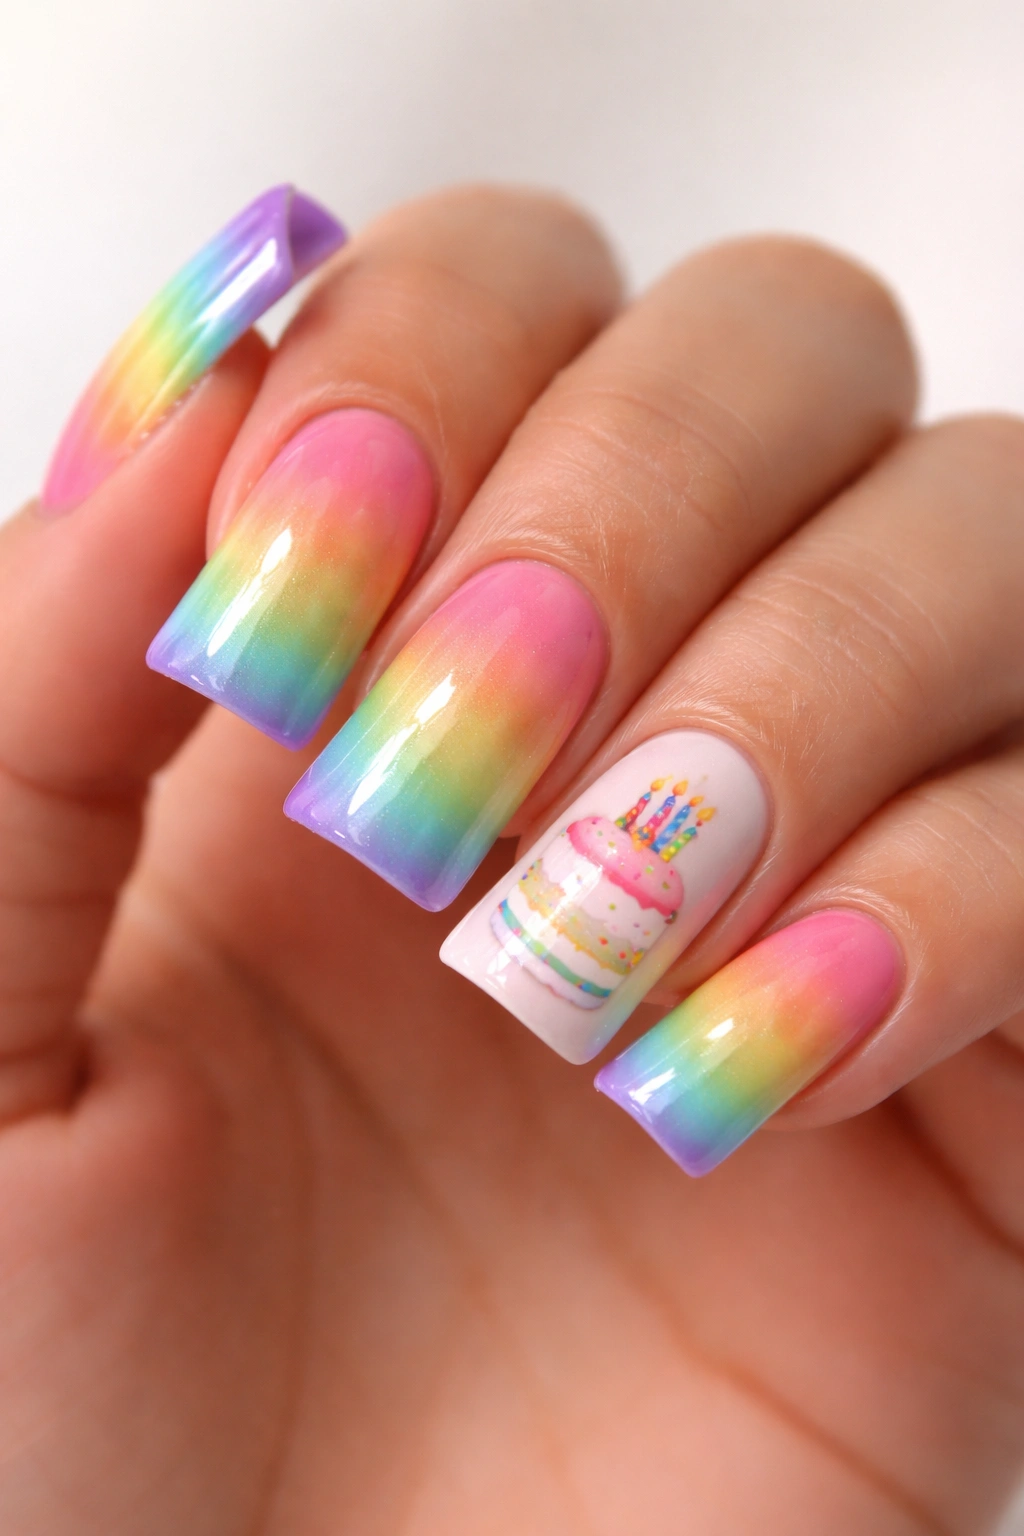
Rainbow gradients are inherently festive, and when you combine one with a tiny illustration of a birthday cake positioned on one accent nail, you get a design that’s both playful and sophisticated. On duck nails, this look has extra impact because the curved shape gives you room to create a detailed gradient that shifts through all the color spectrum, from deep purple through blue, green, yellow, orange, and red.
The Beauty of Spectrum Design on Duck Nails
Duck nails’ bulbous shape means you can create a rainbow gradient that feels full-bodied rather than cramped. The colors blend seamlessly on the curved surface, and when the light hits your nails from different angles, the gradient appears to shift and change. Choose one nail as your focal point for the birthday cake illustration—usually your ring finger works best—and keep the other nails as pure gradient without additional designs.
Building This Design Step-by-Step
- Paint each duck nail a different base section color to map out your rainbow before blending
- Use a sponge or blending brush to create soft transitions between colors
- Let the gradient dry completely under UV light or air-dry depending on your polish type
- On your accent nail, lightly sketch the cake design with a thin detail brush—simple tier shapes with small candles on top work beautifully
- Add fine details like cake texture lines or flame details with an even thinner brush
- Finish with a matte or glossy topcoat depending on whether you want a dreamy or shiny finish
Worth knowing: Rainbow gradients look most vibrant when you use full-opacity colors rather than sheer or pastel versions. Rich, saturated hues create maximum visual impact.
3. Sparkly Pink With Silver Rhinestone Birthday Crown
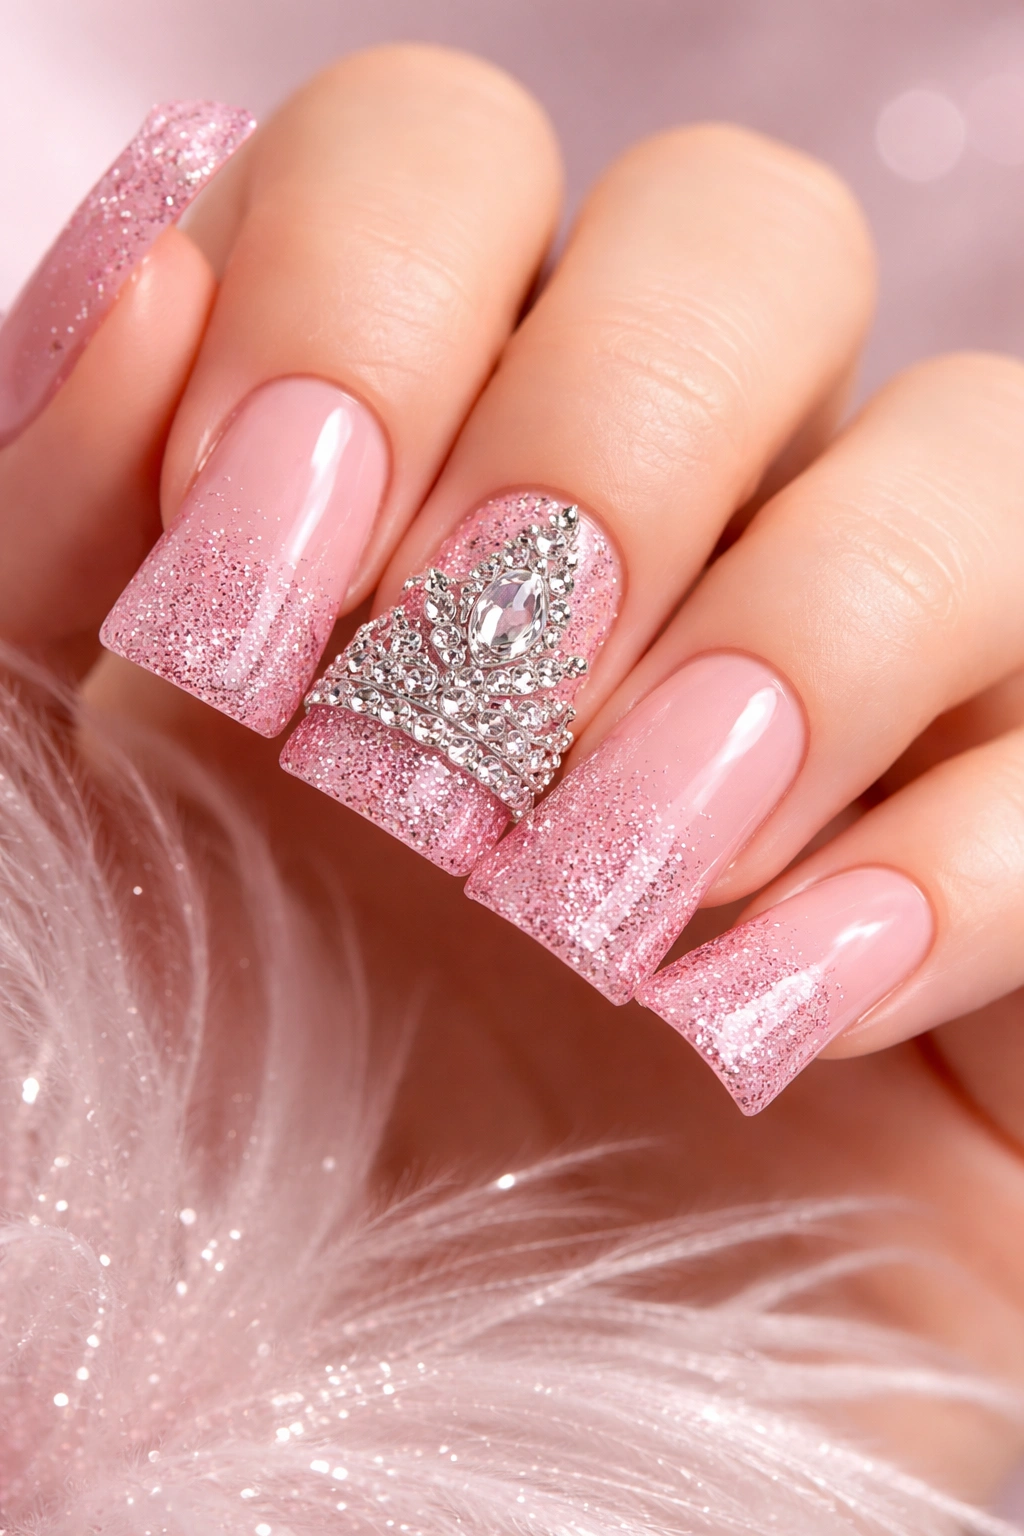
Pink nail polish paired with strategically placed rhinestones creates an elegant, celebratory look that feels appropriate for a birthday while maintaining sophistication. Choose a soft blush pink, hot pink, or rose gold pink depending on your preference—duck nails can handle any shade of pink and look equally stunning. The rhinestones arranged in a crown pattern across the middle of the nail create the sense of “birthday royalty” without feeling childish.
Why This Combination Works So Well
Pink is universally flattering and reads as celebratory without being obvious about it. Silver rhinestones add sparkle and luxury, especially on duck nails where their curved surface creates multiple angles that catch light. The crown arrangement is recognizable instantly—your brain reads “celebration” even if there are no other birthday markers on the nail.
Creating the Crown Pattern
- Paint all duck nails in your chosen pink shade; apply two coats for full opacity
- Let the pink dry completely and apply a clear topcoat or gel base that stays slightly sticky
- Using rhinestone tweezers or a dotting tool with a small dab of adhesive, place silver rhinestones in an arc shape across the center of each nail
- Position the largest rhinestone in the middle and graduate to smaller stones on either side for an authentic crown effect
- Seal everything with a final topcoat to lock the rhinestones in place
Pro tip: Buy mixed-size rhinestones so you can create visual hierarchy with your crown pattern. The variation in stone size makes the design look more intentional and less uniform.
4. Milky White With Hand-Painted Birthday Balloon Design
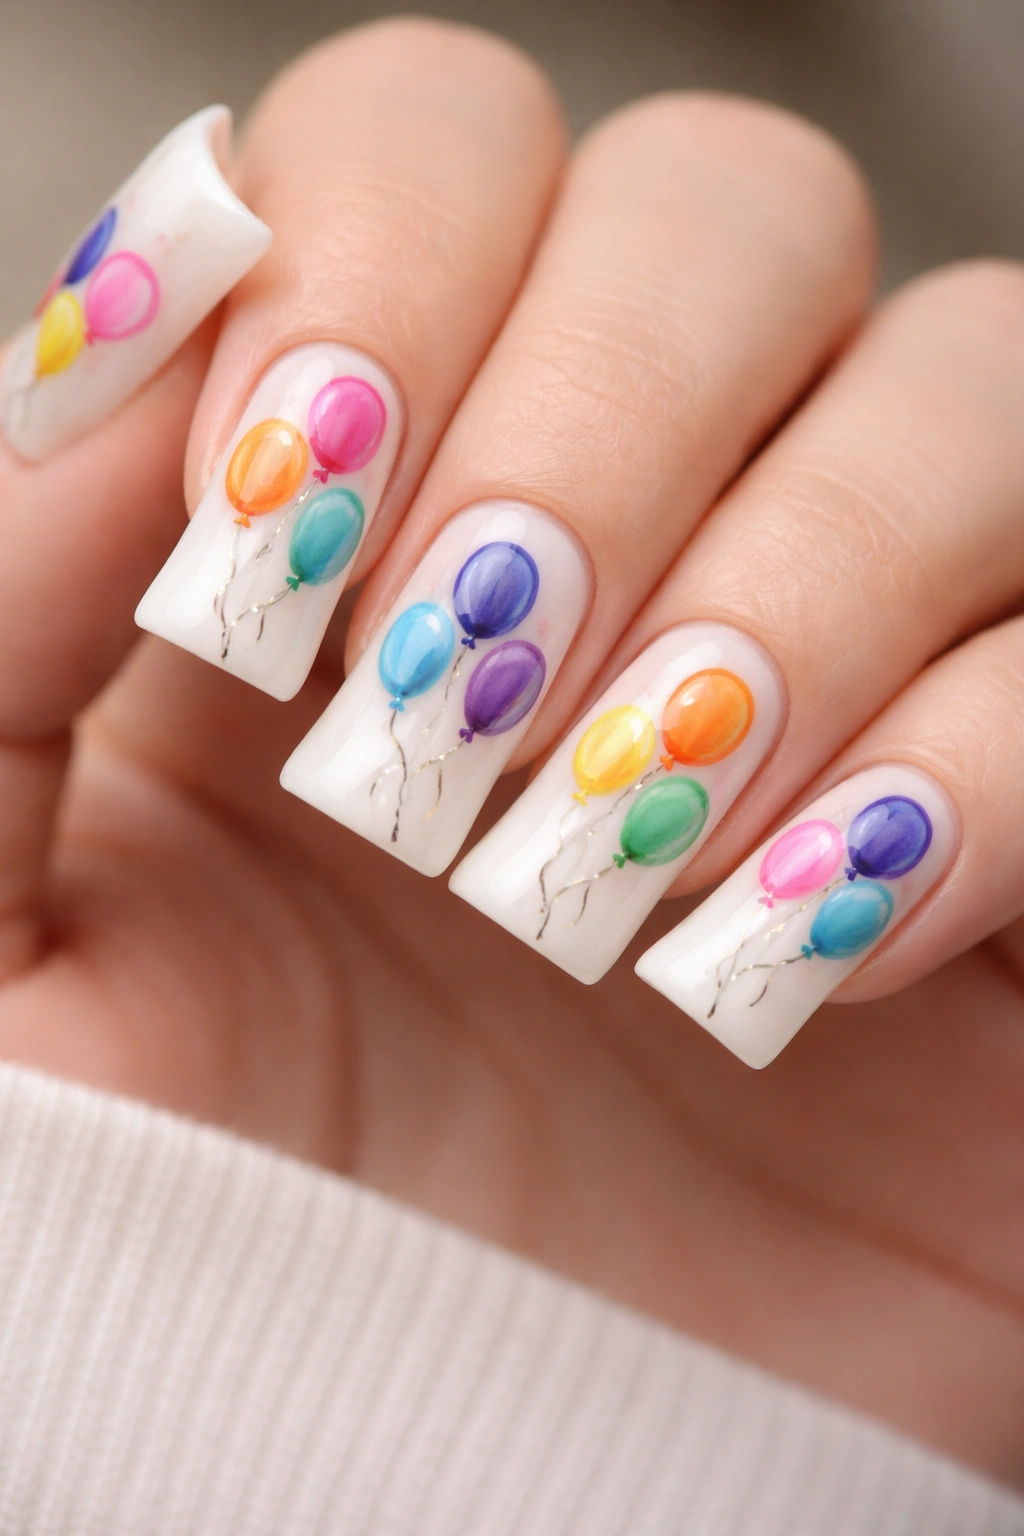
A milky white base—that soft, opaque white with just a hint of translucence—is the perfect canvas for hand-painted designs. On duck nails, this look becomes extra special because you can paint tiny, detailed birthday balloons on each nail, and the curved shape of the nail becomes the perfect space to showcase delicate illustration work. Each balloon can be a different color, and you can add thin string details that follow the curve of the nail.
The Appeal of Illustrative Design on Duck Nails
Hand-painted balloons require precision, but duck nails give you an ideal workspace. The slightly raised center of the nail means your painted design sits in the most visible area, and the curved edges frame your artwork beautifully. The milky white base—not stark white, but creamy and soft—lets your balloon colors pop without harsh contrast.
Painting Your Balloon Design
- Apply milky white polish in two coats; use a gentle sheer-to-opaque formula that creates that signature creamy appearance
- Once dry, use a detail brush and full-opacity nail polish or gel paint to sketch balloon outlines—simple circles or oval shapes work best
- Fill balloons with solid color or add ombre shading within each balloon for depth
- Paint thin strings extending from balloon bottoms with a liner brush, following the natural curve of the nail
- Add tiny shadows or highlights within balloons for dimension
- Finish with a glossy topcoat to make the colors vibrant and the design pop
Insider note: If hand-painting feels intimidating, you can use nail stickers or decals to create balloon designs instead—they’ll still look beautiful on duck nails and require no artistic skill.
5. Deep Purple With Gold Confetti And Pearl Accents
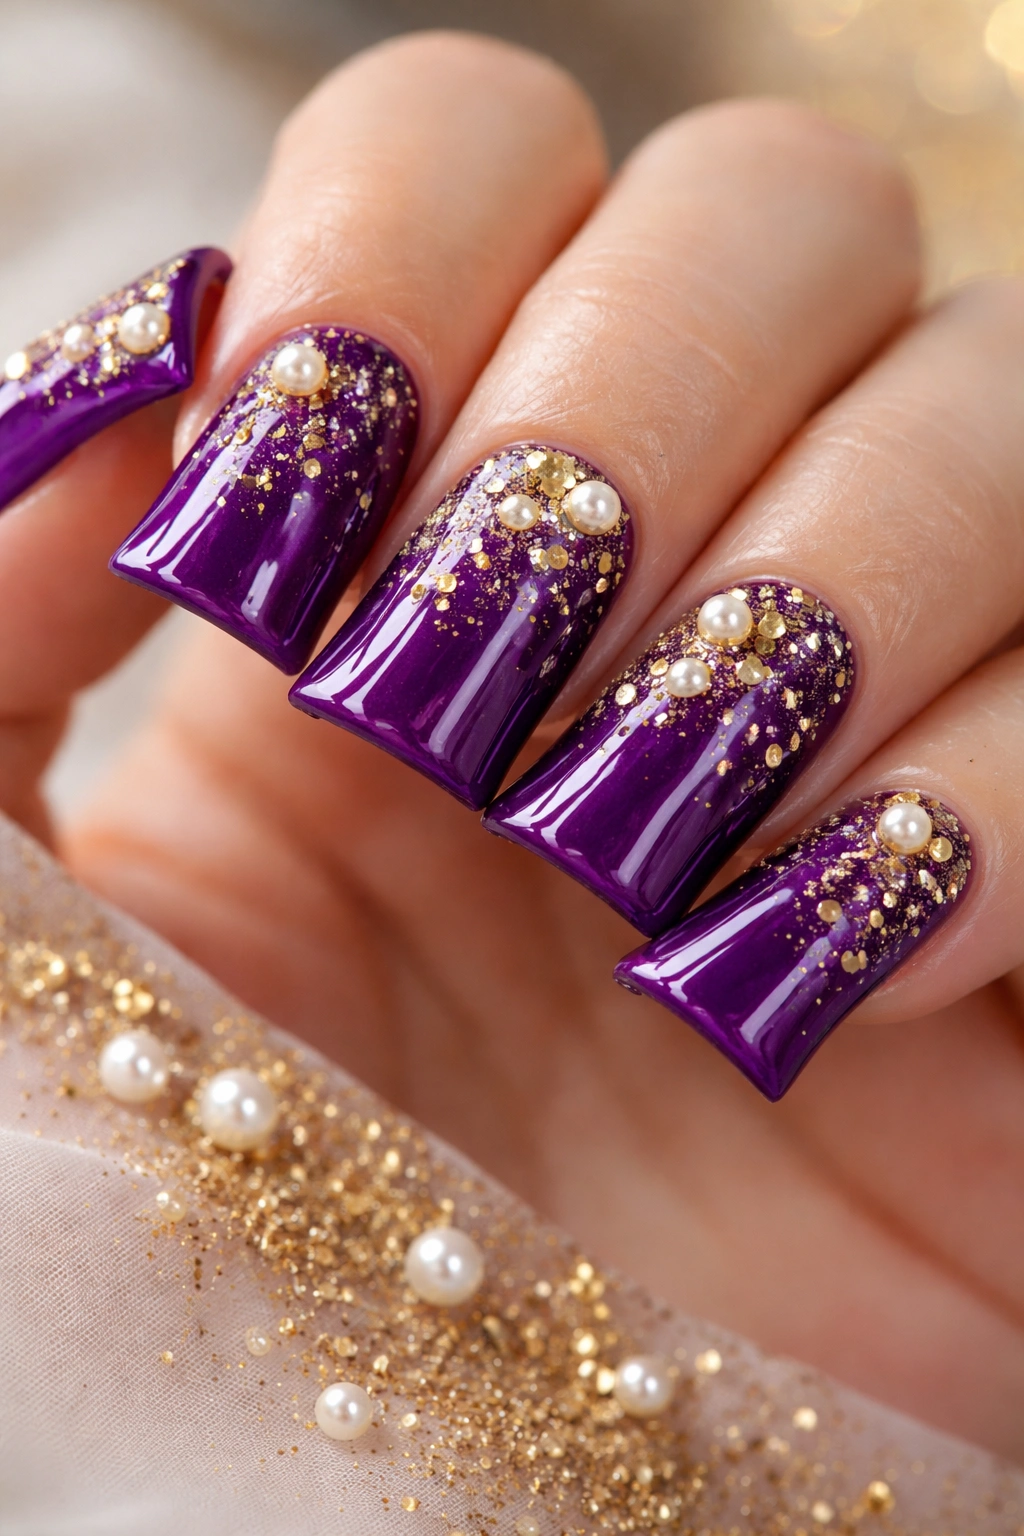
Deep, jewel-toned purple communicates sophistication and celebration simultaneously, especially on duck nails where the color depth is on full display. Layer in gold confetti and pearl accents—tiny metallic dots or pearl studs scattered across the surface—and you’ve created a design that feels both luxe and festive. This combination works whether you’re celebrating a milestone birthday or a casual celebration.
Why Deep Purple Reads as Celebratory
Purple carries associations with royalty and special occasions, making it inherently appropriate for birthdays. When you choose a deep, saturated shade rather than a pale lavender, the purple absorbs light and creates an almost jewel-like appearance on duck nails. The curved surface intensifies this effect, making the color appear richer and more dimensional.
Layering Your Accents Properly
- Paint all duck nails with deep purple; apply three thin coats rather than two thick coats for the most even, rich color
- Once completely dry, apply a clear topcoat or gel base coat that maintains slight tackiness
- While the topcoat is still wet, sprinkle gold confetti pieces across the surface, pressing them gently to ensure they adhere
- Use tweezers to place pearl studs or tiny metallic dots in a pattern—scattered randomly looks modern, while a more structured pattern looks intentional
- Apply a final sealing coat, being careful not to disturb your placed accents
- If working with gel polish, cure under UV light between each layer
Worth knowing: Pearl and gold finishes look most stunning against deep background colors. Light backgrounds wash out metallic accents, but dark backgrounds make them shimmer.
6. Ombré Nude to Black With Minimalist Gold Number
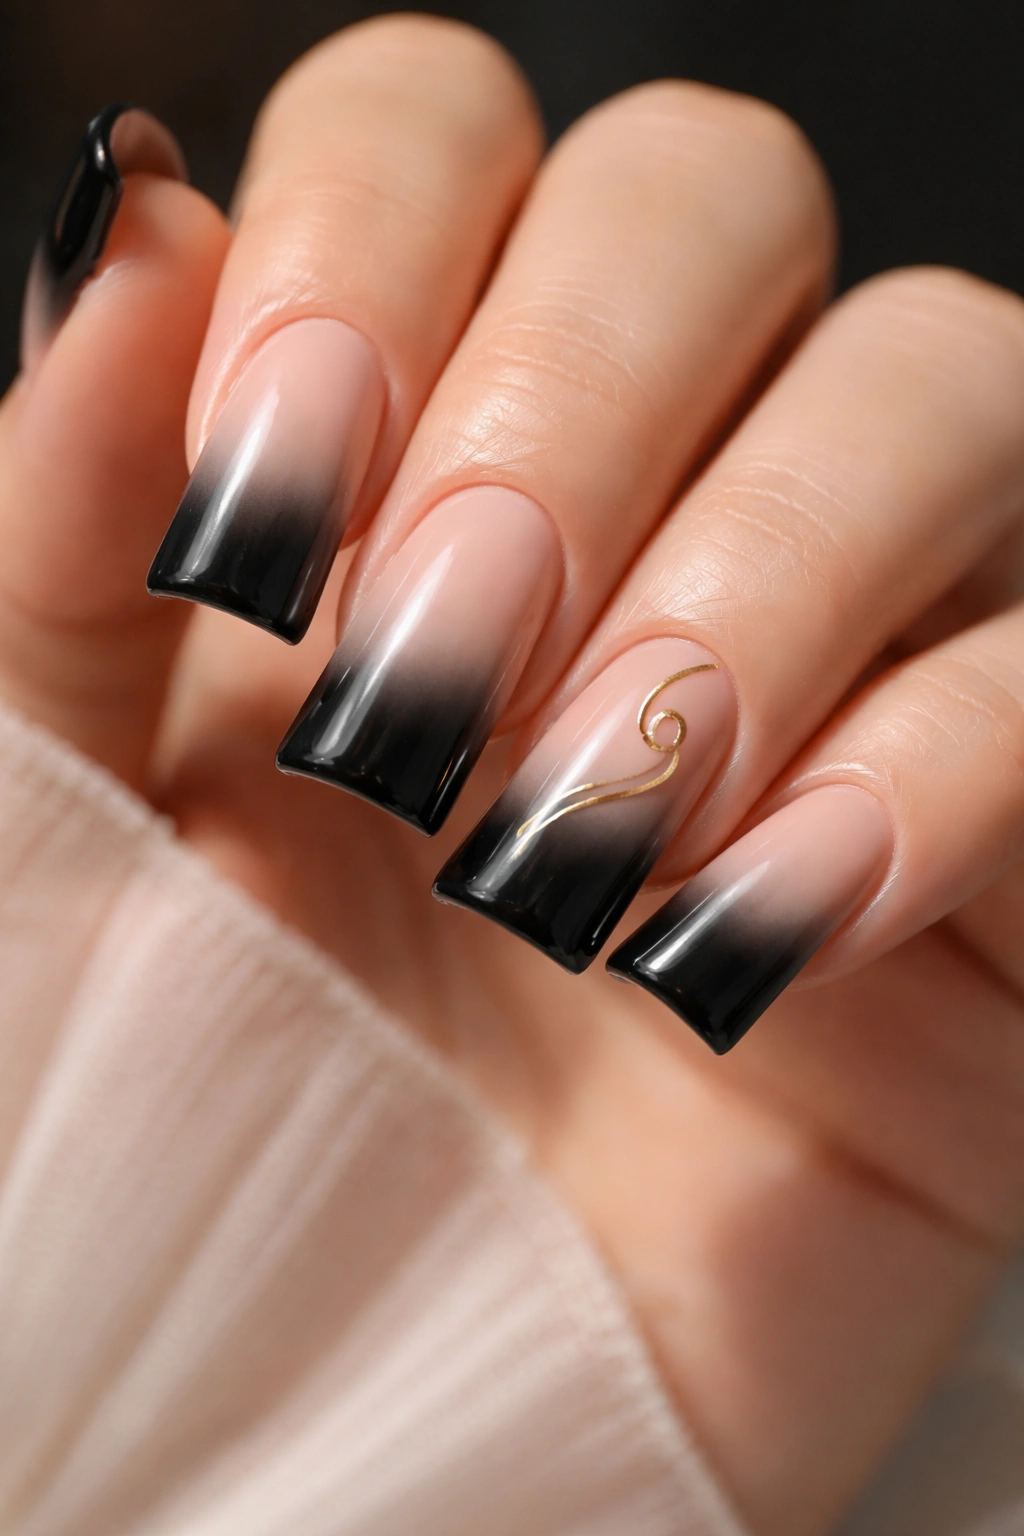
For a sophisticated birthday look that doesn’t scream “birthday” at first glance, create an ombré that transitions from nude at the base to black at the curved tip of the duck nail. Then add a subtle gold number representing your age on one accent nail—a minimalist touch that only those looking closely will notice. This design is perfect for milestone birthdays or if you prefer understated elegance.
The Power of Subtle Celebration
Not everyone wants their birthday advertised on their nails. This design celebrates your special day without announcing it to strangers. The nude-to-black ombré is trendy and flattering on all skin tones, while the small gold number is personal and meaningful without being obvious. On duck nails, the gradient ombré is especially striking because the curved tip is always the darkest area of the nail, making the black look intentional and polished.
Creating the Nude-to-Black Gradient
- Paint a nude or pale pink base covering the entire nail
- Use a sponge to blend black polish into the tip area, creating a soft gradient that darkens toward the curved edge
- Build the gradient gradually over 2-3 applications so the transition appears seamless rather than harsh
- Once dry and sealed, use a fine detail brush with gold polish to paint your age number on the accent nail
- Position the number off to one side rather than centered—it’ll feel more intentional and modern
- Seal with a final glossy coat
Pro tip: This design is sophisticated enough for professional settings while still marking your special occasion. The ombré alone is striking enough to be noticed, while the number adds personal meaning.
7. Pastel Rainbow Ombré With Iridescent Topcoat
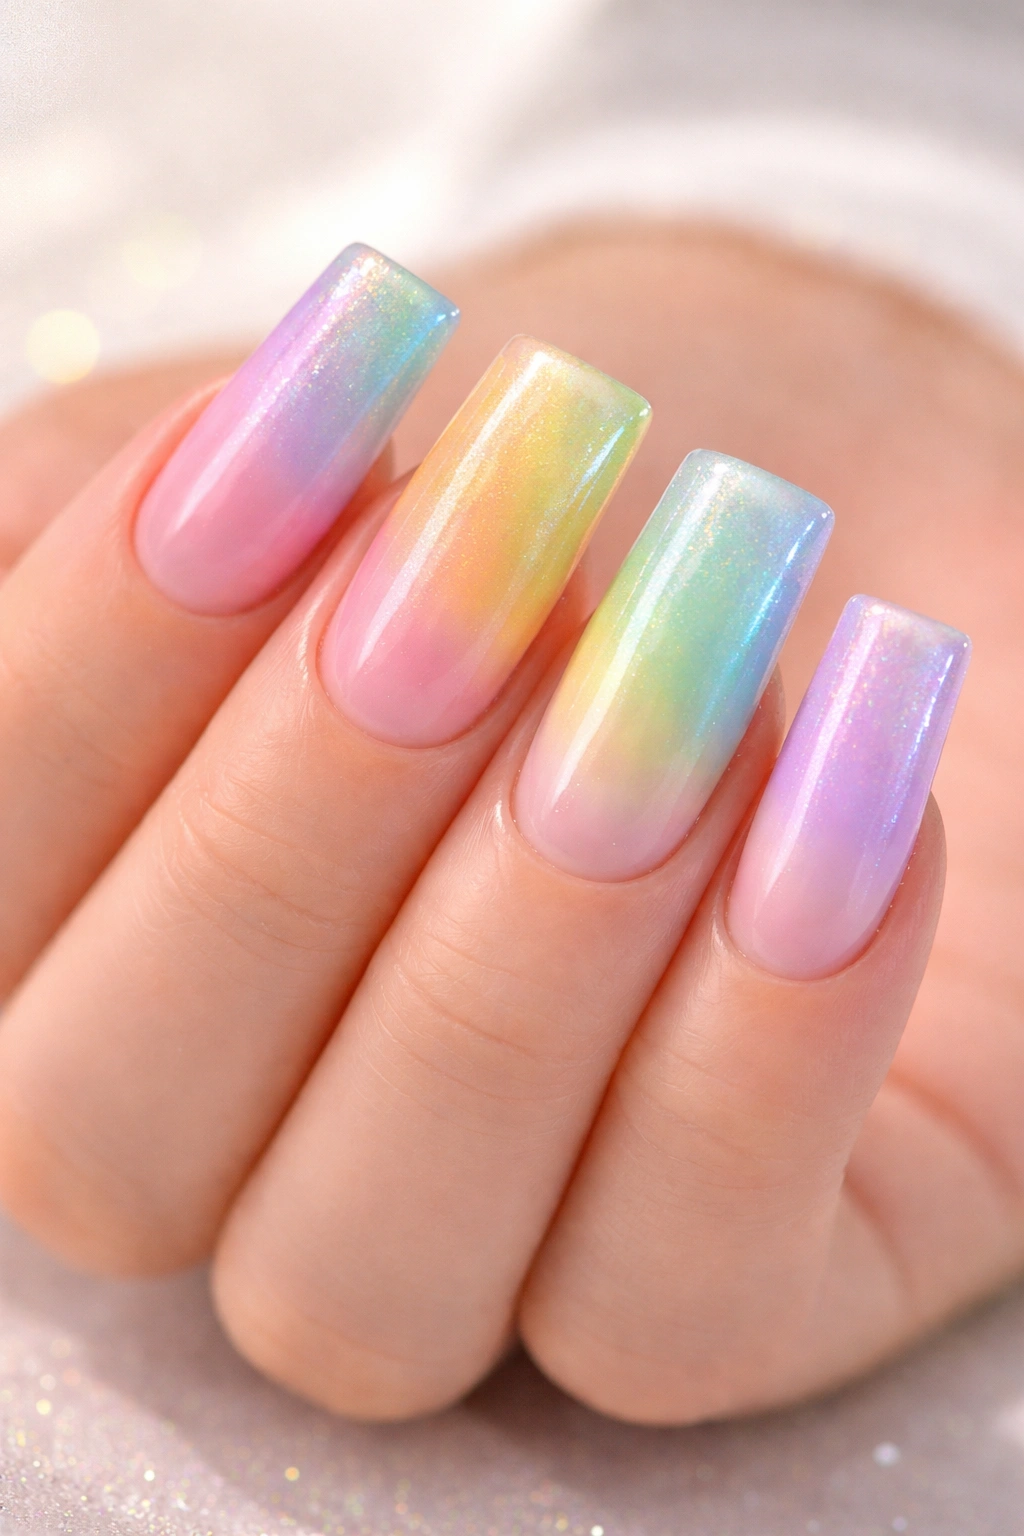
Unlike saturated rainbow gradients, pastel rainbow ombré feels soft, dreamy, and inherently birthday-appropriate. Think pale pink blending to soft peach, sunshine yellow, mint green, baby blue, and lavender as it moves from base to tip. Layer an iridescent or holographic topcoat over the entire design and you’ve created something that shifts between colors depending on the light and angle.
Why Pastel Feels Celebratory Without Being Over-the-Top
Pastels are inherently playful and feel less serious than their saturated counterparts. On duck nails, they create a whimsical effect that’s appropriate for birthdays while still looking polished enough for any setting. The iridescent topcoat adds movement and shimmer that photographs beautifully and catches light constantly, making your nails impossible to ignore without feeling gaudy.
Executing the Pastel Rainbow Ombré
- Paint duck nails with a pale pink base as your starting point
- Using a makeup sponge, dab pastel colors onto the sponge in the order you want them to appear (peach, yellow, green, blue, purple)
- Stipple the sponge onto your nails starting at the base, overlapping colors gradually for seamless blending
- Work toward the curved tip, finishing with the deepest pastel shade
- Let dry completely, then apply your iridescent topcoat
- The topcoat should be thick enough to create a truly shimmery, light-shifting effect
- Seal with a final glossy coat
Worth knowing: Holographic topcoats vary wildly in quality and intensity. Choose one specifically marketed as “ultra holographic” if you want maximum color-shifting effect.
8. White Base With Hand-Drawn Birthday Cake Tier Design
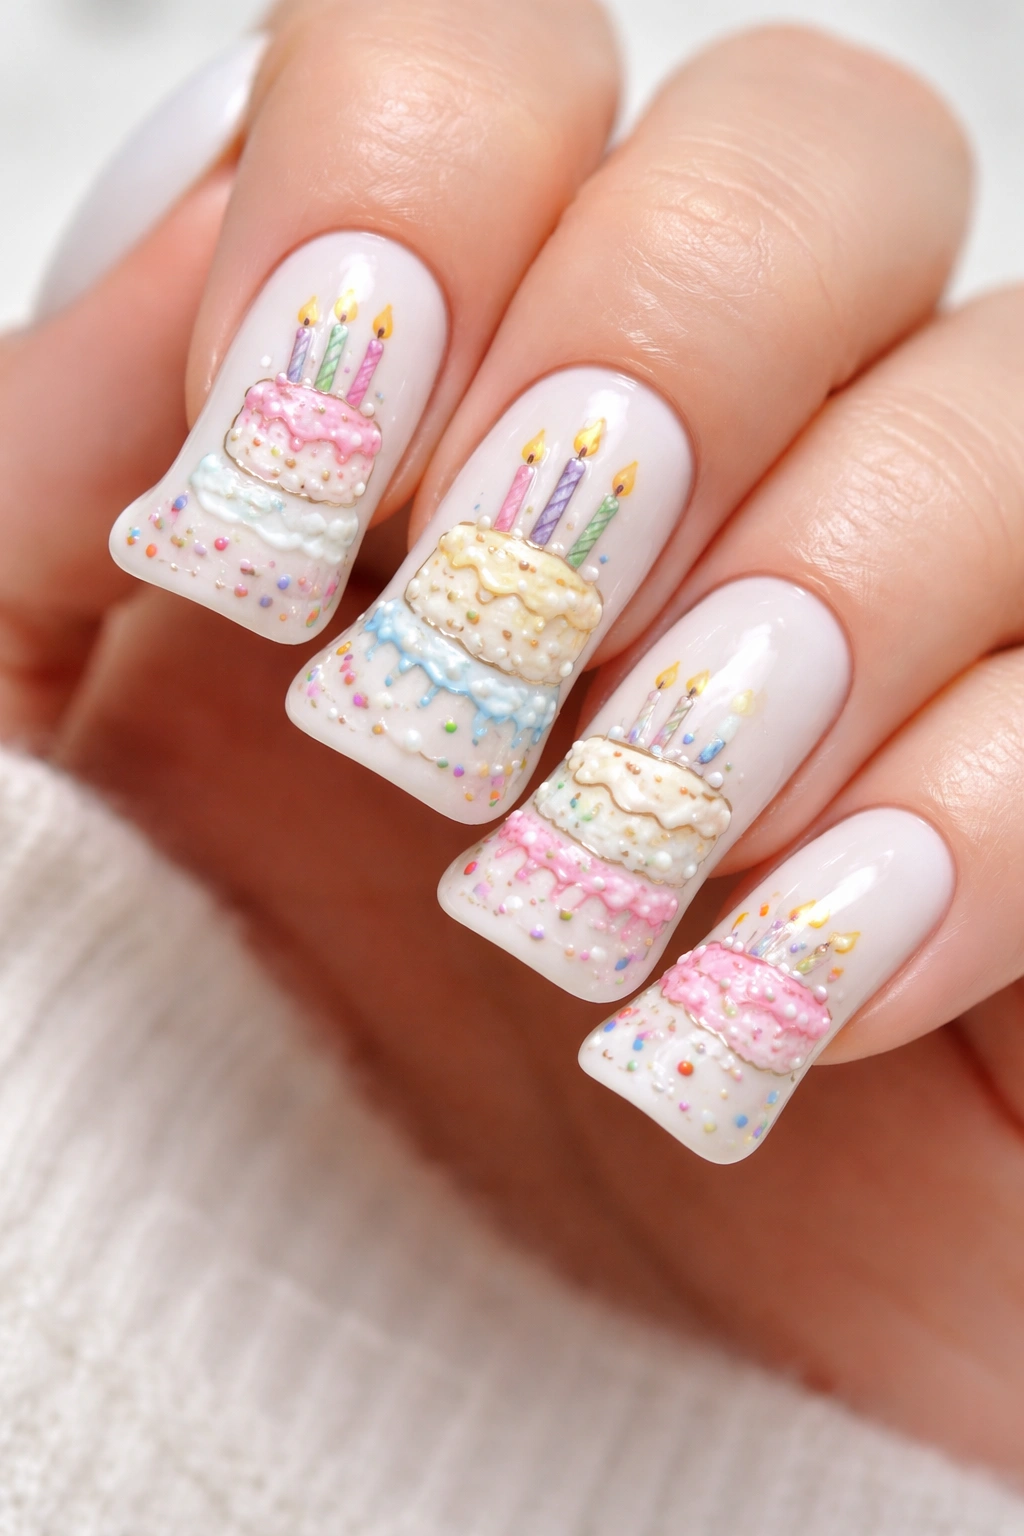
A simple white or off-white base becomes a gallery wall for hand-drawn art when you design a multi-tiered birthday cake across all your duck nails in a coordinated pattern. Imagine each nail representing one tier or section of an elaborate cake, with details like frosting texture, cake layers, decorative elements, and candles painted across your entire manicure. This design turns your nails into a narrative that tells the story of celebration.
The Magic of Coordinated Nail Art
Rather than duplicating the same design on each nail, hand-drawn cake designs work beautifully as a progression. One nail might show the bottom tier with decorative piping, another shows the middle tier with a different frosting pattern, another shows the top with candles. When your hand is at rest, the nails together form one cohesive cake image. This approach makes your manicure feel intentional and artistic rather than repetitive.
Designing Your Cake Progression
- Paint all duck nails in white or off-white; use at least two coats for full opacity
- Lightly sketch your design in pencil or a light-colored eyeliner to map out placement before committing in polish
- Use various nail polish colors or gel paints to create each cake section—pastels, metallics, and brights all work depending on your style
- Add frosting texture details with a detail brush—tiny dots for piping, wavy lines for texture, small decorative elements
- Paint candles on the top tier with a thin liner brush, adding small flames in yellow or gold
- Consider adding shadows beneath tiers or details on the sides to make the cake look three-dimensional
- Seal with a matte or glossy topcoat depending on your preferred finish
Insider note: This design works especially well for milestone birthday celebrations because it’s memorable and photo-worthy. People will ask about your nails, giving you a conversation starter about your special day.
9. Chrome Silver With Geometric Birthday Present Pattern
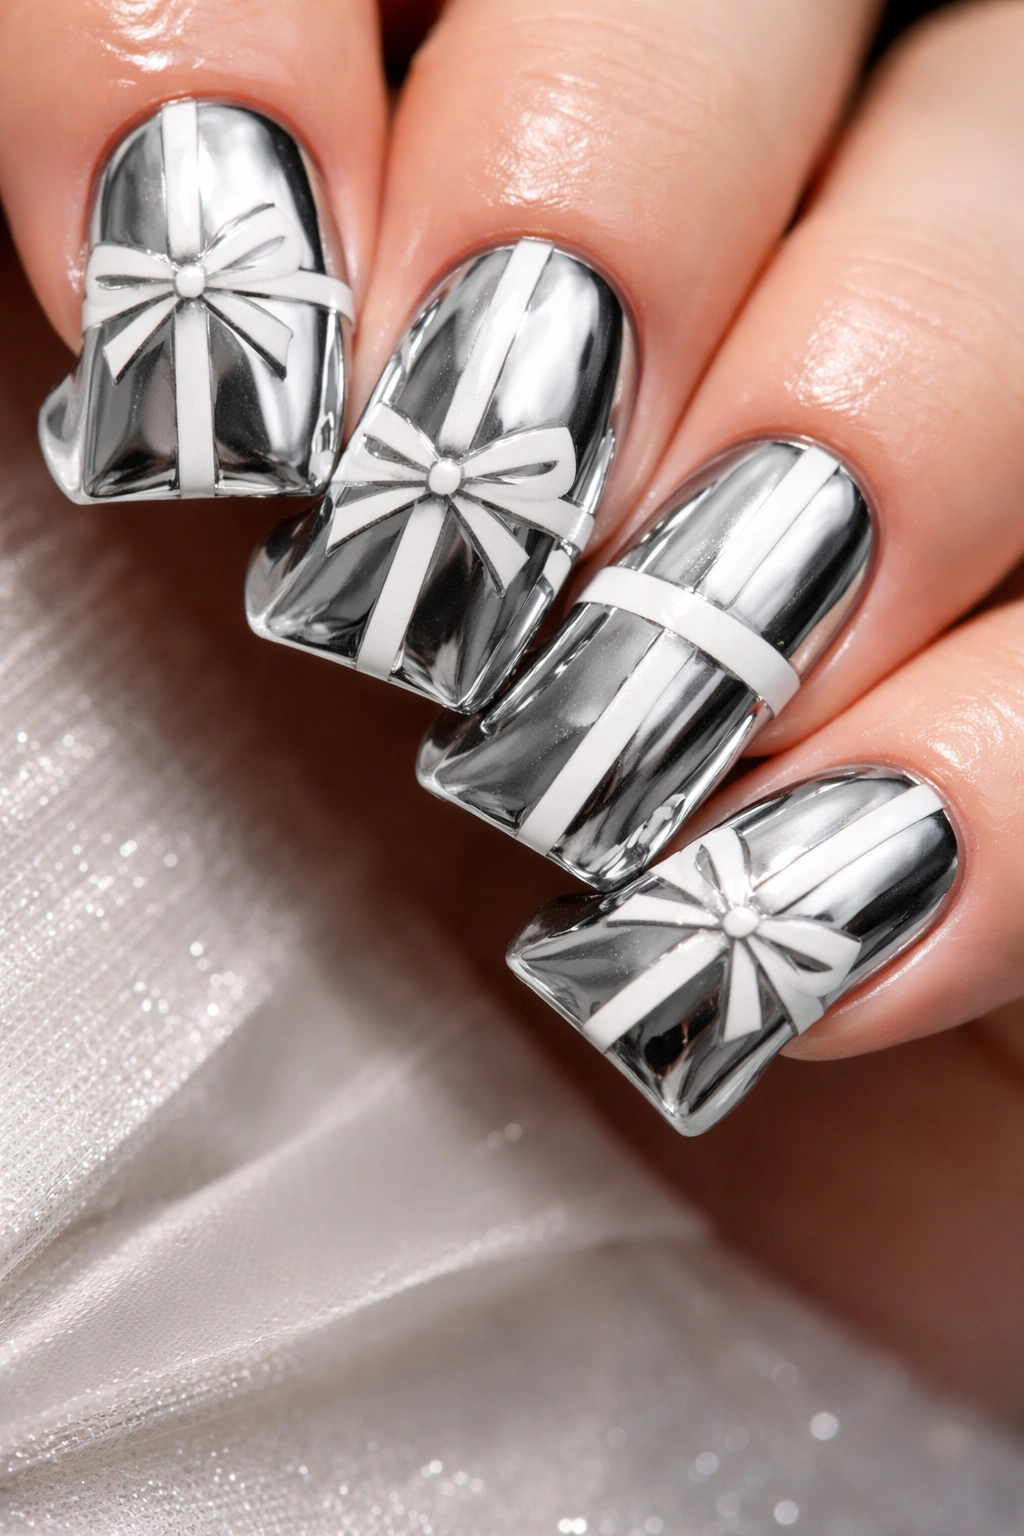
Chrome or mirror-finish nails are inherently striking, and when you layer a geometric pattern that resembles a gift-wrapped present on top, you create a design that feels both modern and celebratory. Use matte nail tape or hand-painted geometric lines to create sharp angles across the silver chrome surface, representing gift-wrap ribbons and bows. Duck nails provide the perfect base for this design because the curved shape contrasts beautifully with the rigid geometry.
The Modern Appeal of Chrome Plus Geometry
Chrome nails alone are fashion-forward and eye-catching. Add geometric elements and you’ve elevated the design into art-deco territory. The stark contrast between the soft curve of duck nails and the sharp lines of your gift pattern creates visual interest and sophistication. This design works for any age celebration but feels especially right for milestone birthdays or professional celebrations.
Creating Your Geometric Gift Design
- Apply chrome or mirror-finish base to all duck nails; most come as gel polish or require a special chrome powder applied over tacky gel base
- Once the chrome base is set and glossy, use matte nail tape to create geometric lines representing gift wrap and ribbons
- Cut tape into strips and apply in a pattern that suggests a wrapped present—diagonal lines, crossing lines, or angular sections
- You can also hand-paint the geometric pattern using a thin brush and matte black or dark gray polish for more control and precision
- Add small metallic stickers or hand-painted bows where ribbons meet for extra detail
- Seal everything with a glossy topcoat that makes the chrome portions ultra-shiny while keeping matte portions matte
Pro tip: The contrast between chrome shine and matte geometric sections is what makes this design work. Don’t seal the matte portions with glossy topcoat—the matte finish is intentional and essential to the design’s impact.
10. Translucent Nude With Scattered Birthstone Crystals
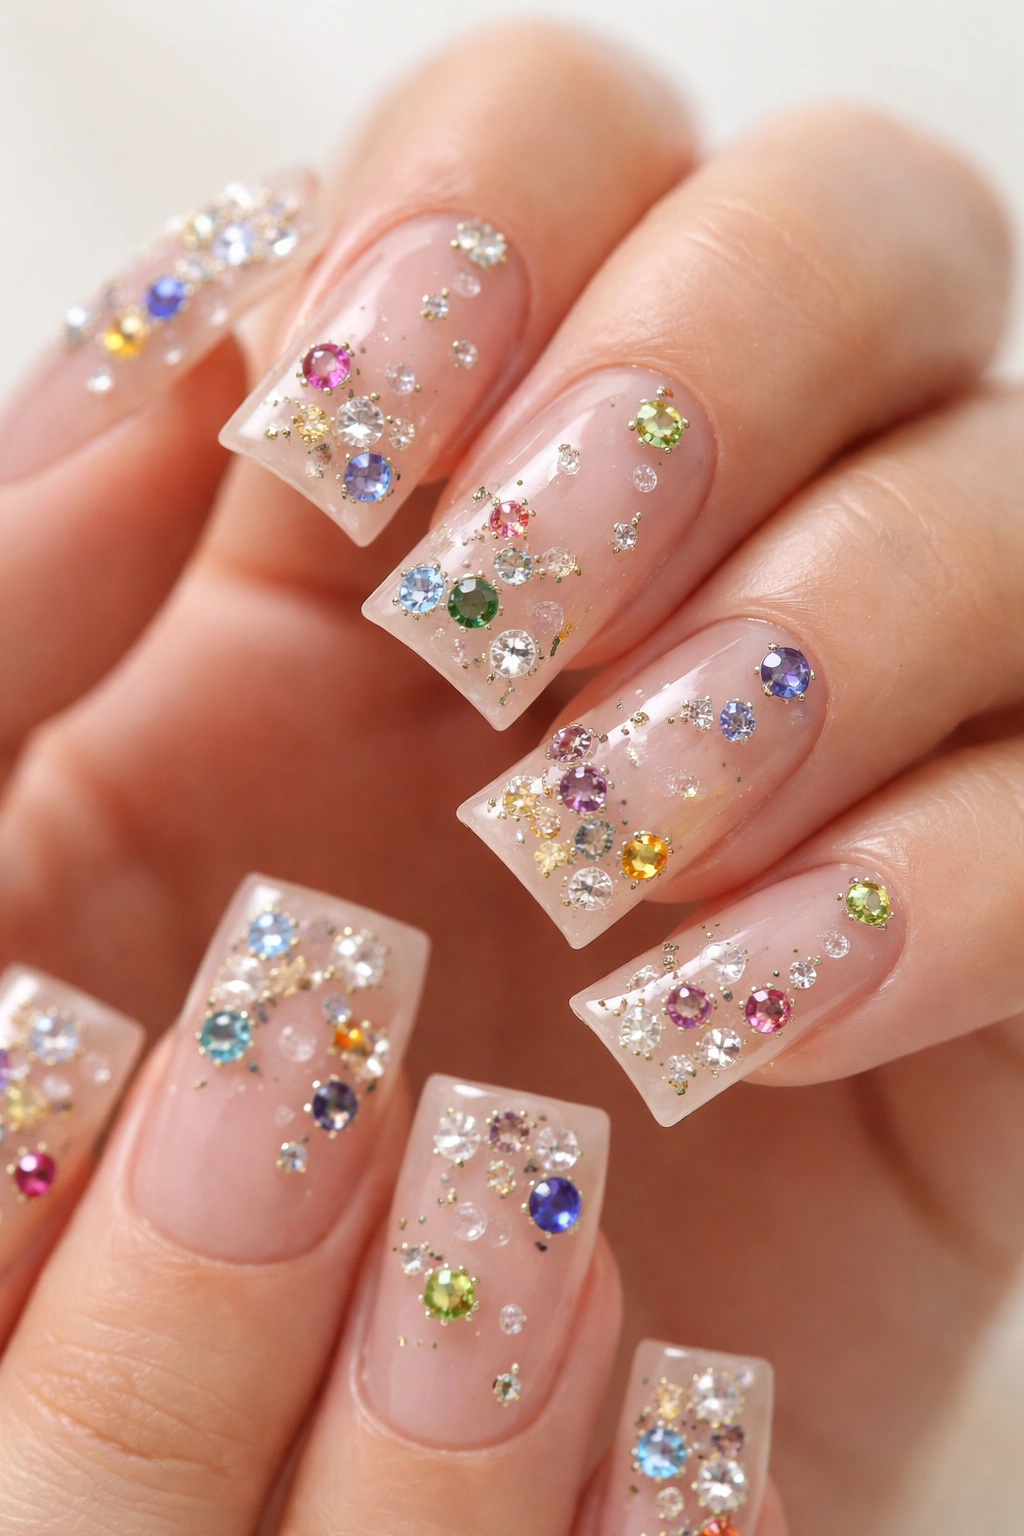
A translucent nude or peachy polish that’s slightly see-through creates an elegant, barely-there base that feels luxe and modern. Over this subtle foundation, scatter actual birthstone crystals or gemstones matching your birth month in a random but intentional pattern across all duck nails. This design celebrates your birthday with personal meaning while remaining sophisticated and wearable for any occasion.
Why Birthstones Add Personal Meaning
Unlike generic birthday markers, birthstone crystals connect your nail design to your actual birth month, adding a layer of personal significance. The translucent nude base lets the gemstones be the stars of the show while keeping the overall look polished and professional. On duck nails, the curved surface displays these crystals beautifully, with light hitting them from multiple angles and creating sparkle.
Applying Birthstone Crystals Successfully
- Paint all duck nails with translucent nude or peach gel polish; build to full opacity with 2-3 thin coats
- Apply a clear, slightly tacky topcoat or gel base that will hold your crystals in place
- Select real birthstone crystals or high-quality gemstone-inspired pieces matching your birth month
- Using tweezers, place crystals across the nail surface in a scattered pattern—avoid clustering them all in one area
- Press each crystal gently to ensure good adhesion
- Once all crystals are placed, seal with a final topcoat, being careful to avoid displacing stones
- If using gel polish, cure under UV light to harden the topcoat and lock crystals in place
Worth knowing: Real birthstone crystals are more expensive but create a genuinely luxe appearance that lasts longer than cheaper alternatives. If budget is a concern, high-quality fake gemstones are nearly indistinguishable and photograph beautifully.
Final Thoughts
Birthday duck nails are your opportunity to celebrate in a way that feels authentic to your style and personality. Whether you gravitate toward bold, sparkly designs or prefer understated elegance with just a hint of celebration, duck nails provide a distinctive canvas that makes any design feel special. The key is choosing a design that genuinely excites you—one you’ll feel confident and beautiful wearing throughout your birthday festivities.
The beauty of all these designs is that they’re adaptable. You can combine elements from multiple ideas, adjust colors to match your outfit or skin tone, or simplify designs to match your comfort level with nail art. If you’re working with a nail professional, bringing reference photos of designs that appeal to you ensures you get exactly what you’re envisioning. If you’re doing this at home, remember that practice makes perfect—even if your first attempt isn’t flawless, the effort and creativity will shine through.
Most importantly, your birthday nails should make you feel celebrated and confident every time you look at your hands. Duck nails are already a statement—you’re saying you’re willing to be a little bold, a little different, and completely intentional about your appearance. Layer on a birthday-inspired design and you’ve created something truly special that honors your day in a way that feels uniquely yours.
