

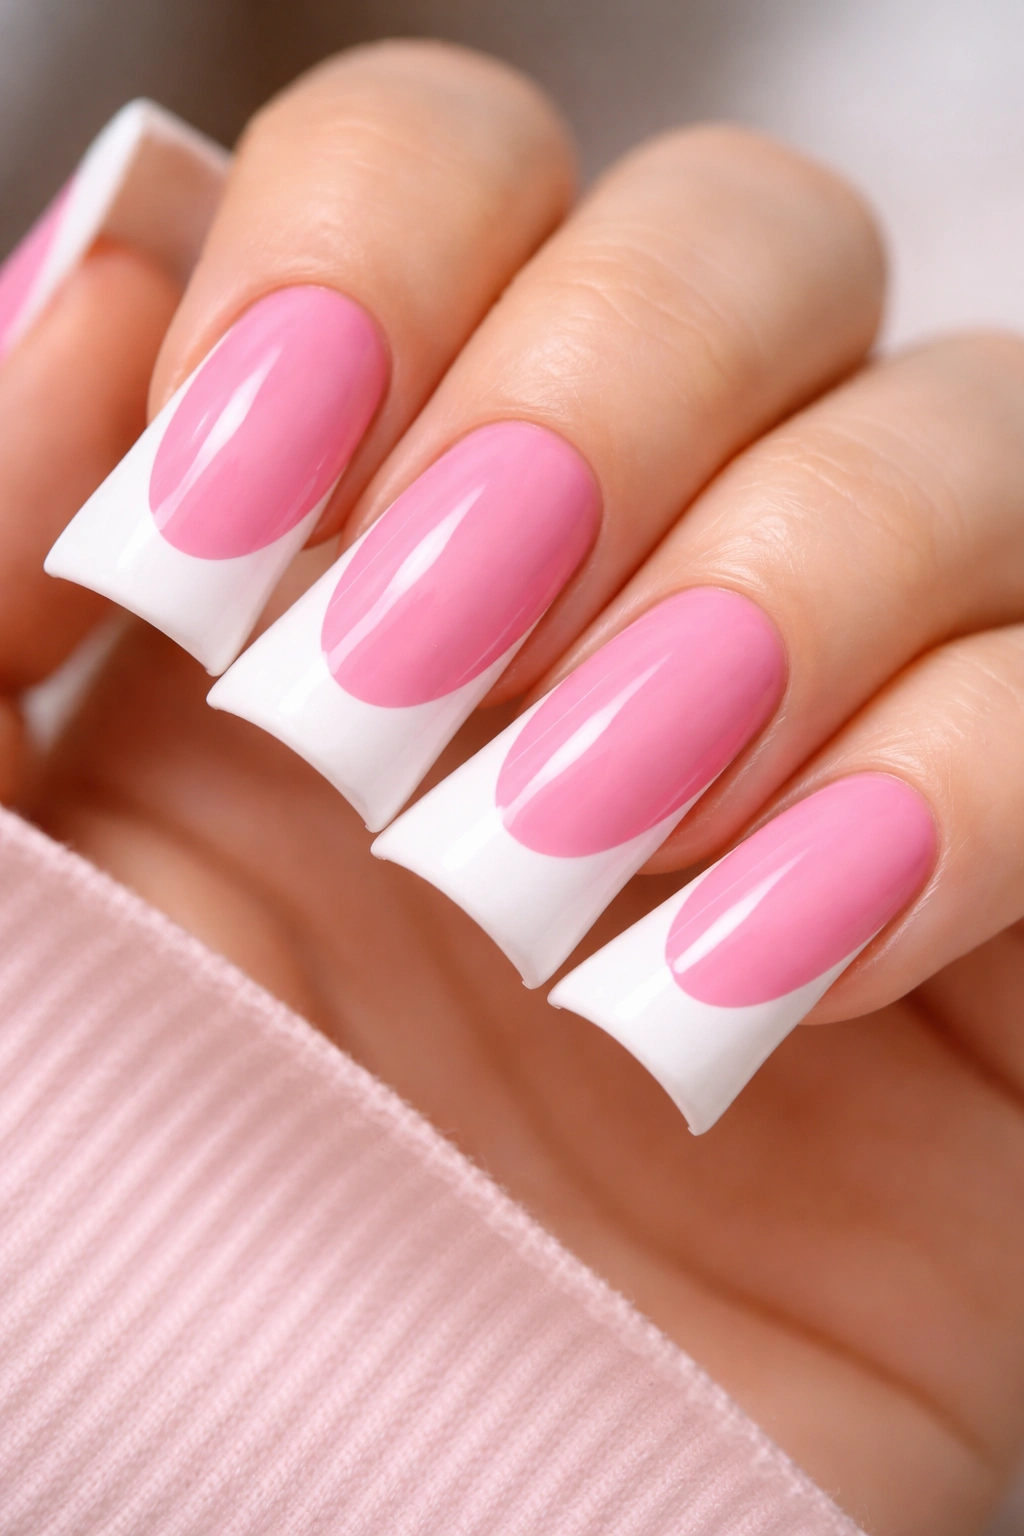
Duck nails have become one of the most eye-catching nail trends, and when paired with pink shades, they create a look that’s simultaneously playful and sophisticated. If you’ve ever scrolled through nail inspiration and wondered what’s actually possible with this bold shape, you’re in the right place. The duck nail—with its wide, squared-off tip that flares outward like a duck’s bill—gives you an expansive canvas to work with, and pink is the perfect color family to showcase what makes this shape special. Whether you prefer soft pastels or vibrant hot pinks, there’s a design here that’ll make you want to book a nail appointment immediately.
What makes duck nails so versatile is that they work for nearly every aesthetic and skill level. You can keep them minimal and chic, or layer them with intricate designs, 3D elements, and mixed textures. The wider surface area compared to traditional squarely-shaped nails means you have room for detailed nail art that actually shows up and photographs beautifully. Pink shades are particularly flattering because they complement virtually every skin tone, from fair to deep complexions, and they read as effortlessly elegant rather than demanding constant maintenance.
The designs below range from understated elegance to bold statement pieces. Some require professional application and specialty materials, while others you could potentially attempt at home with the right tools and patience. Each one includes the specific techniques and materials that make it work, so you’ll know exactly what to ask for at the salon or what supplies to gather if you’re doing your own nails.
1. Soft Rose with Glitter Tips
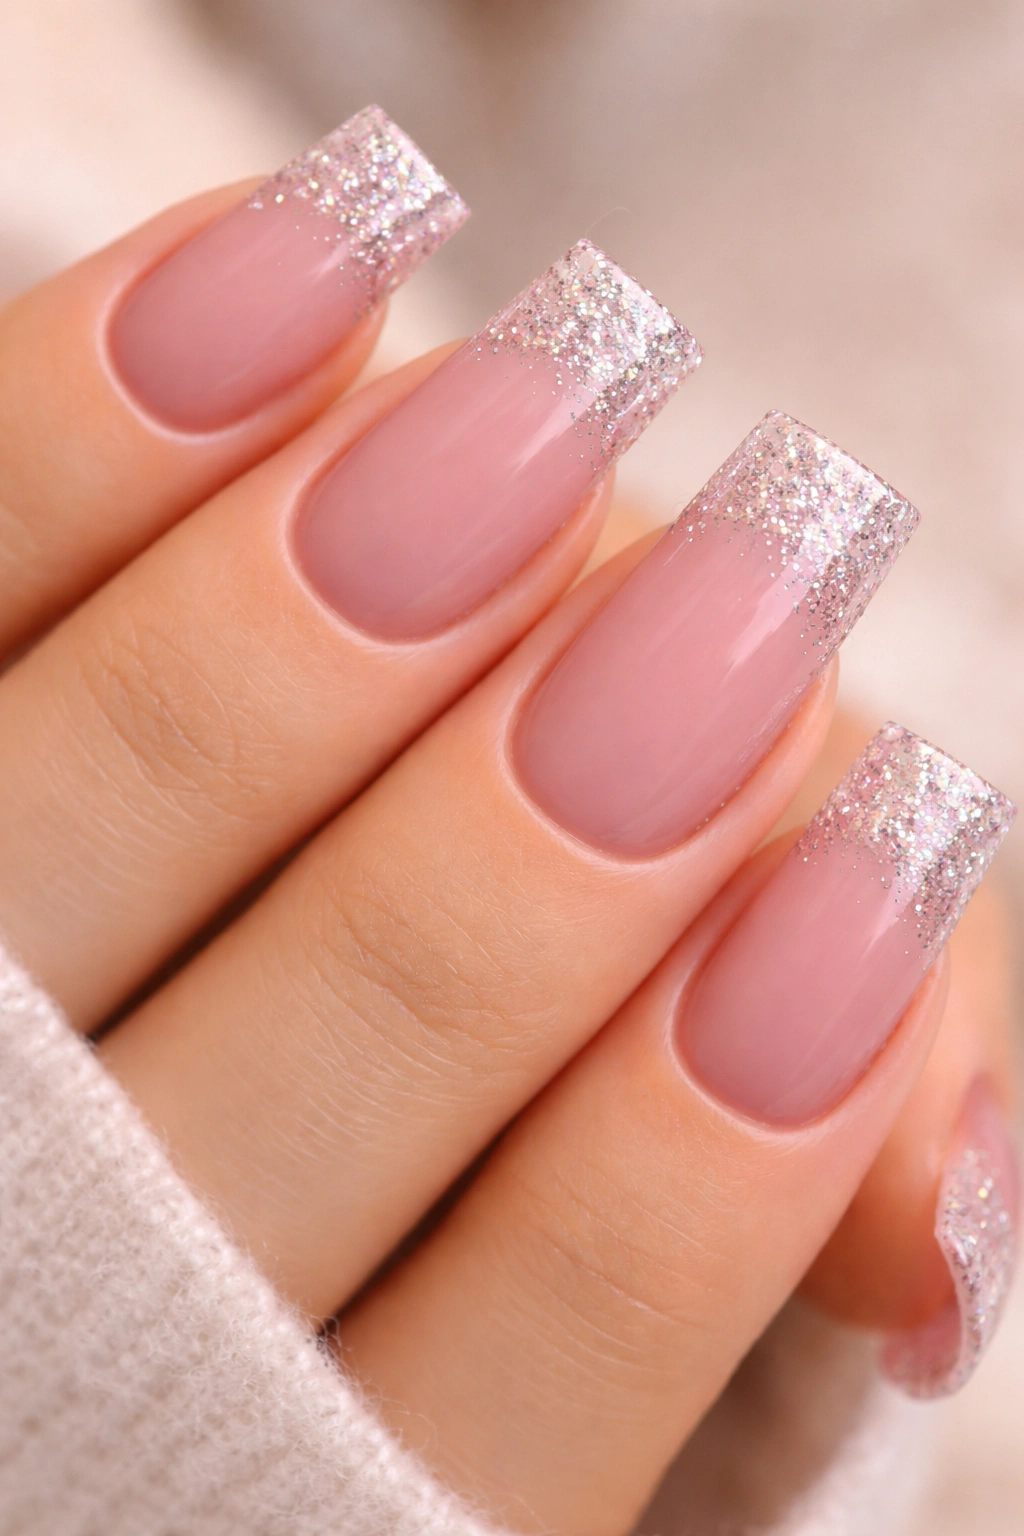
A soft rose base is the foundation for creating a refined, romantic look that still celebrates the boldness of duck nails. This design starts with a creamy, pale pink—think dusty rose or mauve-tinted pink—applied as a full opaque base. The magic happens at the tips, where you transition into glitter that catches the light with every hand movement.
Why This Design Works So Well
The contrast between the smooth, matte rose base and the sparkling tips creates visual depth and prevents the whole nail from feeling flat. Soft rose is forgiving on both fair and deeper skin tones, and it doesn’t look overly dramatic in professional settings. The glitter tips add just enough glamour without committing to a full sparkly nail, making this a perfect choice if you want something special but not over-the-top.
How to Execute This Design
- Apply 2 coats of soft rose base polish, ensuring full opacity
- Use a thin nail art brush to create a ombré transition at the tip by brushing rose base color mixed with clear polish
- While still wet, drag glitter or sparkle polish from the edge toward the middle using a small brush or glitter applicator
- Seal everything with a glossy top coat to make the glitter pop
- Consider using rose gold or champagne glitters for the most flattering effect with pink bases
- A matte top coat on the rose section with a glossy finish on the glitter tips creates extra visual interest
Pro tip: Use a glitter topcoat formulated to be self-leveling—cheap glitter products can look chunky and uneven, while quality ones blend beautifully into the soft pink.
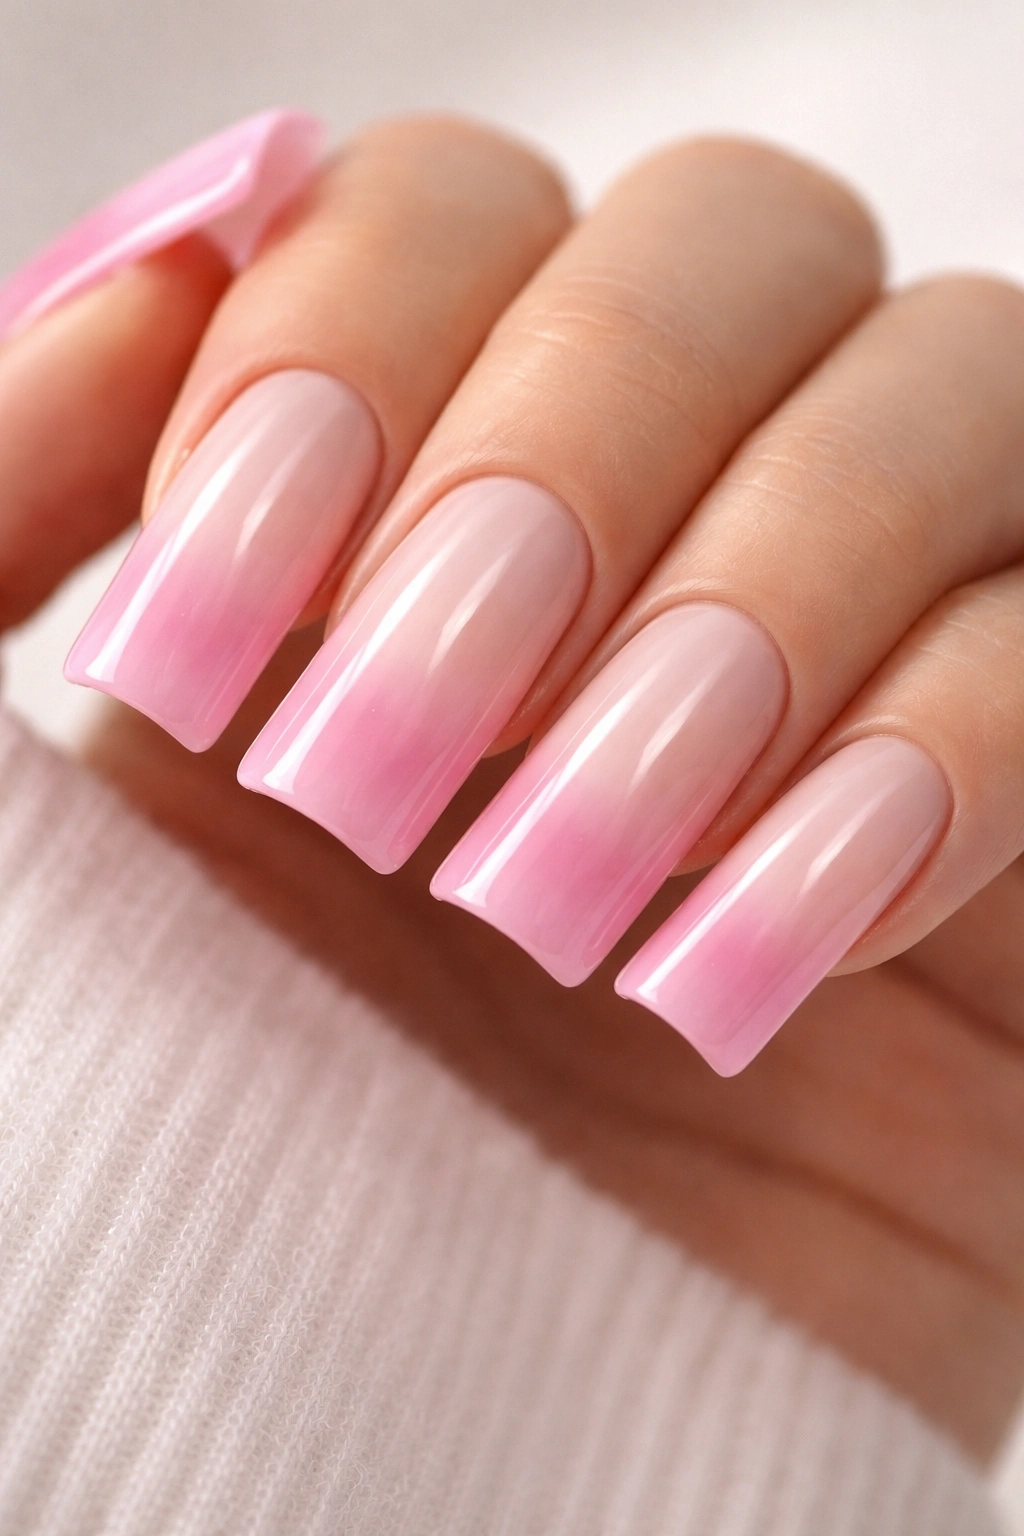
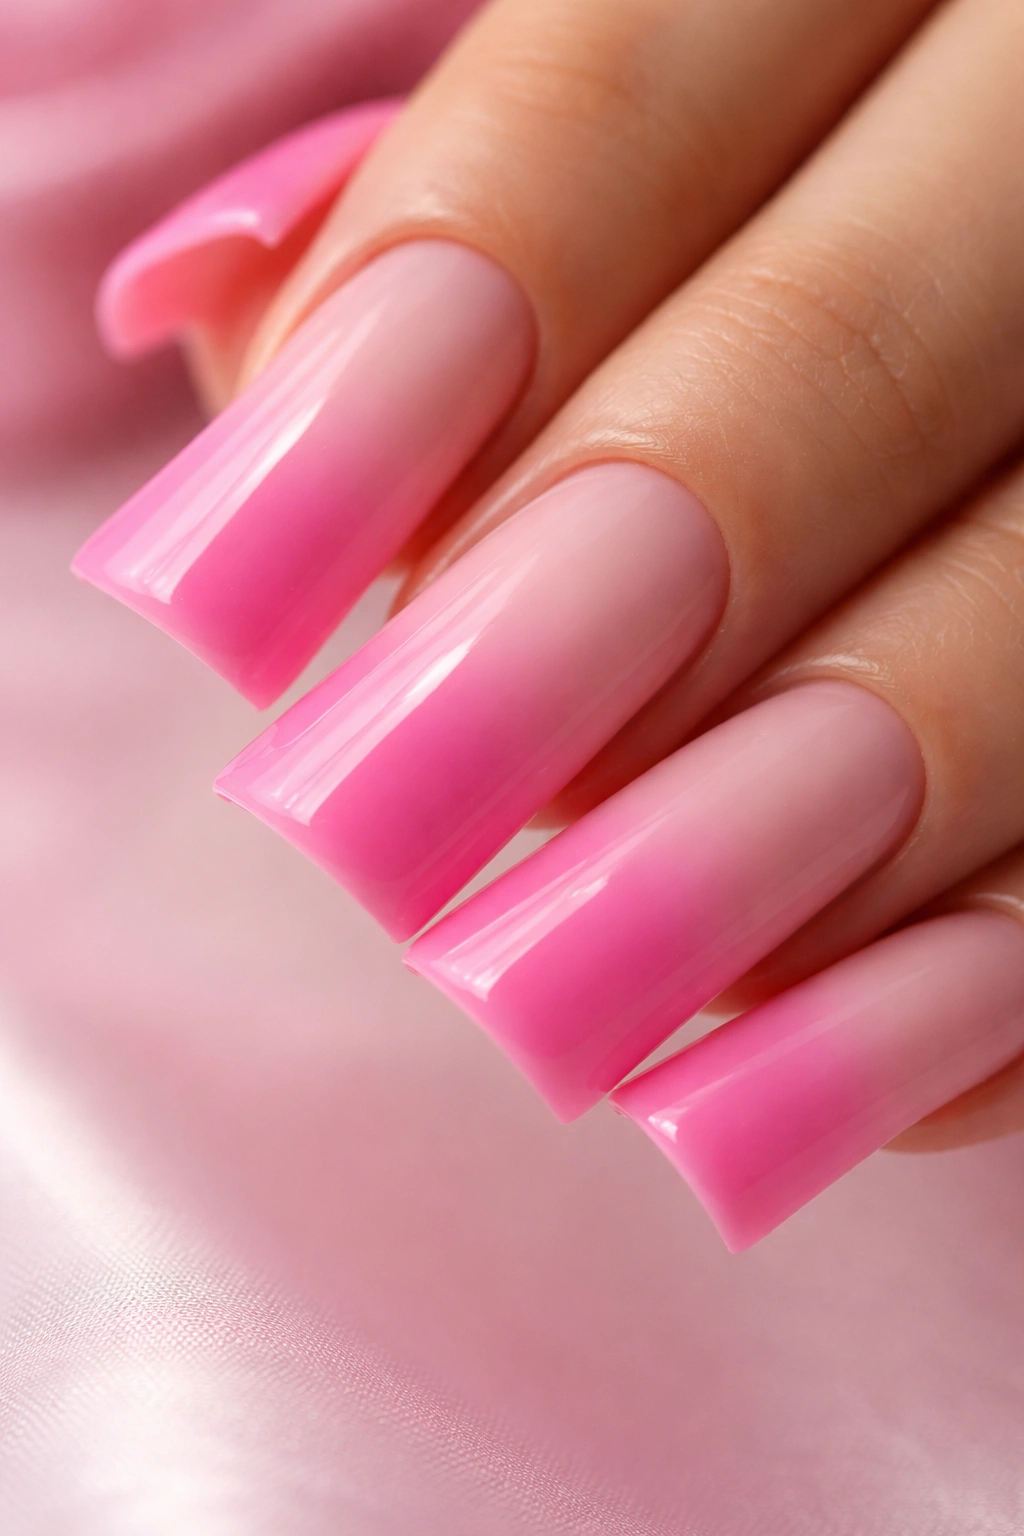
2. Ombre Gradient from Blush to Hot Pink
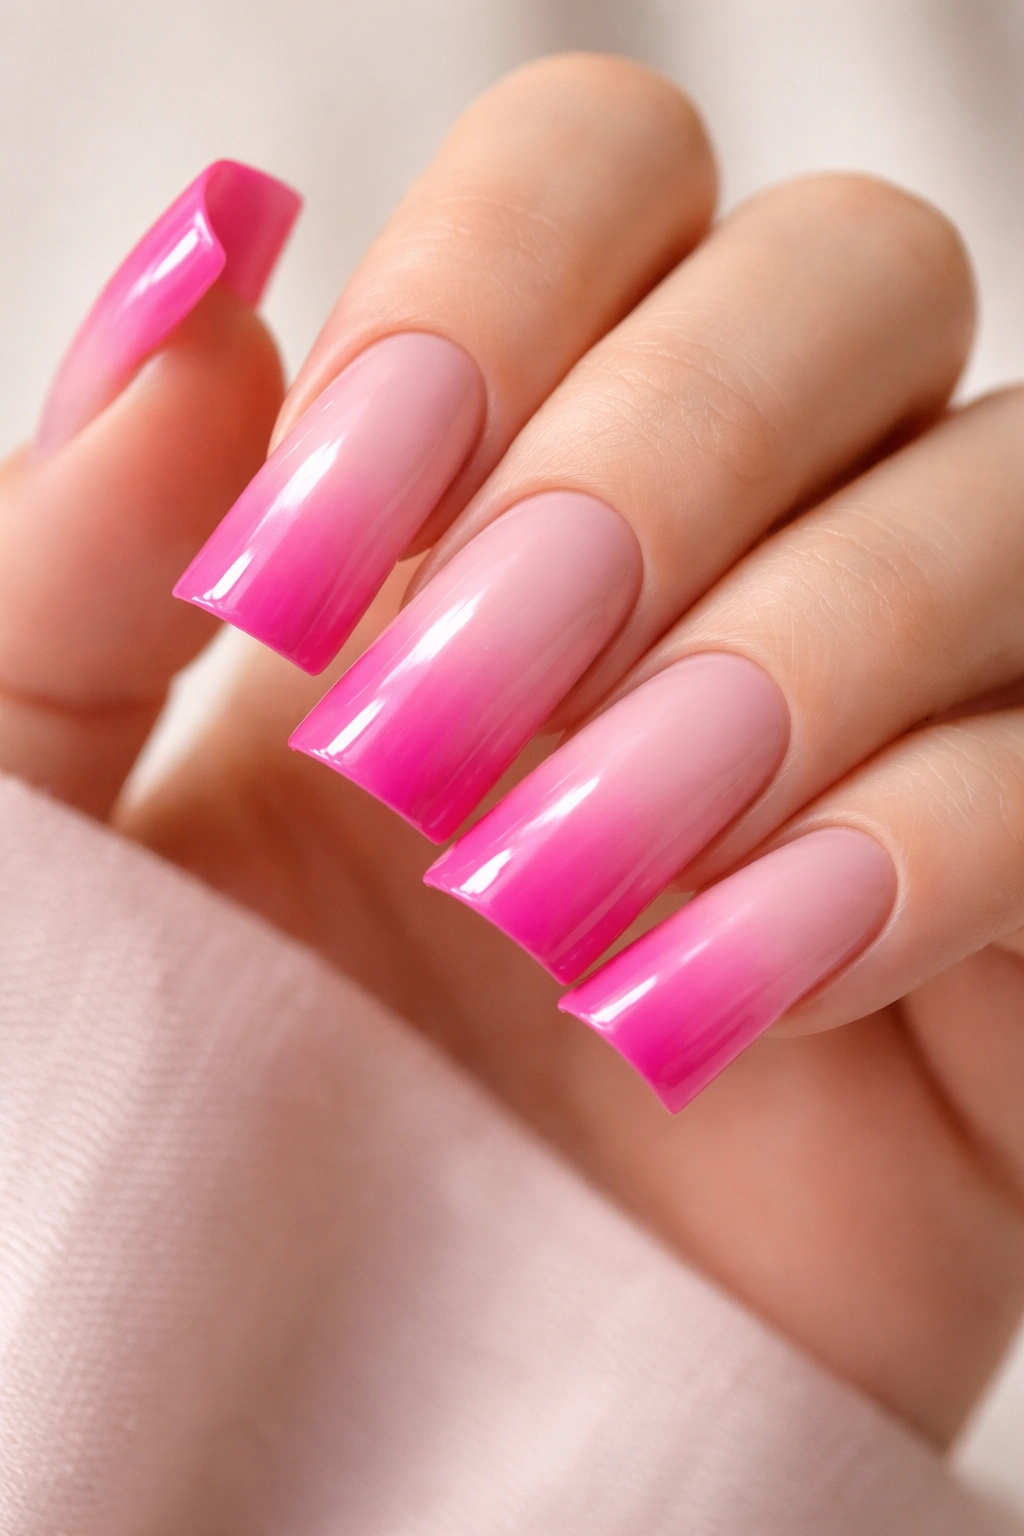
An ombre design on duck nails is absolutely stunning because the gradient has so much surface area to display. This technique moves from a whisper-light blush pink on the nail bed toward progressively deeper and more saturated hot pink as it approaches the tip.
The Technique Behind the Ombre
Creating a true gradient requires either sponging or using a wet brush to blend colors together seamlessly. The sponge method involves dabbing a damp makeup sponge onto multiple nail polish colors in sequence, then pressing the sponge onto the nail with a rolling motion to create the blend. The brush method uses a wet brush to feather the colors together while the polish is still wet. Both require practice, but the results are incredibly striking on the expanded surface of duck nails.
What You’ll Need
- 3-4 shades of pink: blush, dusty rose, mauve-pink, and hot pink
- A makeup sponge or nail art blending brush
- A base coat to protect your nails
- A high-quality top coat to seal and smooth the gradient
- Rubbing alcohol to clean up excess polish around the cuticle
- Patience—this technique is forgiving if you’re willing to refine it
Worth knowing: Cream polishes blend more easily than shimmer or glitter formulas, so choose creamy finishes for the smoothest gradient.
3. White Flower Designs on Pastel Pink
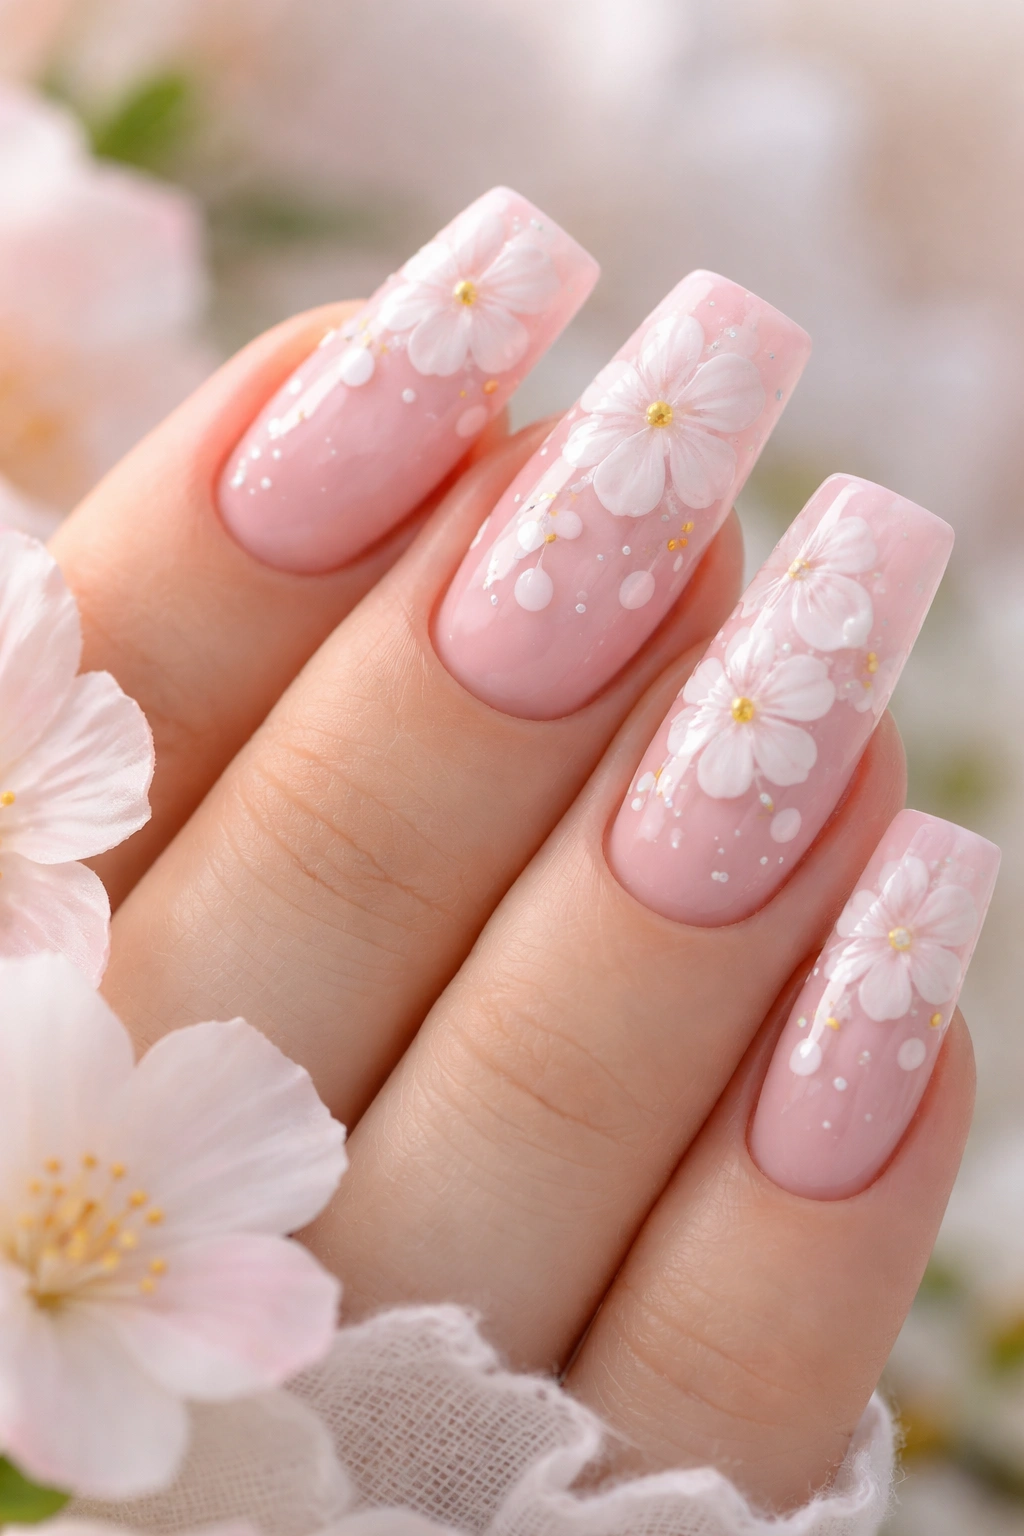
Delicate white flowers floating across a soft pastel pink base bring a garden-inspired elegance to duck nails. This design works best when flowers are hand-painted or applied as nail decals, creating a botanical aesthetic that feels fresh and feminine without being juvenile.
Choosing Your Flower Style
Small wildflowers like daisies and baby’s breath feel whimsical and summery. Larger, more detailed roses or peonies look more romantic and upscale. Minimalist line-drawn flowers work with virtually any nail shape but especially suit the spacious duck nail because they can be larger and more visible. The key is choosing flowers that feel intentional and detailed, not carelessly scattered.
Application Methods
- Hand-painting requires a steady hand and fine nail brushes, but allows complete customization
- Nail decals come pre-printed and simply transfer to the nail with water—no artistic skill required
- Stamping plates let you quickly recreate the same flower design on multiple nails with precision
- Thin line work—painting stems and outlines first, then filling in petals—is easier than painting fully detailed flowers
Insider note: If you’re having this done at the salon, bring a reference image of exactly the flower style and placement you want. Vague descriptions often result in designs that don’t match your vision.
4. Pink Marble with Gold Veining
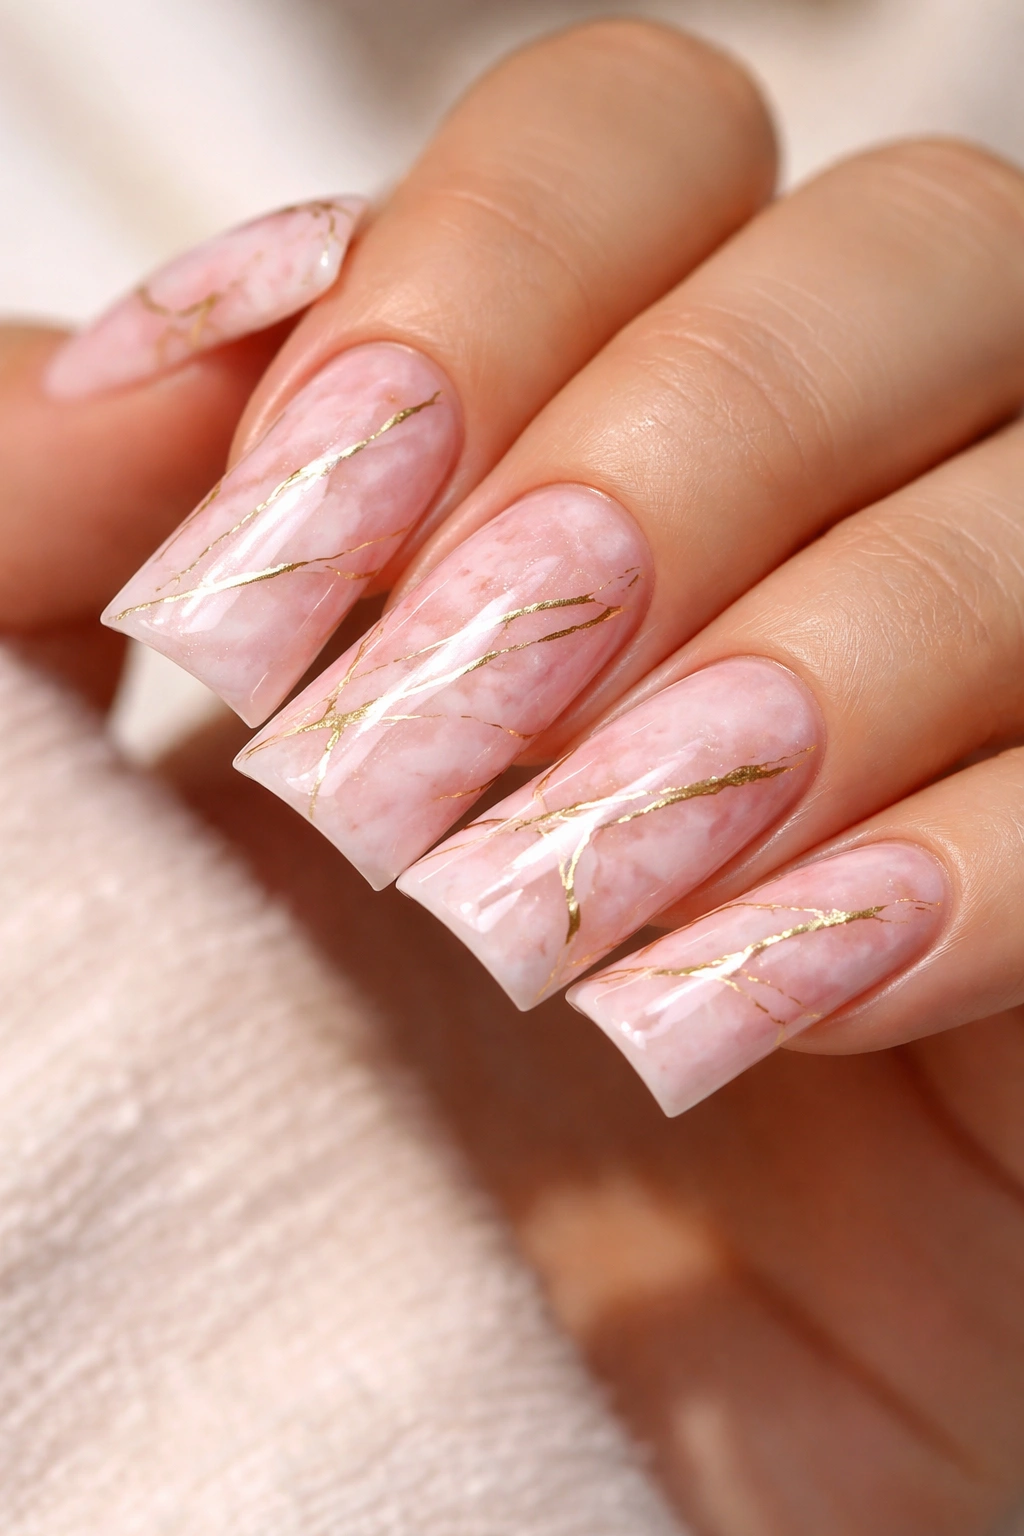
Marble designs tap into the visual richness of actual stone, creating the illusion of expensive mineral veining across your nails. On duck nails, marble looks particularly sophisticated because the larger surface shows off the pattern’s full complexity.
Creating the Marble Effect
The classic approach uses a base color (in this case, blush or light pink), then applies white or cream polish in irregular, flowing lines to suggest marble veining. A thin gold or rose gold nail art pen adds metallic lines that mimic the precious metal veining found in real marble. The whole design is sealed with a glossy top coat that makes it look like polished stone.
The Step-by-Step Process
- Apply 2 coats of pale pink base and let cure (if using gel) or dry completely
- Using a thin white or cream polish, create irregular squiggles and lines that flow across the nail—let these overlap and cross naturally, not in a uniform pattern
- Add thin gold lines using a gold liner pen, allowing them to run alongside or cross over the white veining
- Seal with a glossy top coat and cure
- If done correctly, the effect should resemble actual polished marble, not obvious nail art
Pro tip: Work on one or two nails at a time to prevent the white polish from drying before you finish creating the veining pattern. If working with gel polish, don’t cure between the pink base and the white veining.
5. French Tips with Pink Gradient Base
A modern take on the classic French manicure replaces the traditional white tip with a gradient pink tip, creating a soft, romantic effect. The duck nail shape makes this work especially well because there’s plenty of tip area to showcase the gradient.
How Modern French Tips Differ from Traditional
Traditional French tips are stark white, creating sharp contrast. Modern versions use colors that complement the base—in this case, picking a pink a few shades darker than the base and gradually blending them together. The result feels more cohesive and current while keeping the structured elegance of French-tipped nails.
Execution Details
- Paint a pale blush pink as your full base color
- Using a sponge, blend a deeper pink (mauve, rose, or coral-tinted pink) specifically on the tip area
- The blend should be soft enough that it’s not immediately clear where one color stops and the other starts
- A glossy top coat smooths everything and adds shine
- Seal the edges with a thin line of clear top coat to prevent chipping
What to watch for: If your gradient looks too splotchy or uneven, you can refine it with a small detail brush and rubbing alcohol—the alcohol will help you blend and soften harsh lines.
6. Pink with Rhinestone Accents
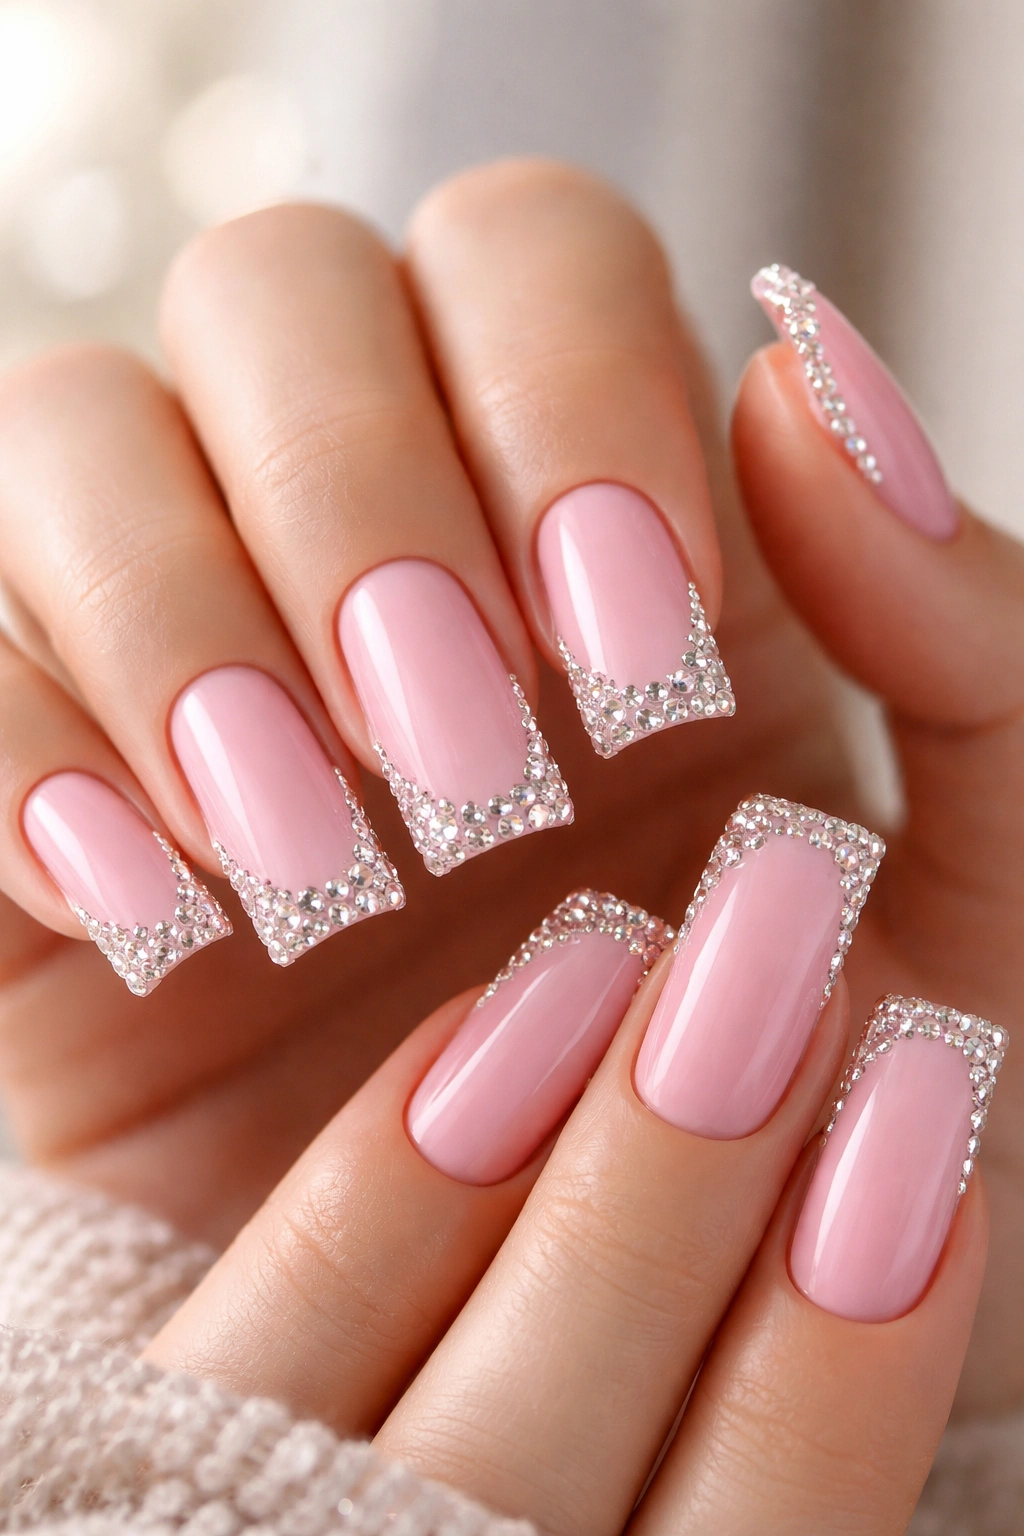
Rhinestones add instant glamour and visual interest to pink nails, particularly when placed strategically along the tips or edges of duck nails. This design works for anyone who wants something sparkly without committing to a fully glittery nail.
Rhinestone Placement Strategies
Placing a small cluster of rhinestones at the center of the tip creates a focal point and draws the eye to the shape of the nail. A line of rhinestones along the edge of the tip mimics a French manicure but with added sparkle. Random rhinestones scattered across the nail look modern and artistic. Corner placements—one or two small gems at the outer edges—feel sophisticated and minimal.
Application Best Practices
- Choose a pink base with enough texture or tackiness to hold rhinestones securely—a thick gel or a matte top coat provides better grip than a slippery glossy finish
- Use a rhinestone picker tool (a small wand with a sticky tip) to position each stone precisely
- Press firmly into the polish or top coat to embed the rhinestone
- If using gel, cure after placing rhinestones to lock them in place
- Seal over the rhinestones with a flexible top coat that won’t crack when your nails flex
Real-world advantage: Lab-created or crystal rhinestones look virtually identical to real diamonds but cost a fraction of the price and are fine for nail art.
7. Matte Pink with Glossy Stripe
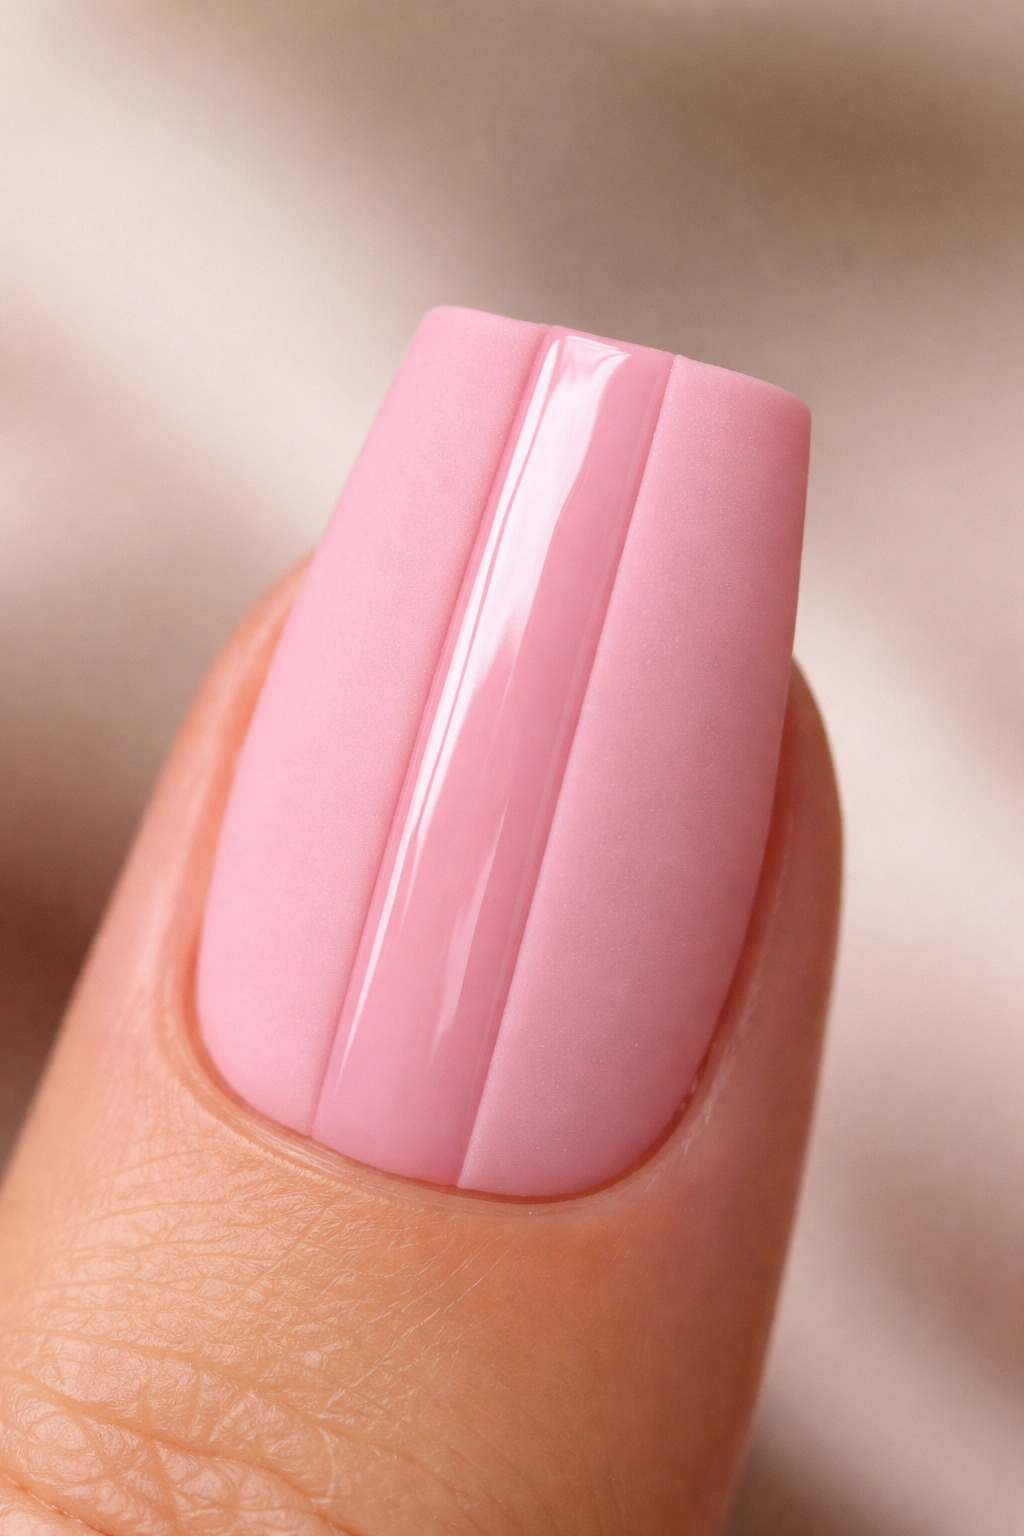
Combining matte and glossy finishes on the same nail creates a striking visual contrast that feels contemporary and intentional. The stripe becomes a design element rather than just a finish variation.
Design Variations with Stripes
A vertical stripe down the center of the nail divides it visually and works especially well on wide duck nails. A horizontal stripe partway up the nail can mimic a French manicure but with more personality. Diagonal stripes feel dynamic and playful. The key is making the stripe substantial enough to read as intentional, not accidental.
How to Create Clean Lines
- Apply a matte base coat of pink and let cure or dry completely
- Mask off the stripe area using thin striping tape or painter’s tape, pressing the edges firmly to prevent seeping
- Apply glossy polish only to the unmasked area
- Remove the tape while the polish is still slightly wet for the cleanest edge
- Seal the entire nail with a matte top coat if you want the matte finish to dominate, or a glossy top coat for more shine overall
Worth knowing: High-quality painter’s tape gives much cleaner results than regular tape, but even it needs a firm press to prevent polish from seeping underneath.
8. Pink with Tiny Gold Lines or Art Deco Pattern
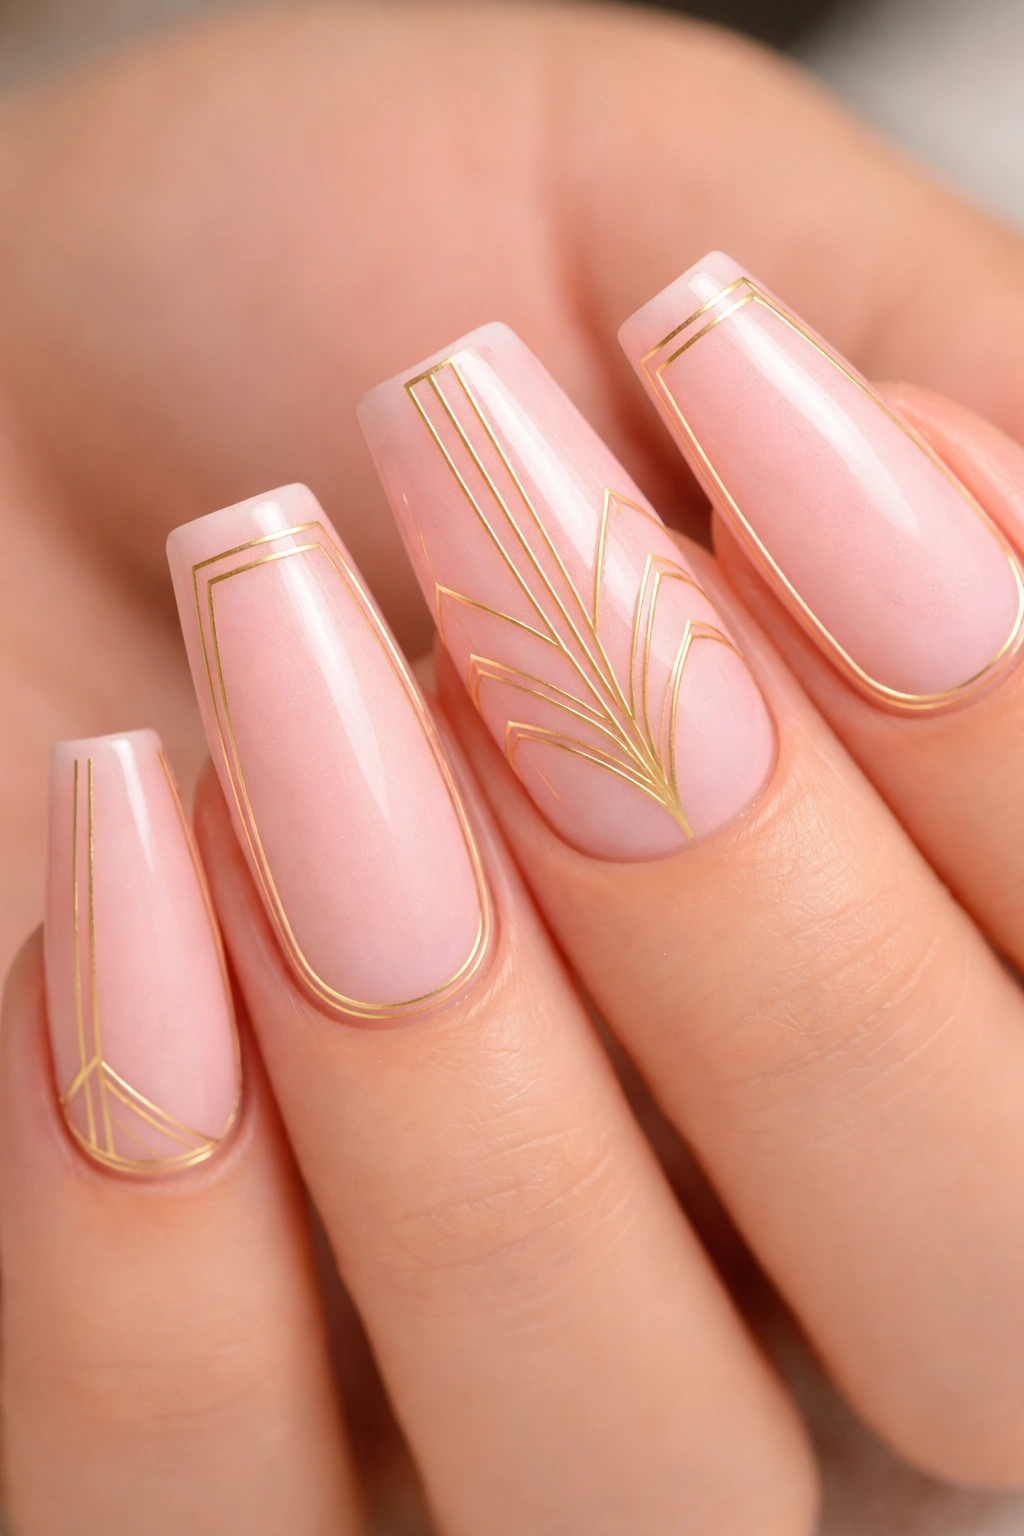
Geometric gold lines on pink create a sophisticated, modern aesthetic inspired by Art Deco design. These fine details work beautifully on duck nails because there’s room for the pattern to be visible and detailed.
Art Deco Elements That Work on Nails
Thin parallel lines running horizontally or vertically create a striped effect. Small geometric shapes—triangles, diamonds, or angular sunburst patterns—clustered on the nail feel art deco and luxe. A border of gold lines around the edge of the nail frames the pink beautifully. Asymmetrical lines feel more contemporary than perfect symmetry.
Creating Precision Gold Lines
- A thin gold nail art pen gives you the most control and allows freehand design
- A striper brush dipped in gold gel or polish can paint lines, though it requires a steadier hand
- Stamping plates designed with art deco patterns transfer ready-made designs instantly
- A combination approach—using stamping for the main pattern and adding hand-painted details—gives professional results with less difficulty
Pro tip: If you’re hand-painting lines and make a mistake, use a thin brush dipped in rubbing alcohol or in your base color polish to clean up the error before it dries completely.
9. Bubblegum Pink with White Smile Line
A smile line design—a white or light-colored curved line across the top of the nail—creates a playful, nostalgic feel that references classic nail design. On duck nails, a smile line is bold and contemporary rather than cutesy.
Modern Smile Line Aesthetics
Instead of a thin, delicate smile line, modern versions use thicker, bolder white strokes that feel more intentional and graphic. The curve doesn’t have to be perfect or symmetrical—slightly wonky or exaggerated curves feel artistic and charming. A smile line can wrap around the entire tip like a frame, or just sit on the outer edge.
Technical Execution
- Apply bubblegum pink as your base—something bright and saturated, not pale
- Using a thick white gel or polish, paint the smile line freehand with a striper or detail brush
- If you make the line uneven, embrace it—imperfect lines often look more interesting and intentional than perfect ones
- Seal with a glossy top coat to emphasize the design
- Cure if using gel polish
Worth knowing: White shows up most vividly on saturated or darker pinks. On very pale pink bases, consider using pale yellow, soft blue, or light peach for the smile line instead.
10. Gradient Pink with Holographic Accents
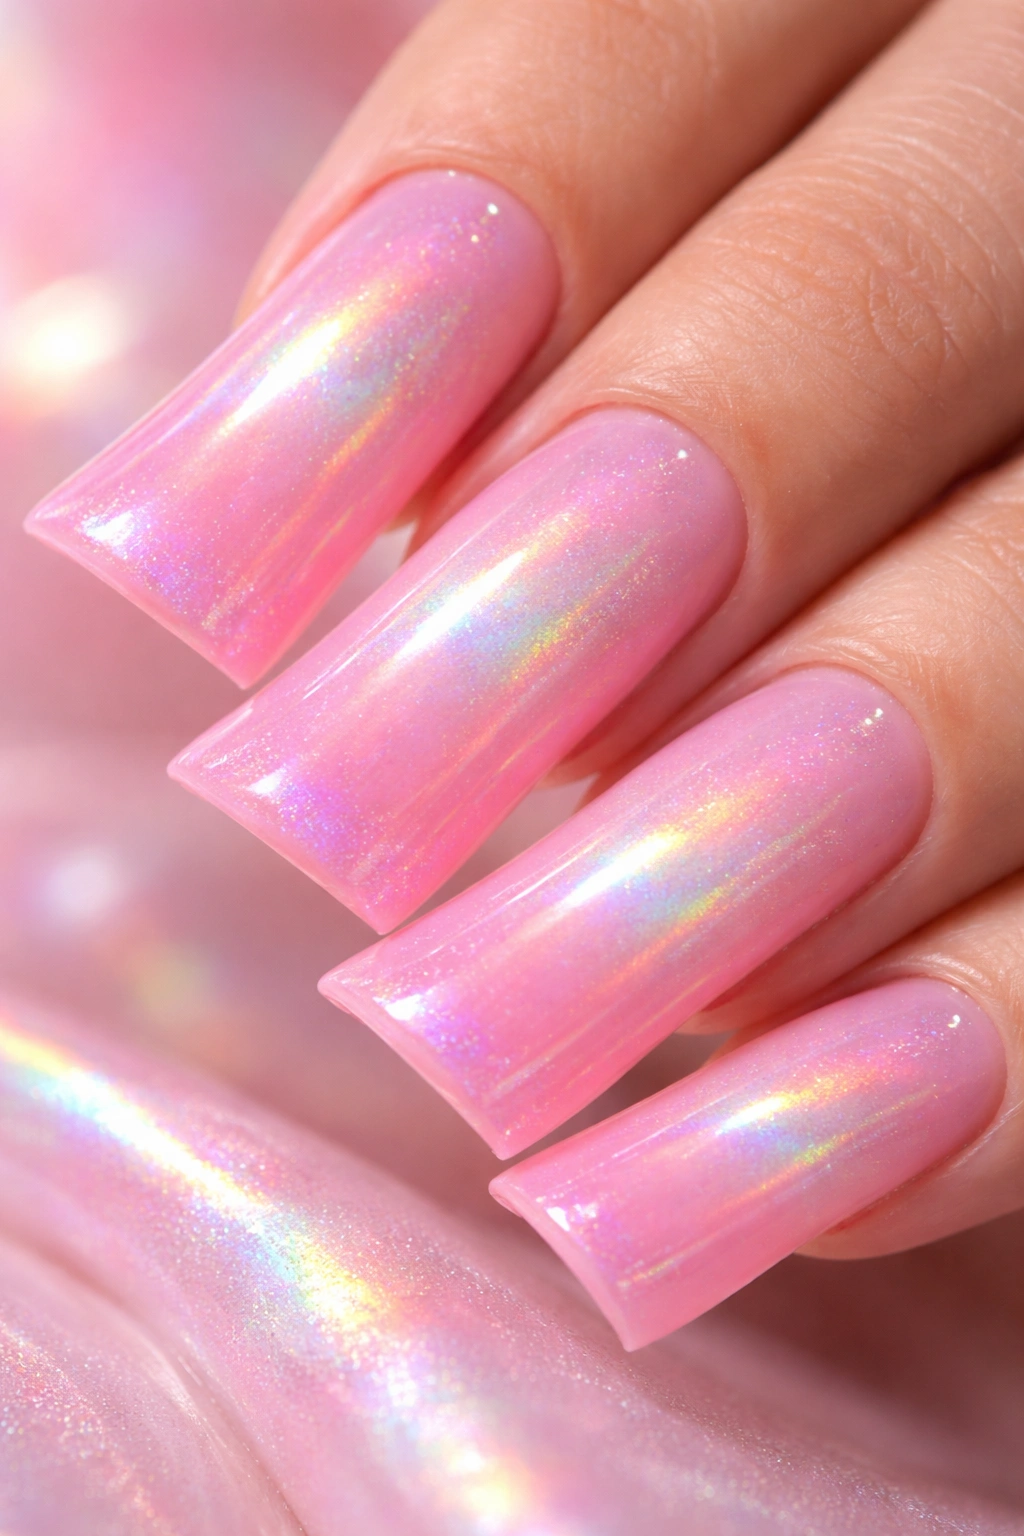
Holographic finishes scatter light across the nail surface, creating a rainbow effect that shifts with movement. Combined with a pink gradient, this design feels magical and contemporary.
Understanding Holographic Polish
True holographic polish contains multifaceted particles that refract light into a full spectrum effect, not just shine. When applied over a pink base, the holographic particles create an iridescent quality without hiding the pink entirely. The effect is most dramatic in natural sunlight and changes subtly under different lighting conditions.
Application for Maximum Impact
- Apply a pink base, either in a single color or a gradient as described in Idea 2
- Top the entire nail with holographic polish—typically 2 coats for full color intensity
- The holographic effect should be visible but not completely opaque; you want the pink base to show through slightly
- Seal with a glossy top coat to bring out the rainbow effect
- Cure if using gel
Insider note: Holographic polish can be pricey, but even budget brands create a convincing effect. The difference is in longevity and true color distribution rather than the basic look.
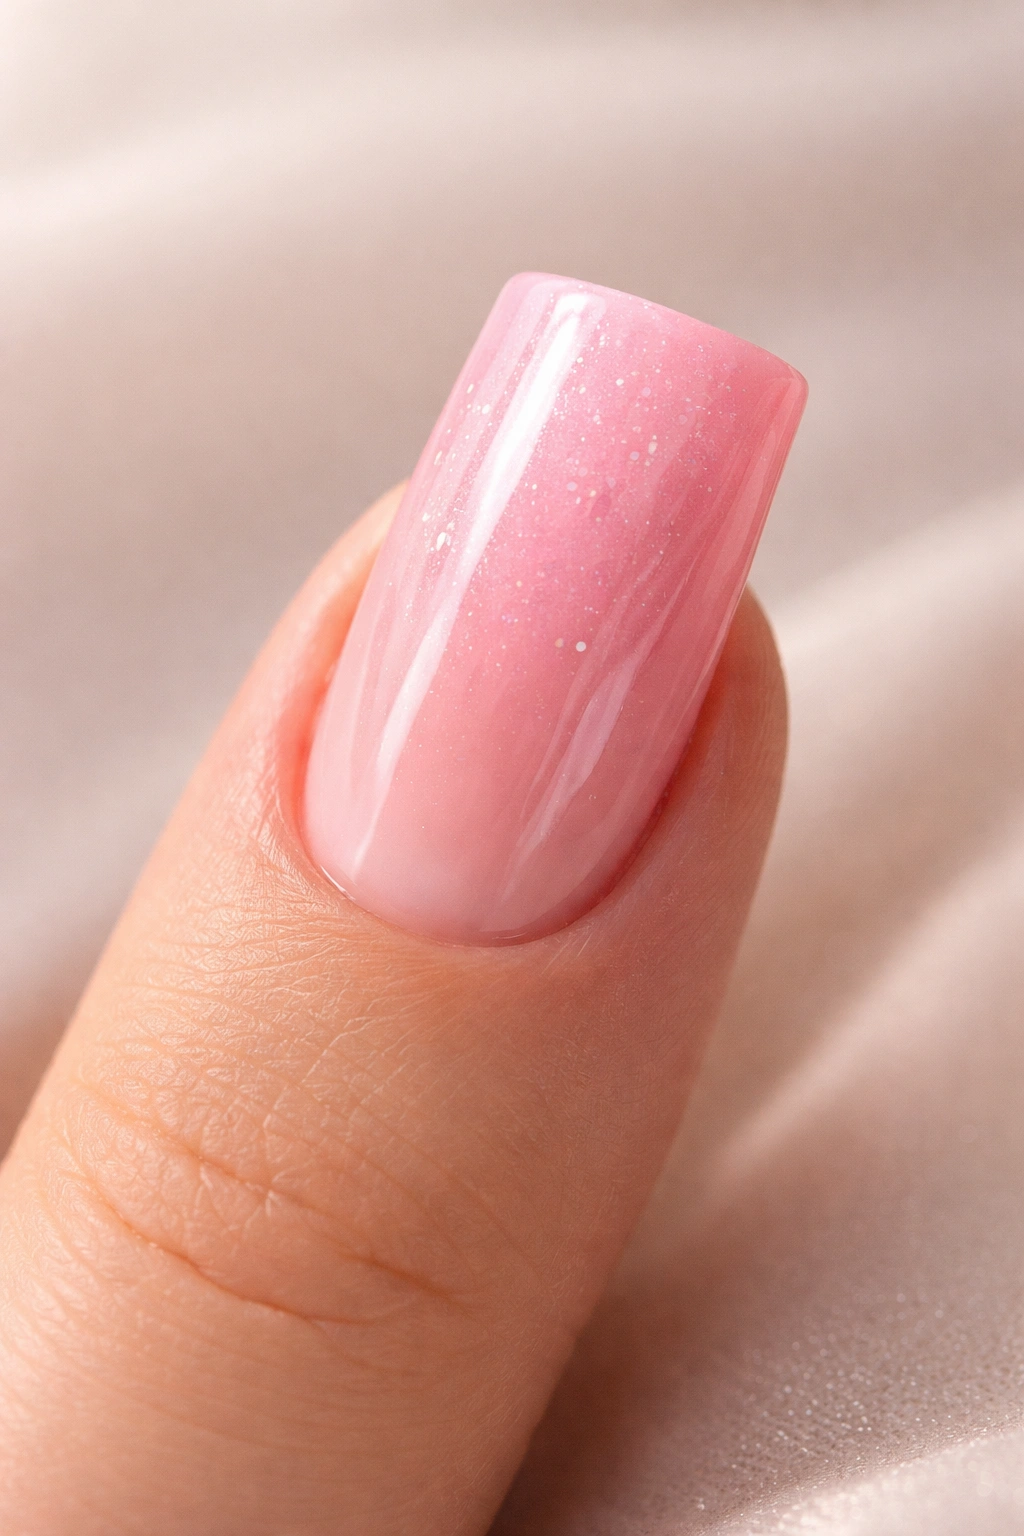
11. Bubblegum Pink Ombré
A monochromatic ombré within the pink family creates a gradient that stays visually cohesive while adding depth and dimension. This design shows off the duck nail’s shape beautifully because the color transition draws attention to the nail’s contours.
Creating a Monochromatic Ombré
Select three shades of pink in the same undertone family—for example, a pale blush, a medium rose, and a saturated hot pink. Blend these from light on the base to dark on the tip, creating a seamless transition that highlights the nail’s structure. The effect is both calming and striking because your eye follows the color gradient naturally.
Blending Technique for Smooth Results
- Apply the lightest shade as a base coat and let it dry or cure fully
- Using a makeup sponge, lightly apply the medium pink shade across the middle portion of the nail
- Dab the sponge in a rolling motion where the colors meet to soften the transition
- Apply the deepest pink to the tip area and blend again
- Repeat the blending steps with a clean, slightly damp sponge until the gradient feels smooth
- Seal with a top coat and cure
- If the gradient looks too stark, use rubbing alcohol on a detail brush to smooth and soften harsh lines
Pro tip: Work with cream polishes for this technique—shimmers and glitters won’t blend smoothly and will interrupt the gradient effect.
Final Thoughts
Pink duck nails offer endless possibilities, and the best design is the one that excites you every time you look at your hands. Whether you choose something minimal and elegant like the soft rose with glitter tips or something bolder like the bubblegum ombré, the duck nail shape amplifies whatever design you select by giving it more surface area and presence. The wide, flared tip becomes a statement rather than just a functional edge.
When choosing a design, consider your lifestyle and how much maintenance you’re willing to embrace. Rhinestones and elaborate nail art last longest when sealed properly and handled carefully. Simpler designs like gradients and single-color mattes are more forgiving if you’re active or working with your hands frequently. Even a straightforward cream pink with no additional design elements looks striking on duck nails simply because of the shape’s inherent boldness.
If you’re planning to have these done professionally, save a reference image or describe the specific elements you want—the exact shade of pink, the style of any patterns, and how prominent you want any sparkly elements to be. Professional nail artists can execute these designs with precision, but they work best when they understand your vision from the start.
