

Black and white is a timeless color combination that never goes out of style—especially when it comes to stiletto nails. The high-contrast pairing works for virtually every occasion, from everyday elegance to high-impact statement looks. Stilettos themselves are already a bold choice; they’re sharp, sophisticated, and command attention. When you combine that dramatic shape with the crisp contrast of black and white, you get nail designs that are impossible to ignore.
What makes black and white stiletto nails so compelling is their versatility. You can go minimal and chic with simple geometric patterns, or dramatic with intricate designs that showcase real nail artistry. The neutral color palette means these designs work with any outfit, any season, and any personal style—which is exactly why so many people come back to them repeatedly.
Whether you’re looking for something trendy and modern, classically elegant, or artsy and detailed, there’s a black and white stiletto design that fits your vibe. These nail ideas range from easy-to-recreate patterns you can try at home to complex designs worth booking a professional appointment for. Let’s explore some of the most stunning ways to wear this iconic color combination on stiletto nails.
1. Classic Black and White Ombre Gradient
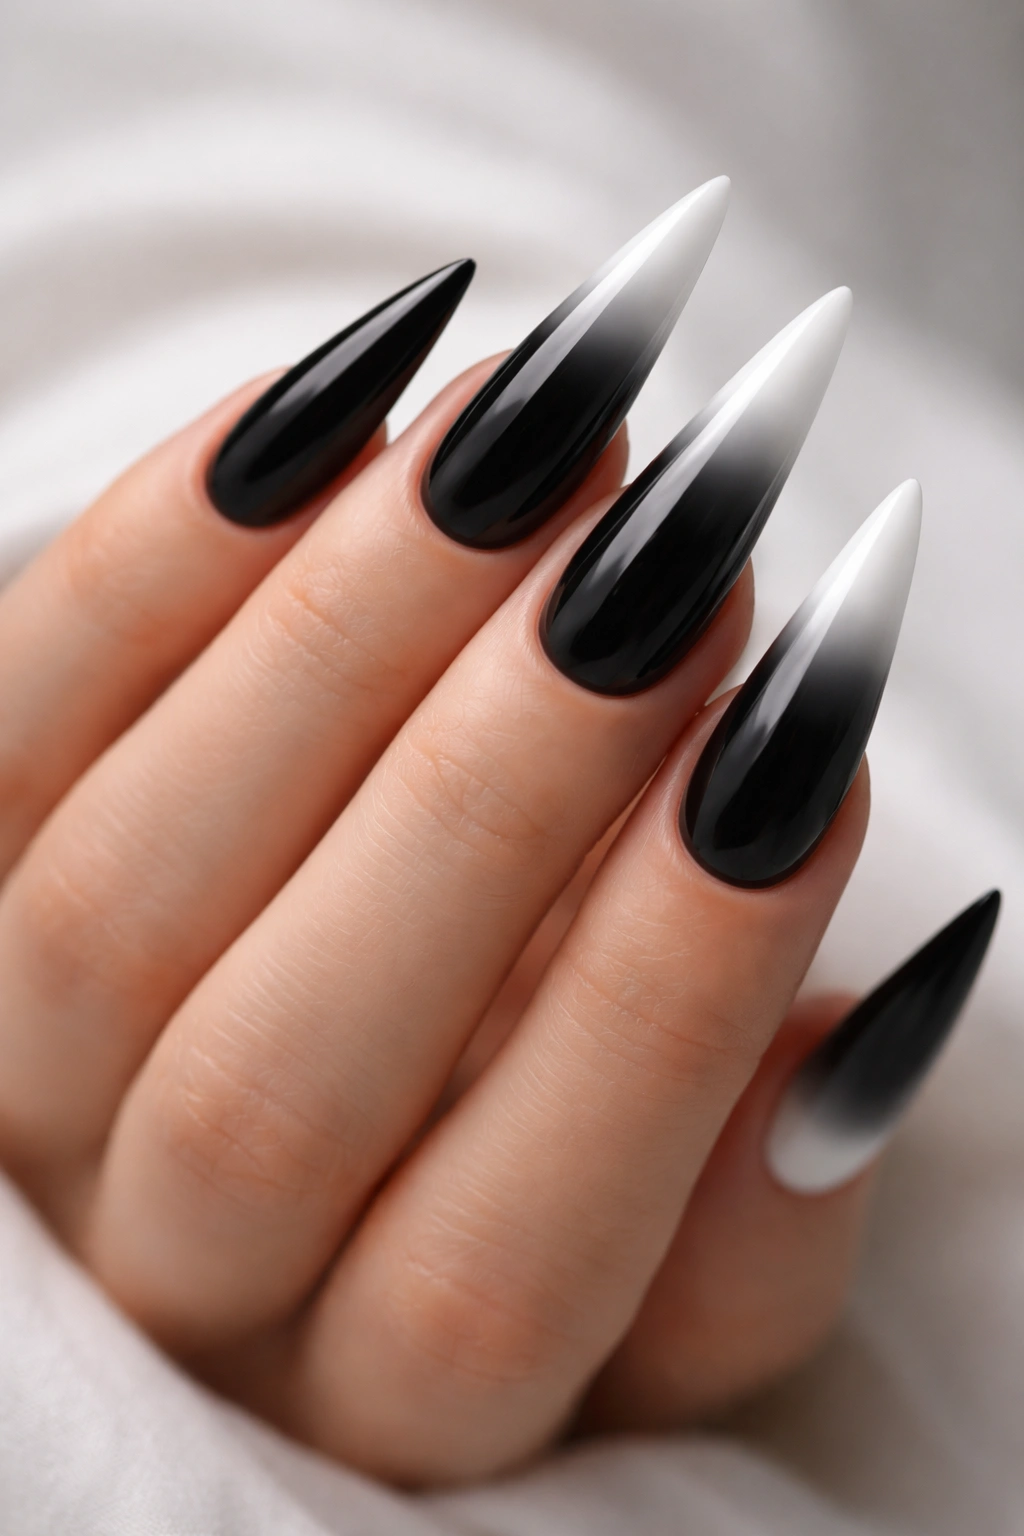
The ombre gradient design is all about that smooth, seamless fade from one color to another. With stiletto nails, starting with pure black at the base and transitioning to crisp white at the tip creates an incredibly elegant, elongated look that plays with the nail’s natural length. This design doesn’t require any complicated stamping or freehand artistry—it’s pure blending technique.
Why This Design Works So Well
The gradient effect instantly elongates the finger and makes the stiletto shape feel even more dramatic and refined. Black at the base provides grounding and sophistication, while the white tip creates a fresh, clean finish. This is the kind of design that works equally well for a business presentation or an evening out.
How to Perfect the Ombre
- Use a makeup sponge or a specialized nail sponge to gently bounce the colors together in the transition zone
- Apply the black polish first, then dab white on the sponge and lightly stipple it over the upper third, then blend with the sponge to create a gradient
- Seal everything with a glossy top coat—the shine enhances the gradient’s visual impact
- Practice on a practice nail or use the sponge technique multiple times to get the blend smooth
- A high-quality gel polish holds the gradient perfectly without it shifting or separating over time
Pro tip: Use a slightly damp sponge to prevent the polish from drying too quickly while you’re blending.
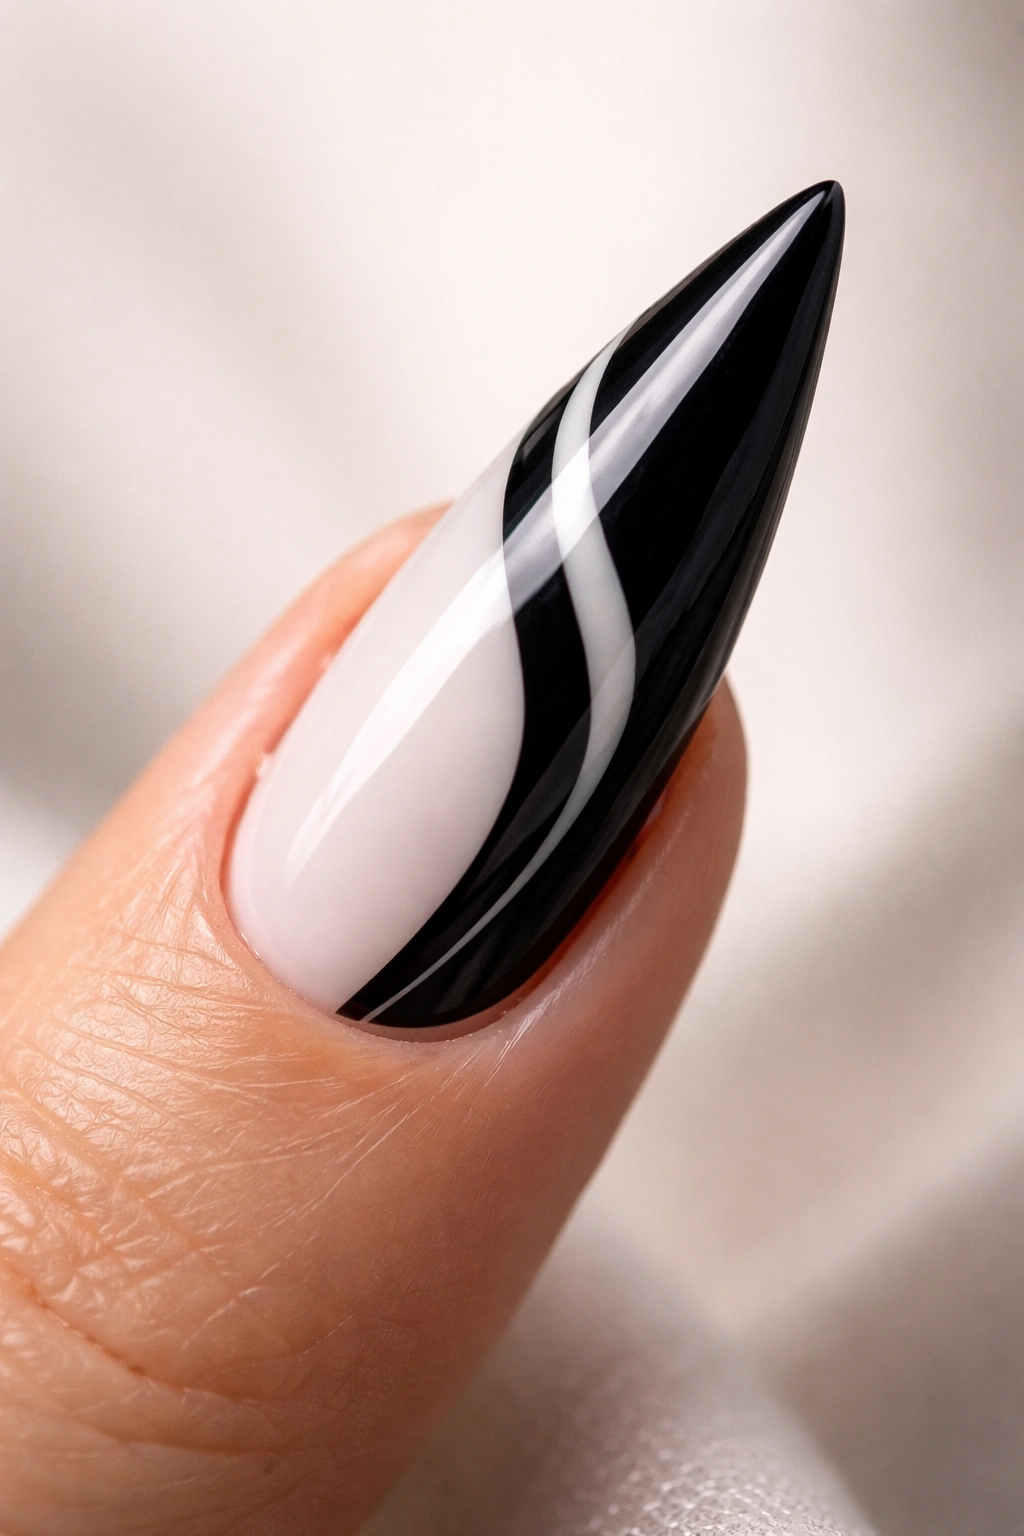
2. Bold Black and White Striped Pattern
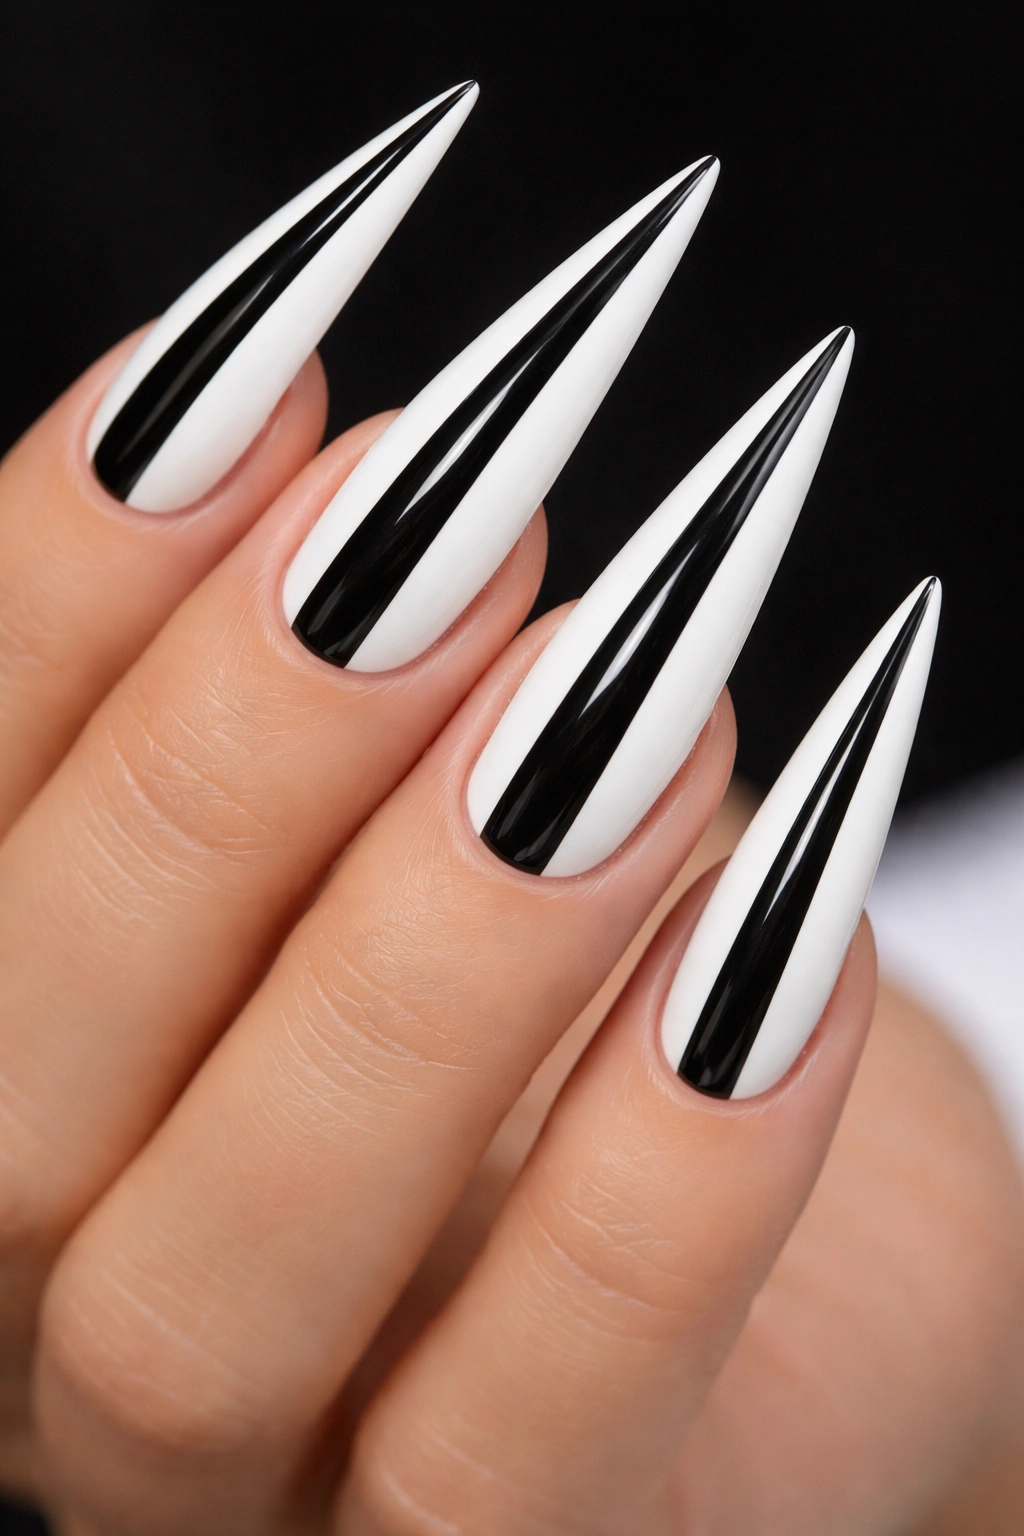
Stripes are graphic, modern, and endlessly appealing on stiletto nails. You can create bold vertical stripes that emphasize the nail’s length, diagonal stripes for movement and energy, or even a mix of stripe widths and angles for a more dynamic design. The key is keeping the lines clean and even.
Creating Impact With Stripes
Stripes inherently draw the eye downward, which is perfect for an already-long stiletto shape. Thin, evenly-spaced stripes feel elegant and minimalist, while thicker stripes or fewer of them feel bolder and more graphic. The contrast between black and white makes even simple stripes pop.
Stripe Execution Tips
- Use a thin striping brush or a striping tape to create perfectly straight lines
- Paint white as your base, then add black stripes for easier coverage and visibility
- Alternatively, use striping tape before applying polish for perfectly crisp, clean edges
- Keep stripes parallel and evenly spaced—uneven stripes will look accidental rather than intentional
- Seal with a high-shine top coat to make the stripes appear even more graphic and defined
Worth knowing: You can paint stripes in any direction—vertical elongates, diagonal adds movement, and horizontal creates a bold modern look.
3. Geometric Triangles and Shapes
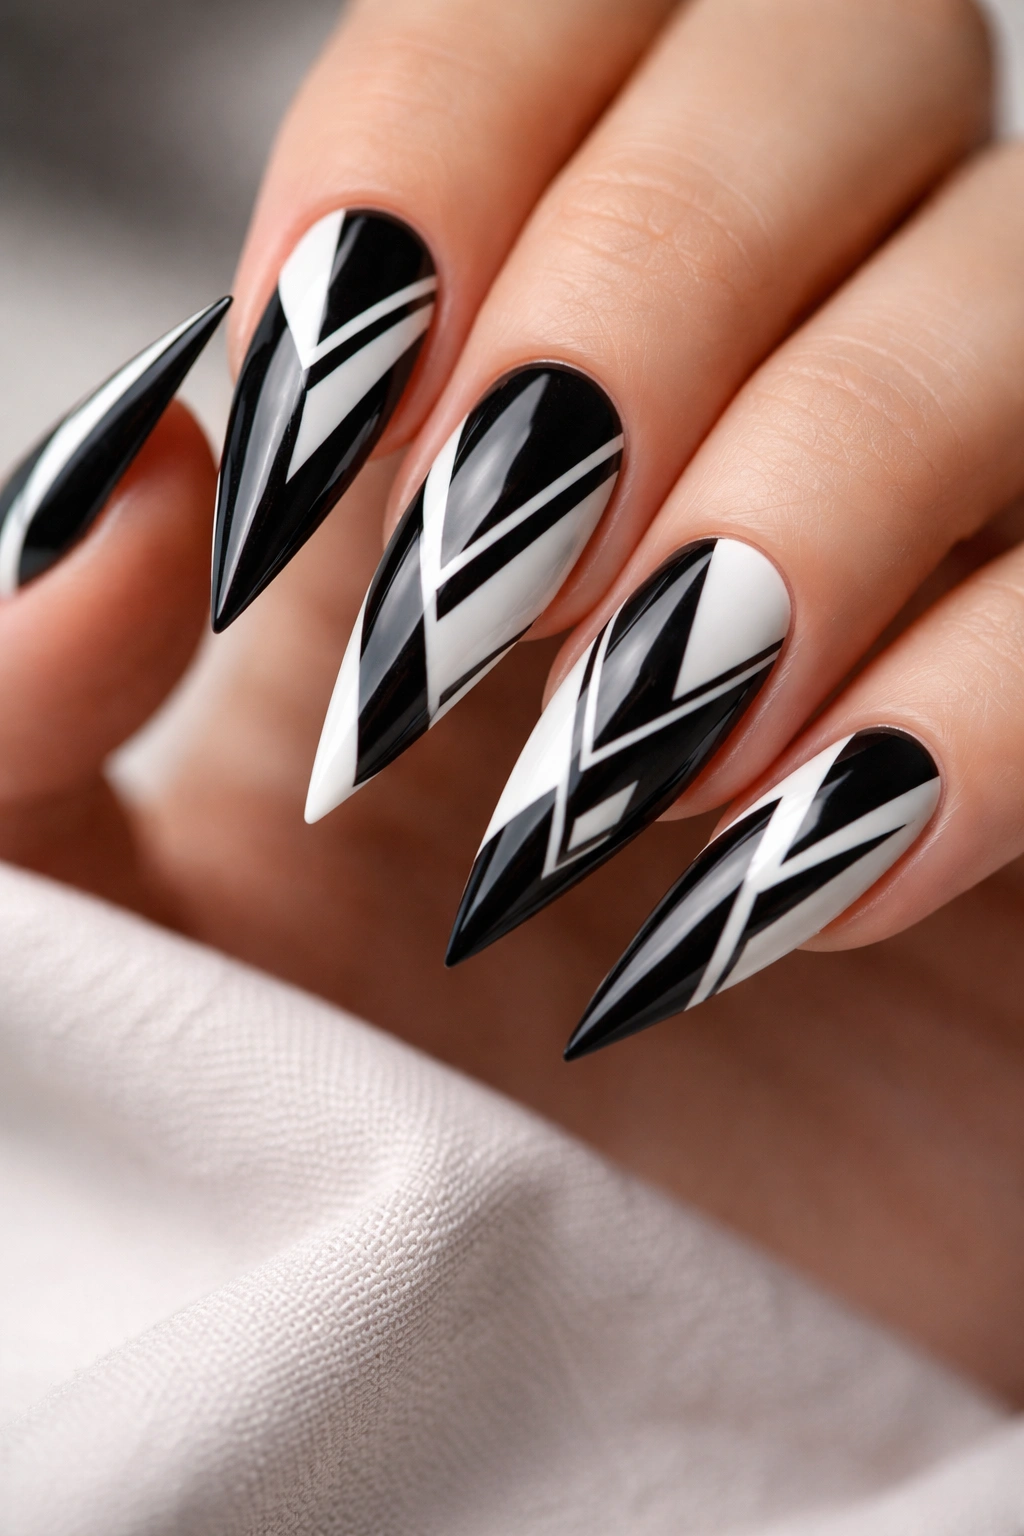
Geometric designs are having a major moment in nail art, and black and white is the perfect color palette for showcasing sharp angles and clean lines. Think triangles pointing downward, stacked geometric shapes, or a gradient of triangles that decrease in size as they move down the nail. These designs feel contemporary and artistic.
The Appeal of Geometric Minimalism
Geometric shapes inherently feel modern, intentional, and design-forward. They’re visually interesting without being overwhelming, and they work on stilettos because the clean lines complement the nail’s sharp point. The black and white palette keeps geometric designs looking sophisticated rather than playful.
Creating Geometric Designs
- Use a striping brush or thin brush for precise lines and angles
- Mark faint guidelines with a white pencil or light pencil before painting to ensure your shapes are even
- Paint negative space designs (white shapes on black background) for maximum contrast
- Combine different geometric shapes on different nails for a cohesive manicure with variety
- Seal the design with a matte or glossy top coat depending on the mood you want
Insider note: Geometric designs photograph beautifully, which is why they’re so popular on social media and in nail inspiration boards.
4. French Ombre with Black and White Twist
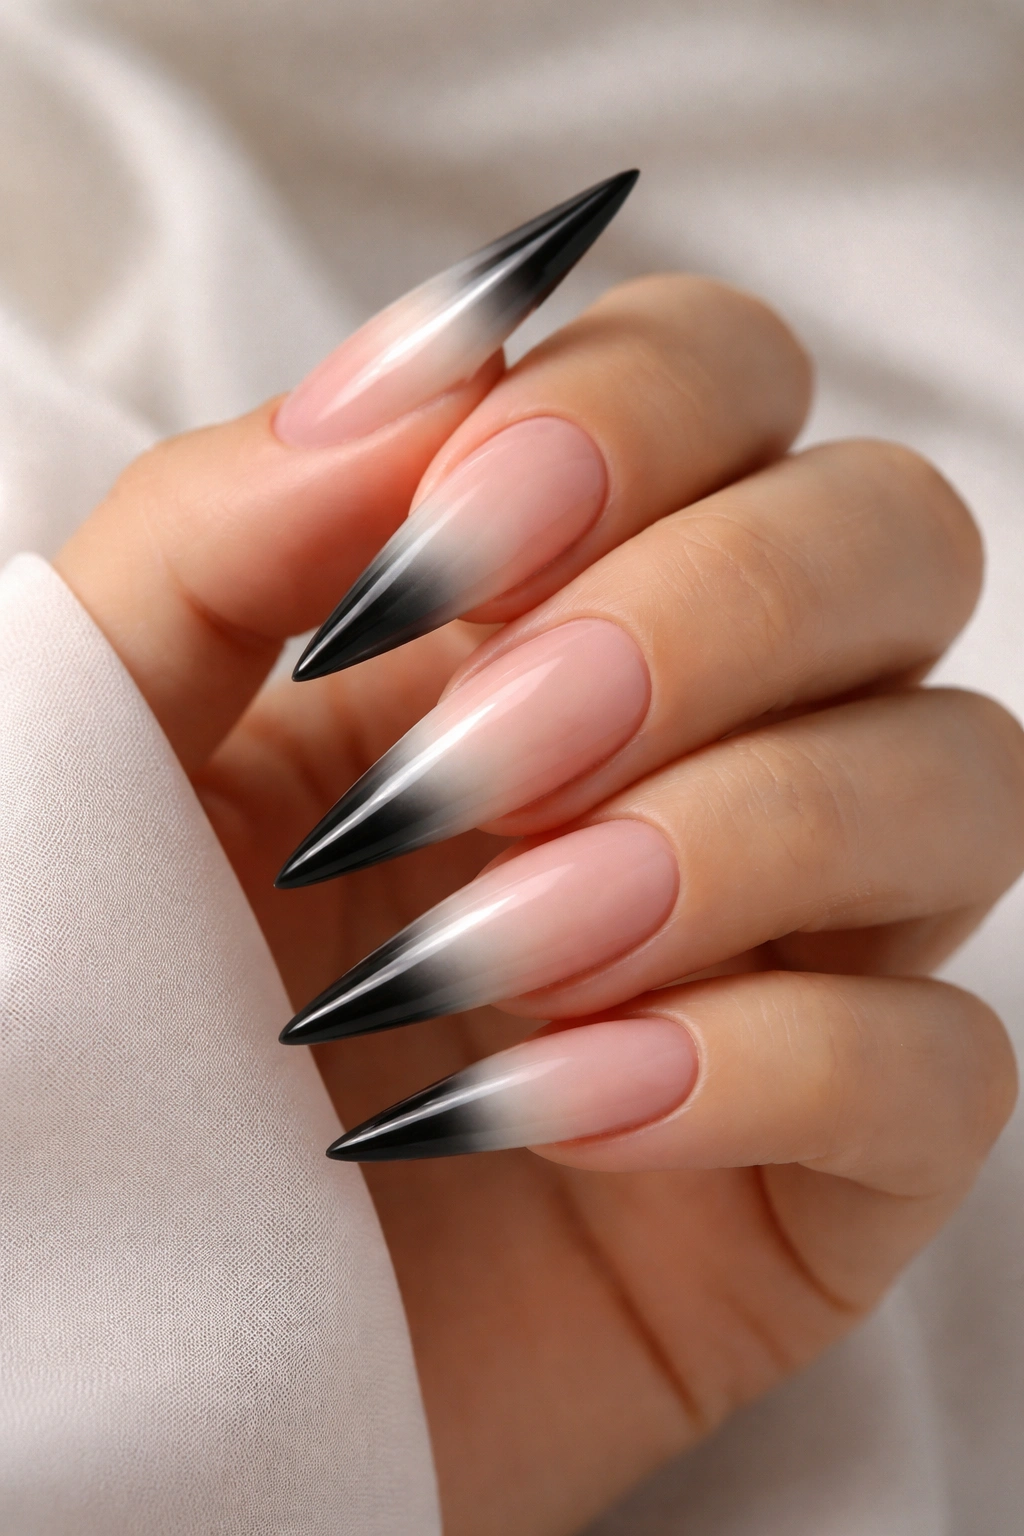
This is a modern spin on the classic French manicure. Instead of a thin white tip, you’re creating a softer ombre effect that transitions from white to black gradually across the tip. It’s refined, slightly unexpected, and absolutely wearable for any occasion.
Why Ombre French Is Fashion-Forward
The traditional French manicure can feel overdone, but replacing the stark white line with a gradient makes it feel current and thoughtfully designed. The softer transition is more elegant than a hard line, and it gives you more creative flexibility in how you blend and place the colors.
Technique for Ombre French
- Start with a nude or translucent pink base for a traditional French feel
- Create the ombre effect starting about halfway down the nail, blending white and black toward the tip
- Use a sponge to create the gradient for the smoothest, most professional result
- This design works best when the black doesn’t extend all the way to the very tip—leave just a whisper of white at the point
- The gradient should be visible but not too dramatic
Pro tip: The longer and more tapered your stilettos are, the more dramatic and stunning this ombre effect will appear.
5. Checkerboard Pattern in Black and White
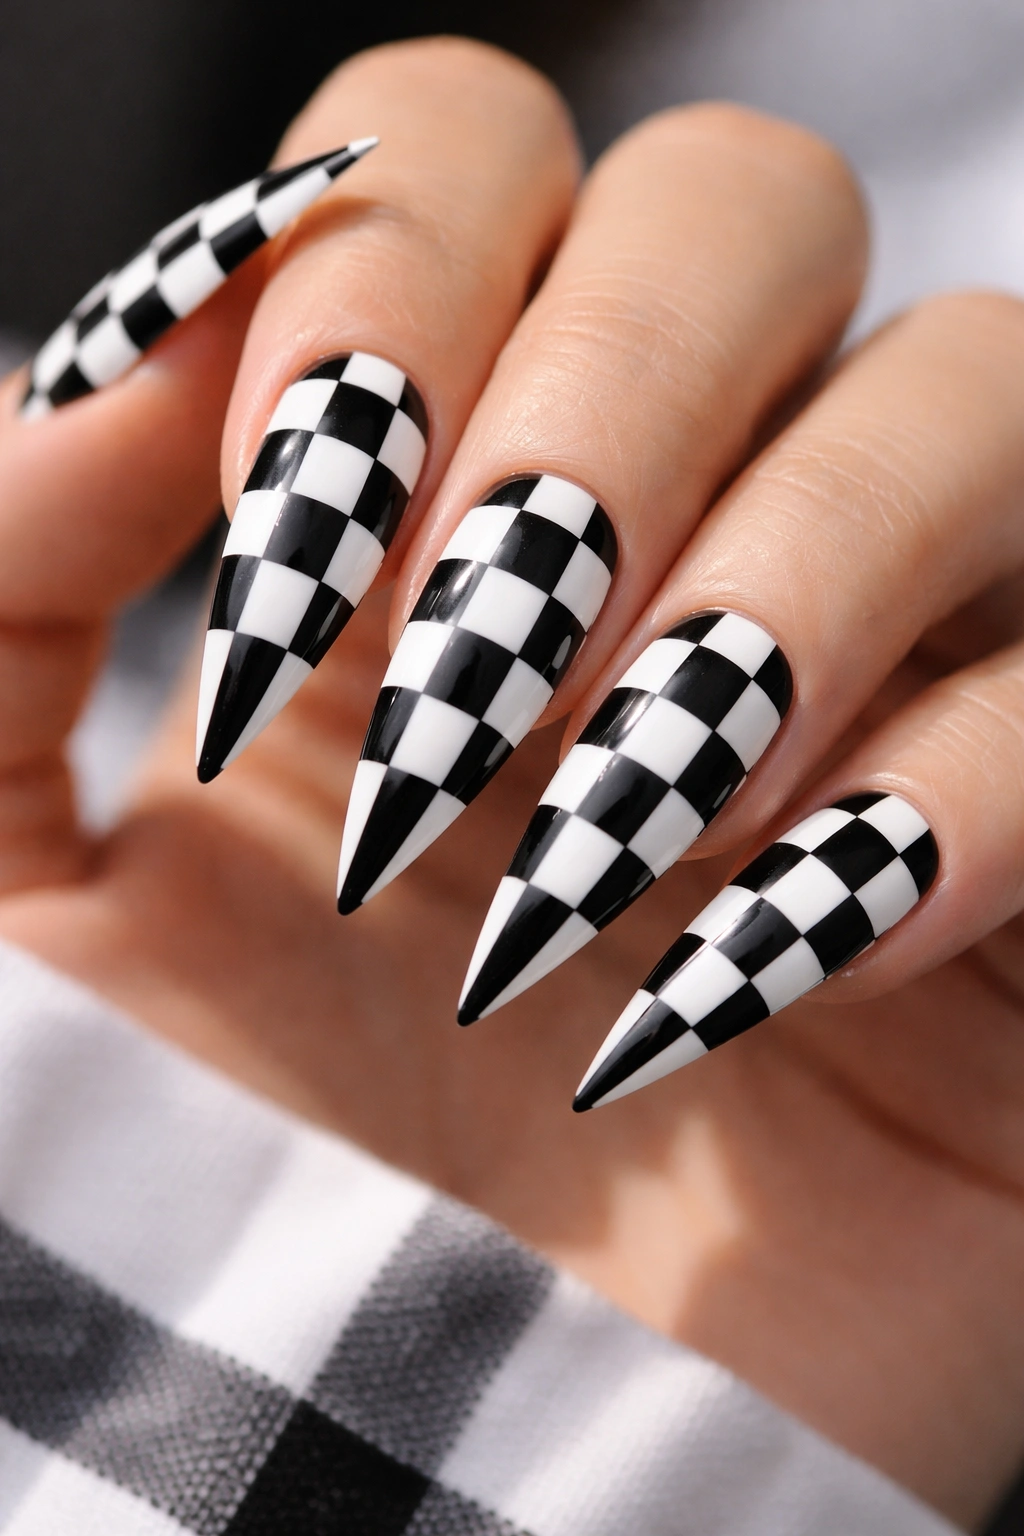
Checkerboard is a bold, graphic pattern that feels retro-modern when done in black and white on stiletto nails. The key is keeping your squares even and your lines crisp. This design makes a statement and shows off precision and patience in nail art execution.
The Charm of Checkerboard Design
Checkerboard brings instant visual interest and a slightly edgy, fashion-forward vibe. It’s the kind of pattern that people will definitely notice and comment on. On stilettos, the pattern wraps around the nail and creates a 3D effect that’s more striking than it would be on shorter nails.
Checkerboard Execution
- Decide on your square size and lightly map out your grid with a pencil or fine-tip marker
- Paint your base color (let’s say white), then carefully paint black squares in a checkerboard pattern
- Use a thin striping brush or toothpick for precision
- Alternatively, use striping tape to create the grid before painting
- This design requires patience and a steady hand—rushing it will show
Worth knowing: Checkerboard works best with slightly smaller squares rather than large ones, which can look disproportionate on a stiletto’s narrower nail bed.
6. Marble Effect with Black Veins on White
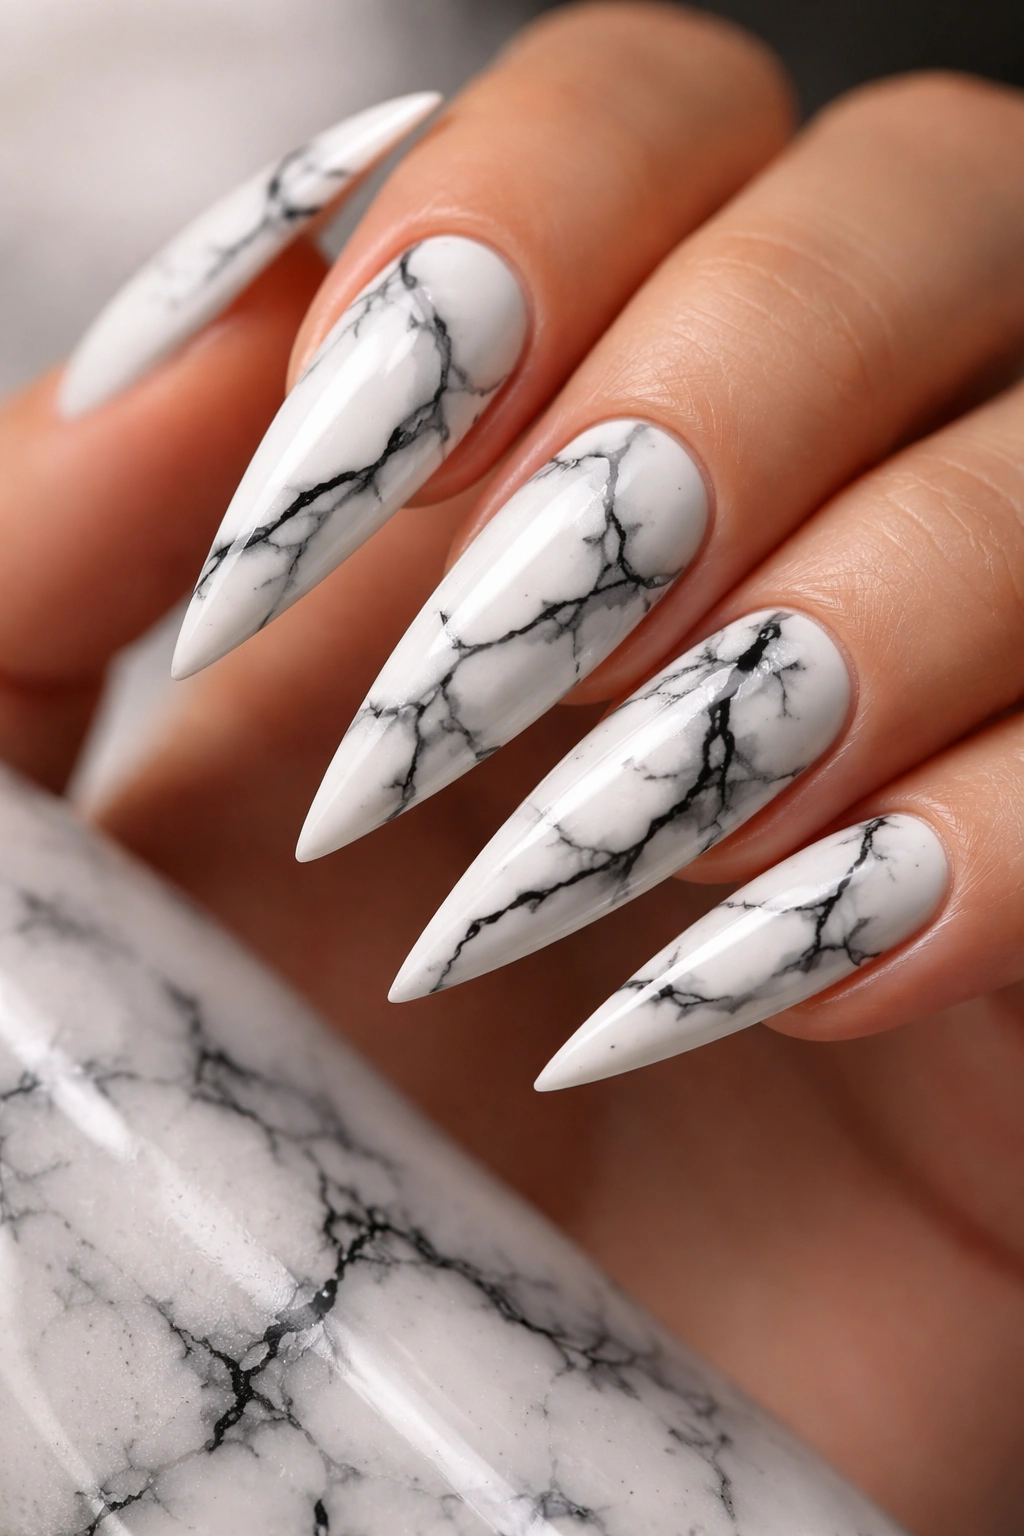
Marble nails create an elegant, sophisticated look that feels luxurious and complex but is surprisingly achievable. Using white as your base and creating black marble veins gives you a high-contrast, striking design. The beauty of marble is that it doesn’t need to be perfect—the irregular, organic veins are part of the charm.
Why Marble Feels Luxury
Marble is associated with high-end design, elegance, and timelessness. When you recreate it on nails, it instantly elevates your manicure to look intentional and expensive. Black veins on white marble nails are especially dramatic and photograph beautifully.
Creating Marble Veins
- Start with a smooth white base and let it dry completely
- Using thin black paint and a fine brush, create organic, irregular lines that meander across the nail
- Some veins should branch off from main lines, just like real marble
- Vary the thickness of your lines—thicker in some places, thinner in others
- Seal with a glossy top coat to enhance the marble’s natural shine
- You can add a touch of gray for depth if desired, but black and white alone is stunning
Insider note: If your veins aren’t perfect, it actually adds to the marble’s authenticity—no two pieces of real marble are identical.
7. Negative Space Design with Cutouts
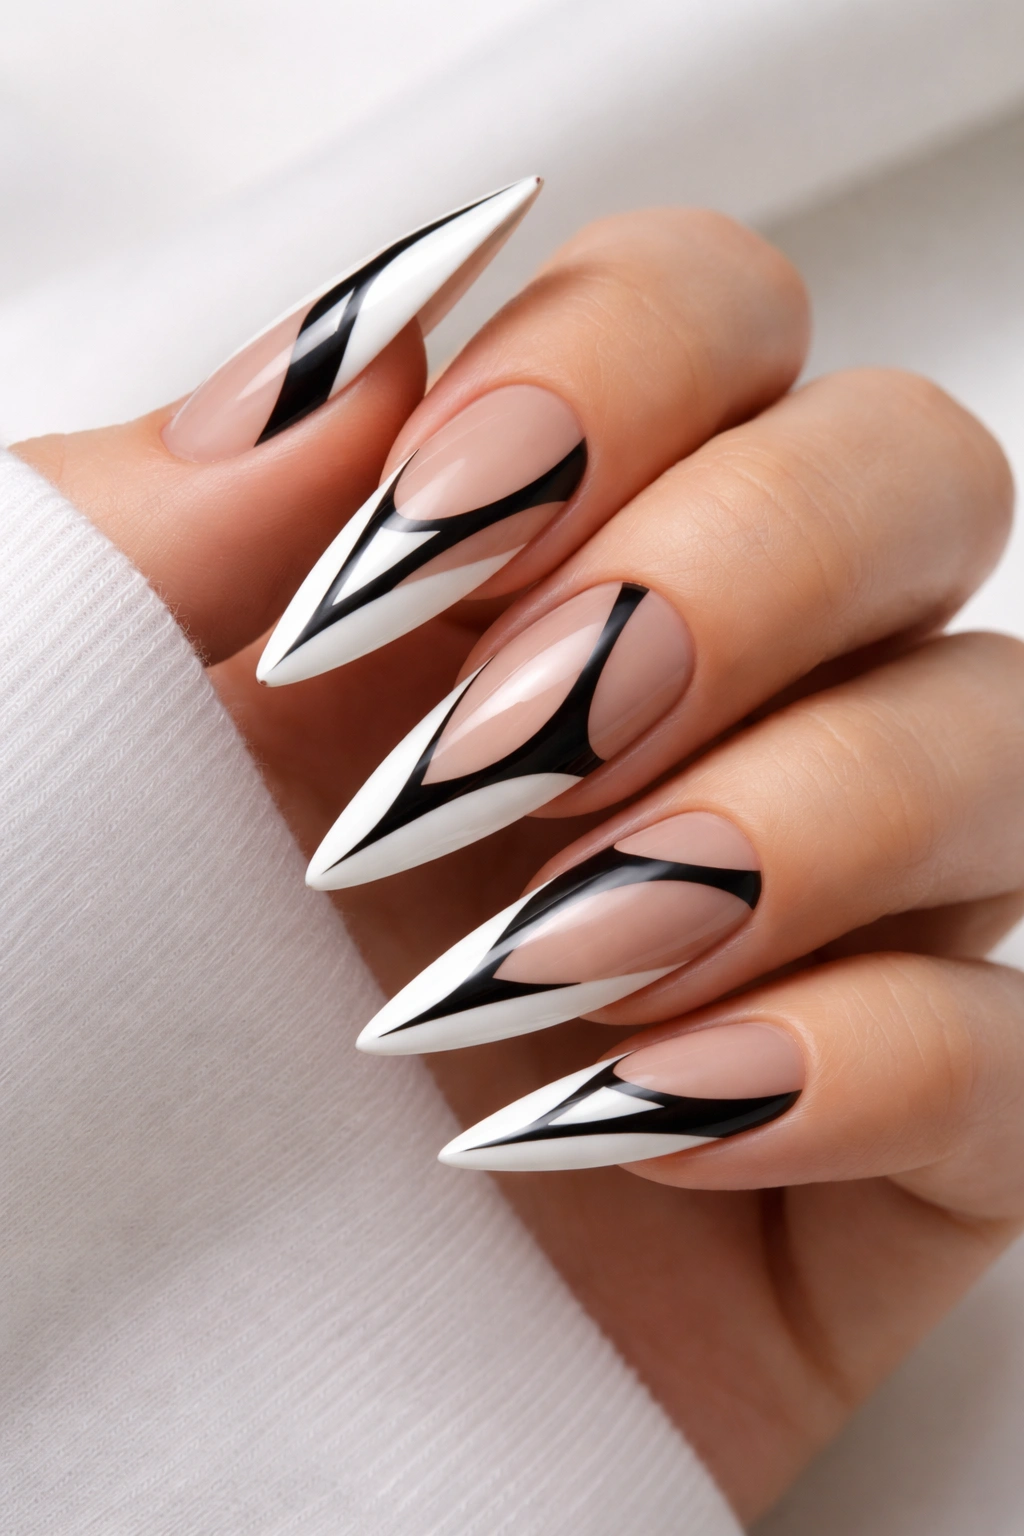
Negative space designs cleverly use the base color (your nail color or skin tone) as part of the design rather than covering it completely. Imagine white nails with black lines creating shapes that frame white space within them, creating an optical illusion effect. This is artistic, modern, and uniquely sophisticated.
The Visual Impact of Negative Space
Negative space designs feel intentional and gallery-like. They require planning and precision, which means they immediately read as more thoughtful than random patterns. On stilettos, negative space designs can create stunning geometric or organic shapes that draw the eye.
Creating Negative Space
- Plan your design first—sketch it out on paper or digitally
- Use thin striping brushes or nail art brushes for precision
- Paint black lines that create shapes, deliberately leaving white or natural nail visible inside those shapes
- Think about balance—the negative space should be as intentional as the painted areas
- Seal carefully to preserve all your hard work
Pro tip: Negative space designs appear more artistic and less chaotic when you focus on just one or two shapes per nail rather than filling the entire nail with patterns.
8. Splatter or Abstract Art Effect
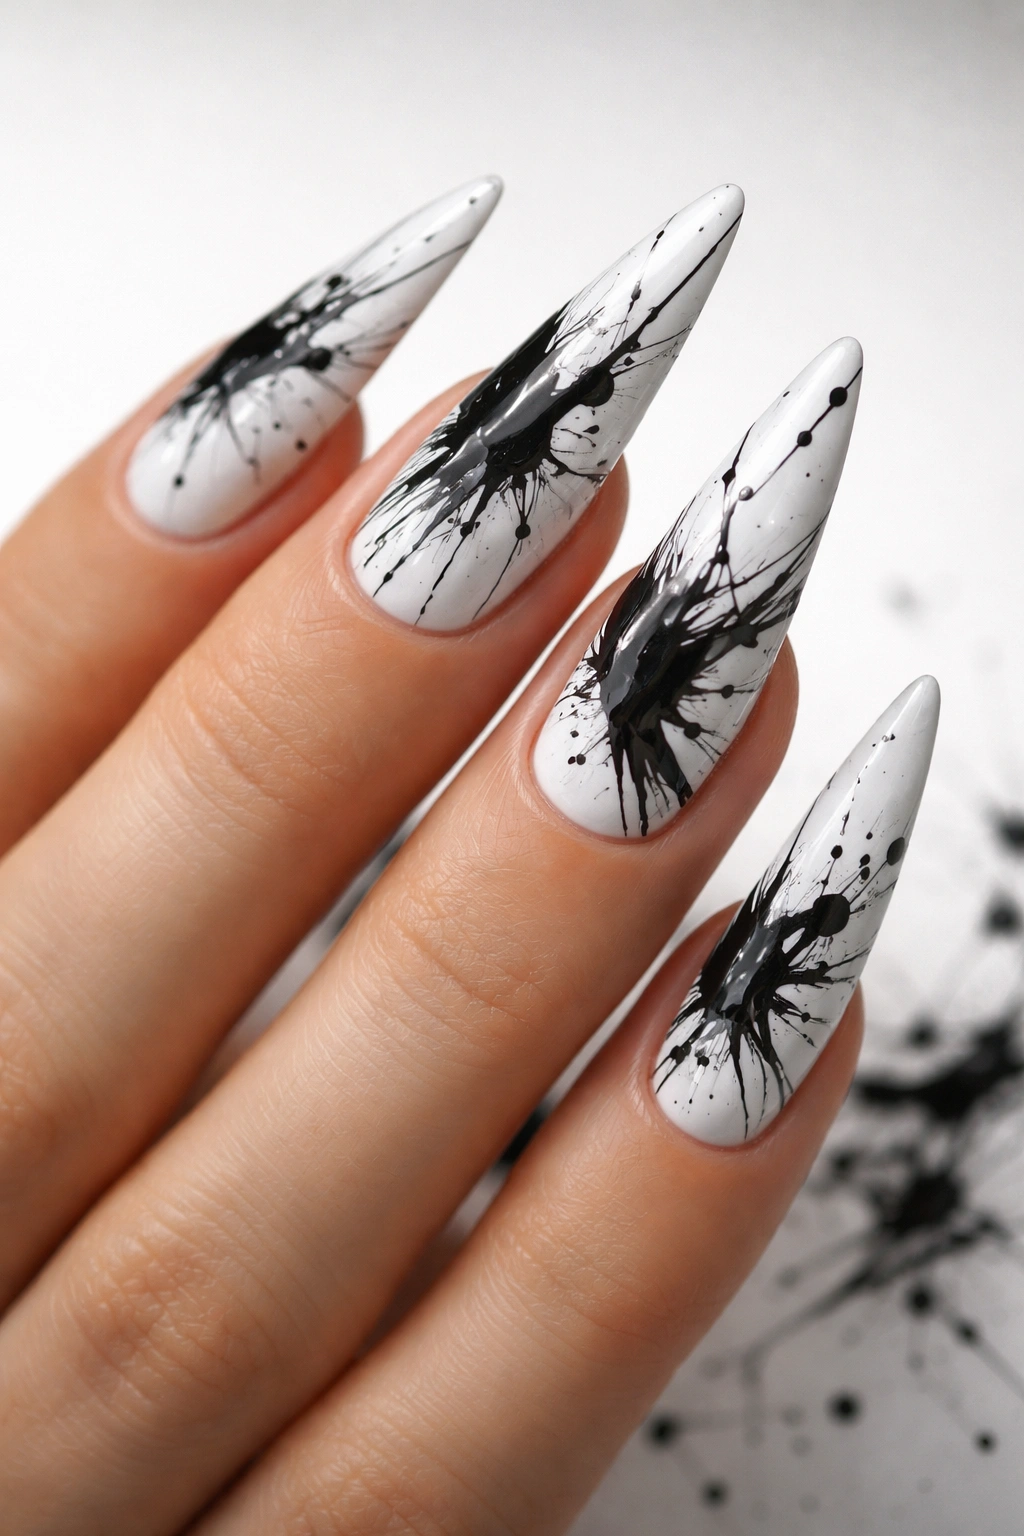
For the artistic and creative, a splatter or abstract art design brings personality and spontaneity to black and white stiletto nails. This isn’t about precision—it’s about energy and movement. Dripping black polish over white nails, flicking a brush, or creating abstract brushstrokes gives you a look that feels unique and expressive.
The Beauty of Abstract Nail Art
Abstract designs are wonderfully forgiving because imperfection is part of the aesthetic. You’re creating something one-of-a-kind that no one else will have. On stilettos, abstract designs feel artistic and high-fashion rather than messy.
Creating Abstract and Splatter Designs
- Start with a white base and let it dry completely
- Using a toothpick, thin brush, or specialized splatter brush, create black marks across the nail
- You can splatter intentionally or drip black polish for organic patterns
- Seal with top coat to prevent the abstract art from smudging
Worth knowing: Abstract designs are perfect if precision isn’t your strength—the “imperfections” make them interesting.
9. Minimalist Dots and Accents
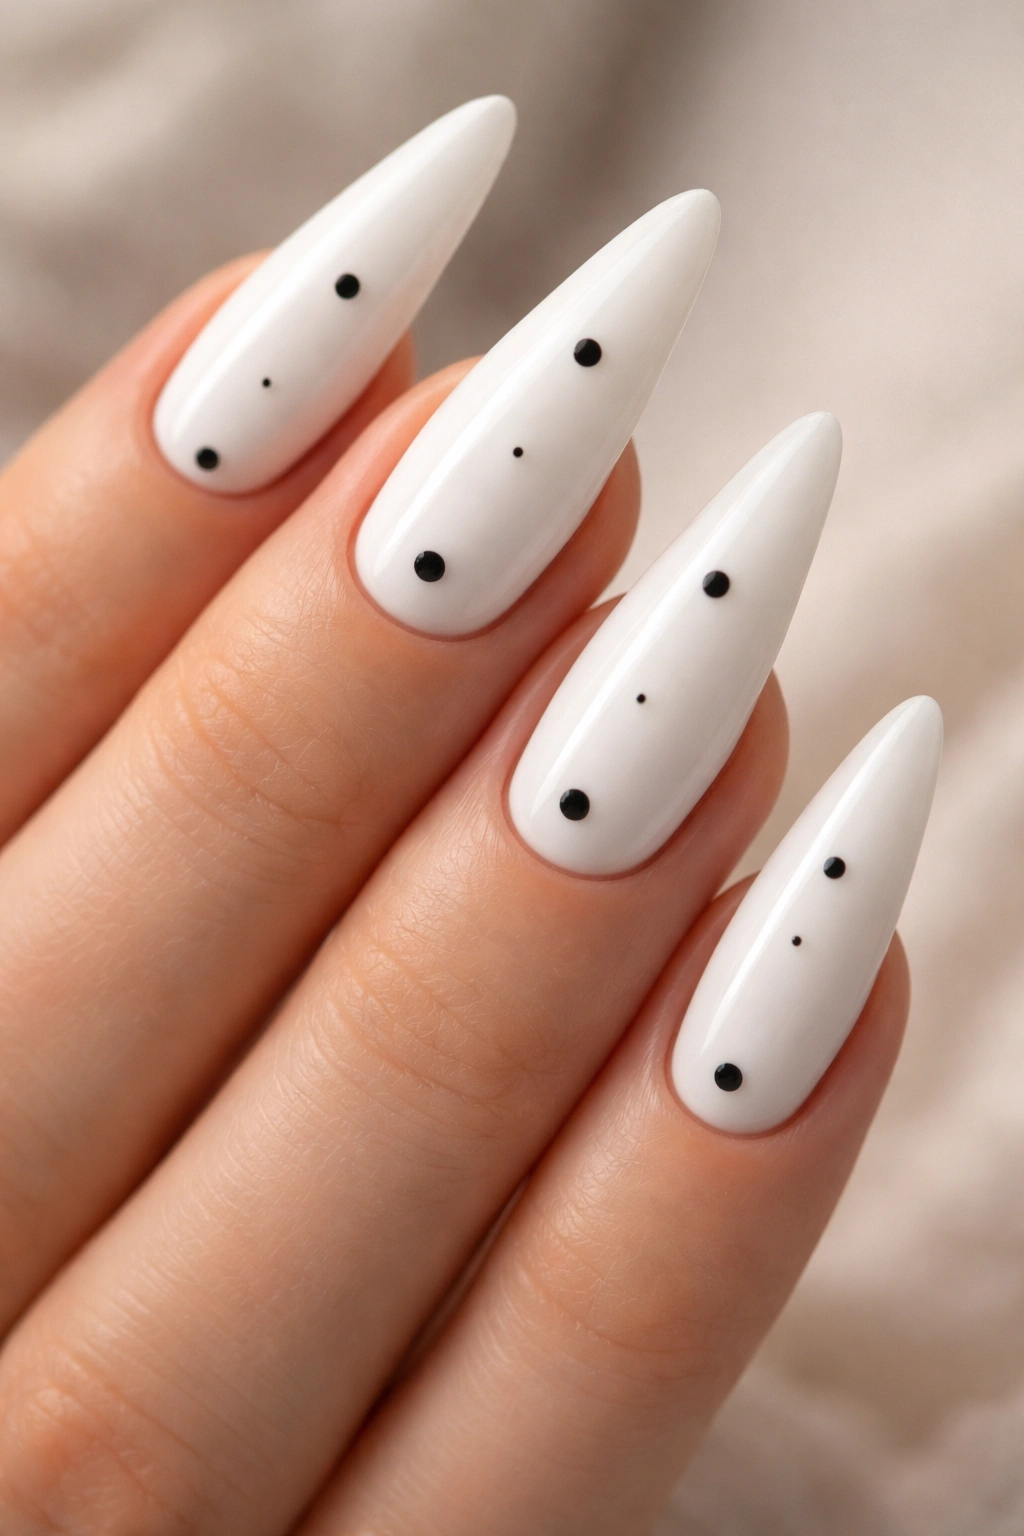
Sometimes less is more. A minimalist design featuring just a few black dots on white nails or white dots on black nails has understated elegance. You could do a single accent nail with a cluster of dots, or space dots evenly across all nails. The simplicity is what makes it striking.
Why Minimal Dots Work
Minimalist designs feel intentional and design-forward. They’re easy to create, quick to apply, and incredibly wearable for any occasion. A few perfectly placed dots create visual interest without being overwhelming. It’s the jewelry of nail art—less is more, and quality over quantity.
Creating Dot Designs
- Use a dotting tool (or the end of a bobby pin) to create even, circular dots
- Practice on paper first to get a consistent size and pressure
- Space dots evenly for a balanced, intentional look
- You can arrange dots in patterns (a vertical line, scattered randomly, or clustered on an accent nail)
- Seal with top coat to protect the dots
Insider note: Tiny dots are harder to control than you’d think—practice a few times before committing to your manicure.
10. Leopard Print in Black and White
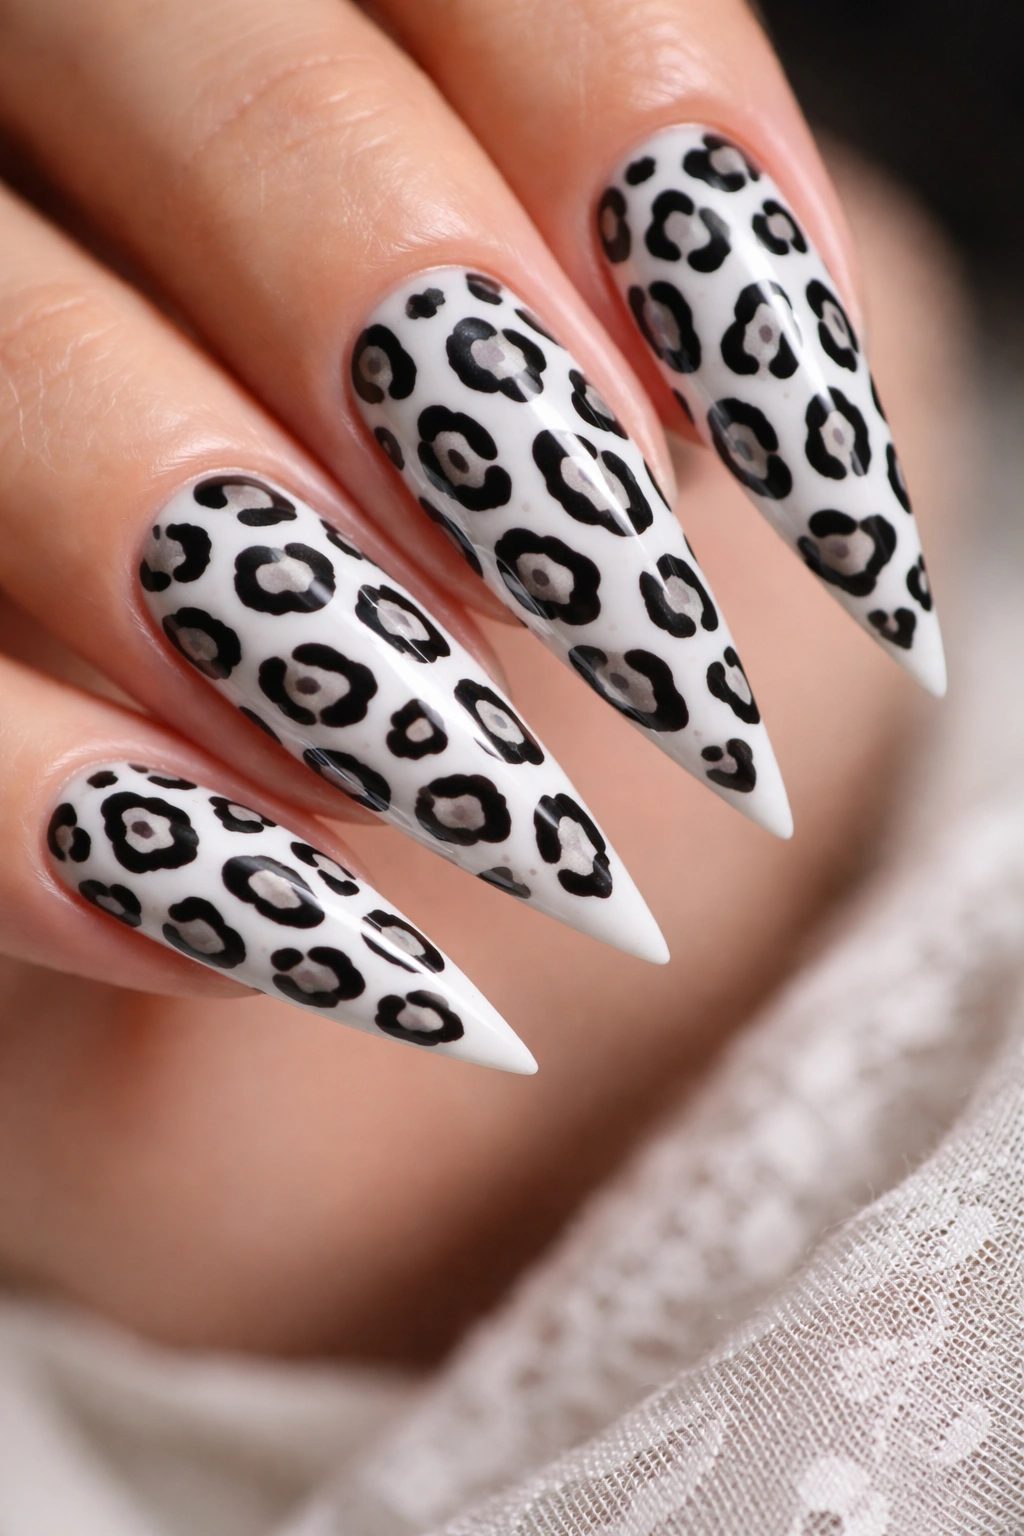
Animal prints are timeless, and a black and white leopard print gives you something that works year-round while remaining sophisticated. Leopard print might feel bold, but the black and white palette keeps it refined and elegant. Each spot can be imperfect, which makes this design very doable at home.
Leopard Print on Stilettos
Leopard print brings attitude and fashion-forward style. Black and white leopard is more refined than gold and brown leopard, making it suitable for professional settings and high-fashion scenarios. The spots naturally follow the curve of your nails, especially on the pointed stiletto shape.
Creating Leopard Print
- Start with a white base
- Using a thin brush, paint black outlines of spot shapes, then fill them in
- Leave small gaps between spots (real leopard spots aren’t touching)
- Spots don’t need to be identical—variation looks more natural
- Add smaller spots within or near larger spots for dimension
- Seal with glossy top coat to enhance the print
Pro tip: Practice on one nail first. Once you nail the spot pattern, you can replicate it on the remaining nails with more confidence.
11. Half-and-Half Design Split Down the Middle
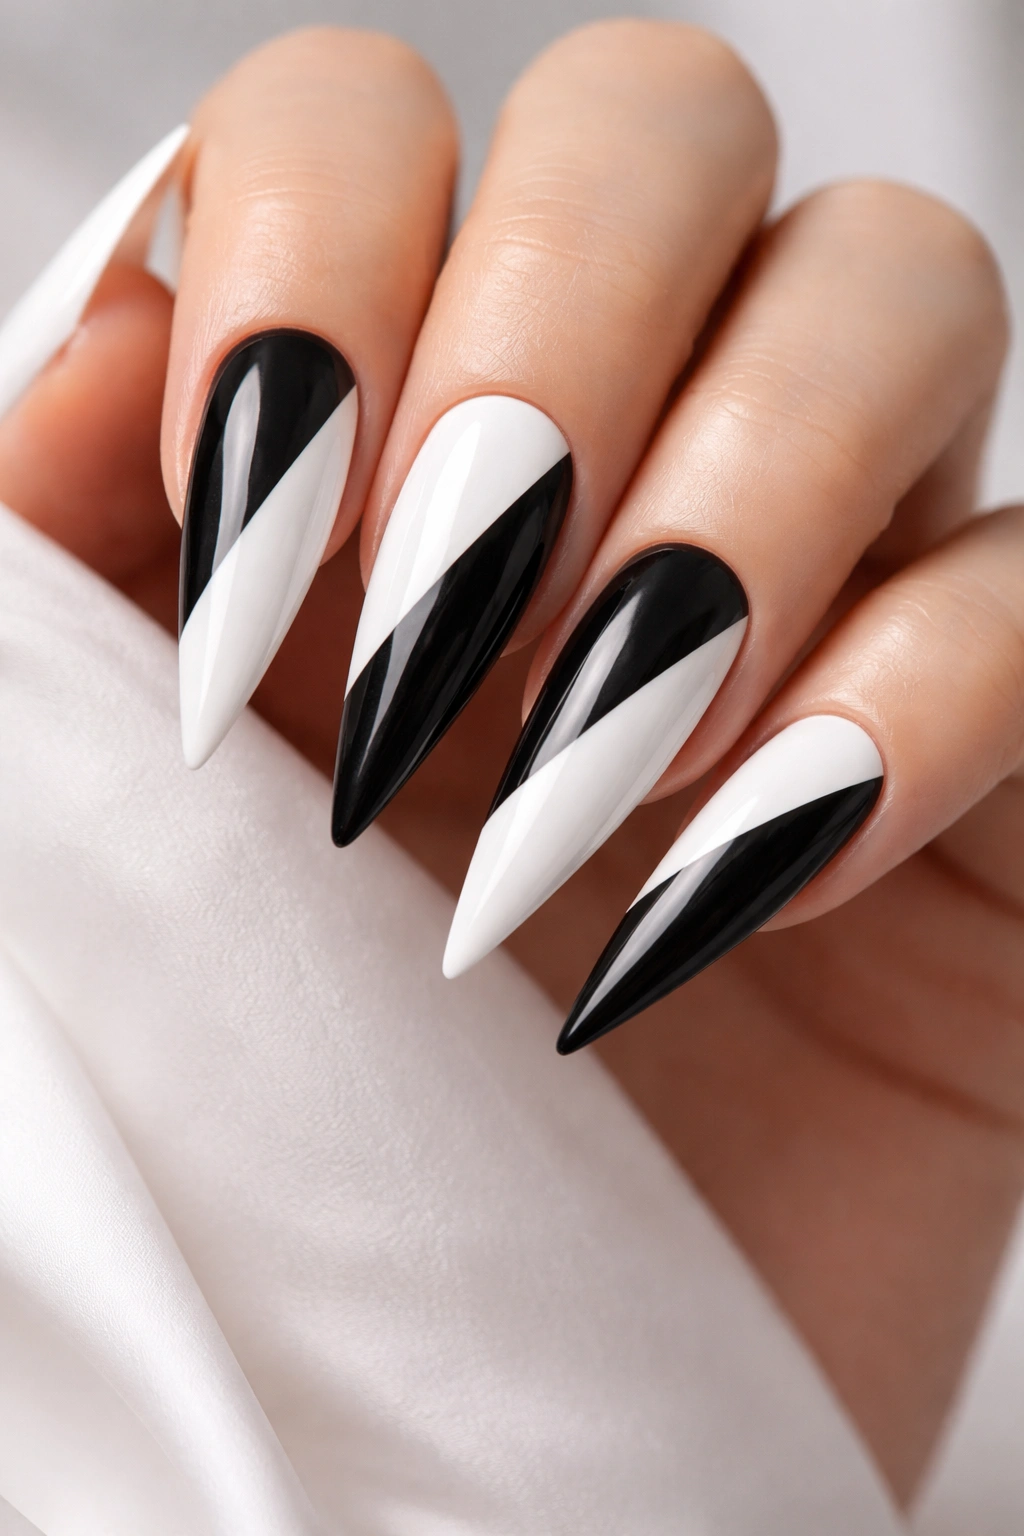
A bold design where half the nail is black and half is white (divided vertically, horizontally, or diagonally) creates stark, graphic contrast. You could do a clean diagonal split, a vertical line down the middle, or even a curved division. It’s modern, striking, and surprisingly elegant.
The Power of Bold Division
When you split a nail into two distinct color zones, you create a striking visual that’s impossible to miss. Half-and-half designs feel intentional, modern, and fashion-forward. The geometric simplicity is what makes them so effective.
Creating Half-and-Half Nails
- Decide on your division line (vertical, horizontal, diagonal, or curved)
- Use striping tape or a thin brush to paint the line precisely
- Paint one half one color, let it dry, then paint the other half
- Ensure the line is clean and crisp for maximum impact
- Seal with top coat
Worth knowing: A diagonal split from upper left to lower right (or vice versa) feels more dynamic and interesting than a simple vertical split.
12. French Tips with Black Accent and White Base
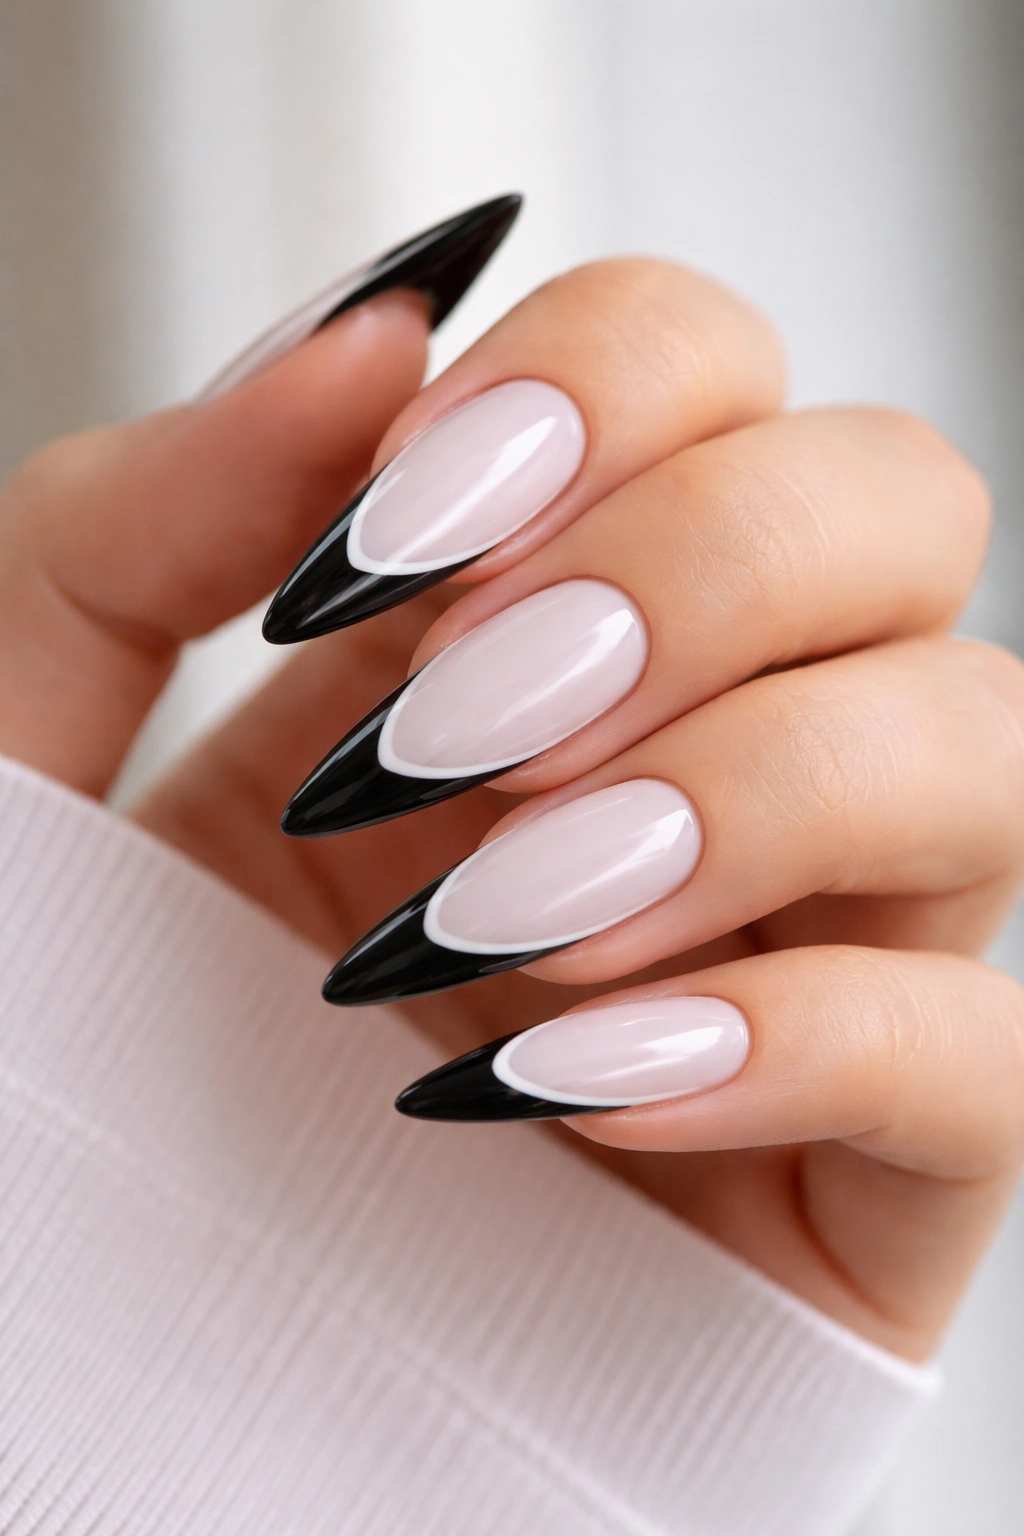
A modern take on the French manicure using white nails with a dramatic black tip creates a sophisticated, wearable design that feels both classic and current. You can make the black tip thin or thick depending on your preference, and you can add a thin white line between the white and black for extra definition.
Why Black French Tips Stand Out
Black French tips feel more modern and edgy than traditional white tips, but they’re still refined and appropriate for any setting. The contrast between the white base and black tip is striking without being too bold. It’s a design that bridges classic elegance and contemporary style.
Executing Black French Tips
- Paint your base with white polish and let it dry completely
- Using a striping brush or French tip guide, paint a clean black line across the tip
- You can make the black section thick (covering the last quarter of the nail) or thin (just a crisp line)
- Add a thin white or nude line between the white and black for extra polish and definition
- Seal with high-shine top coat
Insider note: The thickness of your black tip can change the vibe entirely—thin tips feel more classic, thicker tips feel more modern and bold.
13. Lace or Filigree Pattern
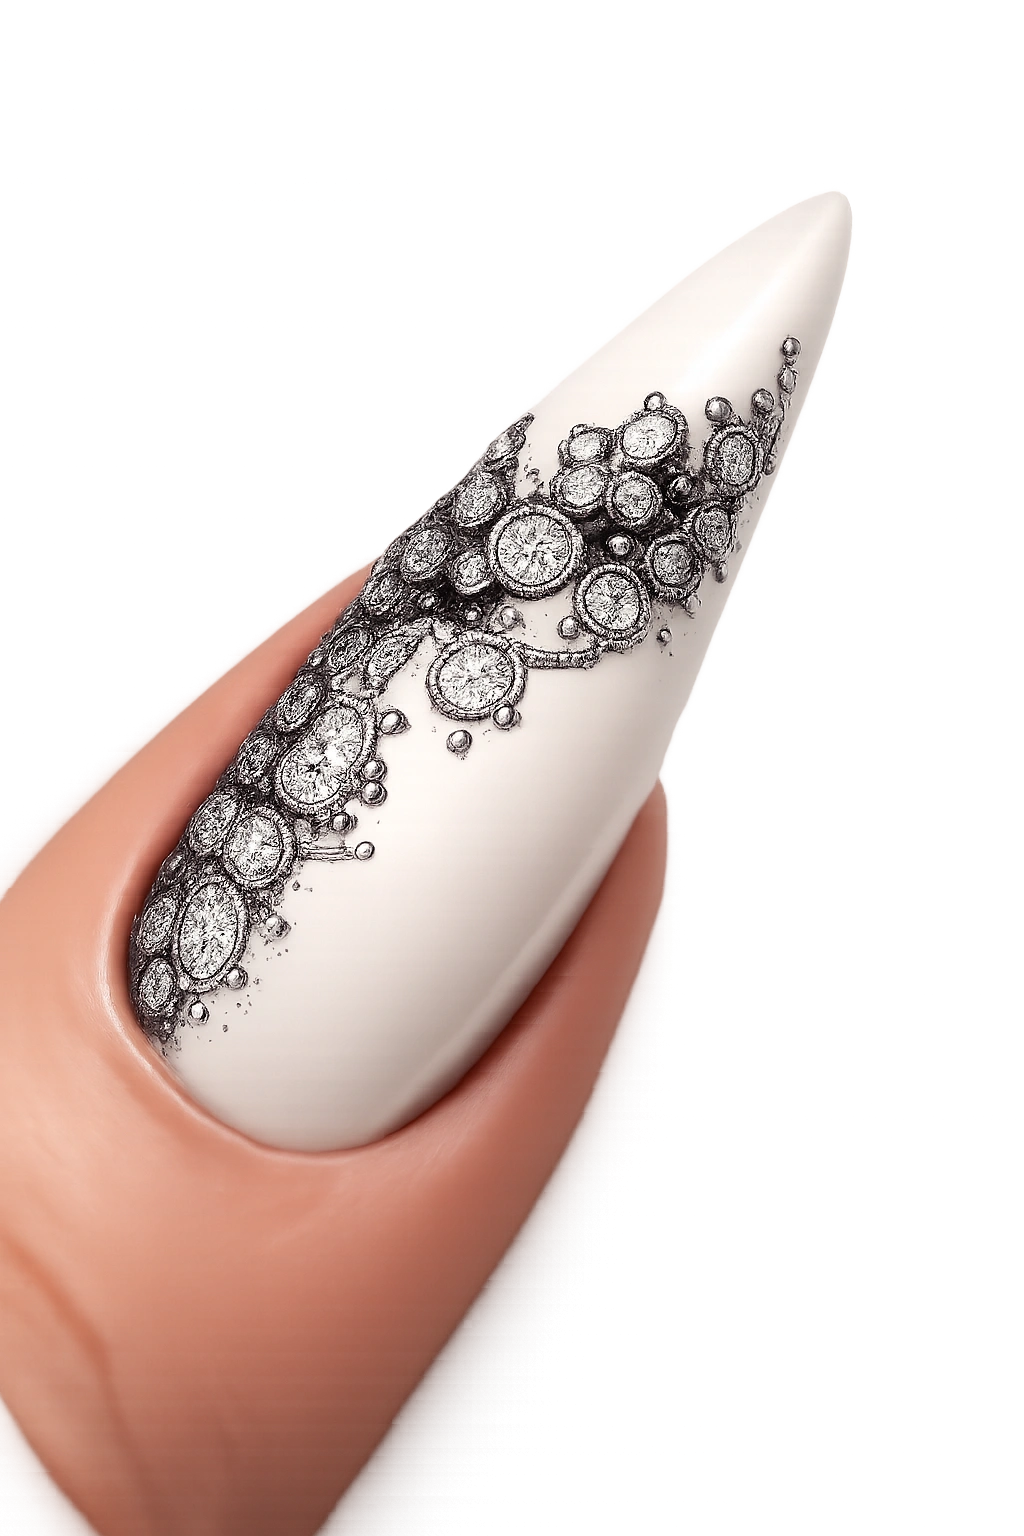
Delicate lace patterns recreated in black on white nails create an intricate, elegant design that feels romantic and sophisticated. This requires patience and a steady hand, but the result is stunning. You’re essentially creating tiny, interconnected lines and loops that mimic lace fabric.
The Elegance of Lace Designs
Lace brings sophistication, femininity, and artistry. When executed in black and white, lace patterns are both timeless and very wearable. This design shows serious nail art skill and dedication, which makes it perfect if you want your nails to be a talking point.
Creating Lace Patterns
- Start with a white base
- Use the thinnest brush possible to paint delicate black lines
- Create repeating patterns of loops, curves, and details that mimic actual lace
- Focus on one nail as a template, then replicate the pattern on other nails
- Seal carefully with top coat
Pro tip: Look at actual lace patterns for inspiration and try to recreate a simplified version—perfectionism isn’t necessary; the general effect is what matters.
14. Yin-Yang Symbol or Dual-Color Swirl
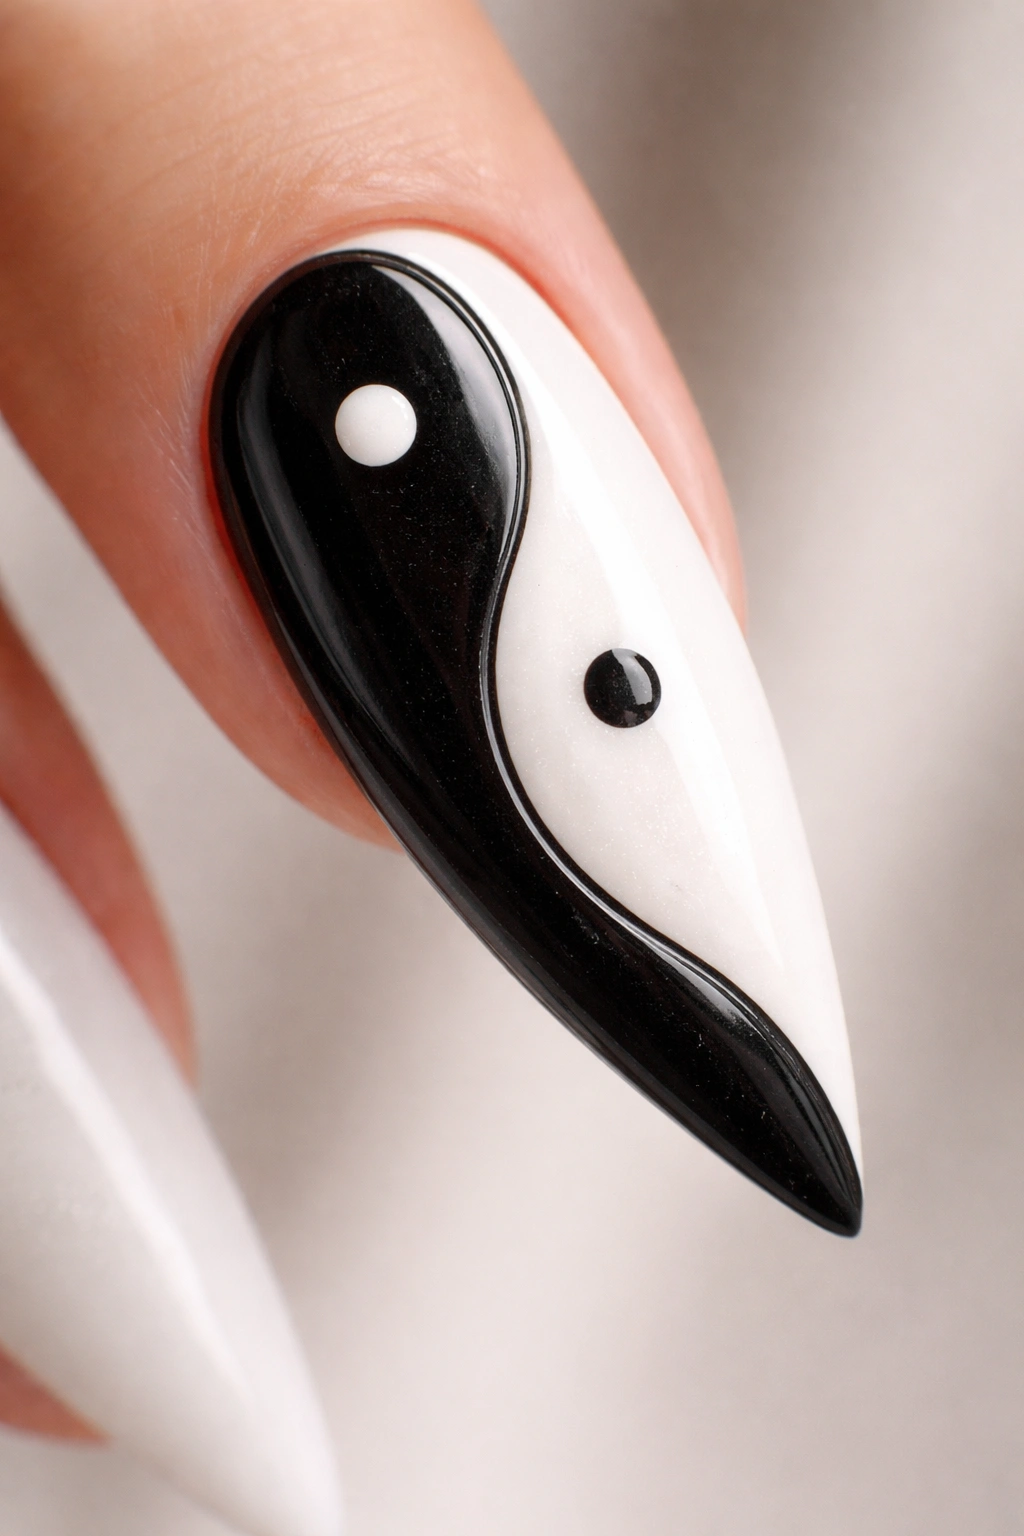
The yin-yang symbol is iconic, balanced, and works beautifully on nails. One half black, one half white with the characteristic curves and opposing dots creates a design that’s deeply meaningful, visually striking, and very wearable. You could do a full yin-yang on an accent nail or create a smaller version on each nail.
Symbolism and Style
The yin-yang represents balance, duality, and harmony. As a nail design, it’s artistic, meaningful, and immediately recognizable. The curves and organic flowing shape of the symbol feel elegant on stiletto nails, and the black-and-white contrast is perfect for the design.
Creating a Yin-Yang Design
- Lightly sketch the basic yin-yang outline with a pencil first
- Paint one half of the nail black, the other half white
- Using a thin brush, create the curved dividing line carefully
- Add the small dots (one black dot in the white half, one white dot in the black half) for authenticity
- Seal with top coat
Worth knowing: You can make the yin-yang small and centered on the nail, or larger to fill most of the nail space—both approaches look stunning on stilettos.
Final Thoughts
Black and white stiletto nails offer endless design possibilities that work for literally any occasion, season, or personal style. Whether you’re drawn to minimalist elegance, bold graphics, artistic expression, or classic sophistication, there’s a black and white stiletto design that matches your vibe and skill level.
The beauty of this color combination is that it’s always in style—these designs won’t look dated in a few months or dated when you look back at photos. They’re timeless while remaining completely modern. If you’re a fan of DIY nail art, many of these designs are achievable with basic tools and some practice. If you prefer professional application, black and white designs photograph beautifully and showcase any nail artist’s skill.
The most important thing is choosing a design that makes you feel confident, beautiful, and like the best version of yourself. Stiletto nails are already a bold choice, and black and white only amplifies that confidence. Try one of these designs at your next manicure appointment, or grab some polish and practice at home. Your nails deserve to be as impressive as you are.
