

Duck nails have evolved far beyond simple shapewear—they’ve become a legitimate canvas for artistic expression and creative nail design. The distinctive shape, with its slightly curved, tapered silhouette that mirrors a duck’s bill, creates a uniquely flattering proportion that works beautifully with bold, statement-making finishes and intricate nail art. What makes duck nails particularly special is their ability to showcase color-shifting finishes, dimensional textures, and detailed artwork in ways that traditional nail shapes simply can’t match. The extended edges and curved tip create depth and movement that catch light and draw attention in the most elegant way possible.
If you’re ready to move beyond basic solid-color duck nails and venture into truly exotic territory, these ten designs showcase the incredible range of possibilities—from holographic and iridescent effects to intricate hand-painted details and 3D embellishments. Each design pushes the boundaries of what you can achieve with this nail shape while remaining wearable and genuinely stunning. Whether you’re looking for something that sparkles, shifts with color, or tells a story through detailed artwork, you’ll find inspiration here.
1. Iridescent Peacock Feather Design
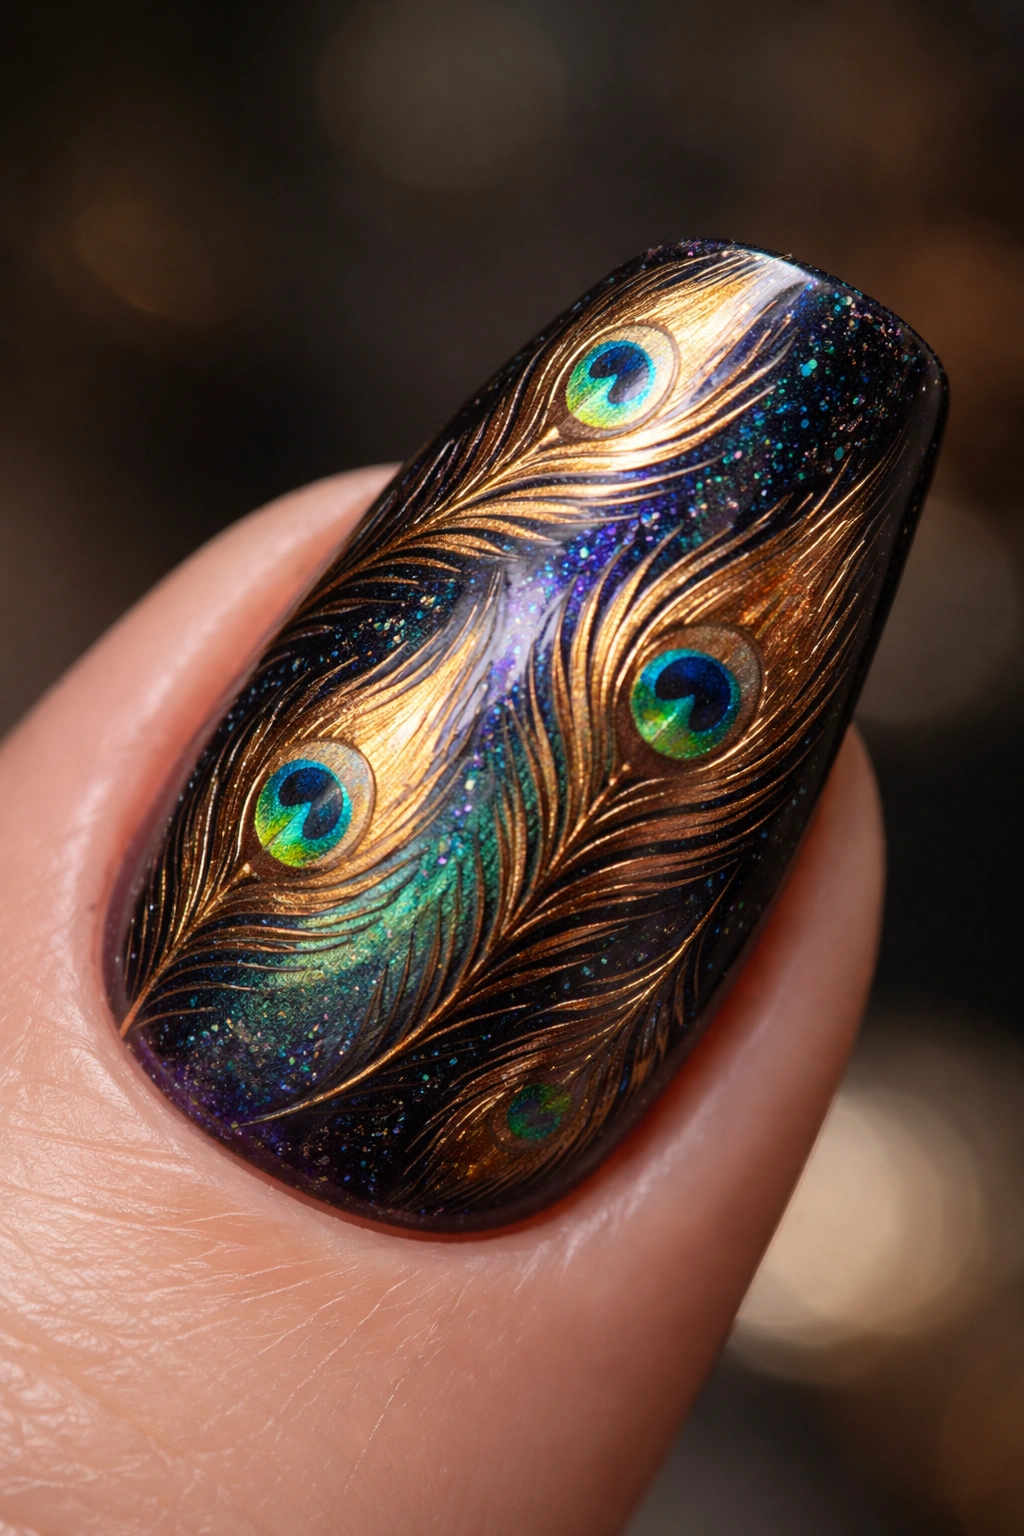
This design captures the magical, color-shifting qualities of a real peacock feather by layering different finishes and hand-painted details across duck-shaped nails. The base starts with a deep jewel tone—navy, emerald, or rich teal—which serves as the foundation for an iridescent topcoat that transforms the color as light hits it from different angles. On top of this shimmering base, delicate hand-painted feather details in gold, bronze, and copper create the iconic peacock eye motif, complete with fine brushwork that brings realistic dimensionality.
Why It Works So Well
The iridescent peacock feather design thrives on the duck nail’s extended length and slight curve, which allows the feather details to stretch elegantly across the nail surface. The color-shifting properties of iridescent topcoats make every hand movement show off a different hue—greens become blues become purples become golds depending on the angle and lighting. This constant movement keeps the design feeling fresh and exotic rather than static.
Application Tips and Techniques
- Use a quality iridescent or aurora topcoat over a dark, opaque base color for maximum color-shifting effect
- Paint peacock feather details using a thin detailing brush and metallic gel or acrylic paint, working from the center eye outward
- Seal everything with a glossy top coat to enhance the iridescent shimmer and protect the hand-painted details
- This design photographs beautifully in both natural and artificial light, making it perfect if you enjoy sharing your nails on social media
Pro tip: Apply the iridescent topcoat in very thin layers—thick applications can appear muddy rather than shimmering. Two to three thin coats outperform one thick coat every time.
2. Metallic Chrome Duck Nails with Gradient
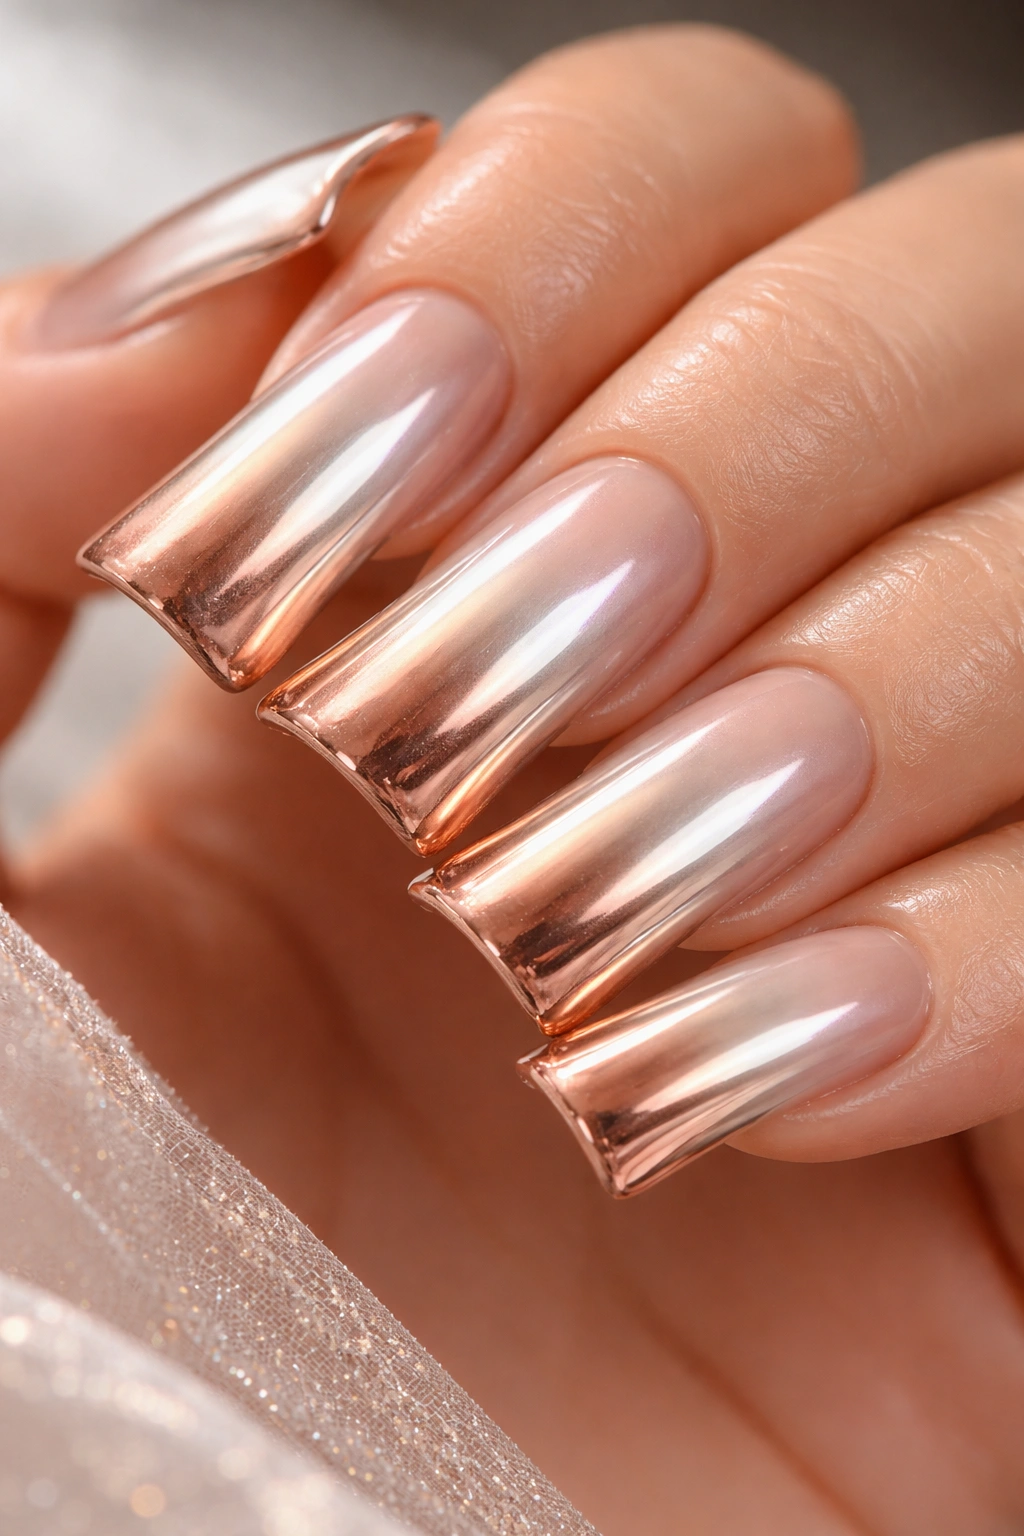
Metallic chrome finishes represent some of the most luxurious-looking options in contemporary nail design, and they absolutely sing on duck nails. A gradient effect—where the chrome shifts from one color intensity to another—creates depth and visual interest across the nail surface. Start with a pale chrome silver on the lower portion of the nail, then transition through champagne and rose gold before ending in a deeper copper chrome at the tip. The duck nail’s slight curve naturally showcases how the metallic finish catches and reflects light at different points.
Why It Works So Well
Chrome powder adheres beautifully to the extended surface area that duck nails provide, and the gradual color transition takes advantage of the full length to create a sophisticated ombré effect. Rather than the chrome appearing flat or one-dimensional, the gradient adds visual movement and richness. The metallic quality reads as high-end and modern, making these nails suitable for everything from professional settings to evening events.
Application Tips and Techniques
- Apply a sticky base coat and ensure nails are completely smooth and buffed—any texture will show through chrome powder
- Use a curved sponge or applicator to gently press chrome powder onto the nail, working in sections for the gradient effect
- Build the gradient by applying more powder to the tips and less toward the base, blending where colors meet
- Seal with a clear gel topcoat designed for chrome finishes—regular topcoats can dull the reflective quality
- Cure between layers to ensure the chrome stays vibrant and doesn’t shift
Worth knowing: Chrome powder requires a completely smooth nail surface to look premium. Any ridges, bumps, or uneven base coat will be magnified by the reflective finish.
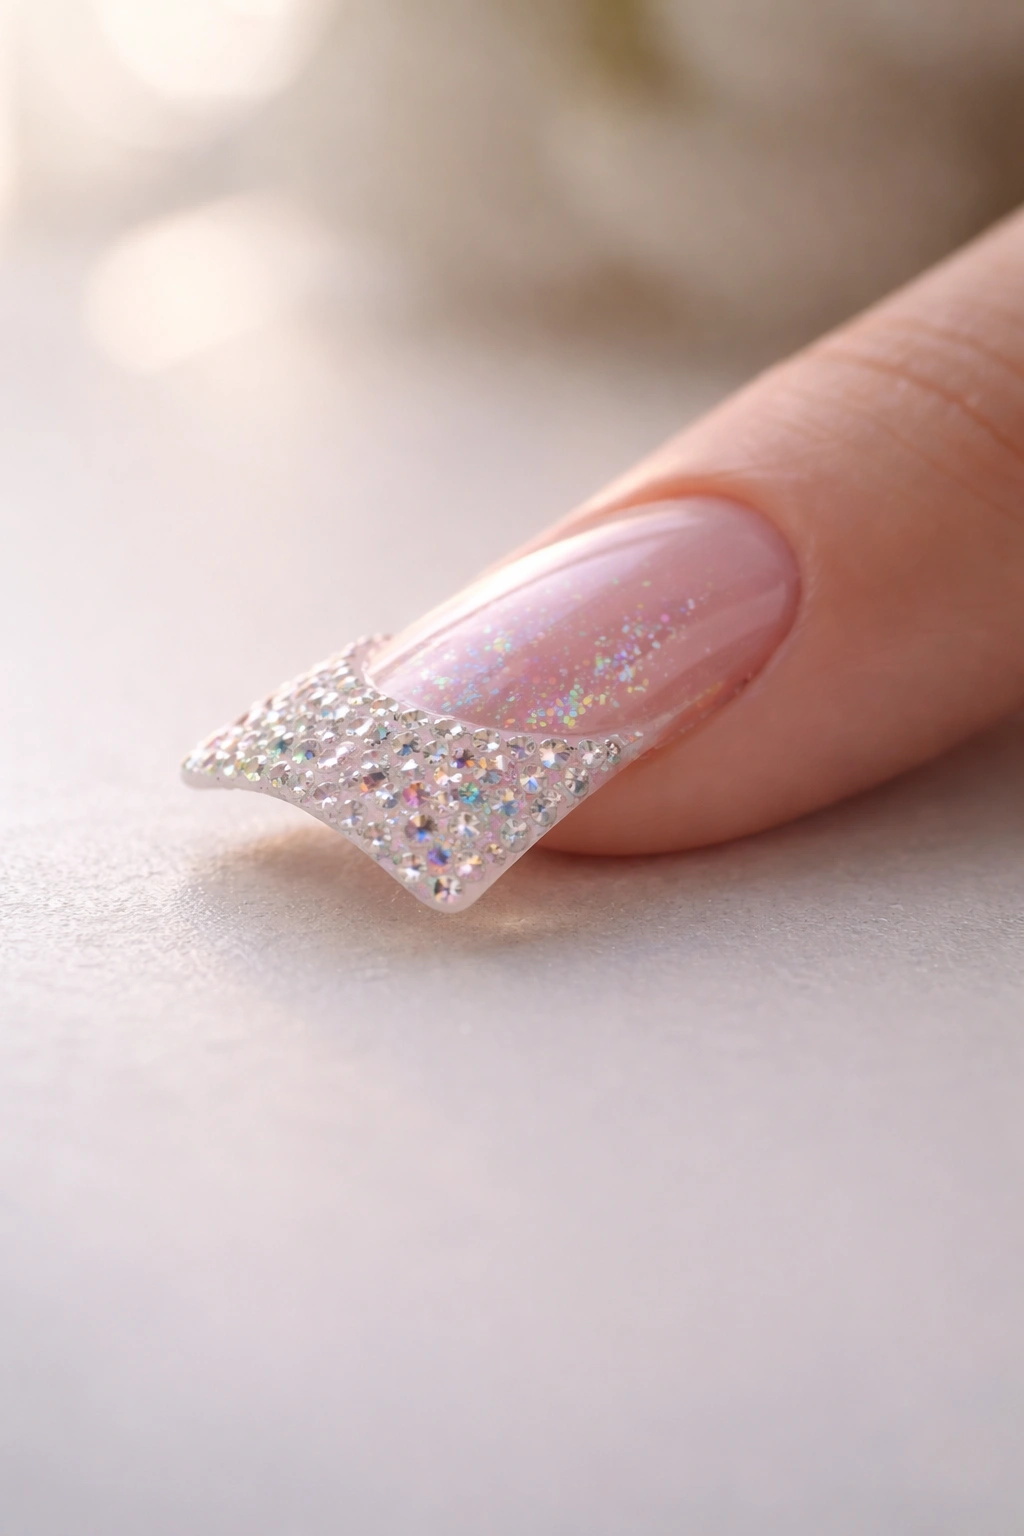
3. Holographic Jeweled Duck Tips
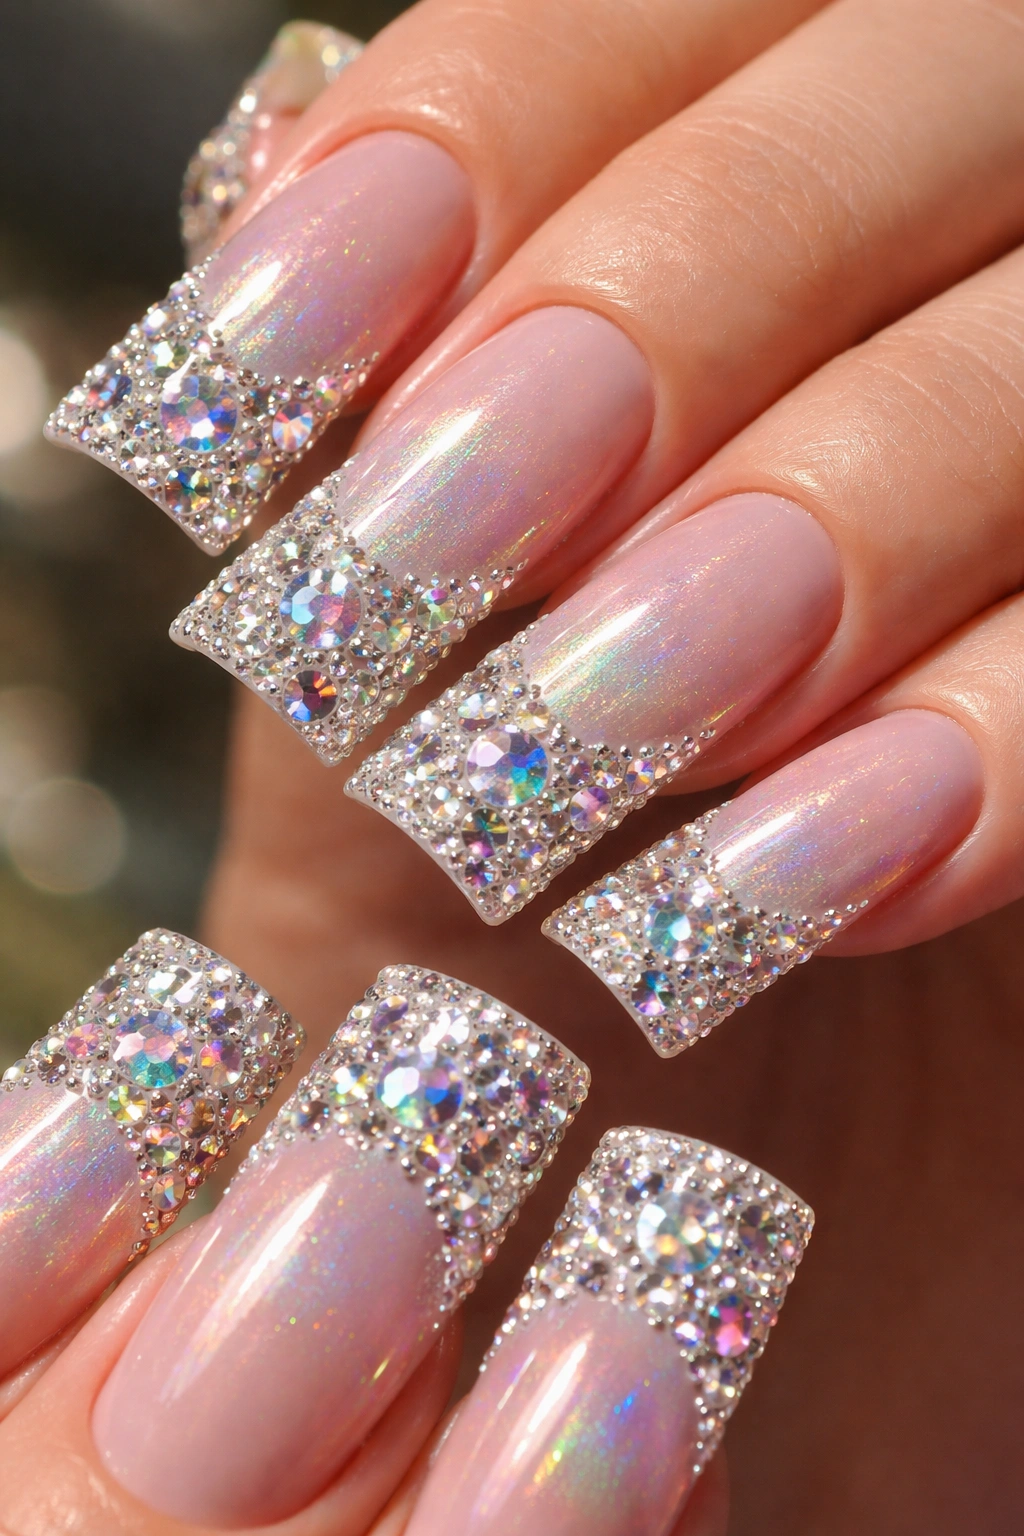
This design combines the futuristic shimmer of holographic effects with the luxurious appeal of embedded jewels, creating nails that literally sparkle from multiple angles. The base is a holographic topcoat in a neutral tone—soft pink, champagne, or translucent white—which already catches light beautifully. Then, strategically placed Swarovski crystals, rhinestones, or specialty holographic studs are embedded into the gel, creating a cascading pattern that draws the eye toward the tip. The duck nail shape provides the perfect stage for this jeweled gradient, as the width at the base and taper toward the tip naturally guide where jewels should be placed.
Why It Works So Well
Holographic surfaces and gemstones have an innate compatibility—both play with light and create rainbow effects that feel magical and otherworldly. The duck nail’s extended tip region gives you space to showcase a meaningful number of jewels without making hands look clunky or overly decorated. The holographic base keeps even the negative space interesting rather than stark or empty.
Application Tips and Techniques
- Apply holographic topcoat in thin, even layers to maintain translucency and maximize the shimmer effect
- Use gel adhesive or a tacky base coat to secure rhinestones and studs in place
- Create a pattern before placing jewels—map out where each stone goes rather than placing them randomly
- Arrange larger stones toward the tip with progressively smaller ones toward the base for visual balance
- Cure thoroughly between layers to ensure jewels are completely secured and won’t shift
- Consider a matte holographic topcoat if you prefer a softer shimmer over ultra-glossy shine
Insider note: Specialty holographic studs designed for nail art stay in place better than repurposed craft rhinestones, as they’re manufactured with nail-specific adhesive backing.
4. Matte Velvet Duck Nails with Ombré
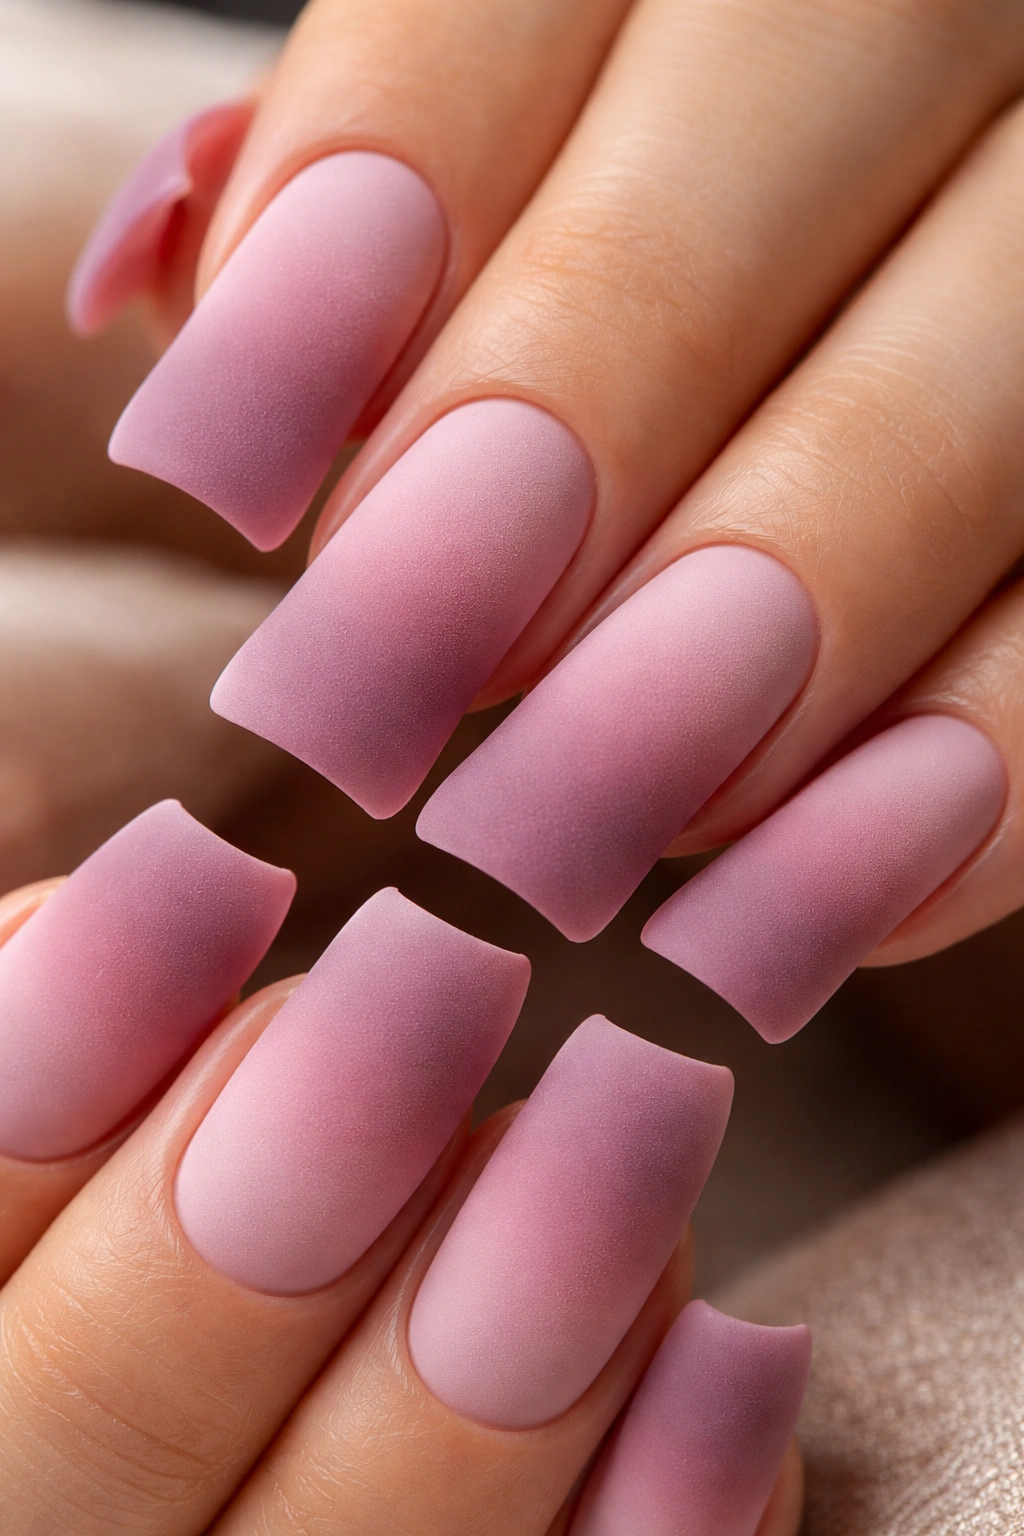
Velvet textures on nails create an almost tactile appeal—they catch the eye because they look like you could actually feel a soft pile beneath your fingertips. Combining matte velvet texture with an ombré effect produces a design that’s both sophisticated and unexpectedly cozy. Start with a blush or nude shade at the base, gradually transitioning to a deeper mauve or plum at the tip, all finished with a matte velvet topcoat that creates the signature velvety appearance. The duck nail’s gradual curve becomes a beautiful transition point where the color shifts and the light hits differently.
Why It Works So Well
Velvet topcoats work magic on darker shades—the matte finish prevents them from looking flat or dull, instead creating depth and richness. The ombré transition takes advantage of duck nails’ extended length and gives the eye something to follow. Matte surfaces also feel more modern and fashion-forward compared to glossy nails, making this design read as intentional and trendy rather than simple or plain.
Application Tips and Techniques
- Use two complementary colors that sit adjacent to each other on the color wheel for smooth, natural transitions
- Create the ombré using a sponge technique, dabbing color onto the nail in sections and blending the edges
- Apply the matte velvet topcoat as the final step, after the ombré gradient is completely cured
- Avoid touching nails immediately after applying velvet topcoat—the texture takes a few moments to fully set
- Consider using a gel builder or thickness-added topcoat under the velvet coat if your natural nails are very thin
- Velvet textures show dust and oils more noticeably than glossy finishes, so keep nails clean for best appearance
Pro tip: If your velvet topcoat application looks patchy, apply a second thin coat rather than buffing and starting over—the second coat usually fills in any gaps seamlessly.
5. Glitter-Dipped Stiletto Duck Nails
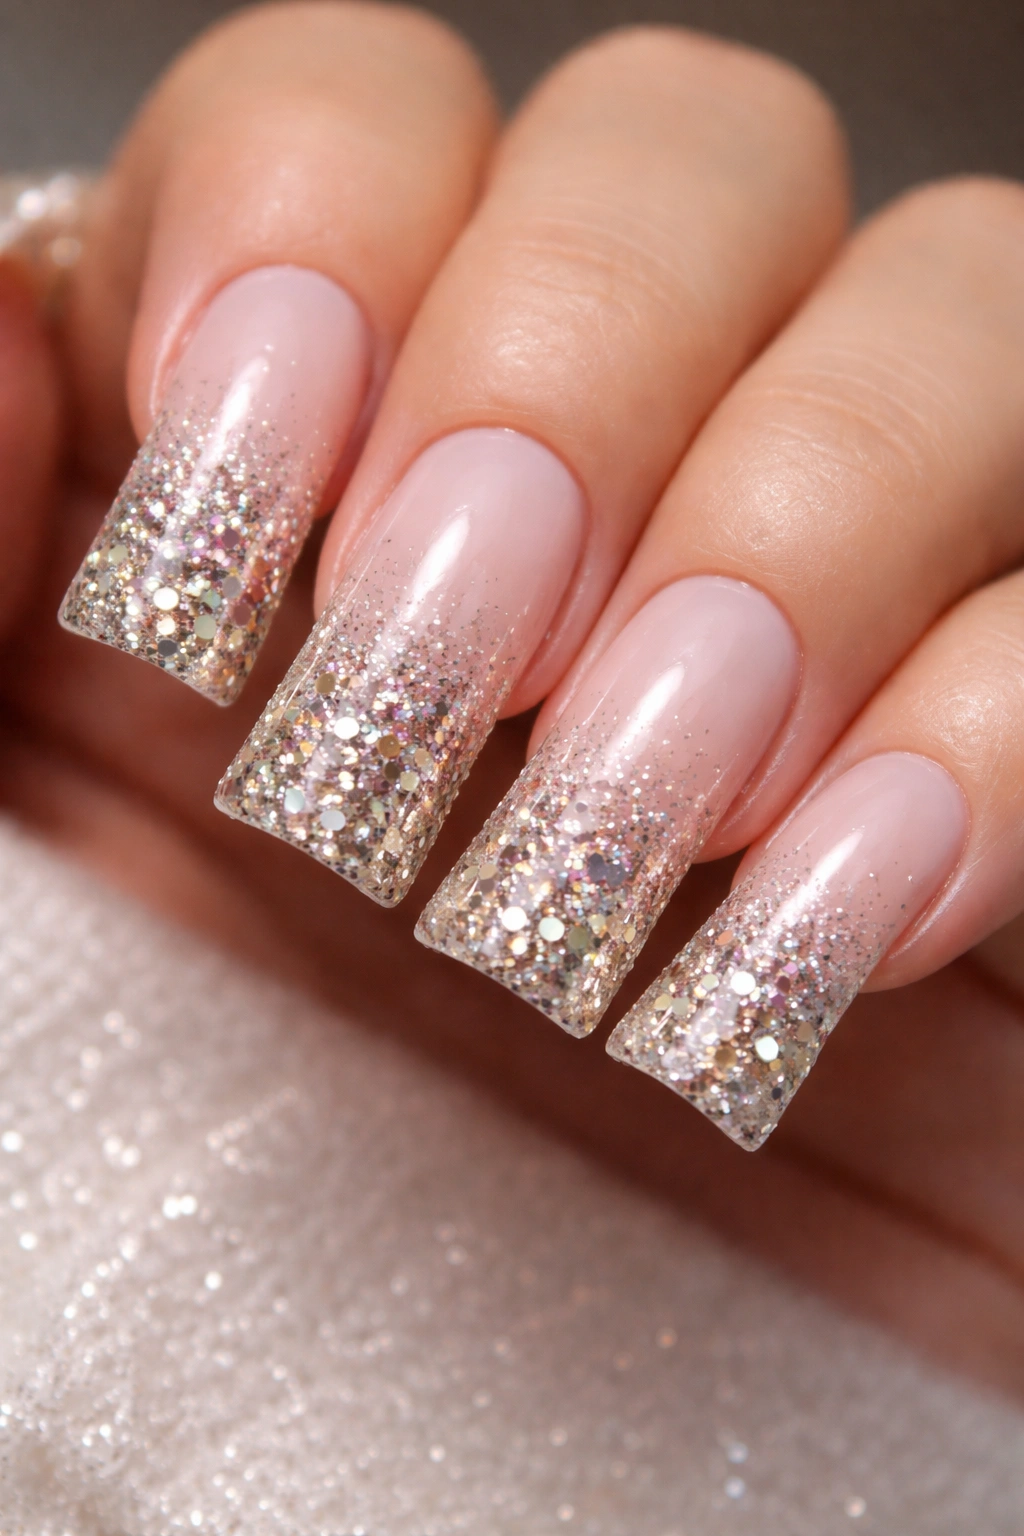
Glitter immersion creates an all-over sparkle that feels celebratory and bold, while dipping into loose glitter rather than using a glitter topcoat creates texture and dimension that photographs spectacularly. For this design, apply a sticky base coat in white, nude, or metallicly tinted gel, then immediately dip the nail into a jar of premium loose glitter. Choose a single color of ultra-fine glitter in a shade like rose gold, champagne, or holographic—mixing multiple colors reads as chaotic on duck nails. The dipped glitter settles at slightly different depths across the curved surface, creating natural sparkle variation.
Why It Works So Well
The duck nail shape holds glitter beautifully because the slightly curved tip prevents glitter from sliding off, and the extended surface area means you get more sparkle per nail without overdoing it. Fine glitter particles catch light consistently across the whole nail, creating movement with every hand gesture. Unlike a solid glitter topcoat, dipped glitter maintains slight texture variation that adds luxury and visual interest rather than a flat, painted-on appearance.
Application Tips and Techniques
- Use premium salon-grade loose glitter rather than craft glitter—the particle size and quality matter dramatically
- Apply a sticky base coat, don’t cure it, and dip immediately while the surface is still tacky
- Dip at a 45-degree angle and rotate slightly to ensure even coverage across the nail surface
- Cure after dipping, then seal with a glossy or sparkly topcoat to lock everything in place
- Apply topcoat carefully to avoid disturbing the glitter—use a light hand and avoid aggressive brushing
- Brush off any loose particles on the surrounding skin before curing the final topcoat
Worth knowing: Glitter-dipped nails shed slightly during the first 24 hours, so avoid touching your face or rubbing your eyes immediately after application. This settles down dramatically after the first day.
6. Celestial Galaxy Duck Nail Art
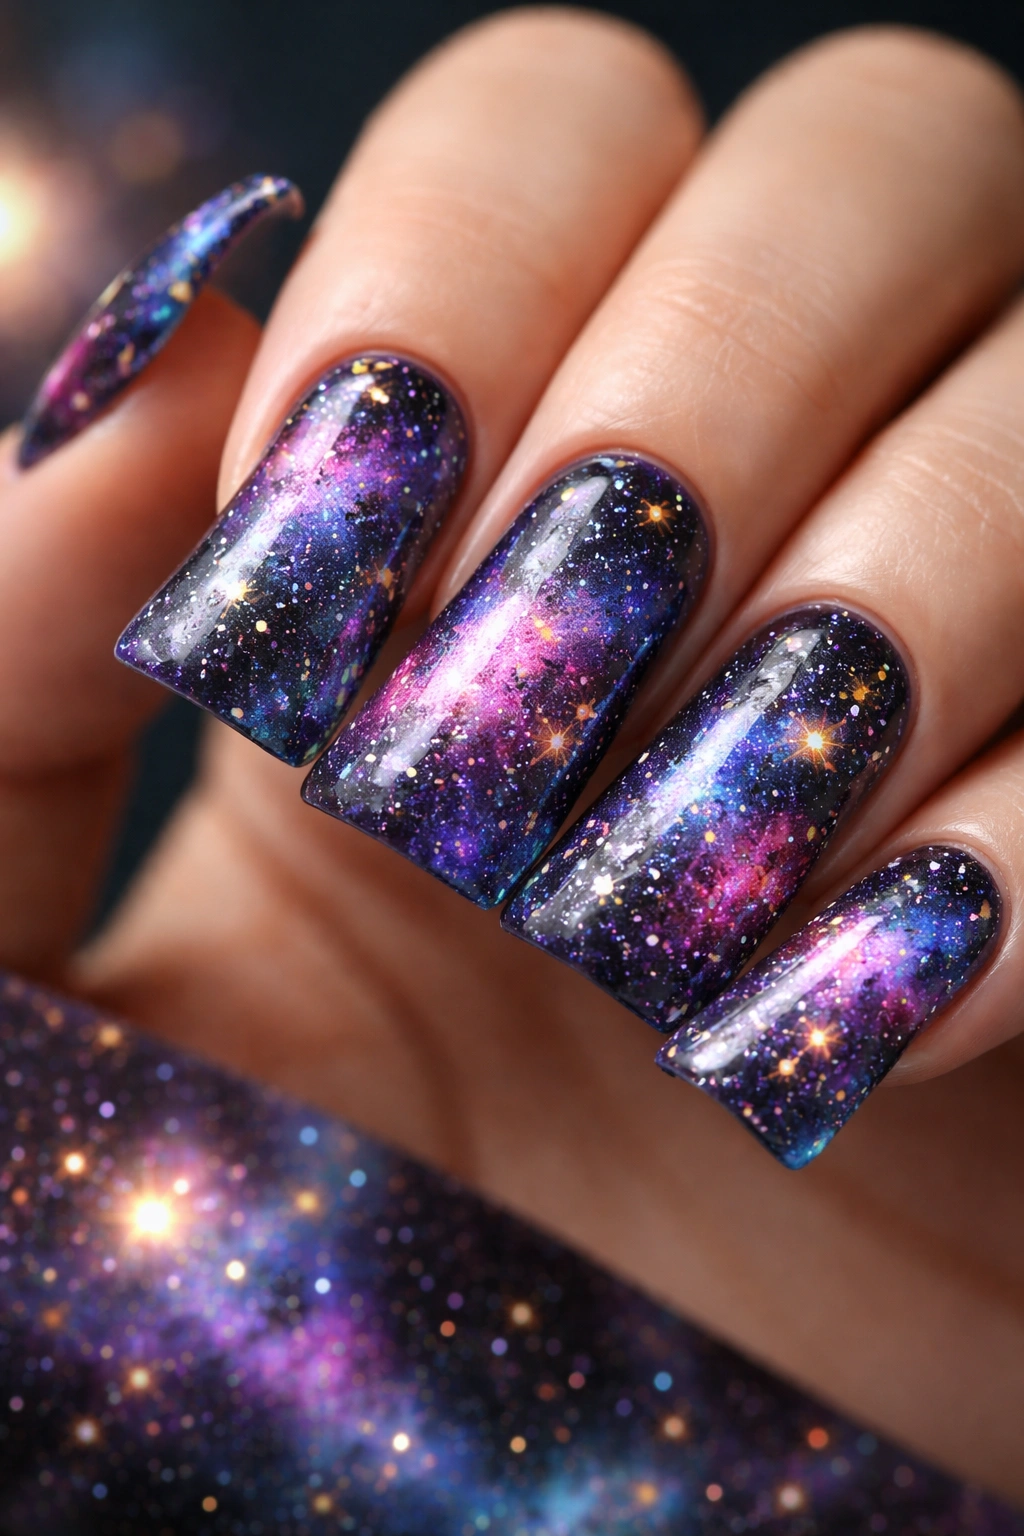
Galaxy nails transport the infinite beauty of space onto your fingertips, and the duck nail provides an expansive canvas for creating swirling nebulas, twinkling stars, and cosmic depth. Start with a deep black or navy base, then layer blues, purples, and teals using a sponging technique to create nebula clouds. Add tiny white and gold stars using a dotting tool, and finish with a holographic or shimmery topcoat that makes the entire galaxy glow. The duck nail’s extended surface lets you create realistic depth—deeper colors toward the edges, brighter colors and stars toward the center—that makes the design feel three-dimensional.
Why It Works So Well
Galaxy designs thrive on color complexity and layering, which requires space to execute properly. Duck nails give you that space without feeling oversized. The slight curve of the nail naturally creates a horizon line where the galaxy transitions from deep space to star-filled areas. The design remains interesting at both close distances and far away, making these nails stunning in person and in photos.
Application Tips and Techniques
- Layer gel colors carefully—allow each color to cure before sponging the next to prevent muddy blending
- Use 2-3 sponges or applicators for different colors to maintain color distinction
- Create stars using a dotting tool with white gel polish or metallic paint, varying sizes for realism
- Add depth by making stars denser in the center of the nail and sparser toward the edges
- Use a holographic or aurora topcoat as the final seal to enhance the cosmic shimmer
- Consider adding fine glitter specks with a detail brush for extra sparkle in specific areas
- Cure thoroughly between each layer to prevent color bleeding
Pro tip: Use a dry-brush technique with a metallic gold or copper paint to add fine detail lines that mimic nebula wisps—this creates complexity without overwhelming the design.
7. Mirror Finish Convertible Duck Nails
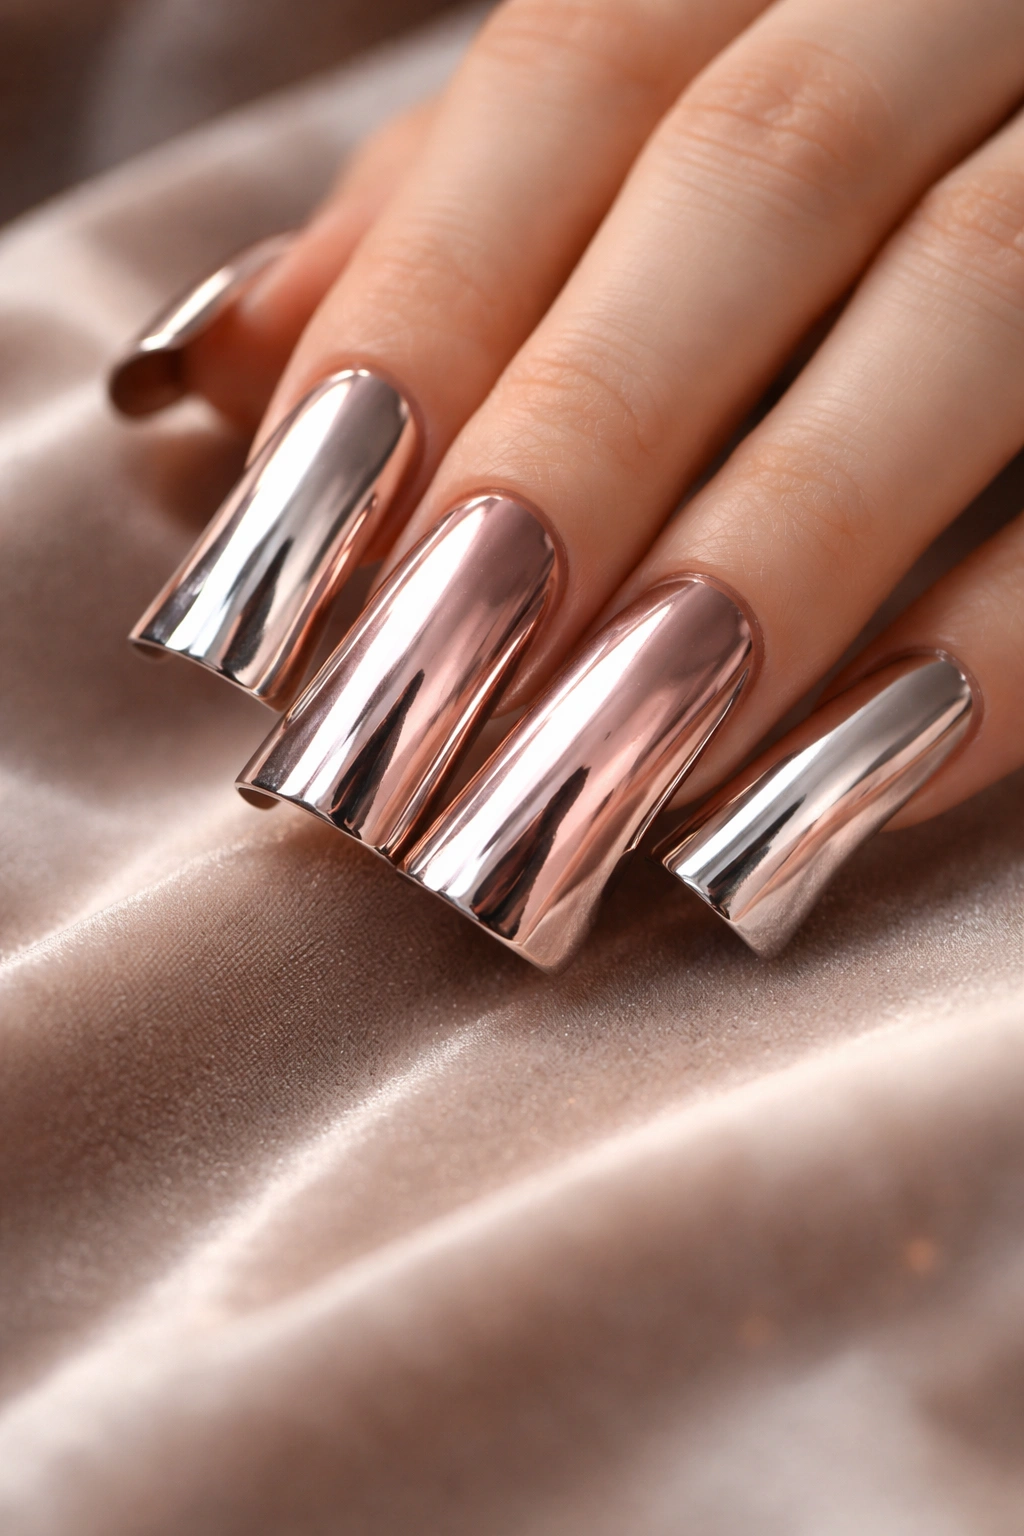
Mirror finishes represent the pinnacle of futuristic nail design, creating a surface that literally reflects light like metal. A convertible design means the mirror effect shifts between colors—typically moving from silver to rose gold to copper as the light angle changes. This design requires specialty mirror powder and a technique that differs slightly from chrome application. The result is nails that look almost alien in their reflectivity, catching every light source and creating a high-fashion aesthetic that reads as incredibly intentional and artistic.
Why It Works So Well
Mirror finishes are attention-grabbing by nature, and duck nails provide enough surface area to showcase the effect without appearing overwhelming or costume-like. The convertible color-shifting quality adds complexity—even while wearing the same nails, you’re seeing different colors depending on indoor versus outdoor lighting or how your hands are positioned. This constant transformation feels luxurious and sophisticated rather than gimmicky.
Application Tips and Techniques
- Ensure nails are completely smooth, buffed, and free of ridges before applying mirror powder
- Apply a sticky base coat and allow it to remain tacky—don’t cure before powder application
- Use a specialized mirror powder applicator (usually comes with the powder) and press gently onto the nail
- Work in small sections, using light pressure rather than rubbing motions
- Cure according to product instructions—some mirror powders require UV light, others require a specific gel topcoat first
- Seal with a clear topcoat designed for mirror finishes to protect the reflective surface
- Avoid applying extra topcoat, which can dull the mirror effect—less is more with this finish
Insider note: Mirror finishes show fingerprints and dust more visibly than other finishes, so frequent gentle cleaning with a soft cloth keeps them looking pristine.
8. Encapsulated Marble Duck Nails
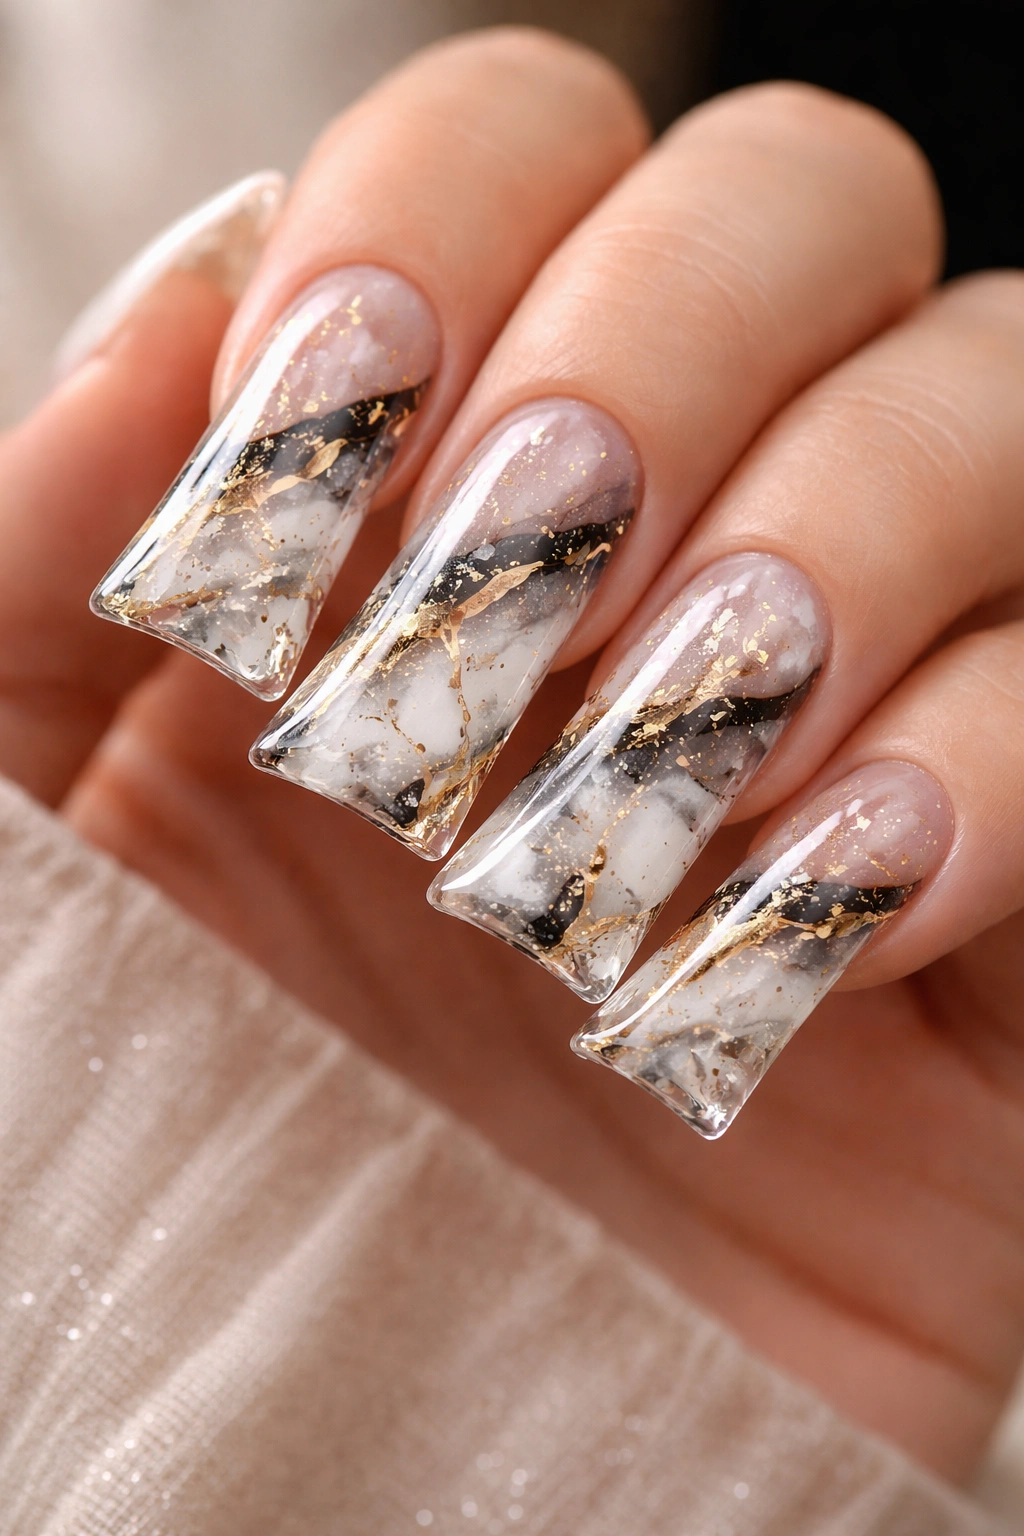
Encapsulation creates an illusion of depth that feels almost three-dimensional, and marble effects are particularly striking when encapsulated within gel layers. This design involves applying a base color, then hand-painting or sponging marble veining in contrasting colors (typically blacks, grays, and golds against whites, blushes, or jewel tones), and then capping the design with a clear builder gel or topcoat that seals the marble pattern inside. The encapsulated technique creates a smooth, glass-like surface while the marble pattern appears to float beneath the surface, creating genuine depth.
Why It Works So Well
Encapsulation transforms hand-painted details into something that feels precious and protected—like art preserved under glass. The marble effect reads as elegant and timeless rather than trendy. Duck nails’ extended surface provides ample space to showcase detailed veining patterns without the design becoming chaotic. The glossy, smooth finish created by the encapsulation adds luxury that matte or textured finishes can’t quite match.
Application Tips and Techniques
- Begin with a colored base coat and allow it to cure fully
- Use a thin brush and contrasting gel color to paint marble veining freehand, working from the center outward
- Create natural-looking veins by varying line thickness and allowing some lines to branch or intersect
- Cure the veining carefully—don’t apply topcoat yet if any design is smudged
- Apply a clear builder gel or thick topcoat in thin layers, curing between coats to maintain design visibility
- The final encapsulation layer should be thicker than a regular topcoat to create the glass-like effect
- Cure thoroughly and apply a final glossy topcoat if desired
Worth knowing: Encapsulated designs appear deeper and more complex after the encapsulation layer cures, so the design often looks more subtle before this final step than it will after completion.
9. Neon Gradient Duck Nails
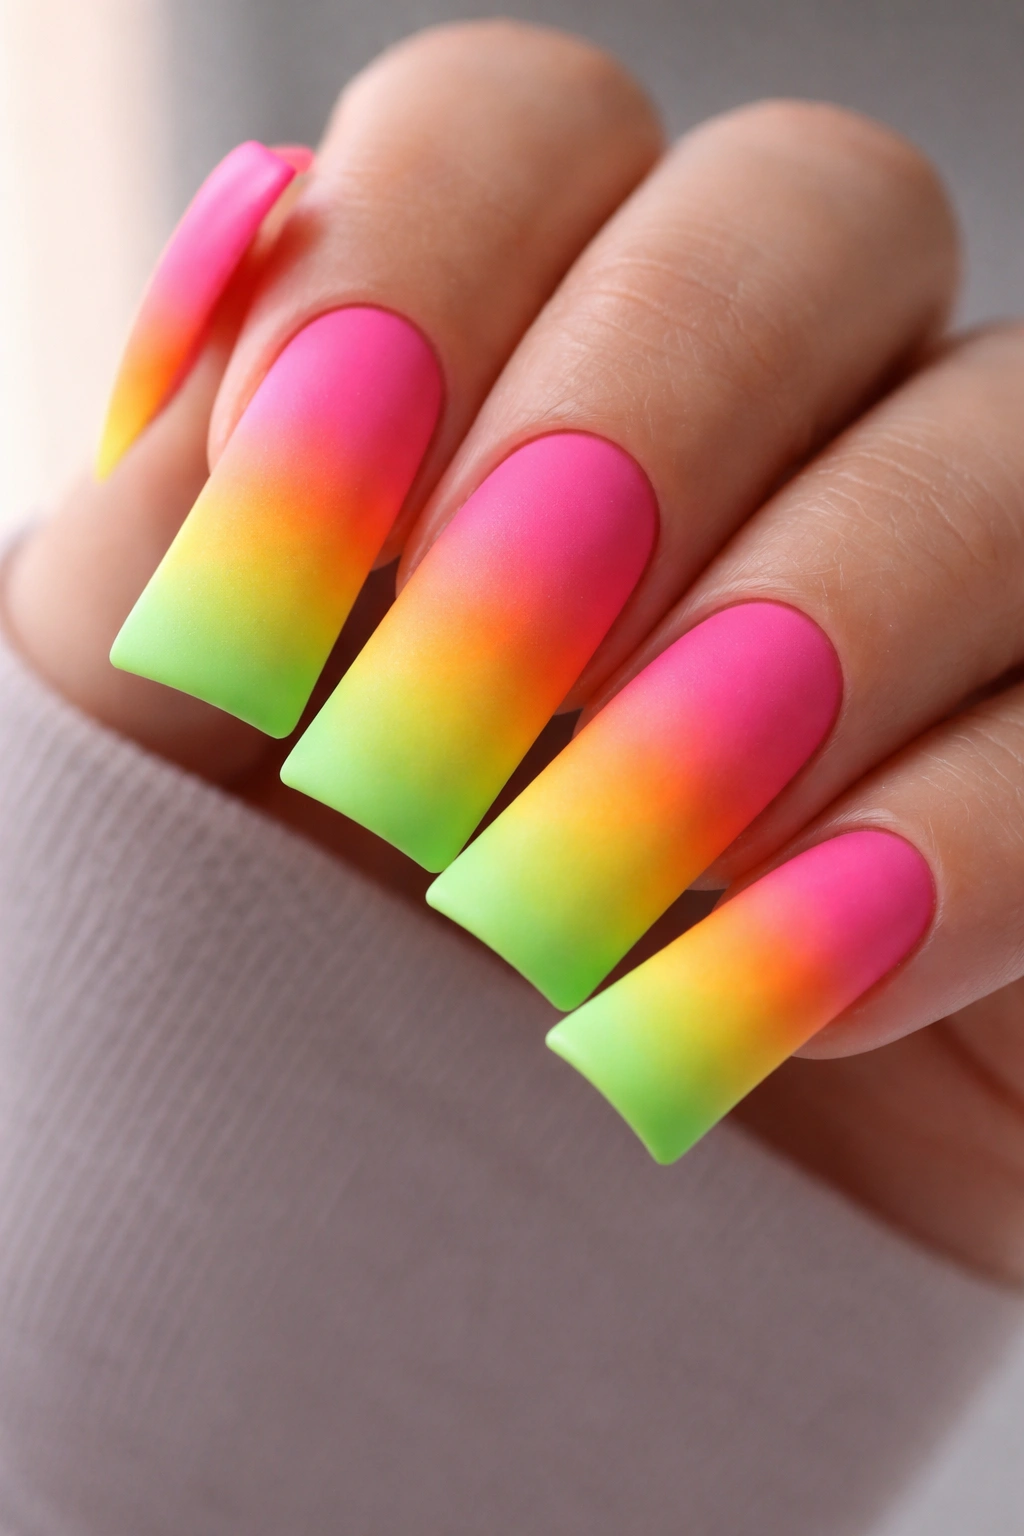
Neon colors possess an inherent energy that demands attention, and gradients allow you to layer multiple neon shades for an effect that’s both vibrant and sophisticated rather than chaotic. A typical neon gradient might transition from hot pink to electric orange to lime green across the length of the duck nail, or you could choose a more subtle version using neon yellow to neon green. The gradient is best executed using a sponge technique that creates soft color transitions, and a matte topcoat enhances the neon intensity while preventing excessive shine that can read as cheap or plastic-looking.
Why It Works So Well
Neon colors are notoriously difficult to wear well, but gradients make them wearable by distributing the intensity across the nail rather than concentrating it in a single flat color. Duck nails’ extended length is perfect for showcasing a multi-color gradient—short nails would feel cramped with three or more colors. The matte finish keeps neon colors looking fashion-forward and intentional rather than casual or play-like. These nails work beautifully in both professional creative settings and social occasions.
Application Tips and Techniques
- Select 2-3 neon colors that work well together—check color wheels to ensure harmonious combinations
- Apply colors using a sponge, blending where colors meet for smooth transitions
- Allow each color to cure before moving to the next to prevent muddiness
- Finish with a matte topcoat to reduce shine and enhance the neon saturation
- Keep the gradient flowing from base to tip for the most flattering effect
- Consider adding a subtle sparkle topcoat over the matte if you want a hint of shine without full gloss
- Neon designs photograph beautifully in natural light and under studio lighting
Pro tip: Neon colors show imperfections more visibly than neutral shades, so take extra time to ensure your base coat is smooth and even before beginning the gradient.
10. Floral 3D Duck Nails with Inlays
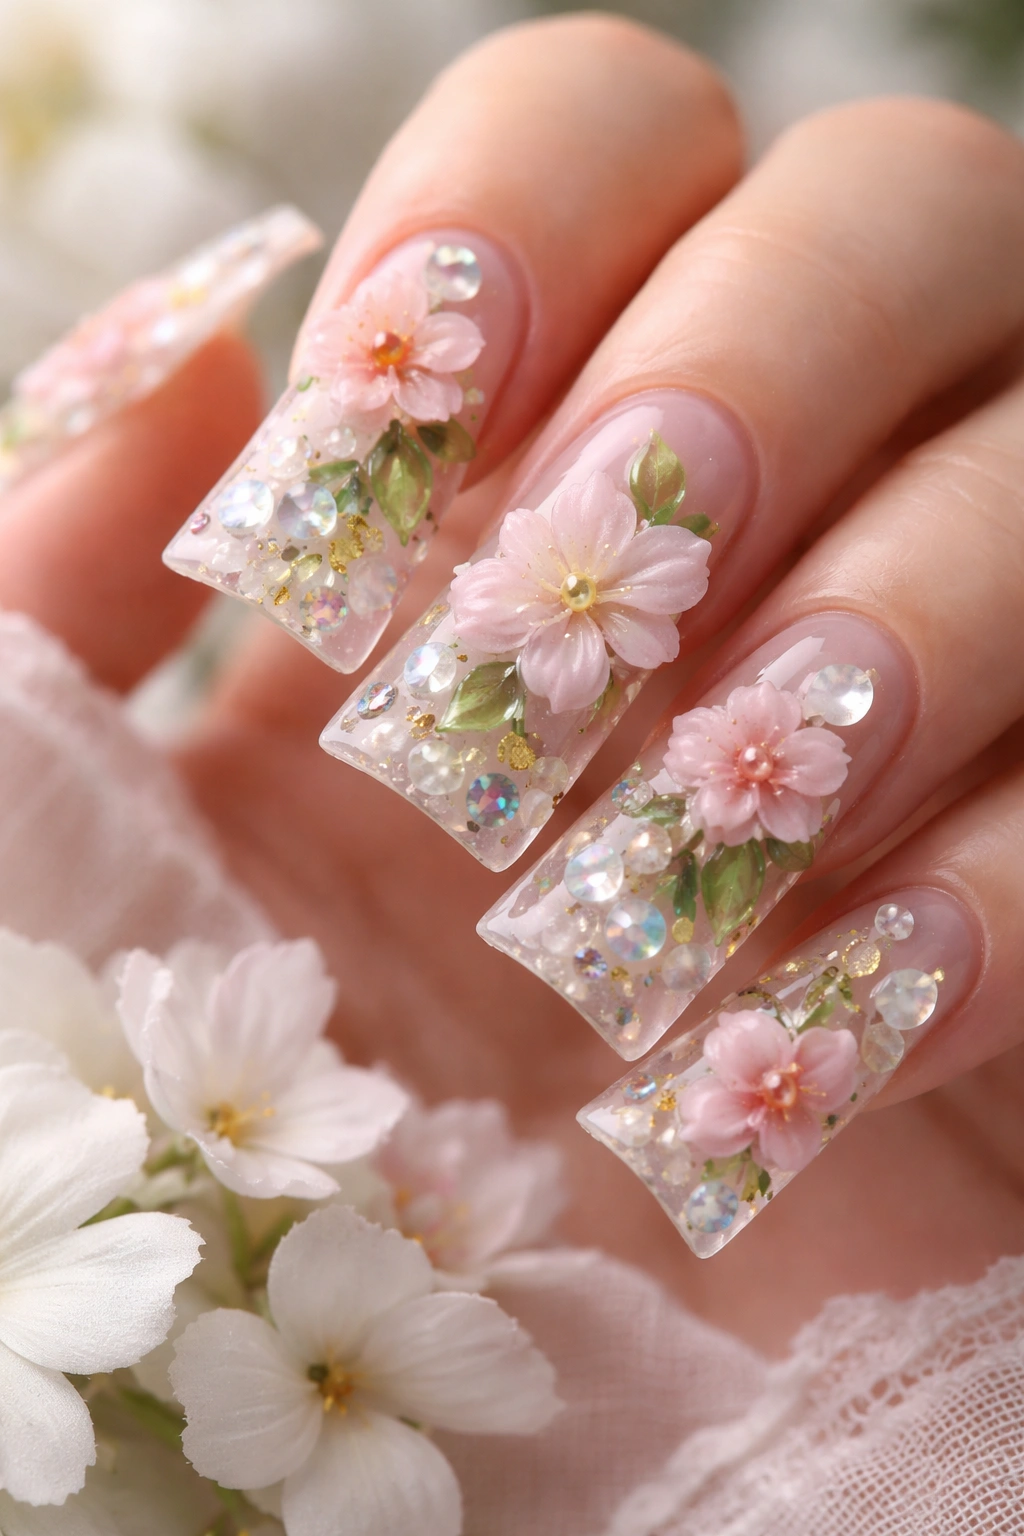
Three-dimensional floral elements create a genuinely sculptural nail design that goes beyond traditional hand-painted art. This design combines hand-painted detailed floral backgrounds with tiny three-dimensional flowers and leaves that are constructed from gel and positioned on the nail surface. A peony or rose constructed from individually sculpted gel petals, combined with delicate hand-painted vine detailing and negative space, creates a design that’s equal parts art and craft. The duck nail shape provides ideal proportions—long enough to showcase dimensional elements without them appearing oversized or awkward, and curved in a way that naturally creates shadow lines that enhance dimension.
Why It Works So Well
3D floral elements feel luxury and bespoke in a way that flat designs cannot match—these are nails that required genuine artistry and time to create, which reads as special occasion worthy. The combination of painted and sculptural elements creates visual interest and texture. Floral themes are inherently feminine and romantic, making this design versatile across age groups and personal styles. The duck nail shape prevents dimension from reading as excessive or unfeminine.
Application Tips and Techniques
- Begin with a detailed hand-painted floral background using a fine brush and gel colors, establishing your design concept
- Create 3D flowers by sculpting individual petals from builder gel or hard gel, building dimension gradually
- Attach sculptural elements using sticky base coat or gel adhesive—cure each attachment thoroughly
- Layer and position elements to create depth—some flowers forward, some recessed into the painted background
- Add fine detail work with a thin brush once all dimension is in place—veins on leaves, stamens on flowers
- Seal everything with a glossy topcoat that highlights both flat and dimensional elements
- Cure thoroughly and allow extra time for the dimensional elements to fully set
Insider note: Dimensional elements require careful curing—use longer curing times than you would for flat nail art to ensure complete gel hardening throughout the structure.
Final Thoughts
Exotic duck nail designs represent a genuine intersection of fashion, art, and personal expression. Whether you’re drawn to color-shifting metallics, intricate hand-painted details, or three-dimensional sculptural elements, the duck nail’s unique proportions and extended surface area allow every design to truly shine. Each of these ten styles demonstrates that exotic doesn’t have to mean impractical—these are all wearable designs that work for everything from professional settings to special occasions to everyday luxury.
The key to pulling off any exotic nail design is ensuring that the application quality matches the ambition of the design itself. A mediocre application of an intricate concept looks worse than a perfectly executed simple design, so invest time in either developing your own skill or finding a talented technician who specializes in detailed work. Premium products matter too—quality gel polishes, proper topcoats, and specialty finishes create the difference between nails that look good and nails that look genuinely exceptional.
Start with designs that align with your current skill level and gradually build toward more complex options. If you’re new to nail art, the ombré and glitter-dipped designs provide beautiful results without requiring advanced hand-painting skills. As your confidence grows, the celestial galaxy and floral 3D designs offer wonderful opportunities to develop artistry and precision. Whichever designs you choose, remember that exotic nails should feel like an expression of your personal style—wear them with confidence and enjoy the artistry.
