

Duck nails have become the go-to canvas for creating ethereal, otherworldly nail designs—and combining them with an aura aesthetic takes that trend into completely enchanting territory. The long, pointed shape of duck nails creates the perfect stage for gradient effects, shimmer finishes, and the kind of luminous quality that makes your hands look like they’re glowing with inner magic. An aura aesthetic specifically embraces soft transitions, celestial-inspired colors, holographic elements, and that dreamy, almost translucent quality that makes nails feel less like accessories and more like tiny works of art. The beauty of this combination is that aura duck nails work for anyone—whether you’re drawn to mystical vibes, love experimenting with nail art, or just want something that catches light in mesmerizing ways.
What makes aura duck nails special isn’t just the design itself, but how they interact with light. These nails are meant to shimmer, shift, and transform as you move your hands, creating an almost hypnotic effect. You’ll notice colors changing subtly, holographic sparkles dancing across the surface, and an overall luminosity that makes even simple designs feel elevated. The duck nail shape amplifies this effect because the long, narrow surface area shows off gradient transitions and light-catching finishes in ways that shorter nails simply can’t match. Whether you’re going for something that looks like captured moonlight, a living aurora borealis, or pure crystalline energy, these 16 ideas offer plenty of inspiration to find your perfect aura aesthetic.
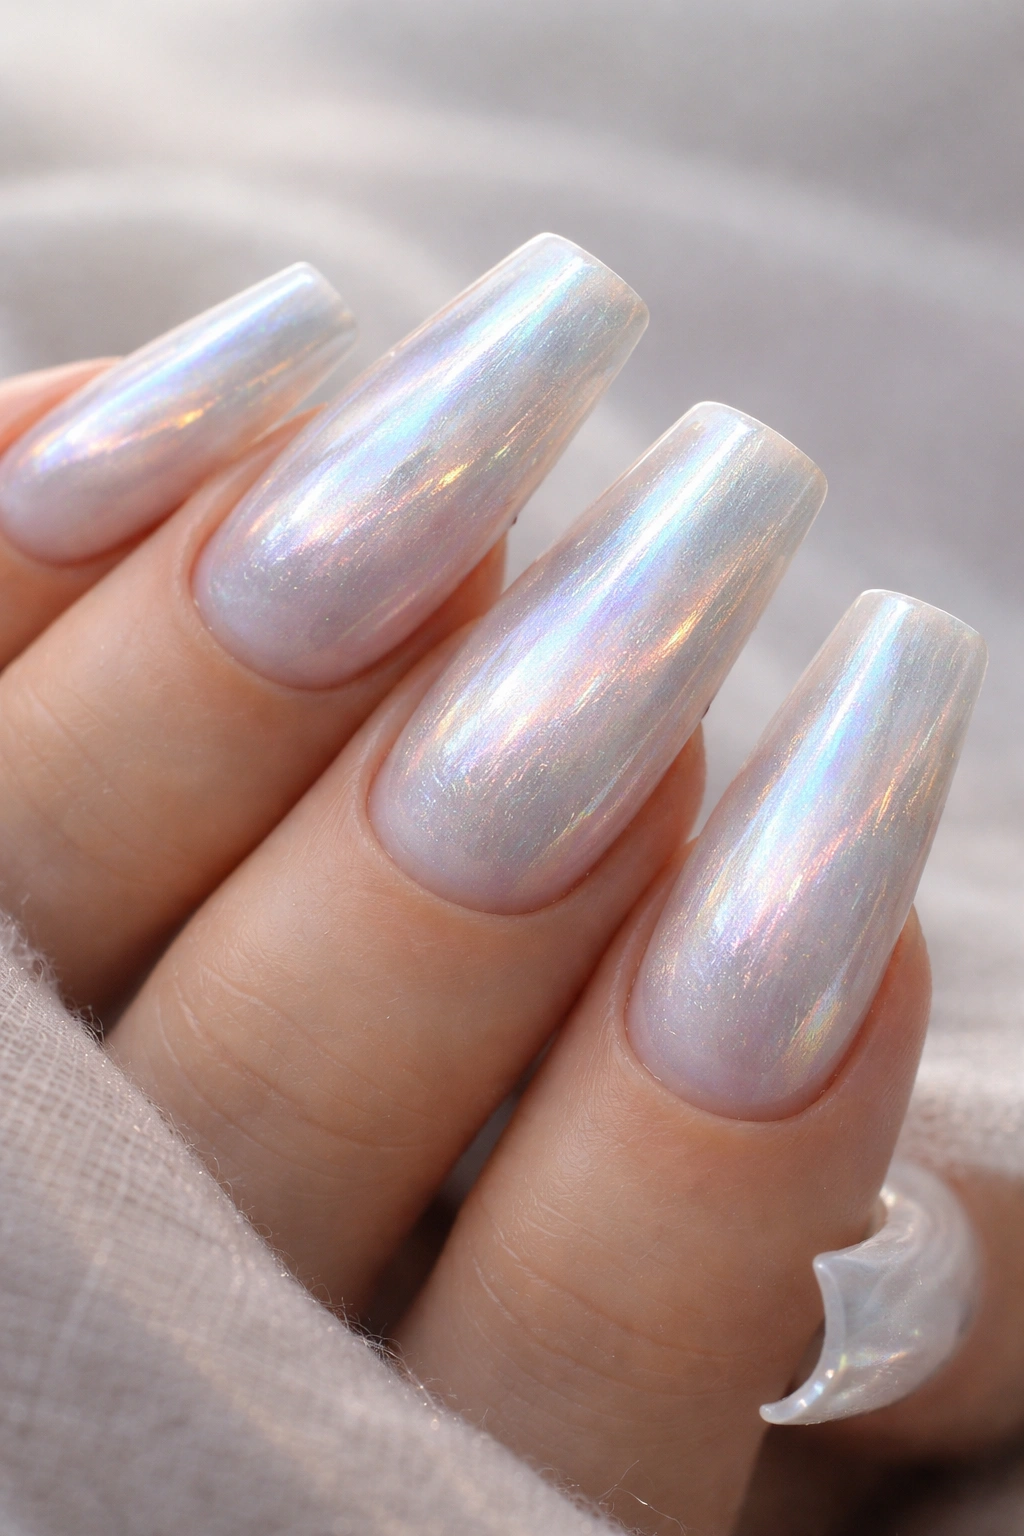
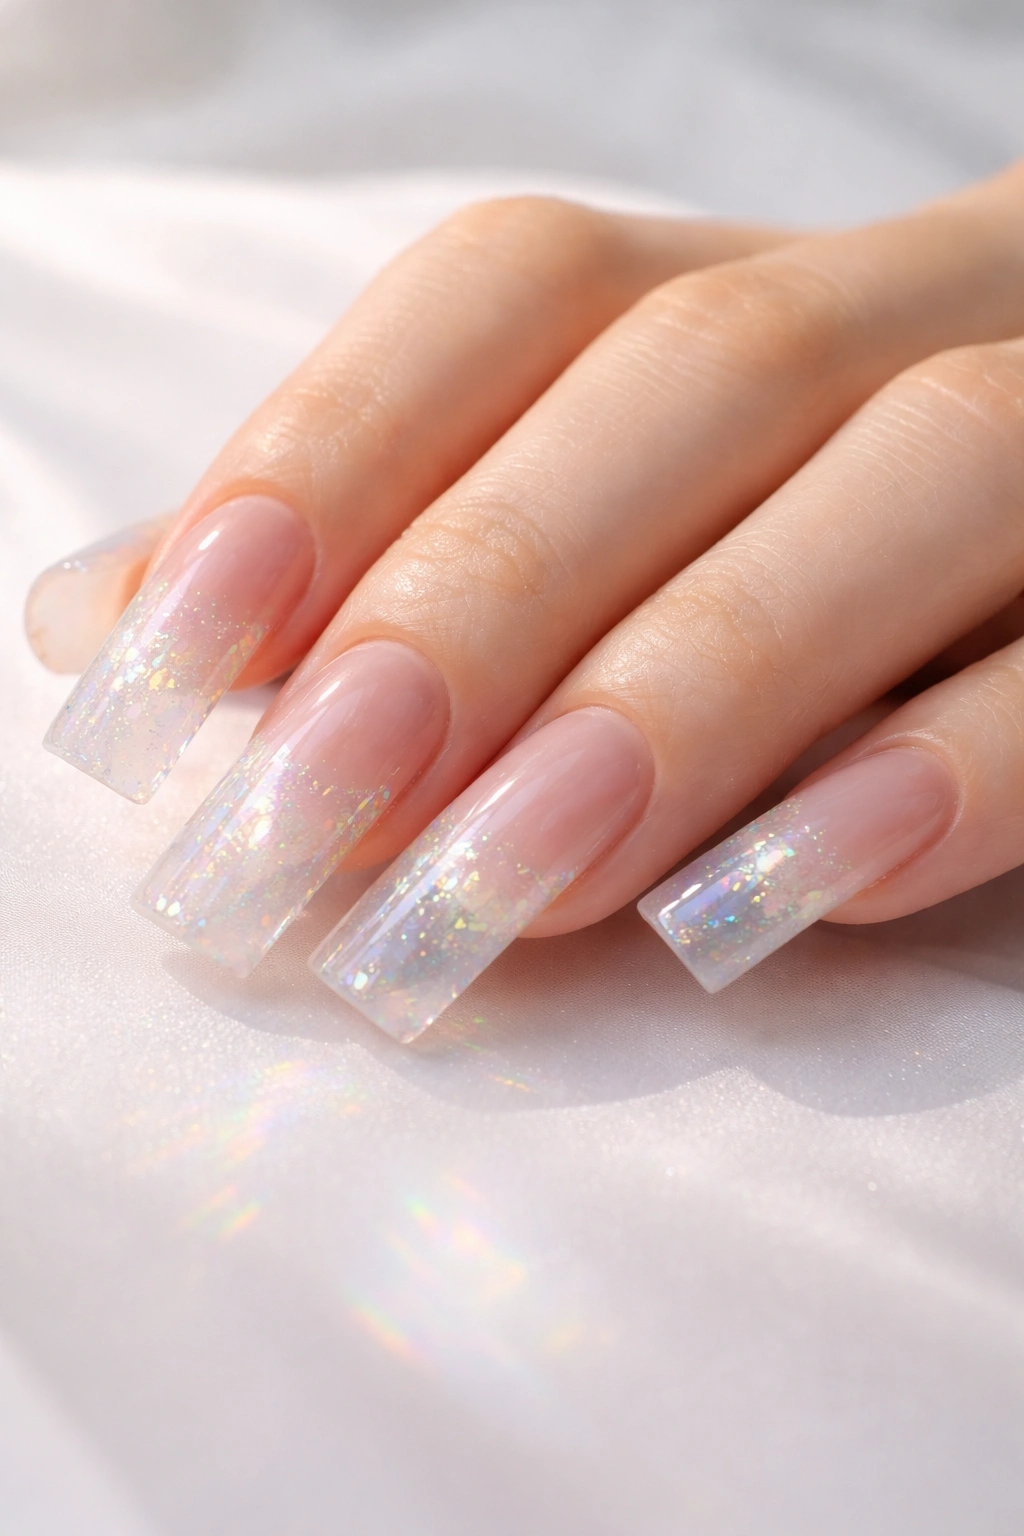
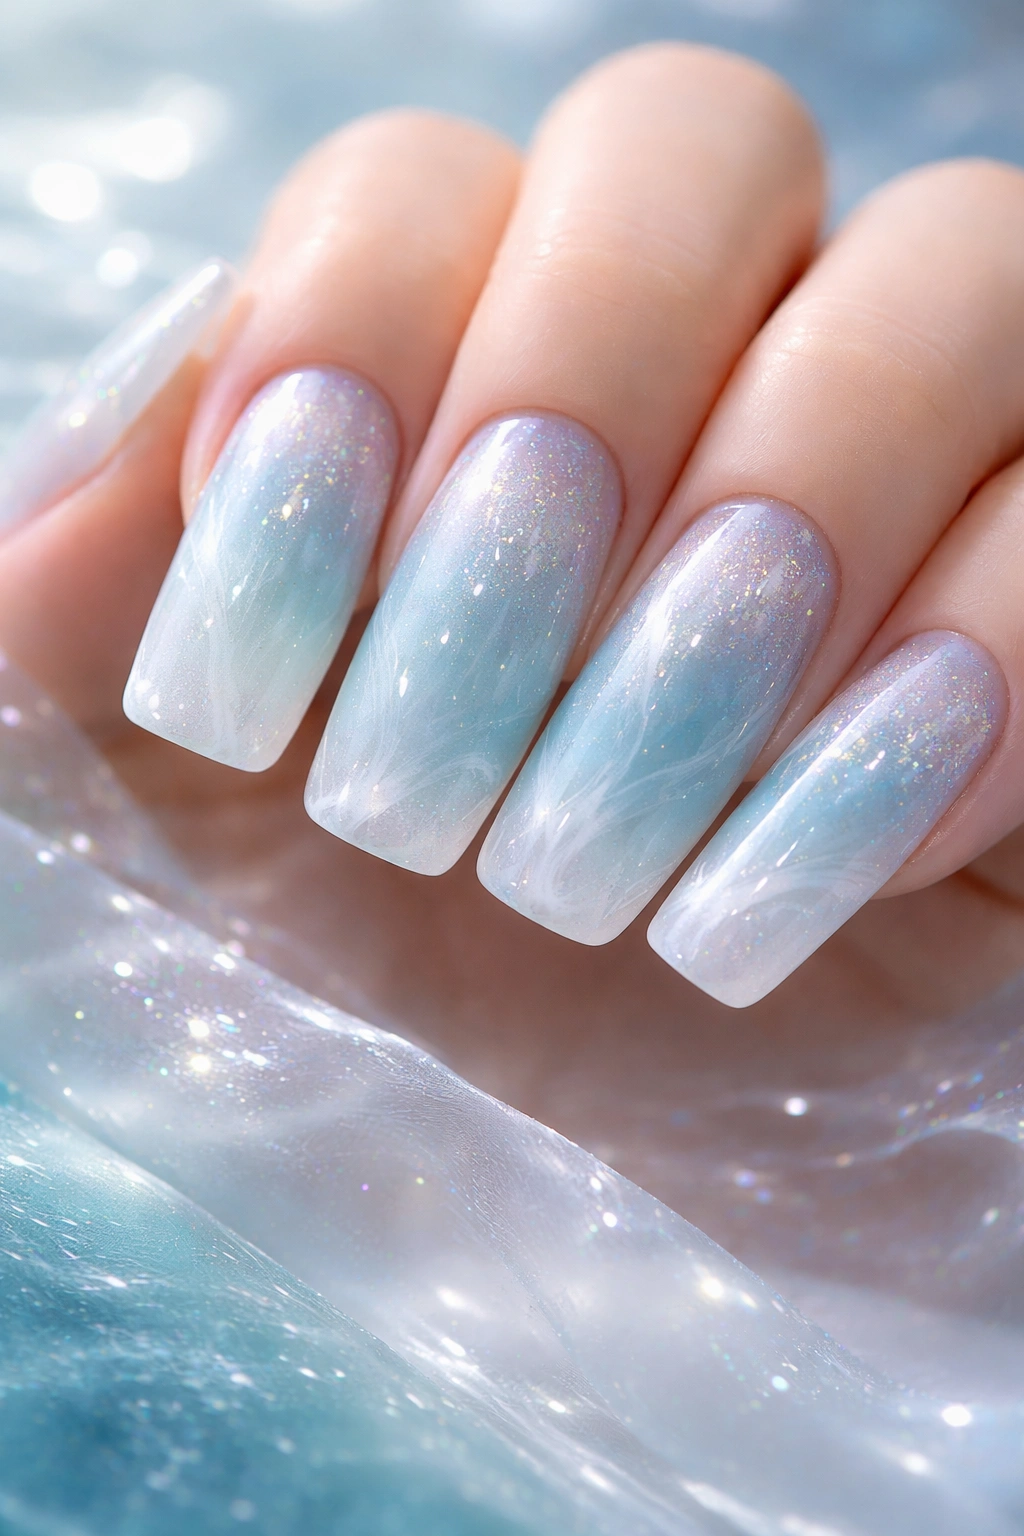
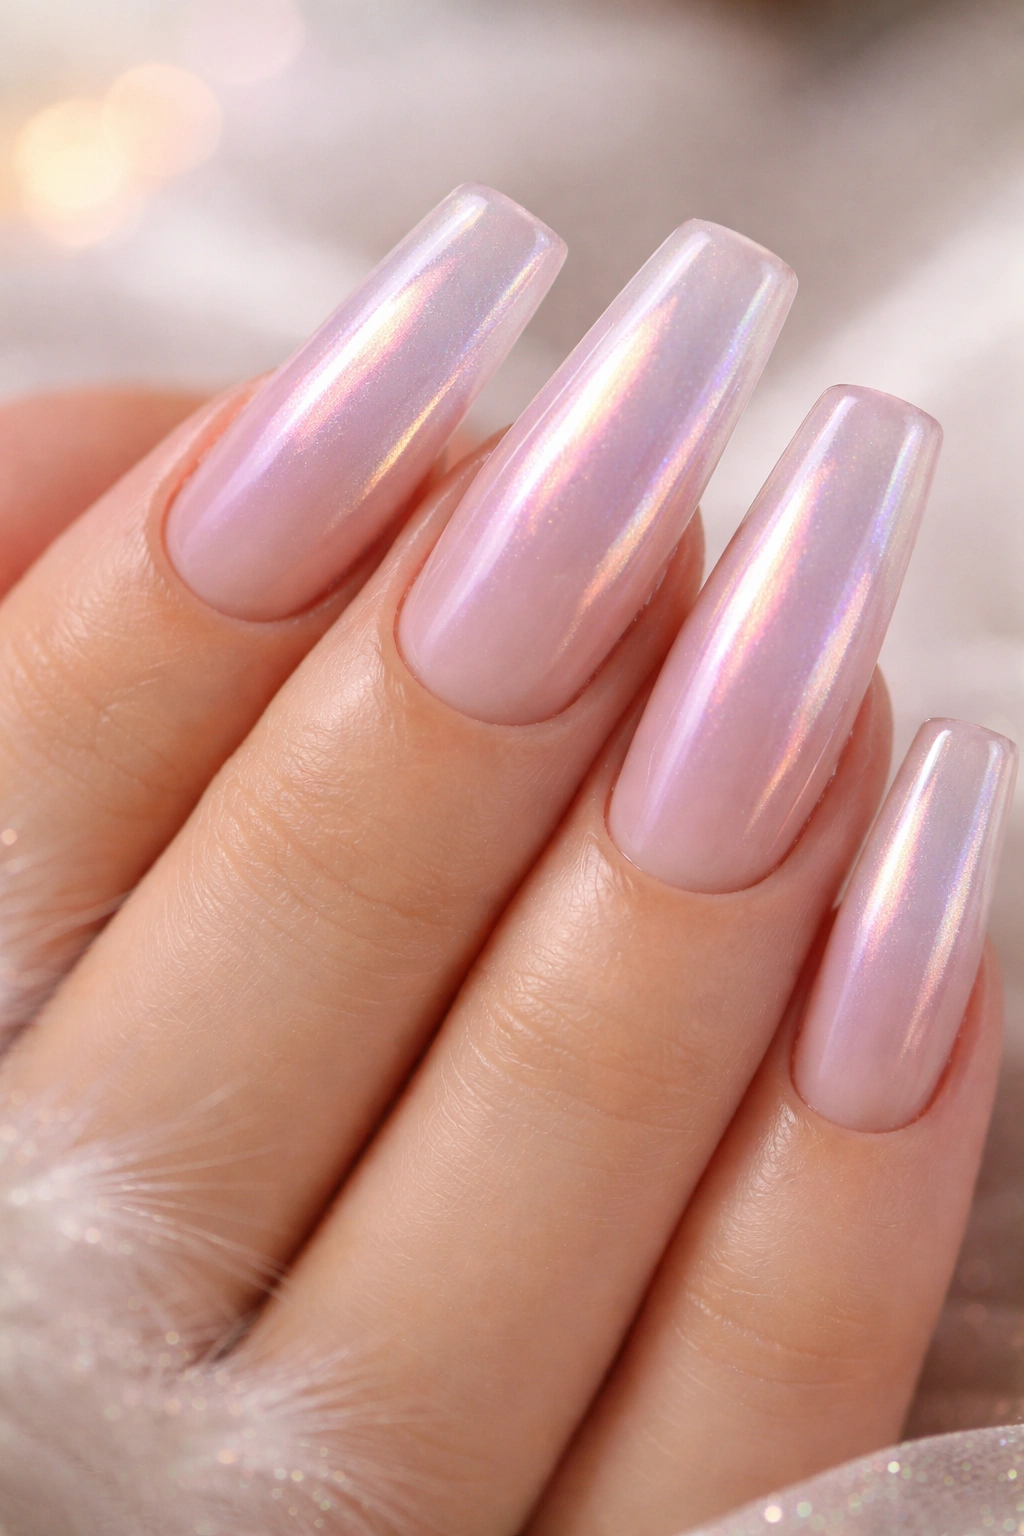
1. Iridescent Pearl Glow
This design starts with a soft, milky base that shifts between pale pink, lavender, and cream depending on the angle and light. The magic happens when you layer an iridescent pearl topcoat over a nude or soft blush base—it creates this luminous quality that looks like your nails are naturally radiating light from within. The shimmer is subtle enough to feel elegant but visible enough to catch every bit of light in the room, creating that coveted glow effect that makes people ask what products you’re using.
Why This Aura Works
The iridescent pearl finish embodies one of the core elements of aura aesthetics: the illusion of energy flowing through your nails. Unlike traditional sparkly finishes that feel surface-level, pearl shimmer creates depth and movement, making your nails look like they’re genuinely glowing.
How to Create It
- Start with a light nude or soft pink base coat (two thin layers for even coverage)
- Apply an iridescent pearl topcoat over the entire nail, focusing on getting smooth, even coverage
- Seal with a glossy top coat to enhance the shimmer and create a glass-like finish
Pro tip: Use a pearl powder mixed into a clear gel base if you want more control over the intensity—you can build the glow gradually rather than applying it all at once.
2. Celestial Star Dust

Imagine the night sky compressed onto your nails. This design combines a deep navy or charcoal base with scattered tiny stars in white, silver, and iridescent colors that look like they’re floating across a cosmic landscape. The stars aren’t arranged in constellations—they’re random and organic, creating the sense that you’ve literally captured stardust on your fingertips. The depth comes from layering: some stars sit on the surface, while others seem to exist deeper within the nail, created by painting stars on the base before adding a translucent topcoat layer on top.
What Makes This Celestial
Star dust designs tap directly into the mystical, otherworldly feeling of aura aesthetics. They represent transformation, wonder, and that sense of being connected to something larger than yourself—all essential aura elements.
How to Create It
- Paint a dark navy or charcoal base (two coats for full opacity)
- Use a thin liner brush or dotting tool to paint tiny white and silver stars randomly across the nail
- Add a few holographic or iridescent accent stars for extra shimmer
- Layer a clear or very pale blue translucent topcoat over some stars to create depth
Worth knowing: Tiny nail art details like stars are easier to create if you use a steady hand or a nail art pen rather than traditional brushes—the precision is much simpler.
3. Northern Lights Aurora
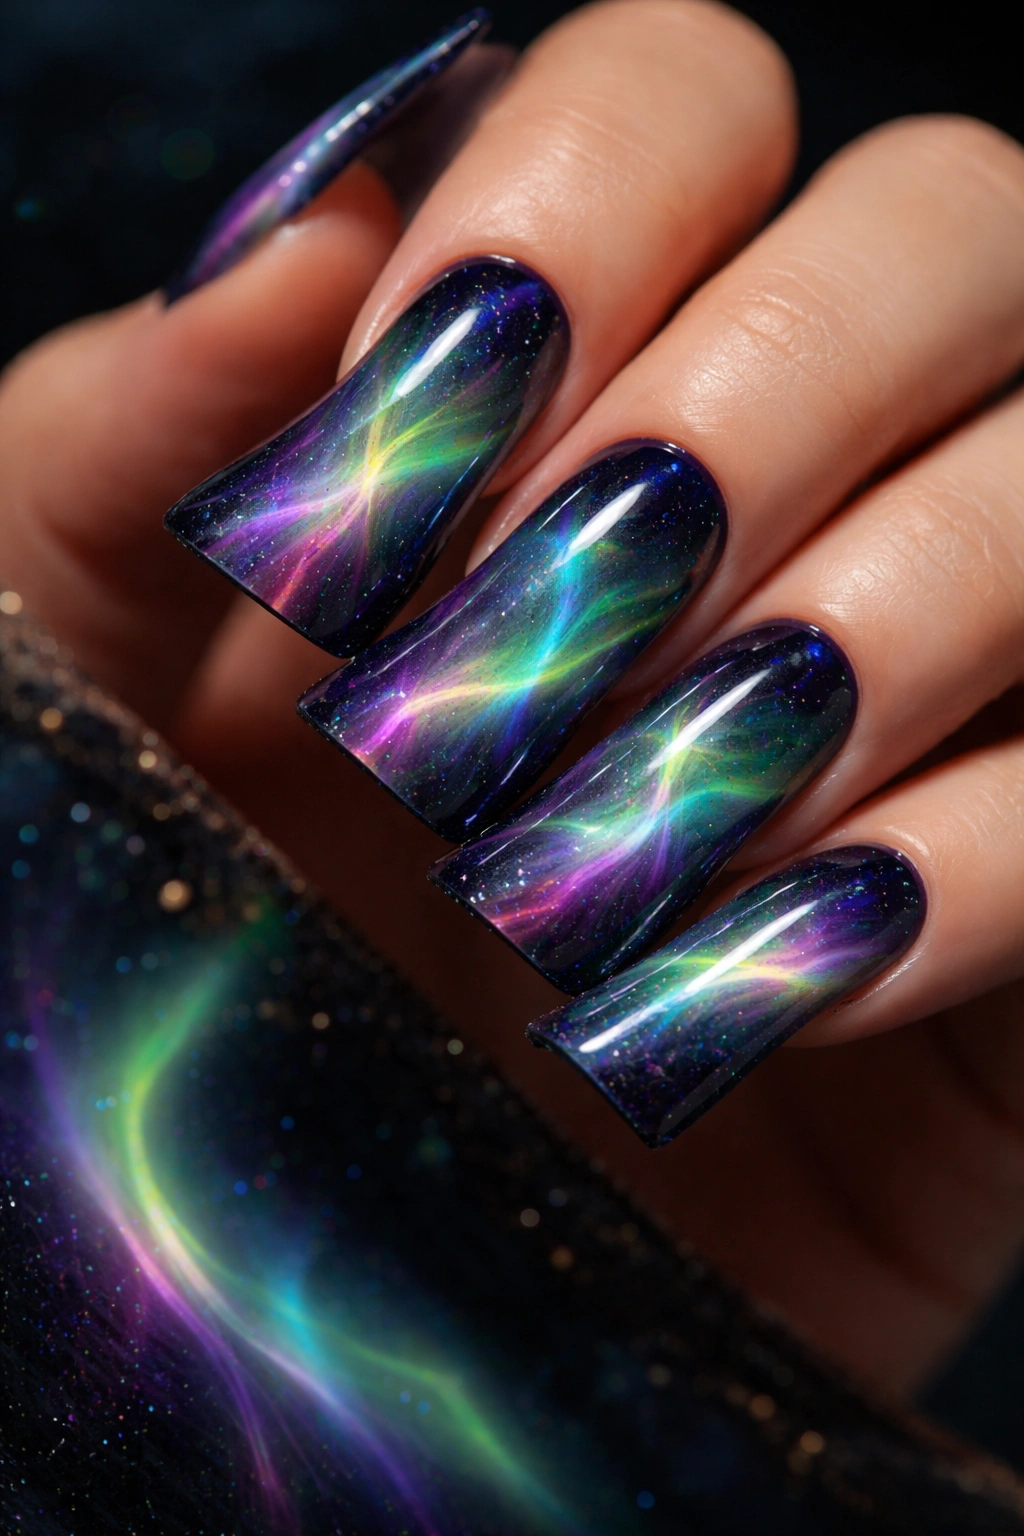
This one captures the magic of aurora borealis right on your nails—soft waves of green, purple, pink, and blue flowing across a dark base, creating the illusion of light dancing and swirling. The colors don’t have hard edges; instead, they blend and fade into each other, with some areas more transparent than others. The effect is hypnotic and definitely reads as pure aura energy. This design works best on duck nails specifically because the length gives you enough space to show the full arc of colors without everything looking cramped.
The Aurora Element
Aurora borealis is practically the definition of natural aura energy—it’s literally luminous light in motion, and replicating that on nails creates an undeniably mystical aesthetic that feels almost spiritual.
How to Create It
- Apply a dark navy, black, or deep purple base coat
- Use translucent gel polishes in green, pink, purple, and blue to create flowing waves across the nail
- Apply colors in horizontal strokes, overlapping and blending them where they meet
- Add holographic flakes or dust to areas where colors overlap for extra luminosity
- Seal with a glossy topcoat to enhance the glowing effect
Insider note: Translucent gels work better for this design than opaque polishes—they allow colors to layer and blend transparently, creating authentic aurora-like color transitions.
4. Moonstone Shimmer
Moonstone is famous for its adularescence—that milky, almost ghostly glow that appears to move across the stone’s surface. Recreating this on duck nails means applying a pale gray or soft beige base with a creamy, multi-chrome shimmer that shifts between cool and warm tones as the light hits it. The finish should feel almost pearlescent and organic, like you’ve somehow managed to polish actual moonstone into wearable nail art. This design is understated but absolutely captivating—the kind of nails that people notice immediately because they look expensive and intentional.
The Moonstone Mystique
Moonstone carries deep spiritual significance in aura practices—it’s associated with intuition, feminine energy, and emotional balance. Wearing moonstone nails means you’re literally carrying that energy on your hands.
How to Create It
- Apply a pale gray, soft beige, or milky white base coat
- Layer a multi-chrome topcoat that shifts between silver, blue, and pink tones
- Apply in thin coats to build the effect gradually—you want the shimmer to feel embedded in the polish, not sitting on top
- Finish with a glossy topcoat for maximum glow
Quick fact: Genuine moonstone typically shows its best glow under indirect light, so if you want authentic realism, apply your nails in natural light and check how they look in different lighting conditions before you seal them.
5. Rose Quartz Pink Aura
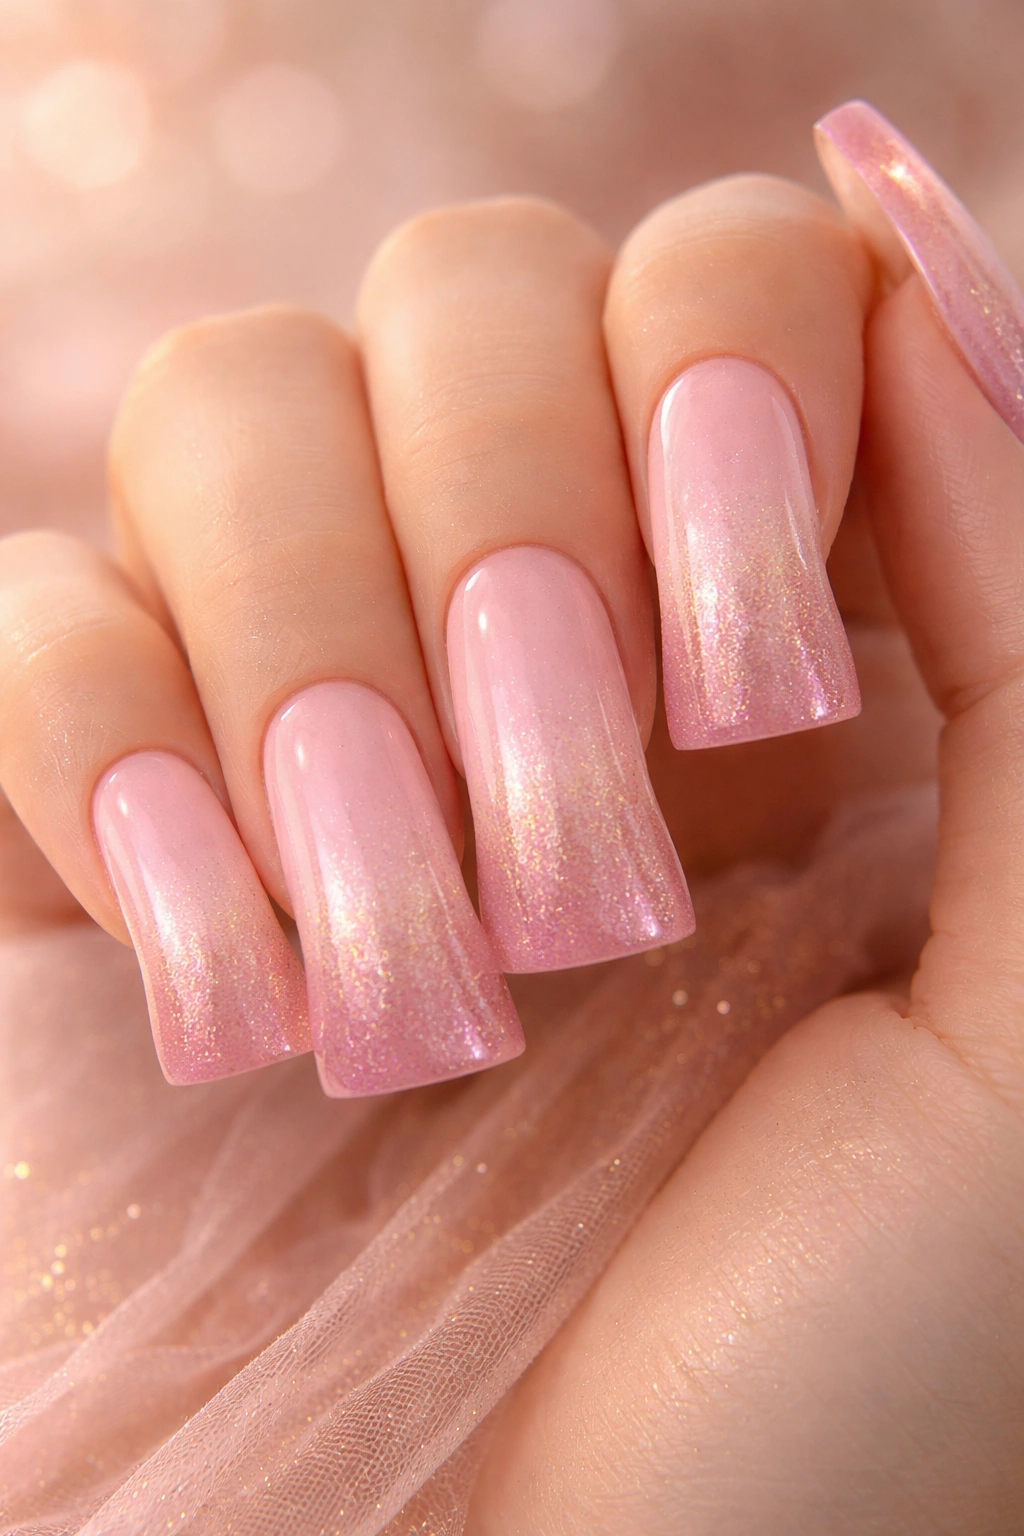
Rose quartz is the stone of love and compassion, and translating that into a nail design means working with soft, warm pinks that feel nurturing and gentle. The design combines pale rose pink as a base with deeper mauve and blush tones creating soft gradients and ombré effects. Layer in some pale gold shimmer and you’ve got nails that literally glow with warmth and light. This design is more subtle than some of the others, but that’s exactly what makes it powerful—it’s not screaming for attention; it’s inviting people to look closer and really see the detail and craft.
Why Rose Quartz Matters
In aura aesthetics, rose quartz represents self-love, healing, and opening your heart—qualities that translate beautifully into soft, glowing nail designs that feel both sophisticated and deeply personal.
How to Create It
- Start with a pale rose pink base coat
- Apply a slightly deeper mauve or dusty rose shade to the tips and edges, creating a soft gradient
- Blend the transition with a sponge for a seamless ombré effect
- Add pale gold or champagne shimmer for luminosity
- Seal with a gloss topcoat
Pro tip: Use a makeup sponge dampened slightly with alcohol to blend the gradient—it’s gentler than using a nail sponge directly and creates incredibly smooth transitions.
6. Opal Dreams
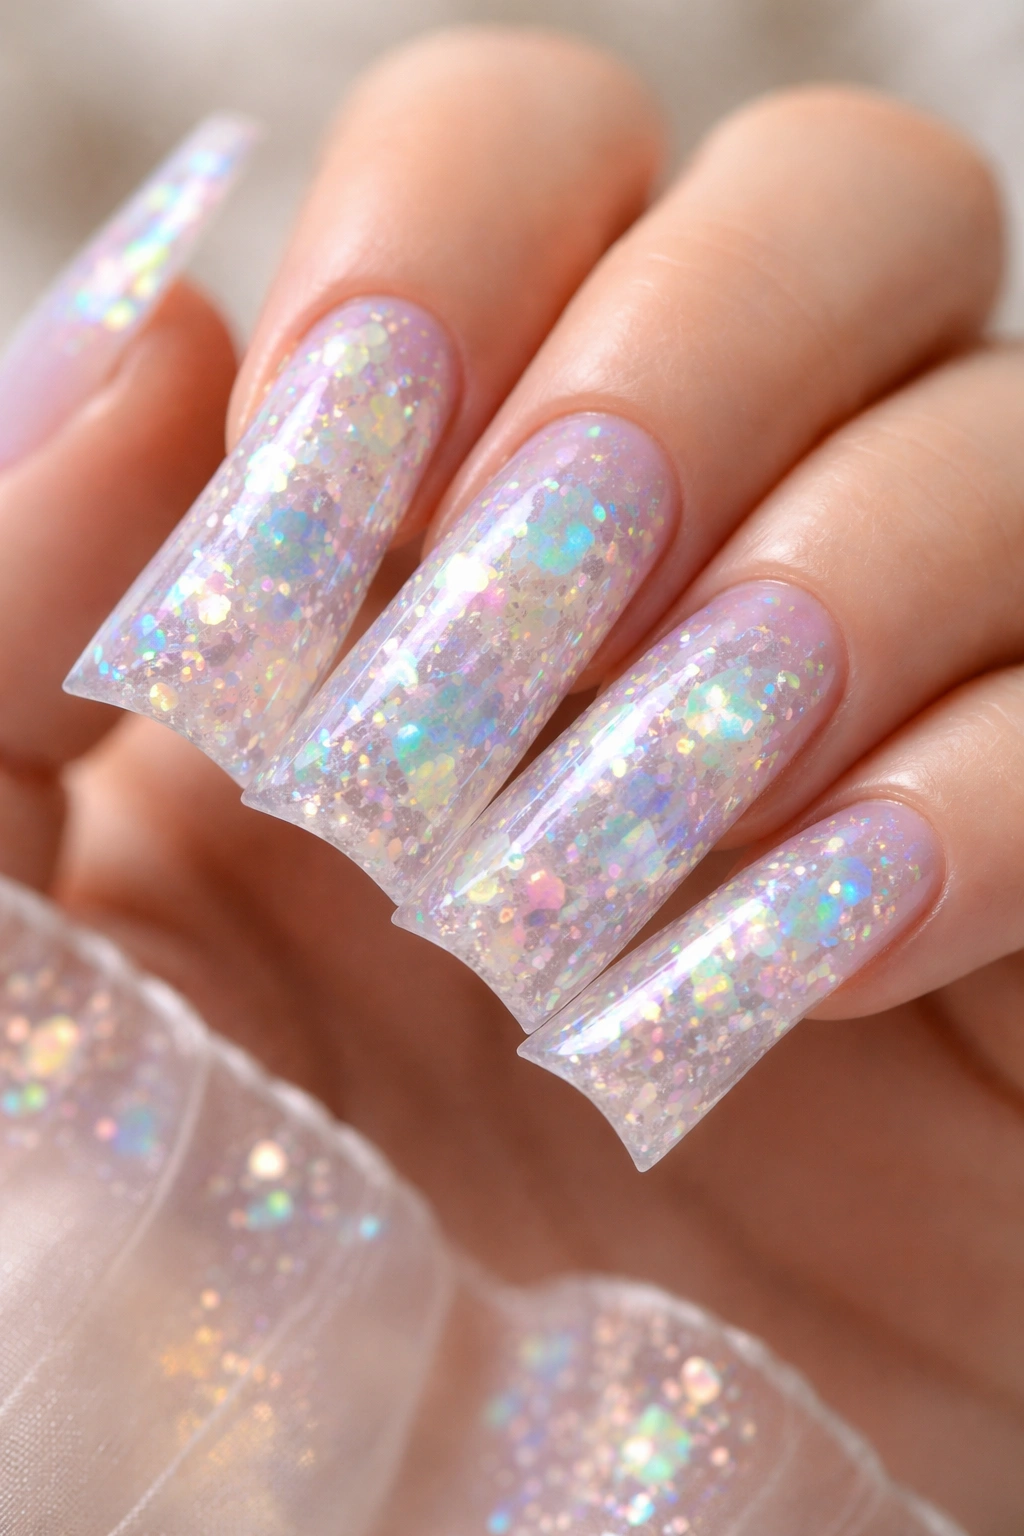
Opals are famous for displaying multiple colors simultaneously, and this nail design captures that multi-color magic. The base is typically translucent or milky white, with random flashes of blue, green, pink, purple, and orange showing through and shifting as you move your hand. Unlike star dust or celestial designs where elements are placed deliberately, opal dreams look organic and natural, as if the colors are naturally occurring within the nail. The effect is mesmerizing because the colors never look quite the same from any two angles—there’s always something new to discover.
The Opal Philosophy
Opals in aura practices represent clarity, creativity, and transformation. They embody the idea that beauty comes from the interplay of many different elements working together, creating something greater than any single piece.
How to Create It
- Apply a milky white or soft nude base coat
- Use opal flakes or crushed opal in various sizes, sprinkling them randomly across wet topcoat
- Alternatively, layer translucent polishes in blue, green, pink, and purple, letting them blend naturally without blending them completely
- Finish with a glossy clear topcoat to seal everything and enhance the shine
- Add holographic dust between coats for extra dimension
Worth knowing: Real opal fragments work beautifully for this design if you can source them—they’re more expensive than synthetic alternatives, but the authentic color play is unmatched.
7. Crystal Clear with Holographic Accents
This design uses a clear or barely-tinted nude base as the foundation, keeping most of the nail transparent and clean. The holographic accents come in the form of shimmer dust, flakes, or strategic topcoat layers that catch light and refract it into rainbow sparkles. Think of it as less-is-more taken to an elegant extreme—the transparency keeps it feeling fresh and modern, while the holographic elements ensure the nails still feel magical and dimensional. This design works particularly well for people who prefer minimal looks but still want that aura-aesthetic glow.
Why Transparency Matters
Clear nails represent clarity of purpose and intention—core aura concepts. Combining transparency with holographic sparkle creates a design that feels both grounded and ethereal at the same time.
How to Create It
- Apply a clear or very pale nude base coat
- Sprinkle holographic dust or flakes into the topcoat layer while it’s still wet, focusing on random placement
- Alternatively, apply thin lines or dots of holographic gel throughout the clear base for a more structured look
- Seal with a glossy clear topcoat
- Buff gently if any holographic particles are too raised—you want them integrated into the finish
Quick fact: Holographic finishes look completely different depending on lighting conditions—indoor fluorescent light makes them pop differently than natural sunlight, so consider your most common environment when applying.
8. Cosmic Galaxy
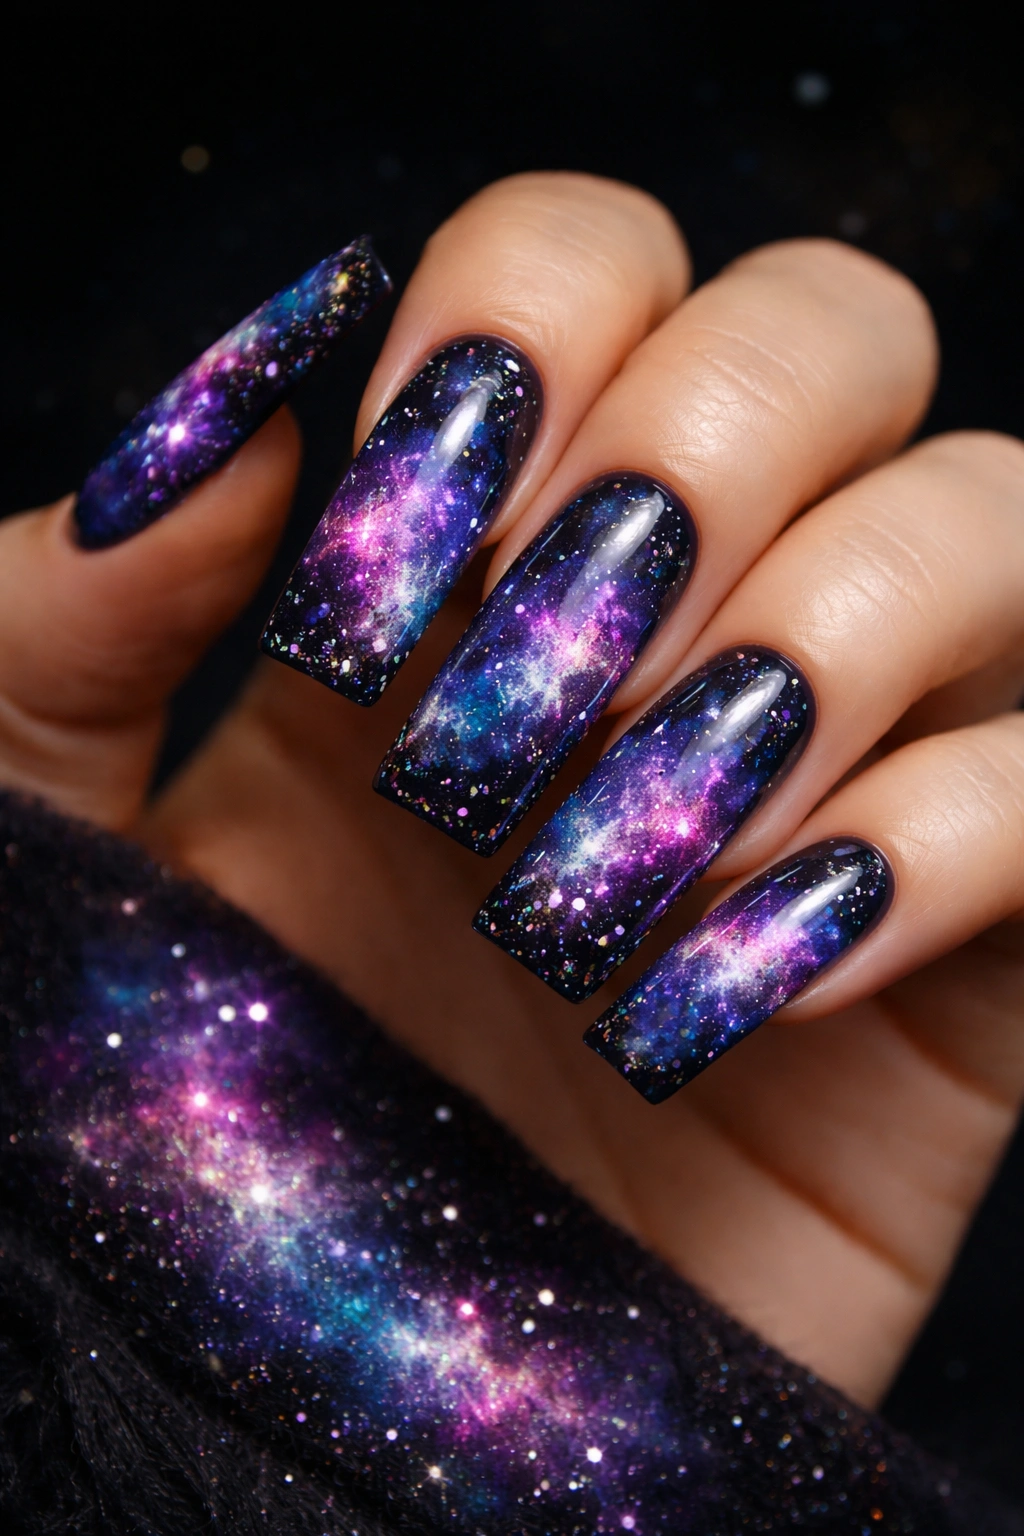
Galaxies are literally where stars, planets, and all the light in the universe exist together—making them the ultimate representation of aura energy on a cosmic scale. This design builds on the star dust concept but adds more complexity: a dark navy or black base, scattered stars, colorful nebula clouds in purple, pink, and blue, and holographic elements that represent distant stars and supernovas. The overall effect is of looking at the actual cosmos through a telescope, with all its mystery and majesty compressed onto your fingertips. Cosmic galaxy nails are bold and statement-making in the best possible way.
The Cosmic Connection
Galaxies represent infinite possibility, the vastness of existence, and humanity’s tiny but important place within something infinitely larger—spiritual concepts that align perfectly with aura aesthetics.
How to Create It
- Apply a very dark navy, black, or deep purple base
- Dab translucent purples, pinks, and blues randomly across the nail using a sponge, creating cloudy nebula effects
- Paint tiny stars with white and silver gel pens or brushes
- Add holographic flakes or dust to areas where colors blend
- Optional: use a black liner to add constellation-like connecting lines between some stars
- Seal with glossy topcoat
Insider note: This design is easier if you work with gel polish instead of traditional nail polish—the extended working time lets you perfect nebula clouds without rushed application.
9. Angel Wing White Aura
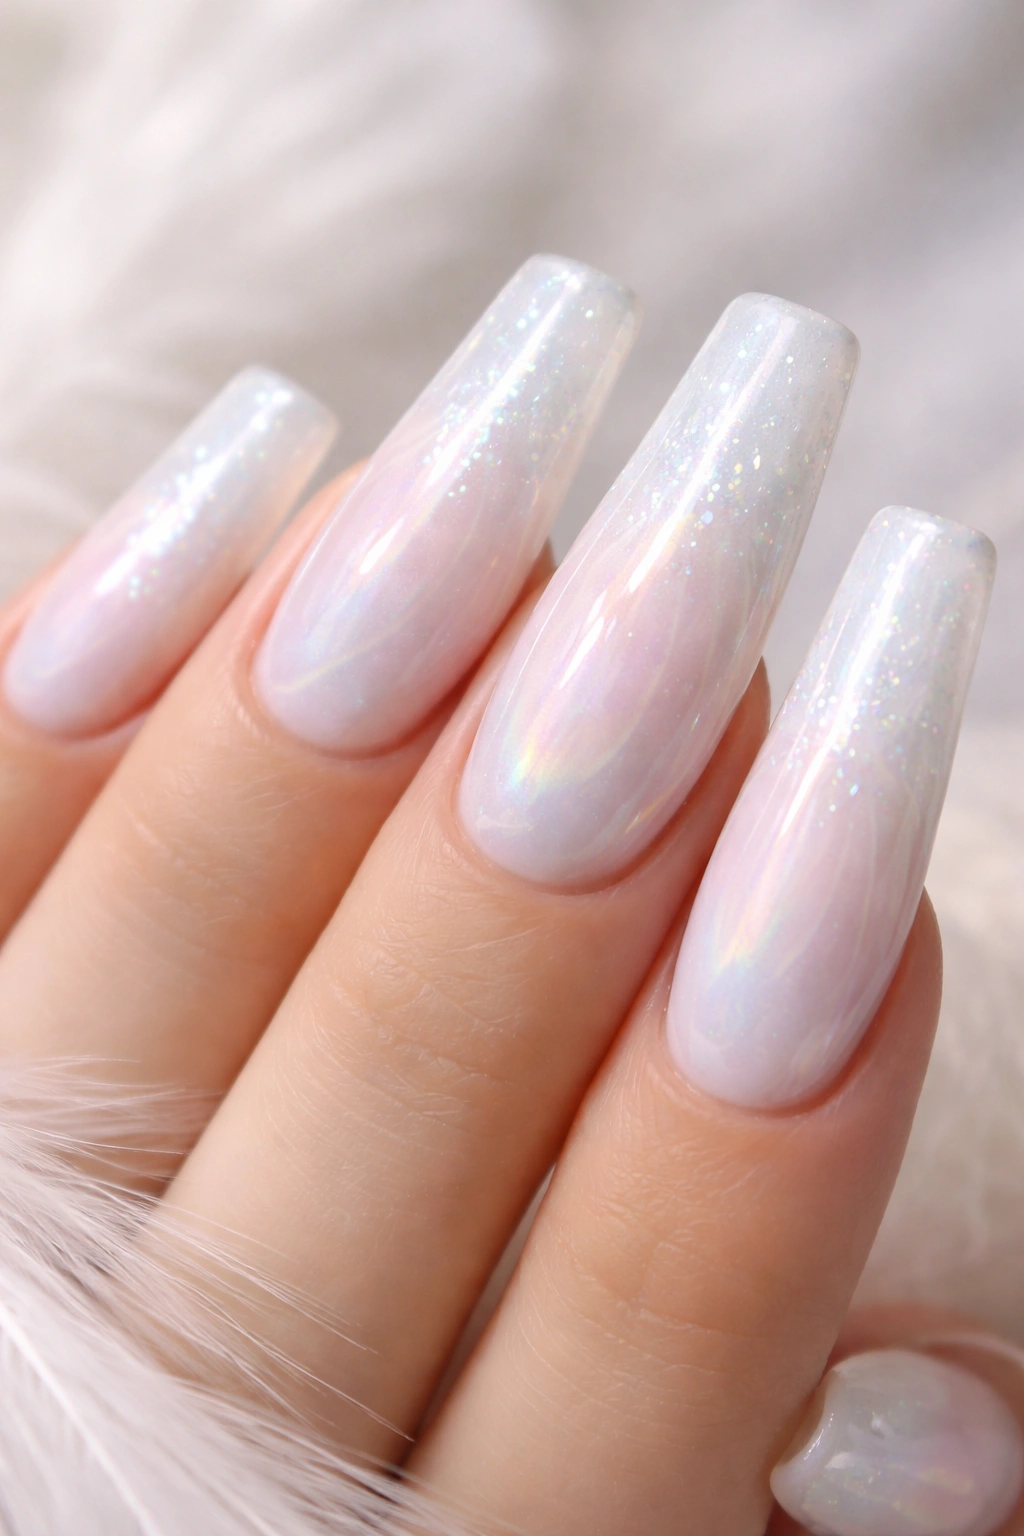
Pure white duck nails sound simple until you add the dimension that transforms them into something ethereal and almost spiritual. This design uses a pristine white base with multi-colored shimmer running through it like invisible light being refracted through angel wings. Soft iridescent, holographic, and pearl finishes layer together to create an effect that’s luminous without being sparkly in an obvious way. The white represents purity and protection—core aura concepts—while the hidden shimmer underneath suggests that pure energy is constantly flowing, just waiting to be seen under the right light.
The Angel Wing Symbolism
Angels in aura practice represent guidance, protection, and connection to higher consciousness. White feathers are classic spiritual symbols, making white duck nails with subtle shimmer a genuinely meaningful design choice.
How to Create It
- Apply a bright white base coat (two coats for full opacity)
- Layer a translucent shimmer topcoat with multi-chrome or iridescent finish
- Add pearl dust or opal flakes to random areas for dimension
- Consider adding very pale pink or lavender shimmer lines to suggest feather texture
- Seal with a gloss topcoat for ethereal glow
Pro tip: True white nails show every imperfection and dust particle—apply them in a clean, dust-free environment and consider a smoothing base coat to ensure the surface is perfectly even before applying white.
10. Amethyst Purple Energy
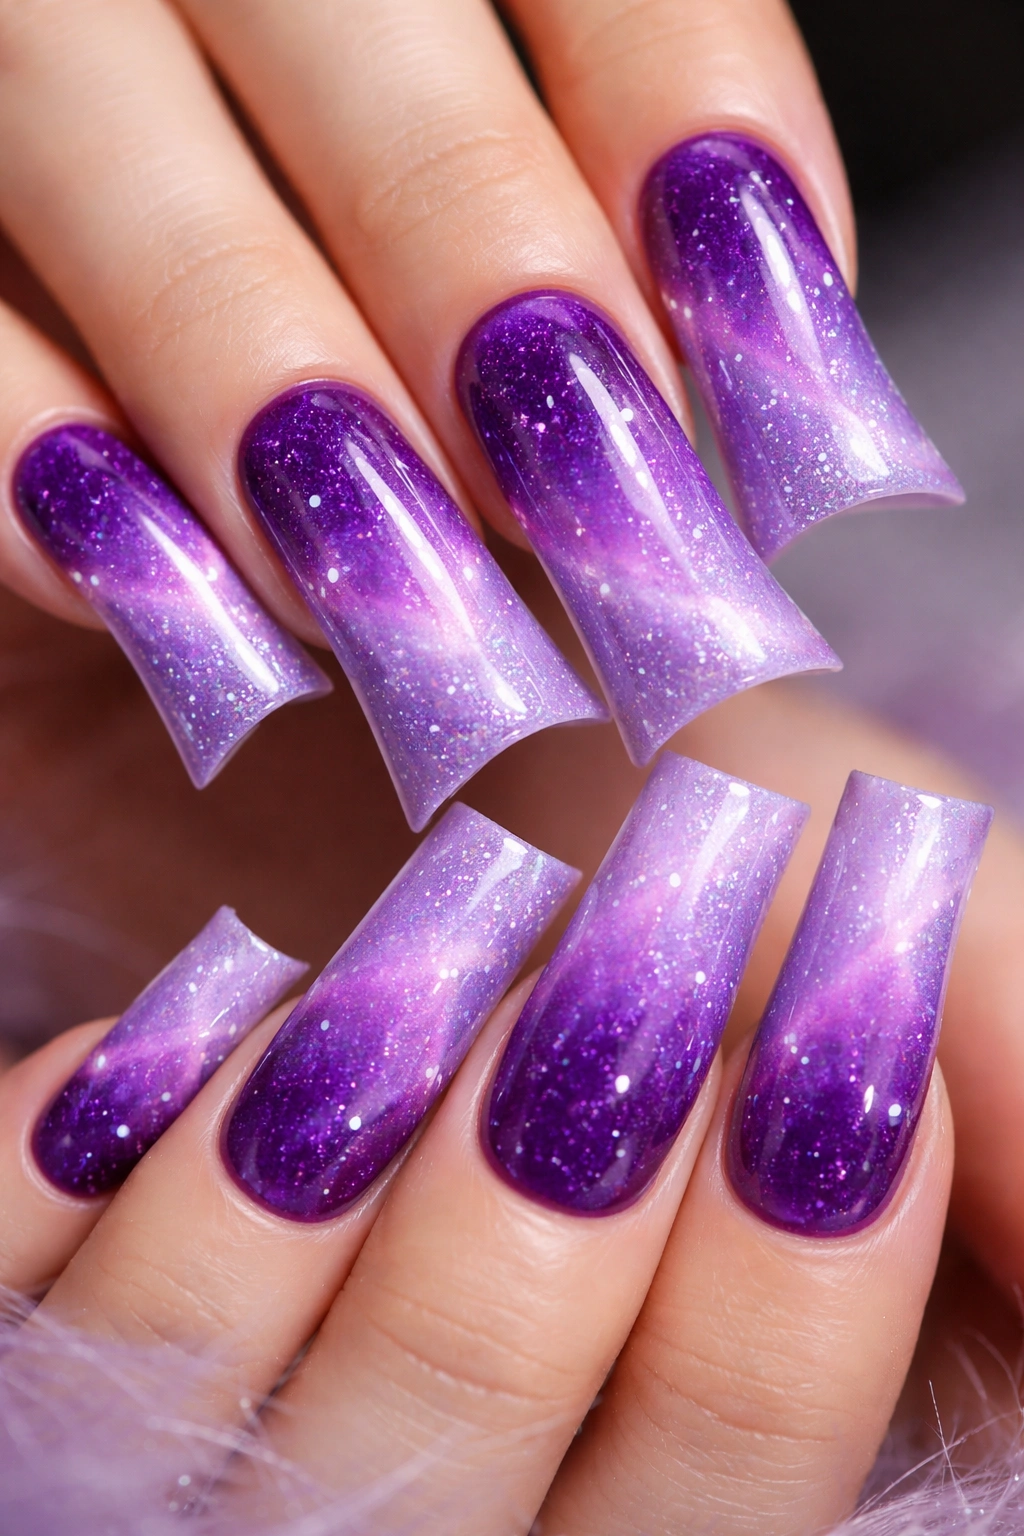
Amethyst is the stone of spiritual awareness and protection, and channeling that into a nail design means working with rich purples that feel grounding and mystical simultaneously. The design combines a base of deep, saturated purple with lighter lavender accents, creating depth and dimension. Layer in some silver or pale pink shimmer and you’ve got nails that look like they’re radiating calm, focused energy. This design is sophisticated enough for professional settings but clearly carries spiritual significance—it’s the perfect choice for people who want their aura aesthetic to be visible but refined.
Amethyst’s Energy
Amethyst is associated with intuition, calm, and spiritual connection. Wearing amethyst nails means you’re literally carrying protective, grounding energy on your hands throughout your day.
How to Create It
- Apply a rich, deep purple base coat (two coats for saturation)
- Create gradient toward lighter lavender at the tips using a sponge blending technique
- Add silver or pale pink shimmer to the lighter areas for luminosity
- Optional: add tiny white dots or lines to suggest amethyst crystal formations
- Seal with a glossy topcoat for polished elegance
Worth knowing: Deep purple nail polish can stain cuticles and skin—apply a cuticle barrier or barrier oil before painting to prevent staining and keep cleanup easy.
11. Ocean Mist Gradient
This design captures the ethereal quality of looking out at the ocean during early morning or sunset when mist obscures the horizon and light refracts through water vapor. The base is pale blue or turquoise, gradually fading to white or pale gray at the tips, with translucent whites and silvers layered throughout. The effect is dreamy and calming, like watching waves in slow motion. Add some holographic shimmer and the nails feel like they’re literally glowing with ocean energy—that perfect combination of calm and power that water represents in aura practices.
Ocean Energy
Oceans represent flow, adaptability, emotional depth, and the unknown. Ocean mist specifically suggests clarity emerging from mystery—a beautiful aura concept.
How to Create It
- Apply a pale turquoise or soft blue base coat
- Use a sponge to blend white and pale gray toward the tips, creating a gradient
- Apply translucent white gel in the upper portion to create mist effect
- Add holographic dust or subtle blue shimmer for dimension
- Blend everything smoothly for a seamless gradient
- Seal with glossy topcoat
Quick fact: Gradient designs look best when colors are applied in thin layers and blended thoroughly—rushing the blending process is the most common reason gradients end up looking muddy or patchy.
12. Golden Hour Glow
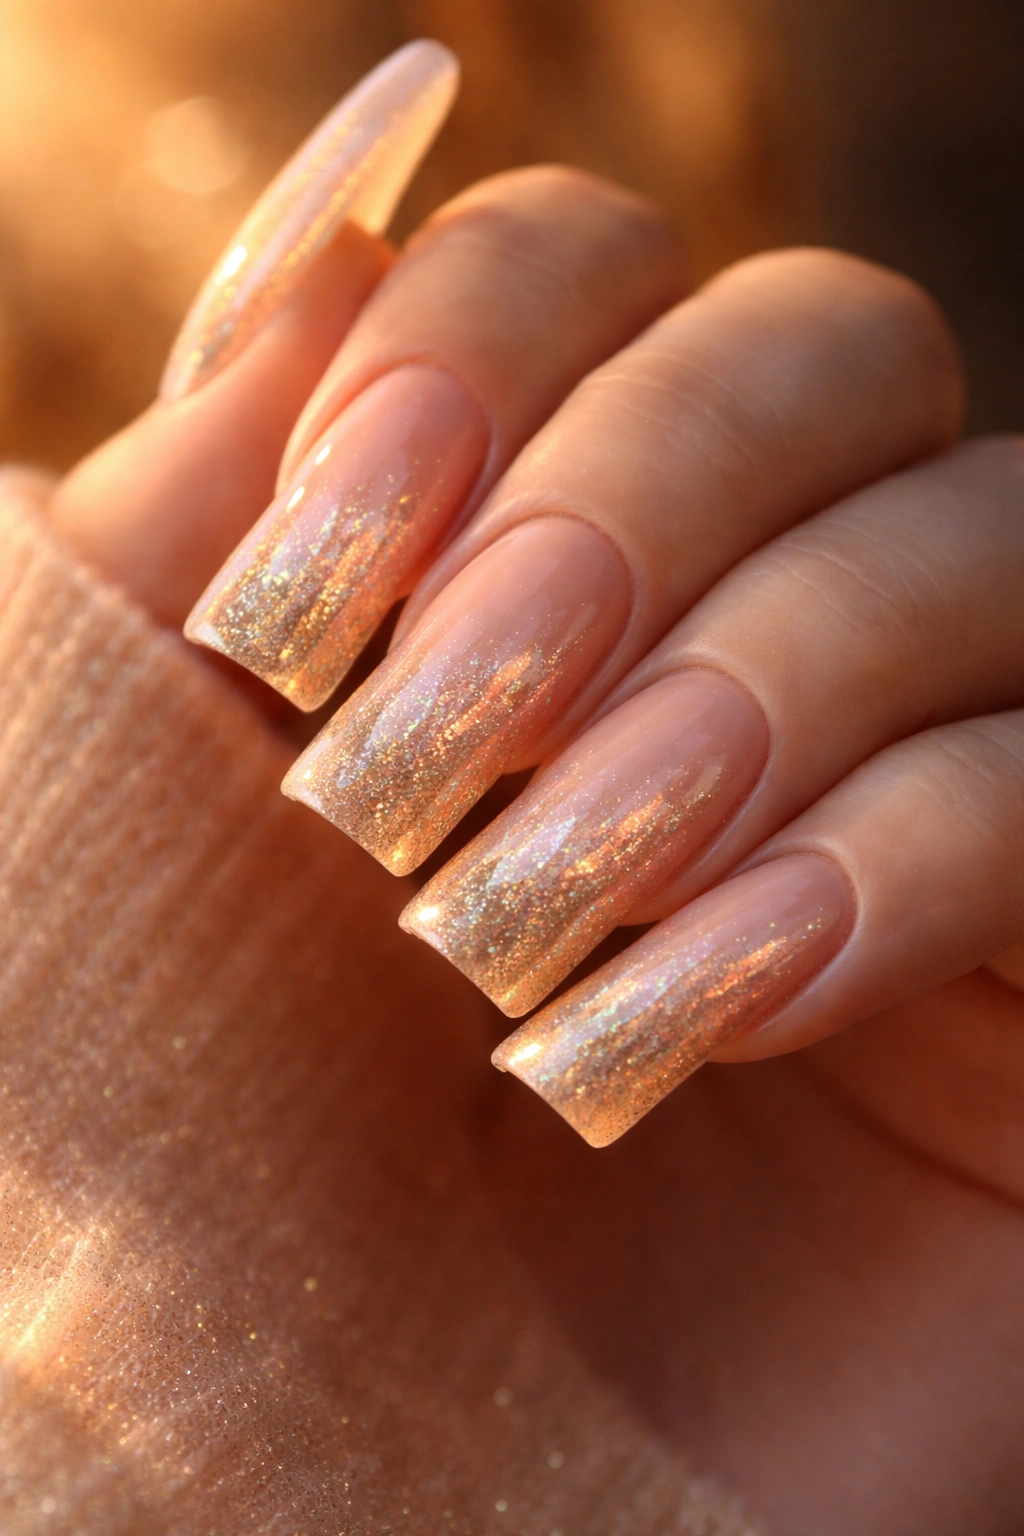
Golden hour—that magical time just before sunset when everything is bathed in warm, golden light—translates into nails that glow with warmth and radiance. This design uses a base of soft peach, warm beige, or pale gold with gradient transitions to deeper golden tones at the tips. Layer champagne, gold, and rose gold shimmer throughout for a luminous, almost sun-kissed effect. The result is nails that literally look like they’ve captured sunlight—perfect for people who want their aura aesthetic to feel warm, welcoming, and full of vitality.
Golden Hour Spirituality
Golden light represents divine energy, wisdom, and transformation across countless spiritual traditions. Golden hour nails channel that transformative energy while keeping the design feel accessible and beautiful.
How to Create It
- Apply a soft peach or warm beige base coat
- Create a gradient toward deeper gold at the tips using a sponge
- Layer champagne and rose gold shimmer throughout both the base and the gradient
- Add subtle holographic dust in the golden areas for extra luminosity
- Blend carefully for smooth transitions
- Seal with a glossy topcoat to enhance the glowing effect
Pro tip: Golden tones look different on every skin tone—test your exact shade combination on a nail wheel or practice nail before committing to all ten nails.
13. Sunset to Stardust
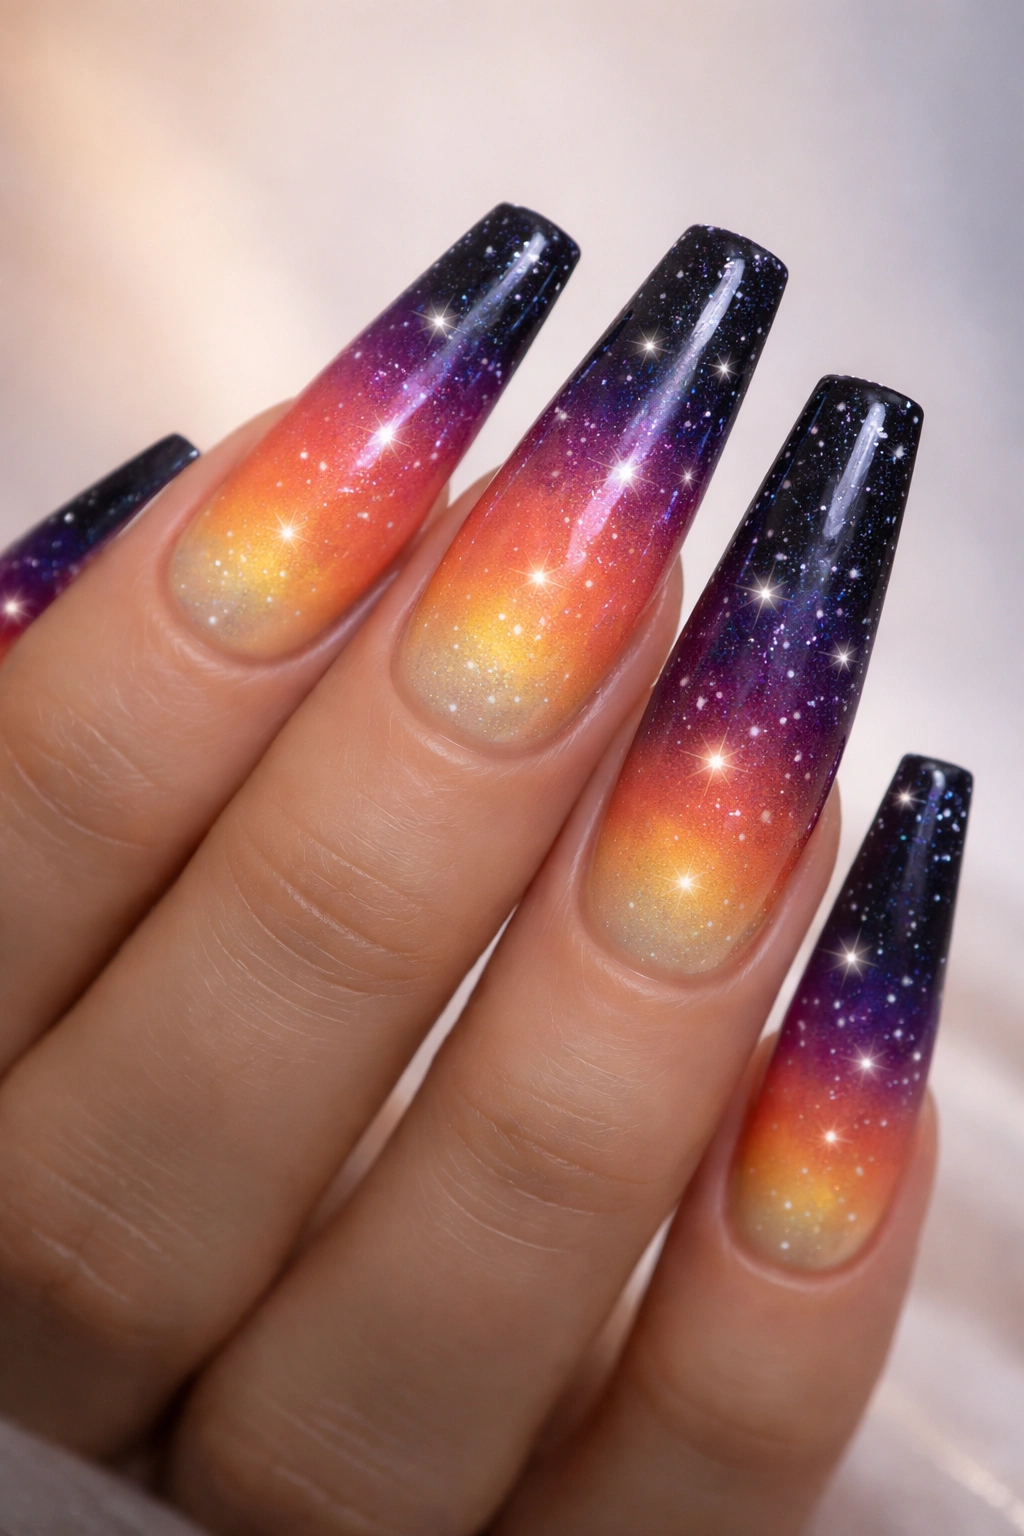
This design tells a visual story from day to night: the base and lower half of the nail show warm sunset colors (coral, orange, gold, red), while the upper half transitions into deep purple, navy, and black, with stars scattered across the night portion. The transition between sunset and starry night is soft and blended, creating a narrative arc across each nail. This design is longer than most, working particularly well on full-length duck nails where there’s enough real estate to show the complete story. It’s whimsical, romantic, and absolutely carries aura energy—representing transformation and the cyclical nature of existence.
Sunset to Stardust Meaning
This design represents the constant cycle of transformation, the movement from light to darkness, and the idea that both day and night are equally valuable. Spiritually, it honors transition and change as essential parts of existence.
How to Create It
- Apply a warm coral or orange base coat
- Create a gradient from coral through orange and gold to the middle of the nail
- At the midpoint, transition to deep purple, then navy, then black toward the tips
- Use a sponge to blend transitions smoothly
- Add tiny white stars in the upper dark portion
- Include holographic dust in both the sunset and starry portions
- Seal with glossy topcoat
Worth knowing: This design requires patience and careful blending—working in layers and letting each layer set slightly before adding the next creates cleaner results than trying to blend everything at once.
14. Bioluminescent Glow Effect
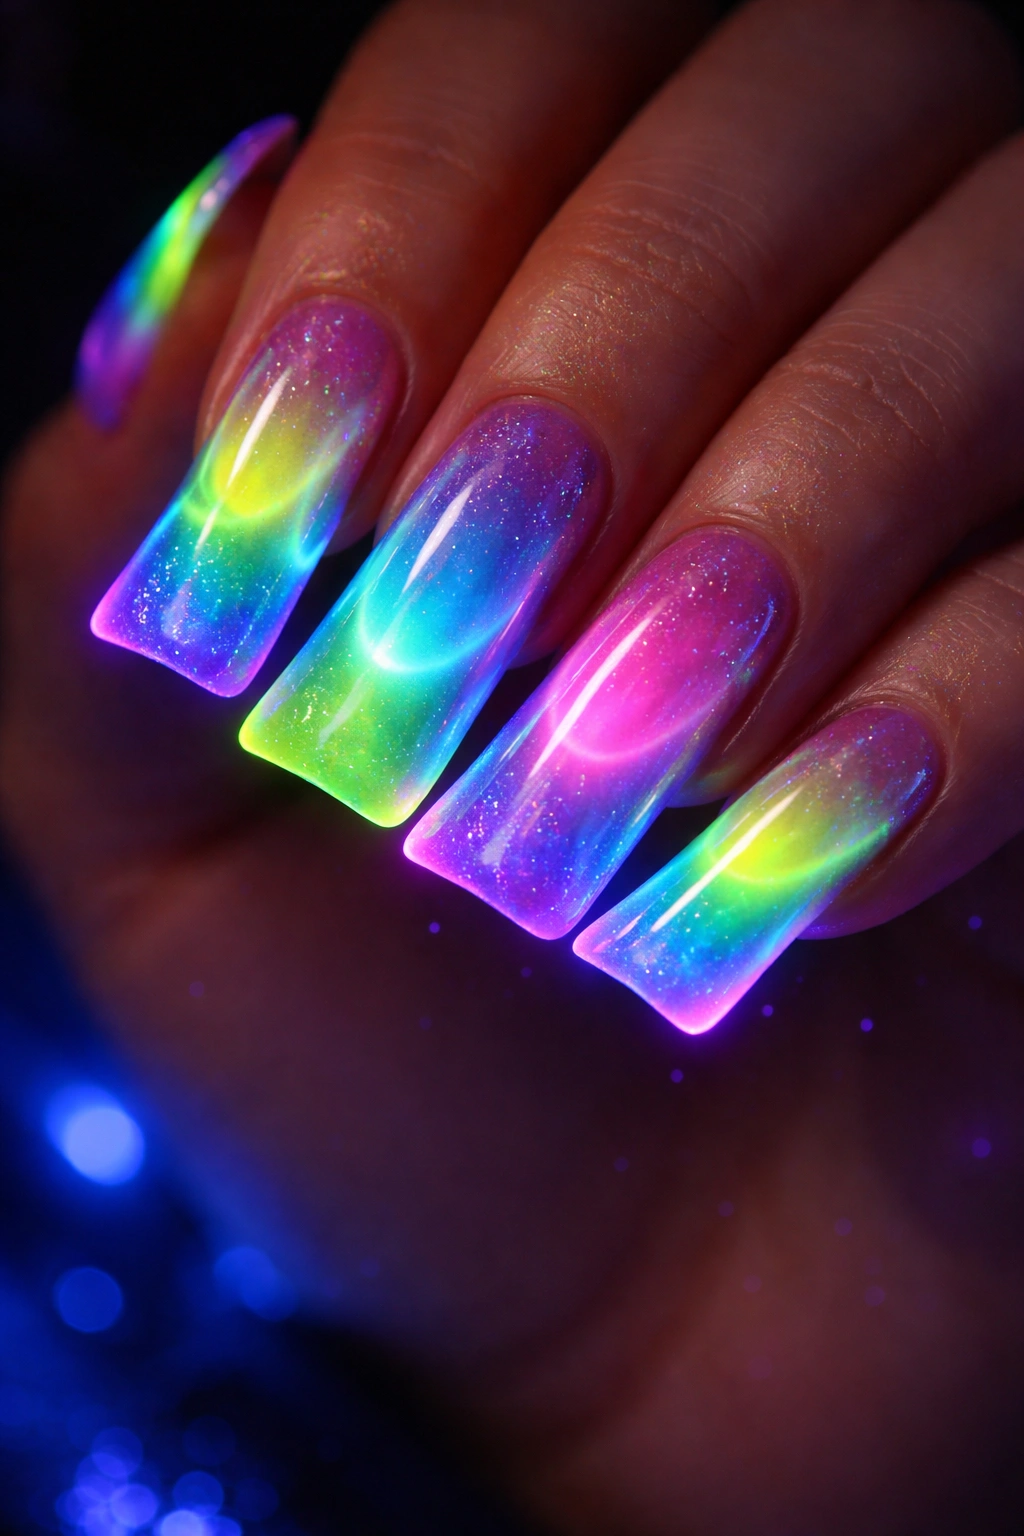
Imagine nails that literally glow in the dark—or at least look like they could. This design uses glow-in-the-dark topcoat as the base element, combining it with neon or bright fluorescent colors (lime green, electric blue, hot pink) that pop under UV light. In daylight, the nails look like they have an inner light trying to escape; under blacklight or in dim settings, they genuinely glow. This is the most theatrical aura design on this list—it’s meant to turn heads and create conversation. The bioluminescent effect captures the idea of internal energy made visible, which is the absolute essence of aura aesthetics taken to its most literal extreme.
Bioluminescence as Energy
Bioluminescence is literally energy converted to light—organisms that glow are displaying their life force visibly. Bioluminescent nails represent bringing your inner light into the world and making your energy tangible.
How to Create It
- Apply a glow-in-the-dark base coat as your foundation
- Add neon or bright fluorescent topcoat in your chosen color over the glow base
- Optional: create patterns or designs within the bright color for added detail
- Seal with a topcoat (use regular topcoat, not glow-in-the-dark, over the bright color for a glossy finish)
- Test the glow effect in low light to make sure it’s bright enough
Insider note: Glow-in-the-dark polish works best on shorter polish wear cycles because the glow effect diminishes over time—plan to refresh these nails every 7-10 days for optimal glowing power.
15. Chrome Mystique
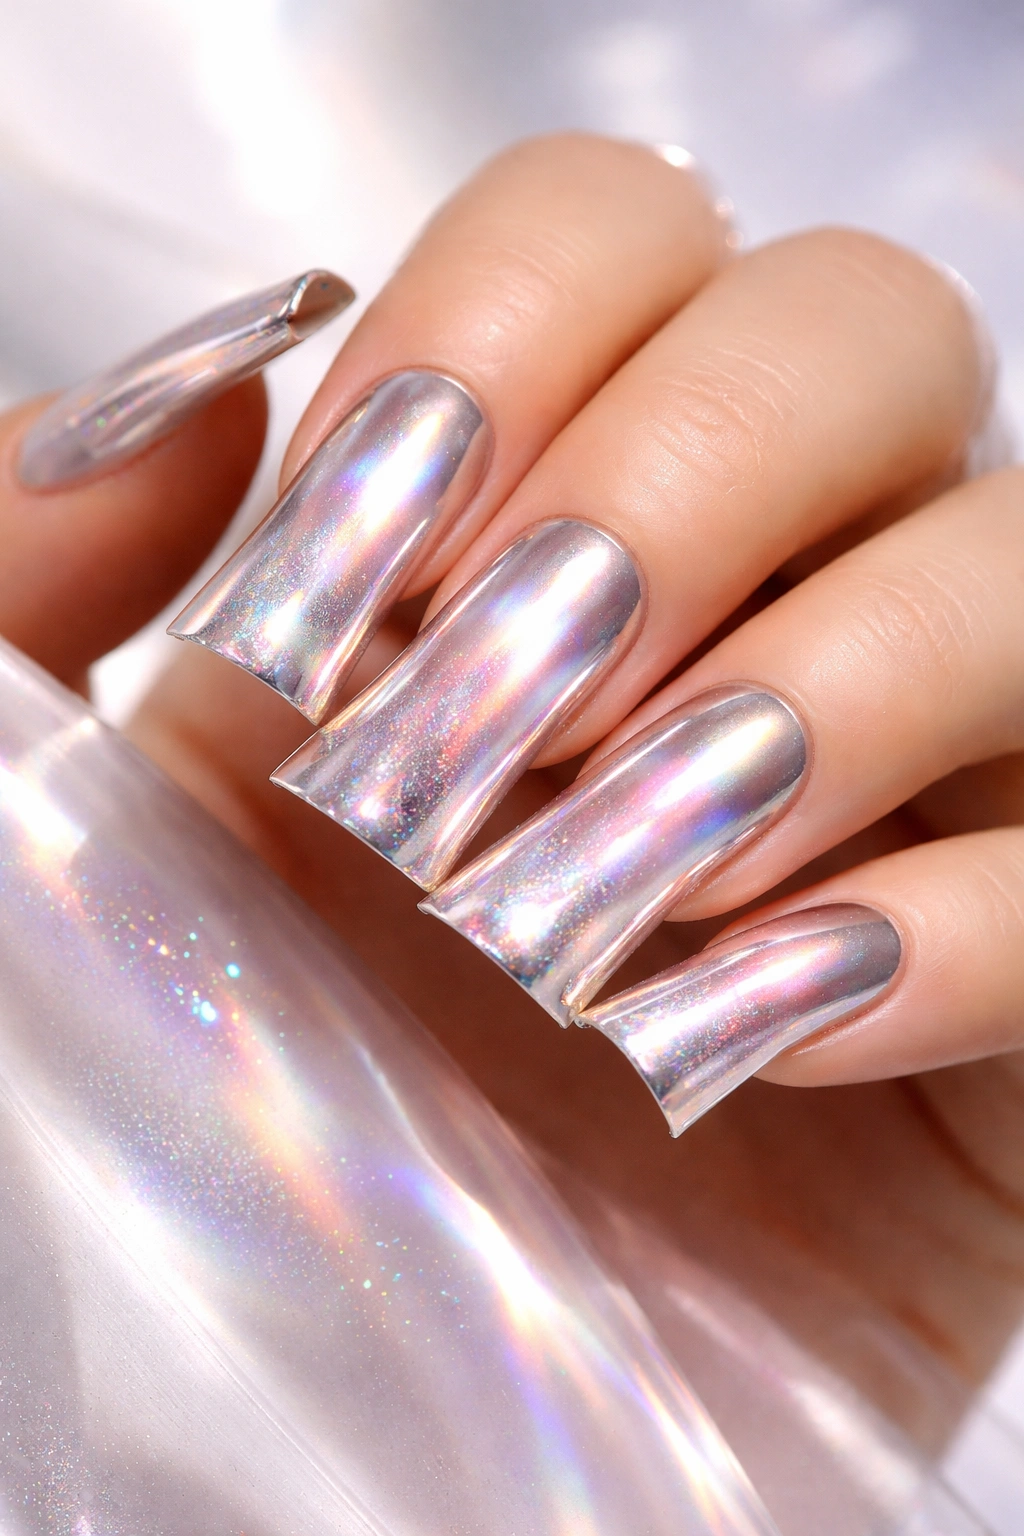
Chrome finishes on duck nails create an almost sci-fi effect—a metallic, mirror-like surface that reflects everything around it. The mystique version combines chrome polish with holographic or iridescent elements, creating a finish that’s both futuristic and magical. Colors can range from traditional silver chrome to rose gold, rose copper, or multi-chrome versions that shift colors depending on angle and light. The effect is otherworldly in the best way—your nails literally become prisms, reflecting and refracting light in ways that keep them constantly changing as you move your hands.
Chrome as Energy Mirror
Chrome represents reflection and clarity—the ability to see yourself truly and reflect light back into the world. It’s a design that says “I reflect the energy around me and amplify it.”
How to Create It
- Apply a smooth base coat (chrome polish requires a very smooth surface)
- Use a specialized chrome powder with a chrome activator, applying according to product instructions
- For added mystique, use multi-chrome or holographic powder instead of traditional silver chrome
- Apply the powder in thin layers, buffing between layers for a seamless mirror finish
- Seal with topcoat specifically designed for chrome (many regular topcoats dull the chrome effect)
Pro tip: Chrome finishes are very scratch-prone—avoid touching your nails while the powder is being applied and applied, and be gentle with your nails for the first 24 hours while the finish fully sets.
16. Ethereal Ombre
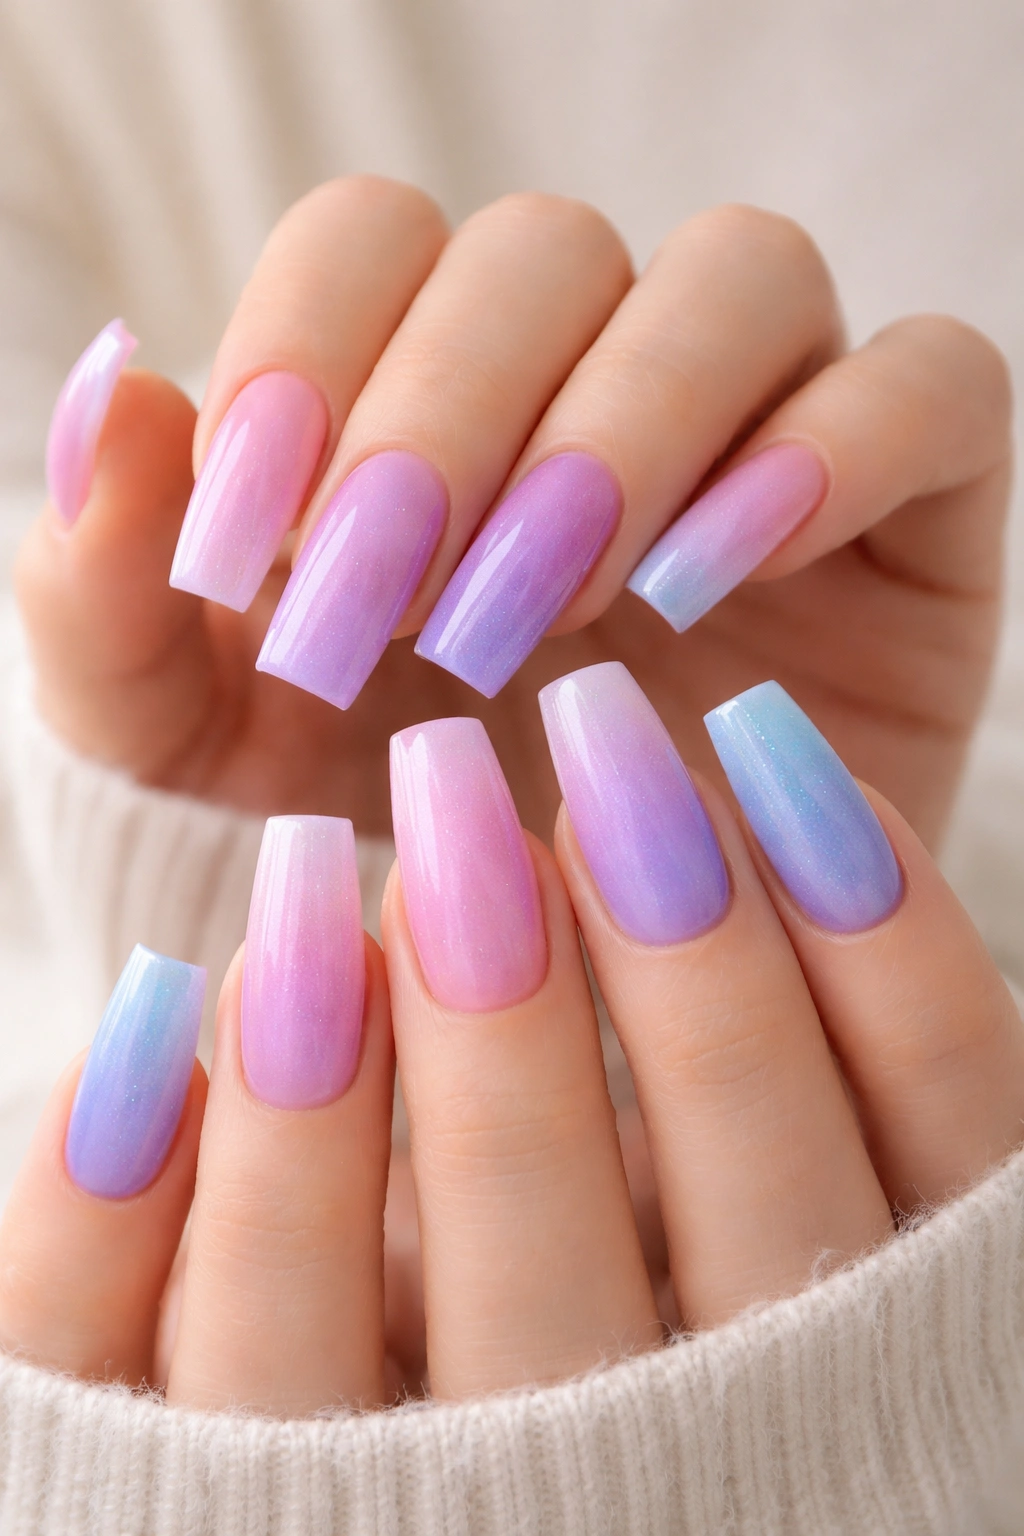
The final design is an ombre that stretches across all ten nails, creating a unified color story from nail to nail. One hand might gradient from soft blush pink to deep purple, while the other hand gradients from pale lavender to ocean blue—creating balance and symmetry. Within each nail, the colors blend smoothly from base to tip, creating depth and dimension. The overall effect when you hold both hands together is almost hypnotic, like watching a living rainbow flow across your fingertips. This design celebrates the fact that your hands are a canvas and your nails are part of a larger artistic statement.
Ombre’s Significance
Ombre represents gradual transformation and the spectrum of possibility—the idea that existence isn’t black and white but exists in infinite shades and gradations. It’s meditation in nail form.
How to Create It
- Choose your color story across all ten nails (e.g., nails 1-5 gradient from pink to purple, nails 6-10 gradient from lavender to blue)
- Apply a light base color to nails on one side of your hand
- Create gradient transitions within each nail using a sponge blending technique
- Adjust colors slightly on each nail so they flow into each other across your hand
- Use the same accent color (holographic, shimmer, or pearl) on all nails for visual unity
- Blend everything smoothly and seal with glossy topcoat
Worth knowing: Planning your color transitions across all ten nails is easier if you paint swatches on a practice wheel first—you can see exactly which colors flow best together before committing to your actual nails.
Final Thoughts
Aura duck nails are genuinely about so much more than just looking beautiful—though they definitely accomplish that. These designs represent bringing your energy, intention, and spirituality into the world in a visible, tangible way. Whether you’re drawn to the soft femininity of rose quartz pink, the bold transformation of sunset to stardust, or the mirror-like mystery of chrome mystique, there’s an aura duck nail design that speaks directly to what you’re channeling right now.
The magic of these designs is that they evolve with you. Your nails catch different light in different settings, revealing new colors and dimensions you didn’t notice before—just like actual aura energy, which is always shifting, growing, and transforming. You’re not just wearing nail art; you’re wearing a visual representation of your internal energy and intention. That’s the real power behind aura aesthetics, and duck nails provide the perfect canvas for bringing that power to life. Start with whichever design calls to you most strongly, and remember that the best aura nails are the ones that make you feel most authentically yourself.
