

Duck nails—those adorable, curved, rounded tips that fan out like a duck’s foot—have become a major trend in the nail design world. The shape itself is instantly recognizable and photogenic, making it the perfect canvas for ombre effects, which create stunning gradient transitions from one color to another. When you combine the playful silhouette of duck nails with the sophisticated flow of an ombre gradient, you get designs that are equal parts fun and elegant, eye-catching without being over-the-top. Whether you’re drawn to pastels, jewel tones, or bold color combinations, ombre duck nails offer endless possibilities for creative self-expression.
What makes ombre duck nails especially appealing is how the gradient effect emphasizes the nail’s unique shape. The curved edges and wider tip mean the color transition has more room to shine, literally creating a visual flow that draws the eye across your entire hand. Unlike some nail shapes where ombre can feel cramped or hard to execute, duck nails give the gradient plenty of real estate to work with, resulting in a more sophisticated and visually interesting finish.
The beauty of ombre duck nails is that they work for virtually any occasion—from casual everyday wear to special events and everything in between. A soft pastel ombre might feel dreamy and romantic, while a metallic or sparkly gradient reads as glamorous and bold. The key is choosing color combinations that speak to your personal style and pairing them with the right techniques to bring them to life.
1. Peachy-to-Pink Gradient with Gold Accents
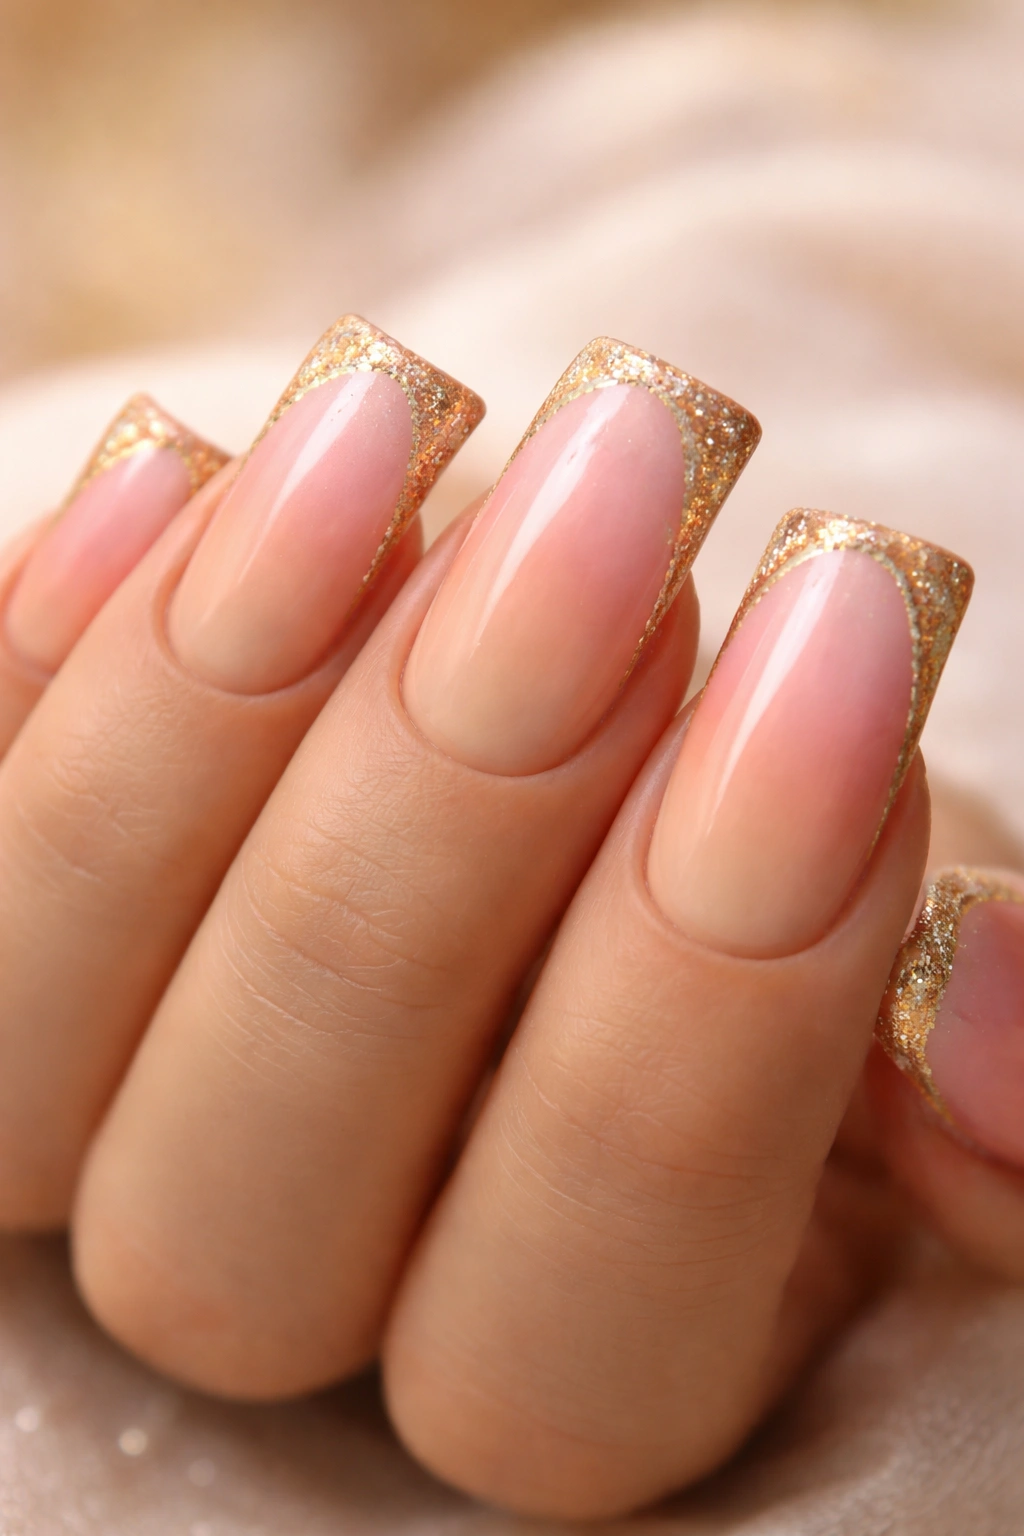
This warm, romantic ombre transitions smoothly from a soft peachy-nude at the base to a blushing pink at the tip, creating an effect that feels both subtle and striking. The beauty of this combination lies in how naturally these colors blend together—peachy and pink are neighbors on the color wheel, which means the gradient feels seamless rather than jarring. Adding fine gold accents along the curved edges of the duck nail emphasizes the shape while introducing a touch of glamour that lifts the design from simple to special.
How to Create This Design
Start by applying a base coat and letting it dry completely. Paint the peachy-nude shade across the entire nail, then apply a slightly darker pink to just the tip and edge of the nail. Use a damp makeup sponge to gently blend where the two colors meet, working in light dabbing motions rather than dragging the sponge across the surface—this prevents the colors from muddying together. Once you’re happy with the gradient, seal it with a clear top coat. After the top coat is completely dry, use a thin gold liner brush to add delicate gold detailing along the curved edges of the duck nail shape. You can also add tiny gold flecks or dots at the very tip for extra sparkle.
Why This Works for Duck Nails
The peachy-pink combination complements a wide range of skin tones and works beautifully with the duck nail’s organic, flowing shape. The gold accents create definition without overwhelming the soft gradient underneath, and the overall effect reads as both wearable and intentional. This design works year-round and suits everything from casual outings to formal events.
Pro tip: If you struggle with blending, invest in a professional gradient sponge—they’re inexpensive and create much cleaner transitions than standard makeup sponges.
2. Deep Emerald to Sage Green Jewel Tone Ombre
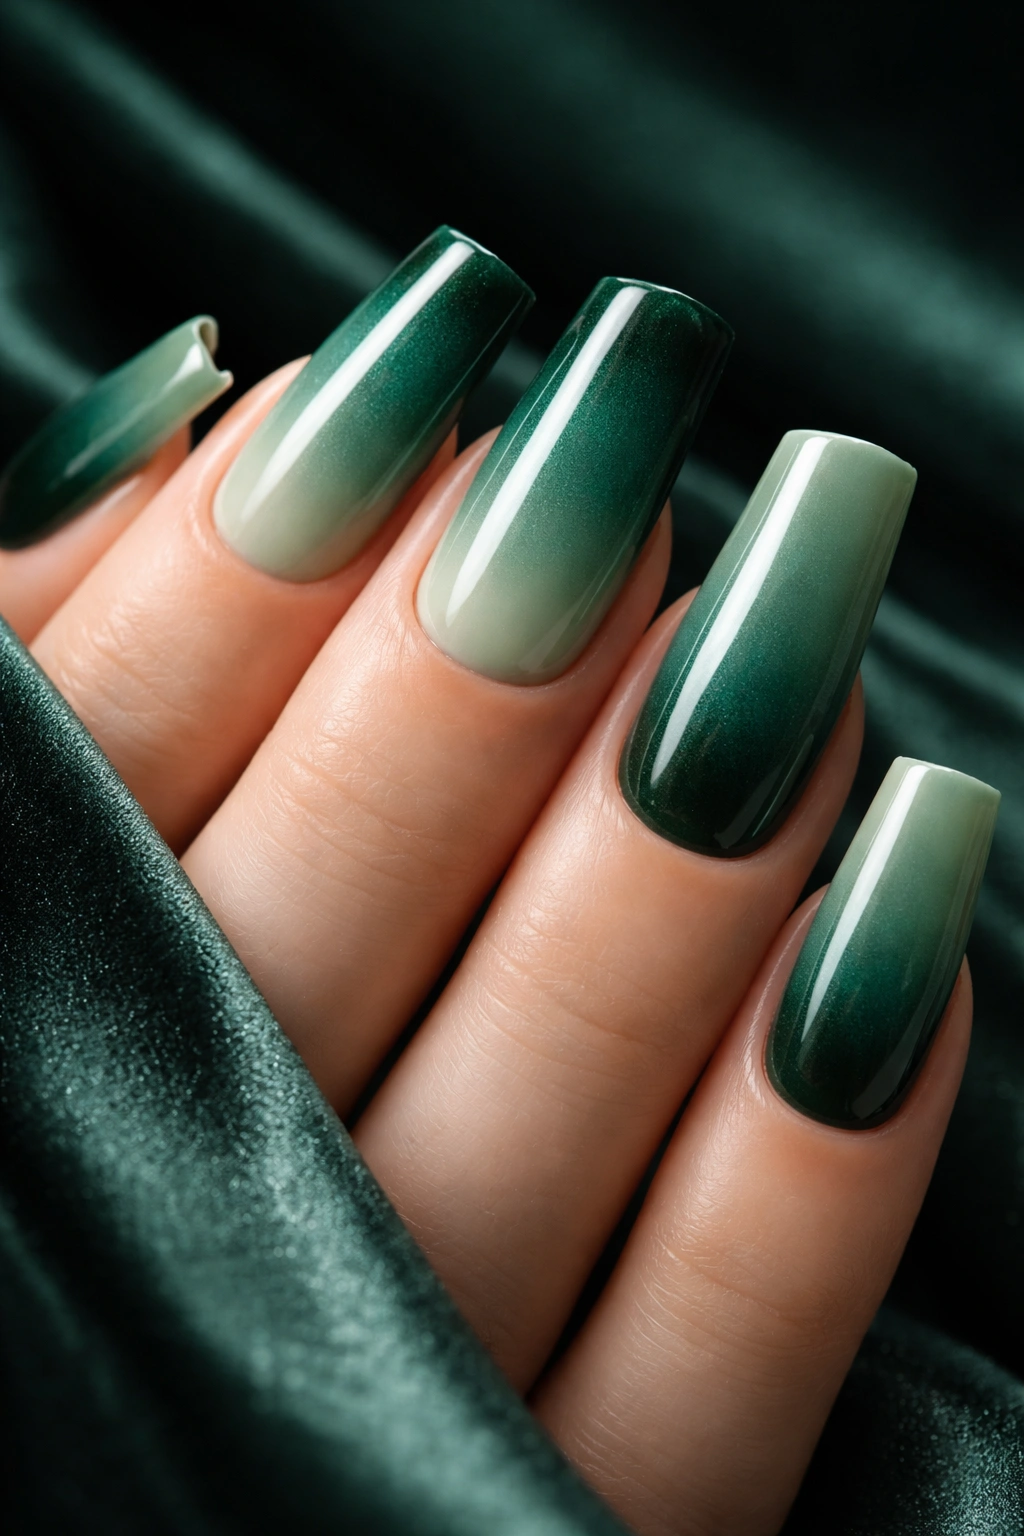
For anyone who loves rich, sophisticated color, an emerald-to-sage ombre is an absolute showstopper. This design starts with a deep, jewel-toned emerald green at the base of the nail and gradually softens into a lighter, more muted sage green toward the tip. The depth of the darker shade makes the lighter shade at the tip pop, creating visual movement and dimension. The color palette suggests luxury and elegance while remaining surprisingly wearable and versatile.
Executing the Emerald-to-Sage Transition
Begin with a smooth base coat and allow it to set. Apply the deep emerald green to the lower half and base of the nail. Then apply the sage green to the upper half and tip area. The beauty of this particular ombre is that you’re working with two colors in the same family, which makes blending incredibly forgiving—any slight streaking will look intentional rather than sloppy. Use your damp sponge to blend the midpoint where the two greens meet, using gentle dabbing motions. Build the gradient gradually with multiple light passes rather than one heavy swipe. Seal with a glossy top coat to make the colors appear richer and more jewel-like.
Making It Personal
This ombre works beautifully on its own, but you can elevate it further by adding tiny gold or silver leaf accents scattered across the surface, or by outlining the duck nail curve with a thin metallic line. If you prefer a more minimalist approach, the gradient alone is stunning.
Worth knowing: These shades can sometimes appear chalky or patchy if you use very thin polish. Don’t skip the second coat on your gradient colors—two thin, even layers blend far better than one thick layer.
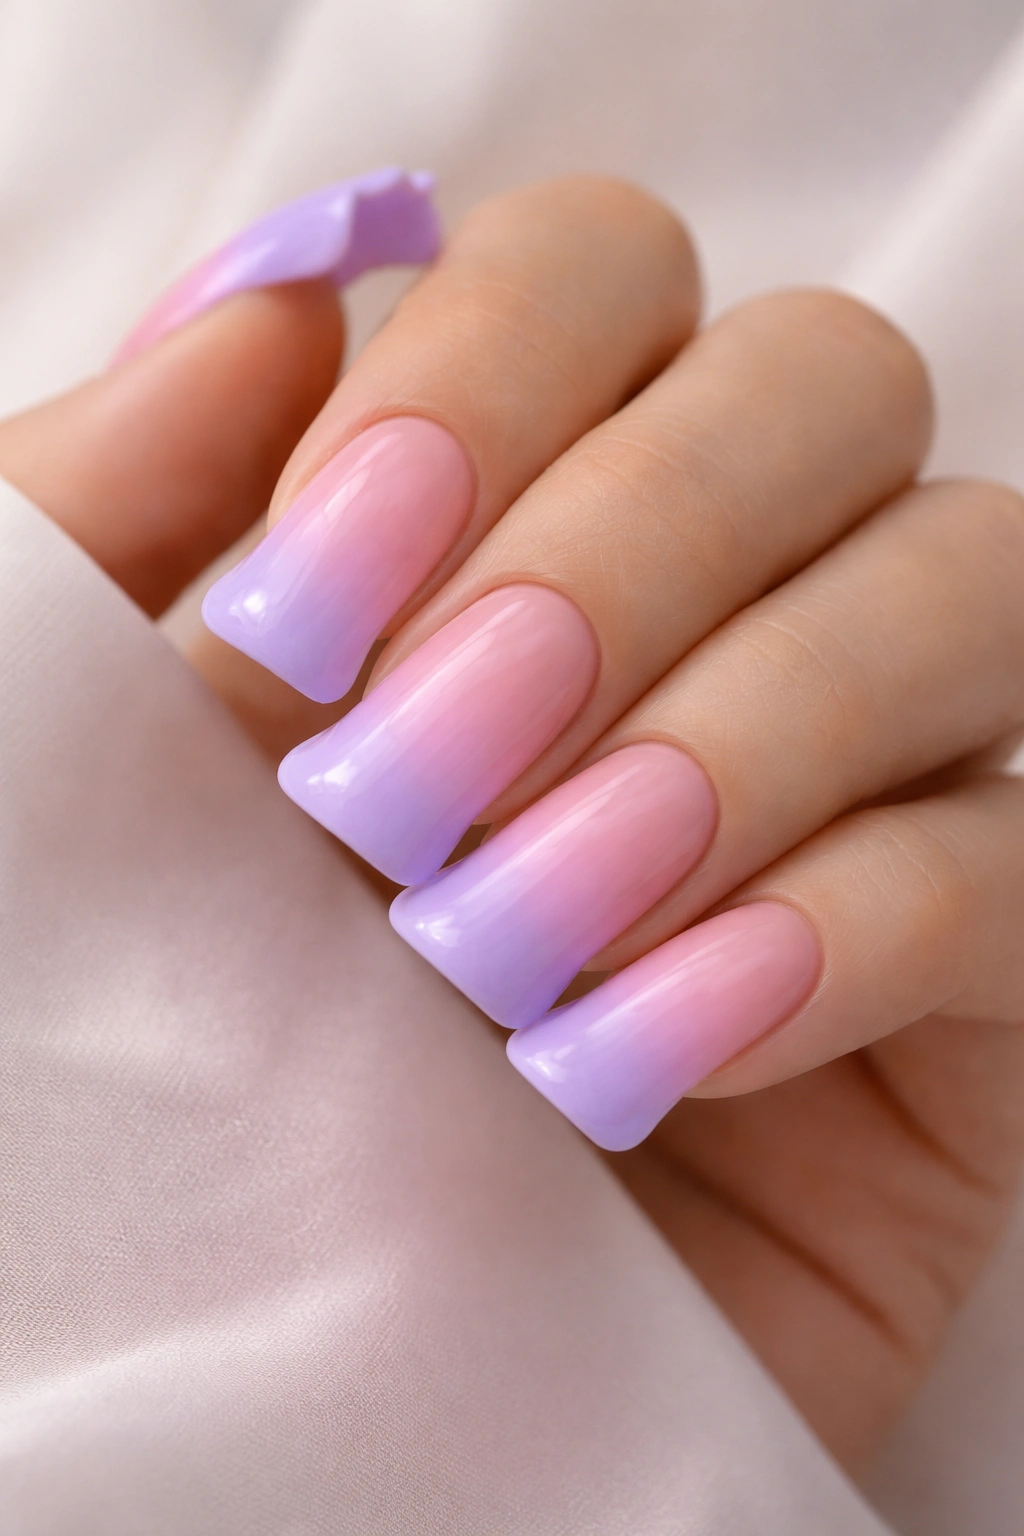
3. Lavender-to-White Soft Ombre with Glitter Fade
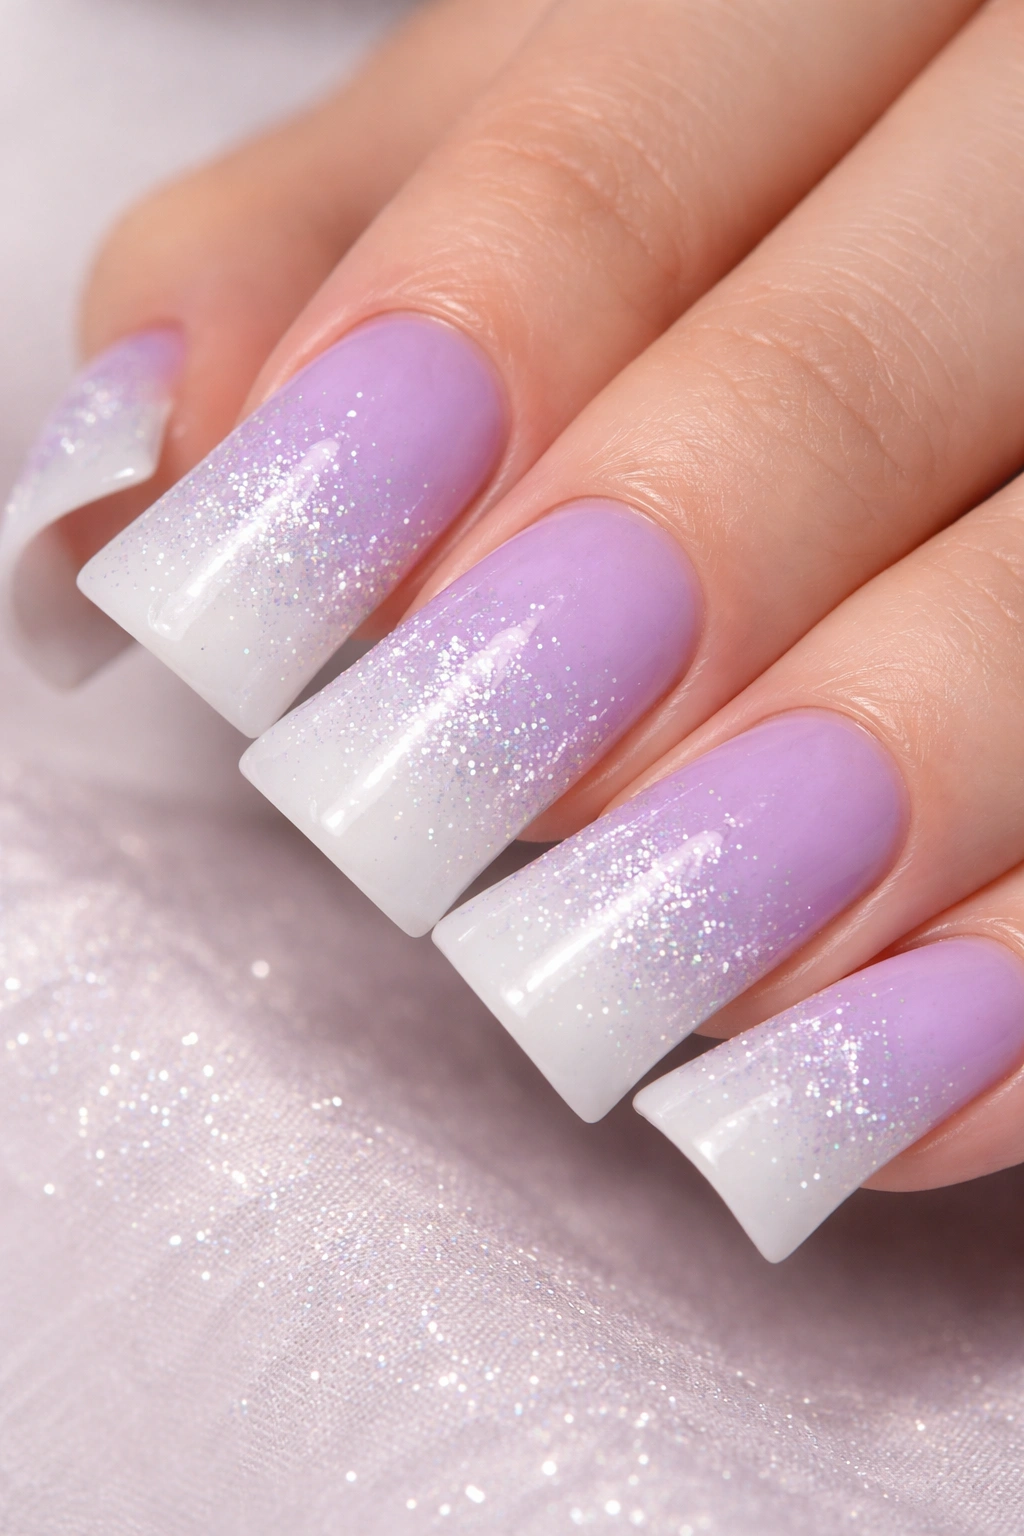
This ethereal design moves from a soft, powdery lavender at the base to pure white at the tip, with a subtle glitter gradient that fades from dense near the middle to sparse at the edges. The result feels dreamy and romantic, perfect for anyone drawn to soft, whimsical aesthetics. The glitter adds dimension and catches light beautifully without making the design feel costume-like or over-the-top.
Building This Delicate Design
Apply your base coat and then paint a soft lavender shade across the entire nail. Once dry, apply white polish to the tip area, extending it about halfway up the nail. Use your damp sponge to blend the lavender and white where they meet, creating a soft, feathered transition. After the gradient is complete and fully set, apply a clear glitter top coat to the entire nail. Before this top coat dries, take a small, stiff brush or even a dry makeup sponge and gently remove some of the glitter from the tip area, leaving more glitter concentration in the middle and base. This creates a glitter fade that mirrors the color gradient.
Perfecting the Effect
The key to making this design work is keeping everything soft and subtle—you want the eye to see an overall impression of gentle gradient and shimmer, not obvious heavy glitter coverage. Multiple thin layers of glitter top coat give better control than one heavy application.
Pro tip: Use a light-catching clear glitter rather than chunky or dark glitter—fine, iridescent glitter complements the soft color palette far better.
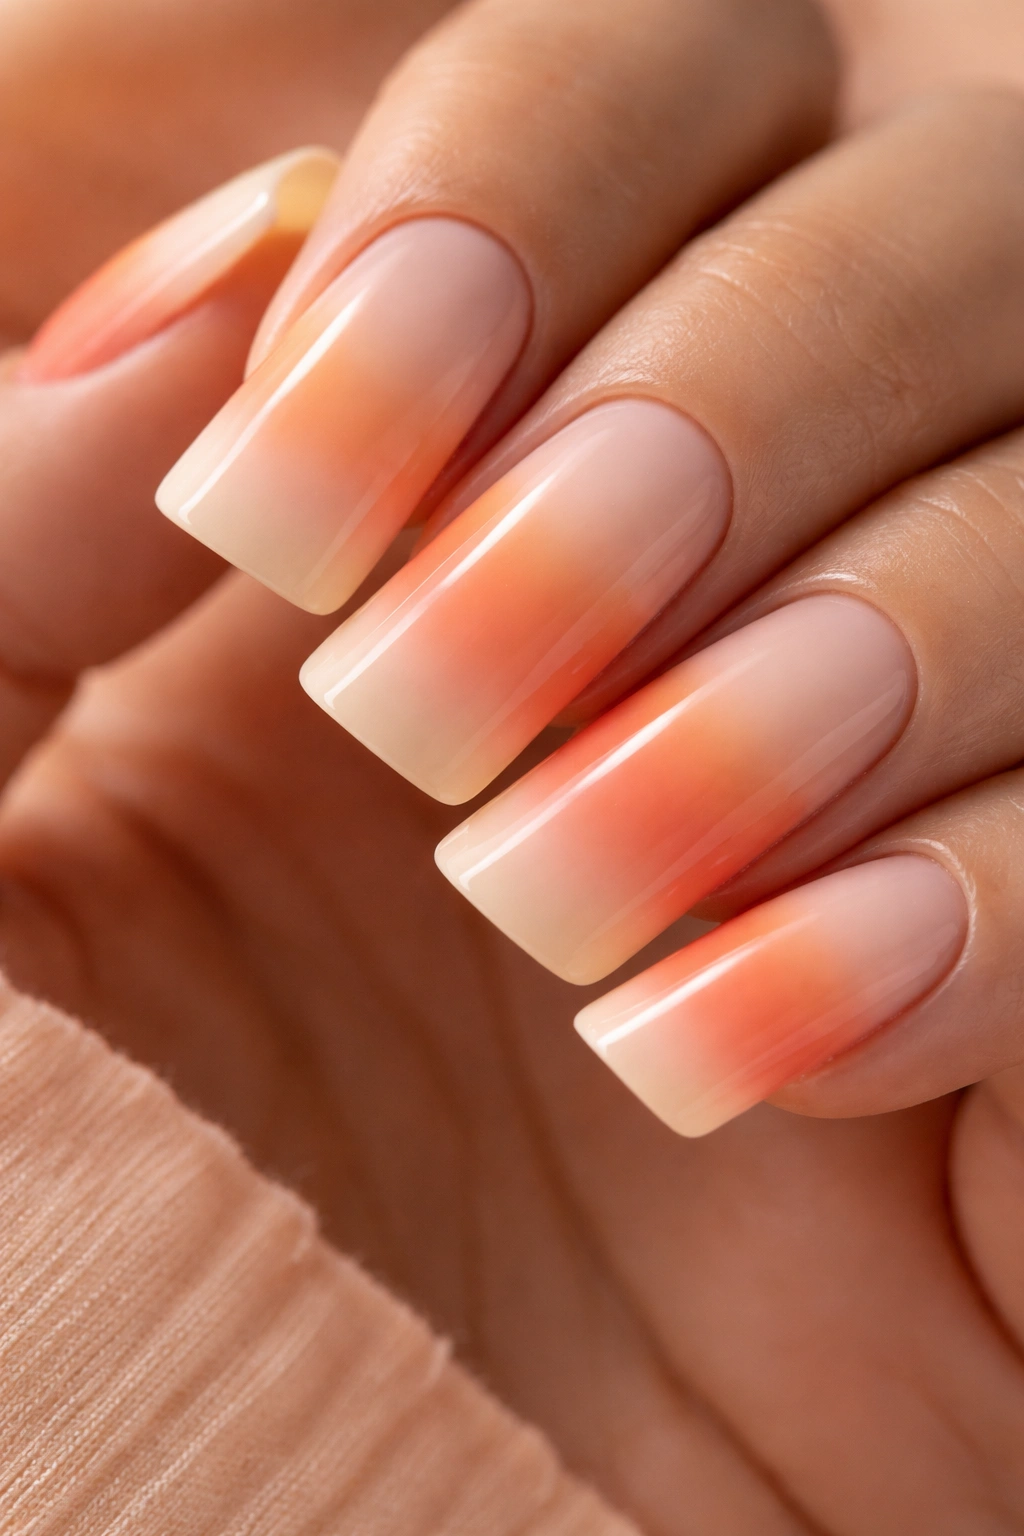
4. Sunset Orange-to-Golden Yellow Warm Ombre
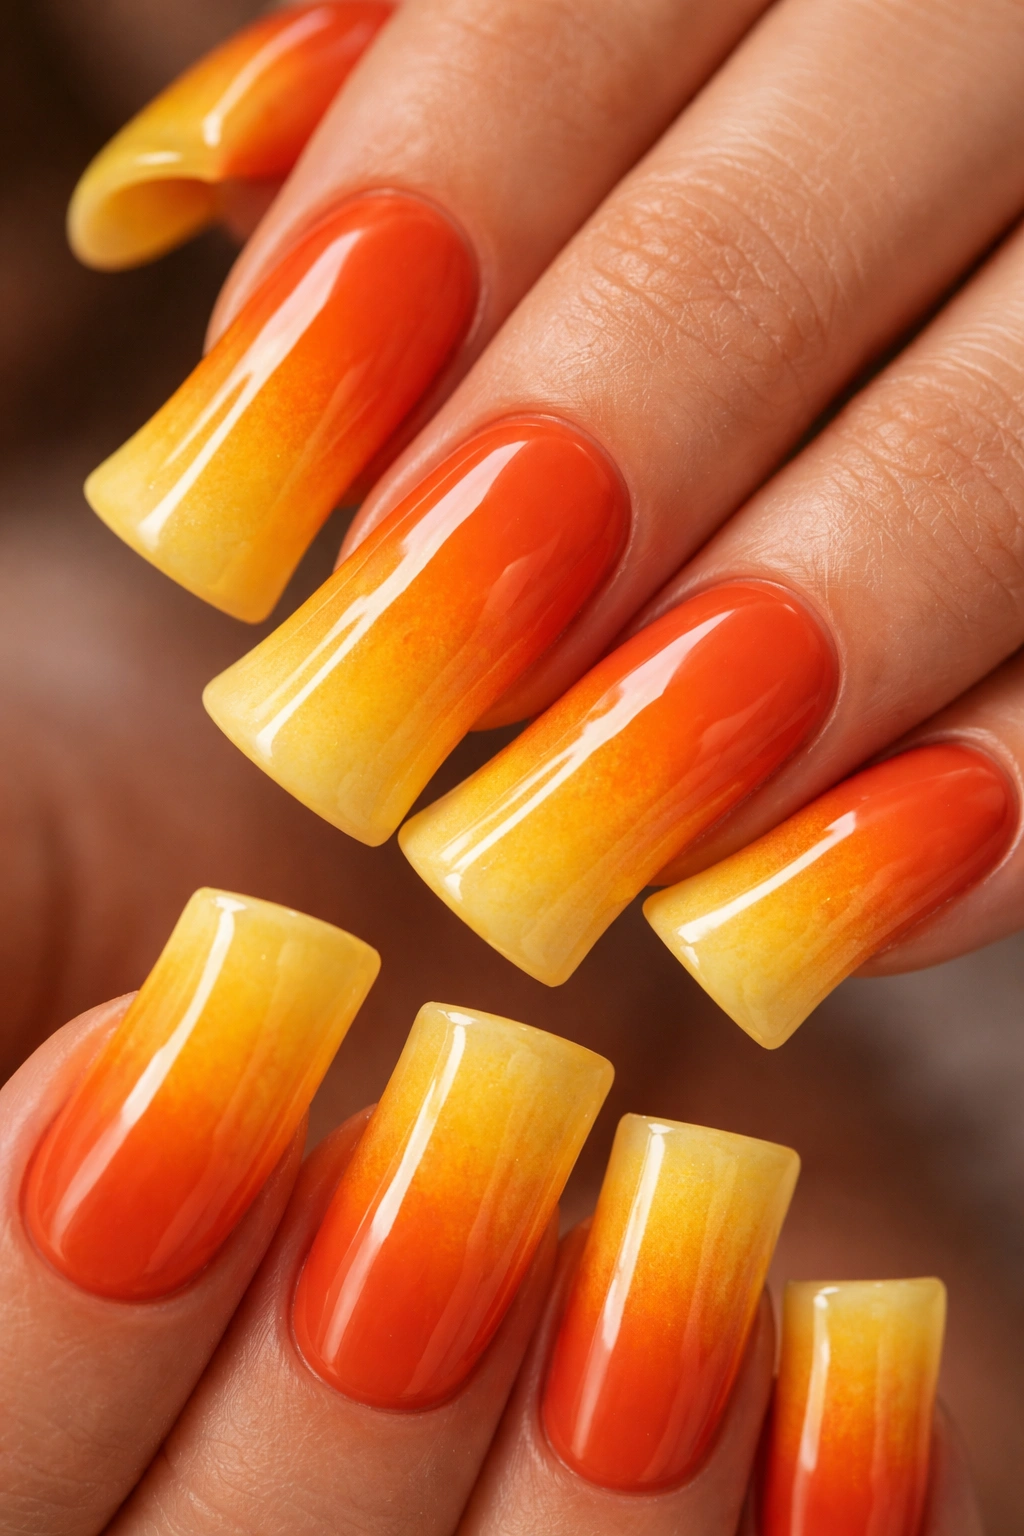
Bring warmth and energy to your nails with an ombre that captures the essence of a stunning sunset. This design transitions from a vibrant, warm orange at the base through golden yellow at the middle and finishing with pale golden yellow at the tip. The effect is energizing and joyful without feeling juvenile, especially when you keep the colors as refined and muted versions of their purest forms.
Creating Warmth and Dimension
Start with a base coat and paint the warm orange shade across the entire nail. Apply the golden yellow to the upper half of the nail, then apply the palest golden shade to the very tip. Use your damp sponge to blend where each color meets the next, using gentle pressure and multiple passes to create a smooth transition. The key here is resisting the urge to over-blend—keep some subtle color distinction visible so the gradient reads clearly. Finish with a glossy top coat to make the colors appear warm and luminous.
Styling Tips
This warm ombre pairs beautifully with minimal nail art. Consider keeping the design clean and simple, or add a delicate line detail in bronze or copper along the curve of the duck nail. Avoid adding glitter or rhinestones, which can compete with the beautiful color gradient.
Real talk: Warm tones can sometimes read as sloppy if the gradient isn’t smooth enough. Don’t rush the blending step—use multiple light passes with a damp sponge rather than one aggressive swipe.
5. Deep Burgundy to Nude Pink Sophisticated Ombre
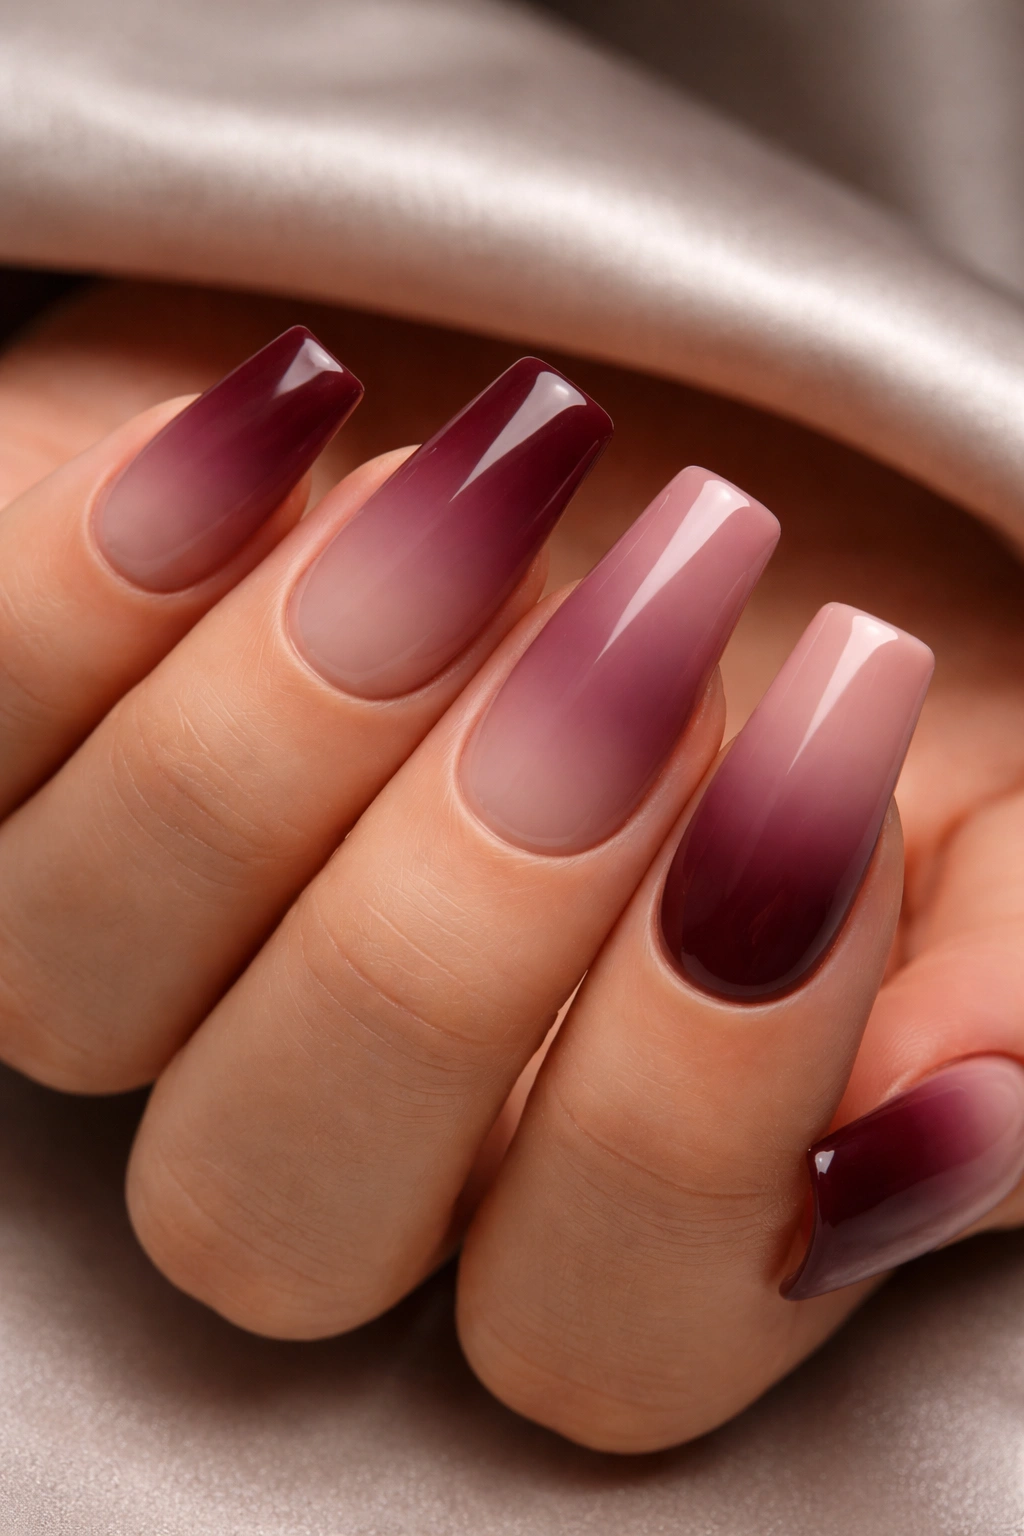
This mature, sophisticated ombre moves from a deep, wine-inspired burgundy at the base through a dusty mauve in the middle and finishes with a soft, warm nude pink at the tip. The design feels luxurious and understated at the same time—it’s the kind of manicure that photographs beautifully and suits professional settings while still feeling intentional and styled. The color progression is subtle enough to work as an everyday mani, yet refined enough for special occasions.
Technical Execution
Apply your base coat and then paint the deep burgundy across the entire nail, extending it about one-third of the way up. Apply dusty mauve to the middle section, overlapping slightly with the burgundy. Apply the nude pink to the tip area. Use your damp sponge to blend each color transition point with gentle dabbing motions. This gradient has multiple color stops, so you’ll want to do extra blending work to ensure smooth transitions between all three shades. Seal with a matte or satin top coat for an ultra-sophisticated finish—the muted sheen complements these muted tones beautifully.
When and Why to Wear This
Burgundy-to-nude is particularly effective for anyone with deeper skin tones, but it’s universally flattering and works across all seasons. The slight matte finish prevents the design from feeling overly shiny or youthful, making it appropriate for professional environments.
Pro tip: If blending three colors feels intimidating, use a professional gradient tool or a soft-bristled blending brush instead of a sponge—the extra control can help you achieve cleaner transitions.
6. Teal-to-Silver Blue Metallic Ombre
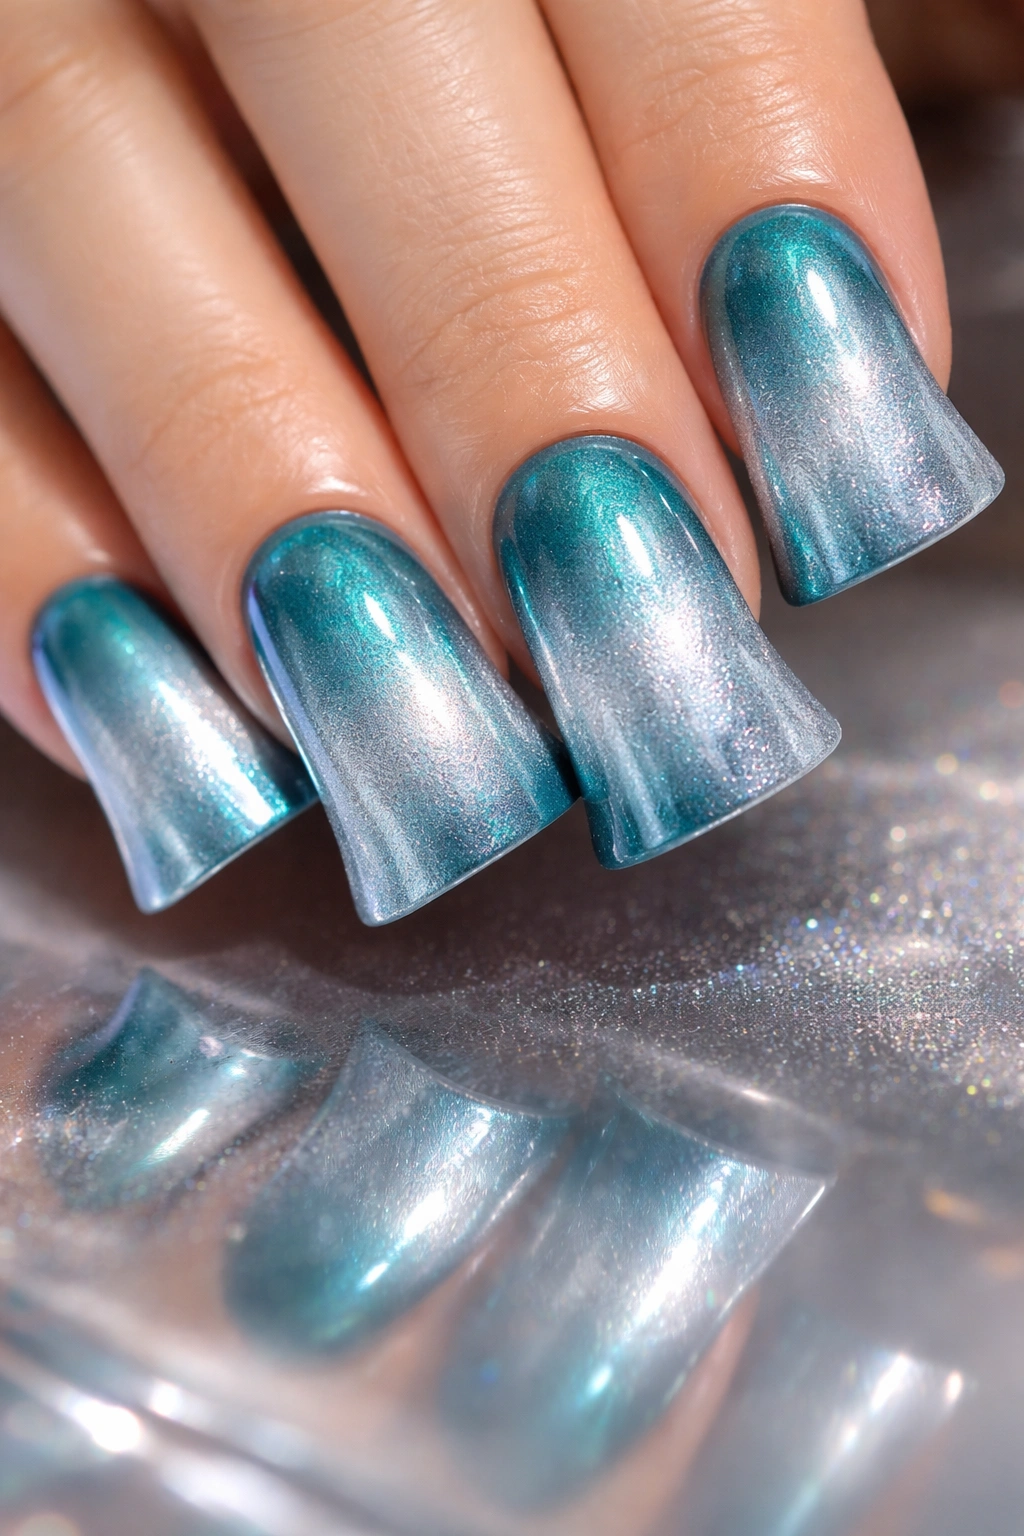
For a design that’s bold yet sophisticated, a teal-to-silver blue ombre with metallic undertones is a winner. This design starts with a rich, saturated teal at the base and gradually lightens to a cool, silvery blue at the tip. Using polishes with subtle metallic sheen amplifies the effect, making the colors appear to glow and shift as they catch light from different angles. The result is eye-catching without being loud.
Achieving the Metallic Shift
Choose a teal polish with slight metallic shimmer and a silver blue with visible shimmer for this to work properly. Apply your base coat, then paint the teal across the lower two-thirds of the nail. Apply the silver blue to the upper third and tip. Use your damp sponge to blend the middle area where the two colors meet, using light dabbing motions. The metallic particles will create additional visual interest during the blending process. Seal with a crystal-clear, high-gloss top coat to maximize the metallic shimmer and make the colors appear more luminous.
Styling and Wearing
Keep additional nail art minimal with this design—the gradient and metallic shift are already doing plenty of visual work. If you want to add detail, consider a thin gold or silver line along the edge of the duck nail curve. Avoid pairing with chunky rings or busy nail designs that would compete for attention.
Worth knowing: Metallic polishes sometimes need two full coats to show their shimmer properly, so don’t be shy about applying generous coverage.
7. Soft Blush to Clear Nude Barely-There Ombre
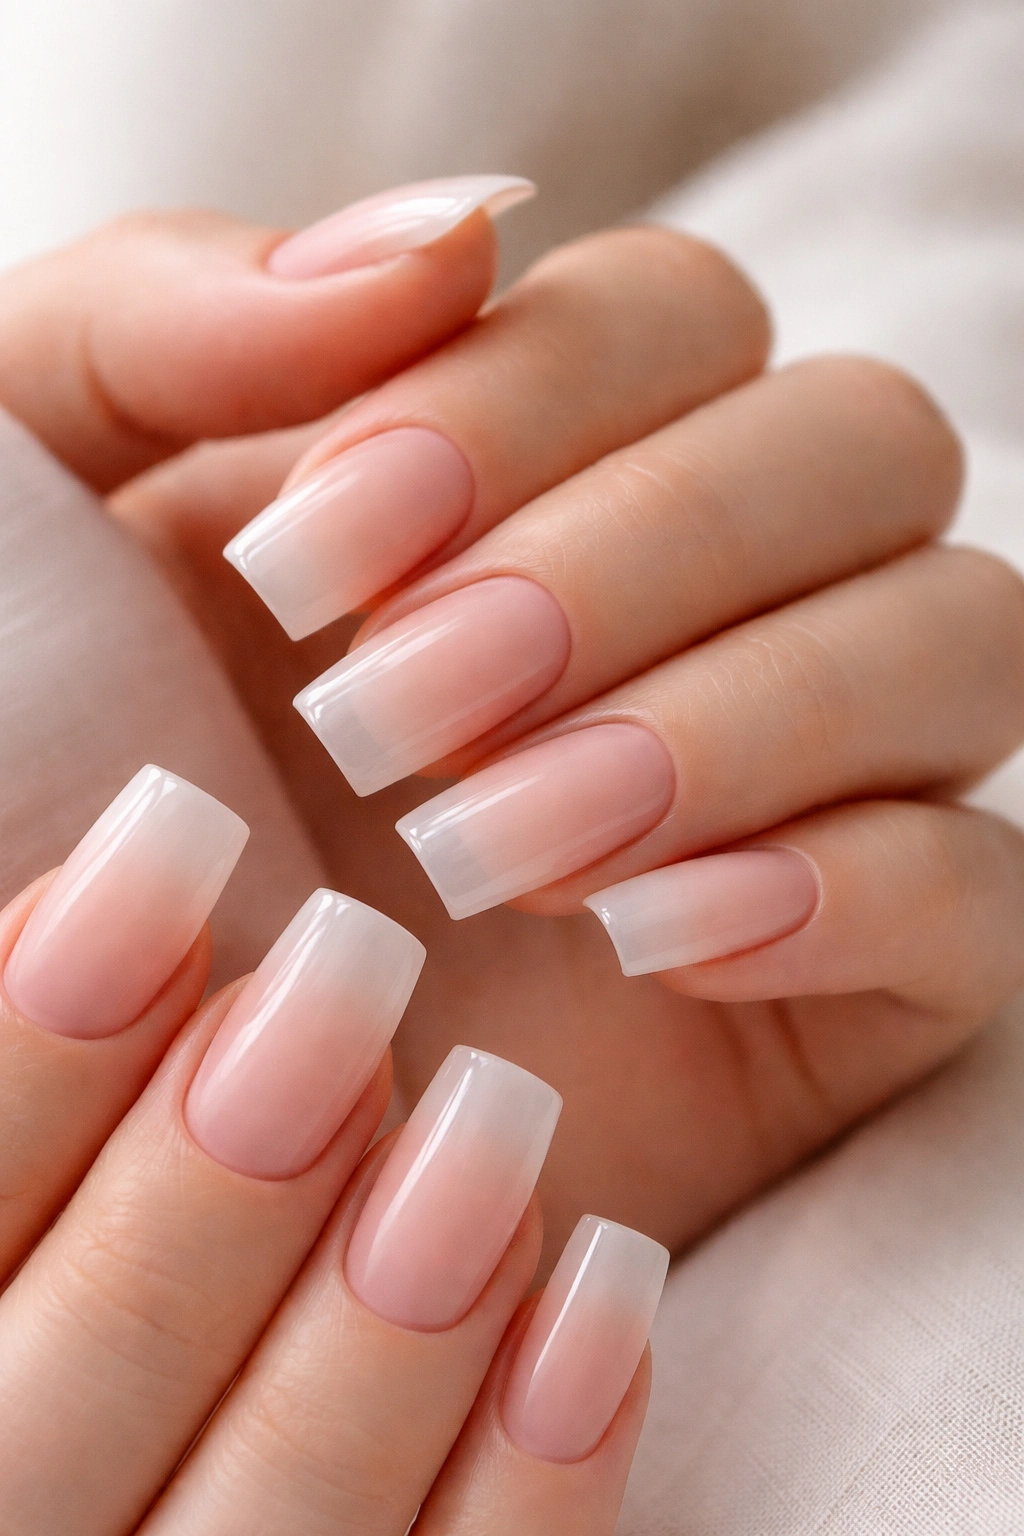
This minimalist ombre is for anyone who loves understated elegance—it transitions so subtly from a barely-there blush tone at the base to nearly clear or very pale nude at the tip that it’s almost barely noticeable, yet it creates a beautiful, elongating effect on the nail. The gradient is so subtle that it reads more like an intentional enhancement of the nail’s natural shape rather than a statement design. It’s perfect for professional settings, everyday wear, or anyone who prefers their nail art to whisper rather than shout.
Creating Subtle Perfection
Use a very pale blush or peachy tone—think almost skin-tone but with a tiny hint of pink or peach. Apply this as your base coat across the entire nail. Then apply an even paler shade or a nearly clear polish to the tip area, extending it about halfway up the nail. Blend very gently where the two shades meet, using extremely light sponge pressure. The entire effect should be so subtle that someone might not immediately realize you have an ombre—they might just think your nails look really well-groomed and polished. Finish with a natural, matte or satin top coat rather than high-gloss, which reinforces the understated vibe.
Who This Works Best For
This design is ideal for anyone with professional dress codes, those who prefer minimal nail art, or anyone who likes their nails to complement rather than dominate their appearance. It’s also an excellent base for adding very delicate accents like thin gold lines or tiny scattered diamonds.
Pro tip: Use a color-correcting concealer one shade lighter than your skin tone for the “almost clear” tip color—it blends more seamlessly than actual clear polish.
8. Coral-to-Peach-to-Cream Warm Tri-Tone Ombre
This multi-color gradient incorporates three distinct shades in the warm family: a vibrant coral at the base, a softer peachy tone in the middle, and a pale cream at the tip. The three-color gradient creates more visual interest and dimension than a two-color ombre while remaining cohesive because all three shades live in the same warm color family. The effect is playful, energetic, and feminine without feeling over-done.
Managing Three Colors
Apply your base coat, then paint the coral across the lower portion of the nail (roughly the bottom third to half). Apply peach to the middle section, overlapping slightly with the coral. Apply pale cream to the tip area. Now comes the blending—you’ll have two transition points to work with your damp sponge. Blend the coral-to-peach transition first with gentle, light dabbing motions. Then blend the peach-to-cream transition. Finally, go back and do a light overall blending pass to ensure all three colors flow smoothly into one another. This takes patience, but the result is worth it.
Finishing Touches
A glossy top coat makes the warm tones appear vibrant and luminous. You can wear this design on its own or add tiny dots of a contrasting color (like a deep coral or sage green) scattered across the surface for extra interest.
Real talk: Three-color ombres require more blending work than two-color designs, and the learning curve is steeper. If your first attempt isn’t perfect, that’s completely normal—the technique gets easier with practice.
9. Navy-to-Powder Blue Patriotic Ombre with Subtle Glitter
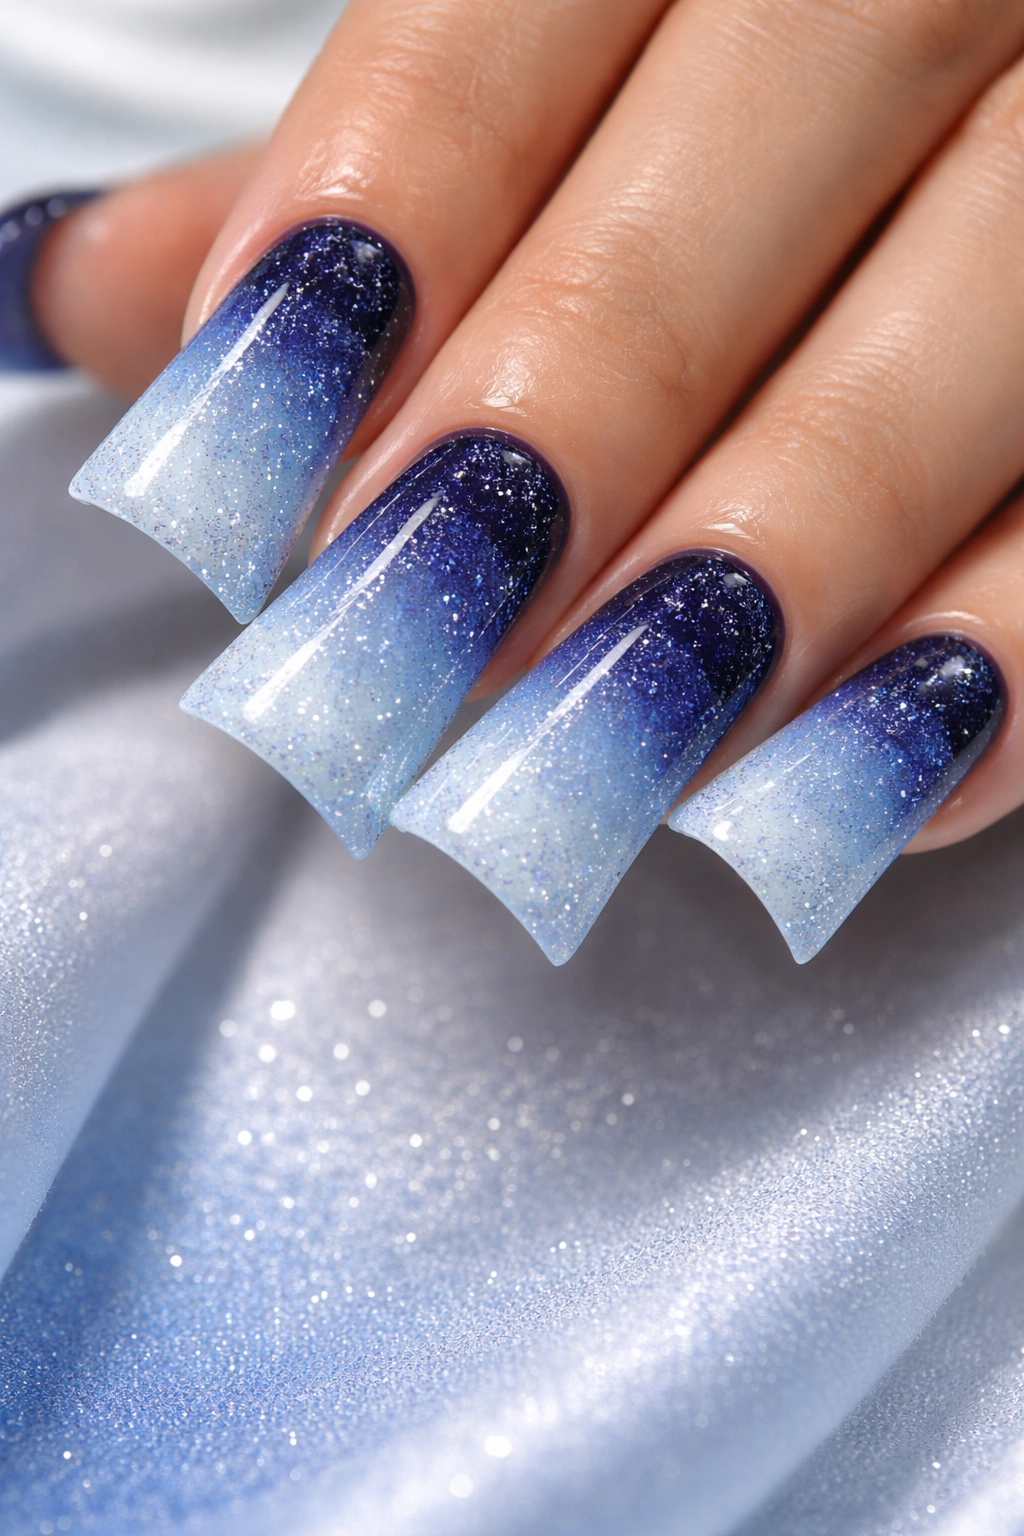
This crisp, classic ombre moves from a deep navy blue at the base through a medium blue in the middle to a soft powder blue at the tip, with subtle white or silver glitter scattered throughout. The color combination evokes a patriotic or nautical aesthetic without being costume-like or overly themed. The glitter adds sparkle and interest while remaining refined—this isn’t chunky, Christmas-tree glitter, but rather fine, elegant shimmer.
Building the Navy-to-Powder Gradient
Apply your base coat and paint the deep navy across the entire nail. Apply medium blue to the upper half, overlapping with the navy. Apply powder blue to the tip. Use your damp sponge to blend where each color meets, creating smooth transitions. Once the gradient is complete and fully dry, apply a clear glitter top coat across the entire nail. You can use a pre-made glitter top coat or mix clear polish with fine iridescent glitter. For extra control over glitter placement, apply glitter more densely to the middle sections and lighter toward the base and tip.
When to Wear This Design
This ombre works beautifully during summer, at patriotic events, or anytime you want a design that’s bold and eye-catching yet maintains sophistication. The subtle glitter keeps it from feeling too “costume-y.”
Pro tip: Use a top coat with fine, light-reflecting glitter rather than holographic or rainbow glitter—the subtlety works better with these blue tones.
10. Dusty Rose-to-Mauve-to-Gray Muted Tone Ombre
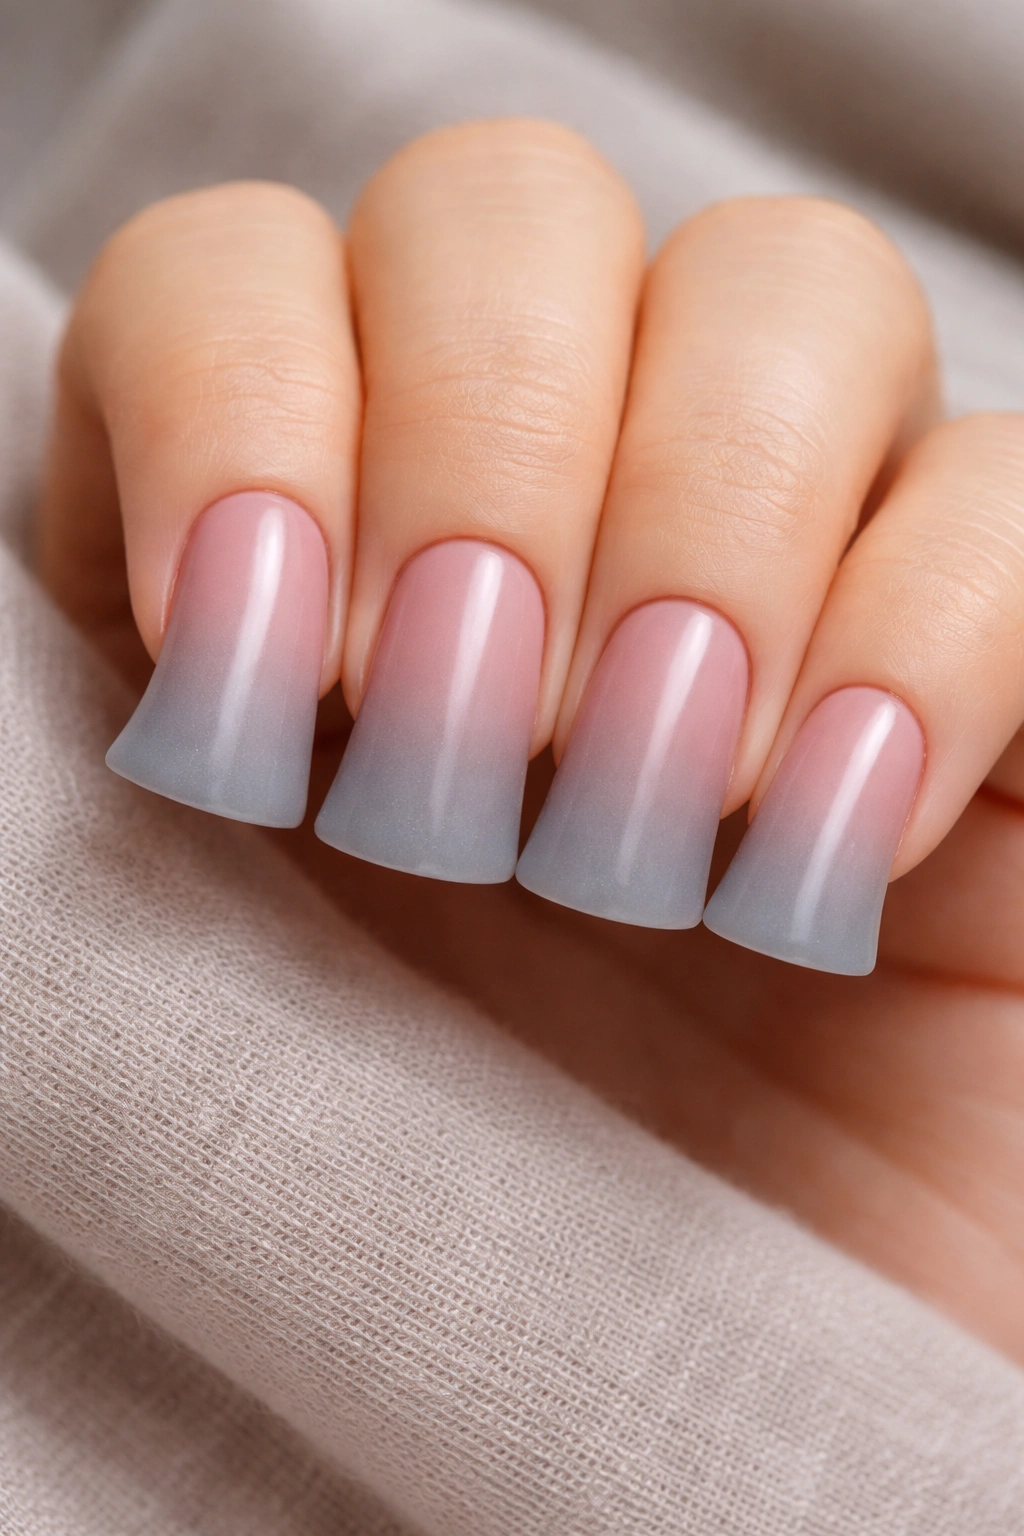
For the ultimate in understated sophistication, a muted-tone ombre that transitions from dusty rose through mauve to soft gray is absolutely stunning. This design works because the colors are all desaturated and cool-toned, creating a cohesive, harmonious look that feels calming and refined. It’s the kind of manicure that makes people pause and say “that’s so pretty”—not because it’s loud or glittery, but because it’s clearly intentional and thoughtful.
Executing Muted Tone Mastery
Select three polishes in these muted tones—think “dusty” and “soft” rather than bright or saturated. Apply your base coat and paint the dusty rose across the lower third of the nail. Apply mauve to the middle section, overlapping slightly. Apply soft gray to the tip area. Use your damp sponge to very gently blend where each color meets. Muted tones are forgiving—slight blending imperfections tend to read as intentional depth rather than mistakes. Seal with a satin or matte top coat to enhance the sophisticated, understated vibe.
Styling for Maximum Impact
Keep the rest of your styling minimal and clean when wearing this design. Avoid mixing with busy jewelry or patterns—let the subtle beauty of the ombre speak for itself. This design works beautifully paired with neutral clothing or jewel tones.
Worth knowing: Muted, desaturated polishes sometimes read as chalky or unfinished if you don’t apply enough coats. Use two full coats of each shade to ensure they have depth and richness.
11. Hot Pink-to-Purple Gradient with Metallic Top Coat
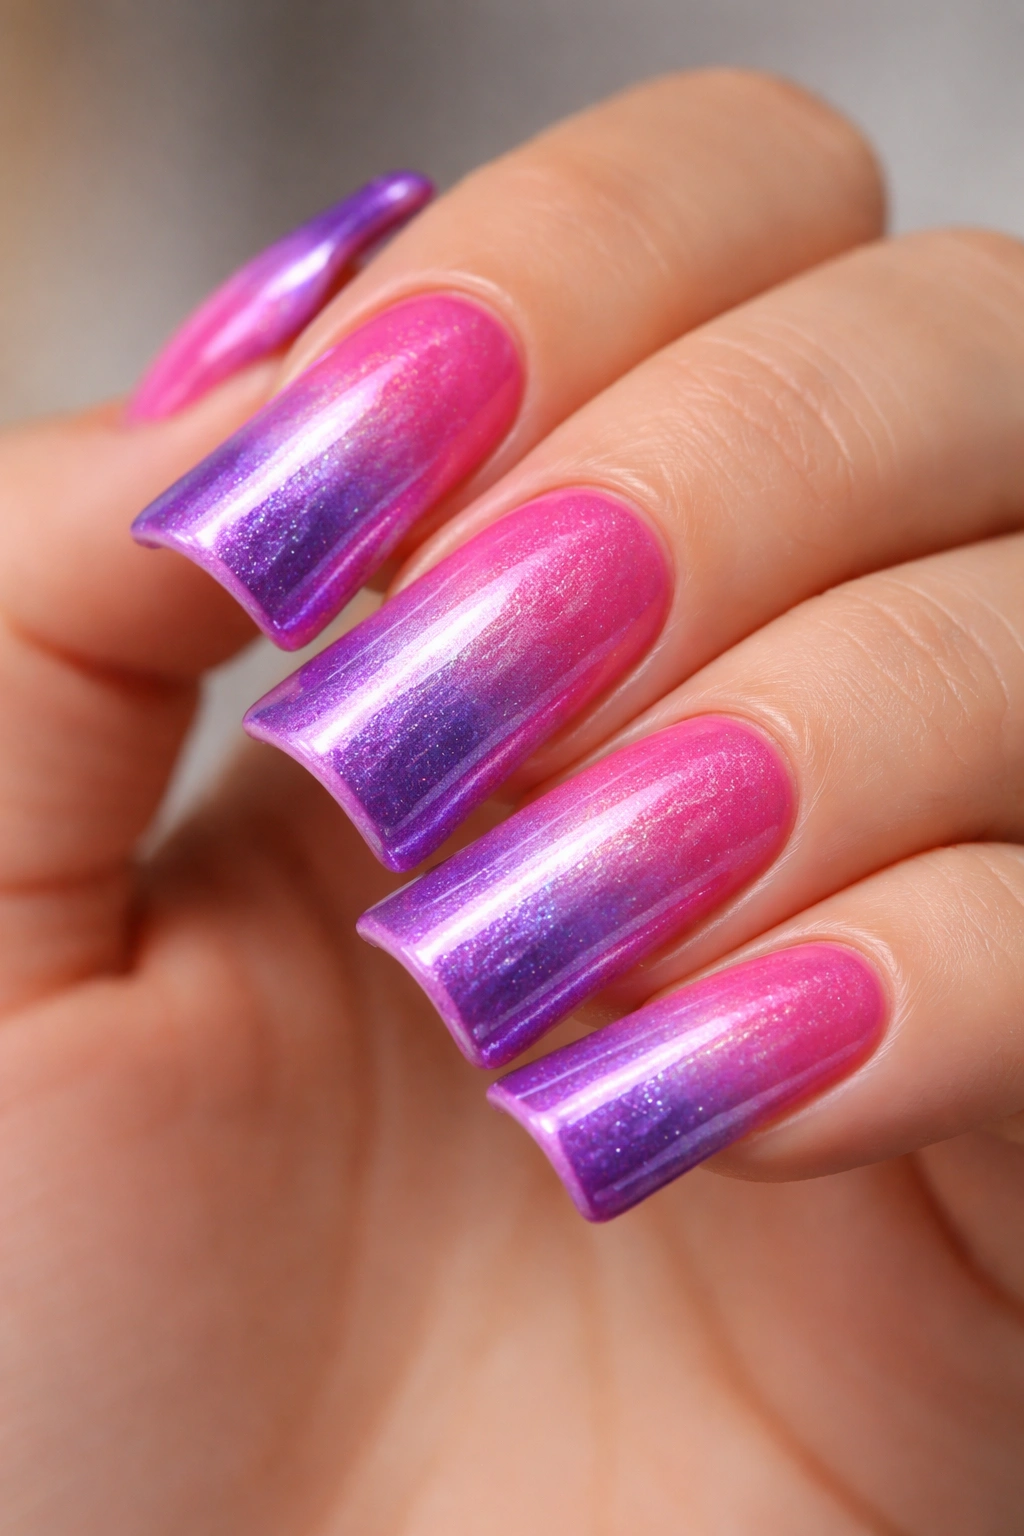
This bold, eye-catching ombre transitions from a hot, vibrant pink at the base to a deep purple at the tip, then gets sealed with a shimmering metallic top coat that makes the entire design glow. The hot pink-to-purple combination is energetic and fun while remaining fashion-forward rather than juvenile. The metallic finish adds glamour and catches light beautifully, making the design appear to shift and shimmer with movement.
Creating Bold Dimension
Apply your base coat and paint hot pink across the lower half of the nail. Apply deep purple to the upper half, overlapping slightly with the pink. Use your damp sponge to blend where the colors meet—since these are both saturated, vibrant colors, you’ll want extra blending work to avoid a stark color line. Once you’re happy with the gradient, apply a metallic or holographic top coat across the entire nail. If you’re using a separate metallic top coat rather than a pre-made metallic polish, apply two coats for maximum shimmer and depth.
Making It Your Own
This design pairs beautifully with minimalist styling or with additional accent details like geometric lines or tiny rhinestones. The bold gradient means it works best when paired with understated secondary nail art rather than busy designs.
Pro tip: Hot pink and purple can sometimes muddy together during blending—if this happens, use extra-light sponge pressure and multiple quick passes rather than heavy pressure.
12. Champagne to Rose Gold Luxe Ombre
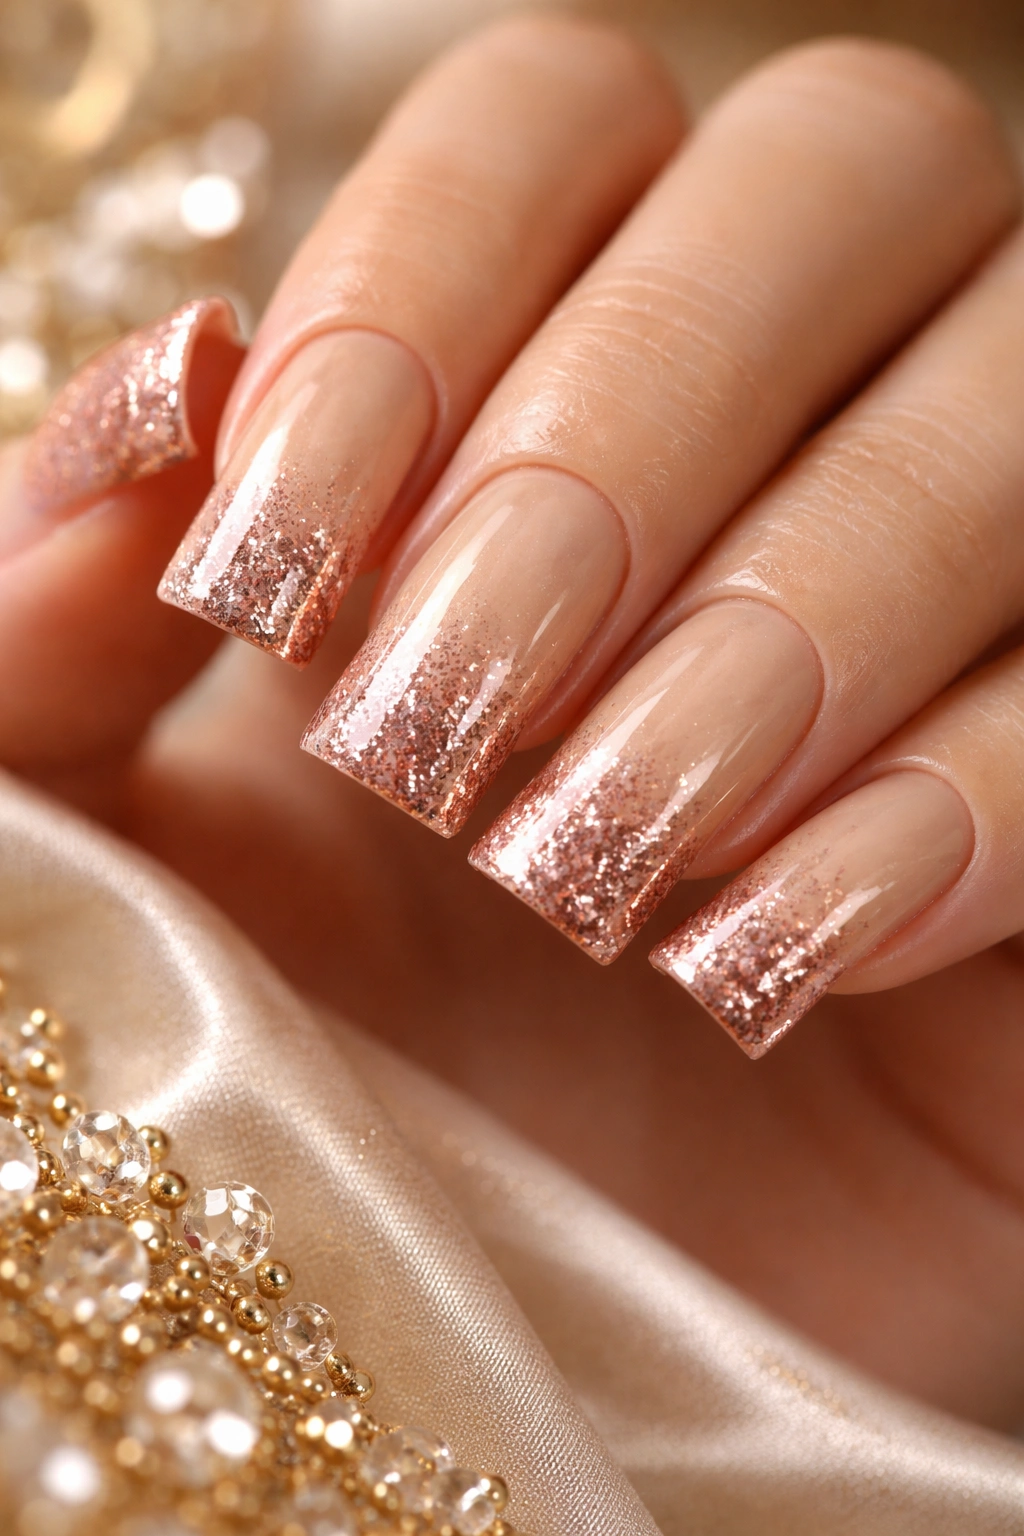
End with pure luxury: a champagne ombre that transitions smoothly to rose gold, creating the ultimate glamorous, celebratory design. The champagne base reads as pale, almost white-gold, while the rose gold tip adds warmth and dimension. Both shades have metallic shimmer, meaning the entire nail glows with subtle, sophisticated sparkle. This is the design for anyone who wants their nails to scream “special occasion” or “I feel fabulous right now.”
Crafting the Champagne-to-Rose Gold Flow
Apply your base coat and then a champagne polish (or pale gold shimmer) across the entire nail. Apply rose gold polish to the tip area, extending it about halfway up the nail. Use your damp sponge to blend where the two metallics meet. Here’s the key: let the metallic particles themselves help with blending—metallic polishes are quite forgiving and blend beautifully. Seal with a high-gloss, crystal-clear top coat to make both shades appear luminous and jewel-like. The finished design should appear to glow from within.
Occasions and Impact
This design works perfectly for holidays, celebrations, parties, date nights, or anytime you want to feel extra glamorous. It’s sophisticated enough for formal events yet playful enough for casual celebration. Pair it with simple styling to let the nails shine—avoid competing jewelry or busy patterns.
Real talk: Metallic-on-metallic ombres are some of the easiest to execute because the shimmer particles help blend the colors together naturally, and minor blending imperfections disappear into the shimmer effect.
Final Thoughts
Ombre duck nails offer the perfect intersection of artistry and wearability—they’re complex enough to feel special and intentional, yet simple enough that anyone can achieve beautiful results with a steady hand and patience. The duck nail’s distinctive shape gives ombre effects room to shine, quite literally, making the color gradients appear more dramatic and visually interesting than they might on a traditional round or square nail.
The variety within ombre duck nail designs means there’s genuinely something for every aesthetic and occasion. Whether you’re drawn to soft pastels, bold jewel tones, warm neutrals, or cool metallics, these twelve ideas provide a framework for exploring what speaks to you. The techniques are largely the same regardless of which color combination you choose: careful base preparation, smooth color transitions, and sealing with an appropriate top coat.
Remember that your first attempt at ombre might not be flawless, and that’s completely okay—nail art is a skill that improves with practice. Each time you recreate one of these designs, your blending will get smoother and more confident. Start with color combinations that feel intuitive to you, take your time with the blending step, and don’t be afraid to experiment with different accent details once you’ve mastered the basic gradient. Your duck nails are the perfect canvas for creativity.
