

If you’re looking to elevate your nail game without committing to bold colors or intricate patterns, clear duck nails might be your new best friend. The beauty of clear nails lies in their versatility—they work with any outfit, any occasion, and any skin tone. And when you combine that transparent base with thoughtful design details, you get something that feels both sophisticated and modern.
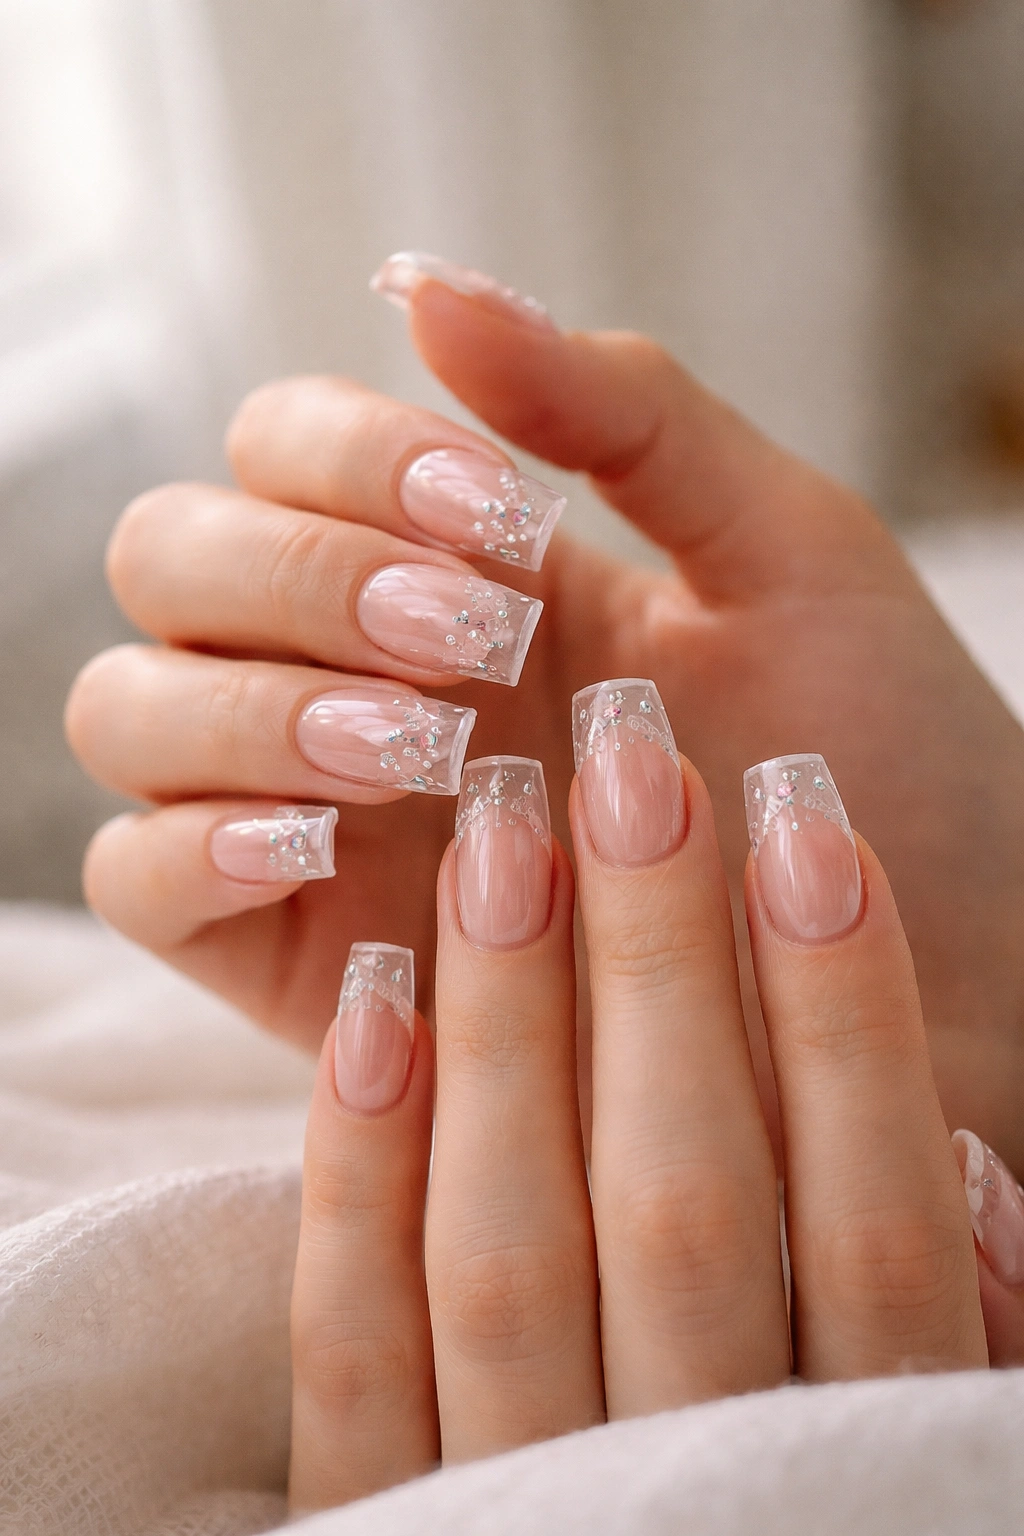
Duck nails have taken over the nail world for good reason. They’re that distinctive squared-off shape with a curved, flared edge that catches light beautifully and gives your hands an instantly manicured, intentional look. The curved, splayed tip creates a striking silhouette that photographs well and feels premium in person. What makes clear duck nails particularly special is how they let you play with minimalism, dimension, and subtle details without the commitment of opaque color. Whether you’re a nail design beginner or someone who loves experimenting with trends, clear duck nails offer endless possibilities for customization.
The following ideas showcase exactly how to style clear duck nails for different moods and occasions. Each design works with the natural beauty of your nail bed while adding just enough visual interest to turn heads.
1. Barely-There Sparkle with Gold Fleck
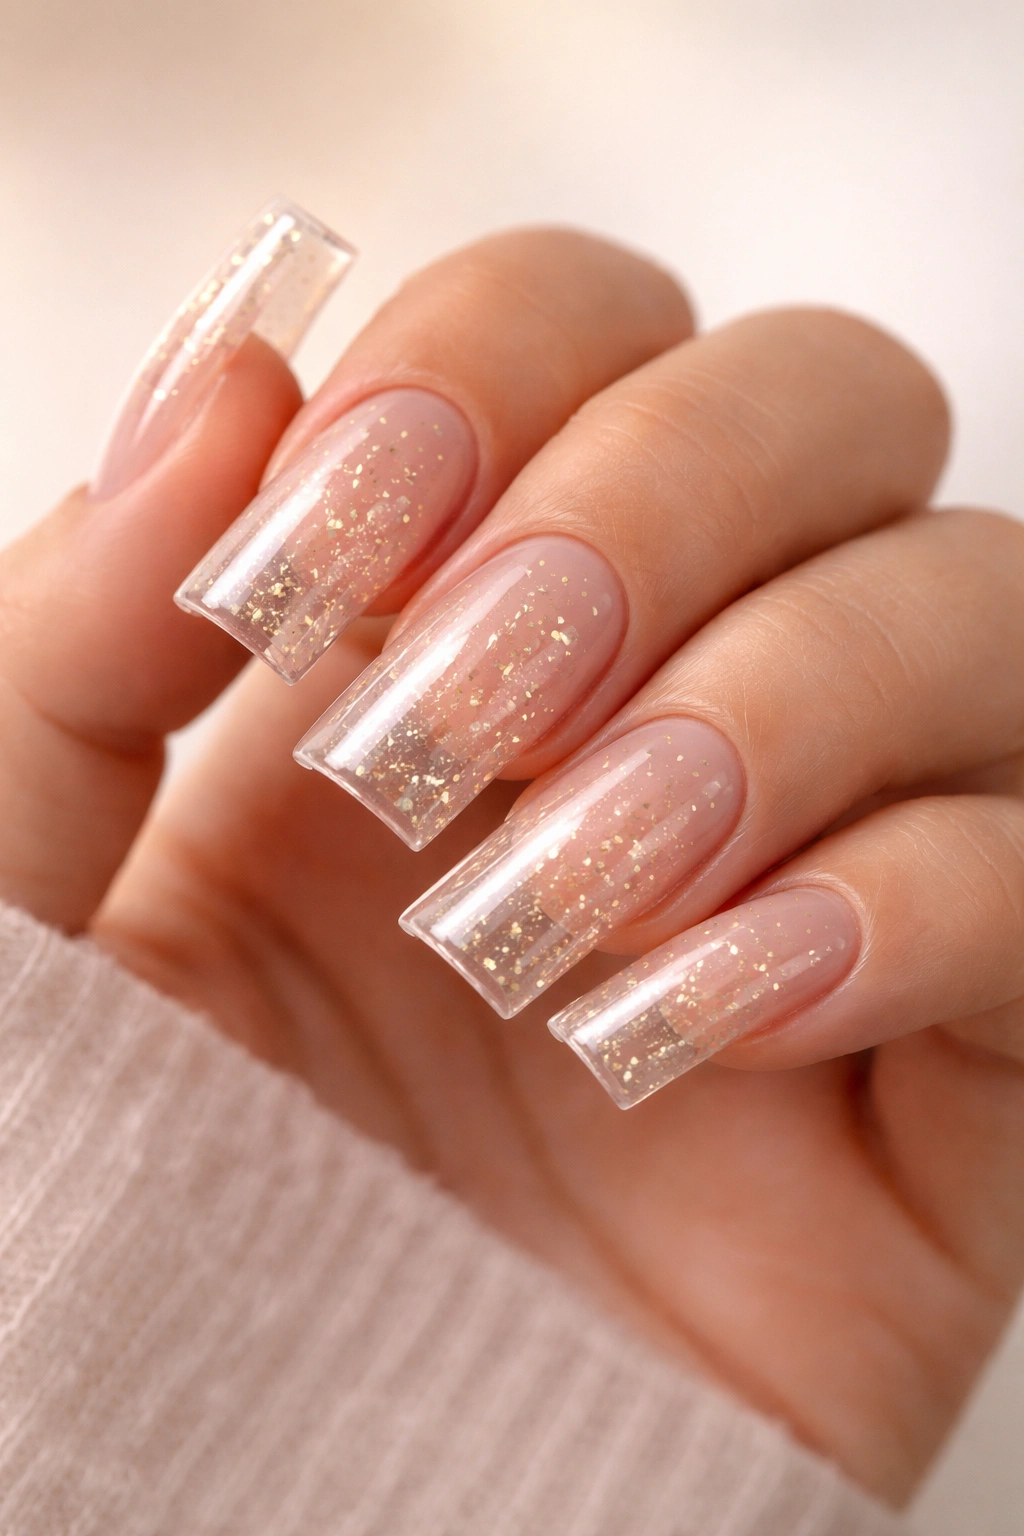
This design keeps things impossibly subtle—clear nails with just a whisper of shimmer scattered across the surface. It’s the kind of manicure that makes people ask what you did differently without being able to pinpoint it exactly. The magic comes from using a ultra-fine gold fleck or glitter suspended in a clear top coat, applied strategically rather than covering the entire nail.
Why This Design Works
A barely-there sparkle creates dimension without overwhelming the natural nail beneath. The light-catching quality makes your nails appear healthier and more luminous, which actually makes your hands look more youthful and cared-for. This is the perfect approach if you want to look polished in professional settings while still having a tiny bit of personality showing through.
How to Achieve This Look
- Use a clear base coat as your foundation, applied in thin, even layers
- Select a fine gold fleck or champagne shimmer product (loose flakes work better than chunky glitter)
- Sprinkle the fleck onto the wet clear polish while it’s still tacky, allowing you to control coverage
- Seal everything with a clear glossy top coat for a smooth, professional finish
- Apply a second thin top coat layer if you want more dimension and shimmer visibility
Pro tip: If loose flakes feel too messy, try a clear polish formula that already contains ultra-fine gold particles—brands like Essie and Orly make excellent shimmer-infused clear polishes that give this exact effect with zero guesswork.
2. Ombré Clear to White at the Tips

This gradient design creates a soft cloud effect at the nail edge, blending from crystal clear at the base to creamy white at the tip. The ombré transition feels grown-up and artistic while still maintaining the clean, minimalist aesthetic that clear nails provide. It’s striking without being loud.
The Technical Approach
Creating a smooth ombré requires the right tool and technique. Most people assume you need an airbrush, but a simple makeup sponge gives professional results when you know the trick. The key is layering—multiple thin passes create a seamless gradient rather than harsh lines.
Steps to Create This Design
- Paint your entire nail with clear polish and let it dry completely
- Pour a small amount of white or off-white polish onto a palette or a clean surface
- Dab a makeup sponge gently into the white polish
- Press and dab the sponge along the tip edge of your nail in a rolling motion, moving slightly higher with each gentle press
- Build the gradient slowly—thin layers blend better than one thick application
- Seal with a glossy or matte top coat depending on your preference
Worth knowing: This design actually looks best with a matte finish because it makes the gradient more visible and creates an almost cloud-like appearance. A glossy version works too, but the matte adds intentional sophistication.
3. Delicate Gold or Silver Chrome Outline
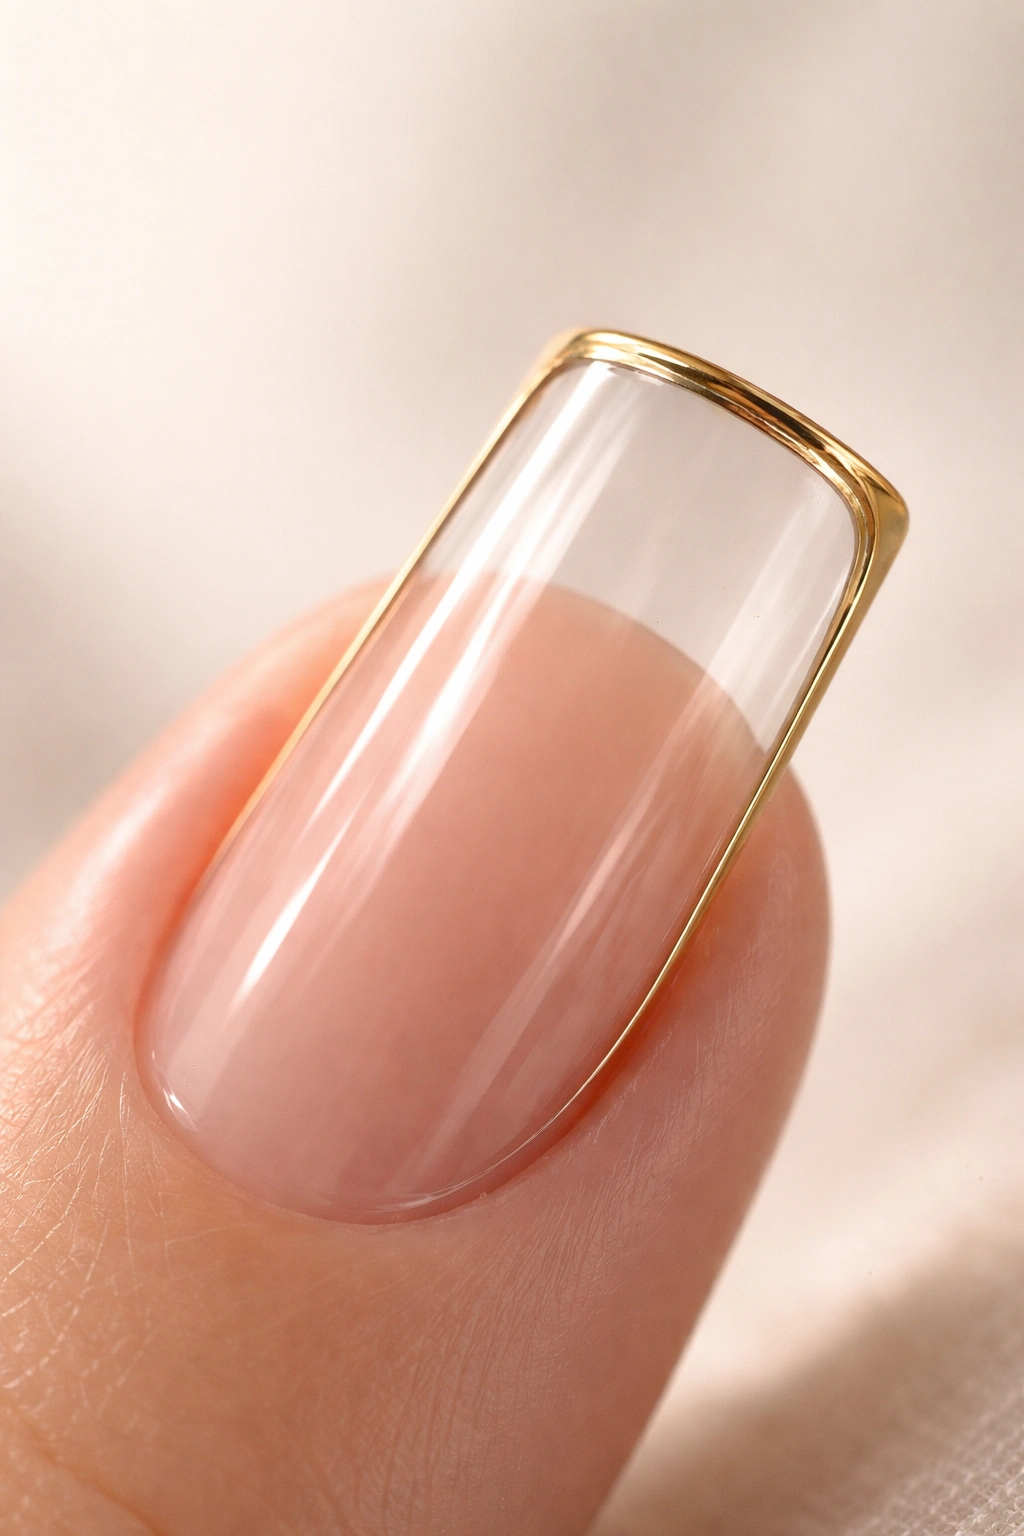
A thin metallic line traced along the edge of your clear duck nail adds jewelry-like elegance. Think of it as an understatement that somehow feels more expensive than anything covered in sparkles. The metallic outline catches light as you move your hands, creating subtle shimmer without any opaqueness interrupting the clear nail aesthetic.
Why the Outline Matters
A chrome or metallic outline adds definition to the natural duck nail shape without obscuring it. Your nail bed remains the focal point, and the metallic line simply frames and enhances what’s already beautiful. This is why it feels so elevated—the design complements your natural nails rather than competing with them.
Application Details
- Start with a clear base coat and allow it to dry
- Use a thin nail art brush or a metallic gel pen (these exist and are game-changers) to draw a precise line
- Apply the metallic polish in a thin, continuous line along the edge where the curved tip begins
- You can outline the entire perimeter or just trace the top curve—both look stunning
- Seal with clear top coat to protect the metallic line
Design variation: Try outlining just the curved portion of the duck nail tip, leaving the sides bare. This creates a minimalist look that emphasizes the actual shape of the nail.
4. Micro Rose Gold Confetti Clusters

Instead of scattering shimmer across the entire nail, this design concentrates tiny rose gold confetti pieces into intentional clusters. You might place one cluster at the base, another at the tip, or scatter three or four around the nail in asymmetrical spots. It’s like tiny fireworks frozen on your nail.
The Visual Impact
Clustered confetti feels more intentional and artistic than all-over shimmer. Your eye knows where to look, which somehow makes the design feel more sophisticated. Rose gold specifically bridges the gap between warm and cool tones, making it universally flattering against any skin tone.
How to Execute It Perfectly
- Begin with two coats of clear base polish
- Mix micro confetti pieces (rose gold works beautifully with clear nails) into a small amount of clear gel or top coat formula
- Using a dotting tool or thin brush, apply small clusters to your nails in predetermined spots
- The clusters don’t need to be uniform—asymmetry actually looks more interesting and modern
- Seal with a glossy top coat for dimension and protection
Real talk: Pre-made clear polishes with rose gold confetti already mixed in exist and save tremendous time. If you’re not interested in mixing your own, brands like Zoya and Cirque Colors make excellent confetti-embedded clear options.
5. Nude or Beige Reverse French with Clear Base
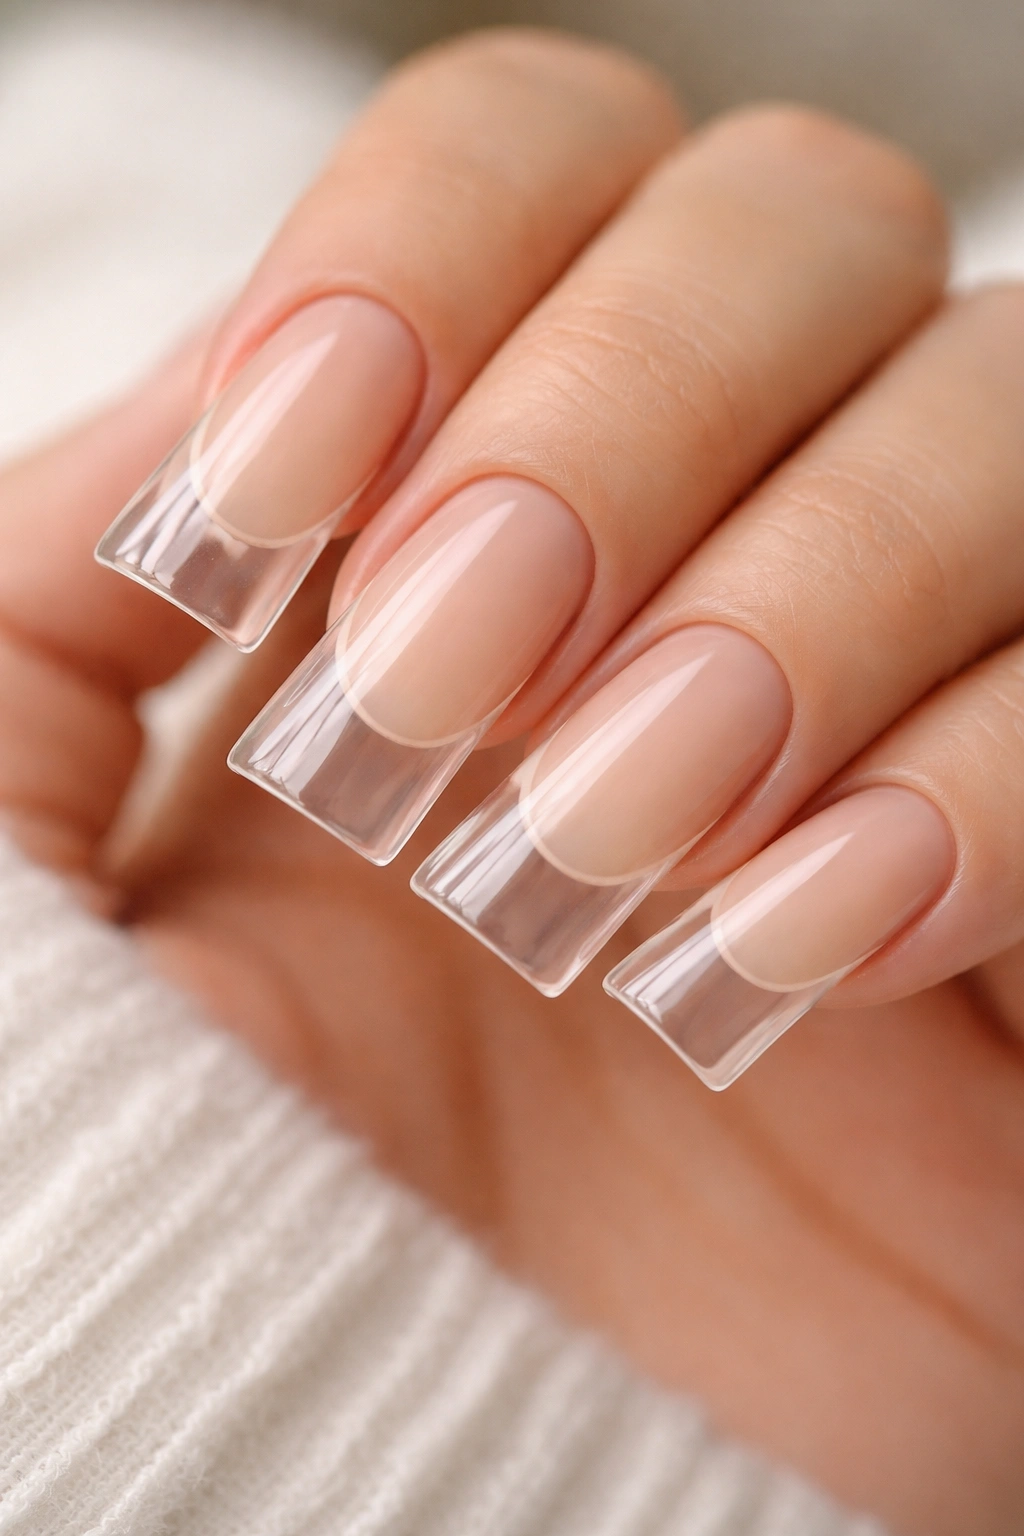
A reverse French manicure flips the traditional design—instead of a white line at the tip, the colored section runs along the cuticle area and sides, leaving the clear tip exposed. With a nude or beige color creating that framed edge, you get definition and structure without losing the clarity that makes clear nails so appealing.
Why Reverse French Reads Modern
This inverted approach feels current and intentional. The clear tip elongates your fingers visually, and the nude frame at the base creates a “finished” appearance that reads as high-maintenance in the best way. It’s a design that photographs well and translates across any lighting condition.
Creating the Reverse French Effect
- Apply a sheer nude or warm beige polish to the base and sides of the nail, stopping about halfway down
- Use painter’s tape along the edge where color meets clear to create a sharp line (remove tape immediately after polish sets)
- Fill the remaining nail (the tip and partial center) with clear polish
- The transition should feel like a gradient or intentional color-block, depending on your placement
- Finish with a glossy top coat for a seamless, polished appearance
Pro tip: A sheer nude that slightly tints the nail rather than full opacity works best—it maintains that clear nail feeling while adding the structural definition of the French accent.
6. Minimalist White Dot or Line Details
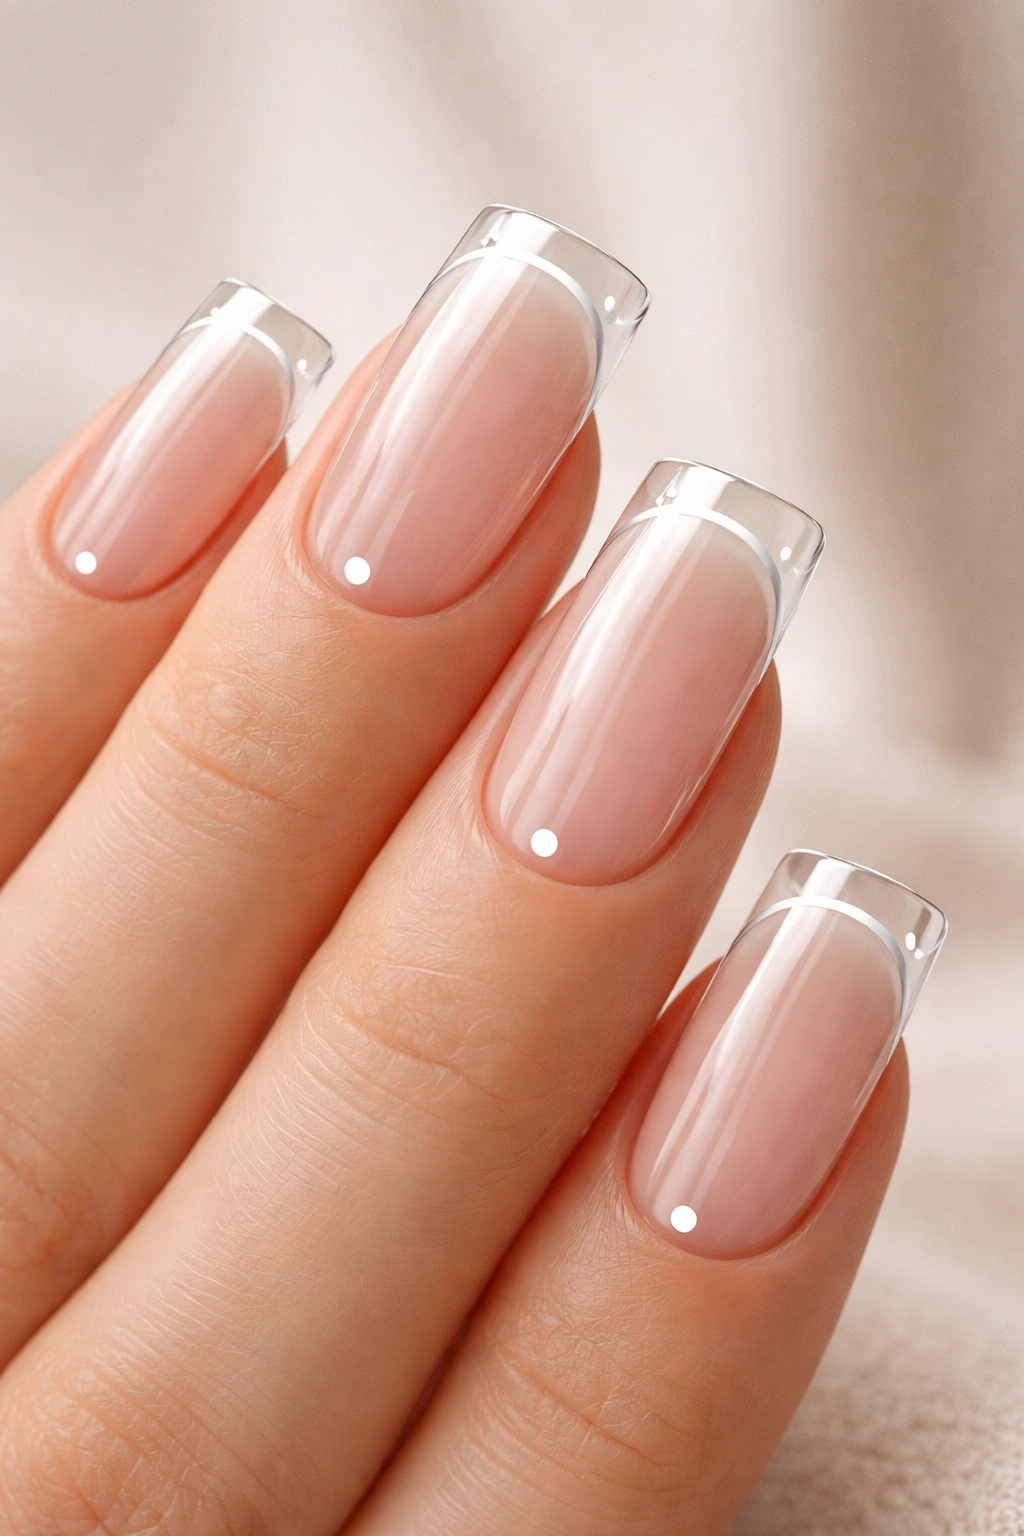
Tiny white dots, a single line along the nail edge, or a small white accent at the base creates understated elegance. These micro details feel almost architectural, like you planned every millimeter of your design. The contrast between clear and white is sharp enough to read as intentional but subtle enough to feel refined.
The Power of Negative Space
Clear nails with white accents benefit from significant negative space. The empty clear areas around the white detail actually make the design feel more precious and considered. This is the opposite of “more is more”—restraint creates the impact here.
Simple Placement Ideas
- Place a single white dot at the center of each nail for a clean, modern look
- Draw a thin white line horizontally across the lower third of the nail
- Create a tiny white half-moon at the base, mimicking the natural nail line
- Add three small white dots in a diagonal arrangement for subtle visual interest
- Use white to frame just the tip edge in a thin outline
Design note: A matte white accent on clear nails reads more contemporary than glossy white, which can feel a bit retro.
7. Clear with Rainbow Holographic Dust at the Tips
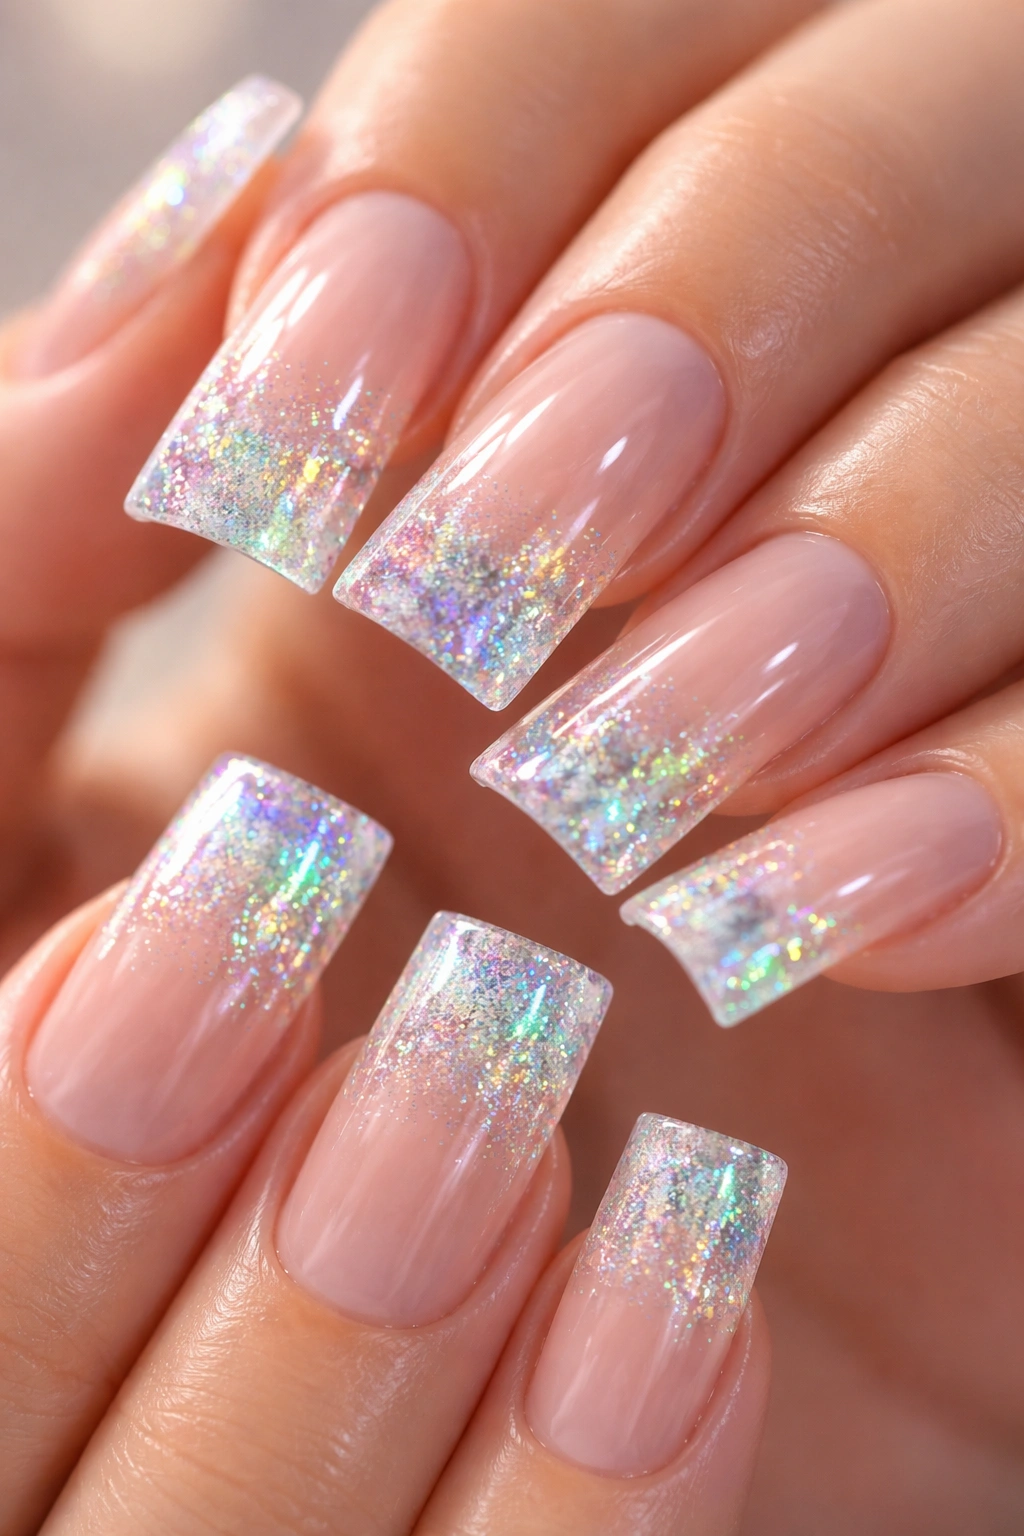
This design captures subtle rainbow shimmer concentrated at the tip area, where light hits your nails most intensely. Holographic dust particles create an iridescent effect that shifts from pink to blue to green depending on how you move your hands under light. It’s magical without being over-the-top.
The Holographic Advantage
Holographic dust creates dimension through light refraction rather than bold color. Your nail bed remains visible and dominant, but rainbow shimmer dances across the surface as you move. This is the sweet spot between “barely-there” and “statement-making.”
Application for Flawless Results
- Paint your clear base coat and let it cure completely
- Create a concentrated zone at the tip by applying a small amount of clear gel mixed with holographic dust
- Use a makeup sponge or brush to apply this shimmer zone, keeping it primarily at the tip edge
- You can create a subtle gradient from tip toward the center, or keep the shimmer concentrated
- Seal with a clear top coat—glossy works beautifully here to amplify the shimmer effect
Worth knowing: Holographic dust looks best under natural light and LED lighting, but can appear too subtle under fluorescent lights in some environments. If you spend most of your time indoors with artificial lighting, try a slightly heavier application.
8. Translucent Blush or Peach Tint Throughout
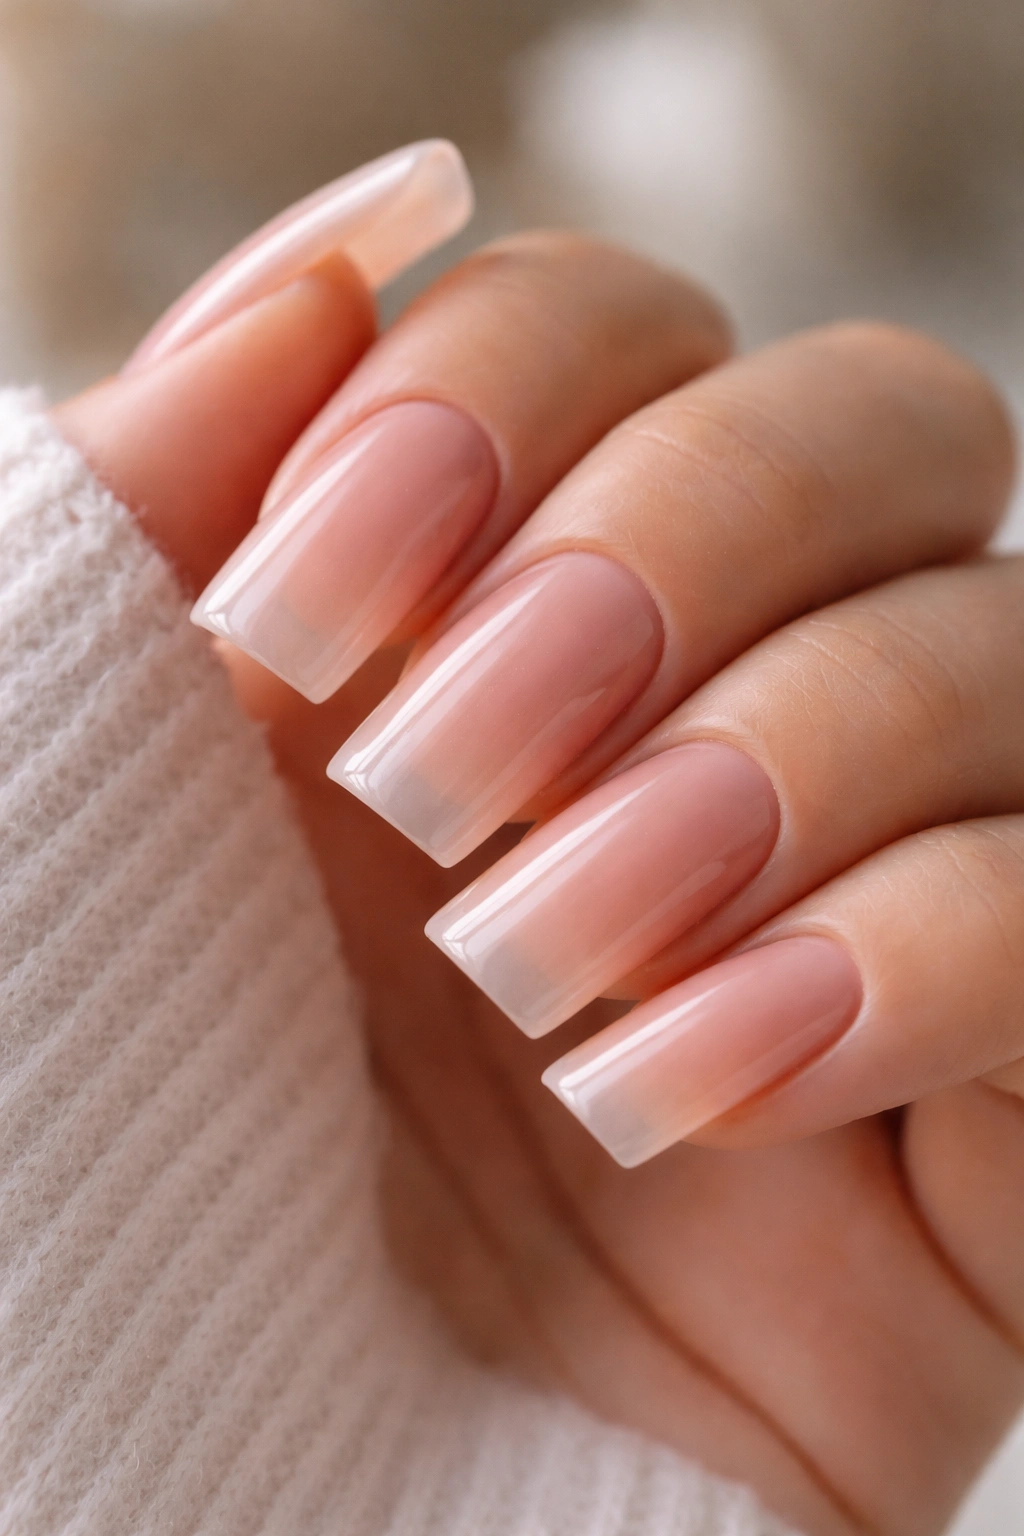
Instead of completely clear, a whisper of blush or warm peach tint runs through the entire nail. This barely-there color feels incredibly sophisticated because it’s not fully opaque—your nail bed still shows through, creating an effect that’s warmer and more dimensional than pure clear while remaining understated.
Why This Tint Works for Everyone
A translucent blush or peach tint works across all skin tones because it’s not saturated enough to clash. It adds visual interest without feeling trendy or dated. The effect is so subtle that it reads as an intentional enhancement rather than a design choice—like your nails are naturally prettier than they actually are.
Achieving the Perfect Tint
- Choose a translucent pink, peach, or warm beige polish formula
- Apply two coats maximum—the goal is a barely-there color, not full coverage
- If the color feels too saturated after two coats, wipe off and apply just one thin coat
- A clear top coat applied over this tinted base creates depth and dimension
- Your nail bed should remain clearly visible through the color
Application tip: Brands like Essie and OPI make excellent translucent tint polishes specifically designed for this effect—search for “sheer” or “barely there” formulas in your local beauty supply store.
9. Minimalist Silver or Pearl Foil Accents
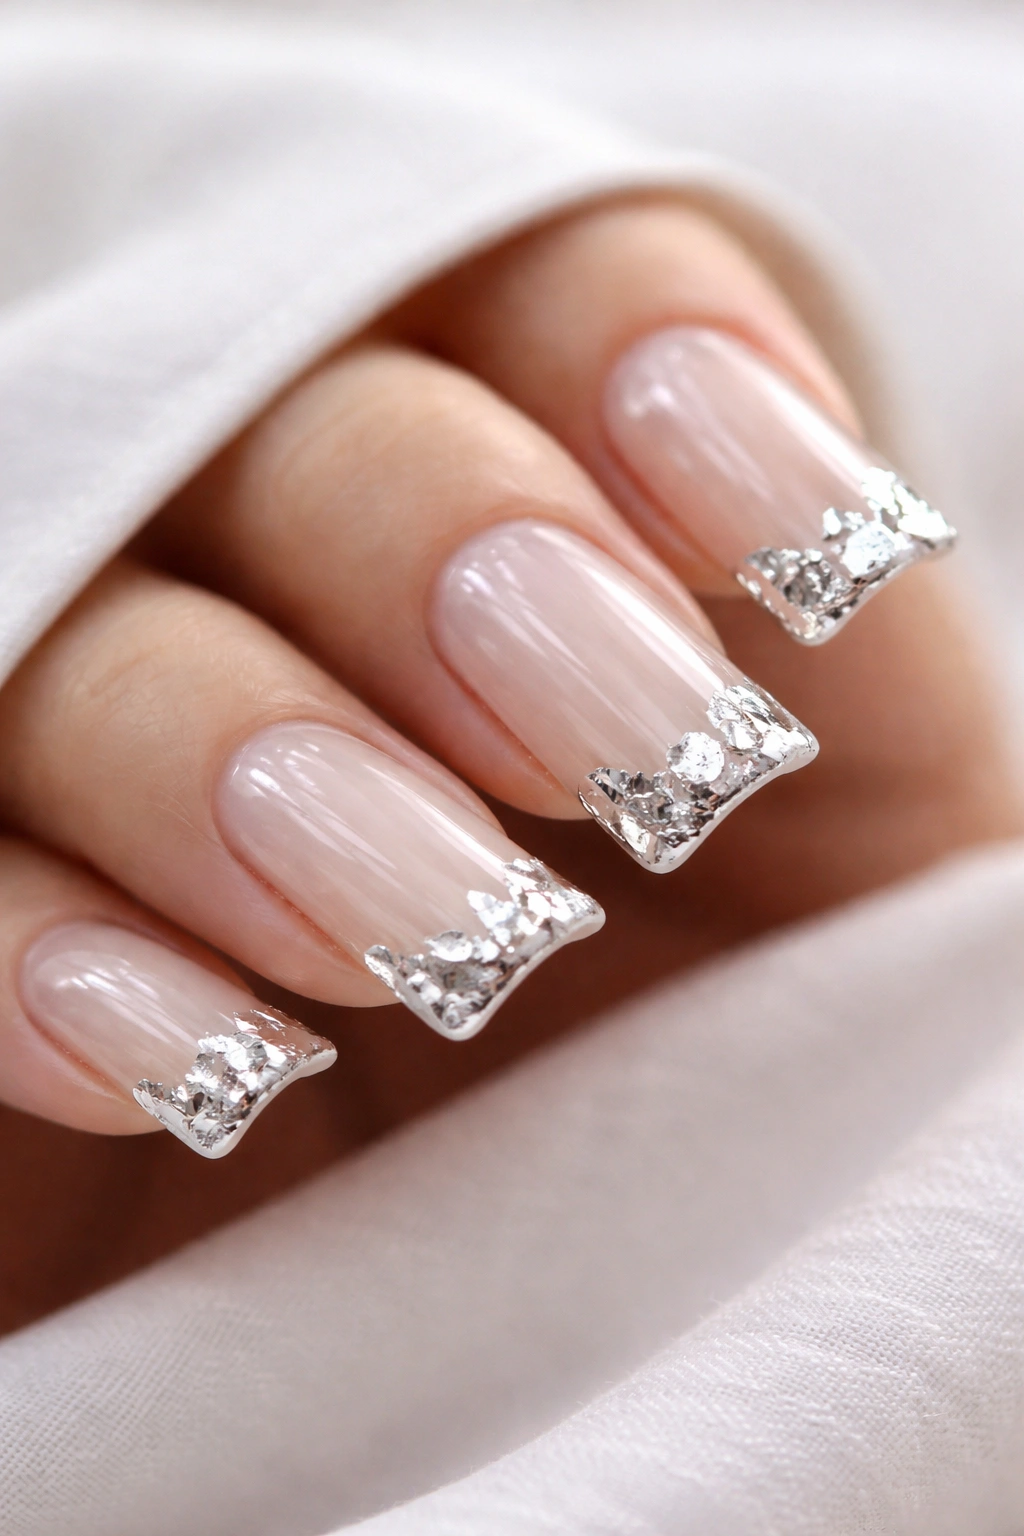
Tiny fragments of silver or pearl foil applied to specific spots create a jewelry-like, precious appearance. Unlike glitter or sparkle that reflects light evenly, foil pieces catch light in distinct flashes, making them feel more intentional and elegant. A few strategic foil pieces are infinitely more sophisticated than an all-over sparkle.
The Foil Aesthetic
Foil catches light differently than shimmer—it creates distinct flashes rather than a subtle glow. This makes even small amounts of foil feel impactful and high-end. The effect reads as intentional and artistic rather than accidental or decorative.
Applying Foil Successfully
- Prep your clear nail with base coat and let it dry
- Apply a sticky base layer (many nail artists use a tacky gel or special foil adhesive) to the area where you want foil
- Cut tiny pieces of foil from a sheet and press them onto the sticky base with a tool or tweezers
- Place foil pieces at the tip edge, scattered along one side, or in a small cluster at the base
- Seal everything with multiple layers of clear top coat to protect the foil pieces
Pro tip: Foil sheets are inexpensive and come in countless finishes—silver, gold, holographic, mirror, and more. Experiment with different foil types to match your personal aesthetic.
10. Dimensional Texture with Clear Polish and Subtle 3D Elements
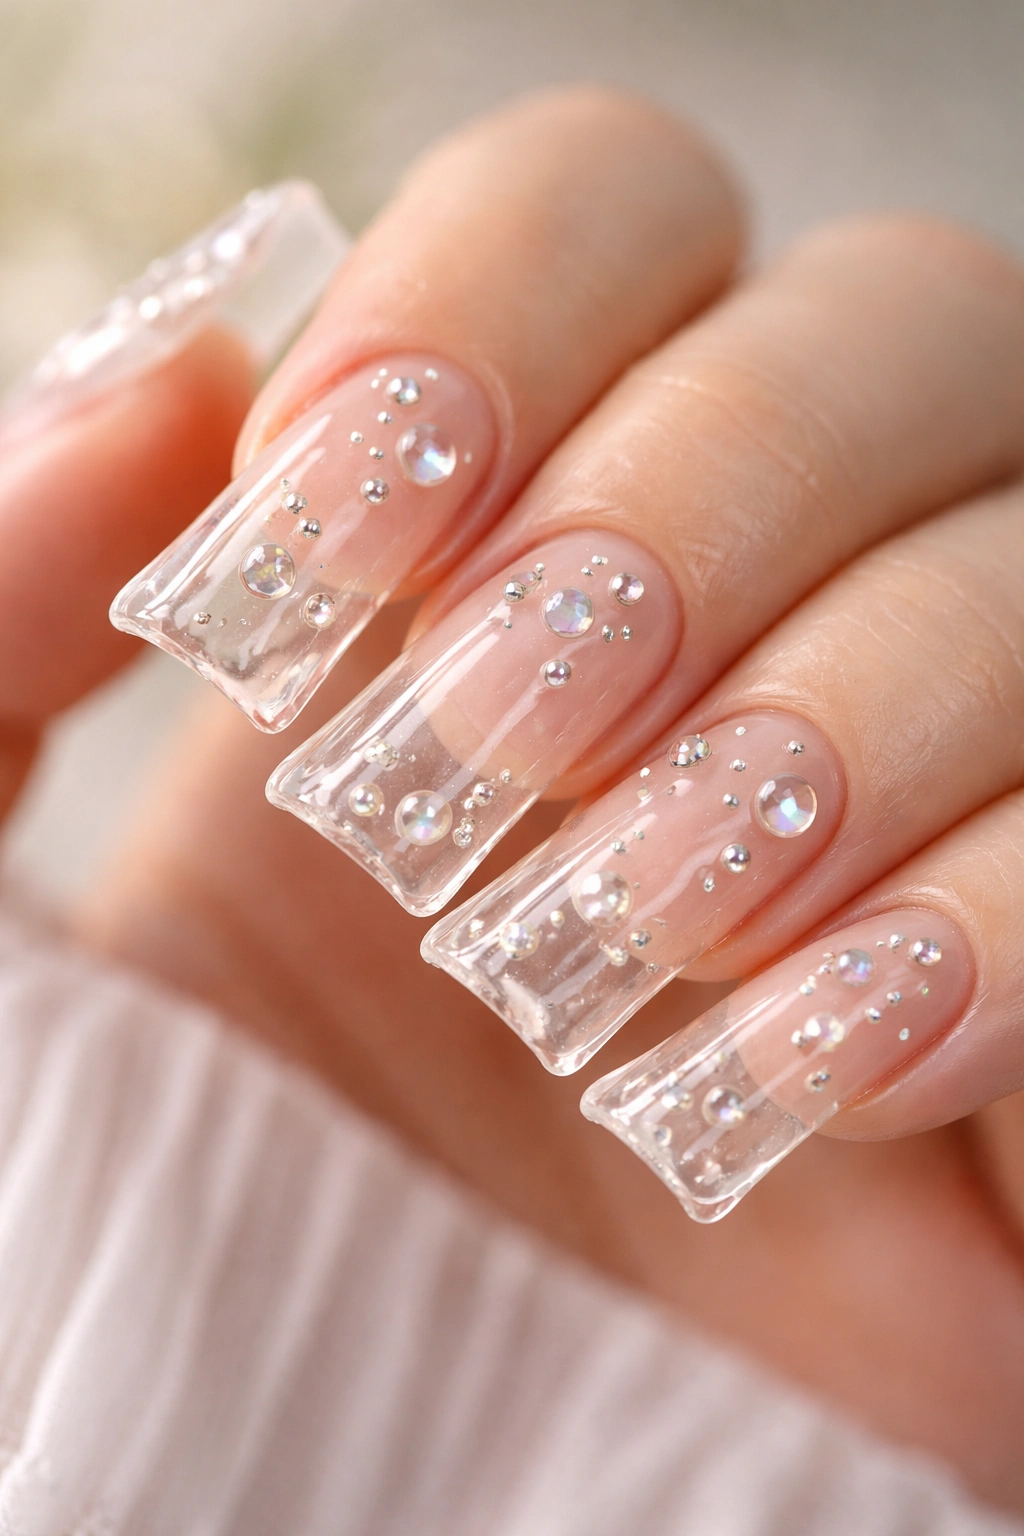
This design uses clear polish as the base with tiny 3D elements—perhaps small glossy or matte studs, delicate beads, or a thin wire outline creating dimension. The clear base ensures that the 3D elements become the focus while maintaining that airy, minimal aesthetic clear nails provide. It’s a design that demands to be touched and examined up close.
Why Texture Adds Appeal
Our brains respond to texture and dimension differently than flat design. Even subtle 3D elements make people want to look closer and ask questions about your nails. The clear base prevents the design from feeling heavy or overdone while the dimensional elements add personality and sophistication.
Adding Subtle 3D Details
- Begin with your clear base coat and allow it to cure completely
- Select small embellishments like tiny metal studs, pearl accents, or small glass beads
- Apply them strategically—perhaps a single stud at the base of each nail, a small cluster at the center, or an asymmetrical arrangement
- Use a strong nail glue or gel adhesive to secure each piece, as regular top coat won’t hold dimensional items
- Seal around (not over) the dimensional elements with clear top coat for protection
- Add a final topcoat layer carefully to prevent dislodging the embellishments
Important note: Dimensional elements require extra care during daily activities—avoid rough contact that could snag or pull the elements loose. This design works best if you have a relatively low-contact routine.
Final Thoughts
Clear duck nails represent the intersection of minimalism and impact—they look effortlessly elegant while requiring genuine attention to detail. Whether you choose subtle shimmer, delicate accents, or strategic dimension, the transparent base lets your natural nail bed shine while giving you plenty of room for creative expression.
The best part about clear duck nails is their adaptability. These designs work beautifully for everyday wear, but they’re equally appropriate for professional settings, special occasions, or when you simply want your hands to feel polished without drawing excessive attention. You can switch between designs regularly without feeling like you’re constantly changing your look—each variation feels fresh but cohesive.
Start with whichever design resonates most with your personal style, and don’t be afraid to customize. Adjust the placement, swap metallic tones, or combine elements from different designs to make something uniquely yours. Clear duck nails offer the perfect canvas for nailing (pun intended) that sophisticated, intentional aesthetic that makes people think you’ve got your entire life together—even if you’ve only perfected your manicure game.
