

If you’re drawn to dramatic nail art, stiletto nails with blue ombre designs hit the sweet spot between bold and sophisticated. The elongated, pointed shape creates the perfect canvas for gradient color transitions, and blue—whether deep navy, icy powder blue, or vibrant turquoise—naturally lends itself to stunning ombre effects. The way light catches the gradient along the curved surface of a stiletto gives the design extra dimension and movement, making it look almost like a wearable piece of jewelry on your fingertips.
What makes blue ombre stilettos so versatile is how they work for nearly every occasion. Pair a soft powder-blue-to-white gradient with a minimalist outfit for understated elegance, or go bold with a navy-to-silver ombre for a night out. The ombre technique itself—that seamless color transition—adds visual interest without overwhelming the shape, which is crucial because stilettos are already a statement on their own. The gradient creates depth and sophistication that solid color nails simply can’t match.
The technical beauty of ombre on stilettos also deserves mention. Because the nail has such a steep curve and comes to a sharp point, the color placement and blending become a skill. A well-executed blue ombre will follow the contours of the nail, with darker shades deeper in the nail bed and lighter shades toward the tip—or vice versa. This isn’t just about painting two colors; it’s about creating a visual flow that enhances the nail’s natural shape. Whether you prefer a subtle, barely-there gradient or a dramatic color shift, these 10 designs showcase the endless possibilities.
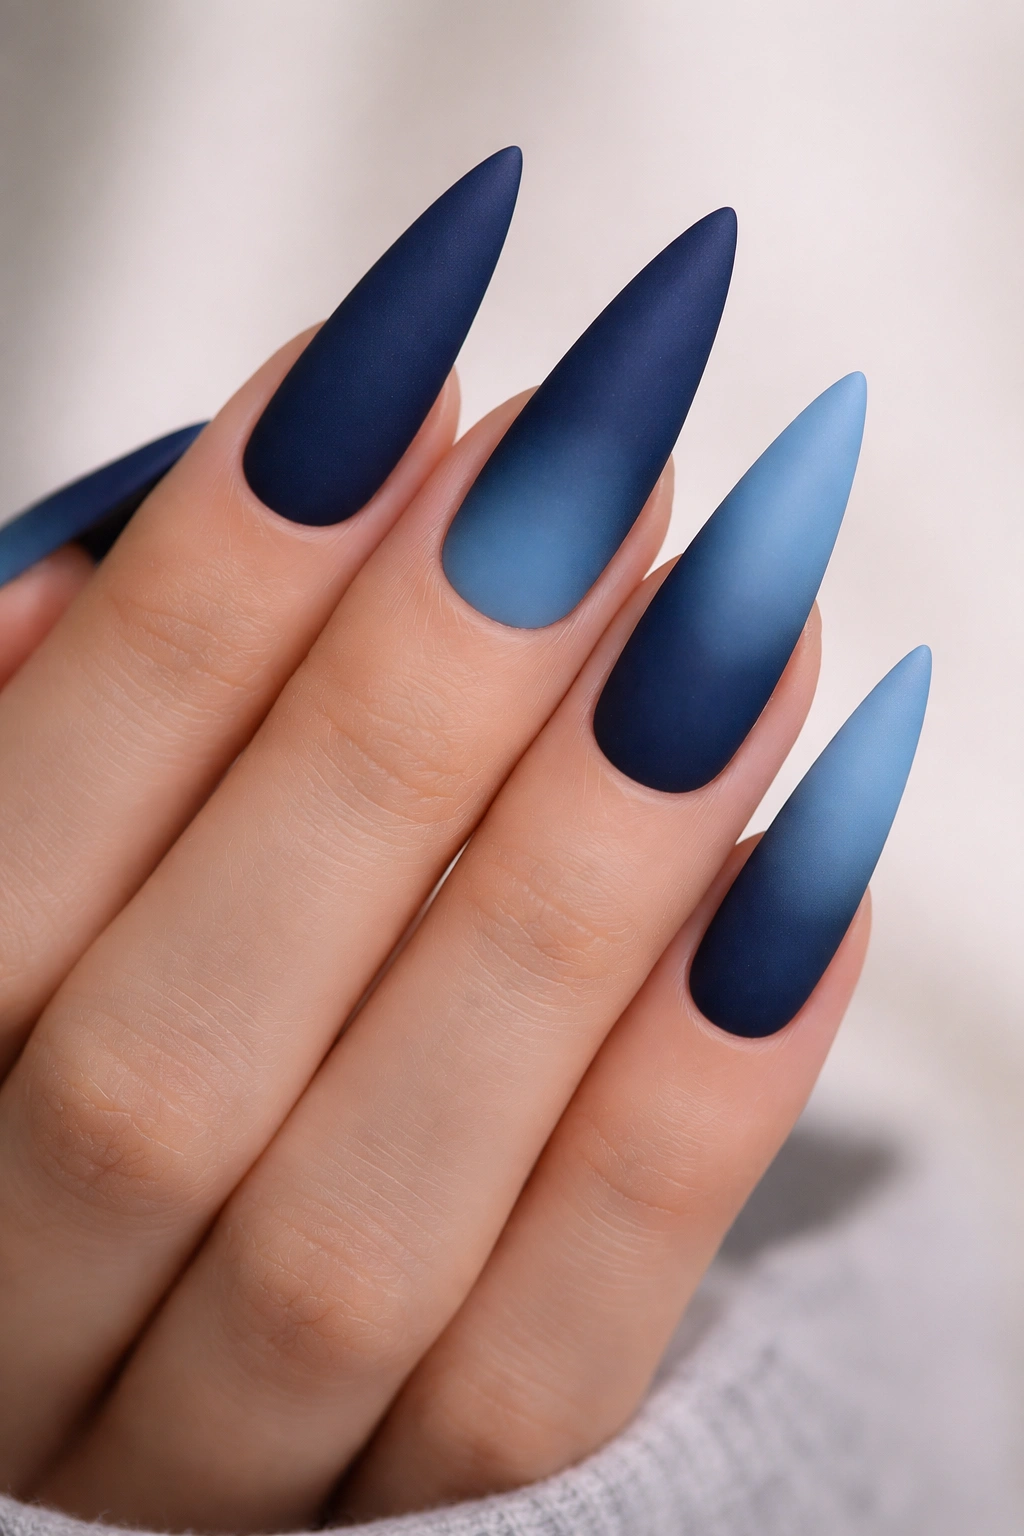
1. Midnight to Sky Blue Ombre with Matte Finish
This design plays with depth by transitioning from a rich, dark midnight blue at the nail bed to a lighter, almost sky-blue tone at the tip. The contrast between these two blues is significant enough to be clearly visible, but they’re in the same color family, so the look stays cohesive rather than jarring. Finish with a matte top coat instead of glossy, and the sophisticated vibe amplifies—the matte texture softens the drama while keeping the gradient as the focal point.
Why Matte Transforms the Look
Matte finishes absorb light rather than reflect it, which means the ombre gradient reads differently than it would under a shiny gloss. The colors appear more blended and smoother on a matte surface, and the overall effect feels more modern and fashion-forward. If you typically opt for high-gloss stilettos, this variation will feel fresh while staying true to the classic ombre structure.
How to Achieve This Design
- Use a midnight blue as your base color, applied to the entire nail
- Sponge a sky blue onto the upper two-thirds of the nail, pressing gently to create a gradient rather than a hard line
- Blend the colors where they meet using a small sponge and subtle bouncing motions
- Apply a matte top coat for the finished look, which requires a special matte formula rather than a traditional glossy one
- Clean up any excess color around the cuticles for a professional, precise finish
- Allow full drying time before exposing hands to water
Pro tip: If matte feels too flat for you, try a satin finish top coat instead—it offers a middle ground between high-gloss shine and full matte, catching light without being reflective.
2. Cobalt to White Ombre with Glitter Accent
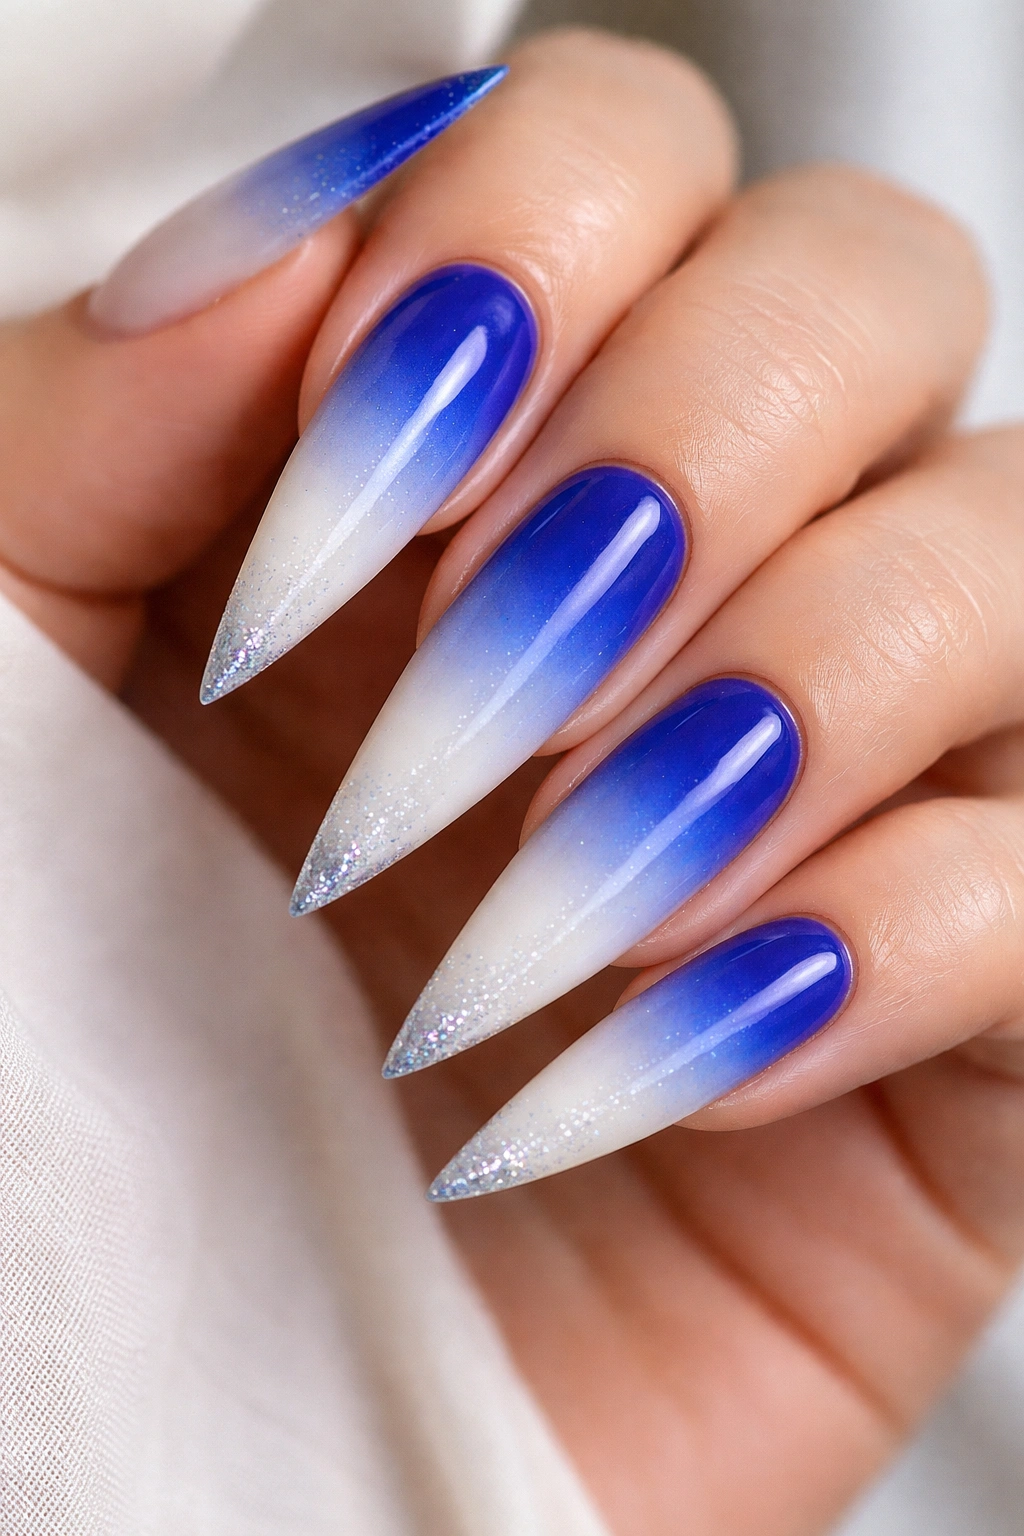
Cobalt blue is a punchy, jewel-toned shade that photographs beautifully, and when it gradually fades to white at the tips, the effect is striking without being overwhelming. This design adds a layer of glamour by incorporating fine glitter or chrome powder at the very tip of each nail—think of it like a subtle sparkle finale to the gradient journey. The contrast between the smooth ombre and the sparkly tip creates visual interest and prevents the design from feeling one-note.
The Power of Sparkle Placement
Instead of embedding glitter throughout the ombre, placing it only at the tip—roughly the last quarter-inch of the nail—keeps the design from looking cluttered. The glitter acts as a highlight, drawing the eye toward the sharpest point of the stiletto. This strategic placement is what separates a well-designed nail from one that looks busy. The white base at the tip means the glitter shows up with maximum impact against a neutral backdrop.
Application Steps for This Design
- Apply cobalt blue to the base of the nail, stopping about halfway up
- Blend white into the upper half using a makeup sponge and quick tapping motions
- Mix the two colors where they meet for a seamless transition—this usually takes 2-3 passes with the sponge
- Once dry, apply a clear top coat to seal the ombre
- While the top coat is still slightly tacky, apply fine blue or silver glitter to the tip portion only
- Seal with a final glossy top coat to lock everything in place
Insider note: Gel systems allow you to cure between layers, which gives you more control over glitter placement and prevents it from shifting around mid-application.
3. Navy to Nude Ombre with Gold Details
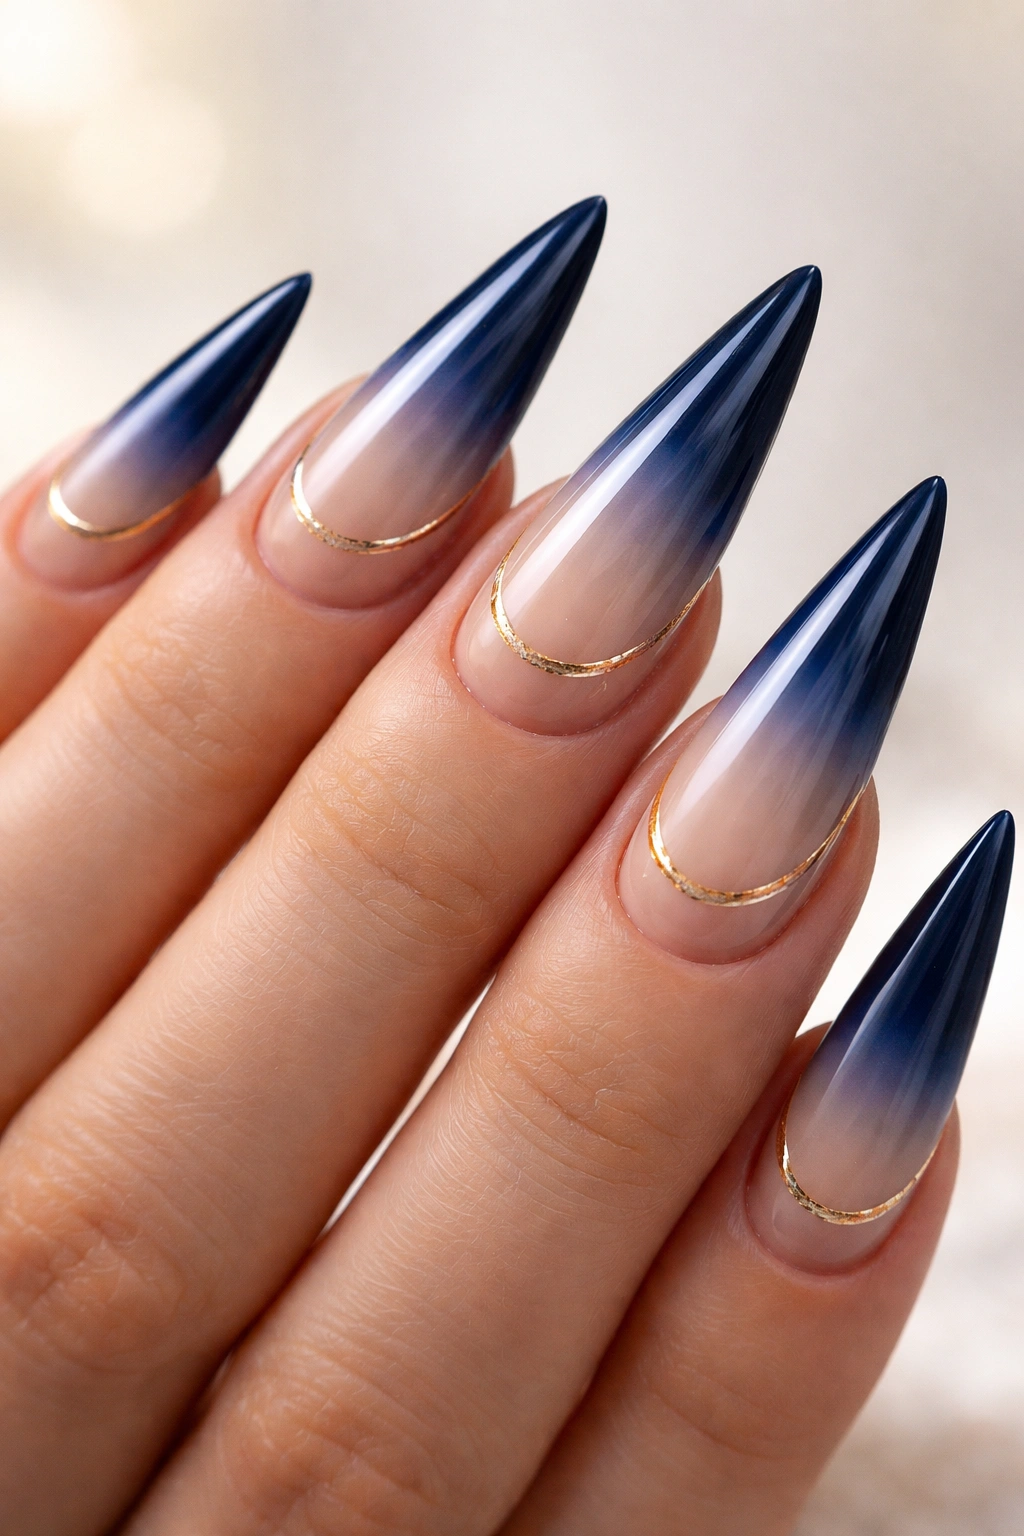
This design brings a sophisticated, grown-up elegance to the stiletto category. Navy blue at the base transitions into a soft, skin-toned nude at the tip, creating a gradient that feels less like “nail art” and more like a refined, luxury manicure. Adding ultra-thin gold stripes or a delicate gold accent near the cuticle line elevates the design from simple ombre to couture-level nail art.
Why This Palette Works for Any Skin Tone
Navy and nude are a power duo because they complement virtually every skin tone. The navy provides sufficient color depth and interest, while the nude acts as a bridge to your actual skin, creating an elongating effect that makes hands look more graceful. This isn’t just aesthetic; it’s optical—the color transition draws the eye downward along the length of the nail, emphasizing the stiletto’s dramatic shape.
Creating the Gold Accent Detail
- Complete your navy-to-nude ombre base using sponging techniques (midnight blue fading gradually to nude over the nail surface)
- Allow the ombre to dry completely, then apply a clear base coat
- Using an ultra-fine nail art brush or gold striping tape, create thin vertical lines near the cuticle area—two to three delicate lines per nail is usually ideal
- Alternatively, use a thin horizontal line at the nail bed as a geometric accent
- Seal with a glossy top coat to protect the gold and blend all elements cohesively
Worth knowing: Real gold and metallic finishes photograph beautifully in person and in photos, making this design particularly stunning for special events.
4. Turquoise to Purple Ombre—A Sunset Gradient
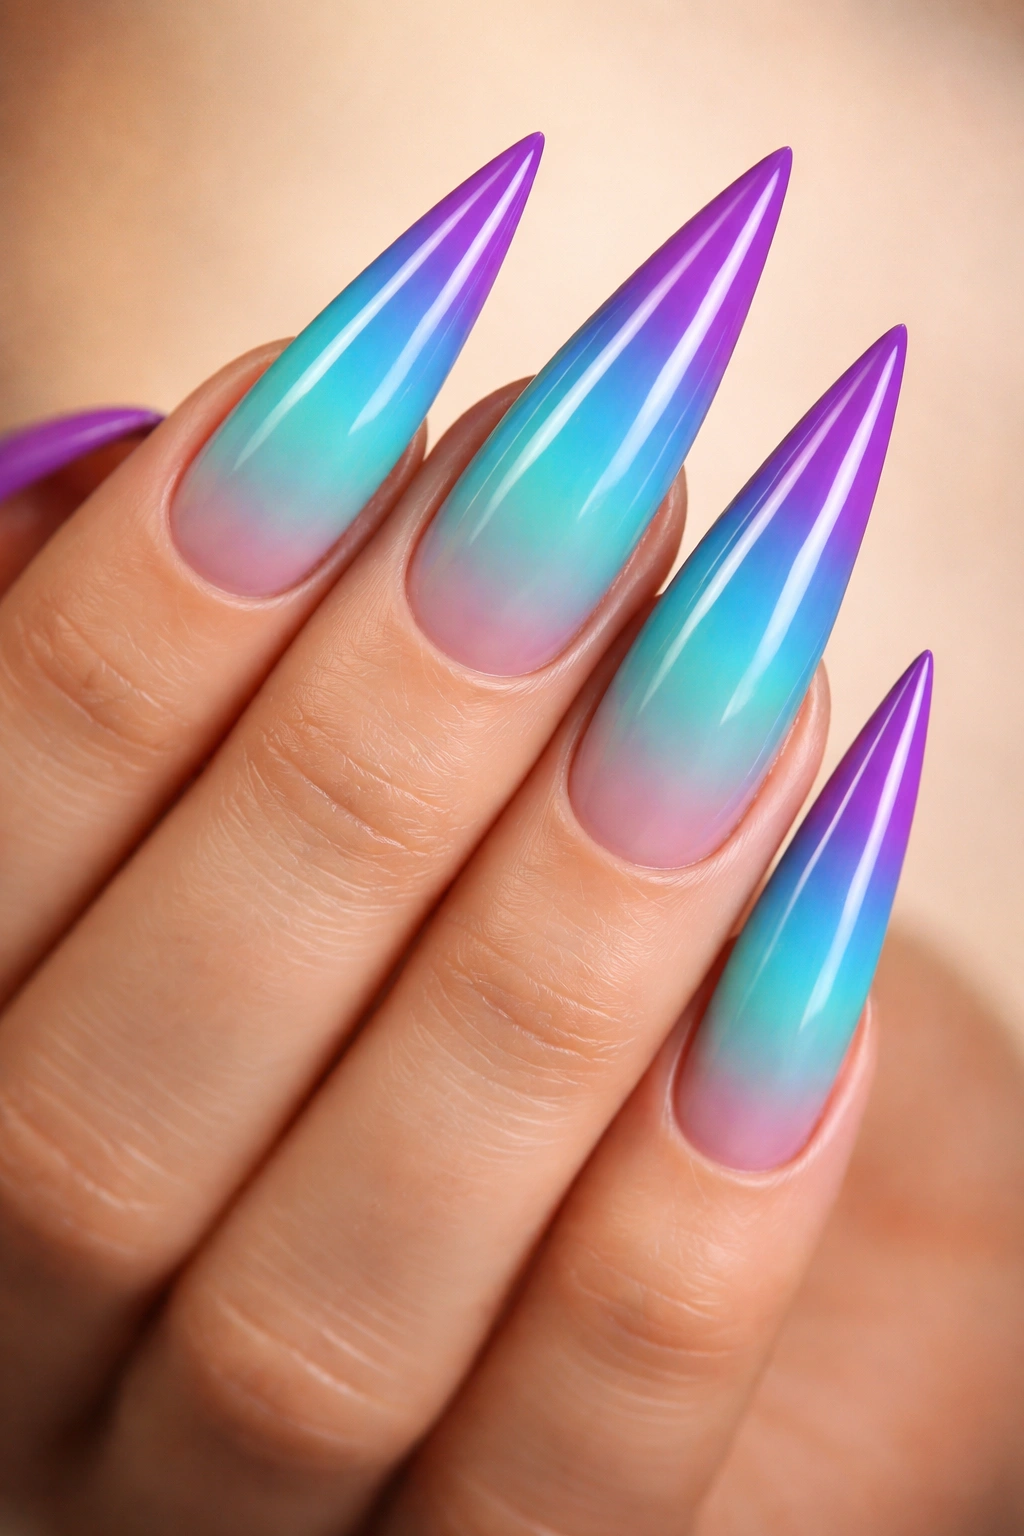
This is where blue ombre gets playful. Turquoise (a blue-green shade) at the base transitions into a cool purple at the tip, creating a gradient that’s vibrant but not neon. The color journey feels almost like a sunset reflected in ocean water—hence the inspiration. This design works particularly well on stilettos because the elongated shape allows the full color spectrum to display without cramping.
The Color Psychology Behind This Combination
Turquoise represents creativity and calm, while purple adds mystery and sophistication. Together, they create a personality-driven design that says something about the wearer. Unlike traditional blue ombres that feel safe and neutral, this combo declares a sense of artistic confidence. On stilettos, this boldness is exactly what the shape demands.
Execution for Maximum Color Impact
- Prime the nail and apply a thin base coat
- Apply turquoise to the bottom third of the nail with a regular brush
- Sponge a transitional teal shade into the middle third, overlapping slightly with the turquoise
- Introduce the purple into the upper third, blending carefully where teal and purple meet
- This takes practice—use a new section of the sponge for each color layer and blend gently
- Three to four sponging passes may be needed for a smooth, unbroken transition
- Seal with a glossy top coat
Pro tip: Practice blending on a nail wheel or paper first; the water-based blending technique takes a few tries to master, but once you nail it, you’ll create ombres that rival salon quality.
5. Powder Blue to Silver Ombre with Rhinestone Border
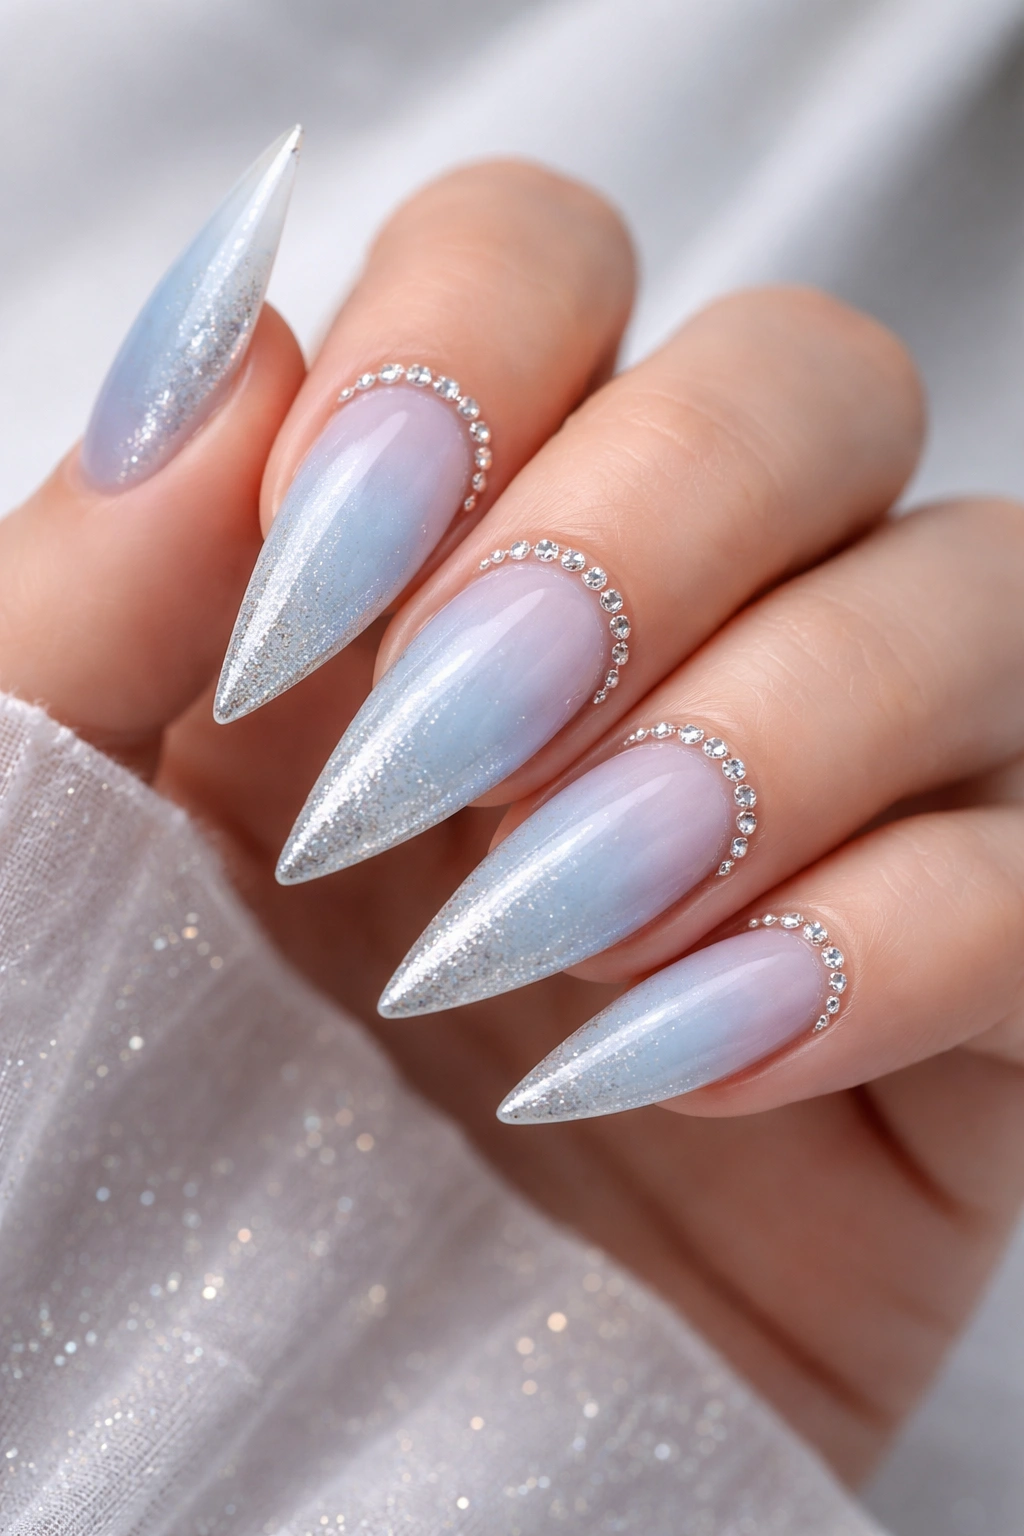
Powder blue is soft, approachable, and dreamy—the kind of shade that makes nails feel feminine without being saccharine. When it fades to silver at the tips, the design becomes more sophisticated, and the addition of small rhinestones placed in a delicate line near the cuticle transforms it into an embellished statement piece. This design appeals to anyone who loves subtle glam over bold glitter.
The Elegance of Restraint in Nail Design
Sometimes the most striking designs are those that don’t go all the way. By limiting the rhinestone detail to a single line and using a soft powder blue as the primary color, this design avoids the trap of looking costume-like. Rhinestones deserve to be the secondary element, not the main event—when placed thoughtfully, they elevate without dominating.
How to Apply Rhinestones Safely
- Create your powder-blue-to-silver ombre using your standard sponging method
- Allow the nail to dry completely, then apply a glossy top coat
- While the top coat is still tacky (curing under a UV lamp for just 10-15 seconds if using gel, or waiting only 30 seconds if using regular polish), pick up small rhinestones with a rhinestone picker tool (a dotting tool works too)
- Place rhinestones in a precise line along the cuticle area or just above it, spacing them evenly across the nail
- For regular polish: allow this to set for several minutes, then seal with a final top coat
- For gel: cure again, then apply a final glossy top coat and cure once more
- Avoid water for at least one hour after application to ensure everything is fully set
This detail work requires a steady hand and good lighting, so don’t rush the process.
6. Deep Teal to Clear Ombre—The Fade-to-Nothing Effect
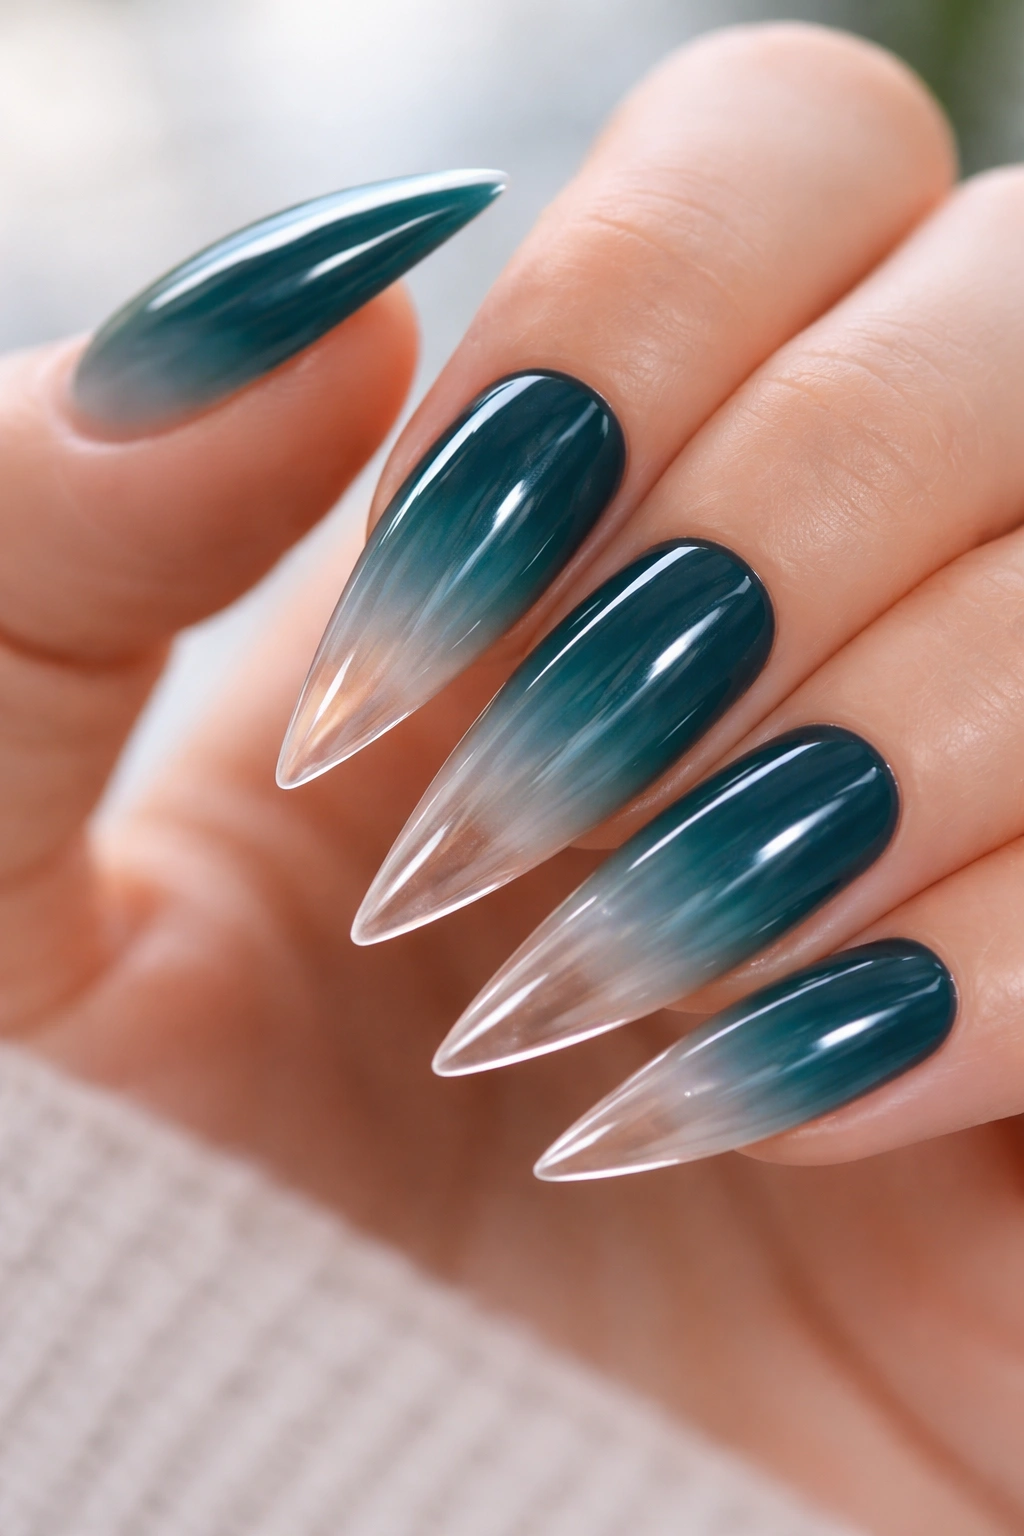
Imagine a color that’s more teal than blue but still sits firmly in the blue family. Now imagine it fading, fading, fading until it completely disappears into just clear polish at the very tip. This is the fade-to-nothing ombre, and it’s a masterclass in subtlety. On stilettos, the effect is almost liquid—as if the color is melting away, creating an optical illusion of translucence.
Why This Design Looks More Expensive Than It Is
The fade-to-nothing gradient is harder to execute than a solid color-to-solid color ombre, which automatically makes it feel more technical and therefore more luxe. The fact that it requires patience, precision, and multiple light passes with the sponge means it reads as more sophisticated. Budget-conscious nail enthusiasts who want their manicure to look expensive should absolutely try this technique.
The Sponging Technique for Fade-to-Nothing
- Apply deep teal to roughly the bottom half of the nail
- Rinse your sponge and squeeze it completely dry (moisture will dilute your polish and ruin the effect)
- Tap the sponge against the border where teal ends, picking up a tiny bit of teal color
- Use very light, bouncing motions to work this into the middle section, creating a lighter, more diffused version of the teal
- Continue this process, using less and less product with each pass, until the color gradually fades into nothing
- The key is patience—this takes five to seven sponging passes, not two or three
- The tip should be pure clear polish with just the barest hint of teal showing through
- Finish with a glossy top coat
Patience required: This is a technique where rushing will show, so set aside extra time for this particular design.
7. Royal Blue to Gold Ombre with Geometric Line Art
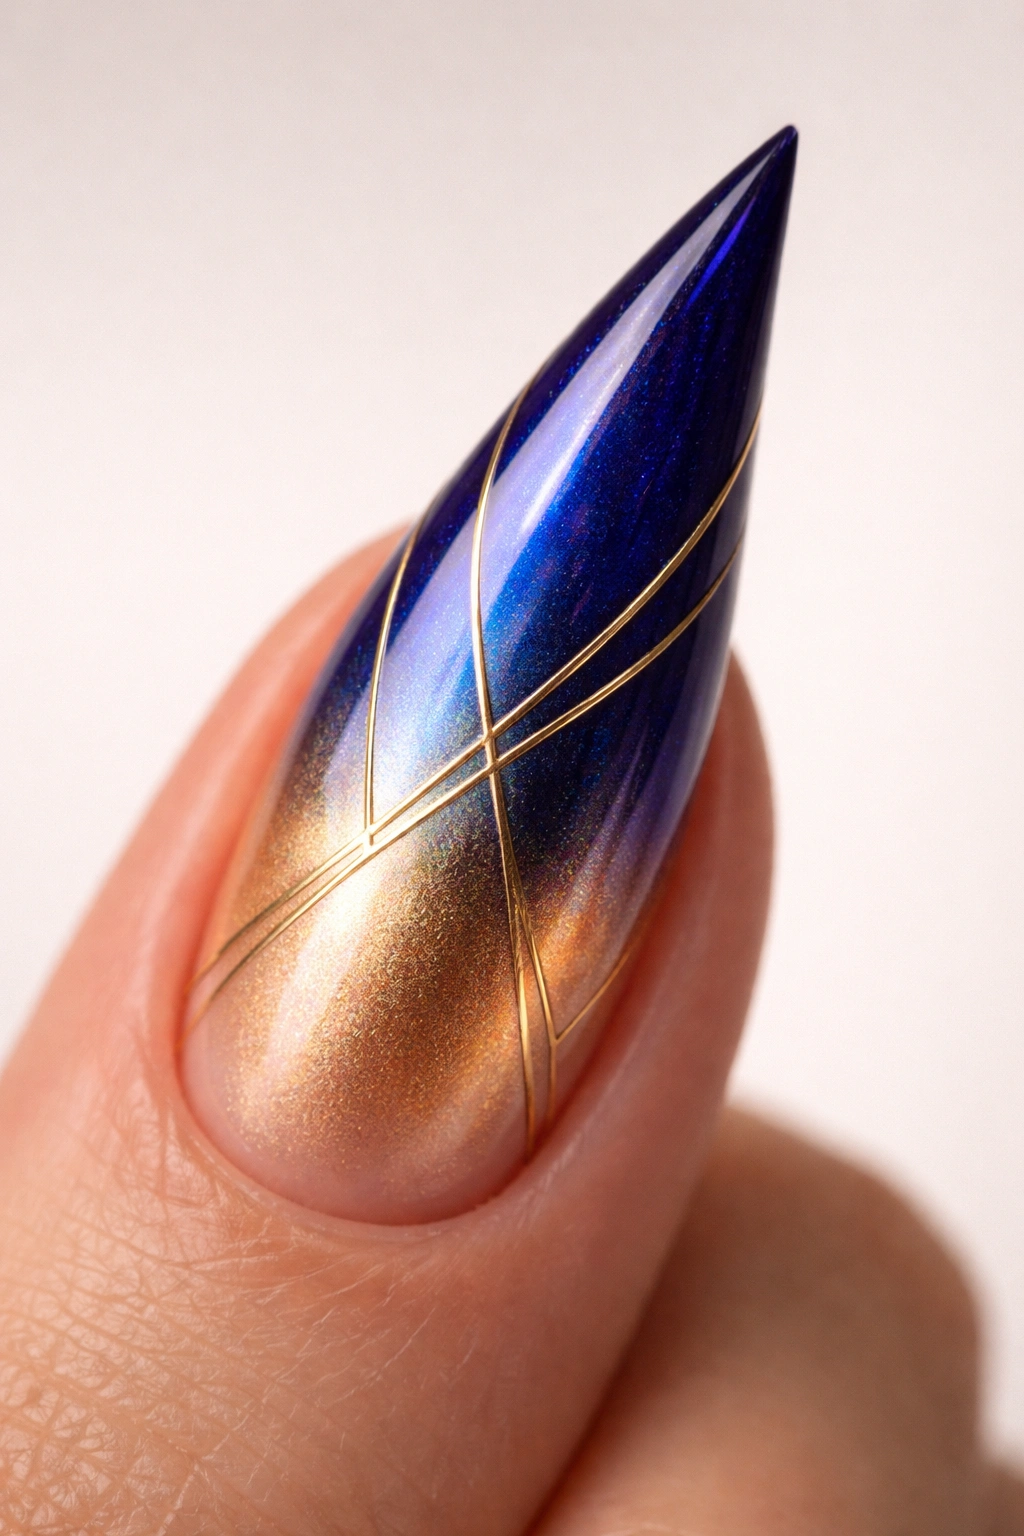
Royal blue is deep, rich, and unapologetically bold—it’s the color of velvet and jewels. Pair it with gold to create a regal, almost luxe aesthetic, and then add thin geometric line art (think triangles, stripes, or angular shapes) in the gold color to break up the gradient. This design works beautifully on stilettos because the sharp angles of the geometric elements echo the sharp point of the nail shape.
How Geometry Enhances a Gradient
When you have a smooth ombre, adding structured geometric shapes creates visual contrast and prevents the design from feeling too soft or blended. The lines act as visual breaks, giving the eye distinct elements to follow. On a stiletto specifically, sharp angles in the nail art reinforce the sharpness of the shape itself, creating a cohesive, intentional look rather than a random combination of elements.
Creating the Geometric Elements
- Complete your royal-blue-to-gold ombre using standard sponging techniques
- Once fully dry, apply a clear top coat
- Using a thin nail art brush or striping brush (size 000 or smaller), draw geometric shapes in gold: thin vertical lines, small triangles pointing downward from the tip, or angular chevron patterns
- Keep lines thin and precise—thicker lines will read as clunky rather than refined
- Work slowly and let each line dry before adding another to prevent smudging
- Alternatively, use gold striping tape applied in geometric patterns for perfectly straight, clean lines
- Seal everything with a final glossy top coat
Thin, precise line work is challenging, so if you’re new to nail art, practice on practice nails or nail wheels first.
8. Periwinkle to White Ombre with Matte Finish and Shimmer Top Layer
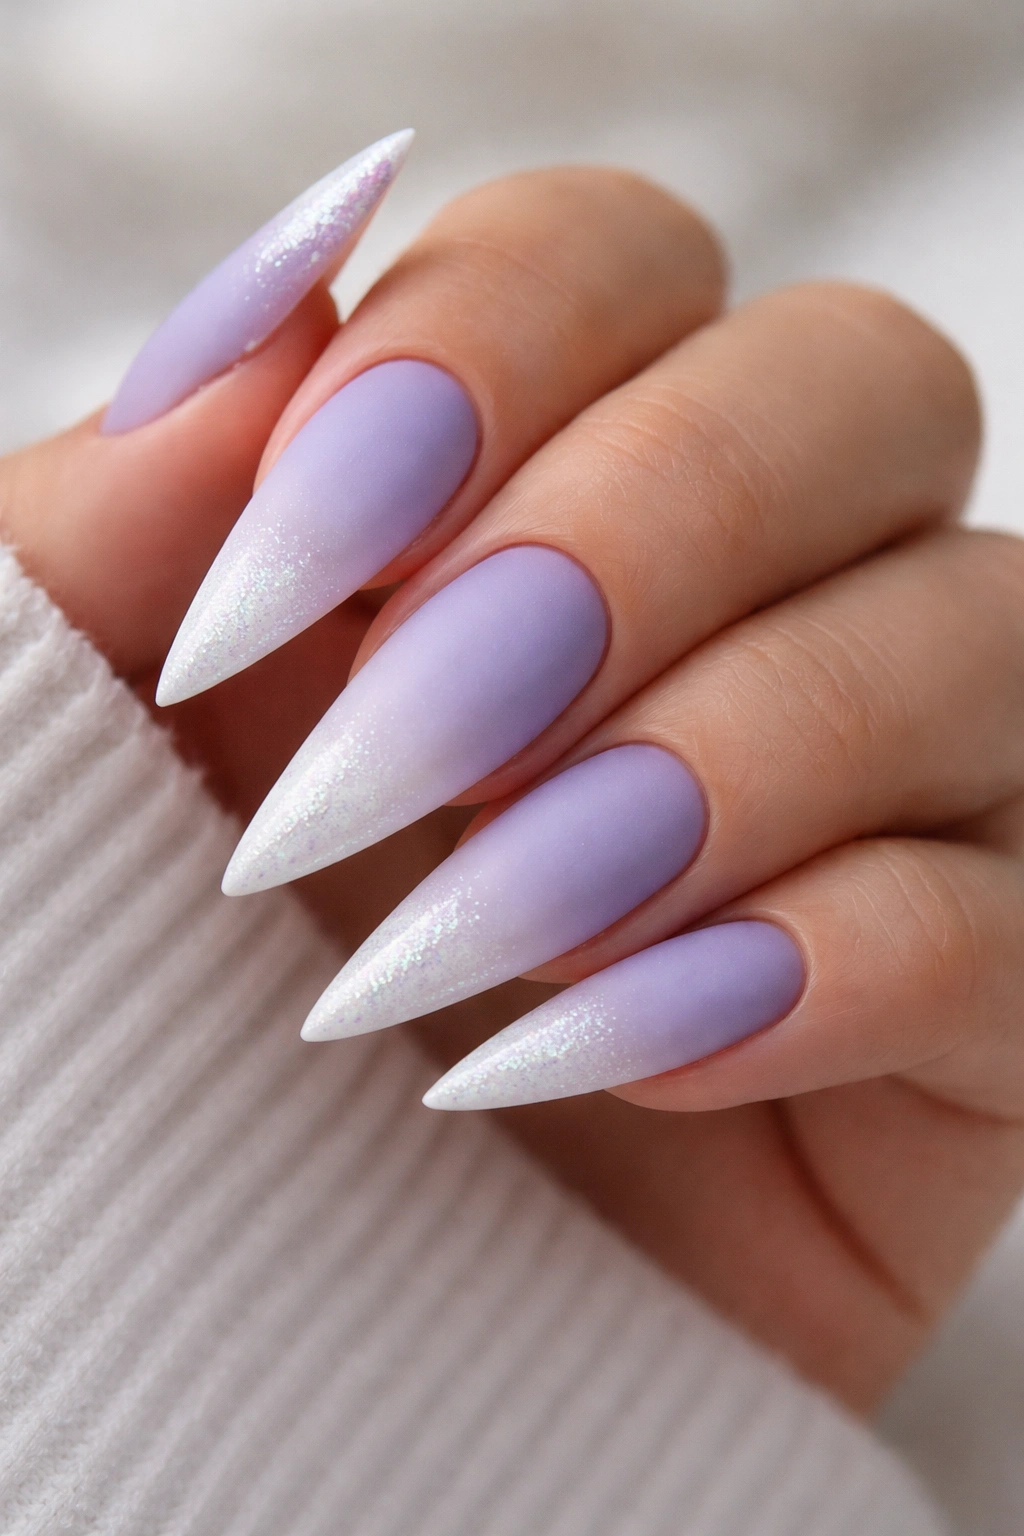
Periwinkle—that perfect blend of blue and purple—creates a softer, more whimsical ombre when it transitions to white. Finish it with a matte top coat for that modern, fashion-forward vibe, then layer a subtle shimmer top coat over just the tips. This creates a multitextured design where the gradient stays matte while the tips catch light, adding an element of surprise and dimension.
Layering Textures for Visual Depth
Most manicures commit to a single finish: either all matte, all glossy, or all shimmer. But by combining finishes, you create depth and sophistication. The matte ombre becomes the canvas, and the shimmer tips become jewelry. This approach is perfect for stilettos because it draws attention to the points—exactly where you want the eye to go.
Application for Dual-Texture Design
- Create your periwinkle-to-white ombre using the sponge method, blending carefully to avoid visible lines
- Once completely dry, apply a matte top coat across the entire nail
- Allow the matte coat to cure or dry according to product instructions
- Using a thin brush or applicator, paint a shimmer top coat only onto the tip area (roughly the last half-inch)—this creates a soft, glowing effect at the point
- If using gel, cure between the matte and shimmer layers for the cleanest separation
- If using regular polish, allow the matte to set fully before applying shimmer
Pro tip: Shimmer looks most luxe when it’s subtle—avoid chunky, obvious glitter and instead choose fine shimmer in silver, pearl, or champagne tones.
9. Navy to Mint Green Ombre—Cool Tones All the Way

This design pushes the blue ombre into unexpected territory by transitioning from navy (blue) to mint green—technically not pure blue, but close enough in the cool color family that it creates a harmonious, almost underwater aesthetic. On stilettos, this gradient feels modern, youthful, and fashion-forward without sacrificing sophistication.
Why Cool-to-Cool Color Transitions Feel Cohesive
When you use colors in the same temperature family (in this case, cool tones), the gradient naturally feels balanced and intentional rather than chaotic. Navy to mint green lives in the cool spectrum, creating a unified color story that doesn’t jar the eye. The transition reads as a natural color journey rather than a random combination.
Building This Specific Gradient
- Start with a navy blue base applied to the bottom two-thirds of the nail
- Introduce a teal shade (the bridge between navy and mint) into the middle section, blending it carefully with the navy
- Move into a light mint green at the tips, ensuring the transition from teal to mint is soft and gradual
- Use a makeup sponge, dampened slightly (not dripping wet) with a blending solution or polish thinner, to soften edges between colors
- The sponge bouncing motion—quick, light taps rather than dragging—creates the most seamless blends
- Finish with a glossy top coat that brings out the luminosity of both shades
The teal intermediate shade is crucial for making this gradient feel natural rather than forced.
10. Azure to Rose Gold Ombre with Holographic Accents
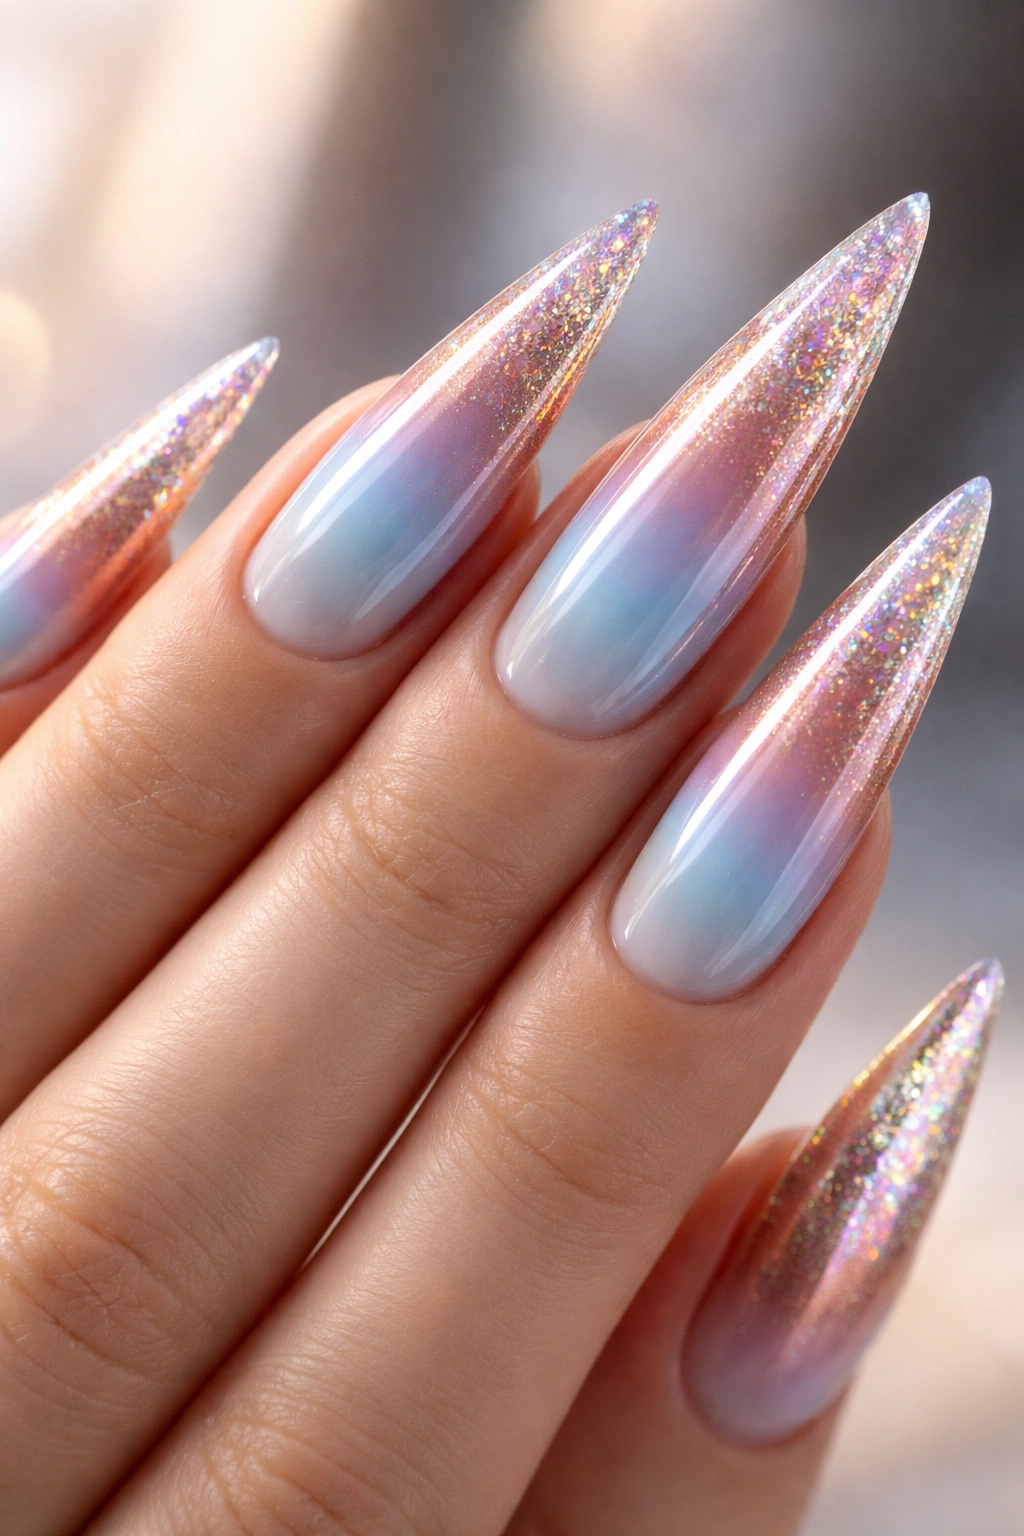
Azure—that bright, almost electric blue—creates stunning visual contrast when it transitions to warm rose gold. The warmth of rose gold against the cool brightness of azure creates a color dynamic that’s nearly iridescent. Add holographic elements at the tips, and the nail catches light like it’s been dipped in liquid shimmer. This design is bold, modern, and absolutely stunning in photographs.
The Science of Warm and Cool Color Contrast
When you pair a cool color (azure blue) with a warm color (rose gold), the contrast isn’t just visual—it’s actually physiological. Our eyes perceive warm and cool colors differently, which is why this pairing feels so vibrant and alive. On a stiletto, this energy-filled combination feels confident and directional rather than overwhelming because the shape itself is so striking that it can handle bold color play.
Executing the Azure-to-Rose-Gold Transition
- Apply azure blue to the base and lower half of the nail
- Using a sponge, begin introducing rose gold into the upper portion—this color is warm and metallic, so it blends differently than matte polish
- Blend where the colors meet by using gentle bouncing motions with a damp sponge
- The metallic nature of rose gold means it may not blend as smoothly as matte polishes—this is normal and adds to the design’s visual interest
- Once the gradient is complete, apply a clear glossy top coat
- For the holographic accent, apply holographic powder or flakes to the very tip of each nail before the final top coat sets
- Seal with a final glossy top coat, ensuring the holographic elements are fully encapsulated
Insider note: Holographic effects are most visible in natural light and photographs, so this design truly shines when you’re out in daylight or in photos.
Final Thoughts
Blue ombre stiletto nails represent the perfect intersection of technical skill and artistic expression. Whether you choose soft, dreamy gradients like powder blue to white, or bold, energetic combinations like azure to rose gold, the key to a successful design is precision in the blending and commitment to the ombre technique. The stiletto shape amplifies whatever design you choose, so take time to ensure your gradient is smooth, your colors transition naturally, and your overall look feels intentional.
The beauty of these ten designs lies in their versatility. You can adapt them based on the occasion, the season, your personal style, or even your mood. A navy-to-nude ombre feels sophisticated and corporate-friendly, while a turquoise-to-purple gradient announces creativity and playfulness. Every version here is proof that blue—in all its many shades and tones—offers endless possibilities for nail art when paired with the elongated elegance of stiletto nails.
Remember that achieving salon-quality ombre requires patience, the right tools (a good makeup sponge makes all the difference), and practice. Your first attempt might not be flawless, but each time you apply the sponge, blend colors, and seal your work, you’ll develop the muscle memory and intuition that separate amateur and professional results. Start with simpler color combinations if you’re new to ombre, then work your way toward more complex gradients and color transitions. Soon enough, you’ll be creating blue ombre stiletto designs that rival anything you’d see in a high-end salon.
