

Animal print has been a cornerstone of bold nail design for years, and when you combine it with the sleek, sophisticated silhouette of stiletto nails, you get something genuinely striking. Stilettos are the perfect canvas for animal-inspired patterns—their elongated shape naturally draws the eye along the length of the nail, making any intricate design feel even more dramatic and intentional. Whether you’re drawn to leopard spots, zebra stripes, snakeskin texture, or something more unexpected like cheetah or dalmatian patterns, animal prints offer endless creative possibilities that work for everything from everyday style to special occasions.
The beauty of animal print stilettos is that they straddle two aesthetics effortlessly. They can be edgy and bold, or refined and subtle depending on your color choices and execution. A black-and-nude leopard print reads differently than a vibrant orange-and-black tiger stripe, yet both feel equally sophisticated on the right stiletto nail. The key is understanding which animal pattern suits your style, how to execute it with precision, and what complementary colors and finishes will make your design truly shine.
Let’s dive into 20 stunning animal print stiletto nail designs that showcase the full spectrum of possibilities—from classic leopard reimagined in unexpected color palettes to exotic prints you might not have considered before.
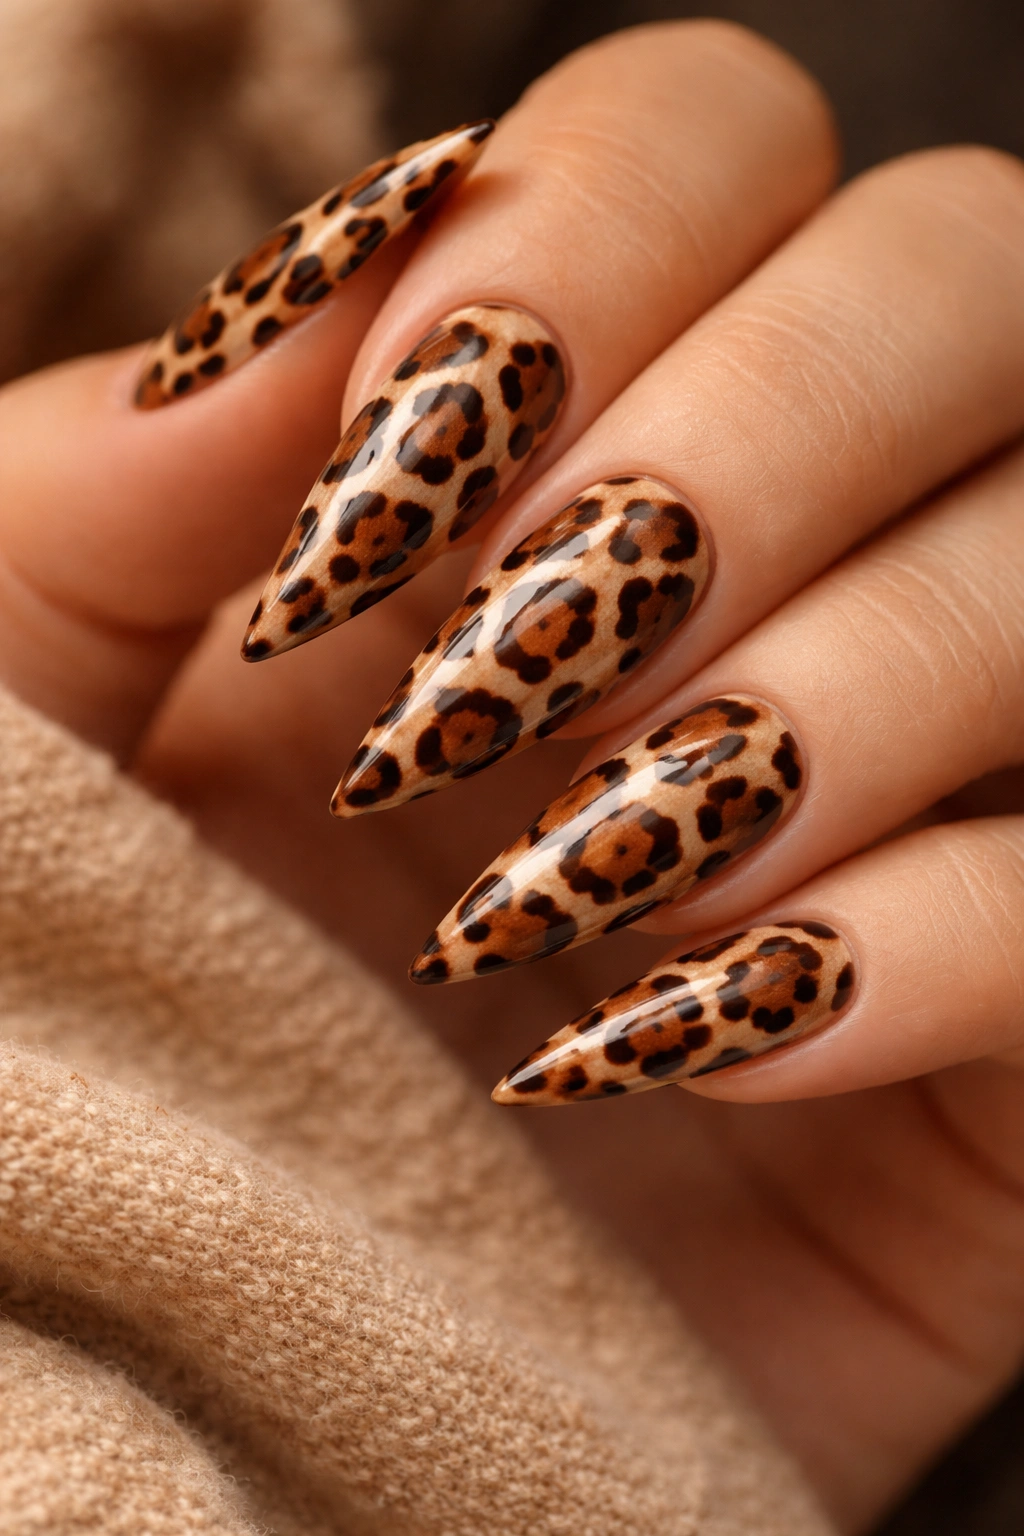
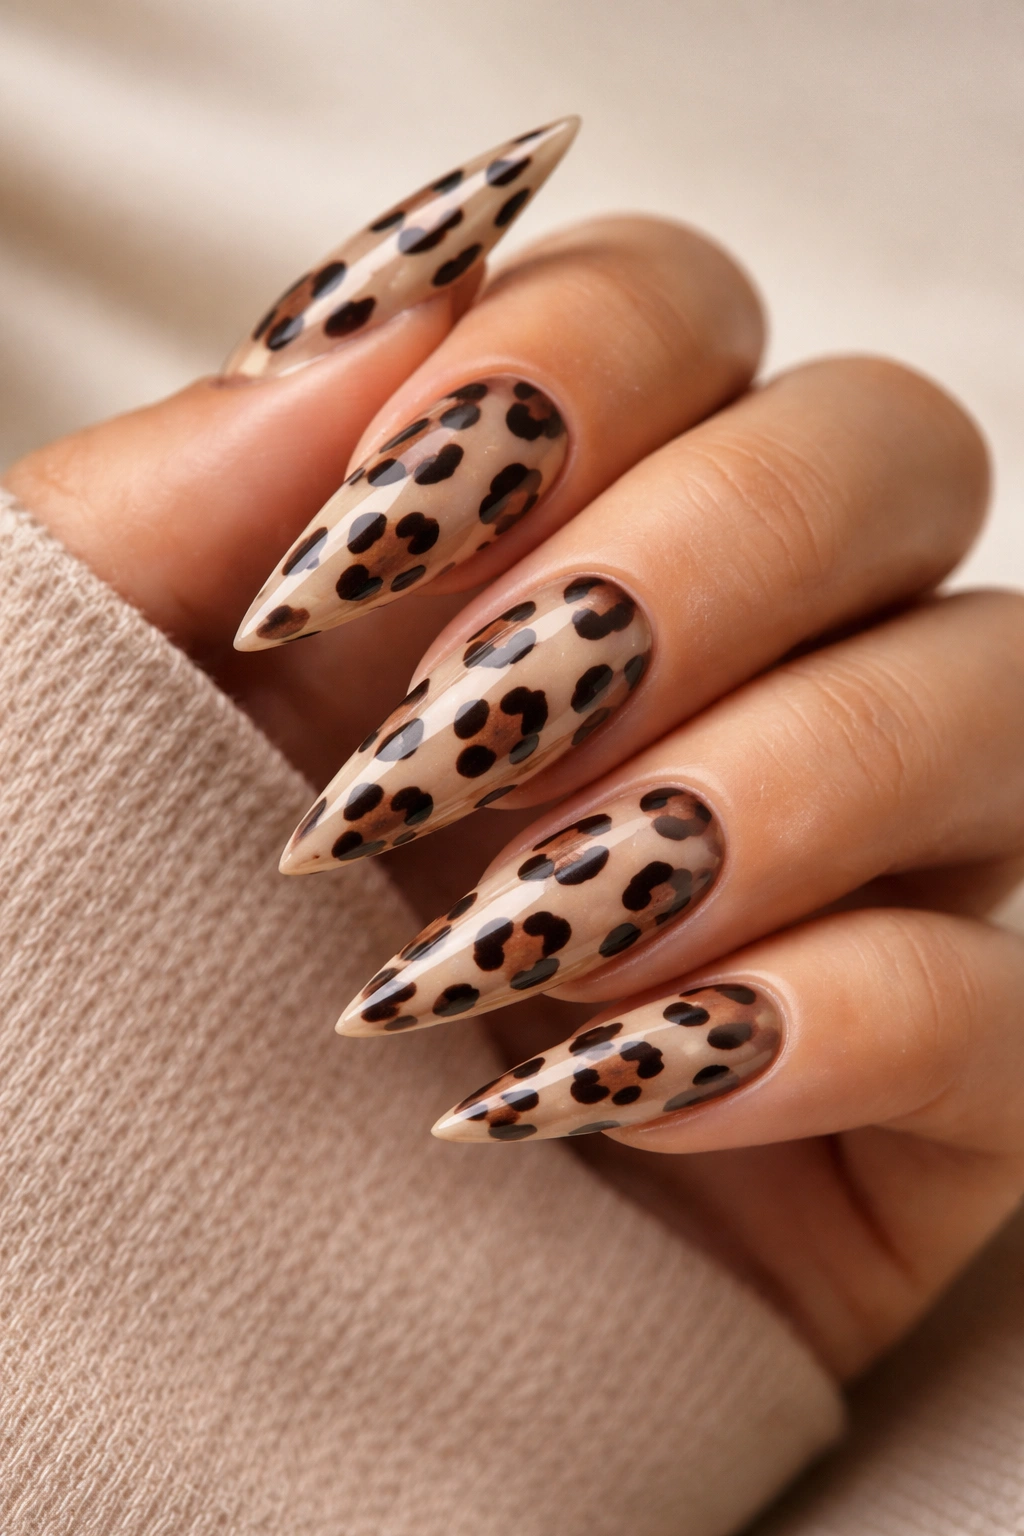
1. Classic Leopard on Nude Base
Nude is the ultimate neutral canvas, and it makes classic leopard spots pop with effortless elegance. This design features a warm beige or light taupe base with irregular dark brown spots scattered across the nail surface, mimicking the natural pattern found on actual leopards. The contrast isn’t dramatic, which makes it feel wearable yet distinctly intentional—this is the leopard print that works in professional settings without feeling out of place.
Why This Design Stands Out
The genius of nude-and-leopard is that it elongates the finger while keeping the overall look grounded and refined. The scattered spot placement means no two nails look identical, giving a handcrafted, artisanal quality rather than a mass-produced feel. This design photographs beautifully, showing incredible depth and texture that solid colors simply cannot achieve.
How to Nail This Look
- Start with two coats of a neutral nude polish (aim for a shade close to your skin tone for maximum elongation)
- Using a thin brush or dotting tool, apply dark brown spots in varying sizes across the nail
- Leave some space between spots—they shouldn’t feel crowded or claustrophobic
- Seal with a glossy top coat to add shine and dimension
- Consider adding a single gold accent line down the center of your ring finger for subtle sophistication
2. Leopard Print with Gold Foil Accents
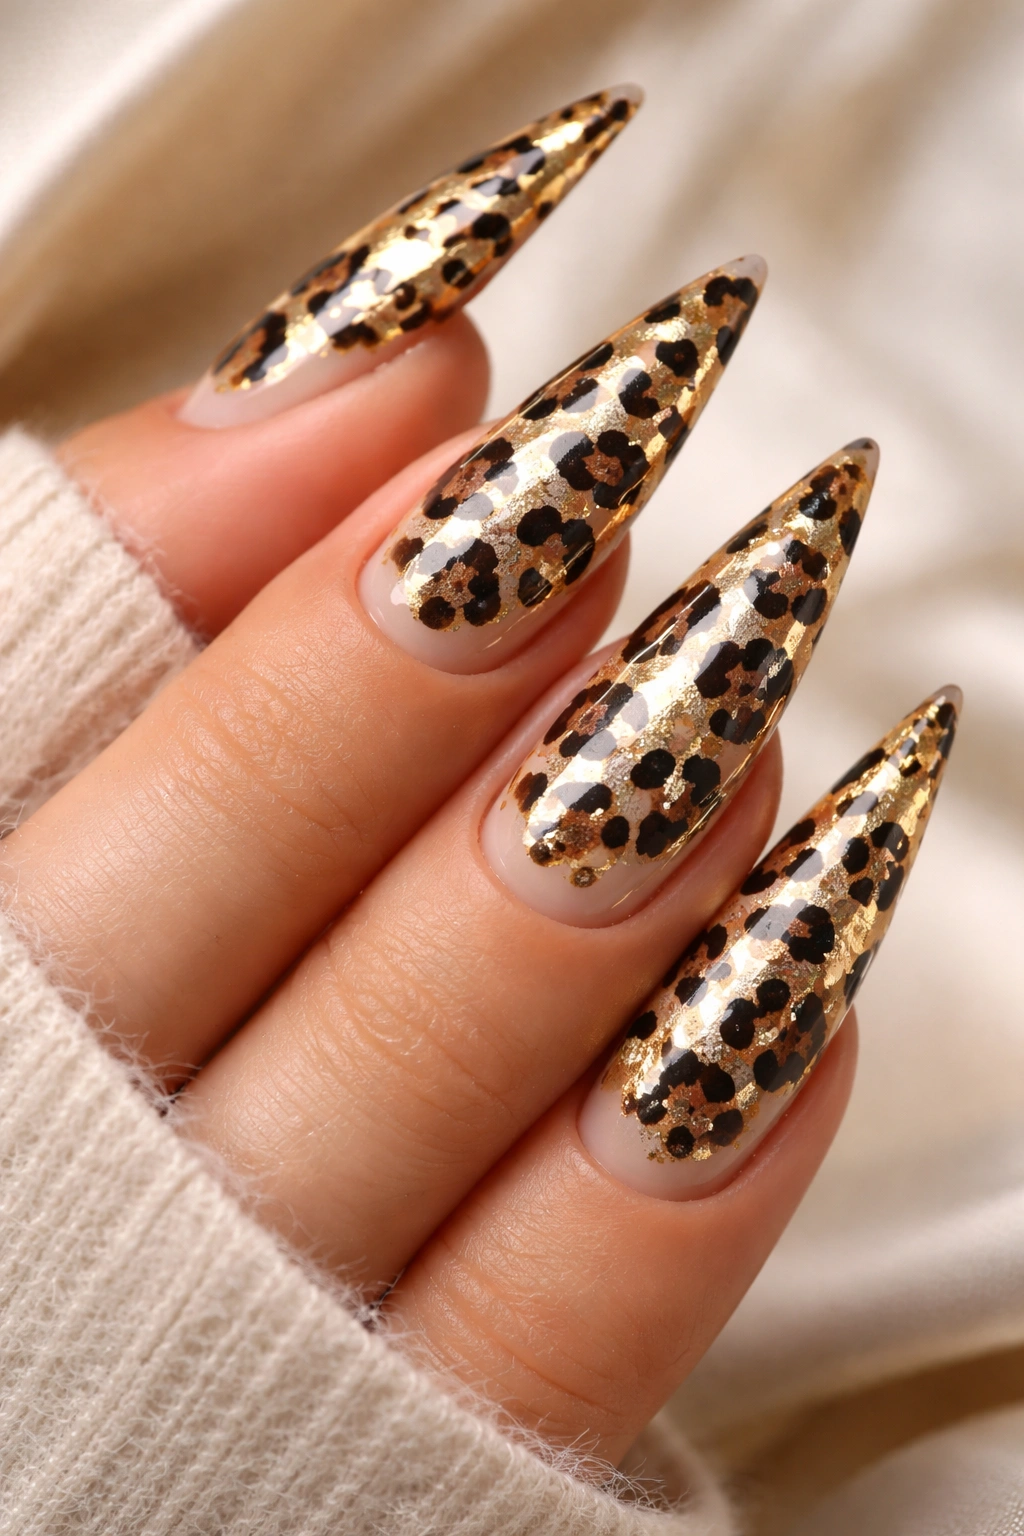
Take classic leopard and elevate it with strategic gold foil placement. This design combines warm leopard spots on a cream or champagne base with delicate gold foil fragments scattered throughout, catching light with every hand movement. The metallic element transforms a timeless pattern into something instantly more luxurious and celebratory, perfect for date nights or events where you want your nails to be a conversation starter.
What Makes This Combination Work
Gold foil interacts with leopard spots in a surprisingly harmonious way. The warm metallic tones echo the brown and tan of the spots while adding an unexpected glamour that prevents the design from feeling too predictable. It’s the difference between “nice nails” and “where did you get those done?” energy.
Application Tips and Details
- Apply a sheer champagne or pale gold base as your foundation
- Create your leopard spots using medium to dark brown polish with a fine brush
- While the brown is still slightly wet, carefully place small pieces of gold leaf or foil directly onto some of the spots and surrounding areas
- Press gently with a tool to adhere—don’t worry about perfect placement; organic randomness looks better
- Seal everything with a high-shine top coat that will magnify the foil’s reflective quality
- This design pairs beautifully with rose gold or warm gold jewelry
3. Reverse Leopard in Black and White
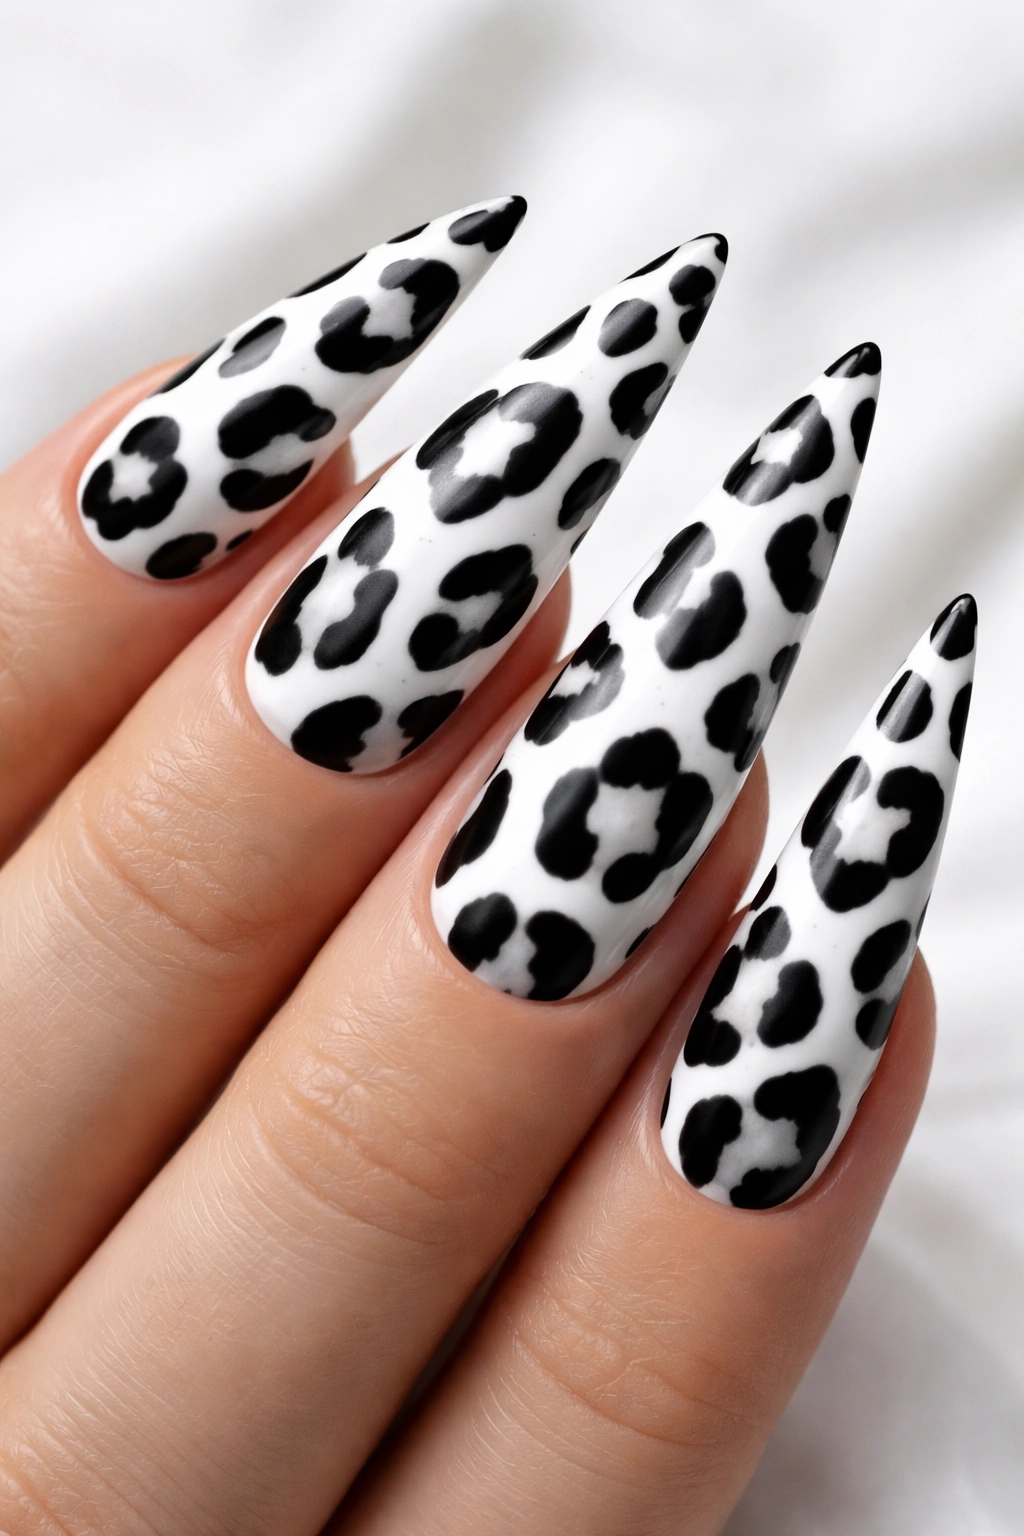
Flip the traditional leopard script by using a stark white base with black spots instead of the warmer brown-and-tan version. Reverse leopard feels crisp, modern, and somehow more graphic than its traditional cousin—it reads as contemporary while still honoring classic animal print DNA. The high contrast makes the pattern bold and immediately recognizable from across a room, and the monochromatic palette works with virtually every aesthetic from minimalist to maximalist.
Why This Design Feels So Fresh
Black and white leopard creates visual tension that feels intentional rather than accidental. Your eye follows the spots more actively than it does with softer color combinations, and that engagement is part of what makes this version feel so striking. It’s the same pattern, completely different energy.
How to Create the Perfect Look
- Paint two coats of brilliant white polish—ensure full opacity and smooth coverage
- Use pure black polish with a thin brush or dotting tool to create your spots
- Vary spot sizes from tiny dots to shapes roughly the size of a lentil
- Don’t make the pattern symmetrical; leopards are organic and imperfect
- Finish with a matte top coat for a chic, unexpected twist, or glossy for traditional shine
- Consider adding a single accent nail in solid black for design continuity
4. Cheetah Spots in Warm Earth Tones
Cheetah spots differ from leopard spots—they’re solid dots without the rosette ring pattern that leopards have. On stiletto nails, this distinction creates a cleaner, more minimalist look that still reads as wild and animal-inspired. Use a warm tan or caramel base with medium to dark brown dots for an earthy, safari-inspired aesthetic. This design works particularly well for autumn and feels like wearable luxury rather than costume or novelty.
How This Design Differs from Leopard
Cheetah spots are essentially solid circles, making them faster to apply and easier to execute with precision. This simplicity is actually a strength—it means beginners can achieve professional-looking results without needing extensive freehand painting skills. The overall effect feels more structured and intentional than the looser, more organic leopard pattern.
Execution and Styling Tips
- Start with a warm tan or buff-colored base coat (two full coats)
- Using a dotting tool or thin brush, apply solid dark brown spots in varied sizes
- Aim for roughly 4-6 larger spots per nail, plus several smaller accent dots
- Space the dots so they don’t feel crowded—each one should breathe
- Seal with gloss or matte finish depending on your preference
- Pair with warm-toned jewelry and deeper autumn lip colors for maximum visual cohesion
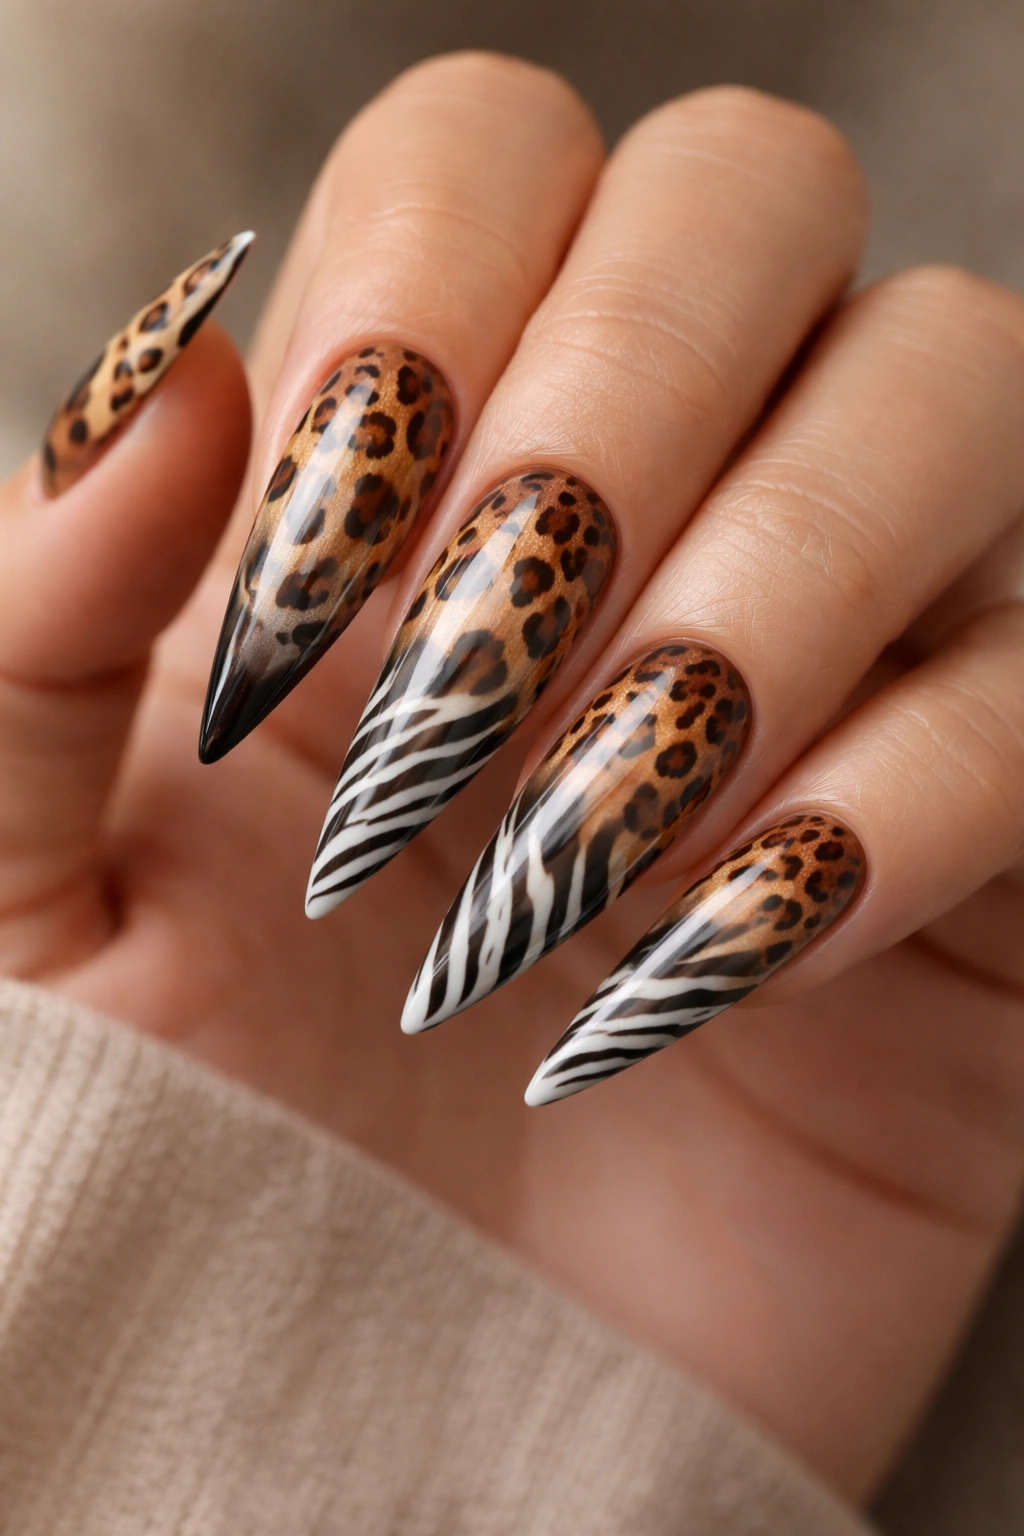
5. Zebra Stripes in Black and White
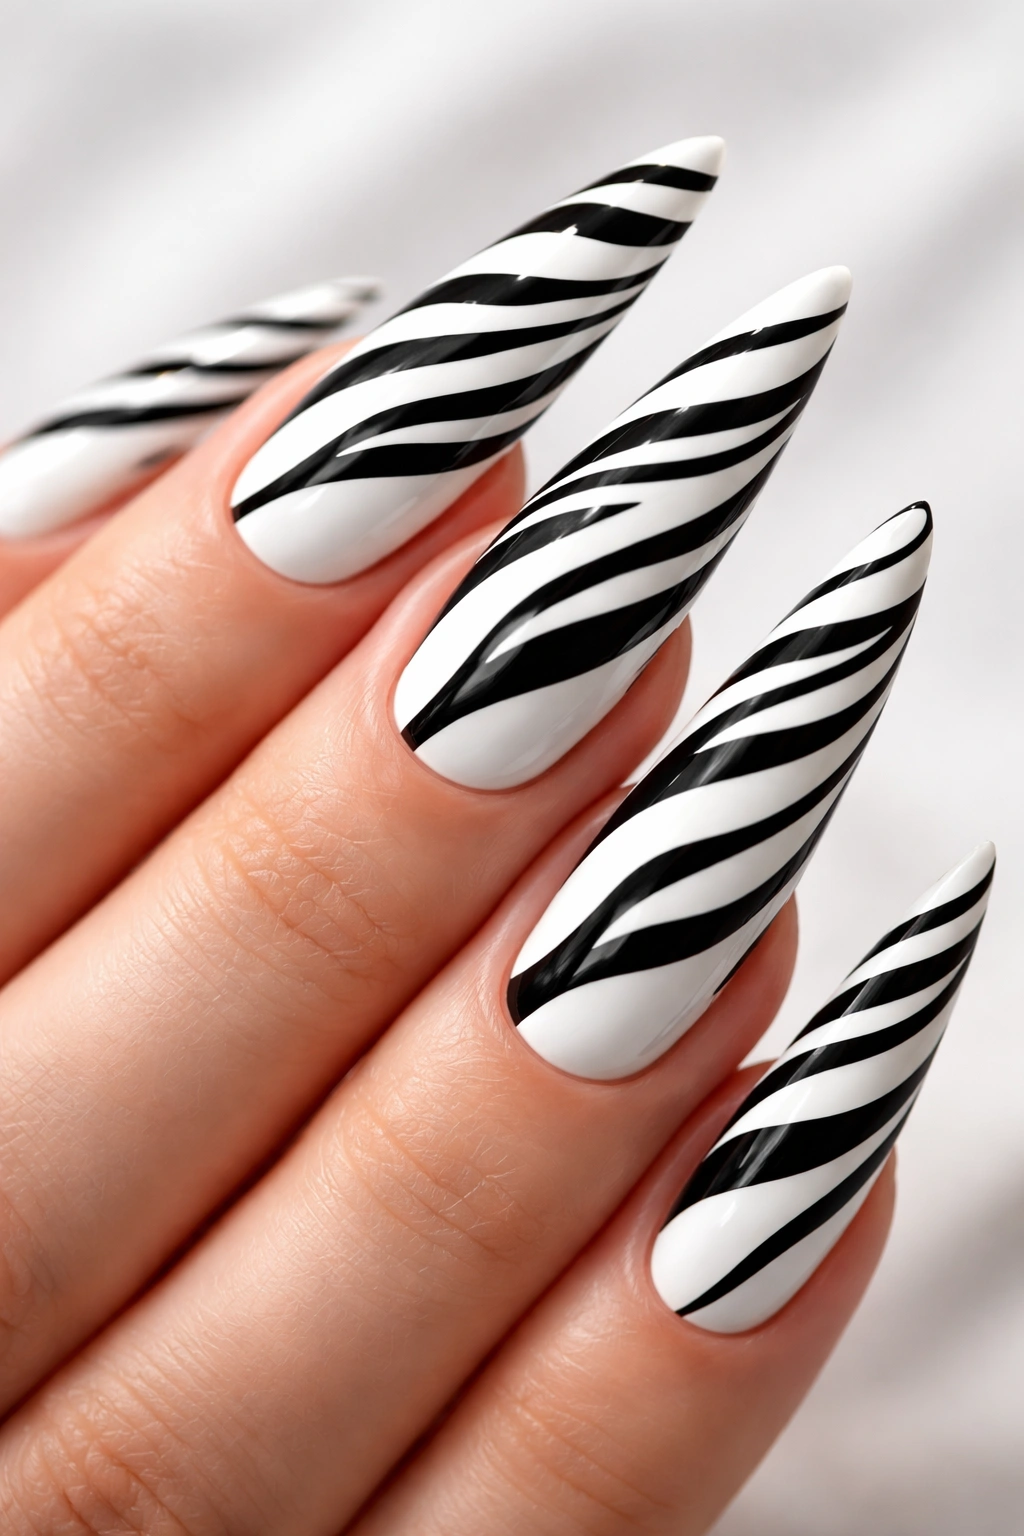
Zebra print on stiletto nails creates instant drama through bold, flowing lines. Rather than spots, you’re working with organic curved stripes that follow the contours of the nail, which means the elongated stiletto shape naturally enhances the design’s movement and flow. Black stripes on a crisp white base feel bold and confident, with each nail reading as a distinct work of art since no two zebra patterns are identical in nature.
Why Zebra Stripes Work So Well on Stilettos
The vertical elongation of stiletto nails makes stripe patterns feel even more dynamic and eye-catching. Stripes naturally draw the eye along the length of the nail, amplifying the already-dramatic shape. You get a design that feels both wild and surprisingly sophisticated.
How to Paint Zebra Stripes Like a Pro
- Begin with two coats of pure white polish as your base
- Using black polish and a thin, angled brush, paint curved stripes that flow down the length of the nail
- Vary stripe width—some should be thin and delicate, others bolder
- Don’t worry about perfect symmetry; nature’s stripes are gloriously imperfect
- Stripes should angle slightly rather than going completely vertical (more natural looking)
- Top with a gloss coat that emphasizes the contrast
- For an elegant twist, try one accent nail in reverse (white stripes on black) for visual interest
6. Tiger Stripes in Orange and Black

Bring heat to your nails with tiger stripes that embrace warm orange, gold, and deep black tones. This design celebrates the fierce energy of tiger patterns while translating beautifully onto stiletto nails. The warm color palette makes it feel wearable rather than costume-like, and the intensity is perfect for someone who wants their nails to make a bold statement without apology.
What Makes Tiger Stripes Feel Luxe Rather Than Costume
The secret is in the color choice and blending. A true orange-and-black tiger print feels authentic and inspired, while overly bright or artificial colors can veer into Halloween territory. Choosing quality polishes with rich pigmentation makes all the difference in how sophisticated this design reads.
Application Technique for Tiger Stripes
- Apply a warm golden-orange base (two coats for full coverage)
- Using black polish and a thin brush, paint curved stripes that follow the nail’s contour
- Rather than painting solid black lines, slightly soften the edges of some stripes by dragging the brush through the orange base while still wet
- Add a hint of deep amber or dark orange accent stripes over some black ones for dimension
- Seal with glossy top coat to capture the rich color depth
- This design pairs beautifully with gold jewelry and deeper warm-toned clothing
7. Snakeskin Effect with Iridescent Polish
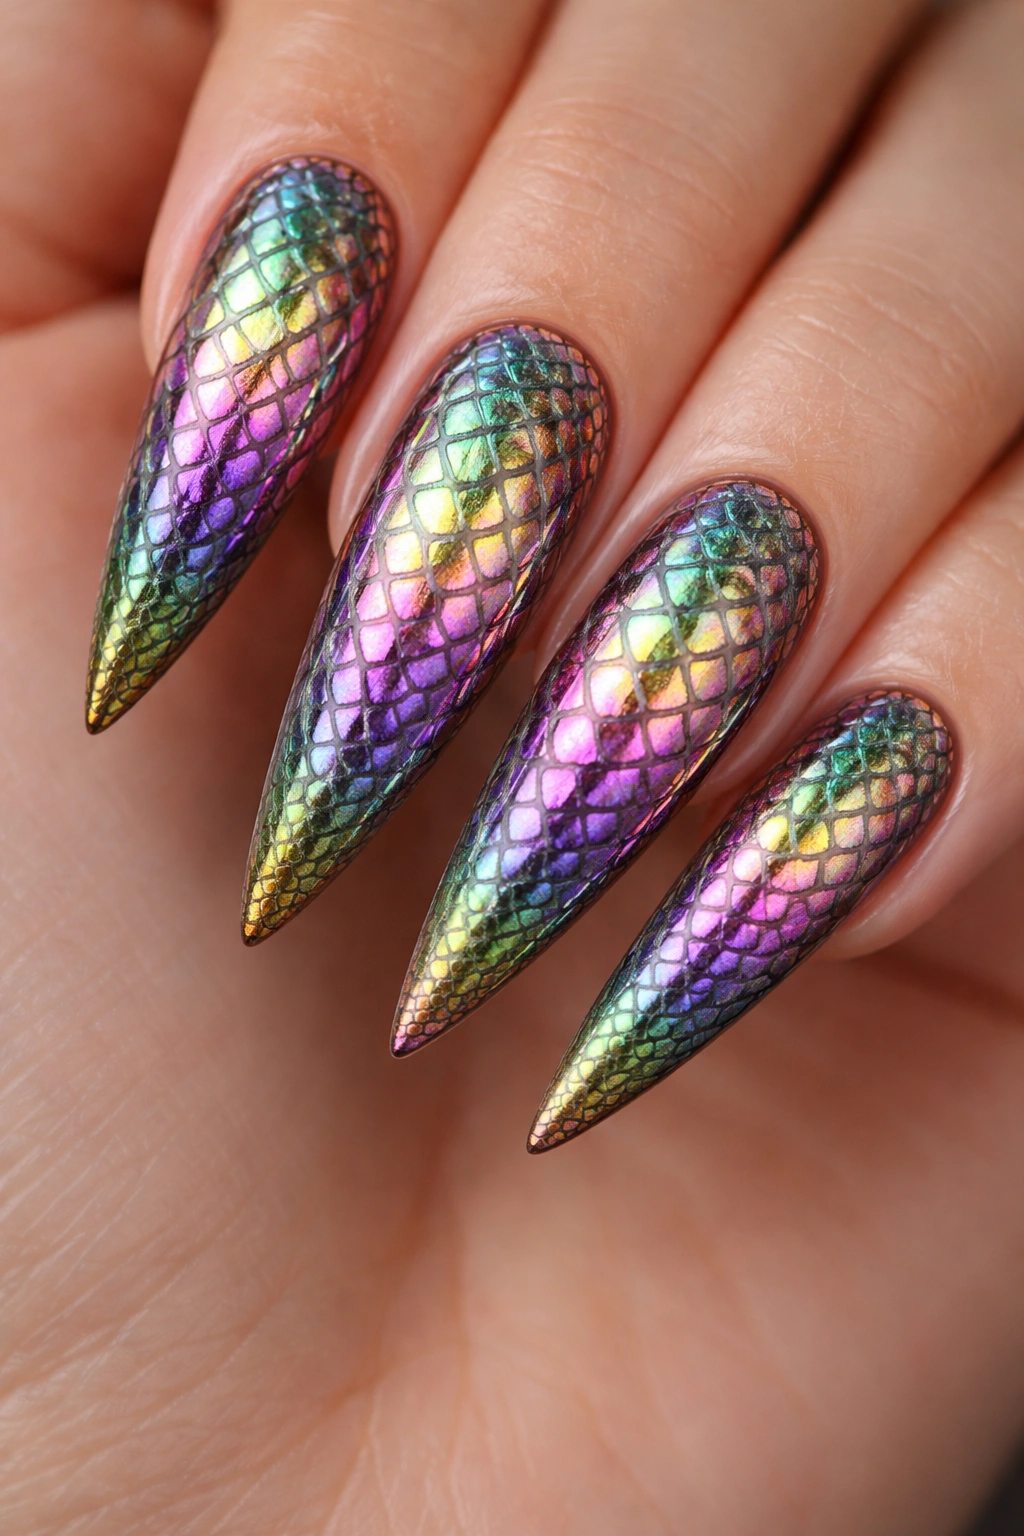
Create texture and movement with a snakeskin design that uses iridescent or multichromatic polish for an otherworldly effect. Rather than traditional spots or stripes, snakeskin features interlocking curved shapes that resemble actual snake scales. Using a color-shifting polish makes this design feel especially sophisticated—shift from green to purple to gold as the light hits it, mimicking how actual snakeskin catches the light.
Why Iridescent Snakeskin Feels So Modern
Iridescent polish adds dimension that flat colors cannot achieve. The way the color shifts with movement and angle creates an almost hypnotic quality that keeps viewers’ eyes engaged. It’s animal print with a futuristic twist that feels entirely current.
How to Create Dimensional Snakeskin
- Apply a neutral base (soft gray, taupe, or pale nude) as your foundation
- Using an iridescent polish, paint curved interlocking shapes across the nail that vaguely resemble scales
- Don’t aim for perfect precision—snakeskin is organic and slightly irregular
- Layer multiple shapes to create the illusion of overlapping scales
- Consider adding metallic lines (gold or silver) between scale shapes for definition
- Finish with a top coat that enhances the iridescent effect
- Under different lighting, this design reveals completely different color stories
8. Dalmatian Print in Black and White
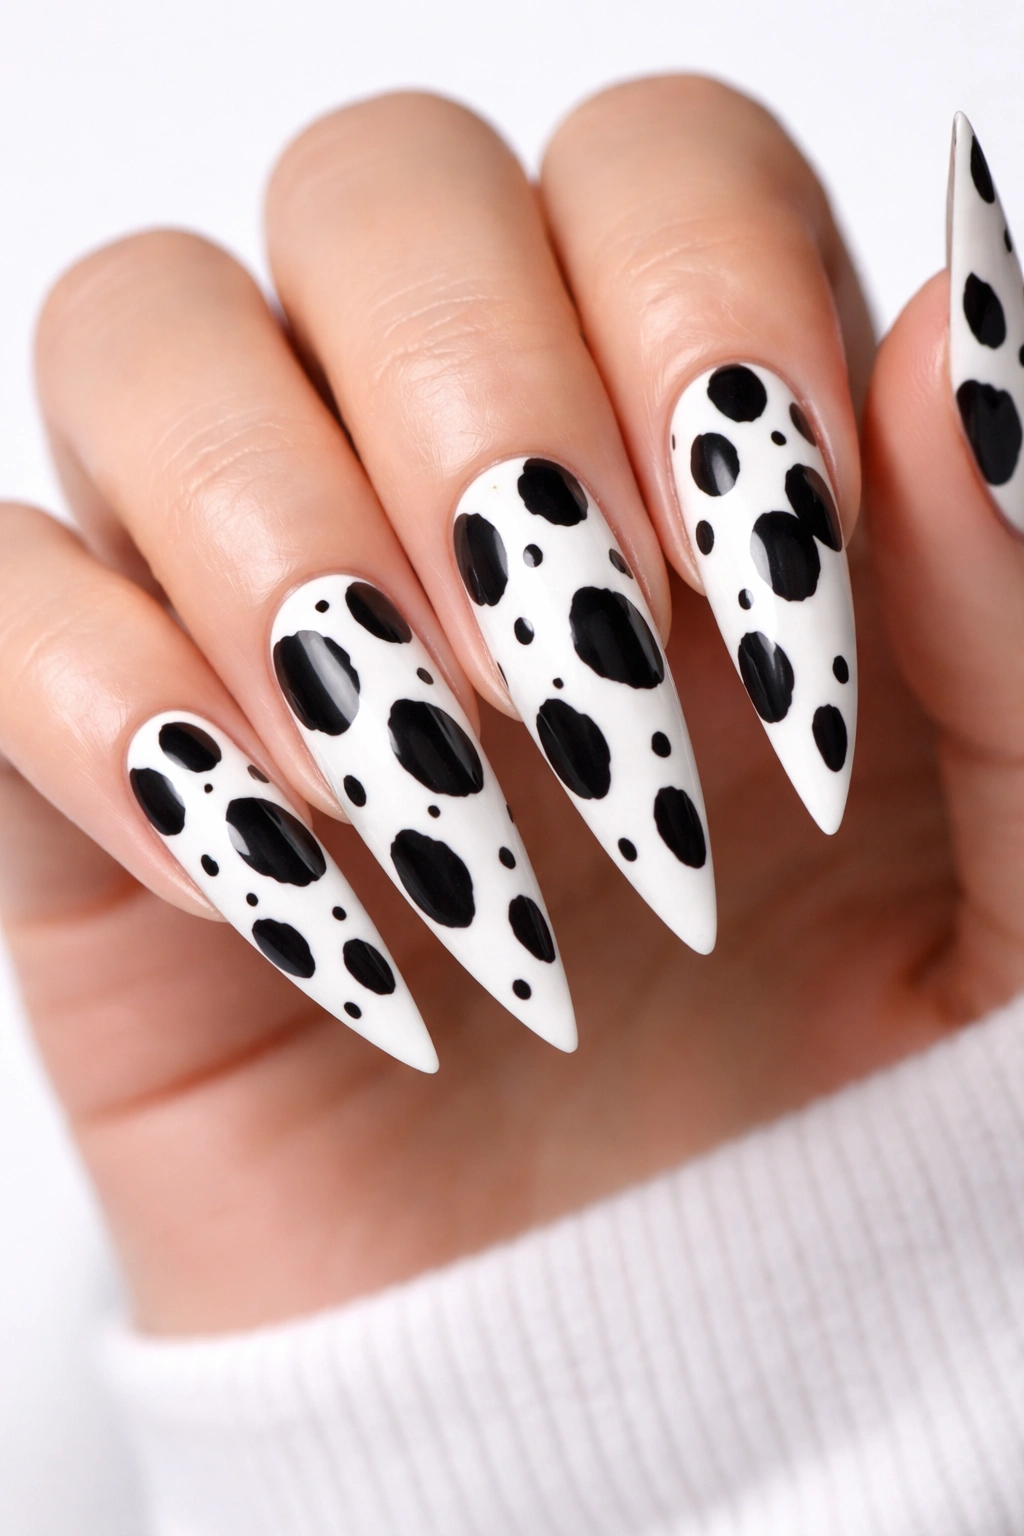
Dalmatian spots—large, irregular black dots on white—create a playful yet sophisticated aesthetic that reads differently than leopard or cheetah. The pattern is more spacious and graphic, with each spot feeling intentional and bold. This design works especially well on stiletto nails because the nail length provides plenty of space for the larger spots without feeling cramped or overwhelming.
Why Dalmatian Print Feels Fresh on Stilettos
Dalmatian is less common in nail design than leopard, which means it feels original and unexpected. The larger spot size creates visual impact without requiring intricate detail work, making this a surprisingly beginner-friendly animal print design. It feels fun and confident without being overly trendy.
Steps for Flawless Dalmatian Nails
- Paint two coats of bright white polish—ensure perfect opacity
- Using black polish and a dotting tool, create large dots spread across each nail
- Dots should be roughly the size of a pea or small bean, varying slightly
- Leave white space between dots—they shouldn’t feel connected or clustered
- Create at least 3-5 spots per nail for clear Dalmatian recognition
- Seal with glossy top coat for that classic painted look
- Consider painting one accent nail completely black with white spots for reversal and balance
9. Leopard Gradient with Ombre Effect
Blend traditional leopard spots into an ombre background that flows from dark to light. This design combines two trending techniques—animal print and gradient color—into one cohesive aesthetic. The spots appear on a color-shifting base, usually progressing from deep brown or black at the cuticle to warm tan or nude at the tip, creating an elevated, almost three-dimensional effect.
How Ombre Enhances Animal Print
The gradient background gives your leopard spots more dimension because they’re living on a surface that’s already shifting in tone. The spots become more visible where the base is lighter and blend slightly where it’s darker, creating natural depth that feels sophisticated. It’s like your nails captured light itself.
Technique for Leopard Ombre
- Create an ombre base using two coordinating colors (dark brown to tan works beautifully)
- Use a sponge to blend the colors smoothly across each nail from cuticle to tip
- Once the base is completely dry, apply your leopard spots using dark brown or black polish
- Let the spots vary in density—more concentrated toward the darker end, slightly sparser toward the light
- The contrast between spots and background will shift naturally along the gradient
- Seal with high-shine top coat that emphasizes the color transition
- This design works year-round and pairs with virtually any wardrobe aesthetic
10. Snake Scale Pattern in Jewel Tones
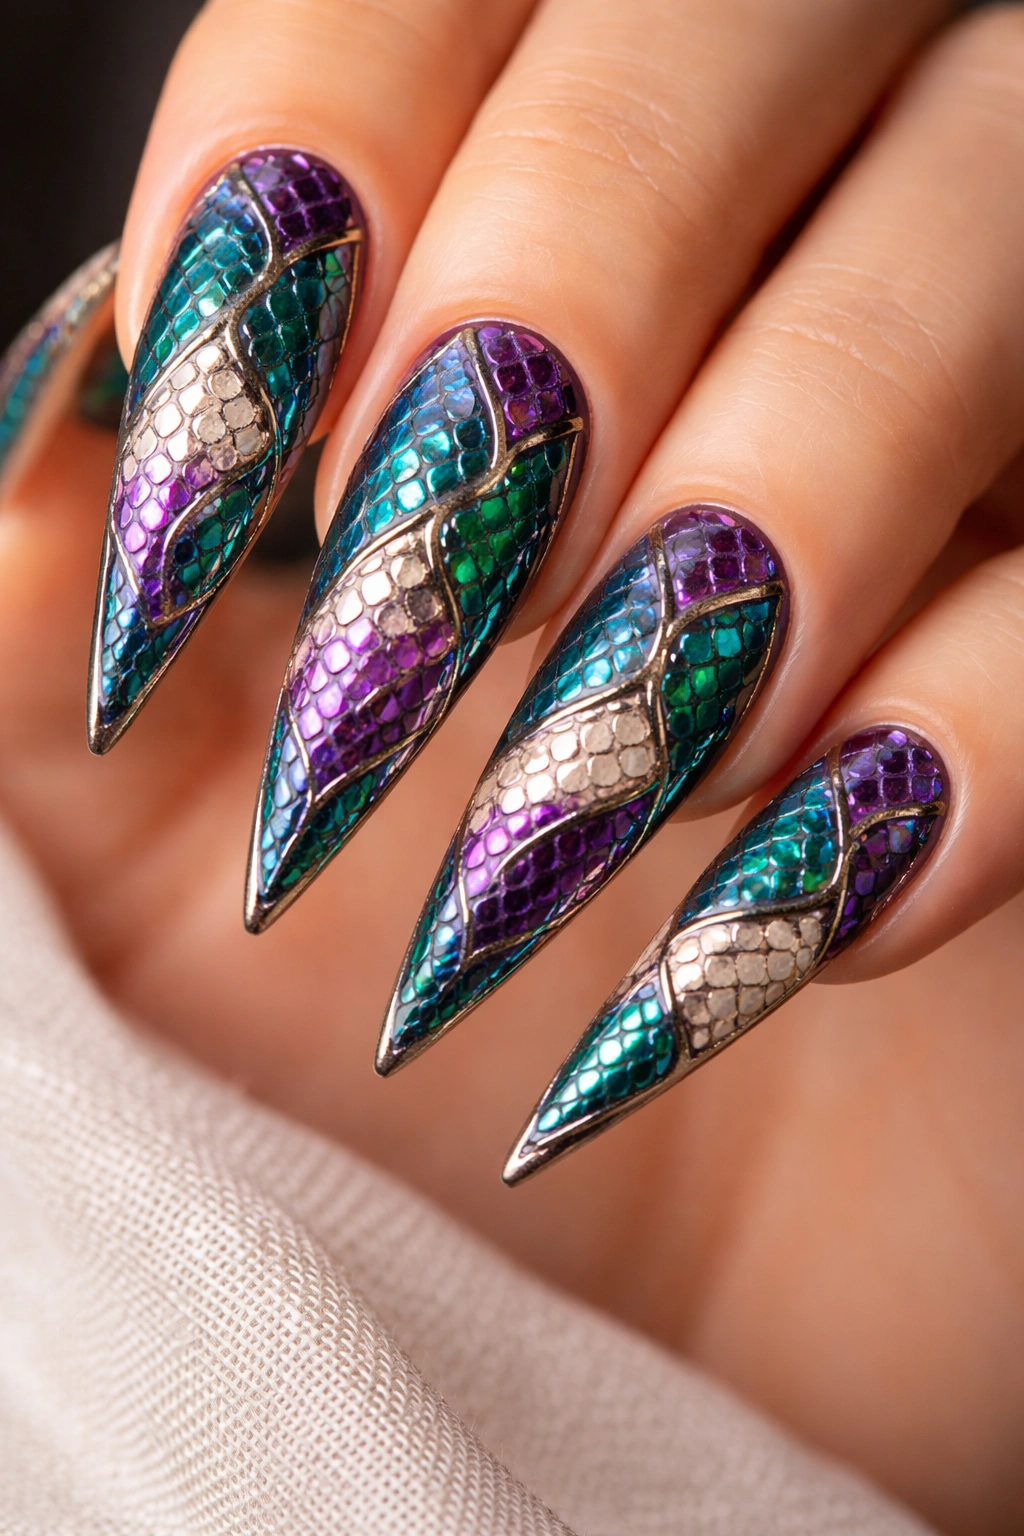
Move beyond traditional snakeskin with a design that uses jewel-toned polishes—emerald, sapphire blue, amethyst—to create an interlocking scale pattern. This approach celebrates the aesthetic of actual snake scales while translating them into something that feels luxurious and contemporary rather than literal. The rich, saturated colors make this design feel like wearable jewelry.
Why Jewel Tones Transform Scale Patterns
Emerald and sapphire snakeskin instantly feels more upscale than black and white or basic brown versions. The colors themselves evoke luxury and sophistication, and when combined with the geometric precision of scale patterns, they create something gallery-worthy. This is animal print for someone who wants to feel special and intentional.
Application Strategy for Jewel-Tone Scales
- Use a neutral nude or soft gray as your base to let jewel tones truly shine
- Using a thin brush, paint interlocking curved shapes in your chosen jewel tone
- Create variations by outlining some scales with a metallic gold or silver polish
- Layer shapes to mimic how actual scales overlap one another
- Consider creating an ombre effect by using two different jewel tones that transition along the nail
- Finish with a glossy top coat that makes the colors absolutely glow
- This design pairs exquisitely with gold jewelry and evening wear
11. Giraffe Print with Irregular Polygons
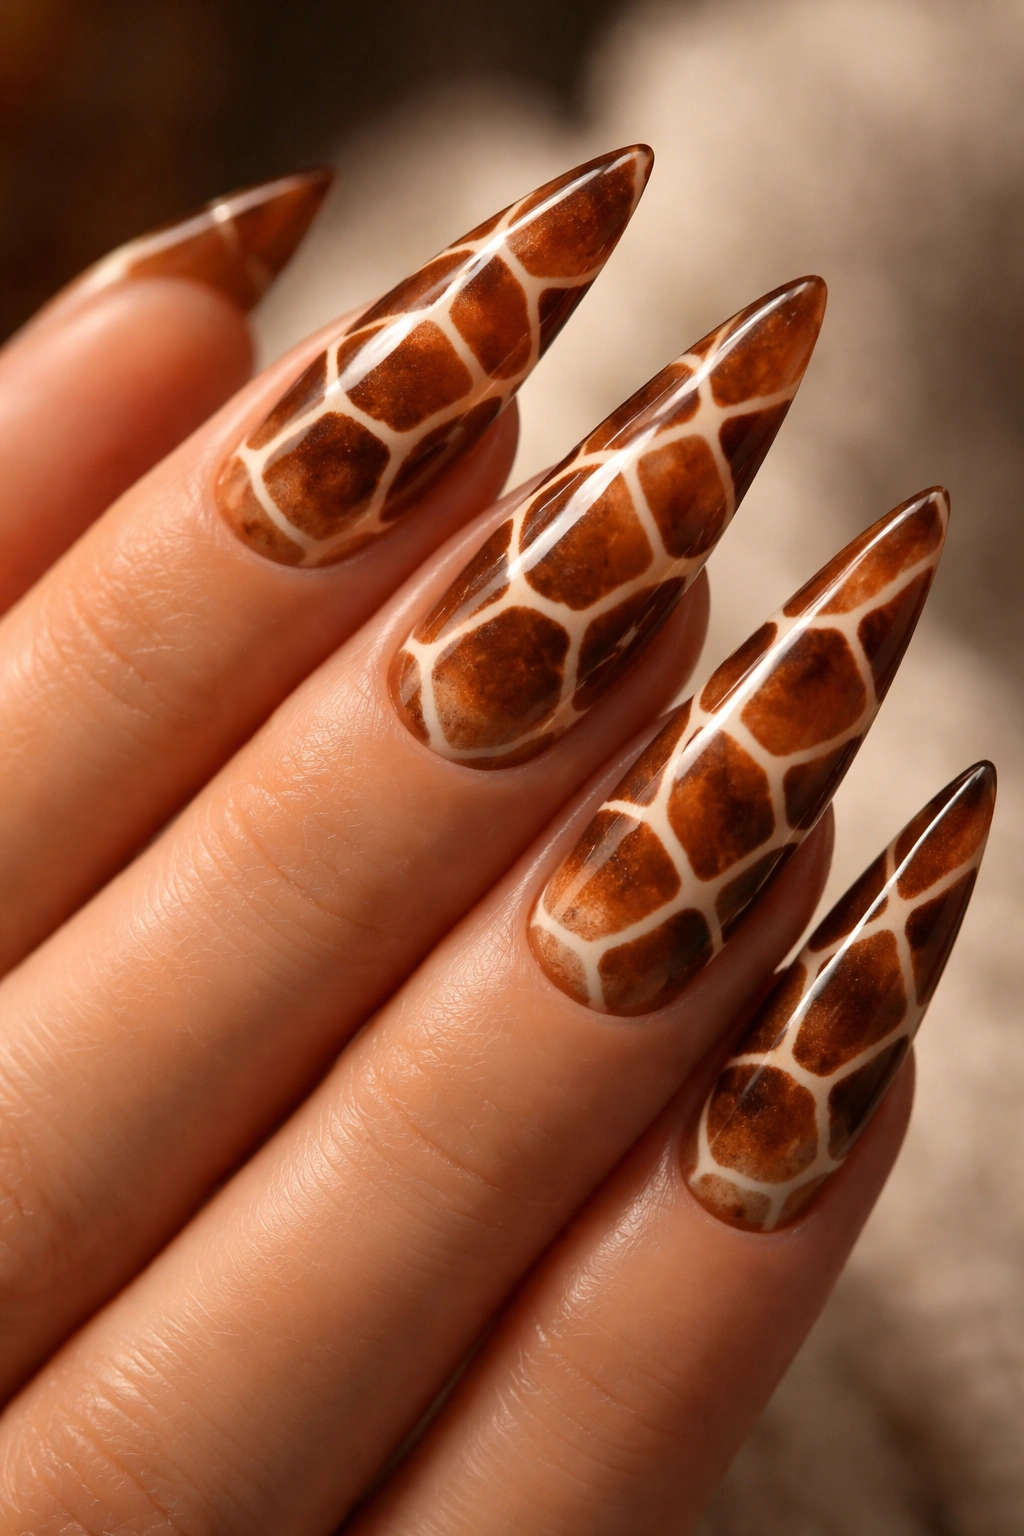
Giraffe print features irregular, multi-sided shapes (polygons) separated by fine lines, creating a honeycomb-like pattern. On stiletto nails, this design reads as sophisticated and almost geometric rather than traditionally wild. The pattern is visually complex yet feels elegant, particularly when executed in warm brown and cream tones that echo actual giraffe coloring.
What Sets Giraffe Print Apart
Giraffe patterns are less common in nail design, making this choice feel inspired and original. The geometric nature of the shapes creates a modern interpretation of animal print that appeals to those who love both wild patterns and clean design. It’s a sweet spot between bold and refined.
How to Paint Giraffe Print Successfully
- Apply a warm cream or pale tan base (two coats for evenness)
- Using medium to dark brown polish and a thin angled brush, draw irregular polygon shapes across the nail
- Connect the shapes with thin lines to create the honeycomb effect
- Vary polygon sizes—some large, some small—for natural-looking randomness
- Leave cream-colored space between all shapes for clarity and definition
- This requires steady hands and some patience, but the payoff is worth it
- Seal with matte top coat for a sophisticated, nearly tattoo-like appearance
12. Cow Print in Black and White with Pink Accents
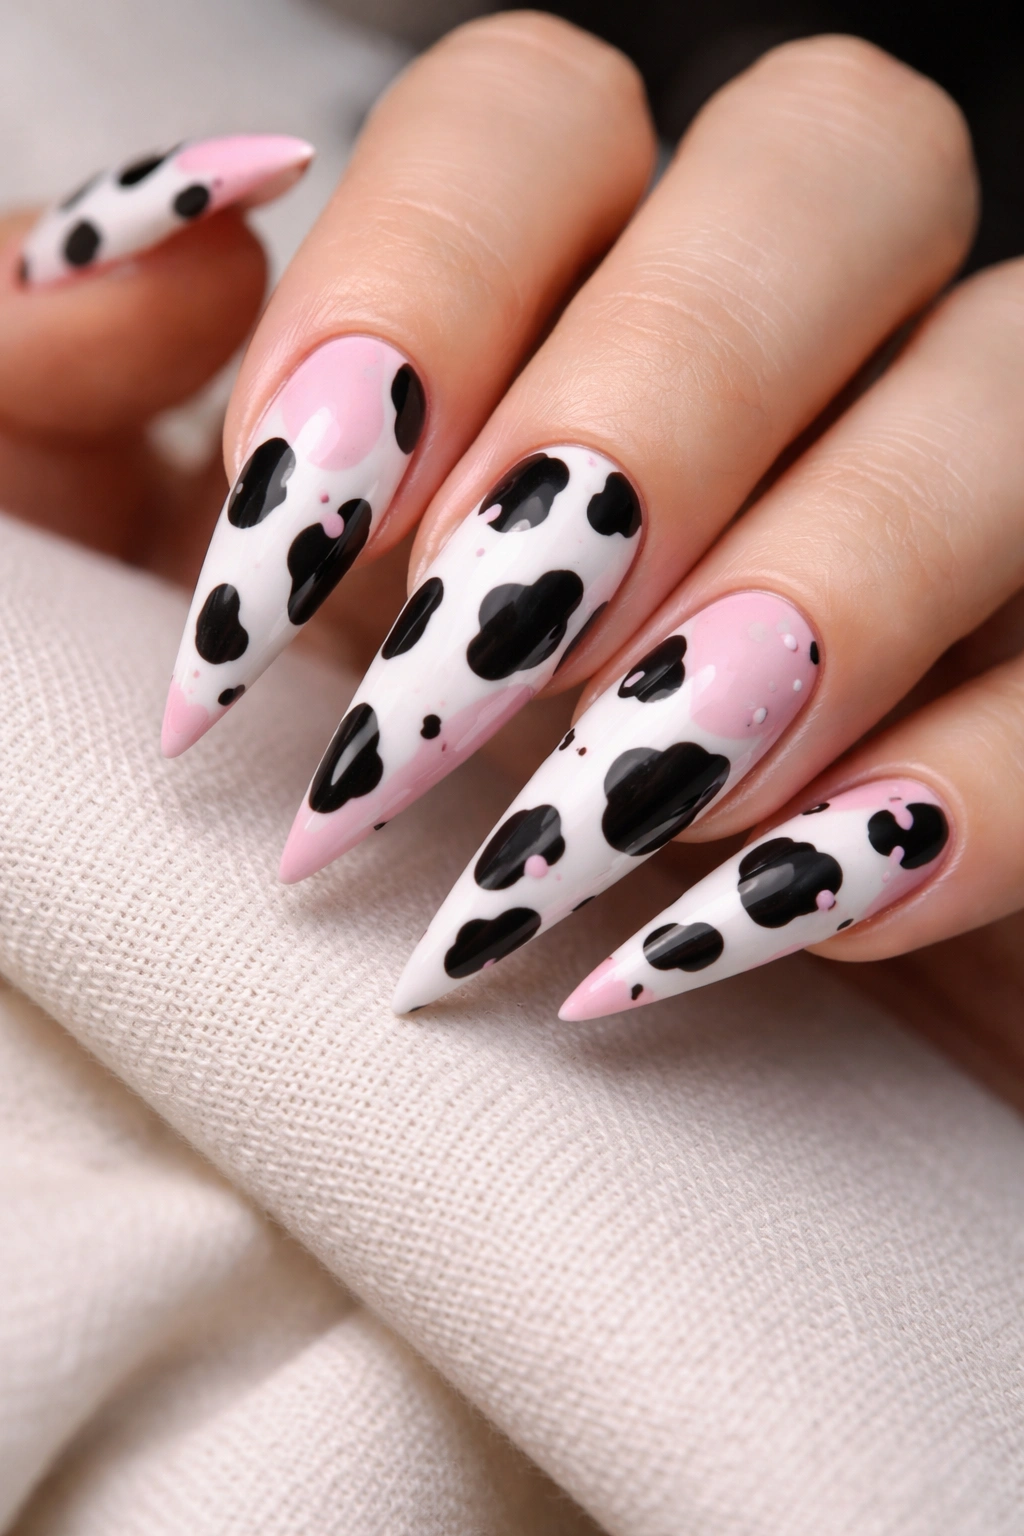
Give classic cow spots a playful twist by adding unexpected pink accents—small geometric shapes, dots, or lines in soft pink that break up the traditional black-and-white pattern. This design bridges animal print and contemporary nail art, feeling both whimsical and fashion-forward. The pink acts as a subtle nod to playfulness without overwhelming the animal print’s boldness.
Why Pink Elevates Cow Print
Pink against black and white creates visual interest and prevents the design from feeling too stark or one-dimensional. It’s a small element that signals confidence and creativity—you’re not just replicating cow print, you’re personalizing it. That personalization is what makes nail design memorable.
Steps for Pink-Accented Cow Print
- Paint a brilliant white base coat (two full coats)
- Using black polish, paint large irregular blobs across the nail to mimic cow spots
- Once dry, use a thin brush and soft pink polish to add small accent details within or beside black spots
- Pink accents might be small dots, thin lines, or tiny geometric shapes
- Ensure pink placements feel intentional rather than random—distribute them evenly across the nails
- Finish with glossy top coat that makes the pink shimmer
- Consider doing one accent nail in reverse (black base with white and pink spots) for visual balance
13. Tortoiseshell-Inspired Animal Print
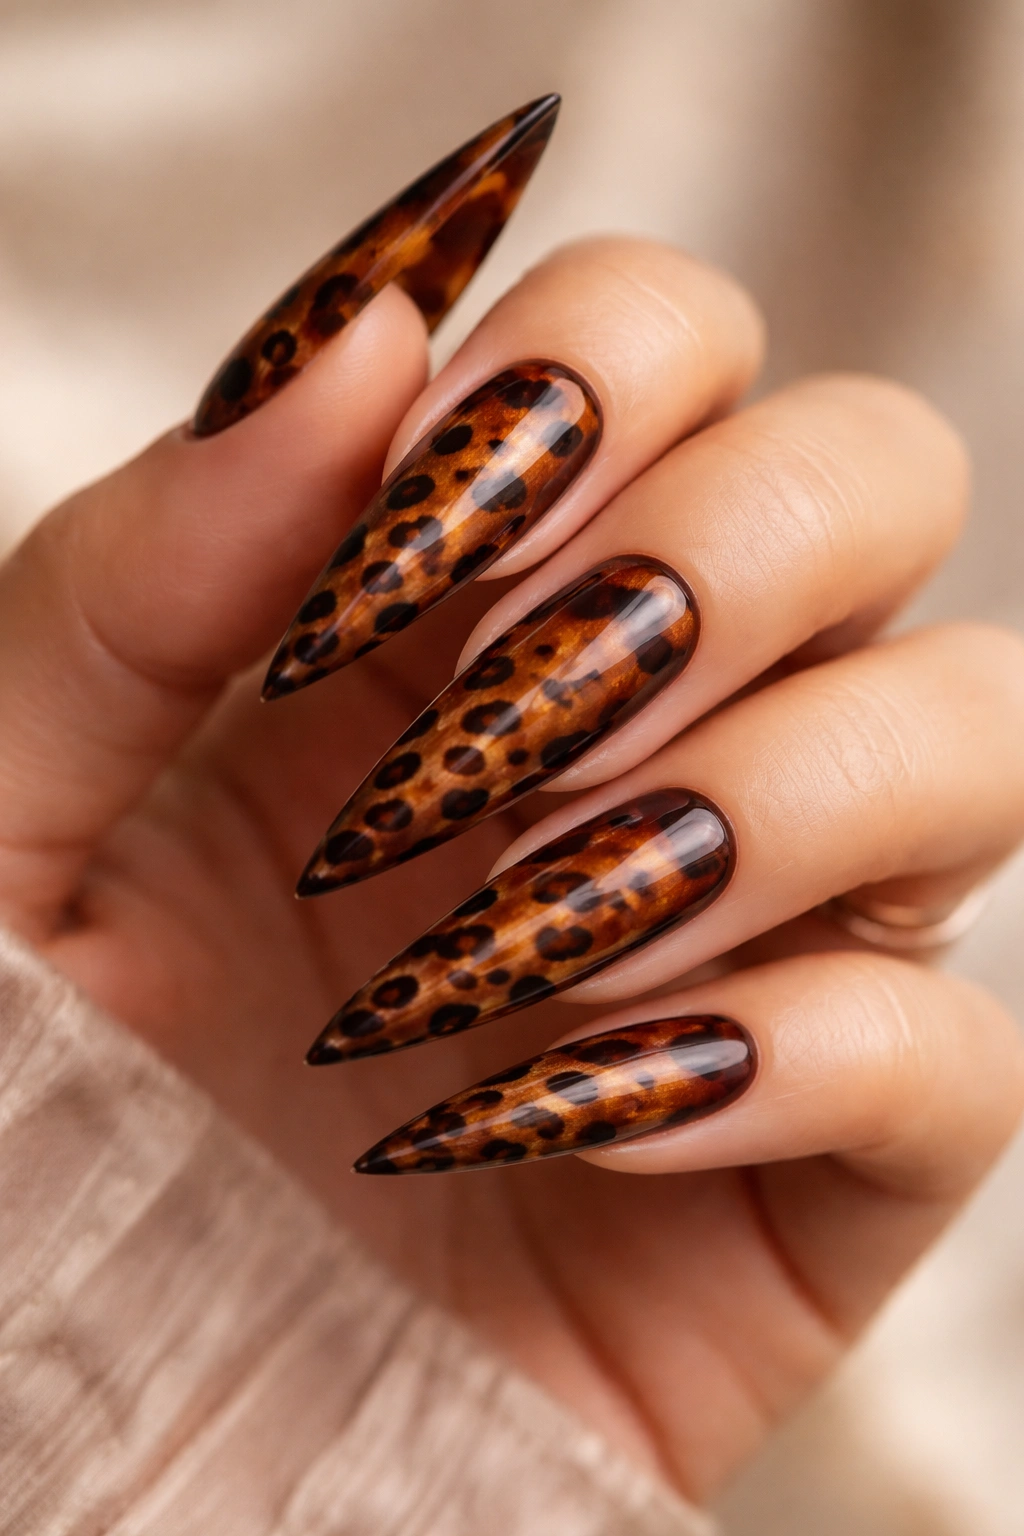
Create a design inspired by tortoiseshell’s organic, marbled appearance combined with animal print sensibility. This design uses warm browns, tans, oranges, and cream swirled together with darker brown spots or streaks, creating texture and depth reminiscent of both natural tortoiseshell and leopard print. It’s sophisticated, warm, and works beautifully on elongated nails where the marble effect can flow vertically.
How Tortoiseshell Texture Enhances Animal Print
Tortoiseshell’s natural irregularity pairs perfectly with animal print’s organic feel. Rather than spots sitting on a flat background, they’re nestled within a variegated surface that feels rich and dimensional. The overall effect is luxury—think tortoiseshell accessories and how coveted they’ve always been.
Technique for Tortoiseshell Animal Hybrid
- Apply a pale tan or warm cream base as your foundation
- While the base is still slightly wet, randomly apply patches of medium brown, burnt orange, and darker tan using a sponge for soft blending
- Once this tortoiseshell layer is completely dry, add leopard spots using dark brown or black polish
- Spots should sit on top of the marbled base, creating a cohesive design
- The spots become part of the overall texture rather than sitting on a flat surface
- Seal with high-shine top coat that emphasizes depth and dimension
- This design feels seasonal and pairs beautifully with neutral and warm-toned clothing
14. Leopard Print with Geometric French Tip
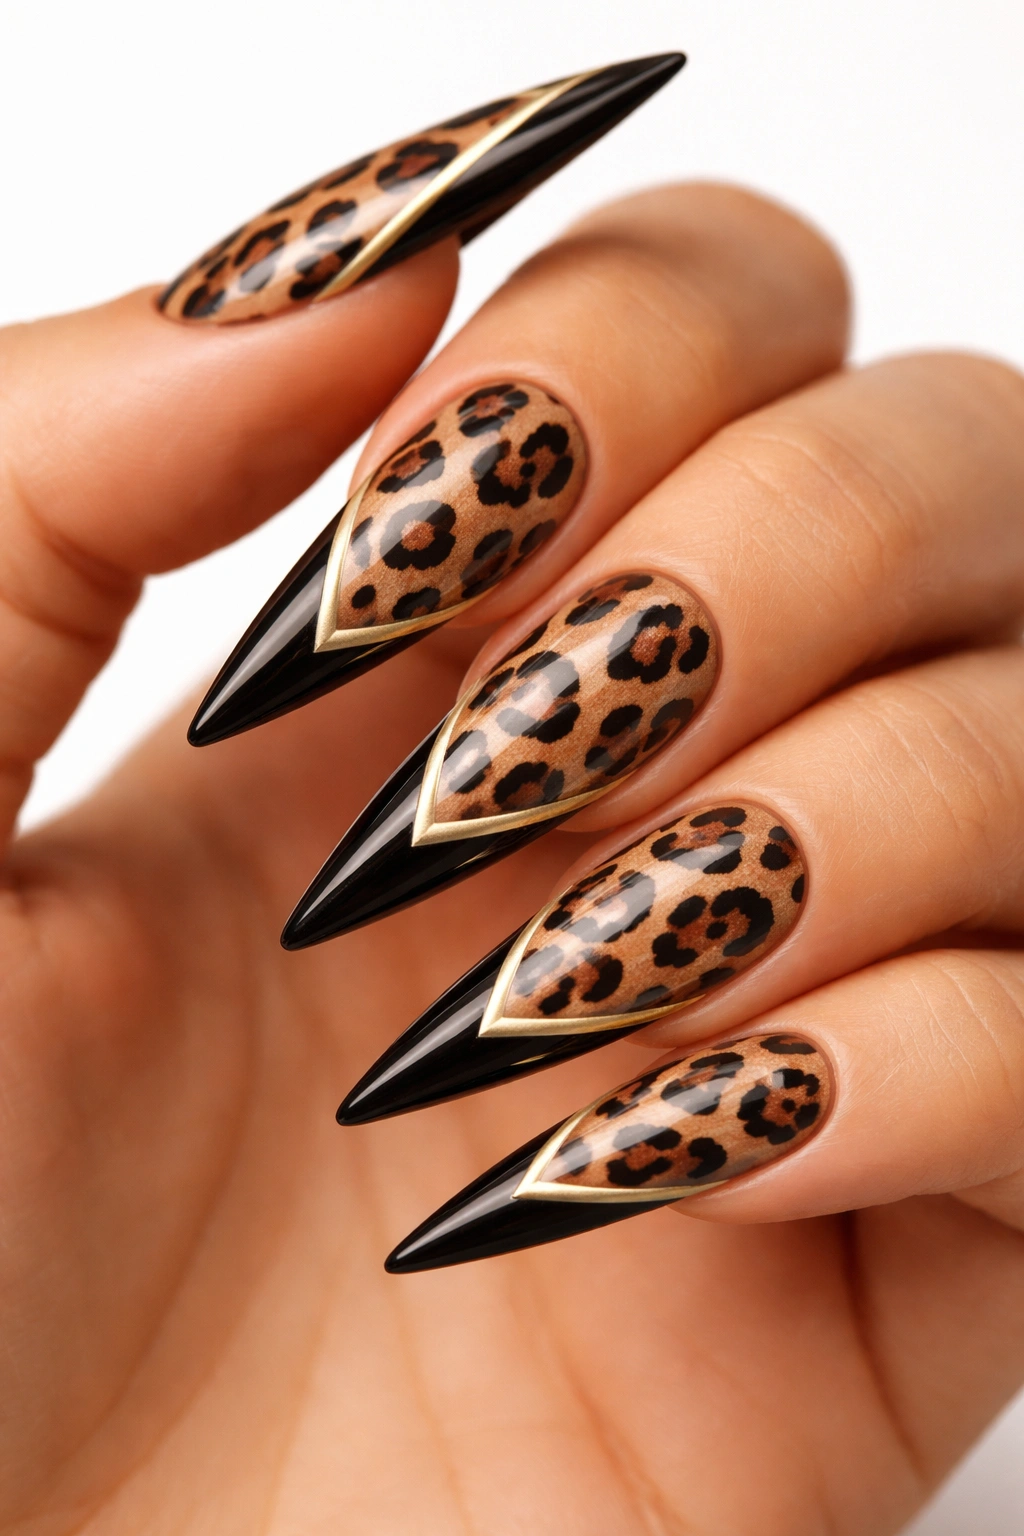
Combine traditional leopard spots with a modern geometric French tip for a hybrid design that honors both animal print and contemporary nail aesthetics. The tip features clean lines—perhaps an angular chevron, a thick geometric border, or nested triangles—in a contrasting color (gold, black, or nude), while the nail bed displays your leopard pattern. This creates visual interest through pattern mixing while maintaining sophistication.
Why Pattern Mixing Works on Stilettos
The elongated shape of stiletto nails provides enough real estate for two distinct design elements without feeling cluttered. The geometric tip actually draws emphasis to the nail’s length while the animal print grounds it in texture. You get wildness and polish in the same design.
Execution for Geometric French Combination
- Apply your leopard print base across the entire nail using your preferred color palette
- Once completely dry, use a thin brush or striping tape to create geometric shapes at the tip
- Geometric elements might be a triangular point, parallel lines, or angular blocks in contrasting color
- Keep geometric work clean and precise—this is where the “modern” aspect of the design lives
- The contrast between organic leopard and geometric tip is what makes this design sing
- Seal with gloss top coat and consider adding a metallic accent line if your geometric color is matte
- This design works for professional settings where standard animal print might feel too bold
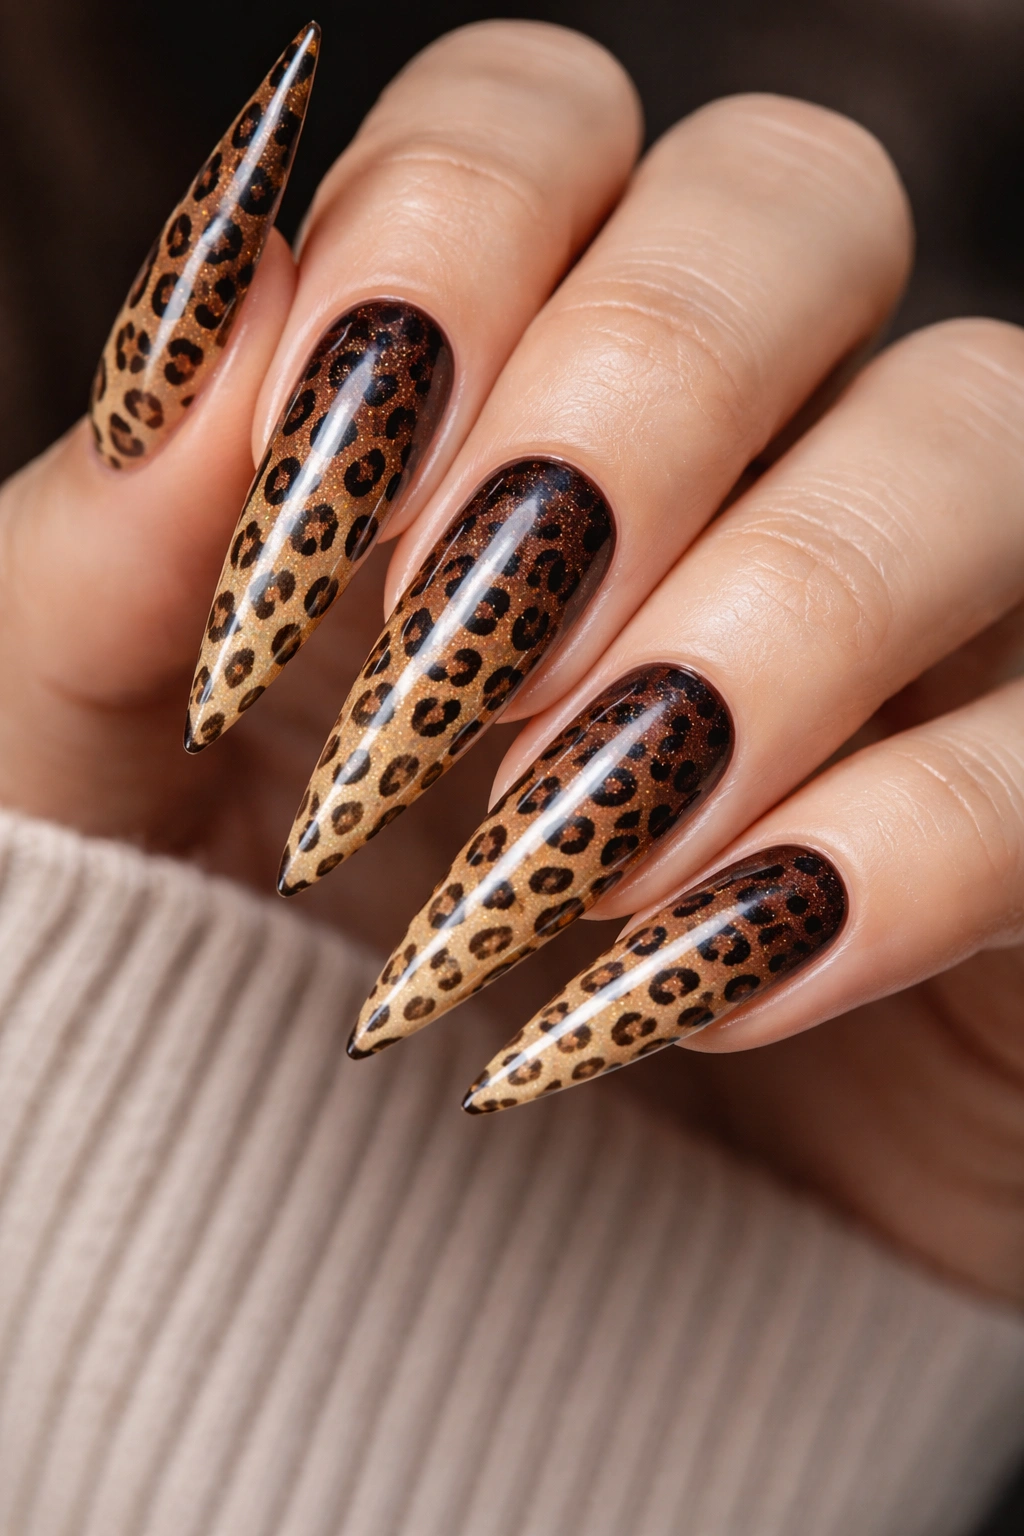
15. Cheetah Print Ombre with Metallic Details
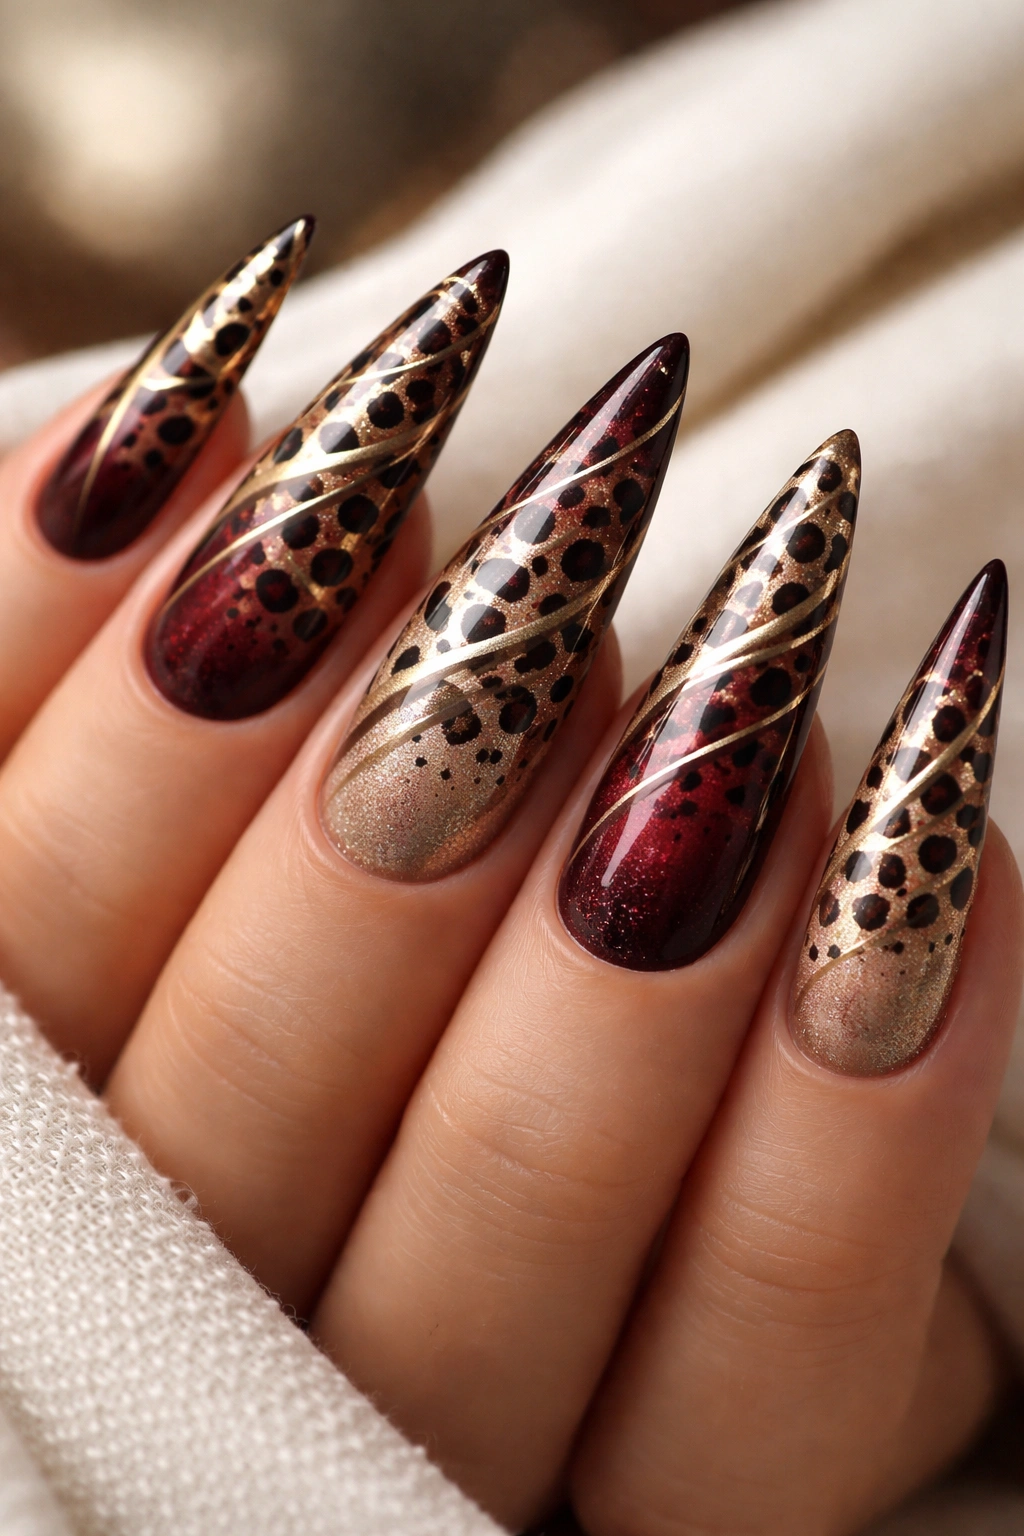
Layer a cheetah spot pattern over an ombre base, then add fine metallic lines or accents for luxury appeal. Start with a color gradient—perhaps burgundy to gold or deep bronze to champagne—apply your cheetah spots across it, then use thin metallic striping or micro details to unify the design. The metallic element catches light and elevates the entire look from nice to noteworthy.
The Power of Adding Metallic Accents to Animal Print
Metallic details act as a visual bridge that ties different elements together and adds immediate luxury. Even a thin gold line or tiny metallic stars scattered throughout completely transforms how the design reads—suddenly it feels intentional and high-fashion rather than straightforward.
How to Layer Cheetah Ombre with Metallics
- Create your ombre base using two complementary colors that shift from dark to light
- Use a sponge to blend the colors smoothly—this is your foundation
- Once fully dry, apply solid cheetah dots (usually dark brown or black) across the ombre surface
- The spots will read differently against lighter and darker portions of the gradient
- Using a fine brush and metallic polish (gold, silver, or rose gold), add thin accent lines or tiny details
- Metallic elements might outline some spots, create vertical lines, or form small geometric shapes
- Seal with a glossy top coat that makes metallics absolutely gleam
- This design pairs beautifully with evening wear and special occasions
16. Micro Leopard Print (Tiny Spots Throughout)
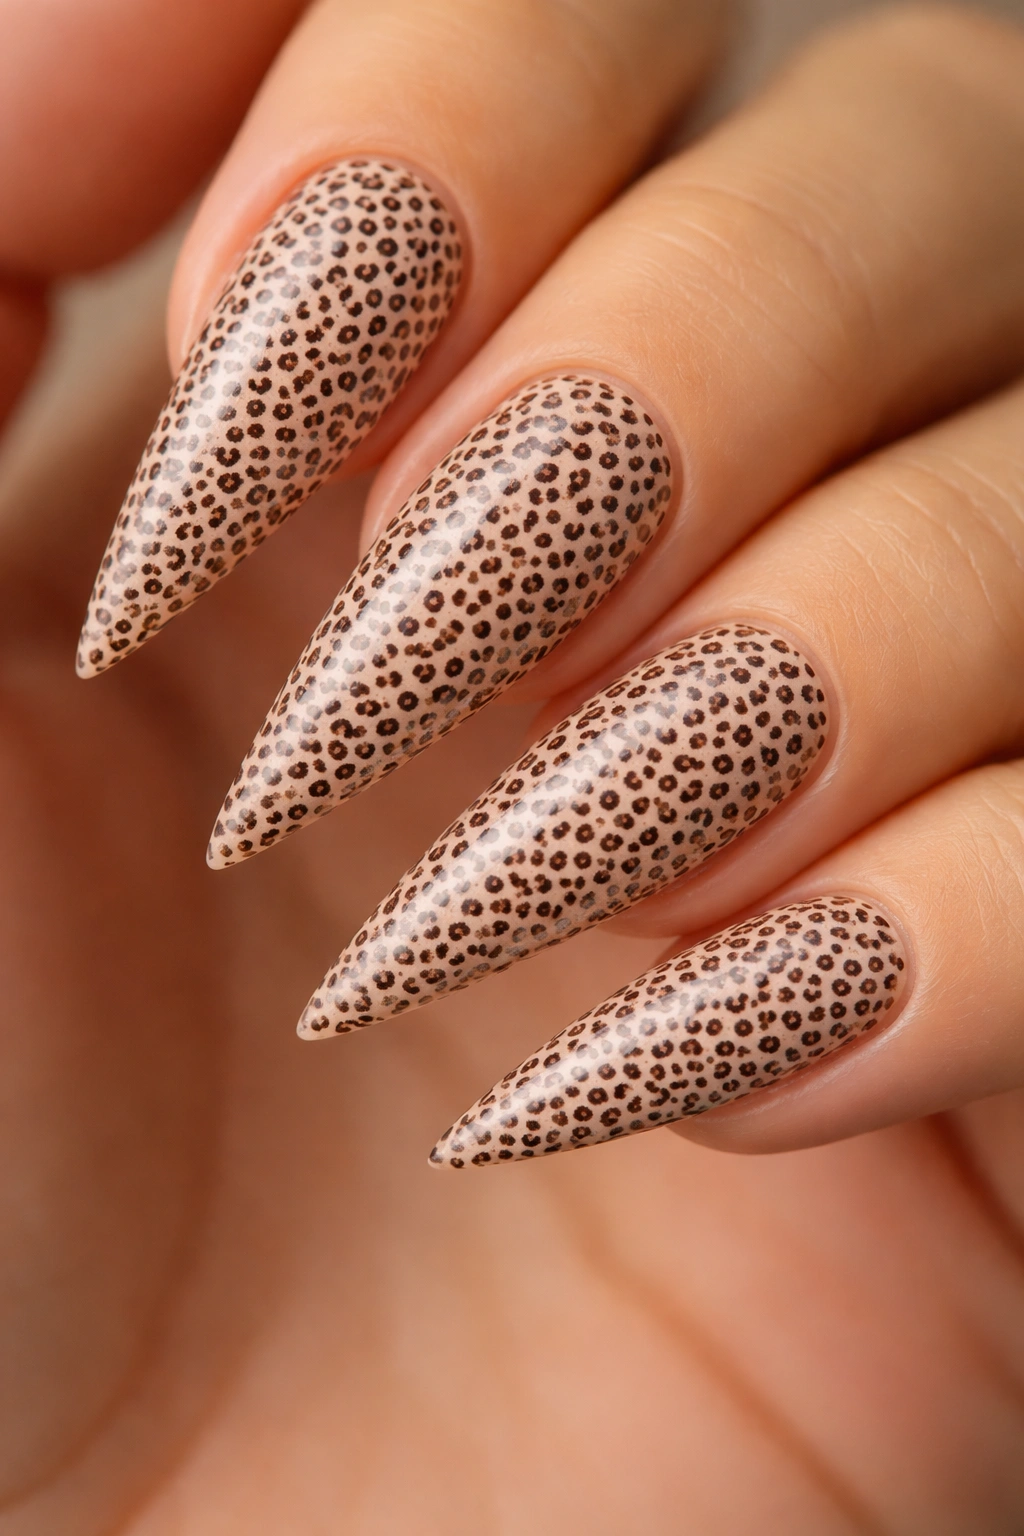
Scale down traditional leopard by using much smaller spots that cover more surface area of the nail. Rather than a few larger leopard spots scattered across the nail, this approach features dozens of tiny spots creating an almost textured, densely patterned effect. The visual result feels more intricate and requires more technical skill, but the payoff is a design that looks incredibly detailed and polished.
Why Micro Print Feels More Sophisticated
The sheer precision and patience required to execute dozens of tiny spots signals serious nail artistry. The densely patterned effect reads as more technically advanced than larger, sparser spots. It’s the difference between “nice nails” and “this person knows exactly what they’re doing.”
Application Tips for Micro Leopard
- Choose a neutral base (soft gray, pale nude, or cream) that will let your work shine
- Using a very fine brush or toothpick, create dozens of small dots in dark brown or black
- Start with larger spots, then fill in gaps with progressively smaller ones
- The goal is cohesive coverage without spots feeling connected or overwhelming
- This design takes patience and steady hands—don’t rush it
- Let each “section” dry before moving to the next to avoid smudging
- Seal with a matte top coat for a sophisticated, almost velvety appearance
- This design is statement-making and feels like genuine nail art rather than a simple design
17. Marble and Leopard Print Fusion
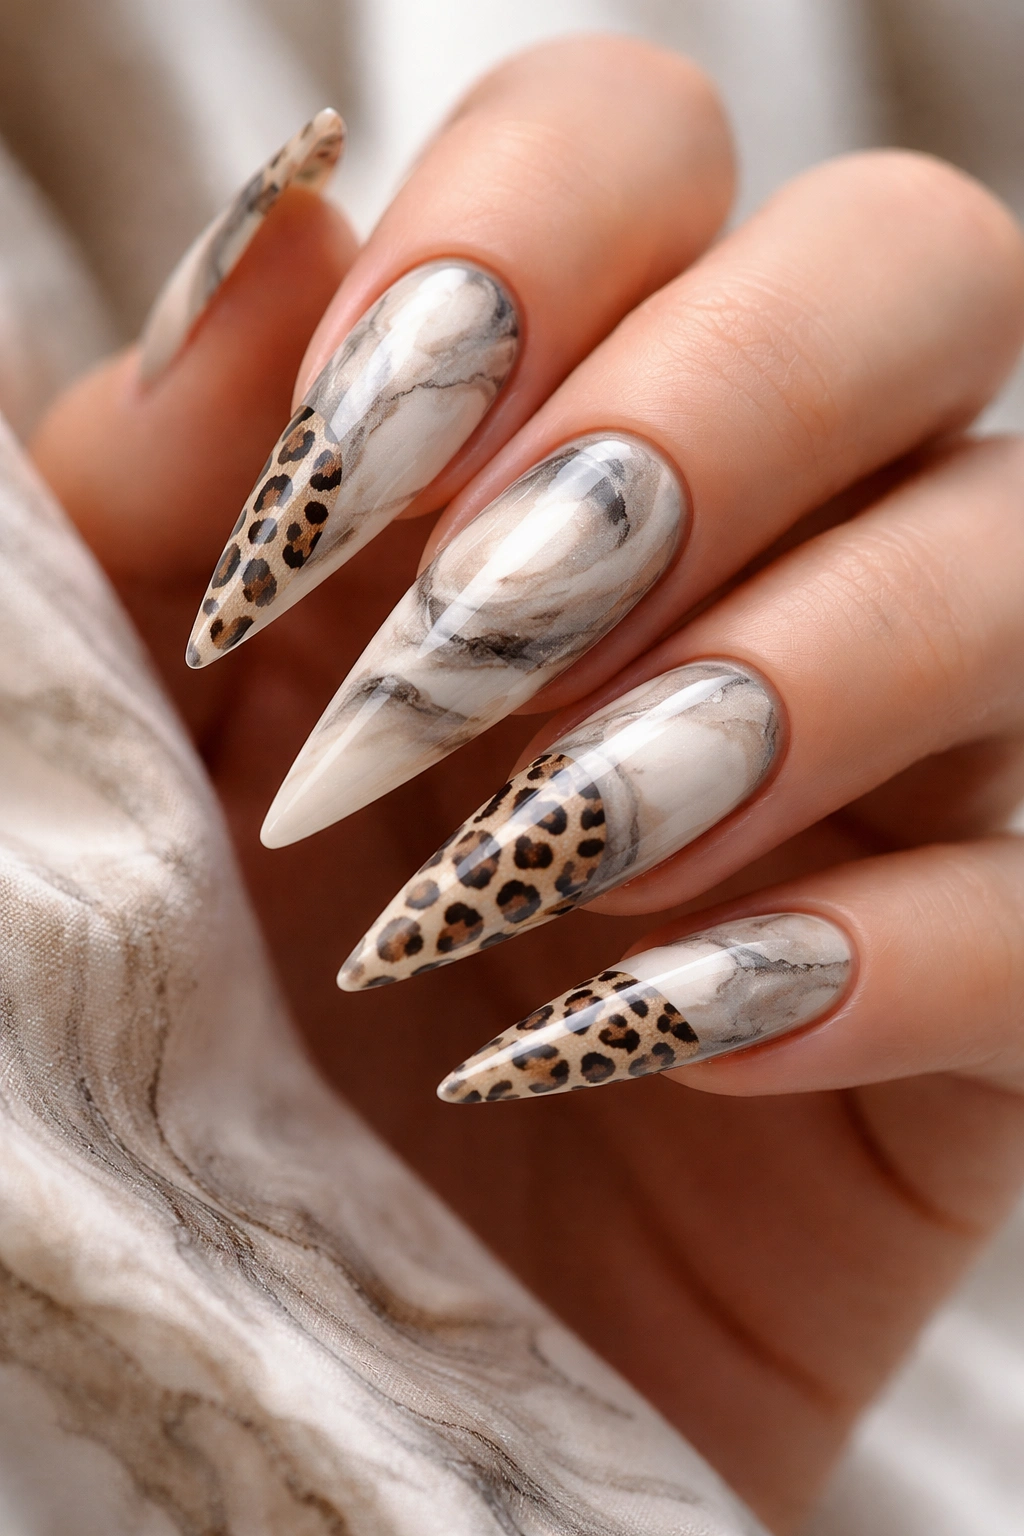
Combine flowing marble effects—swirls of contrasting colors creating organic patterns—with traditional leopard spots for a design that’s equal parts wild and refined. The marble provides movement and depth while the leopard spots anchor the design and provide the animal print element. This hybrid approach appeals to anyone who loves both maximalist patterns and sophisticated luxury finishes.
How Two Patterns Become One Cohesive Design
The key is ensuring the marble and leopard don’t compete for attention but instead support one another. The marble swirls become the background that makes leopard spots more visible and striking, while the animal print spots add structure to the flowing, organic marble pattern. Together they create something that feels intentional and curated.
Steps for Marble-Leopard Fusion
- Apply a light base color that will serve as your canvas (cream, pale pink, soft gray all work)
- Using two contrasting colors (perhaps black and gold, or deep burgundy and cream), create marble swirls using a thin brush or water marbling technique
- Allow the marble to be the dominant visual element—keep it flowing and organic
- Once completely dry, add leopard spots using a medium to dark tone that contrasts with both the base and marble colors
- Place spots somewhat randomly across the design—don’t force them into specific patterns
- Seal with glossy top coat that emphasizes the dimension created by layered patterns
- The finished design should read as intentional despite the layered complexity
18. Snakeskin Scale Patterns with Chrome Accents
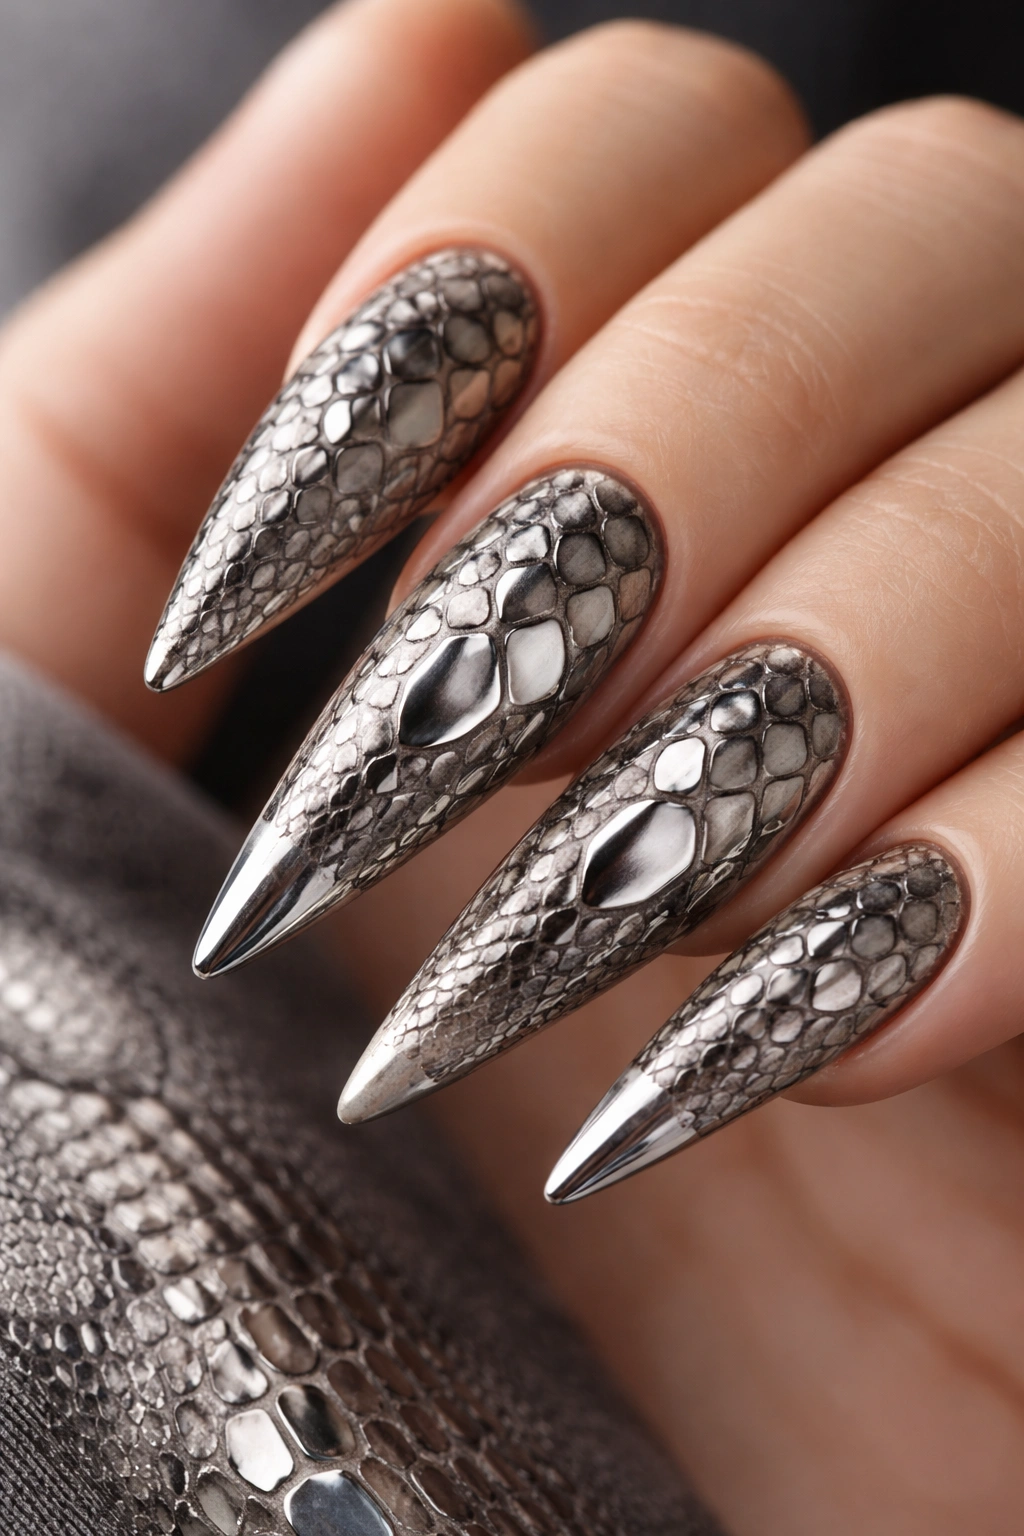
Create an interlocking scale pattern in muted tones, then amplify certain scales with chrome or mirror finish polish for an ultra-modern effect. The combination of traditional scale texture with futuristic chrome creates cognitive tension that feels sophisticated and bold. Some scales remain matte, others shimmer with chrome, creating visual rhythm and movement across the nail.
Why Chrome Elevates Snakeskin
Chrome’s reflective quality transforms a traditional animal pattern into something contemporary and unexpected. It’s the perfect way to honor animal print tradition while signaling that you’re not afraid of modern, bold aesthetics. The mix of matte and reflective finishes is visually dynamic in person.
Technique for Scale and Chrome Combination
- Choose a neutral base (taupe, soft gray, or pale nude) that lets chrome shine
- Paint interlocking scale shapes using muted tones (soft brown, gray-green, or dusty emerald)
- Outline each scale with a very fine line to create definition and clarity
- Once dry, apply chrome polish to selected scales using a thin brush—don’t do every scale, keep it random
- The chrome scales should catch light dramatically while matte scales remain grounded
- Finish with a top coat formulated specifically for chrome (regular top coat can dull chrome’s reflective quality)
- In sunlight or artificial light, this design completely transforms, revealing different versions of itself
19. Ombré Animal Print Transition (Two Species)
Create a design that transitions from one animal print at the cuticle to a completely different animal print at the tip. For example, start with leopard spots near the base and gradually transition to zebra stripes as you move toward the nail tip, or begin with cheetah spots and fade into giraffe polygons. This ambitious design celebrates the full spectrum of animal print possibilities while creating an eye-catching gradient effect.
Why This Design Pushes Creative Boundaries
Two-animal transition requires planning and precision, but the payoff is spectacular. You’re essentially telling the story of your versatility through nail design—honoring multiple aesthetics simultaneously. It’s the kind of design that makes people do a double-take.
Execution Strategy for Two-Pattern Transition
- Decide which two animal prints you’re combining and which direction the transition flows
- Apply your base color(s) to accommodate both patterns
- Begin with your first animal print pattern at the cuticle, applying it fully and confidently
- Gradually reduce the density of the first pattern as you move toward the center of the nail
- Simultaneously introduce your second animal pattern, building its density as the first diminishes
- By the tip, the second pattern should dominate completely
- The transition zone should feel organic—not a harsh line, but a gradual evolution
- Seal with top coat and prepare for genuine compliments on your boldness and creativity
20. Negative Space Animal Print (Minimalist Modern)
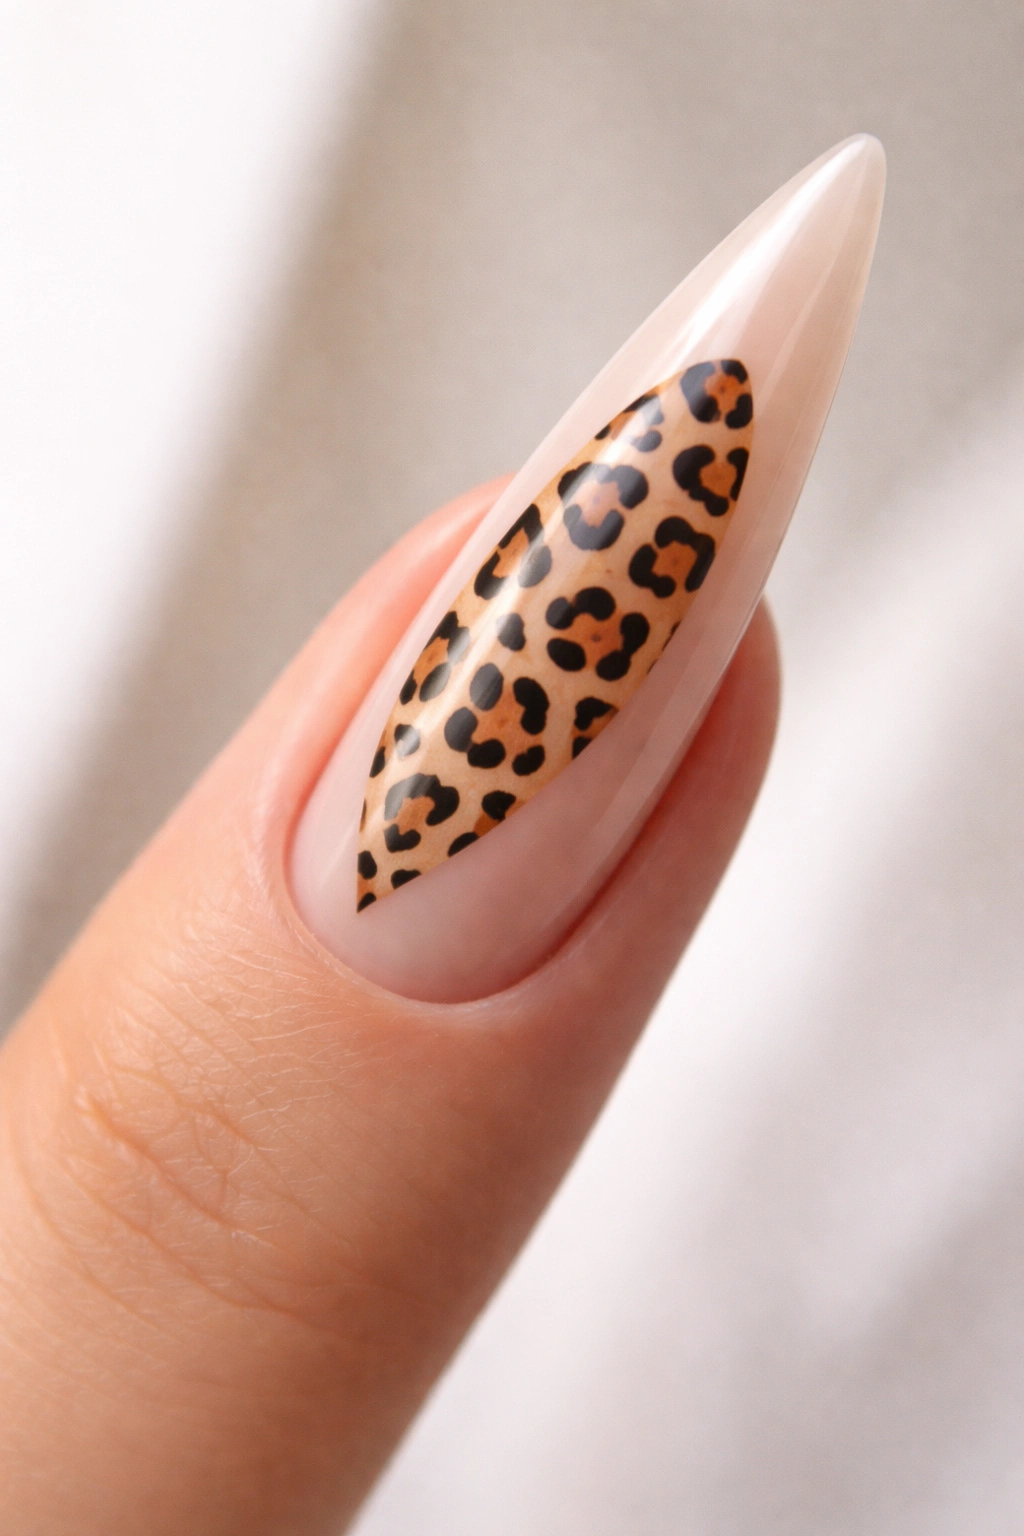
Use negative space creatively by having your animal print pattern sit on only a portion of the nail while leaving surrounding areas bare or featuring only a thin metallic outline. Rather than covering the entire nail with pattern, perhaps you do leopard spots only in the center oval with clean white space around it, or zebra stripes only along one curved side with matte nude space dominating. This minimalist approach feels contemporary and sophisticated—less is more.
Why Negative Space Feels More Modern
Minimalism reads as intentional and high-fashion. By choosing what NOT to fill rather than covering everything, you’re signaling confidence and restraint. The empty space becomes as important as the pattern itself, creating visual breathing room that feels luxurious and calm rather than overwhelming.
How to Execute Negative Space Animal Print
- Paint your full base color (two coats for opacity)
- Lightly sketch where you want your animal print to exist using a non-permanent marker or pencil
- Apply your animal print pattern only within these designated areas
- Leave surrounding space completely clear—this is the negative space doing its visual work
- Alternatively, outline the negative space area with a thin metallic line for subtle definition
- The unadorned space should feel as purposeful as the patterned area
- Seal with gloss top coat that makes the contrast between patterned and bare areas crisp
- This design appeals to minimalist aesthetic lovers who still want the impact of animal print
Final Thoughts
Animal print stiletto nails represent the perfect convergence of timeless style and personal expression. Whether you’re drawn to the classic appeal of leopard, the bold drama of tiger stripes, or the unexpected sophistication of something like giraffe or snakeskin, there’s an animal print design that speaks to your aesthetic. The elongated silhouette of stiletto nails amplifies whatever pattern you choose, making even simple designs feel dramatic and intentional.
The key to nailing any of these designs is patience, precision, and choosing a color palette that resonates with you personally. Premium polishes, steady hands, and quality top coats make the difference between designs that look good and designs that look professionally executed. Don’t hesitate to practice—your first attempt might not be flawless, but each design teaches you something about technique, color harmony, and what works best with your nail shape and personal style.
Ultimately, animal print stiletto nails are about confidence. They’re a statement that you appreciate bold design, attention to detail, and aren’t afraid to let your nails be a form of self-expression. Whether you’re heading to an event or simply want your everyday look to feel a bit more special, these 20 designs offer endless inspiration for your next manicure.
