

Yellow duck nails bring a playful, cheerful energy to your manicure that’s impossible to ignore. Whether you’re drawn to adorable duckling designs, bold cartoon interpretations, or sophisticated minimalist approaches, yellow duck nail art offers endless creative possibilities that work for every skill level and occasion. The beauty of this trend is that it combines the warmth and optimism of yellow with the universal charm of ducks—creating designs that feel simultaneously whimsical and surprisingly versatile.
What makes yellow duck nails so appealing is their versatility across seasons and settings. You can rock them at casual summer gatherings, incorporate them into themed events, or even adapt them for professional environments with a more subdued interpretation. The color yellow itself acts as a confidence booster, brightening your entire appearance while the duck details add personality without requiring extensive artistic ability. From nail technicians creating intricate watercolor renderings to at-home DIYers applying simple stickers and polish, there’s a yellow duck design suited to every comfort level and aesthetic preference.
The designs in this collection showcase different techniques, color combinations, artistic approaches, and finishing touches. Some emphasize bold, graphic ducks while others lean into soft, delicate renderings. Some pair yellow with complementary neutrals for understated elegance, while others celebrate full saturation with vibrant multi-color accents. Whatever draws you to duck-themed nail art, you’ll find inspiration in these twelve distinct approaches to making yellow duck nails your own.
1. Classic Cute Duckling Faces on Pale Yellow Base
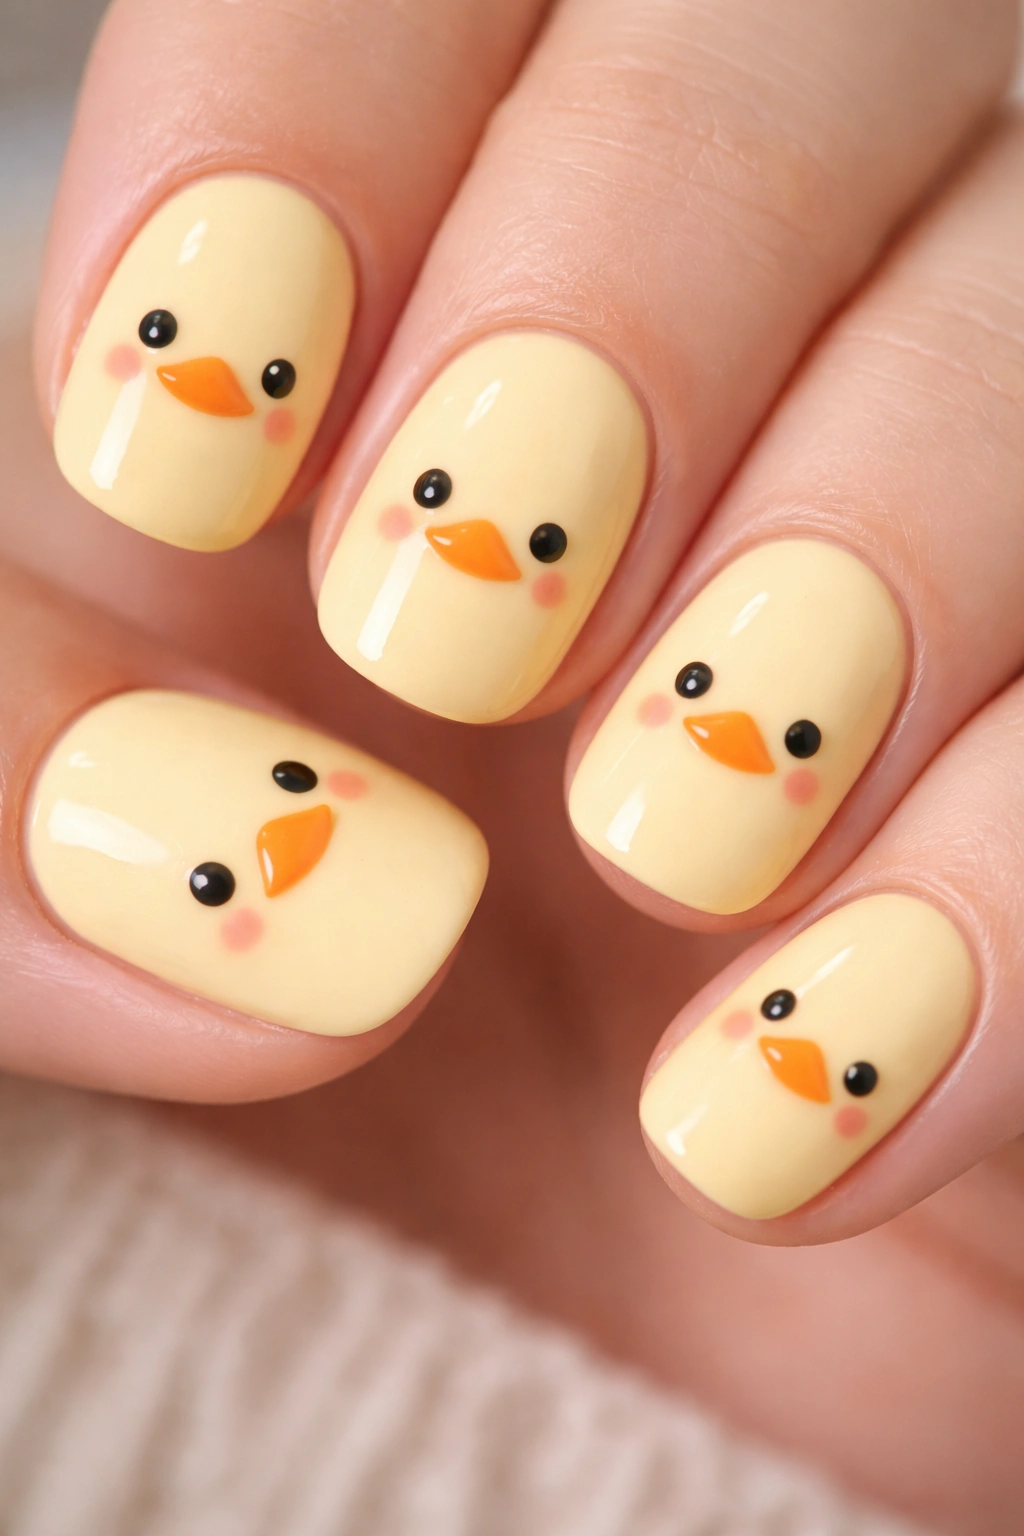
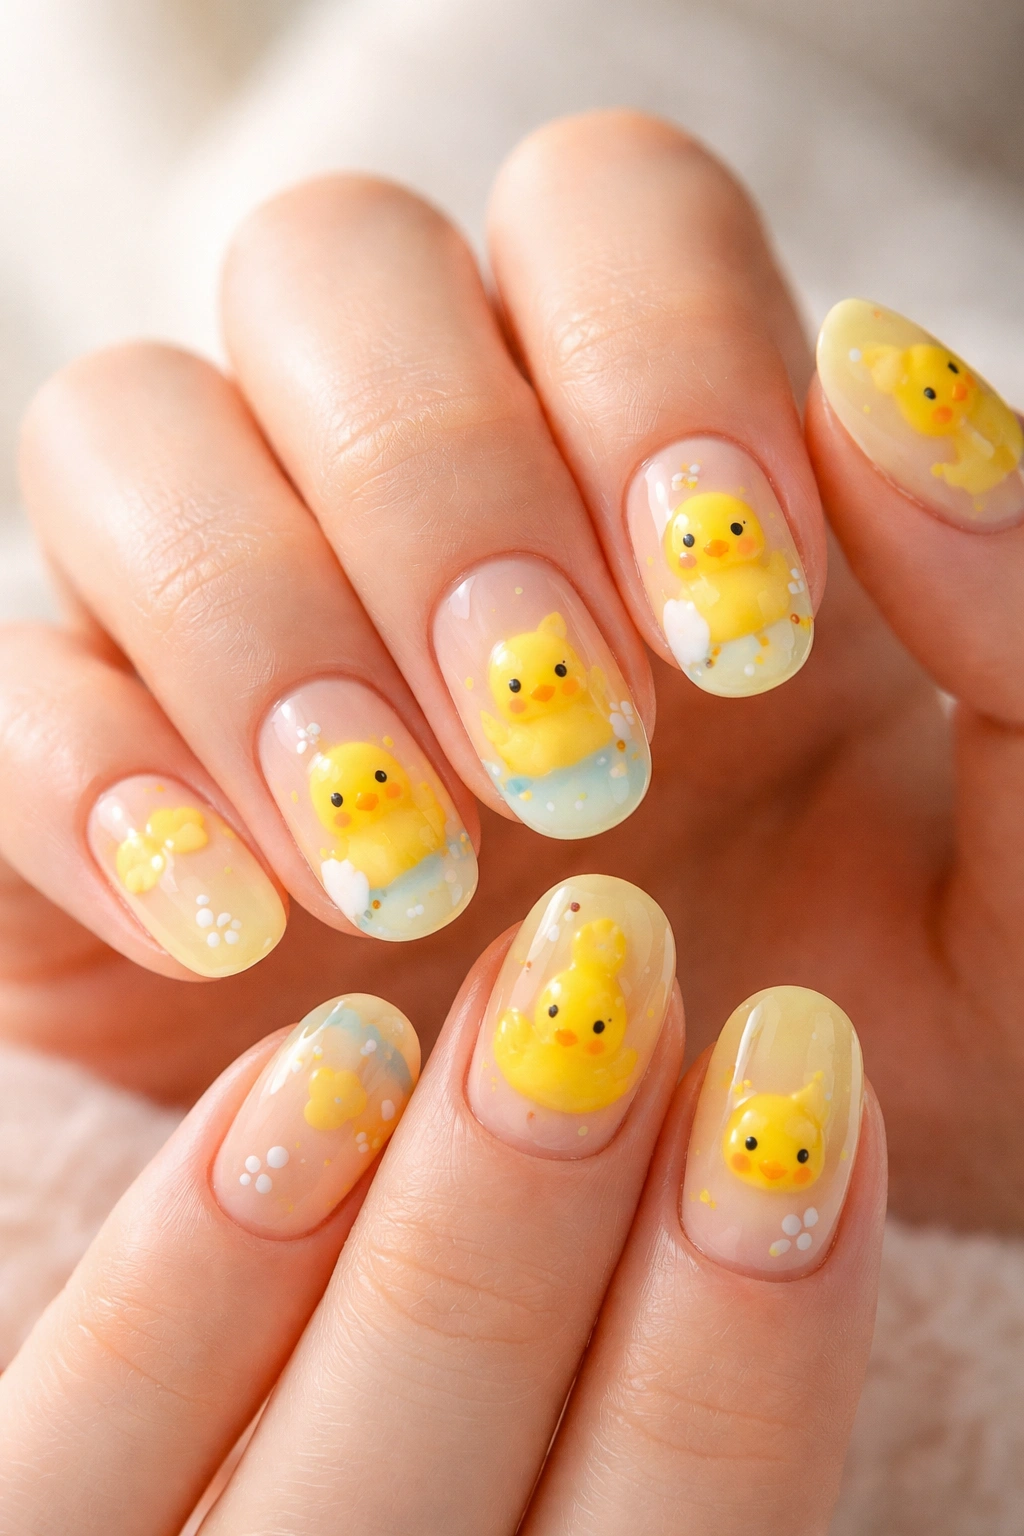
This foundational design places adorable duckling faces across a soft, pale yellow base that feels light and playful without overwhelming your nails. The pale yellow serves as the perfect canvas—sunny enough to feel intentional but subtle enough that the duckling details become the focal point of the design. Each duck face typically features two black dots for eyes, a small orange triangle for the beak, and occasionally tiny curved lines for wings or a charming smile.
Why This Design Works Best
The simplicity of duckling faces makes them forgiving to execute while still delivering major charm. You can paint them freehand with a thin brush and black polish, use a dotting tool to create perfectly round eyes, or even apply them with a simple nail stamp if you prefer precision. The pale yellow background is incredibly forgiving—it hides minor imperfections and creates a cheerful, approachable look that reads as intentionally cute rather than overly elaborate.
Application and Technique Tips
- Start with 2-3 coats of pale yellow polish (brands like OPI’s “Suzi’s Hungary Again” or Sally Hansen’s “Golden Girl” work beautifully) for even coverage without streaking
- Allow the base to fully cure for 10-15 minutes before adding duck details
- Use a thin round brush or dotting tool dipped in black polish to create eyes—place them slightly off-center to give each duck personality
- Add the orange beak with a very small brush using burnt orange or pure orange polish depending on your preference
- Seal with a glossy topcoat to protect the details and enhance the overall shine
Customization Ideas
Swap the pale yellow for buttery yellow on some nails while keeping others pale, creating subtle dimension. Add a thin black outline around each duck face to make them pop. Include occasional accent nails with complementary colors like soft pink or mint green. Vary the duck expressions—some smiling, some with closed happy eyes, some with a surprised expression—to keep the design feeling playful and dynamic.
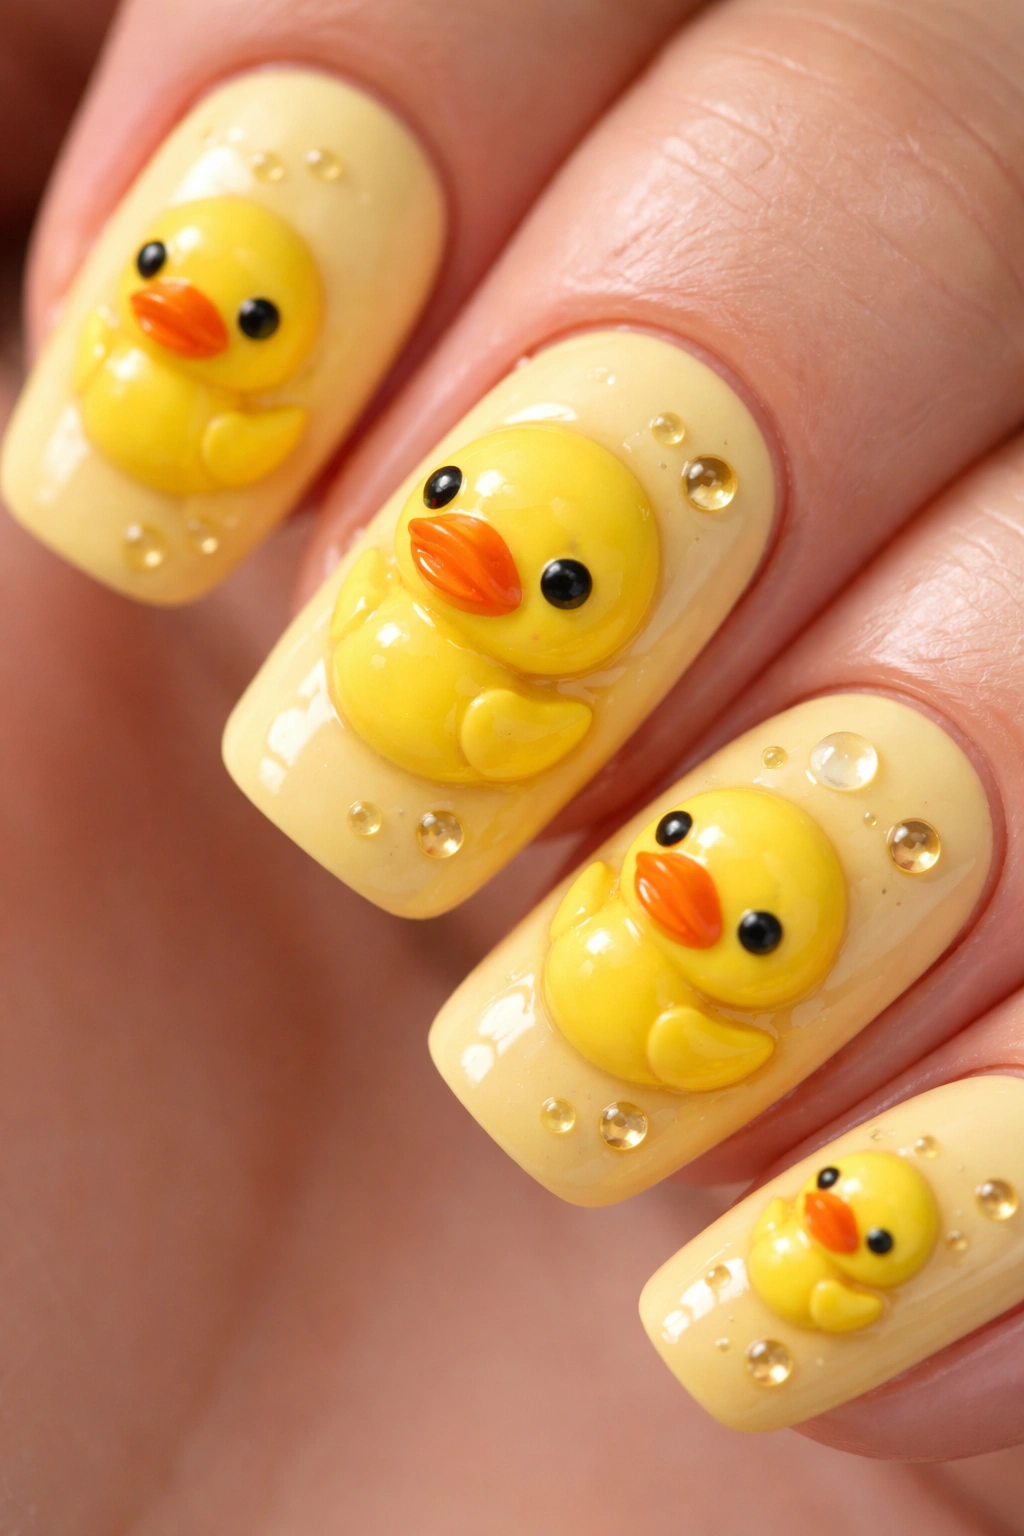
2. Rubber Duck Vintage Illustration Style
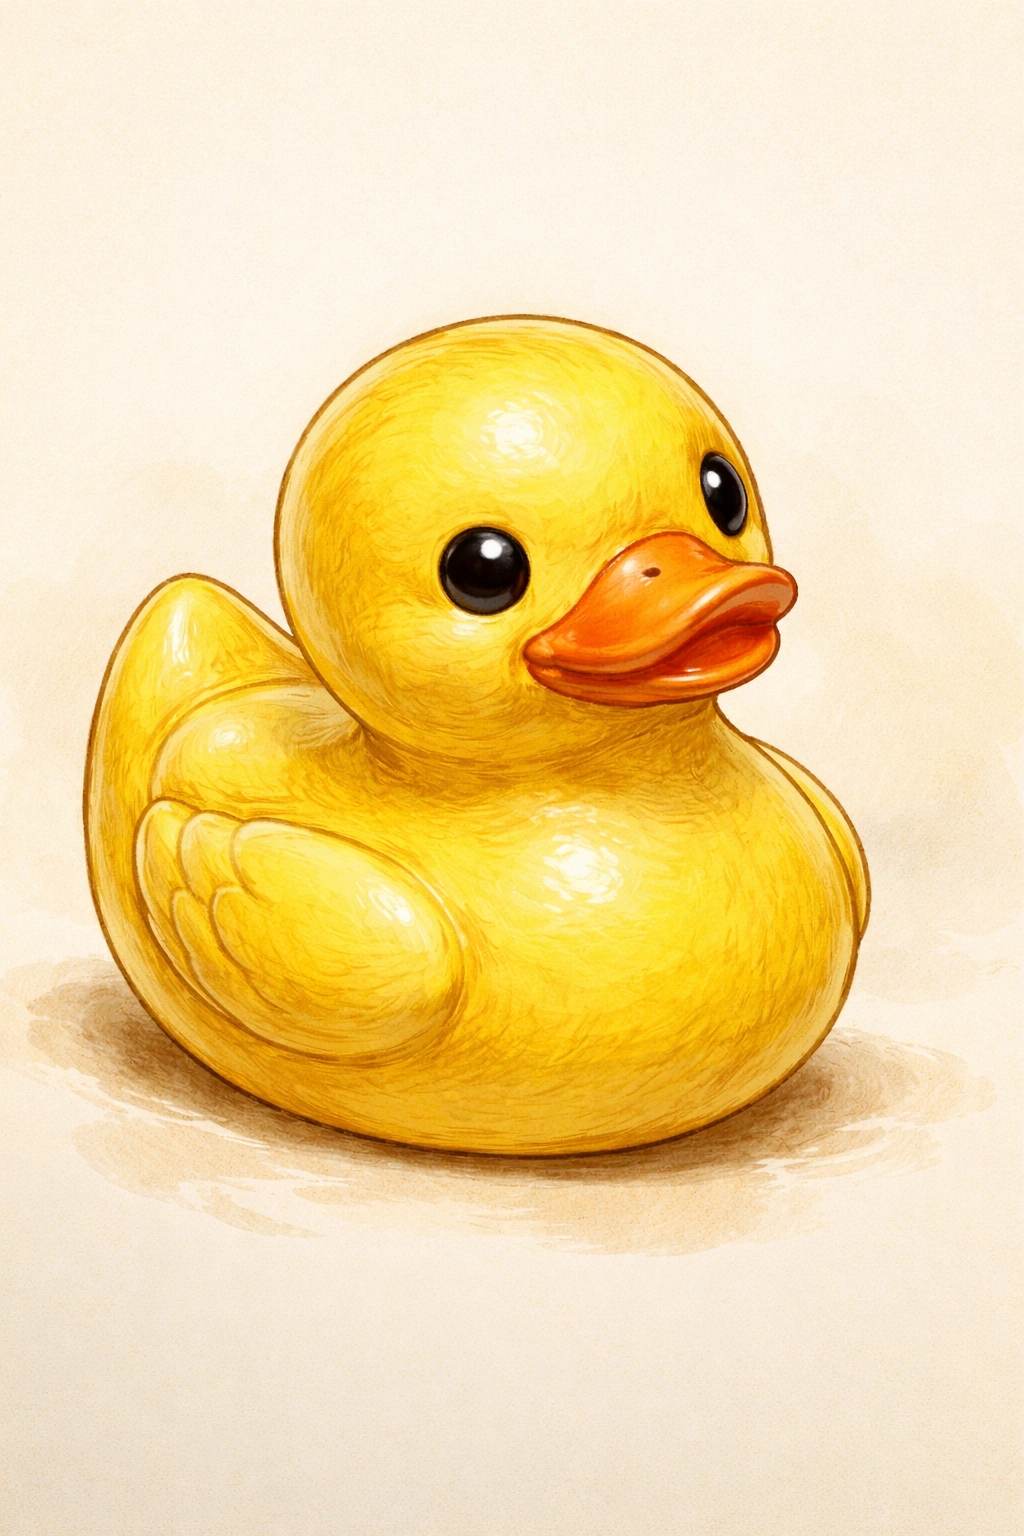
Transform your nails into a nostalgic journey through children’s book aesthetics with a rubber duck illustration approach. This design captures that beloved, timeless quality of classic rubber ducky imagery—the kind that instantly evokes bathtime memories and innocent joy. The ducks feature more defined anatomy with visible body shape, textured details, and sometimes gentle shading that gives them depth and dimension while maintaining an inherently charming, non-realistic quality.
Why This Technique Stands Out
Illustration-style designs feel more sophisticated than simple cartoon versions because they demonstrate drawing skill and artistic intention. They work equally well on short nails and long acrylics, and they photograph beautifully for social media. The watercolor or hand-drawn aesthetic naturally conveys craftsmanship, whether you’re paying a nail artist or attempting the design yourself. This style also adapts beautifully to different nail shapes—the proportions remain flattering whether you’re working with rounded or almond-shaped nails.
How to Create the Illustration Effect
- Begin with a creamy pale yellow or warm butter yellow as your base—one that feels vintage and approachable
- Use a thin detail brush and black or dark gray polish to sketch light outlines before committing to full details
- Add texture with very light cross-hatching or stippling on the duck’s body to suggest dimension without overwhelming the design
- Include tiny details like feather lines on the wing, a small curl on the tail feathers, or subtle shading under the body
- Leave parts of the yellow base visible around the duck outline to prevent the design from feeling too heavy or enclosed
- Finish with matte topcoat for an authentic hand-drawn, almost storybook appearance
Ideal Color Pairings
Pair rubber duck illustrations with a warm white or soft cream on your accent nail for subtle elegance. Combine pale yellow ducks with one nail featuring a slightly darker mustard yellow for dimension. Add tiny black line details (water ripples, reeds, or rocks) on one accent nail to suggest a pond environment without overwhelming the design. Consider nude or pale pink on your pinky for a balanced, sophisticated overall manicure.
3. Gradient Yellow with Hand-Painted Ducks
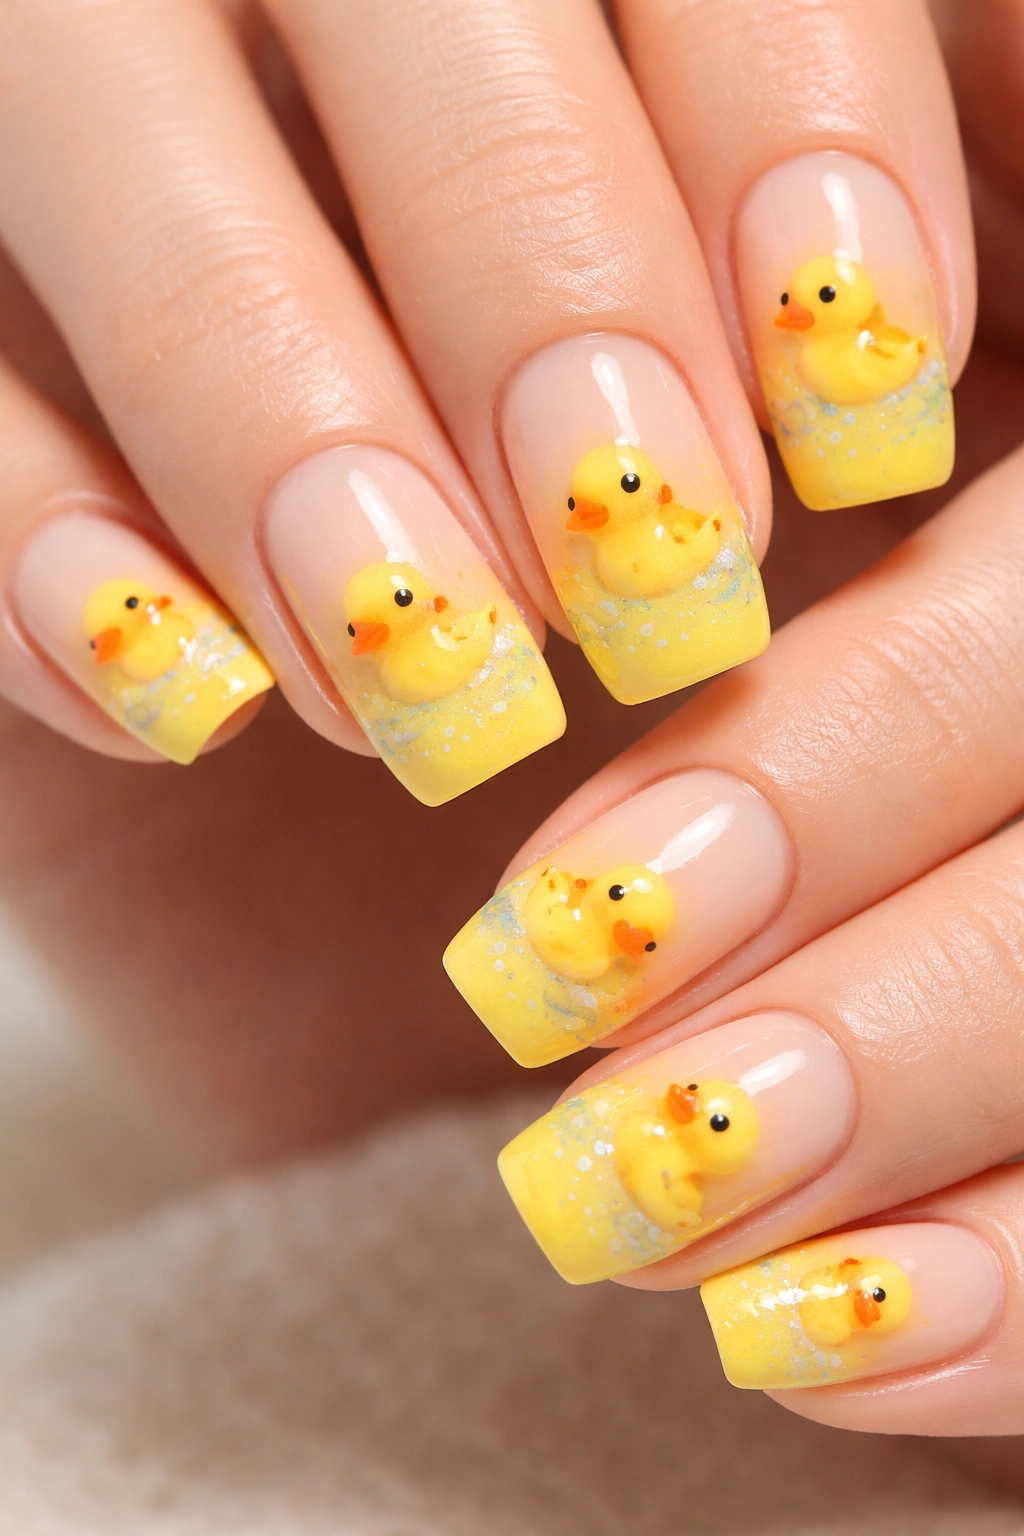
Create dimension and visual interest by layering a beautiful yellow gradient with hand-painted duck details that seem to float across the ombré effect. A gradient takes the yellow from pale on the nail bed to richer, deeper yellow toward the tip—or sometimes transitions from yellow into white, cream, or even soft orange. The gradient automatically adds sophistication while the duck details maintain the playful spirit of the design.
Creating a Flawless Gradient
Gradients intimidate many people, but the sponge method makes achieving professional results completely accessible. Cut a small piece of makeup sponge and dab (never swipe) together the two yellow shades you’re blending on the sponge until they merge into a smooth transition. Press the sponge vertically onto your nail, working from where the pale yellow meets the darker shade, building up color gradually. The key is patience—multiple light dabs create smoother transitions than one heavy press.
Best Yellow Combinations for Gradients
Pair pale butter yellow with golden yellow for warm, cohesive elegance. Blend pale yellow into champagne or soft white for a sophisticated, almost sunset effect. Transition from canary yellow into pale pink for a warmer, more feminine gradient that still celebrates the yellow duck theme. Try pale yellow into mint green for a cool-toned refresh that feels modern and unexpected.
Positioning Your Duck Details
Paint ducks at various points along the gradient—some at the pale end, some at the transition point, and some at the deepest yellow section. This creates a sense of movement and ensures the ducks remain visible regardless of where they fall on the gradient. Consider painting some ducks slightly smaller in the background and larger in the foreground to suggest depth and dimension. Add subtle water details (ripples, reeds, pebbles) to ground the ducks within their gradient environment.
4. Tiny Ducks with Gold Foil Accents
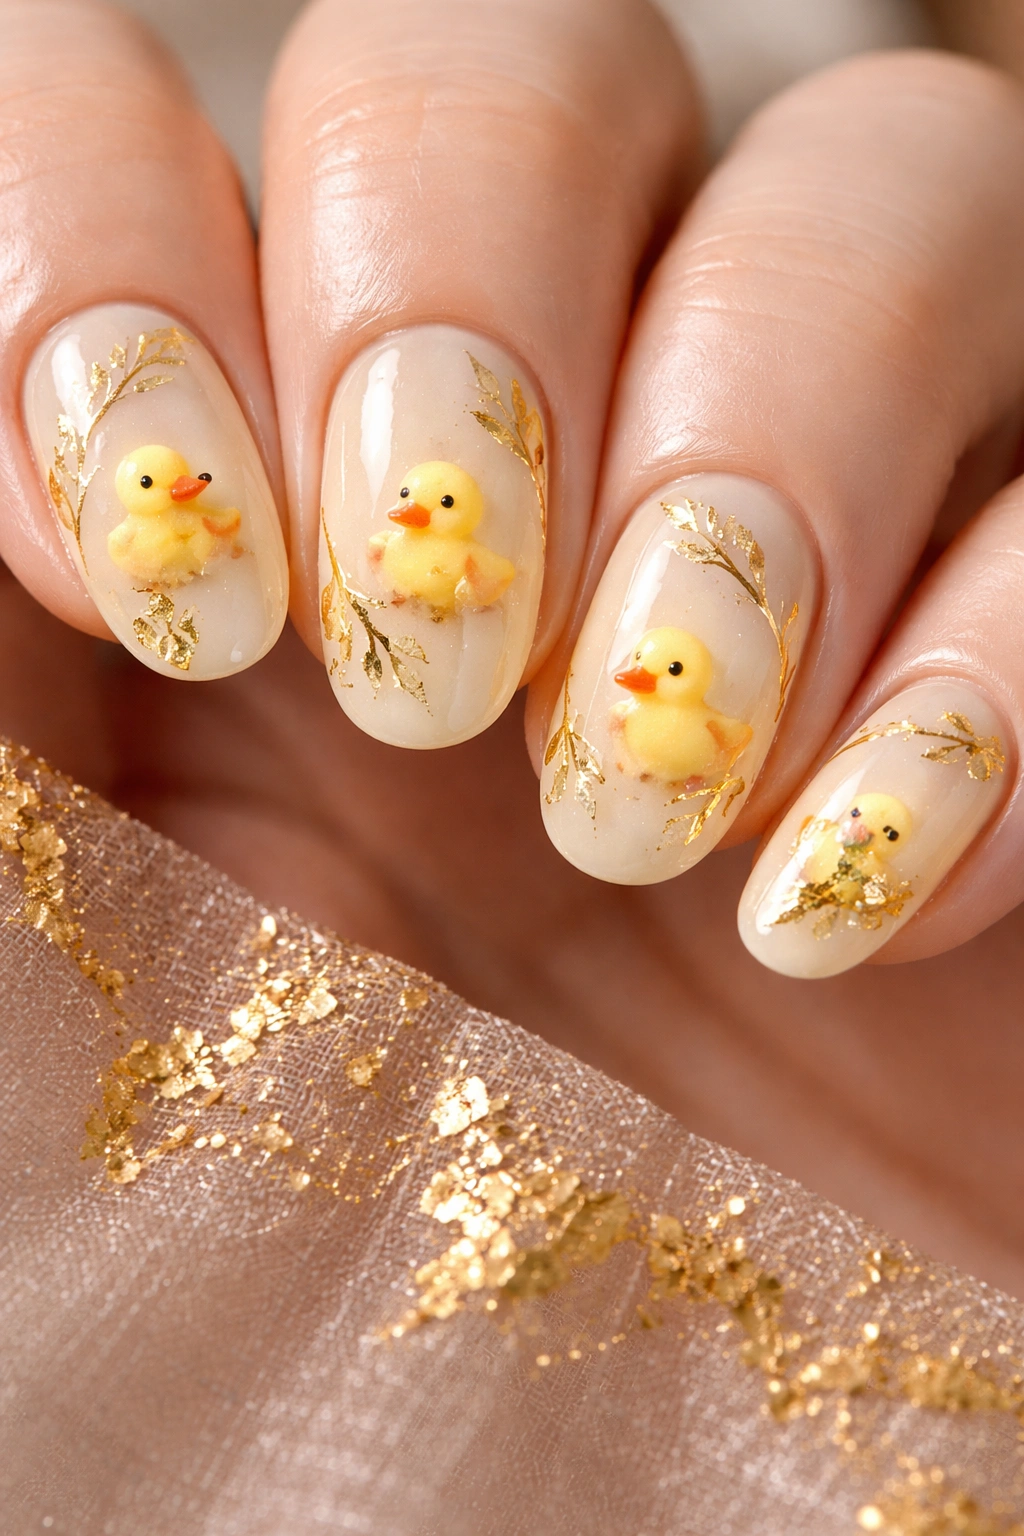
Combine diminutive duck designs with luxe gold foil details for a manicure that feels both whimsical and elevated. Tiny ducks work beautifully on short nails and feel less heavily themed than larger designs, making them wearable for professional settings when paired with minimalist gold touches. The foil catches light and creates visual sophistication that balances the playfulness of the duck concept.
Incorporating Gold Foil Effectively
Gold foil pieces adhere best over a slightly tacky layer of topcoat or specifically formulated foil adhesive. Apply your base yellow polish, then paint a small gold foil section—perhaps a simple line, geometric shape, or brushstroke—on each nail. Press foil onto the tacky surface with a rolling motion, then seal with clear topcoat. The foil should complement but not overwhelm your duck designs, appearing as intentional accents rather than secondary focal points.
Strategic Foil Placement Ideas
Add vertical gold foil stripes on one or two nails while keeping the others with just duck designs—this creates a sophisticated accent nail effect. Border your ducks with delicate gold foil lines that frame each design without covering the duck details. Create small gold foil dots scattered across the nail to suggest a glittery, magical atmosphere around the ducks. Apply foil to the tips of your nails for a soft French manicure effect that incorporates the gold without fighting the yellow duck focus.
Color Harmony Considerations
Rose gold foil offers warmth that complements pale butter yellow beautifully, creating a softer, more romantic aesthetic. Champagne foil works with golden yellow for an understated luxury vibe. Mirror foil creates maximum shine and drama—use sparingly to avoid overwhelming the playful duck theme. Matte gold foil paired with glossy yellow creates interesting textural contrast that feels modern and intentional.
5. Minimalist Line-Drawn Ducks in Black
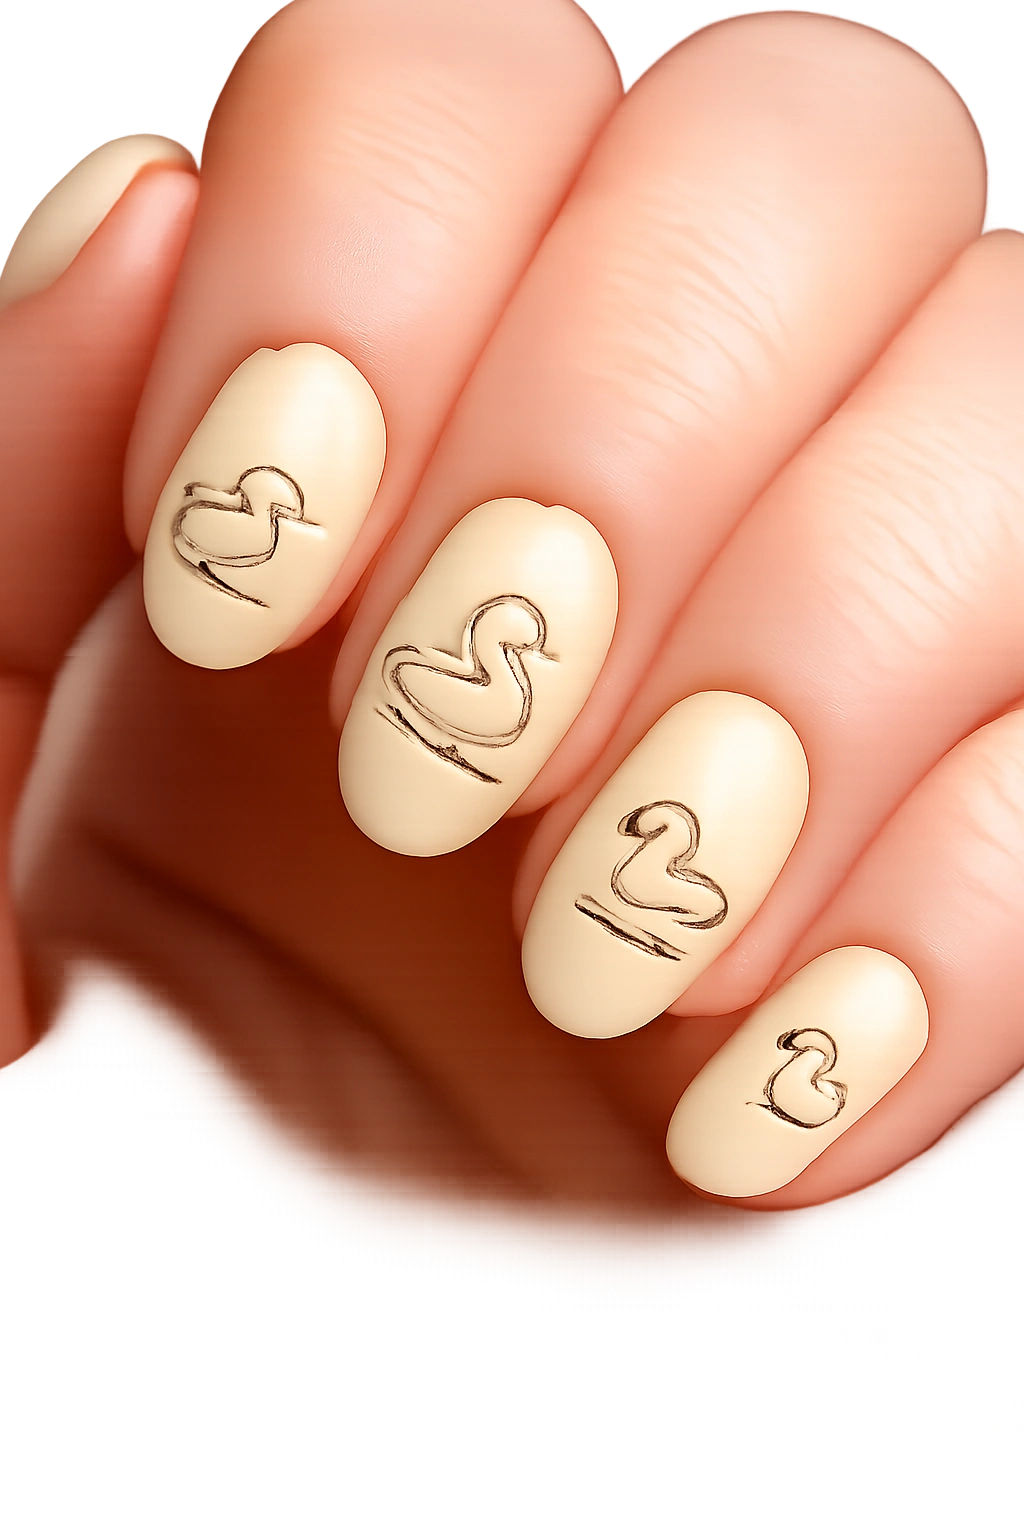
Strip the concept down to its most elegant essentials with minimalist line-drawn ducks rendered in clean black lines against yellow polish. This approach prioritizes artistic sophistication over cute factor, appealing to those who love conceptual nail art and modern design sensibilities. Single continuous lines or simple geometric representations convey “duck” instantly while feeling refined and gallery-worthy.
Mastering Minimalist Duck Illustration
The beauty of minimalism lies in every line mattering—there’s nowhere for mistakes to hide, which means taking time with your tool selection and hand steadiness. Use the thinnest brush available in your collection or invest in a professional detail brush specifically designed for nail art. Hold your hand very still while painting, or rest your painting arm’s pinky finger against your hand for stability. One continuous line that suggests a duck’s profile (head connected to body, implied beak) works beautifully and feels intentionally artistic rather than incomplete.
Line Art Composition Strategies
Paint one detailed line-drawn duck on an accent nail while keeping other nails solid yellow for balance. Cover multiple nails with tiny duck profiles, each slightly different in positioning or angle to create movement. Create a “duck family” with varying sizes—one large mama duck and several smaller ducklings in line formation. Add minimal water details (a single curved line suggesting a water surface, a few ripple lines) to ground your ducks without overcomplicating the design.
Finishing Touches for Maximum Impact
Matte topcoat enhances the line-art aesthetic, allowing the black lines to feel crisp and intentional rather than sitting on top of glossy finish. Glossy topcoat creates more contrast between the shiny yellow and the matte black lines—the choice depends on whether you prefer sophistication (matte) or drama (glossy). Consider adding a single accent nail with negative space—skip the yellow polish on one nail and instead paint only the duck outline in black against your natural nail, creating an ultra-minimalist statement.
6. Duckling Pattern with Scattered Details
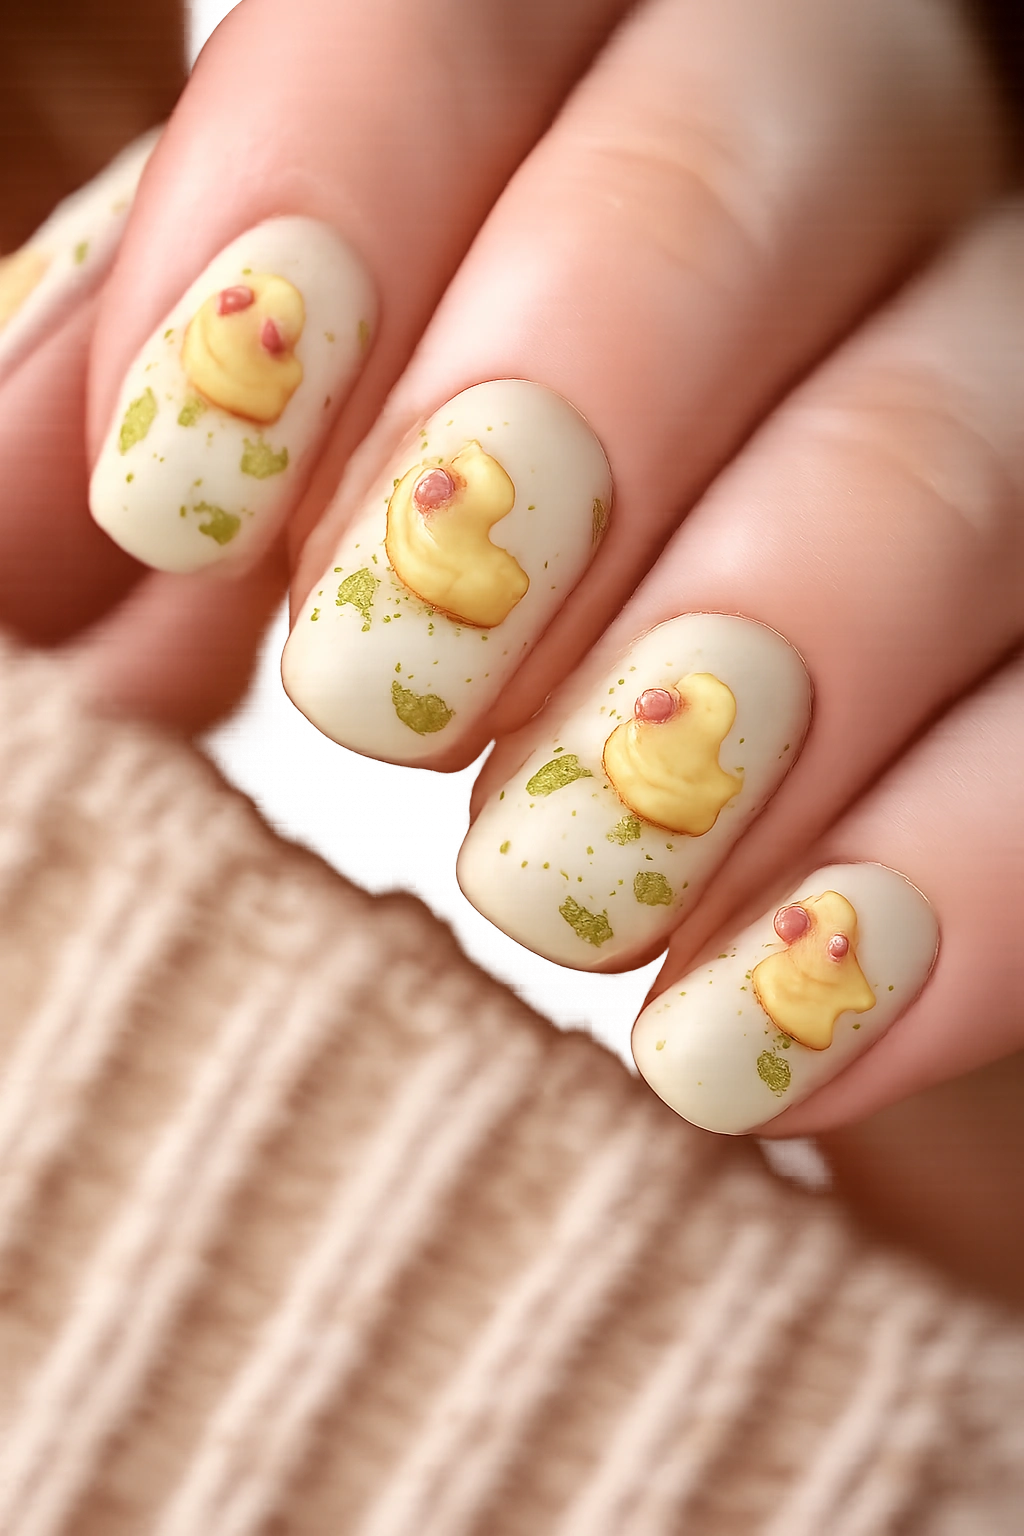
Create a cohesive pattern across all your nails by scattering multiple small ducklings in various poses and sizes, with complementary details that fill negative space. Rather than one focal duck per nail, this design celebrates abundance and density—your nails become a cheerful landscape populated with ducks in different orientations and expressions. Tiny clouds, grass tufts, pebbles, or water details surround and balance the ducks throughout the design.
Building a Balanced Scattered Pattern
Begin by lightly sketching duck positions in pencil on your nail before applying any polish—this prevents overwhelming one area with too many ducks or leaving awkward blank spaces. Distribute ducks across the entire nail surface rather than clustering them in one corner. Vary sizes intentionally—larger ducks in the foreground and smaller ones in the background create natural depth. Leave some negative space (areas of just yellow polish visible) to keep the design from feeling chaotic or overwhelming.
Supporting Details That Complete the Design
Paint tiny fluffy clouds in white or pale blue to suggest a cheerful sky environment. Add simple grass tufts in green along the bottom of nails to suggest a grassy shore. Include tiny reeds, cattails, or water plants rendered as simple lines to indicate a pond setting. Place small pebbles or rocks in gray or tan to anchor the landscape. These details should remain small and simple—they’re supporting players, not focal points.
Color Palette Considerations for Scattered Designs
Keep your base yellow consistent across all nails for visual cohesion while the scattered elements create interest. Use 2-3 complementary accent colors (blues for water, greens for grass, black for duck details) to maintain harmony while creating visual interest. Consider nude or white nails as anchors between your most heavily decorated nails—the simplicity prevents sensory overload.
7. Duck Faces with Water Ripple Details
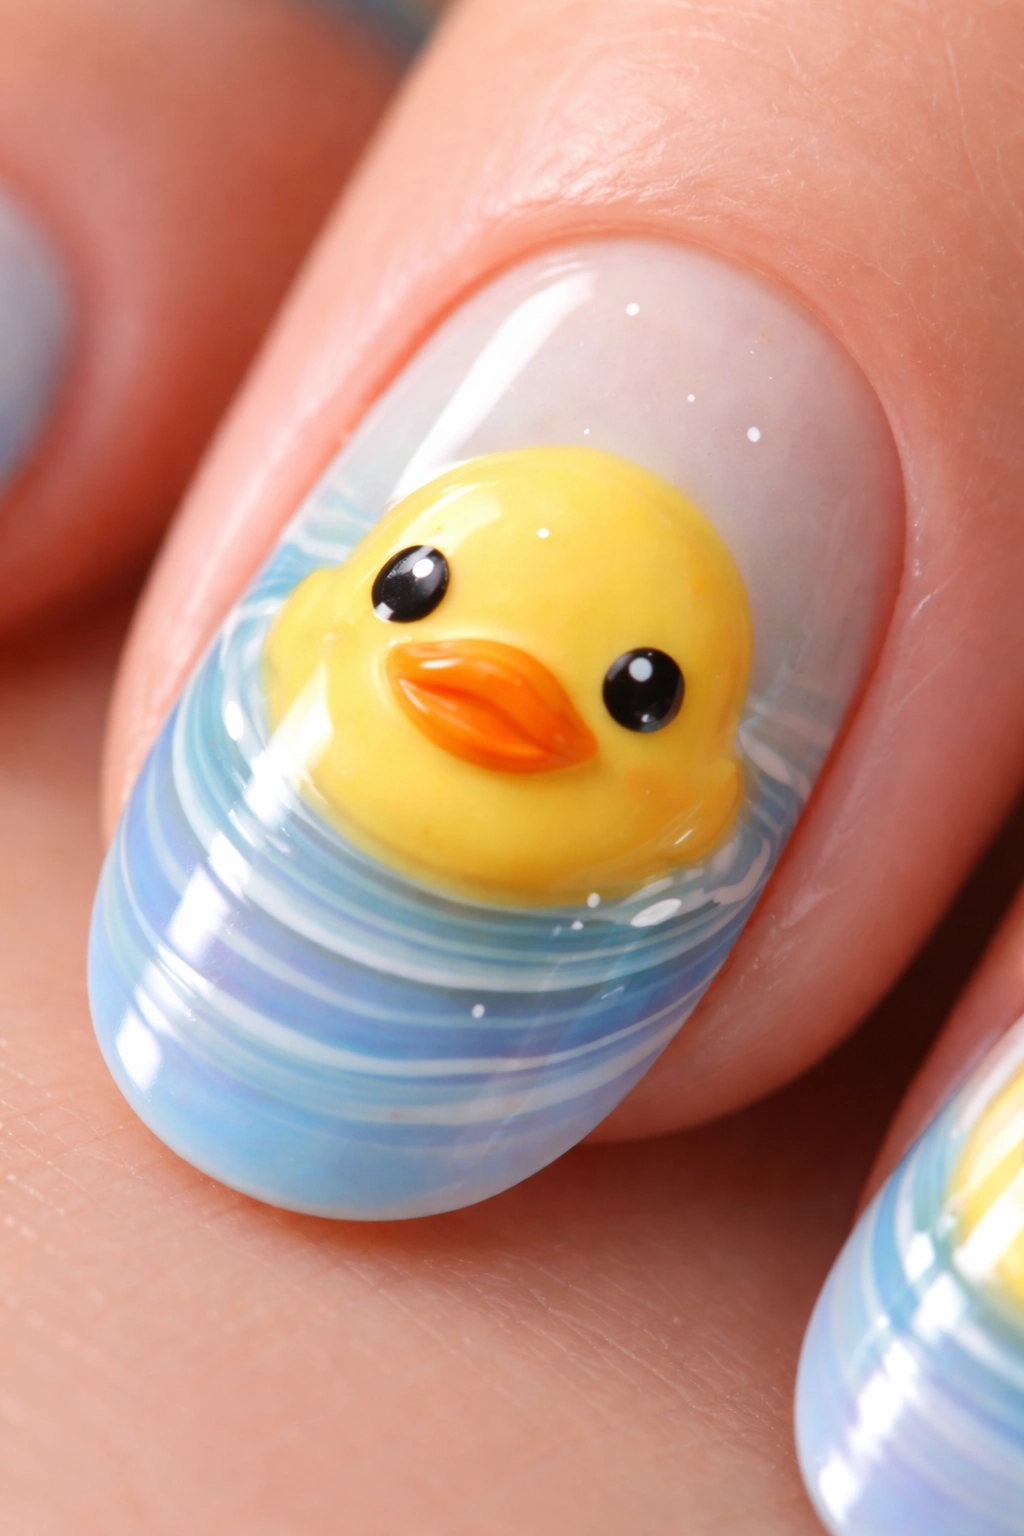
Bring your yellow ducks to life by positioning them as if swimming in water, complete with ripple patterns that suggest movement and environment. This design transforms simple duck faces into scenes by adding context—the water detail immediately tells a story and creates a more complete, thoughtful composition. Ripples rendered as concentric curved lines in blue, purple, or lighter yellow suggest gentle water movement.
Painting Realistic Water Ripples
Start with concentric curved lines centered where the duck appears to sit in the water. Use a thin brush and a light blue or pale purple polish to create the ripples—the lines should be slightly wobbly and imperfect to feel natural rather than mechanical. Paint some ripples with thicker lines close to the duck (suggesting immediate water disturbance) and finer, fading lines moving outward (suggesting ripples traveling outward and diminishing). Vary the spacing between ripple lines to suggest realistic water dynamics.
Water-Themed Color Combinations
Pair pale yellow ducks with soft sky blue ripples for a bright, cheerful aesthetic. Use turquoise ripples against golden yellow for a tropical, warm water feeling. Combine lavender ripples with butter yellow for unexpected color harmony that feels modern and playful. Layer multiple ripple colors (pale blue near the duck, deeper blue moving outward) to suggest depth and dimension.
Environmental Context Details
Add cattails or water reeds in green along the edges where water meets land. Paint a simple shoreline in tan or pale brown to ground the scene. Include tiny fish or water droplets in complementary colors to enhance the aquatic environment. Consider adding lily pads in green with tiny pink flowers for a storybook pond aesthetic. Keep these details minimal so they support rather than compete with your duck and ripple focal points.
8. Chunky Glitter Yellow with Glitter Ducks
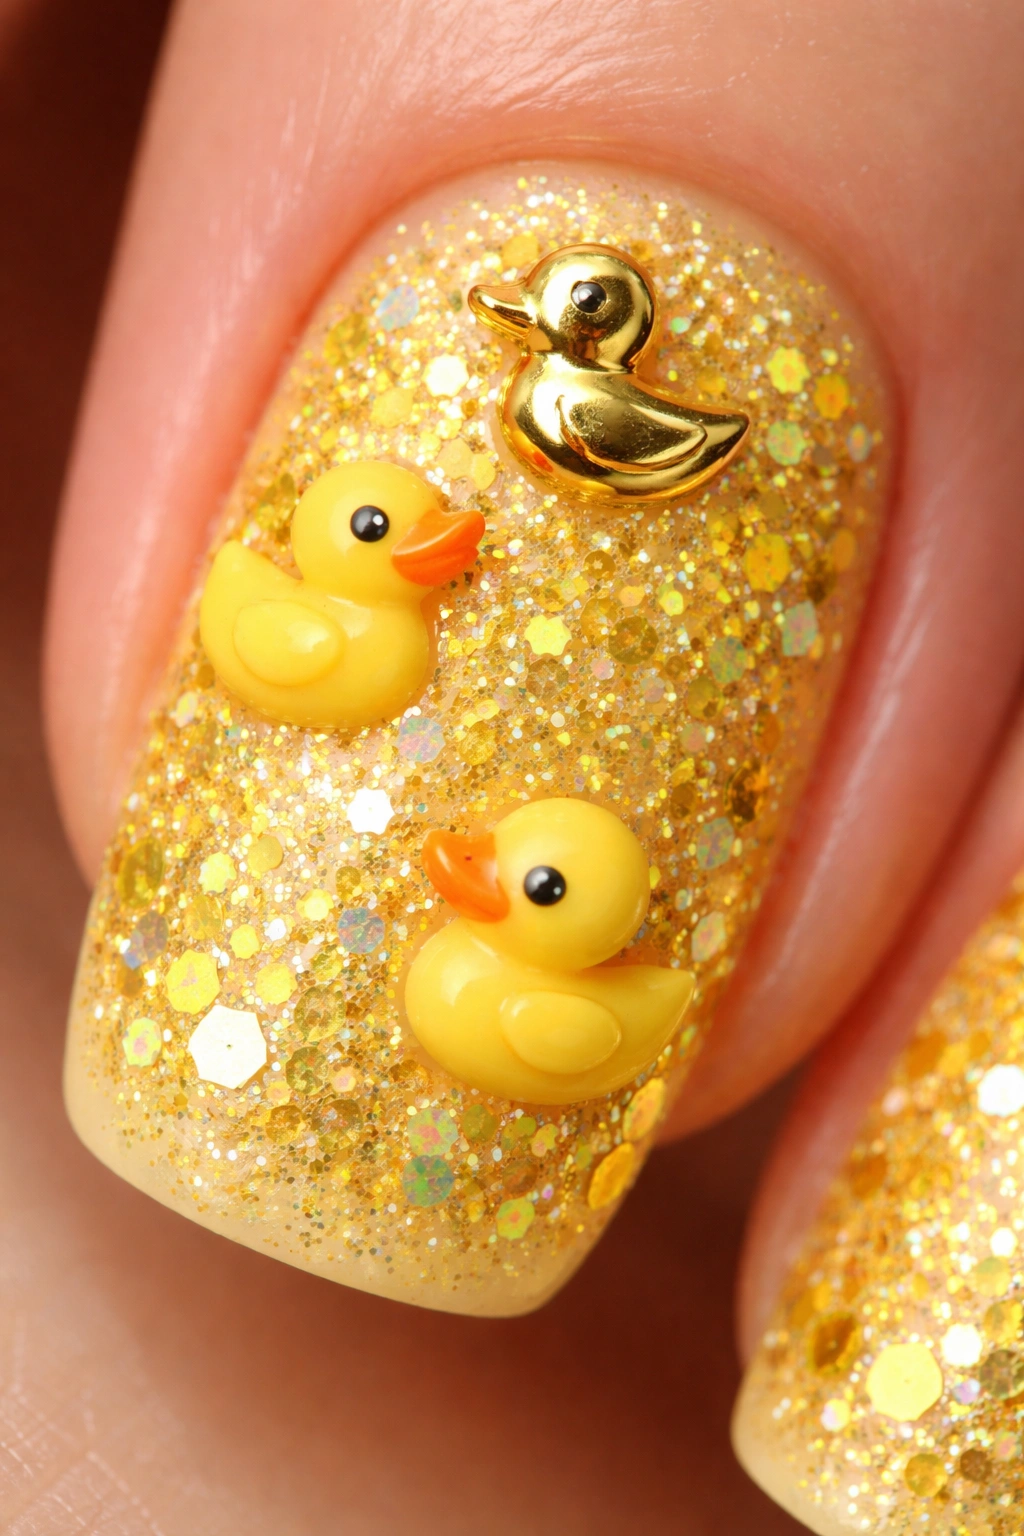
Layer sparkle and shine across your nails with a glitter-packed yellow base and three-dimensional or metallic duck details that catch light from every angle. Chunky glitter yellow creates an instantly festive, celebratory vibe perfect for parties, events, or whenever you want to feel extra special. The glitter provides texture that makes even simple duck designs feel more elaborate and impressive.
Selecting and Applying Chunky Glitter Polish
Chunky glitter polishes often benefit from a smooth base coat underneath to prevent the glitter from settling unevenly or appearing sparse. Apply one coat of regular pale or golden yellow polish as your foundation, allowing it to dry completely. Then apply the chunky glitter polish in one generous coat, using gentle pressing motions rather than swishing back and forth to distribute the glitter evenly. You may need 2-3 coats depending on your glitter polish’s density and opacity.
Duck Details Over Glittery Surfaces
Paint ducks using opaque polish (black, orange, or contrasting colors) that will show up clearly against the glittery background. Consider using gel polish or metallic polish for your duck details to make them stand out while matching the overall glittery aesthetic. Add glitter duck silhouettes by painting a duck shape and then pressing fine glitter into the sticky polish before it sets. Apply matte topcoat to just the duck area for textural contrast against the shiny glittery base.
Glitter Density and Wearability
Chunky glitter polish can feel overwhelming on all ten nails—consider applying it to just fingernails while keeping thumbs and pinkies with solid yellow for visual balance. Vary glitter colors (gold glitter on some nails, silver on others) to create interest. Add a small amount of loose glitter suspended in your topcoat for extra dimension and shimmer without the heaviness of a full glitter polish coat.
9. 3D Duck Embellishments and Nail Studs
Take your yellow duck nails into the third dimension by incorporating dimensional duck embellishments, tiny studs, or sculpted details that literally stick up from the nail surface. 3D elements create immediate visual impact and make your manicure feel special-occasion ready. From tiny metallic duck head studs to small resin duck charms glued to the nail, dimensional details transform a simple design into wearable art.
Working with Nail Embellishments
Clear nail glue specifically formulated for nail embellishments holds studs and charms securely without damaging your nails when removed properly. Apply a small amount of glue to the back of your embellishment and press firmly onto the nail surface for 10-15 seconds until the glue sets. Position embellishments on accent nails rather than covering all ten nails—one dimensional duck per hand or on just one nail creates elegant emphasis without becoming unwieldy.
Sourcing and Securing Studs
Metal studs in duck shapes or simple geometric duck silhouettes work beautifully and feel sophisticated rather than overly playful. Tiny resin ducks, often found in craft or nail art supply stores, offer more detail and personality. Japanese nail art shops frequently stock adorable micro duck charms perfect for nail embellishment. Ensure any embellishment is smooth on the back (no sharp edges that could catch fabric or skin) and secure enough that you won’t lose it during daily activities.
Styling with 3D Elements
Paint simple duck faces on most nails while reserving one or two nails for 3D embellishments—this balances dimension and visual interest. Use metallic or nude polish on embellishment-free nails to complement the shine of studs or charms. Add tiny painted details around your embedded elements—perhaps painted ripples around a dimensional duck or painted water droplets surrounding a stud. Consider matte topcoat on embellishment-free nails and glossy topcoat around (but not over) your studs for interesting textural variation.
10. Duck Silhouettes in Negative Space
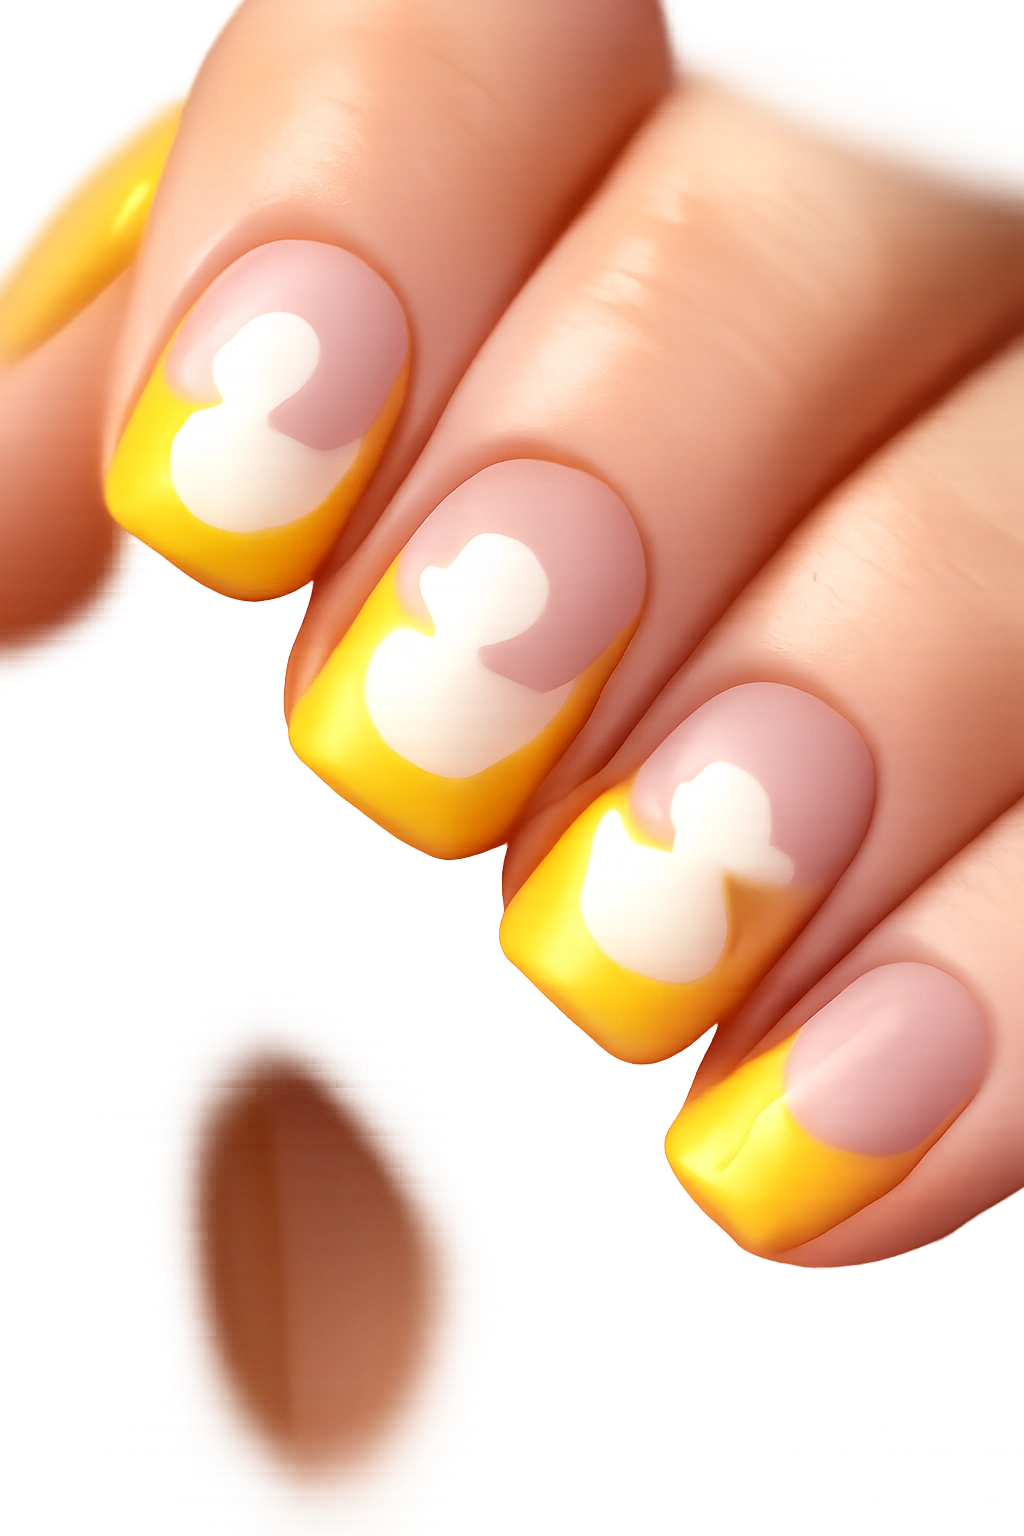
Create sophisticated graphic designs by using negative space—leaving portions of your natural nail visible to form duck silhouettes. Rather than painting yellow polish across the entire nail surface, this technique involves painting yellow around duck-shaped blank areas, allowing your natural nail (or a contrasting base color) to form the actual duck image. The result feels modern, gallery-quality, and requires minimal artistic skill since the absence of color defines the shape.
Executing Negative Space Designs
Plan your duck silhouette location before applying polish—sketch lightly with a pencil to determine exact positioning. Apply yellow polish carefully around your intended duck shape, using painter’s tape if you want perfectly clean edges. The negative space (unpainted area) will read as a duck against the yellow background due to the stark contrast. Consider using a nude or pale pink base under the yellow to create interesting color variation in your negative space.
Silhouette Design Variations
Paint one large duck silhouette spanning from the base of the nail to the tip for dramatic impact. Create a family of ducklings in decreasing sizes across the nail surface. Paint duck profiles in a line formation as if swimming in formation. Alternate nails—solid yellow on some and silhouette on others—for visual rhythm that feels intentional and balanced.
Finishing the Negative Space
Matte topcoat on the yellow areas with glossy topcoat on the negative space creates subtle textural contrast that enhances the design. Reverse this approach for different aesthetic effect—matte natural nail silhouette against glossy yellow background. Add painted details around your silhouettes (water ripples, grass, clouds) rendered in complementary colors to complete the scene. Keep negative space nails clean of other designs to let the silhouette concept remain the focal point.
11. Cartoon Ducks with Exaggerated Features and Expressions
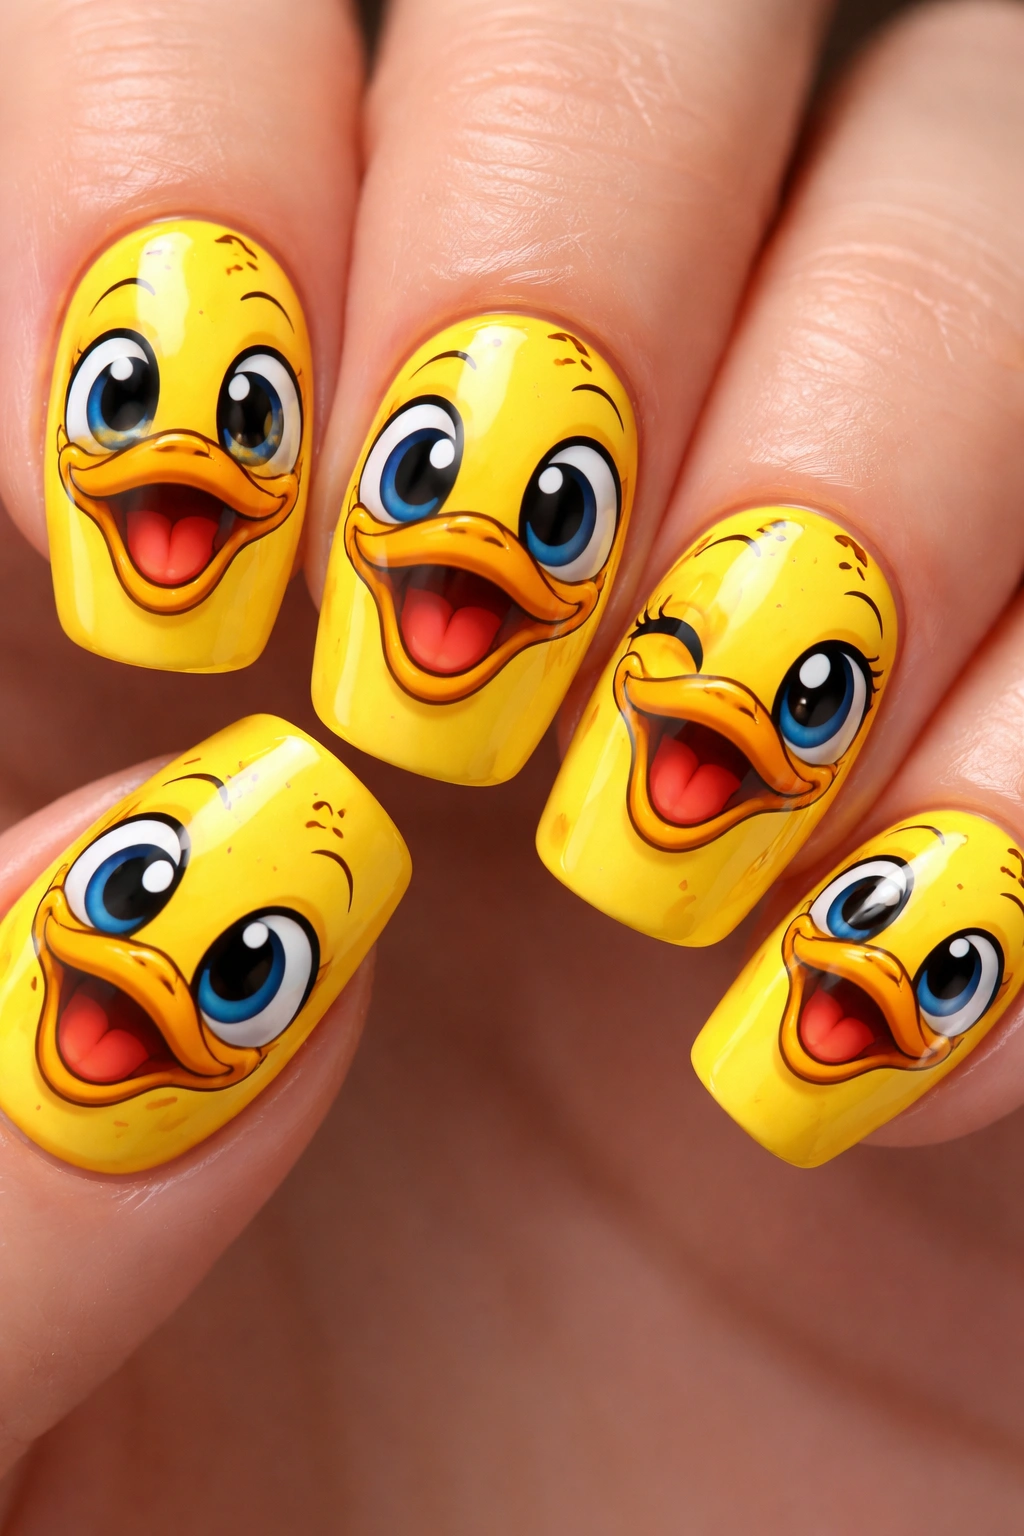
Lean into playfulness and personality by painting cartoon ducks with intentionally exaggerated features—oversized eyes, prominent beaks, comical expressions, or anthropomorphic details that make your ducks feel like characters rather than realistic birds. This approach celebrates fun and whimsy over accuracy, making it perfect for those who love bold, personality-driven nail art. Each duck becomes a distinct character with recognizable mood and charm.
Developing Duck Personality
Experiment with different eye styles—round and wide for surprised ducks, happy crescents for joyful ducks, sleepy lines for relaxed ducks. Vary beak shapes and angles to suggest different emotions. Add small details like tiny hats, scarves, or bow ties to give ducks personality and suggest they’re characters in a story. Paint some ducks with open beaks (singing or quacking) and others with closed beaks for expressive variety.
Color Saturation and Impact
Cartoon ducks often work better with very saturated, vivid colors rather than pale yellows—true bright canary yellow, golden yellow, or even neon-leaning yellows. Use bold contrasting colors for features (orange, red, or pink beaks; black or navy eyes) that make the cartoon quality unmistakable. Consider adding cheek details in light pink or rosy tones to enhance the cute, character-like quality.
Background and Story Elements
Add tiny background details that suggest what your cartoon ducks are doing—a duckling wearing sunglasses, a duck in a shower cap under water droplets, ducks with tiny bubbles suggesting they’re underwater. Paint small objects (a tiny fish, a water lily, a cloud) that add context and narrative. Include text if you’re comfortable—a small word bubble with “quack” or a simple label feels playful rather than cheesy in cartoon styles.
12. Ombré Yellow to White with Subtle Duck Accents
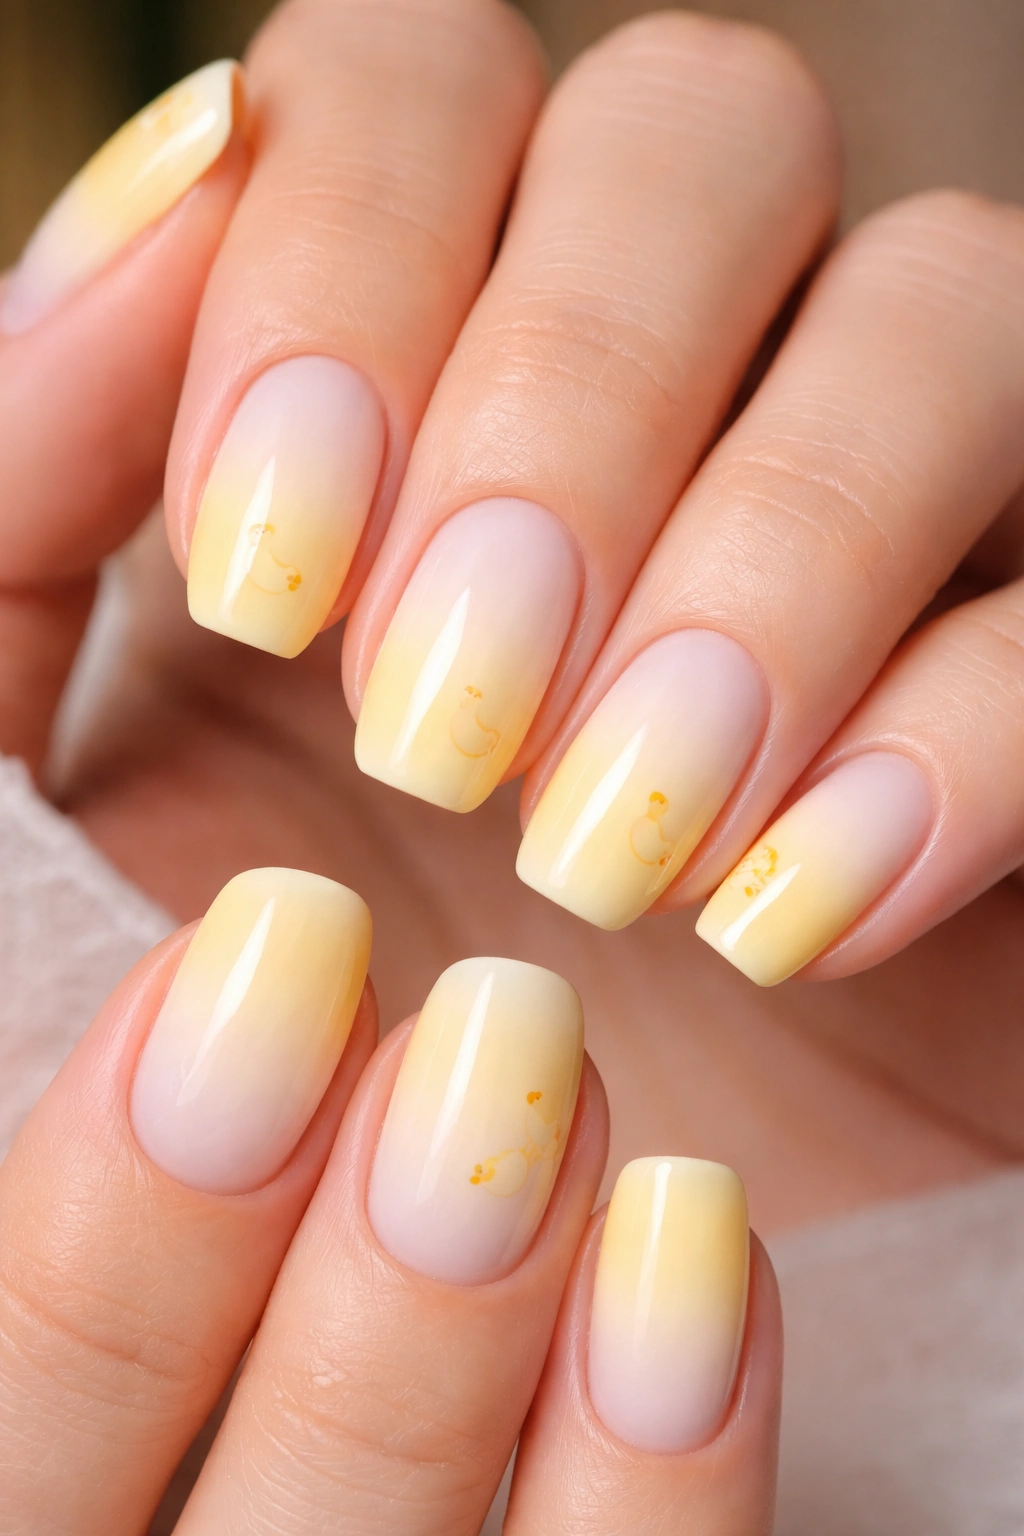
Create a sophisticated, refined manicure by blending yellow into white in an ombré gradient, then adding restrained duck details that feel like a whispered rather than a shout. This design appeals to those who love the yellow duck concept but prefer subtlety and wearability for everyday settings. The white ombré keeps the overall look polished while the duck accents maintain the playful theme.
Building a Flawless Yellow-to-White Ombré
The sponge method remains your best tool for achieving smooth gradients without visible lines or streaks. Blend pale yellow and white on a makeup sponge to create a middle tone, then press the sponge gently onto your nail at the transition point where yellow should shift to white. Build up the gradient gradually with multiple light applications rather than trying to achieve perfection in one heavy application. The finished gradient should show yellow concentrated near the nail base and gradually fade to white at the tip.
Subtle Duck Placement Strategy
Place small duck designs only on the yellow portion of the ombré for maximum visual harmony. Consider painting just duck silhouettes or simple outlines rather than detailed, filled-in ducks. Add ducks to only 2-3 nails while keeping others as pure ombré for balance. Include tiny black line ducks at the transition point between yellow and white, creating visual interest while maintaining sophistication.
Supporting Color Details
Add pale blue water ripples in the yellow section to suggest a water environment without competing with the gradient. Include fine black lines suggesting grass or reeds along where yellow meets white. Paint a single thin black line across each nail (perhaps at the transition point) to suggest a horizon line that grounds your ducks. Keep details minimal and monochromatic to preserve the elegant, refined aesthetic the ombré creates.
Final Thoughts
Yellow duck nail art transforms a whimsical concept into sophisticated, wearable designs through thoughtful color selection, technique, and detail work. Whether you choose adorable cartoon ducks, minimalist line illustrations, or dimensional embellishments, the key to a successful design lies in respecting your chosen style and executing it with intention. These designs work because they balance playfulness with polish—they make people smile without looking unprofessional or juvenile.
The real power of yellow duck nails is their versatility across skill levels and settings. Beginners can create charming designs using dotting tools and simple shapes, while advanced nail artists can push into watercolor techniques, complex shading, and intricate environmental details. Your skill level, time commitment, and personal aesthetic should guide which design appeals to you most—there’s genuinely a yellow duck design suited to every preference and capability.
Consider your lifestyle and how often you’re willing to touch up or replace your manicure when choosing your design. Simpler designs hold up beautifully through wear and tear, while more intricate work may chip sooner and require professional application or significant time investment. Once you find your perfect yellow duck design, the real joy emerges each time you glance at your nails and feel that spark of happiness—that’s what makes playful nail art worth the effort.
