

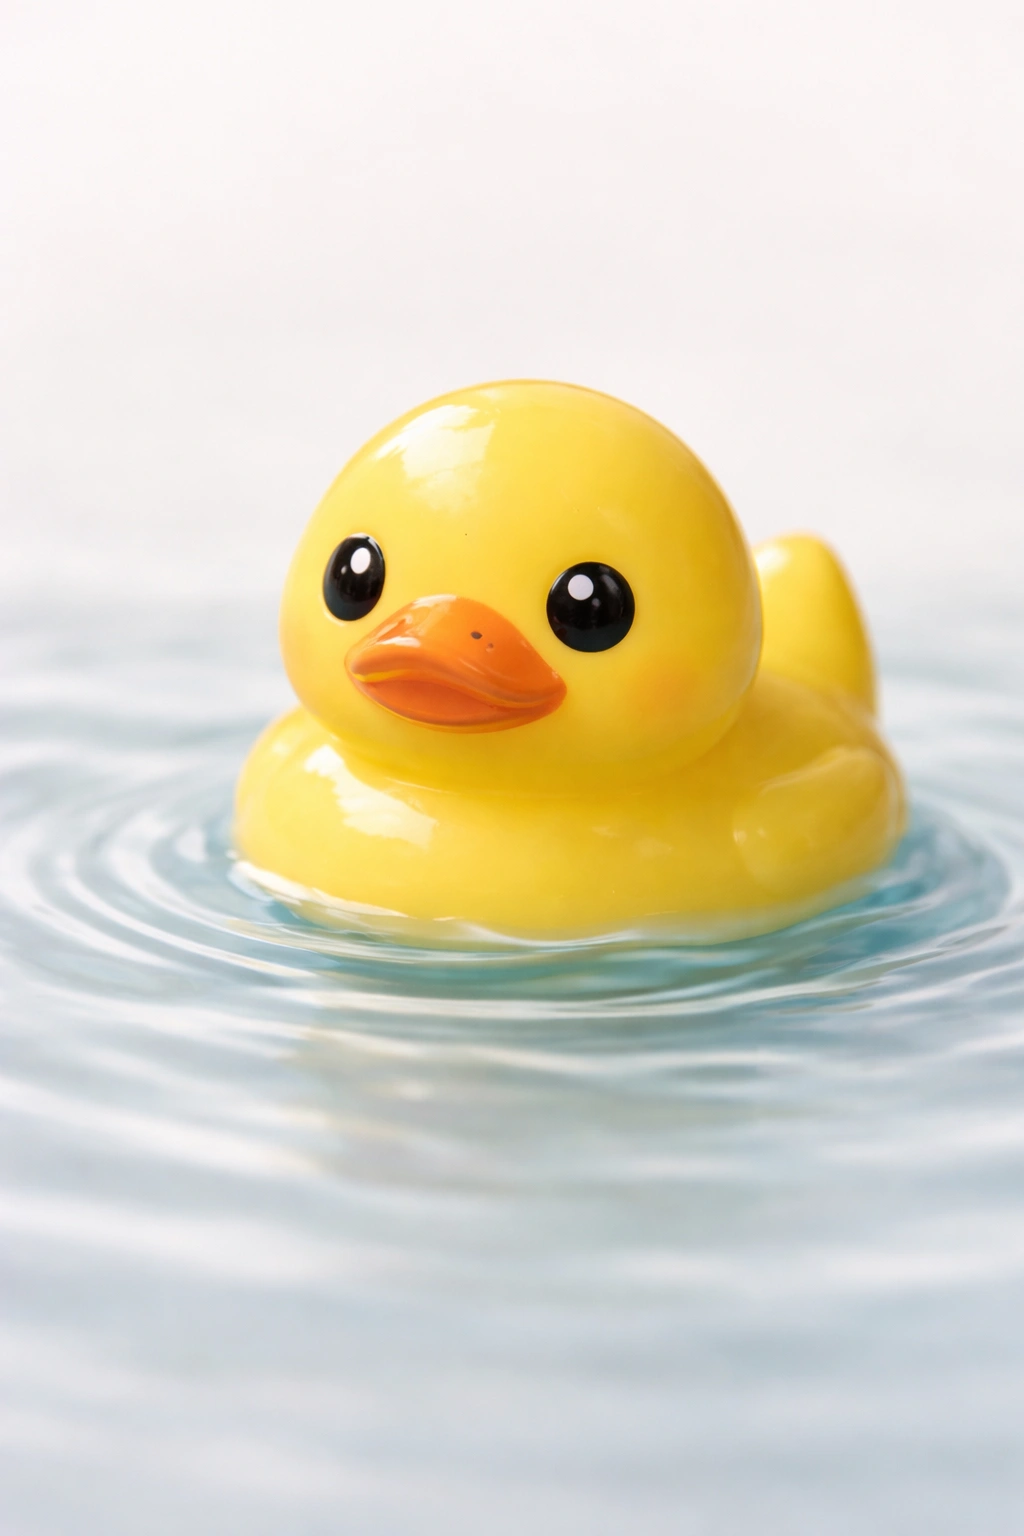
Yellow duck nails have become one of the most playful and instantly recognizable nail designs in modern manicure culture. The combination of bright yellow polish with adorable duck features—those signature eyes, beaks, and webbed feet—transforms your fingertips into miniature works of whimsical art. What makes this trend so appealing is that it works beautifully on short nails, where space constraints actually force designers to be more creative and intentional with their placement and detail work.
Short nails are often overlooked in favor of long acrylics and extended gel designs, but they offer genuine advantages for duck nail art. The compact canvas means you can pull off bold, recognizable designs without them feeling overwhelming or difficult to maintain. Yellow duck nails on short nails read as confident, fun, and deliberately chosen—not like an afterthought. Plus, there’s something refreshingly low-maintenance about a short nail length that pairs perfectly with a design that’s meant to make you smile.
Whether you’re drawn to minimalist interpretations, three-dimensional embellishments, or intricate hand-painted details, the following 18 designs offer something for every skill level and aesthetic preference. Each design works specifically with short nail dimensions, meaning they’ll look polished and intentional rather than cramped. You’ll find everything from simple cute approaches to sophisticated color combinations that happen to feature yellow and ducks as their central elements.
Let’s explore 18 ways to rock duck nails on your shorter nail beds.
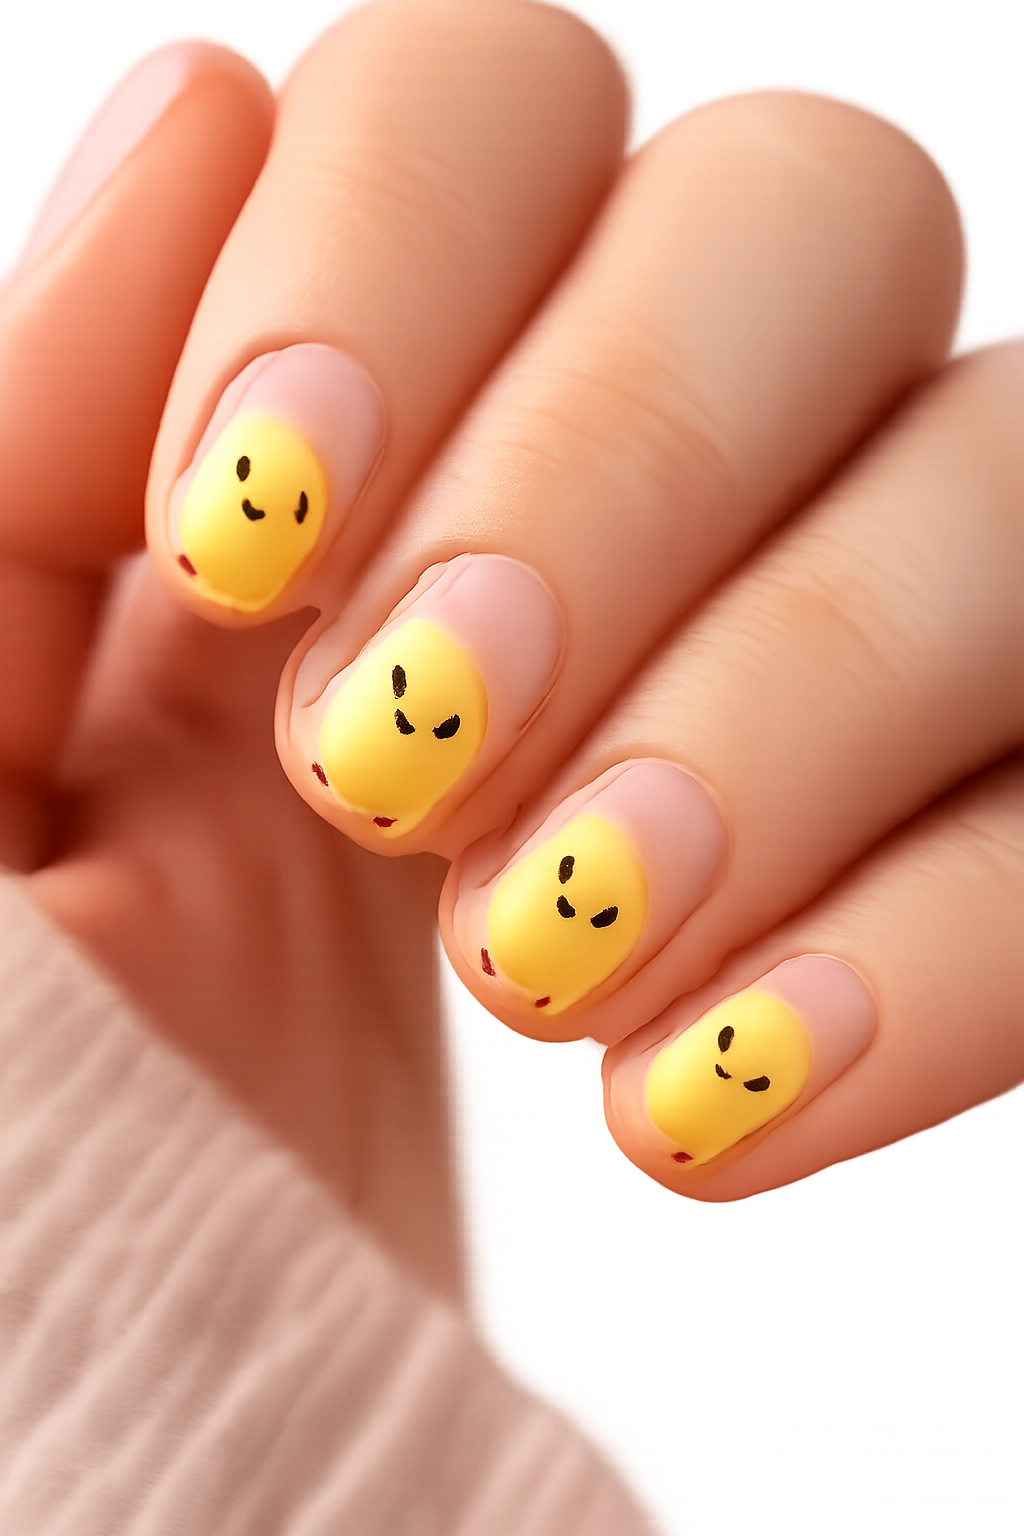
1. Classic Simple Duck Face on Solid Yellow
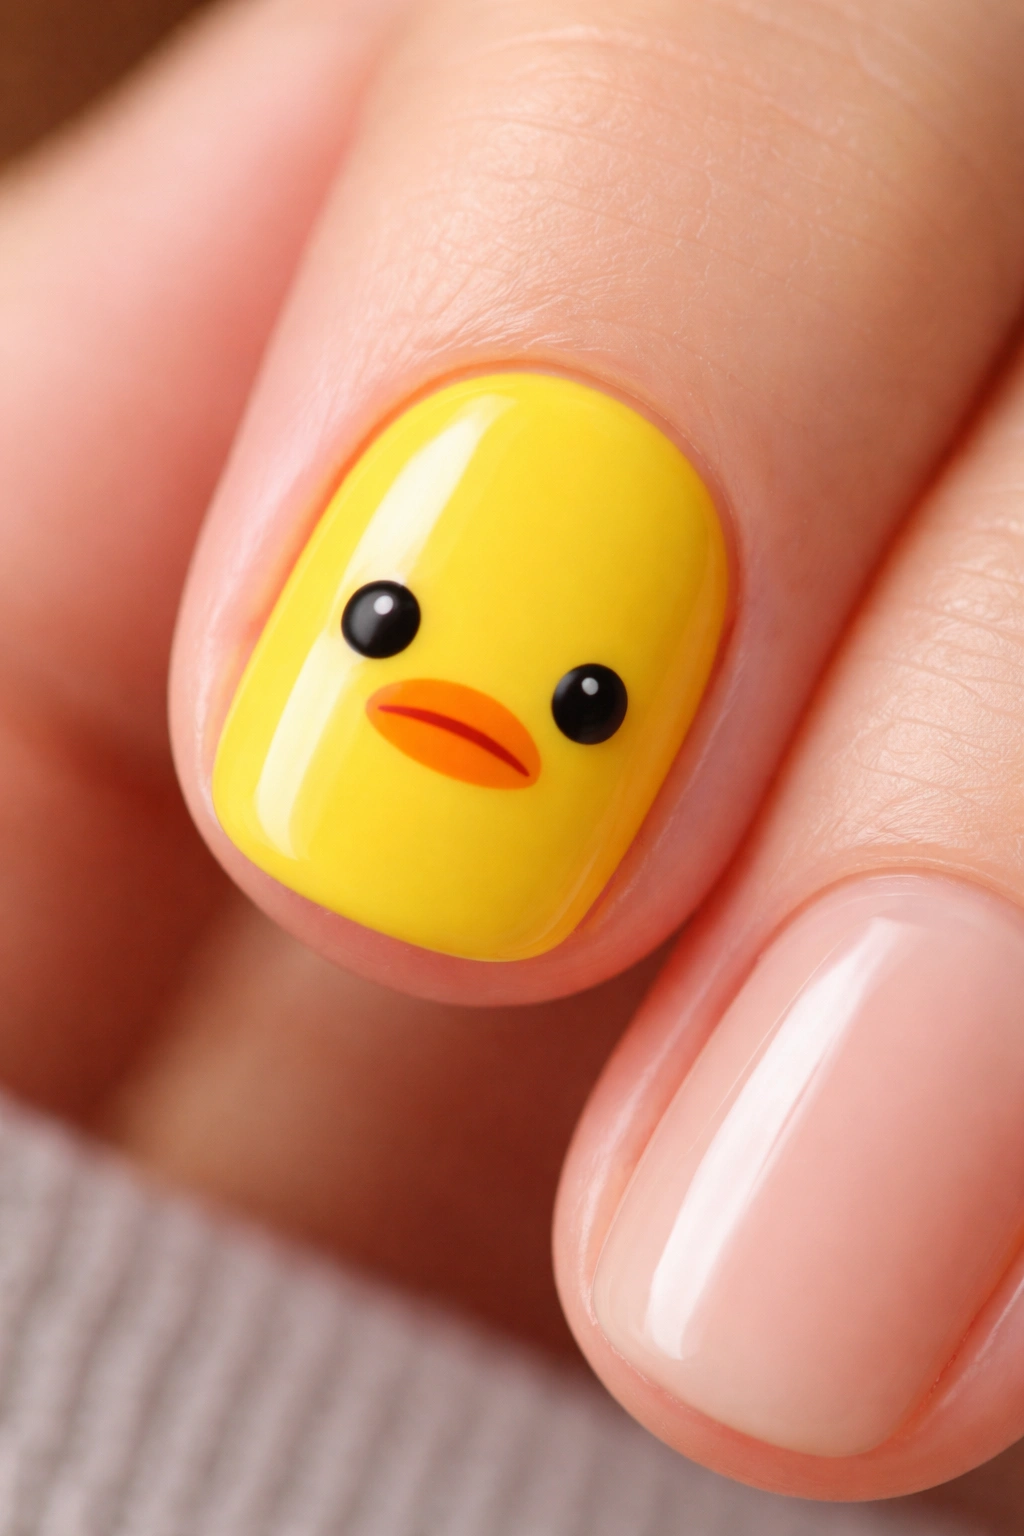
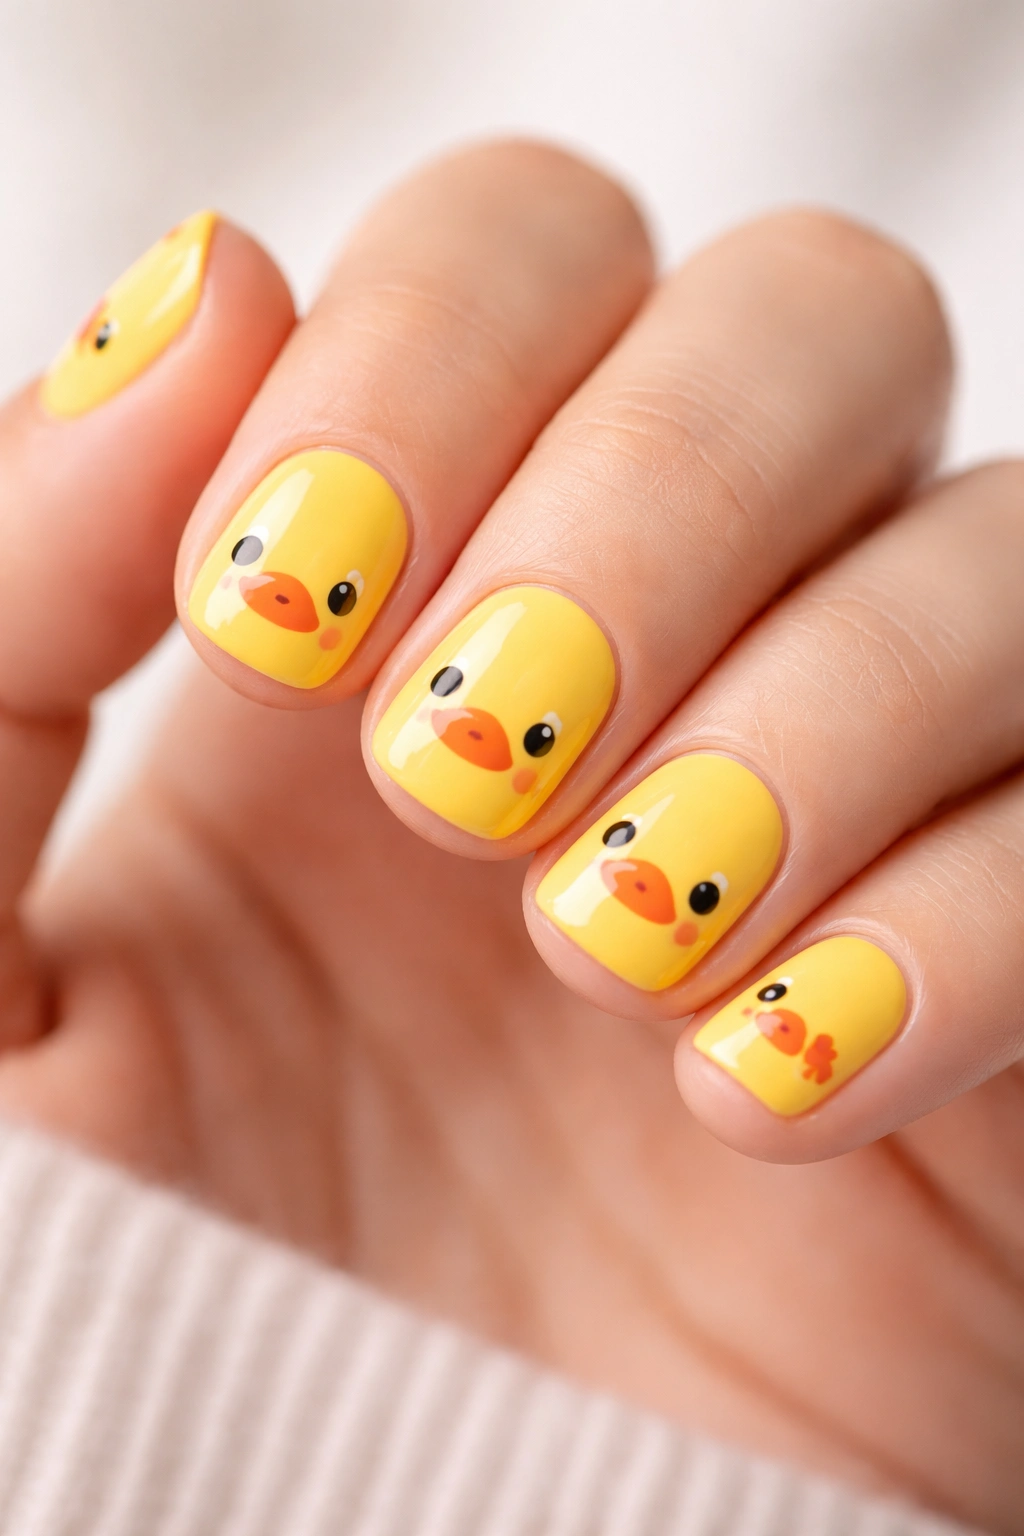
This is the design that started the duck nail trend, and it remains the most charming. A solid, bright canary yellow base coat covers the entire nail, with a minimalist duck face created using a thin black liner or black gel pen. Two small black dots serve as eyes, a small black triangle or curved line forms the beak, and an optional tiny red line adds a hint of dimension. The beauty of this design lies in its bold simplicity—nothing distracts from the cheerful yellow and that instantly recognizable duck expression.
Why It’s the Perfect Starter Design
This style works on every nail length, but short nails showcase it especially well because the design has room to breathe without competing with excess nail surface area. The hand-painted quality of the eyes and beak is achievable even if you’ve never done detailed nail art before. You can recreate this look with just two colors of polish and a steady hand, or use a thin gel brush for more control and durability.
Essential Details to Perfect
- Choose a yellow shade that’s bright and warm—avoid pale, buttery yellows that lack visual impact on short nails
- Keep the duck face centered on the nail for maximum charm and balance
- Use a matte top coat to give the design a modern finish, or a glossy seal for that traditional polished look
- The duck face should take up roughly one-third to one-half of the nail surface on short nails
Pro tip: Practice drawing the duck face on paper first, scaling it to match your actual nail size. This helps you develop the right proportions before committing to polish.
2. Gradient Yellow to White Duck Ombre
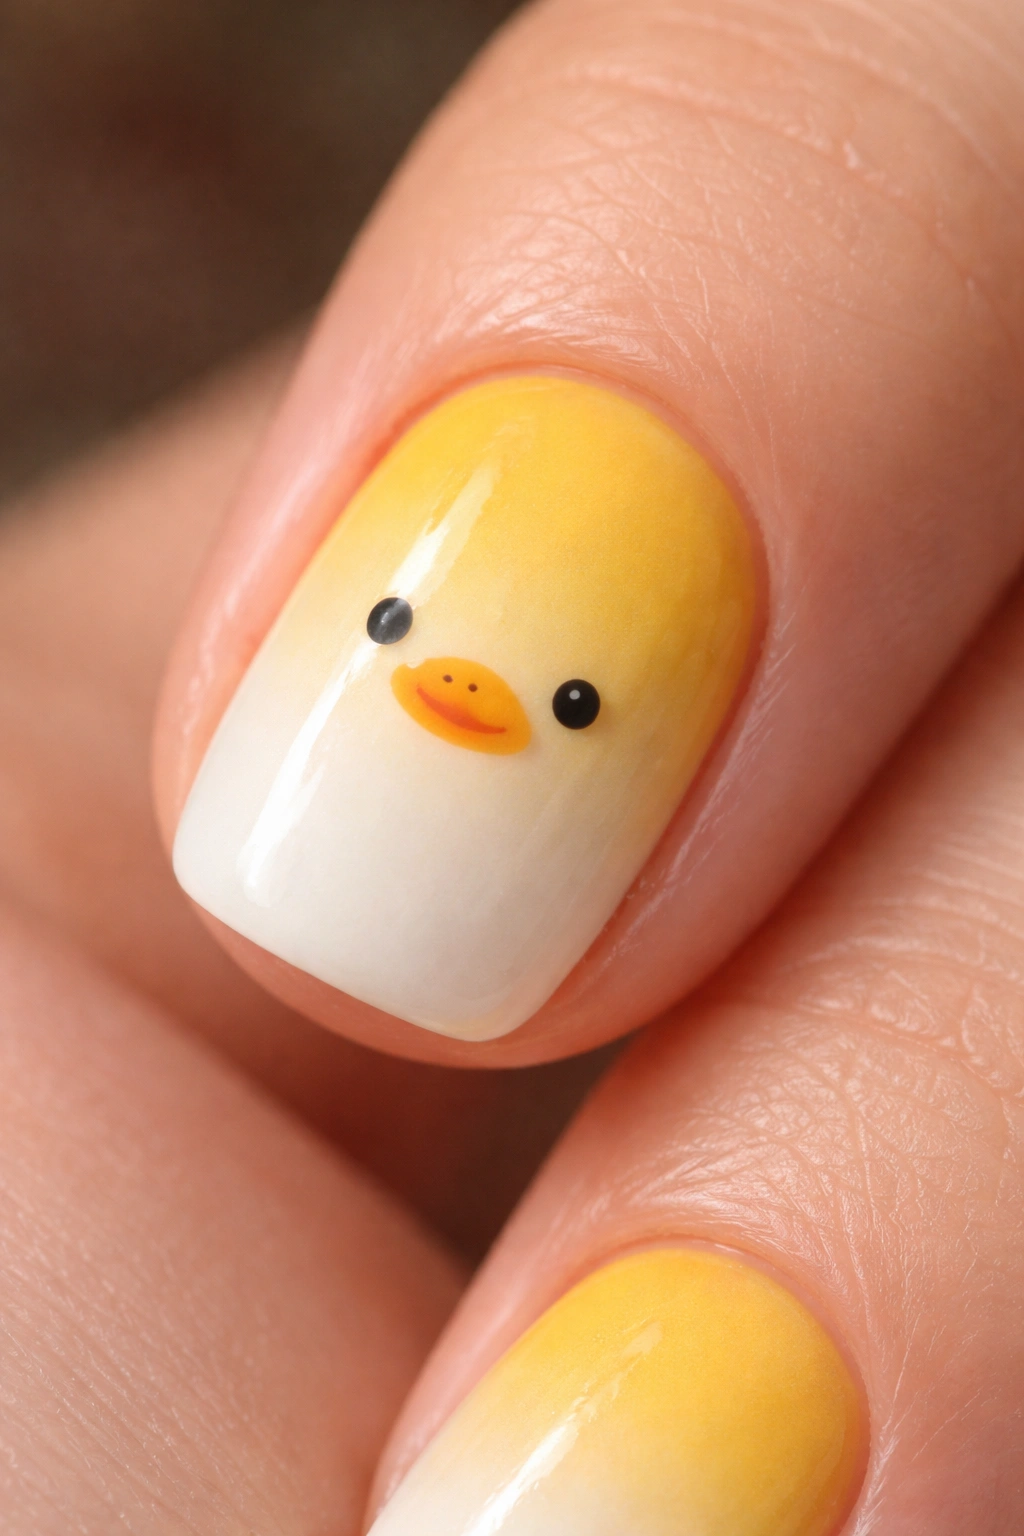
This design blends a rich yellow at the base of the nail and fades gradually into creamy white toward the tip, creating a gentle ombre effect. A simple duck face in black sits somewhere in the transition zone where the colors meet, giving it a soft, ethereal quality. The gradient softens the brightness of pure yellow while maintaining the cheerful energy, and the fading color creates visual movement across the short nail surface.
What Makes It Stand Out
The ombre technique adds sophistication to an otherwise whimsical design. Short nails benefit immensely from gradient effects because the visual journey from one color to another is more noticeable and deliberate on a compact surface. The gradient draws the eye across the nail, making the nail appear slightly longer and more elongated than it actually is—a clever visual trick.
How to Achieve the Gradient
- Use a makeup sponge to blend yellow and white polish together on the nail
- Start with the darker yellow at the base and gradually introduce white polish higher toward the tip
- Blend using gentle stippling motions with the sponge for seamless color transition
- Seal with a clear gel or polish to protect the ombre and lock it in place
- Add your black duck face over the gradient once the ombre is fully set
3. Cute Yellow Duck with Tiny Feet and Webbing Detail

Take the classic duck face concept and add precise, tiny webbed feet below the face using thin black lines. Three toes on each foot, connected by delicate webbing lines, create an anatomically cute interpretation that feels more playful and character-forward than the simple dot-and-line approach. The feet sit lower on the nail, with the duck face occupying the upper two-thirds, creating a charming full-body composition.
Why Feet Make It More Memorable
Adding feet transforms the design from just a face into a complete, recognizable duck character. On short nails, this full-body approach uses the space efficiently without ever feeling crowded. The webbed detail requires a steady hand and a very fine brush, but even slight imperfections in the webbing look intentional and charming—as if your duck is uniquely your own.
Technical Execution Tips
- Use a 0000 or 000 ultra-fine brush for the webbing detail to avoid thick, heavy lines
- Draw the webbing first in very light gray or pale black, then outline it in darker black for definition
- Keep the feet proportionally small relative to the face so they don’t dominate the design
- Add a tiny dot of red in the center of each foot pad if you want extra personality
4. Yellow Nails with Tiny Duck Silhouette

Instead of a realistic or cartoonish duck, use a minimalist black silhouette—just the recognizable duck shape rendered in pure solid black. The silhouette approach is bold and modern, eliminating the need to paint facial features. One clean, solid black duck shape sits centered on each bright yellow nail, creating a striking graphic quality that photographs beautifully and feels intentionally artistic.
The Modern Minimalist Appeal
This design strips away all extraneous detail and focuses purely on the iconic duck profile. It appeals to people who love the duck nail trend but prefer a more graphic, less cutesy aesthetic. The contrast between the vibrant yellow and the solid black silhouette is high and professional-looking, making it suitable for various settings beyond just playful casual wear.
Executing the Perfect Silhouette
- Create a duck silhouette template on paper first, testing the proportions on your actual nail size
- Use a nail stamper or hand-paint with a thin black brush for crisp, defined edges
- Position the silhouette slightly off-center for a more interesting composition than dead-center placement
- Consider placing multiple silhouettes (different sizes or facing directions) on some nails for a dynamic scattered effect
5. Yellow Duck Nails with Rhinestone Eyes
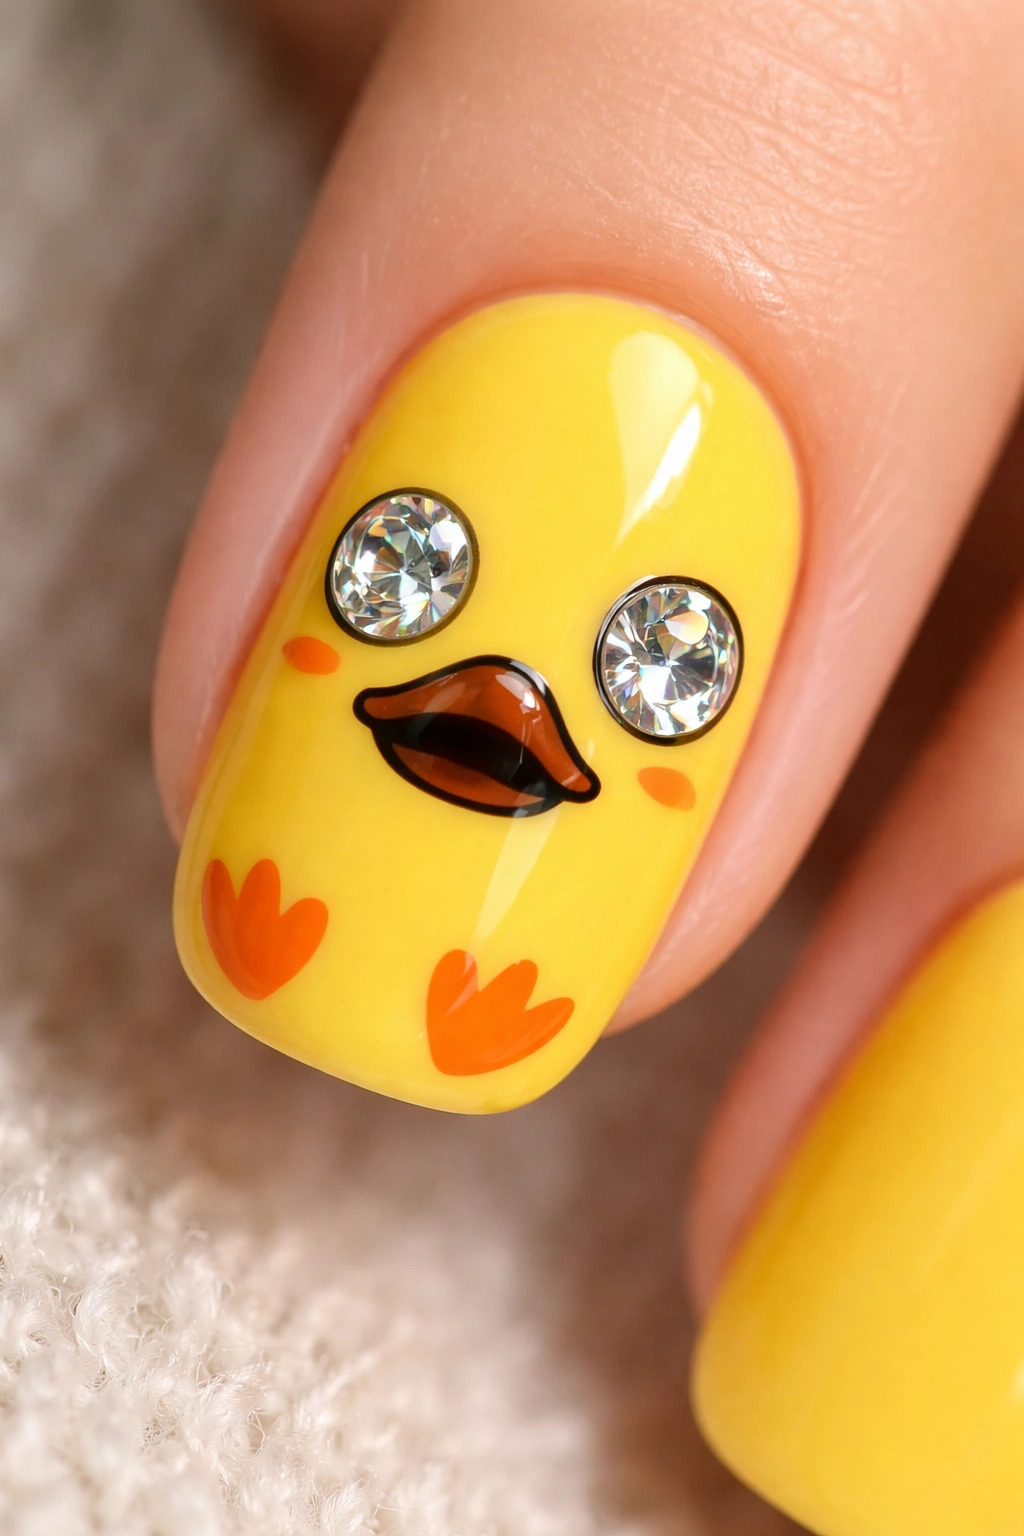
Keep the yellow base and simple duck face design, but replace the painted black dots with tiny, shimmering rhinestones. Clear rhinestones add sparkle, or use black rhinestones for a more defined, glamorous take. The rest of the duck—the beak and any additional details—remains hand-painted, but those rhinestone eyes catch light and add dimension that makes the design feel more luxe and special than painted versions.
Why Rhinestones Elevate the Design
Rhinestones instantly transform a cute design into something more polished and intentional-looking. The subtle shine and movement of the stones catch light as your hands move, creating an interactive quality that delights both you and anyone who sees your nails. On short nails, a modest rhinestone application never overwhelms—instead, it adds just enough sparkle to make the design feel elevated.
Application and Durability
- Use high-quality nail rhinestones (not craft rhinestones, which fall off easily) and a specialized nail glue or gel adhesive
- Place rhinestones before sealing with top coat so they’re permanently secured
- If using gel polish, use a non-wipe matte top coat under rhinestones for better grip, then seal after placement
- Keep the rhinestone count modest—just two for eyes is elegant; additional decorative stones risk looking cluttered on short nails
6. Sunshine Yellow with Hand-Painted Duck Portrait
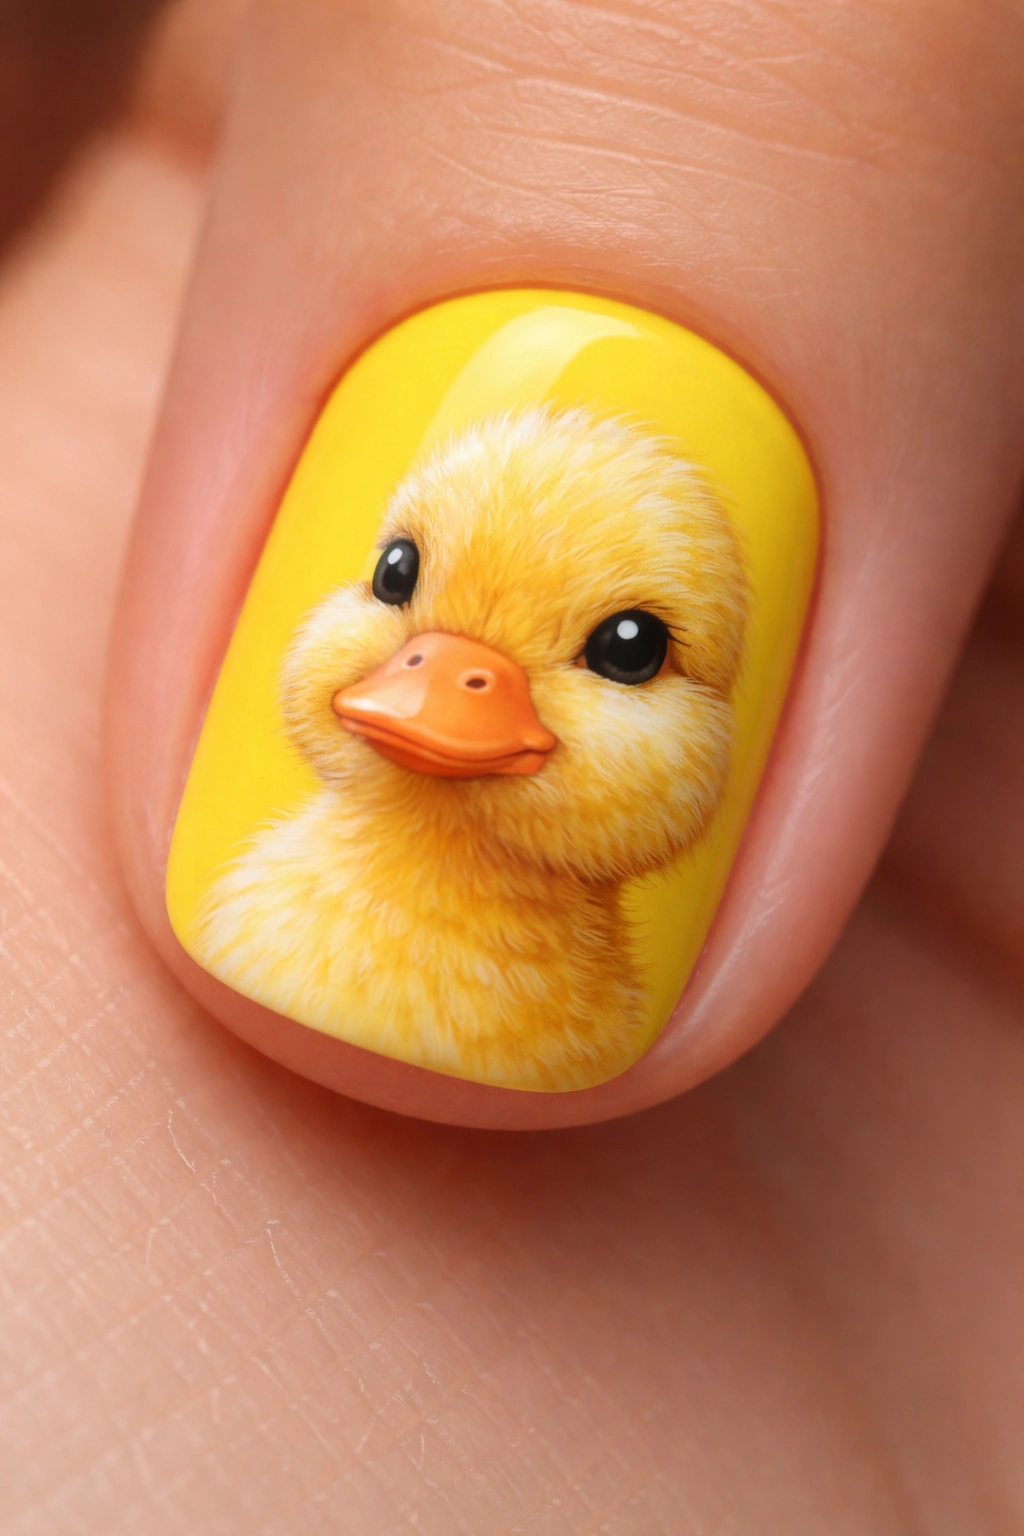
Move beyond the simple smiley-face approach and paint a more detailed duck portrait that shows some three-dimensional form. Add shading around the beak to suggest depth, paint tiny highlights in the eyes, include a hint of the duck’s neck extending downward, and use slight color variation to suggest feathering. The portrait sits centered on the yellow nail and takes up a good portion of the nail surface, creating a mini artwork feel.
Developing Your Portrait Style
This design requires more skill than simpler versions, but the payoff is a nail that genuinely looks like a tiny painting. The added detail creates a narrative quality—this is a specific duck with personality, not just a generic duck motif. Short nails actually work wonderfully for portrait-style work because the smaller scale forces you to focus on essential details, eliminating unnecessary complexity.
Portrait Painting Approach
- Sketch the duck lightly with a pencil first so you can erase and adjust proportions before committing to paint
- Use thin layers of black and gray to build shading gradually rather than applying heavy dark lines all at once
- Add a tiny white highlight in the top corner of each eye to create dimension and bring the portrait to life
- Consider painting the duck’s body slightly turned (three-quarter view rather than straight-on) for visual interest
7. Yellow and White Duck Nail Gradual Color Block
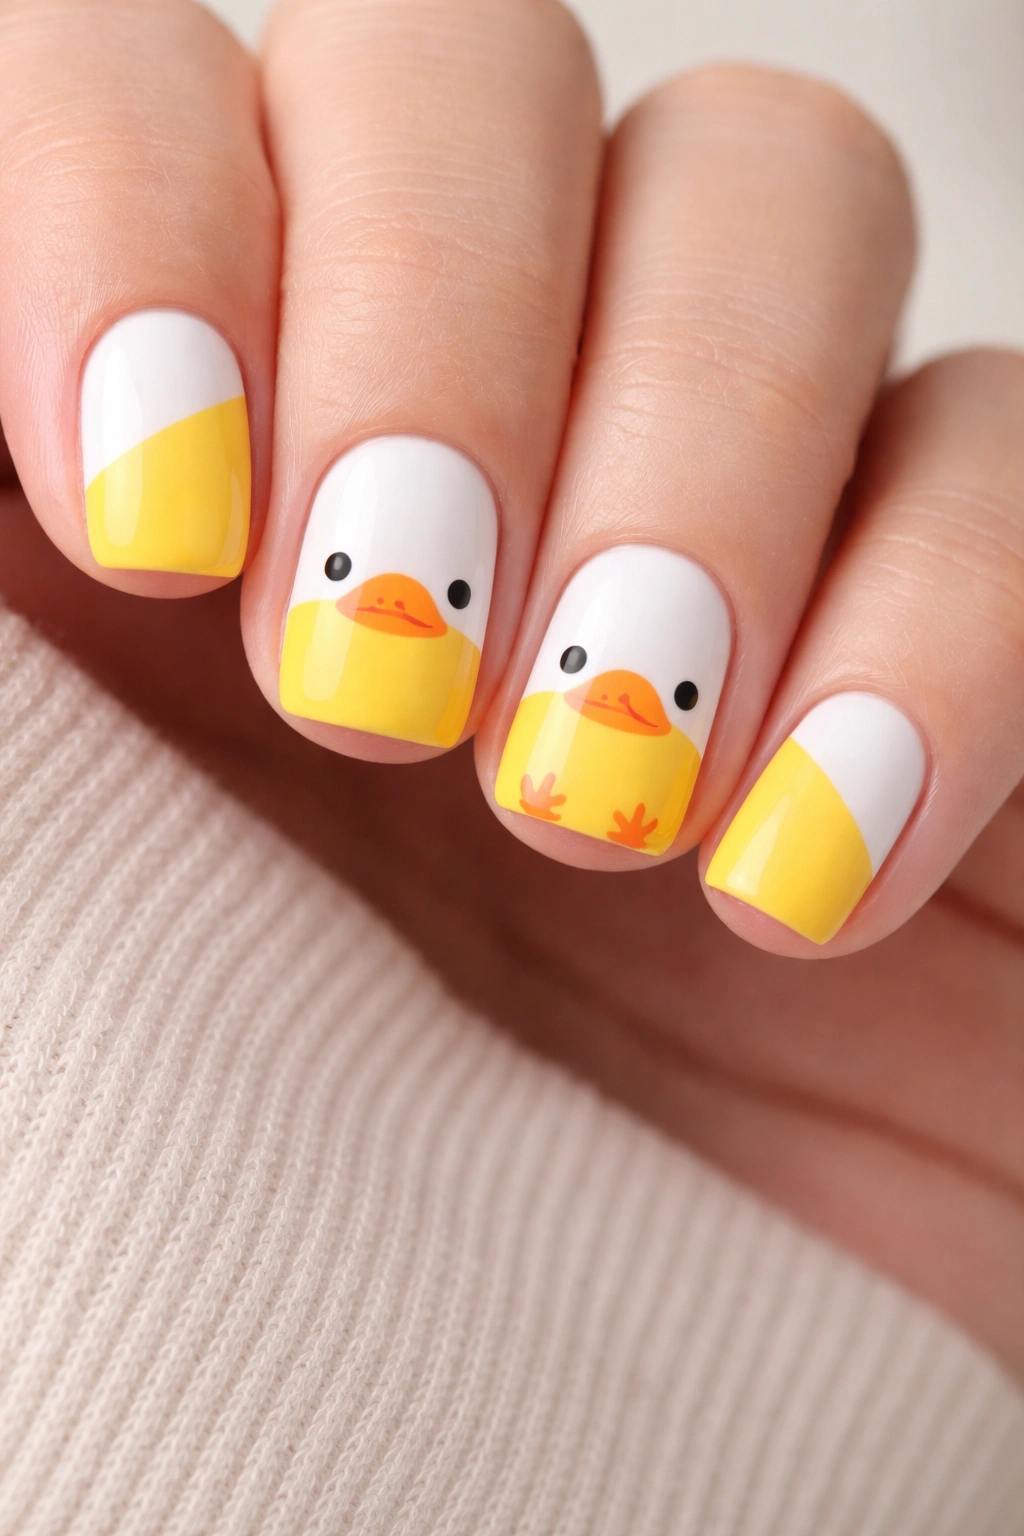
Split each nail into two clean color blocks—a bright yellow section and a crisp white section—with the duck design straddling the line between both colors. The duck face sits partly in the yellow, partly in the white, creating a clever visual composition that uses both colors equally. This geometric approach feels modern and intentional, like the design was deliberately planned rather than simply painted onto a yellow base.
Why Color Blocking Works on Short Nails
Color blocking draws the eye across different areas of the nail and creates visual interest through contrast and composition, not just through detailed painting. On short nails, this approach maximizes the impact of your design without requiring intricate detail work. The clean lines between colors also make the design feel graphic and polished, not precious or overly decorated.
Creating Clean Color Blocks
- Use painter’s tape at a diagonal angle to separate the two colors for razor-sharp edges
- Apply thin, even coats of each color to avoid thick, obvious brush marks
- Allow the first color to fully dry before applying tape to prevent sticking and lifting
- Paint the duck face over the dried color block, allowing it to cross into both colors for visual unity
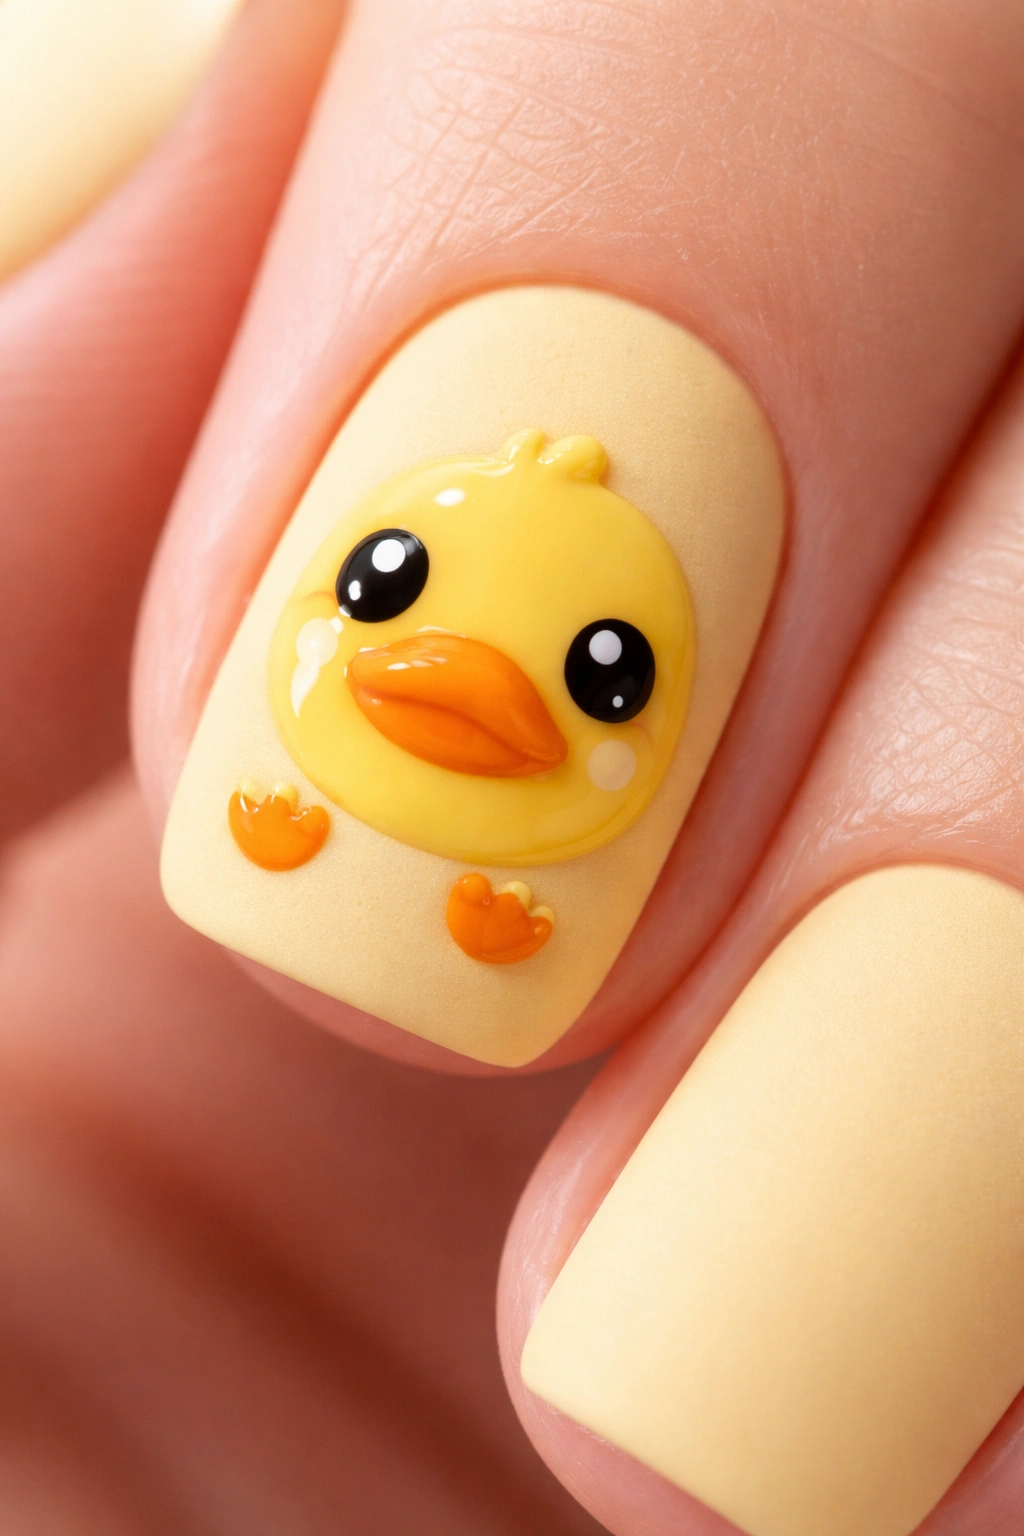
8. Pastel Yellow Duck with Blush Pink Cheeks
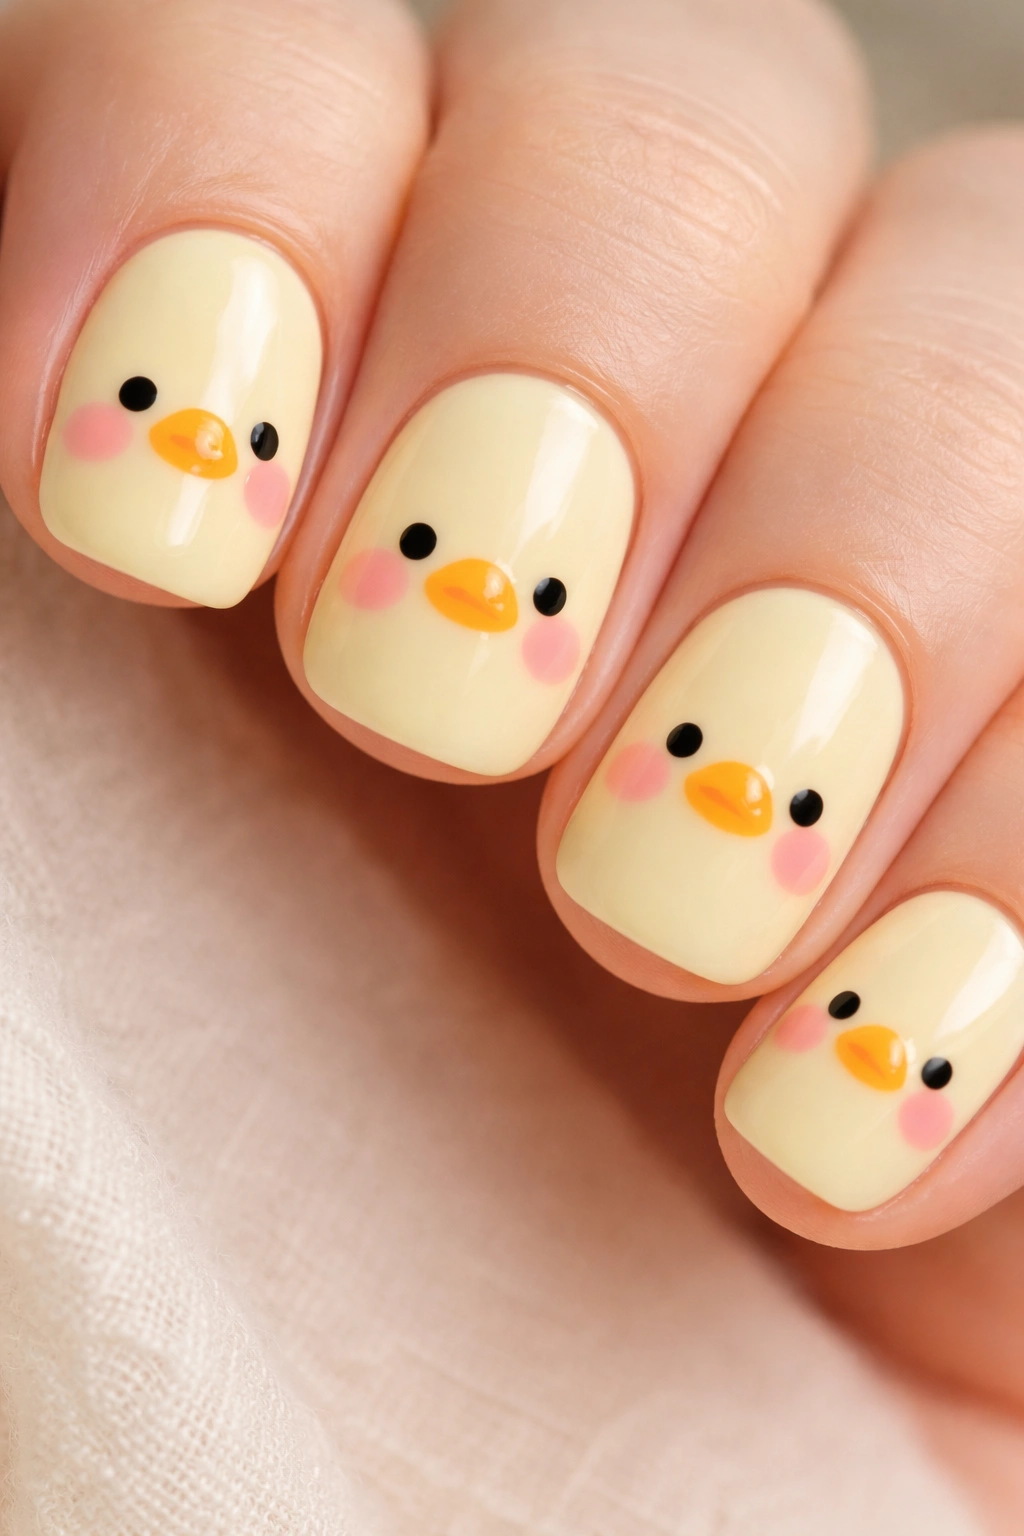
Start with a softer, more muted yellow—think pale, buttery yellow rather than neon—and add rosy pink cheeks to the duck face using a thin brush and a warm pink shade. Two rounded circles of pink on either side of the duck’s face create a sweet, innocent quality that feels vintage and charming. Black eyes and a simple beak complete the design, but those pink cheeks become the signature detail that everyone notices and remembers.
The Gentle Sophistication of Pastels
Pastel yellow is less visually aggressive than bright yellow while remaining unmistakably cheerful. The addition of pink cheeks softens the design further, creating a personality that reads as gentle and approachable rather than bold or playful. This combination appeals to people who love the duck trend but want something a bit more subdued or sophisticated for professional settings or personal preference.
Painting the Perfect Blush Cheeks
- Use a very light touch with the pink shade so the cheeks don’t look heavy or disproportionate
- Blend the edges of the pink cheeks slightly by stamping over them with a dry brush to create a gradient effect
- Position the cheeks symmetrically on either side of the duck’s beak for balanced, intentional-looking placement
- Keep the cheeks small enough that they complement the overall design rather than dominating it
9. Yellow Duck Nail with Tiny Floating Bubbles
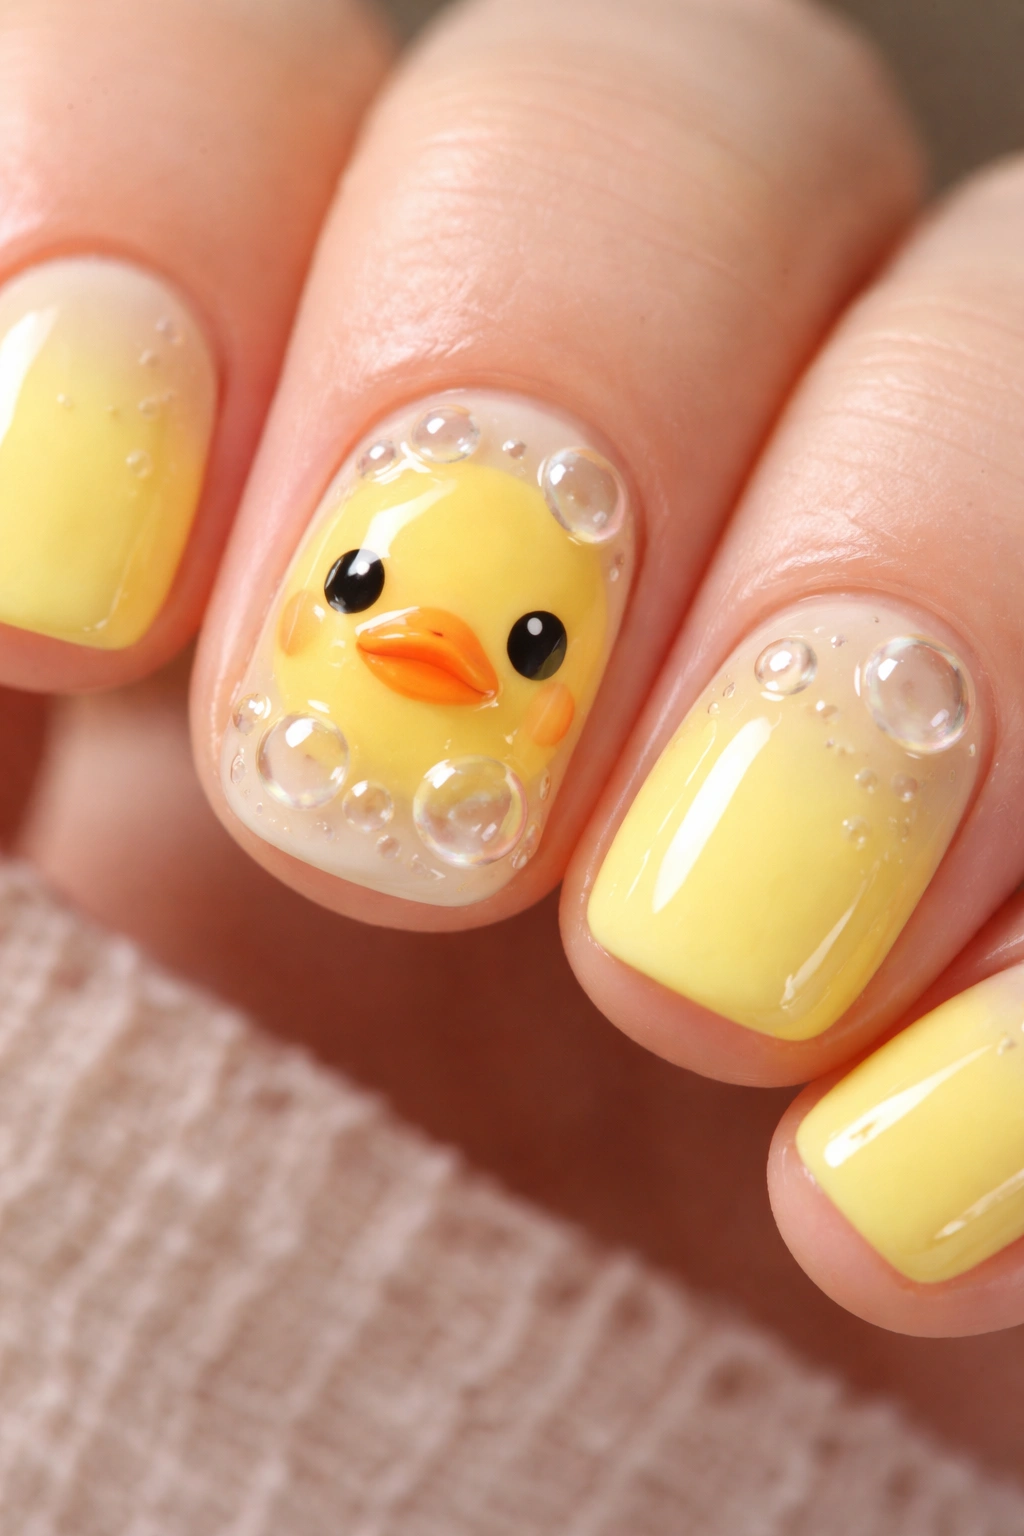
Paint the primary yellow duck face design, then add 4-6 tiny circles (bubbles) floating around or below the duck using white or translucent gel polish with a domed effect. The bubbles are three-dimensional, standing slightly up from the nail surface, and optionally include a tiny white highlight to suggest they’re catching light. This design adds a playful, animated quality—as if the duck is underwater or surrounded by a cheerful bubbling atmosphere.
Creating the Bubble Effect
Bubbles elevate a simple design into something more dimensional and modern. They suggest movement and playfulness, making the nail feel animated and dynamic. Even on very short nails, a few subtle bubbles don’t overwhelm; instead, they add just enough texture and visual variety to keep the design feeling fresh and intentional.
Building Dimensional Bubbles
- Use thick gel polish or builder gel to create the domed bubble shapes directly on the nail
- Apply in small increments, allowing each layer to cure before adding more for proper dimension
- Once cured, add a tiny white or pale yellow highlight on the upper portion of each bubble
- Seal the entire design with a clear gel to protect the bubbles and create a smooth, professional finish
10. Transparent or Nude Base with Bright Yellow Duck Design
Instead of a solid yellow background, use a nude, skin-tone, or barely-there transparent base that lets your natural nail show through (or mimics the appearance of clean, healthy nails). The yellow duck design pops dramatically against this neutral backdrop, creating striking contrast without the visual weight of a completely colored-in nail. The design reads as more wearable and sophisticated for work or formal settings while maintaining the playful duck motif.
The Sophistication Factor
This approach proves that duck nails don’t require bold color everywhere to be charming. The neutral canvas lets the duck design be the clear focal point without any competing visual elements. On short nails, this restraint creates an elegant, polished quality that appeals to people who want whimsy without announcing it loudly to the world.
Achieving the Sheer Neutral Base
- Use a nude gel or polish that matches your skin tone, or skip base color entirely and apply a clear topcoat to protect your natural nails
- Paint the duck in a bright, saturated yellow for maximum contrast against the neutral background
- Keep all other design elements minimal and clean so the duck remains the unquestionable focal point
- Seal with a glossy topcoat that makes the nude base look polished and intentional rather than unfinished
11. Yellow Duck Nail with Tiny Flowers and Foliage
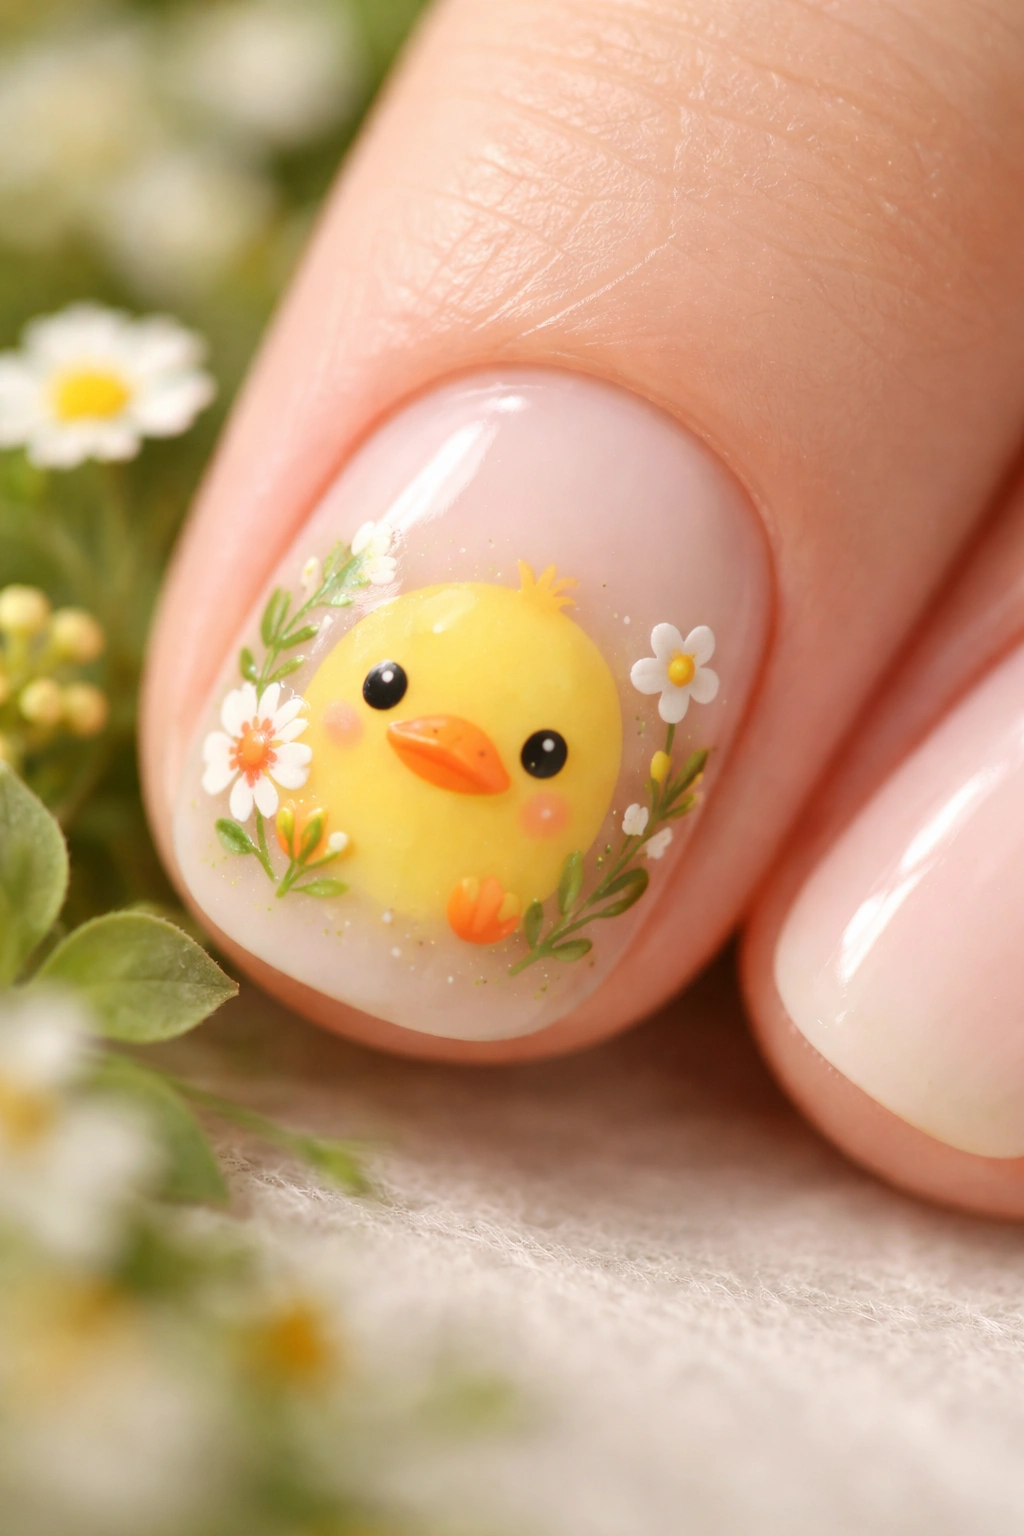
Combine the yellow duck with a small floral garden motif. Paint the duck face in the center-to-upper portion of the nail, then add 2-3 tiny flowers in complementary colors (pale pink, soft green, light blue) and small leaves scattered below or around the duck. The overall effect is that the duck is sitting in a miniature garden, creating a whole scene rather than just featuring an isolated duck. This garden-inspired approach appeals to nature lovers and adds botanical beauty to the whimsy of the duck design.
Creating a Cohesive Scene
Instead of scattered random elements, think of the nail as a tiny landscape composition. The duck becomes a character within that landscape, not the only element competing for attention. This approach requires slightly more painting skill but results in a design that feels thoughtful and intentional, like you’ve created a narrative rather than simply painted two separate decorative elements.
Painting the Garden Scene
- Sketch the entire composition lightly before committing to paint so proportions work across the whole nail
- Paint the duck first so you can plan the garden around it rather than vice versa
- Use pale, muted flower colors so they support the duck as the primary focus
- Add tiny green stems and leaves that feel organic and naturally positioned, not rigidly perfect
12. Yellow Duck Nails with Metallic Gold Accent Lines
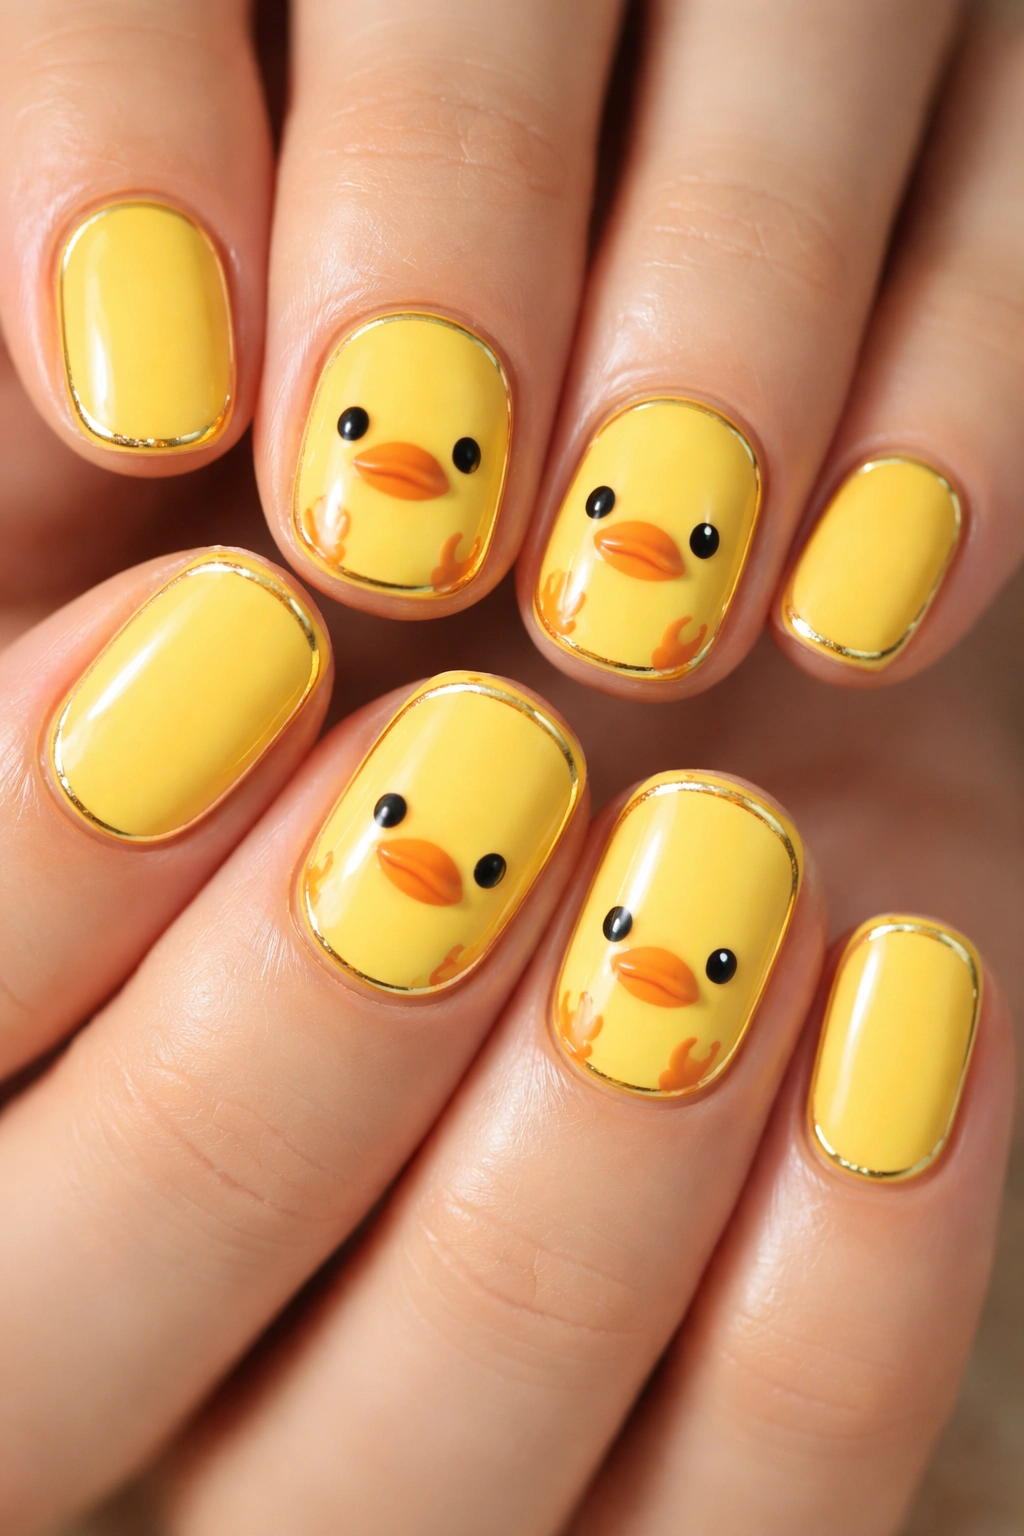
Paint the basic yellow duck design, then add fine metallic gold lines that outline the duck’s silhouette, frame the duck face, or create decorative borders around the edge of the nail. The gold acts as sophisticated accent detailing that elevates the playful duck into something more luxe and intentional. Use gold gel or metallic gel polish applied with an ultra-fine brush for crisp, precise lines that catch light beautifully.
Why Metallic Details Matter
Metallics add instant sophistication and polish to even the simplest designs. The tiny gold lines signal that you’ve put thought and care into the manicure, transforming what might read as a simple cute design into something more intentional and fashion-forward. On short nails, these fine metallic accents don’t overwhelm—instead, they add visual interest and dimension without bulk.
Working with Metallic Polish
- Use gel metallics rather than regular polish for better opacity and durability
- Apply metallics over a dry base coat layer so they have something to grip and don’t slip around
- Use the very tip of an ultra-fine brush and let the polish do the work rather than pressing hard
- Metallic polish is more forgiving of slightly unsteady lines than black, so don’t fear minor imperfections
13. Yellow Duck with Gradient Rainbow Wings
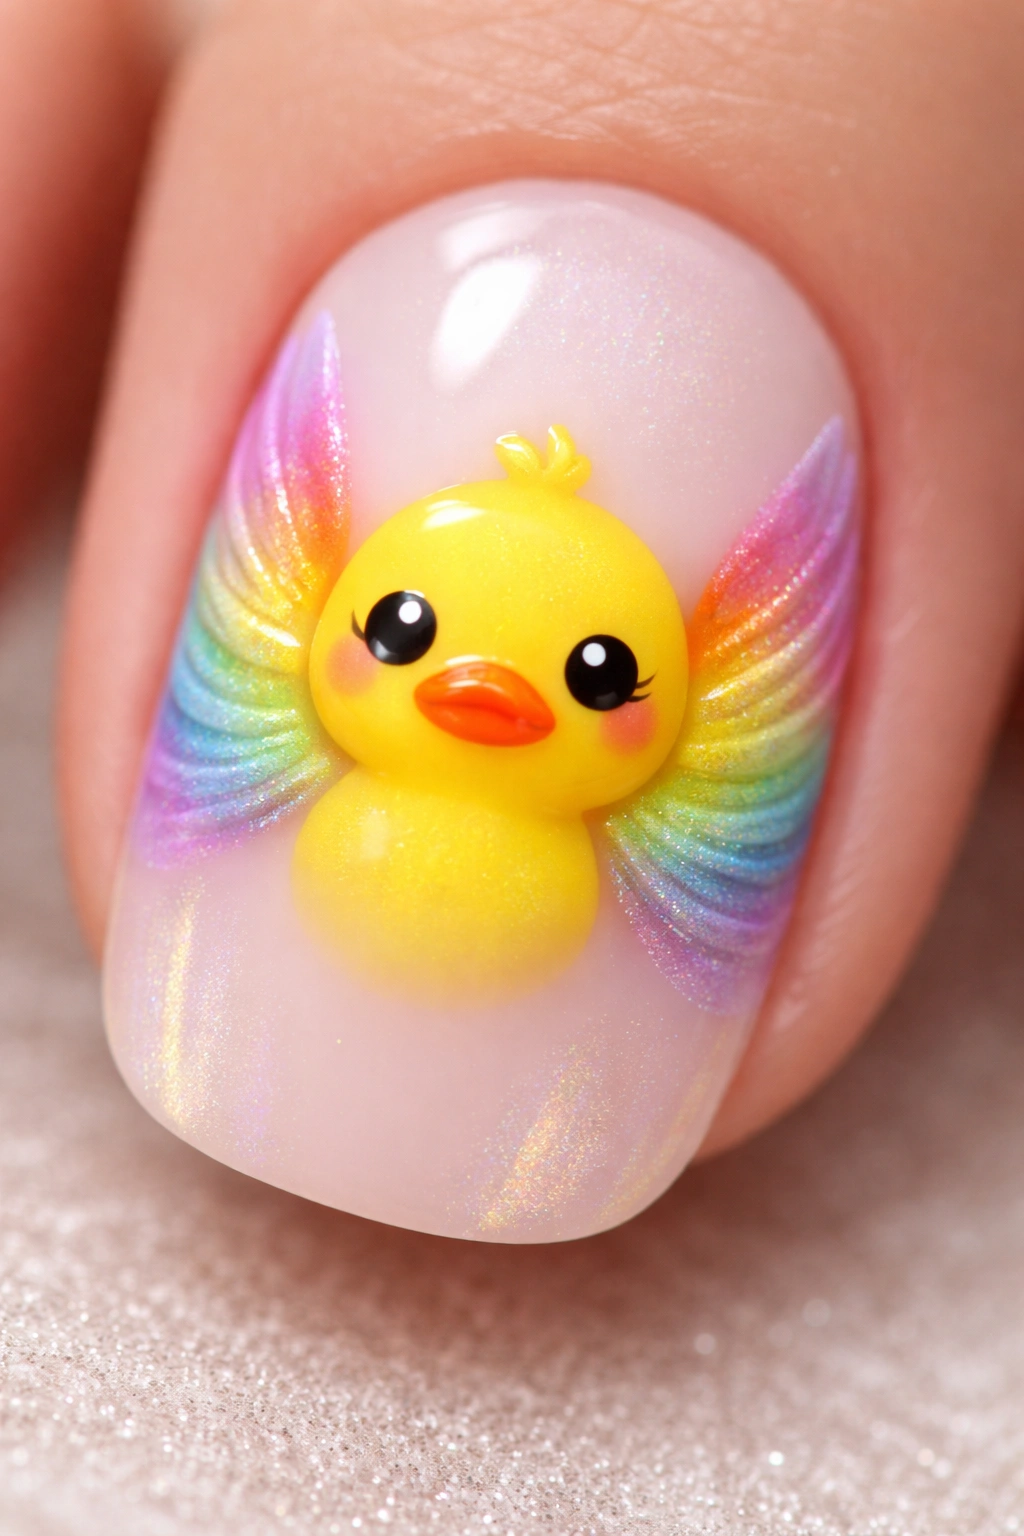
Paint the basic yellow duck face design, then add abstract wing shapes on either side of the duck using a rainbow gradient. The wings don’t need to look anatomically realistic; instead, use them as an opportunity to blend yellow, orange, pink, blue, and purple in a smooth gradient that suggests movement and playfulness. The gradient wings add color variety while the centered yellow duck keeps the design grounded and recognizable.
Balancing Whimsy with Intention
Rainbow gradients on their own can feel chaotic, but anchoring them to the yellow duck face gives the design a clear focal point and narrative. The wings suggest the duck is in flight or about to soar, adding a sense of joy and movement. This design appeals to people who love bright, multi-color combinations but still want a unified, intentional-looking result.
Painting Rainbow Wing Gradients
- Use a makeup sponge to blend rainbow colors directly onto the nail on either side of the duck face
- Start with lighter colors toward the duck and deeper, more saturated colors toward the nail edges
- Keep the gradient within clearly defined wing shapes so it feels intentional rather than accidentally colorful
- Use the sponge to blend colors rather than brushing, which prevents obvious brush marks and creates smoother transitions
14. Matte Yellow Duck with Glossy Topcoat Shine
Paint the duck design on a matte yellow base, then apply a clear, high-shine topcoat only to the duck face itself, leaving the surrounding yellow base matte. The contrast between the matte and glossy surfaces creates dimensional visual interest—the duck appears to pop forward from the background because it catches light differently. This subtle textural play adds sophistication without looking busy or overly decorated.
The Power of Matte-Gloss Contrast
This technique uses finish contrast rather than color contrast to create visual depth. It’s perfect for people who want their nails to look intentional and artistic without painting intricate details. The shiny duck face feels premium and polished, while the matte background ensures the overall look remains subtle and wearable. On short nails, this dimensional finish effect is especially noticeable and impressive.
Executing the Matte-Gloss Effect
- Apply a matte topcoat to the entire finished nail first
- Once fully cured, carefully apply a high-gloss topcoat only to the duck face area using a thin brush
- Keep the gloss application precise so you don’t accidentally coat the surrounding matte yellow
- The line between matte and gloss should be relatively clean, suggesting the duck is a distinct element within the design
15. Adorable Yellow Duck with Tiny Accordion Beak
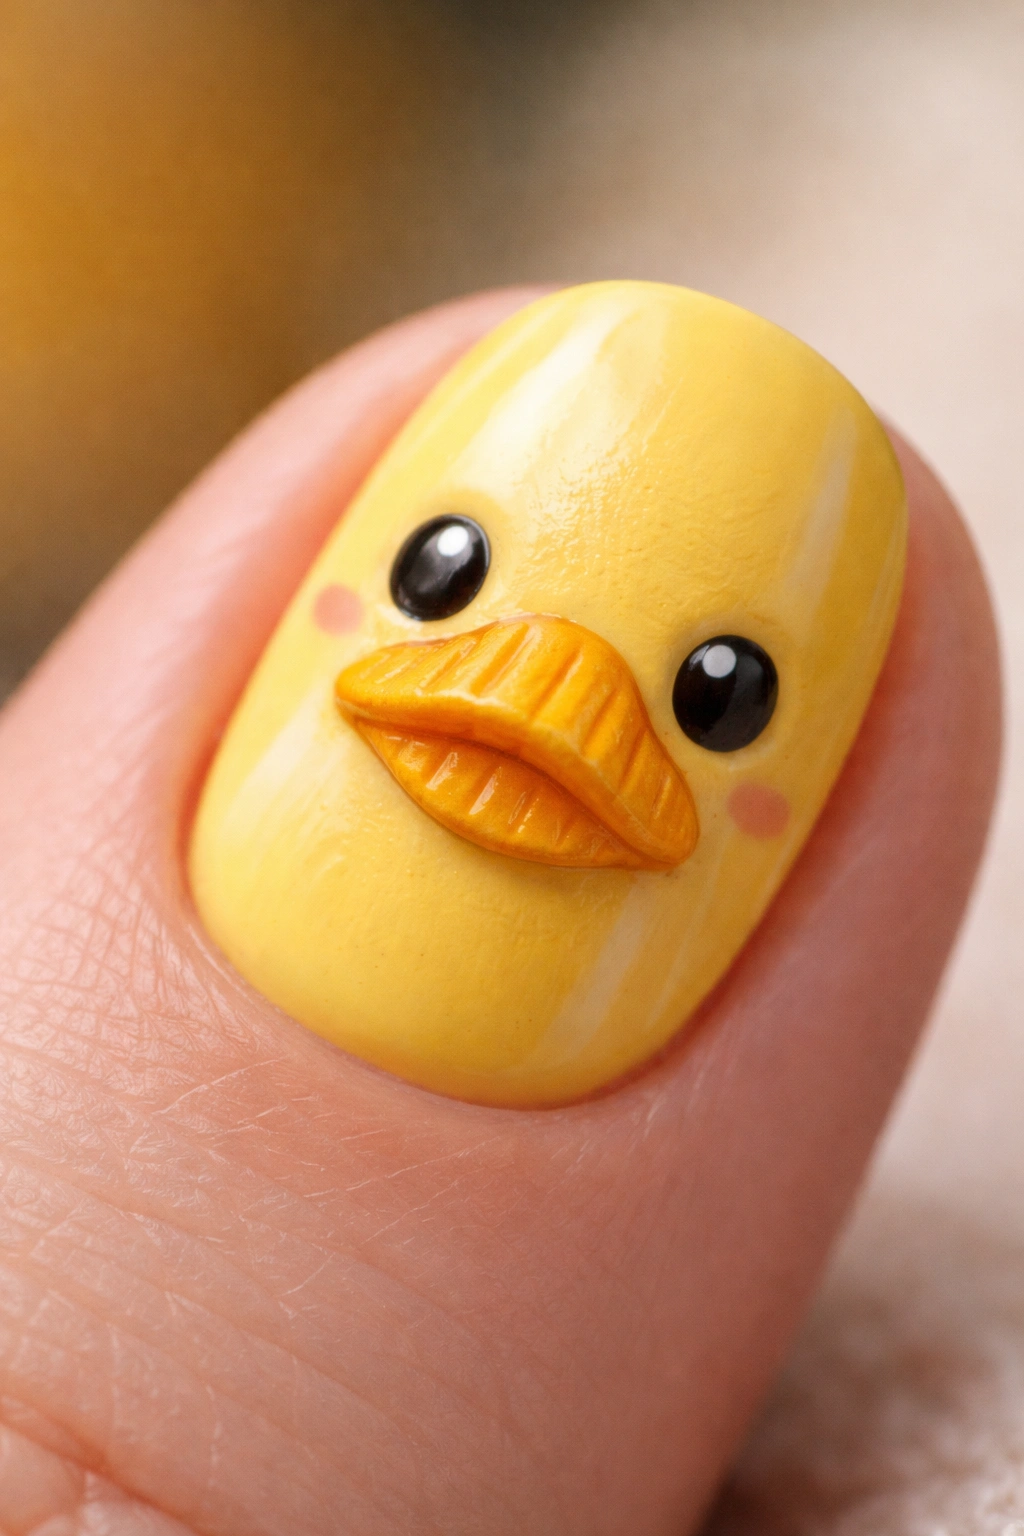
Rather than a simple painted beak, create a dimensional accordion or fan-shaped beak using a slightly darker shade of yellow or pale orange. The accordion texture suggests movement and adds three-dimensional interest. Paint the beak with multiple thin lines radiating outward from the center point, creating the illusion that it’s folded or textured. This single detail transforms a simple design into something with personality and charm.
Adding Character Through Detail
The accordion beak is a signature touch that people remember and talk about. It’s specific enough to feel like your creative contribution to the design rather than a generic duck. On short nails, this kind of focused detail work is easier to execute than covering the entire nail with intricate painting, making it accessible even for amateur nail artists.
Creating the Accordion Beak
- Use a thin brush and a slightly darker yellow or warm peachy-orange shade
- Paint thin parallel lines radiating outward from the center point where the beak meets the face
- Space the lines evenly and keep them similar in length for a balanced appearance
- The accordion effect works best when lines are thin and closely spaced, suggesting actual folding
16. Yellow Duck Nail with Tiny Black Bow Tie
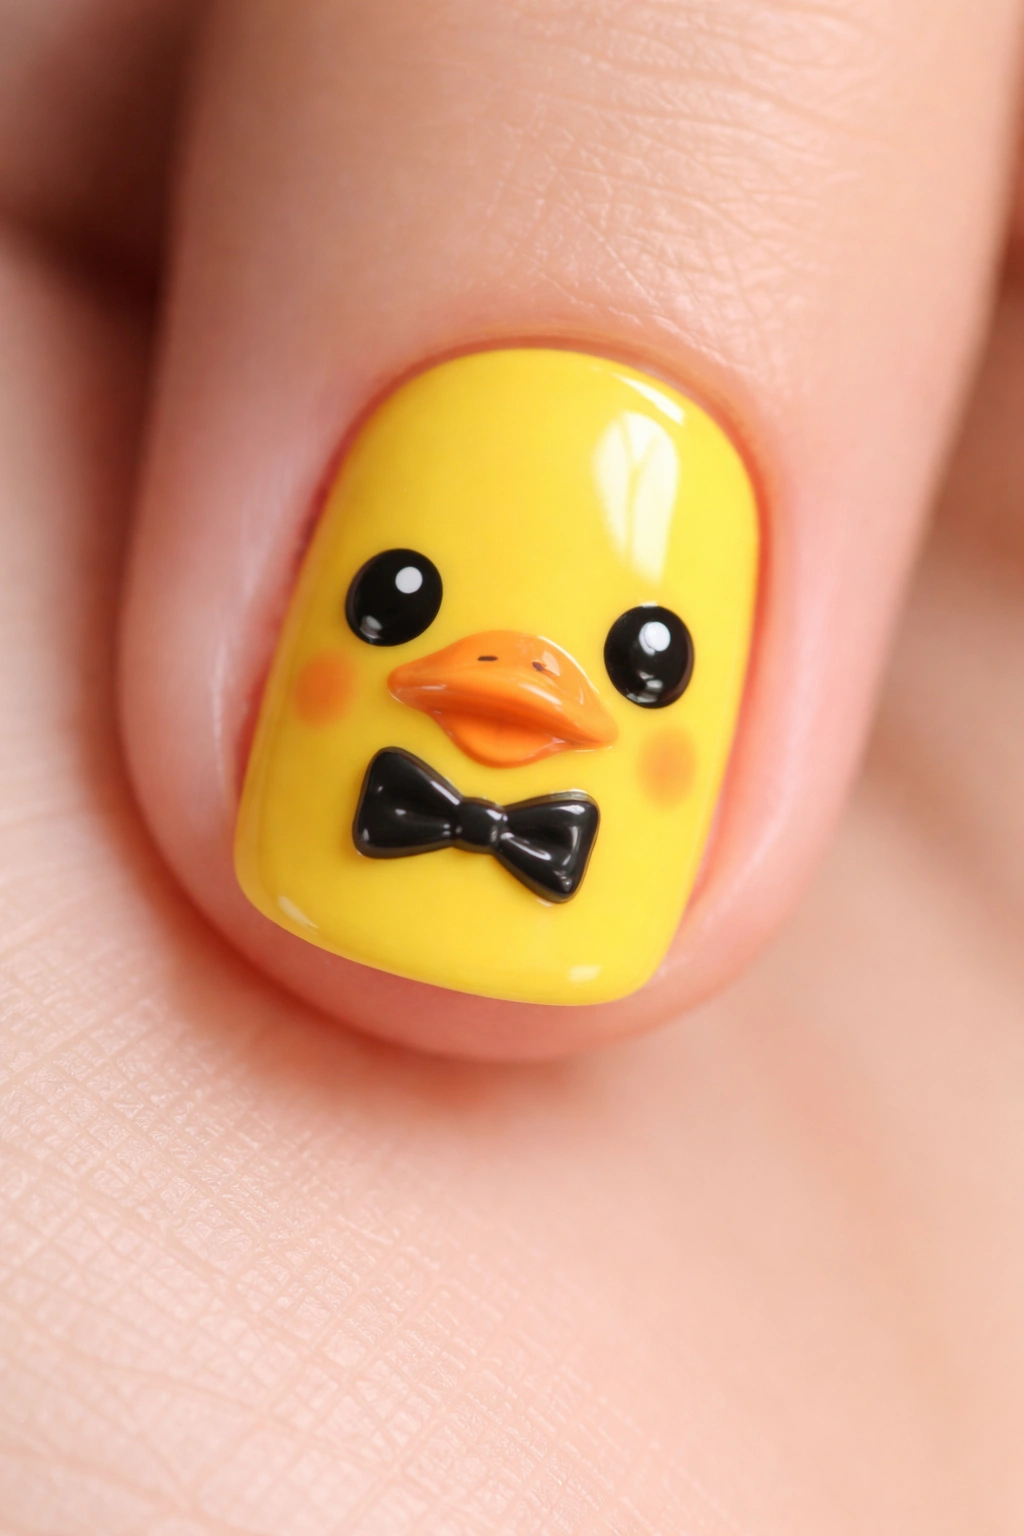
Paint the duck face design but add one distinctive detail: a tiny black bow tie sitting below the duck’s beak where the neck would be. The bow tie adds surprising sophistication and personality to the cute duck, making the design feel endearing but also slightly dapper and intentional. The bow tie is small enough that it doesn’t overwhelm the design yet distinctive enough that it becomes the memorable signature detail people notice immediately.
Why the Bow Tie Adds Personality
A bow tie signals personality and style. It transforms the duck from just cute into cute-with-character, like your duck is dressed for an occasion. This detail appeals to people who love whimsy but with a touch of sophistication. The tiny bow tie works beautifully on short nails because it’s proportionally small enough to look balanced and intentional, not cramped.
Painting the Perfect Bow Tie
- Paint two small circles or ovals on either side of the center point where the tie knot would be
- Connect them with a tiny center rectangle or circle representing the knot
- Make sure the proportions are balanced—the bow loops should be roughly the same size as the knot
- Use pure black for maximum definition against the yellow background
17. Yellow Duck with Wavy Water Ripples Below
Paint the duck face in the upper portion of the nail, then paint 2-3 wavy lines in lighter blue or pale turquoise below the duck to suggest water ripples. The water ripples create a scene—the duck is floating on or standing above water—which adds narrative context to the design. This simple addition transforms a design from “a duck face” into “a duck in an environment,” making it feel more complete and thoughtful. Use thin curved lines that follow the contour of the nail edge for organic-looking ripples.
Building a Scene with Minimal Elements
You don’t need complicated painting to create a complete scene. A few ripple lines instantly establish location and context, making the design feel more intentional and thoughtful. Short nails accommodate this scene-setting beautifully because the compact space forces you to simplify, keeping only the essential elements that define the setting.
Painting Realistic Water Ripples
- Use pale blue or turquoise gel or polish applied with a thin brush
- Paint curved lines that roughly follow the contour of the lower nail edge
- Vary the curve slightly from line to line so ripples feel natural rather than robotic
- Make ripples progressively lighter toward the edges of the nail to suggest they’re fading out
- Keep the number of ripples minimal (2-3 lines) so they feel like accent detail rather than taking over the design
18. Gradient Dip-Dye Yellow Duck with Ombré Nail Effect
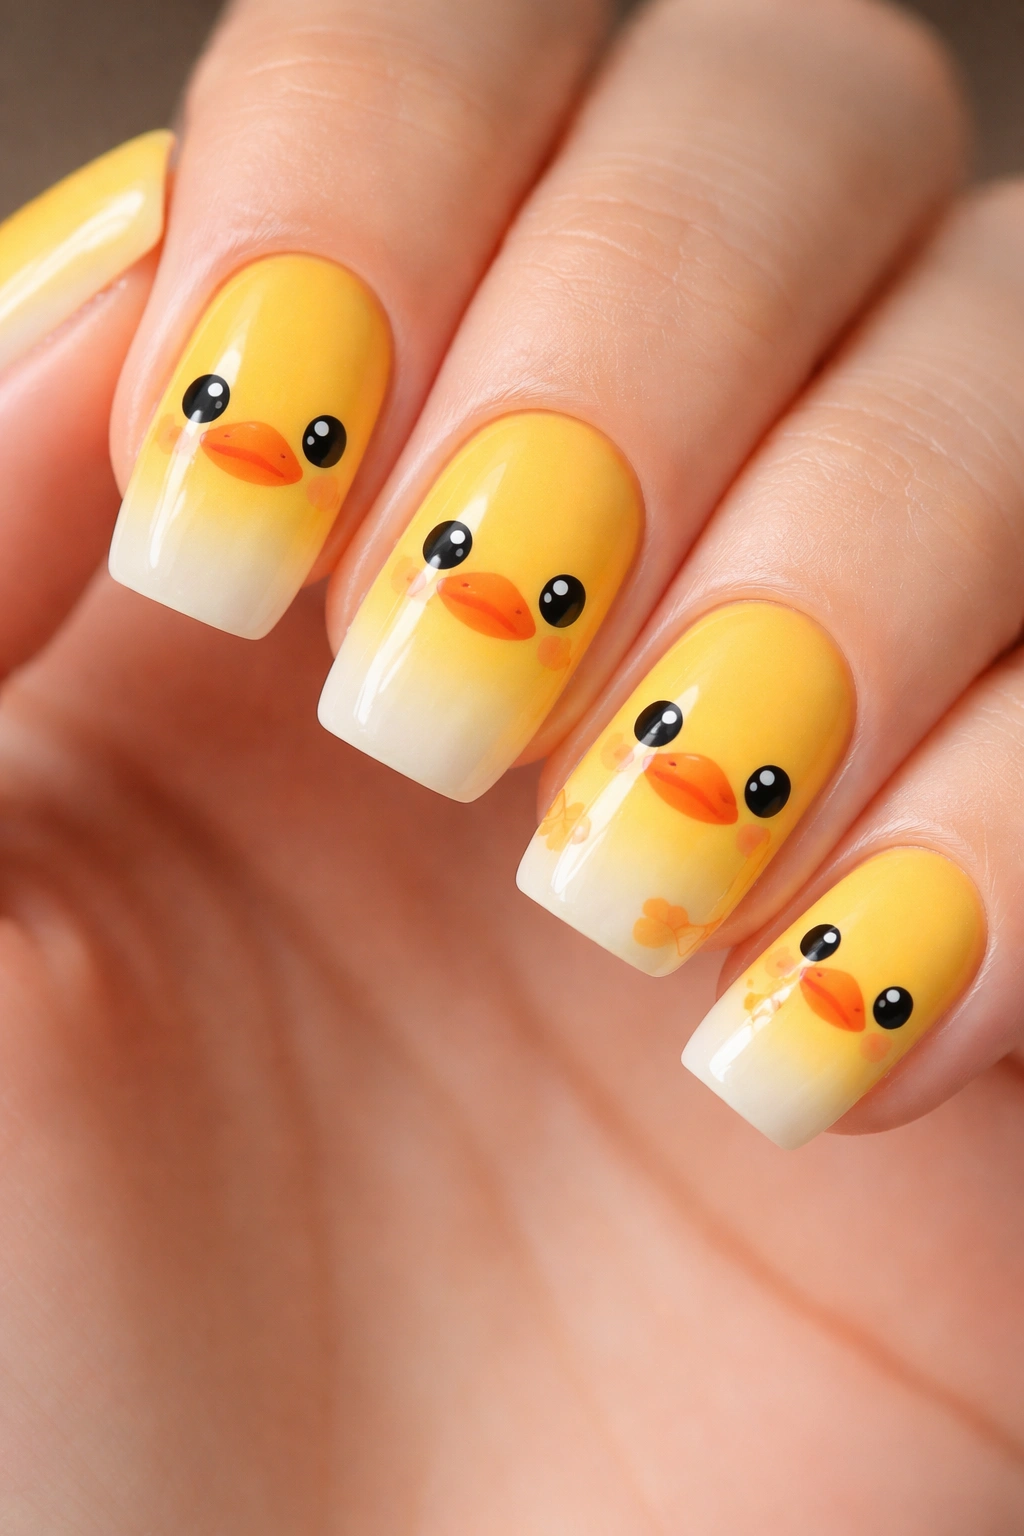
Create a gradient effect where the nail transitions from bright, saturated yellow at the base to pale, barely-there yellow toward the tip, using the ombré dip-dye technique. The duck face sits somewhere in the middle transition zone where the color is still visibly yellow but beginning to lighten. This soft gradient effect makes the nail appear slightly longer while maintaining the cheerful yellow duck theme. The gradual color fade creates a sophisticated, polished look that works for various settings.
Why Ombré Remains Timeless
Gradient and ombré effects never date because they’re fundamentally flattering and elegant. On short nails, a subtle ombré creates visual lift and elongation—the color progression draws the eye from base to tip, making nails appear longer than they actually are. This technique pairs beautifully with any duck design without competing for visual attention.
Achieving the Perfect Dip-Dye Gradient
- Create a gradient using a makeup sponge to blend yellow shades from dark to light
- Build the gradient in layers, blending gradually so the transition is seamless
- Paint the duck face once the gradient is fully set, positioning it to span across the transition zone
- Use a clear topcoat to seal and protect the gradient, ensuring longevity
- Alternatively, use a gel gradient builder and cure each layer for maximum durability
Final Thoughts
Yellow duck nails prove that playful, character-forward designs belong on short nails just as much as anywhere else. The compact canvas actually encourages creativity by forcing you to be more intentional about composition, detail placement, and overall balance. Each of these 18 designs works because it respects the dimensions of short nails while delivering unmistakable duck charm that makes you smile every time you glance at your hands.
The beauty of the duck nail trend is its flexibility. Whether you prefer minimalist approaches or detailed painted scenes, metallic accents or soft pastels, there’s a duck design that matches your aesthetic and skill level. Many of these designs are achievable even if you’ve never attempted detailed nail art before—others reward practice and patience with truly personalized, artistic results.
Short nails deserve celebration, not apology. These 18 designs demonstrate that length doesn’t determine impact or creativity. Your short nails can be just as expressive, intentional, and joyful as any longer manicure. Pick one that speaks to you, gather your polishes, and bring some yellow duck happiness to your fingertips.
