

Duck nails are having a major moment right now, and there’s a good reason for it. That exaggerated, curved tip shape isn’t just eye-catching—it creates the perfect canvas for bold nail art. When you pair the dramatic duck nail silhouette with the elegance of red French tips, you get a look that’s simultaneously edgy and sophisticated. Red is the ultimate power color in nail design, and when it frames the tip in that classic French manicure style, the effect is striking without screaming for attention.
What makes red French tip duck nails so versatile is that red itself comes in so many shades. We’re talking everything from soft rose-reds to deep burgundies to true crimsons. Each variation changes the vibe of the entire manicure. Add in different finishes, accent designs, and complementary nail art, and you’ve got endless possibilities to express your personal style. Whether you’re looking for something understated and classy or bold and statement-making, there’s a red French tip duck nail design that fits.
The shape of duck nails actually makes French tips even more dramatic because of that curved point. The tip naturally catches light differently than a traditional rounded or squared edge, which means your red French design gets extra visual impact. Plus, the overall duck nail aesthetic has that trendy, fashion-forward quality that feels current without being trying-too-hard.
Let’s walk through some of the most beautiful, wearable red French tip duck nail ideas you can actually pull off—whether you’re doing this at home or showing reference photos to your nail tech.
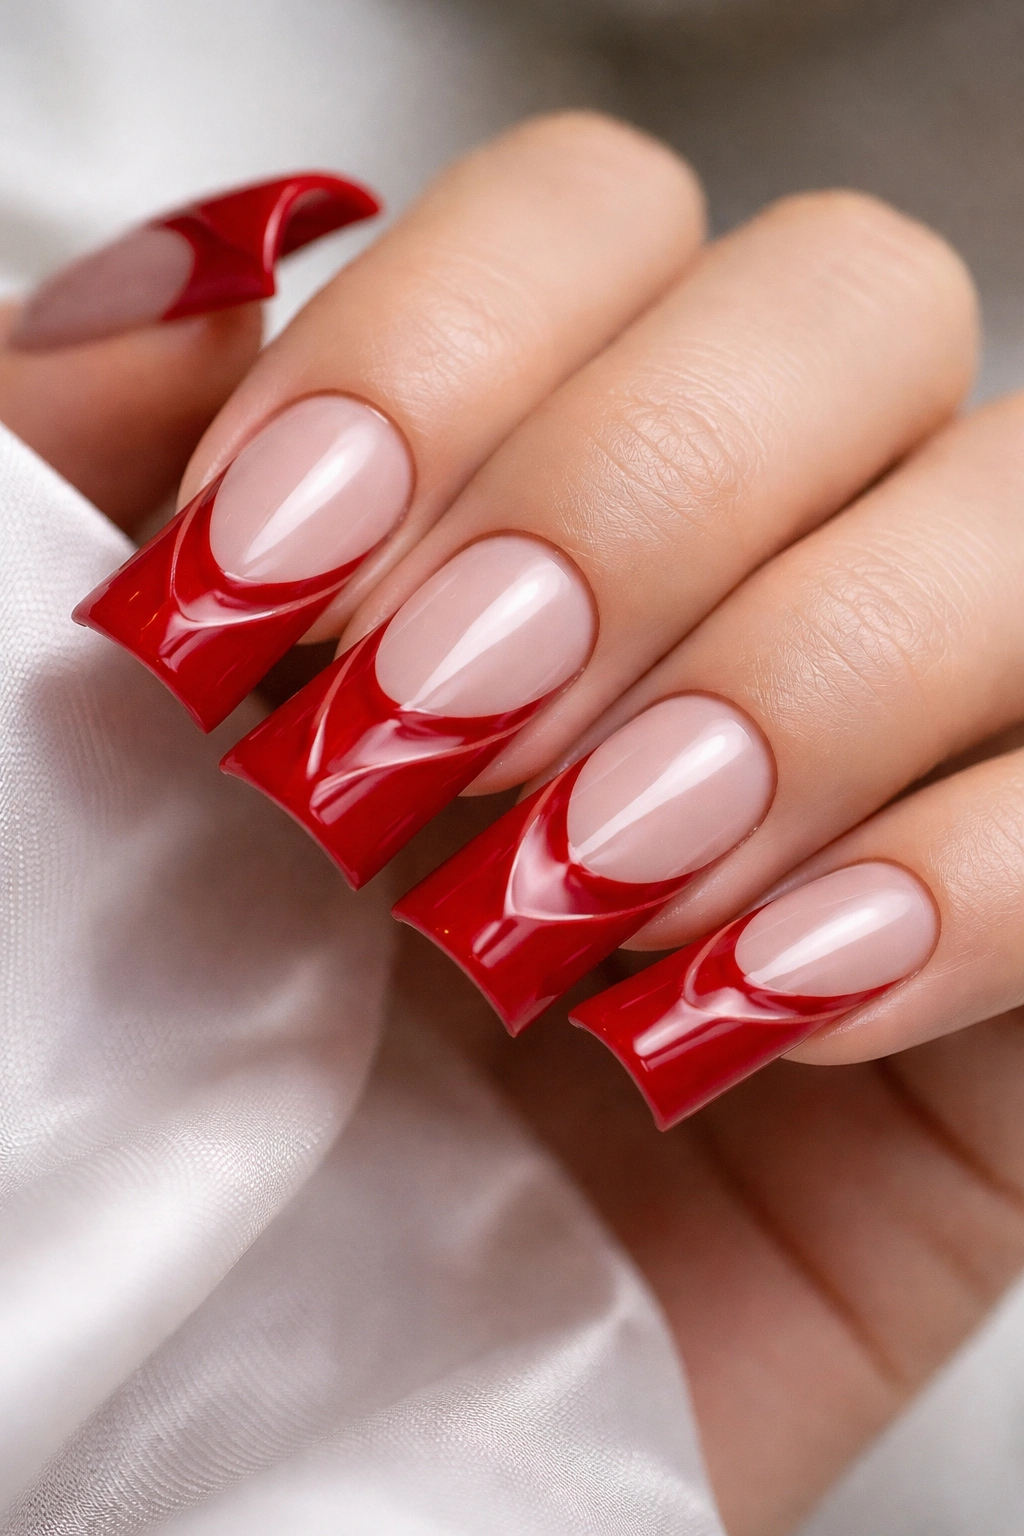
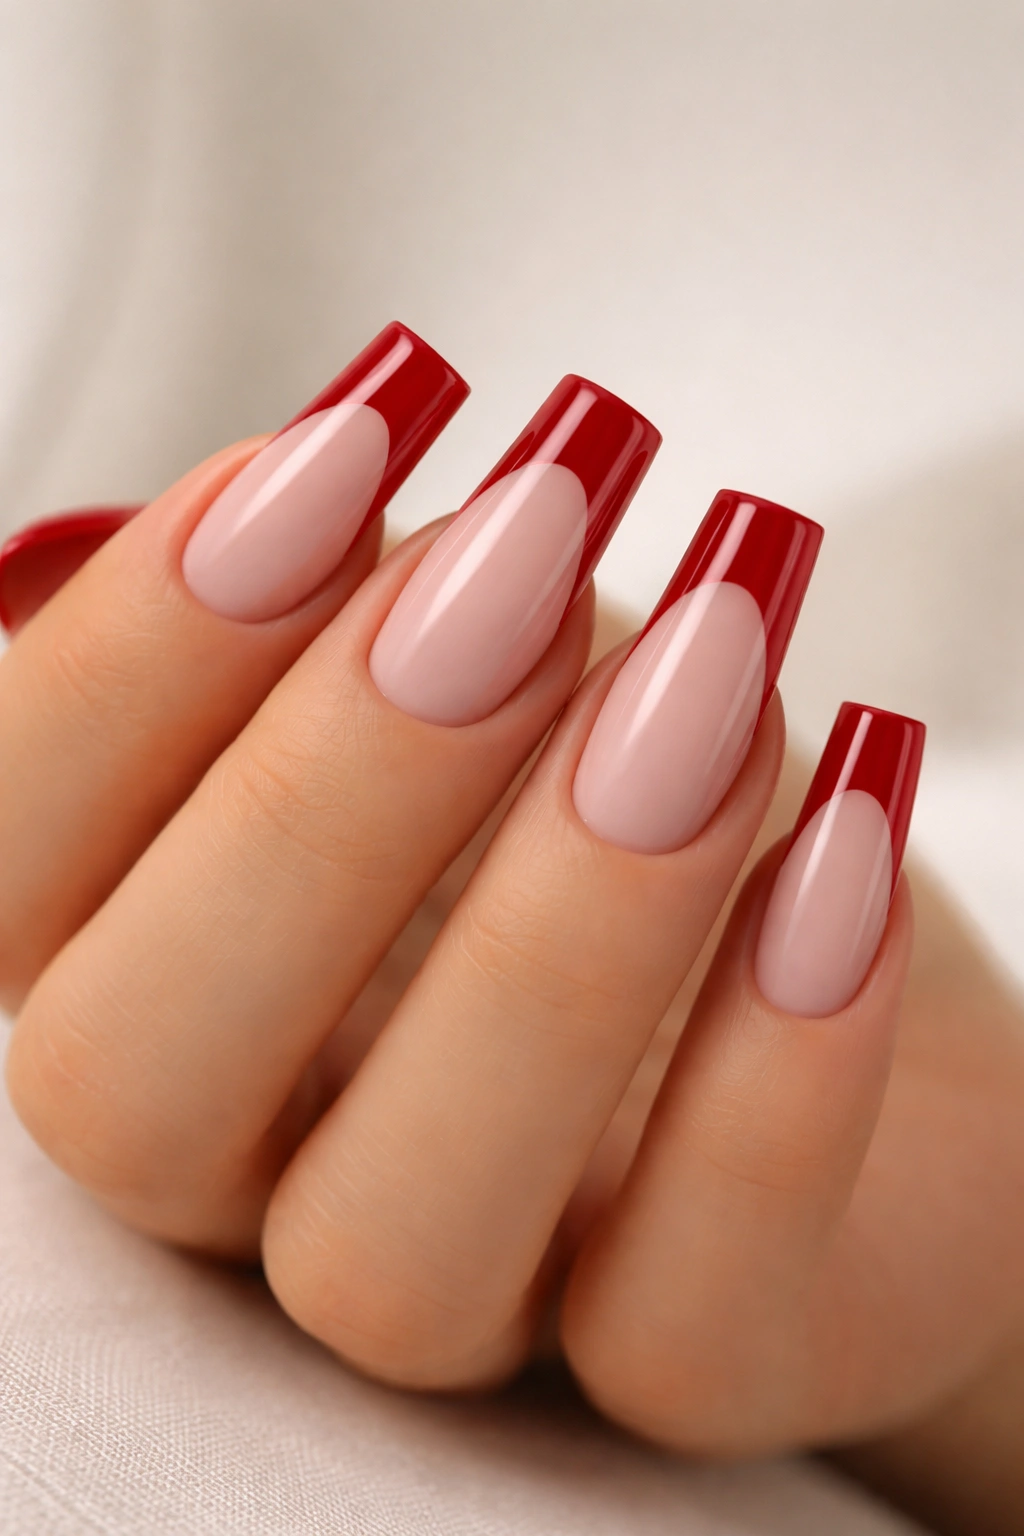
1. Classic Crimson French Tips
There’s something timeless about a pure, true crimson red used as a simple French tip. This is the design that works in any context—professional meetings, casual weekends, formal events. The beauty of keeping it straightforward is that your nail shape becomes the main event, and the red frame around that curved duck tip is all the detail you need.
Why This Design Works
The classic French tip has been beloved for decades because it’s inherently flattering and versatile. When you apply it to duck nails, the curved tip naturally elongates the visual line of your finger, making your hands look more graceful. Crimson red is bold enough to make a statement but not so trendy that it’ll look dated in a few months. The contrast between the natural or pale pink nail base and the deep red tip creates instant visual interest without requiring any extra embellishment.
How to Get Perfect Edges
Clean lines are everything with a simple French tip. If you’re applying this at home, invest in a thin, angled brush or a French tip stencil—it’s genuinely a game-changer for getting that sharp, defined line. Paint your duck nail shape with a light nude or pale pink base first, let it dry completely, then carefully apply two thin coats of crimson red along the curved tip edge. The trick is to let each coat dry before applying the next; rushing leads to smudging and uneven edges.
Maintenance and Longevity
Crimson can stain lighter nail beds, so make sure your base coat is solid and protective. Use a quality topcoat to seal everything in—this keeps the red vibrant and prevents that annoying fading that happens with reds over time. The classic version without glitter or texture actually holds up longer than heavily embellished designs because there’s nothing to snag or catch.
Pro tip: Keep a thin brush with some of your crimson red on hand for touch-ups. Even minor chips at the tip line can throw off the whole look, so quick maintenance keeps this design looking salon-fresh for weeks.
2. Ombré Red to Pink Gradient French Tips
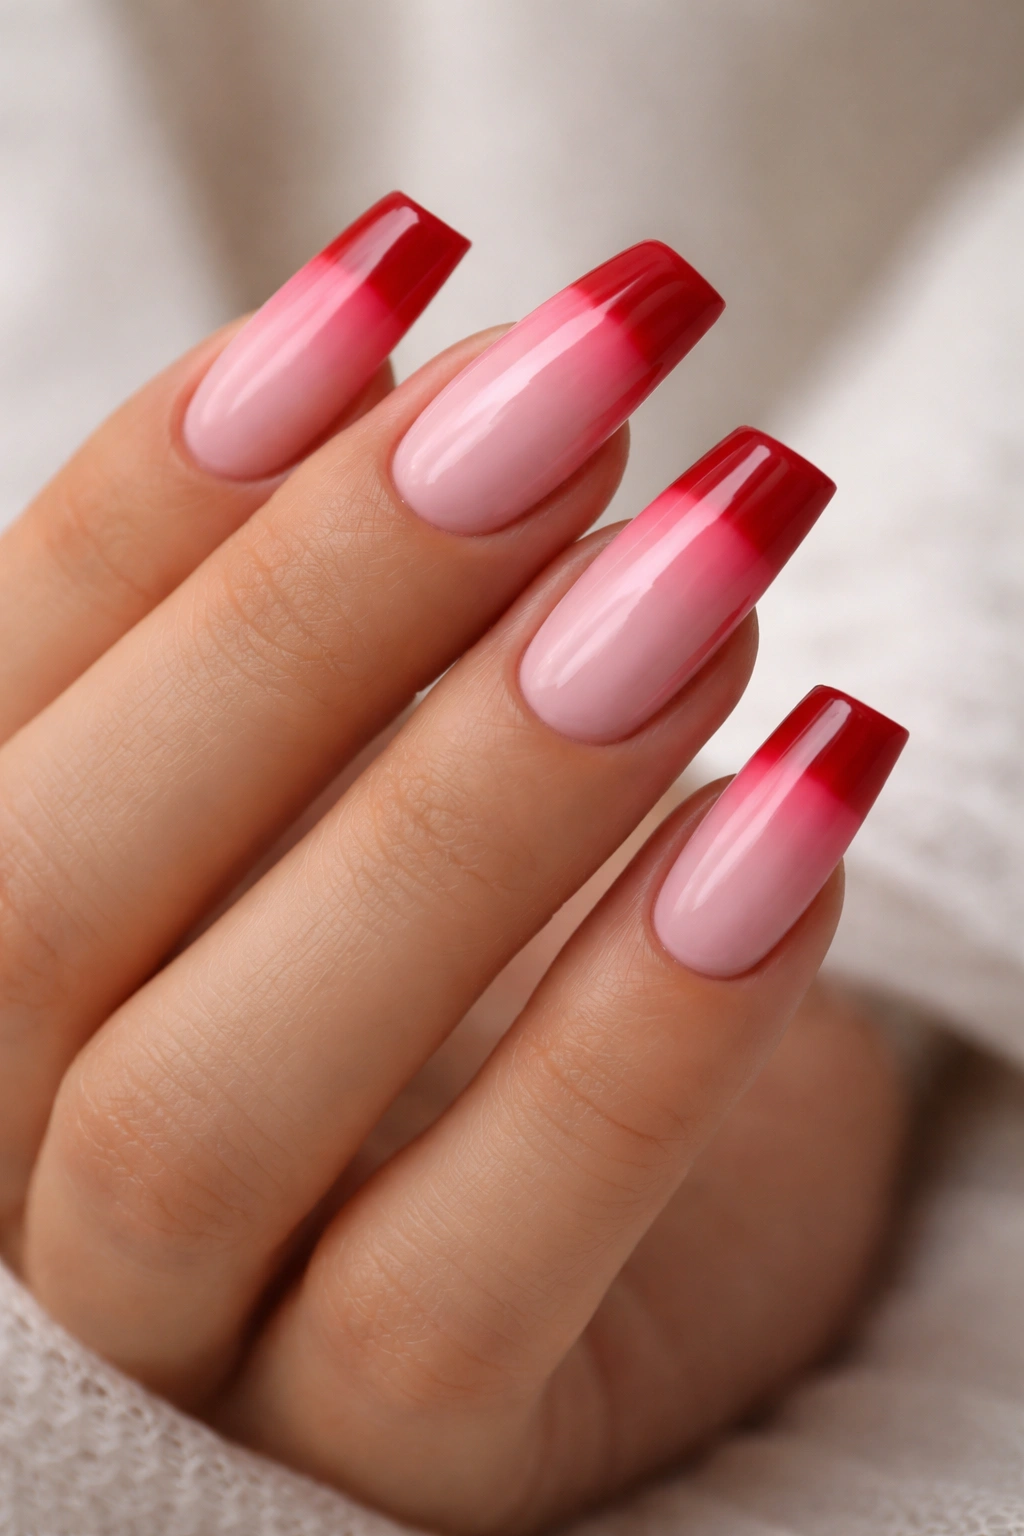
An ombré effect where your red tip gradually fades into a softer pink base is where modern romance meets edgy nail shape. This design has that high-fashion quality without actually requiring high-fashion-level nail skills. The gradient naturally softens the dramatic duck nail shape, creating something that feels a touch more wearable for everyday wear.
The Gradient Technique Explained
You don’t need fancy tools for an ombré French tip—a sponge and some patience will do the trick. Paint a light pink base on your entire nail, then apply red to the tip area. While the red is still wet, take a dry makeup sponge and gently dab (don’t wipe) where the two colors meet to create that blended transition. You might need to do this a couple of times to get a smooth gradient, but that’s actually the secret—multiple light dabs of color blending create a more natural gradient than one heavy application.
Color Combos That Actually Work
Crimson to pale pink is the most classic pairing, but you could also try burnt red to peachy pink for a warmer feel, or burgundy to mauve for something more sophisticated. The key is making sure your lighter shade is truly lighter—if they’re too similar in tone, the gradient disappears and you just get a muddled middle ground.
Best Occasions for This Look
An ombré gradient feels both playful and put-together, making it perfect for date nights, parties, or even creative workplace environments where you want to show some personality. The soft transition between colors reads as more romantic than a stark French line, while the duck nail shape keeps things fashion-forward and contemporary.
Worth knowing: Sponging technique takes practice, so don’t get frustrated if your first attempt isn’t perfectly smooth. The beauty of the ombré is that some imperfection actually looks more organic and less “computer-generated” than a perfectly flawless gradient.
3. Glitter-Accented Red French Nails
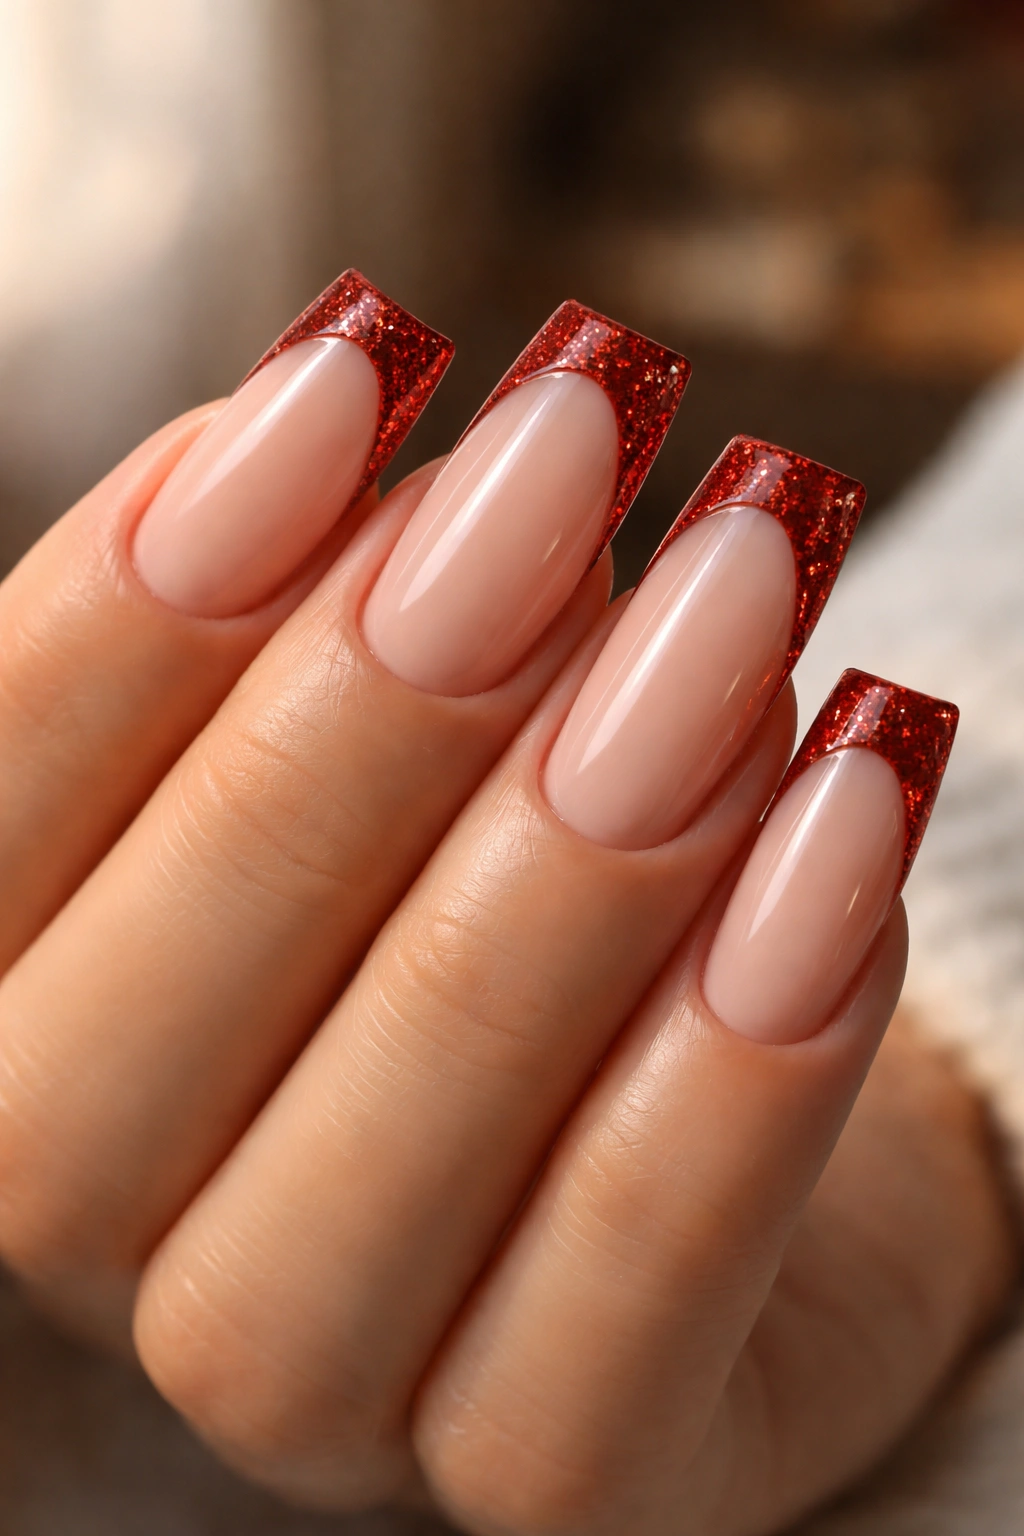
The moment you add glitter to a red French tip duck nail, you’ve elevated the design from everyday to special occasion. Glitter catches the light in ways that solid color simply cannot, creating this gorgeous shimmering frame around your tip. The key to making it work is strategic placement—not glitter all over everything, just where it counts.
Where to Place the Glitter
The most flattering approach is to keep the glitter confined to the tip itself, concentrating it heaviest right at the point of the duck nail where light naturally hits. You can either use a glitter polish that has sparkle mixed throughout, or apply a solid red French tip and then add a glitter topcoat just to the tip area. The latter gives you more control and a cleaner look overall.
Glitter Size Matters
Fine glitter particles create a subtle, sophisticated sparkle that catches light delicately. Chunky glitter reads as more playful and youthful. For a duck nail design, which is already quite dramatic in shape, I’d lean toward finer glitter so the overall effect feels cohesive rather than overwhelming. Think of it like seasoning food—the goal is to enhance what’s already there, not bury it.
Application Without the Mess
Use a thin brush or even a toothpick to apply glitter exactly where you want it. If you’re using loose glitter, place your brush in the wet topcoat first, then dip it into the glitter, and carefully apply to just the tip area. Working in sections—one nail at a time—prevents glitter from going everywhere and keeps the mess manageable.
Pro tip: Seal glitter in with a glossy topcoat to prevent it from chipping off prematurely. Without proper sealing, glitter can flake away within days, leaving bare spots that look unfinished.
4. Marble Red French Duck Nails
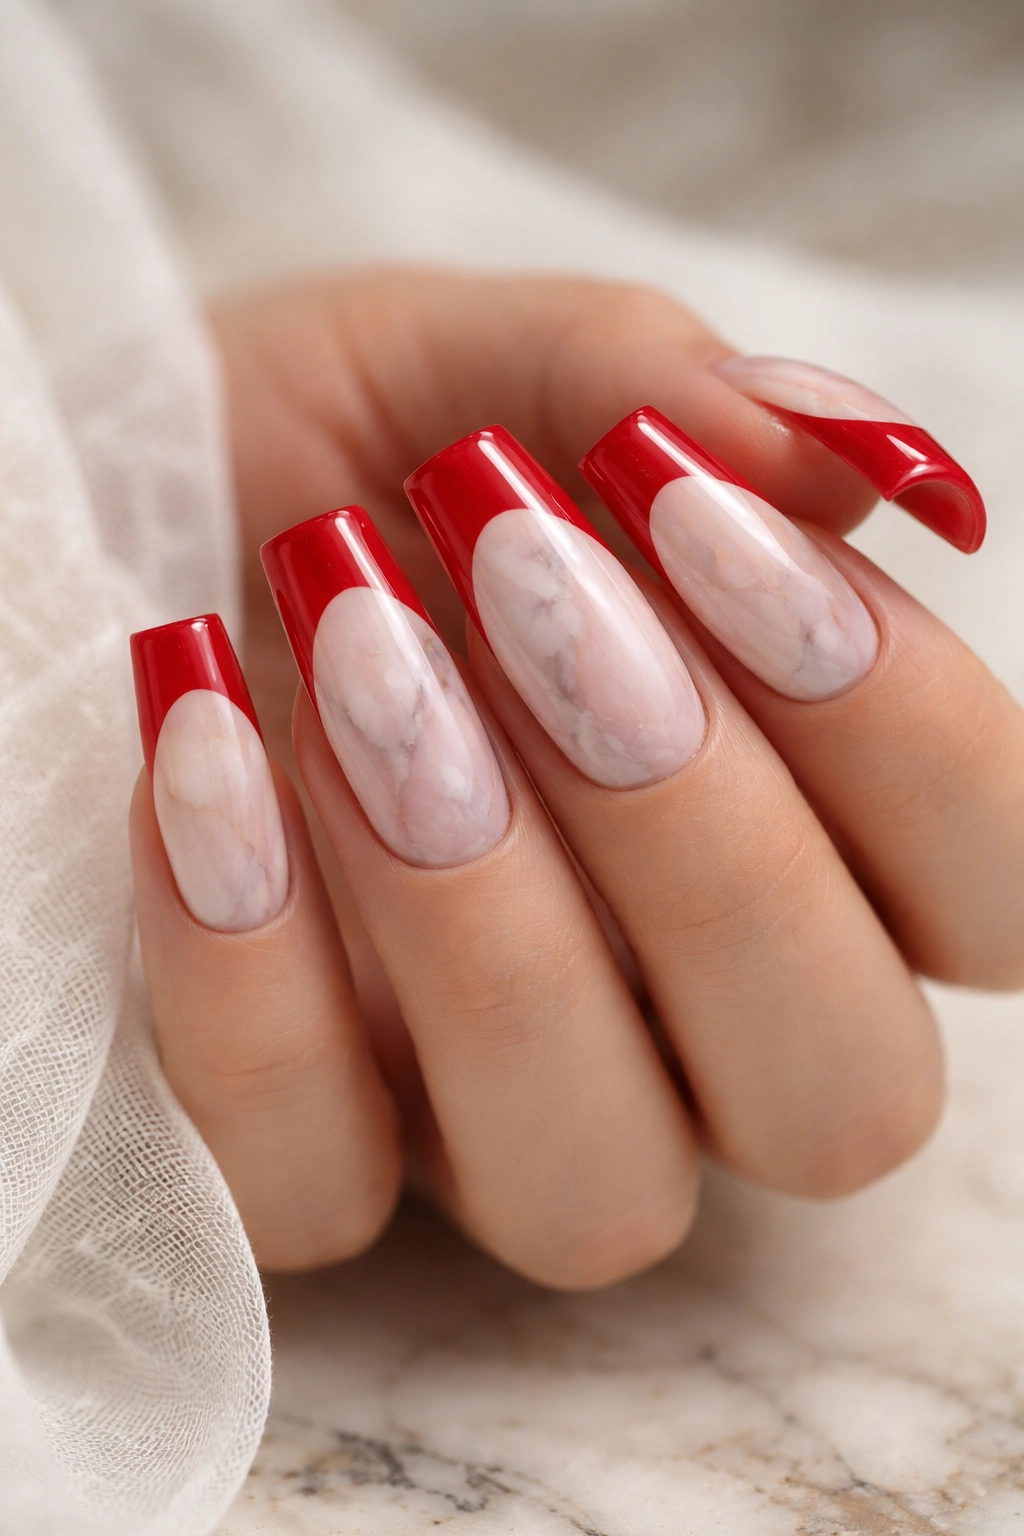
Marble nail art has such an elegant, artistic quality, and when you combine it with red French tips, you get something that feels like wearable art. A subtle marble pattern peeking through in the base, with a clean red tip, creates depth and visual complexity that pure red and nude would lack.
Creating a Marble Effect
The classic water marble technique works here, but honestly, you don’t need to be super skilled at it. Use a clear or pale pink base, then drip thin lines of red, black, or burgundy into the base coat while it’s still wet and let them naturally spread across the nail surface. You’ll get organic, unpredictable patterns that look naturally marbled. If traditional water marbling feels complicated, there are also marble nail art pens and stencils available that make the process much simpler.
Balancing Pattern and Simplicity
When you add marble patterns to the base, keep the French tip line sharp and simple. You want the contrast between the intricate base and the clean-lined red tip to be obvious. This restraint actually makes both elements stronger—the patterned base becomes the supporting actor and the red tip is clearly the star.
Design Variations Within Marble
Black and red marble on a nude base reads as modern and edgy. Red and gold marble feels more luxe. Red and white marble has a more refined, minimalist quality. Play with the secondary colors you pair with red based on the mood you’re going for.
Worth knowing: Marble effects look best when sealed with a thick, high-quality topcoat. This protects the design and adds shine that makes the marbling pop even more visually.
5. Matte Red with Glossy Tips
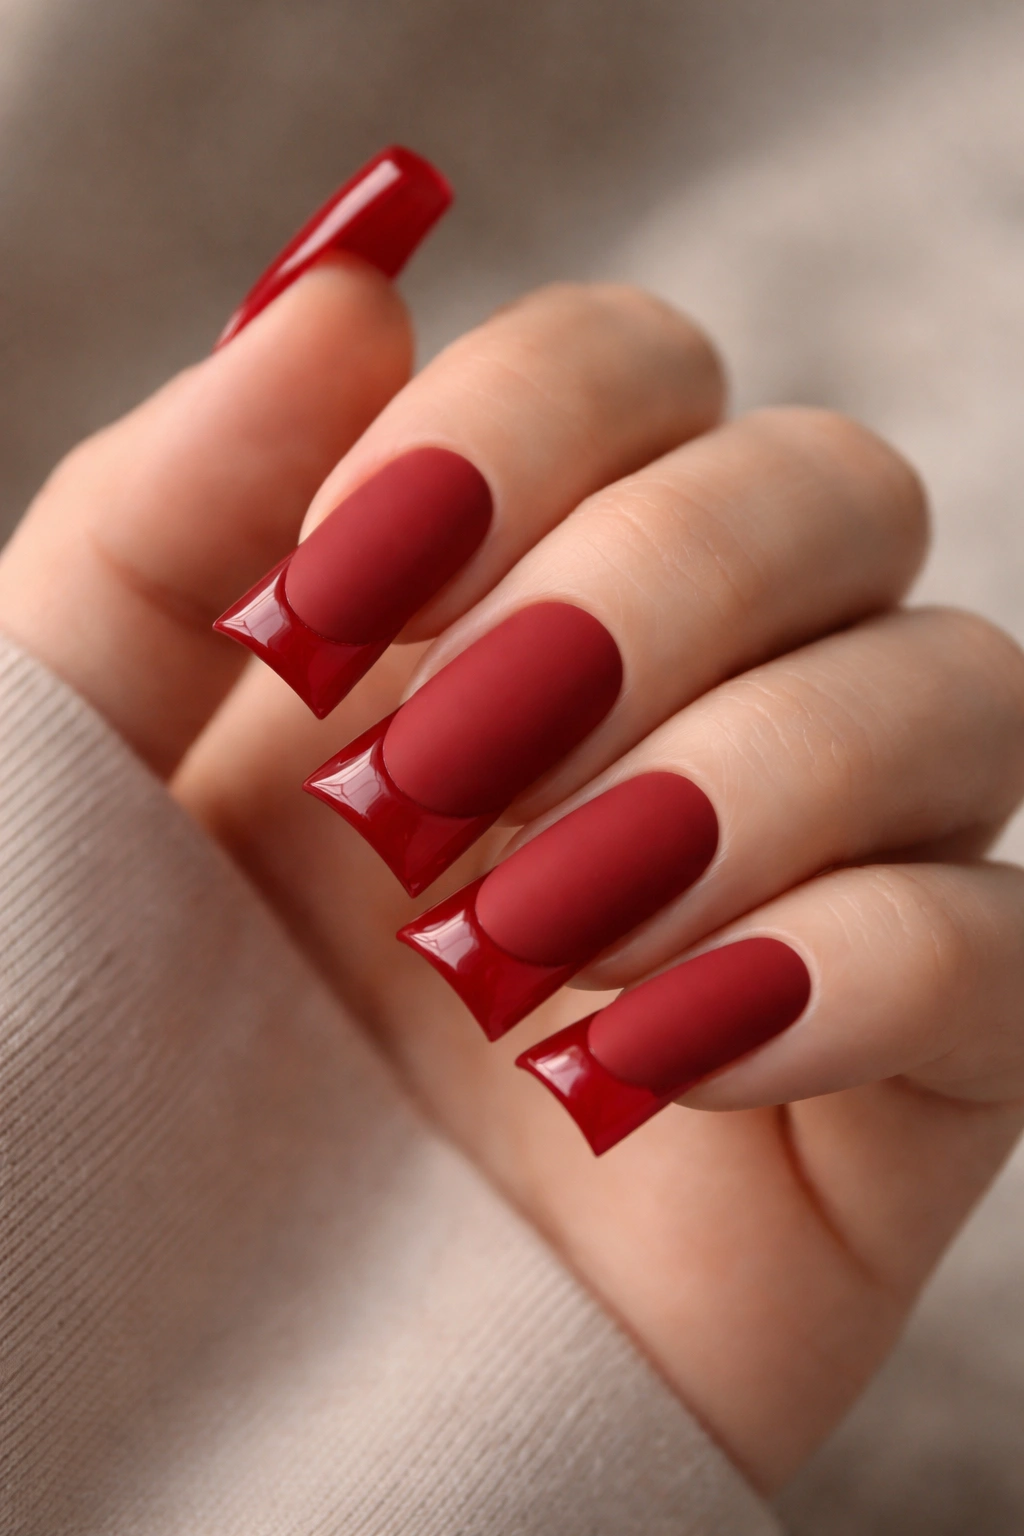
Playing with finishes is a sophisticated way to add visual interest without changing colors. Picture a soft, velvety matte red covering your entire duck nail, then that same red—but in glossy, shiny finish—applied just to the tip. The contrast between matte and glossy is subtle but incredibly striking when you see it in person.
The Finish Contrast Effect
Matte finishes have this modern, understated elegance that appeals to anyone who loves minimalist design. When you add a shiny tip to a matte base, you’re creating a visual focal point through texture rather than color. Your eye naturally goes to the shiny finish, so even though it’s the same red, the tip feels more prominent and defined.
Application Process
Apply your matte red polish to your entire nail first—two coats for full coverage. Let it dry completely. Then, using a glossy topcoat (which inherently has shine), apply only to the tip area, creating that French tip line. You now have your matte-to-gloss contrast without any color change required.
Color Depth with Finish Play
Because the finish changes, the same red can look different depths depending on light. In natural sunlight, the matte base might look softer and lighter, while the glossy tip pops as deeper and richer. Indoors under artificial light, you get a different balance. This dynamic quality is part of what makes this design so visually interesting.
Pro tip: Matte finishes can look dusty over time, so regular maintenance with a matte topcoat keeps them looking intentional and fresh rather than worn.
6. Nail Art Red French Tips with Rhinestones

Rhinestones add instant glamour and that expensive, jewelry-for-your-nails quality. When you place them strategically along the French tip line or scattered across the tip area, you’re adding dimension and sparkle that reads as luxury. This is the design for when you want to feel special and fancy.
Strategic Rhinestone Placement
The most flattering placement is along the curved line where the red meets the nude base—the rhinestones follow that natural French tip boundary and actually enhance the line definition. Alternatively, you can create a subtle gradient of rhinestones, concentrated heavily at the very point of the duck nail tip and thinning out as you move toward the center of the nail.
Rhinestone Sizing
Mixing rhinestone sizes creates visual interest—large stones for impact, smaller ones for detail. All the same size can feel a bit costume-y on duck nails since the shape is already quite bold. Using varied sizes keeps the look refined rather than over-the-top.
Application and Durability
Use a rhinestone-specific adhesive or a thick topcoat to apply stones. Press each one firmly and let the adhesive cure completely before wearing or washing your hands. For longevity, seal everything in with a strong topcoat once the stones are fully set. Rhinestones can pop off if they’re not secured properly, which definitely disrupts the polish.
Worth knowing: Clear or AB (aurora borealis) rhinestones work beautifully with red because they catch light without competing for attention. Colored rhinestones can clash with the red if you’re not intentional about your choices.
7. Chrome Red French Duck Nails
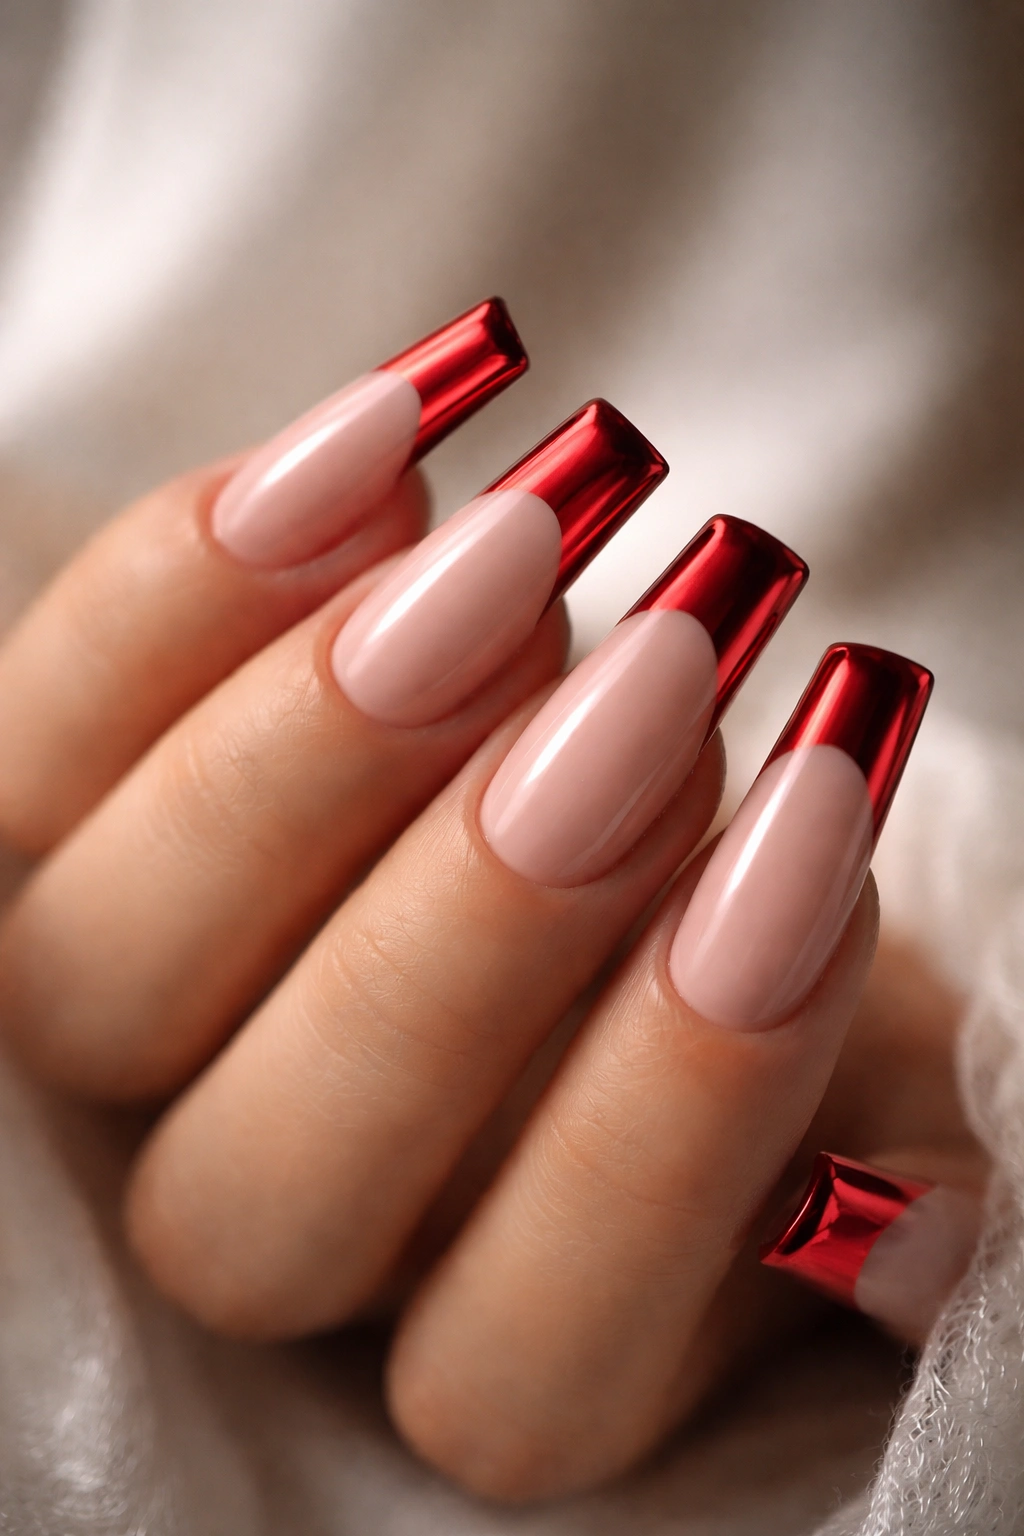
Chrome finishes are relatively new to at-home nail art, and they create this almost metallic, mirror-like effect that’s absolutely stunning. A red chrome finish on just the tip of a duck nail is like having jewelry that literally reflects light back at you. The effect is eye-catching without being subtle.
What Chrome Polish Actually Is
Chrome polishes contain special particles that create that mirror-like, metallic finish. You apply them like regular polish, but they require a specific technique and usually a special topcoat or adhesive layer to activate the chrome effect. They’re a bit more finicky than regular polish, but the payoff is worth it if you’re going for that modern, high-impact look.
Combining Chrome with Matte or Glossy
You could do a matte or glossy nude base with a chrome red tip for maximum contrast, or you could do chrome red over the entire nail with a different finish on just the base for a more subtle version. The chrome finish is the star here, so make sure whatever base you pair it with doesn’t compete visually.
Maintenance of Chrome
Chrome finishes are delicate and can chip or fade more easily than regular polish. They’re better suited for times when your nails aren’t taking a beating—special events rather than everyday wear. Keep your hands out of heavy water exposure when you can, and use a topcoat designed to work with chrome finishes.
Pro tip: Take photos of your chrome red duck nails in different lighting situations. The way the finish changes under sunlight, artificial light, and flashlight is part of the beauty, and you’ll be amazed at how different they can look.
8. Red French Tips with White Nail Art Details
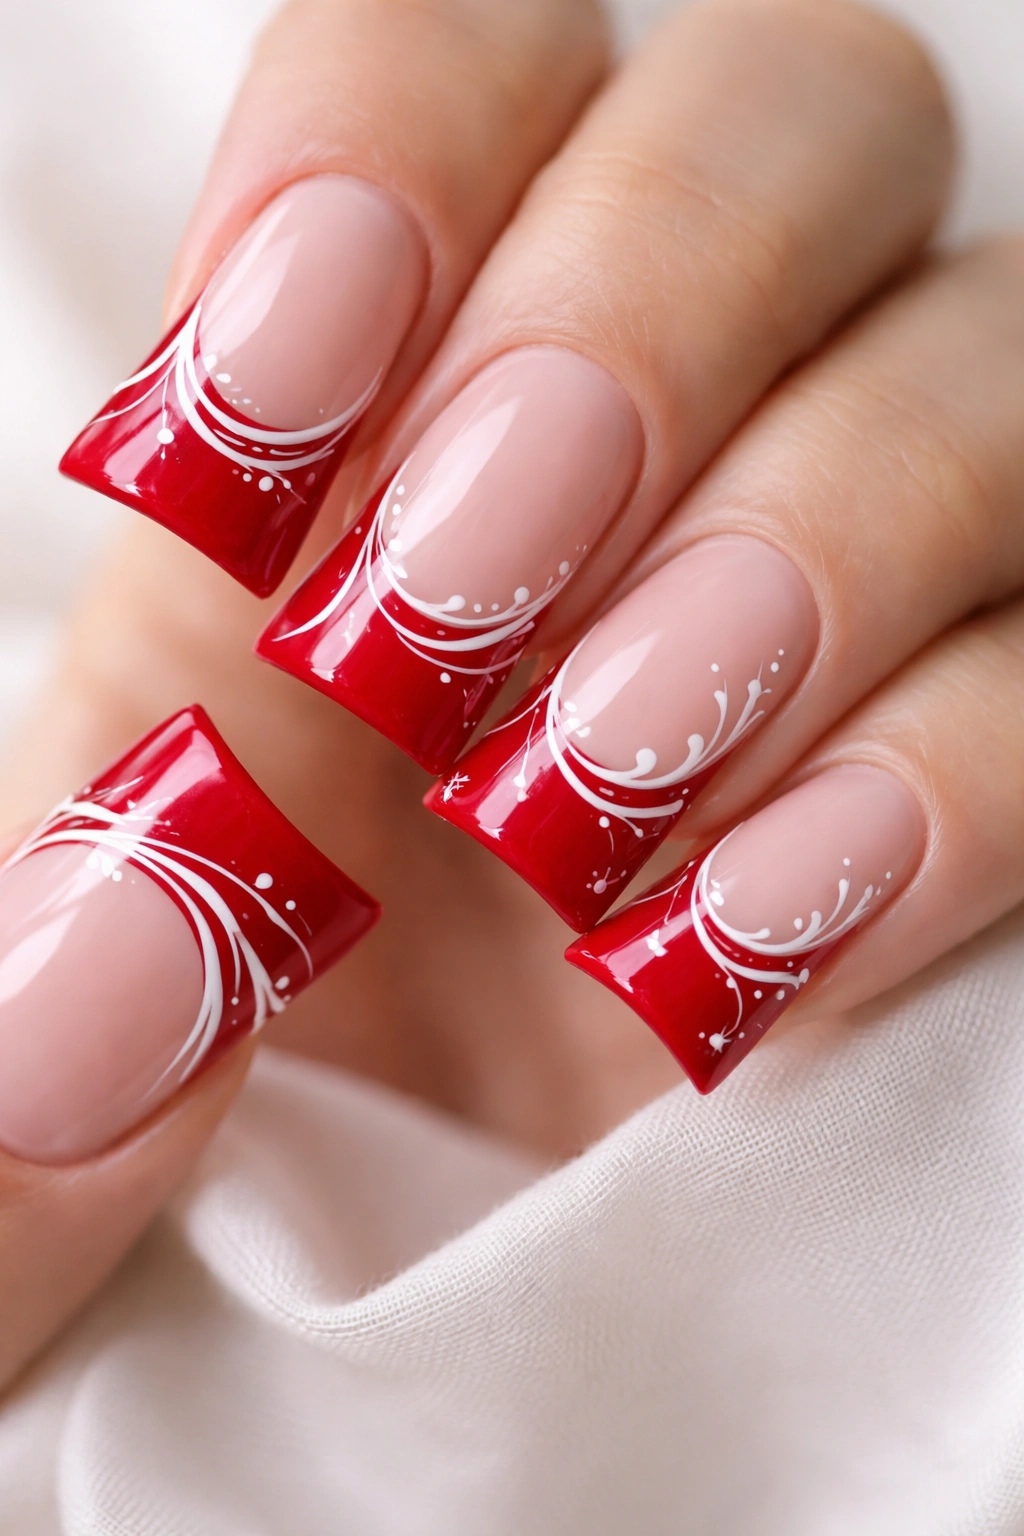
Adding white accent details—whether that’s delicate lines, dots, or small patterns—to a red French tip creates visual complexity and a more artistic overall look. The contrast between red and white is classic for a reason: they’re complementary colors that naturally draw the eye.
White Detail Design Ideas
Thin white lines radiating from the tip create a subtle sunburst effect. Small white dots scattered across the red can feel playful. A thin white line running along the inside edge of the red French tip adds definition. Tiny white flowers or geometric patterns in the red area feel more artistic and unique. Each option completely changes the vibe while keeping the same color combo.
Nail Art Pens for Precision
A white nail art pen with a fine tip makes it so much easier to add these details compared to trying to control a regular brush. These pens give you the control you need to create clean, intentional designs without the shaky hand problem. They’re worth having on hand if you want to customize your manicure regularly.
Balancing Simplicity and Design
The key to this design working is restraint. You don’t want so many white details that the red tip becomes a busy, chaotic background. A few carefully placed white elements feel intentional and artistic. Too many read as overdone.
Worth knowing: Let your red base completely dry and cure before adding white details. Painting on top of uncured polish leads to muddy colors and details that don’t stay sharp and defined.
9. Burgundy Deep Red French Tips
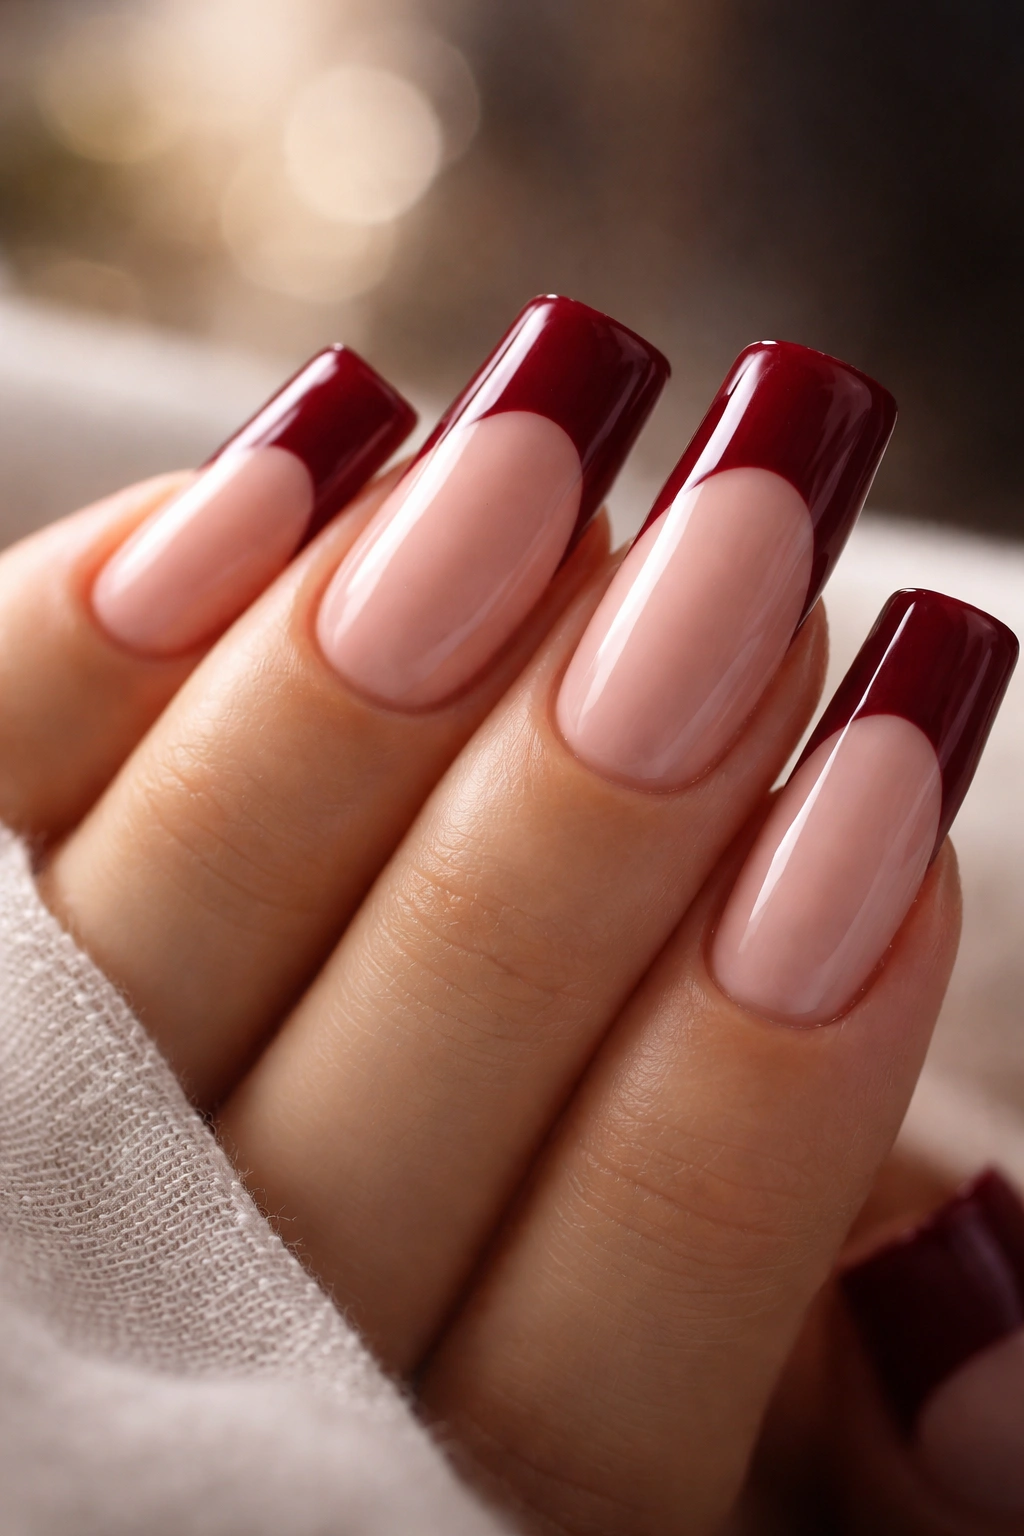
Burgundy is the sophisticated older sister of bright red. It’s richer, more complex, and carries this inherent elegance that reads as refined rather than bold. When you use deep burgundy for your French tips instead of a true red, the entire vibe shifts toward luxury and understated power.
Why Burgundy Works on Duck Nails
The exaggerated shape of duck nails can read as trendy and fun, which is great. But when you pair that trendy shape with a sophisticated burgundy color, you create an interesting juxtaposition—modern shape, elegant color. It’s unexpected in the best way, feeling both current and timeless at the same time.
Burgundy Shade Variations
There’s a range within burgundy. A burgundy with more red undertones feels warmer and slightly more playful. A burgundy with more brown undertones feels earthy and sophisticated. A burgundy with purple undertones feels more mysterious and artistic. The nude or pale pink base you pair it with can emphasize different burgundy undertones—cooler bases make purple-toned burgundies pop, warmer bases enhance red-toned burgundies.
Pairing Burgundy with Other Elements
If you want to add anything to a burgundy French tip—glitter, rhinestones, nail art—lean toward gold, champagne, or bronze accents rather than silver. Warm metals complement burgundy beautifully while silver can make it feel a bit cold.
Pro tip: Burgundy is particularly flattering on cooler skin tones, but honestly, everyone can wear it if they choose the right undertone. Warmer skin tones often look stunning with more red-leaning burgundies, while cooler skin tones usually shine with purple or brown-toned burgundies.
10. Red French Tips with Negative Space Design
Negative space—the intentional areas where you don’t apply polish—creates a contemporary, artistic look that feels very current. When you use this technique with red French tips, you’re combining a classic manicure style with a modern design approach, which creates something totally unique.
How Negative Space Works with French Tips
You apply your red French tip as usual, but then you leave strategic sections of the nude base visible. This could be thin lines running through the tip, geometric shapes cut out of the red area, or patterns where alternating sections of red and bare nail create visual rhythm. The eye moves across both the color and the negative space, making the design feel more dynamic.
Design Ideas with Negative Space
Thin vertical lines running through the red tip area create a modern, minimal look. A geometric cutout—maybe a triangle or rectangle—removes color from strategic spots. Alternating red and bare space in a striped pattern feels playful. A curved negative space line creates flow across the tip. Each option feels artistic and intentional.
Application Technique
Use painter’s tape or vinyl nail stickers as guides to create clean negative space lines. Apply your red tip, let it dry, then carefully remove the tape to reveal the unpainted base underneath. The edges will be super clean, which is what makes this design feel polished and professional.
Balance and Visual Impact
Negative space works best when it’s intentional and considered. Random bare spots look like chips or mistakes. Clearly planned patterns look artistic and designed. Aim for at least 2-3 specific negative space elements per nail so it reads as deliberate rather than accidental.
Worth knowing: Negative space designs actually require less polish overall, which can make them more cost-effective if you’re doing them yourself and buying individual colors.
Final Thoughts
Red French tip duck nails offer an incredible range of possibilities depending on what mood, occasion, or personal style you’re expressing. Whether you choose a classic clean crimson, add glitter for sparkle, introduce finish contrasts, or get artistic with negative space and details, you’re working with a combination that’s both timeless and contemporary.
The beauty of this style is that it works across different skill levels. If you’re just starting out with nail art, a simple classic French tip is absolutely achievable and stunning. If you’ve been doing nails for a while, you have room to experiment with techniques like marbling, chrome, and negative space designs that push your abilities.
Your duck nail shape is already making a statement—it’s bold, it’s modern, it’s undeniably eye-catching. The red French tip frames that shape and adds elegance while letting the dramatic silhouette be the main focal point. Paired together, they create something that feels intentional, fashionable, and completely yours. Whether you’re getting these done professionally or creating them at home, any of these ten approaches will have your nails looking polished and put-together.
