

Nude stiletto nails have become the gold standard for anyone who wants sophisticated, elegant nails that work from the boardroom to a night out with friends. There’s something undeniably chic about a perfectly executed nude stiletto—it’s not trying too hard, yet it commands attention the moment you reach for your coffee or sign a document. The beauty of this nail category lies in its versatility. “Nude” doesn’t mean boring beige; it encompasses warm taupes, cool grays, peachy undertones, creamy ivories, and everything in between, allowing you to find the perfect shade for your unique skin tone.
What makes stiletto nails such a powerful choice is their inherent drama. The sharp, elongated point creates an instantly glamorous silhouette that transforms even the simplest color palette into something striking. When you pair that shape with a nude tone, you’re creating an optical illusion that actually makes your hands look longer and more refined. It’s a minimalist approach to maximum impact—the opposite of what you’d expect from such a bold shape.
The real magic happens when you move beyond basic solid color. Nude stilettos become a canvas for texture, dimension, and subtle nail art that feels modern rather than over-the-top. From barely-there chrome accents to barely-there glitter, from structured geometric patterns to soft ombré gradients, there are endless ways to elevate a nude stiletto design while keeping the sophistication intact. Whether you’re a nail art minimalist or someone who loves intricate details, you’ll find a nude stiletto idea here that speaks to your style.
1. Creamy Ivory with Gold Leaf Accent

A creamy ivory base creates an incredibly luxe foundation that photographs beautifully and feels timeless regardless of the season. This particular shade sits right between white and warm beige—light enough to feel ethereal, but warm enough to complement most skin tones without looking stark or clinical. The ivory base lets your nail shape truly shine without any competing tones.
Why Gold Leaf Creates Understated Luxury
Gold leaf isn’t loud; it’s actually one of the most sophisticated ways to add dimension to a neutral nail. Unlike solid gold stripes or thick lines, delicate flakes of gold catch light unpredictably, creating an almost organic, handmade appearance. The leaf fragments settle into the nail surface in slightly different ways on each nail, so even though your nails aren’t identical, they feel intentional rather than accidental.
How to Create This Look
- Apply two thin coats of a creamy ivory gel or polish (brands like Essie or Sally Hansen make excellent options in shades like “Ballet Slippers” or “Linen”)
- While the second coat is still tacky (if using gel) or slightly wet (if using regular polish), carefully apply small pieces of gold leaf using a cuticle pusher or tweezers
- Press the leaf gently onto the nail surface—place fragments across the nail or concentrate them in one corner for an asymmetrical moment
- Seal everything with a glossy top coat to lock in the leaf and create a smooth, luxe finish
- This works equally well as a full manicure or an accent nail on just one or two fingers
Pro tip: Gold leaf can lift at the edges if you’re rough with your hands, so seal it generously and avoid aggressively washing dishes for the first 24 hours.
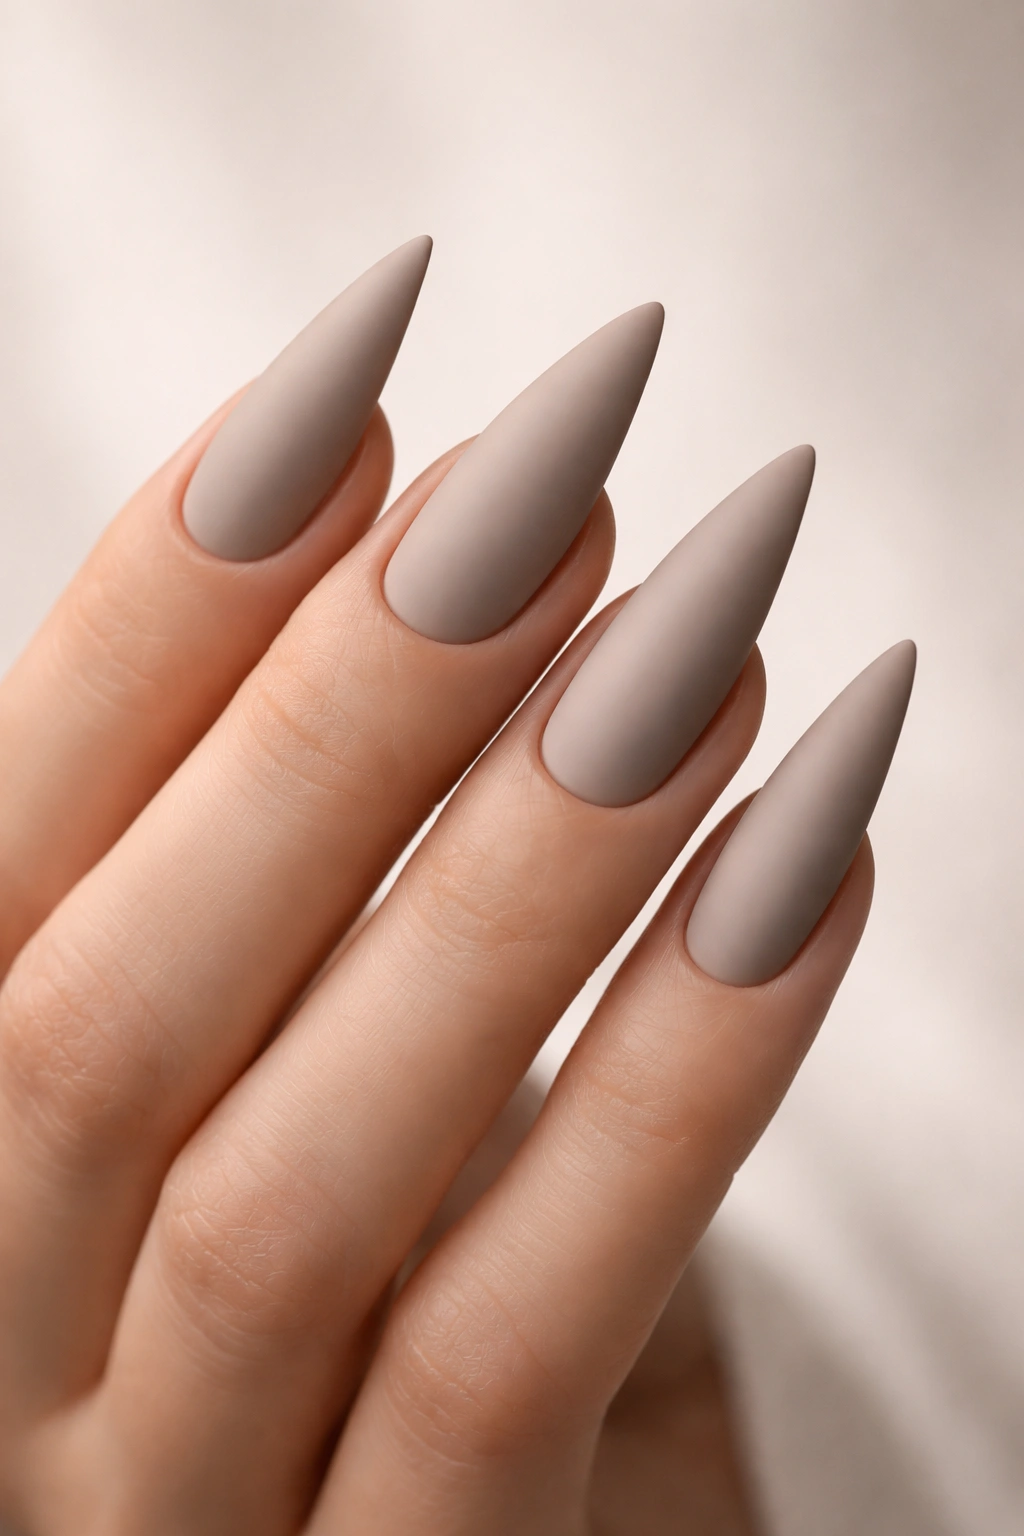
2. Warm Taupe with Matte Finish
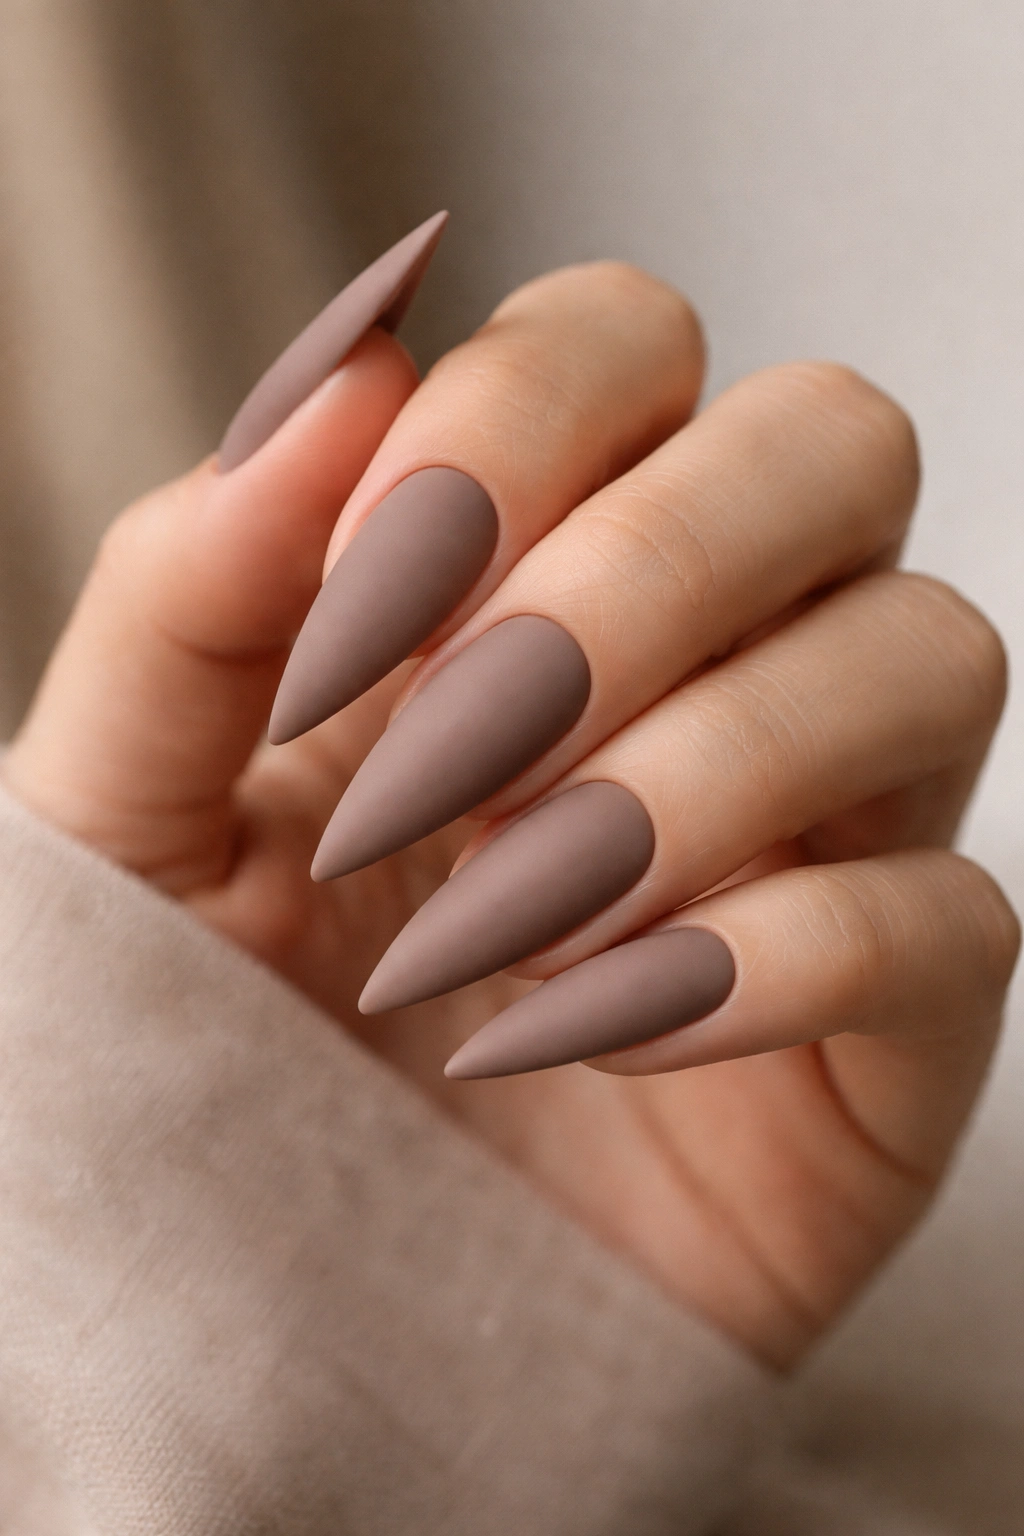
Warm taupe is where neutral truly shines—it’s the nude that looks good on absolutely everyone because it has just enough color to feel intentional while remaining undeniably subtle. A matte finish on this shade is the ultimate “quiet luxury” moment. There’s something deeply satisfying about the velvety texture of matte nails, and it photographs with an almost tactile appeal that glossy finishes can’t quite match.
The Sophistication of Texture Over Shine
Matte nails force you to appreciate the color itself rather than relying on shine to create visual interest. This actually makes imperfect application more forgiving—tiny bubbles or dust particles that would be obvious under a glossy top coat practically disappear in matte. The flat finish also makes your nails feel more substantial and modern, like you’re intentionally choosing understated elegance over obvious glamour.
Application Tips for Flawless Matte
- Choose a high-quality warm taupe formula that won’t look muddy or flat (shades like “Greige” or “Toasted Taupe” work beautifully)
- Apply three thin, even coats rather than two thick ones—this prevents the streaky appearance matte finishes are sometimes prone to
- Use a matte top coat specifically designed for matte nails, not just a regular glossy coat applied over a matte base
- Cure in UV/LED light between each layer if using gel, or allow 5-10 minutes of air-dry time between coats for regular polish
- If you prefer a softer matte (sometimes called “satin”), apply one thin coat of glossy clear polish over the finished matte for a subtle sheen that still reads as matte
Worth knowing: Matte finishes require slightly more maintenance than glossy finishes because they show fingerprints and dust more readily, but weekly hand moisturizing keeps them looking fresh and prevents the color from looking chalky.
3. Cool Grey with Chrome Dust
Cool grey sits at the intersection of understated and unexpected—it’s neutral enough to feel appropriate anywhere, yet distinctive enough that people actually notice your nails. When you layer chrome dust over cool grey, you’re not creating a mirror finish; instead, you’re adding ethereal, smoky dimension that catches light from multiple angles. The metallic particles sit just slightly proud of the nail surface, creating a three-dimensional effect.
Why Chrome Works Differently on Grey
Chrome dust over grey tones looks less “costume-y” and more “refined” than chrome over warmer tones. The cool undertones of the grey Base seem to anchor the reflective quality of the chrome, making it feel like an intentional design choice rather than a trend-chasing moment. This combination whispers rather than shouts.
Layering Chrome Like a Pro
- Paint your base color in a cool grey shade with good opacity (two coats minimum)
- Once fully dry or cured, apply a sticky gel coat or dry binding base coat—chrome dust adheres best to a slightly tacky surface
- Use a chrome powder application brush or a soft, dense brush to press the chrome dust firmly onto the nail in a gentle circular motion
- Start with less powder than you think you’ll need—you can always add more, but removing excess without disturbing the base is tricky
- Seal with a quick-dry topcoat or gel topcoat depending on your polish type, pressing gently with the brush rather than swirling
- The chrome particles will look slightly darker when sealed, so the depth increases from application to finish
Pro tip: Chrome dust creates the most beautiful effect when applied to the center of the nail, leaving a thin border of the grey base visible around the edges—this creates a frame effect and prevents the chrome from looking too overwhelming.
4. Peachy Nude with Negative Space Design
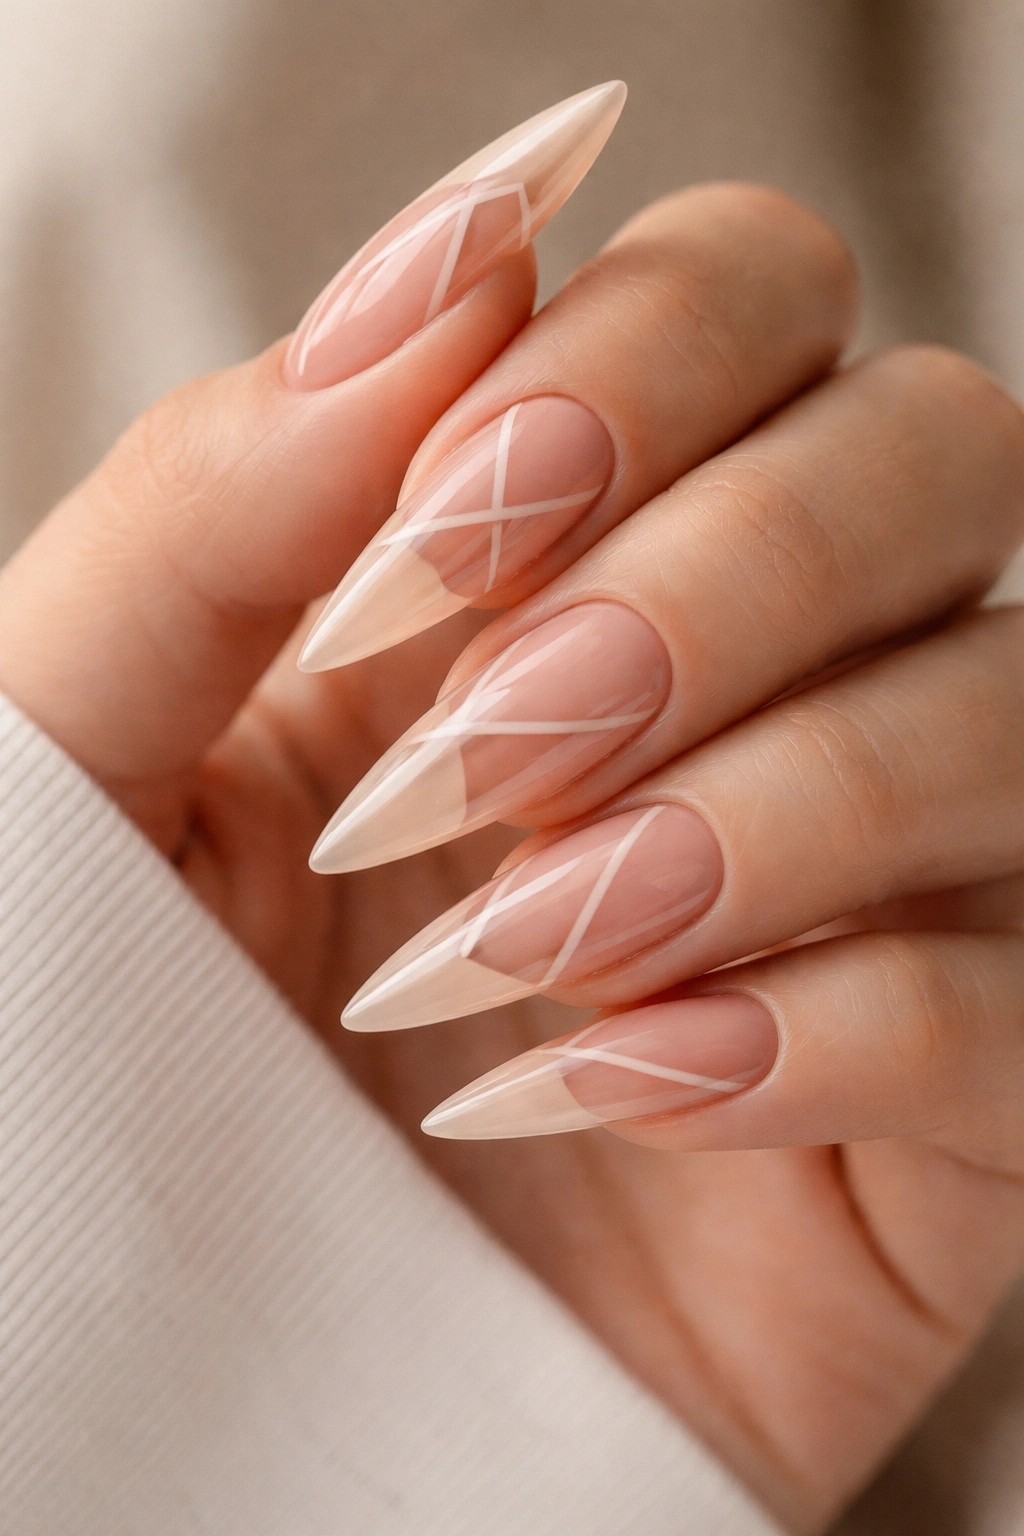
Peachy nude tones sit beautifully on deeper skin tones and add warmth to cooler complexions—it’s one of the most flattering neutral shades available. When you pair this warm nude with negative space (strategically painted areas where the nail itself shows through), you create visual interest without adding pattern or texture. The exposed nail becomes part of the design itself, forming clean lines and geometric shapes.
The Modern Appeal of Negative Space
Negative space designs feel contemporary and intentional in a way that solid manicures sometimes don’t. They also reduce the visual weight of stiletto nails slightly—instead of solid color running the entire length, you’re creating breaks and openness that balance the sharp points of the shape. It’s particularly effective for people with longer nails who want sophistication without the intensity of full coverage.
Creating Clean Negative Space
- Start with a peachy nude base (two coats, fully cured or dried)
- Using striping tape (thin, sticky tape designed specifically for nail art), create your pattern—vertical stripes, diagonal lines, geometric cutouts, or curved sections
- Press the tape firmly to ensure paint won’t seep underneath
- Apply a contrasting nude shade (try pure white or a warmer tan) only to the exposed areas, painting carefully along the tape edges
- Remove the tape immediately after painting while the color is still wet (this prevents peeling up the underlying base coat)
- Once fully dry or cured, seal with a glossy topcoat for a finished, polished appearance
- Alternative method: Use a very fine brush or nail art pen to hand-paint thin, straight lines directly on the nail without tape (this takes practice but feels more organic)
Worth knowing: Negative space designs actually reveal any nail imperfections, so make sure your actual nail surface is smooth and even before beginning—file gently and shape carefully.
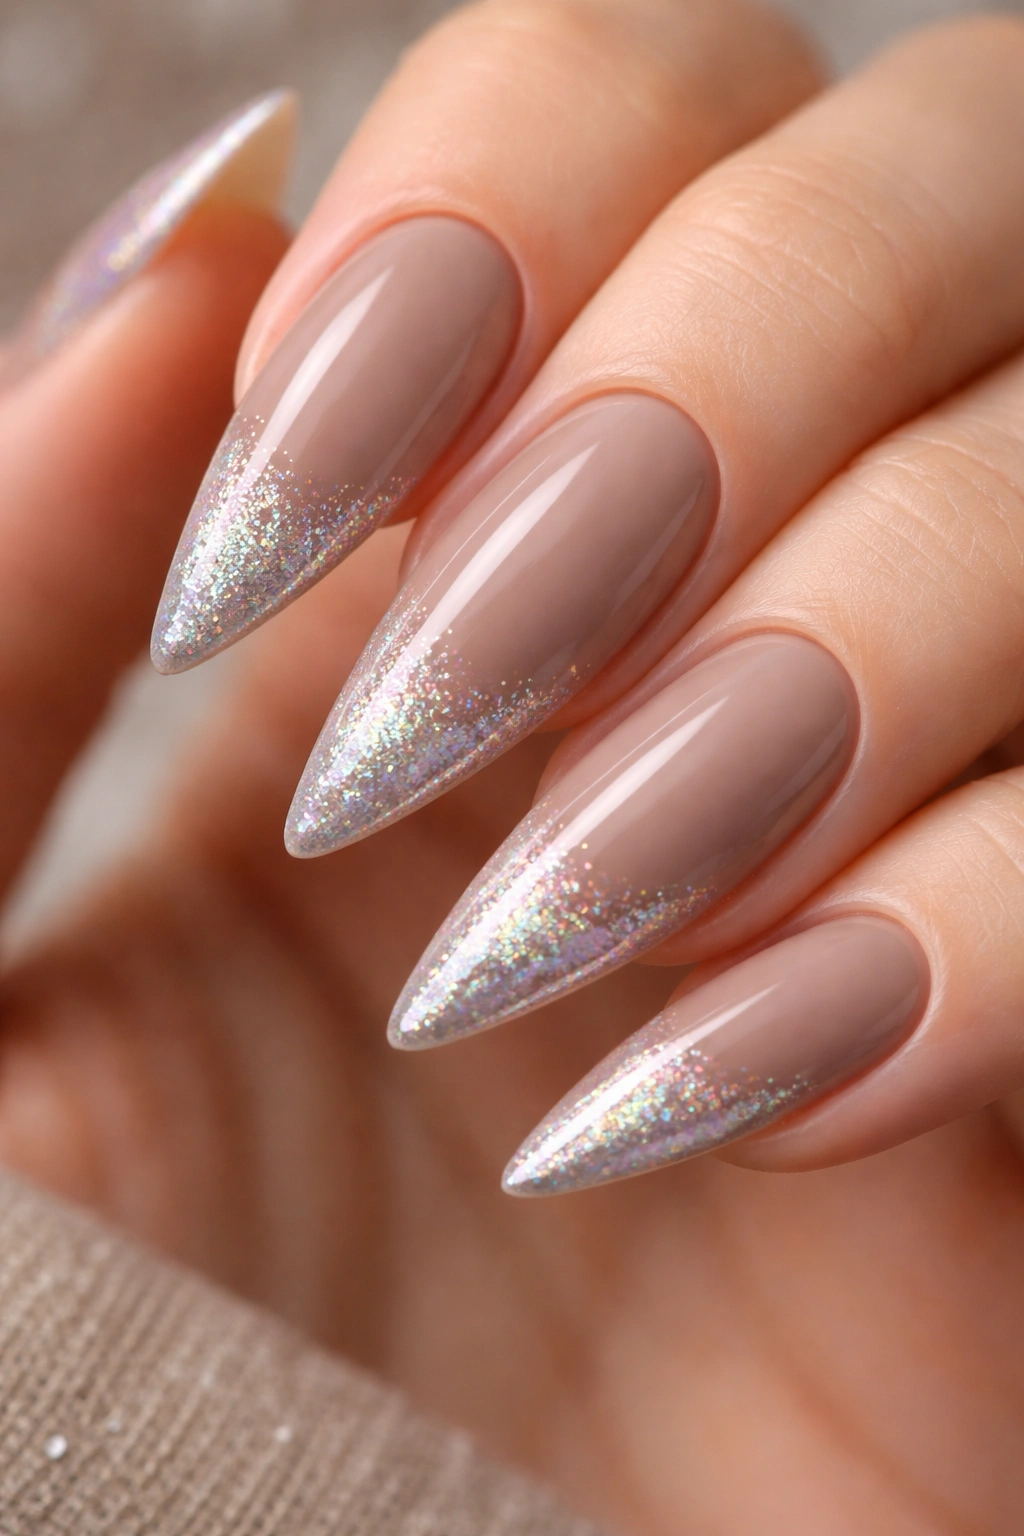
5. Ballerina Pink with Micro Glitter Gradient
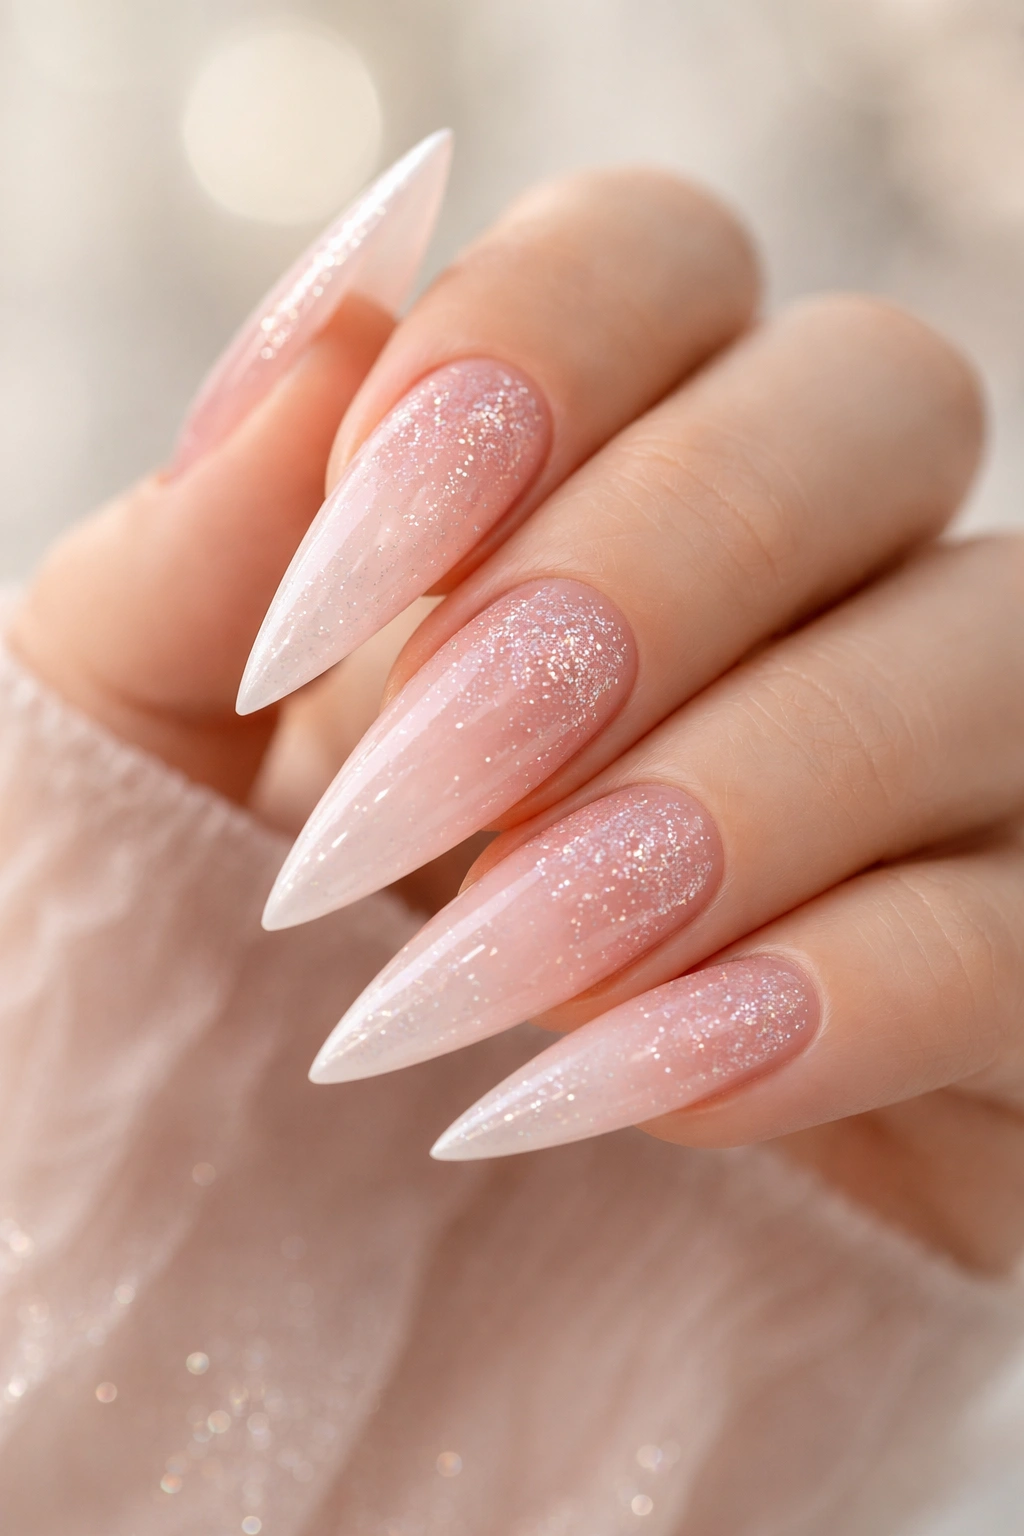
Ballerina pink is the slightly warmer, slightly more saturated cousin of traditional nude tones—it’s still decidedly neutral, but with just enough personality to feel special. When you layer micro glitter in a gradient effect (dense at the base, fading to nearly transparent at the tips), you create dimension and movement without the look of a full glitter manicure. The gradient effect is particularly flattering on stiletto nails because it follows the natural line of your fingers.
How Gradient Glitter Transforms a Subtle Base
A solid pink or nude base alone might feel just a little too flat, but that same color with strategic glitter placement becomes immediately more interesting. The gradient approach ensures the nail tips stay relatively clean, which maintains the sophisticated stiletto silhouette while adding visual depth where it matters most. It’s the sweet spot between bold and understated.
Achieving a Flawless Glitter Gradient
- Apply two coats of ballerina pink base color and allow it to fully cure or dry
- Mix a small amount of glitter (use very fine, micro glitter, not chunky pieces) with a clear gel or polish to create a diluted glitter mixture
- Apply this mixture densely to the lower third of the nail (near the base)
- Using a clean brush, blend the glitter mixture upward in gentle strokes, creating a gradual fade toward the tips
- The glitter should become more sparse and transparent as you move toward the point of the stiletto
- Allow each layer to set partially before adding more—this prevents glitter from just spreading all over the nail
- Seal with a glossy clear topcoat, using gentle pressure so you don’t disturb the gradient you’ve created
Pro tip: If you’re working with regular polish instead of gel, a lint-free wipe dampened with a tiny bit of topcoat can help create smooth transitions between glitter and bare base—just dab gently where you want to blend.
6. Warm Beige with Thin Gold Stripe
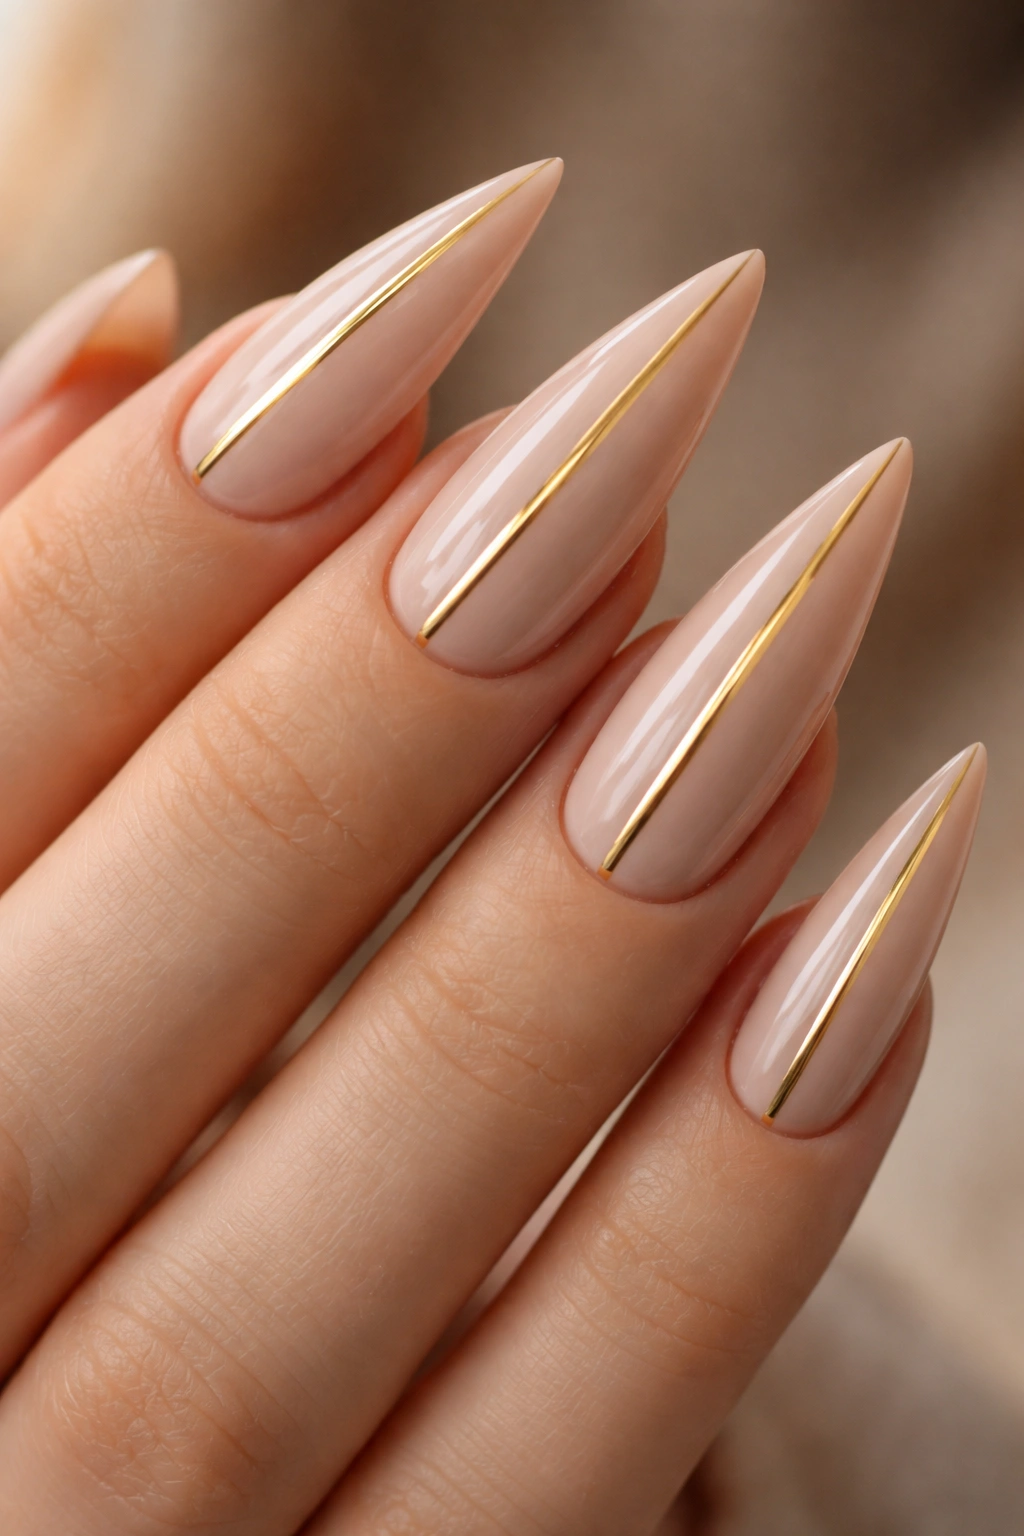
Sometimes the most sophisticated designs are also the simplest. A warm beige base with a single thin vertical gold stripe down the center of each nail creates a striking look that’s mature, intentional, and requires zero nail art skill to execute. The stripe divides the nail visually, creating the impression of length while adding enough visual interest to keep the manicure from feeling flat.
Why Minimalist Geometry Feels Modern
A single line is actually one of the most current nail design trends because it respects the integrity of the nail shape while adding dimension. It’s not trying to be a full design or intricate art piece; it’s just a line. That restraint is what makes it feel expensive and considered rather than overcomplicated. On stiletto nails specifically, a vertical stripe echoes the shape itself, creating visual harmony.
Painting a Perfect Stripe
- Apply two full coats of warm beige and cure or dry completely
- Use striping tape or a very fine, steady-handed brush to apply a thin line of gold gel or polish directly down the center
- If using tape, press it firmly, paint your gold line, and remove the tape while still wet
- If hand-painting, use a thin striping brush and a steady hand—rest your painting hand on the table to stabilize it
- The stripe should be thin enough that it feels like an accent, not a statement—somewhere between 1-2mm in width
- Once the stripe is dry or cured, seal everything with a glossy topcoat
- Alternative: Try a stripe that runs at a slight diagonal angle for a modern twist on the classic centered line
Worth knowing: Some people find it easier to paint stripes using a nail art pen or a very thin brush with a bottle of gold polish rather than specialized striping gel—experiment to see what gives you the steadiest hand.
7. Greige (Grey-Beige) with Velvet Matte Finish
Greige is the technical term for the gray-beige hybrid that’s become a staple neutral in fashion and interior design, and it’s absolutely stunning on nails. This tone is chameleon-like—it appears slightly different depending on the lighting and what you wear around it. When finished with a velvet matte topcoat, the entire nail takes on a soft, touchable quality that feels incredibly luxurious and contemporary.
The Sophistication of Greige
Greige doesn’t have the starkness of pure grey or the warmth of beige—it lives comfortably in the middle, which is precisely why it’s so universally flattering. It pairs beautifully with almost any outfit and skin tone because it’s fundamentally neutral. The matte finish amplifies the understated elegance, transforming what might have been a basic nude into something that feels intentionally curated.
Perfecting a Matte Velvet Finish
- Begin with a greige shade that has good pigmentation and opacity—muddy greige looks flat and unfinished
- Apply two to three thin coats of color, allowing proper cure or dry time between layers
- Use a velvet matte topcoat specifically formulated for matte finishes (brands like Gelish and OPI make excellent versions)
- Apply the matte topcoat in thin layers, curing or drying between coats if needed
- The velvet finish should have a soft, almost powdery appearance—if it looks plastic-like or too flat, you may need a different topcoat formula
- If you want very subtle shine beneath the matte (a satin look rather than full matte), apply one very thin layer of glossy topcoat under the matte coat
- To maintain the velvet finish and prevent it from looking dull, moisturize your hands frequently—cuticle oil makes velvet finishes look fresher
Pro tip: Velvet matte finishes show dust and fingerprints more readily than glossy or satin finishes, but they also hide cuticle lines and nail imperfections beautifully—the trade-off is worth it for the sophisticated appearance.
8. Caramel Nude with Glowing Pearl Essence
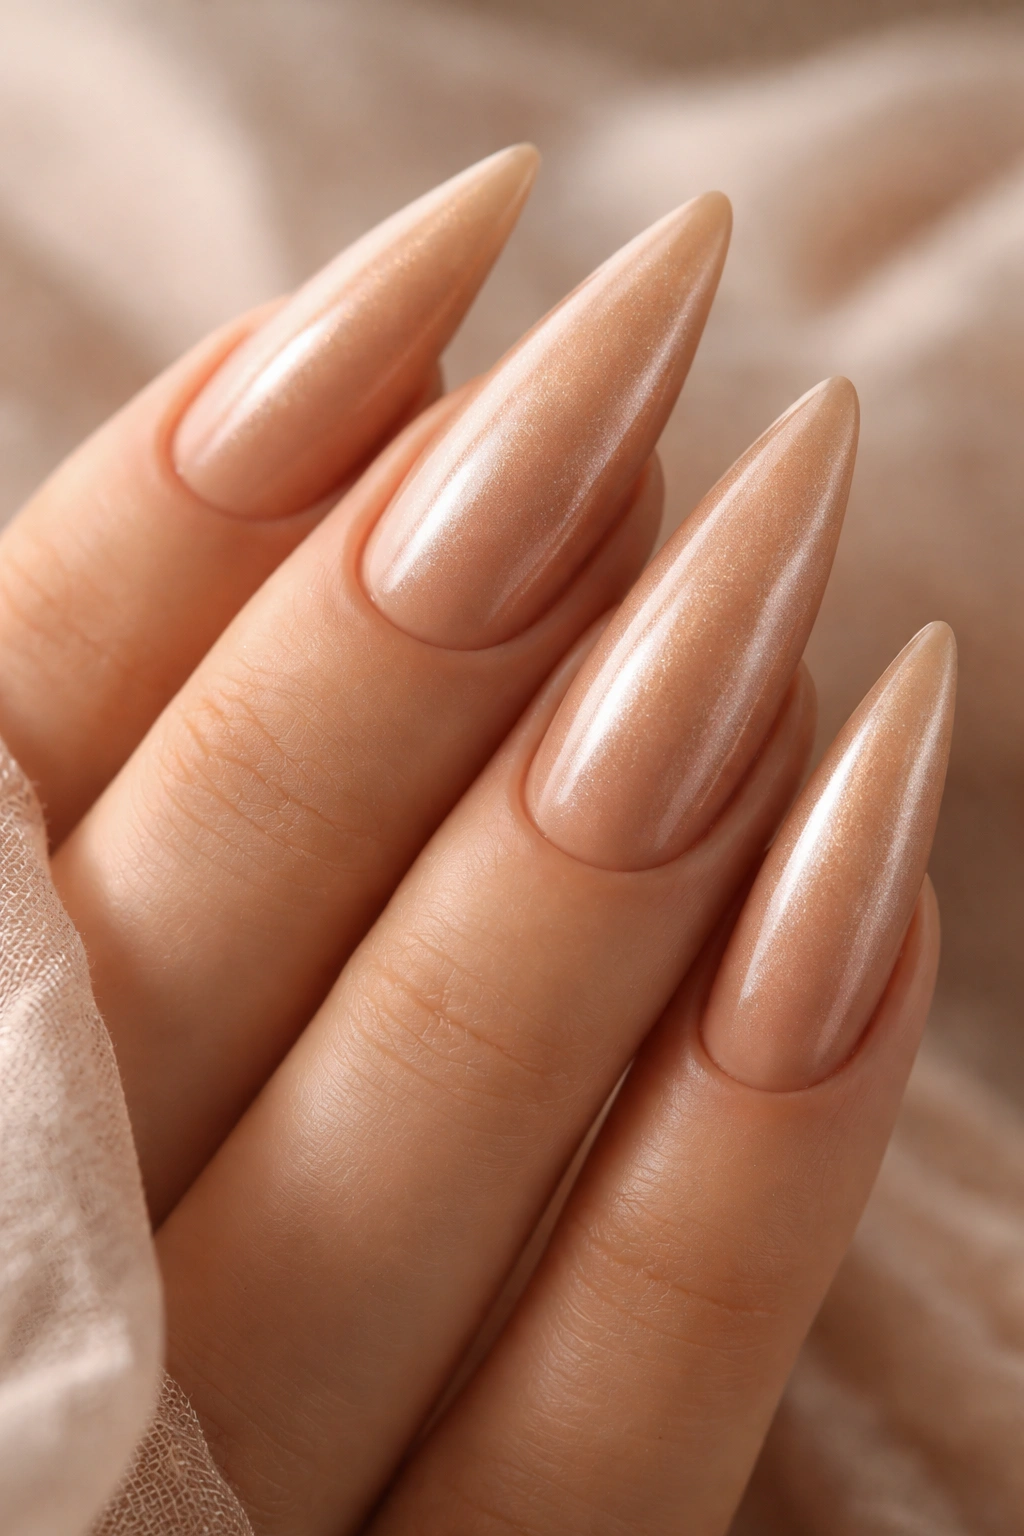
Caramel nude tones have warmth without being obviously brown or tan—they sit in this beautiful sweet spot that complements medium to deeper skin tones particularly well while still reading as neutral. When you add pearl essence (a reflective shimmer ingredient that creates an almost iridescent glow), the entire nail gains depth and luminosity without looking glittery. It’s a glow from within rather than sparkle on top.
How Pearl Creates Dimensional Warmth
Pearl essence works differently than glitter or chrome—instead of sitting on the surface, pearl particles are suspended throughout the polish formula, creating a subtle radiance as light passes through the color. This means the nail looks good from every angle, not just when the light hits it directly. The caramel base becomes richer and more dimensional with pearl, developing depth that a solid color simply can’t achieve.
Selecting and Applying Pearl Essence Products
- Choose a caramel nude base that coordinates with the pearl essence you’re using—warm golds and rose golds work beautifully with caramel
- If buying a polish that already contains pearl essence, apply two coats for optimal color and glow
- If creating a pearl effect yourself, apply your caramel base coat first (two coats), then apply a pearl essence topcoat or a clear gel/polish mixed with pearl powder
- The pearl effect should be subtle enough that someone across the room notices your nails look “luminous” rather than “sparkly”
- Make sure your topcoat is crystal clear—any yellow or amber tone will muddy the effect
- The finish should be glossy, allowing light to reflect through the pearl particles
- This look is particularly striking in sunlight and under warm lighting
Worth knowing: Pearl essences wear better than loose glitters because the particles don’t shift or migrate across the nail—what you apply at the start is what you keep throughout the manicure’s wear time.
9. Barely-There Blush with Micro-Shatter Detail

Barely-there blush is such a light nude-pink that it’s almost imperceptible at first glance—it looks almost like sheer color over bare nail. This minimalist base becomes an interesting canvas when you add micro-shatter effect (tiny fractured lines that look like cracks but are actually part of the polish design). The shatter sits on top, creating texture and visual interest while the blush base keeps everything soft and romantic.
The Textural Appeal of Shatter Polish
Shatter creates dimension through pattern rather than through shine or sparkle. The delicate cracked lines catch light differently than the surrounding nail, creating a topographical effect that’s more sophisticated than flat glitter. Because your base is so light, the shatter pattern reads as the main design rather than an addition to a bold color—it becomes the entire focal point.
Creating Perfect Shatter Effect
- Apply your barely-there blush base in two thin coats—this shade is so delicate that thin coats work better than thick ones
- Allow the base to fully cure or dry until it feels completely set
- Apply one coat of shatter polish in a complementary shade (soft grey, pale taupe, or translucent white shatter work beautifully over blush)
- Do not allow shatter polish to dry slowly; curing with LED/UV light or allowing it to air dry very quickly creates the signature cracked texture
- Some formulations benefit from a thin topcoat to seal the shatter and prevent it from catching on clothes or skin (test on one nail first)
- The shatter pattern should look almost three-dimensional, with tiny fractured lines creating shadows and depth
- This combination works particularly well on stiletto nails because the shape provides enough surface area for the shatter pattern to read clearly
Pro tip: Different shatter polish formulas create different effects—test a shade you love before committing to all ten nails, as some sheers create finer lines and others create broader, more obvious cracks.
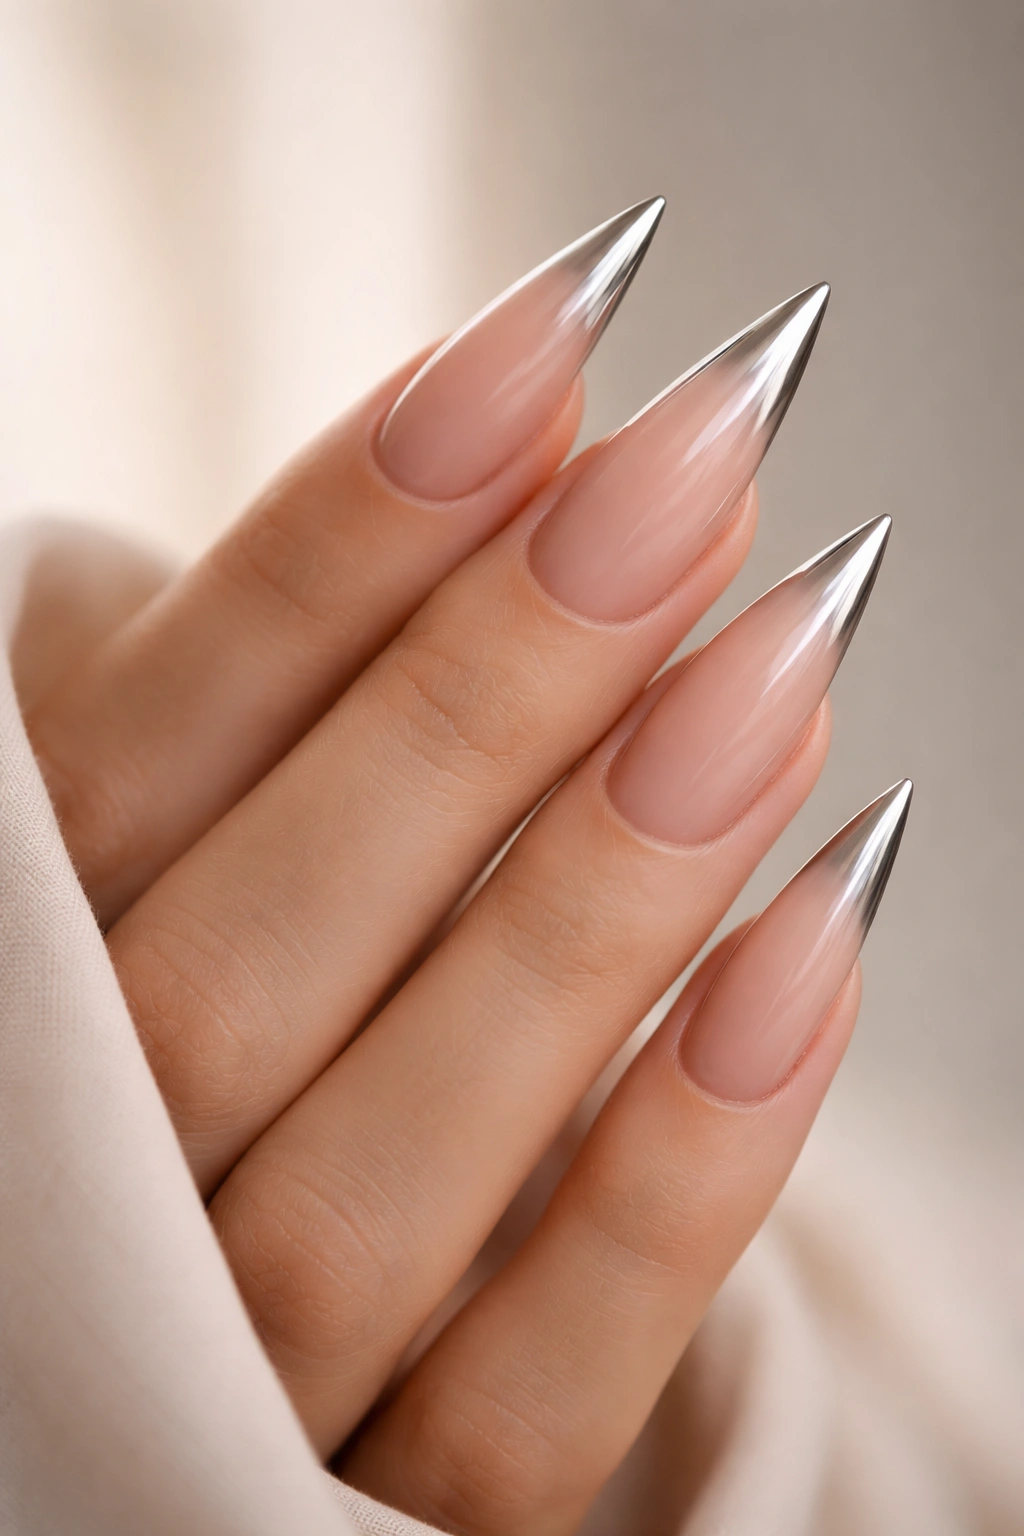
10. Cool Ivory with Rose Gold Dust
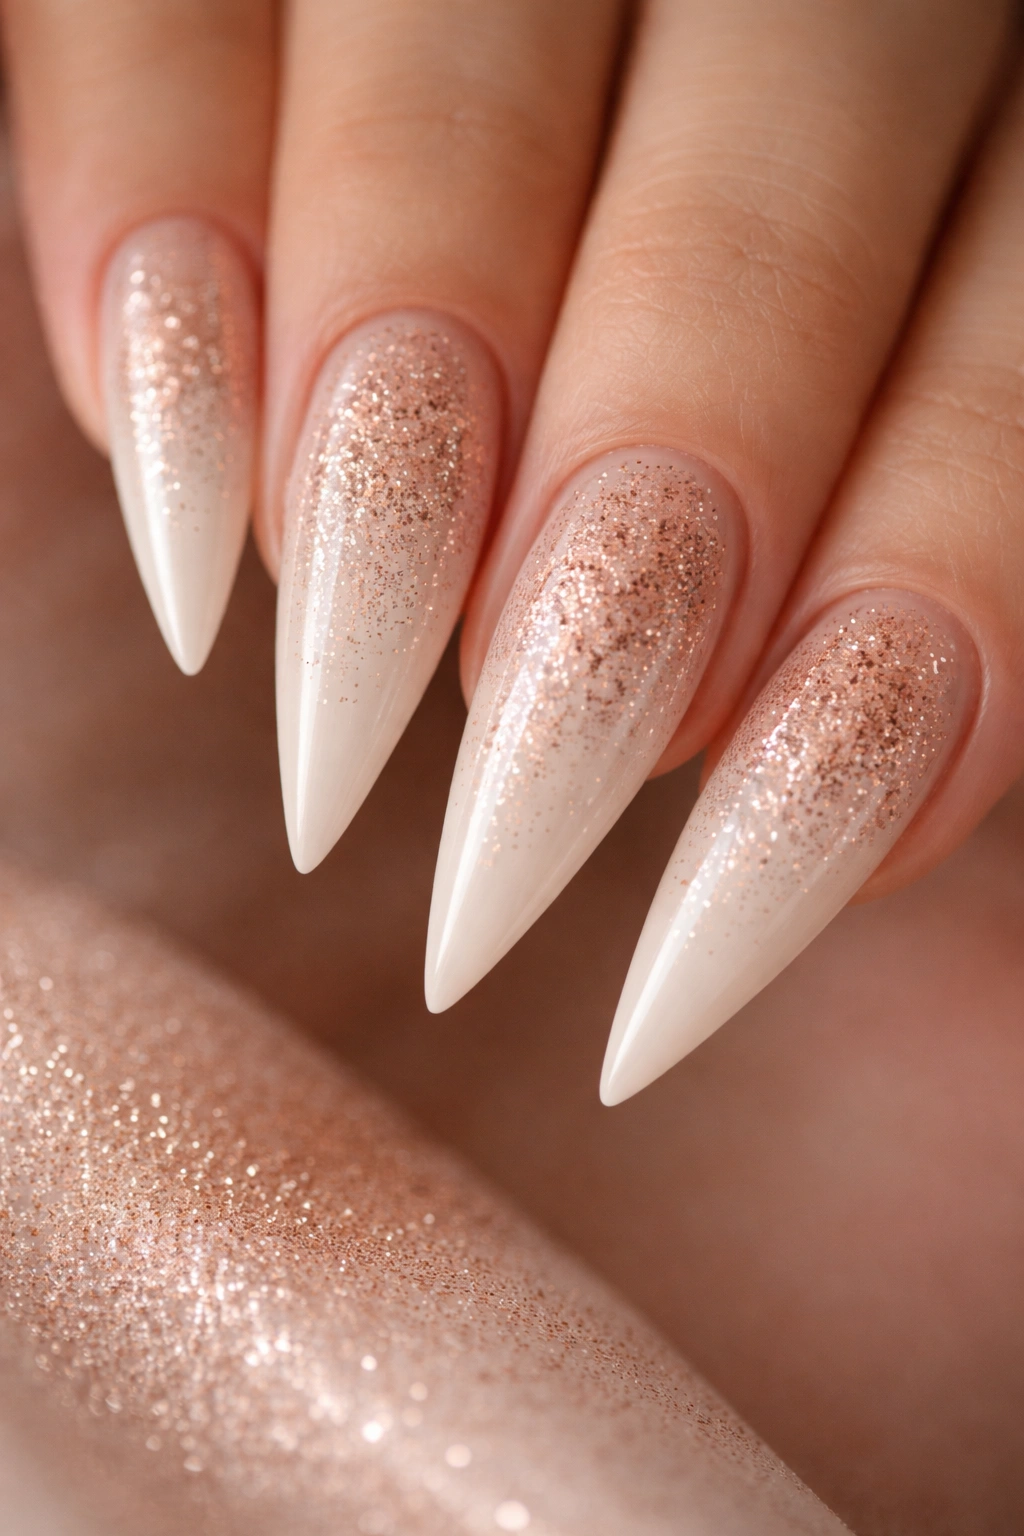
Cool ivory avoids warmth, leaning instead toward clarity and brightness—it’s like the white of fresh snow rather than cream. Rose gold dust creates a romantic, slightly warm sparkle that might sound contradictory but actually complements cool ivory beautifully. The cool base grounds the warmth of the rose gold, while the rose gold adds dimension and femininity to the cool tone.
Why Rose Gold Flatters Ivory
Rose gold has become universally beloved because it works across all skin tones and all undertones. When paired with cool ivory, it creates contrast that’s subtle but noticeable. The rose gold catches light, drawing attention to your hands, while the ivory keeps everything feeling fresh and clean. It’s a combination that feels both romantic and contemporary.
Blending Rose Gold Dust Into Ivory
- Start with a cool ivory base (two coats, fully set)
- Apply a tacky gel base coat or use regular polish that’s still slightly wet
- Using a dense brush, press rose gold dust into the surface—you can concentrate it in one corner, spread it across the nail evenly, or create an ombre effect where it’s dense at the base and fades toward the tip
- For an ombre effect, apply the dust densely at the base and use a clean, dry brush to blend it upward in gentle strokes
- Once you’re happy with the placement and intensity, seal with a clear topcoat
- The rose gold should shimmer subtly, not look heavy or overwhelming
- This effect photographs beautifully because the contrast between cool ivory and warm rose gold creates visual pop
Worth knowing: Rose gold dust looks more elegant when it’s partially transparent (you can still see some of the ivory base through it) rather than fully opaque—go easier on application than you think you need to.
11. Dusty Rose with Subtle Gradient

Dusty rose is a sophisticated nude-adjacent tone that leans pink without being obviously pink. It’s muted, sophisticated, and has vintage charm. A subtle gradient on dusty rose means you’re adding an extra layer of dimension—perhaps slightly deeper rose at the base, fading to barely-there blush at the tips, or vice versa. The gradient should be so soft that it reads as almost monochromatic at first glance, then reveals itself on closer inspection.
Monochromatic Gradients for Quiet Sophistication
Gradients within a single color family feel more elegant than high-contrast gradients because they require closer observation to appreciate. This works beautifully with stiletto nails because it adds length and dimension without being loud. A gradient that moves from darker at the base to lighter at the tips follows your natural nail growth pattern, creating harmony with your finger shape.
Building a Soft Monochromatic Gradient
- Choose two shades of dusty rose or rose-adjacent tones—one slightly deeper, one slightly lighter (or use one shade and mix it with white or clear to create variations)
- Apply the deeper shade to about the lower third of the nail
- Apply the lighter shade to the middle third and upper third
- Using a clean, damp brush or a makeup sponge, blur the line where the two colors meet in gentle stippling motions
- Don’t fully blend the colors into each other; let them remain distinct enough that dimension is visible, but soft enough that there’s no harsh line
- Allow each layer to cure or dry before adding additional depth or topcoat
- The final result should look like the color is naturally deepening toward the base, as if the nail is receiving more light at the tips
Pro tip: This technique is forgiving because the colors are similar—imperfect blending actually looks intentional and organic rather than like a mistake.
12. Taupe with Holographic Sparkle Accent
Taupe is the everyday neutral that deserves more attention—it’s warm without being obviously tan, it’s neutral without being boring, and it suits virtually every skin tone. When you add holographic sparkle as an accent (rather than covering the entire nail), you’re creating a design that walks the line between elegant and playful. The holographic particles catch every color of light, creating an otherworldly shimmer.
Strategic Sparkle Placement for Impact
Rather than full sparkle coverage, try concentrating the holographic effect on just the tips, or creating a small area of sparkle near the base that’s visible when your hands are resting. This approach maximizes the impact of the sparkle while keeping the manicure feeling sophisticated. On stiletto nails, a line of sparkle down the center or across the tips becomes a design element rather than just glitter.
Applying Holographic Sparkle Strategically
- Paint your taupe base in two full coats
- Decide where you want the holographic accent—tips only, a side accent, or a geometric pattern
- Use striping tape or very careful brush work to define the area where sparkle will go
- Apply a holographic sparkle polish or a clear gel mixed with holographic glitter particles to this designated area
- Press the particles firmly so they adhere and catch light from multiple angles
- Remove tape if using it while the application is still wet or tacky
- Seal with a glossy topcoat that allows the holographic effect to shine
- The sparkle should be the focal point, so make sure your taupe base is smooth and well-applied so it doesn’t compete for attention
Worth knowing: Holographic effects look most impressive in natural daylight and under clear LED lighting—fluorescent or dim lighting mutes the effect significantly.
13. Cream with Fine Gold Line Work
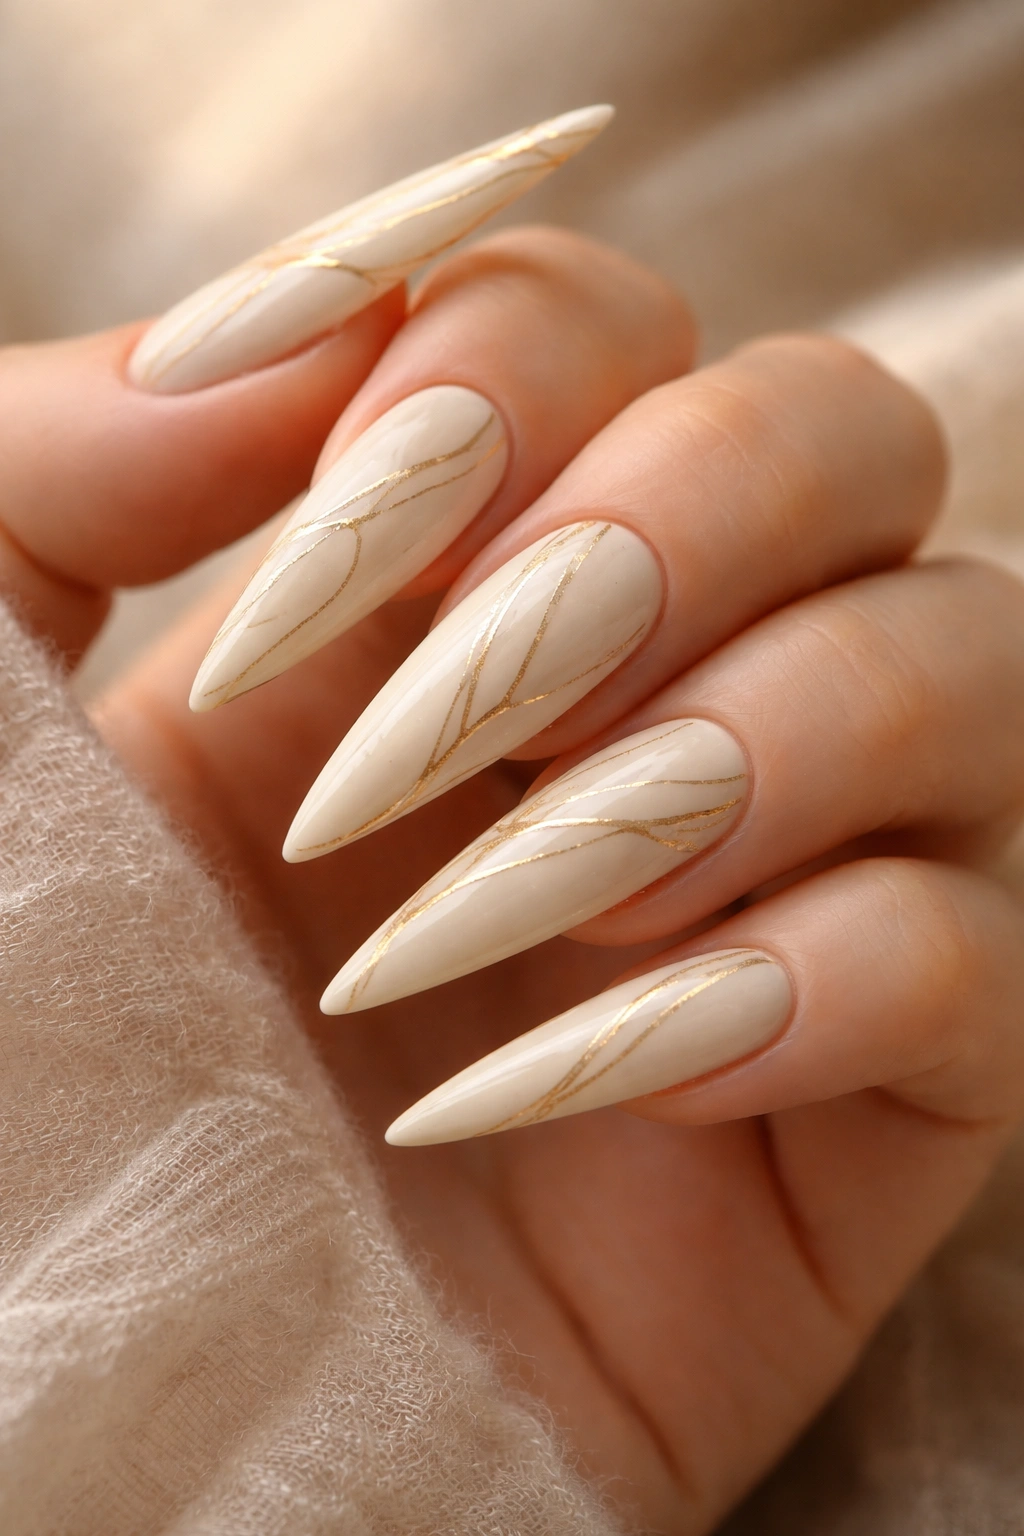
Cream is warmth and softness in nail color form—it’s like the inside of an eggshell, both delicate and substantial. Fine gold line work drawn across the cream base creates a graphic, intentional design that feels like wearable art. These lines don’t need to form a pattern; they can be organic, sketch-like marks that feel collected and considered.
Handmade Details as Sophistication
Fine line work reads as intentional artistry rather than commercial polish application. Even if the lines aren’t perfectly even, the overall effect feels curated and personal. This is particularly effective on stiletto nails because the length provides an actual canvas for these marks. The lines can follow the nail shape, creating flow and movement.
Creating Fine Line Work That Looks Professional
- Apply two coats of cream and ensure it’s completely dry or cured
- Use either a very fine striping brush or a nail art pen in your chosen color (gold is classic, but grey or taupe works beautifully too)
- Sketch fine lines across the nail—vertical, horizontal, diagonal, wavy, or geometric
- Rather than trying to create perfect symmetry, embrace slight irregularities that make the design feel handmade
- You can create an overall pattern (like a grid), or allow the lines to be more organic
- Seal with glossy topcoat to protect the line work and add shine that makes it pop
- The cream base keeps the design feeling soft while the gold lines provide definition and visual interest
Pro tip: Practice on a few nails first if hand-painting makes you nervous—a striping brush with a long, fine tip is actually easier to control than you’d expect, and most people find that steady hands come naturally with just a couple of practice nails.
14. Peachy Tan with Dry Brush Accent
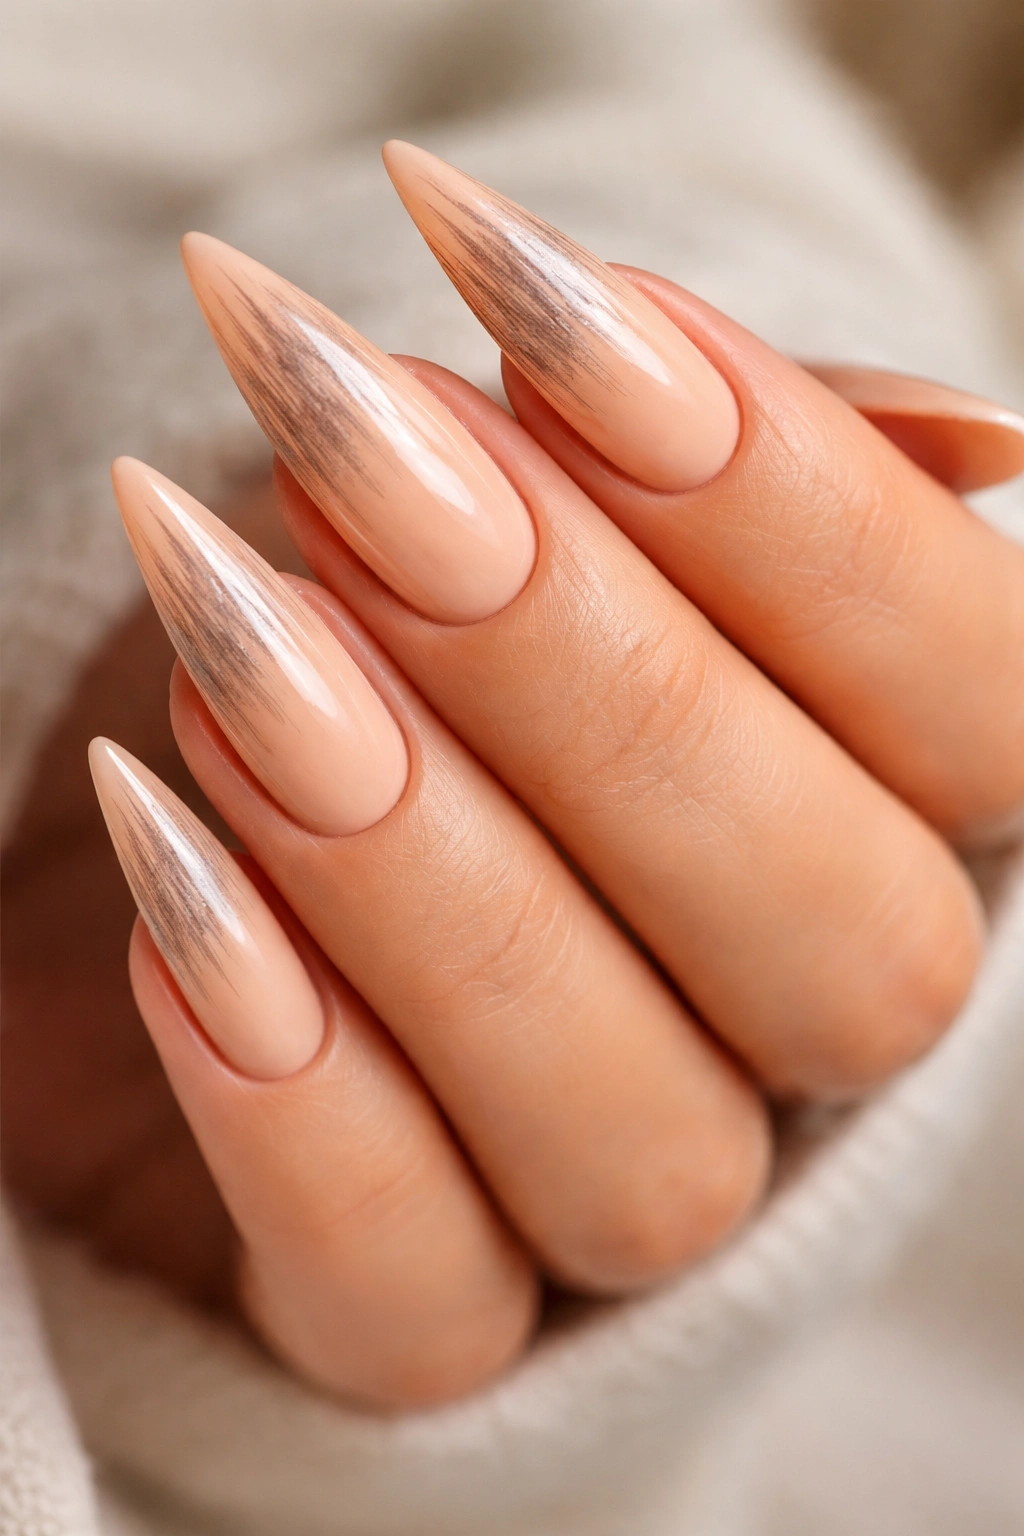
Peachy tan is where warm and cool undertones meet—it has the saturation of tan with the softness of peach. A dry brush technique (using very little product and creating textured, slightly separated strokes) adds dimension and visual interest. The dry brush effect looks intentionally imperfect, like you’ve patted paint across the nail rather than smoothly brushing it on.
Texture as Design Through Dry Brush Technique
Dry brushing is an underutilized technique in nail design because it requires confidence to intentionally not smooth things out. But that unpolished quality is precisely what makes it feel contemporary and artistic. The textured strokes catch light differently than smooth polish, creating depth. On stiletto nails, dry brush accents can frame the edges or create a central design.
Mastering the Dry Brush Effect
- Paint your peachy tan base in two smooth coats and allow it to fully set
- Using a striping brush or thin nail art brush, load a very small amount of a contrasting shade (try deep taupe, grey, or warm brown)
- Rather than applying the brush smoothly, use quick, dabbing motions that leave visible brush strokes
- The strokes should be somewhat separated, not creating a solid line or shape—think of it as texture rather than coverage
- You can create a pattern (like strokes around the edges, or a central design), or allow them to be more random
- The effect should look like painted marks rather than smooth polish application
- Seal with glossy topcoat, which will enhance the textured appearance and make the dry brush strokes really pop
Worth knowing: Dry brush effects show dust and fingerprints easily, so maintaining hand cleanliness is part of keeping this manicure looking fresh throughout its wear time.
15. Warm White with Negative Space Half-Moon
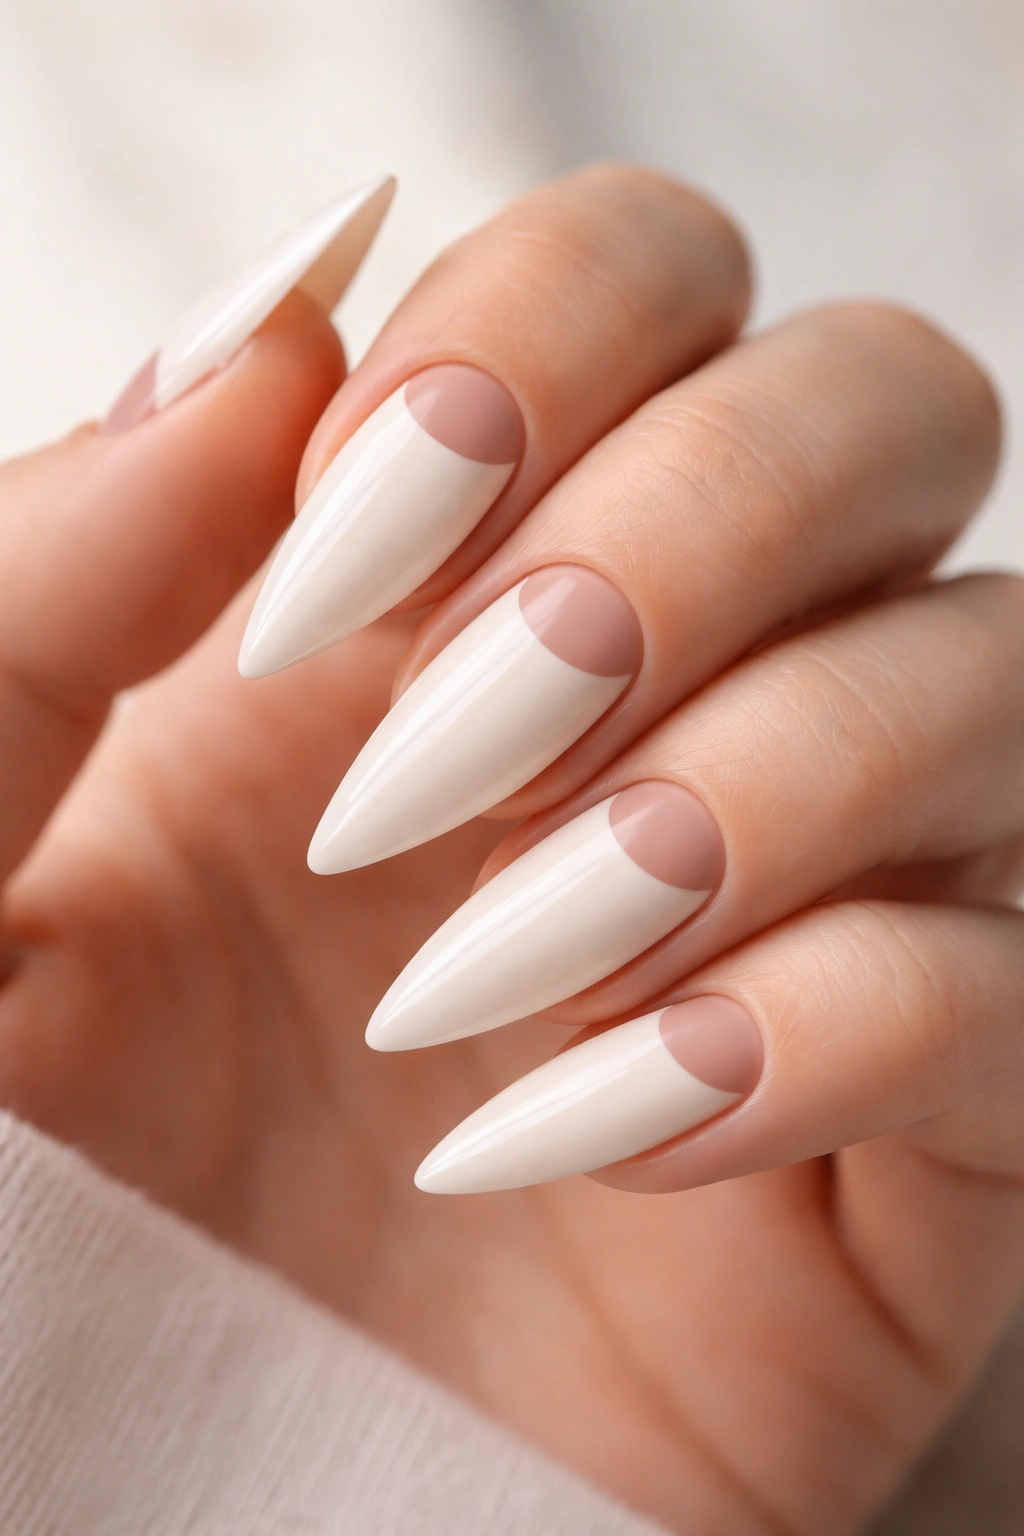
Warm white is ivory that skews slightly toward cream—it’s not sterile or clinical, but it’s definitely in the white family rather than beige. A negative space half-moon design (where the upper half of the nail is painted and the lower half, near the cuticle, is left bare) is a classic, timeless look that feels both retro and modern depending on your color combination and finishes.
Why Half-Moon Design Works on Stiletto Nails
The half-moon creates a visual dividing line that actually makes stiletto nails feel more balanced and less extreme. Instead of one long point, you’re creating visual sections. The exposed nail at the base also provides contrast and breaks up the color, making the overall effect feel more sophisticated and intentional. It’s a design that’s been around for decades, yet never feels dated.
Creating a Precise Half-Moon Design
- Apply your warm white base color to the upper half of the nail (above where the moon shape will be)
- Use a striping tape or half-moon nail guides to ensure a clean, precise curve where the painted area meets the bare nail
- The curved line should follow the natural half-moon shape near your cuticle, but start slightly lower to create an intentional gap
- Some people prefer to paint a contrasting color to the exposed lower section (try a deeper nude, grey, or even a soft black), while others prefer to leave it as natural nail
- Remove tape while the polish is still wet to prevent pulling up the paint
- If adding a second color to the moon section, apply it cleanly and seal both colors with a glossy topcoat
- The finished design should have a clear, defined line with no fuzziness or bleeding
Pro tip: Half-moon guides can be purchased as adhesive stencils, which make this design accessible even if you’re not confident with tape application—they’re sticky enough to stay in place but removable without damage.
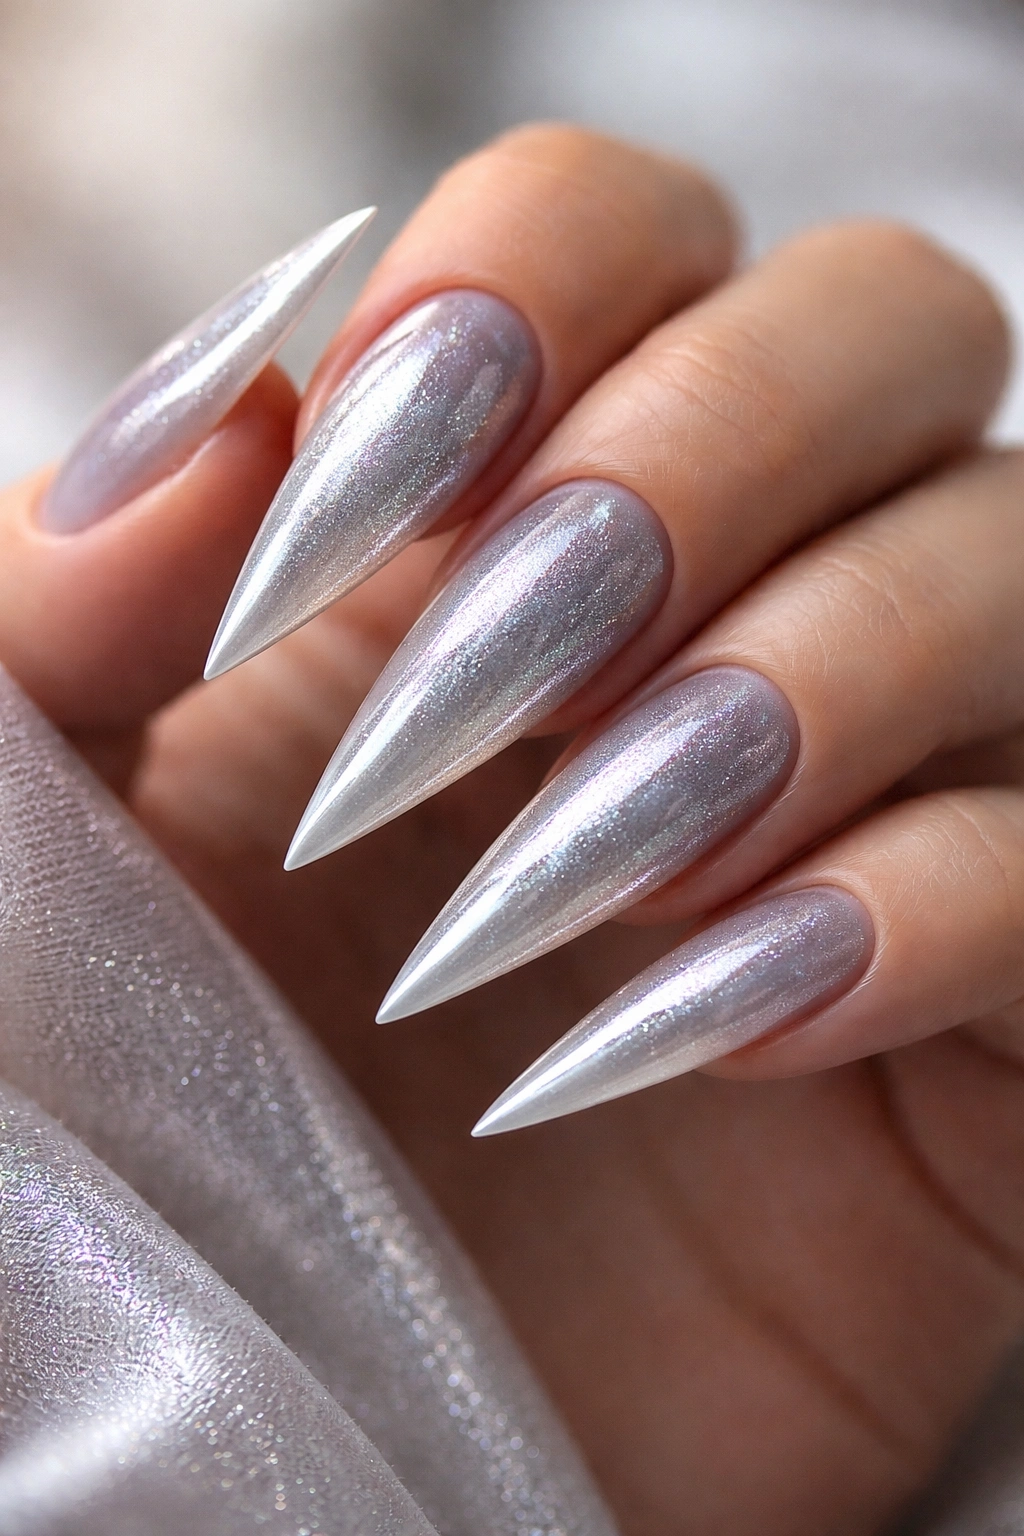
16. Greyed-Out Mauve with Pearl Shimmer
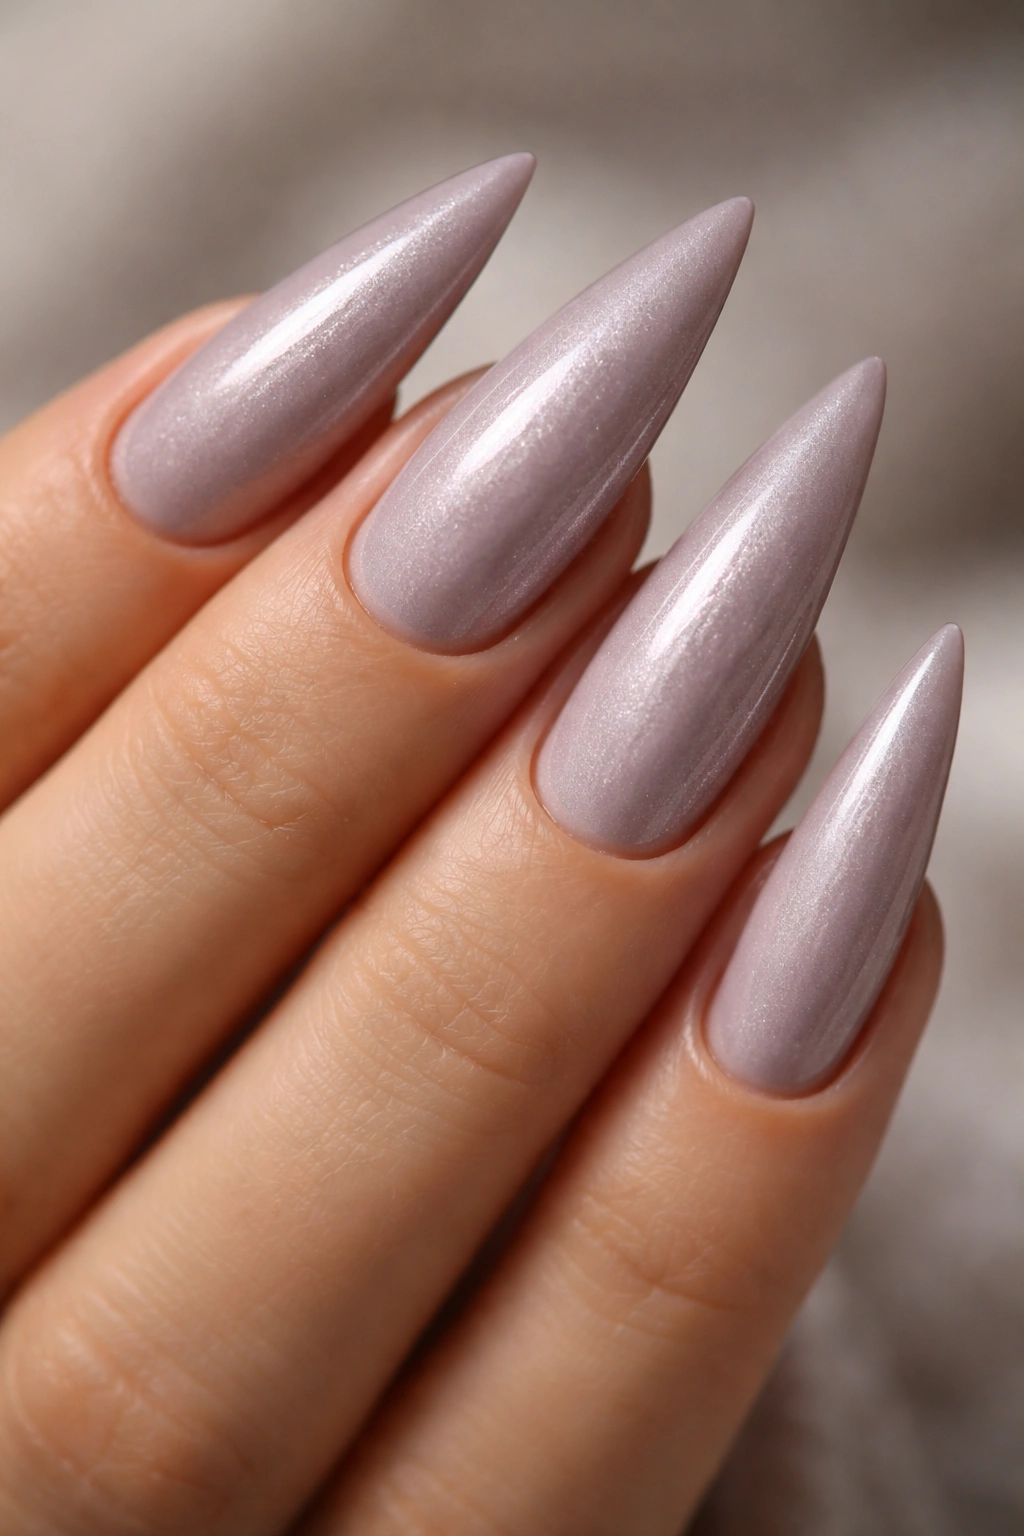
Greyed-out mauve is a muted version of a pink-purple tone—it’s sophisticated, slightly cool, and inherently elegant. When you add pearl shimmer throughout the color (not as glitter but as a built-in reflective quality), the nail gains depth and luminosity. The pearl essence makes the muted tone feel richer and more dimensional than it would as a flat color.
How Pearl Transforms Mauve Into Luxury
Mauve alone can sometimes feel slightly washed out or dated, but mauve with pearl becomes immediately more interesting and high-end. The shimmer catches light from every angle, making your nails appear to glow from within. This is particularly effective on stiletto nails because the length allows the light-catching properties to be visible from greater distances.
Working With Pearl Shimmer Mauve
- Look for a mauve shade that specifically contains pearl essence, or mix a mauve base with a pearl topcoat
- If using a formula that already contains pearl, apply two coats for full color and maximum shimmer
- If layering, apply the mauve base in two coats first, then apply a pearl-infused topcoat
- The pearl should create a subtle glow, not an obvious sparkle—if it looks too glittery, you’ve used too much or your formula is too coarse
- Ensure your topcoat is completely clear—even a hint of yellow or tint will muddy the effect
- The finished result should look like the color itself is luminous rather than covered in sparkle
- This design works beautifully in any lighting but is especially striking in natural sunlight or warm interior lighting
Worth knowing: Mauve with pearl is particularly flattering in photography—it creates a romantic, sophisticated appearance and tends to photograph better than many other nude combinations.
17. Pale Nude with Negative Space Geometric Pattern
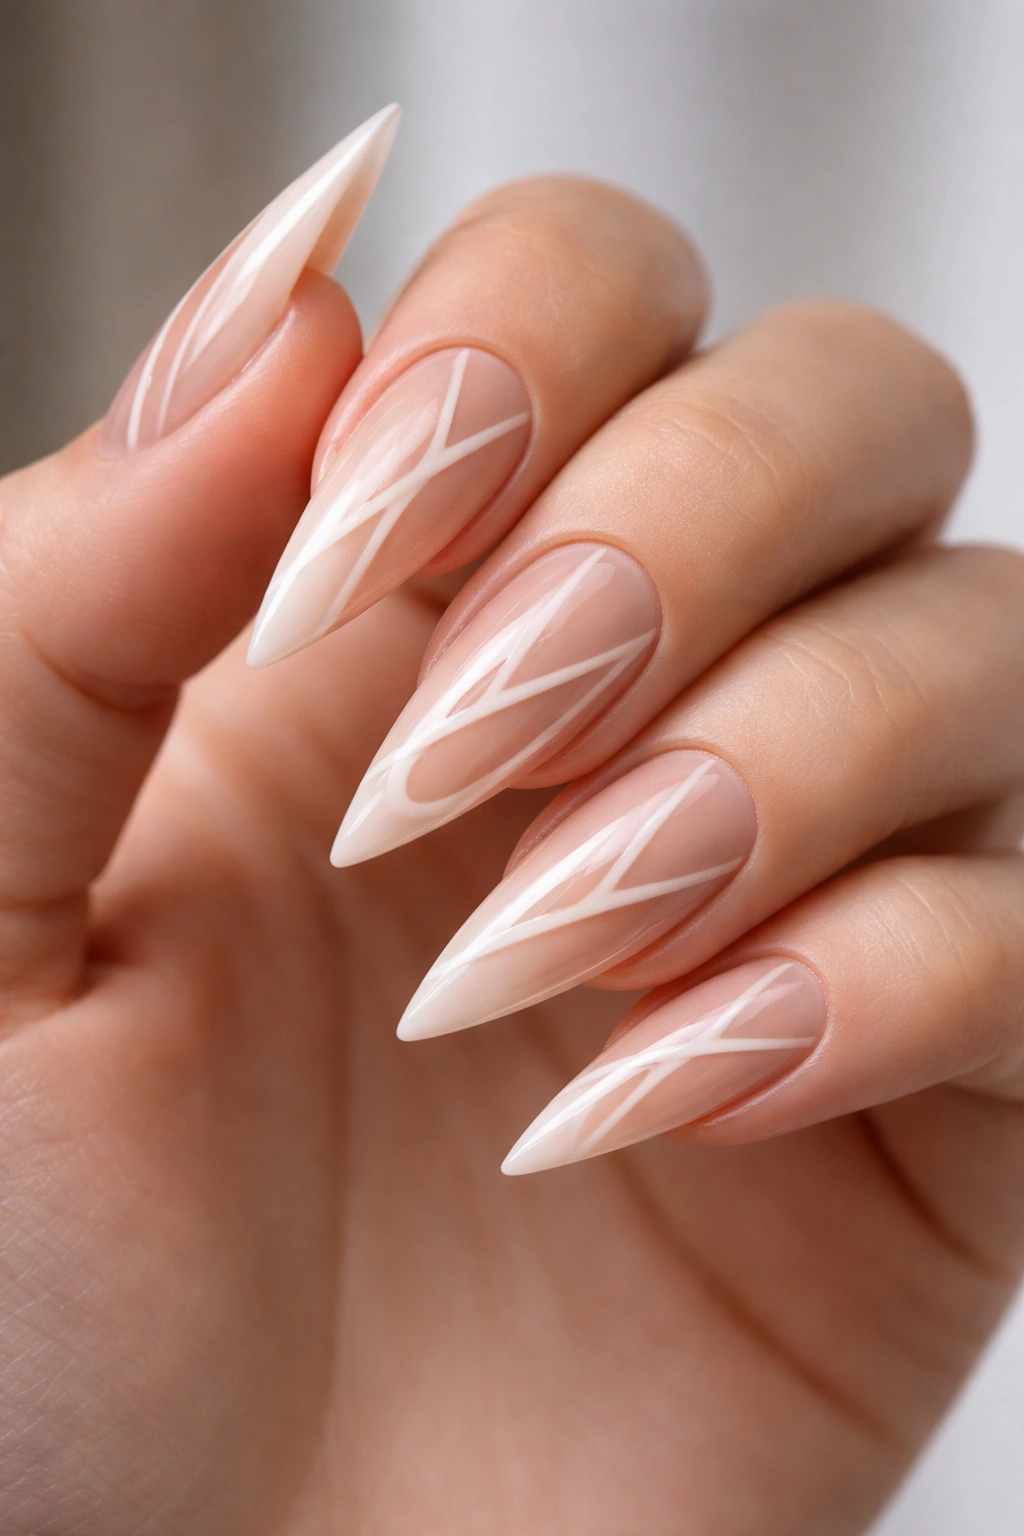
Pale nude sits right at the edge of beige and white—so light that it’s almost translucent. When you add negative space geometric patterns (multiple exposed areas of actual nail creating angular, bold shapes), the design becomes dramatically modern and architectural. The lightness of the base makes the geometric elements stand out prominently.
Geometry as Visual Interest on Minimalist Bases
Geometric patterns feel contemporary and intentional in a way that organic designs sometimes don’t. On pale, minimal bases, geometric negative space becomes the primary design element. This works beautifully on stiletto nails because the shape itself is already geometric—you’re echoing and amplifying that aesthetic.
Executing Geometric Negative Space
- Apply pale nude base color to the entire nail
- Plan your geometric pattern—consider triangles, hexagons, angular stripes, or architectural shapes
- Use striping tape to define each section, creating clean edges and precise angles
- Paint or leave exposed only the areas where you want negative space (actual nail showing through)
- Build the pattern section by section, removing tape as you go to prevent product buildup
- Some people prefer to add a contrasting color to some exposed sections (a deeper nude or even black) while leaving others as bare nail
- The final effect should be bold and graphic—clean lines, clear shapes, striking contrast between painted and bare areas
- Seal with glossy topcoat to protect the design and add shine
Pro tip: Plan your geometric design on paper first, or even sketch it on your nail with a pencil—this prevents the frustration of creating an asymmetrical or poorly proportioned pattern.
18. Buttery Beige with Metallic Gold Accent Tips
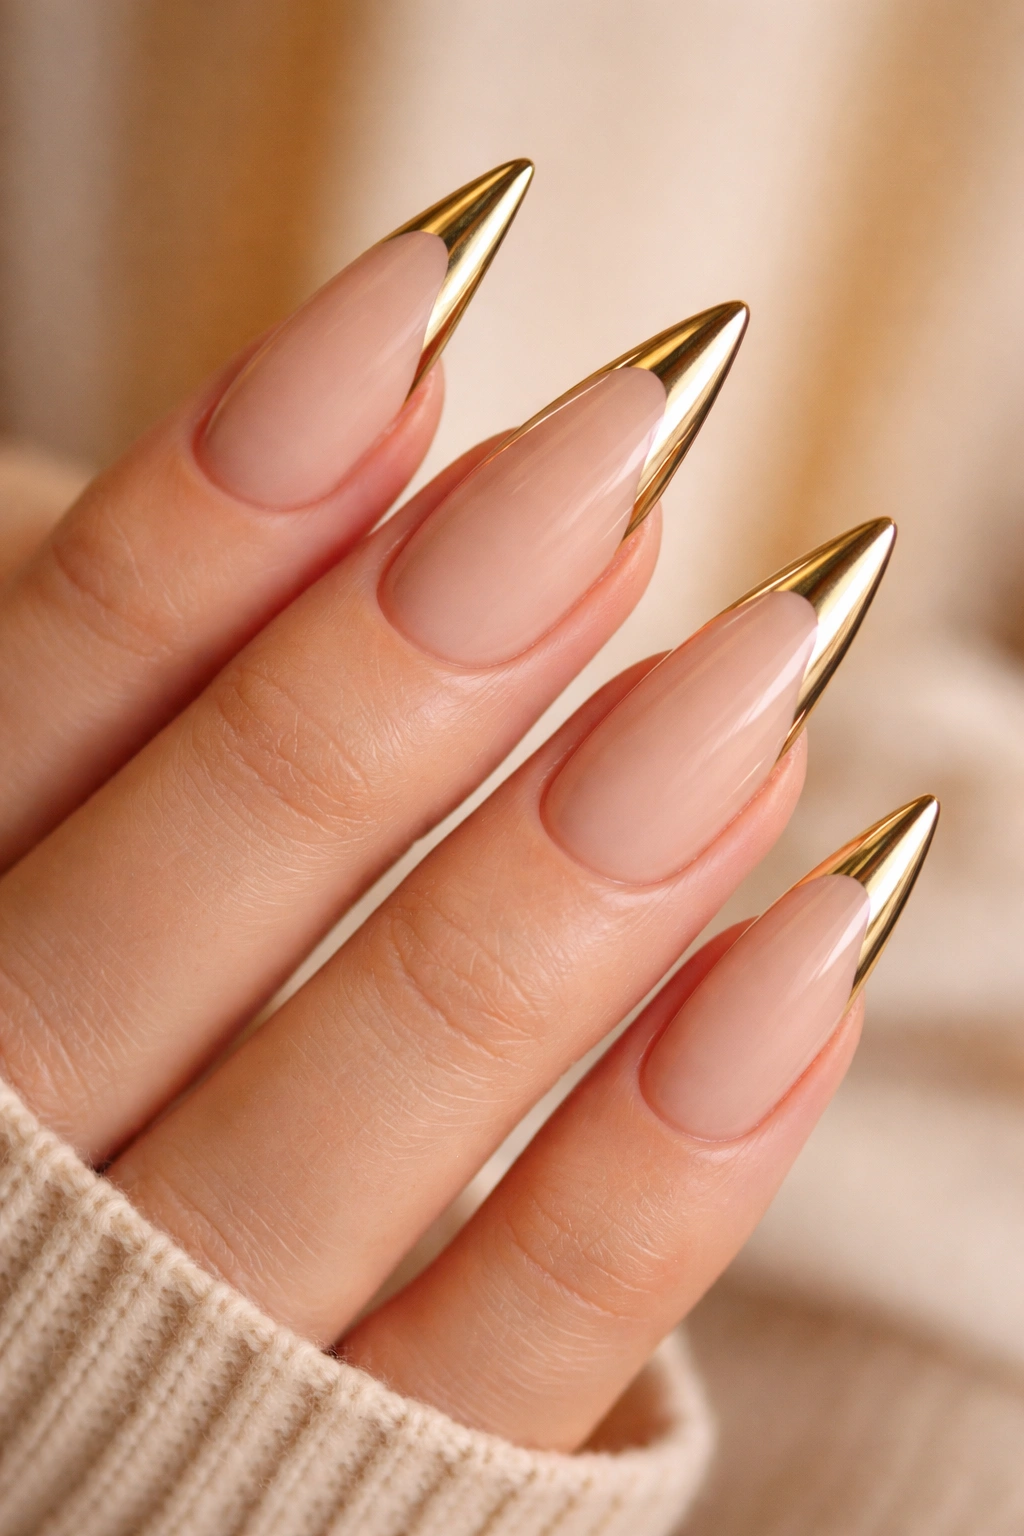
Buttery beige is warm, creamy, and undeniably luxurious—it has the richness of butter without actually being yellow. When you add metallic gold to just the tips, you’re creating a modern extension of the classic French manicure concept. The metallic gold catches light and creates an eye-catching point that’s perfect for stiletto nails because it emphasizes the shape.
Metallic Tips as an Evolution of Classic Manicure Design
Metallic tips feel more contemporary than traditional white tips because the warmth of gold complements buttery beige perfectly. The metallic quality creates shine and dimension, making your nails look more intentionally designed and less utilitarian. This is an easy design to maintain because the gold concentration at the tips hides any growth naturally as your real nail extends.
Applying Metallic Gold Tips
- Paint your buttery beige base color across the entire nail in two coats
- Using either striping tape or a thin brush, apply metallic gold polish to the tip area of each nail
- The gold section should be about one-quarter to one-third of the nail length—adjust based on your preference and nail length
- If using tape, create a gentle curved line (mirroring a French manicure curve) rather than a harsh straight line for a more modern look
- Apply two coats of metallic gold to ensure full opacity and maximum shine
- Blend the transition between beige and gold very slightly with a clean brush if you prefer softer edges, or keep the line crisp for a bolder statement
- Seal everything with a glossy topcoat
- The metallic gold should have clear, reflective shine that makes the tips virtually glow
Worth knowing: This design is particularly stunning on very long stiletto nails because the metallic tips become a focal point—the longer the nail, the more dramatic the effect. On shorter stilettos, it’s still beautiful but feels more subtle.
Final Thoughts
Nude stiletto nails represent the ultimate intersection of sophistication and personal style. Whether you choose a barely-there blush with shatter detail or a buttery beige with bold metallic tips, you’re selecting a design that works across every context of your life. These aren’t nails that demand attention or require explanation—they’re simply beautiful, refined, and undeniably you.
The beauty of working within a nude color palette is that experimentation feels safe. You’re not committing to a bright color or trendy design that might feel dated in a few months. Instead, you’re exploring the infinite variations within neutral territory, discovering which undertones and finishes make you feel most confident and polished. Try one combination that speaks to you, and if you find yourself curious about another, a quick visit to your favorite manicurist transforms your entire look.
Remember that the “right” nude shade is the one that matches your undertones and makes you feel good when you look at your hands. The added texture, shine, or design element should enhance your natural beauty rather than compete with it. Whether you’re drawn to matte elegance, metallic accents, or subtle details, your nude stiletto nails become a signature element of how you present yourself to the world. There’s real power in choosing something that feels effortlessly refined rather than obviously trying—and that’s exactly what nude stilettos deliver.
