

Stiletto nails are the ultimate statement of confidence and style. Whether you’re heading to a special event or just want to elevate your everyday look, these sharp, sculptural nails command attention and convey a sense of boldness that other nail shapes simply can’t match. The elongated point creates an elegant silhouette that flatters your hands and photograph beautifully, making them a favorite among nail enthusiasts and beauty influencers worldwide.
The beauty of stiletto nails lies in their versatility. You might assume they’re complicated or difficult to maintain, but many of the most striking stiletto designs are surprisingly simple to execute and keep looking fresh. A few strategic color choices, subtle patterns, or minimalist embellishments can transform a basic stiletto shape into a sophisticated manicure that feels entirely polished and intentional. The key is understanding which styles work best for your lifestyle, skin tone, and personal aesthetic—then owning that look with complete confidence.
If you’re considering your first stiletto manicure or looking for fresh ideas to take to your nail technician, these 14 designs prove that simple doesn’t mean boring. Many of these looks can be achieved at home with basic tools and supplies, while others benefit from professional application. Either way, each design showcases a different facet of stiletto nail potential, from timeless classics to modern interpretations that feel current without being trendy or time-bound. Let’s explore the designs that work, the techniques that matter, and the finishing touches that elevate a basic stiletto from adequate to absolutely stunning.
1. Classic Red Stilettos
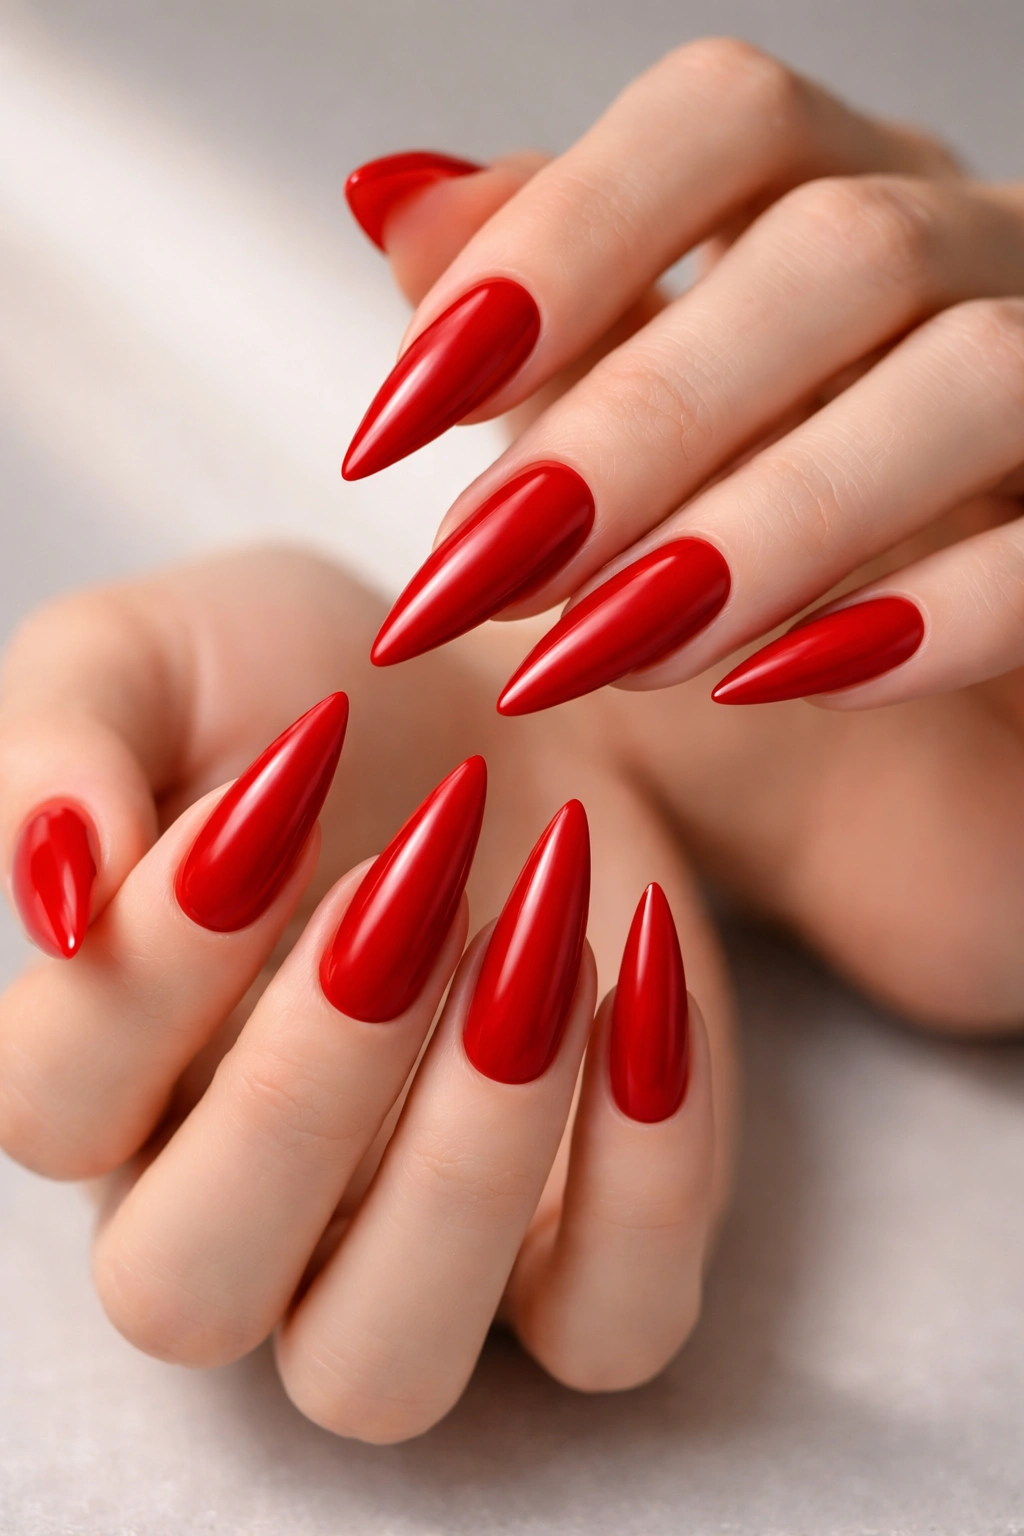
Red is the quintessential stiletto nail color, and for good reason—it’s bold, timeless, and universally flattering. A true red stiletto is the kind of manicure that immediately makes you feel powerful and put-together, whether you’re wearing it to a boardroom meeting or a night out. The sharp point of the stiletto shape creates a dramatic contrast with deep, rich red polish, amplifying the sense of sophistication and intentional beauty.
Why Red Commands Attention
The psychology of red is undeniable. Red nails signal confidence, strength, and a willingness to be noticed. With a stiletto shape, that message becomes even louder. The sharp angles of the nail mirror the boldness of the color choice, creating a look that feels cohesive and powerful rather than chaotic.
Getting the Perfect Red Stiletto
- Choose a true red shade rather than orange-red or burgundy for the classic effect that works across seasons
- Apply a base coat to prevent staining, especially important with deep reds
- Use two or three thin coats of polish rather than one thick coat for even coverage and a professional finish
- Seal with a glossy top coat to amplify the color’s depth and protect against chipping
- Keep the shape sharp—file the point regularly to maintain that signature stiletto silhouette
Pro tip: If you want red stilettos but worry about the commitment, try the look with gel polish or at a salon first. Many people discover that red actually feels more versatile than they expected, working beautifully with casual jeans and also formal evening wear.
2. Nude with Thin White Tip
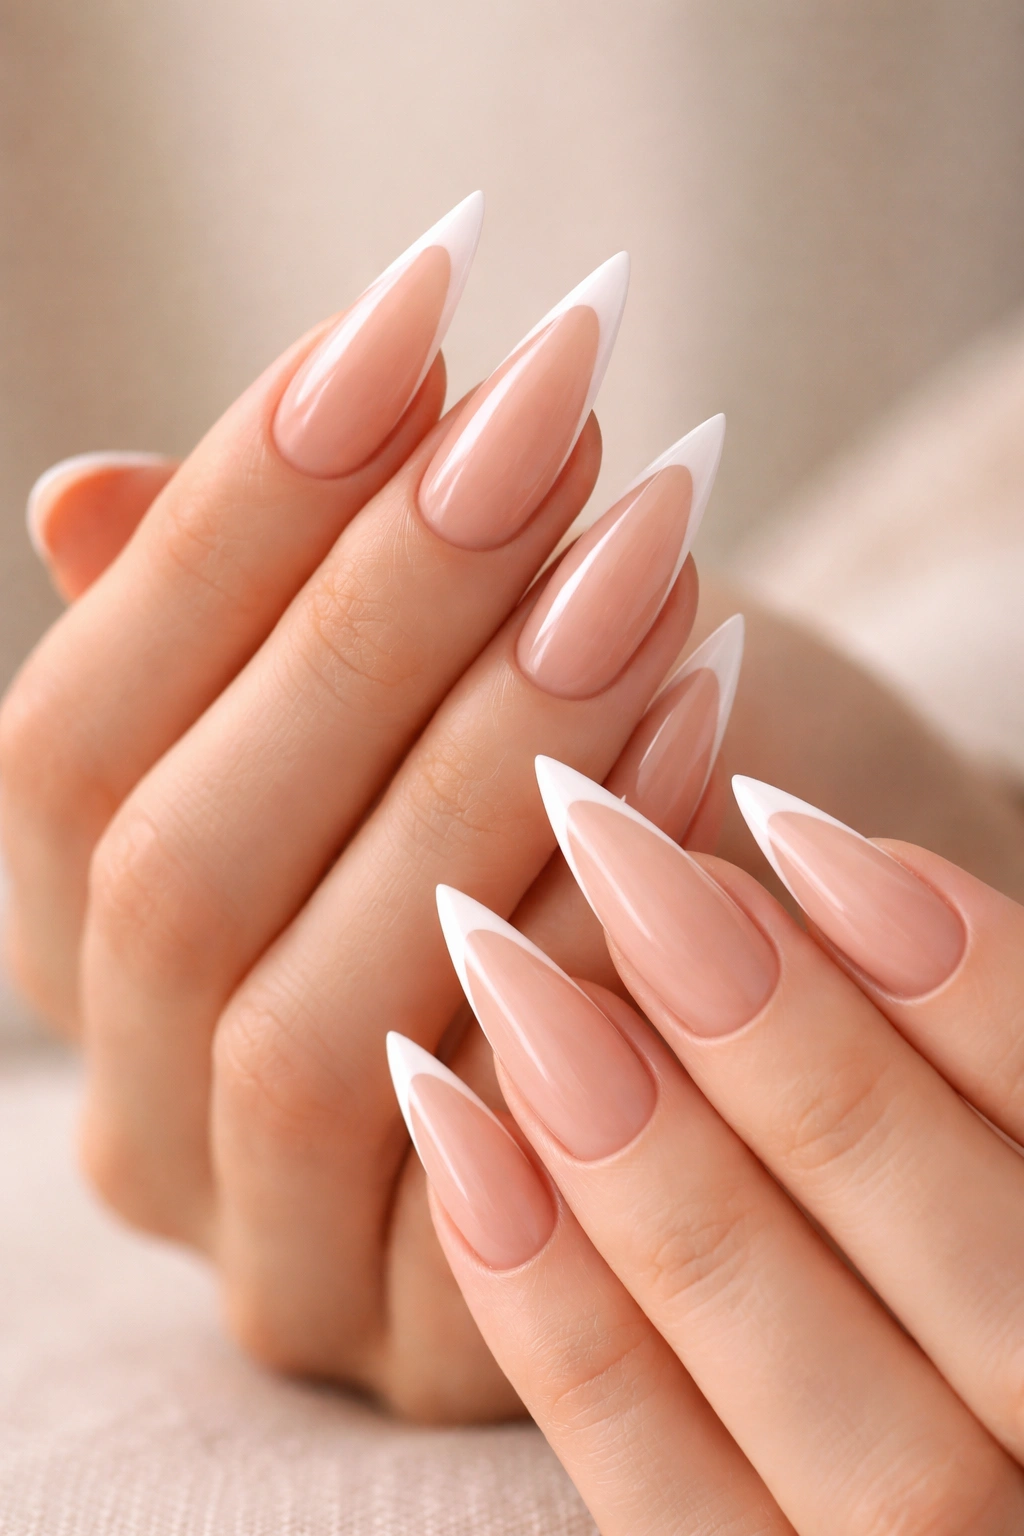
This design strips away complexity in favor of pure elegance. A nude or beige base that matches your skin tone creates length and makes your fingers appear more slender, while a thin white line at the very tip of the stiletto adds just enough definition and modern polish. It’s the manicure equivalent of a crisp white button-up shirt—simple, always appropriate, and somehow always chic.
The Power of Understated Design
Sometimes the simplest ideas are the most sophisticated. This look doesn’t scream for attention; instead, it suggests quiet confidence and an understanding of what truly works. The white tip draws the eye downward along the elongated shape of the nail, emphasizing the length and drama of the stiletto point without any additional embellishment.
How to Execute This Look at Home
- Start with a sheer nude base coat that closely matches your actual skin tone (test a few shades if you’re unsure—undertones matter)
- Paint two coats for even coverage without looking thick or plasticky
- Use a thin striping brush or a fine-tipped nail art brush to paint a narrow white line across the tip
- The white should be just thick enough to be visible but thin enough to feel delicate and refined
- Finish with a matte or glossy top coat depending on your preference (both look equally sophisticated)
Real talk: This design takes practice if you’re doing it yourself, but it’s worth the effort. The thin white tip requires a steady hand and a quality brush, but once you nail the technique, you’ll find yourself returning to it constantly because it goes with literally everything.
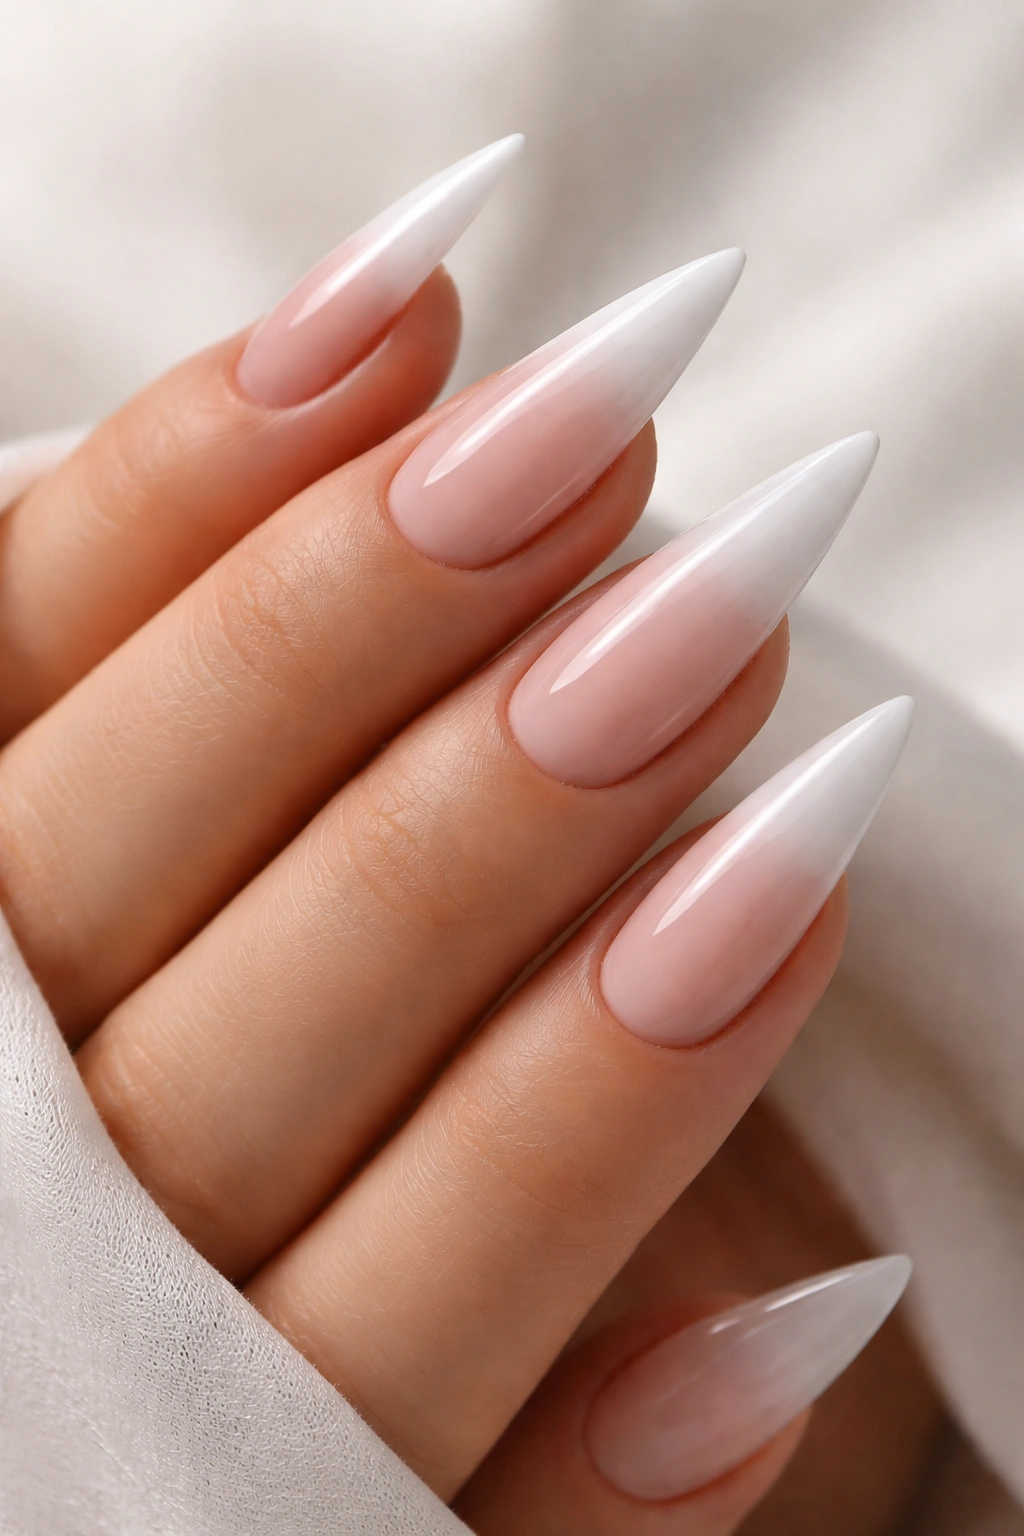
3. Ombré Blush to White
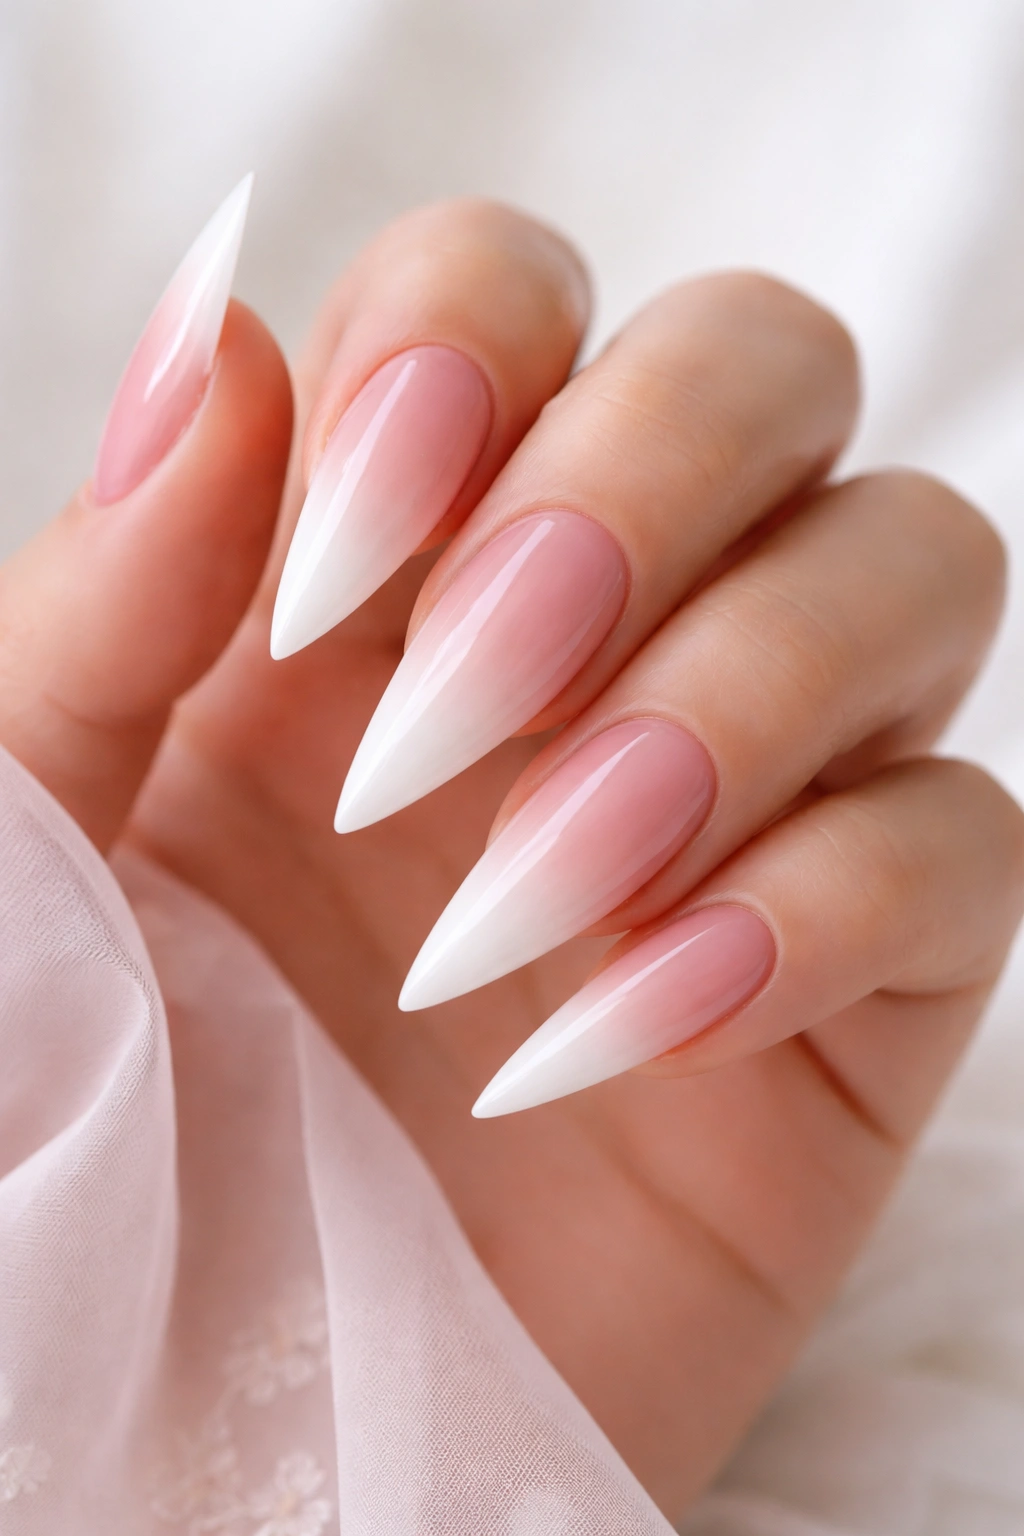
Ombré stiletto nails create the illusion of an even more dramatic point, as the color gradually shifts from a soft blush pink at the base to pure white at the tip. This gradient effect adds dimension and visual interest without being busy or complicated. The soft pink-to-white progression is inherently romantic and modern at the same time, making it work for both everyday wear and special occasions.
Creating the Ombré Effect
The ombré technique relies on blending, which is easier than it sounds. You’ll apply two colors and use a sponge to blend them where they meet, creating that seamless transition from one shade to the other. The key is using colors that live in the same color family—blush pink and white work together naturally, whereas attempting an ombré with contrasting colors often looks jarring.
Step-by-Step Ombré Application
- Paint your entire nail with a soft blush pink base and let it dry completely
- Paint white polish onto a makeup sponge, concentrating the white in a band across the tip
- Dab the sponge gently onto the upper third of each nail, letting the white blend slightly into the pink
- Repeat with fresh sponge application until the gradient looks smooth and intentional
- Use a small brush dipped in the blush pink to clean up the edges if any white extends beyond the nail shape
- Seal with a thick top coat to protect the blended color and add shine
Worth knowing: Ombré designs look more dimensional in person than in photos because the gradient creates actual depth and shadow on your nails. When you see this style in real life, it’s far more impressive than a flat image suggests.
4. Matte Black with Gold Flecks
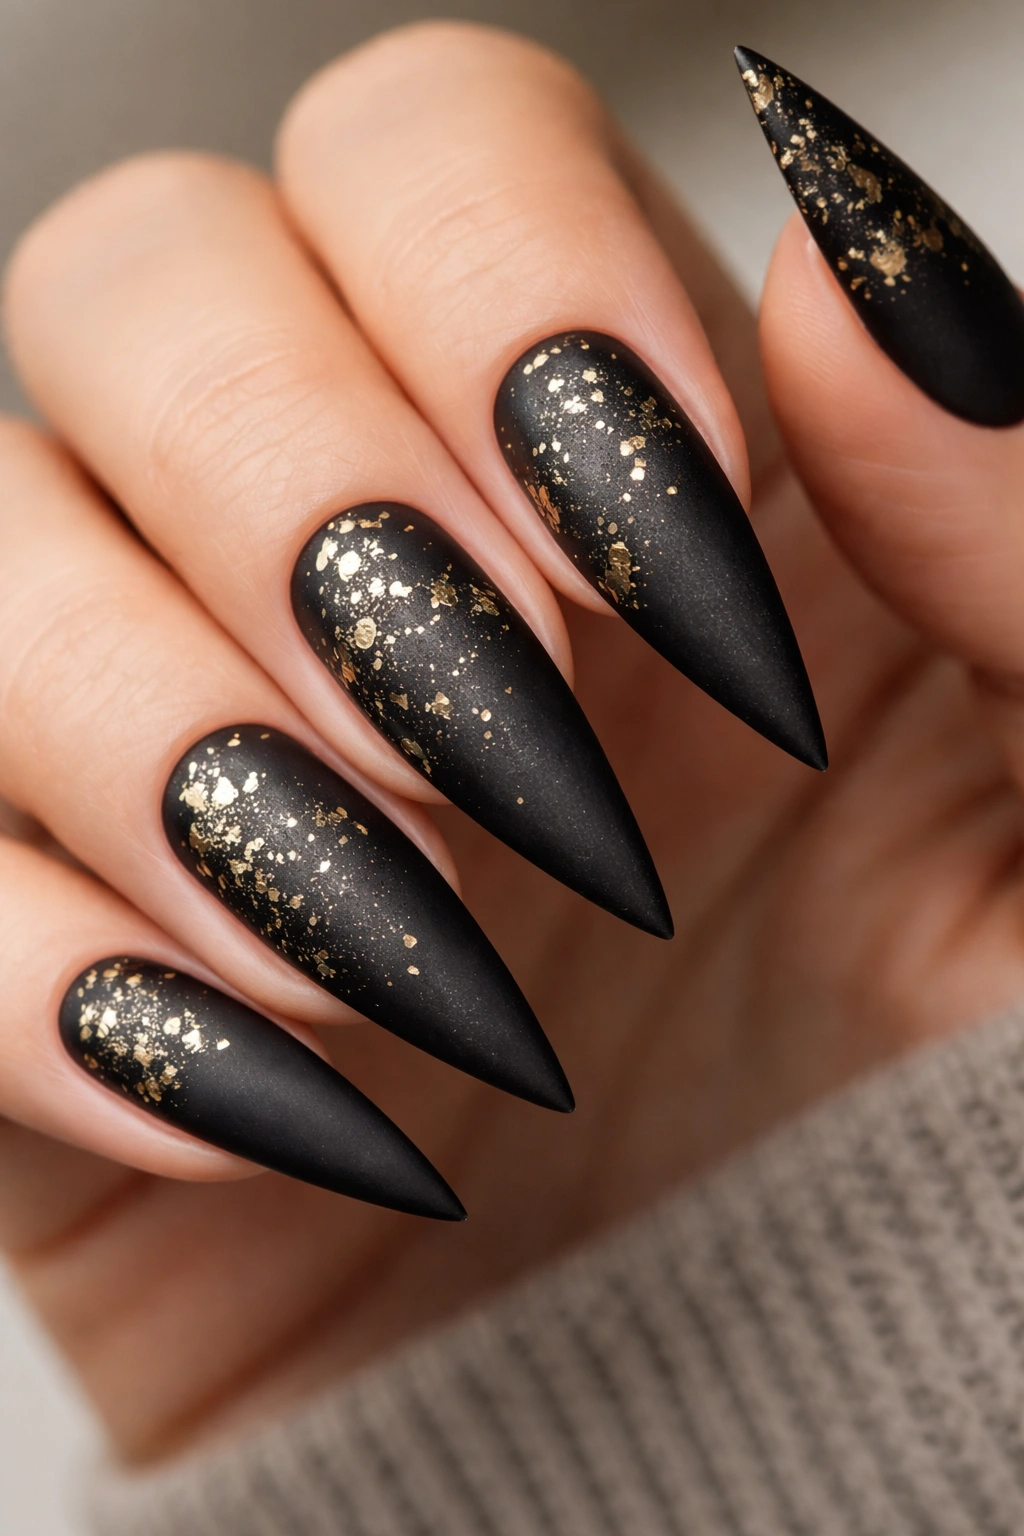
Matte black stilettos are inherently edgy and modern, but adding gold leaf or gold fleck accents elevates the design into something genuinely striking. The contrast between the matte finish and the reflective gold creates visual texture and luxury. This design walks the line between minimalist and dramatic—it’s bold enough to make a statement but refined enough to work in professional settings or casual environments.
Why Matte Changes Everything
Glossy black nails read one way; matte black reads entirely differently. The matte finish absorbs light rather than reflecting it, making the color appear deeper and more sophisticated. When you introduce gold flecks into that matte field, they suddenly become the focal point, catching light and creating a sense of expensive refinement.
Applying Gold Flecks to Matte Black
- Paint your entire nail with a quality matte black polish (two coats for even coverage)
- Once completely dry, use a dotting tool or small brush to apply clear nail glue or gel to areas where you want gold flecks to sit
- Press tiny gold leaf pieces or gold flecks onto the glued areas (these are sold in nail art supply sets)
- Allow the adhesive to cure according to product instructions
- Seal everything with a matte top coat to even out the finish and protect the gold pieces
Insider note: You don’t need an expensive matte top coat specifically. A regular glossy top coat applied very thinly over gold flecks on a matte base will maintain the matte appearance while protecting your design beautifully.
5. Soft Pink with Pearl Finish
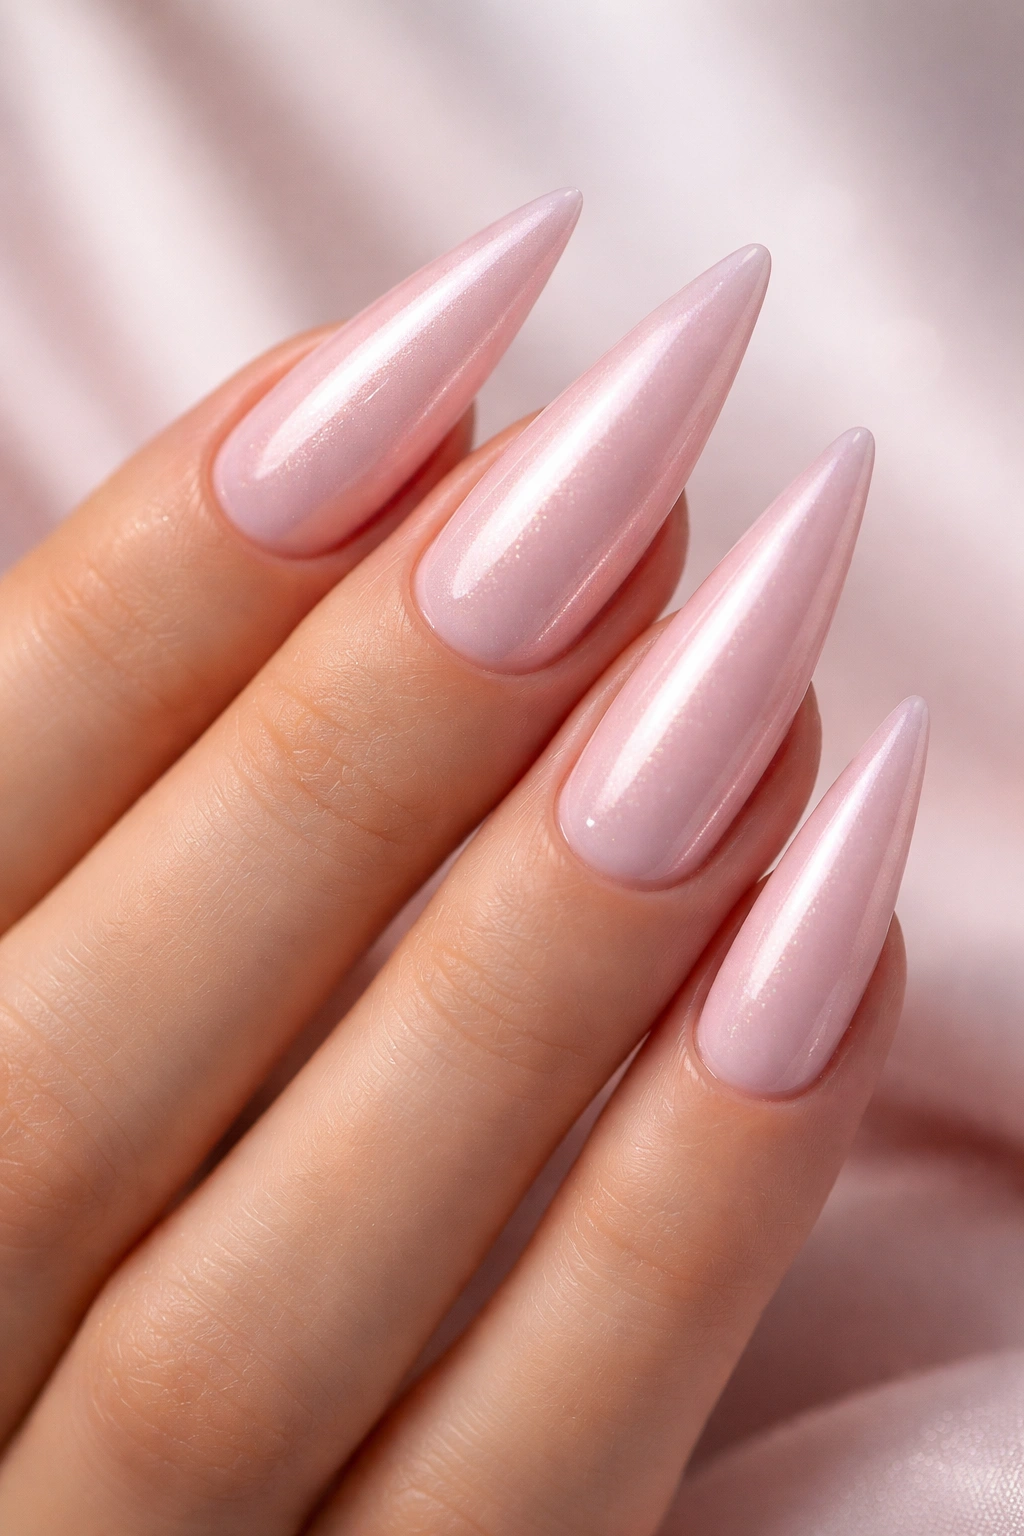
Pearl pink stilettos are the definition of feminine elegance. The pearly quality of the polish creates subtle shimmer that catches light and makes your hands look luminous. Unlike glittery designs, which can feel juvenile or overstated, pearl nail polish reads as refined and intentional. This is the kind of manicure that makes people compliment your hands without quite being able to articulate why—the subtlety of the effect is exactly what makes it work.
The Pearl Effect Explained
Pearl polish contains mica and other light-reflecting particles that create an iridescent quality. The color shifts slightly depending on the angle and the light source, which means your nails never look quite the same twice. This constant subtle variation keeps the design from feeling flat or boring, even though it’s technically very simple.
Finding Your Perfect Pearl Pink
- Light, sheer pearls work beautifully on pale to medium skin tones
- Medium pearls offer versatility across most skin tones
- Deep pearl pinks work best on deeper skin tones where they create striking contrast
- Test shades in natural light—pearl finishes look different in indoor versus outdoor light, and you want to choose a shade you love in both settings
Pro tip: Layer pearl polish over a slightly tinted base coat to customize the depth and warmth of the pearl effect. A pearl pink applied over a pale nude base looks different from the same polish applied over white, giving you control over exactly how the final color appears.
6. Minimalist White with Negative Space

This design uses negative space—areas where the nail is left bare or semi-transparent—as an intentional design element. Typically, you’d paint a geometric shape in white or a light color, leaving the rest of the nail showing your natural nail or a translucent base. The stark contrast between the painted shape and the bare nail creates a modern, editorial quality that’s far more sophisticated than covering the entire nail with color.
Why Negative Space Feels Modern
Negative space in nail design signals confidence and restraint. It suggests that you don’t feel the need to cover every inch of your nail with color or embellishment—instead, you’re using what you leave bare as much as you’re using what you paint. This approach is characteristic of contemporary design and feels intentional and high-fashion.
Executing Minimalist Negative Space
- Start with a clean nail with a clear or very light base coat
- Decide on your geometric shape: a vertical stripe, a triangle, a half-moon, or an abstract shape
- Paint your shape in crisp white using a thin brush or striping tape to keep edges clean
- Leave the majority of the nail bare or use a sheer nude base to show a hint of the natural nail
- The contrast between white and bare nail is what makes this design visually striking
Real talk: This design is surprisingly forgiving because any slight imperfection reads as intentional abstraction rather than a mistake. The beauty of negative space is that you don’t need perfect precision—just confident, clean application.
7. French Ombre with Gradient Tip
A modern twist on the classic French manicure, this design uses an ombré effect that shifts from your nail color at the base to a darker shade at the tip. It maintains the clean, sophisticated energy of a traditional French manicure while adding dimension and contemporary flair. The gradient tip creates visual interest without any pattern or additional embellishment—it’s all about color blending.
The Evolution of French Mani Design
The traditional French manicure has evolved far beyond the simple white tip. Today’s versions play with color, finish, and technique in ways that honor the original’s elegance while feeling entirely modern. The ombré gradient is one of the most successful evolutions because it adds depth without abandoning the clean, refined aesthetic that makes French nails timeless.
Creating a Flawless Gradient Tip
- Choose your base color and paint the entire nail
- Select a darker shade in the same color family (for example, pale pink base with medium pink gradient tip)
- Apply the darker shade to a makeup sponge
- Dab the sponge across the tip area, blending upward toward the base
- Repeat until you achieve a smooth gradient with no harsh lines
- Use a small brush with the base color to clean up and soften the blended area if needed
- Seal with a glossy top coat for that polished French manicure aesthetic
Worth knowing: This design is easier than it looks. Even slight imperfections in blending just create a softer, more organic gradient, which actually looks more contemporary than perfect precision.
8. Glossy White with Thin Black Outline
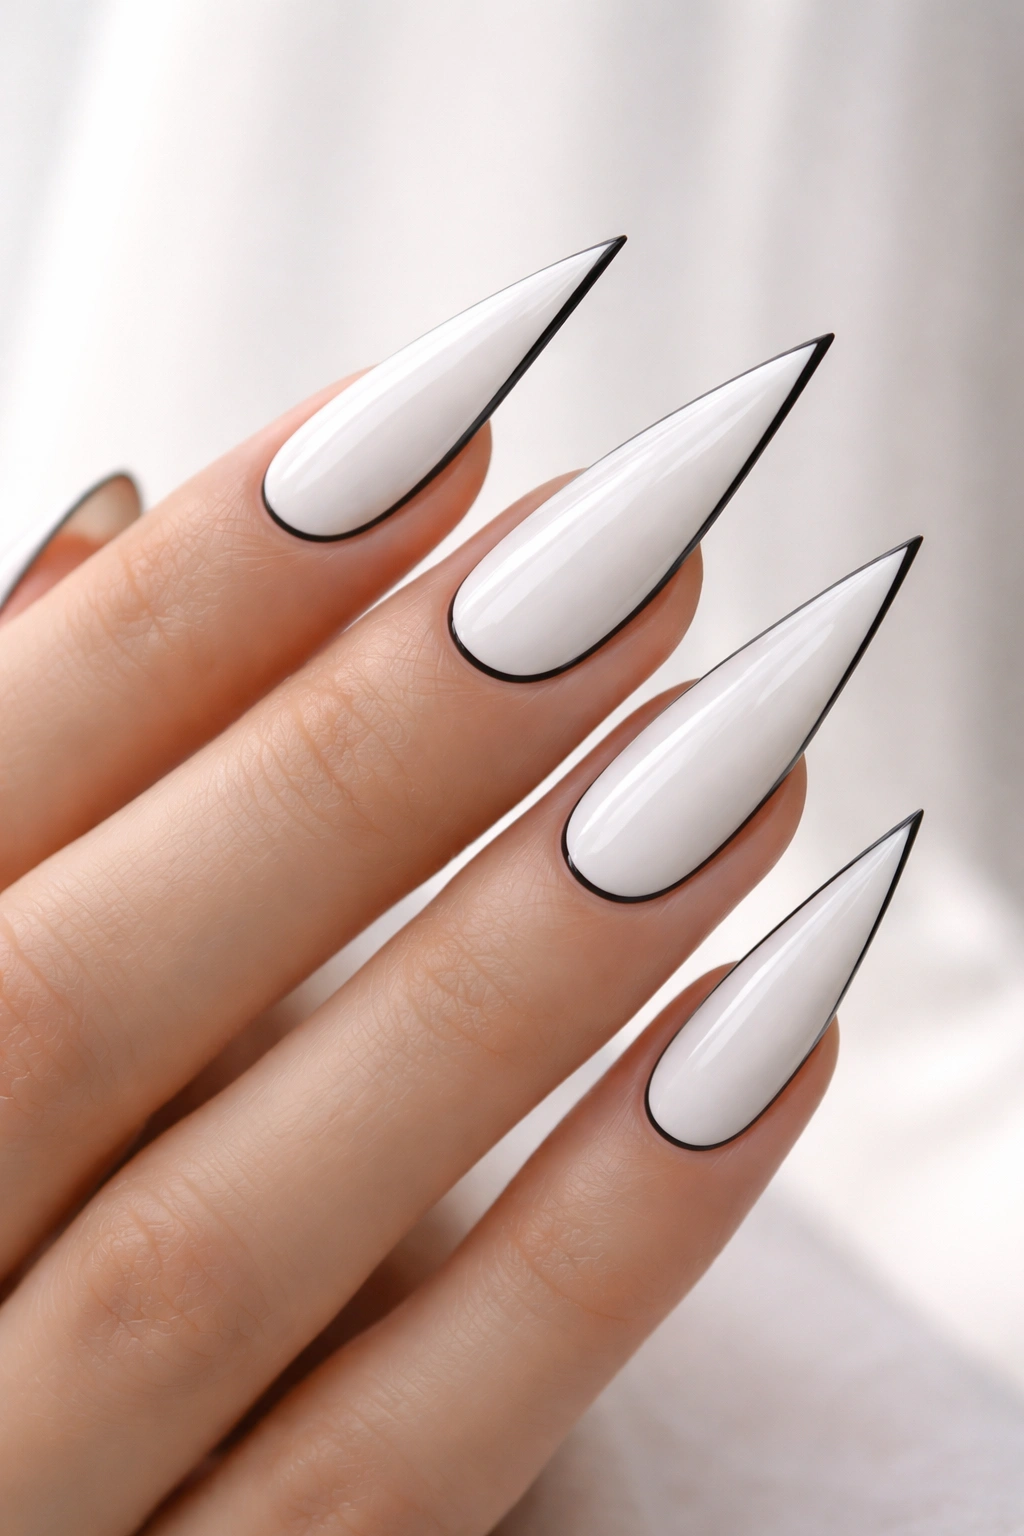
This design combines crisp white stilettos with an ultrathin black outline around the perimeter of each nail. The black line creates definition and makes the white pop visually, while maintaining minimalist sophistication. It’s the kind of manicure that photographs beautifully and reads as intentional and edgy without being complicated.
Why Outlines Elevate Simple Colors
When you outline a solid color, you’re essentially creating a frame that draws the eye directly to the shape of your nail. With stiletto nails, that shape is already dramatic, and the outline amplifies that drama by emphasizing the sharp point. The black line also creates contrast that makes the white appear brighter and more dimensional.
Applying a Perfect Thin Outline
- Paint two coats of glossy white polish and let dry completely
- Use a thin striping brush or a fine-tipped nail art brush
- Dip the brush in black gel or regular polish (gel holds a thinner line better)
- Carefully trace along the perimeter of each nail, starting at one side of the cuticle, following the nail’s edge, and ending at the opposite side
- Don’t attempt to outline the very tip—the point will be too sharp to outline smoothly; instead, let the outline fade as you reach the point
- Seal with a glossy top coat to protect the black line and add overall shine
Pro tip: If outlining freehand stresses you out, use nail striping tape to create straight lines on the sides of the nail, then paint the outline using the tape as a guide. Remove the tape while the polish is still slightly tacky for clean edges.
9. Soft Cream with Nude Gradient
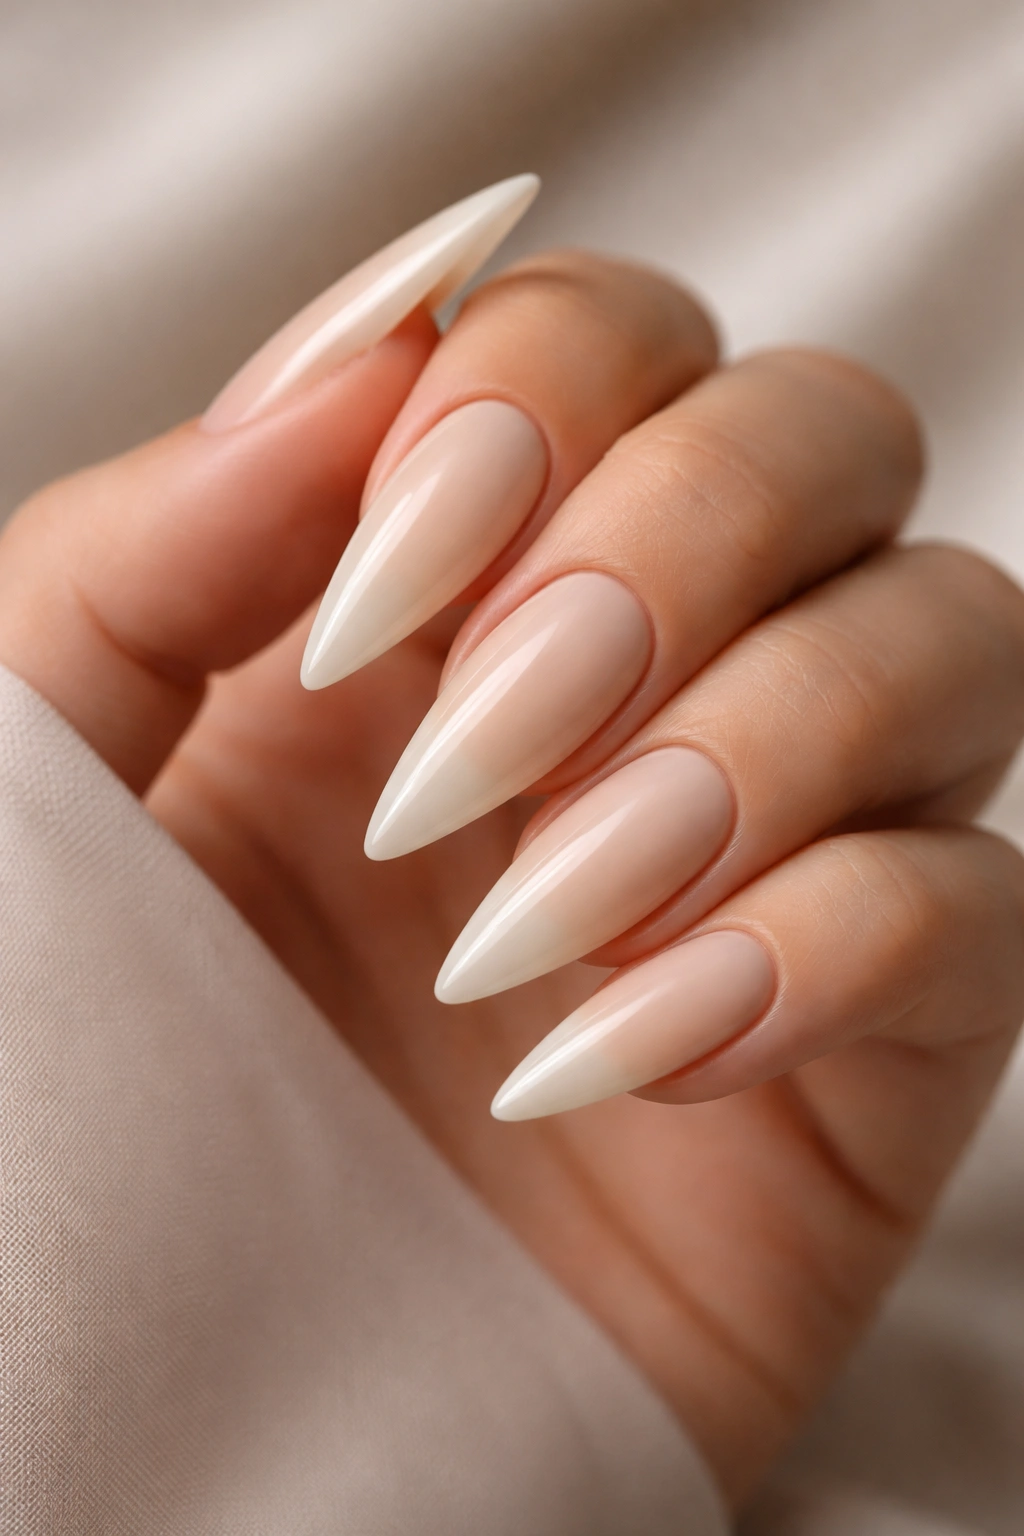
This nearly-monochromatic design uses two very similar shades—soft cream and nude—creating a subtle gradient from base to tip. The minimal color shift creates visual interest without obvious pattern. This design is perfect for people who love understated elegance and want their nails to enhance their overall look rather than dominate it. The soft, warm tones complement almost every skin tone and work beautifully with any wardrobe.
The Appeal of Nearly-Monochromatic Design
When colors are very close in value and tone, the contrast is subtle enough that the design reads as sophisticated and calm rather than bold or playful. This approach works beautifully for professional settings, formal events, and everyday wear where you want your nails to be noticed but not distracting.
Creating a Subtle Gradient
- Start with a soft cream base (two coats, fully dry)
- Select a nude shade that’s only slightly darker or warmer than your cream base
- Apply the nude to a makeup sponge and dab it across the tip area
- Blend gently upward, creating a transition so subtle it’s almost invisible
- The beauty of this design is that slight imperfections look like natural light and shadow
- Finish with a top coat that complements your preferred finish (matte and glossy both work here)
Real talk: This design is one of the most wearable and versatile of any stiletto nail style. You can wear it forever without it feeling dated or tired because the colors are so timeless and the execution is so refined.
10. Nude Base with Micro Rhinestone Accents
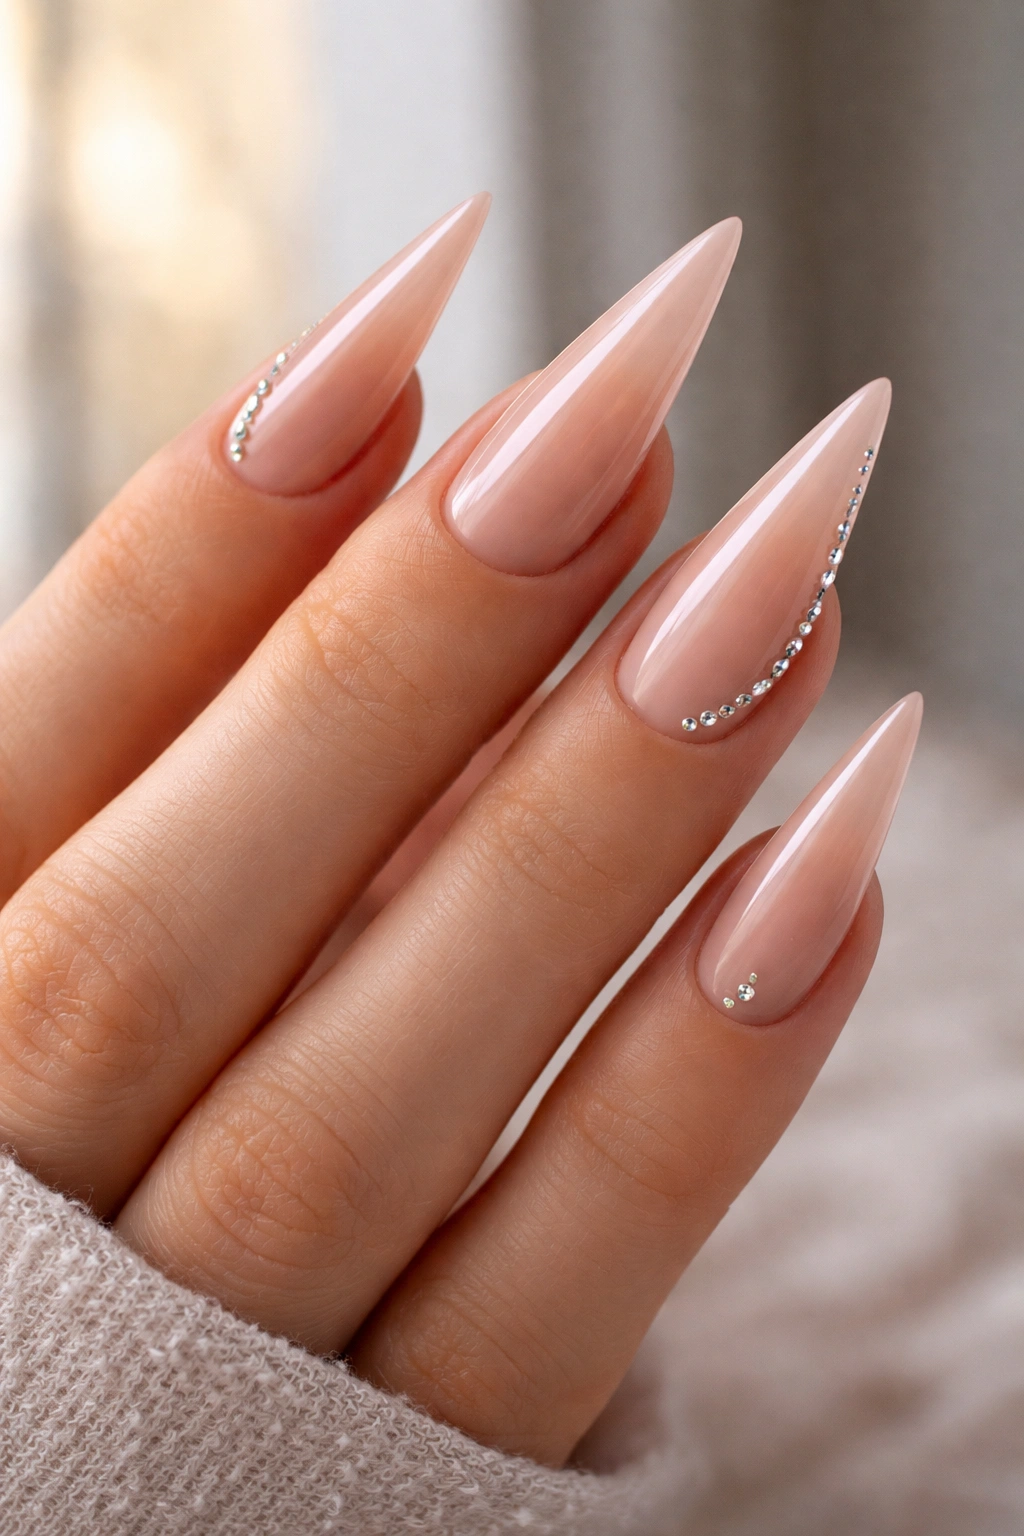
Rhinestones feel special without being over-the-top when used sparingly and strategically. This design keeps the base simple—a clean nude or champagne tone—and adds just a few tiny rhinestones placed with intention, typically clustered near the tip or along one side of the nail. The sparkle catches light and draws attention without overwhelming the overall minimalist aesthetic.
When Rhinestones Feel Sophisticated vs. Costume
The difference between rhinestone nails that feel luxury and those that feel costume comes down to restraint and placement. Using just a few quality rhinestones, well-spaced and positioned thoughtfully, creates visual interest. Covering the nail in rhinestones reads as either costume or costume-adjacent. With stiletto nails, less is always more.
Applying Rhinestones with Precision
- Paint your base color (nude or champagne) and allow it to dry completely
- Decide on your rhinestone placement—clusters near the tip work beautifully, as does a thin vertical line along one edge
- Use tweezers or a rhinestone picking tool to lift individual rhinestones
- Dip the rhinestone in a clear nail glue or a designated rhinestone adhesive (better grip than polish alone)
- Press the rhinestone onto the nail, holding it in place for a few seconds while the adhesive sets
- Allow all rhinestones to cure fully before sealing with a top coat
- Apply a thick top coat that flows around the rhinestones, protecting them without creating obvious bumps
Worth knowing: Not all rhinestones are created equal. Swarovski crystals are pricier but hold their shine infinitely longer than cheaper imitations, which can look cloudy or lost their sparkle after a week or two.
11. Burgundy with Metallic Gold Swirl
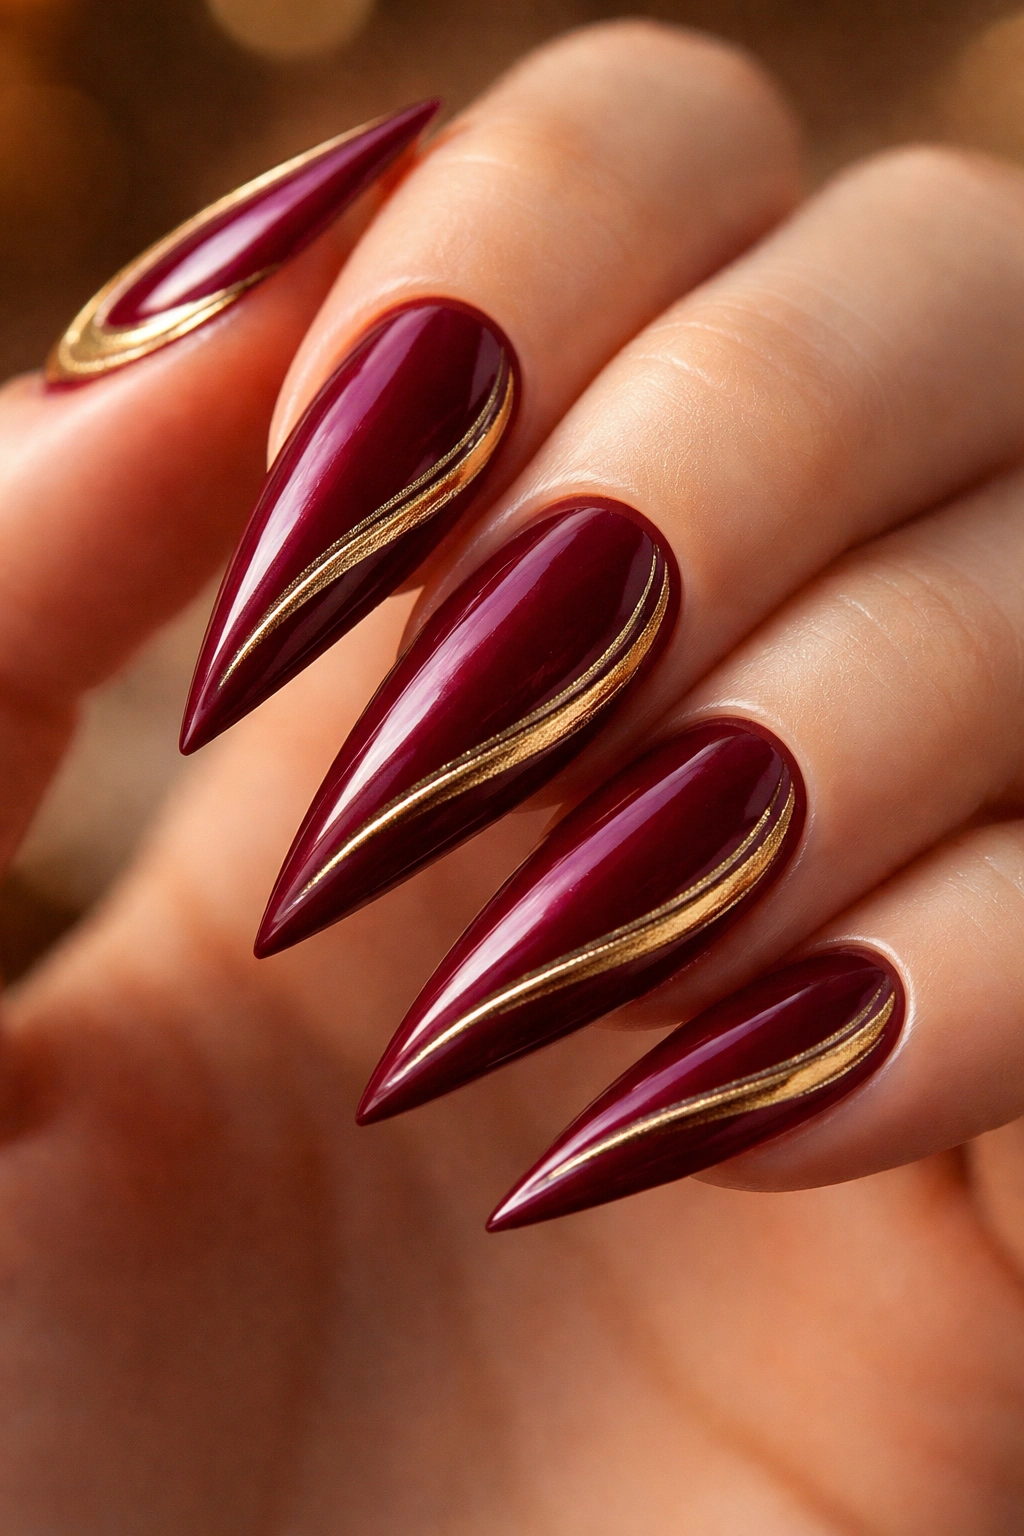
Burgundy stiletto nails are inherently luxurious and sophisticated, but adding a delicate metallic gold swirl elevates them into something truly special. The warm metallic against the deep, rich burgundy creates a sense of expensive elegance. This design feels perfect for evening events, special occasions, or whenever you want your nails to make a statement without sacrificing sophistication.
Why Burgundy Is Underrated
Burgundy sits in the space between red and brown—warm, deep, and inherently elegant. It’s bold enough to command attention but sophisticated enough to work in any setting, from boardroom to cocktail party. When you add a metallic accent, you’re amplifying that sense of luxury and intentional beauty.
Creating an Elegant Metallic Swirl
- Paint two coats of deep burgundy and allow to dry completely
- Use a thin brush or striping brush dipped in metallic gold polish or gel
- Create a loose, organic swirl pattern—think delicate curves rather than geometric precision
- Start at the base of one side of the nail and swirl upward toward the tip, letting the gold line meander naturally
- You don’t need to cover the entire nail—a swirl that covers about one-third to one-half of the nail surface is ideal
- Allow the gold to dry slightly, then seal everything with a high-shine top coat
Insider note: Metallic gold finishes look different depending on the finish of your burgundy. Over a matte burgundy, gold creates dramatic contrast. Over a glossy burgundy, gold and burgundy blend together more harmoniously. Both effects are beautiful—choose based on the level of contrast you’re seeking.
12. Pale Pink with Thin Silver Sparkle Line
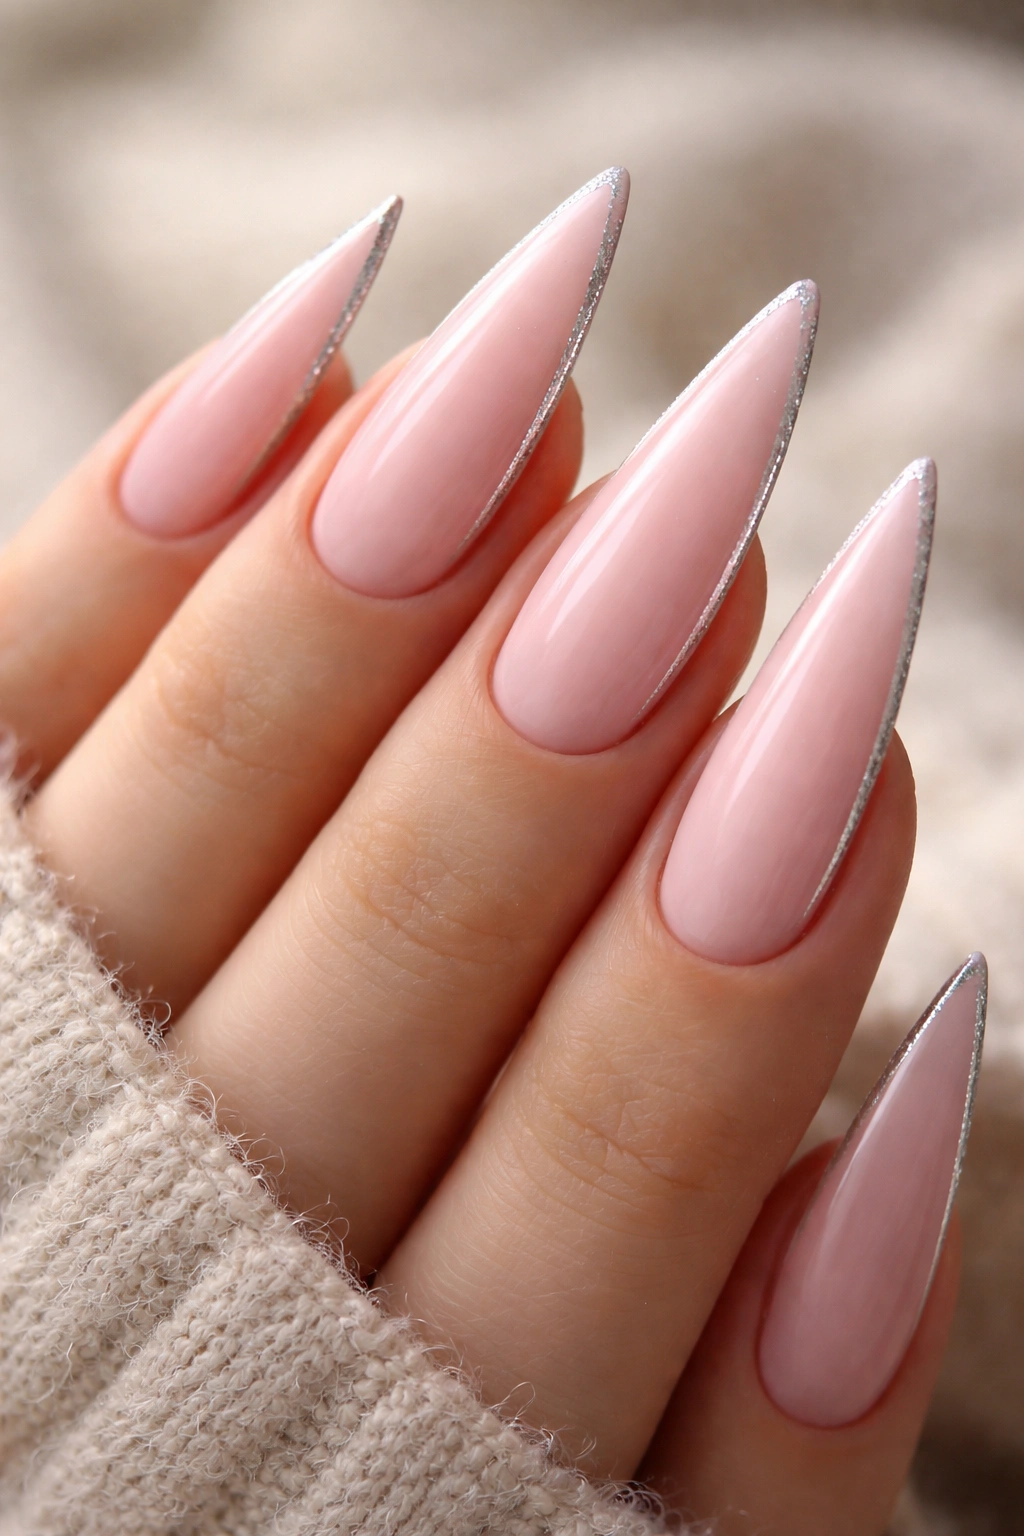
This design combines softness and subtle glamour. A pale pink base provides a gentle, sophisticated foundation, while a thin line of fine silver sparkle creates understated shine. The sparkle line typically runs vertically down the center of the nail or horizontally across the tip, creating visual interest without being flashy. This is the ideal design for people who want their nails to sparkle without being loud about it.
Soft + Sparkle = Unexpected Elegance
The combination of pale pink and silver sparkle feels both romantic and contemporary. The softness of the color prevents the sparkle from reading as juvenile, while the sparkle prevents the pale pink from feeling too basic. Together, they create a manicure that feels intentional and thoughtfully designed.
Applying a Sparkle Line
- Paint your pale pink base (two coats) and allow to dry completely
- Decide on your sparkle line direction—vertical or horizontal—and the width (thin lines read more sophisticated than thick ones)
- Use a fine striping brush dipped in silver sparkle polish, gel, or a mix of clear gel with finely ground silver glitter
- Paint your line with steady pressure, using the brush’s fine tip to create an even width
- Allow the sparkle to dry (longer if using gel)
- Seal with a glossy top coat that won’t dull the sparkle
Pro tip: If painting a perfectly straight line feels intimidating, use nail striping tape as a guide. Apply the tape where you want your sparkle line, paint over it, and remove while still slightly tacky for perfect edges.
13. Black with White Geometric Pattern
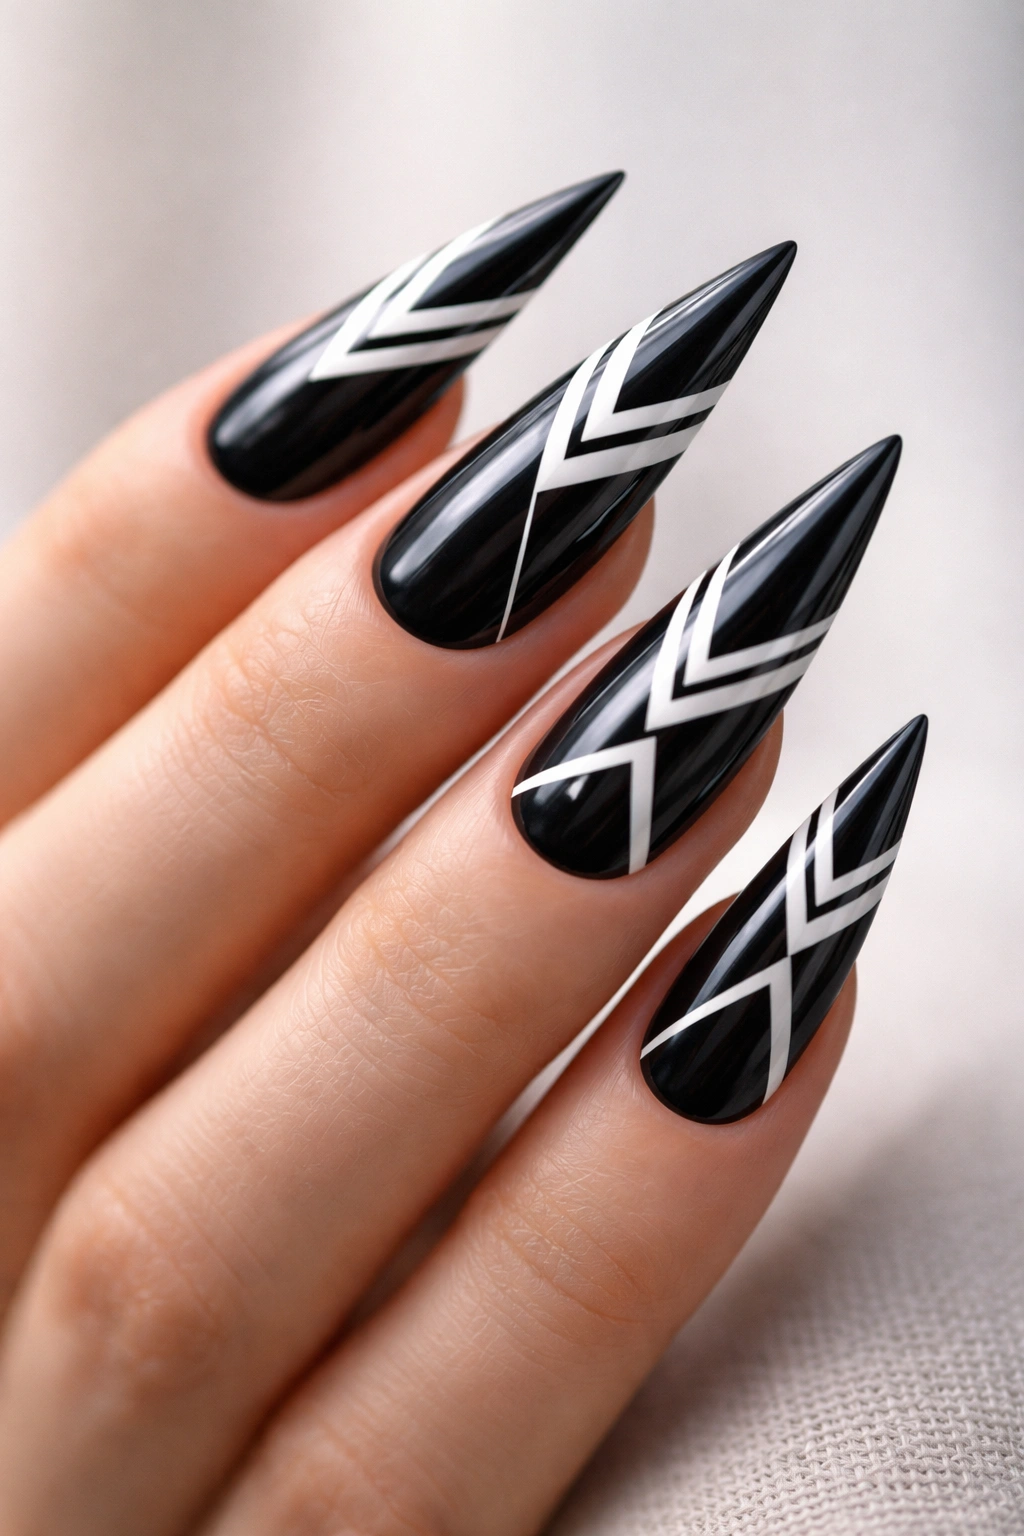
Geometric patterns on stiletto nails create a striking visual effect, especially when using high-contrast colors like black and white. Simple shapes—triangles, stripes, blocks, or abstract angles—create modern sophistication. The sharp point of the stiletto nail echoes the sharp angles of geometric design, making the two feel perfectly aligned. This design is bolder than minimalist styles but maintains clean, intentional lines that prevent it from feeling chaotic.
Geometry Meets Stiletto Shape
The geometry of stiletto nails makes geometric pattern design feel organic rather than forced. The shape itself is an angle—the sharp point—so introducing other angles and geometric shapes simply extends that existing visual language. This design feels cohesive and intentionally designed rather than arbitrary.
Creating Crisp Geometric Patterns
- Paint a base coat of glossy black and allow to dry completely
- Decide on your geometric pattern: vertical white stripes, a white triangle at the tip, white geometric blocks, or abstract angular shapes
- Use striping tape to create clean edges for your design
- Apply tape where you want to keep black, leaving exposed areas where you’ll paint white
- Paint white polish over the exposed areas
- Remove the tape while the polish is still slightly tacky
- Seal with a top coat for a finished, polished appearance
Real talk: This design is easier than it looks because tape does the work of creating clean lines. If you’re worried about freehand geometric painting, tape is your best friend.
14. Champagne with Holographic Shimmer

Holographic shimmer creates an otherworldly, multidimensional effect that’s genuinely difficult to capture in photos. A champagne base combined with holographic polish creates nail art that shifts through different colors as it catches light—purples, greens, blues, and pinks all playing across the nail surface. This design is perfect for people who love sparkle and dimension and want their nails to be a conversation starter.
The Holographic Effect Explained
Holographic polish contains micro-particles that refract light, creating that rainbow shimmer effect. Unlike regular glitter, which is chunky and obvious, holographic particles are fine enough to create a smooth, dimensional finish that reads as intentional and high-tech. The champagne base provides warmth and elegance while the holographic particles add unexpected fantasy.
Applying Holographic Polish Flawlessly
- Paint a pale champagne or nude base (two coats) and allow to dry completely
- Apply one coat of holographic polish over the entire nail
- Allow to dry, then apply a second coat if the holographic effect isn’t dimensional enough
- The holographic finish shows every tiny imperfection, so use thin, even strokes and avoid bubbles
- Seal with a clear, high-shine top coat to protect the holographic finish and amplify the shimmer
- Avoid matte top coats, which will dull the holographic effect
Worth knowing: Holographic polish looks different in different lighting. Indoors, under warm light, it may appear more purple or pink. Outdoors in natural daylight, it reads more blue or green. This constant shift is exactly what makes it beautiful—your nails are never quite the same color twice.
Final Thoughts
Stiletto nails aren’t just about the shape—they’re about choosing a design that makes you feel confident and polished. The designs in this collection prove that simple doesn’t mean boring. Whether you prefer barely-there minimalism or subtle sparkle and dimension, there’s a stiletto nail design that matches your personal style and suits your lifestyle.
The most important thing to remember is that your nails should feel like you. If you love drama and boldness, lean into the deeper colors and metallics. If you prefer quiet elegance, the nude-based designs with simple accents will feel far more comfortable. You might even find yourself rotating between several of these designs depending on your mood, outfit, and what occasion you’re dressing for.
Keep your stiletto nails well-maintained with regular filing and protective top coats, and they’ll stay looking salon-fresh far longer than you’d expect. Remember that the sharp point of the stiletto requires slightly more careful handling in daily life—nothing that makes them impractical, just a gentle awareness that you’re wearing a shape that demands a bit of intention. That intentionality is exactly what makes stiletto nails so rewarding to wear.
