

Stiletto nails and cow print are a match made in manicure heaven. The sleek, elongated shape of a stiletto pairs perfectly with the bold, graphic nature of a cow print design — creating nails that command attention without saying a word. Whether you’re leaning into farmcore fashion or just want something edgy and unexpected, cow print stilettos offer endless possibilities for personal expression.
The beauty of cow print on stilettos is that the design works across virtually every aesthetic. Pair it with minimalist fashion for an ironic edge, go full maximalist with matching cow print accessories, or use it as your statement piece against an otherwise neutral wardrobe. The sharp lines of stiletto nails actually emphasize the organic curves and patches of authentic cow spots, making the pattern look intentional and sophisticated rather than random or childish.
What makes these designs genuinely versatile is how they can be adapted to match your lifestyle. Whether you need something work-appropriate or full glam for a night out, there’s a cow print stiletto approach that works. You can go classic and refined, bold and artistic, minimalist and chic, or whimsical and fun — all while keeping that signature cow print aesthetic.
Let’s explore ten stunning cow print stiletto nail ideas that’ll have you rethinking what animal print can do.
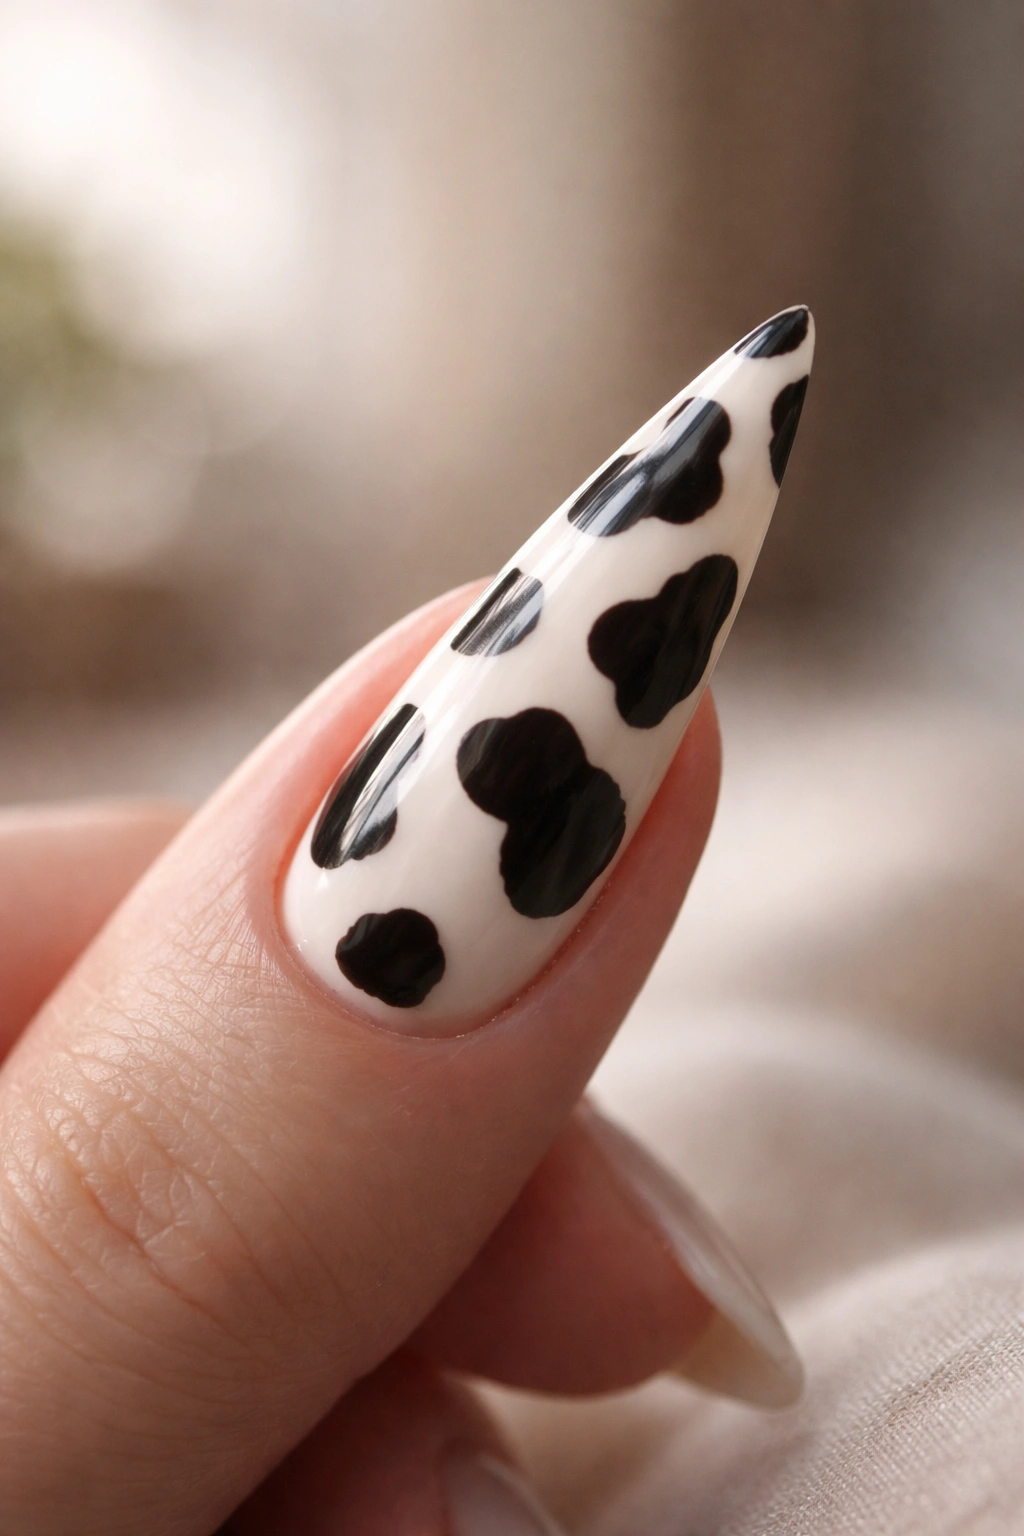
1. Classic Black and White Cow Print
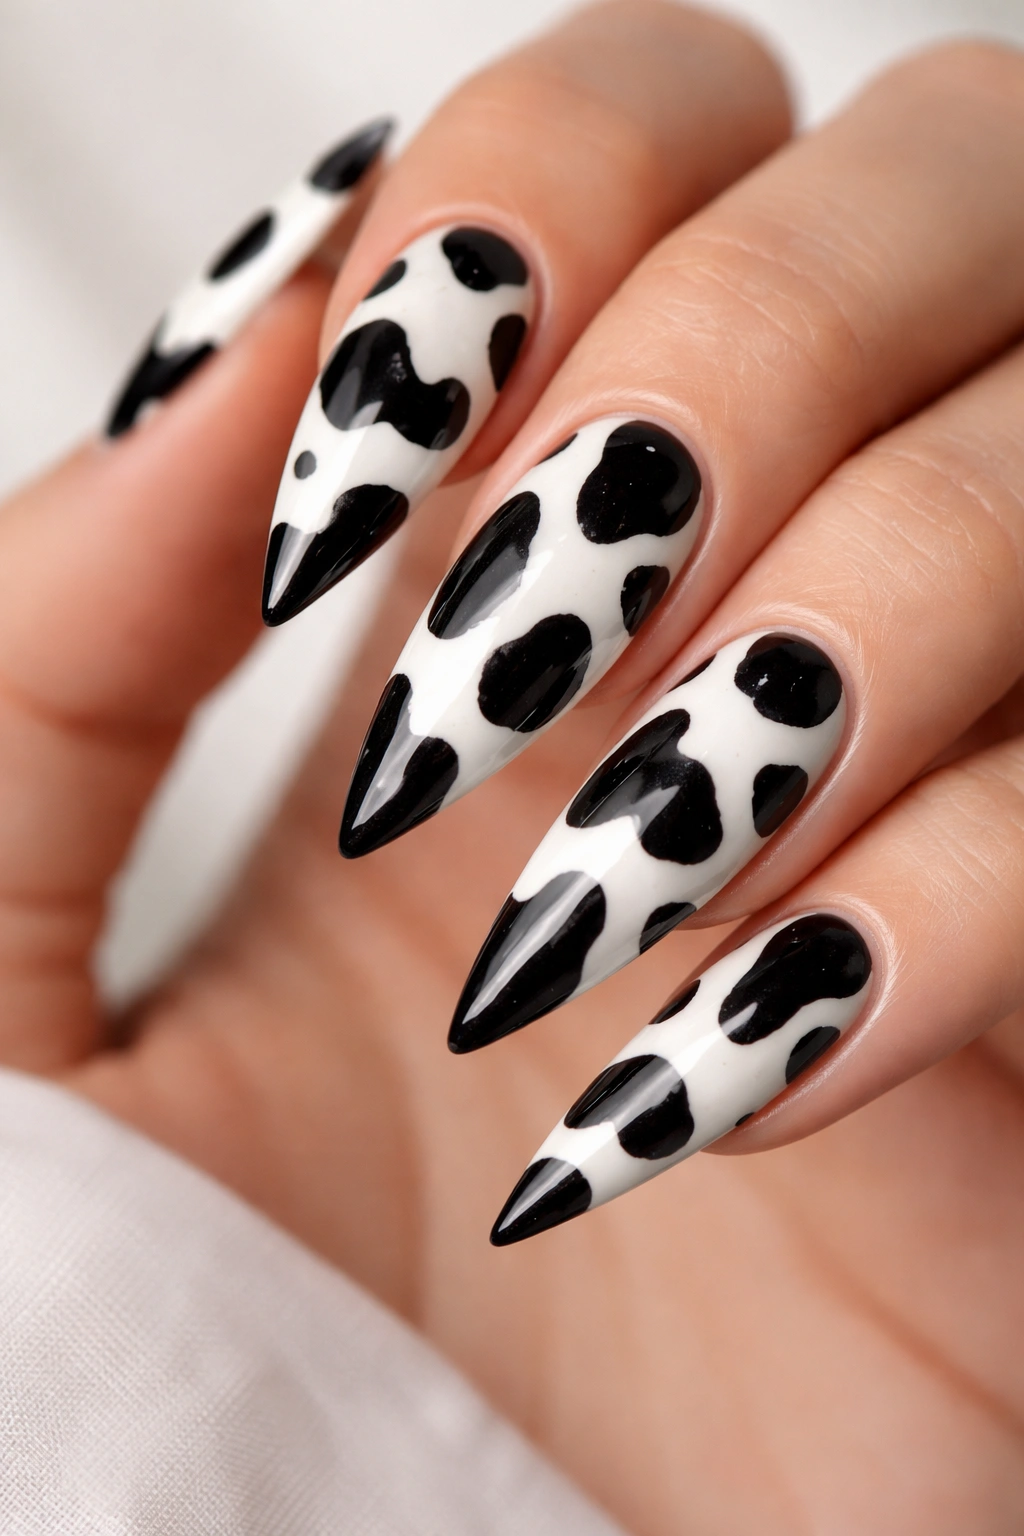
The timeless black-on-white cow print is pure elegance in stiletto form. This design uses a crisp white base with organic black patches that mimic actual cow spots, creating a look that feels both playful and polished. The high contrast makes the pattern pop without requiring any additional embellishments, letting your nail shape do the heavy lifting.
Why This Design Works
Black and white cow print is inherently striking because of the maximum contrast between the two colors. On stiletto nails, this contrast becomes even more dramatic thanks to the elongated surface area. The design reads as intentional and design-forward rather than gimmicky, making it surprisingly wearable in professional settings when executed cleanly. The simplicity also means the focus stays on your nail shape and the quality of the application.
Application Techniques and Details
- Paint a smooth white base coat as your foundation — this should be opaque and evenly applied
- Use a thin nail art brush or a cow print stamping plate to apply black patches in irregular, organic shapes
- Keep patches varied in size and spacing so they don’t look repetitive or mathematical
- Seal everything with a glossy top coat for maximum shine and longevity
- The black should feel organic, not perfectly symmetrical — this is what separates gorgeous from gimmicky
Pro tip: If freehand painting feels intimidating, invest in a quality cow print stamping plate. You’ll get consistent, professional results with minimal stress, and you can use the same plate for weeks.
2. Glazed Pink Cow Print with Gold Details
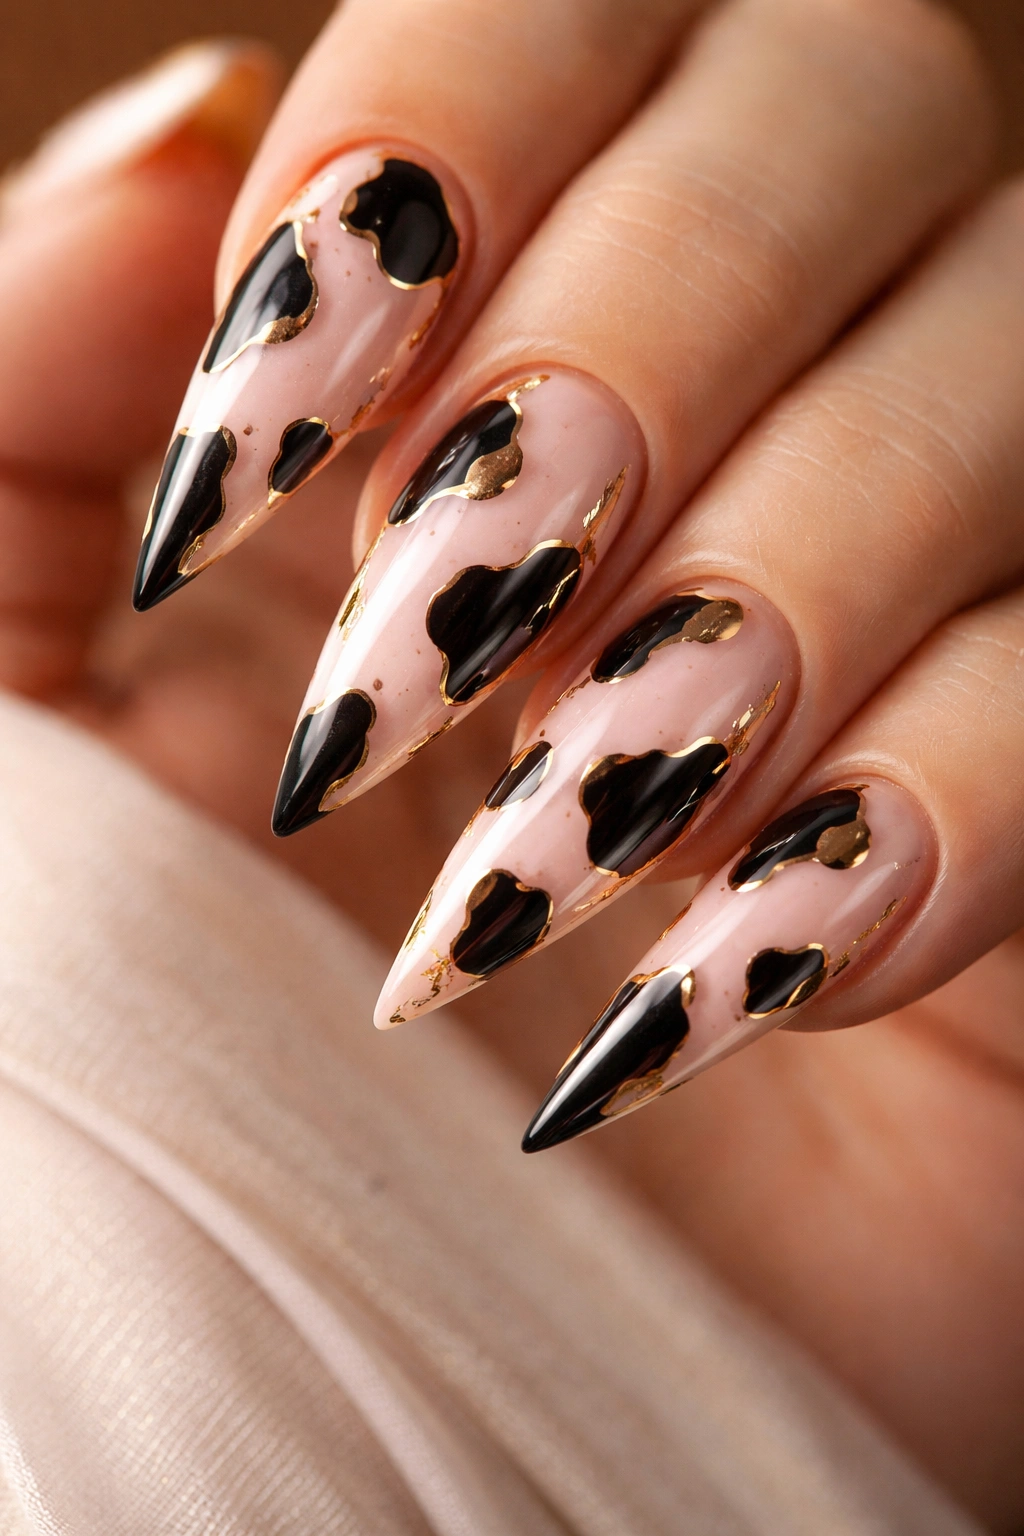
Swap stark white for a soft, creamy pink base and you’ve got a design that’s considerably more romantic. This version uses dusty rose or blush pink as the foundation, with black cow patches, then adds delicate gold accents — maybe thin gold lines along the edges of patches, a gold outline on some shapes, or tiny gold dots scattered throughout. The result is cow print that leans glam without sacrificing the recognizability of the pattern.
The Elegance of a Blended Color Story
Pink automatically softens any design, and cow print is no exception. Pairing black patches with a warm pink base creates visual warmth that pure black-and-white simply can’t match. Add gold accents and you’ve created a design that feels luxurious and intentional — like you spent time curating every detail. This version works beautifully for date nights, upscale dinners, or any occasion where you want your nails to whisper “I put thought into this” rather than shout.
Execution and Materials You’ll Need
- Start with a pink base that has warm undertones — avoid anything too cool or pastel, as it can make the design feel flat
- Apply your black patches using the same technique as the classic version, but with slightly less coverage
- Once the black is fully set, use an ultra-thin brush or gold pen to add metallic accents
- Gold works on some patches, not all — this selective placement prevents the design from feeling overdone
- Finish with a shiny top coat, ideally one with a touch of shimmer to catch light
Worth knowing: The shade of pink matters significantly. Taupe-pink, dusty rose, and warm beige-pink all work beautifully. Avoid anything too neon or too pale — the cow patches need enough contrast to read clearly.
3. Minimal Two-Tone with Negative Space
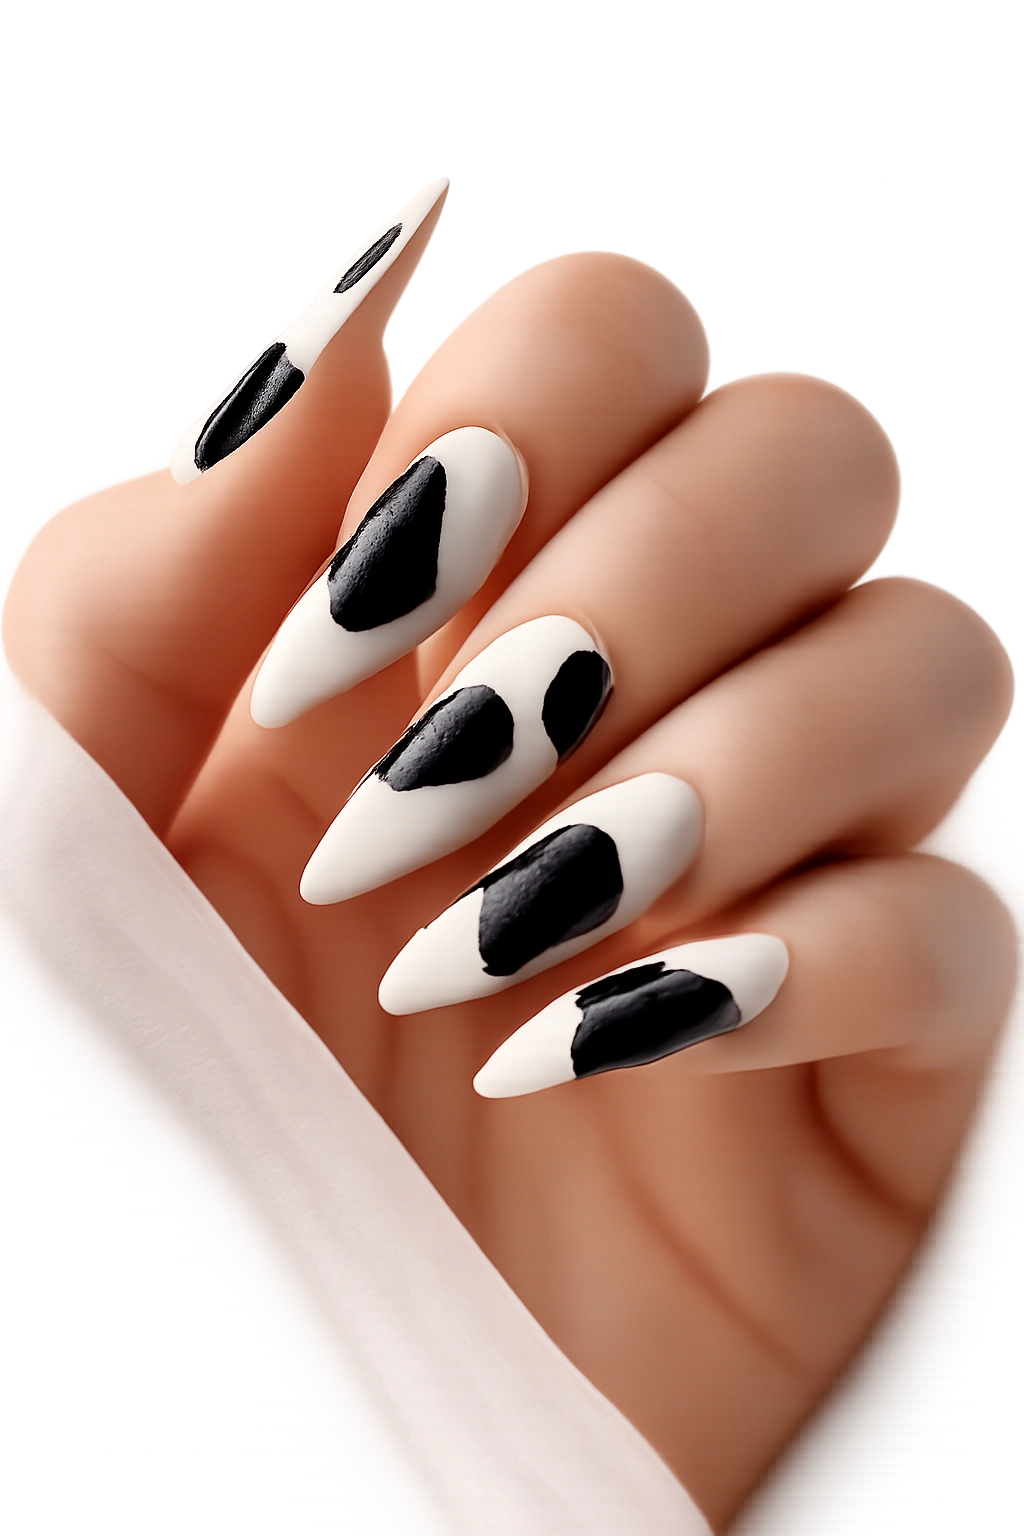
For the minimalist in all of us, this version strips cow print back to its absolute essence. Use white nails with just one or two large black patches per nail, leaving plenty of white negative space. The patches might be positioned along the tip, down one side, or asymmetrically across the nail — the key is restraint. This approach still communicates “cow print” but does it with a whisper rather than a shout.
Why Less Can Be More
Not every nail trend needs to be covered completely in pattern. Negative space actually makes cow print feel more modern and editorial. Your eyes have room to rest, the pattern reads as intentional rather than busy, and the focus remains on your beautiful stiletto shape. This version is perfect if you want the aesthetic without the commitment, or if you work in an environment where maximum subtlety is your safest bet.
Strategic Patch Placement Ideas
- One large patch that spans from the middle of the nail down toward the tip
- A smaller patch positioned in the corner for an accent-nail effect
- Two separate patches on opposite sides of the nail for balance
- An asymmetrical cluster on one side that creates visual interest without overwhelming
- Keep the remaining space absolutely clean and pristine white — any smudges will be instantly visible
Quick technique note: Use a makeup sponge instead of a brush for larger patches. Stipple the black polish gently onto the sponge, then press onto your nail in a dabbing motion. This creates softer, more organic edges than a painted line.
4. Ombre Cow Print Fade
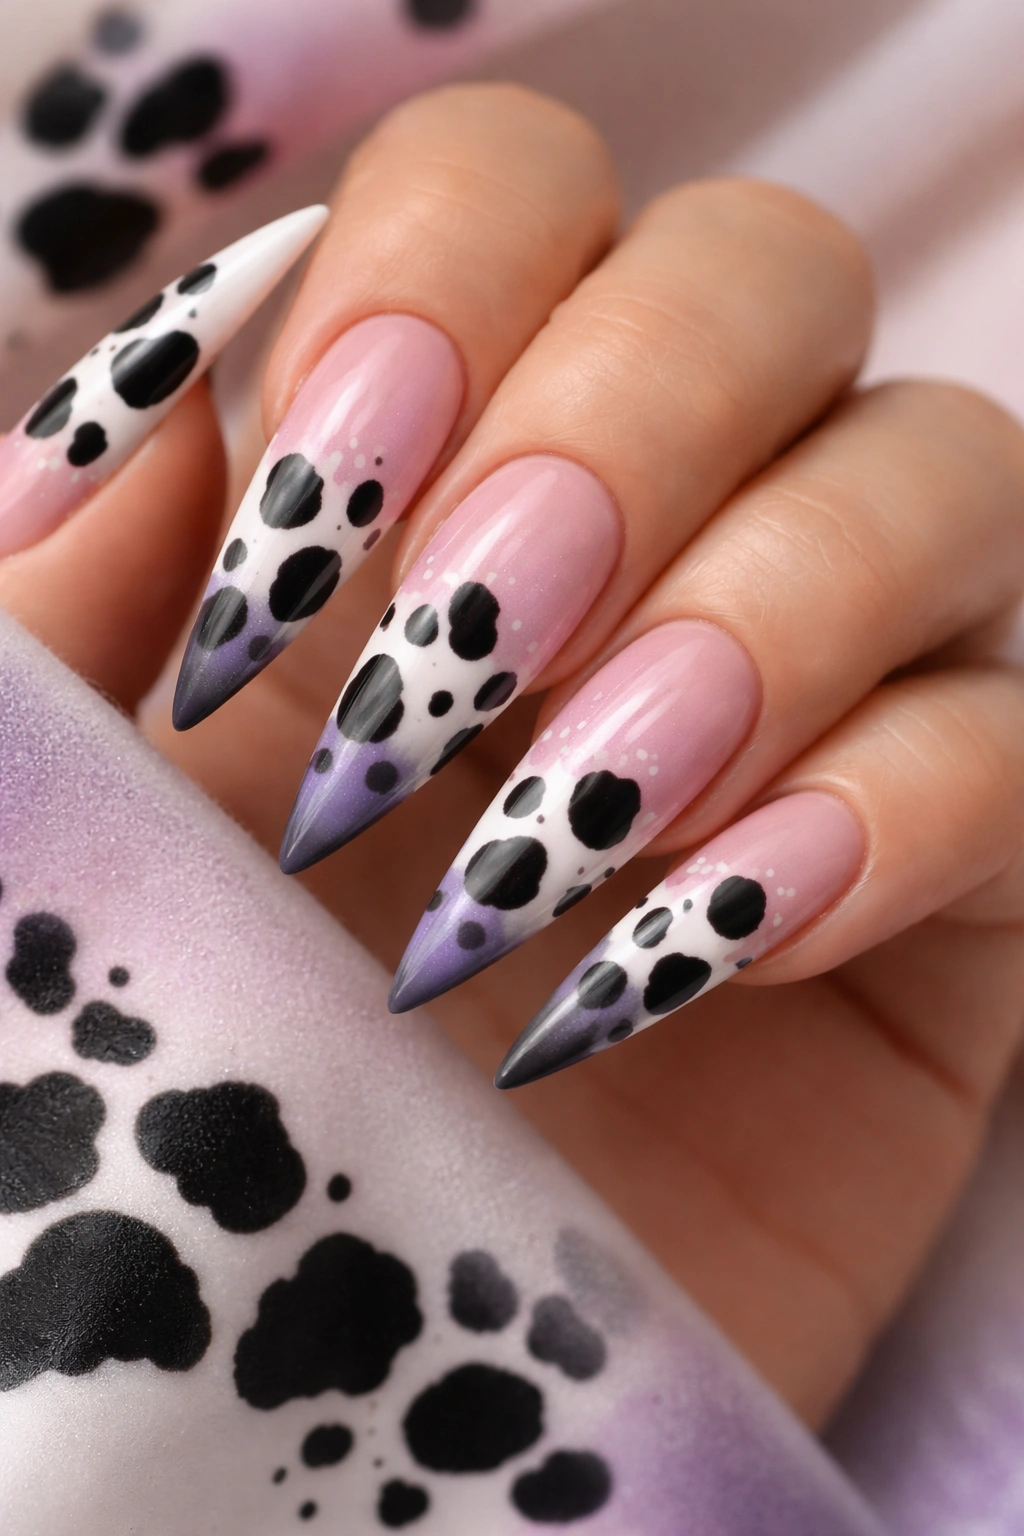
This version plays with color gradation rather than a flat color base. Picture a fade that moves from pure white at the cuticle to pale pink, then soft lavender, then deeper gray toward the tips — with black cow patches distributed across the entire gradient. The patches become part of a larger color story, creating dimensional interest that reads as sophisticated and trendy.
Creating the Gradient Effect
The ombre technique requires a bit more patience, but it’s absolutely worth the effort. Use a makeup sponge to create the color transition, working with thin layers of semi-transparent polish. Each color should blend softly into the next — there shouldn’t be harsh lines between shades. Once your base gradient is set, apply your black cow patches over the entire nail, letting the varying background colors show through and create subtle depth variations in how the patches read.
Color Combinations That Work
- White to blush pink to mauve with black patches
- Off-white to peach to coral with black spots
- Cream to soft gray to charcoal with black patches
- White to soft yellow to warm tan with black spots
- The key is choosing colors that exist on the same temperature spectrum — mixing warm and cool can feel chaotic
Pro tip: Start your ombre application on the areas that see the most wear first, since fading or chipping will happen gradually anyway. This way your manicure actually looks intentional as it ages.
5. Chrome and Cow Print Hybrid
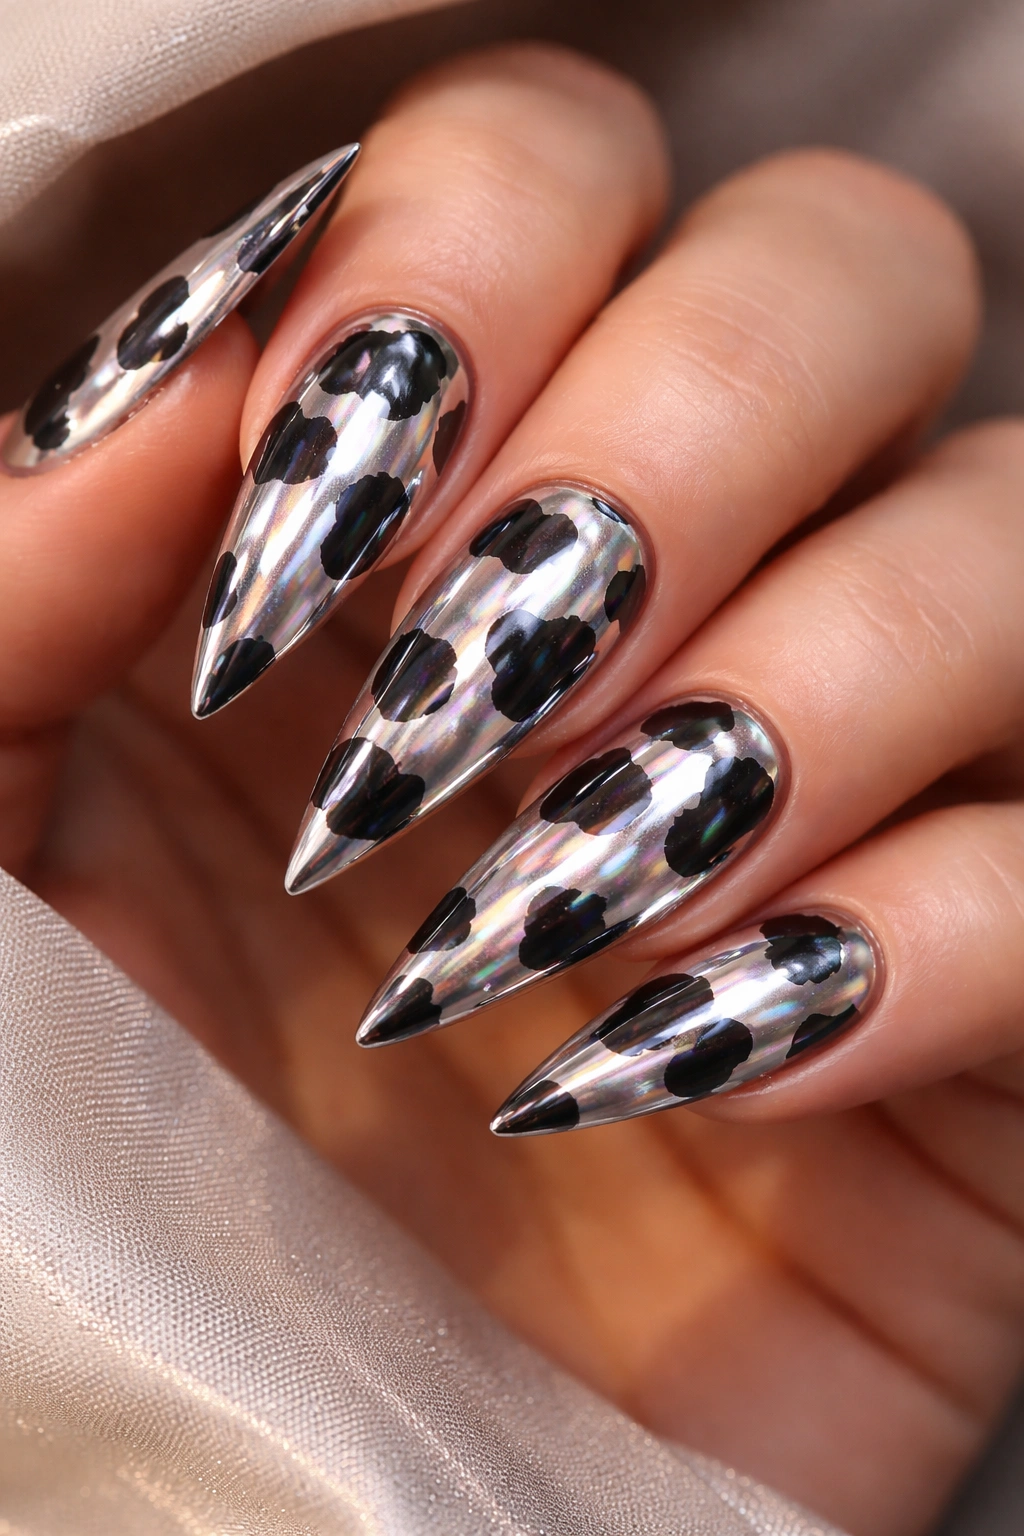
Combine the futuristic shimmer of chrome polish with classic cow print and you’ve got something truly distinctive. Apply a glossy white base, add your black patches as usual, then dust the entire nail with chrome powder using a velvet applicator. The result is nails that shift from deep metallic to lighter shimmer depending on how the light hits them — with the cow print pattern visible underneath the chrome effect like it’s suspended in an iridescent shell.
The Technology Behind the Look
Chrome powder creates a mirror-like finish that reflects light in ways regular polish simply cannot. When layered over cow print, it makes the design feel three-dimensional and modern. The chrome effect is slightly more forgiving than a flat print too — minor imperfections in your patch application essentially disappear under the metallic finish. This is genuinely one of the most visually striking approaches if you have the right products and application technique.
Tools and Materials Required
- A high-quality chrome powder (not glitter — actual chrome creates the mirror effect)
- A velvet or silk applicator pad specific to chrome application
- A regular polish base (white or your color of choice)
- Black polish for your patches
- A matte top coat followed by a glossy top coat (chrome works best with this layering)
Essential warning: Chrome powder is delicate and can rub off if your top coat isn’t properly sealed. Make sure your final top coat is thick, even, and fully cured. Some people apply chrome, seal with matte top coat, then apply glossy top coat over that for extra durability.
6. Neon Cow Print Statement Nails
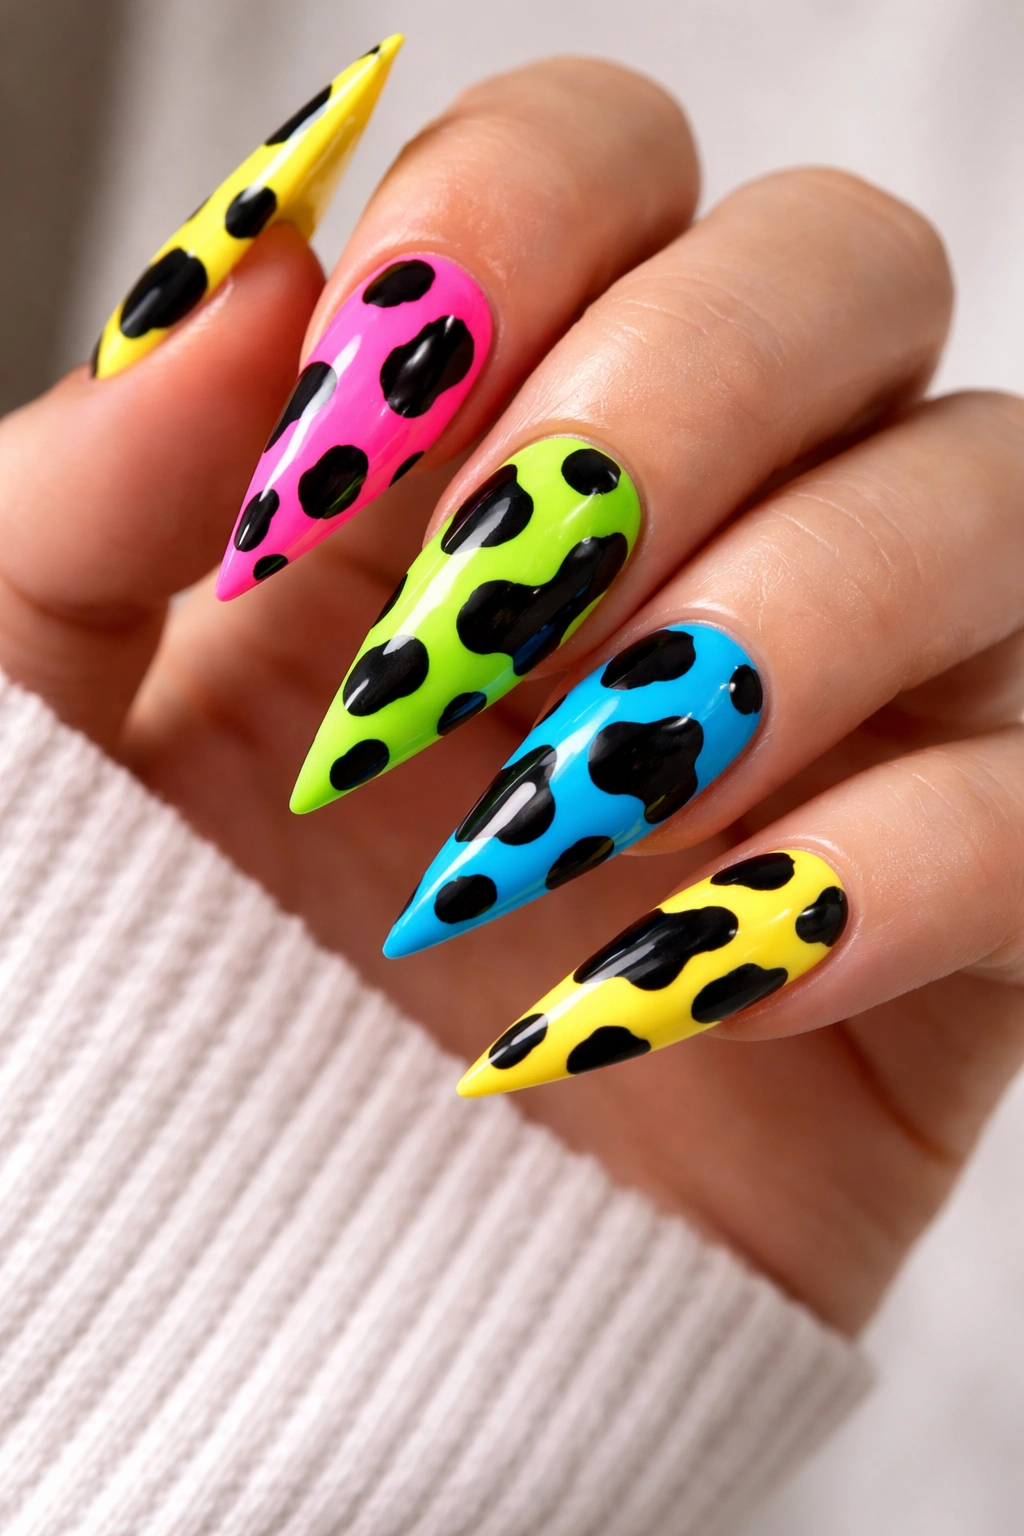
Turn up the volume with neon black patches on a bright white base, or swap the white for neon yellow, neon pink, or neon green with darker patches. Neon reads as bold, playful, and confident — perfect for anyone who doesn’t do subtle. These nails work best when you’re leaning into the fun, unapologetic side of nail art, whether that’s for a festival, a night out, or simply because you refuse to be boring.
Making Neon Work Without It Feeling Costume-y
The key to neon cow print feeling fashion-forward rather than costume-like is quality execution and intentional color pairing. Neon white paired with actual black reads differently than neon pink paired with neon black — the former feels modern, the latter risks feeling cartoonish. Choose one element to be neon (usually the base) and keep the other classic, or pair two neons that naturally complement each other (neon pink with black, or neon yellow with charcoal).
Application and Durability Considerations
- Neon polish can be trickier to apply because it’s often more sheer than regular polish
- You may need three to four coats of neon base color to achieve true opacity and vibrancy
- Work in thin layers rather than trying to cover everything in two thick coats — this actually gives better color saturation
- Let each coat dry completely before applying the next one
- Your patches can be applied once the base is fully set and cured
Real talk: Neon looks most stunning in person and under natural or warm indoor lighting. It doesn’t always photograph well, but it’s absolutely striking when someone sees your nails in person. Commit to the aesthetic if you’re going this route.
7. Matte Cow Print with Glossy Patches
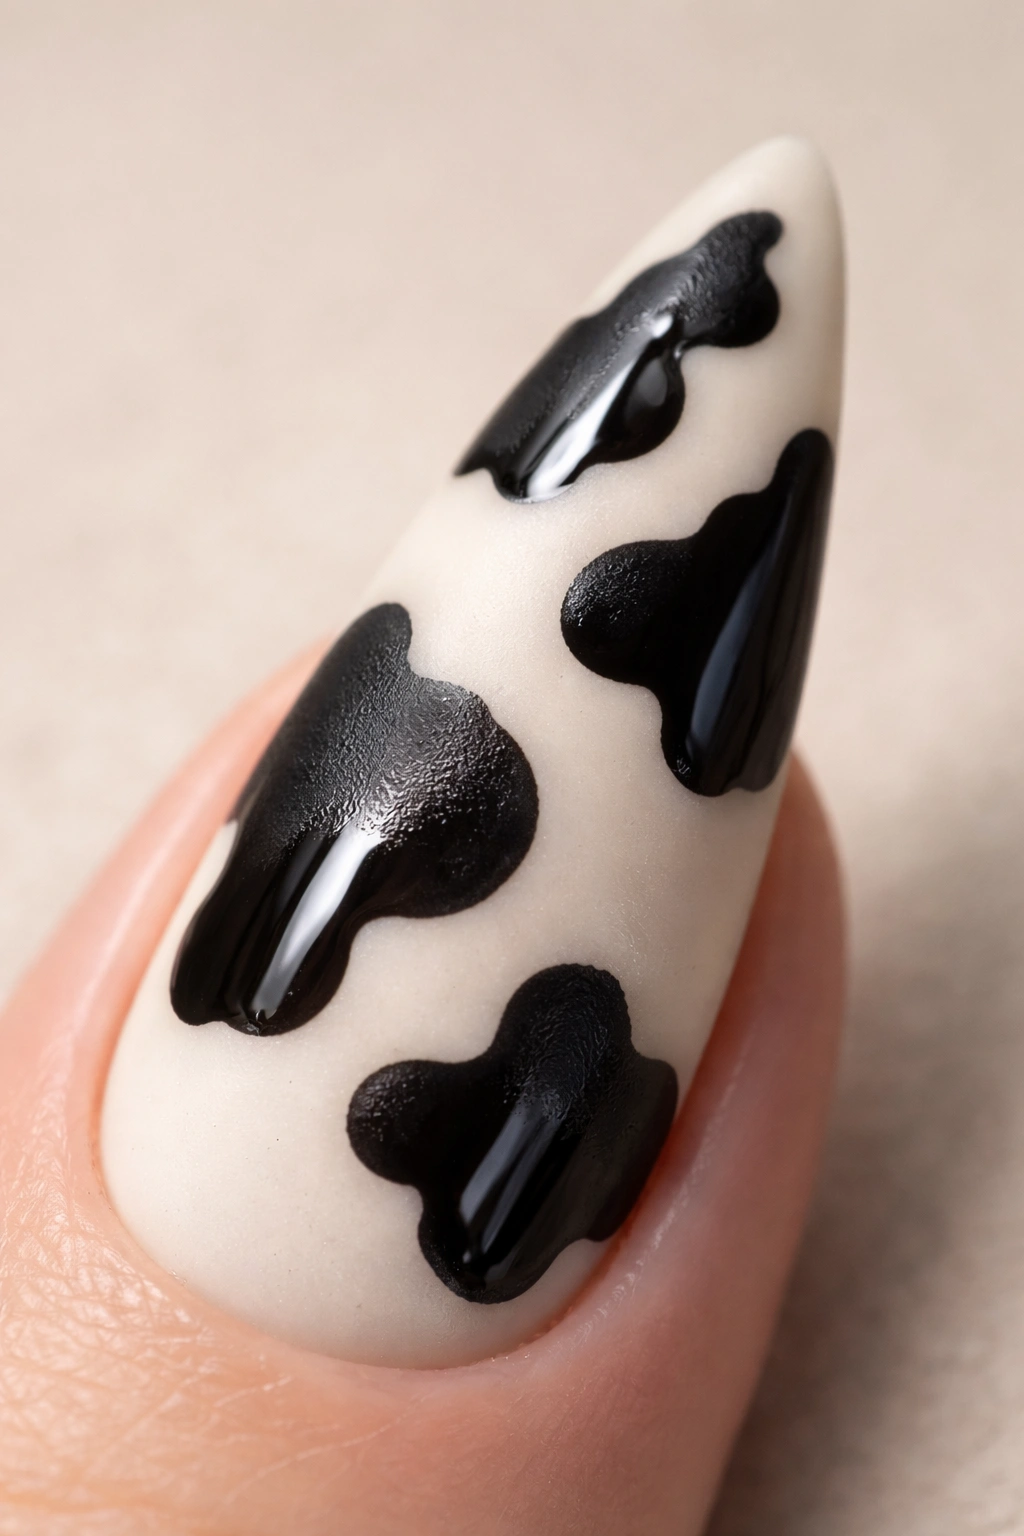
Flip the traditional formula by creating a matte white or cream base with black patches, then sealing only the patches with glossy top coat while leaving the rest of the nail matte. The visual contrast between matte and glossy creates unexpected dimension — the patches seem to float on top of the nail surface because of how they catch light differently. This approach is subtle enough to work in professional settings but visually interesting enough to be genuinely memorable.
Why Texture Contrast Works
Our eyes naturally follow shine and gloss. By making your cow patches glossy while keeping the base matte, you’re directing attention exactly where you want it. The matte base also feels more modern and understated — less “traditional manicure,” more “intentional design choice.” This version is honestly one of the most sophisticated approaches to cow print, and it doesn’t require any special products beyond what you likely already have.
Application Strategy for Flawless Results
- Apply your white or cream base and let it dry completely
- Paint your black patches using regular glossy polish
- Once the patches are fully dry, apply a matte top coat to the entire nail
- Let the matte top coat dry completely — this is important because you’ll be going back in
- Using a thin brush, carefully apply a glossy top coat only over the black patches, staying strictly within the patch boundaries
- The contrast will be obvious and intentional
Insider tip: If using a brush feels too precise, apply a glossy top coat to your entire nail, then use a matte top coat on a cotton pad or small brush to remove the shine from everywhere except the patches. It’s often easier to remove shine selectively than to apply shine selectively.
8. Pastel Cow Print with Soft Gradients
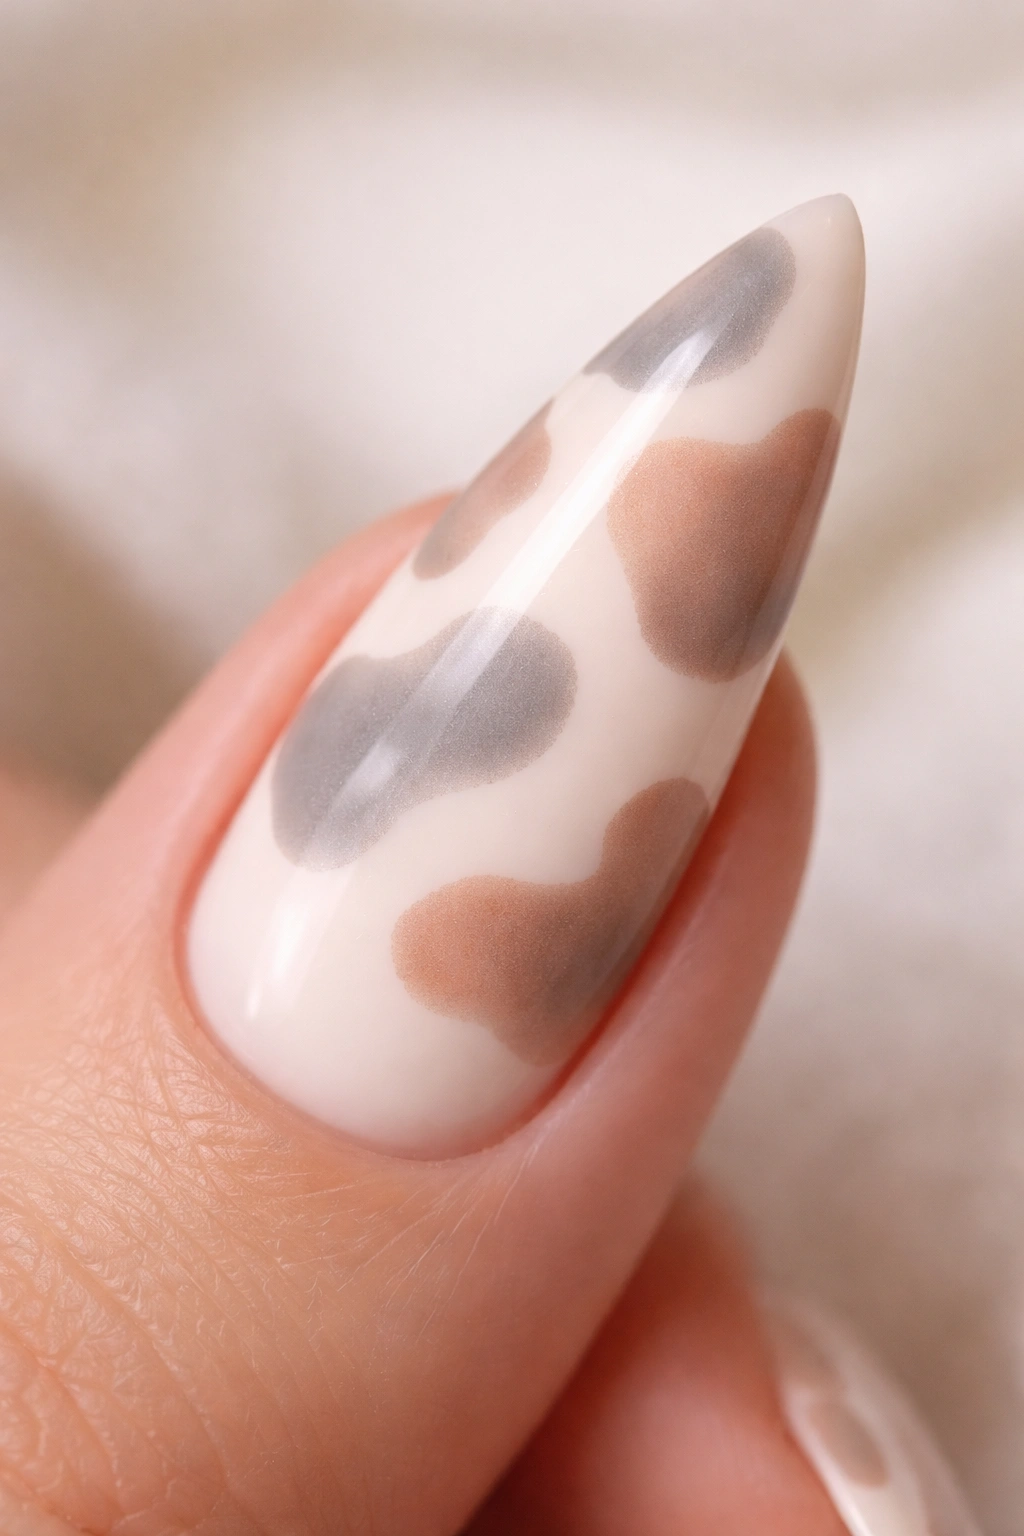
Instead of bold black patches on white, try soft pastel versions with gentle color gradients within each patch. For example, apply a pale cream or ivory base, then create cow patches in soft gray or light brown, with even lighter gradient shading to suggest dimension. The entire design feels dreamy, understated, and considerably more wearable for everyday situations. It’s cow print for people who want the aesthetic without the visual volume.
Creating Soft, Dimensional Patches
Use a technique called “color blocking” to add subtle shading within each patch. Paint the main patch color, then while it’s still slightly tacky, feather a lighter or darker shade into one edge to create a gradient effect. This gives the patches dimension and makes them feel less flat. The result is a design that reads as intentional and artistic without screaming for attention.
Color Palettes That Maintain the Soft Aesthetic
- Cream base with light taupe and oatmeal patches
- Pale pink base with soft mauve and rose patches
- Off-white base with light brown and tan patches
- Soft gray base with slightly darker gray and charcoal patches
- The entire color story should feel cohesive and calm, not jarring
Worth considering: Pastel cow print actually photographs beautifully and photographs better than neon versions. If Instagram-worthiness matters to you, this approach delivers sophisticated, filter-friendly results.
9. Cow Print with Rhinestone and Jewel Accents
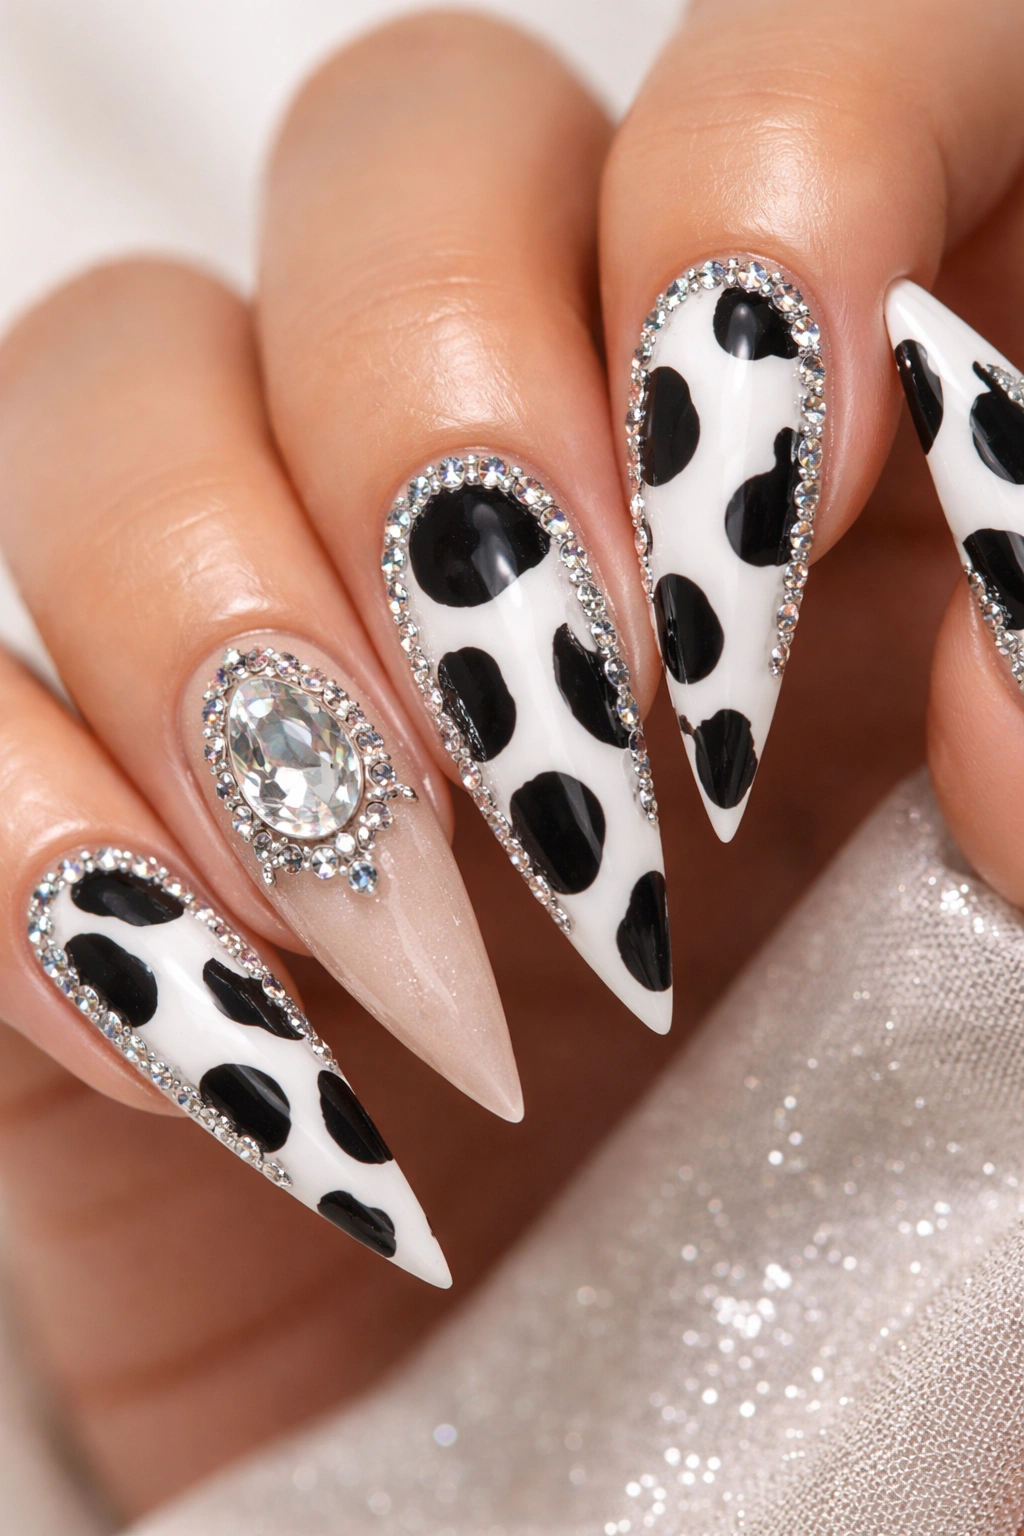
Take any cow print stiletto base and elevate it with strategic rhinestone placement. Add tiny crystals along the outline of some patches, scatter them across the white space, or create a jeweled accent nail where one nail gets heavier crystal coverage while the others stay classic. The sparkle adds luxury and glamour without overwhelming the fundamental cow print design. This version works beautifully for formal events, parties, or any occasion where you want your nails to genuinely shine.
Strategic Rhinestone Placement
Less is almost always more with rhinestones. Placing crystals around the perimeter of patches rather than covering them completely keeps the cow print legible while adding visual interest. An accent nail — where one nail gets notably more rhinestone coverage than the others — is a sophisticated approach that looks intentional rather than overdone.
Rhinestone Application Techniques
- Use a specialized rhinestone adhesive, not regular nail glue or top coat
- Apply adhesive to the back of each rhinestone or use a dotting tool to place tiny dots of adhesive on the nail
- Press rhinestones firmly in place and hold for a few seconds
- Wait for the adhesive to fully cure before applying top coat
- Use a clear top coat to seal everything once the adhesive is completely dry
- Avoid soaking your hands in water for at least 24 hours after application to ensure maximum adhesion
Pro tip: Invest in tweezers designed specifically for nail art rhinestones. They grip delicate crystals without crushing them and make placement vastly easier than using your fingers.
10. Reverse Stamped Cow Print with Nail Art Designs
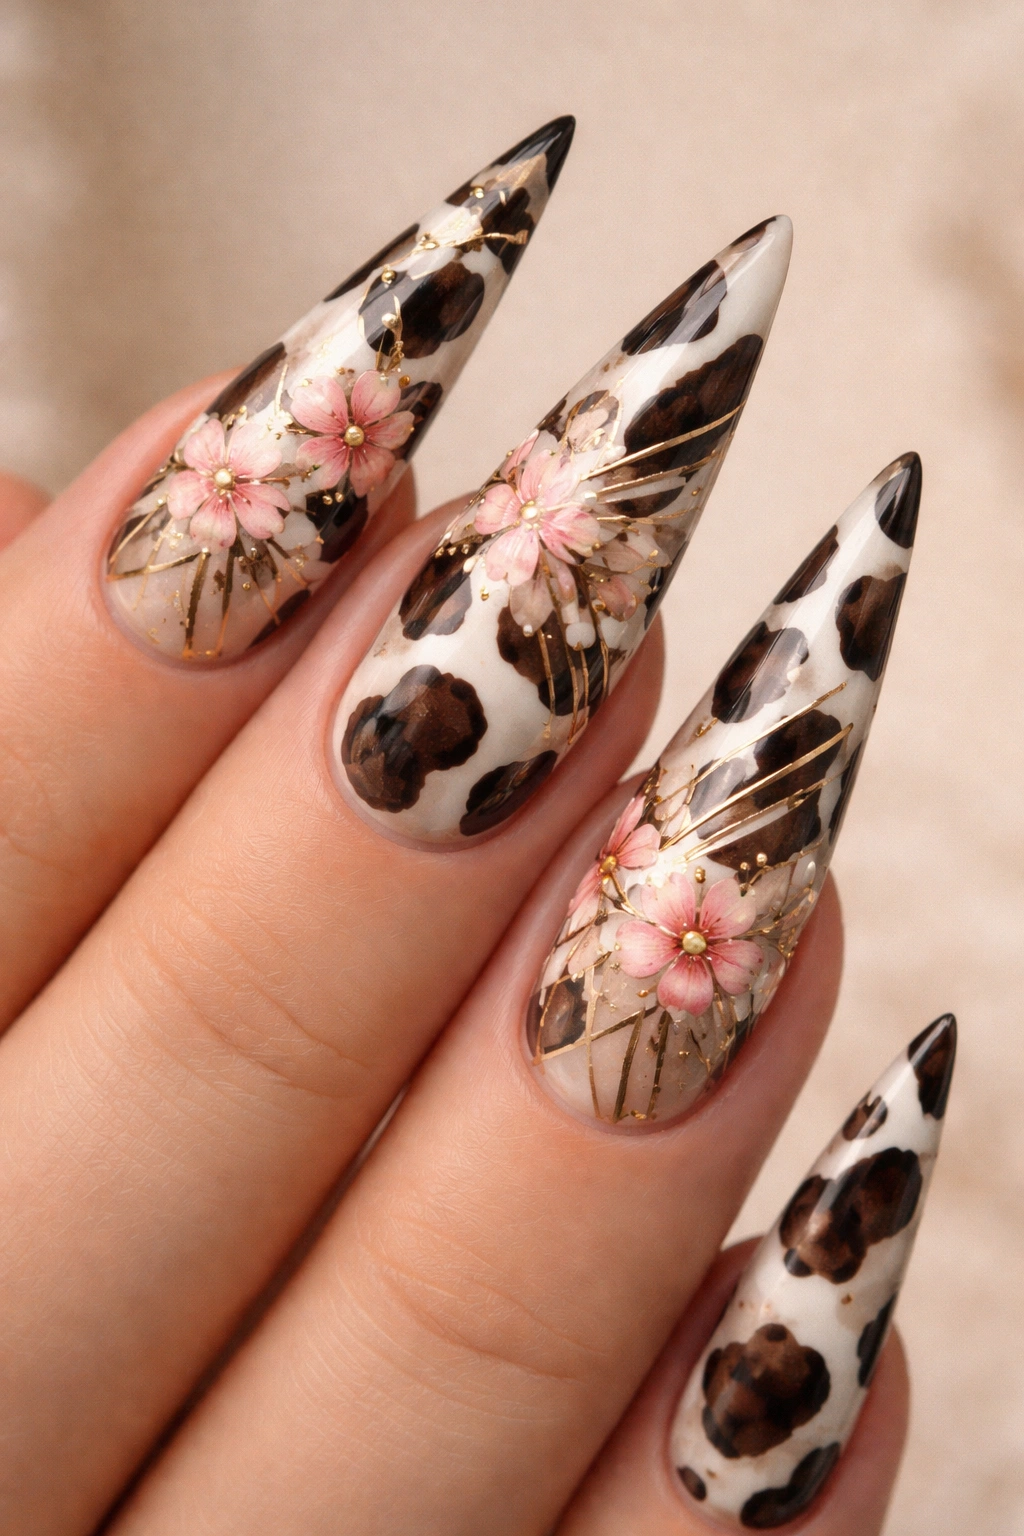
For the true nail art enthusiast, try reverse stamping — a technique where you stamp your cow print design onto a silicone mat, then peel it off and apply it to your nail as a finished decal. This allows you to create incredibly intricate patterns and combine cow print with other designs (florals, geometric shapes, fine lines) that would be nearly impossible to paint freehand. You might create a half-and-half design with cow print on one side and delicate florals on the other, or cow print with metallic geometric overlays.
How Reverse Stamping Works
Stamping plates allow you to transfer pre-designed patterns to your nails using a scraper and stamper tool. With reverse stamping, you stamp onto a silicone mat instead of directly onto your nail, which lets you manipulate, layer, and customize the design before transferring it. You can stamp multiple colors, layer designs, add embellishments, and create incredibly complex patterns that would take hours to paint by hand.
Why This Approach Elevates Cow Print
Reverse stamping takes cow print from simple pattern into true nail art. You’re no longer limited by what you can hand-paint — you can create designs that look like they came from a professional nail salon. The technique also allows you to experiment with complex color combinations and hybrid designs that might feel overwhelming if painted traditionally.
Materials and Skill Level
- At least one cow print stamping plate (readily available online and at beauty supply stores)
- A silicone mat or stamper-specific work surface
- Stamping tools (scraper and stamper)
- Multiple polish colors if creating layered designs
- This technique has a learning curve — your first few attempts might not be perfect, but it gets easier quickly
- Once you understand the basic reverse stamping technique, the possibilities become nearly endless
Real talk: Reverse stamping is genuinely a game-changer for intricate designs, but it does require specific tools and a bit of practice. Don’t get discouraged if your first attempts aren’t flawless — most nail artists needed multiple tries before achieving salon-quality results.
Final Thoughts
Cow print on stiletto nails is genuinely versatile — whether you’re going minimal and refined or bold and artistic, there’s an approach that matches your personal style. The elongated shape of stilettos gives these designs room to breathe and show off the pattern in ways shorter nails simply can’t. The key to any cow print manicure is investing in quality application, whether that’s doing it yourself with good tools or visiting a skilled nail technician.
What makes cow print so enduringly appealing is that it works across virtually every aesthetic and occasion. You can wear it as an ironic statement against minimalist fashion, pair it with maximalist accessories for full maximalist energy, or use it as your one bold choice in an otherwise neutral outfit. The design is playful enough to be fun but striking enough to feel intentional and fashionable rather than gimmicky.
Whatever cow print stiletto design you choose, commit to it with confidence. The whole point of these nails is to make a statement — whether that statement is quiet and sophisticated or loud and joyful. Your nails should feel like an extension of your personal style, not a compromise between what you want and what you think you’re “supposed” to wear.
