

Stiletto nails with star designs represent the intersection of two major nail trends—dramatic length and celestial artistry. The elongated stiletto shape creates an ideal canvas for star motifs, whether you’re going for glamorous statement nails or subtle geometric sophistication. Stars work beautifully on this nail shape because the pointed tip naturally extends the visual drama, and the wider nail bed gives you space to play with multiple design elements, layering techniques, and decorative embellishments.
The appeal of star-themed stiletto nails extends beyond pure aesthetics. Stars symbolize aspirations, magic, and timelessness, which makes them appropriate for everything from everyday wear to special occasions. Whether you’re drawn to intricate hand-painted designs, simple stamped patterns, or embellished looks loaded with sparkle and shine, there’s a star stiletto design that matches your skill level and style preference. The best part? Many of these ideas work whether you’re getting them done at a salon or creating them yourself at home with basic tools.
What makes star designs particularly forgiving on stiletto nails is their geometric nature. Even if your hand-painting isn’t perfectly precise, stars have a playful quality that makes slight imperfections feel intentional rather than like mistakes. Combined with the modern silhouette of stiletto nails, stars feel current without being trendy—they’ll look just as stunning months from now as they do today.
1. Classic Five-Point Stars in Contrasting Colors
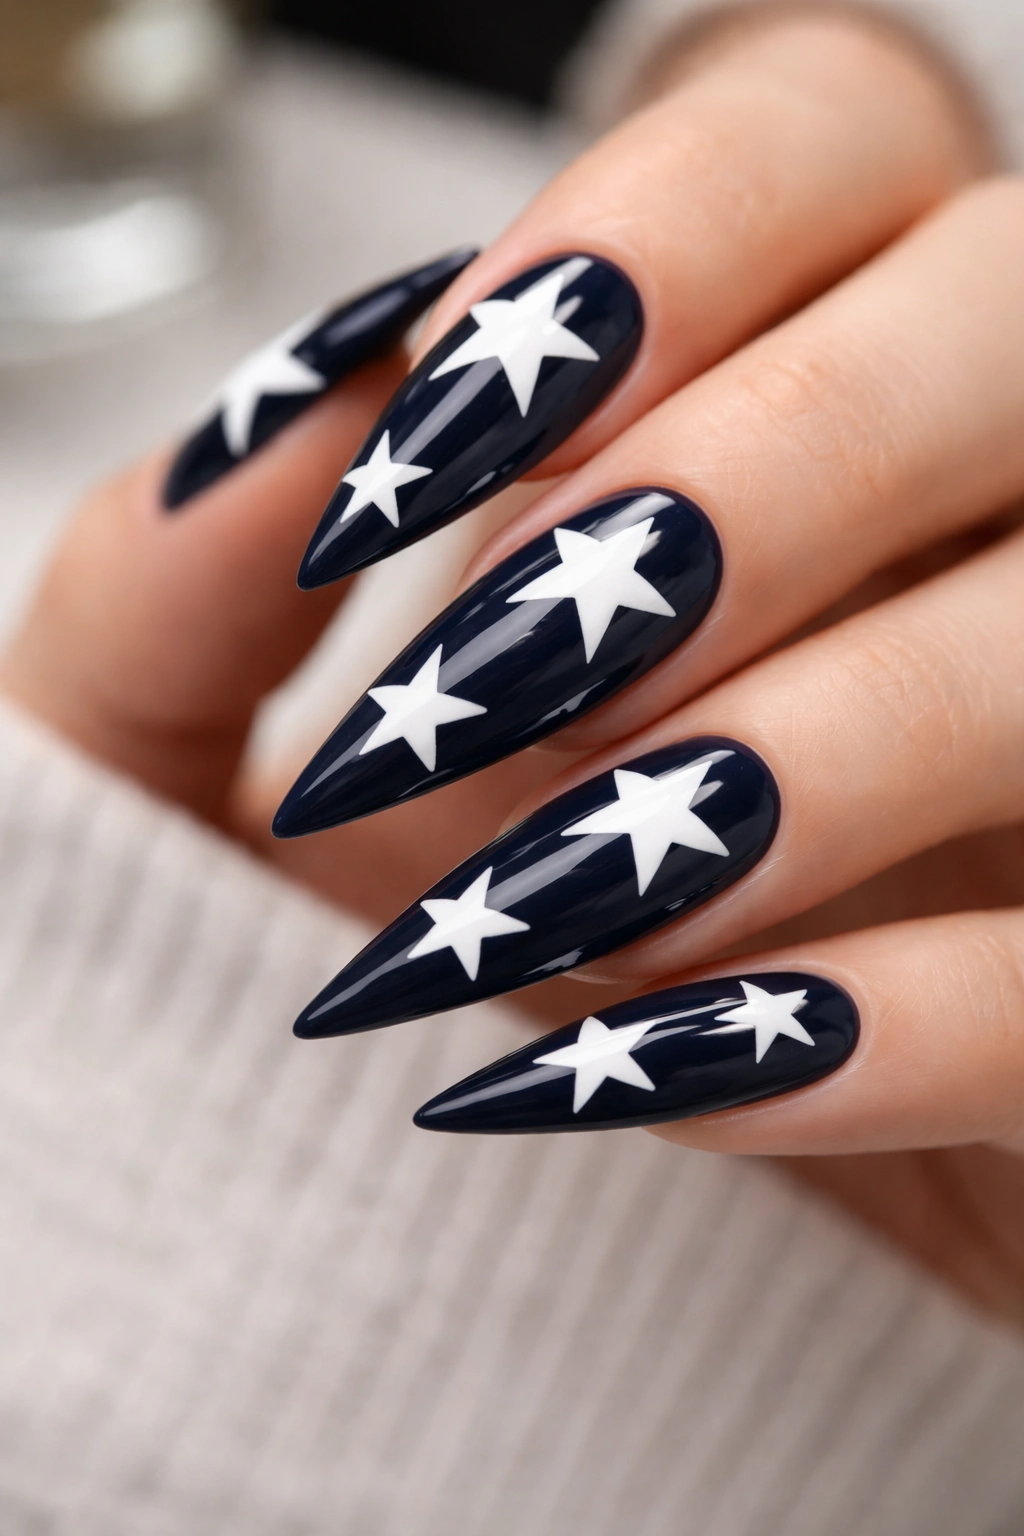
The timeless five-point star is the foundation of stellar nail art, and it becomes completely transformed when placed on a stiletto base. A classic approach pairs white five-point stars against a deep navy, emerald, or burgundy background, creating high contrast that reads instantly recognizable and polished. What makes this design work is the simplicity—you’re relying on clean geometry and color theory rather than complex techniques or layers of embellishments.
Why This Design Reads as Universally Polished
Five-point stars have become almost symbolic of elegance and aspiration precisely because they’ve been used across cultures and design movements for centuries. When you nail this classic combination (literally), it signals refined taste and attention to detail. The high contrast between star and base color makes your manicure appear intentional and planned, not accidental or hastily done. On stiletto nails, this design gains additional sophistication because the elongated shape emphasizes the star’s points, making them appear sharper and more dramatic.
Getting the Technique Right
- Use a fine detail brush or a thin striping brush to hand-paint each star freehand, or invest in a star-shaped stamper for perfectly uniform shapes every time
- Start with two coats of your base color to ensure solid, even coverage without visible streaking
- Paint stars in varying sizes across each nail for visual interest—larger stars on your ring fingers, smaller ones on your pinky
- Seal everything with a glossy topcoat to make colors pop and protect your artwork from chipping
- If hand-painting feels intimidating, star nail stickers offer a foolproof shortcut that looks professionally done
- Practice on a nail wheel or piece of paper first to build confidence with your tool
2. Glitter Star Gradient with Nude Base
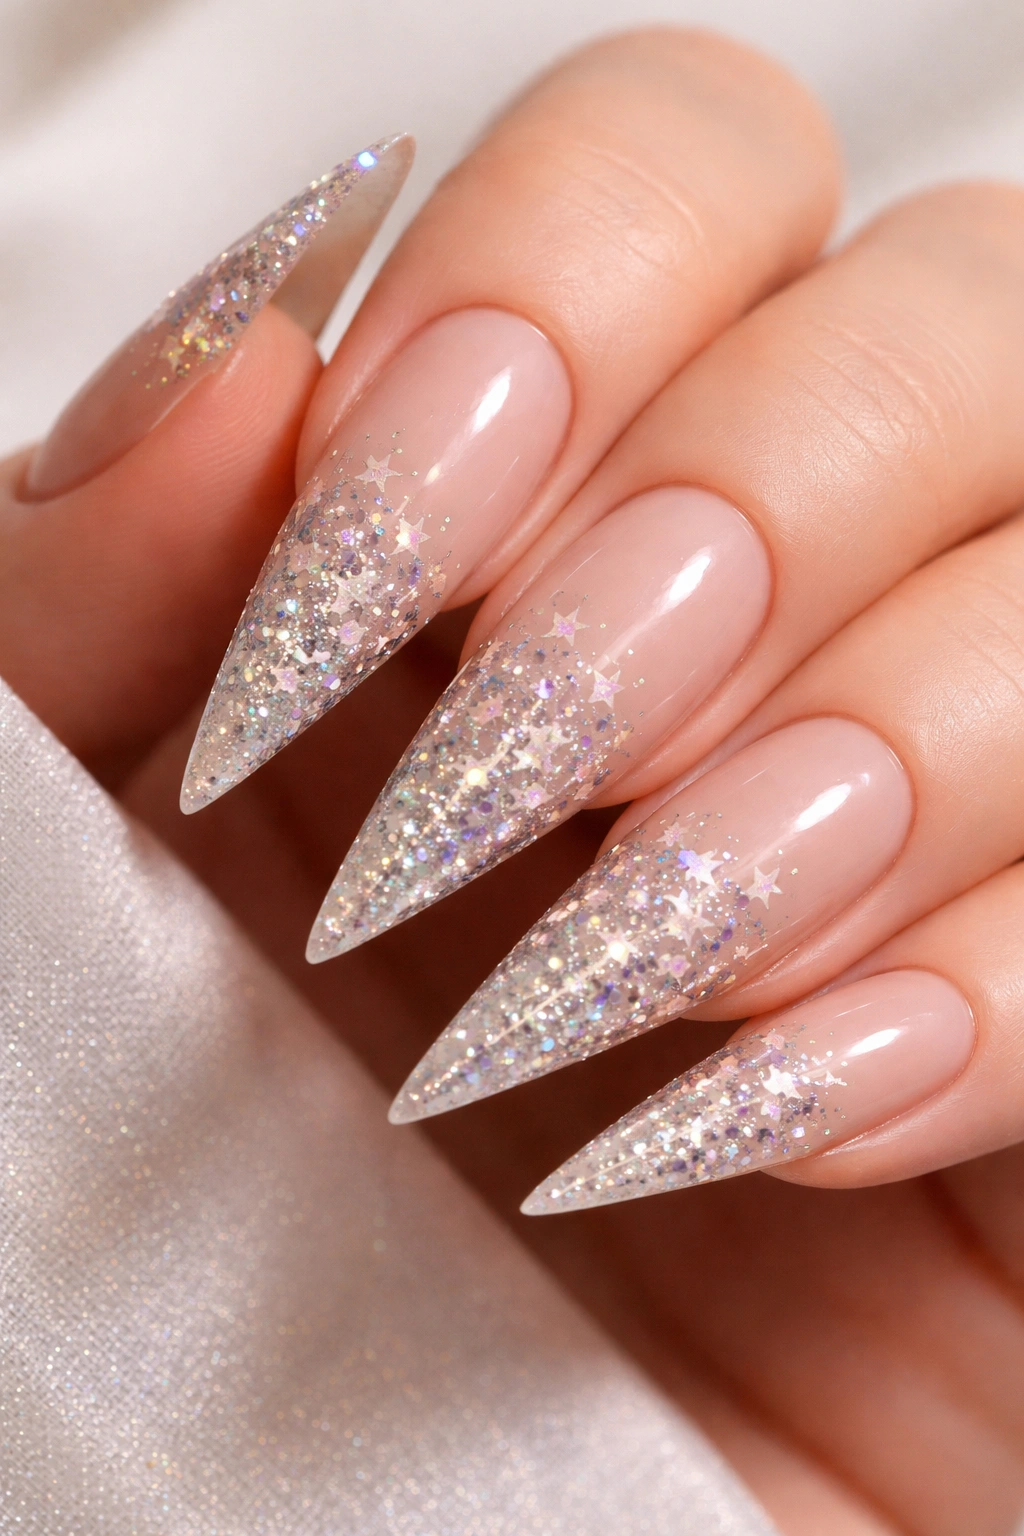
Glitter transitions create immediate visual movement, and when you layer star-shaped glitter elements across a nude or soft pink base, you get a design that feels both playful and sophisticated. This gradient approach works by starting with sparse glitter placement at the base of the nail and gradually increasing glitter density toward the tip, creating the illusion of glitter cascading or floating across your stiletto nails.
The Magic of Gradient Layering
Nude base colors act as a neutral canvas that lets glitter become the star (pun intended) without competing for attention. The gradient effect adds dimension—your nails appear to have depth and movement even in a still photograph. This design feels celebratory without being over-the-top, making it appropriate for professional settings with a touch of personality, casual outings where you want to feel special, or actual celebratory events. The gradient also makes the design feel more intentional and high-effort than simply sprinkling glitter randomly.
Achieving the Perfect Gradient Effect
- Begin with a sheer nude or pale pink base color—something that lets light filter through slightly
- Use a makeup sponge to dab glitter polish onto your nails, concentrating the glitter at the tip and feathering it backward
- Alternatively, apply clear topcoat in sections and sprinkle loose glitter directly onto wet topcoat, working from tip toward base
- Add dimensional star-shaped glitters or sequins on top for extra sparkle—these catch light differently and add texture
- Seal everything with a thick, glossy topcoat that completely encases all glitter and prevents pieces from shifting
- Pro tip: Tap excess loose glitter onto a piece of paper before topcoat application, catching any pieces that didn’t stick
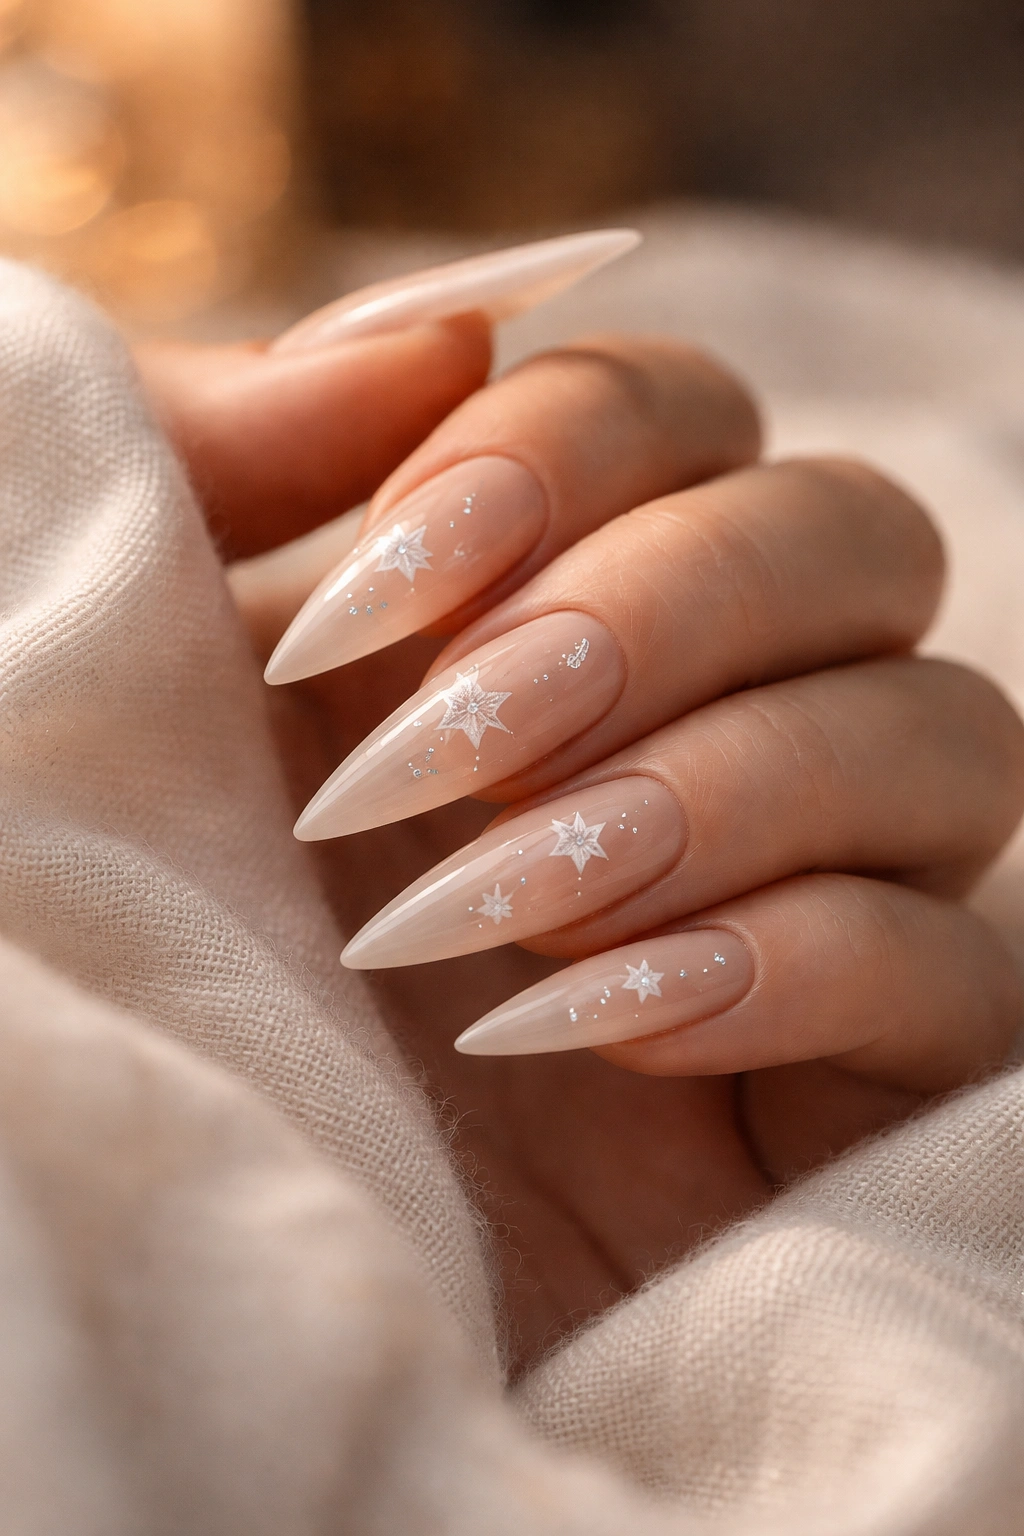
3. Metallic Gold Stars on Nude or Cream Base
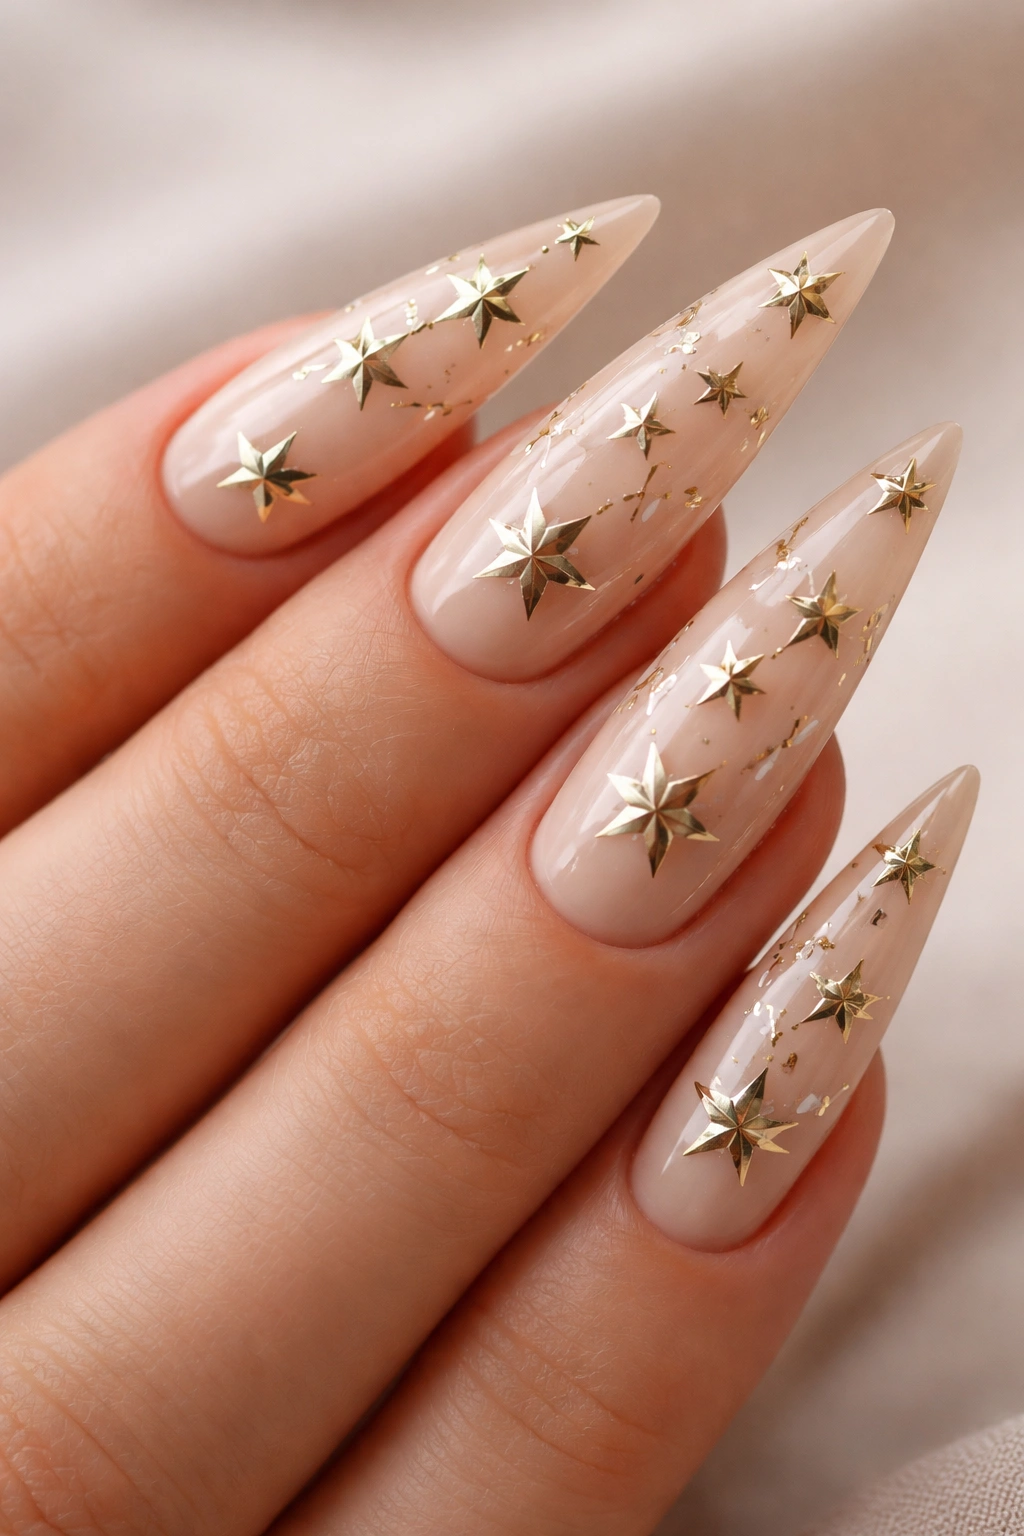
Gold stars possess an inherently luxurious quality that instantly elevates any nail design. When you choose a warm nude, champagne, or off-white base paired with rich gold stars, you create a design that feels both timeless and upscale—the kind of manicure that photographs beautifully in natural lighting and feels appropriate for professional, casual, or celebratory contexts.
Why Gold Stars Signify Luxury
Gold has been associated with wealth, achievement, and aspiration across human history. When applied to nails in the form of deliberate star shapes, gold becomes a design choice rather than just a color preference. Metallic finishes catch and reflect light, which creates dimension that flat colors cannot replicate. This light-reflecting quality makes gold particularly striking on long stiletto nails, where the extended surface area catches more light as you move your hands.
Techniques for Perfect Gold Stars
- Use metallic gold gel or regular polish with fine shimmer particles for best light reflection
- Apply stars in a scattered constellation pattern rather than uniform rows—this feels more organic and artistic
- Vary star sizes to create visual hierarchy and prevent monotony
- Consider using stamping plates specifically designed for star patterns to ensure uniform shapes
- Blend some stars slightly into the base color by using a damp brush to feather the edges, creating an ombré effect
- Layer a clear topcoat to intensify the metallic shine and create a glass-like protective finish
- This design pairs beautifully with minimalist jewelry that won’t compete for visual attention
4. Negative Space Stars with Geometric Precision
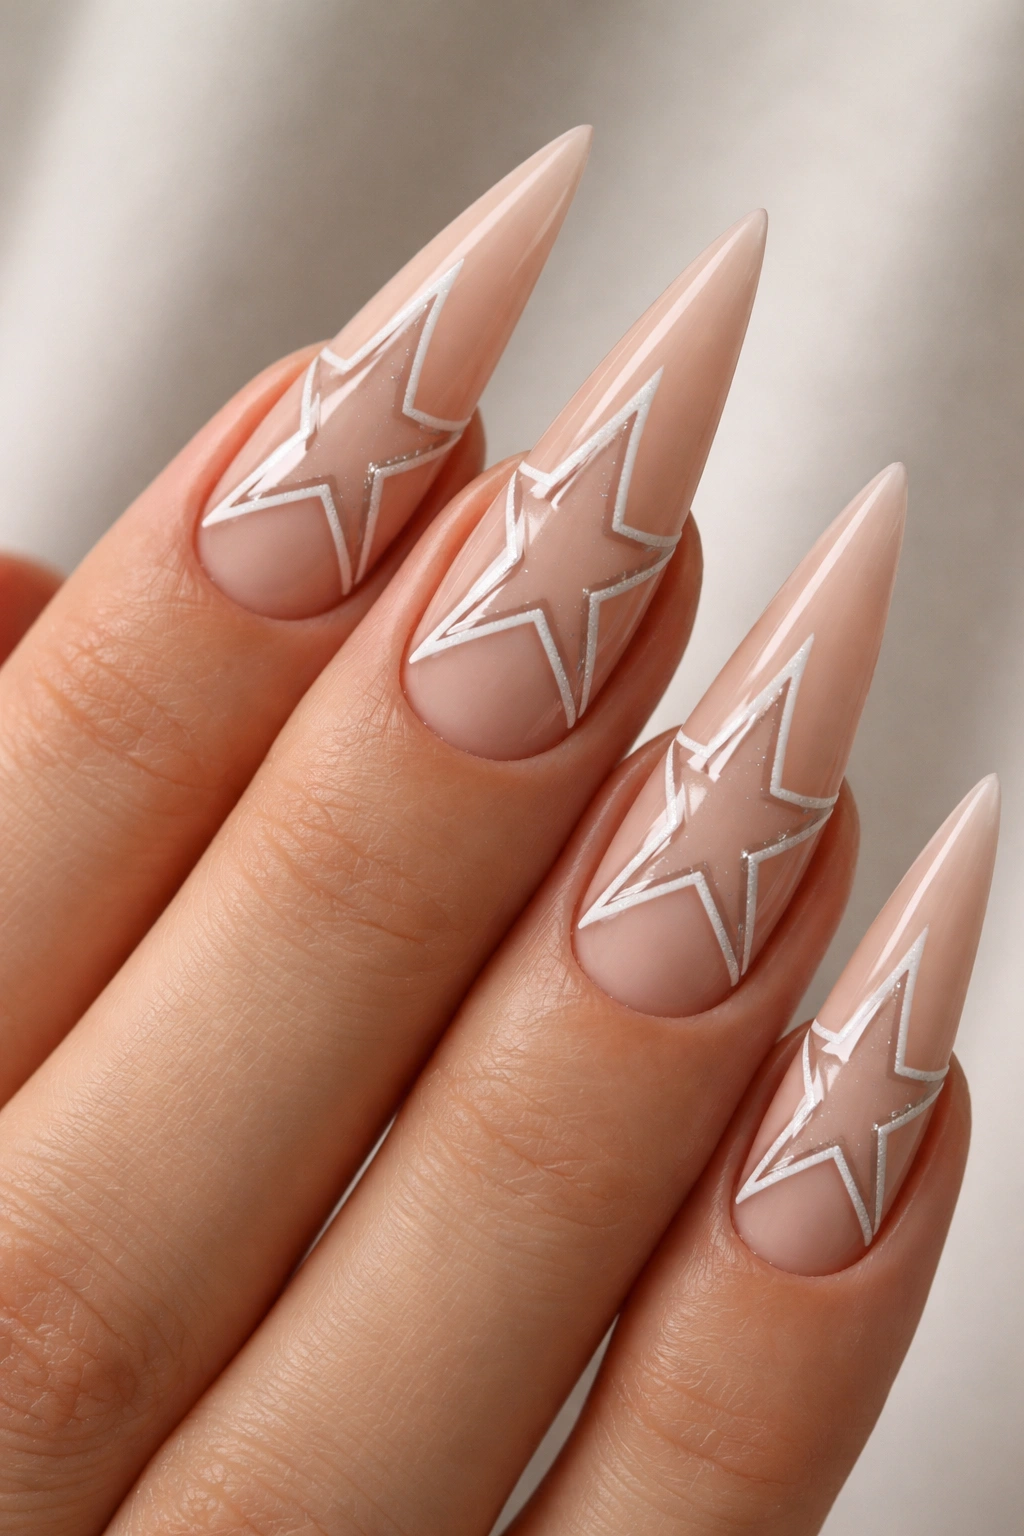
Negative space design uses the natural nail as part of the artwork, leaving portions unpainted while creating shapes through strategic color blocking. When applied to stars, this technique feels modern and fashion-forward—you’re essentially letting the nude nail color become one element of the design rather than a background.
The Modern Appeal of Negative Space
Negative space designs appeal to people who want sophistication without maximum saturation of color or glitter. This approach works particularly well on stiletto nails because the shape itself makes a statement, so the design can be minimal while still feeling intentional. The math-like precision of geometric negative space creates a visual puzzle that engages viewers—your nails become something worth looking at and thinking about rather than just something pretty.
Creating Flawless Negative Space Stars
- Map out your design using a pencil or thin marker on your nail before applying any polish
- Apply thin strips of painter’s tape along your design lines, pressing firmly so no polish seeps underneath
- Paint your chosen color (gold, silver, black, or jewel tones all work beautifully) within the taped areas
- Remove tape immediately after painting while polish is still slightly wet, before it sets completely
- The tape removal reveals clean, sharp lines that look professionally done
- You can add fine outline details with a thin detail brush to sharpen edges further
- Seal with topcoat for a finished look that actually makes the design feel more intentional and refined
5. Reverse Stamped Stars with Intricate Details
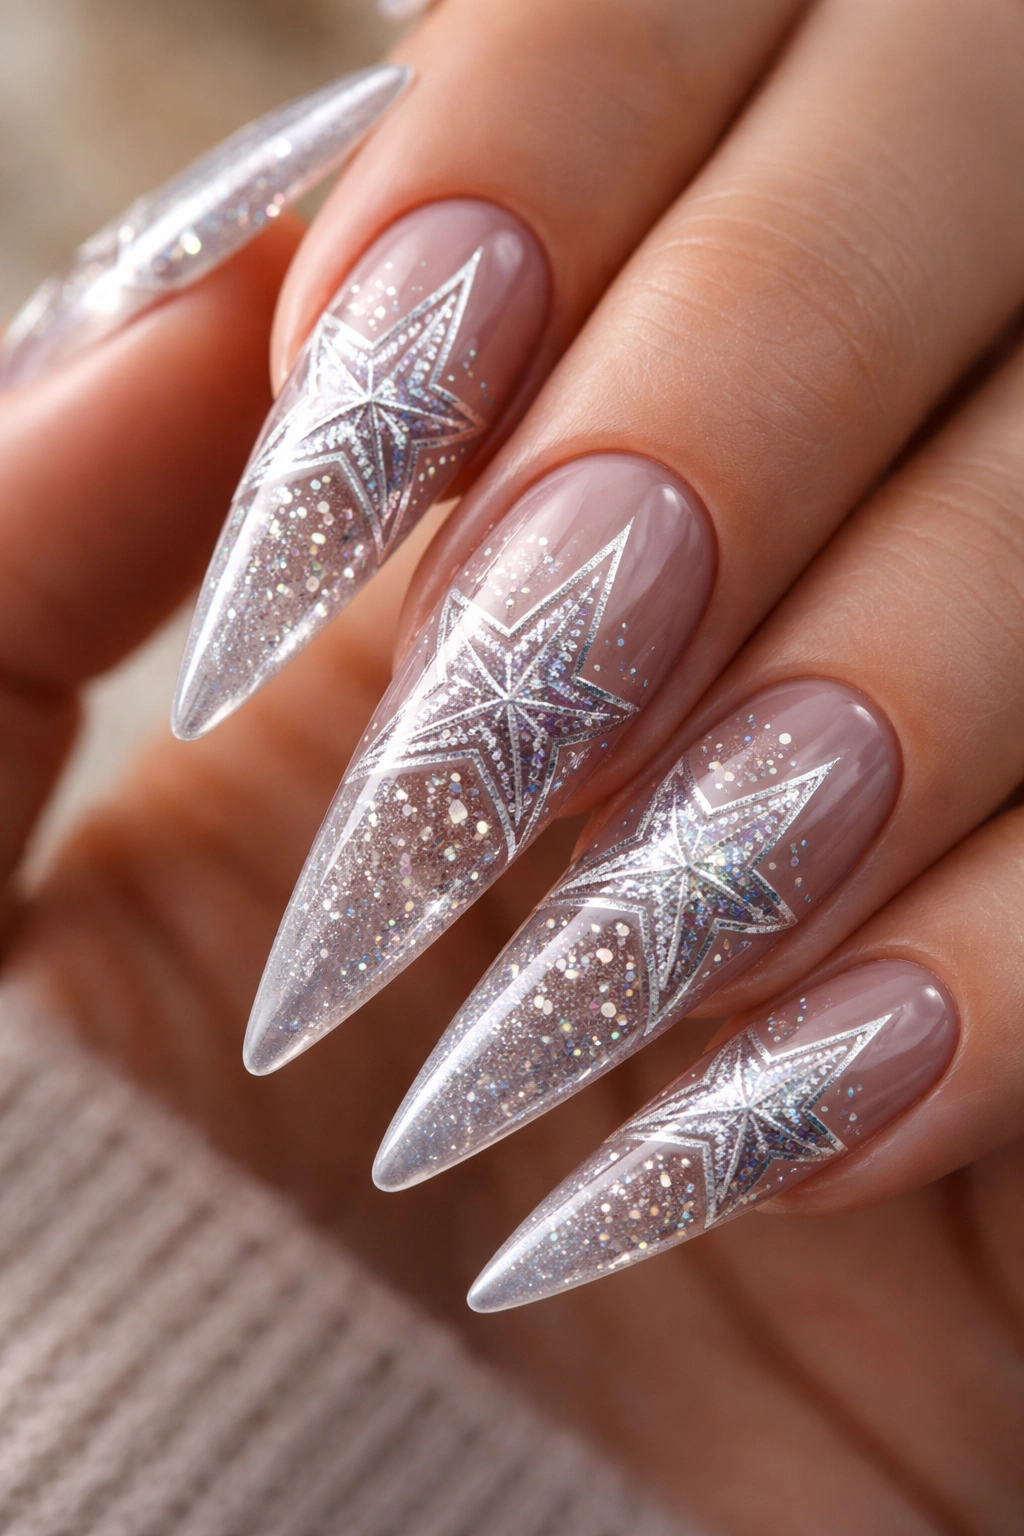
Reverse stamping is a technique where you stamp an image onto a silicone mat, paint finer details onto the stamped image while it’s still wet, allow it to dry, and then carefully peel the entire design away from the mat and apply it to your nail. This allows for incredibly detailed star designs that would be nearly impossible to hand-paint with perfect precision.
Why Reverse Stamping Elevates Star Designs
This technique is genuinely a game-changer for people who love detailed nail art but don’t possess painting skills that would make professional artists jealous. You can create designs that look hand-painted and intricate, adding swirls inside stars, tiny details within each point, and seamless color transitions. On stiletto nails, these detailed designs appear as miniature art pieces worthy of close inspection. The technique allows you to prepare multiple designs in advance, so you have options ready whenever inspiration strikes.
Mastering Reverse Stamping Technique
- Use a silicone mat or smooth surface as your stamping base (some people use clear cellophane or a glass tile)
- Stamp your chosen star image onto the mat with your selected stamping polish color
- While the stamped image is still wet and malleable, add extra details using thin brushes and additional colors
- Allow the stamped design to dry completely on the mat—this typically takes 10-15 minutes depending on humidity
- Once fully dry, carefully peel away the entire image from the mat using a thin, flexible tool (a dotting tool works perfectly)
- Apply a thin layer of topcoat to your nail and carefully position the peeled design onto your nail, adjusting as needed
- Seal with another coat of thick topcoat, working carefully to avoid shifting the delicate design
- This technique works best on nails with a relatively flat surface, so shorter stilettos might work better than extremely long ones
6. Rhinestone Star Accents for Glamorous Drama
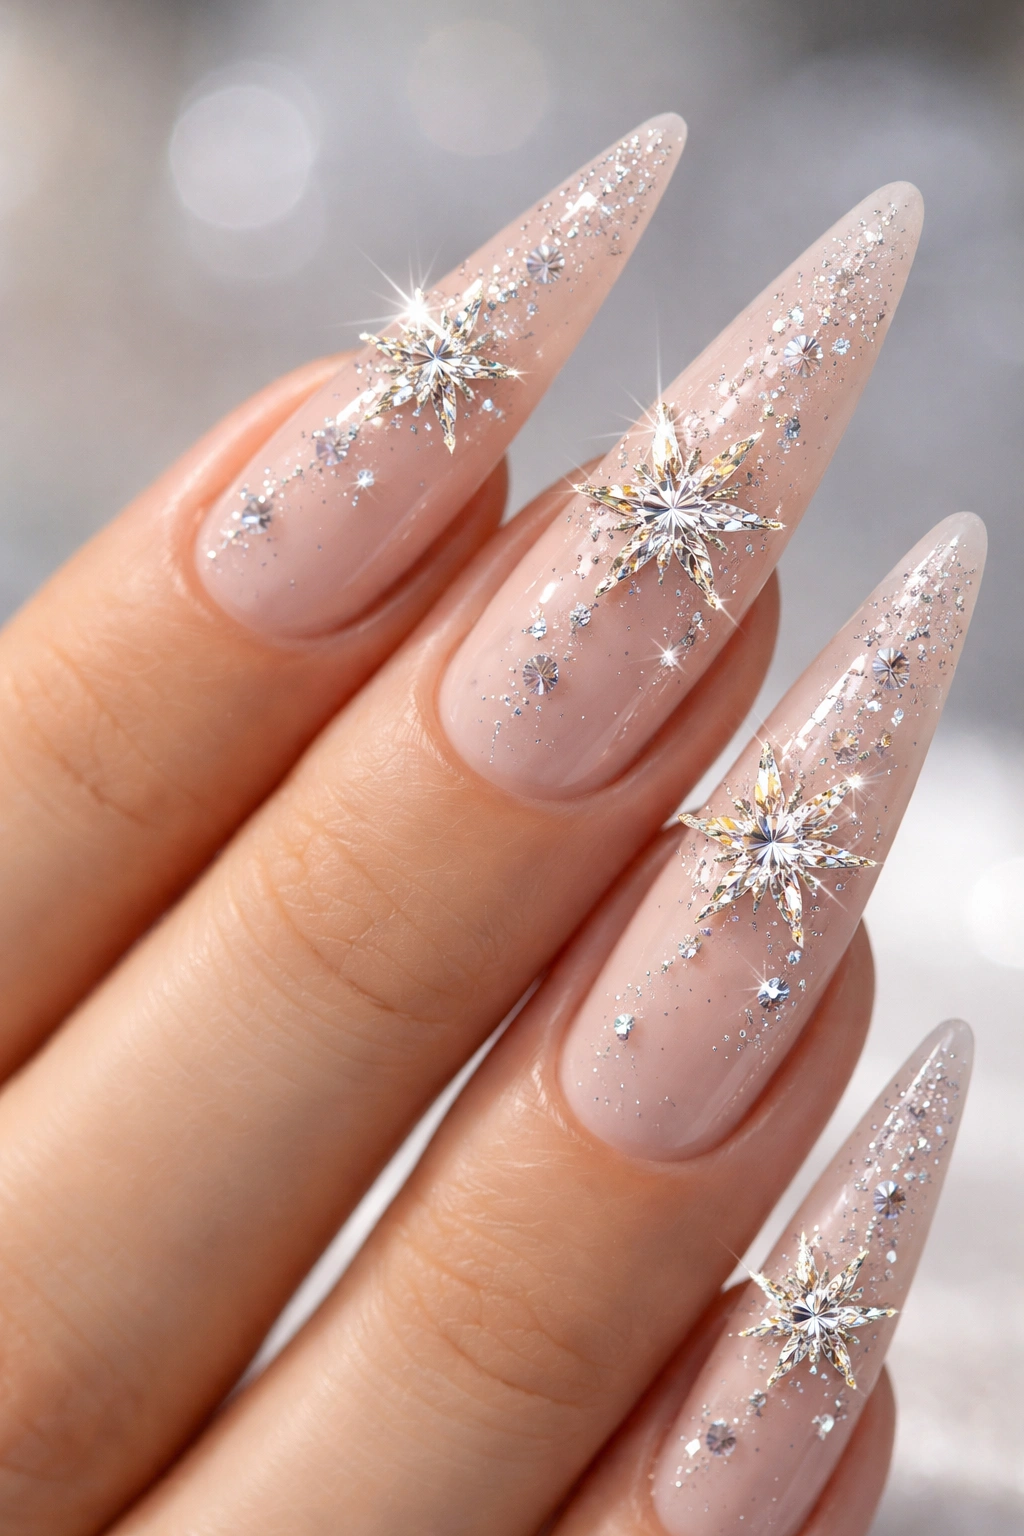
When you want maximum glamour and sparkle, rhinestones become your secret weapon. Scattered rhinestone stars (or a combination of rhinestones arranged in star patterns) create immediate three-dimensional drama that flat designs cannot achieve. This approach works beautifully when you keep the base color simple—any jewel tone, black, nude, or even white—allowing rhinestones to be the clear focal point.
The Luxe Factor of 3D Embellishment
Rhinestones catch light and reflect it in multiple directions simultaneously, creating sparkle that literally moves and changes as your hands move. This dynamic quality makes rhinestone designs feel more special and valuable than even the most carefully painted artwork. On stiletto nails, rhinestones sit at the tip where they’re most visible and create a natural focal point. The height and angle of stiletto nails actually make rhinestones more noticeable than they’d be on shorter, flatter nail shapes.
Application Tips for Long-Lasting Rhinestone Designs
- Prepare nail surfaces with a sticky base coat or UV gel base—this gives rhinestones something to grip
- Use tweezers or a small dotting tool moistened with topcoat to position each rhinestone precisely
- Press rhinestones firmly but gently until they sit flush against the nail surface
- Allow the base layer to cure completely before adding the topcoat sealing layer
- Apply thick topcoat carefully around rhinestones, ensuring complete coverage without creating visible bumps
- For extra durability, apply a second topcoat layer, being careful not to dislodge stones
- Consider placing rhinestones primarily on accent nails (ring finger and pinky) rather than every nail for balanced impact
- Star-shaped rhinestones create immediate visual impact, but arranging round rhinestones in star patterns works beautifully too
7. Ombré Star Design with Smooth Color Transitions
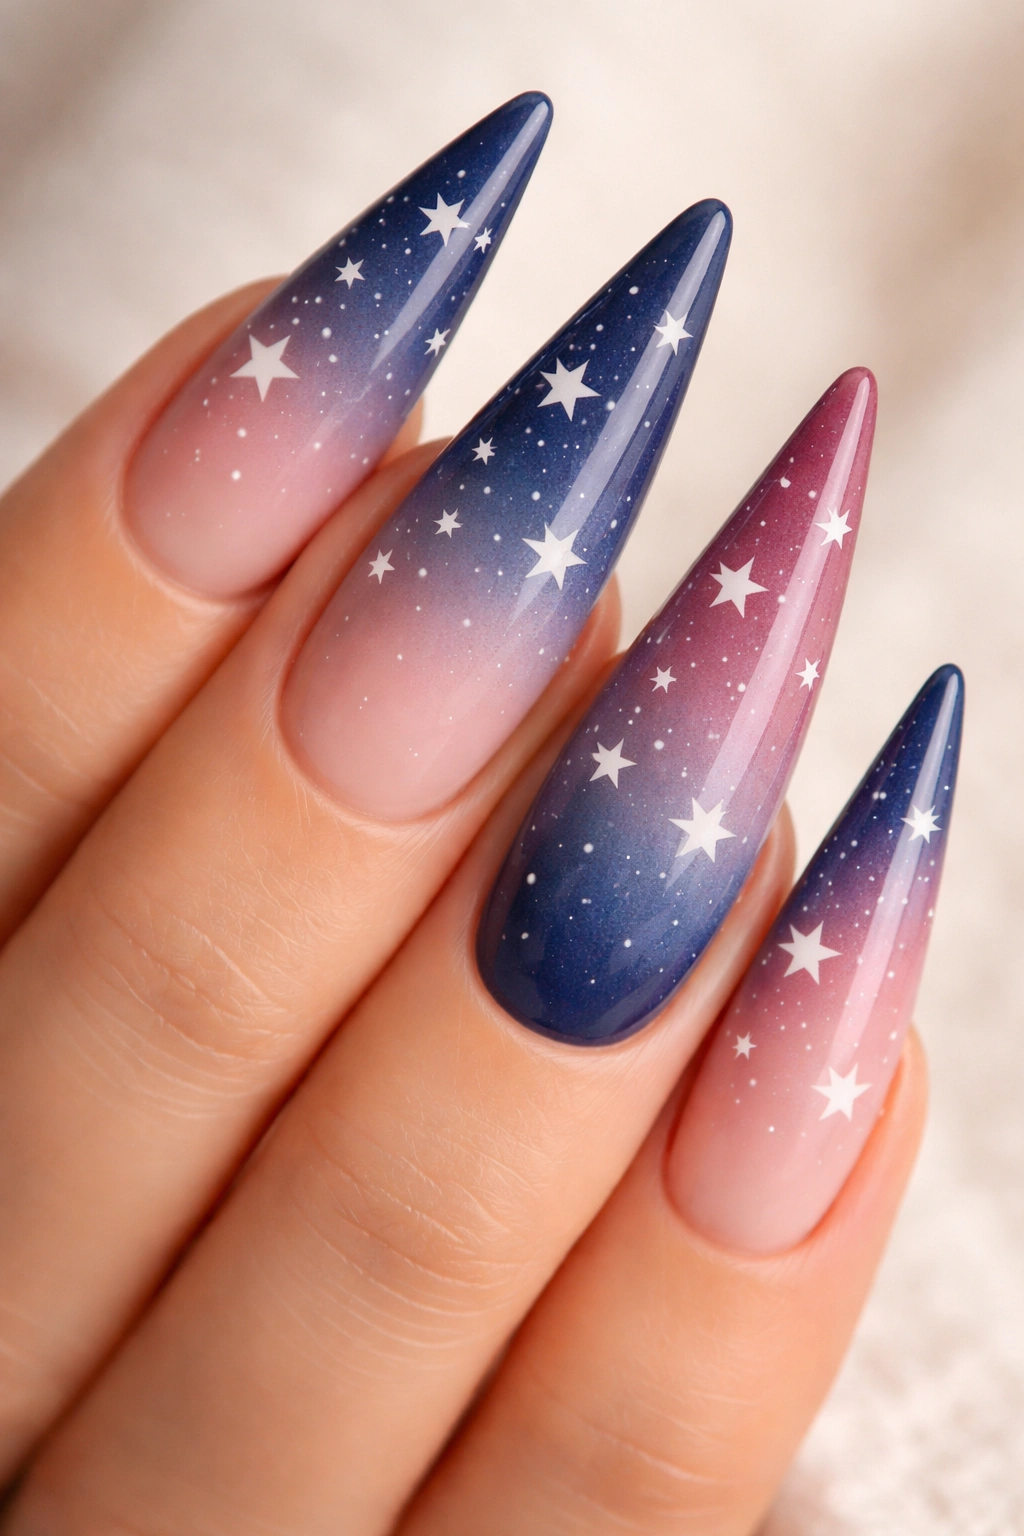
Ombré refers to a gradient effect where one color transitions smoothly into another, creating depth and dimension through subtle color shifts rather than distinct lines. When you combine ombré backgrounds with star designs, the stars gain dimension and pop against the shifting color backdrop. The most striking ombré star designs use contrasting colors—dark to light, or analogous colors on the color wheel.
Creating Depth Through Ombré Layering
Ombré naturally draws the eye through the color gradient, but strategically placed stars interrupt that visual flow in intentional ways. This creates sophisticated visual tension—your eyes follow the color gradient, then get caught by the stars, creating a richer visual experience than either element alone would provide. On stiletto nails, the extended length allows room for visible color transitions, so the gradient effect becomes more pronounced and impactful than it would be on shorter nails.
Achieving Smooth, Professional Ombré Effects
- Choose two colors that either complement each other (analogous colors) or contrast dramatically (complementary pairs)
- Apply your lightest color as a base coat on all nails
- Use a makeup sponge to dab and blend the darker color onto the tip, feathering it backward gradually
- Work back and forth with the sponge, blending the colors together until the transition looks smooth
- Add a glossy topcoat to seal the ombré—this dramatically intensifies the effect by evening out the texture
- Once the ombré base is sealed, add star designs using either stamping, hand-painting, or white polish
- White, metallic, or contrasting stars show up beautifully against an ombré backdrop because they have clear color definition
- Consider adding star designs only on one or two nails (accent nails) rather than all ten for a more sophisticated look
8. Holographic Star Pattern for Iridescent Magic
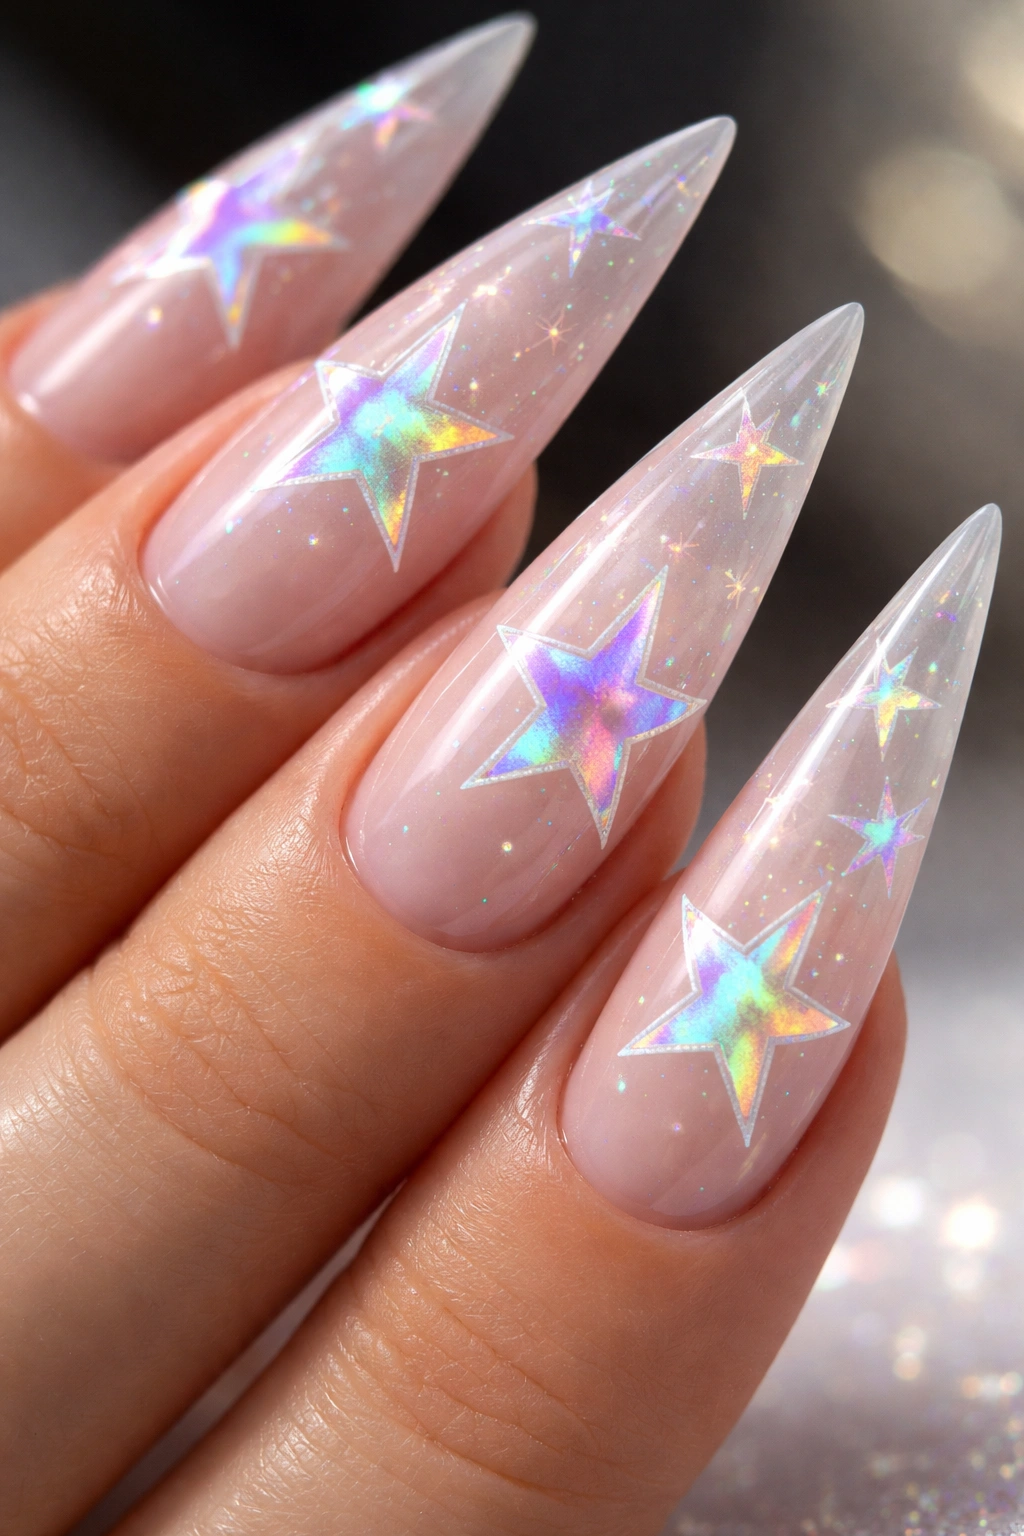
Holographic polishes create an almost magical effect—the color shifts and changes depending on the angle and lighting, creating rainbow effects that seem to move across your nails. When applied in star patterns or combined with star designs, holographic polish creates nail art that feels genuinely special and otherworldly.
The Mesmerizing Quality of Holographic Finishes
Holographic effects work because the polish contains tiny reflective particles that bounce light in specific patterns, creating the illusion of rainbow colors even though the polish itself might be just one color base. On stiletto nails, this creates an effect that’s impossible to capture well in static photographs—the nails genuinely look different in different lighting, making them endlessly interesting to look at. This is ideal if you want nails that maintain visual interest throughout the day, in different environments (office, outdoor, evening), and from different viewing angles.
Working with Holographic Polish for Star Designs
- Holographic polishes work best over lighter bases or true white because the reflective particles show up more clearly
- Apply holographic polish in a star stamp pattern directly over your base color, or use it as your full nail color with white or metallic star accents
- Layer holographic polishes over specific nail sections to create star-shaped holographic areas surrounded by solid color
- Use a glossy (not matte) topcoat to seal—matte finishes dull the holographic effect significantly
- For maximum holographic shimmer, apply the topcoat in thin layers rather than one thick layer
- Position your nails under different types of lighting to appreciate the full range of color shifts
- Pair holographic stars with simple base colors rather than additional patterns—the holographic effect itself provides all the visual interest needed
- This design is particularly stunning in natural daylight, fluorescent office lighting, and evening lighting—each context reveals different color aspects
9. Stars with Chrome Powder for Modern Metallic Shine
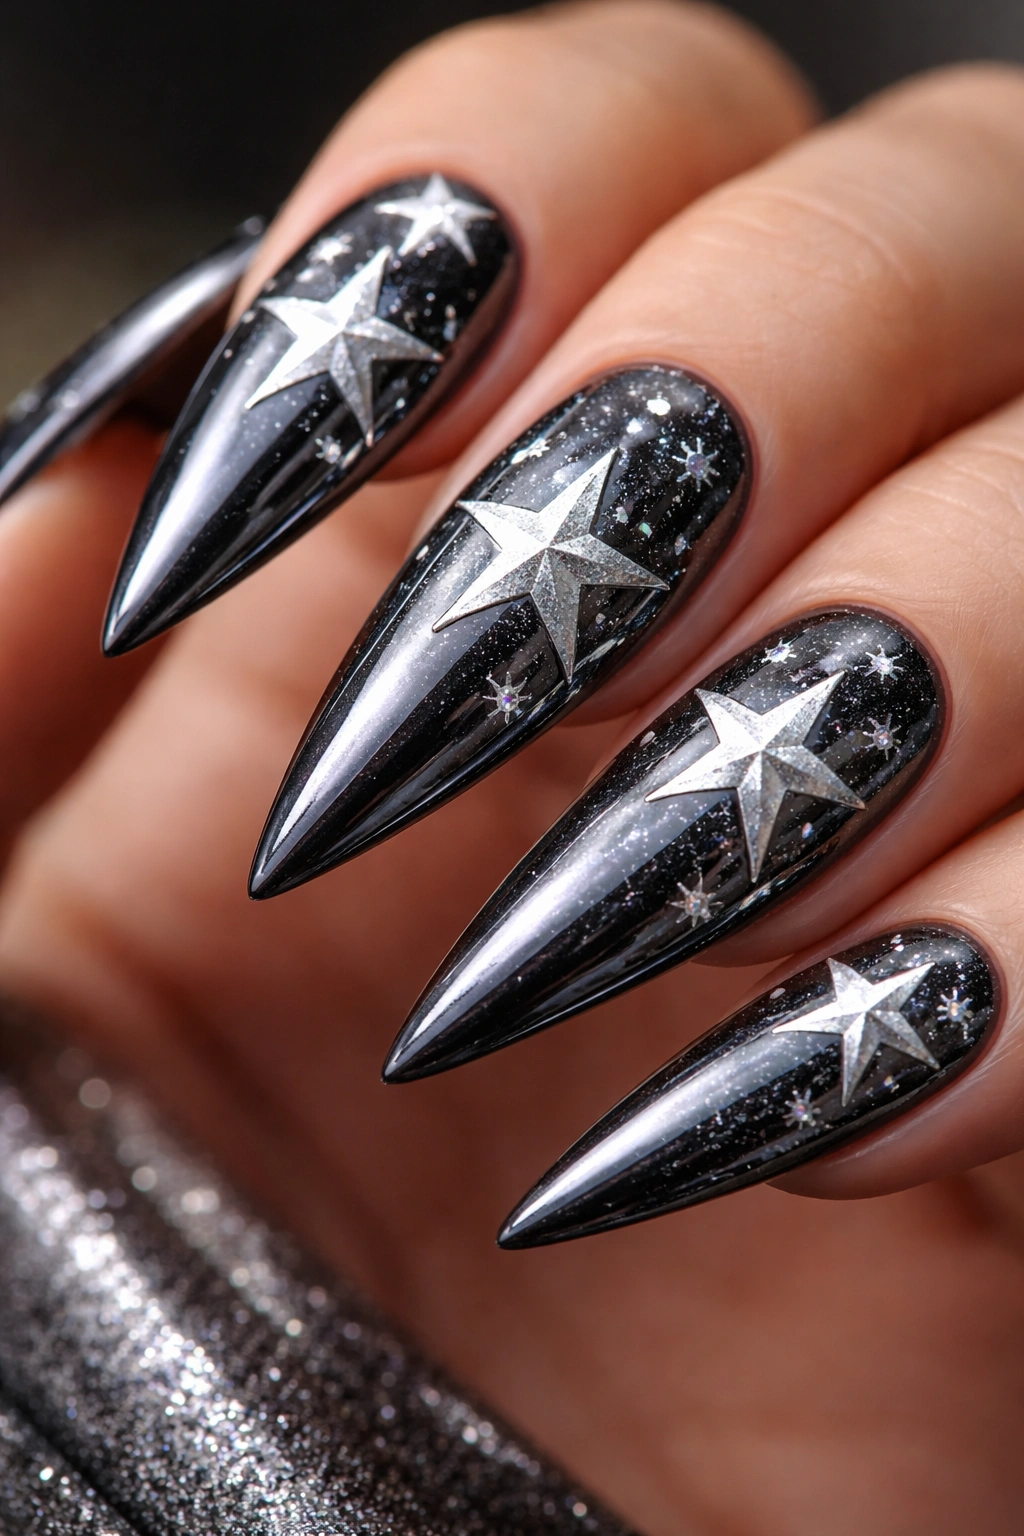
Chrome powder creates an intensely reflective mirror-like finish that makes nails look almost liquid or metallic. When applied in star patterns or over star-stamped designs, chrome creates nail art that feels extremely modern and fashion-forward. This technique requires a sticky base layer (typically a gel polish base) and careful buffing technique, but the results are genuinely stunning.
Why Chrome Feels Cutting-Edge
Chrome finishes have become increasingly popular in high-fashion manicure settings precisely because they feel novel and striking. The ultra-reflective surface creates an almost 3D effect—nails appear to glow from within. On stiletto nails, this creates an extended metal-like appearance that’s both sophisticated and bold. Chrome works particularly well in single-color designs where the mirror finish itself becomes the design element, or in combination with matte or glitter accents that contrast with the high shine.
Applying Chrome Powder Correctly
- Begin with a gel base coat that creates a sticky surface layer—chrome powder requires something to grip
- Apply your chosen color of gel polish (typically dark colors show chrome effects most dramatically, though light backgrounds work too)
- Cure the gel layer under UV or LED light according to product instructions
- Sprinkle chrome powder onto the cured gel surface, working in sections to maintain control
- Use a soft brush or applicator to gently work the powder into the sticky surface, distributing it evenly
- Remove excess powder before applying topcoat—brush powder away from your nails onto a piece of paper
- Seal with a gel topcoat and cure under light
- The finished effect should look like liquid metal—highly reflective and dimensional
- You can create star patterns by masking off areas before applying chrome, or by applying chrome only to star-stamped sections
- Chrome nails require a bit of maintenance as the finish can dull with repeated handwashing, but regular topcoat reapplication keeps them pristine
10. Minimalist Line Art Stars with Elegant Simplicity
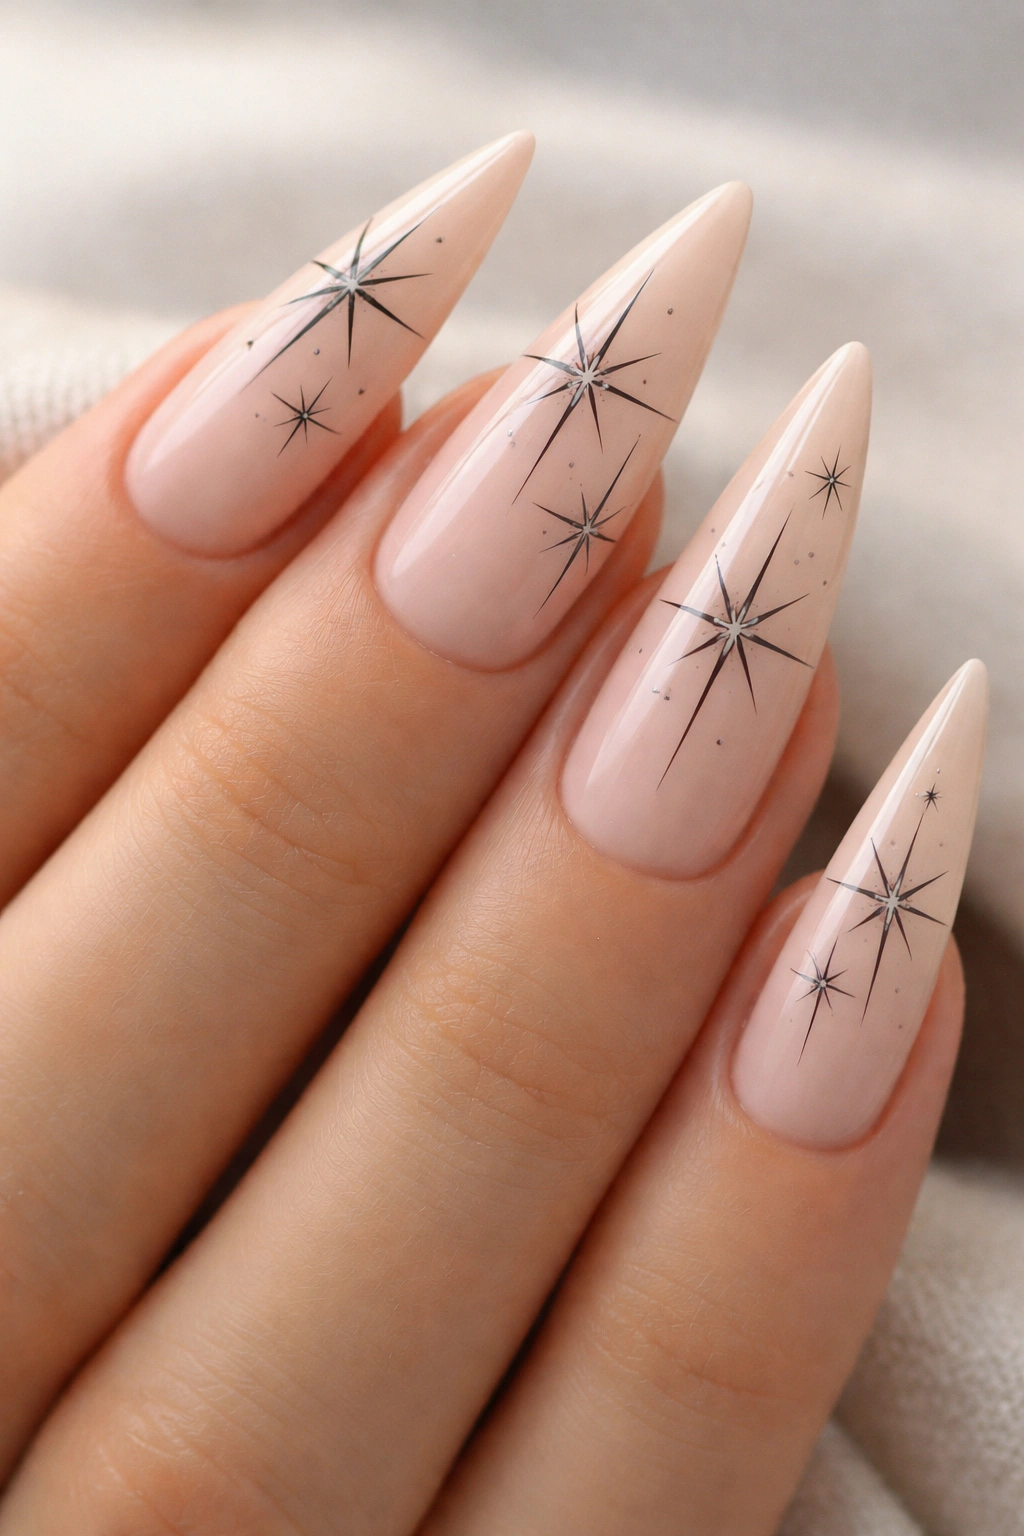
Sometimes the most striking designs are the simplest ones. Minimalist line art stars created with thin, precise lines using black or dark colors paired with nude, white, or soft pastels create sophisticated nail designs that read as artistic without being busy or overwhelming. This approach works beautifully on stiletto nails because the elongated shape allows you to place stars at different positions—some pointing upward, others at angles—creating dynamic visual composition.
The Underrated Sophistication of Minimalism
There’s a reason minimalist design appeals so broadly—it’s visually peaceful and elegant while simultaneously feeling intentional and artistic. Line art stars don’t try to impress through complexity or glitter; they impress through precision, composition, and the confidence of the design choice itself. On stiletto nails, a few well-placed minimalist stars can feel more impactful than elaborate designs because they give the eye rest while still creating clear focal points.
Creating Perfect Minimalist Line Art
- Use an extremely thin detail brush (size 000 or smaller) and a dark color (black, dark gray, or dark navy)
- Plan your design by lightly marking star positions with pencil before applying any polish
- Draw single-line star outlines, filled stars in solid color, or stars created entirely from thin parallel lines
- Vary star size and rotation to create visual movement and prevent a rigid, repetitive appearance
- Keep the background simple—white, nude, soft pink, or pale blue allow line art to remain the clear focal point
- Consider adding extremely minimal details—a single dot inside each star, tiny dots scattered around stars, or thin connecting lines between stars
- Apply a matte topcoat for an artistic, gallery-like quality, or glossy topcoat for a more polished finish
- Line art designs work beautifully across all ten nails with the same design, or as an accent on just one or two nails
- This design is perfect if you want something that looks hand-drawn and artistic without requiring professional-level painting skills
Final Thoughts
Star stiletto nails offer incredible versatility, whether you’re drawn to glittery glamour, minimalist sophistication, or anything in between. The elongated silhouette of stiletto nails naturally complements star motifs, extending and emphasizing the pointed design elements inherent in star shapes. The key to creating designs you’ll genuinely love is selecting techniques that match your skill level and aesthetic preferences.
If you’re new to nail art, start with simpler designs like classic five-point stars in contrasting colors or star stickers paired with neutral bases. These teach you the basics without requiring advanced techniques. As your confidence grows, experiment with stamping, gradient effects, or rhinestone placement. You’ll quickly discover which approaches feel most intuitive and which designs you genuinely enjoy wearing day after day.
Remember that trends come and go, but stars as a design element have proven timelessly appealing across decades and design movements. Your star stiletto nails will look equally stunning whether you’re wearing them for a special occasion or for everyday confidence. The most important thing isn’t perfection—it’s choosing a design that makes you feel genuinely happy whenever you look at your hands.
