

Stiletto nails demand creativity because their dramatic pointed silhouette naturally commands attention. Unlike shorter nail shapes that hide behind function, stilettos are a canvas for bold self-expression — they invite artistic designs that capitalize on their elongated, eye-catching profile. Whether you’re drawn to minimalist sophistication or maximalist art, the length and angle of stilettos make every design pop in ways that other shapes simply can’t match. The trick is understanding which design concepts work best with this particular nail geometry, then executing them with confidence.
1. Gradient Ombre with Metallic Accent Tips
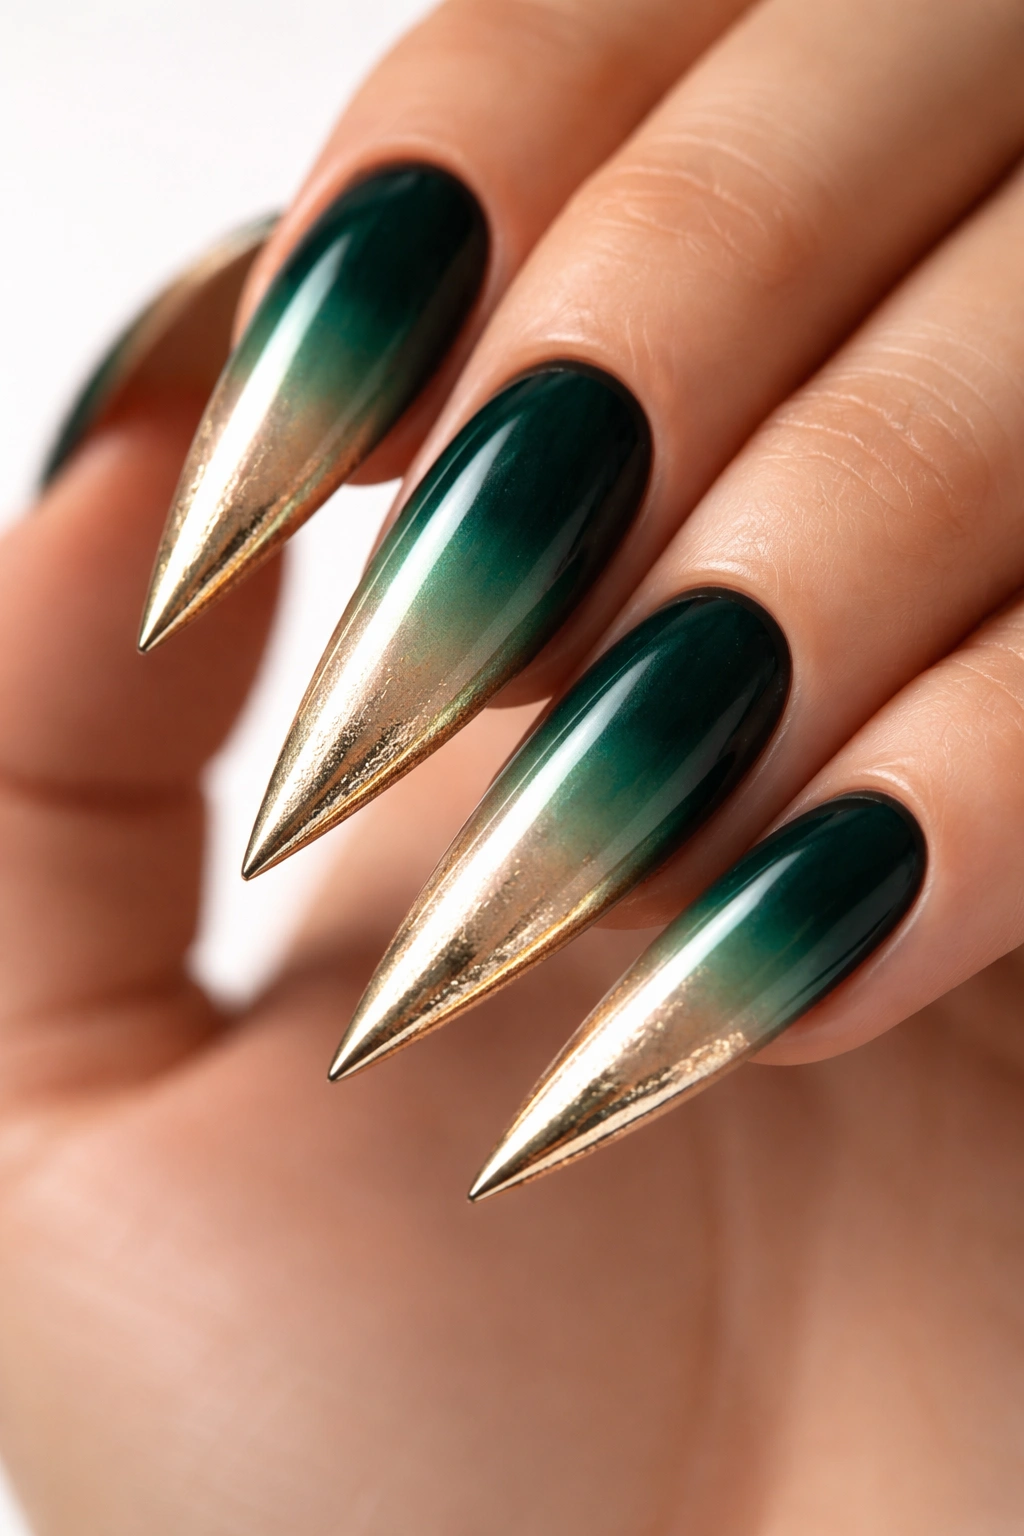
A gradient ombre that flows from a rich jewel tone at the base to a shimmering metallic gradient tip is a masterclass in modern elegance. Start with a deep emerald, sapphire, or burgundy base, then blend it gradually into champagne or rose gold at the tip, finishing with a thin line of actual metallic foil pressed into the polish at the very edge. The vertical length of the stiletto makes this gradient effect especially dramatic — your eye naturally follows the color shift downward, which is exactly what you want.
Why This Design Shines
The contrast between matte jewel tones and reflective metallics creates visual depth that catches light from multiple angles. Stiletto nails amplify this effect because the gradient spans more surface area than shorter nails, making the transition smoother and more luxurious-looking. The technique also works regardless of your skin tone — you just adjust which jewel tone and metallic you pair together.
Execution Tips
Use a sponge to blend three shades of gel polish together on the nail: the base color, a transitional mid-tone, and the metallic. Work in thin layers to avoid a muddy blend. Once the base gradient is sealed, apply a thin metallic foil to just the upper millimeter of the tip, or paint on a metallic gel and cure it. This creates a real contrast between the gradient and the pure shine.
Pro tip: If foil intimidates you, substitute a thin geometric line of metallic gel instead — equally striking, less finicky.
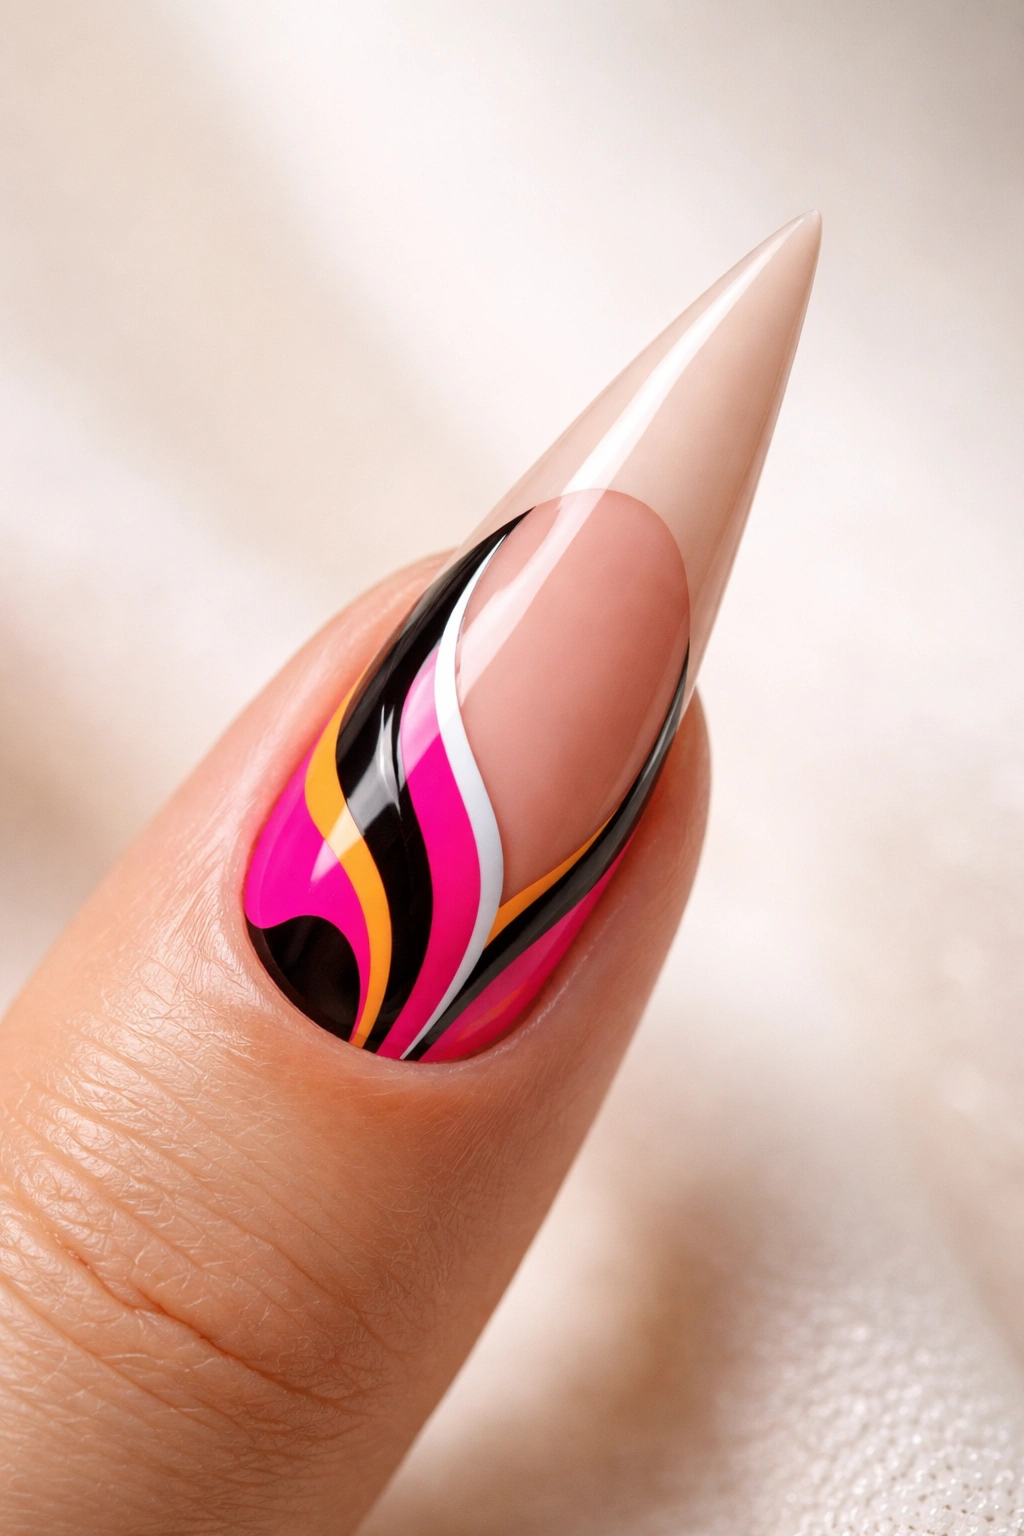
2. Negative Space with Bold Geometry
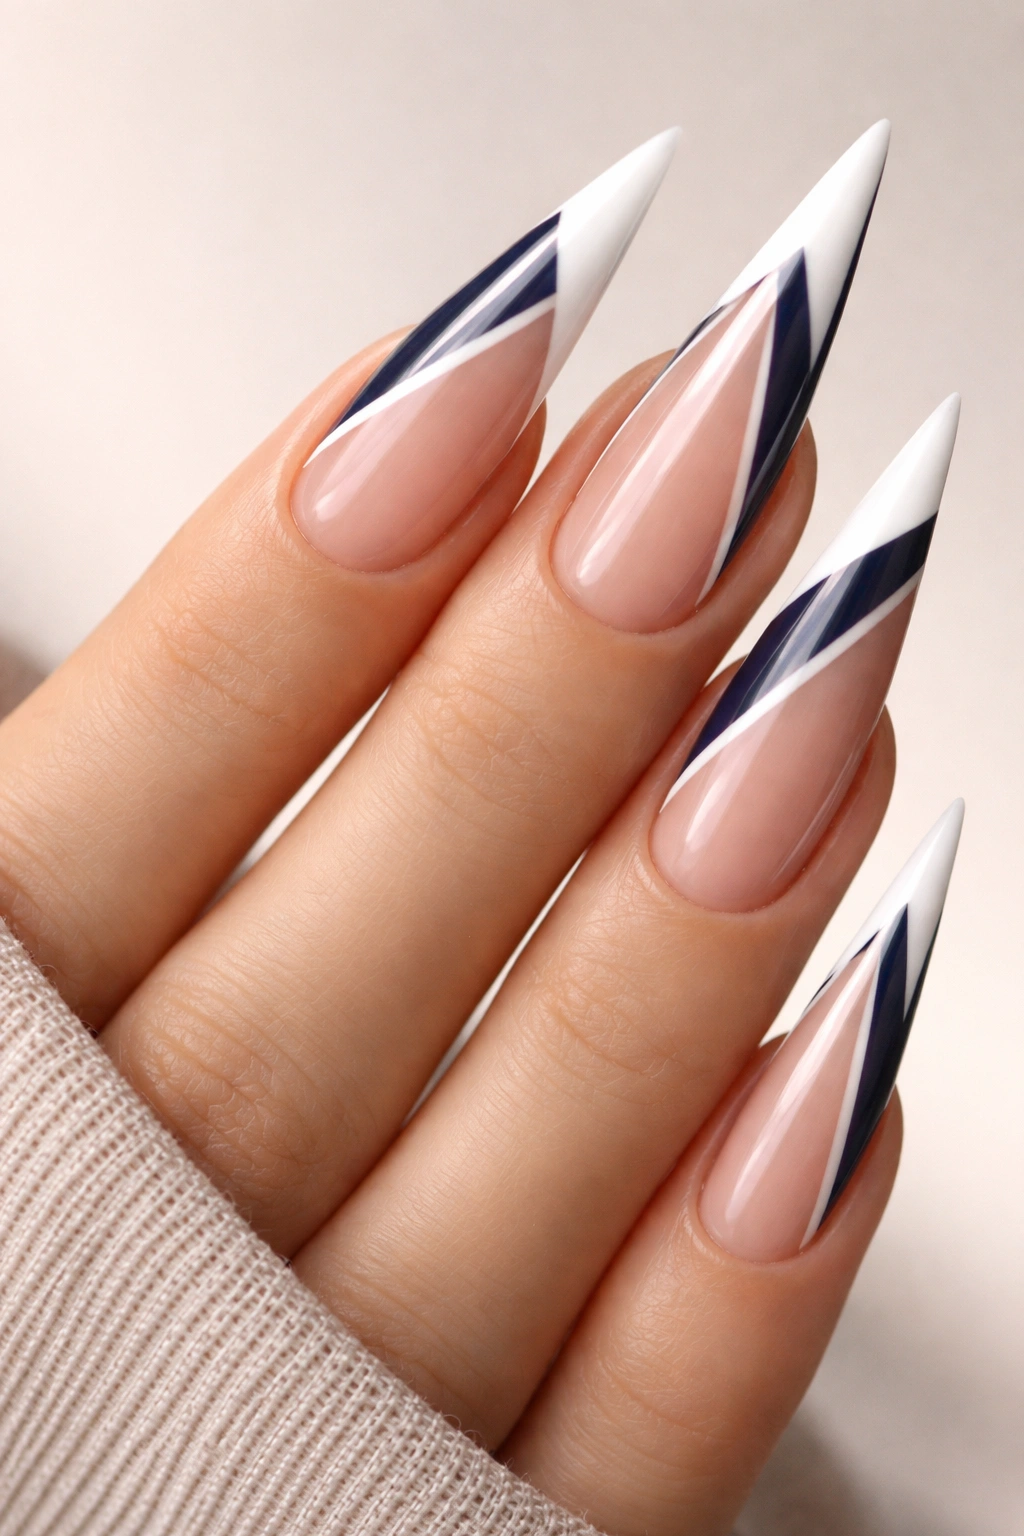
Negative space designs use the natural nail color as a design element, which is especially striking on stilettos because the sharp point naturally guides the eye toward geometric shapes. Create bold angular designs — triangles, stripes, or asymmetrical blocks of solid color — that deliberately leave sections of the nail bare. A deep navy side stripe with white geometric accents, or a single black triangle pointing from the base toward the tip, reads sophisticated rather than incomplete because the design is intentional.
What Makes Negative Space Work Here
Stiletto nails have enough vertical real estate that you can play with scale in your geometric shapes. A thin stripe reads differently than a thick one; a small triangle has a completely different vibe than a large one. The pointed tip naturally becomes the focal point of any geometric design, so lead your lines toward it and let the negative space breathe.
How to Create Clean Lines
Use striping tape or a thin nail brush to paint geometric shapes, or sketch them first with a pencil (yes, regular pencil — it wipes off before polish). Gel polish holds clean lines better than regular polish because it doesn’t flow and settle the way liquid polish does. Apply thin coats and let each cure fully before adding another color.
The contrast between bare nail and solid color feels minimalist and architectural, which is exactly the vibe that works best on elongated stiletto shapes.
3. Hand-Painted Abstract Watercolor Wash
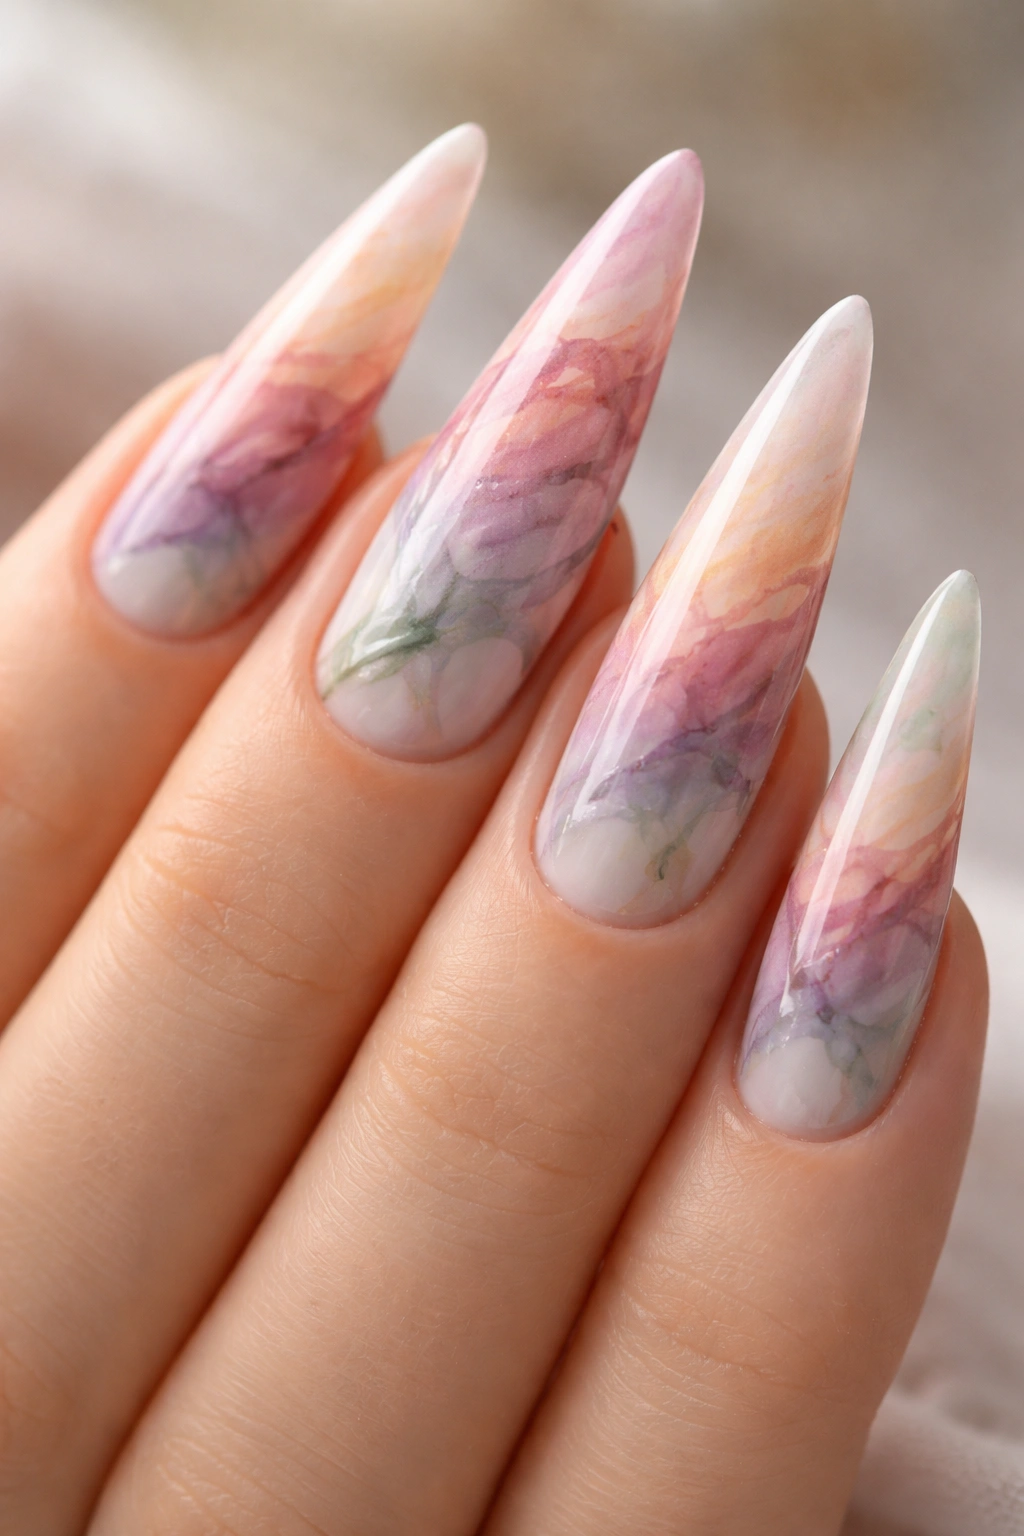
Abstract watercolor effects are forgiving because they’re supposed to look organic and unpredictable. Mix translucent gel polish shades in soft pastels — dusty rose, soft lavender, pale peach, and sage green — and apply them in irregular dabs and swirls across the nail, letting colors blend where they touch. The pointed tip becomes the natural endpoint of the design, and the color concentration naturally draws toward the apex.
Why Watercolor Complements Stilettos
The vertical length of stiletto nails gives you plenty of space to create an evolving design that changes as it travels down the nail. What starts as a pale blush at the base can deepen into dusty mauve at the tip, with hints of other colors showing through. The length makes the design feel cohesive rather than cramped.
Application Method
Use a dry brush technique with minimal product to avoid an overly wet, muddy look. Apply one gel shade, cure briefly (5-10 seconds), then add another shade in a different area and let it partially blend. This staged approach gives you more control than trying to blend everything at once. Seal with a clear topcoat to keep the soft, diffused quality intact.
Worth knowing: Translucent shades work better than opaque ones for this effect — they let colors show through each other rather than sitting flat on top.
4. Chrome Powder Ombré into Glitter Transition
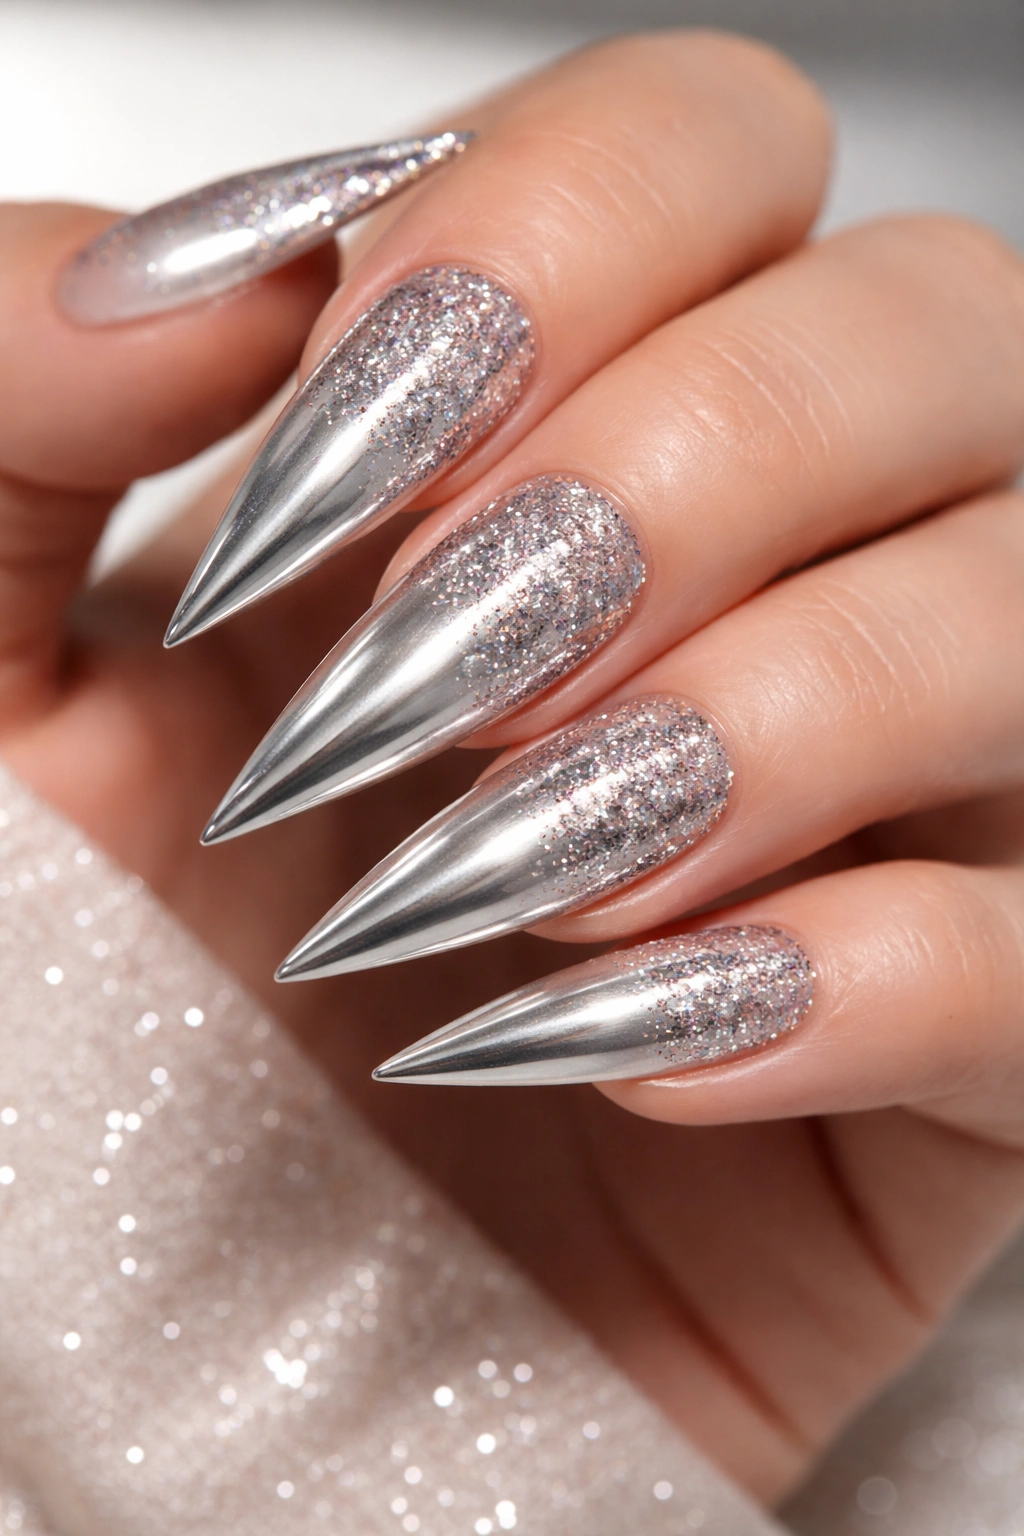
Chrome powder creates an almost liquid-metal finish that literally shifts color depending on viewing angle. Layer a soft chrome powder base (rose gold or holographic) that gradually transitions into a dense glitter zone in the upper third of the nail. The sparkle catches light independently from the chrome, creating a two-tone luminescence that’s hypnotic on elongated nails.
The Visual Impact
Chrome powder finishes feel futuristic and high-fashion because they have that unreal, perfectly reflective quality. Combining it with glitter adds movement and texture — the chrome is smooth and unified, while the glitter creates individual points of light. On stiletto nails, this pairing reads as intentional luxury.
Technical Execution
After your base gel cures, apply a thin tacky layer of clear gel and press chrome powder in using a velvet pad, working primarily in the lower portion. Once that cures and you’ve wiped away excess, transition to a glitter formula in the upper third. The chrome and glitter should meet at roughly the middle of the nail, creating a gradient effect rather than a harsh line.
Layer the glitter with two thin coats rather than one thick coat for a more refined, expensive look.
5. Stiletto Point Gradient with Contrasting Liner
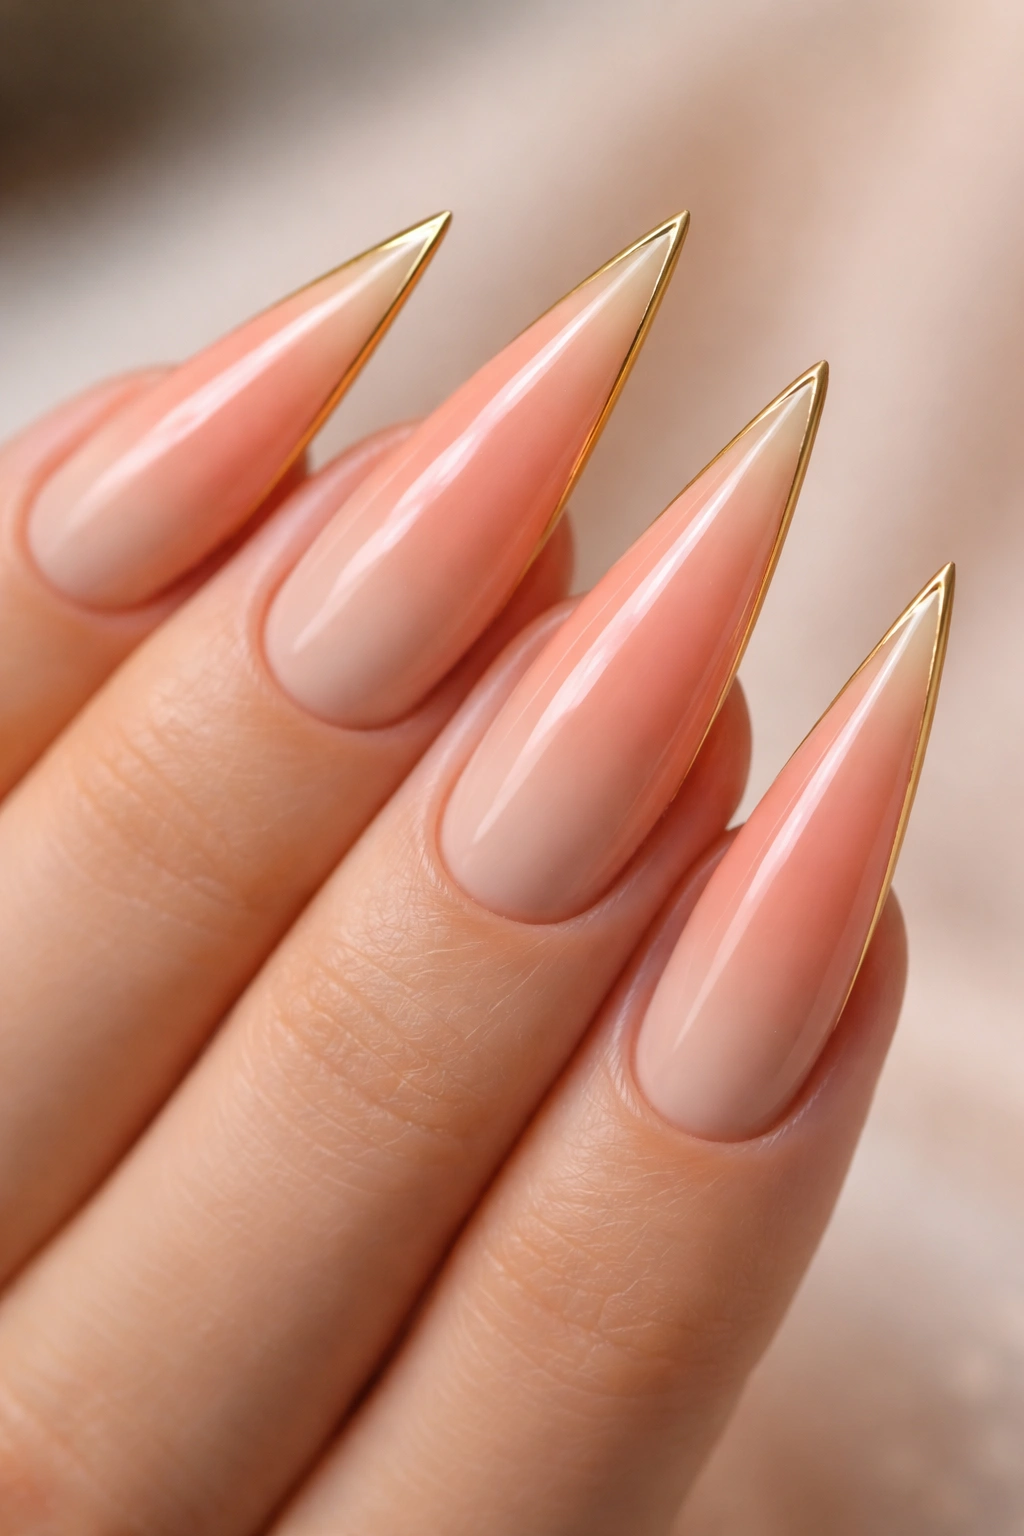
Use your nail color as the primary design element by creating a smooth gradient across the whole nail, then adding a thin contrasting line that hugs the pointed tip’s outer edge. Picture a soft peachy-to-nude gradient with a razor-thin gold or deep charcoal liner running along the edge of the point — like you’re underlining the nail’s sharpest feature.
Why the Liner Matters
A one-color gradient alone is beautiful but subtle. Adding a contrasting liner transforms the design by emphasizing the stiletto’s defining characteristic — that dramatic point. The liner acts as an intentional frame that says, “Yes, this shape is the whole point of this design.”
Creating the Perfect Line
Use a super-thin detailing brush and highly-pigmented gel polish. Paint the line in one smooth motion if possible, rather than multiple strokes. The line should be thin enough to look refined (not chunky), but visible enough to create contrast against the gradient.
A metallic liner adds glamour; a dark liner adds edge; a neon liner adds attitude.
6. Marble Veining with Metallic Swirls
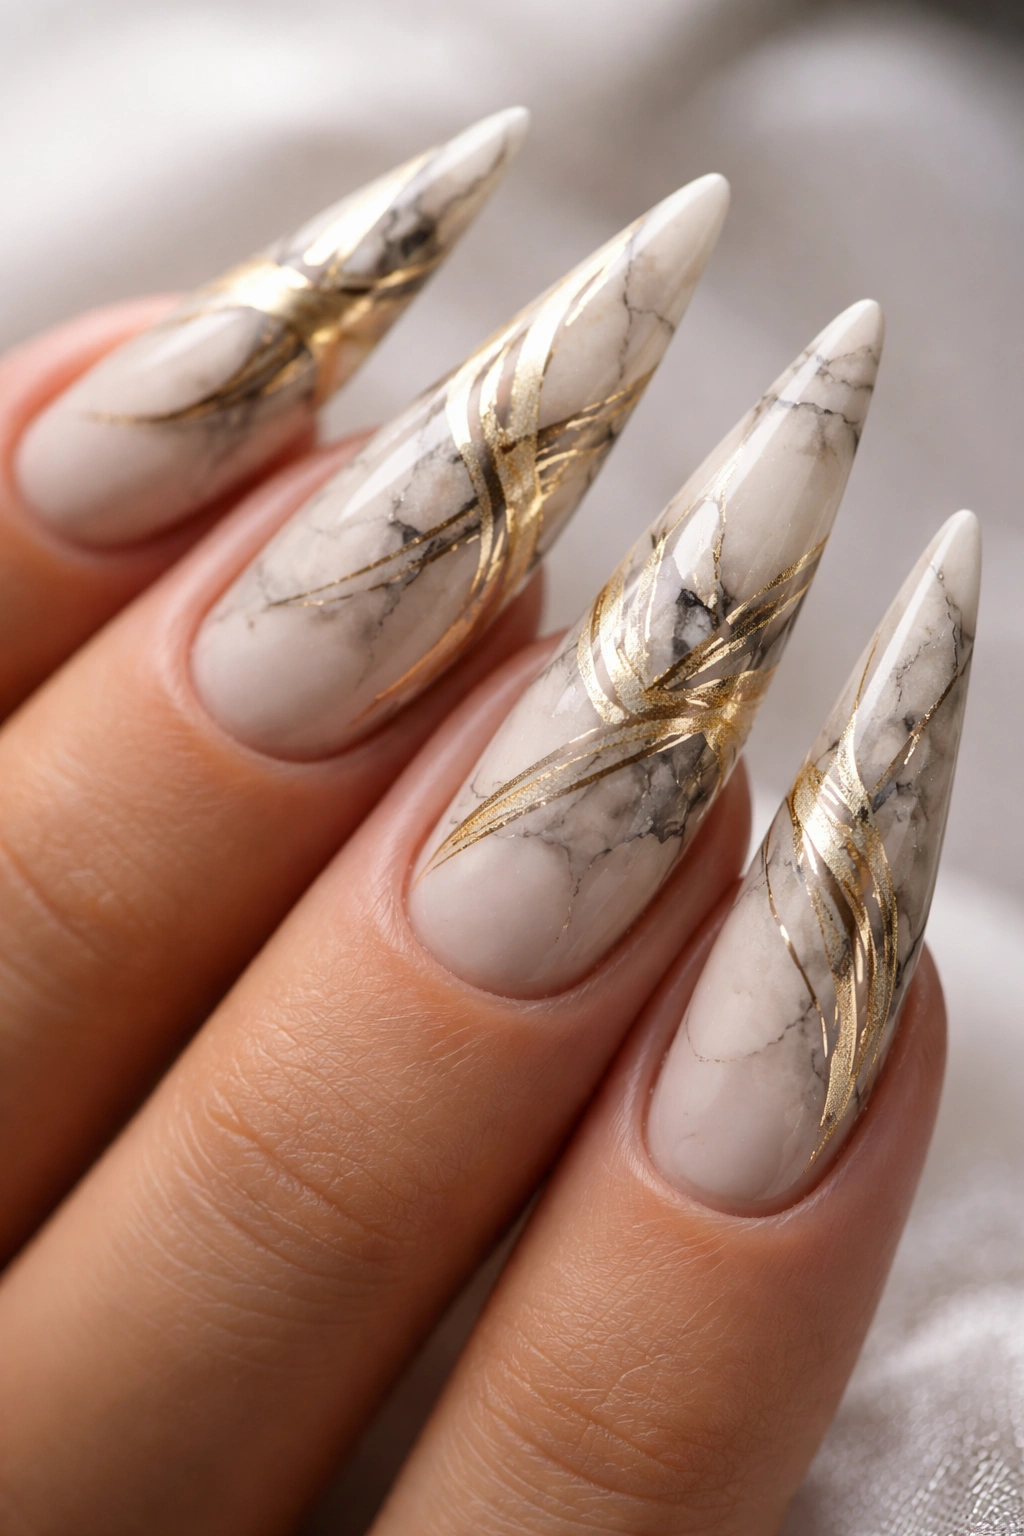
Marble designs work beautifully on stilettos because the veining naturally follows the length of the nail, creating visual lines that complement the shape. Mix a neutral base (cream, soft gray, or pale pink) with darker veining in black, charcoal, or deep burgundy, then add thin metallic gold or silver swirls that wind through the marble pattern. The marble looks organic; the metallic swirls look intentional.
Creating Convincing Marble
Use a thin brush to draw irregular, meandering lines of darker polish across the base color. Don’t overthink it — marble in nature is random. Let some lines thicken and thin as they travel. Once the dark veining is set, add metallic accents that follow some (but not all) of the existing lines, creating an interplay between the two patterns.
Where to Focus the Design
Concentrate the thickest veining and most metallic swirls in the upper half of the nail, letting the pattern thin out toward the base. This draws the eye upward and emphasizes the length of the stiletto.
The combination of marble’s organic quality with geometric metallic lines feels elevated and intentional.
7. Color-Block Design with Shaped Sections
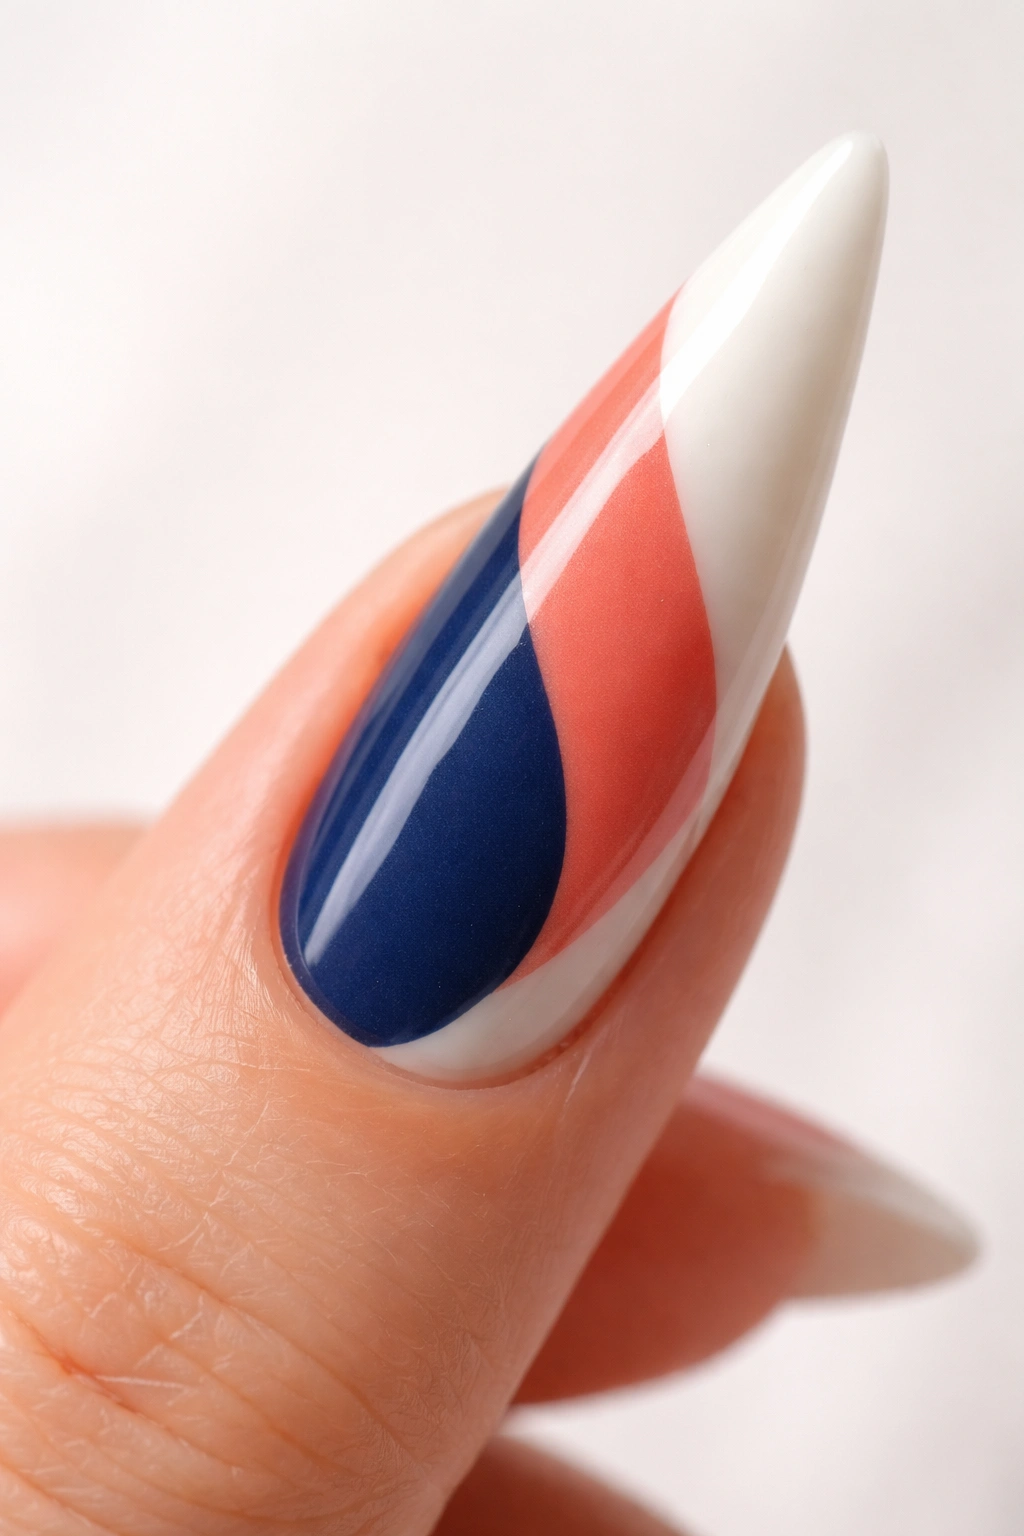
Divide your stiletto nail into distinct sections using different bold colors, but instead of using straight lines, use the natural curve and point of the nail to inform the shape of each color block. For example, the base third might be solid navy, the middle third solid coral, and the tip third white or cream — but the boundaries between colors follow a slightly curved or diagonal line rather than a straight horizontal one.
Why Curves Work Better Than Straight Lines
Straight horizontal lines can actually make the nail look shorter because they divide the vertical space into equal parts. Curved or diagonal lines instead emphasize the length and flow of the stiletto. A diagonal color shift that moves from one corner to the opposite corner naturally guides the eye along the length of the nail.
Color Pairings That Pop
Choose colors with genuine contrast: jewel tones against pastels, neons against neutrals, or metallics against mattes. The more distinct each color block, the more modern and intentional the design appears.
Use guide tape to create clean boundaries between colors, or freehand the line with a steady hand and a thin brush.
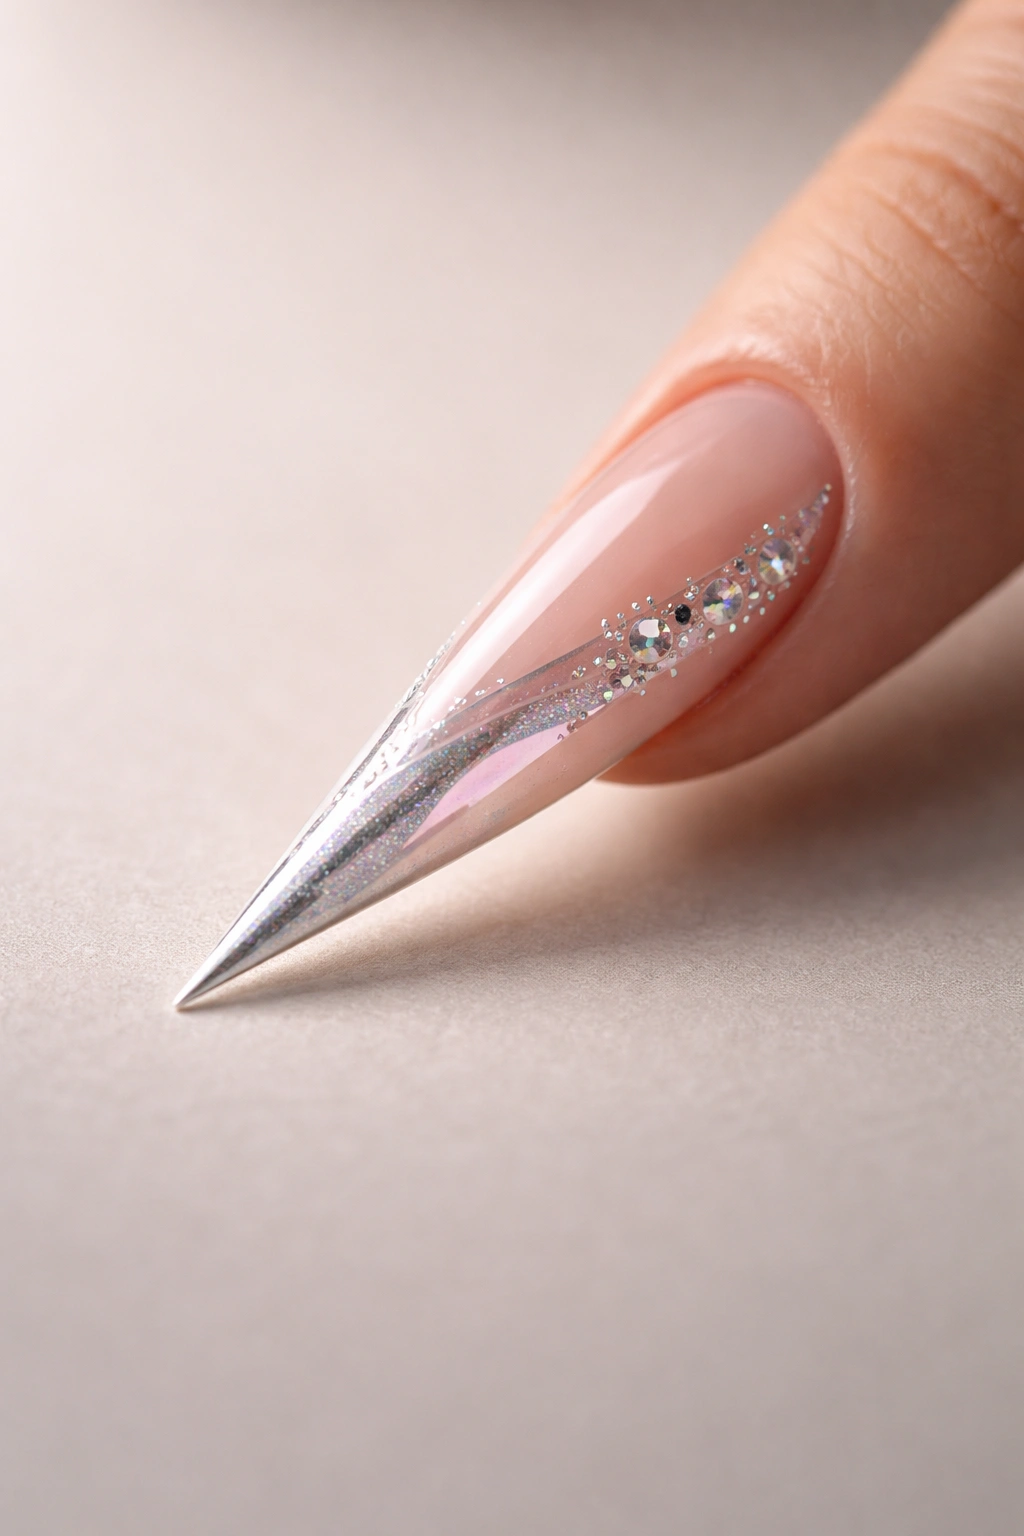
8. 3D Embellishment with Strategic Placement
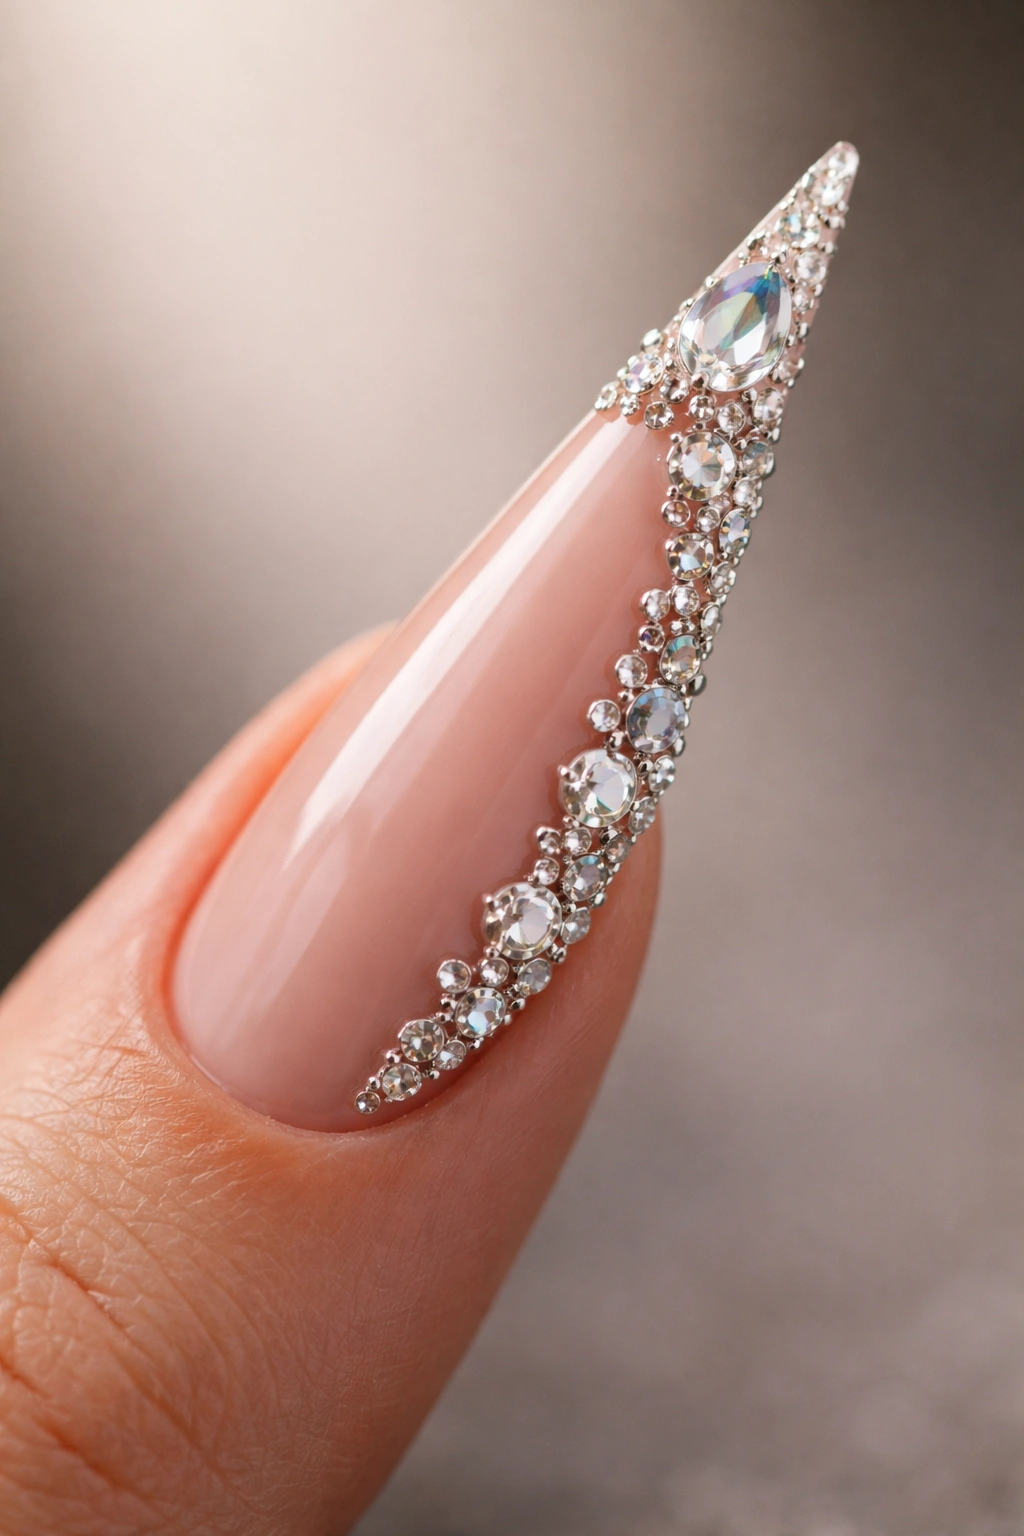
Stiletto nails are ideal for three-dimensional elements because the pointed tip naturally becomes a focal point for visual elements. Add small studs, rhinestones, or sculpted elements (like tiny charms, beads, or hand-sculpted gel flowers) positioned along the outer edge or clustered near the tip. The 3D elements don’t overwhelm the whole nail — they accent specific areas while letting the underlying color and shine do the heavy lifting.
Making 3D Elements Look Luxe Rather Than Cheap
Avoid filling the entire nail surface with stones. Instead, create a clear focal point: a constellation of small crystals climbing up the outer edge toward the tip, a few larger stones clustered at the point, or a single statement piece at the apex. Negative space around the embellishments makes them read as intentional jewelry rather than desperate glitter.
Securing Embellishments
Use gel as your adhesive, not resin or nail glue. Cure after each stone is placed. This ensures durability for daily wear without the stone popping off unexpectedly.
High-quality rhinestones and crystals catch light beautifully and read expensive; cheaper stones can look plastic-y even with perfect application.
9. Reverse French Manicure with Graphic Twist
The traditional French manicure inverts on a stiletto: instead of a white tip, use a bold color or pattern on the lower portion of the nail, leaving the pointed tip a contrasting shade — typically nude, white, or silver. Take it further by making the colored section a graphic pattern rather than a solid block: a checkerboard, a ombré effect, or abstract marks in the lower half, while the tip remains clean and minimal.
Why This Works on Stilettos
The reverse French subverts the eye’s natural expectation, creating an element of surprise. On stiletto nails, this subversion feels intentional and modern. The clean pointed tip becomes an elegant accent to the busier lower section.
Execution Options
Option one: Create a traditional base color (say, deep burgundy), then paint a graphic pattern in the lower half using white, metallic, or a contrasting shade, leaving the tip in the base color or switching to white. Option two: Use the lower half for a bold statement (holographic, glitter, marble) and keep the point pristine. Both strategies work.
The graphic element could be geometric shapes, abstract swirls, a gradient transition, or even hand-painted details.
10. Gradient Glitter Fade into Clean Tip
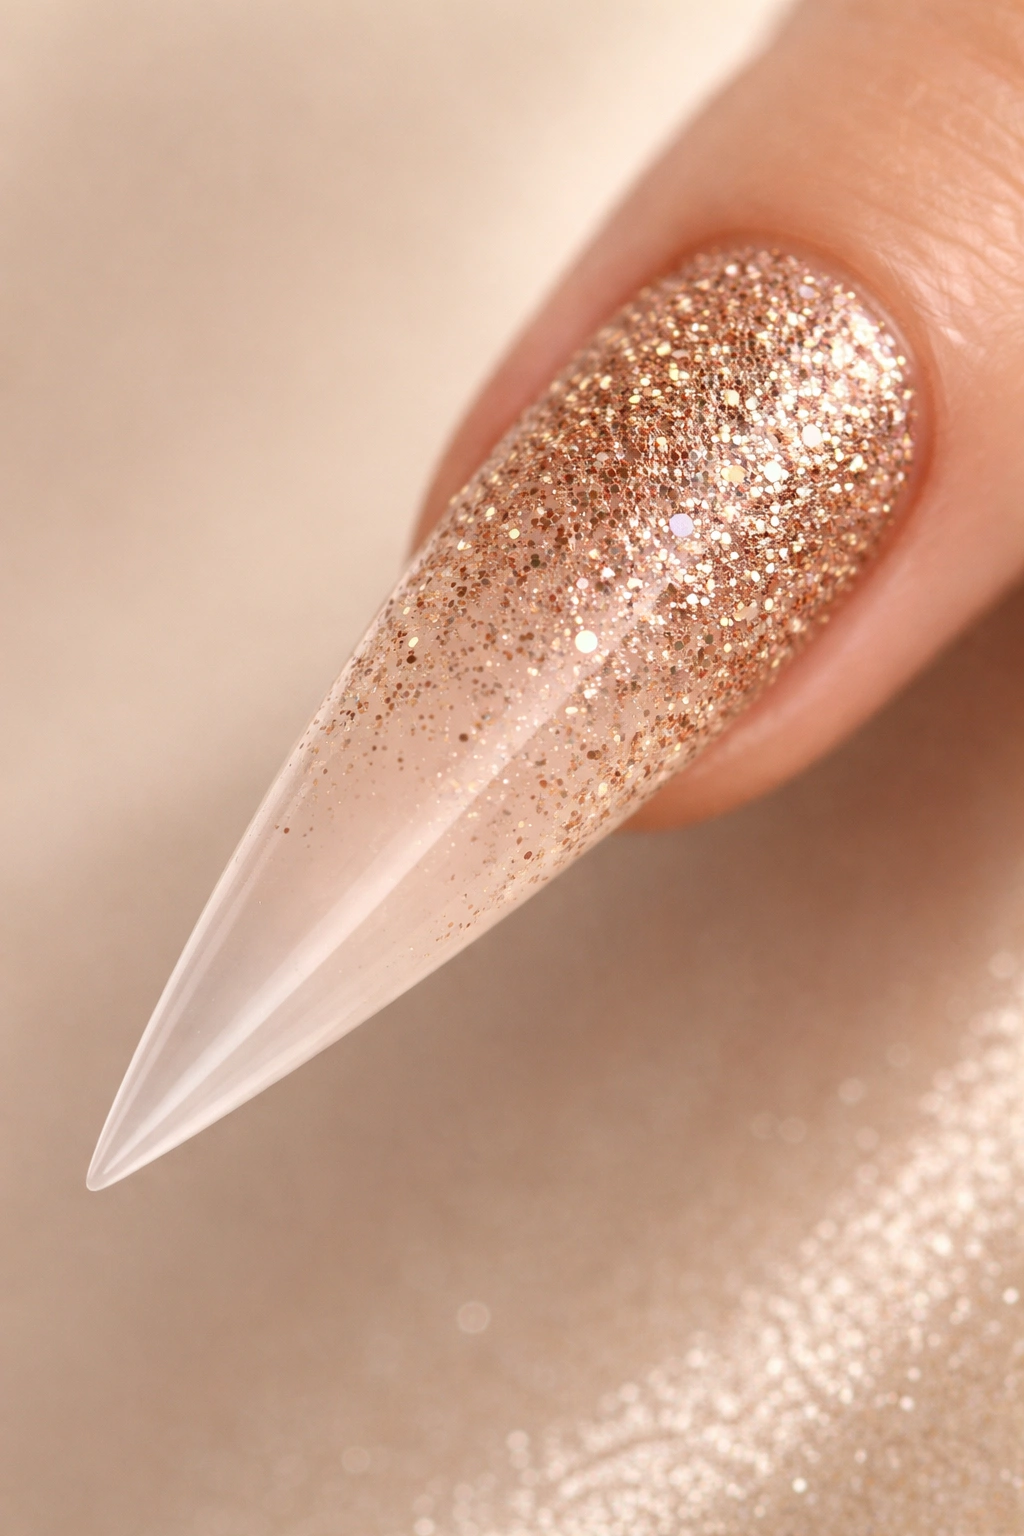
Build a gradient that starts with dense, colorful glitter at the base of the nail and gradually fades toward transparency as it approaches the tip, ending in a clean, polished point with no glitter at all. The visual effect is a sparkly transition zone that culminates in a refined, pointed finale.
The Psychology of This Design
Glitter reads fun and celebratory, but glitter-covered tips can read slightly chaotic. By fading the glitter out before the point, you’re creating a purposeful transition that balances playfulness with sophistication. The clean tip becomes an intentional design choice rather than an accidental empty space.
Creating the Fade
Layer your glitter gel thin in the lower portions, then use a lighter touch as you move upward, effectively thinning the density of the glitter. Alternatively, use a clear gel in the upper third and press fewer glitter particles into it, creating a more transparent look. The transition should be gradual, not abrupt.
This works especially well with warm-toned glitters (gold, rose gold, copper) layered over nude or champagne bases.
11. Negative Gradient: Dark Base to Bare Tip
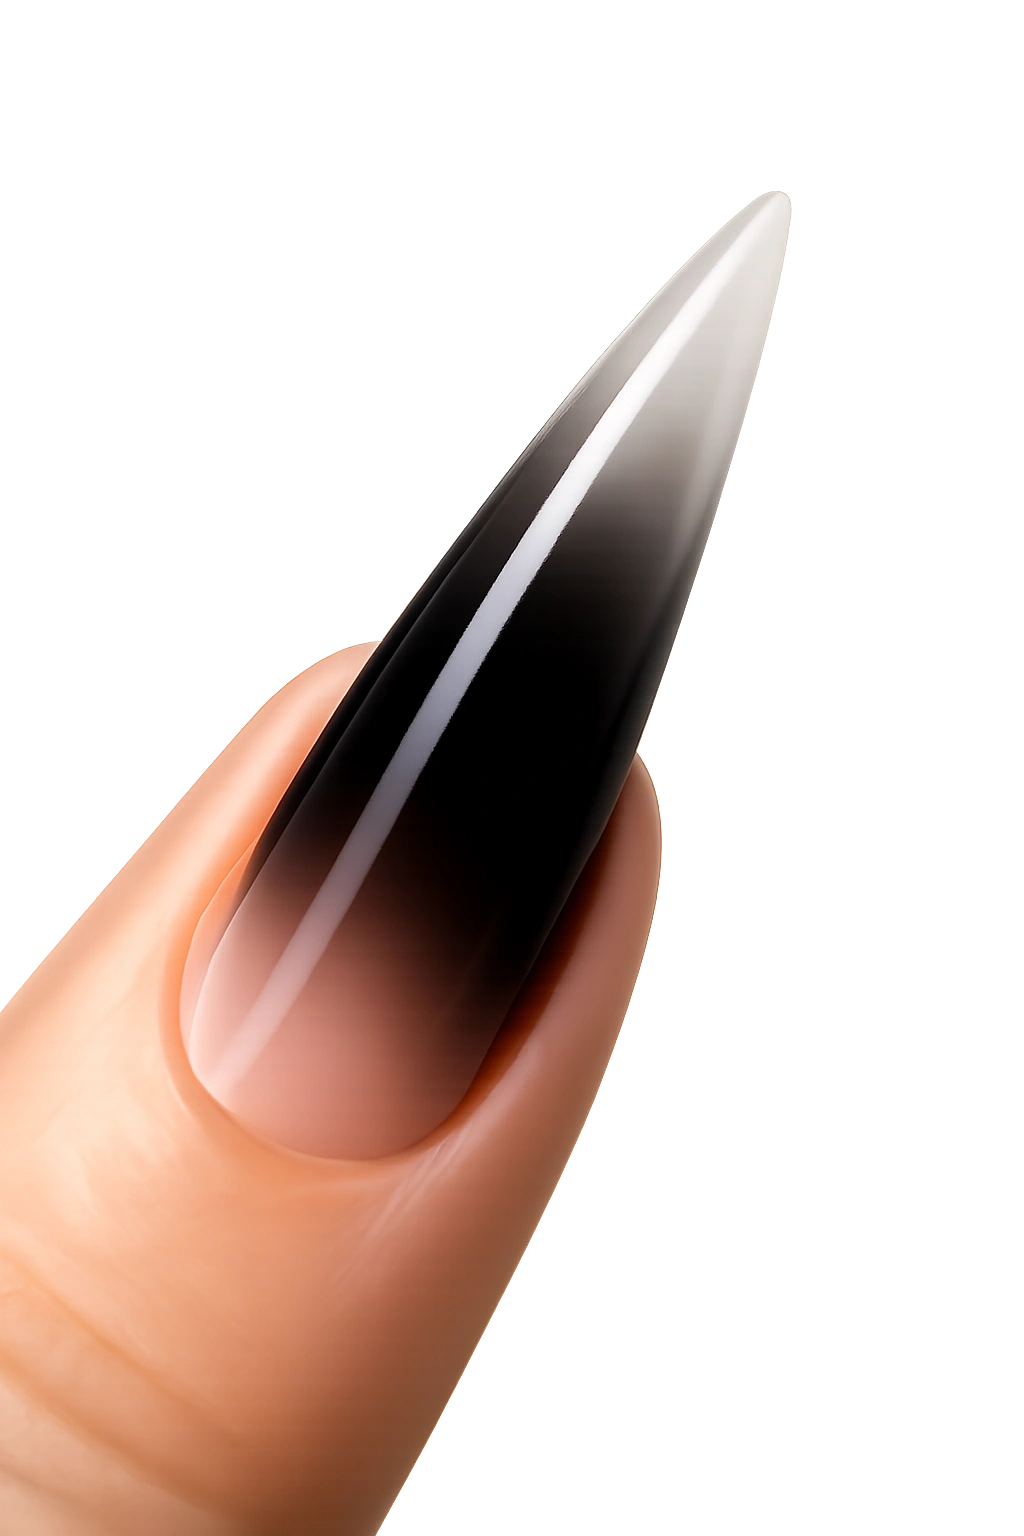
Create a gradient that moves from a deep, saturated color (black, forest green, or burgundy) at the base toward progressively lighter shades as you move toward the tip, ultimately revealing the natural nail color at the pointed tip. Unlike traditional gradients that blend two polish colors, this design is a gradient toward transparency — the bare nail itself becomes the lightest shade in the progression.
Why This Reads Sophisticated
This design is inherently minimalist because part of it isn’t there. The eye naturally follows the progression downward, and the reveal of bare nail at the point feels intentional and refined. It’s a quiet design that doesn’t scream for attention but rewards close observation.
Application Technique
Apply your darkest shade in full saturation at the base, then blend progressively lighter layers of the same shade (mixed with increasingly more clear gel) as you move upward. By the time you reach the tip, you’re applying mostly clear gel with just a hint of color, allowing the natural nail to show through.
This creates a sophisticated ombré that’s technically a gradient toward transparency.
Pro tip: Use one shade family rather than multiple colors — the sophistication comes from the tonal shift, not color variety.
Final Thoughts
Freestyle stiletto nail designs work best when you think about how to complement the nail’s inherent drama rather than fighting against it. The length, angle, and pointed tip are your greatest design assets — use them as guides for where to concentrate color, pattern, and embellishment. Whether you choose bold geometry, soft watercolor effects, sparkle and chrome, or intentional negative space, the design should feel like it was created specifically for this nail shape.
The common thread in all these designs is intentionality. Every element has a purpose, every color choice creates contrast or harmony with intention, and negative space is used strategically rather than accidentally. Start with one design idea you’re genuinely drawn to, practice the technical execution, and don’t be afraid to adapt it to your personal style. Your stiletto nails are a small canvas with outsized impact — make every design count.
