

Stiletto nails and birthdays go together like champagne and celebration—they’re the kind of beauty statement that instantly elevates your whole look and makes you feel like the main character. Pink is the ultimate birthday color choice: it’s universally flattering, instantly festive, and carries that perfect balance between bold confidence and soft femininity that makes turning another year older feel like something truly special. Whether you’re going for understated elegance, playful glamour, or all-out dazzle, pink stilettos offer endless possibilities to match your birthday mood and personal style.
The beauty of choosing pink stiletto nails for a birthday is that the color and shape alone do so much of the work for you. You’re not fighting against your design choice or questioning whether it reads as “too much”—pink and stilettos are inherently celebratory. The shape elongates your fingers and gives you that instant red-carpet energy, while the pink shade keeps things wearable enough that you’ll actually feel comfortable in them, not self-conscious. What matters is picking the specific style and shade that resonates with how you want to feel on your special day.
This is where the real fun happens. Pink comes in infinite variations, and each one pairs differently with embellishments, patterns, and finishes. Some of these designs whisper elegance; others demand attention. Some are pure sparkle, while others let the graceful shape of the stiletto do all the talking. Whatever direction you choose, your nails will be doing serious heavy lifting in making your birthday look completely intentional and put-together.
1. Classic Hot Pink with Gold Foil Accents
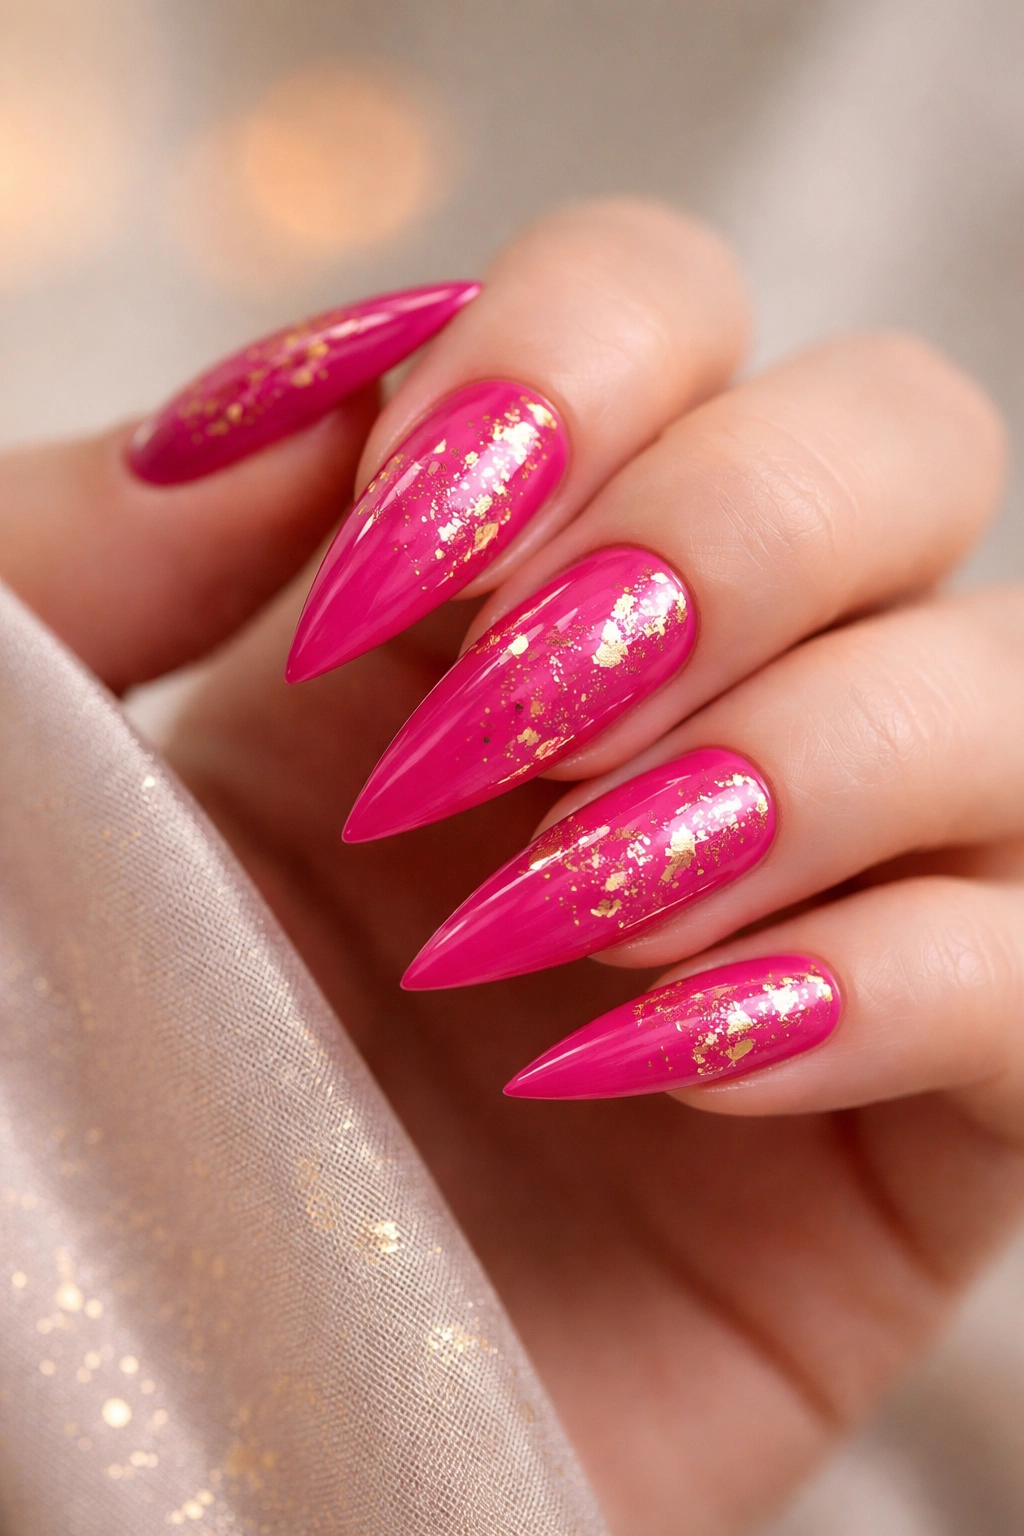
Hot pink is the birthday color—bold, unapologetic, and impossible to miss. This design takes that vibrant base and adds micro flecks of gold foil scattered across the surface, catching light every time you move your hand. The hot pink itself should be rich and saturated, the kind of shade that photographs beautifully and commands attention without needing anything else to back it up. The gold flecks work as little sparkles of celebration, breaking up the solid color just enough to add movement and interest while staying cohesive.
Why This Works for Birthday Nails
Hot pink reads as pure celebration instantly. Gold has always been associated with luxury and special occasions, so combining these two creates an automatic “something important is happening” energy. The foil keeps the design modern and sophisticated rather than dated, and it’s subtle enough that you could wear this to brunch, dinner, or dancing without it feeling out of place anywhere.
How to Execute It
Ask your nail technician to apply a bright, true hot pink base coat—think somewhere in the magenta-to-bubblegum family, not too cool and not too coral. Once that sets, they’ll apply thin brushstrokes or scattered pieces of gold foil across the surface using a gel topcoat. The key is randomness; too-perfect placement looks less elegant than organic, scattered placement. Finish with a glossy topcoat so the pink stays vibrant and the foil catches maximum light.
Pro tip: This design works beautifully on a stiletto because the elongated shape maximizes the surface area where the gold can catch light.
2. Ombre Pink to White with Glitter Fade
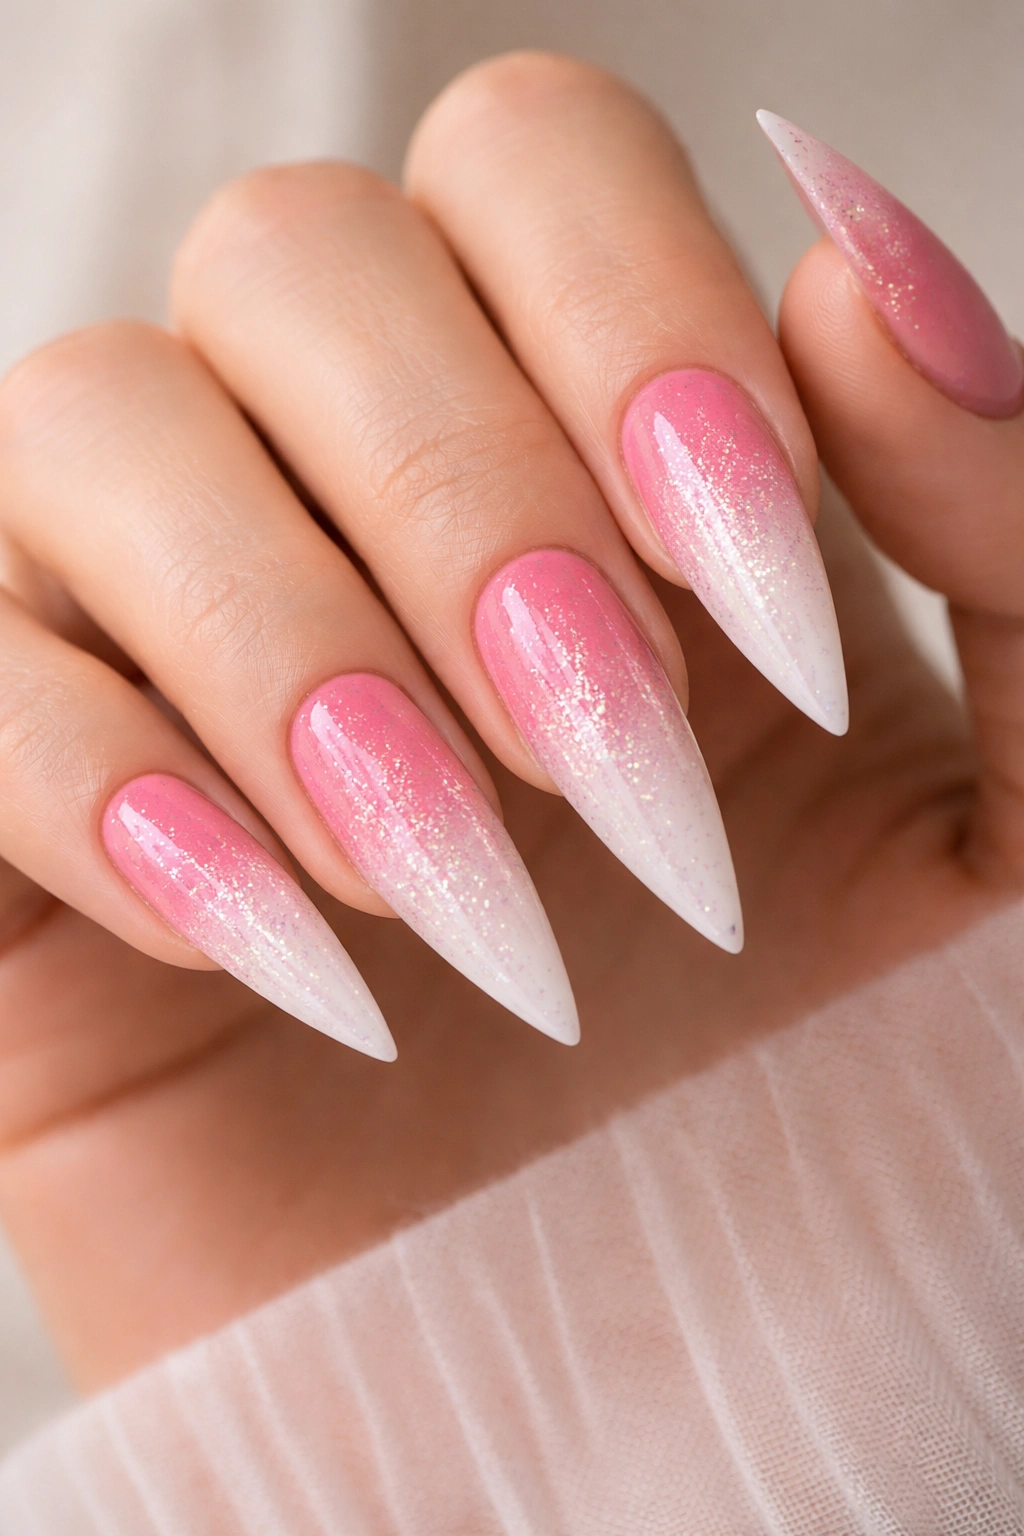
Ombre nails create movement and depth—one color melts into another across the nail bed, creating an almost cloud-like effect. Starting with a deeper pink or coral at the base and fading to pure white at the tips gives you sophistication wrapped around birthday sparkle. Add fine glitter throughout the fade zone, and you’ve got nails that feel substantial and detailed without being overwhelming. The glitter picks up the transition between colors and makes the whole gradient feel more intentional.
The Visual Impact
An ombre design on a stiletto is like a visual arrow pointing toward the tips of your fingers—it elongates even further and creates a sophisticated, editorial quality that makes your hands look intentional and styled. The white tips look clean and fresh while the pink base grounds you in warmth. Glitter throughout adds celebration without committing to full-coverage sparkle.
Application Notes
This requires either hand-painting and blending with a sponge, or a skilled technician who can feather the colors together smoothly. The glitter should be mixed into the gradient itself, not just placed on top—this makes it feel integrated rather than like decoration on top of decoration. Use a fine glitter rather than chunky pieces so the fade stays the focal point.
Worth knowing: Ombre nails photograph incredibly well, so if your birthday involves any photo moments, this design will look stunning in pictures.
3. Ballet Pink with Delicate Lace Overlay
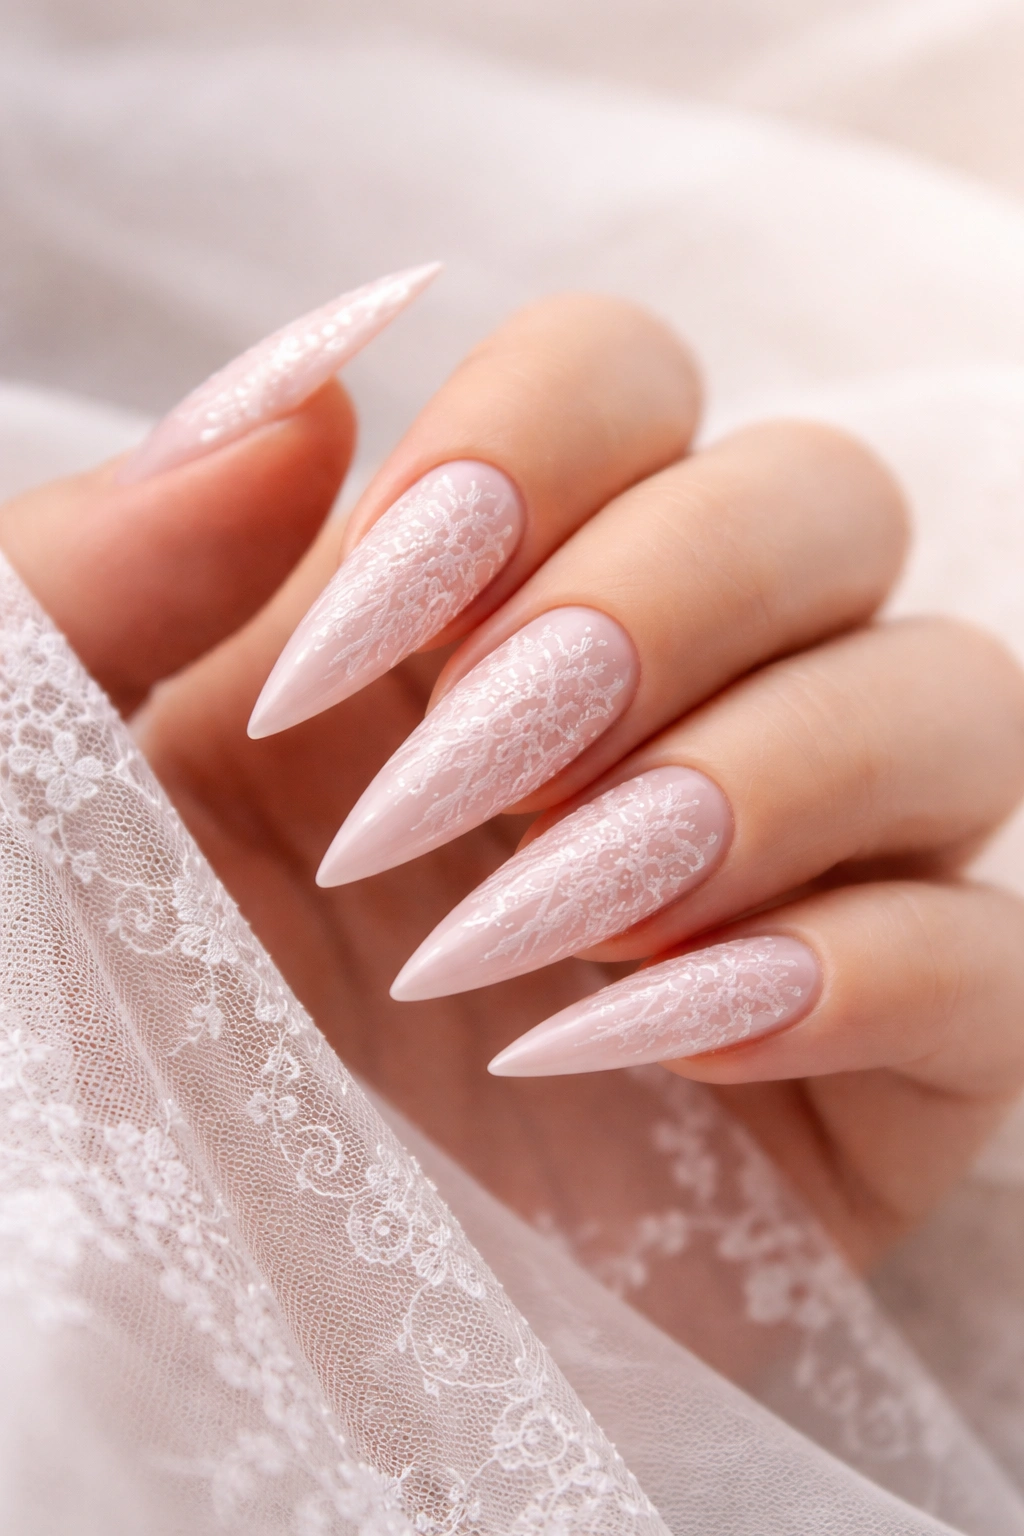
Ballet pink is refined, almost skin-toned, with just a whisper of blush. This is the pink that says you’re put-together and elegant rather than loud about your celebration. Add an intricate lace pattern overlaid across the nail—thin white or nude lines creating a delicate web pattern—and you’ve got something that feels special-occasion without being costume-y. The lace pattern should be consistent but not perfectly symmetrical, giving it an artisanal quality.
Why It Works
This style reads as refined celebration. You’re not shouting “it’s my birthday,” but anyone looking at your nails knows something intentional and beautiful is happening. Ballet pink is universally flattering regardless of skin tone, and the lace detail transforms it from a simple manicure into genuine nail art. On stilettos, the delicate pattern becomes a focal point without overwhelming the elegant shape.
Creating the Lace Detail
Thin lace patterns are usually hand-painted using a fine nail art brush, or applied using nail stickers or decals specifically designed for lace patterns. If going the hand-painted route, ask for a pattern that’s consistent enough to look intentional but organic enough not to look machine-like. The lace typically works best when it covers about sixty percent of the nail, leaving some ballet pink visible around the edges and at the base.
Insider note: Lace designs are more delicate than heavily embellished nails, so schedule this for when you don’t need your hands to withstand heavy wear.
4. Bubblegum Pink with Rhinestone Accents
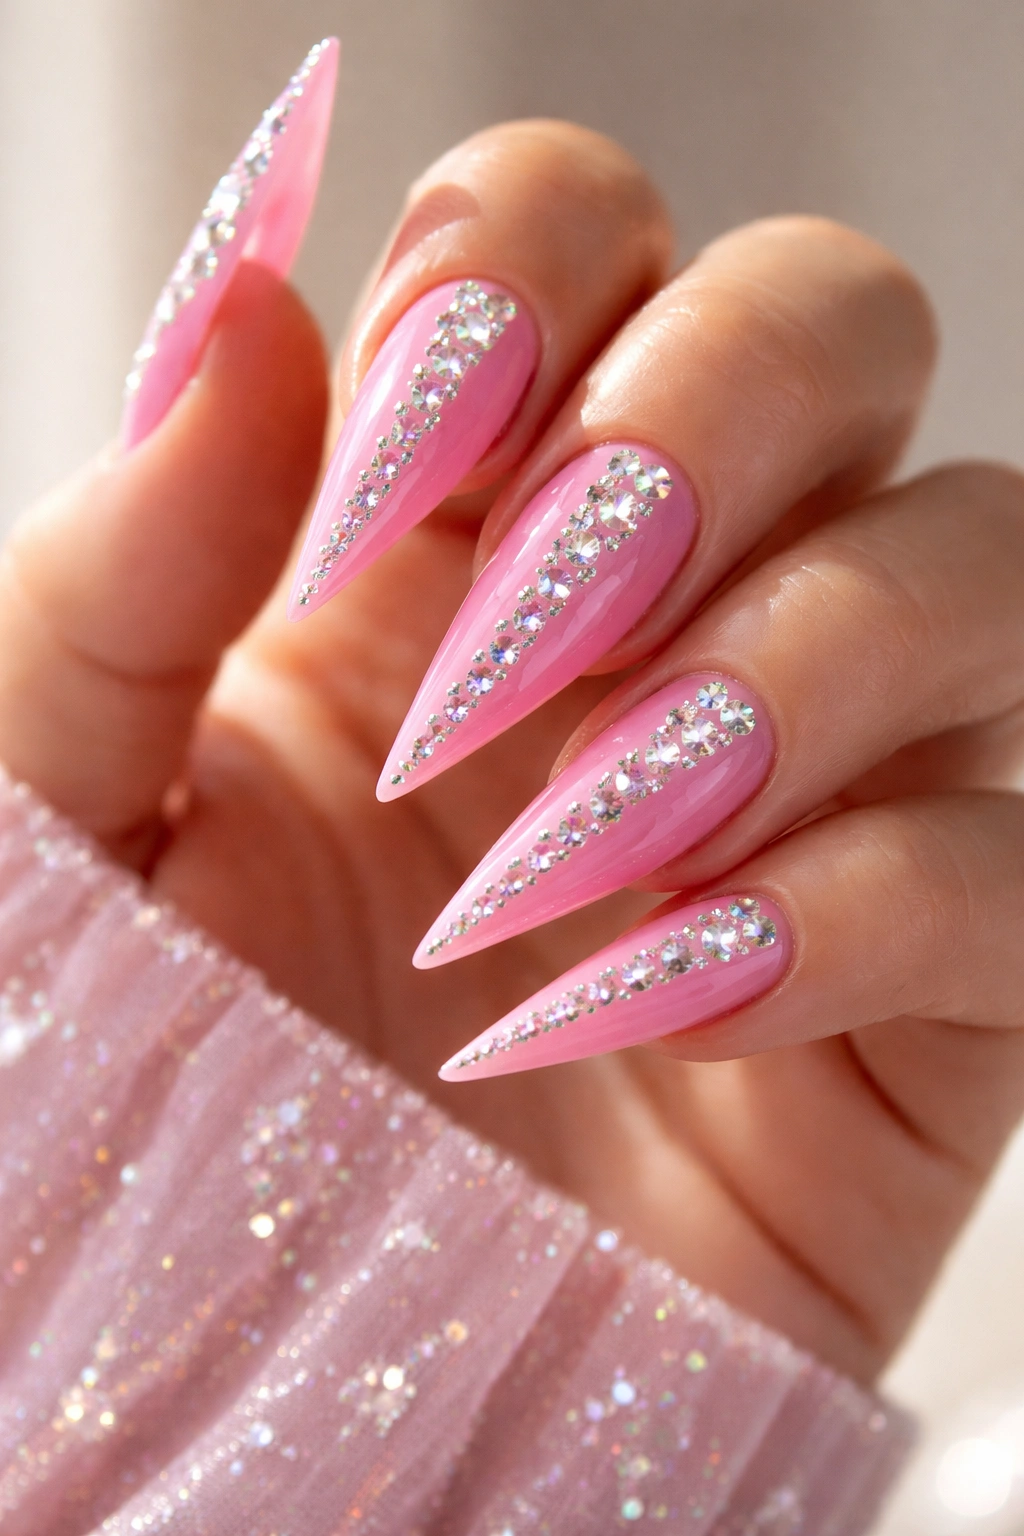
Bubblegum pink is pure joy—it’s playful, youthful, and instantly makes you smile. This shade sits right between hot pink and a lighter ballet pink, with enough warmth to feel summery and enough brightness to feel celebratory. Add rhinestones strategically placed along the tips and down the center of each nail, and you’ve got a design that’s glamorous without being costumey. The rhinestones should graduate in size, with larger stones at the tip and smaller ones cascading down.
The Birthday Vibe
Bubblegum pink automatically reads as celebratory and fun. Rhinestones add that “I’m getting special treatment today” sparkle that makes birthdays feel ceremonial. Together, they create a design that feels indulgent and celebratory in the best possible way. This works if your birthday celebration involves dancing, partying, or anywhere where a bit of extra shimmer feels appropriate.
Rhinestone Placement Strategy
The most flattering way to place rhinestones on a stiletto is to focus them on the tip—either a full graduated line down the center, or a cluster right at the apex of the tip. This draws the eye to the point of the stiletto and maximizes the light-catching effect. Make sure the rhinestones are glued securely with a high-quality adhesive beneath your topcoat, as loose stones can snag on hair and fabric.
Real talk: Rhinestone nails catch on everything, so if you have long hair or wear delicate fabrics frequently, keep the rhinestones clustered rather than scattered everywhere.
5. Nude Pink Matte with Geometric Outline
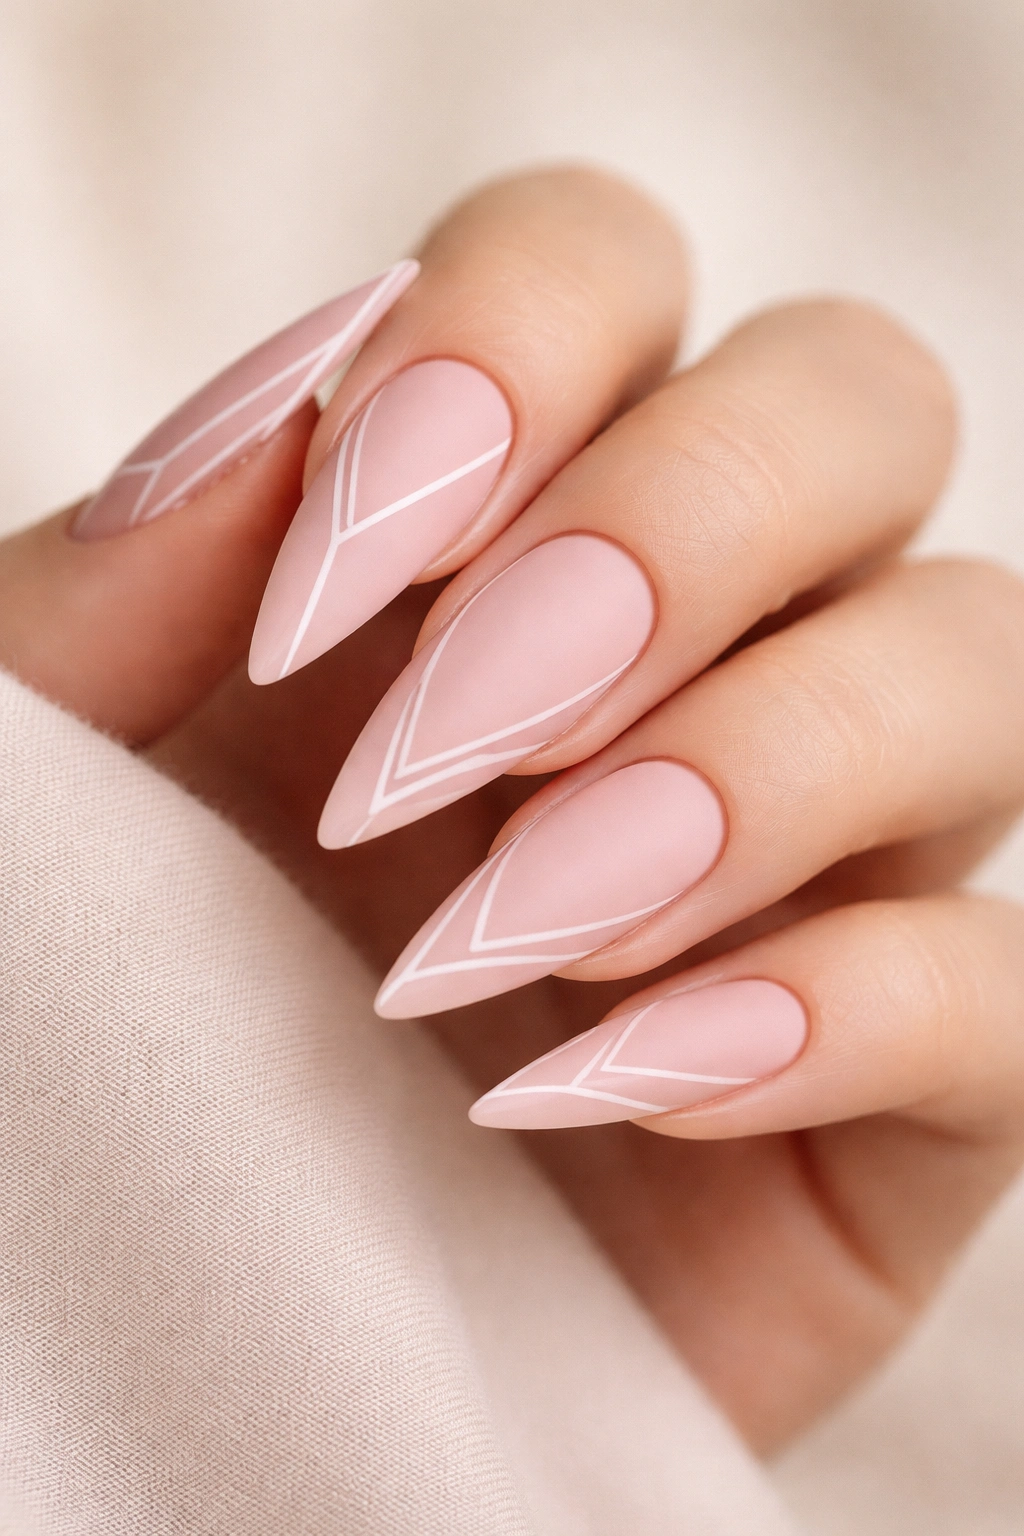
Matte finishes have a modern, architectural quality that transforms any color. A nude pink—so subtle you might mistake it for a natural manicure—paired with a matte topcoat creates a soft, warm canvas. Add geometric outlines in white or nude polish in clean lines: thin stripes, triangles, or minimalist shapes that frame the nail or create a subtle pattern. Matte finishes make geometric lines look sharp and intentional.
Modern and Minimal Birthday Energy
This design says you’re celebrating in a sophisticated way. There’s nothing overdone about it, but the geometric detail signals that you put thought into your appearance. It’s the kind of nail design that works equally well at a business lunch or a birthday dinner—it’s special without screaming for attention. The matte finish gives it a high-fashion quality that glossy finishes can’t quite match.
Executing Geometric Patterns
Ask your technician to use thin brushes or striping tape to create the geometric lines—consistency in line weight is what makes geometric designs read as polished and intentional. The pattern can be symmetrical or asymmetrical, but either way, it should look like it’s been planned, not randomly applied. Start with the matte base, then apply the geometric detail, and finish with either a matte or glossy topcoat (your choice—matte-on-matte is trendier, but glossy topcoat on matte details creates interesting texture contrast).
Pro tip: Geometric designs look even more striking on elongated stilettos because the straight lines of the nail shape amplify the geometric pattern.
6. Rose Gold Pink with Pearl Finish
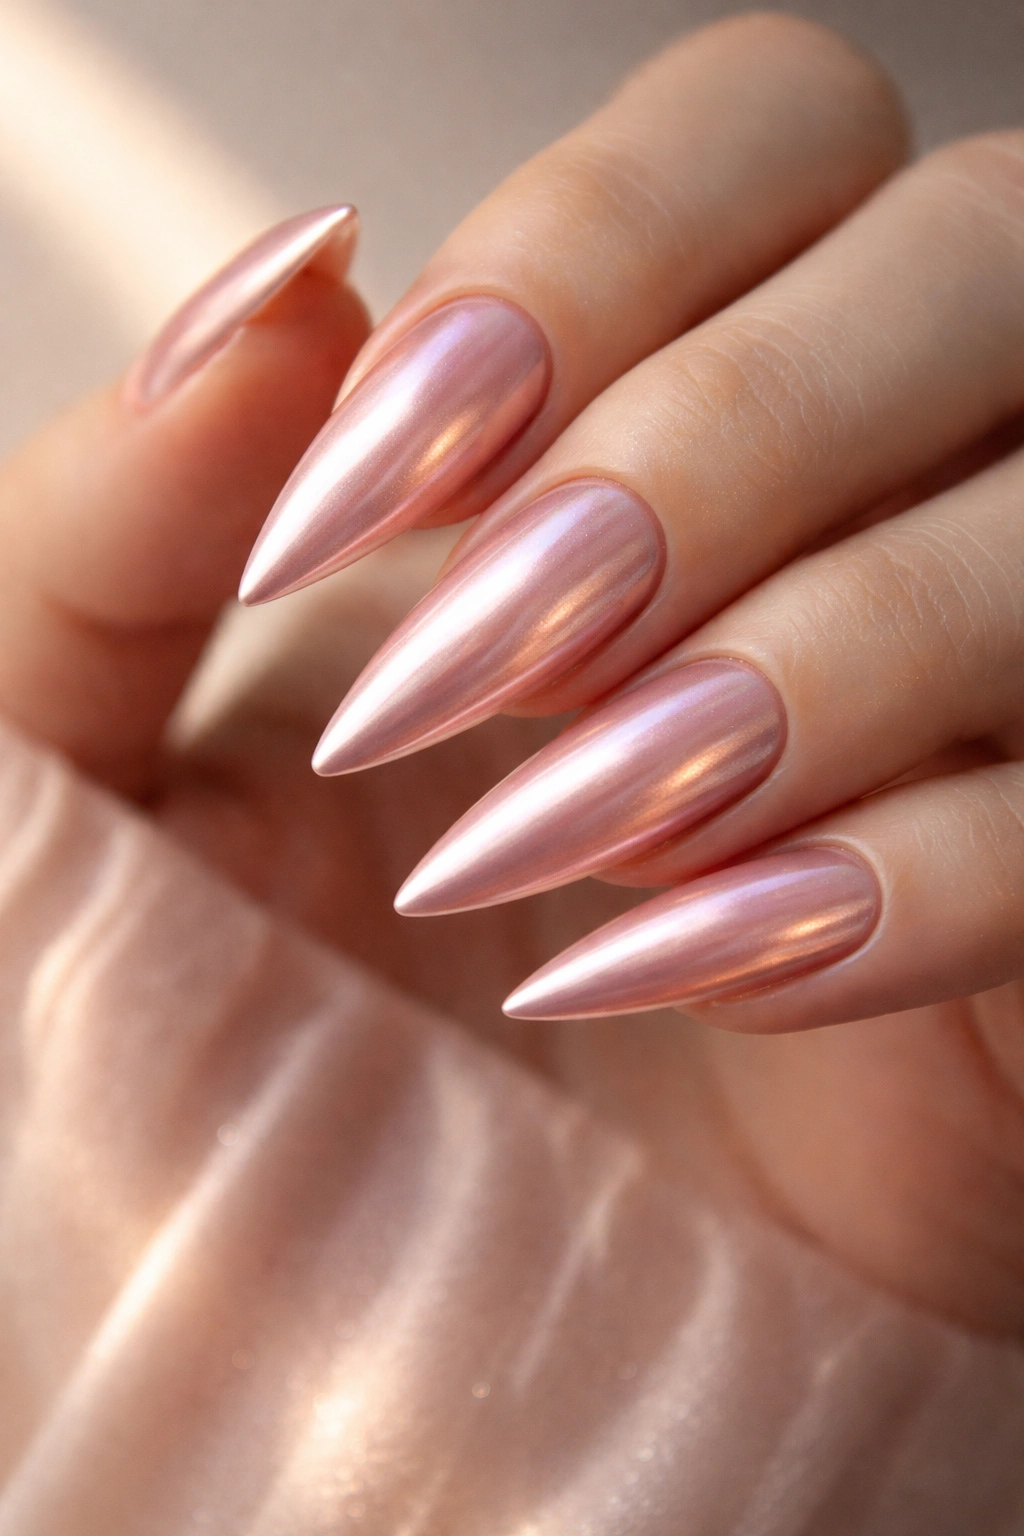
Rose gold pink is a warm, metallic shade that sits somewhere between pink and gold, reflecting light in a way that feels luxurious and sophisticated. A pearl finish—which gives a soft, glowing luminescence rather than a high-shine sparkle—transforms this into something especially elegant. The pearl effect makes the pink shift slightly as you move your hand, creating subtle dimension without any added embellishment. It’s all about the finish doing the work.
Luxury Without Extra Work
Sometimes the most impressive nail design is one where the polish itself is doing all the heavy lifting. Rose gold pink with a pearl finish requires no additional detail or embellishment because the color and finish are already interesting enough to capture attention. On stilettos, this creates a look that’s unmistakably special-occasion but also completely wearable for any birthday setting.
Getting the Pearl Finish Right
Pearl finishes aren’t the same as metallic or chrome—they have a more subtle, almost nacre-like quality. Ask specifically for a “pearl” or “pearl effect” top coat, not a metallic. Your technician should apply it evenly for consistent luminescence. The rose gold pink base should be a medium shade so the pearl effect shows up clearly without making the color too light or washed out.
Worth knowing: Pearl finishes photograph beautifully in different lighting, showing different subtle shifts of color depending on how the light hits them.
7. Pink Ombre to Black Tips with Minimalist Design
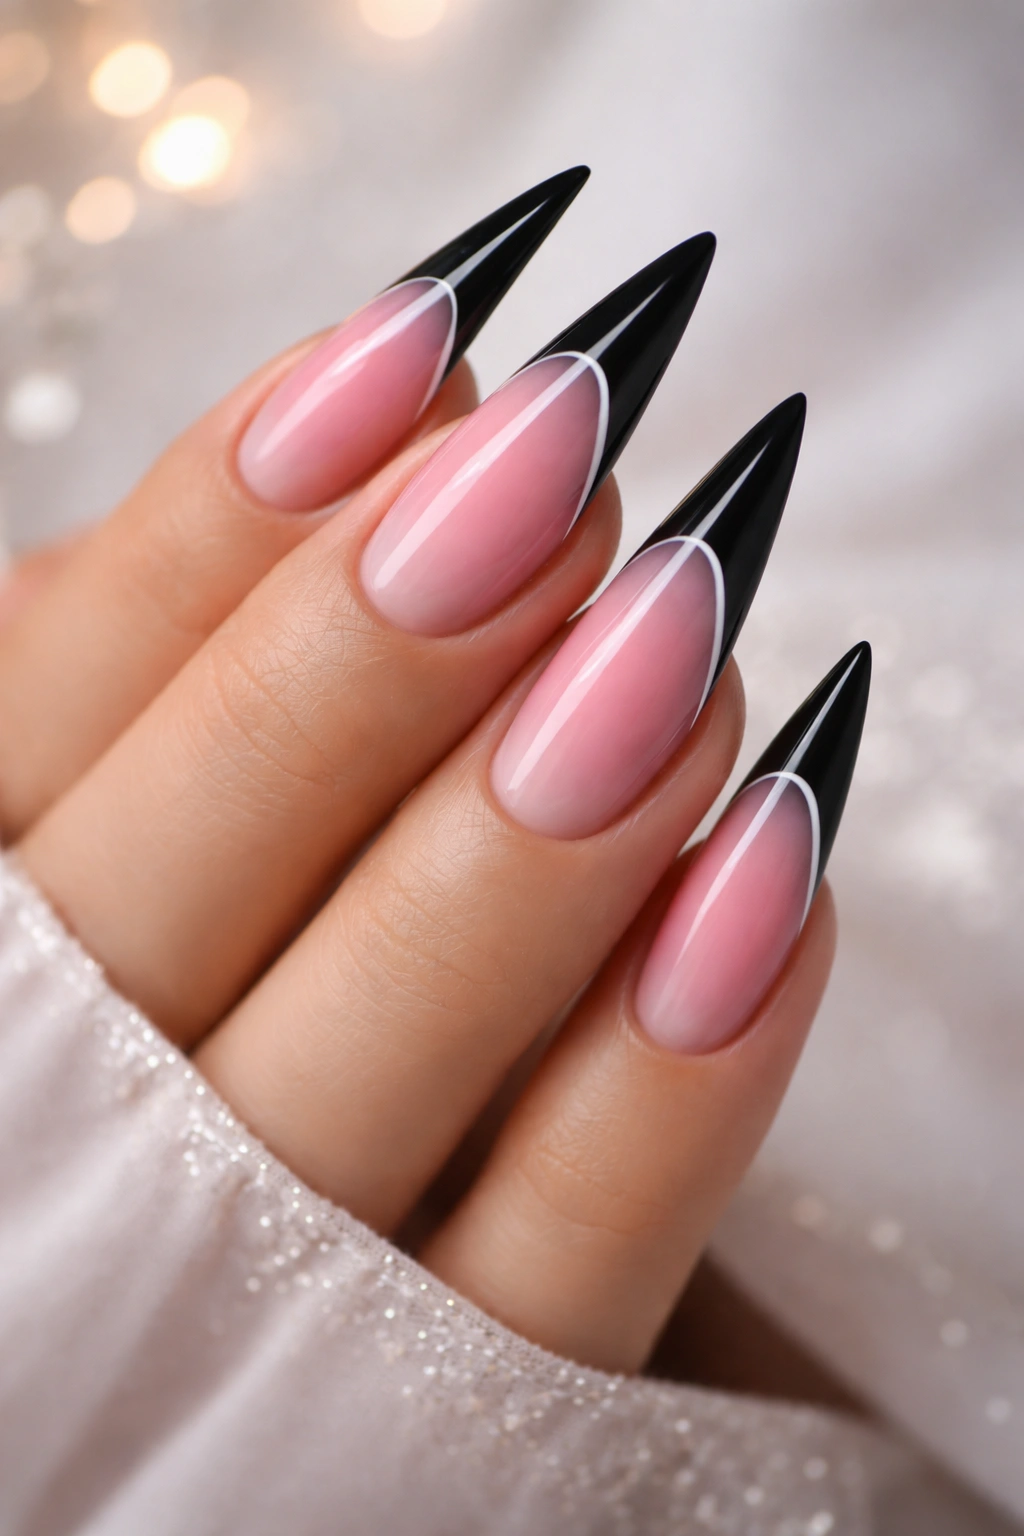
Ombre from pink to black is edgier than pure pink but still totally on-brand for a birthday celebrating someone with attitude. The ombre creates drama and depth, while the black tips feel contemporary and chic. Add one minimal design element—maybe a thin white line, a tiny symbol, or a single accent—to keep it from reading as too serious. The minimalist element rescues the design from feeling moody and brings it back into celebration territory.
Attitude with Celebration
This design works for someone whose birthday style is more rock-and-roll than princess. The ombre gradient gives it visual interest, while the black tips add edge. The minimal accent detail proves you still know how to celebrate without going full-sparkle. On stilettos, this creates a striking silhouette that’s modern and confident.
Executing the Black Ombre Gradient
Ask your technician to start with a bright or medium pink at the base and gradually add black, fading it deeper as you move toward the tips. The gradient zone should transition smoothly, with no harsh line between colors. Once that’s set, a single accent—a thin white line along the side, a tiny dot, a minimalist symbol—adds the birthday element without overwhelming the design.
Pro tip: If you’re nervous about how dark this will look, ask your technician to leave a tiny sliver of pink visible at the very base of the nail to keep it from reading as too gothic.
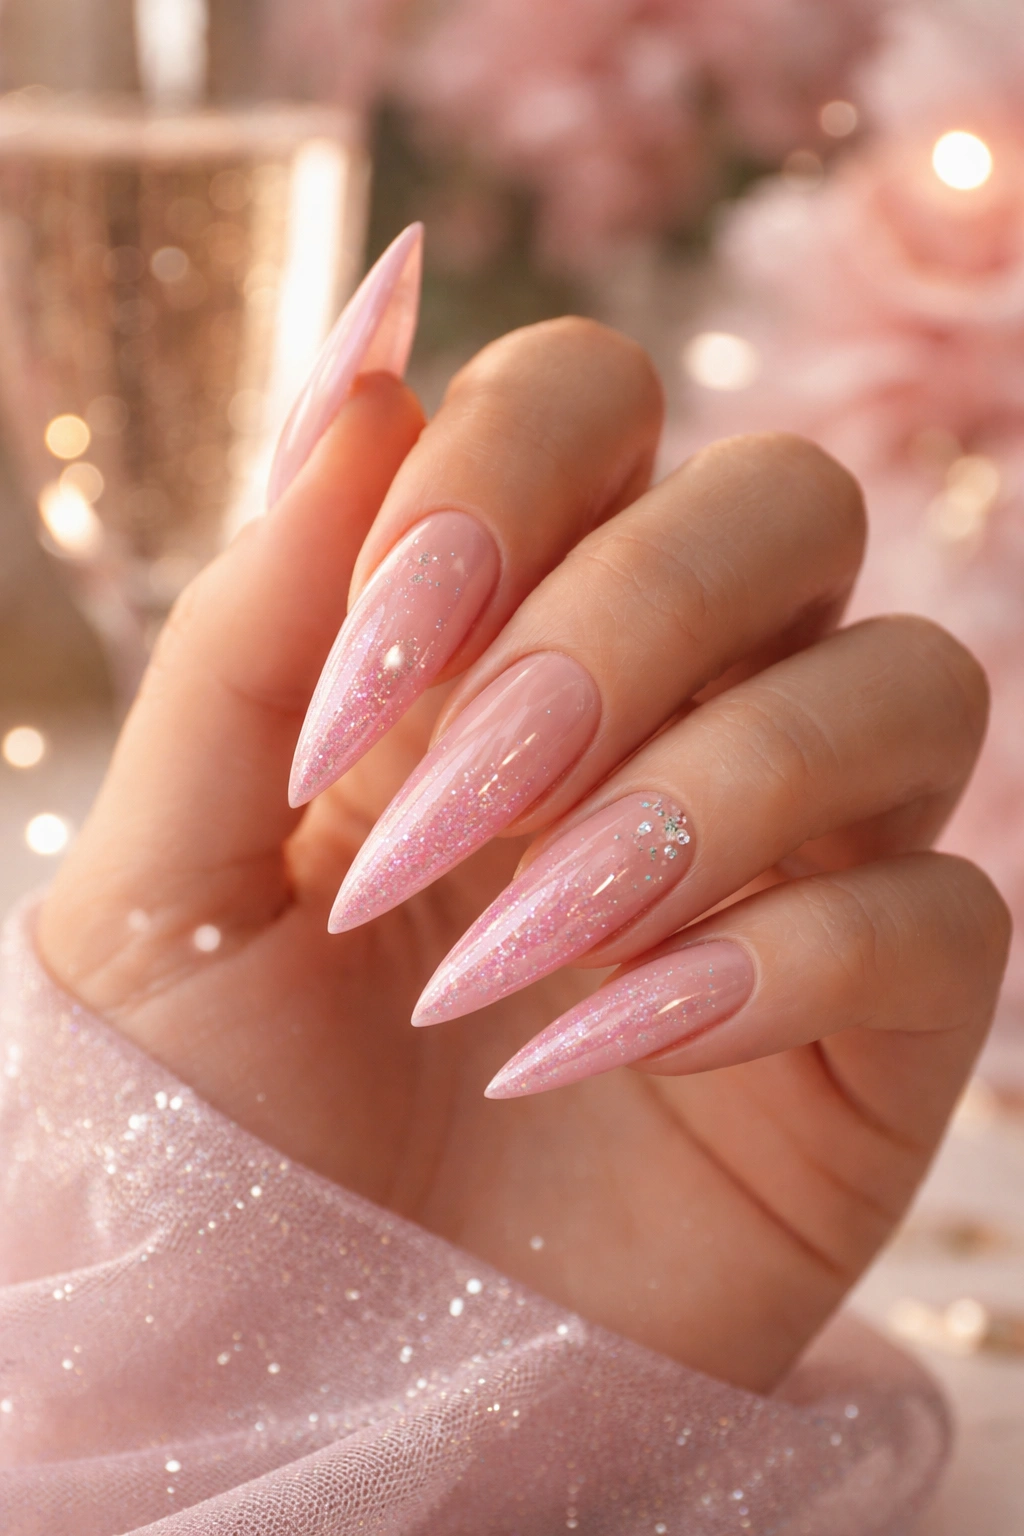
8. Pastel Pink with Hand-Painted Watercolor Florals
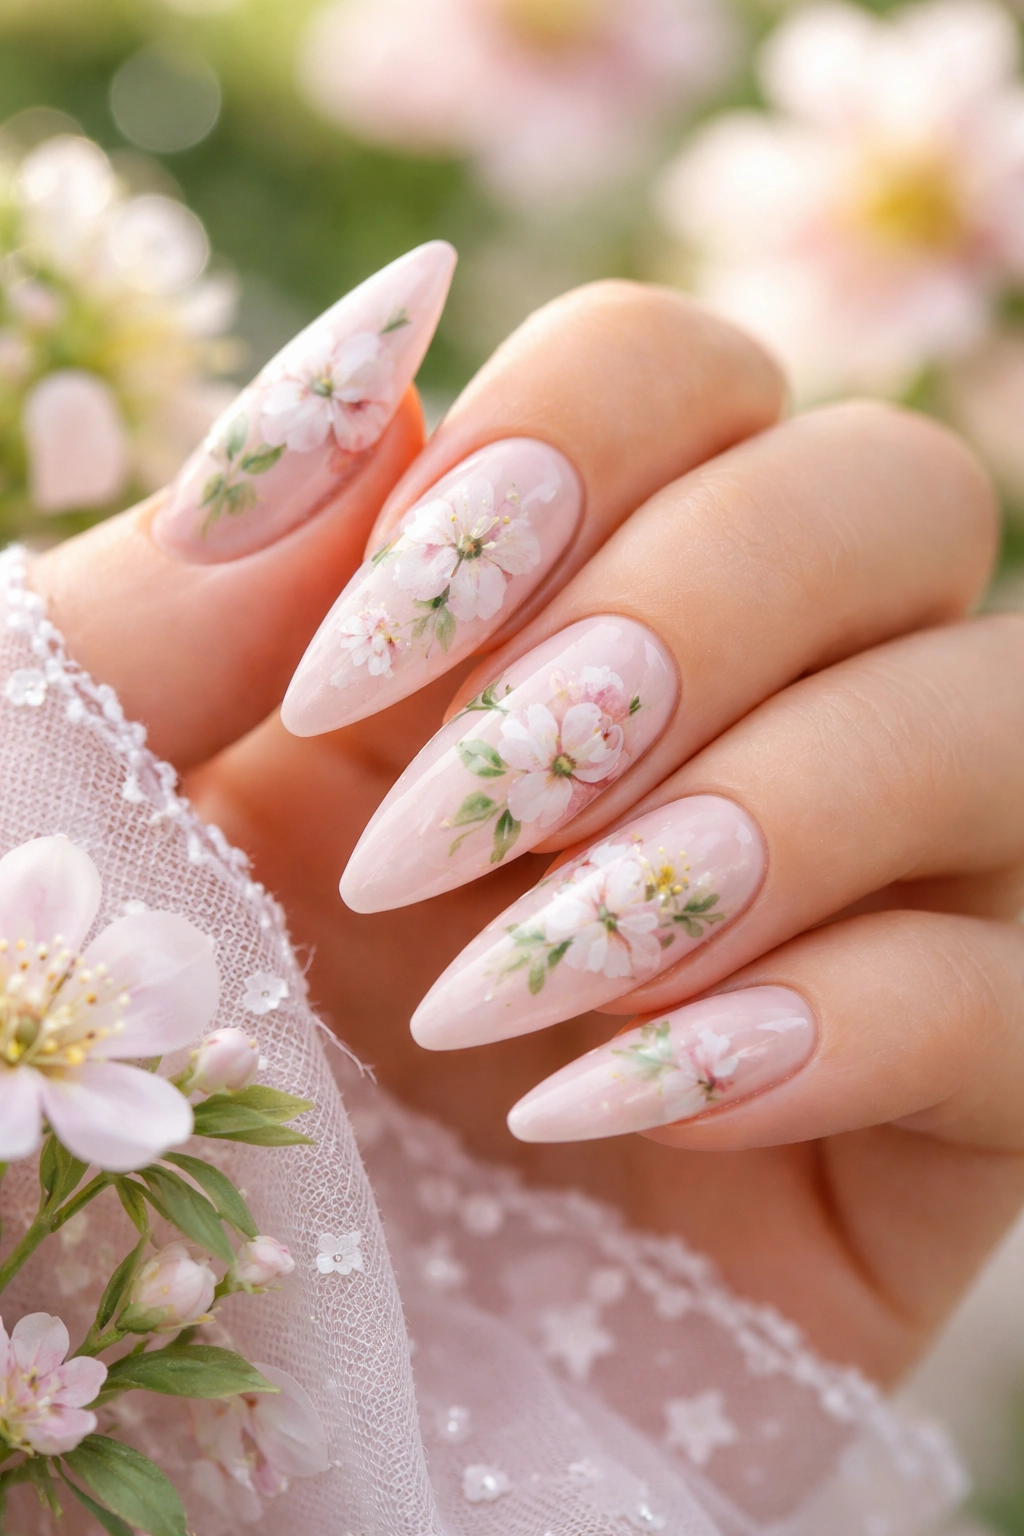
Pastel pink is soft, romantic, and inherently celebratory in a garden-party kind of way. Hand-painted watercolor florals scattered across the nails add artistry and personality without reading as costume-like. The watercolor effect—where colors blend and fade into each other rather than having crisp edges—keeps the design looking artistic rather than literal. Tiny flowers, leaves, and stems in soft greens, whites, and muted accent colors create a design that feels both special and wearable.
Artistic Birthday Celebration
This design works if your birthday vibe is more garden-party-in-a-Jane-Austen-novel than nightclub-glitz. It’s the nail design equivalent of a beautiful dress rather than a statement piece. The hand-painted quality means your design is one-of-a-kind, and watercolor florals feel personal and artistic in a way pre-made decals can’t quite match. On stilettos, the delicate florals contrast beautifully with the bold shape.
Getting Watercolor Florals Right
This requires a skilled nail artist who specializes in hand-painted designs. The watercolor effect comes from diluting the polish slightly with water or a watercolor medium, then applying it in a way that lets the colors blend and fade naturally. The florals should be loose and impressionistic rather than photo-realistic—think “inspired by flowers” rather than “exact flower replicas.” Small details like tiny stems and individual petals make the design feel complete without overdoing it.
Real talk: Hand-painted designs take longer than regular manicures, so schedule accordingly and expect to pay more for the artistry.
9. Hot Pink with Silver Mirror Accents on Tips
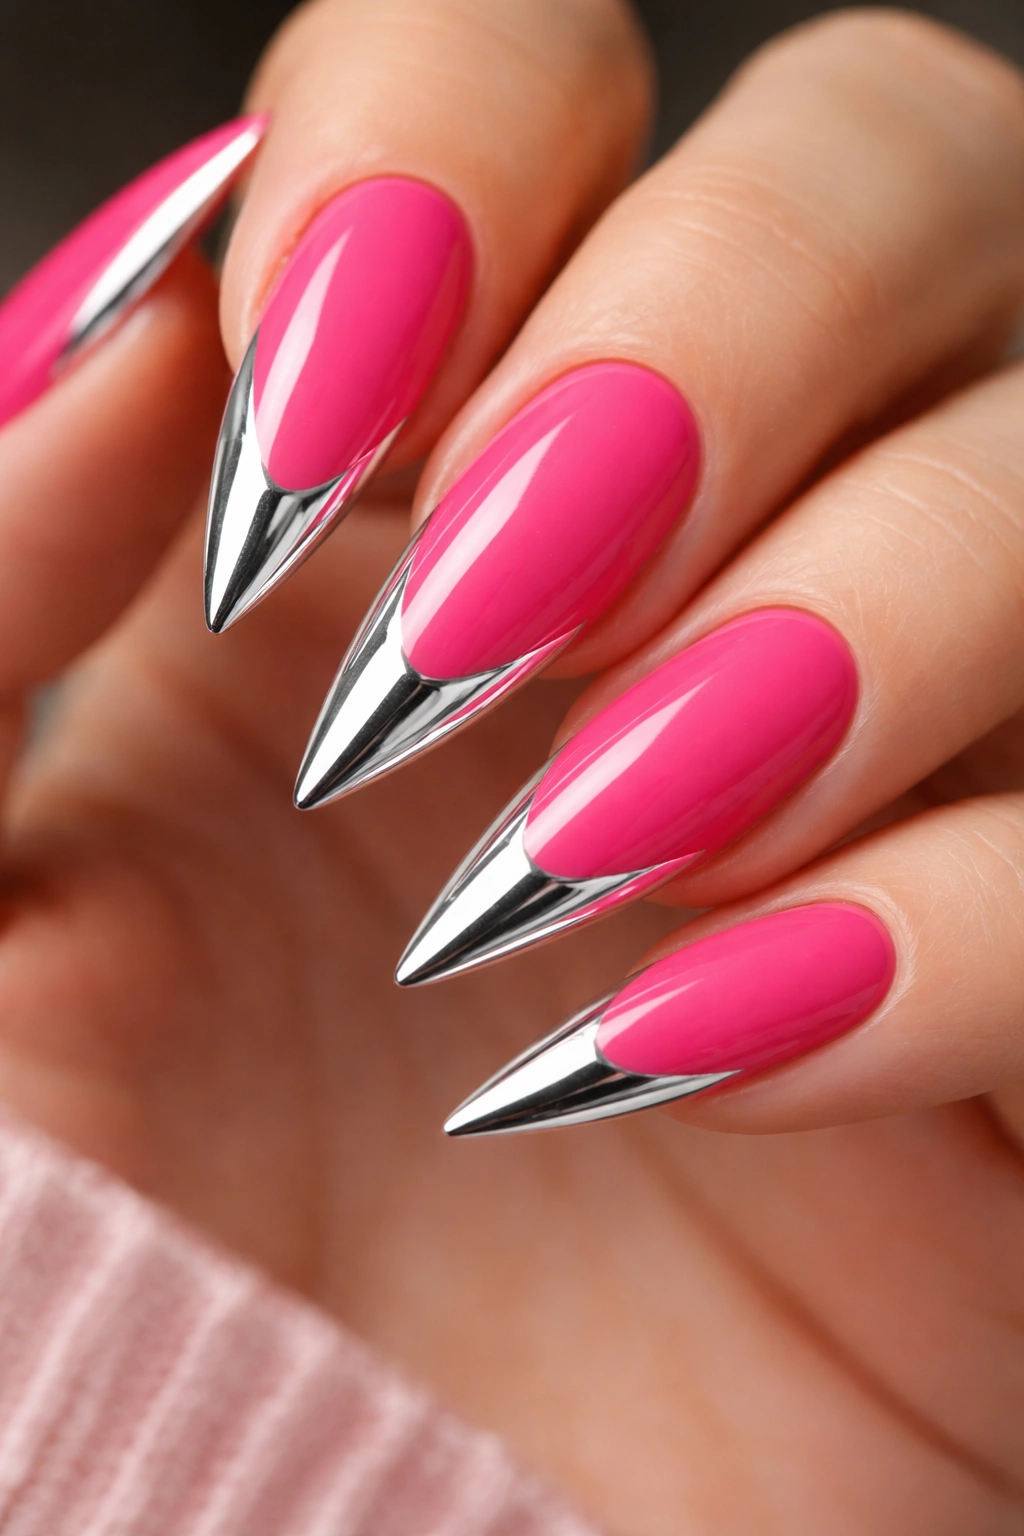
Mirror effect on nails is cutting-edge and creates an almost liquid, reflective quality that catches light dramatically. Using a hot pink base and applying mirror chrome specifically to the tips creates a striking two-tone effect that’s modern and celebratory. The mirror chrome should cover just the tip portion, maybe the last quarter-inch to half-inch of the nail, creating a crisp line where the colors meet. The contrast between matte or semi-gloss pink and the ultra-reflective mirror chrome is what makes this design work.
Futuristic Celebration Energy
This design says you’re celebrating in a forward-thinking, fashion-forward way. Mirror chrome isn’t something everyone has the confidence to wear, but on a birthday when you’re already feeling like the main character, it works perfectly. The hot pink base keeps it fun and celebratory while the mirror tips add edge and modernity. On stilettos, the reflective tips look striking and elongate the already-long nails even further.
Applying Mirror Chrome
Mirror effect requires a special powder or gel designed specifically for this effect—it’s not the same as metallic polish. Your technician will apply the hot pink base, cure it, then apply the mirror powder or gel using a specific technique that creates that reflective, liquid-like appearance. The edges between the pink and mirror should be clean but can have a slight gradient if you prefer a softer transition. Finish with a topcoat designed for mirror effects to maintain the reflectivity.
Worth knowing: Mirror chrome nails are more delicate than regular polish, so ask your technician for care instructions and expect them to potentially need touching up sooner than standard manicures.
10. Dusty Rose with Champagne Sparkle and Micro Rhinestones
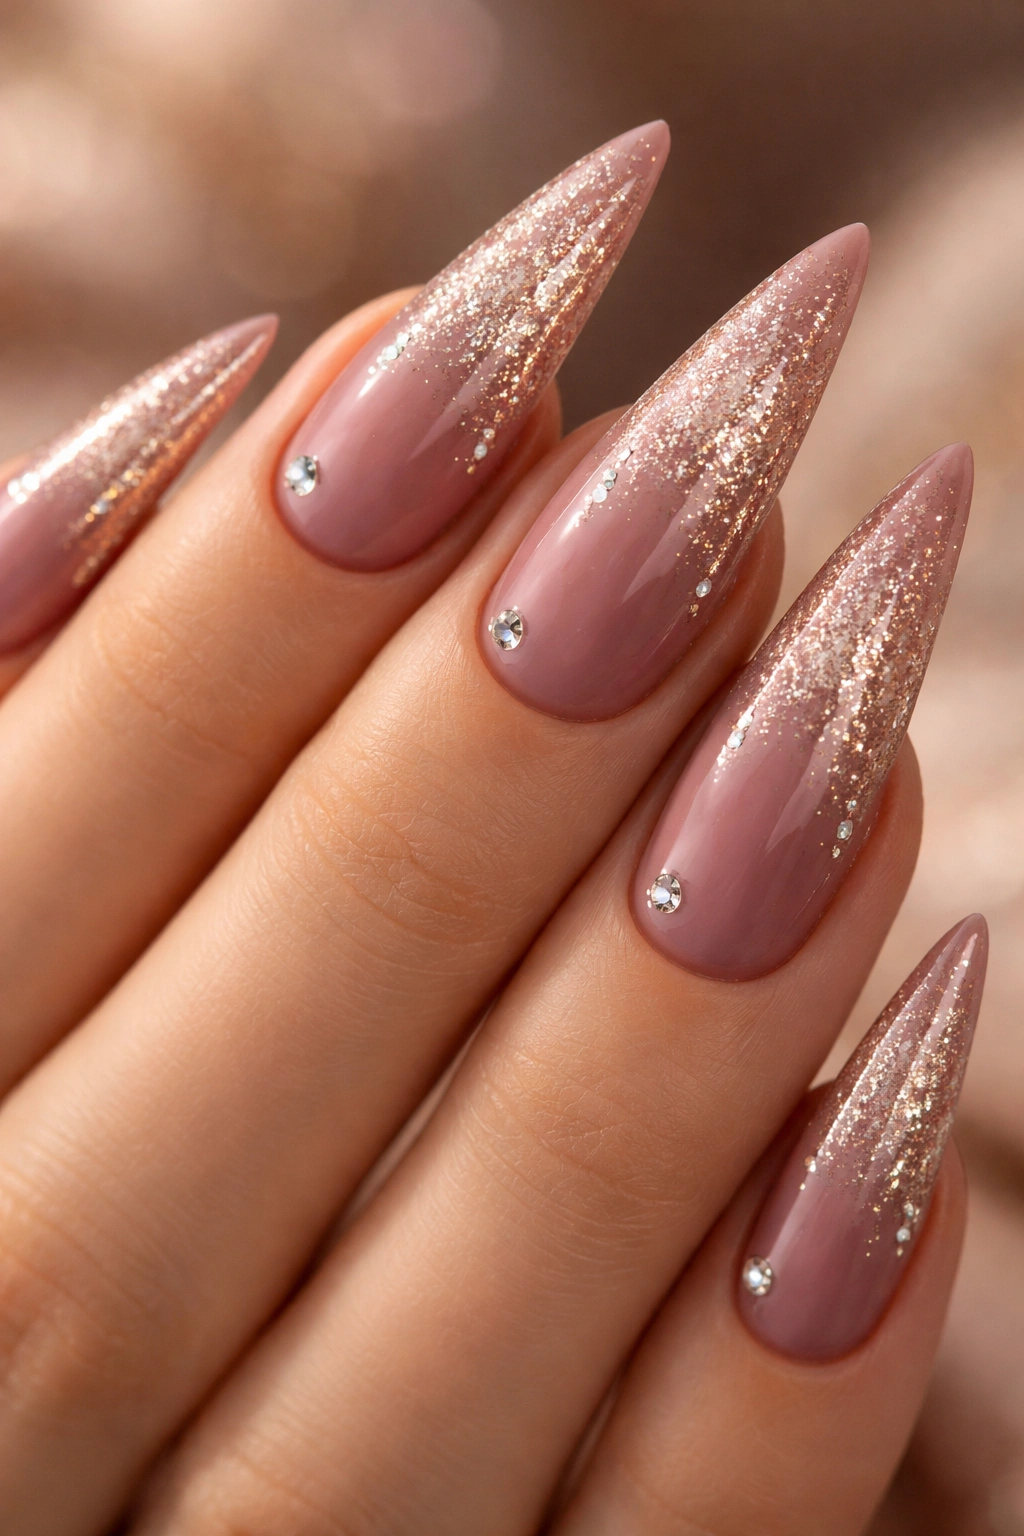
Dusty rose is muted, sophisticated, and deeply romantic—it’s the pink that doesn’t shout but definitely commands attention through pure elegance. Add a champagne sparkle throughout the base and micro rhinestones scattered strategically, and you’ve created something that feels like you’re ready for a celebration that involves actual champagne. The champagne sparkle creates a warm, glowing effect while the micro rhinestones add tiny points of light without overwhelming the design. This works because all the elements—dusty rose, champagne sparkle, and tiny rhinestones—work in the same warm color family, creating cohesion rather than chaos.
Sophisticated Sparkle
This design is for the birthday person who knows how to celebrate elegantly. Everything about it whispers luxury and refinement rather than screaming for attention. The dusty rose keeps it mature and wearable, the champagne sparkle adds celebration, and the micro rhinestones provide just enough glitter to feel special. On stilettos, this creates an effect that’s unmistakably “dressed up for something important” without looking like costume nails.
Layering Sparkle and Rhinestones
Start with a dusty rose base—this should be a muted, cool-toned pink with gray undertones, not a warm or bright pink. Once that’s cured, apply a champagne sparkle throughout using either a sparkle gel or by mixing sparkle into a topcoat. Once that’s set, strategically place micro rhinestones using a fine brush and rhinestone adhesive, focusing them along the tip and down the center line of each nail. The micro rhinestones catch light without dominating the design.
Pro tip: Dusty rose photographs beautifully in warm lighting, so this design is especially stunning for evening birthday celebrations or dinner parties.
Final Thoughts
Choosing a pink stiletto nail design for your birthday is about finding the version of pink and the level of sparkle that makes you feel like the celebration is real and it’s happening for you. Whether you go for barely-there ballet pink with lace details, hot pink that demands attention, or dusty rose that whispers sophistication, the stiletto shape and the birthday-appropriate color combination already do most of the work.
The shape of a stiletto automatically elongates your fingers and adds drama, while pink keeps everything feeling warm, celebratory, and flattering regardless of your skin tone. What varies is how you dress up that basic combination—sparkle, geometric lines, ombre, florals, metallics, or pure simplicity. Each approach is equally valid; it just depends on what version of “celebrating me” feels truest to your actual personality and birthday mood.
Think about what kind of celebration you’re actually doing. Are you going dancing, or are you having dinner with close friends? Will you be taking photos, or living quietly in the moment? What makes you feel most confident and celebratory—drama and sparkle, or sophisticated simplicity? Answer those questions first, and the nail design will follow naturally. Whatever you choose, you’re starting your birthday with nails that prove you thought about yourself, cared about the details, and decided that today was worth getting something beautiful done. That’s the real celebration right there.
