

Your duck nails don’t have to be plain. Adding glitter transforms them into show-stopping designs that catch light and turn heads every time you move your hands. Whether you’re drawn to subtle sparkle or full-on shimmer, glitter works beautifully on the duck nail shape’s wider canvas, giving you endless possibilities for creating nails that feel both bold and wearable at the same time.
The duck nail shape—wider at the tip, tapered toward the base—creates a naturally flattering silhouette that actually looks longer and more elegant than traditional squared or rounded tips. When you layer glitter on top of this shape, you get a dramatic effect that photographs incredibly well and feels luxurious every single day. The key is finding the right glitter technique and color combination for your personal style, whether that means full glitter coverage, a glitter gradient, or strategic placement that lets the base color shine through.
In this guide, I’m sharing 16 specific glitter duck nail ideas that range from romantic and delicate to bold and glamorous. Each one is designed to be achievable with common nail products and techniques, so you can either recreate them at home or show the exact concept to your nail technician. Let’s dive into designs that will make your duck nails absolutely sparkle.
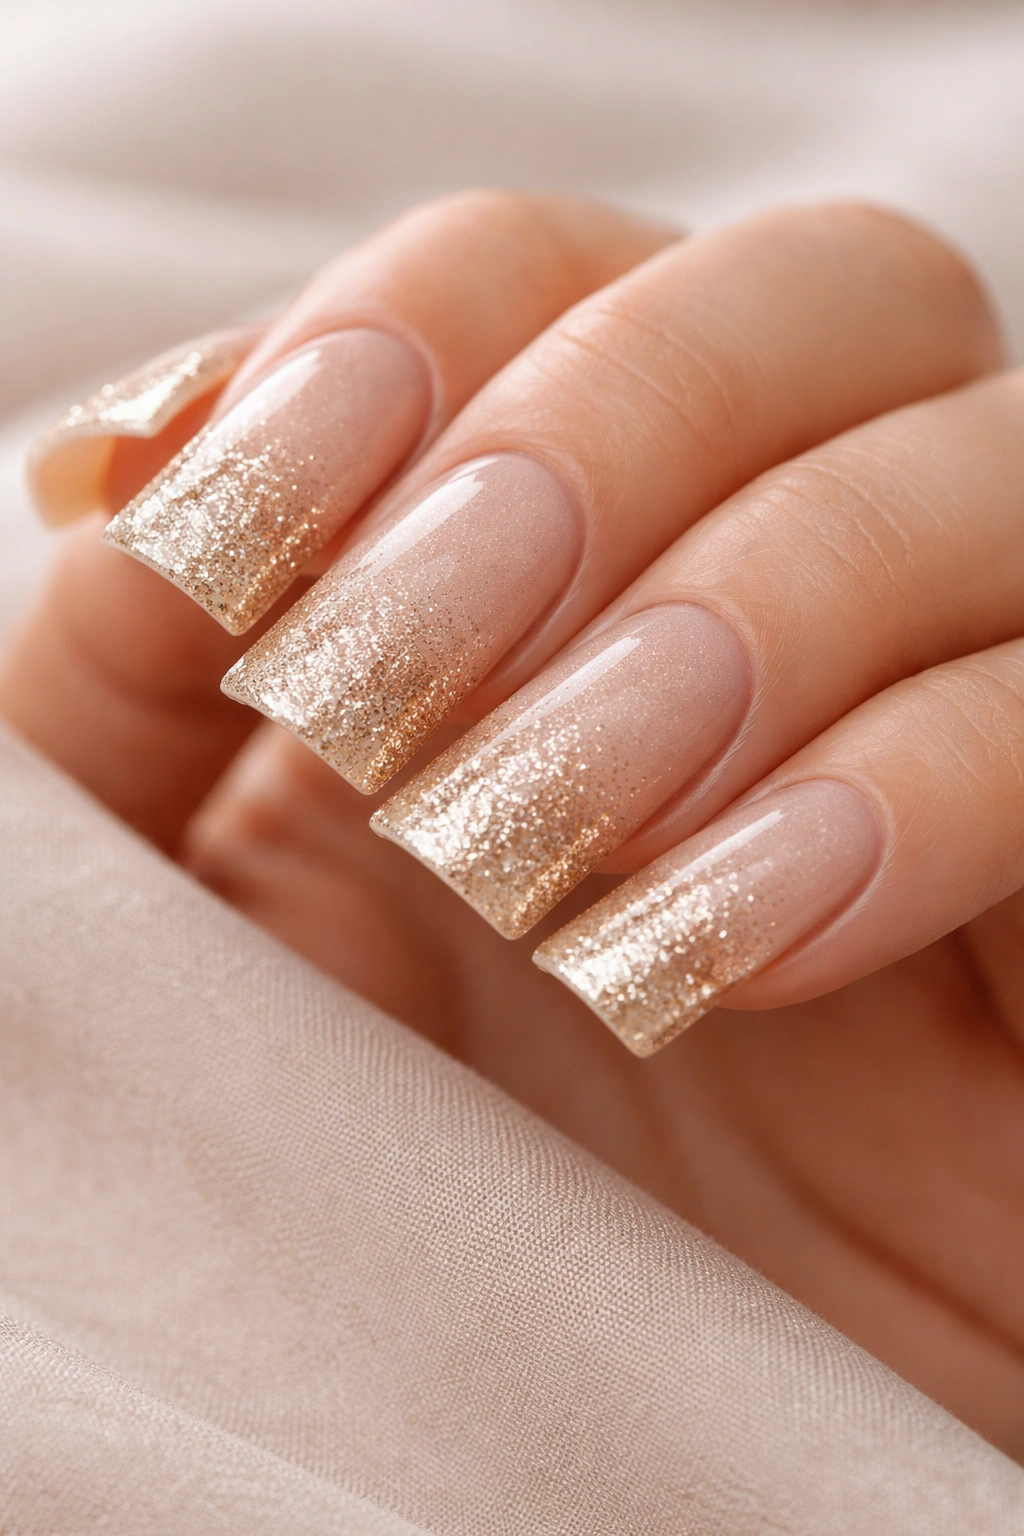
1. Rose Gold Glitter Over Nude
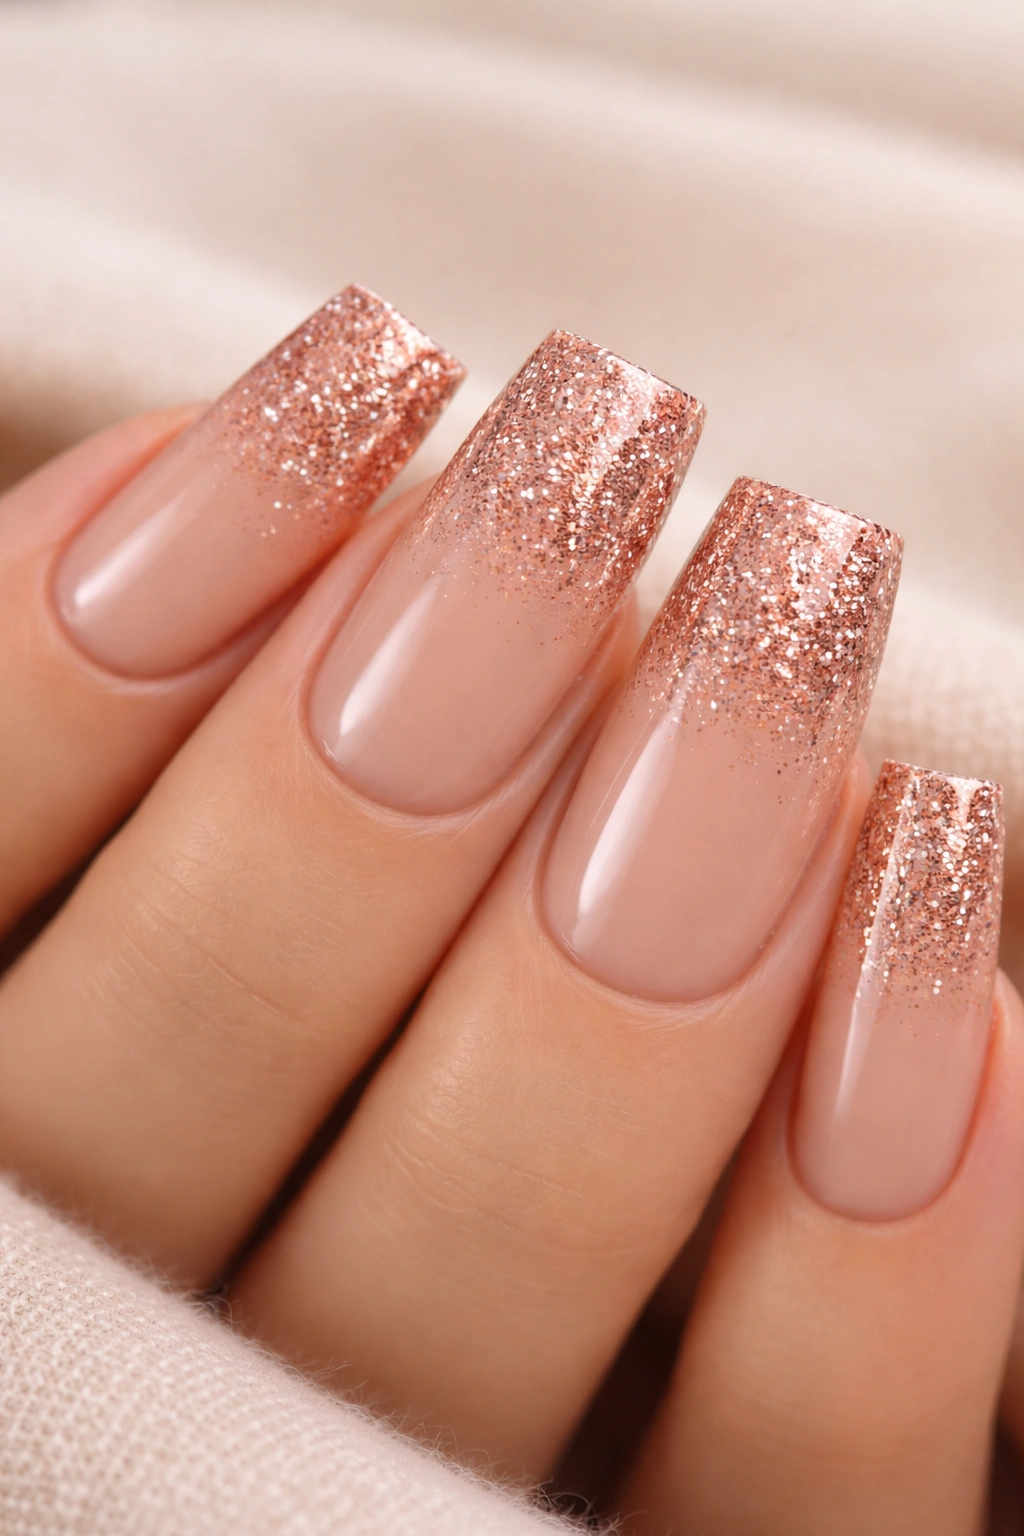
This design pairs a warm, skin-toned base with rose gold glitter layered on top for a sophisticated, barely-there look that works for any occasion. The combination feels elegant without screaming for attention, making it perfect for work environments or formal events where you want your nails to be pretty but not distracting.
Why This Works So Well
Rose gold glitter has a flattering warmth that complements most skin tones beautifully. The nude base keeps the overall look refined, while the glitter adds just enough dimension and sparkle to catch light without feeling overwhelming. This design is also incredibly practical—the neutral tone hides minor imperfections and wear, so your manicure looks fresh longer.
How to Achieve It
- Apply a thin base coat to protect your nails
- Paint two coats of a warm beige or nude polish (choose one that matches your skin tone closely)
- Use a glitter brush to apply rose gold glitter in varying density—full coverage on the tips, fading lighter toward the cuticle for dimension
- Seal everything with a glossy top coat to smooth the texture and make the glitter shine
Pro tip: Use a mix of fine and slightly larger rose gold glitter particles for added depth and visual interest.
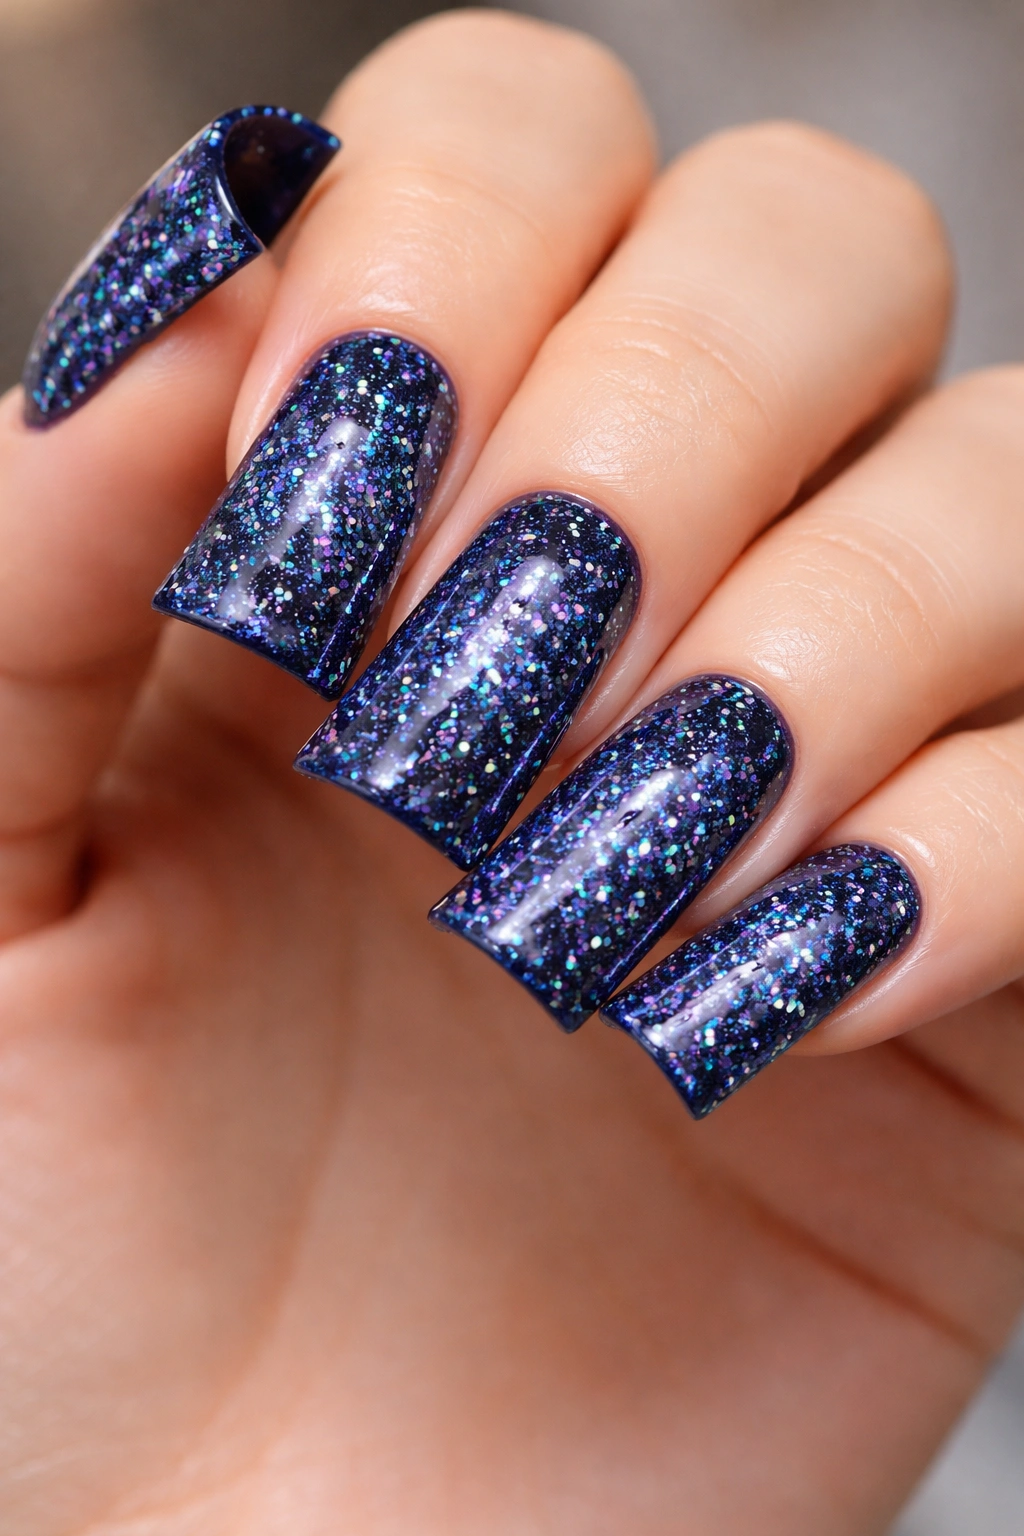
2. Midnight Blue with Rainbow Holographic Glitter
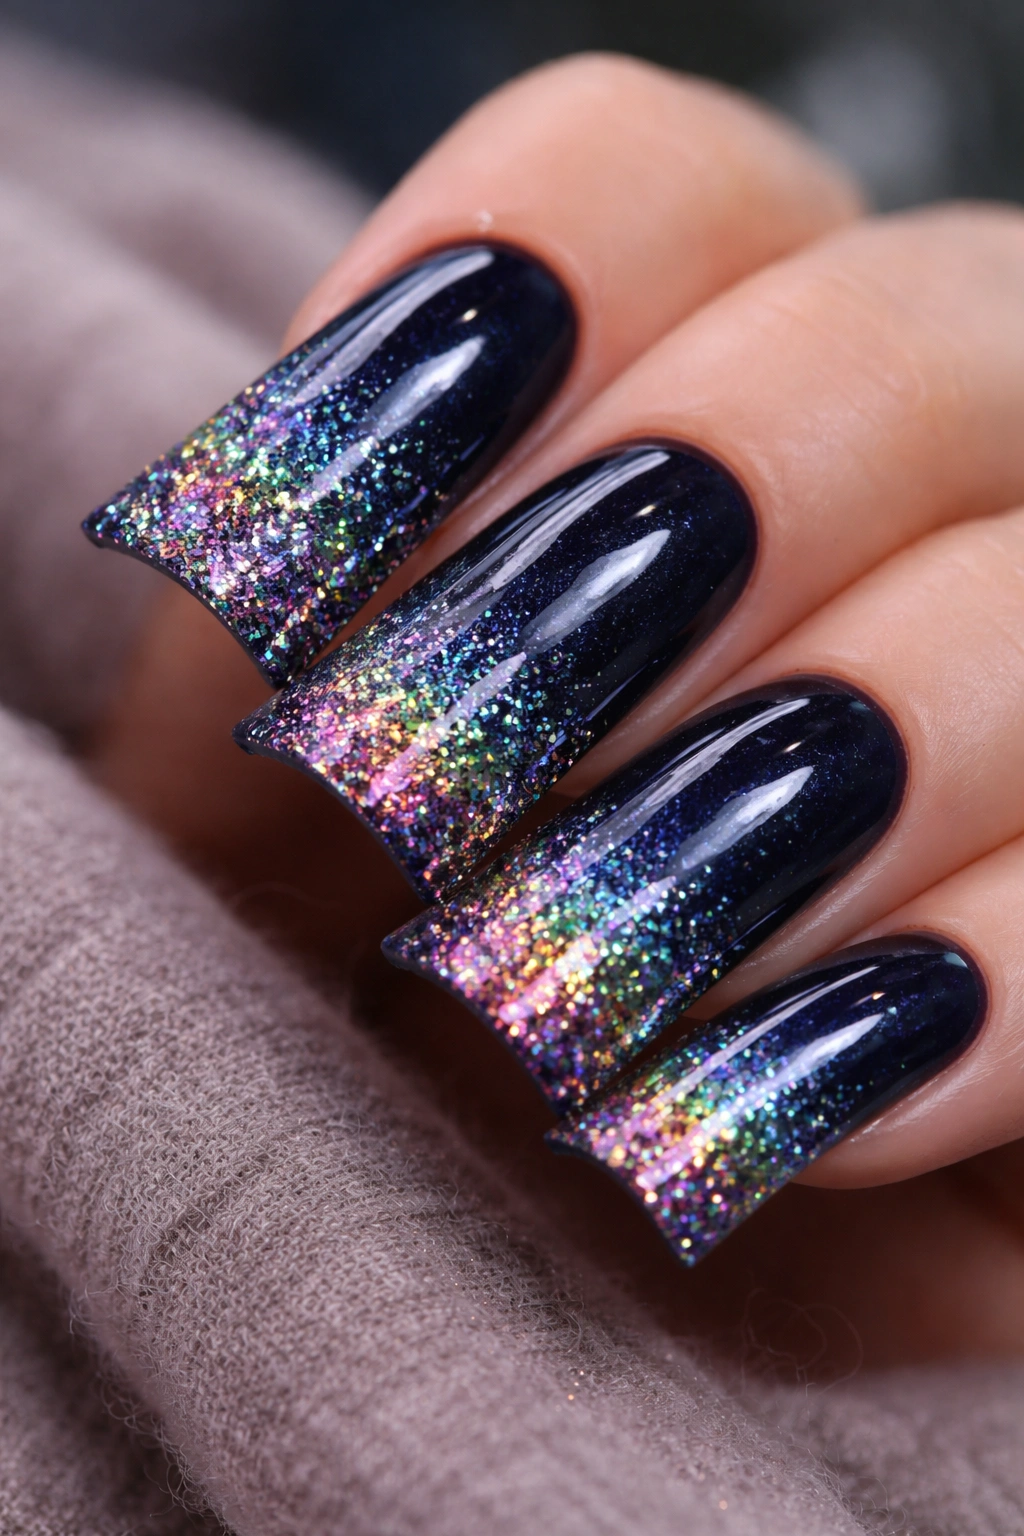
Deep midnight blue provides a rich, jewel-toned base that makes rainbow holographic glitter absolutely pop with color-shifting magic. This design feels luxurious and playful at the same time, especially when the light hits it from different angles and reveals hints of pink, purple, and green.
Why Rainbow Holographic Glitter Shines Here
The dark blue background acts as a canvas that allows the holographic particles to really stand out and shimmer. You get maximum sparkle and color-play without the glitter getting lost against a lighter base. This combination is dramatic enough for evenings out but wearable enough for everyday if you love bold nails.
How to Achieve It
- Start with a dark blue base coat (two to three coats for opacity)
- Apply a clear gel or thick top coat layer while still tacky
- Sprinkle or brush rainbow holographic glitter while the top coat is wet
- Press the glitter gently into the polish
- Seal with another layer of clear top coat and cure if using gel
Pro tip: Apply glitter more densely at the nail tips and fade it lighter toward the cuticles for a gradient effect that elongates your fingers.
3. Classic Red with Gold Glitter Tips

A bold red base with glitter concentrated on just the very tips creates a classic, timeless look that’s been flattering for decades. The clean contrast between the solid red and the glittering tips gives you polish and glamour without feeling overdone.
What Makes This Combination Timeless
Red nails feel powerful and put-together on their own, but adding gold glitter to the tips elevates them from simple to special. This design works for date nights, holiday parties, or whenever you want to feel extra confident. The gold-on-red pairing is inherently flattering and works across skin tones.
How to Achieve It
- Paint your entire nail with a rich red polish (two coats for full opacity)
- Once dry, apply a clear top coat or gel layer just to the tips
- While still sticky, apply gold glitter to the tips, creating a distinct line where the glitter begins
- Seal with a glossy top coat to blend the edges slightly
Worth knowing: Use a thin brush or a glitter applicator to keep the glitter placement clean and precise rather than letting it scatter across the entire nail.
4. Nude Base with Confetti Glitter
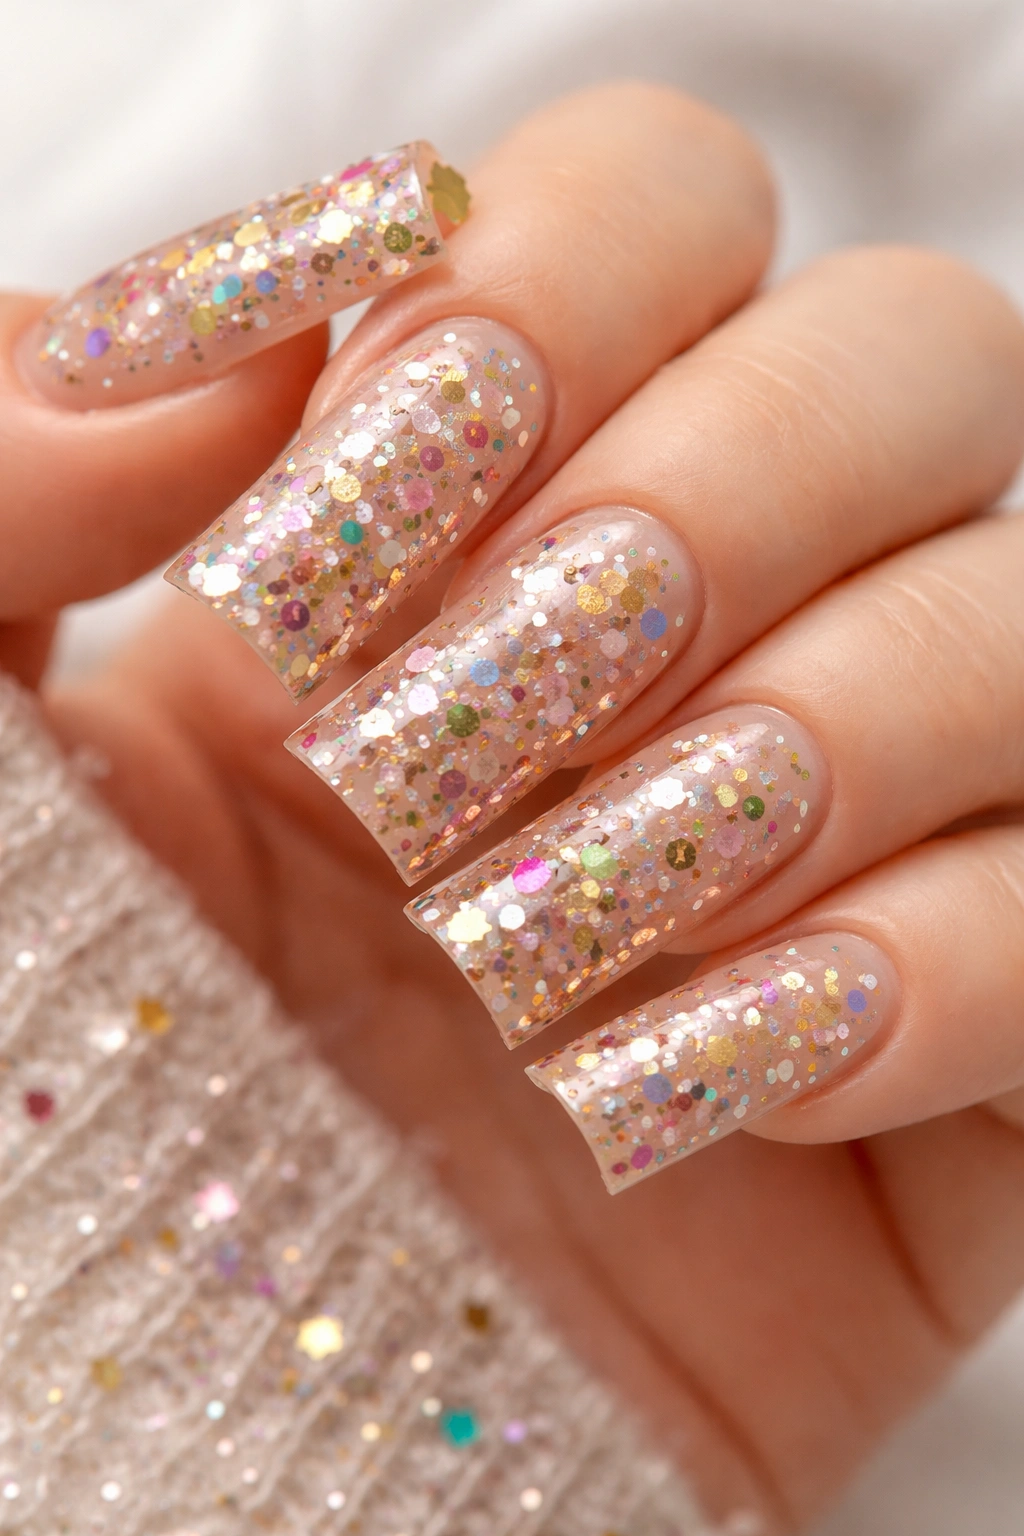
Confetti glitter—a mix of different sized shapes in complementary metallic shades—transforms a simple nude base into something fun and celebratory. The variety of glitter sizes and shapes creates depth and visual texture that keeps the design interesting.
Why Confetti Works on Duck Nails
The wider duck nail tip gives you plenty of space to showcase the different glitter pieces without crowding. Each glitter element becomes a focal point, and the mix of colors (usually gold, silver, and copper together) feels playful while still looking polished.
How to Achieve It
- Apply nude base polish in two coats
- While the final coat is still slightly tacky, apply confetti glitter generously across the entire nail
- You can either use full coverage or concentrate glitter more heavily on the tips
- Seal with a thick top coat to even out the texture
Quick facts:
- Confetti glitter tends to be chunkier than fine glitter, so it shows up well even from a distance
- This design works beautifully with both warm and cool-toned nude bases
- The multiple colors mean it pairs well with any outfit or color scheme
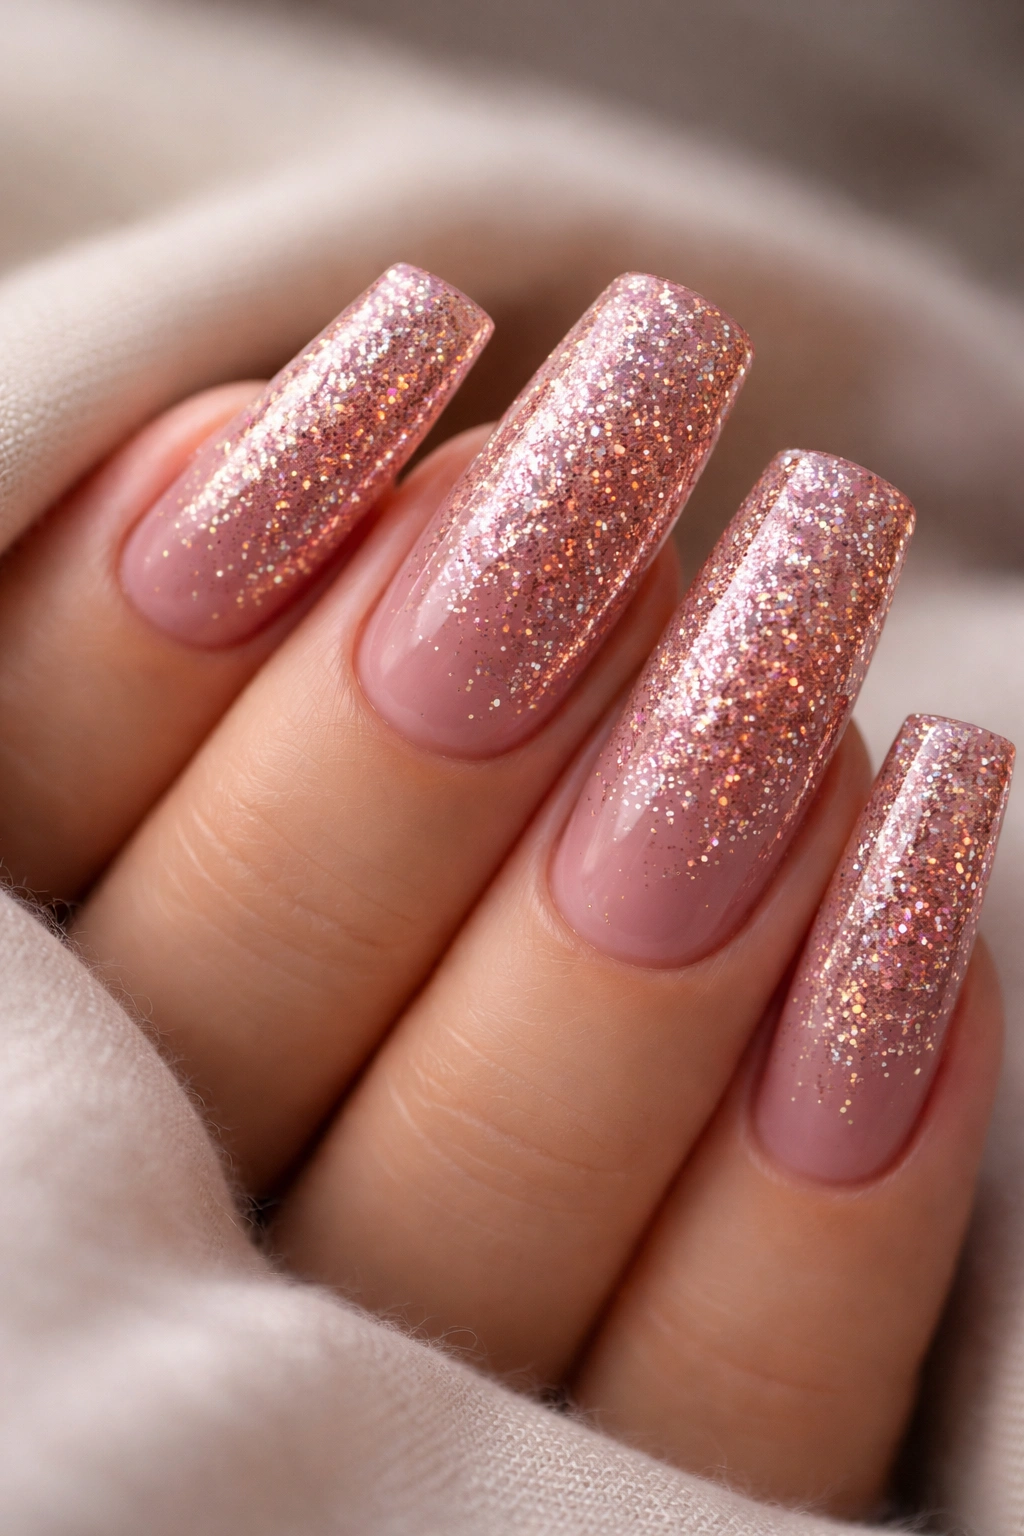
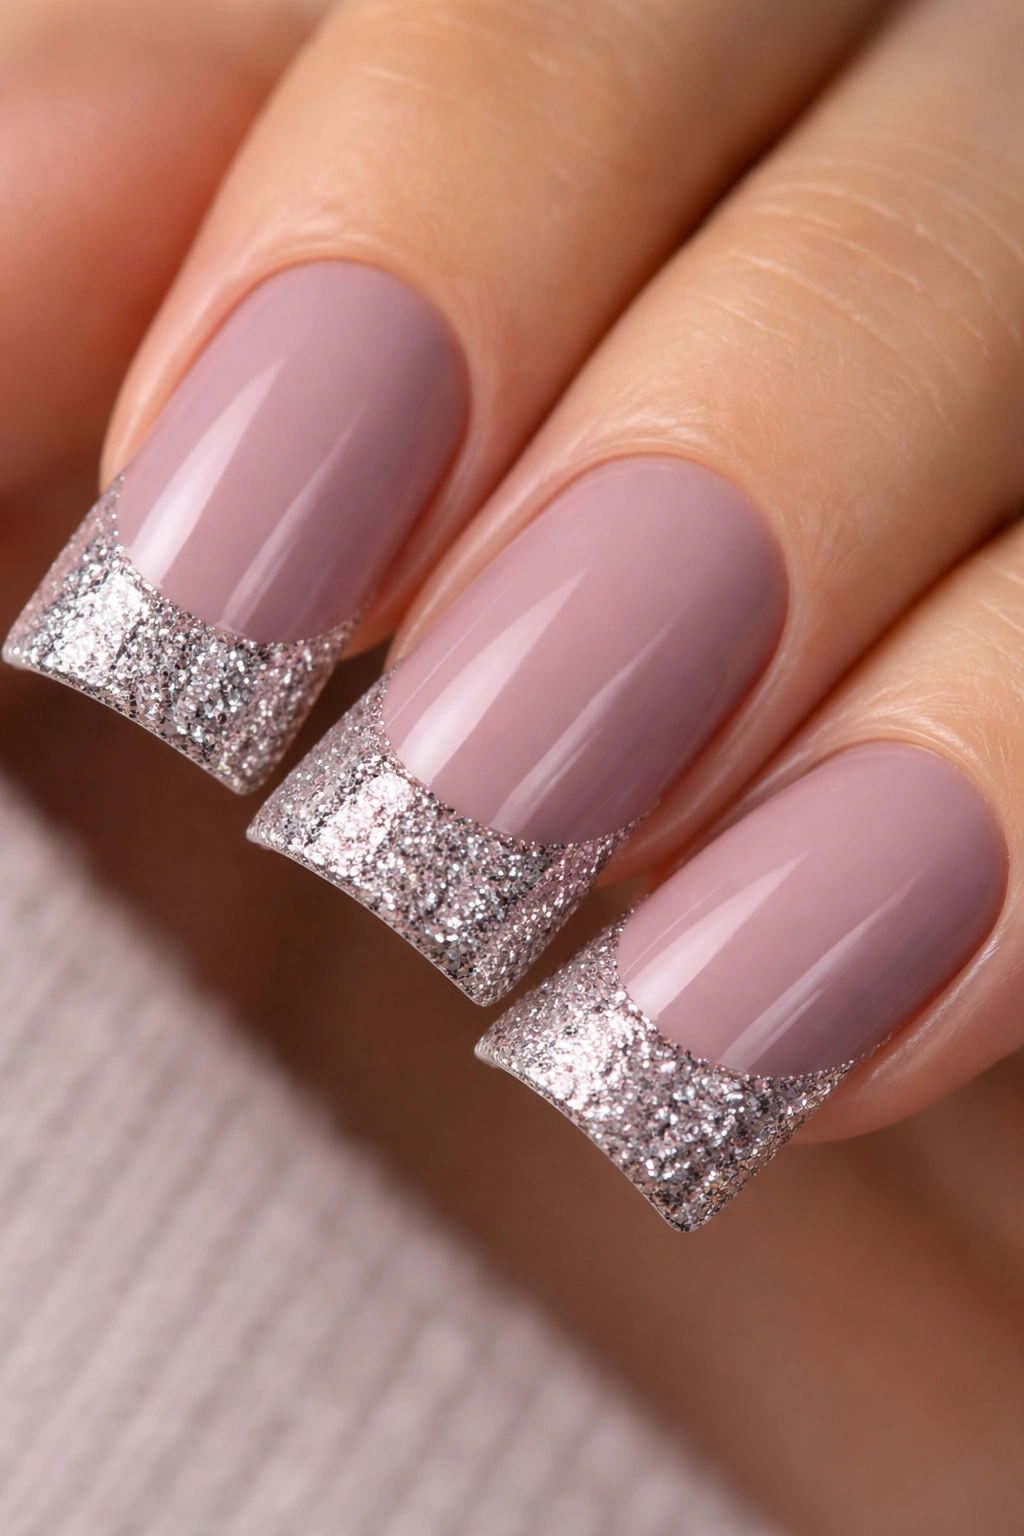
5. Blush Pink with Fine Rose Gold Glitter
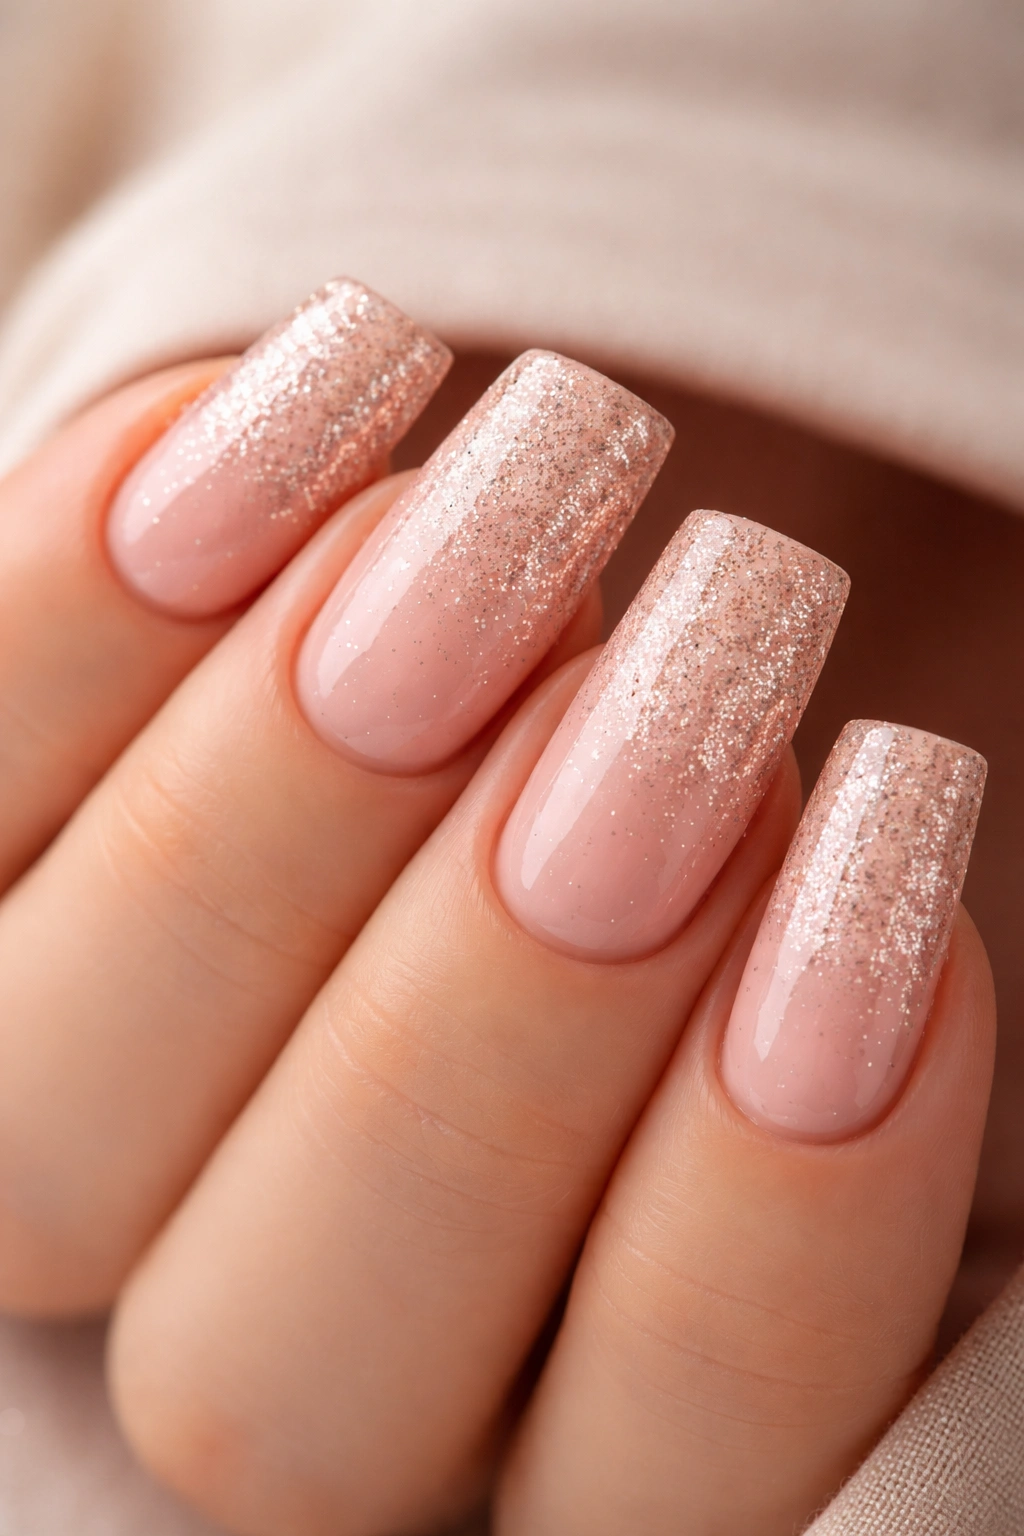
Soft blush pink combined with fine rose gold glitter creates an ultra-feminine, romantic design that feels delicate and special. The fine glitter particles catch light subtly rather than making a big statement, which is perfect if you love sparkle but prefer understated elegance.
The Appeal of Fine Glitter Layering
Fine glitter particles distribute evenly across the nail surface, creating a cohesive shimmer rather than visible sparkly bits. This technique is more sophisticated than chunky glitter and feels appropriate for formal events, weddings, or any time you want subtle glamour. The rose gold-on-blush combination feels soft and romantic without being too young or trendy.
How to Achieve It
- Paint blush pink base (two coats for even coverage)
- Apply a layer of clear base coat or gel while slightly tacky
- Sprinkle or brush fine rose gold glitter across the entire nail
- Use a soft brush to distribute evenly and eliminate clumping
- Seal with a smooth top coat
Pro tip: If you’re using loose fine glitter, apply it to the nail using a damp brush rather than sprinkling it directly—this gives you better control and less waste.
6. Emerald Green with Silver Glitter Accent
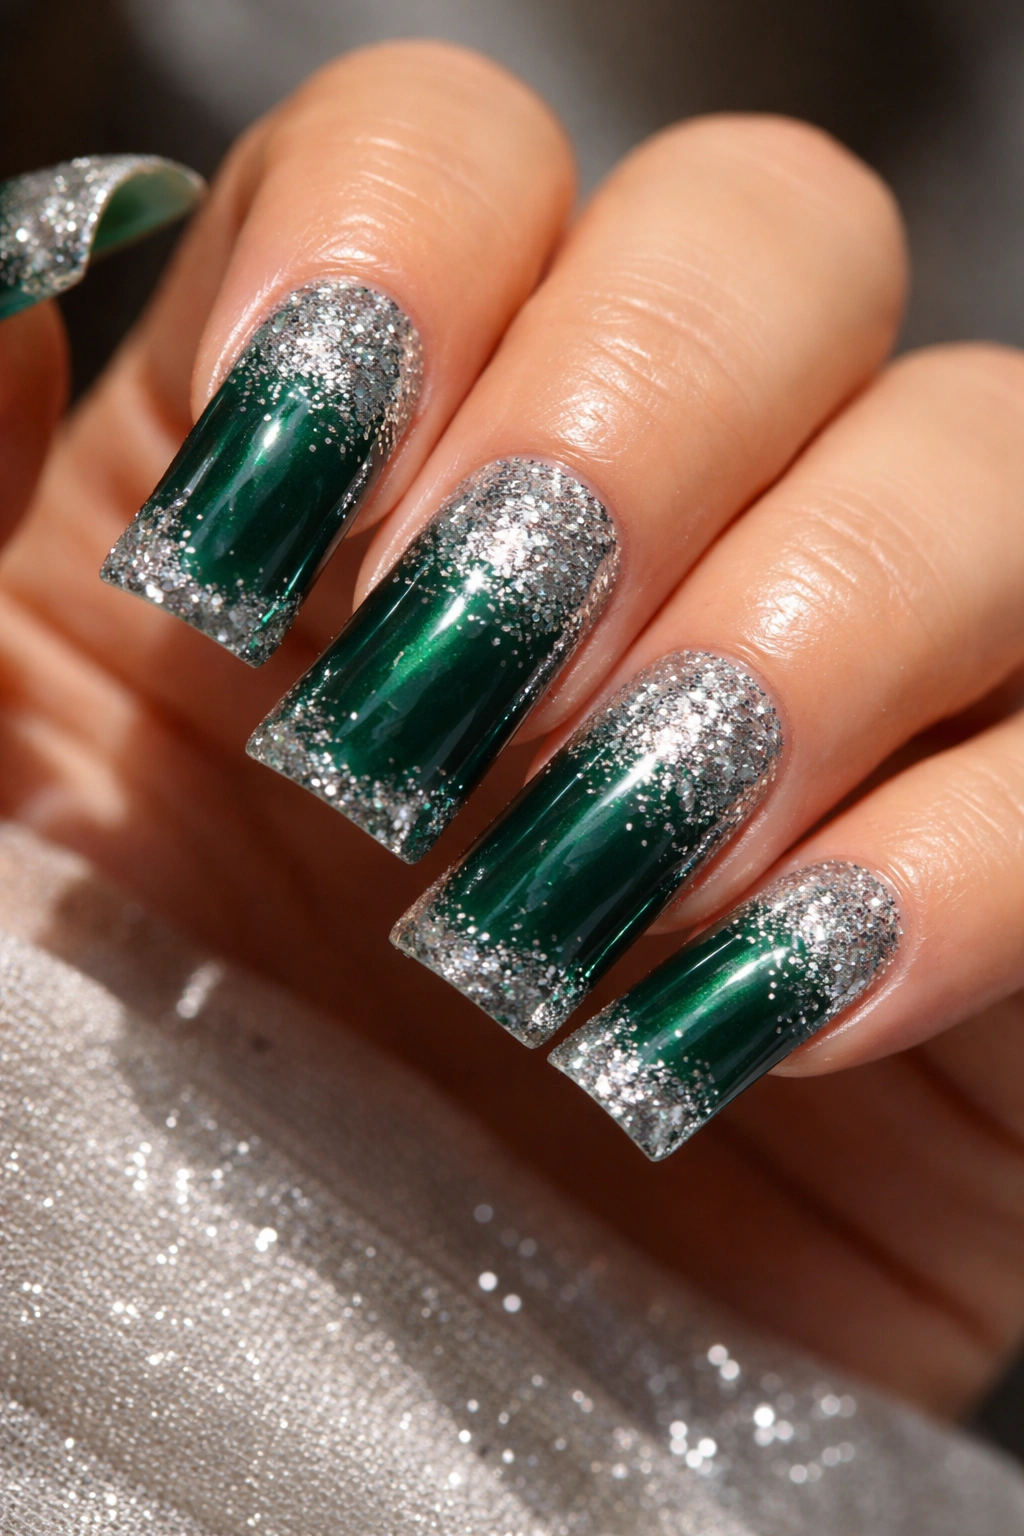
Deep emerald green serves as a rich, sophisticated base that pairs beautifully with silver glitter concentrated on just the top half or tips of the nail. This creates a gradient effect that feels polished and high-end without being overdone.
Why Emerald and Silver Is Such a Winning Combination
Emerald is a jewel tone that feels luxurious and elegant, while silver glitter provides cool-toned brightness that makes the green pop. The contrast between the deep solid color and the sparkly top creates dimension and draws the eye. This design reads as intentional and well-coordinated rather than random.
How to Achieve It
- Apply two coats of emerald green polish as your base
- Once fully dry, apply a clear top coat or gel to the upper half of the nail
- While tacky, press silver glitter onto just that portion
- You can create a sharp gradient line or let it fade naturally
- Seal everything with a final glossy top coat
What to know: This design is especially striking on longer duck nails where the gradient line has room to create real visual interest.
7. White Base with Rainbow Gradient Glitter
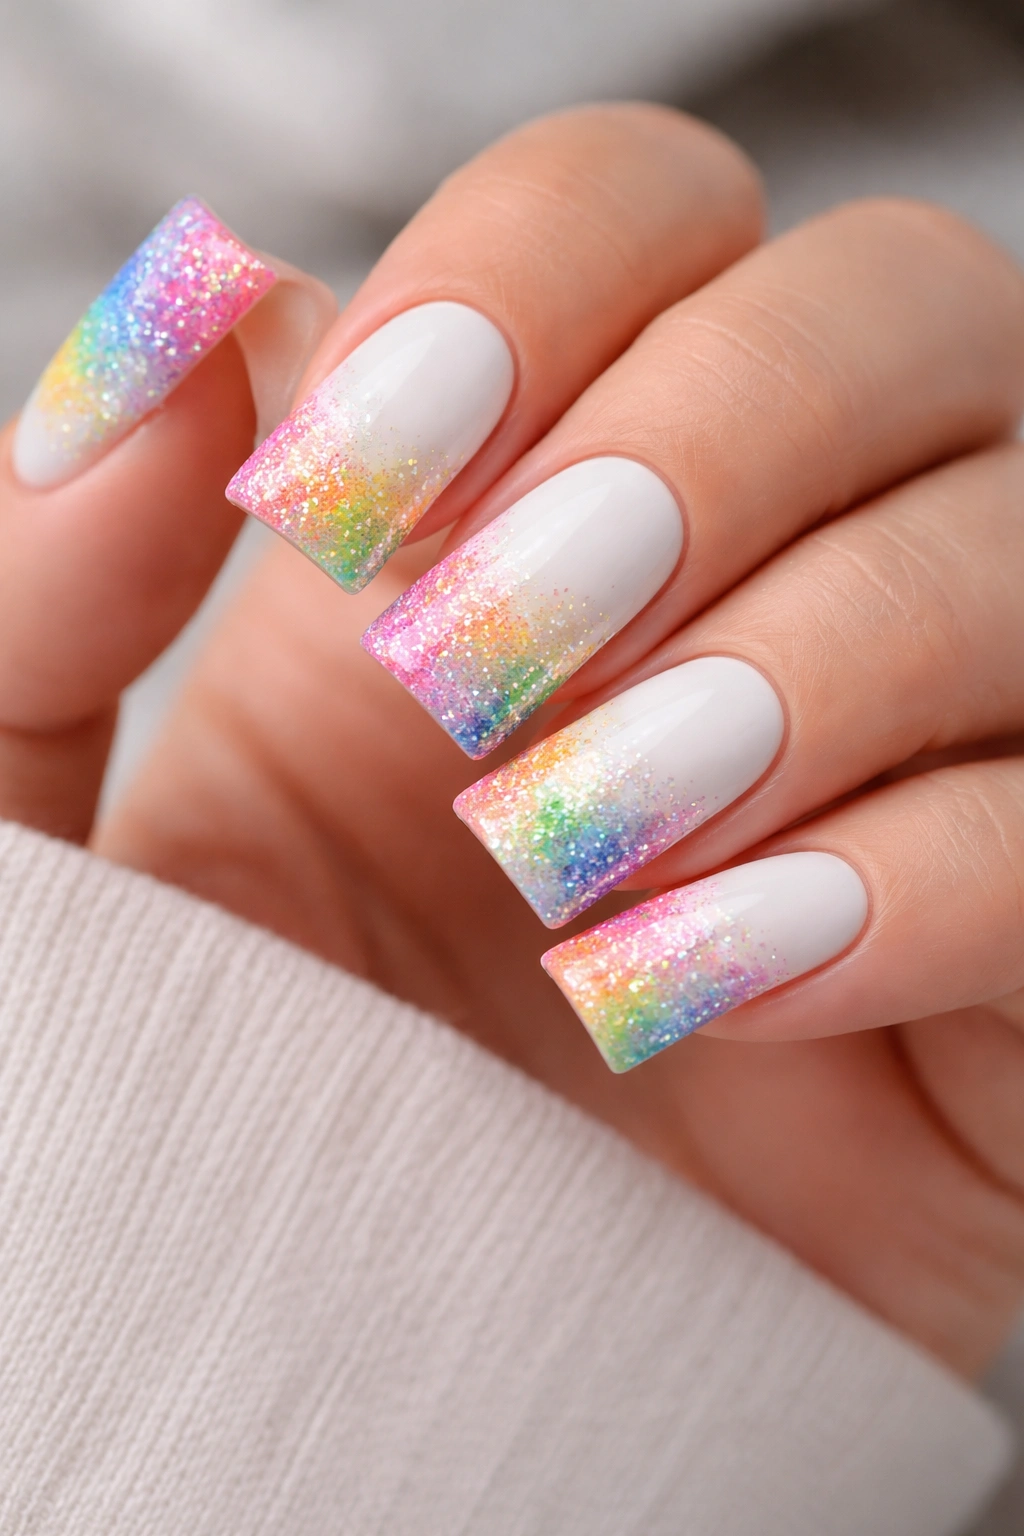
A clean white base topped with rainbow glitter that transitions from one color to the next creates a playful, joyful design that feels modern and artistic. Each nail can feature a different color gradient, or they can all follow the same progression.
Why Rainbow Glitter Feels So Joyful
Rainbow glitter naturally draws attention and makes a statement about confidence and personality. On white, the colors pop without competing against each other. This design is perfect for people who love color and don’t want to choose just one.
How to Achieve It
- Apply white polish as your base (two to three coats for brightness)
- Mix rainbow glitter shades or use a pre-mixed rainbow glitter
- Apply glitter to the tips and fade it down the nail, transitioning colors as you go
- You can blend the glitter particles themselves or keep distinct color sections
- Seal with a top coat that smooths out the texture
Quick facts:
- Use tweezers to place larger glitter pieces exactly where you want them
- Rainbow glitter comes in fine, medium, and chunky options—all work on duck nails
- This design is memorable and photo-friendly
8. Black Base with Gold and Silver Mixed Glitter
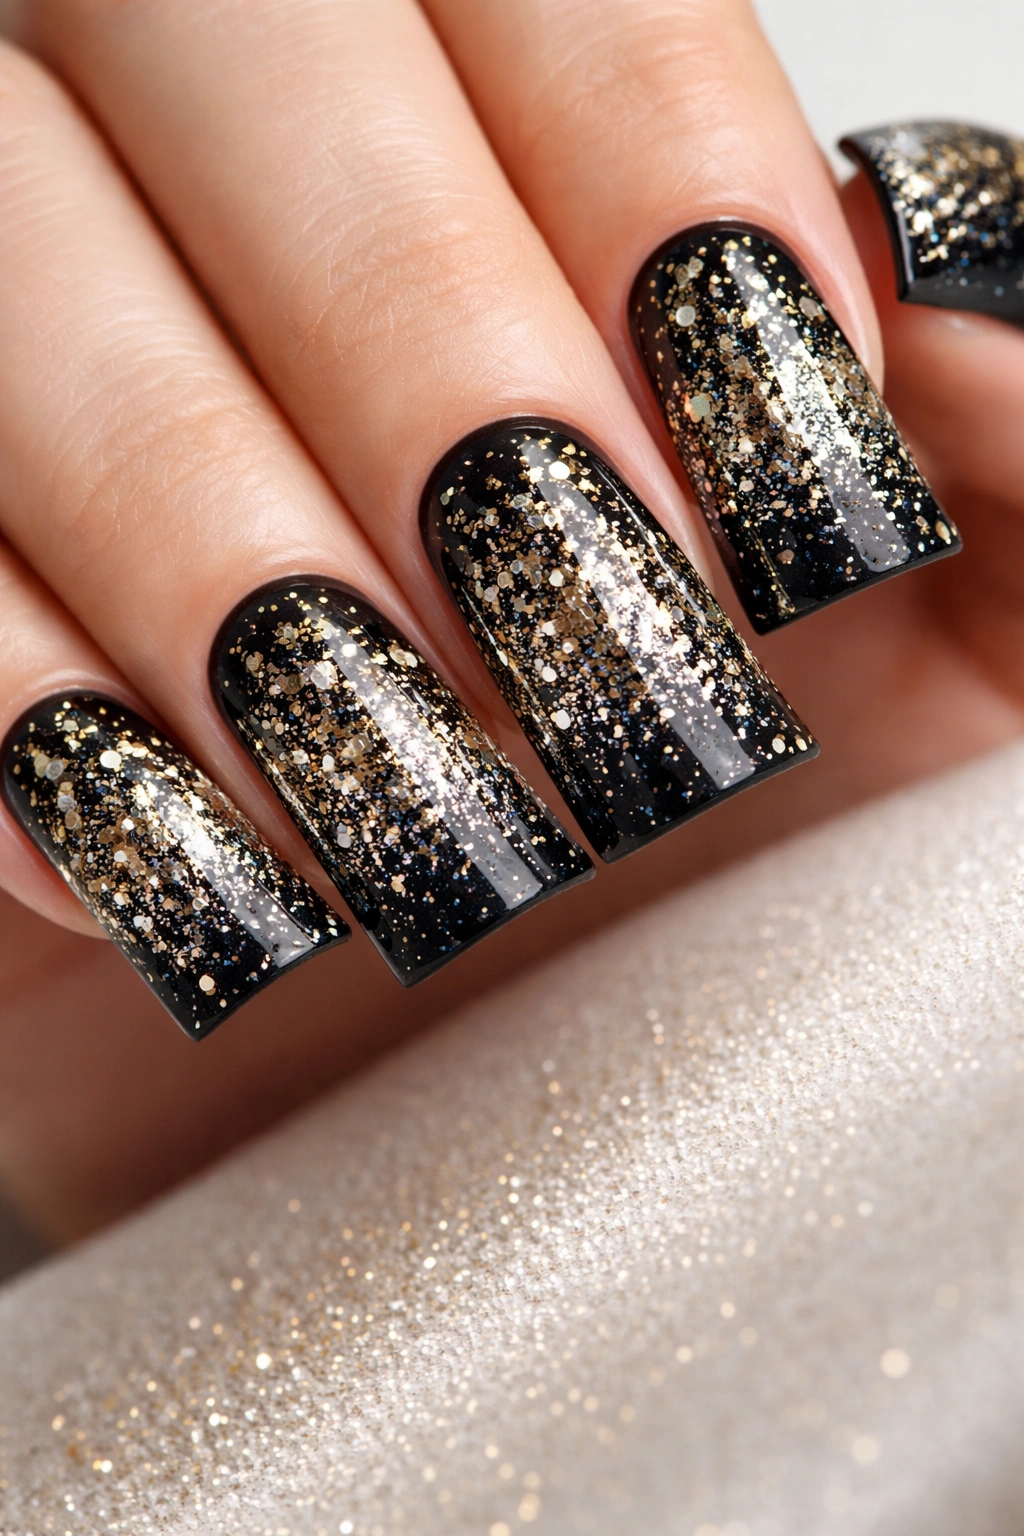
Sleek black polish topped with a mix of gold and silver glitter creates drama and elegance in equal measure. The contrast between the dark base and the metallic sparkle feels high-fashion and works beautifully for both casual and formal occasions.
The Power of Metallic Glitter on Black
Black is the ultimate neutral that makes any glitter shade sing. Using both gold and silver glitter together creates visual complexity—the warm and cool tones play off each other, catching light differently depending on the angle. This design reads as intentional and sophisticated rather than random.
How to Achieve It
- Paint nails with two to three coats of black polish
- Apply a layer of clear base while the final coat is still slightly wet
- Mix gold and silver glitter together and apply generously
- Press glitter firmly into the tacky base for secure adhesion
- Seal with a thick top coat
Worth knowing: Full glitter coverage on black is more forgiving of application mistakes because the glitter hides any thin spots in the base color.
9. Champagne Base with Champagne Glitter Ombre
Using the same color family in both base and glitter—champagne on champagne—creates a sophisticated ombre effect that feels elegant and cohesive. The different finishes (matte base, sparkly glitter) create dimension without introducing a contrasting color.
Why Monochromatic Glitter Works
Staying within one color family feels intentional and upscale. The glitter catches light while the base provides depth, creating a luxurious effect that reads as refined. This design is perfect for formal events, weddings, or anyone who prefers subtle sophistication over bold contrast.
How to Achieve It
- Apply champagne-toned base polish (two coats)
- Once dry, apply a clear top coat or base gel layer
- Apply champagne glitter while the top coat is tacky, concentrating more on the tips and fading toward the cuticle
- Seal with a final top coat
Pro tip: Use a combination of champagne glitter in different sizes for added depth and visual interest—mix fine and medium glitter together.
10. Navy Blue with Iridescent Holographic Glitter
Navy blue is deeper and more sophisticated than bright blue, and it serves as a stunning backdrop for iridescent holographic glitter that shifts between purples, teals, and silvers. This design feels both elegant and eye-catching.
The Magic of Iridescent Glitter
Iridescent particles change color depending on the light and angle, creating a magical effect that never looks the same twice. Against navy, these color shifts become the focal point. The combination feels modern, artistic, and undeniably special.
How to Achieve It
- Paint nails with navy blue base (two coats minimum for depth)
- Apply a clear top coat or gel layer while the final base coat is still tacky
- Press iridescent holographic glitter into the wet top coat
- Work in sections if needed to ensure even distribution
- Seal with a smooth, thick top coat
What to watch for: Iridescent glitter can sometimes feel slightly gritty under the top coat—use a very smooth, high-quality top coat and let it cure fully to ensure a polished finish.
11. Dusty Rose with Rose Gold Holographic Glitter
Dusty rose is a muted, sophisticated pink that pairs beautifully with rose gold holographic glitter for a romantic, feminine design. The muted tone of the base keeps the overall look wearable while the holographic glitter adds glamour.
Why This Color Pairing Feels So Romantic
Dusty rose has an inherently soft, romantic quality that works for both everyday and special occasions. When topped with rose gold holographic glitter that shifts slightly in different lights, it feels luxurious without being overwhelming. This combination flatters most skin tones and works with nearly any outfit.
How to Achieve It
- Apply dusty rose base in two coats
- Once dry, apply a sticky base layer (clear gel or tacky top coat)
- Apply rose gold holographic glitter while tacky, using medium density so the base color shows through slightly
- Seal with a top coat that creates a smooth, glass-like finish
Quick facts:
- This design benefits from layering—apply base coat, then a thin layer of glitter, then top coat, then another thin glitter layer
- The layering creates depth and dimension that reads as more expensive
- Works beautifully with both long and medium-length duck nails
12. Burgundy Base with Glitter Gradient Fade
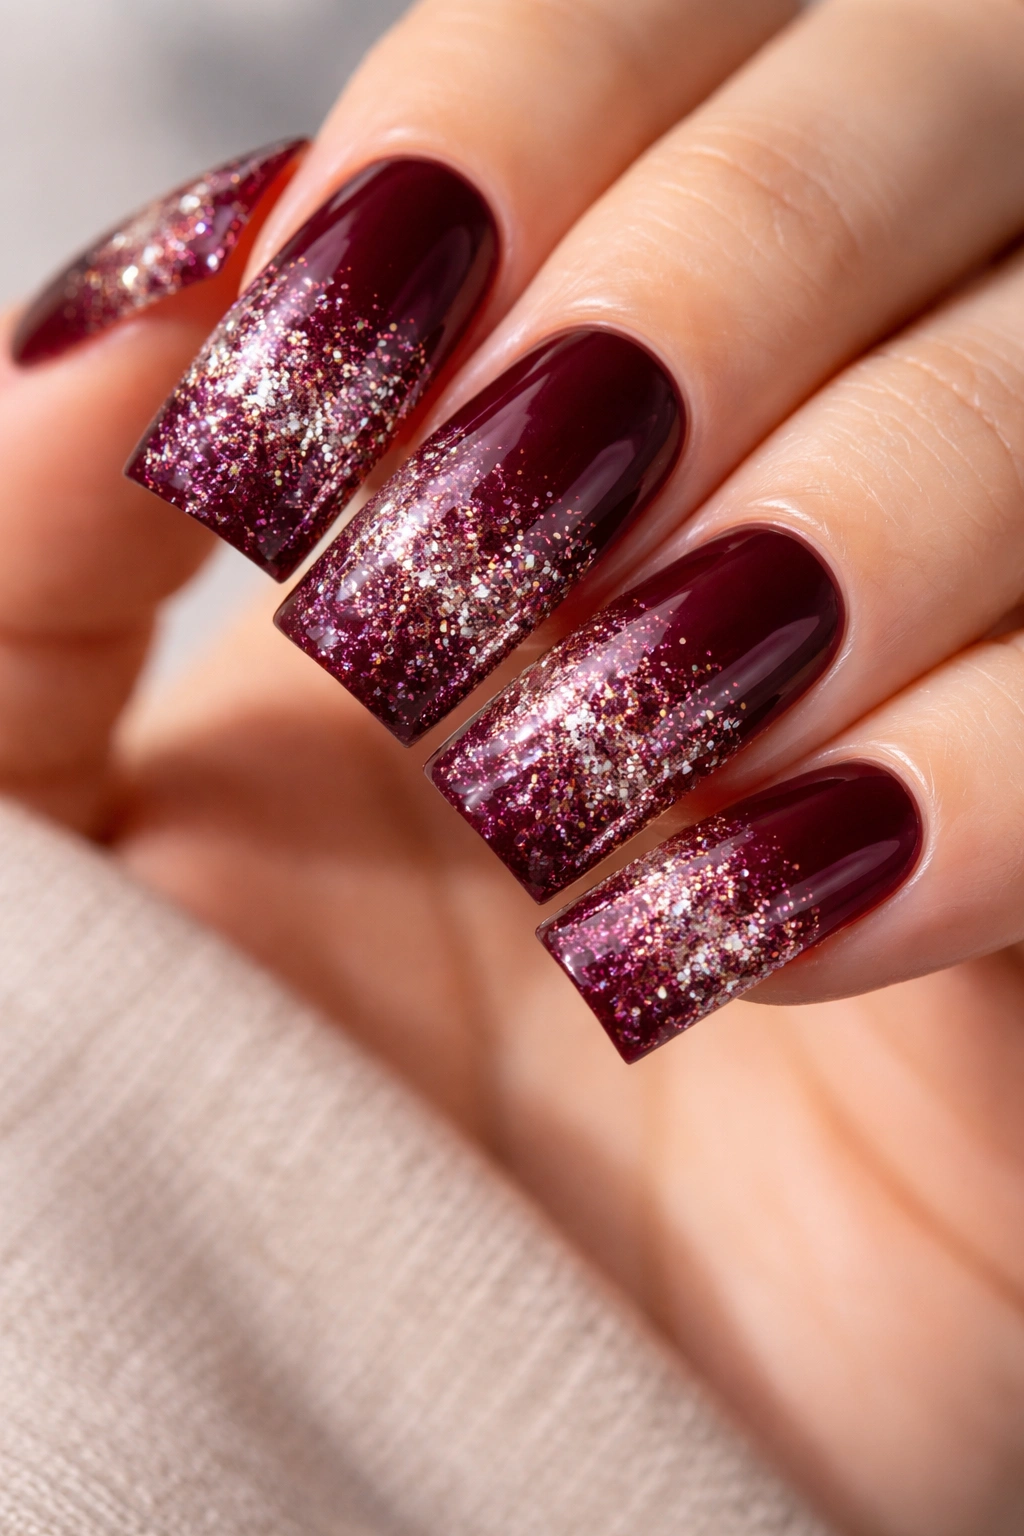
Deep burgundy provides a rich, luxurious base, and when you layer glitter more densely at the tips and fade it lighter toward the cuticle, you create a stunning gradient effect. This design is elegant, wearable, and creates visible dimension.
Why Gradient Effects Feel So Polished
A gradient moves the eye from the lighter cuticle area to the glittery tips, creating a directional flow that makes fingers look longer and more elegant. The technique requires slightly more skill than full coverage, but the payoff is a truly professional-looking manicure.
How to Achieve It
- Paint burgundy base (two to three coats for full opacity)
- Once dry, apply a clear top coat layer
- Starting at the tips, press glitter firmly into the wet top coat
- Continue working toward the cuticle, using less glitter and spreading it thinner as you go
- Blend the transition with a soft brush before it dries completely
- Seal with a final top coat
Pro tip: Use a makeup sponge to gently tap glitter into the nail for better control of density and placement.
13. Nude with Chunky Mixed-Metal Glitter
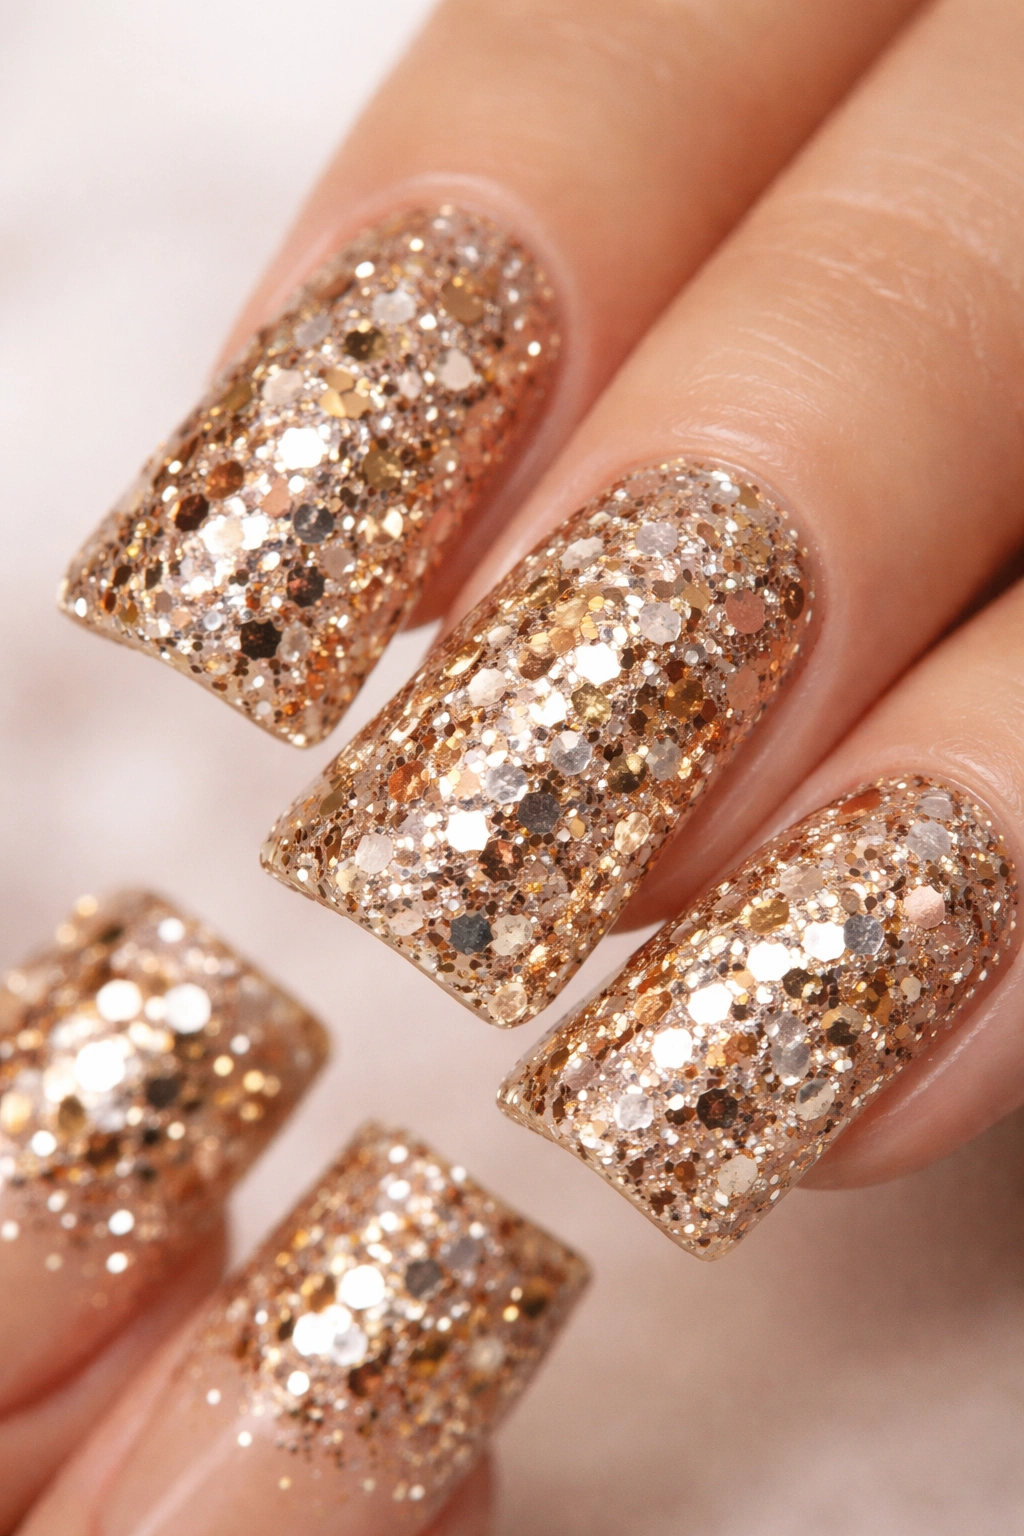
Chunky glitter in mixed metals (gold, silver, rose gold, and copper all together) applied to a nude base creates a texture-rich, visually interesting design that feels fun and celebratory. The variety of glitter sizes and metallic tones adds complexity and depth.
Why Chunky Glitter Shines on Duck Nails
The wider duck nail tip gives chunky glitter plenty of space to showcase its size and sparkle without looking crowded. Each glitter particle becomes its own focal point. The mixed metals mean the glitter works with any metal jewelry or accessory you pair it with.
How to Achieve It
- Apply nude base in two coats
- Apply a tacky clear layer (gel or thick top coat)
- Apply chunky mixed-metal glitter generously across the entire nail
- Press each piece firmly so it adheres securely
- Seal with a thick top coat that may feel slightly textured
What to know: Chunky glitter manicures will have a textured finish unless you apply an extremely thick, smoothing top coat. Many people love this texture as part of the appeal.
14. Teal Base with Silver Fine Glitter Ombre
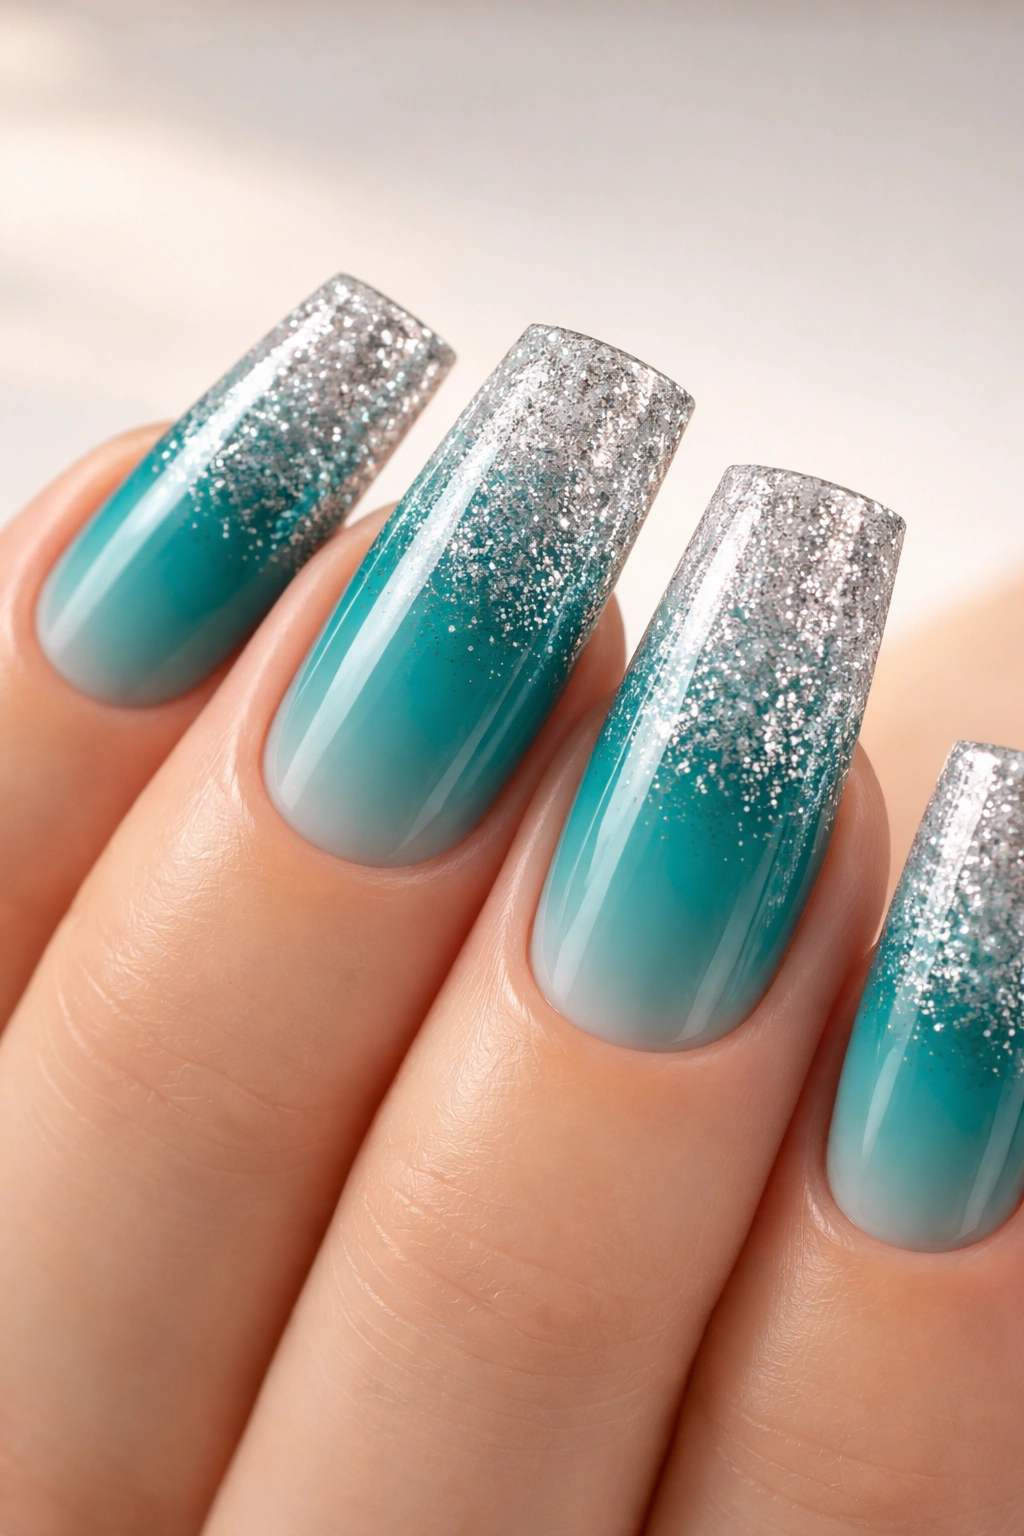
Teal sits between blue and green on the color spectrum and pairs beautifully with silver fine glitter for an oceanic, refreshing look. By concentrating the glitter more densely on the tips and fading it down the nail, you create an ombre that feels natural and cohesive.
Why Teal Feels So Fresh and Modern
Teal is a color that works for multiple seasons and pairs well with nearly any outfit. It’s bold enough to feel intentional without being overwhelming. When paired with silver glitter, it feels cool-toned, modern, and slightly artistic.
How to Achieve It
- Paint teal base in two coats
- Apply a clear top coat layer
- Concentrate fine silver glitter on the tips, pressing it in firmly
- Fade the glitter down the nail, using a damp brush to blend the transition
- Create an ombre effect where glitter density decreases toward the cuticle
- Seal with a smooth final top coat
Quick facts:
- Fine glitter on teal creates a sophisticated shimmer rather than obvious sparkle
- This design works beautifully for professional settings paired with work clothes
- The ombre effect makes duck nails look even longer
15. Mauve with Glitter Tips in Contrasting Shade
Soft mauve base topped with glitter in a contrasting metallic shade (like silver or rose gold) applied only to the very tips creates a clean, modern design with sharp definition. The contrast between the matte base and sparkly tips feels intentional and polished.
Why Tip-Only Glitter Creates Impact
Concentrating glitter on just the tips draws attention to the nail’s shape and length. This placement is also practical—the glitter stays where you want it and wears more evenly since it’s less likely to be rubbed away on frequently-touched areas. The contrast between solid and sparkly creates visual interest.
How to Achieve It
- Apply mauve base in two coats
- Allow to dry completely
- Create a clear line where the glitter will begin (approximately the top third of the nail)
- Apply a sticky layer of clear gel or thick top coat only to the tip area
- Press metallic glitter onto that area while still tacky
- Wipe away any glitter that migrated beyond your intended line
- Seal with a final top coat
Pro tip: Use painter’s tape placed slightly below where you want the glitter to start—this creates a clean line and prevents glitter from straying below it.
16. Deep Purple with Multi-Color Holographic Glitter
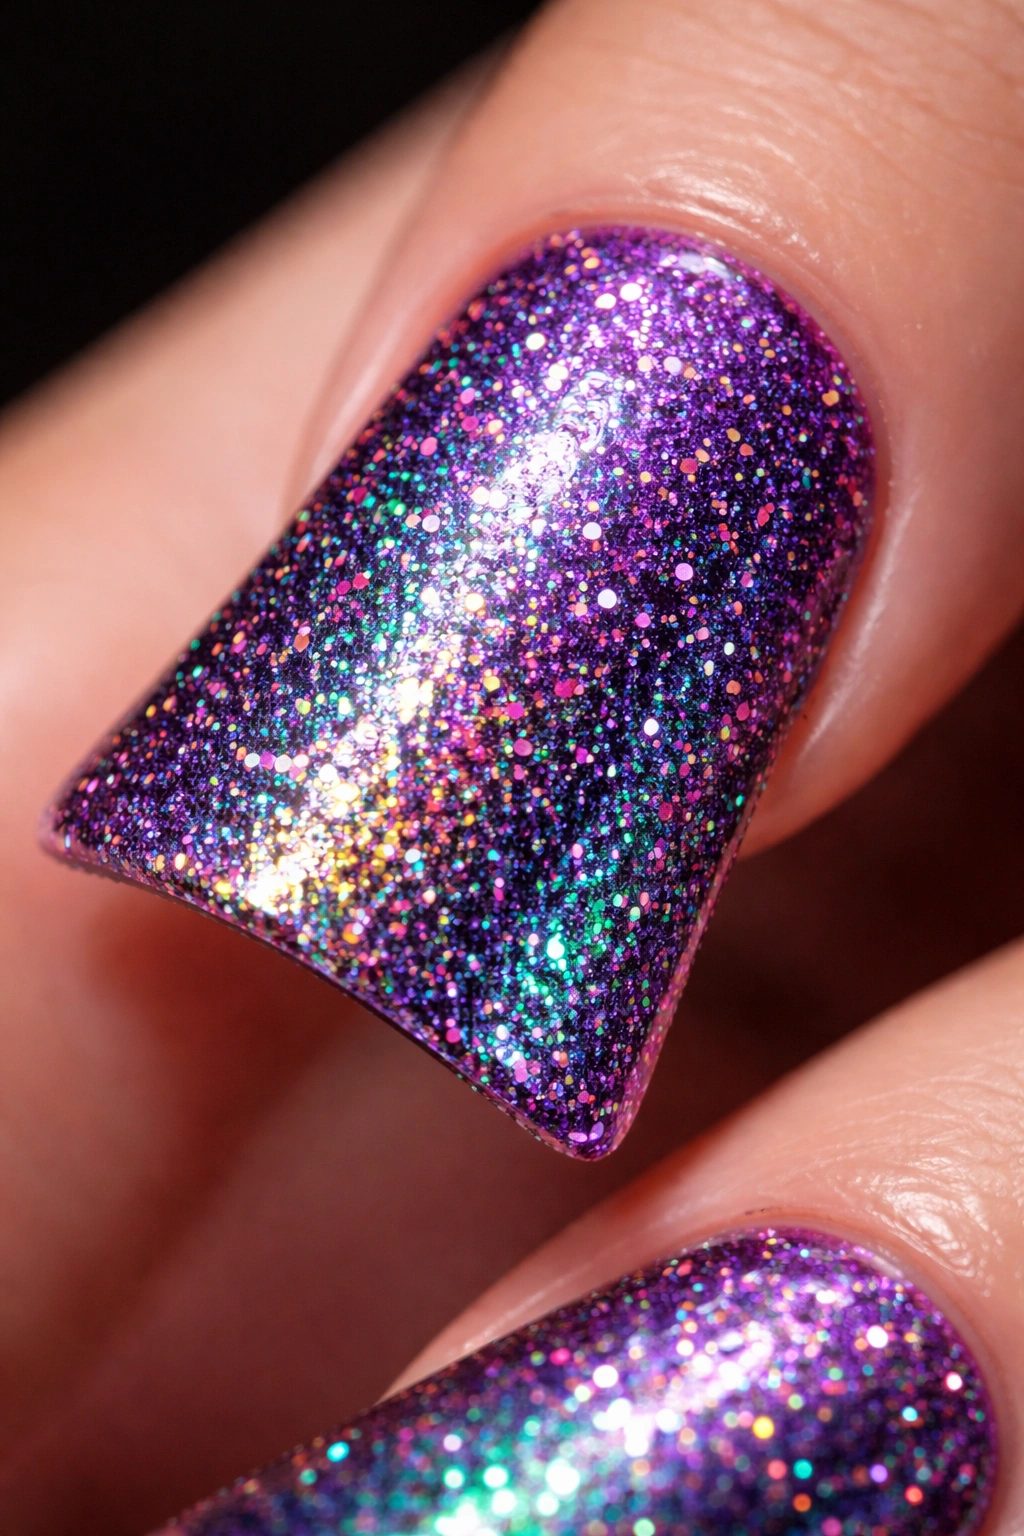
Deep royal or plum purple serves as a jewel-toned base that makes multi-color holographic glitter absolutely dazzle. The glitter shifts through rainbow hues—purple, blue, green, pink—depending on light and angle, creating an almost magical effect.
Why Purple Is the Perfect Backdrop for Holographic Glitter
Purple naturally contains multiple color undertones, so holographic glitter that shifts through rainbow hues feels cohesive rather than random when applied over it. The depth of the base color makes the glitter’s color shifts even more dramatic and noticeable.
How to Achieve It
- Paint deep purple base in two to three coats for rich color depth
- Apply a clear top coat or gel layer while the final base is still slightly tacky
- Apply multi-color holographic glitter generously, pressing each particle firmly
- Work in sections if needed to ensure full, even coverage
- Seal with a thick, smooth top coat
What to watch for: Holographic glitter looks different depending on the light source—it may appear more purple or blue under certain lighting, more green or pink under others. This shifting is the whole appeal, so embrace it.
Final Thoughts

Glitter duck nails are a versatile way to add sparkle and personality to a classic nail shape. Whether you choose subtle fine glitter over a nude base or bold rainbow holographic over deep jewel tones, the key is matching the glitter style and density to your personal preference and the occasion.
The duck nail shape is particularly forgiving with glitter because the wider tip provides plenty of space to showcase different glitter sizes, shapes, and application techniques. You can create anything from barely-there shimmer that whispers elegance to full-coverage sparkle that commands attention.
When applying glitter at home, remember that the tackiness of your base layer matters—glitter adheres best to slightly wet polish or gel, and pressing each particle firmly ensures longevity. If you’re working with a nail technician, showing them the exact design and glitter density you want ensures you get the manicure you’re envisioning.
Your duck nails deserve to sparkle in a way that feels authentically you, whether that’s just a hint of shimmer or full-on glamour.
