

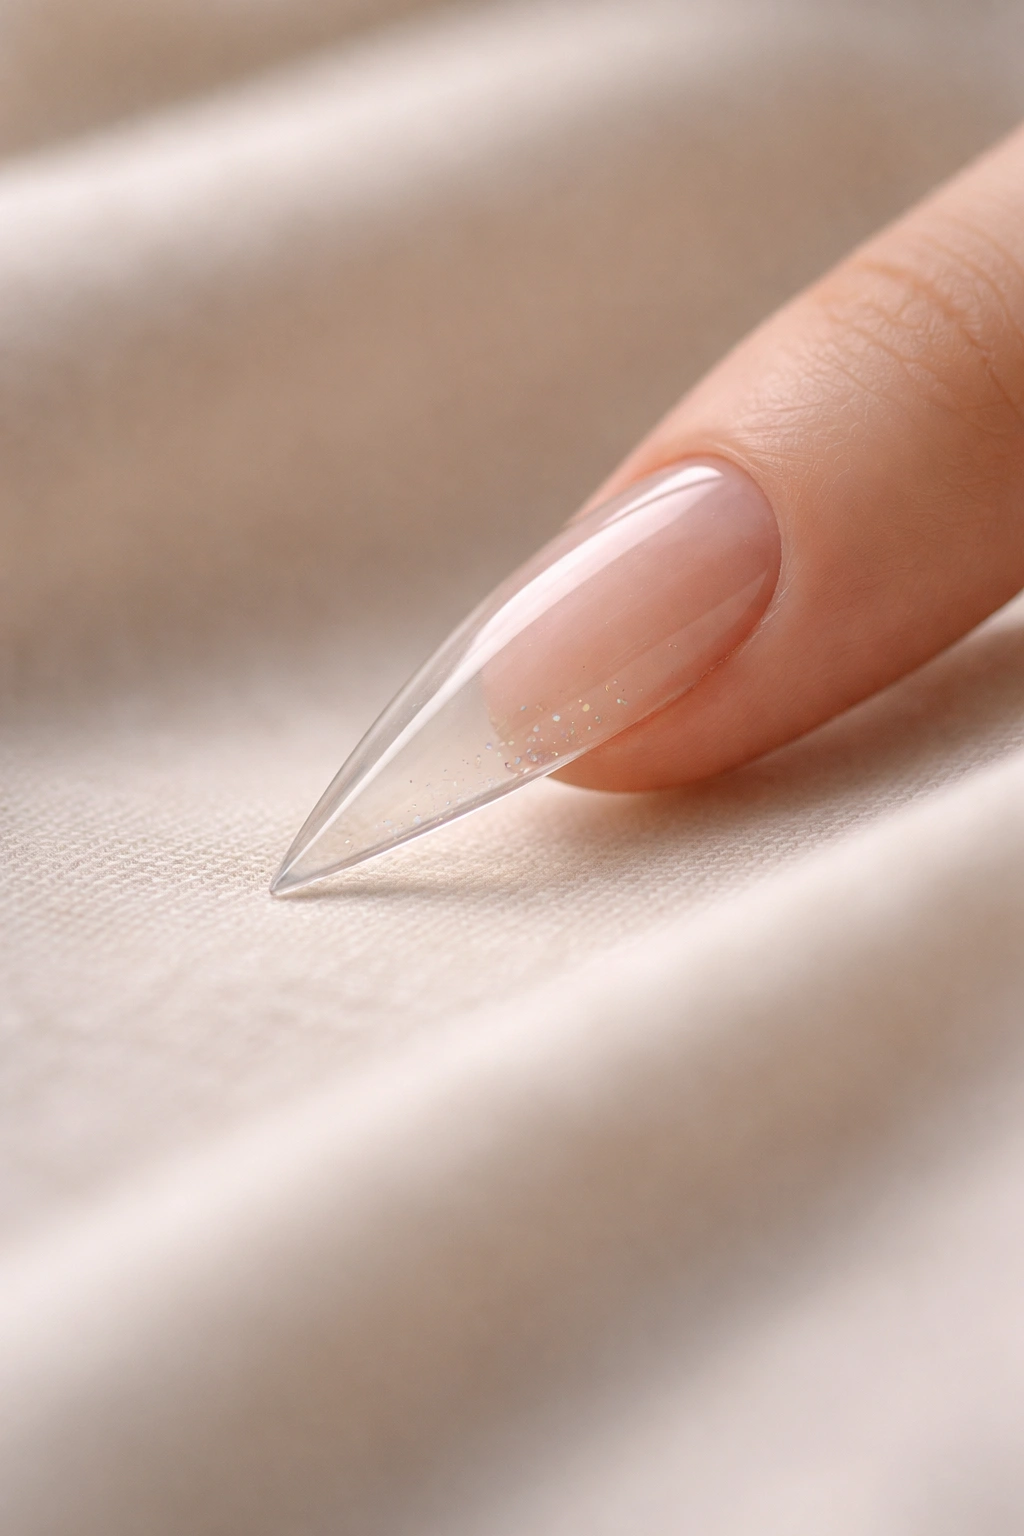
Clear stiletto nails offer the perfect canvas for creative, sophisticated nail art. Unlike opaque colors that dominate the nail, clear bases showcase intricate designs, minimalist details, and dimensional accents that would disappear against darker polish. They’re elegant, versatile, and surprisingly flattering on every skin tone—the transparent base elongates your fingers and adds an understated luxury that feels effortlessly polished. Whether you prefer bold statement designs or whisper-soft minimalism, clear stiletto nails work for nearly every occasion, from professional settings to weekend celebrations. The beauty of working with a clear base is that you can layer finishes, textures, and decorative elements without the design feeling heavy or overdone.
1. Nude Gradient Tips
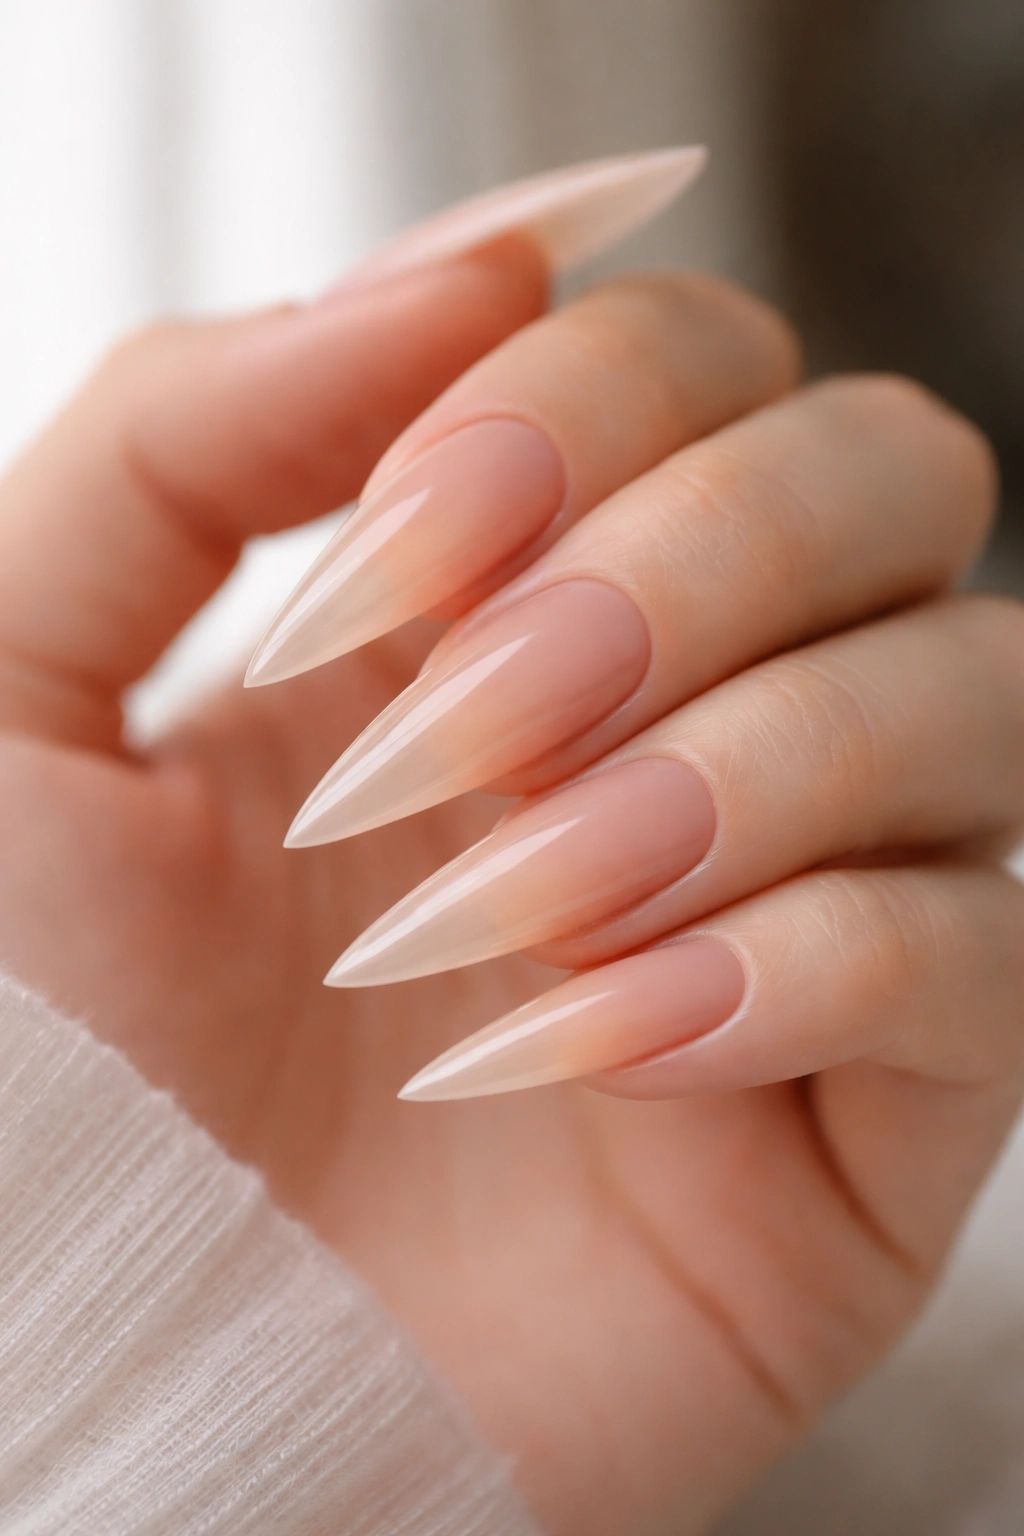
Nude gradient tips create a soft, sophisticated look that feels both modern and timeless. This design uses a sheer or skin-toned polish to create a subtle ombré effect across the stiletto point, transitioning from nearly clear at the base to a warm beige or peachy tone at the tip. The result is deceptively simple but requires precision to execute smoothly.
Why This Design Works So Well
The nude gradient is universally flattering because it mimics the natural shadow of a longer nail, creating an illusion of extra length and elegance. It’s sophisticated enough for formal events yet subtle enough for everyday wear. The gradation draws the eye toward the nail tip, emphasizing the dramatic stiletto shape without overwhelming it. This design also bridges the gap between natural and decorated nails, making it perfect for people who want nail art that still feels professional and understated.
How to Build the Perfect Gradient
Start with a clear base coat applied to your entire nail. Using a makeup sponge or a gradation tool, dab a nude or peachy-beige polish onto the sponge and bounce it gently across the tip third of each nail, working it upward with light dabbing motions. The key is layering light coats rather than applying heavy pigment all at once—this prevents the sponge from picking up the base and disrupting your gradient. Once you’ve achieved the depth you want, seal with a glossy top coat.
Pro tip: Warm undertones (peachy, sandy, or caramel shades) work best on deeper skin tones, while cooler nudes (pale pink, ash beige) suit fair complexions. You can also use a translucent powder mixed with your nude polish to create a buildable, customizable gradient that’s easier to control than liquid polish alone.
2. Gold Leaf Accents
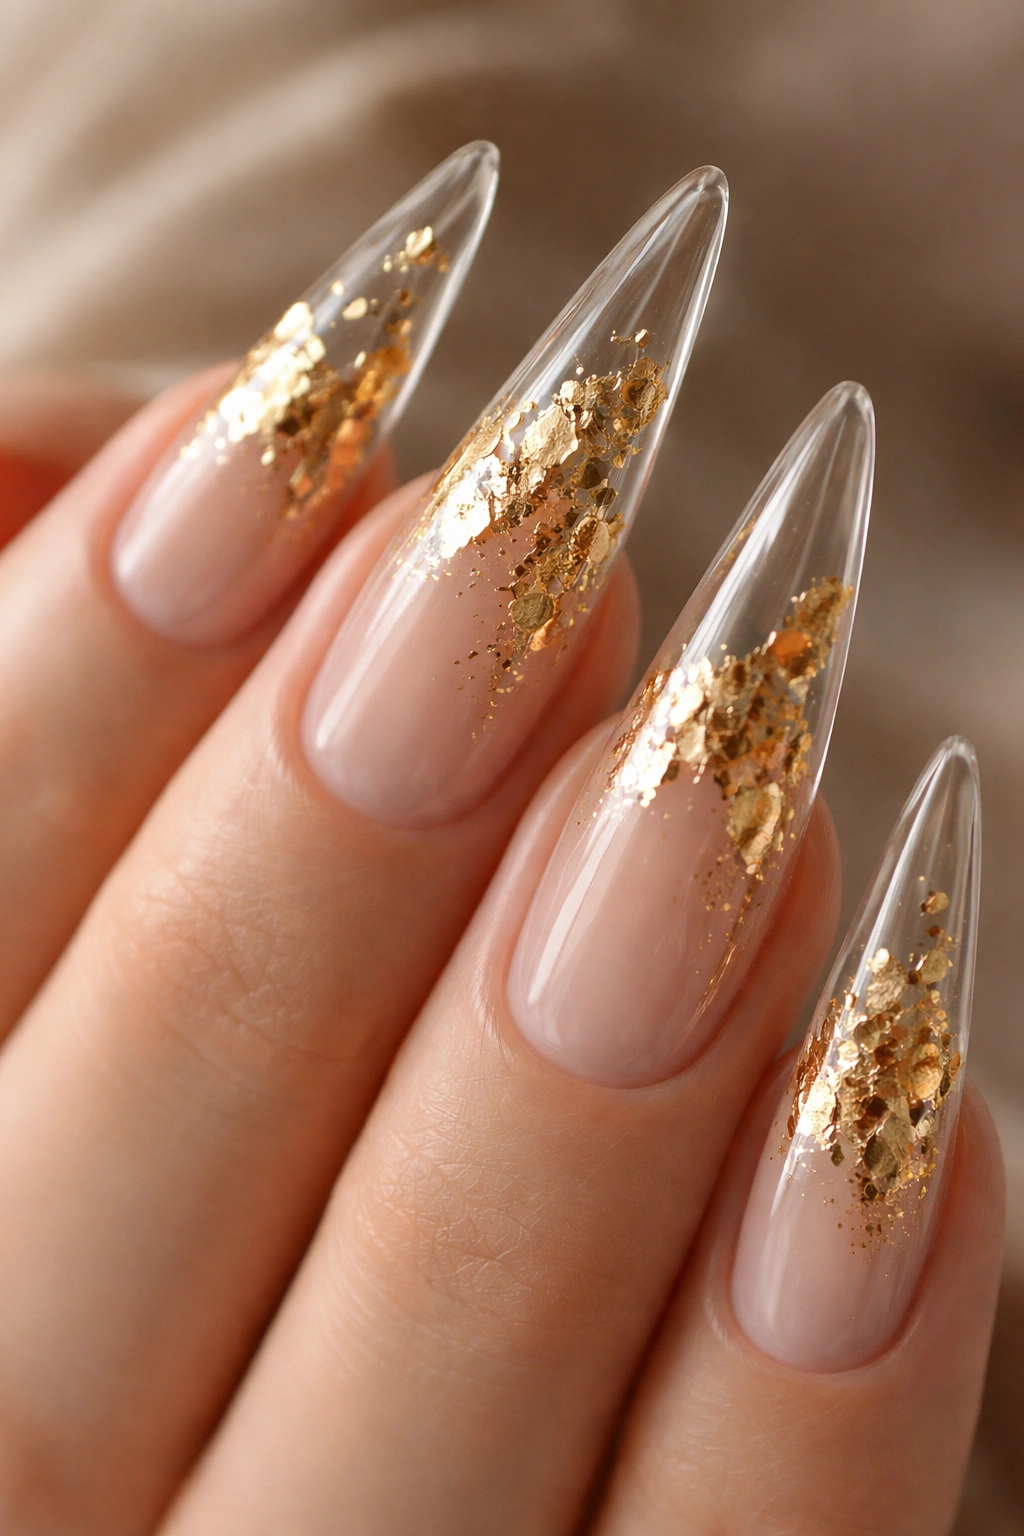
Gold leaf elevates clear stiletto nails instantly, adding a luxe, gallery-worthy dimension that catches light beautifully. Thin sheets of real gold leaf applied strategically—either as a scattered pattern, a geometric frame, or flowing strokes—create depth and visual interest against the transparent base. The metallic finish reflects light differently depending on your angle, keeping the design dynamic and engaging.
Why Gold Leaf Makes Such an Impact
Gold leaf is three-dimensional in a way that painted details can’t achieve. It sits on top of the nail surface, creating shadow and depth that photographs gorgeously and catches the eye in person. The organic, slightly irregular edges of gold leaf feel artistic and intentional, never cookie-cutter. Gold also plays well with clear nails because the transparency lets light pass through, making the metallic accent glow rather than sit flat on the surface.
Applying Gold Leaf Correctly
After your clear base dries completely, apply a thin layer of glue (either specialized leaf adhesive or a tiny amount of top coat) where you want the gold to go. Tear small pieces of gold leaf—they don’t need to be perfect; irregular shapes look more organic. Using a small brush or tweezers, press the leaf onto the adhesive, then seal the entire nail with a protective top coat. The sealing step is critical because unsealed gold leaf flakes off within hours.
Design Ideas With Gold Leaf
- Scattered confetti pieces across the upper third and along the edges
- A complete outline frame around the perimeter of the nail
- Diagonal sweeping strokes from corner to corner
- Clustered accent on one accent nail per hand, with the other nails left plain clear
Worth knowing: You can find gold leaf at art supply stores, online retailers, and some beauty supply shops. Real gold leaf is more durable and luminous than imitation leaf, though imitation works in a pinch and costs less.
3. Crystal Embellishments
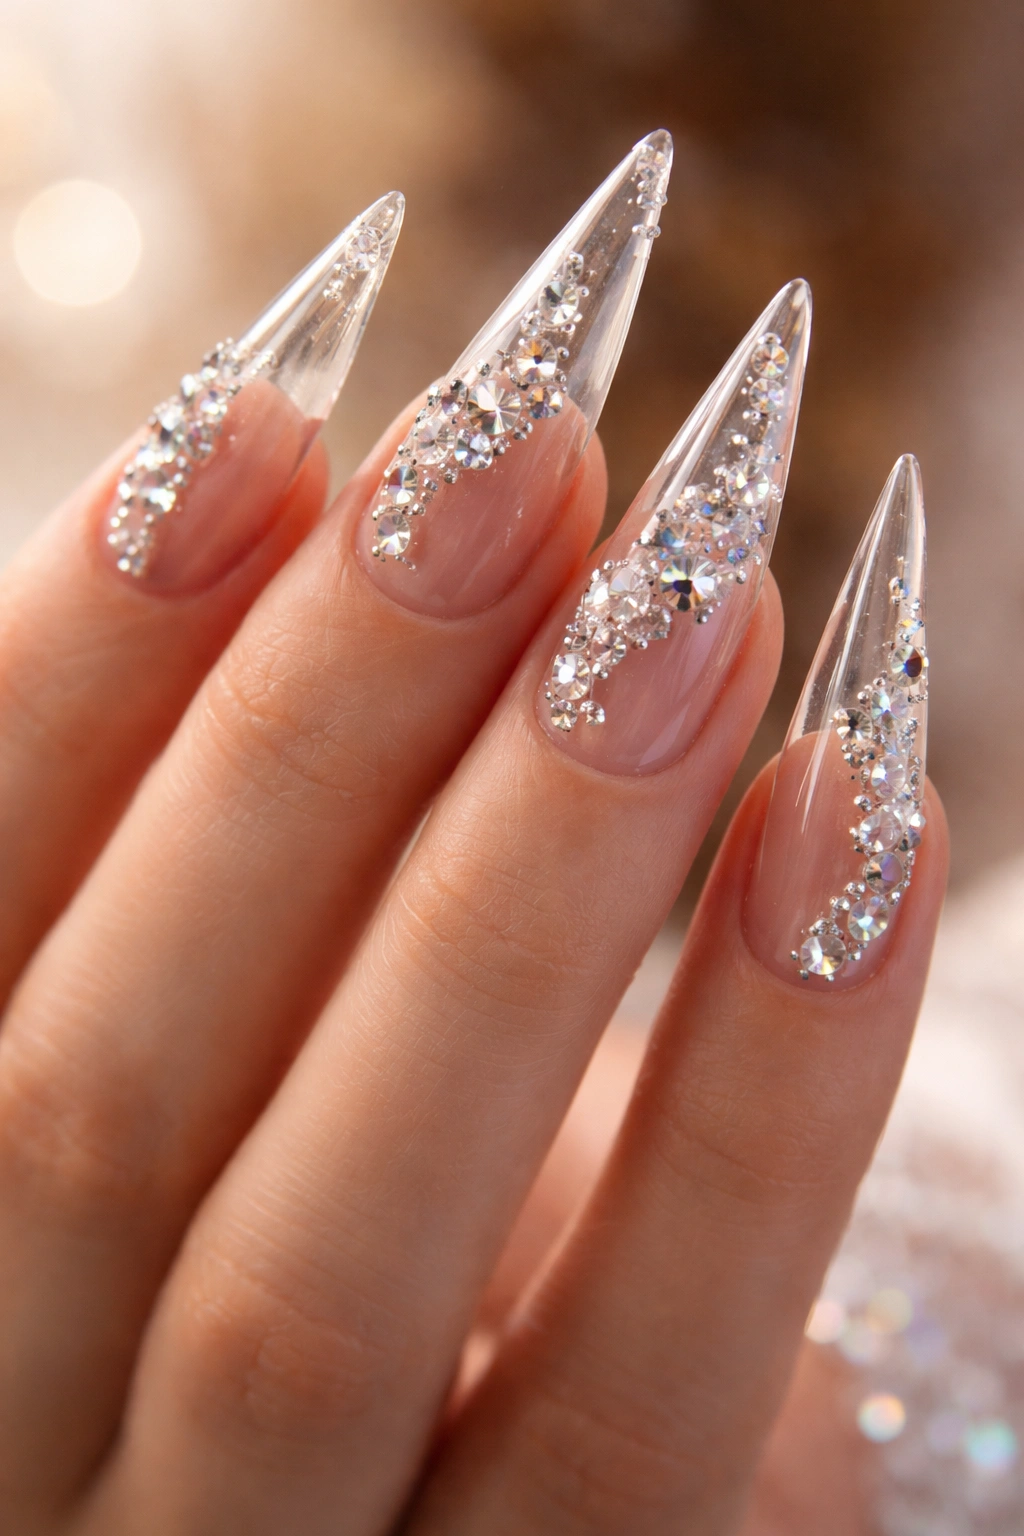
Crystals and rhinestones transform clear stiletto nails into jewelry for your fingers. Swarovski crystals, natural gemstones, or affordable flat-backed rhinestones can be applied in infinite patterns—graduated size arrangements, geometric clusters, scattered constellations, or deliberate focal-point designs. The way light refracts through clear polish and bounces off crystal facets creates a mesmerizing, high-impact look.
The Visual Impact of Crystals
Crystals immediately elevate the perceived value and artistry of a nail design. Even a simple placement of three or four premium-quality stones feels intentional and costly. Clear nails amplify this effect because the transparent base doesn’t compete with the sparkle—instead, it frames it and allows light to pass through both the nail and the stone, creating a doubled brilliance. This makes clear stiletto nails with crystals perfect for special occasions where you want maximum glamour.
Application Methods and Best Practices
The most secure method uses a semi-cured gel base and UV curing. Apply your clear gel, cure it partially (until slightly tacky), then use a pick tool to place each crystal onto the tacky surface. Once all crystals are positioned, cure the nail fully with your UV lamp. The gel surrounding the stones cures and locks them in place. For a more temporary option, use nail glue specifically formulated for crystal application—apply a tiny dot to the back of each stone and press firmly onto the clear polish for 10 seconds. Always seal with a protective top coat.
Strategic Crystal Placement Ideas
- Graduated gradient: Large stone at the tip, progressively smaller stones working toward the base
- Accent nail spotlight: One nail heavily crystallized, others left plain or with just 1-2 stones
- Geometric cluster: Stones arranged in a triangle, rectangle, or abstract shape on one area of the nail
- Scattered constellation: Tiny stones sprinkled across the entire nail surface in an asymmetrical pattern
Pro tip: Swarovski crystals cost more but last significantly longer and maintain their brilliance through wear and washing. Budget rhinestones may become cloudy or lose stones more easily, but they’re great for testing designs before investing in premium stones.
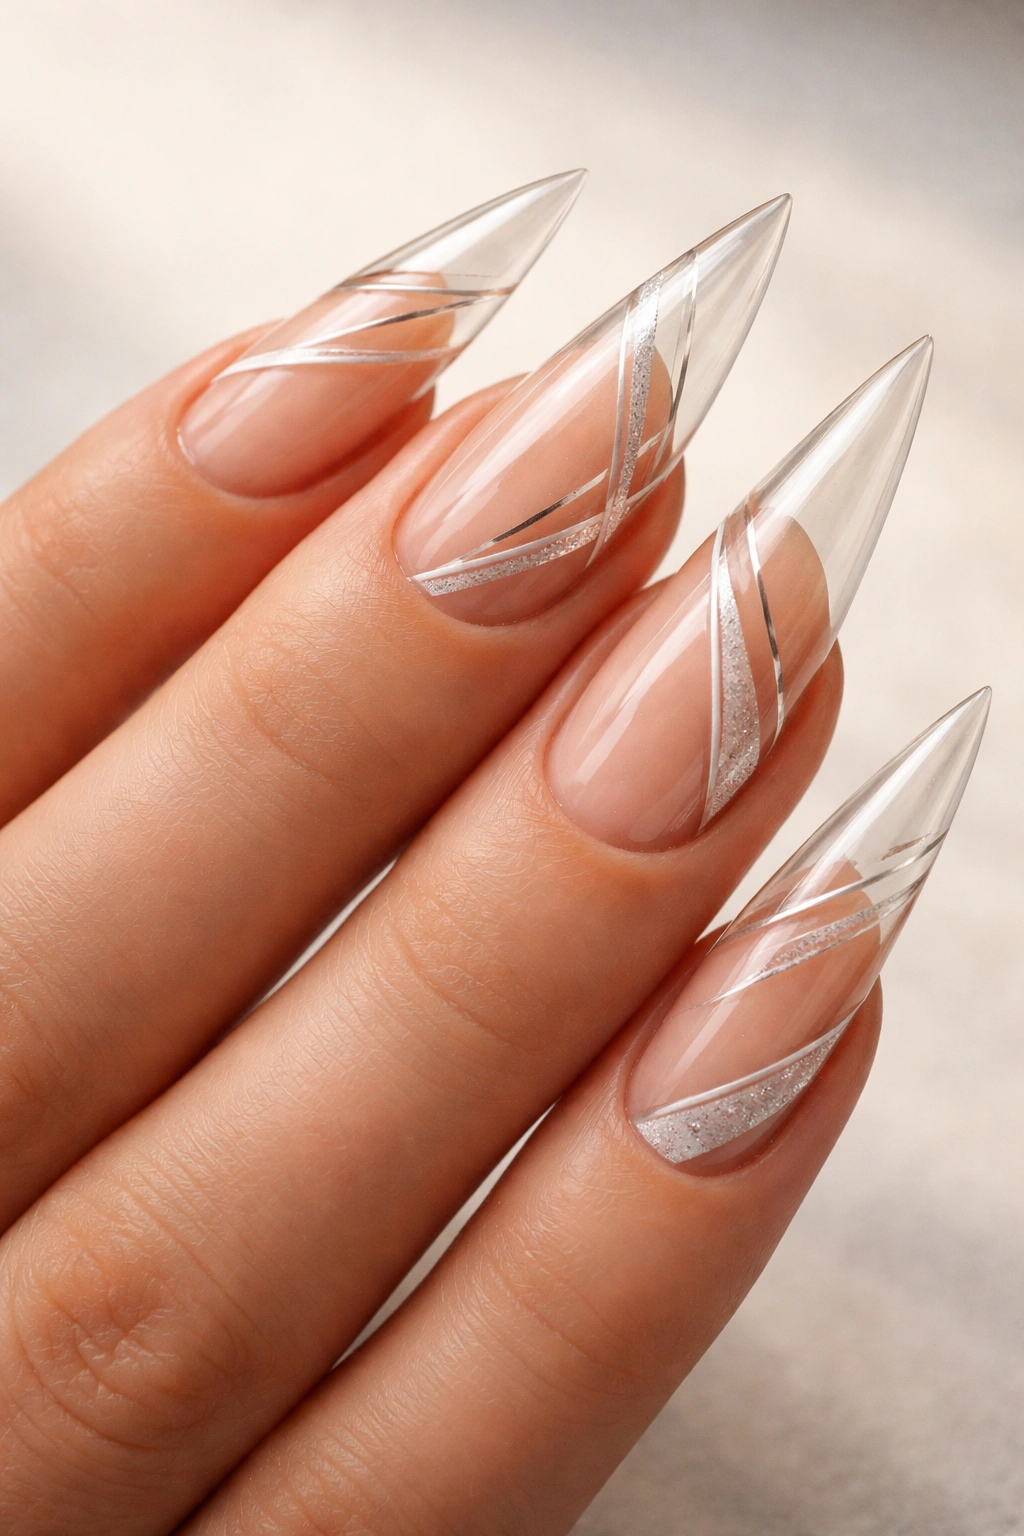
4. Minimalist Line Art
Clean, precise lines in black, white, gold, or nude create sophisticated, understated designs that feel artfully modern. Single-line drawings—a geometric shape, an abstract stroke, a linear pattern, or negative-space design—can be applied freehand or using nail art striping tape for perfectly straight results. The simplicity demands precision, but the payoff is a design that reads as artistic rather than busy.
Why Less Is More With Line Art
Minimalist designs age well aesthetically and never look dated because they’re not built on trend-driven details. A simple black line across the center of a clear nail is elegant enough for business settings but still creative. The negative space (the clear nail showing through) is as important as the line itself, creating visual breathing room that makes the design feel intentional and controlled rather than cramped or fussy.
Tools and Techniques for Clean Lines
Use a thin nail art brush or striping brush for freehand work—the narrower the bristles, the more control you’ll have. Steady your hand by resting your pinky or ring finger on the table while you work, and paint slowly with light pressure rather than trying to draw quickly. For perfectly straight lines, apply thin strips of striping tape before polishing, then paint over the tape. Once the polish is dry, peel away the tape to reveal clean, sharp edges.
Line Art Design Ideas
- A single continuous line forming an abstract shape or curve
- Geometric patterns like triangles, hexagons, or parallel lines
- A minimalist illustration (a leaf, a mountain, a face outline)
- Negative space design where the line creates enclosed areas
- Thin frames around the nail perimeter or just near the tip
Insider note: One strategic line can be more visually interesting than you’d expect. A white line across black polish draws attention, but that same line on clear polish feels sophisticated and intentional because it isn’t trying hard.
5. Glitter Ombre
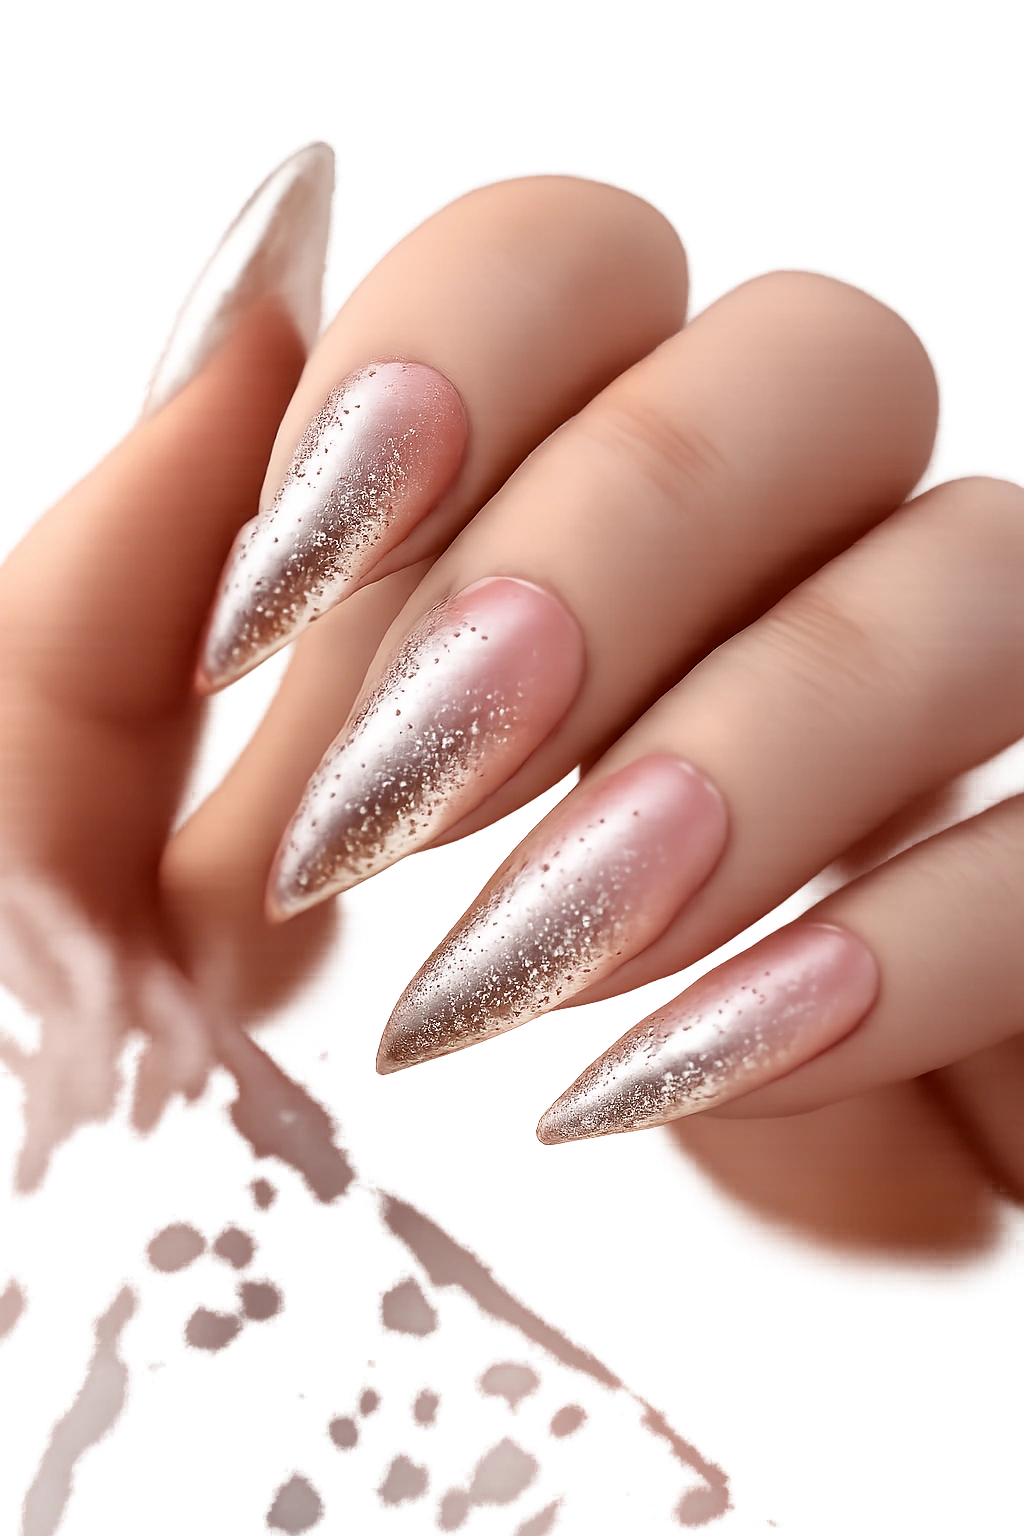
Glitter fades gradually from concentrated at the tip to scattered and sparse near the base, creating movement and dimension. This design works with any glitter color—holographic, rose gold, silver, or jewel tones—and reads as celebratory without feeling costume-like when executed thoughtfully.
The Appeal of Gradient Sparkle
A glitter ombre feels more refined than solid glitter coverage because the clear base is visible in most areas, preventing the “heavy handed” appearance that sometimes accompanies full glitter manicures. The gradient itself creates visual flow and draws the eye upward along the stiletto shape. Against clear nails, glitter appears to float within the polish rather than sitting flat on top, adding depth and dimension that solid polish can’t achieve.
Creating a Flawless Glitter Gradient
Mix a small amount of glitter into clear gel or use a clear polish with glitter suspension. Apply this mixture most densely at the tip using a brush or sponge, then gradually reduce the concentration as you work toward the base, either by picking up less of the mixture or by blending it with pure clear polish. The key is patience—multiple thin layers create smoother transitions than one heavy application. A light, strategic hand with the glitter results in a sophisticated gradient rather than a chaotic scatter.
Glitter Color Combinations
- Rose gold and champagne for warm, romantic elegance
- Holographic for iridescent sparkle that shifts with movement
- Jewel tones (emerald, sapphire) for depth and luxury
- Multicolor glitter for celebratory occasions
- Chrome or mirror glitter for modern, futuristic appeal
Worth knowing: Avoid chunky craft glitter or large flakes for nail art; they’re uncomfortable to wear and don’t adhere well. Professional nail glitter is specifically formulated for adherence and comfort.
6. Pearl Details
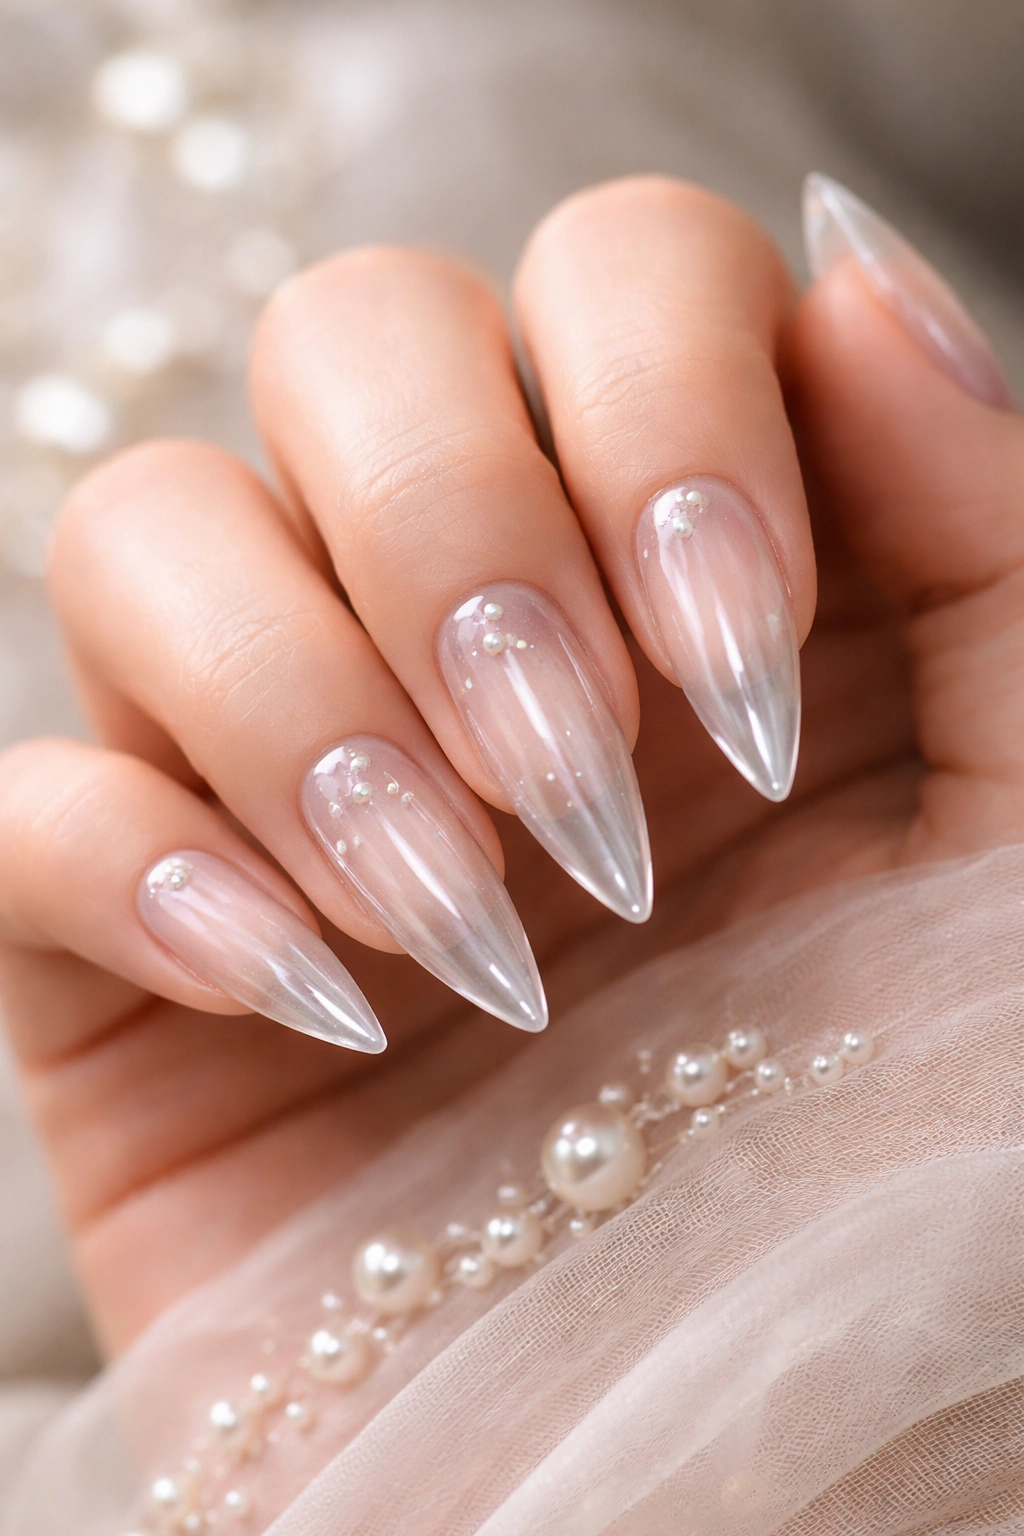
Pearls—whether traditional white, lustrous champagne, or modern matte finishes—add an organic, soft luxury to clear stiletto nails. Small pearl pigments mixed into gel, pearl-effect polishes, or literal micro pearl cabochons applied as accents create a sophisticated, jewelry-adjacent aesthetic that feels timeless and refined.
The Understated Elegance of Pearls
Pearls evoke luxury and sophistication because of their association with classic jewelry and bridal wear. On clear nails, pearls feel less heavy than metallic accents and more organic than crystals. A pearl-finish polish creates a subtle, luminous quality that shifts slightly with movement and light, adding visual interest without screaming for attention. This makes pearls perfect for people who want nail art that’s clearly intentional but also quietly elegant.
Achieving Pearl Effects
Pearl nail polishes and gels create an overall lustrous finish across the entire nail. Apply two thin coats of pearl polish for optimal luster and color depth. For more subtle pearl accents, use pearl powder mixed into a clear gel base—apply the clear polish first, cure it, then dust pearl powder onto the tacky surface and seal with a final top coat. You can also apply actual pearl cabochons (tiny round decorative elements) along the nail edge or concentrated in one area for a more sculptural approach.
Pearl Application Ideas
- Full pearl finish across all nails for a coordinated, luxe appearance
- Pearl dust concentrated along the cuticle area, fading toward the tip
- Scattered pearl cabochons along the stiletto edge
- One accent nail fully pearled, others left plain clear
- Pearl tips (just the final millimeter or two) creating a soft gradient
Pro tip: White pearls work on every skin tone, but warm champagne pearls are particularly flattering on deeper skin tones, while cool white pearls complement fair complexions beautifully.
7. Chrome Effect
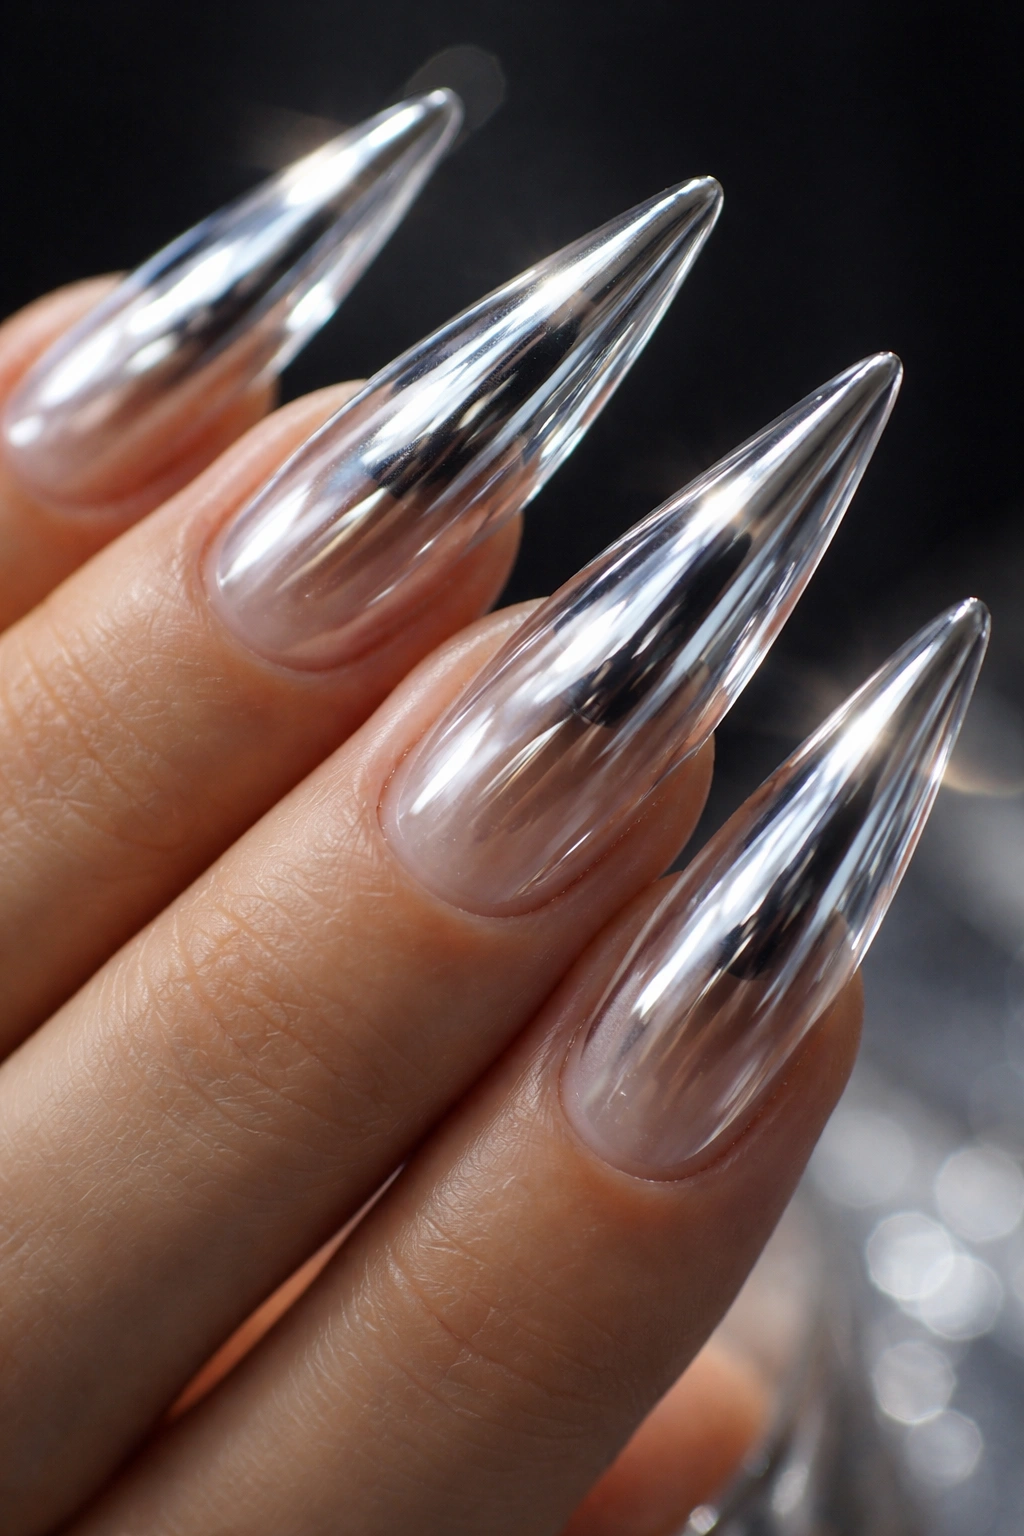
Chrome or mirror finishes create a metallic, otherworldly look that’s bold and modern. Reflective chrome powder applied over a semi-cured gel base produces an almost liquid-metal appearance that photographs stunningly and catches light dramatically. Against clear nails, chrome creates an optical illusion of depth and futurism.
Why Chrome Reads as High-Fashion
Chrome finishes have been adopted by high-end nail artists and fashion designers because they’re visually striking and technically impressive. They suggest professional execution and investment in quality materials. The reflective quality makes your nails appear to shift and move with changing light and angles, keeping the design dynamic and engaging. Chrome on clear nails feels especially luxe because the transparency hints at the nail beneath while the mirror effect dominates visually.
Applying Chrome Powder Successfully
Use a gel base (semi-cured, still tacky) designed specifically for chrome applications, or apply a sticky top coat. Using a velvet applicator or specialized chrome powder brush, press the reflective powder onto the tacky surface with a gentle buffing motion. Don’t brush or swipe—the pressing motion helps the powder particles adhere and create that seamless mirror effect. Seal immediately with a UV-cured top coat. The seal is absolutely critical because unsealed chrome powder flakes off.
Chrome Design Variations
- Full chrome coverage across all nails
- Chrome tips (just the top third or half of the nail) with clear base
- Chrome accent on one nail per hand
- Chrome with geometric shapes or patterns created by masking areas before application
- Colored chrome (rose gold, blue, copper) for personality beyond traditional silver
Worth knowing: Chrome powder varies dramatically in quality. Professional-grade powders from reputable nail suppliers create seamless, durable finishes, while cheaper alternatives often look patchy or dull.
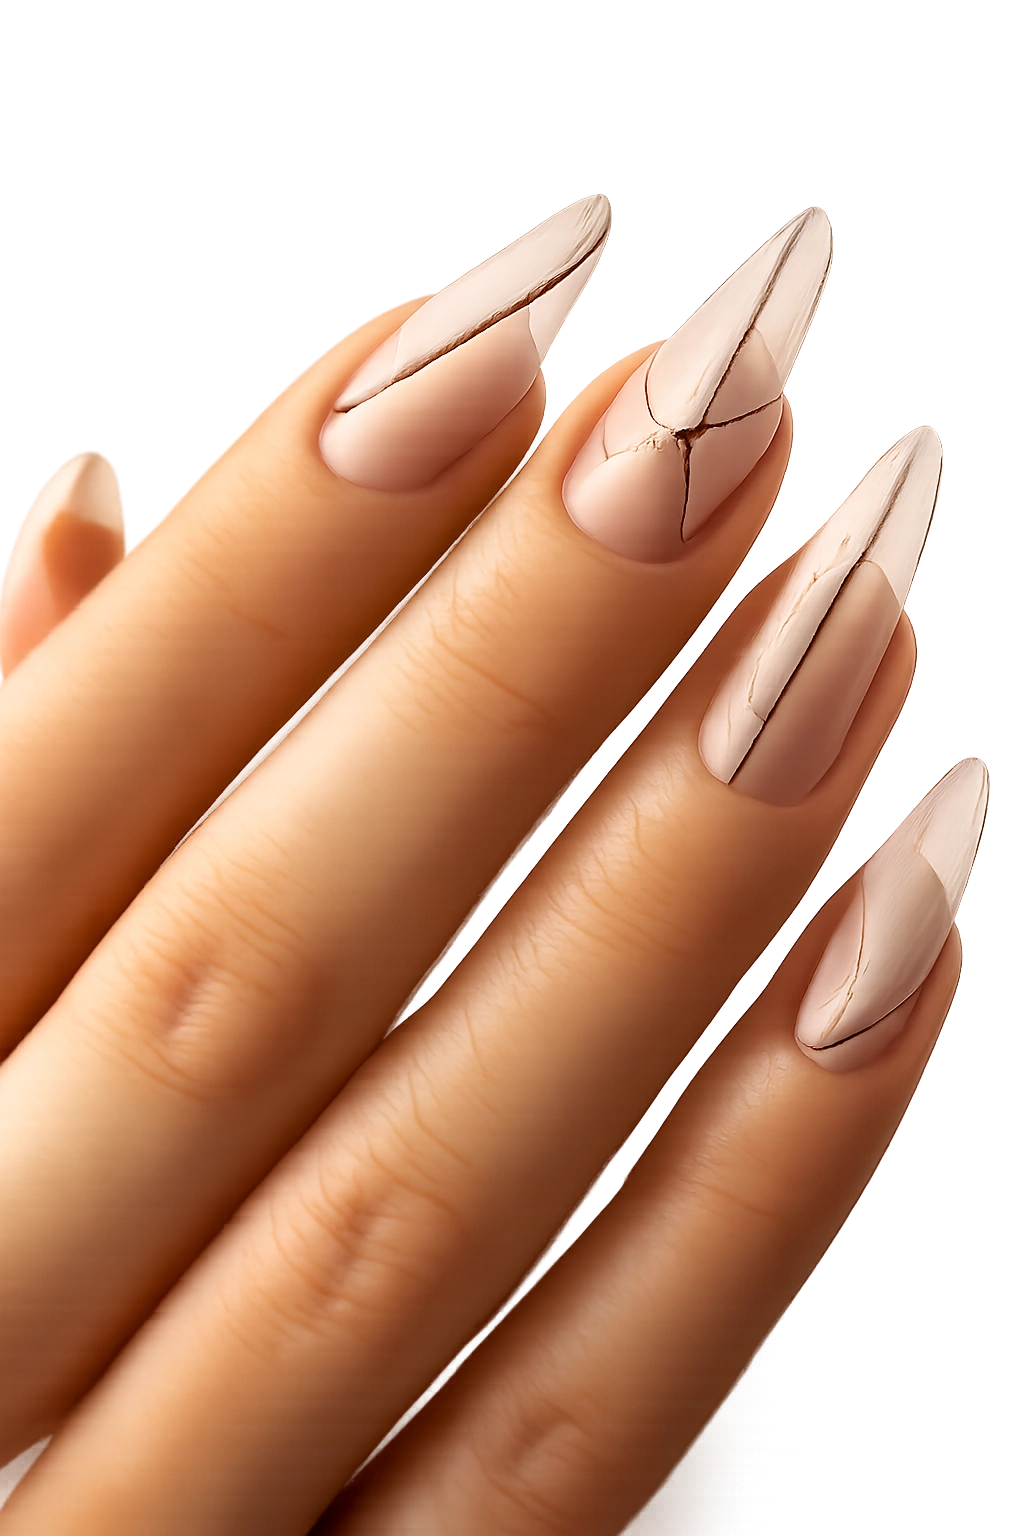
8. Negative Space Design
Negative space designs intentionally leave portions of the nail bare, allowing the natural nail or skin beneath to show through as part of the artwork. These designs feel modern, architectural, and intentionally minimal—geometric cutouts, framing edges, or strategic open areas create visual puzzle pieces that engage the viewer.
The Sophistication of Deliberate Emptiness
Negative space proves that you don’t need to fill every inch of the nail with color or decoration to create a striking design. Strategic emptiness shows restraint, confidence, and artistic intention. It’s harder to execute than a fully covered nail because every inch that remains clear becomes part of the design statement. Against clear stiletto nails, negative space designs create fascinating optical effects where the eye isn’t sure whether it’s looking at clear nail, unpainted area, or intentional design.
Creating Negative Space Effects
Use thin striping tape to mask off areas before applying color, gel, or glitter. Create a design with tape—say, a geometric frame or linear pattern—then apply your chosen color or texture only within the exposed areas. Once dry, remove the tape to reveal clean negative space. Alternatively, paint designs with polish remover or a specialized latex peel-off base on areas you want to keep clear, then apply color over the entire nail. Once dry, peel away the latex to reveal the negative space beneath.
Negative Space Design Ideas
- Geometric frame (triangle, square, or hexagon outline) with clear center
- Vertical or diagonal stripes with alternating clear and colored/decorated sections
- Cutout shapes near the edges (small triangles, circles, or abstract forms)
- Linear patterns that create enclosed negative space shapes
- Tip frame—polish the top portion only, leaving the base and sides clear
Pro tip: The sharper and more defined your masked areas, the more impressive your negative space design. Invest in quality striping tape and apply it firmly so polish doesn’t creep underneath.
9. Rose Gold Confetti
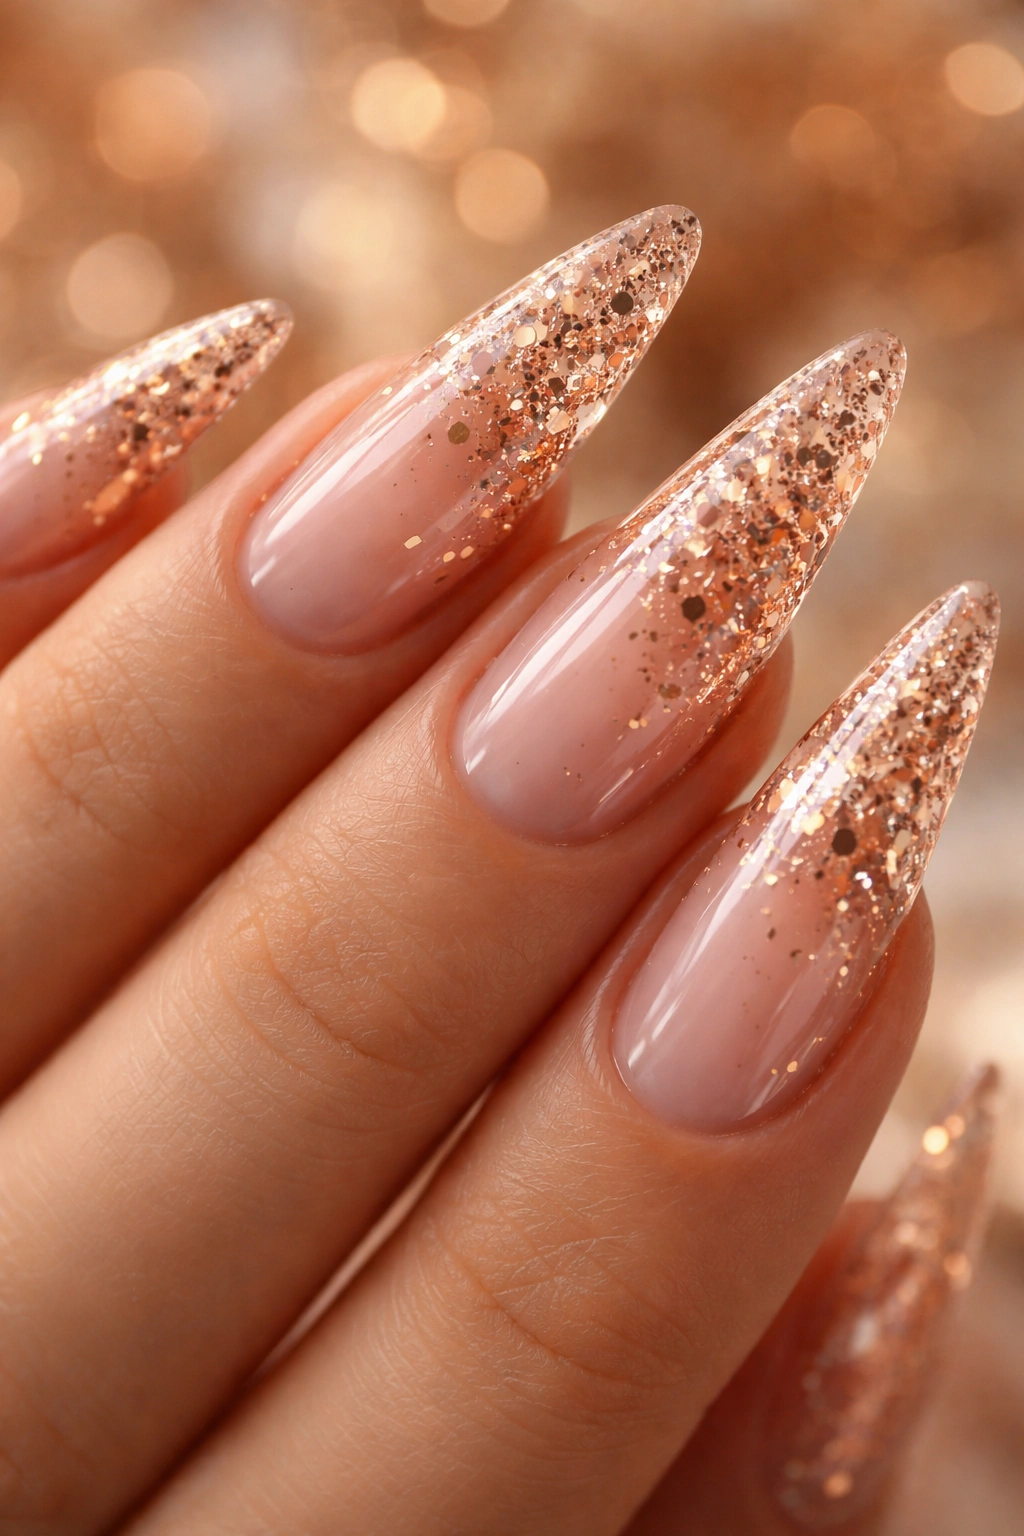
Rose gold confetti scattered across clear nails creates a festive, celebratory look that’s still refined enough for everyday wear. Tiny flakes, dots, or geometric shapes in warm metallic tones add personality and shimmer without overwhelming the clear base. This design balances sparkle with sophistication.
Why Rose Gold Works on Every Skin Tone
Rose gold sits in the warm family, flattering deep, medium, and fair skin tones alike. Its pinkish undertone makes it feel softer and more approachable than yellow gold, while its metallic quality ensures it still registers as luxurious. Against clear nails, rose gold confetti creates a warm glow that appears to emanate from within the nail, adding dimension and visual interest without looking heavy or costume-like.
Applying Confetti Effectively
Mix rose gold flakes or dust into a clear gel, then apply selectively—concentrating the confetti at the tip or edges while keeping the base more sparse. Alternatively, use a clear polish with rose gold suspension (sold as “confetti polish” in most collections). Apply thin layers, allowing each to cure if using gel, until you achieve your desired sparkle level. The transparency of the clear base means light passes through the flakes, creating a subtle sparkle rather than an opaque glitter effect.
Confetti Placement Ideas
- Scattered across the entire nail in random distribution
- Concentrated heavily at the tip, fading toward the base
- Clustered in geometric patterns (lines, triangles, frames)
- One accent nail heavily confettied, others with just a few scattered pieces
- Edge detail—confetti applied only along the perimeter or side edge of the nail
Insider note: Mix confetti colors (rose gold with white or holographic) for added depth and visual complexity without looking chaotic.
10. Milky White Base With Gems
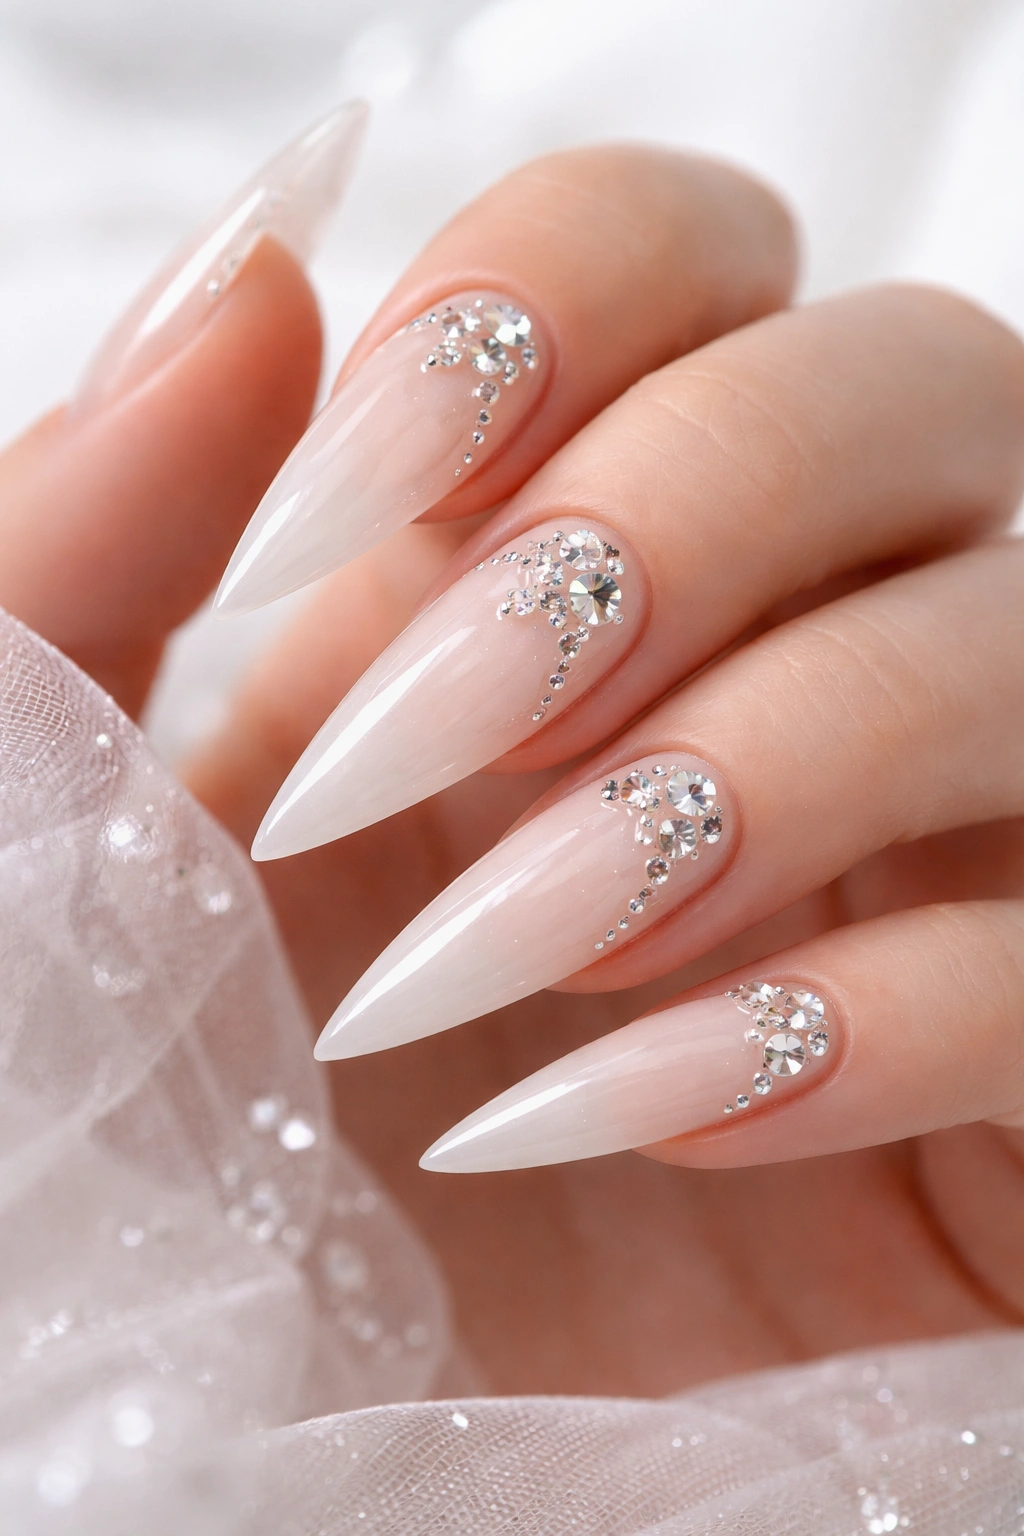
A barely-opaque milky white creates subtle coverage while maintaining the ethereal quality of clear nails, perfectly complemented by strategically placed gems. This hybrid approach combines the sophistication of sheer coverage with the impact of dimensional accents, creating a bridal or special-occasion look that’s utterly polished.
The Appeal of Sheer Coverage
Milky white polish (also called milk polish or semi-sheer white) is just opaque enough to create a clean, finished appearance while remaining transparent enough to feel airy and elegant. It skims the line between decorated and natural-looking nails. The subtle base doesn’t compete with gem accents; instead, it frames and elevates them. This makes the design feel cohesive rather than like scattered elements on a clear nail.
Building the Perfect Milky Base
Apply two thin coats of milky white polish or gel, allowing each coat to dry or cure fully. The goal is even coverage without a heavy, chalky appearance. If your first coat seems streaky, add a second; if it looks perfect after one, you’re done. The milky base will appear almost translucent initially but will solidify into a soft, opaque finish once sealed. Top with a glossy or semi-matte top coat depending on your preference for shine.
Gem Arrangement Ideas
- Graduated size: Large gem at the tip, progressively smaller gems working toward the base
- Scattered placement: Gems dotted casually across the entire nail surface
- Frame detail: Gems concentrated along the edges or in a line across the center
- Focal cluster: All gems grouped in one area, creating a dimensional accent
- Accent nail: One nail heavily gemmed, others left as plain milky white
Worth knowing: The milky base is forgiving and covers minor imperfections, making it ideal if your clear nail art skills are still developing. It’s also excellent for special occasions because the soft coverage and gem accents read as intentional luxury rather than everyday design.
Final Thoughts
Clear stiletto nails offer a stunning playground for creativity and self-expression. Whether you choose the subtle sophistication of a nude gradient, the sparkle of glitter ombre, or the statement-making boldness of chrome, clear nails as your canvas ensure that whatever design you choose feels elevated and intentional. The transparency works in your favor—it elongates your fingers, flatters every skin tone, and lets your chosen accents shine without visual competition from opaque color.
The beauty of these ten ideas is their versatility across life’s moments. A quick nude gradient works for the office. Crystals and gems suit celebrations and formal events. Chrome and line art satisfy creative impulses on regular days. Because clear is inherently versatile and works with nearly every design direction, you can rotate through these ideas seasonally or based on mood without worrying about clashing with your wardrobe or aesthetic. Start with one design that speaks to you, master the application technique, then experiment with others. Each one builds your skill and confidence as a nail artist.
