

There’s nothing quite like the disappointment of watching your freshly done gel manicure start peeling just days after leaving the salon. You’ve invested time and money, picked the perfect shade, and imagined having flawless nails for the next few weeks—only to notice a tiny lift at the edge that quickly spirals into a full peel. The frustration is real, and you’re definitely not alone. The good news? Peeling gel polish is almost always preventable, and once you understand what causes it, you’ll never have to deal with a prematurely ruined manicure again.
The truth about peeling isn’t mysterious. It’s not random bad luck or an inherent flaw in gel polish itself. Every single case of gel polish peeling comes down to one or more specific, avoidable mistakes—whether during application, curing, maintenance, or removal. The variables are completely within your control, whether you’re getting your nails done at a salon or doing them at home. Some issues hide in your prep routine, others lurk in your aftercare habits, and some are caused by equipment or product choices you might not have even considered.
What makes this topic so important is that understanding the mechanics of peeling doesn’t just help you fix the problem when it happens—it gives you the knowledge to prevent it entirely. Gel manicures are supposed to last two to three weeks looking pristine. When they peel, it’s not because the product failed; it’s because something in the application, curing, or maintenance process created a weak bond. The difference between a manicure that lasts flawlessly for three weeks and one that peels in three days often comes down to just a few critical details.
Let’s dig into what’s actually causing your gel to peel, and more importantly, exactly what you need to do to stop it from happening.
Understanding Why Gel Polish Peels at All
Before jumping into solutions, it helps to understand the basic science of what’s happening when gel polish peels. Gel polish is essentially a plastic-like coating that bonds to your natural nail through a combination of physical and chemical adhesion. When gel is applied correctly and cured properly, it forms a tight seal that flexes slightly with your nail as it grows and moves. This flexibility is key—rigid gel that can’t bend with your nail will crack and peel under normal daily stress.
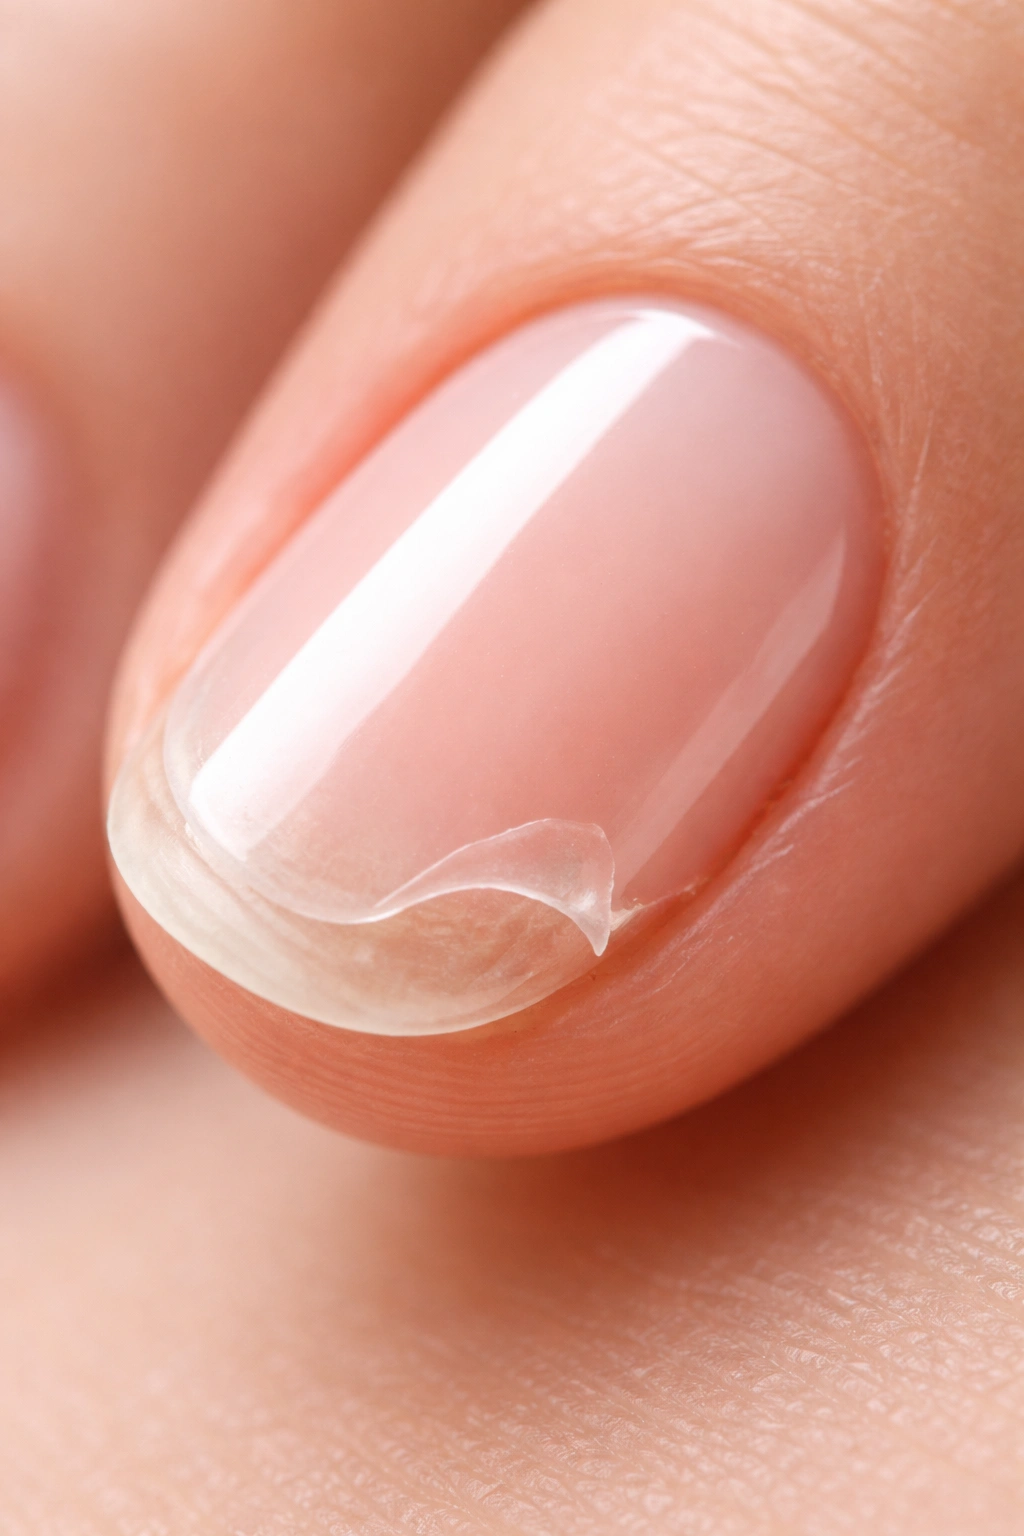
Peeling happens when that bond weakens or breaks. The gel pulls away from the nail plate, creating a gap where moisture can seep in, causing further lifting. Once this process starts, it accelerates quickly. A tiny lift becomes a peel, a peel becomes a chip, and before long, the whole manicure is compromised.
The underlying reason for this breakdown always involves one or more of these core issues: improper nail preparation, excess moisture or oil on the nail plate, insufficient curing, thick applications that don’t cure evenly, missing base or top coats, neglected free edges, or damage from picking and external stress. Understanding which of these is affecting your nails is the first step to fixing the problem.
Improper Nail Prep and Its Impact on Polish Adhesion
Here’s the uncomfortable truth: most peeling problems start before you ever apply color. Nail prep is the foundation of a long-lasting gel manicure, and skipping steps or rushing through this phase is one of the fastest ways to guarantee failure.
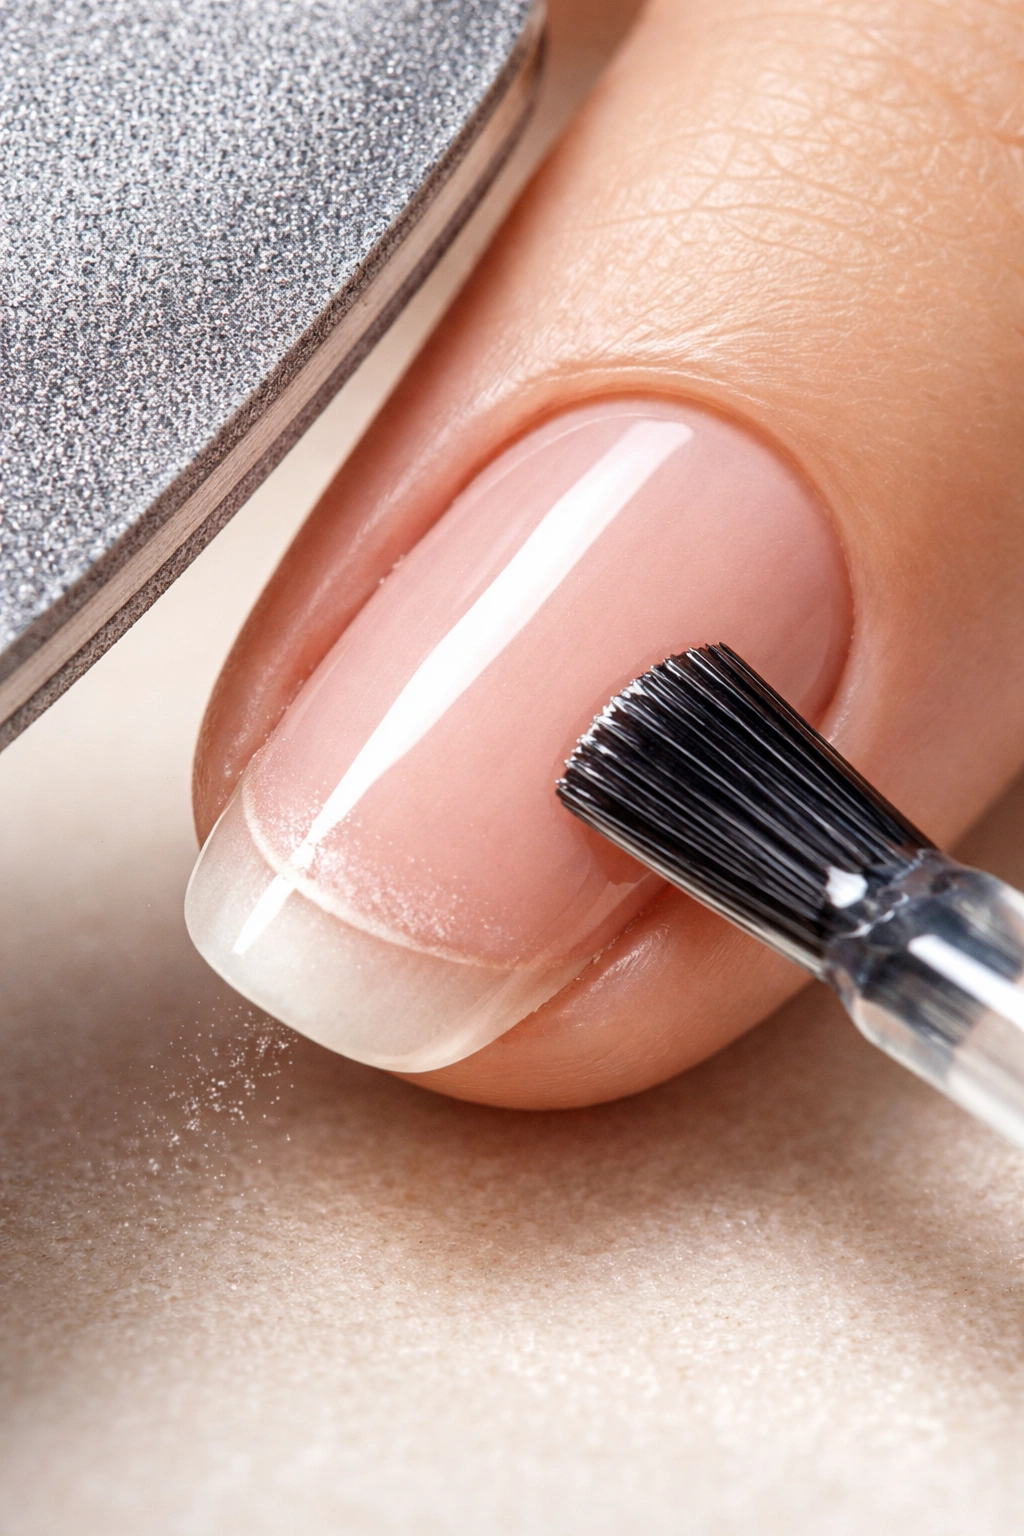
Proper prep involves three critical steps: pushing back and trimming cuticles, buffing the nail plate, and removing oils and moisture. If your salon or your DIY routine is cutting corners on any of these, your polish doesn’t stand a chance. A clean, slightly textured nail surface is absolutely essential because gel polish needs something to grip onto. Think of it like trying to stick a decal onto a wet, slippery surface versus a clean, slightly rough one—the difference is huge.
Buffing your nails isn’t about making them smooth and shiny. In fact, that’s the opposite of what you want for gel adhesion. You need to lightly buff the nail plate with a 180 to 220-grit file in one direction, creating microscopic grooves that give the gel something to hold onto. If your nails are too smooth—especially if they’re naturally very glossy—the gel has nothing to anchor to and will lift within days. Many people think buffing damages nails, but gentle buffing with the right grit file actually protects them by ensuring better adhesion and preventing lifting.
Cuticles are another critical detail that people often underestimate. Overgrown or improperly trimmed cuticles create a ledge where gel polish naturally wants to lift away from the nail plate. This is one of the most common reasons for premature peeling, especially around the cuticle area. You need to push back your cuticles properly and trim any dead white skin, but you shouldn’t be aggressive about it—the goal is a clean, smooth transition from cuticle to nail plate.
Moisture and Oil on the Nail Plate: The Silent Peel Trigger
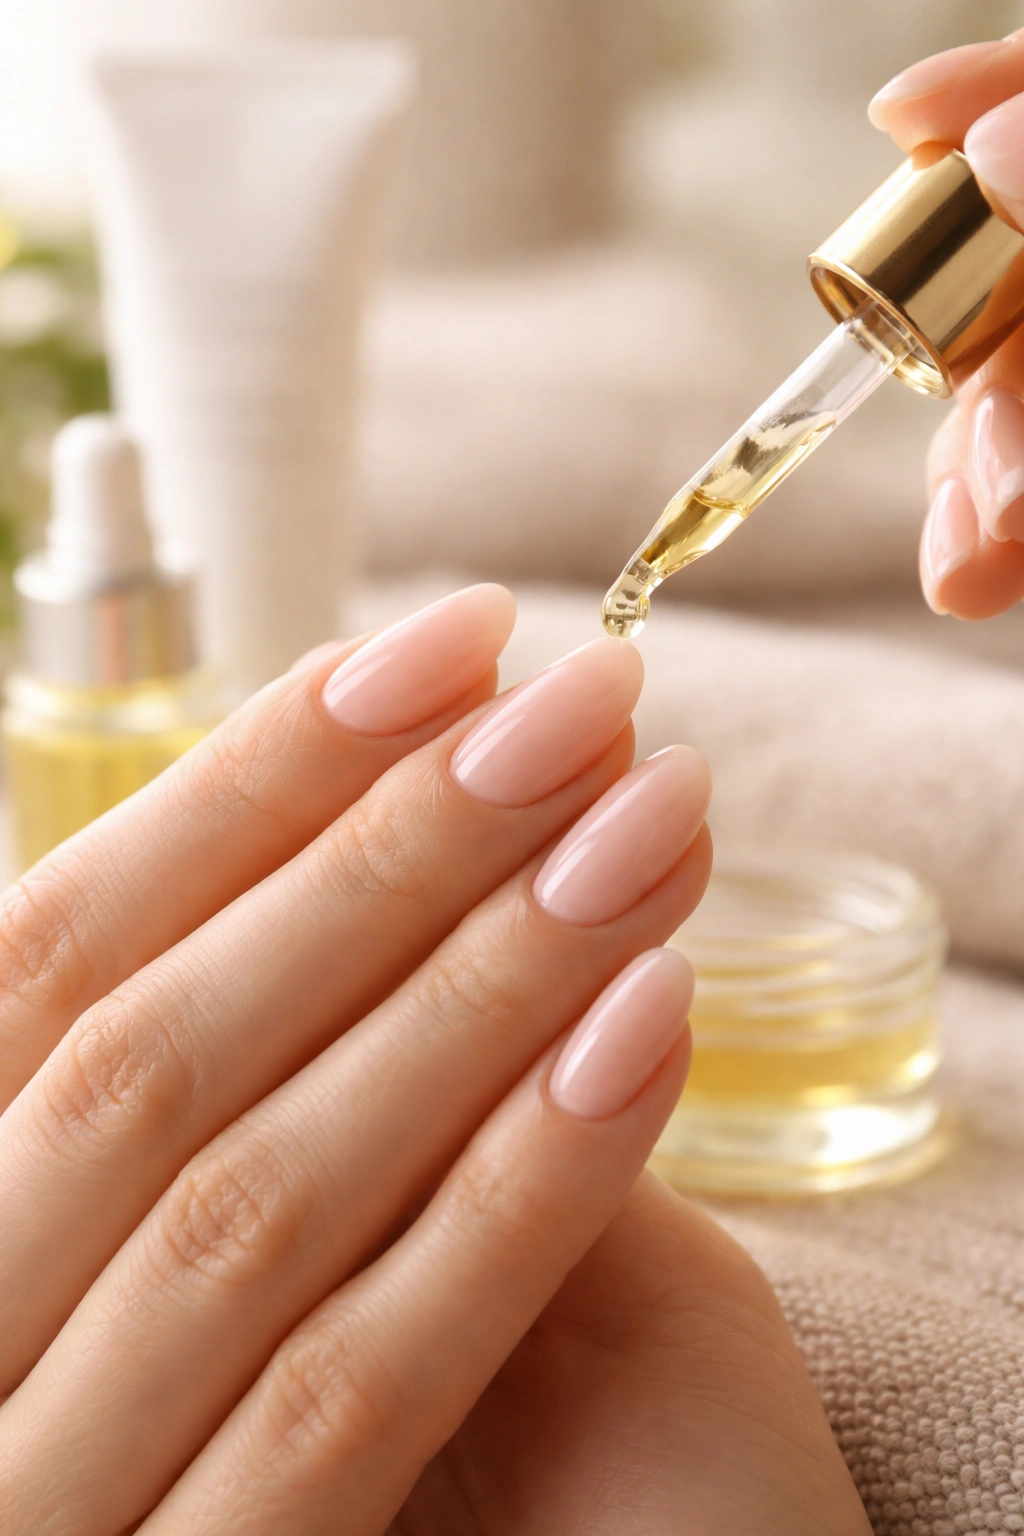
Water and oil are gel polish’s worst enemies. This is why dehydration is such a critical part of gel prep. When moisture sits on your nail plate, it creates a barrier between the gel and your nail, preventing the adhesive bond from forming properly. Worse, nail beds naturally expand when they absorb water and contract when they dry. If you apply gel to damp or even slightly moist nails, the nails will shrink back as they dry, and the gel will come with them, creating stress on the adhesion. The result? Peeling and lifting within days.
This is why professionals always use acetone or a dedicated nail dehydrator after buffing and before applying base coat. Some people worry that acetone is too harsh, and while repeated use can be drying, a single wipe-down with acetone before gel application is perfectly safe and essential for adhesion. If you’re doing nails at home and skipping this step, that could be your entire problem right there.
The tricky part is that moisture doesn’t always come from obvious sources. Even if you wash your hands right before a manicure, soap residue can leave a film of oils on your nails. Your skin naturally produces oils that migrate to your nails. Environmental humidity can add moisture. A quality nail prep product is designed to remove all of these invisible barriers in one efficient step. This is different from regular nail polish remover—many removers actually contain moisturizing ingredients that work against gel adhesion.
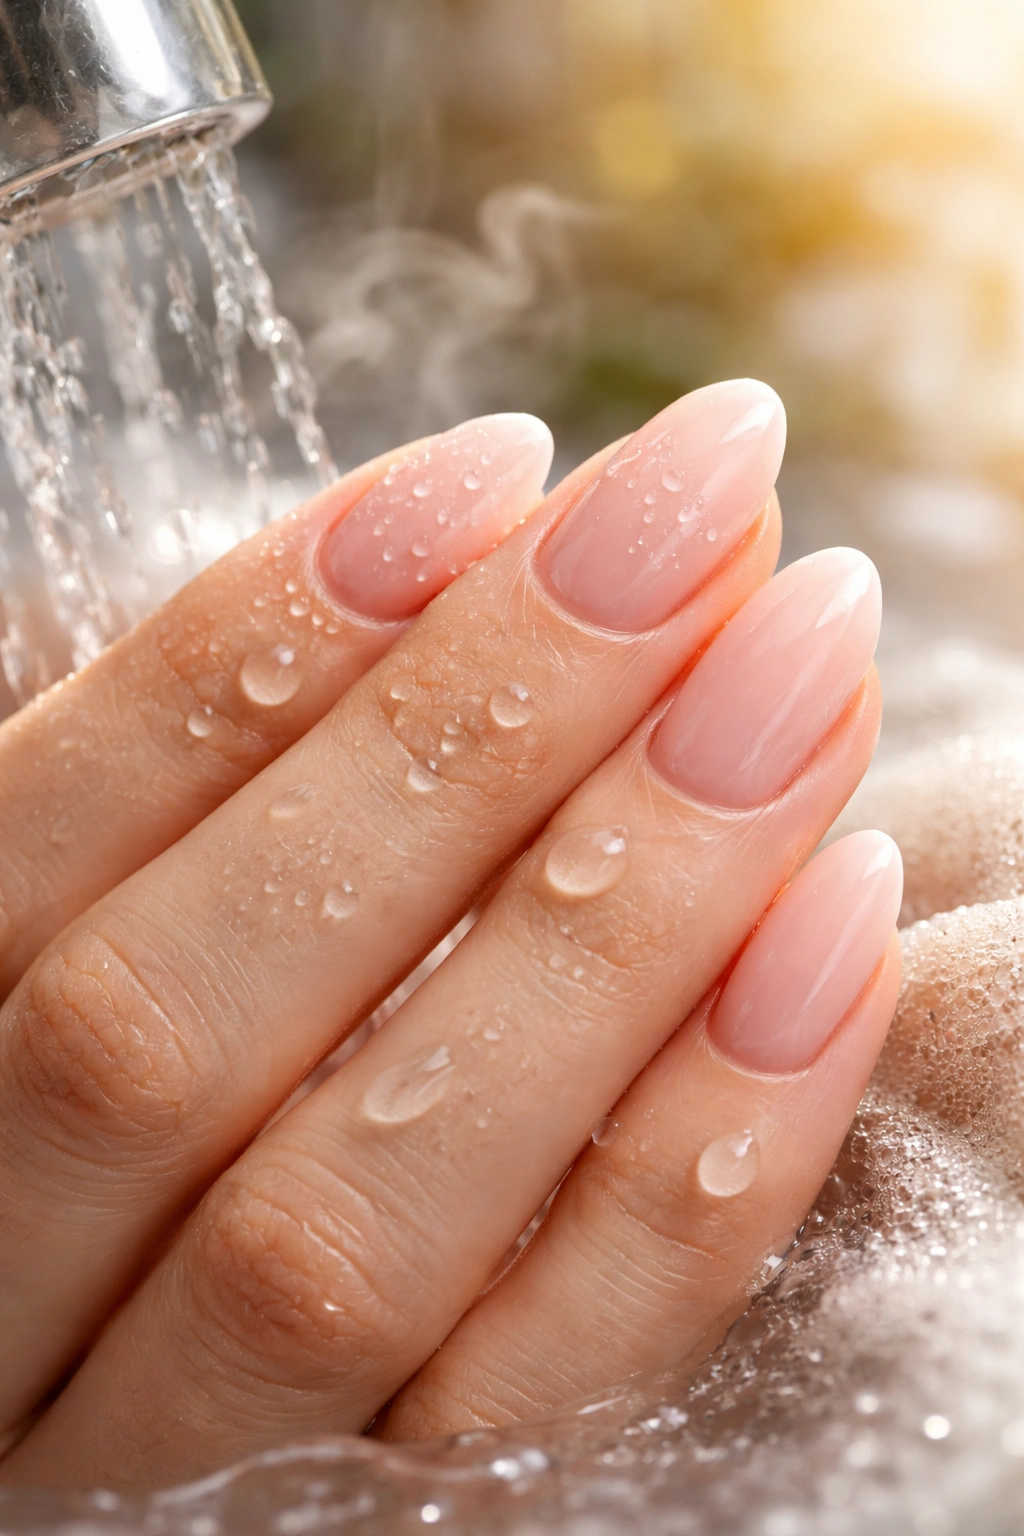
Post-application, you also want to be cautious about water exposure. Soaking your nails in water before applying gel is absolutely a mistake you want to avoid. Ideally, wait at least an hour after washing your hands before getting a gel manicure, and even then, make sure your nails are completely dry.
Incorrect Application Techniques That Compromise the Entire Manicure
How you apply gel polish matters just as much as what you apply. Even if your prep is flawless, poor application technique can still result in peeling. The most common application mistake is applying layers that are too thick. This seems counterintuitive—shouldn’t more product mean stronger nails? Actually, no. Thick layers of gel don’t cure evenly all the way through.
When you apply gel too thickly, the UV or LED light can harden the surface layer while the gel underneath stays soft and uncured. This creates a mushy, weak foundation under a hard shell. As your nails flex during normal activities, that soft layer can’t support the hard top layer, and peeling starts. Additionally, thick applications are prone to wrinkling under the lamp, pooling at the edges, and lifting around the sides of the nail.
The correct technique is to apply thin, even coats and cure between each layer. Yes, this takes more time than slapping on one thick coat, but it’s absolutely worth it. Building color gradually with multiple thin layers also gives you better opacity, more even color, and a more professional appearance than trying to do it in one or two heavy applications. Each thin layer cures completely, creating a strong foundation for the next layer.
Another application mistake is not getting product onto the very edge and tips of your nails. Gel should extend just slightly past the free edge—we’ll talk more about edge sealing in a moment—but many people either skip this entirely or are inconsistent about it. Inconsistent application also includes variations in layer thickness across the nail, which leads to uneven curing and stress points where peeling is likely to start.
The Curing Process and Lamp Quality: Your Manicure’s Make-or-Break Moment
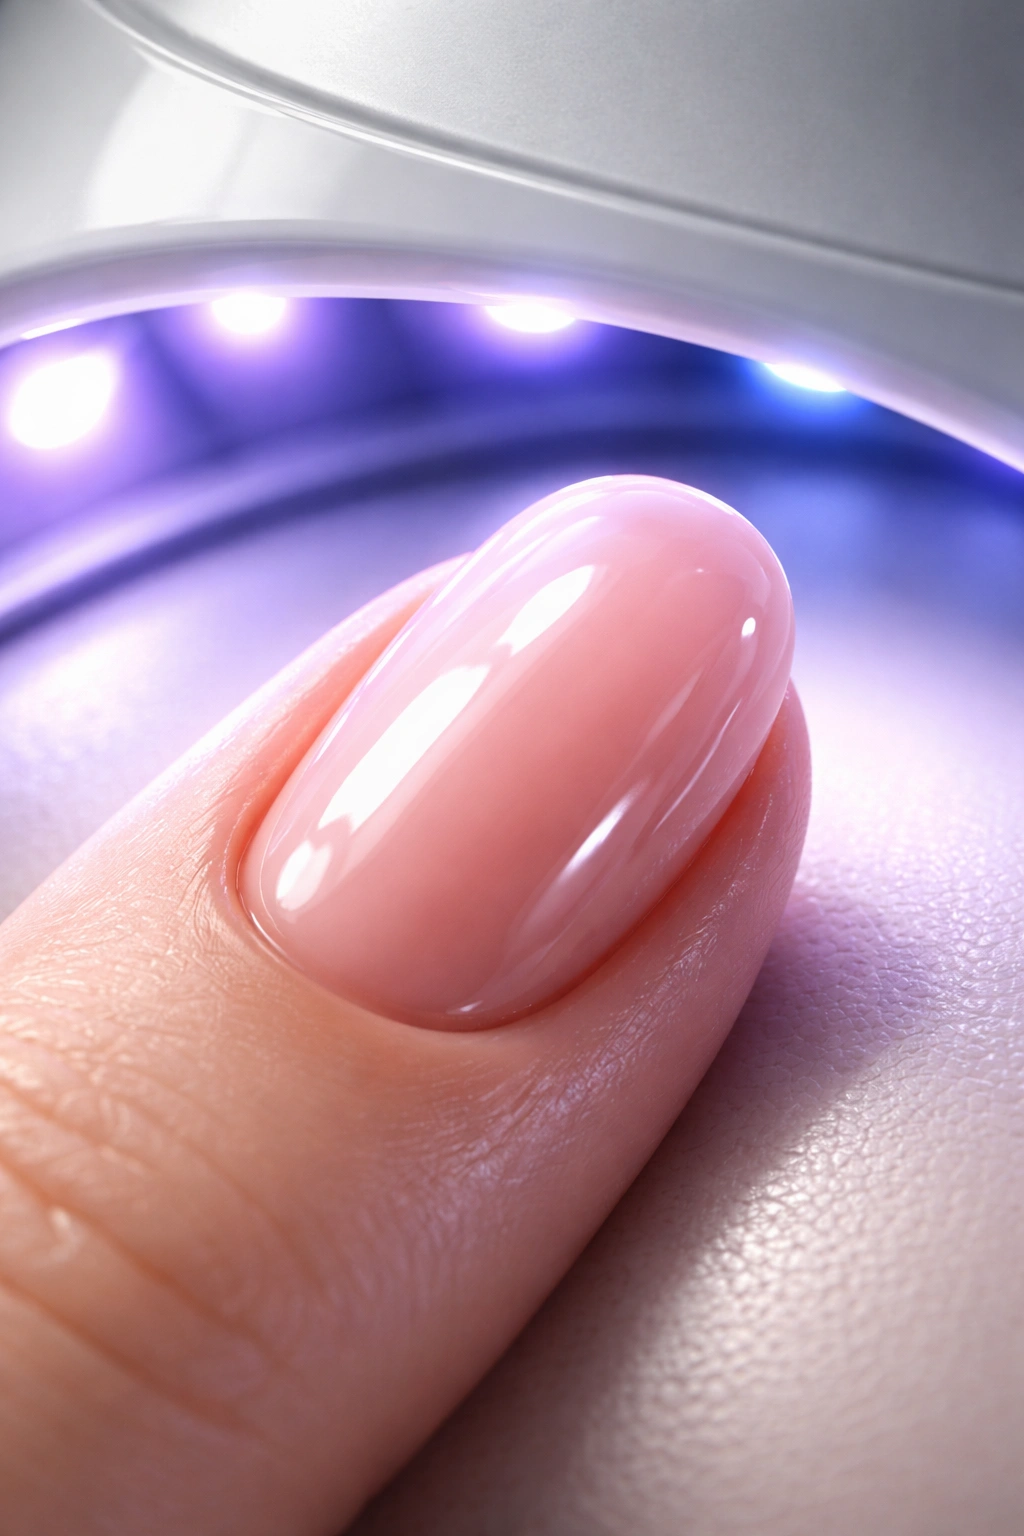
Curing is where gel polish transforms from liquid to hard polymer, and if this step isn’t done right, nothing else matters. An improperly cured gel manicure will fail no matter how perfect your prep and application were.
The first variable is lamp quality. Not all UV and LED lamps are created equal, and using an incompatible or low-quality lamp is a direct path to peeling. Some gel brands work better under specific wattage lamps—there’s no universal standard. High-wattage lamps can actually burn the surface of some gels while leaving the interior uncured, while low-wattage lamps might not cure thick layers thoroughly. If you’re using a lamp and your gels keep peeling, the lamp itself could be the culprit.
Even more commonly, people use old or worn-out lamps. LED bulbs degrade over time, losing their curing power. If your lamp is more than five years old, its output has probably declined significantly. A lamp that looks like it’s working fine might actually be curing your gel at only 50% of its proper potential, leaving the polish weak and prone to lifting.
Beyond the lamp itself, many people don’t position their hands correctly under the light. Your fingers need to be flat and centered directly beneath the lamp, not at an angle or off to the side. Thumbs are particularly prone to improper positioning because of how hands naturally rest. If certain nails are consistently peeling more than others, it’s often a positioning issue—those nails aren’t getting adequate light exposure.
Curing time also matters. Most gels should cure for 30 to 60 seconds depending on the lamp and the thickness of the layer. Don’t rush this step or assume that a gel looks cured when it’s not. Visually, uncured gel and cured gel can look identical, but undercured gel will peel almost immediately. Set a timer and be patient—this short wait is what stands between a manicure that lasts three weeks and one that peels in three days.
Base Coat and Top Coat: The Protective Layers You Can’t Skip

A base coat is absolutely essential. This isn’t optional, and it’s not just a step that some nail techs prefer. A proper base coat creates the chemical and physical bond between your natural nail and the gel color. Without it, the color gel is sitting directly on your nail with minimal adhesion, and peeling is virtually guaranteed.
Base coats are formulated differently depending on your nail type. If you have naturally oily nails or nails that tend to be bendy or weak, you need the right base coat for your situation. A soft, adhesive base is different from a harder, more rigid one, and using the wrong formulation for your nails is asking for trouble. This is why many nail professionals recommend having several base coat options and choosing based on individual nail characteristics.
The top coat serves an equally critical function, though people often overlook it. The top coat seals everything in and protects your polish from chips and peeling. Without a top coat, your manicure is essentially defenseless against wear and tear. Additionally, top coats create that crucial seal around the free edge of your nail—more on that in a moment.
One important detail: use the same brand for your base coat, color, and top coat whenever possible. Different brands have different formulations, and mixing them can create compatibility issues that lead to lifting and peeling. Brands design their products to work together as a system, with specific chemical compounds that bond properly across the full layer sequence. Cross-brand mixing might seem like no big deal, but it’s a common reason for unexpected peeling.
Also, don’t skip the top coat thinking you can use a faster-drying alternative from a different brand. Some top coats are thinner or designed for different gel systems, and using the wrong one can compromise the entire manicure. Invest in a quality top coat and use it consistently.
Avoiding Thick Gel Polish Layers: Why Less Is Actually More
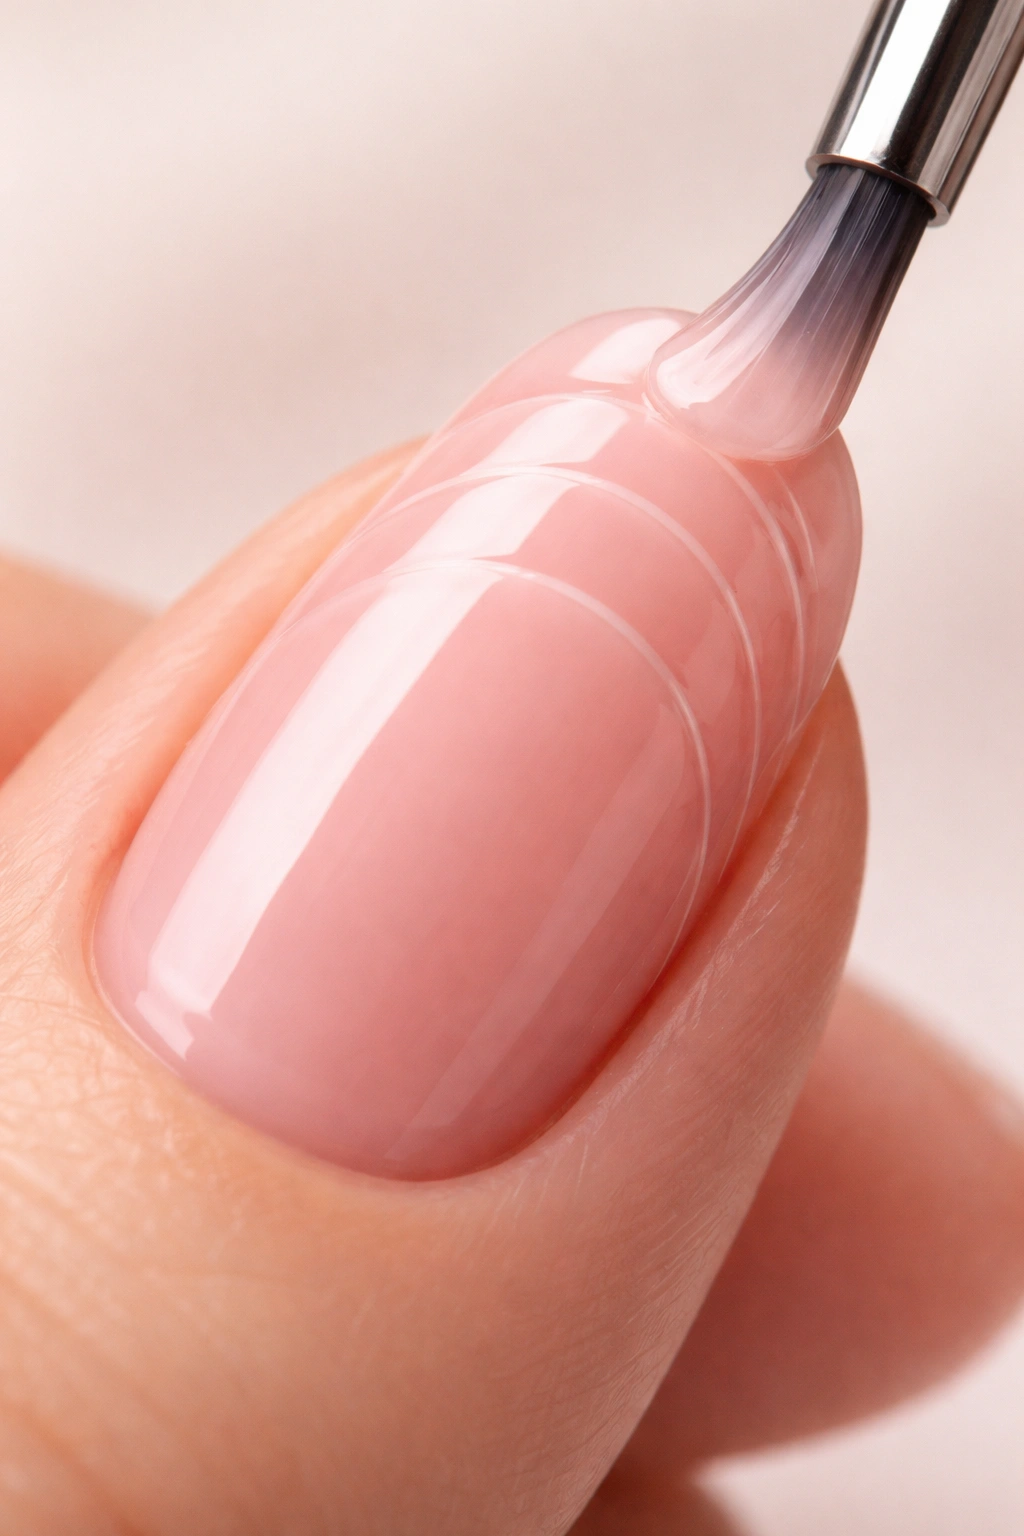
We touched on this already, but it bears repeating because thick applications are such a common cause of peeling. Thin, even layers are the secret to gel that lasts. Each layer should be thin enough that you can see through it to the layer beneath, with just enough opacity to provide color coverage when combined with other layers.
When you apply gel too thickly, several problems cascade from that single mistake. First, the thickness prevents light from penetrating evenly, leaving soft spots inside the gel. Second, thick layers are more prone to stress and cracking as your nails flex. Third, the weight of thick gel puts more strain on the adhesive bond with your nail, making lifting more likely. Fourth, thick applications cure unevenly, often developing a wrinkled texture under the lamp that’s a visual sign of improper curing.
The right approach is to apply base coat thinly, then build your color with two or three thin coats rather than one or two heavy ones. Yes, this takes a few extra minutes, but those few minutes are the difference between a manicure that peels in a week and one that stays flawless for three weeks.
If you’re doing your nails at home and struggling with application thickness, invest in a good brush or use a brush size that matches your nail size. A brush that’s too large makes it harder to control application thickness, while the right size gives you more control and consistency.
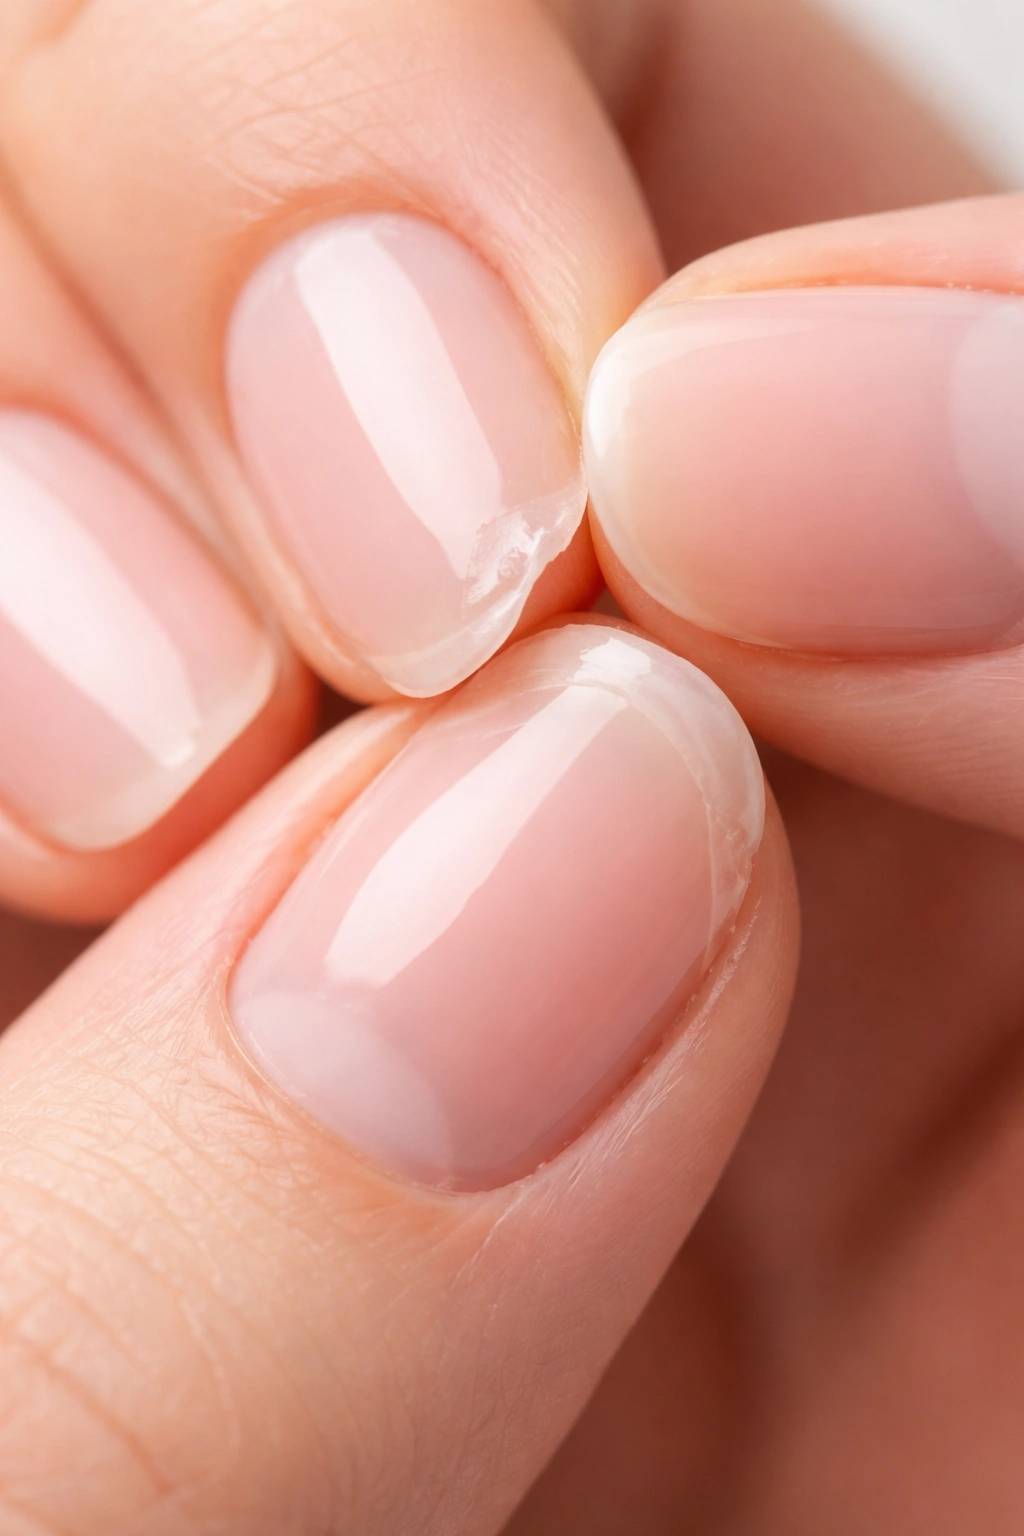
Sealing the Free Edge Properly: A Detail That Changes Everything
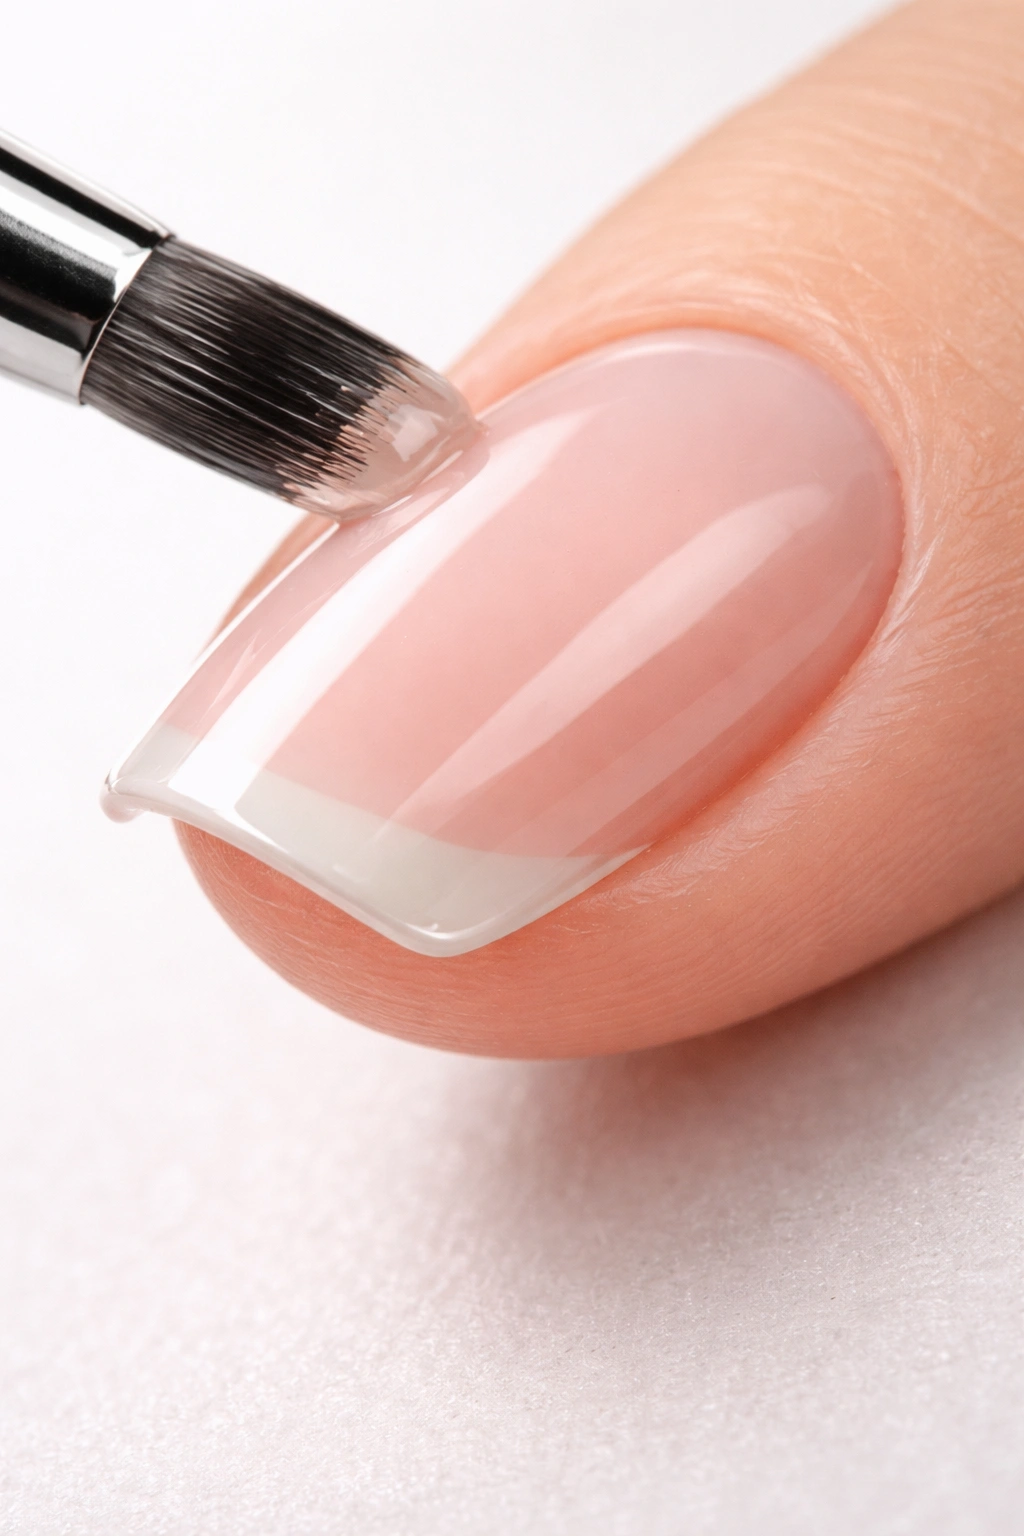
One of the most overlooked causes of gel peeling is failure to properly seal the free edge—the white tip of your nail that extends past the nail plate. This technique is called “capping” the free edge, and it’s simple but absolutely critical.
When you apply gel polish, the product should extend over the edge of your nail and seal it completely. Without this seal, the free edge is exposed to air, water, and friction, which causes the gel to break down and peel away from underneath. Additionally, the free edge of your nail is more flexible than the rest of the nail plate, so without a protective seal, that flexibility creates stress on the gel adhesion right where it’s most vulnerable.
To properly cap the free edge, apply your base coat over the entire nail including the tip, apply color with the same coverage, and then finish by running your top coat along the very edge of the nail, making sure you cover the underside of the tip as well as the top. This creates a complete seal that protects against peeling.
Many people find this technique tricky with short nails because the surface area is small and hard to work with. The solution is to pull back the skin underneath your nail slightly (using a cuticle pusher), which exposes more of the free edge and makes sealing easier. Take your time with this step—it’s one of the most important details for preventing peeling.
Cuticle Care and Its Critical Role in Lasting Polish
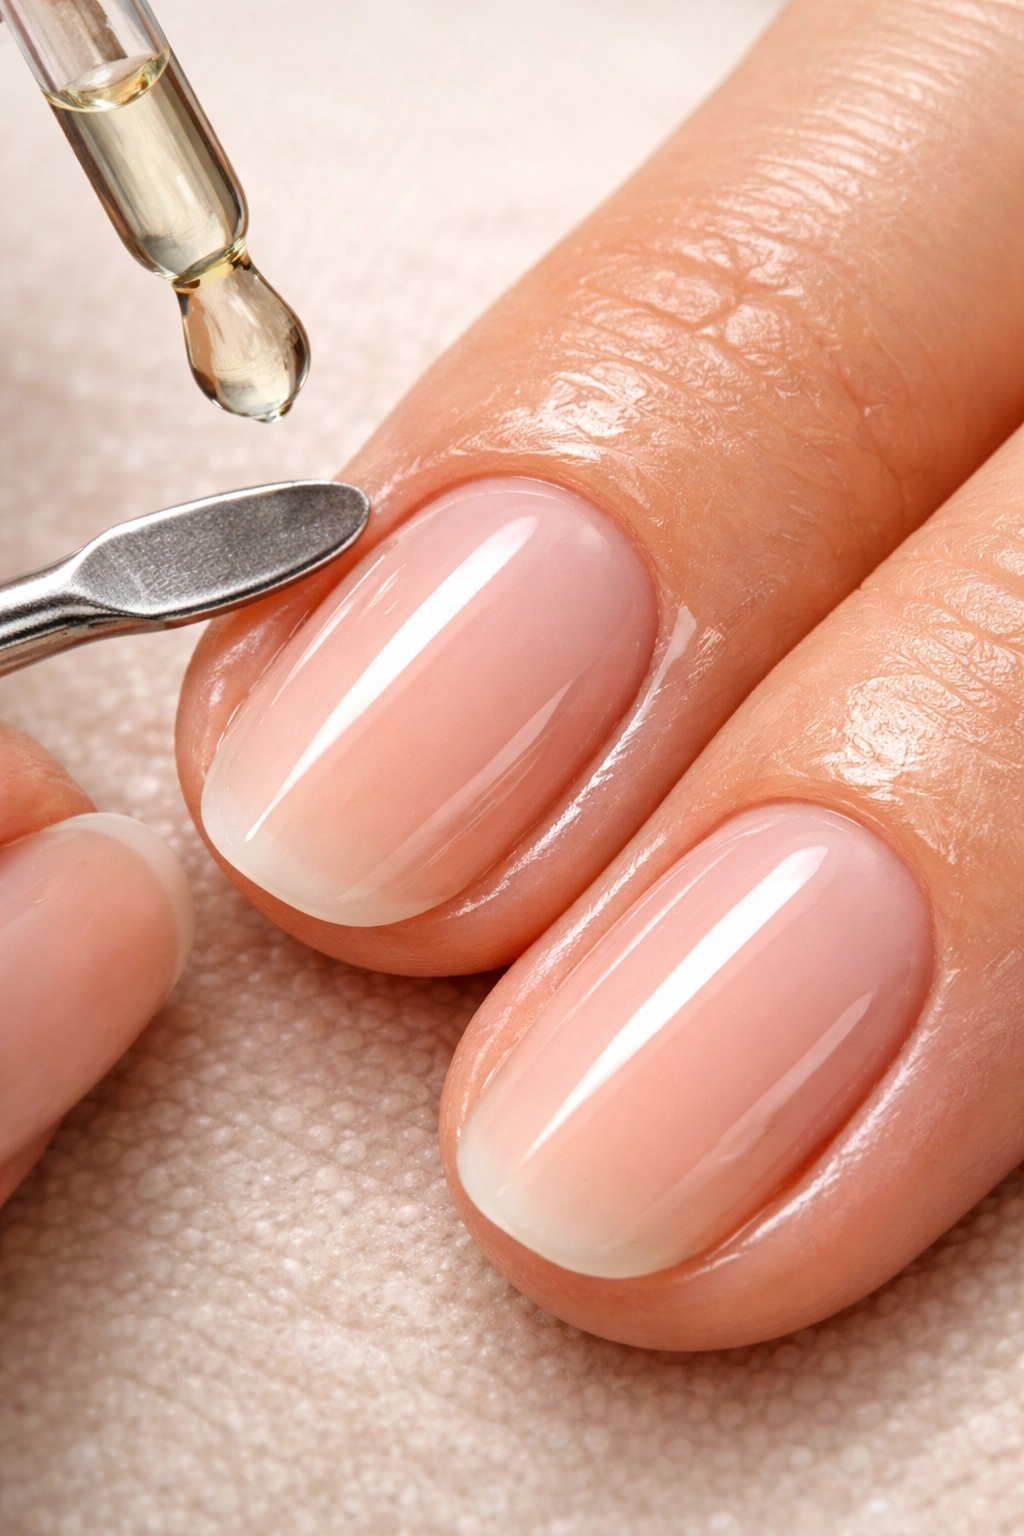
Healthy cuticles are essential for a lasting gel manicure. When cuticles aren’t pushed back properly, they create a physical barrier that prevents gel from adhering flush against the nail plate. They also trap moisture and bacteria against the nail, which causes lifting and peeling over time.
Beyond just pushing back cuticles during prep, you also need to maintain their health between manicures. Dry, cracked, or inflamed cuticles don’t provide a good foundation for gel adhesion. If your cuticles are chronically dry or damaged, your gel is fighting an uphill battle every single time you apply it.
Cuticle oil is your friend here. Apply it daily after your gel has fully dried, and especially during any break periods between manicures. Quality cuticle oil with nourishing ingredients like jojoba oil, vitamin E, and essential oils will improve cuticle health and, by extension, improve how well your gel adheres and lasts. Just never apply cuticle oil before getting a manicure—the oils will prevent proper adhesion and are one of the things dehydration is meant to remove.
Some nail professionals also recommend using a cuticle remover (not to be confused with cuticle cutter) before prep. These products gently soften and dissolve dead cuticle skin, making it easier to push back and trim. This creates a cleaner transition between cuticle and nail plate, which improves adhesion significantly.
Quick Fixes When Peeling Starts
If you catch peeling early, you can sometimes save your manicure without removing everything and starting over. The key is catching it right when it starts, not waiting until it’s a full disaster.
As soon as you notice a tiny lift or chip, file the edge gently to smooth it out. Don’t pick at it—that only makes it worse. Once you’ve filed the rough edge, apply a thin layer of fresh top coat and cure it thoroughly. This seals the small problem and can prevent it from escalating into a full peel.
For slightly more advanced peeling where a section has started to lift but is still attached, you can try a similar approach: gently file the lifted area and the surrounding edge, clean away any debris, apply a fresh layer of gel (either color or clear), and cure thoroughly. This essentially “glues” the peeling section back down. Finish with a new top coat for extra protection.
The critical thing is not to ignore peeling or assume it will somehow fix itself. Peeling always gets worse if left untouched. The moment you spot it, address it immediately with a file and fresh top coat.
Environmental Factors Affecting Gel Wear and Longevity
Beyond application and maintenance, external environmental factors significantly impact how long your gel manicure lasts. Understanding these factors helps you take preventive action.
Hot water is one of the biggest culprits. Exposure to hot water—whether from dishwashing, showers, or simply washing your hands with hot water—causes your nails to expand and contract repeatedly. This constant flexing stresses the gel adhesion and accelerates peeling. Use lukewarm water when possible, and wear gloves when doing dishes or cleaning. This simple habit alone can extend your manicure’s life by days.
Chemical exposure is another factor. Cleaning products, bleach, and harsh soaps can weaken the gel bond and cause lifting. Again, gloves are your solution. They protect both your nails and your skin, and they’re a simple preventive measure that makes a real difference.
Cold weather and low humidity can dry out your nails, which paradoxically makes them more prone to peeling because dry nails are more brittle and less flexible. During drier seasons, increase your cuticle oil use and make sure you’re staying hydrated. Your nail health is connected to your overall hydration levels.
Physical stress also matters. If you’re regularly using your nails as tools—opening cans, picking at things, or using them for tasks that require force—you’re putting stress on the gel adhesion at the edges and tips where peeling is most likely. Use actual tools for tasks, not your nails.
Breaking Bad Habits: Picking and Biting Nails
Picking and biting at your gel polish is one of the fastest ways to destroy a manicure. Not only does it damage the gel, but it also removes the top protective layers of your actual nails, weakening them for future manicures.
Here’s what happens when you pick at gel: you’re not just removing the polish, you’re physically peeling away layers of your nail plate. Our nails consist of about 25 layers of keratinized skin cells, and aggressive picking removes several of these protective layers. This leaves your nails thinner, weaker, and more prone to breaking and peeling in future manicures.
If you’re a habitual picker or biter, the solution isn’t willpower alone—it’s removing the opportunity to pick. Keep your hands busy, wear gloves, apply a bitter-tasting product to your nails to discourage biting, or find another habit to replace the picking. Some people find that having beautiful gel nails actually makes them less likely to pick because they don’t want to ruin the look. Others benefit from setting a specific goal (“I won’t pick at my nails for one week”) and working up from there.
If you’ve already peeled off a gel manicure, don’t panic. You’ve damaged the surface layers of your nails, but they will recover with proper care. Give your nails a break from gel for at least a week, apply cuticle oil and hand cream daily, keep your nails short to prevent further damage, and once they feel stronger, you can do a gel manicure again with proper prep.
Choosing Quality Products: Why Cheap Gel Keeps Peeling
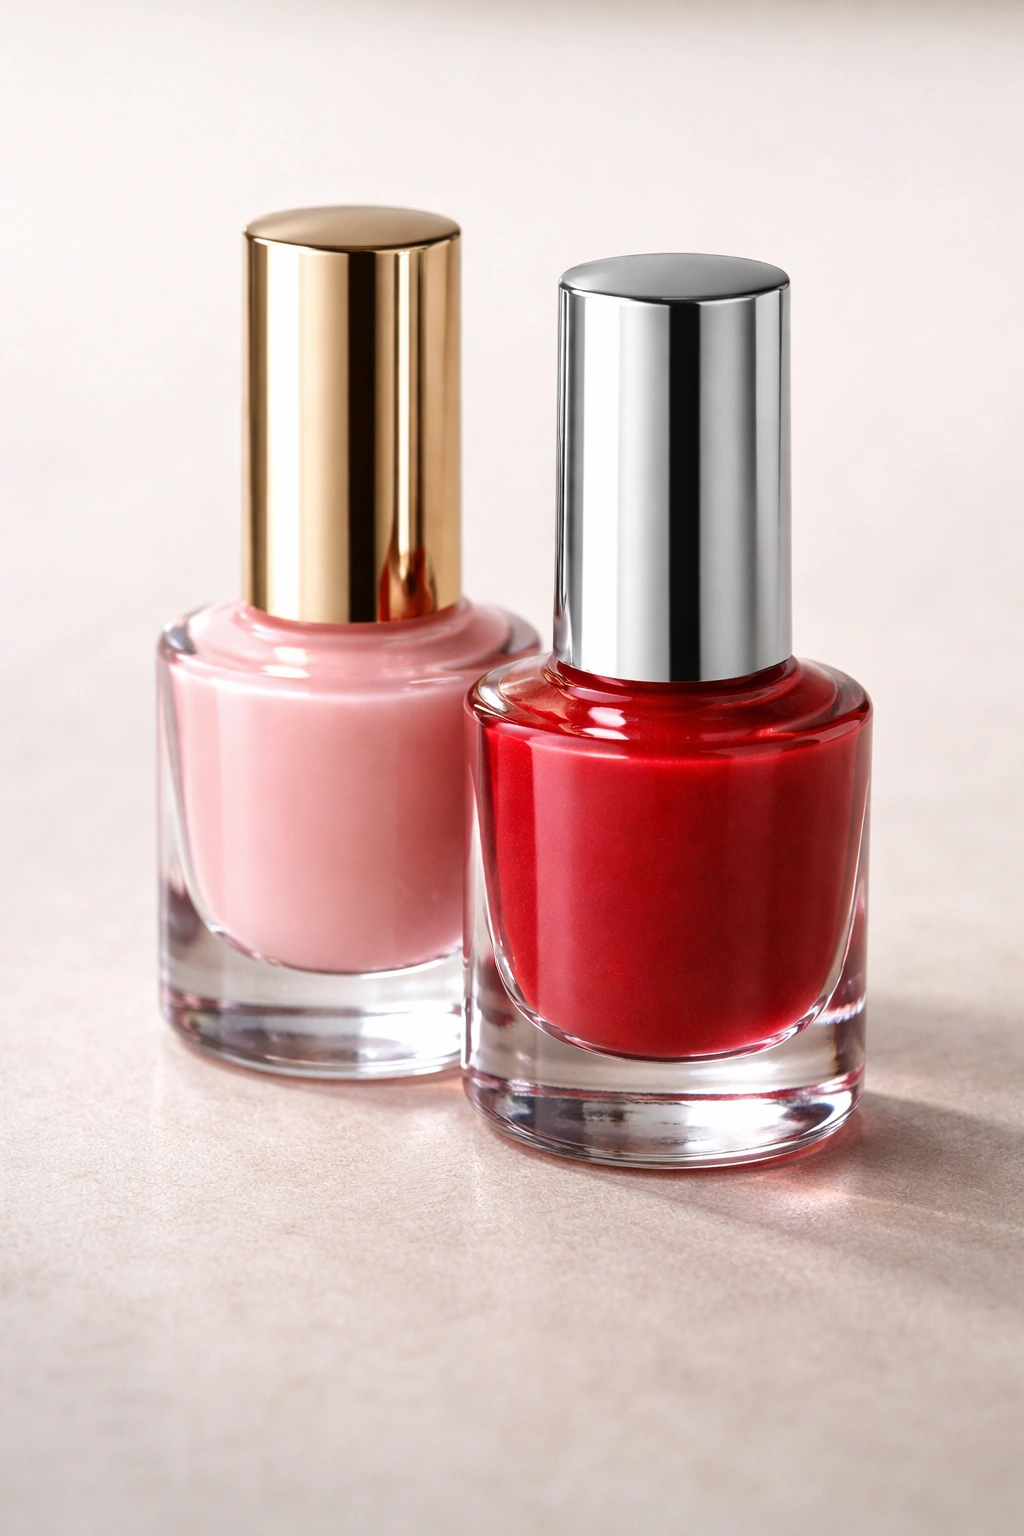
The products you choose matter tremendously. Budget gel polish might look the same in the bottle, but it’s often formulated with inferior ingredients that don’t adhere as well, don’t cure as consistently, or contain fillers that weaken the overall strength of the finished manicure.
Investing in reputable gel brands is genuinely one of the best ways to prevent peeling. Quality gel has better adhesion properties, cures more evenly, and maintains flexibility and durability over the two to three week wear time. Budget brands often start peeling after a week because the formula simply isn’t as resilient.
This doesn’t mean you need to use the most expensive option available, but there’s definitely a quality threshold below which problems become common. Mid-range to higher-quality brands developed by nail professionals who’ve tested these products extensively tend to perform significantly better than rock-bottom options.
The same principle applies to base coats, top coats, and prep products. A quality dehydrator actually works. A quality top coat provides real protection. These aren’t places to cut corners if you want results that last.
Post-Manicure Maintenance and Hydration: Aftercare That Extends Longevity
Your responsibilities don’t end the moment your gel cures. How you care for your nails after the manicure is applied significantly impacts how long they’ll look good.
The most important post-manicure practice is hydration. After that heavy dehydration during prep, your nails actually need moisture to stay healthy and maintain flexibility. Flexible nails support gel polish better than brittle, dry ones. Apply cuticle oil to your nails and cuticles twice daily, especially after washing your hands or any water exposure.
You should also apply hand cream regularly. Moisturizing your hands and nails keeps everything supple and reduces the stress on the gel adhesion that happens when nails become dry and brittle.
Avoiding water exposure for the first hour after application is also important. During the first few hours, the gel is still settling and bonding to your nail, and water exposure during this critical window can interfere with complete curing and adhesion.
Beyond that first hour, continue to minimize water exposure when possible—not because you can never get your nails wet, but because frequent, prolonged water exposure accelerates peeling. That doesn’t mean you can’t shower, wash dishes, or swim. It just means being mindful of keeping your hands out of water as much as practical and using gloves for tasks that involve prolonged water contact.
Final Thoughts
Peeling gel nails are frustrating, but they’re also one of the most preventable manicure problems. Every single case of premature peeling comes down to a specific cause or combination of causes—improper prep, moisture, thick applications, incomplete curing, skipped base or top coats, unseal edges, picking, or poor product quality.
The good news is that once you identify which factor is sabotaging your manicure, it’s usually simple to fix. If prep is your weak point, commit to the full sequence every single time. If moisture is the issue, dehydrate thoroughly and protect your nails from water. If curing is the problem, invest in a quality lamp and be patient with cure times. If picking is your habit, find strategies to break it. If product quality is the issue, upgrade your brands.
Most of the time, fixing peeling doesn’t require expensive solutions or professional techniques. It requires attention to detail, patience with processes that take a few extra minutes, and understanding that your gel manicure is only as good as every single step in its application and care. Commit to the full process, nail every detail, and you’ll have flawless gel nails that genuinely do last three weeks without issues.
