

Your wedding day is one of the most important moments of your life, and you want every detail—including your nails—to look absolutely stunning. But here’s the reality: bridal beauty expenses add up quickly. Between hair, makeup, the dress itself, and all the other finishing touches, your manicure budget might be feeling stretched thin. The good news? Looking like a polished bride doesn’t require spending a fortune at an upscale bridal salon or booking an appointment months in advance with an exclusive nail artist.
Beautiful bridal nails don’t have to break the bank. Whether you’re working with a tight budget or simply prefer to allocate your wedding funds elsewhere, there are plenty of elegant, sophisticated nail options that cost significantly less than high-end alternatives—without sacrificing the polished, professional look you deserve. From DIY approaches using affordable products to smart salon choices that deliver luxury results at fraction-of-the-price, you have more options than you might think.
The key to nailing a budget-friendly bridal manicure is understanding which styles offer the most impact for the least investment, knowing where to find quality products without premium pricing, and recognizing that timeless elegance doesn’t require elaborate designs or expensive embellishments. In fact, some of the most stunning wedding manicures are the simplest ones—a perfectly groomed nail with a flattering neutral shade, for instance, can look just as refined and wedding-ready as a high-maintenance design.
This guide walks you through eight nail ideas specifically chosen for brides who want to look beautiful without overspending. Each option is achievable, whether you’re working with a professional or doing your nails yourself, and every single one will photograph beautifully in your wedding day pictures. Let’s dive into affordable bridal nail solutions that prove elegance and budget-consciousness can absolutely coexist.
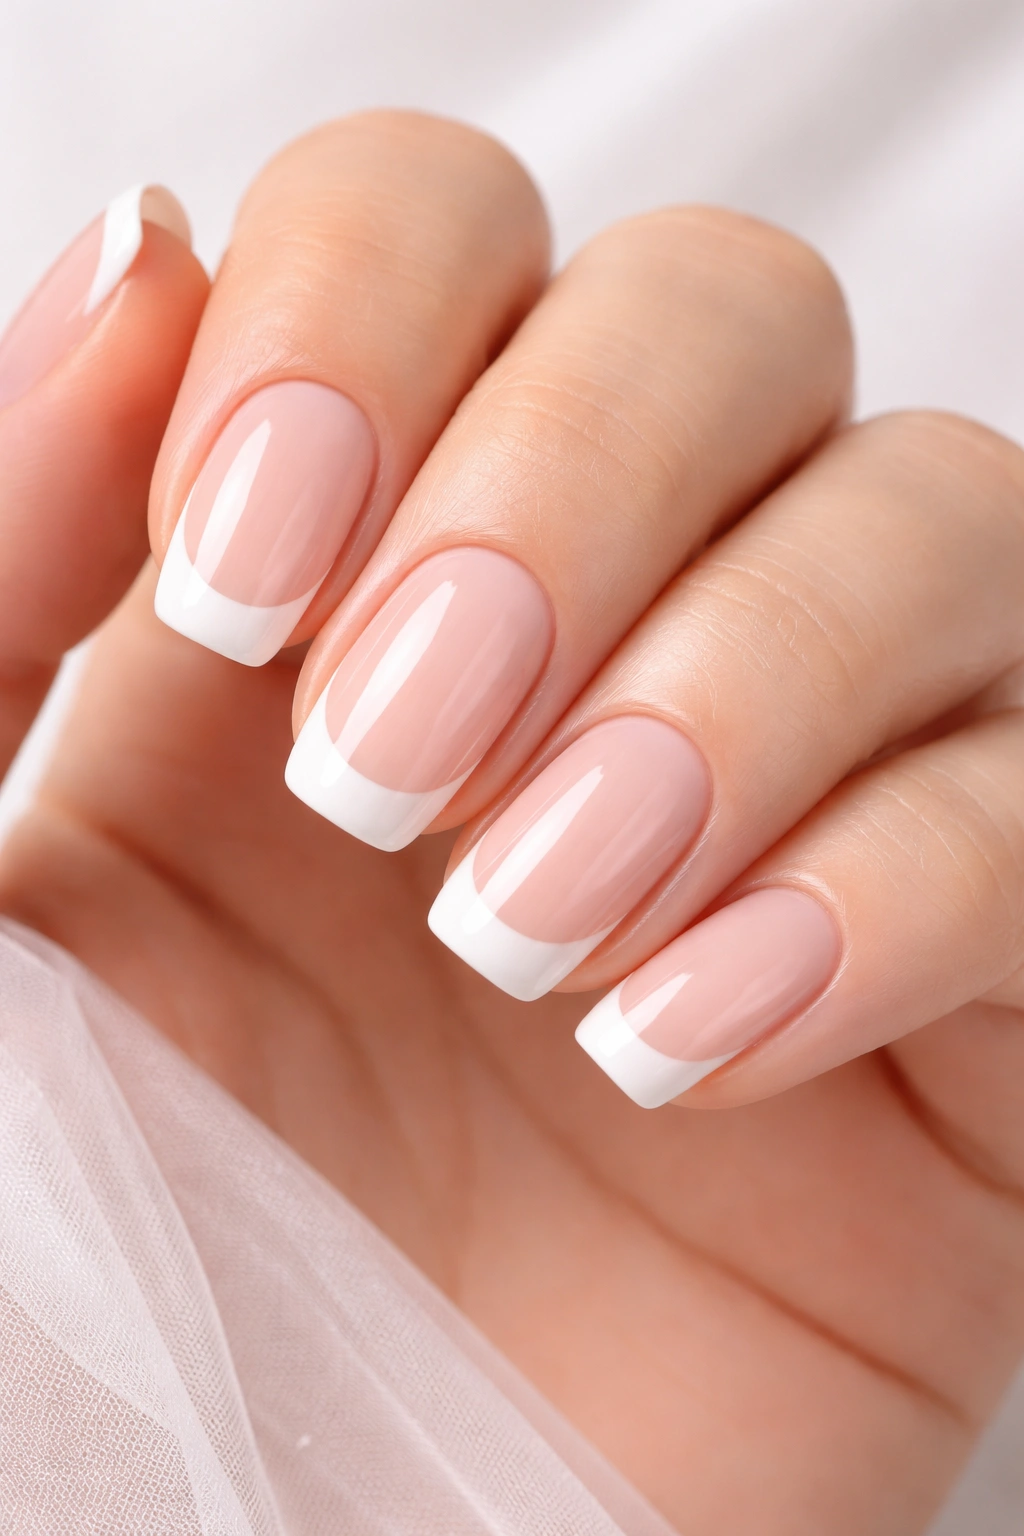
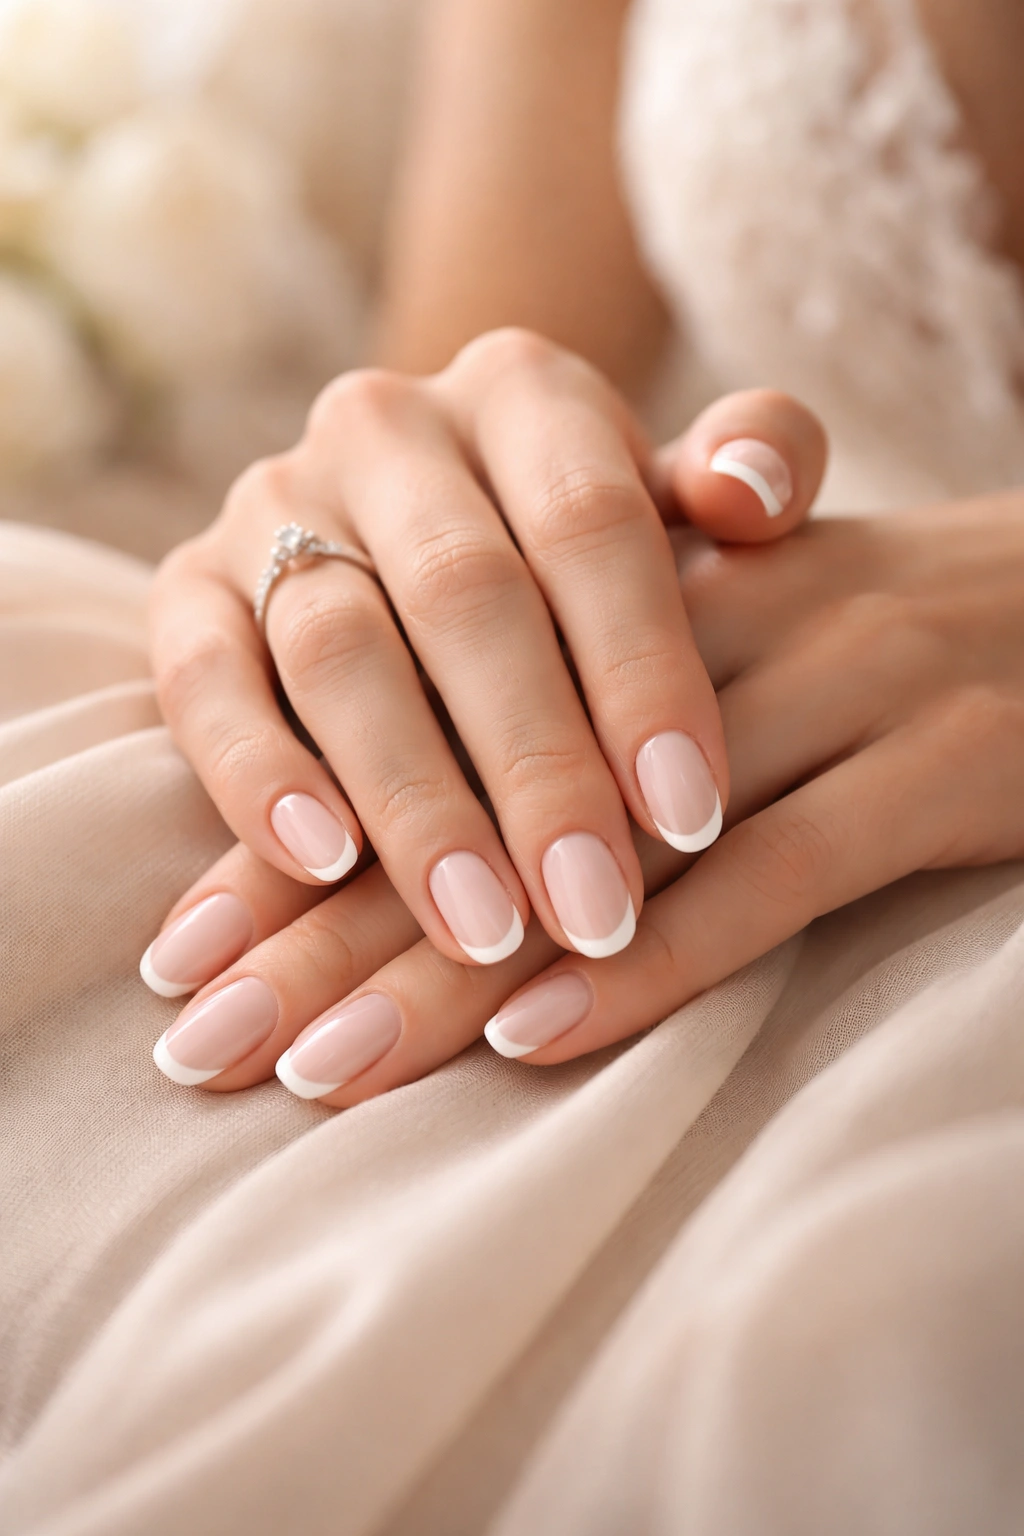
1. Classic French Manicure on Natural Nails
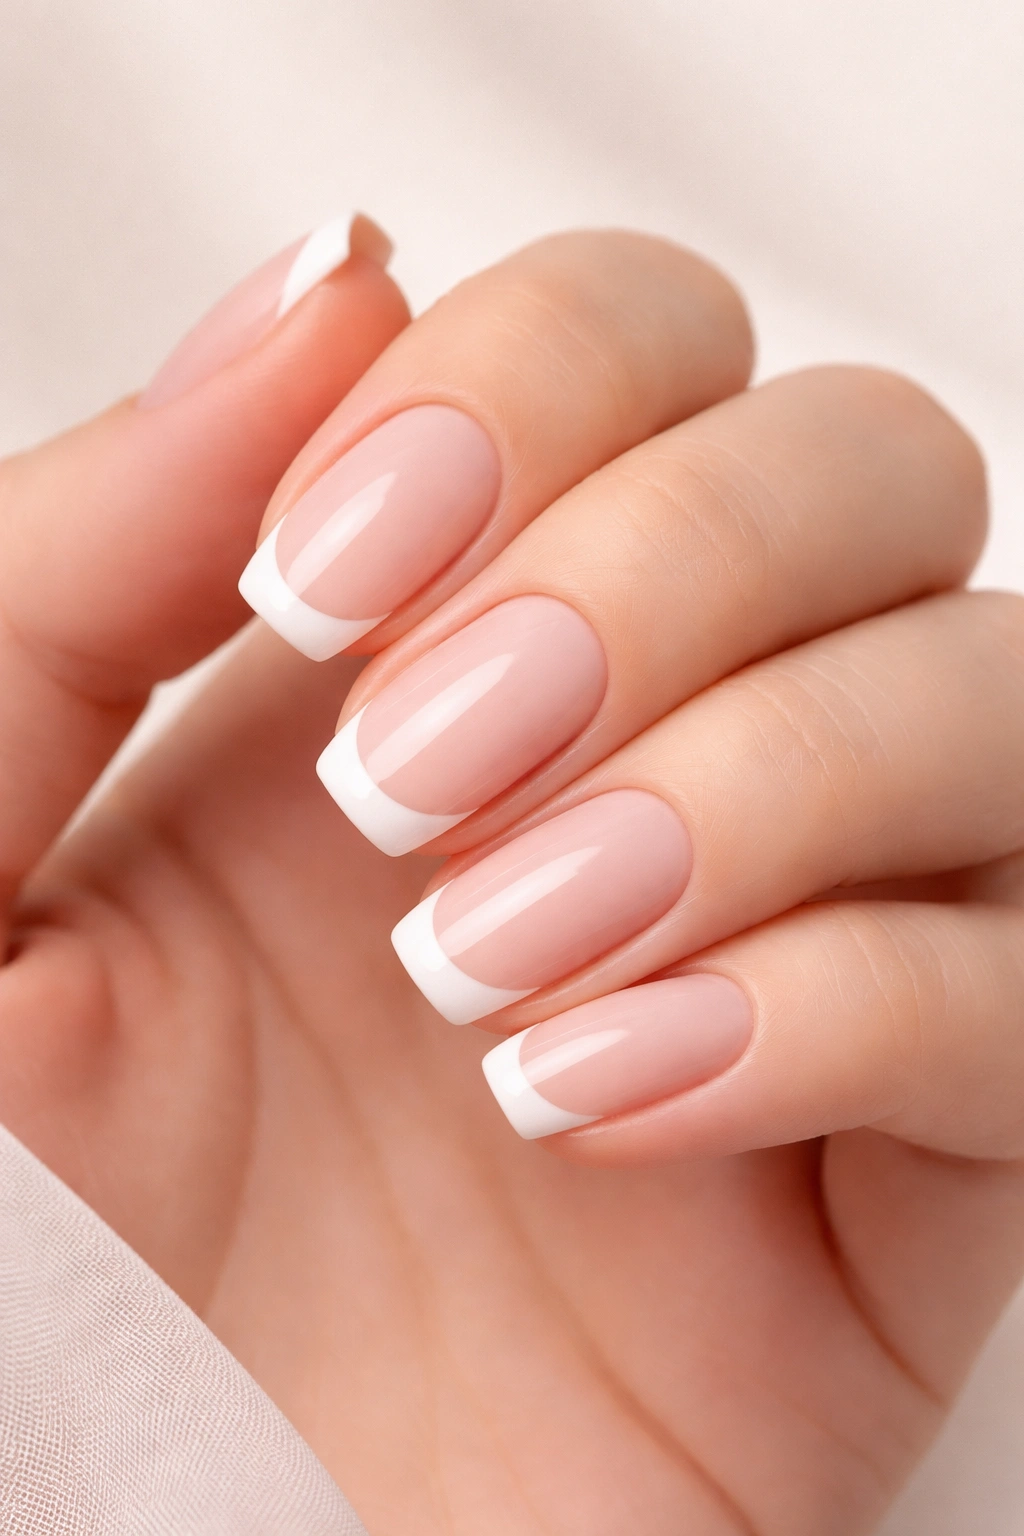
The French manicure is the definition of timeless bridal elegance, and the beautiful part? It costs virtually nothing to achieve if you have healthy natural nails and a steady hand. This iconic look features a nude or clear base with white tips, and it remains one of the most flattering options for any bride regardless of skin tone, dress style, or wedding aesthetic.
Why This Works for Budget Brides
A French manicure on natural nails requires only two inexpensive nail polish colors—a sheer nude or clear polish and a white polish—plus a standard topcoat. There’s no need for gel, acrylics, extensions, or complex designs. You can achieve this look for under $10 in supplies if you already have polish at home, or roughly $15-20 if you need to purchase everything from a drugstore. If you prefer to have a professional do it, a basic French manicure at a standard salon (not a bridal specialty salon) typically costs between $20-35, a fraction of the price you’d pay for anything more elaborate.
How to Get It Right
The key to a budget-friendly French manicure is precision. File your natural nails into a soft almond or oval shape—avoid anything too sharp or trendy looking, as you want your nails to feel timeless in photos. Push back your cuticles gently using a wooden or plastic pusher (metal cuticle pushers are harsh and can damage the nail bed). Buff the surface of your nails lightly to create a smooth base for polish adhesion.
Apply two thin coats of your nude or clear base polish, allowing each coat to dry completely before applying the next. The white tips should be painted with precision—you can use a thin nail art brush, a nail striping pen, or even a thin angled eyeshadow brush if you don’t have specialized nail tools. Paint the white tip in a clean line across the edge of each nail, keeping it slightly thinner than a traditional French tip for a more modern, refined look. Seal everything with a high-quality glossy topcoat for shine that lasts.
Pro tip: Practice your French manicure at least a week before your wedding. Doing a test run allows you to perfect your technique, troubleshoot any issues, and feel completely confident on your actual wedding day.
2. Press-On Nails with Customization
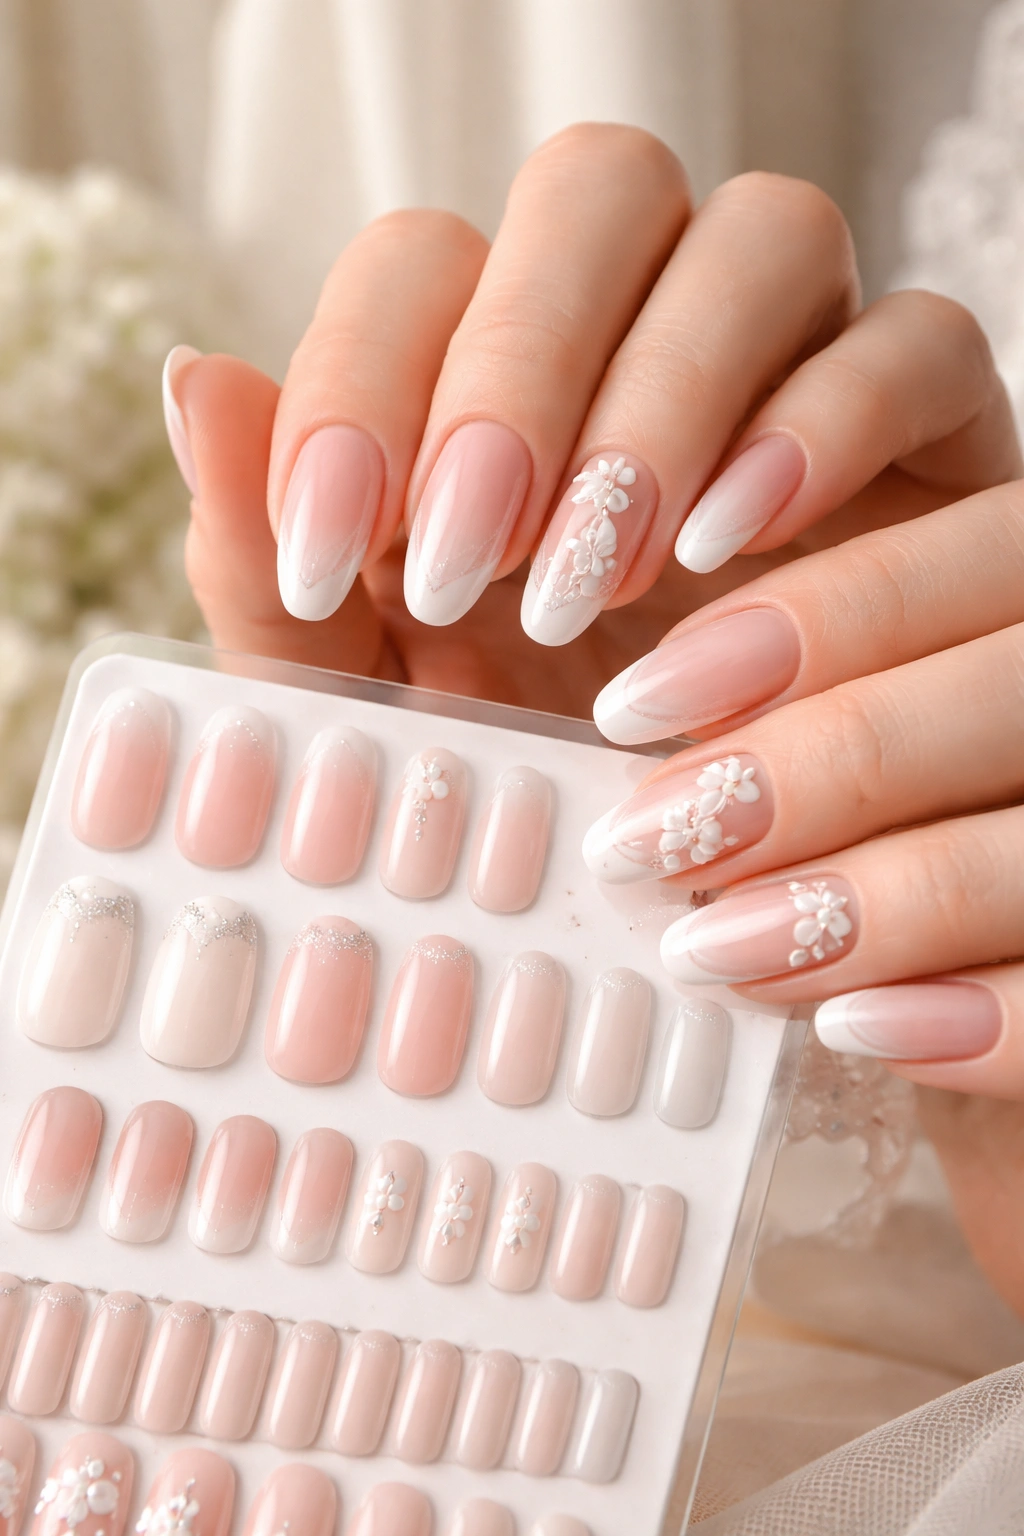
Press-on nails have undergone a complete transformation in recent years. What was once a budget option reserved for last-minute emergencies is now a legitimate, high-quality choice that many brides—from all budget categories—actively choose for their wedding day. Modern press-on nails look incredibly natural, last all day and night, and come in hundreds of styles and colors.
The Beauty of Budget-Friendly Press-Ons
Quality press-on nails range from $8-20 per set when purchased from drugstores or online retailers, compared to $50-150+ for a professional gel or acrylic manicure. Because you’re buying a pre-made set, there’s zero labor cost involved. You simply select the style you like, file the tips to match your nail beds perfectly (this is the secret to a seamless look), apply nail glue, and press them onto your natural nails. The entire application process takes 15-20 minutes, which you can do at home on the morning of your wedding while you’re getting ready.
Making Them Look Custom
The trick to making inexpensive press-on nails look like a luxe, personalized manicure is customization. Most nail sets come in multiple sizes, so take time to match each tip to your actual nail bed—a perfect fit eliminates any gaps and makes the nails look like they grew out of your fingers naturally. Use a nail file to slightly adjust the width or length to suit your hands.
Many brides take affordable, simple press-on sets and add personal touches: rhinestones glued on strategically, a thin line of metallic polish painted on, delicate lace stickers applied to just one or two accent nails, or even a tiny pearl glued to the tip of your ring finger to complement your wedding band. These customizations take 10 minutes and cost just a few dollars in supplies, but they transform a basic set into something that feels uniquely yours and far more expensive than it actually was.
Worth knowing: Always buy a backup set. At roughly $10-15, a second set takes up minimal space in your wedding day emergency kit and provides absolute peace of mind.
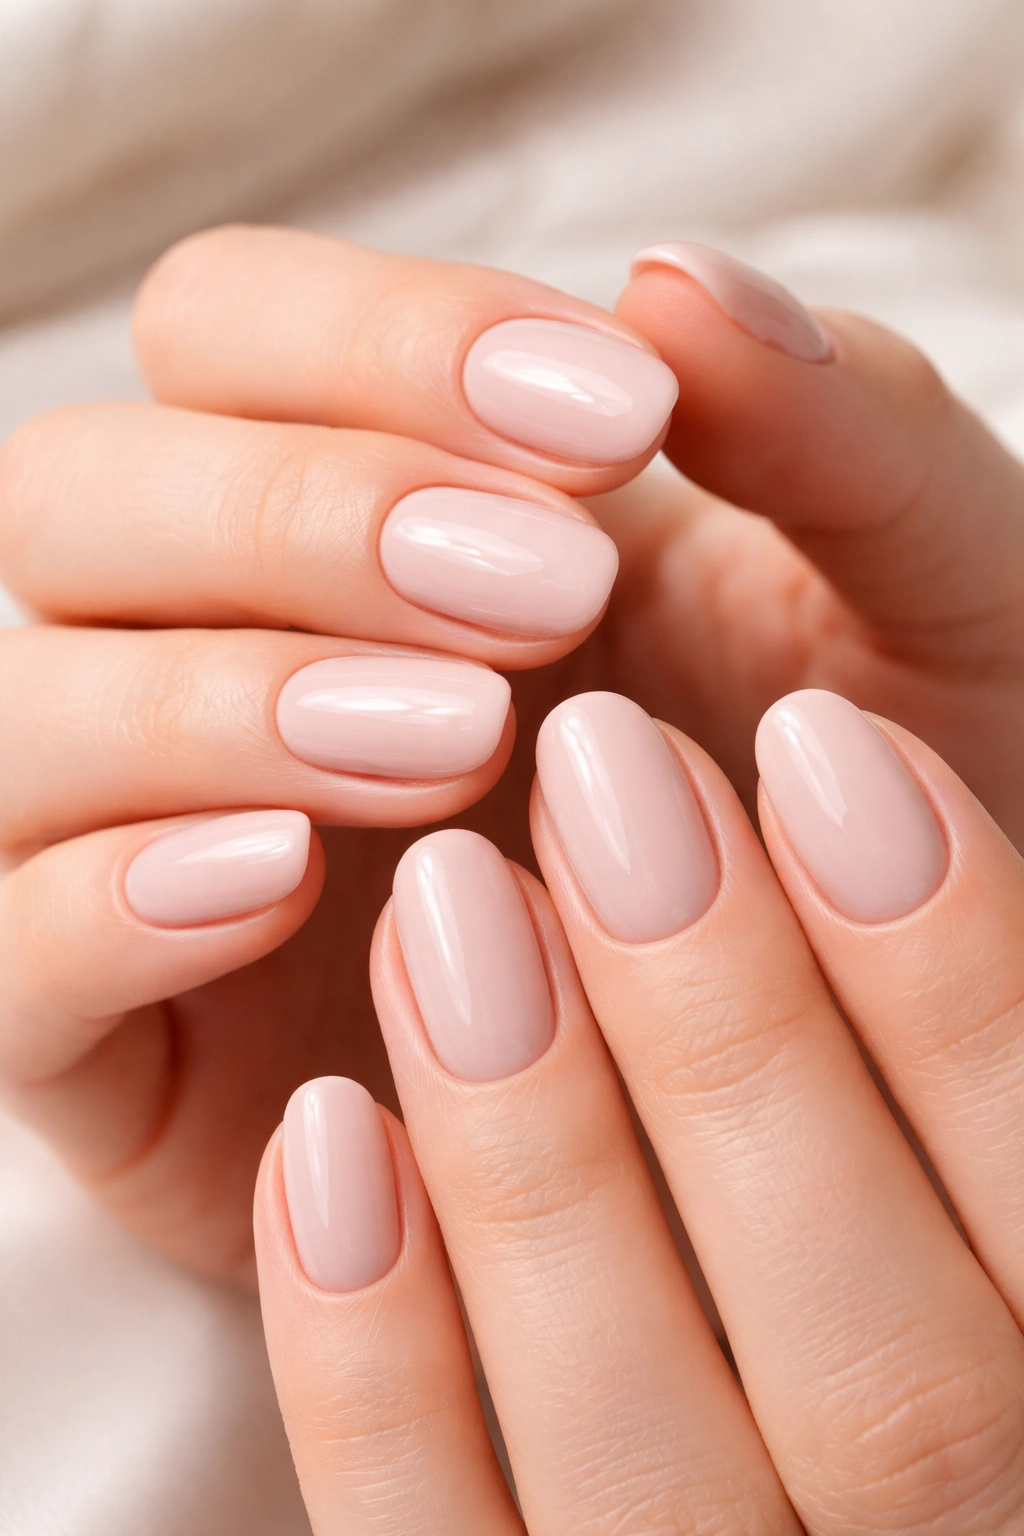
3. DIY Nude or Neutral Polish
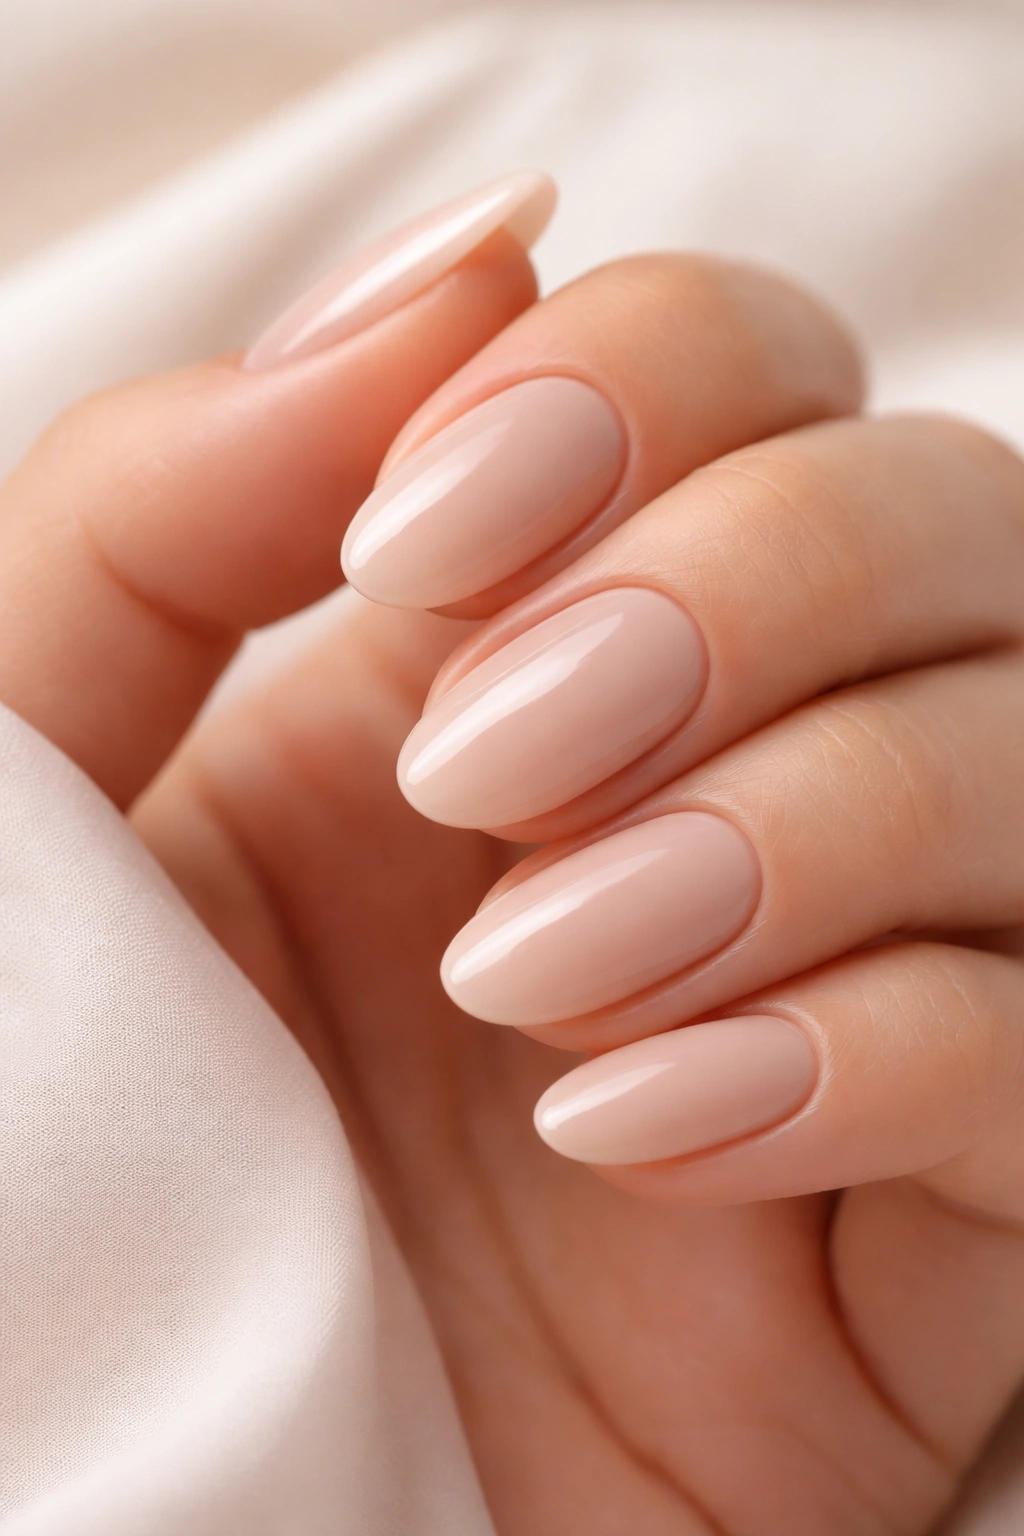
Sometimes the simplest approach is the most budget-friendly. A beautifully groomed set of natural nails painted in a flattering nude, beige, or soft peachy tone is the definition of understated bridal elegance. This option requires only a single bottle of polish and perhaps five minutes of application time.
Why This Is Perfectly Bridal
Neutral shades are universally flattering, work with any wedding dress color or style, and photograph beautifully. They create an elegant frame for your wedding ring without competing for attention, and they feel timelessly sophisticated rather than trendy. The neutral polish draws zero attention but somehow makes your entire hand look more polished and put-together—there’s real magic in that simplicity.
Executing the Look Flawlessly
Start with clean, well-groomed natural nails. Push back your cuticles, use a buffer to smooth out any ridges, and trim your nails to a length that feels natural and comfortable for your hands (shorter, rounder shapes tend to photograph better than very long or stiletto-shaped nails for traditional bridal looks). A soft almond or oval shape is universally flattering.
Choose a neutral shade that has a touch of warmth—pure whites can look harsh on many skin tones, while slightly tinted neutrals are more flattering. Look for shades with names like “ballet slippers,” “bubble bath,” “pale pink,” “barely there,” “sand,” “beige,” or “peachy nude.” Apply two coats of your chosen polish, allowing proper drying time between coats. A glossy topcoat adds shine and professional finish. The entire project costs under $5 if you already own nail polish, or roughly $8-10 to purchase a quality formula.
Insider note: A glossy topcoat makes an inexpensive polish look far more expensive and professional. This single step is worth the investment.
4. Gel Manicure at Budget-Friendly Salons
Gel manicures are more durable than regular polish and last longer with zero chipping, making them ideal for a bride who’s investing time and money in her appearance. The misconception is that gel manicures are expensive, but they’re actually quite affordable if you visit a standard neighborhood salon rather than a high-end bridal salon or upscale urban location.
Finding Affordable Gel Services
Standard salons in most areas charge $30-50 for a basic gel manicure, which is comparable to or even cheaper than a traditional manicure in many regions. You’ll pay more for complex nail art, extensions, or embellishments, but a simple, elegant gel manicure—just solid color with no designs—costs the same as or less than what you’d pay for other bridal nail options. The benefit: your nails will stay chip-free through your entire wedding day and night, including dancing, toasts, and celebration.
Choosing Your Gel Look
Keep your gel manicure simple and understated. A soft neutral shade, a subtle nude with shimmer, or a classic French manicure in gel all work beautifully and cost exactly the same as more complicated designs. You eliminate the premium you’d pay for custom nail art simply by choosing a straightforward style. File the nails into a soft shape that flatters your hands—your nail technician can guide you here.
Call ahead to confirm the salon’s pricing, but don’t be shy about asking for simplicity. Some salons assume brides want elaborate designs and may quote higher prices. When you specifically request a simple single-color gel manicure, you’ll likely find the cost is significantly lower than you expected. Additionally, many salons offer discounts for booking during off-peak times (weekday mornings or afternoons), so see if you can schedule your appointment for a less busy time.
Pro tip: Schedule your gel manicure two to three days before your wedding, not the day before. This gives you a small buffer in case you need touch-ups, and it avoids potential stress on the day of.
5. Simple Design with Rhinestone Accents
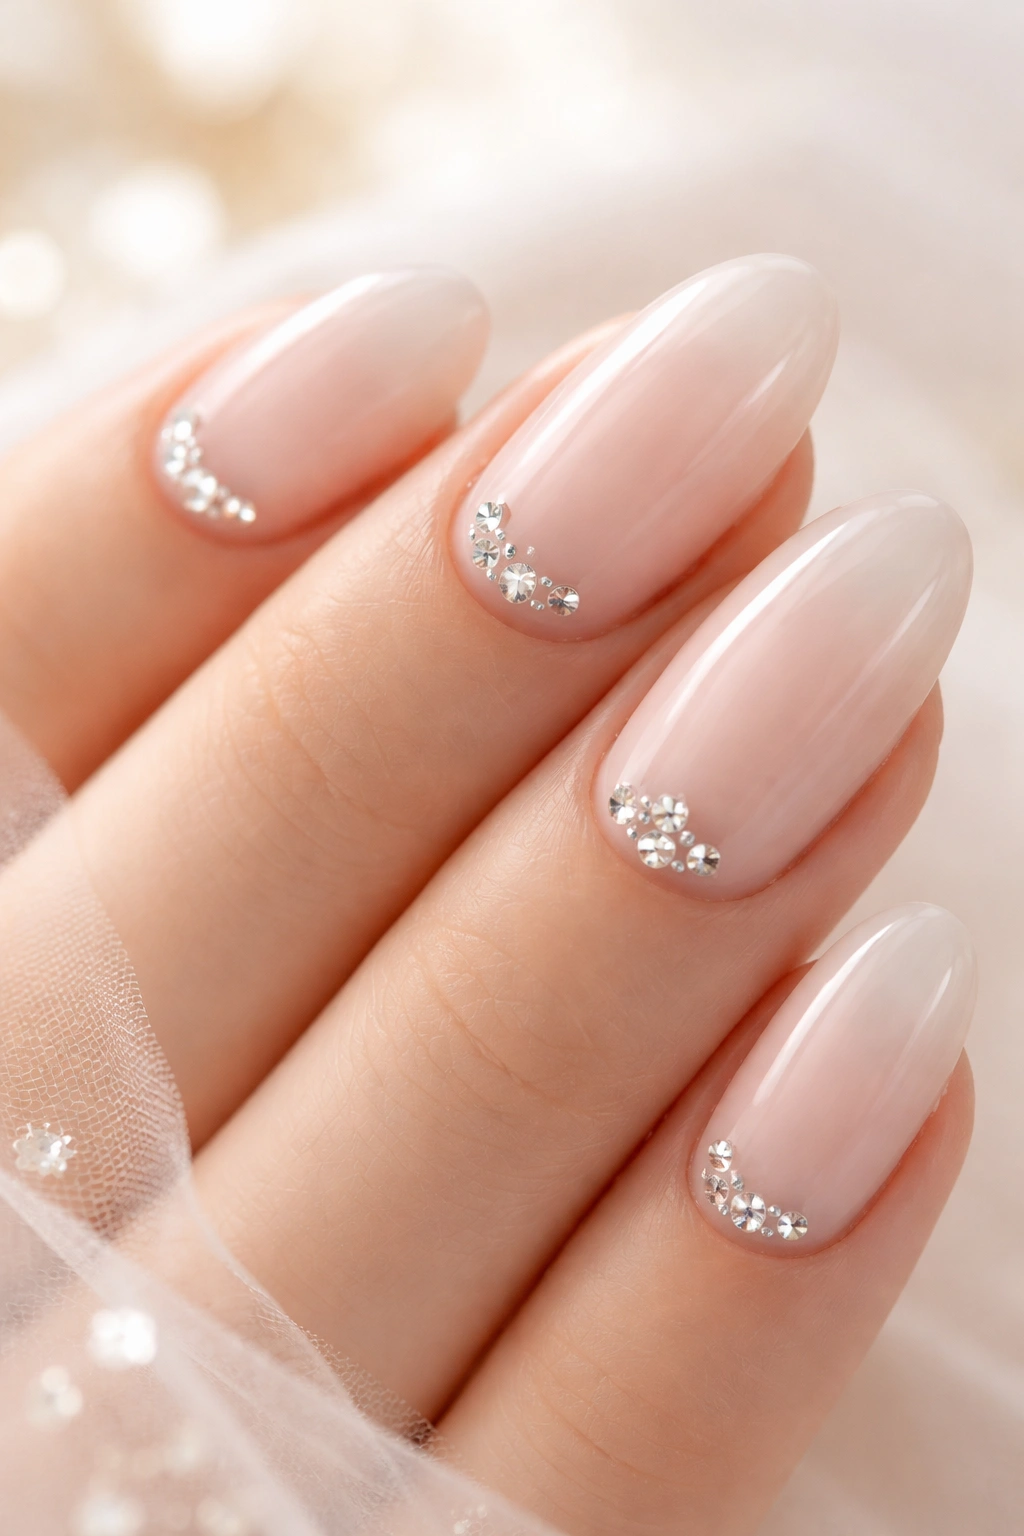
Want a touch of personality and sparkle without elaborate nail art? A simple base color with strategically placed rhinestones offers visual interest and glamour while remaining incredibly affordable. This approach gives you that “extra something” without the premium price tag that usually comes with custom design work.
Budget-Friendly Glamour
Rhinestones are inexpensive—you can buy a assorted pack of quality crystals for $3-5, and a small bottle of nail glue costs about $2-3. A bottle of neutral polish runs $5-8. Total investment: under $15, and you’ll have plenty of supplies left over. If you prefer to have a professional apply the rhinestones, most salons charge a small design fee (typically $5-10) on top of the basic manicure cost, keeping your total under $40-50.
Making Rhinestones Look Intentional
The key to making rhinestones look elegant rather than tacky is restraint. Don’t cover your entire nail with stones. Instead, place a single rhinestone on the tip of each nail (particularly flattering on ring fingers), or create a small cluster of 3-4 stones near the cuticle area. You can also place one small stone on just your ring finger as a subtle sparkly accent, or create a tiny “V” shape using three stones on two accent nails.
Choose clear or white rhinestones for maximum versatility, or select shades that coordinate with your wedding palette or metals in your jewelry. Ensure stones are set properly—if applying them yourself, let the nail glue dry completely (follow the instructions on your glue bottle) before submerging your hands in water.
Worth knowing: Rhinestones purchased from craft stores are often cheaper than nail-specific rhinestones and work just as well. A quick trip to a craft store can cut your costs by half.
6. Matte Finish on Natural Nails
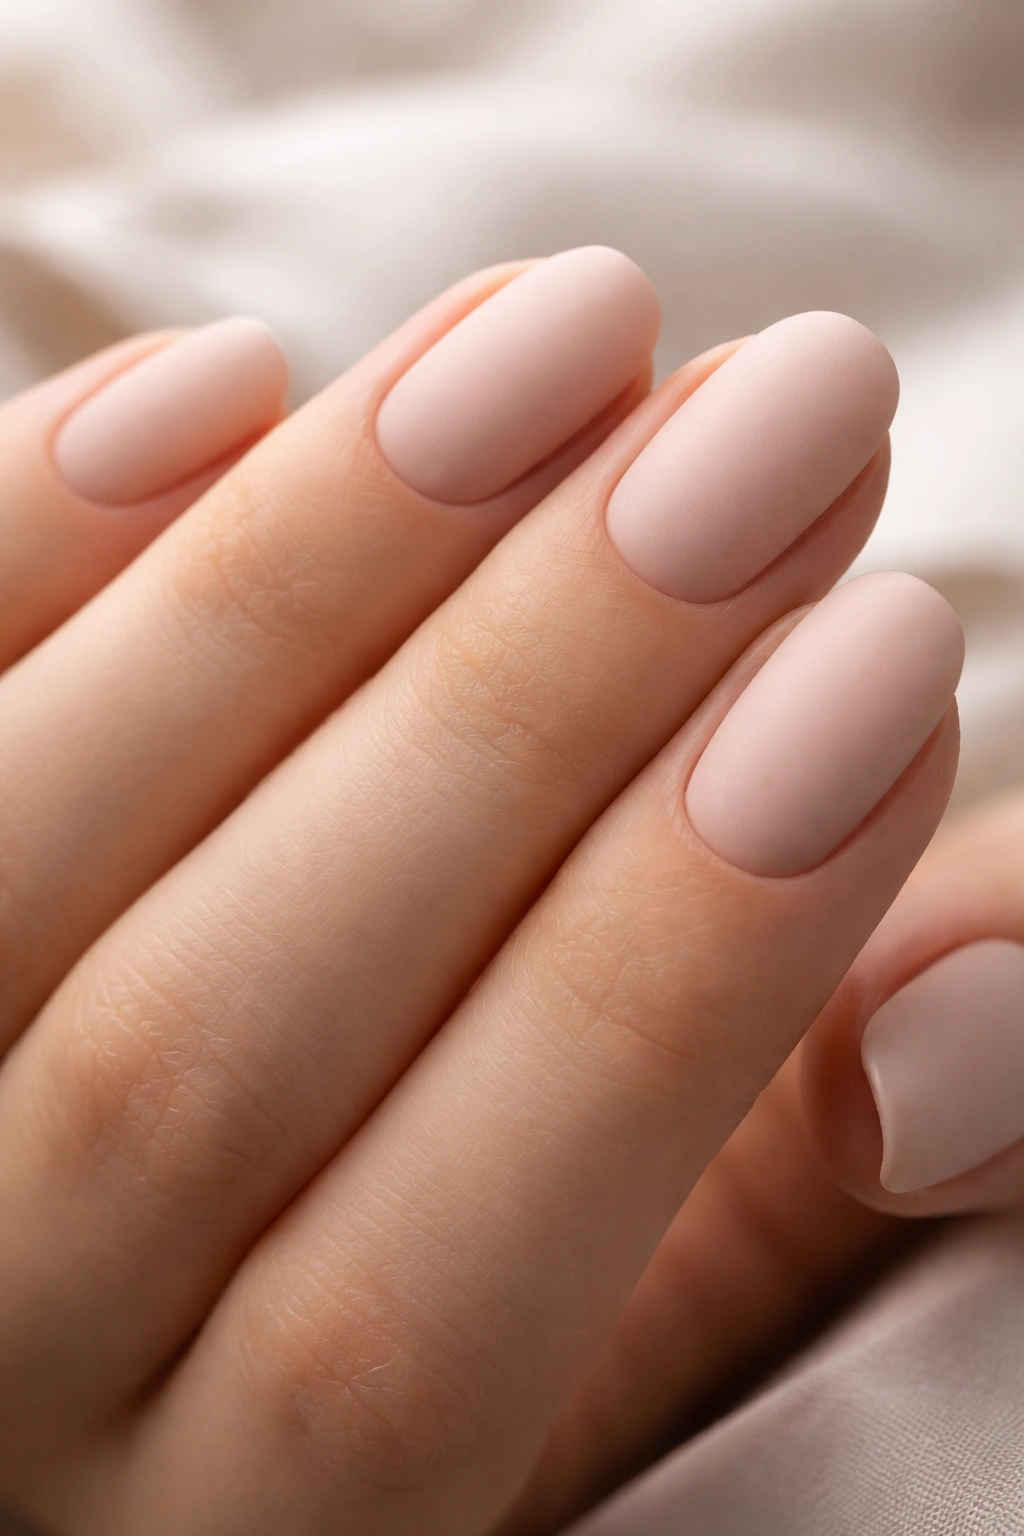
Matte nail finishes have become increasingly popular and sophisticated, offering a modern, understated elegance that photographs beautifully. A matte manicure on natural nails is not only affordable but also incredibly chic, with a velvety finish that looks far more expensive than its actual cost.
The Appeal of Matte Finishes
A matte topcoat transforms any polish into a modern, refined look. Instead of a shiny, glossy finish, matte creates a soft, velvety appearance that feels luxurious and intentional. This can be achieved with inexpensive products: a drugstore neutral polish plus a matte topcoat costs roughly $8-12 total. If you prefer a professional application, most salons charge the same for matte finish as they do for glossy finish, so there’s zero cost premium.
Application and Durability
Matte finish works best with softer, more neutral tones—think warm beiges, dusty pinks, soft grays, or creamy whites. Apply your chosen polish with two coats of even coverage, then seal it with a matte topcoat. The topcoat is essential; it protects your polish and gives you that professional, intentional matte look rather than a dull or chalky appearance.
Matte manicures on natural nails last about a week before showing signs of wear, which is perfect if you’re applying them a few days before your wedding. If you want maximum longevity, ask your nail technician to apply a gel matte manicure instead of regular polish with matte topcoat—same aesthetic, superior durability, still affordable.
Pro tip: Matte finishes look particularly stunning in close-up wedding photography. The soft finish is incredibly photogenic and conveys sophistication without appearing shiny or overdone.
7. Dip Powder Manicure at Home
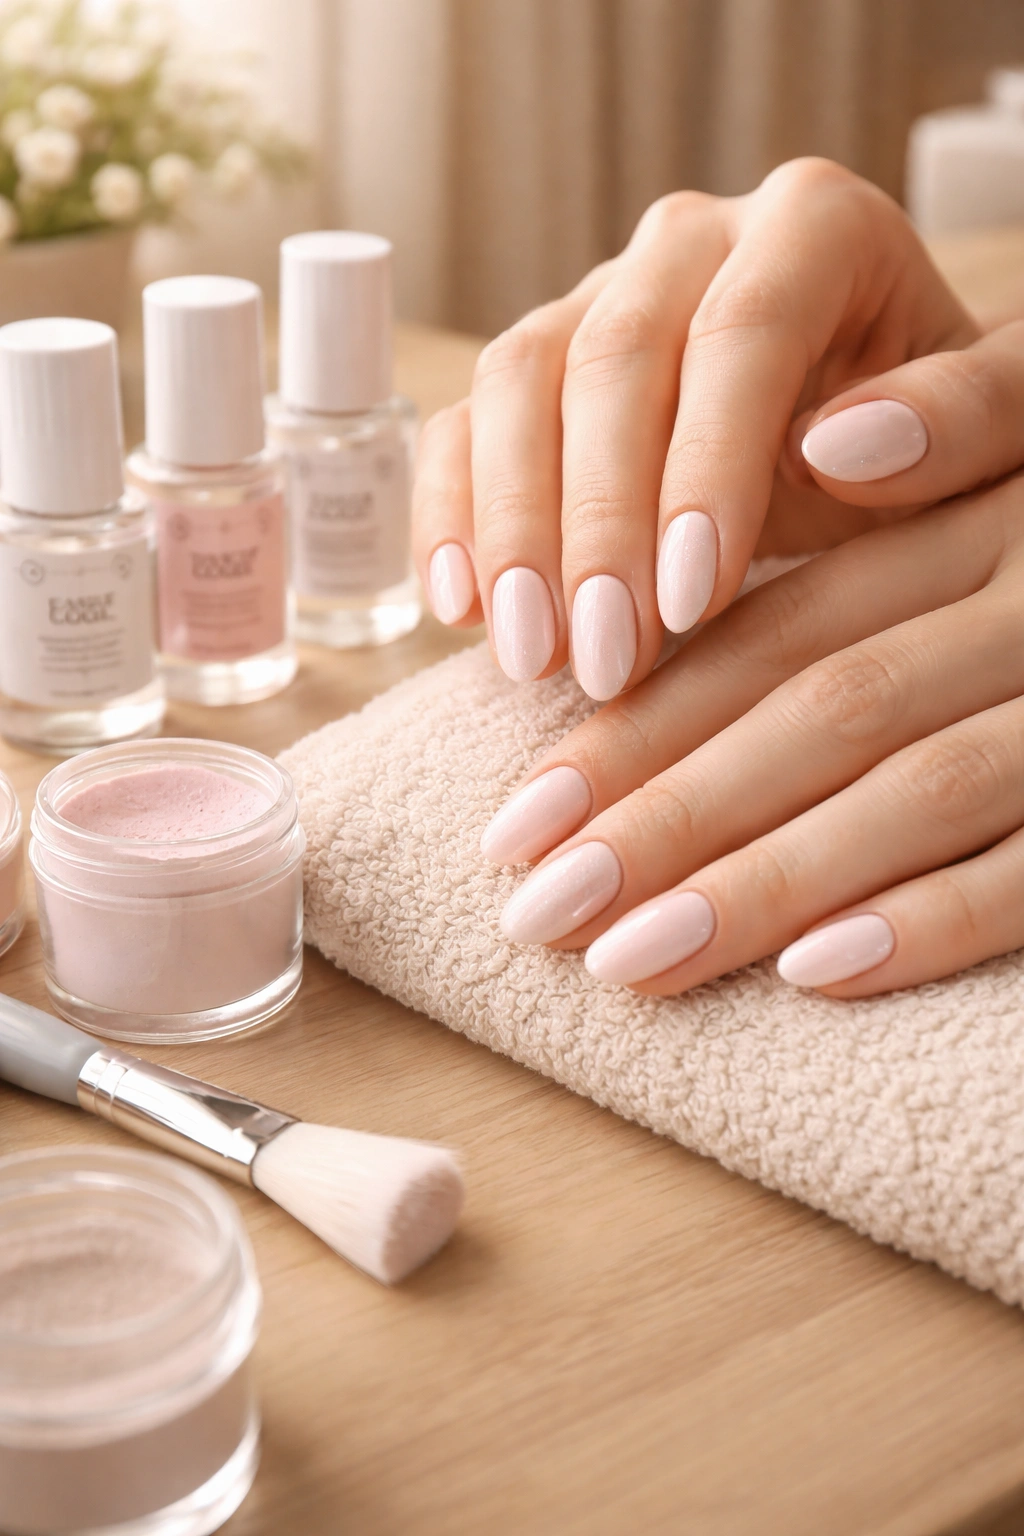
Dip powder manicures have become remarkably popular, and for good reason: they’re durable, beautiful, and far more affordable to do at home than gel manicures. A dip powder starter kit costs roughly $25-40 and includes everything you need to create salon-quality manicures repeatedly, meaning your cost per manicure drops to just $2-3 in supplies.
Building Your Dip Powder Kit
A basic dip powder system requires four components: a base coat (activator), dip powder in your chosen color, a top coat (usually called a “seal” or “gloss”), and a drying agent or accelerator. Many brands sell complete starter kits that include all of these items plus a nail file and cuticle pusher. Once you’ve invested in the initial kit, you can use it multiple times, making each subsequent manicure extremely budget-friendly.
Creating Your Bridal Manicure
Choose a soft neutral dip powder color—options include milky whites, soft pinks, warm beiges, or nude shades. The application process is straightforward: apply base coat to your nail, dip your finger into the powder jar at a 45-degree angle, tap off excess, apply another layer of base coat, dip again, then seal with topcoat and accelerator.
The result is a durable, professional-looking manicure that lasts 2-3 weeks without chipping. For your wedding day, apply your dip manicure 3-5 days beforehand so it has time to fully cure and harden. Dip powder is incredibly durable through dancing, eating, toasting, and all the physical activity of a wedding day—far more resilient than regular polish.
Worth knowing: YouTube tutorials for dip powder application are abundant and genuinely helpful. Watch a few before your first attempt, and your application will be significantly more successful.
8. White Tips on Natural Nails with Gloss
Here’s an underrated budget option that delivers major bridal impact: perfectly groomed natural nails with clean white tips and a high-gloss topcoat. This approach offers the timeless elegance of a French manicure with more freedom in execution, and it costs almost nothing to achieve.
Why This Works
Clean, white-tipped nails have been a bridal staple for decades because they simply work. They’re universally flattering, photograph beautifully, and convey polish and sophistication. You don’t need to paint a perfect smile line—instead, you simply ensure your white tips are clean and well-groomed. This eliminates the precision painting required for a traditional French manicure, making it more forgiving for DIY application.
Execution Made Simple
File your natural nails to a soft, medium length in your preferred shape. Using a white nail pencil (these are designed specifically for whitening under the nail edge) or a white chalk pencil from an art supply store, draw along the underside of your nail edge to brighten and define the white tip. This takes seconds and requires no painting skills whatsoever.
Alternatively, gently buff the very tip of each nail with a white nail buffer or a piece of white chalk, which deposits whiteness along the edge. Then apply a clear glossy topcoat to seal everything and add shine. The entire process takes five minutes and costs under $5 in supplies (white pencil or chalk plus clear topcoat).
Insider note: A quality glossy topcoat is the secret ingredient that makes simple nails look polished and professional. Invest in a good one—the difference is immediately visible.
Final Thoughts
Looking absolutely stunning as a bride doesn’t require spending a fortune on your nails. Each of these eight options proves that budget and beauty are not mutually exclusive. Whether you choose the timeless elegance of a French manicure on natural nails, the practical durability of press-ons, the subtle sophistication of a matte finish, or any other option on this list, you can absolutely achieve a polished, professional bridal manicure without breaking your wedding budget.
The most important element of your bridal nails is that they make you feel confident and beautiful. Choose the option that aligns with your skill level, budget, and personal style. If DIY isn’t your comfort zone, don’t hesitate to visit an affordable neighborhood salon rather than a pricey bridal specialist—you’ll likely be amazed at the quality you can get for a fraction of the cost. If DIY is your jam, you’ll find that the simplest options often look the most elegant in photographs.
Remember that your hands will be prominently featured in your wedding photos—holding your bouquet, showing off your ring, during the vows, in toasts. You deserve to feel proud of how they look. By choosing one of these budget-friendly options and investing time in proper nail care beforehand, you’ll have beautiful, photograph-ready nails that complement your entire bridal look without derailing your wedding budget. That’s the kind of smart, confident choice that makes any bride feel even more beautiful on her special day.
