

Long oval nails are the ultimate canvas for prom night glamour. There’s something about the elegant elongated shape that just screams sophistication — it flatters your hands, photographs beautifully, and gives you so much room to work with design-wise. Whether you’re going for understated elegance or show-stopping sparkle, oval nails can pull off virtually any aesthetic you’re imagining for your big night.
The beauty of prom nails is that they’re a low-pressure way to express your personal style without committing to a major hair change or dress redesign. Your nail design can complement your entire look — or totally surprise people who know your everyday aesthetic. Plus, your nails will be visible in every single photo, so why not make them absolutely stunning?
Long oval nails specifically offer this perfect balance between dramatic length and wearability. They’re not as fragile as super pointy acrylics, they don’t shorten your fingertips like very short nails do, and the shape is deeply flattering to most hand shapes. The elongated oval creates an optical illusion that makes your fingers look longer and more graceful — which is exactly what you want when you’re getting your hands done for a formal event.
Here are 12 prom nail designs that will have you obsessing over your hands in every mirror and every photo.
1. Soft Pearl with Gold Leaf Accents
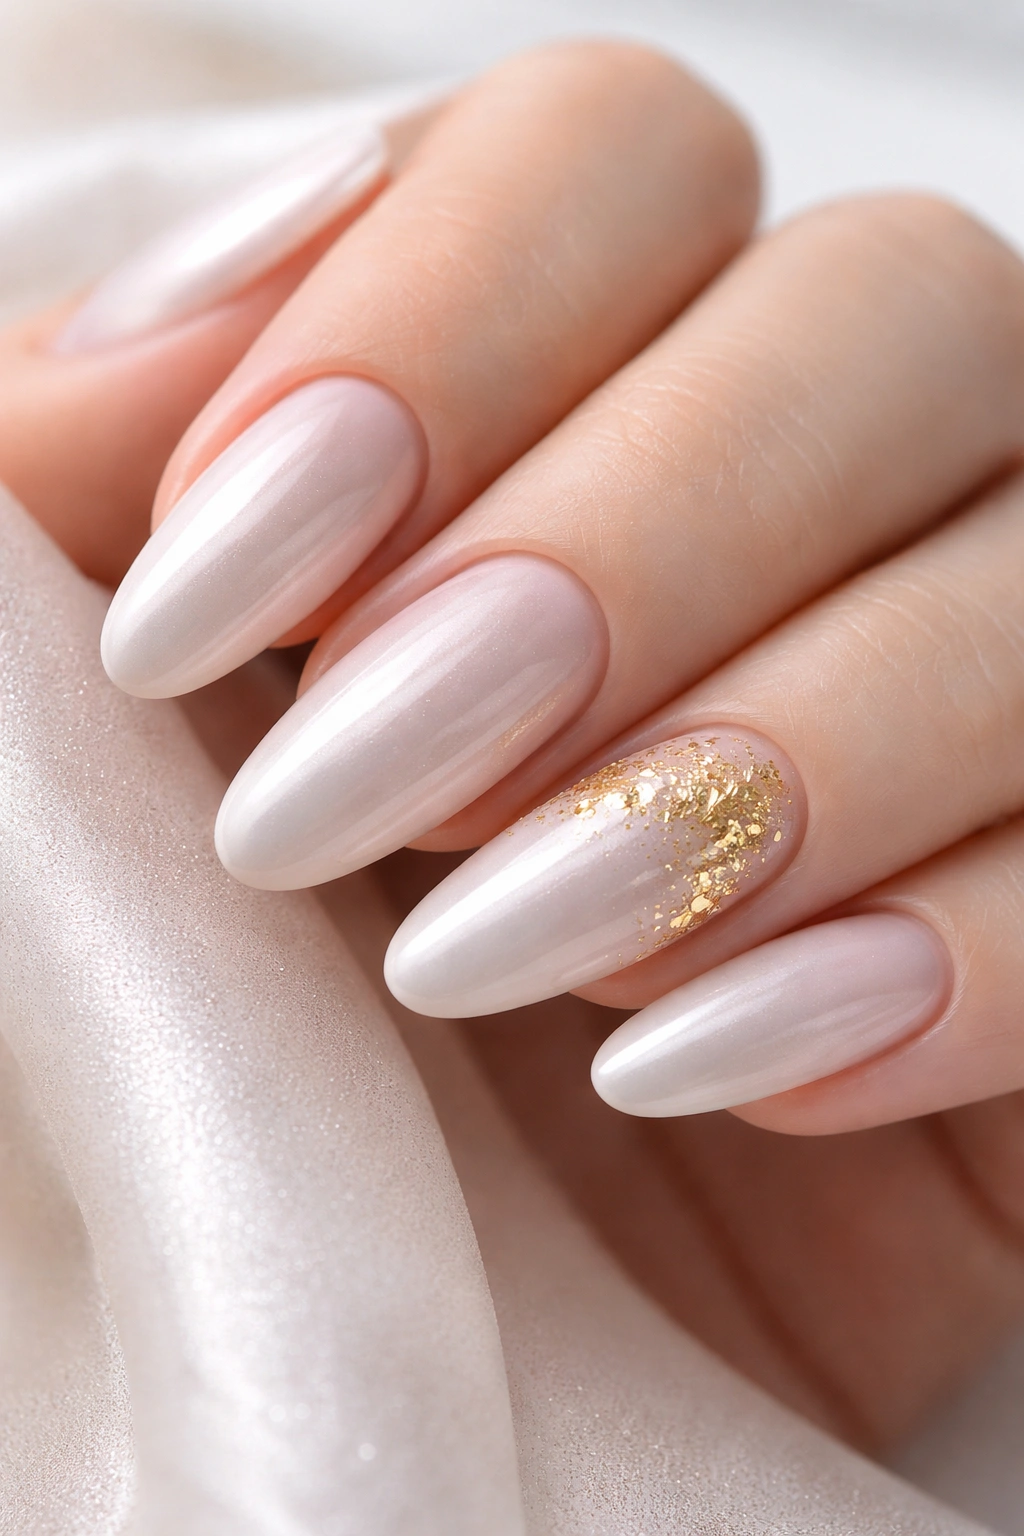
Soft pearl is the definition of understated luxury for prom. This design uses a creamy, iridescent pearl base that shifts between white, champagne, and soft pink depending on how the light hits it. The beauty is that it works with literally any dress color and won’t compete with a busy gown or statement jewelry.
Why This Works for Prom
Pearl nails feel mature and sophisticated without being trendy or dated. Gold leaf accents — placed strategically on one accent nail or scattered across all ten — add just enough visual interest to elevate the design beyond plain. The combination of pearl and gold is inherently elegant and works for both casual after-prom events and formal dinner photography.
Design Details to Ask Your Nail Tech
- Base: Soft pearl or oyster pink shimmer (not white — too stark)
- Accent placement: Gold leaf on the ring and pinky finger nails, or scattered along the tips
- Finish: Glossy or matte top coat depending on the pearl shade (glossy tends to enhance the iridescence)
- Optional: Add a tiny crystal or diamond stud at the cuticle area for extra glam
- Longevity: This design typically lasts 3-4 weeks without chipping because solid pearl colors are forgiving
Pro tip: Ask your nail technician to use thin, delicate gold leaf rather than chunky flakes. Thinner leaf adheres better and looks more refined on long oval nails.
2. Classic Deep Red Ombre
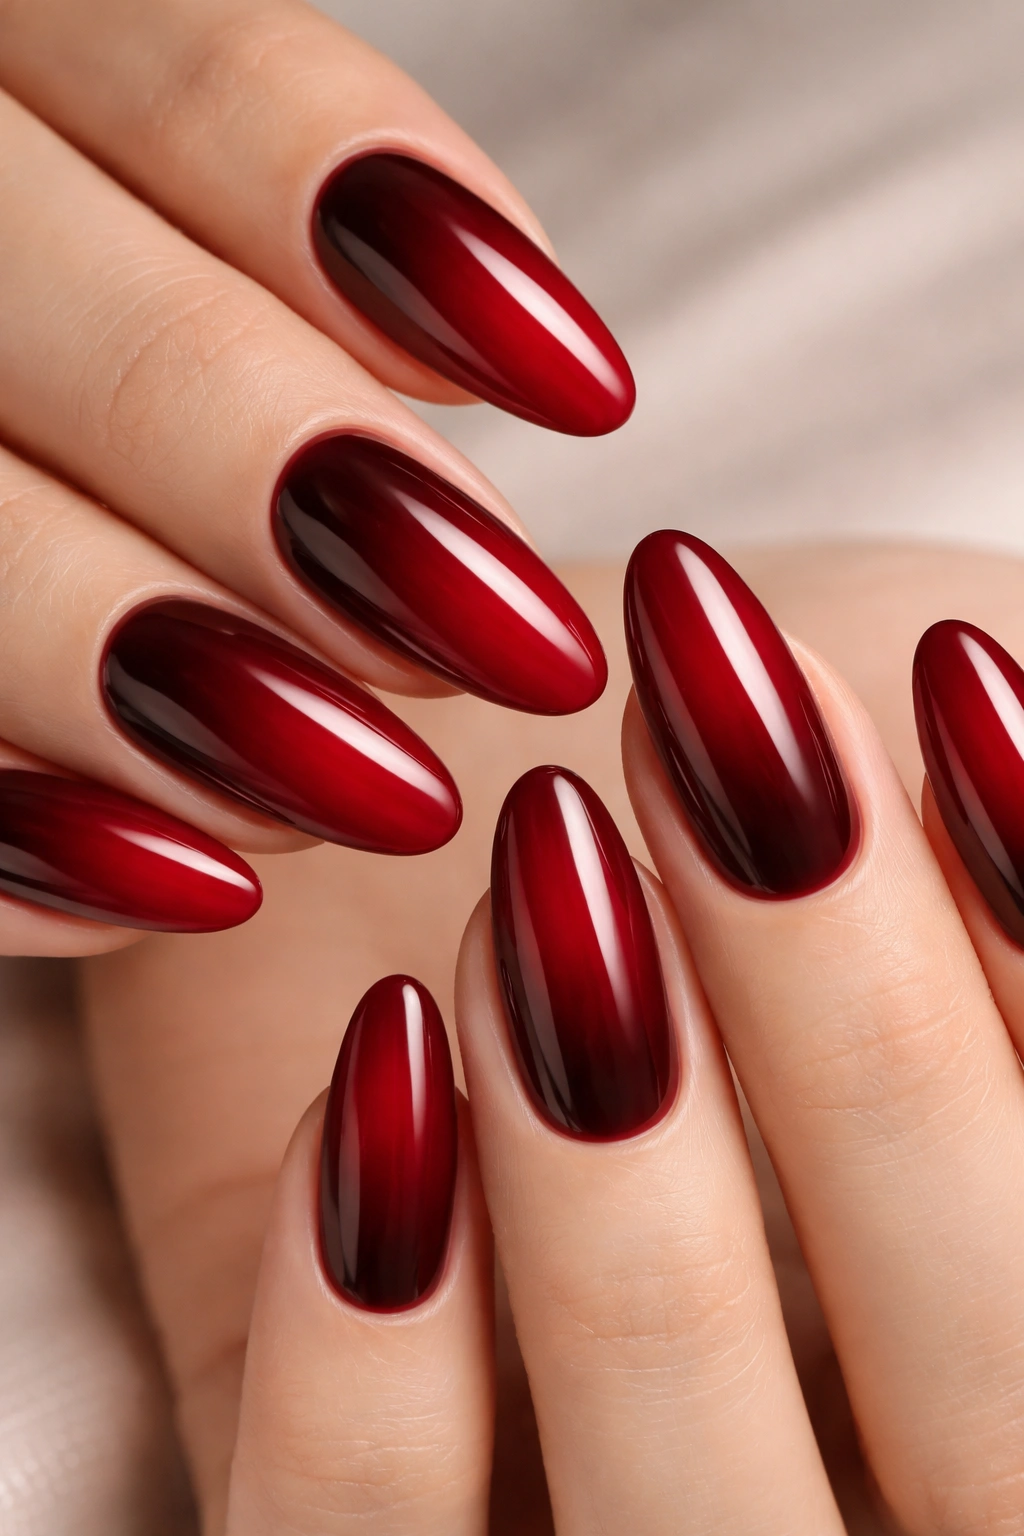
Deep red is prom red. It’s bold, it’s timeless, and it says you’re confident and ready to have an amazing night. An ombre technique — where the red is darker at the base and gradually transitions to lighter shades toward the tips — creates movement and dimension without looking busy.
The Red Ombre Technique
Start with a deep burgundy or wine red at the cuticle that gradually fades to a brighter cherry red or even nude-red blend at the tips. This gradient effect is incredibly flattering on oval nails because it elongates the nail and creates a subtle depth that plain color can’t achieve. The ombre also hides growth beautifully, so your nails will look freshly done for weeks.
How to Maintain This Look
- Get a gel manicure rather than regular polish if you want this to last through prom and beyond
- Schedule your appointment 2-3 days before prom to avoid smudges and allow time to fix any imperfections
- Wear gloves when washing dishes to prevent the ombre from fading unevenly
- Keep cuticle oil on hand for touch-ups — red ombre can look dull without regular moisturizing
- A glossy top coat will make the ombre pop more than matte
Worth knowing: Red ombre photos beautifully. The gradient will show up clearly in flash photography and look stunning in close-up shots.
3. Romantic Blush Pink with Pearl Swirls
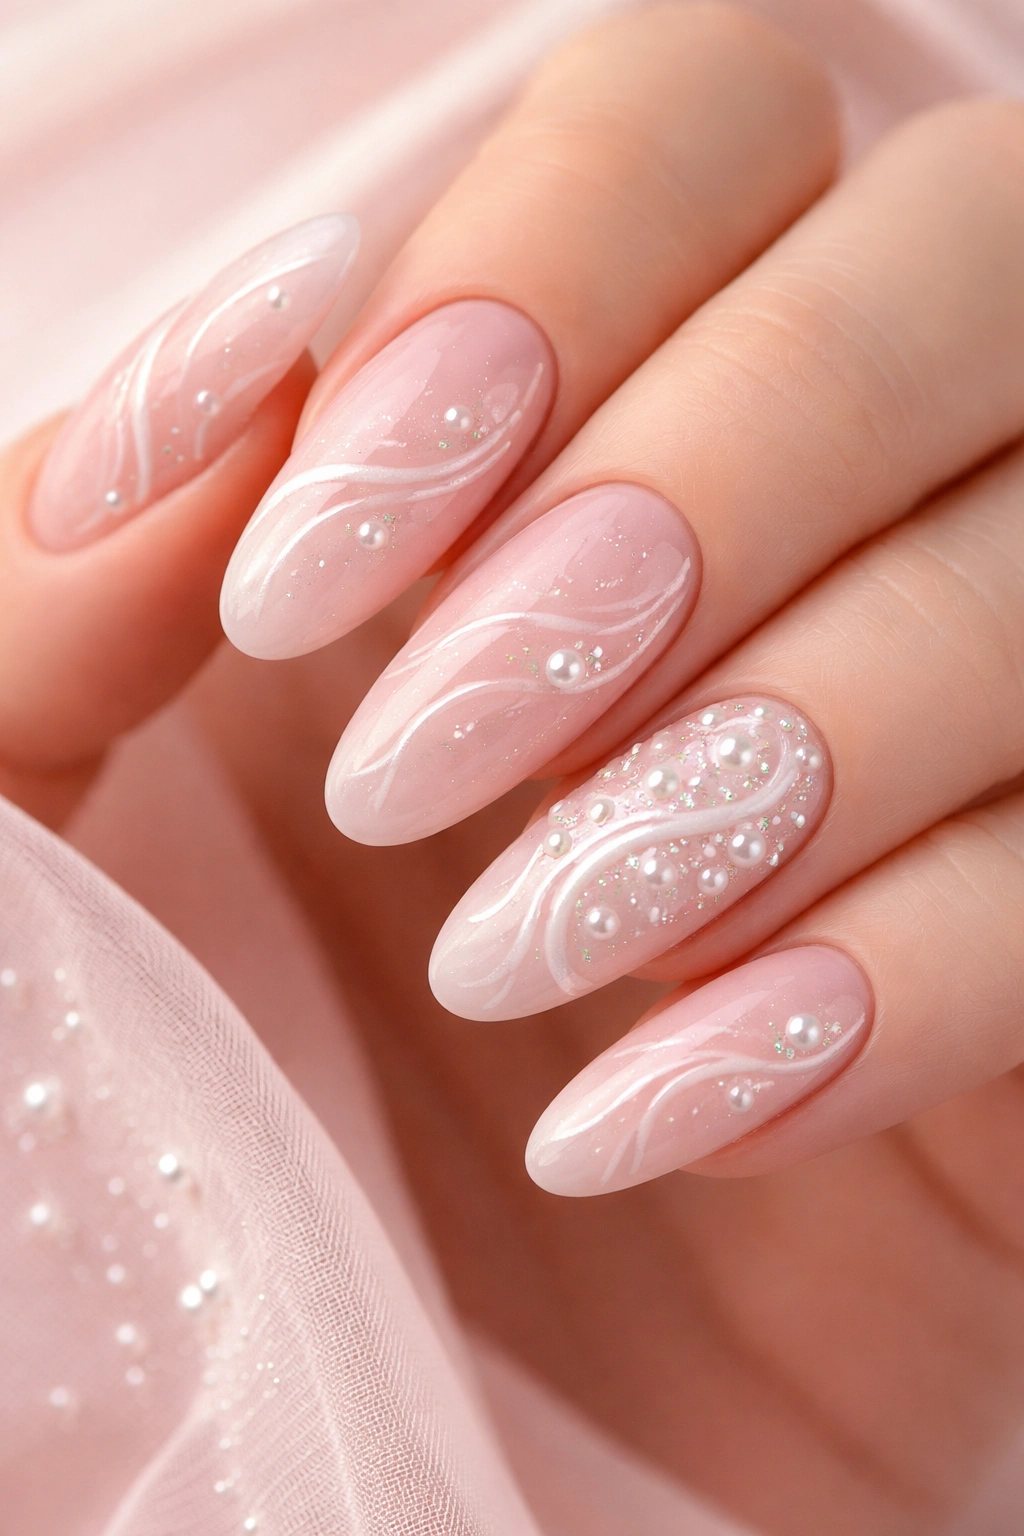
If your prom dress is any shade of pink, white, or neutrals, blush pink nails with pearl swirls are an absolute dream. This design is soft, romantic, and effortlessly chic — it looks like something a celebrity would wear on the red carpet.
Creating the Pearl Swirl Effect
Start with a blush pink base (something between pale rose and soft mauve). Using a thin nail art brush or specialized swirl tool, apply white pearl or opalescent polish in loose, organic swirl patterns across the nail. The swirls should look hand-painted and slightly irregular — perfection is the enemy here. One accent nail with a more concentrated pearl design (maybe a full reverse ombre of pearl fading into blush) adds focal interest.
Nail Art Variations
- Minimal swirls: Just one or two delicate swirls per nail
- Dense swirls: Multiple overlapping swirls that create a marble effect
- Half-swirl: Pearl swirls only on the top half of the nail with solid blush on the bottom
- Single-nail focal: Solid blush on nine nails, dramatic full swirl design on your ring finger
The pearl component reflects light beautifully, so this design is perfect if your prom venue has good lighting or lots of photo opportunities.
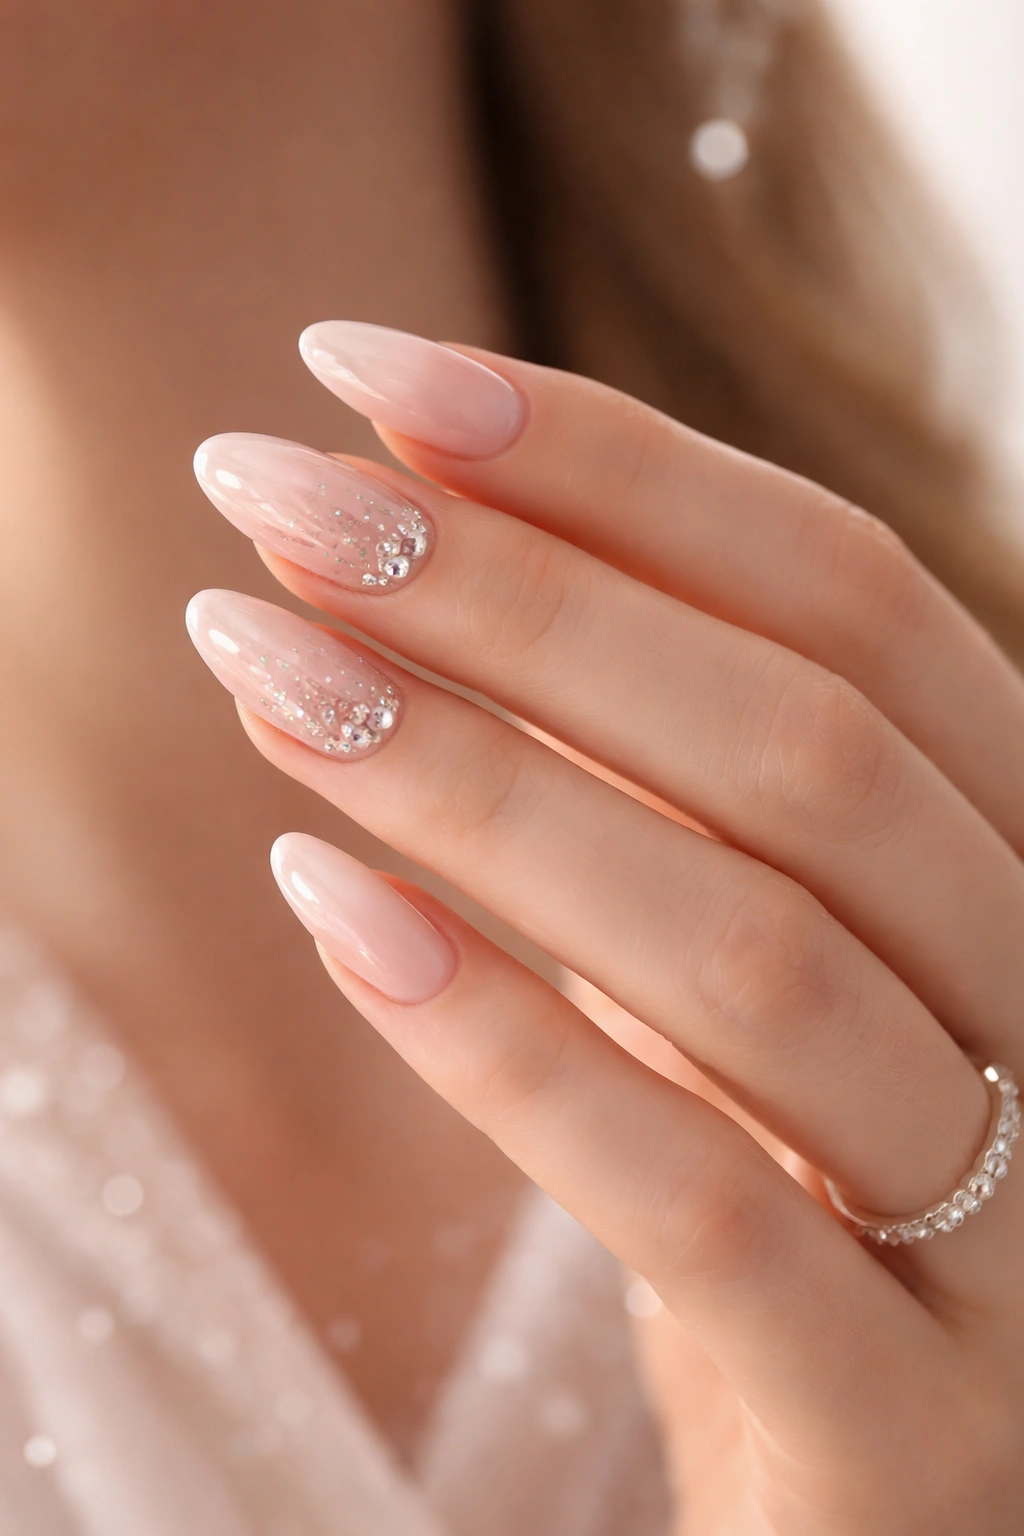
4. Sparkle Gradient with Ombré Glitter
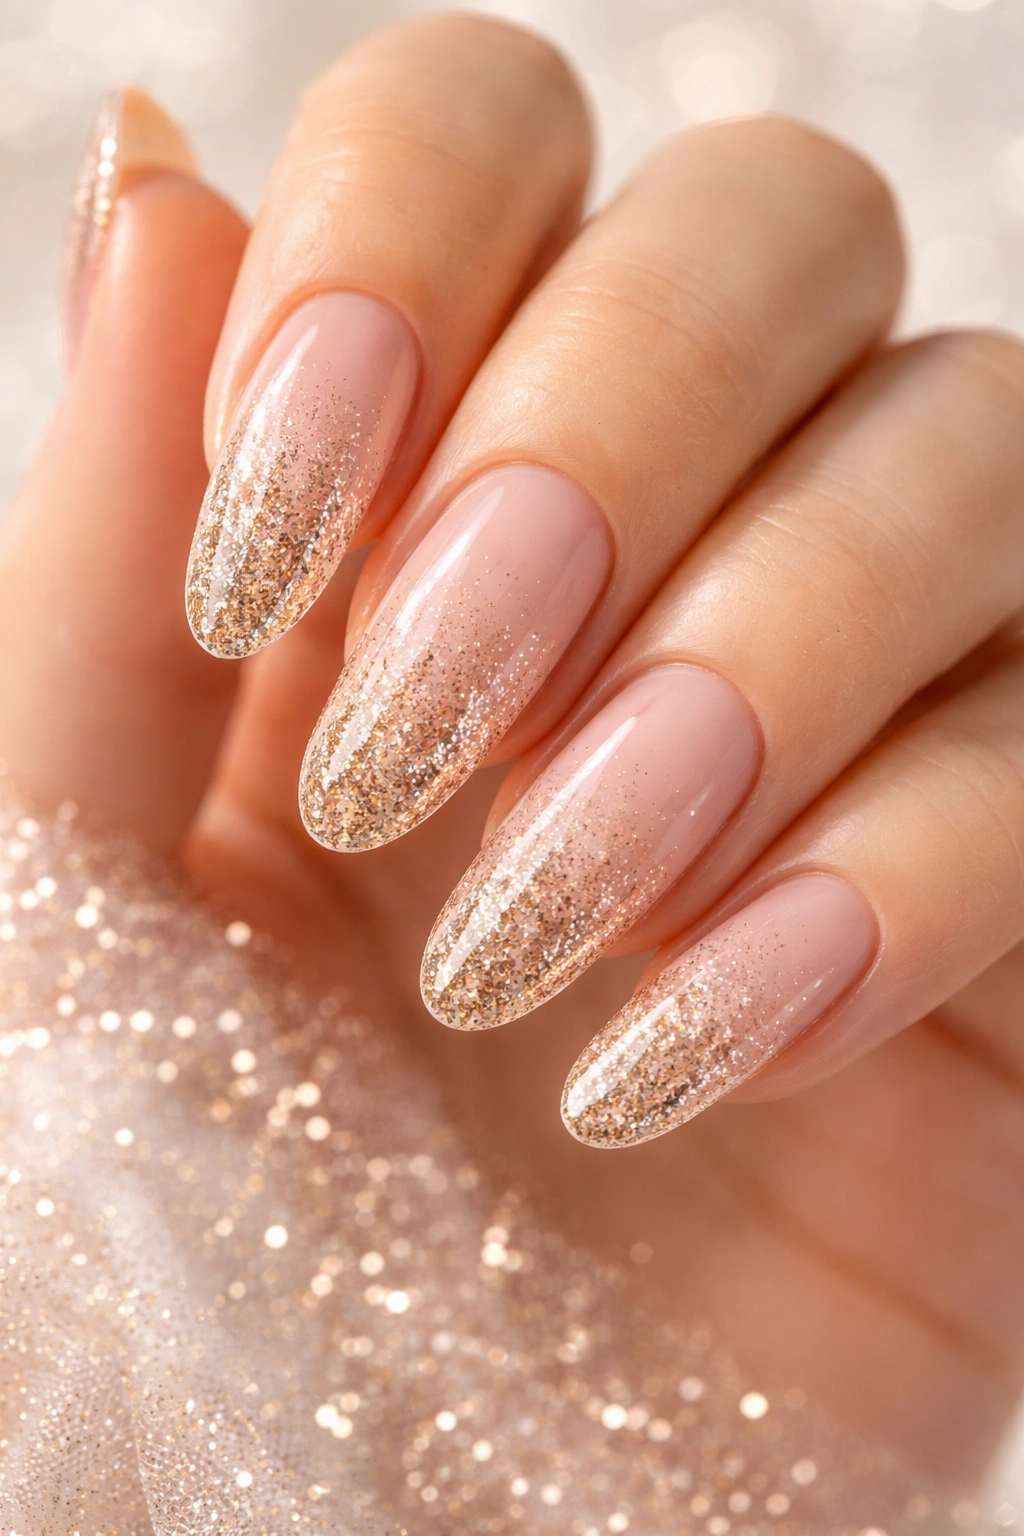
This is your design if you want serious sparkle without committing to full glitter nails. A sparkle gradient uses fine glitter particles that transition from none at the cuticle to fully covered at the tips, creating an elegant fade from solid color to pure shimmer.
Achieving the Perfect Glitter Gradient
The key is layering. Start with your base color (nude, blush, champagne, or even a soft metallic). Apply a thin layer of clear or tinted gel. Sprinkle fine glitter particles onto the wet gel, then carefully brush away excess so most glitter is concentrated at the tips. Cure under the UV lamp, then apply another layer of clear gel to seal everything in place. The result should look like your nails are gradually getting more and more sparkly as you move toward the tips.
Glitter Selection Tips
- Use cosmetic-grade glitter, never craft glitter (it’s too chunky and won’t adhere properly)
- Smaller particle sizes look more elegant on long oval nails
- Mix colors subtly: gold and champagne together, or silver and iridescent together, for dimension
- Avoid neon or very bold glitter colors unless your dress is equally bold
- The gradient should transition gradually — avoid a harsh line where glitter suddenly starts
Insider note: This design photographs incredibly well under flash because the glitter reflects the light. You’ll look absolutely luminous in every prom photo.
5. Nude Elegance with Diamond Studs
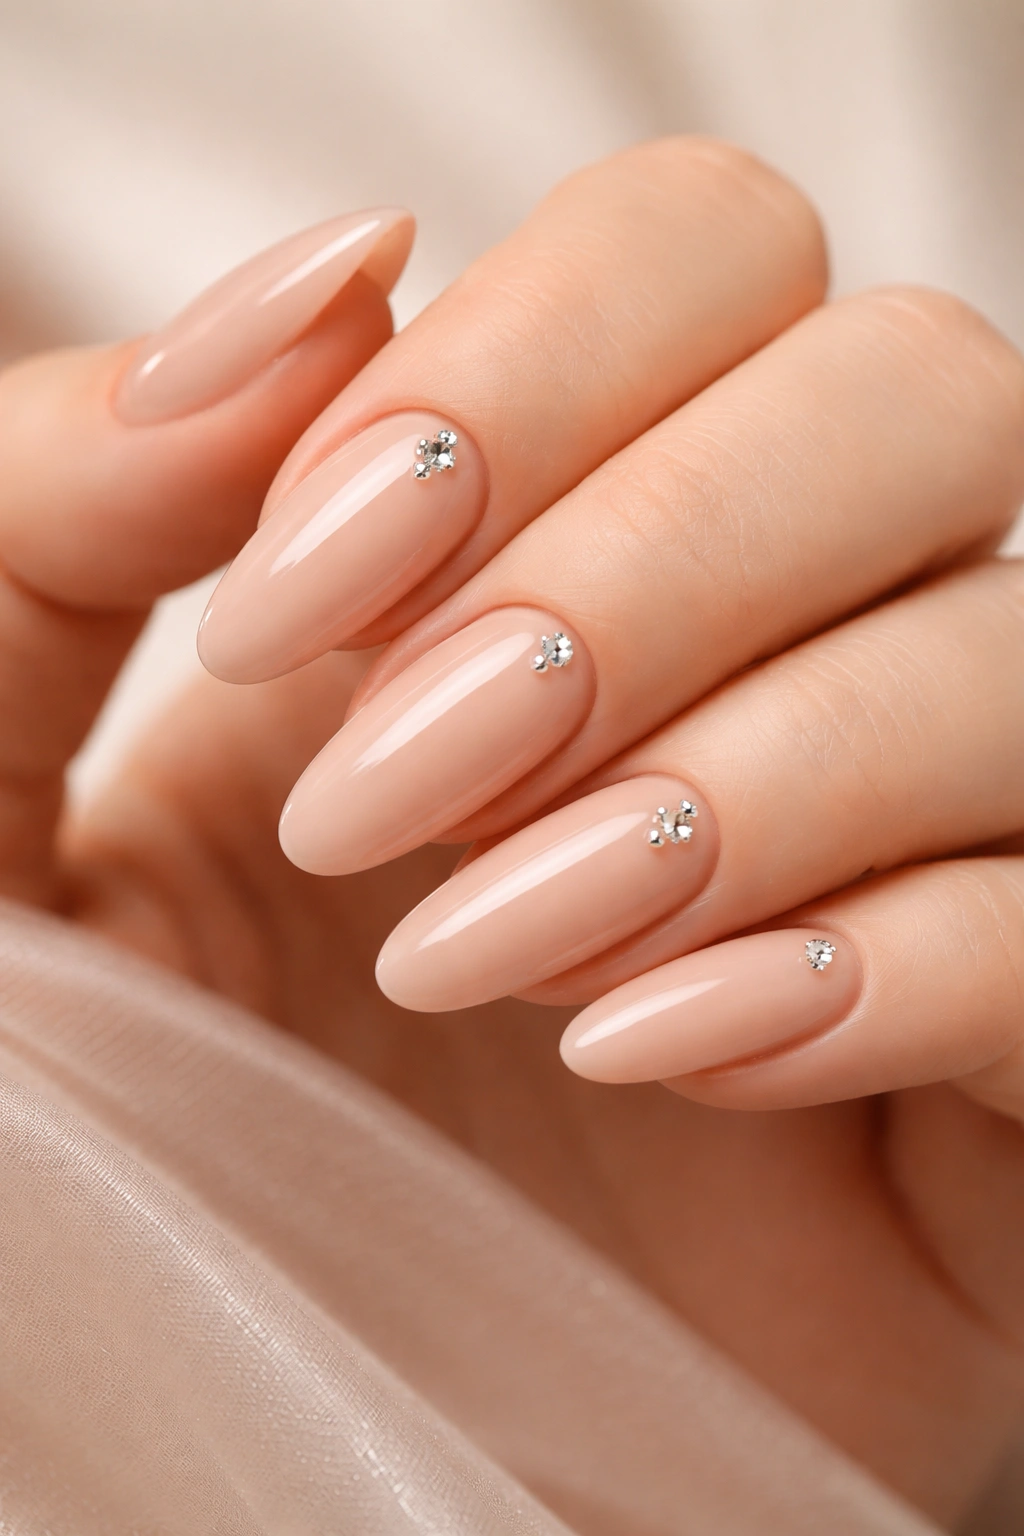
Sometimes the most sophisticated choice is the simplest one. Nude nails with strategically placed diamond studs are the definition of understated luxury — they enhance your hands without screaming for attention.
Selecting the Right Nude Shade
The “nude” should match your skin tone reasonably closely (or be one shade warmer for a sophisticated effect). If you’re fair-skinned, go for a pale beige or warm ivory. If you have medium skin, a peachy or warm taupe nude works beautifully. Deeper skin tones look stunning with warm caramel nudes or even a slightly pinky-toned nude.
Diamond Stud Placement Strategy
- One stud per nail (ring finger and pinky only) for a subtle look
- Three studs per nail (cuticle, middle, and tip) for moderate glam
- Full cluster at the tips for maximum impact
- A single statement stud at the cuticle of your ring finger nail as the only embellishment
The diamond studs catch light beautifully and add instant elegance. This design pairs perfectly with any dress color and won’t distract from other statement pieces like a bold lip or chandelier earrings.
Longevity Considerations
Nail studs adhere with specialized adhesive (not regular glue), so they’ll last through your entire prom night if applied by a professional. Just be careful not to snag them on fabrics or grasp things too tightly when applying lipstick or adjusting your hair.
6. Black Glossy with Gold Metallic Tips
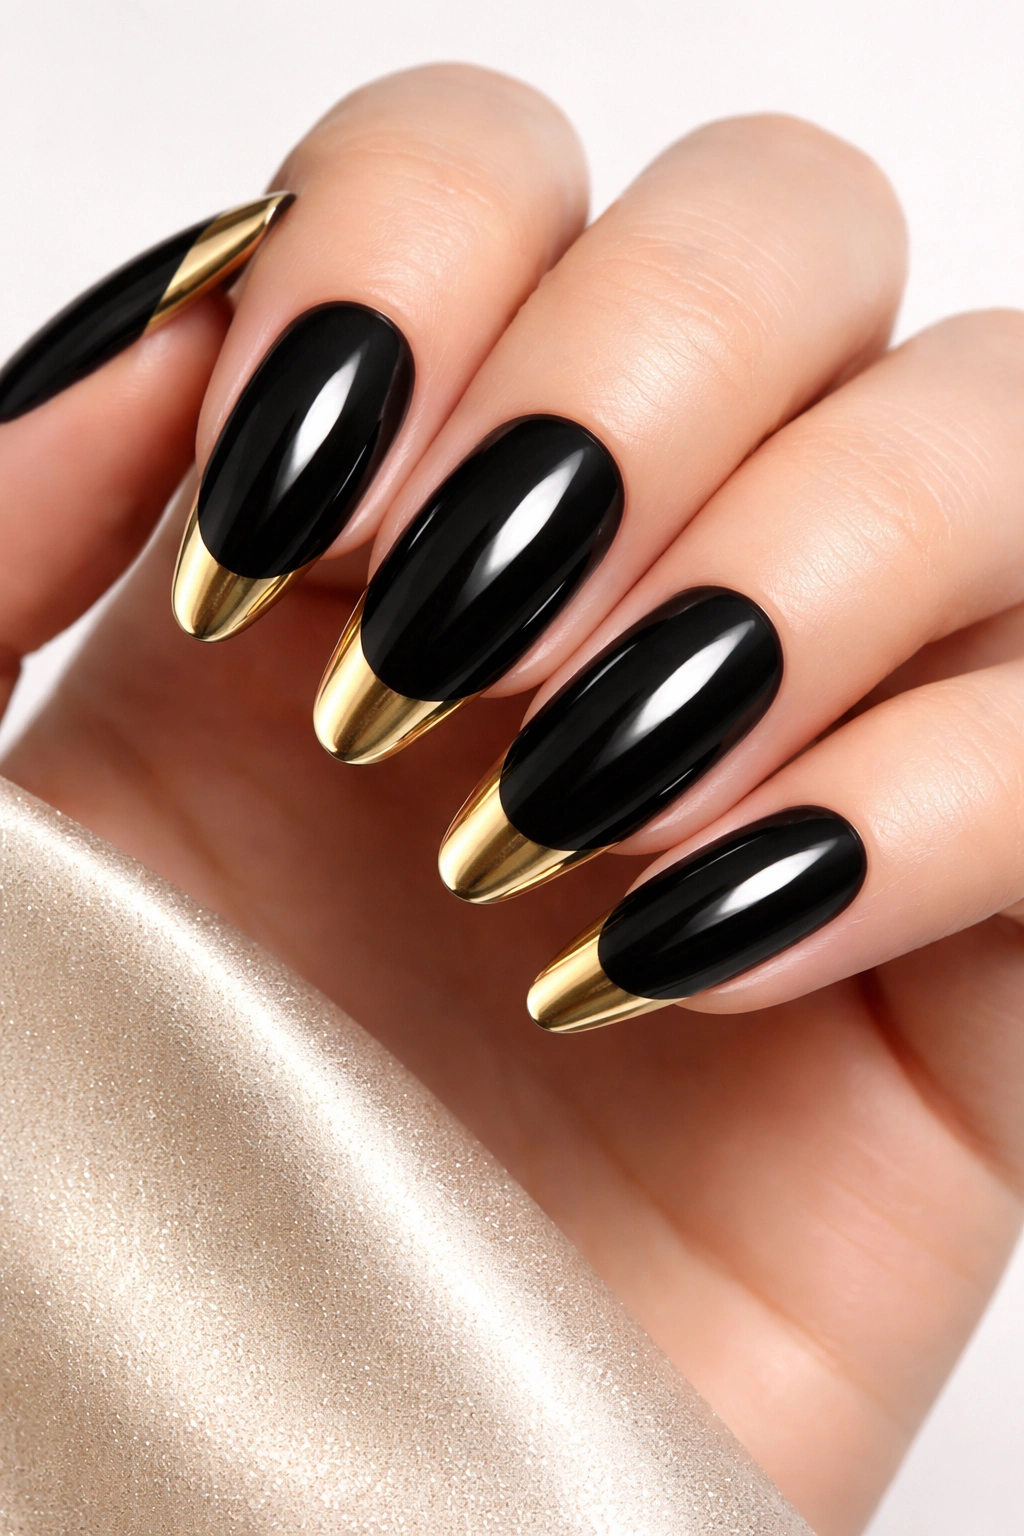
If you’re going for glamorous and dramatic, black nails with gold metallic tips are absolutely stunning. This is the kind of design that makes a statement — it says you’re confident, you have refined taste, and you’re not afraid to stand out.
The Color Combination
Use a true black (not dark gray or charcoal) for the base to make the gold really pop. The gold tips should be a true gold or champagne-gold, not orange or brassy. The contrast between the black and gold is what makes this design work — each color makes the other look more luxurious.
Execution Options
- Reverse ombre: Gold transitions to black as you move from tips toward cuticles
- Half-and-half: A clean, straight line dividing the nail into black (bottom) and gold (top)
- Gradient: A soft fade where gold gradually becomes black, creating a subtle transition
- Tips only: Black nails with just the very tips painted gold
This design pairs beautifully with silver jewelry (not gold) to avoid a cluttered metallic situation. It’s also perfect if your dress has any metallic elements — the black and gold will echo those tones.
7. Champagne Shimmer with Nude Gradient
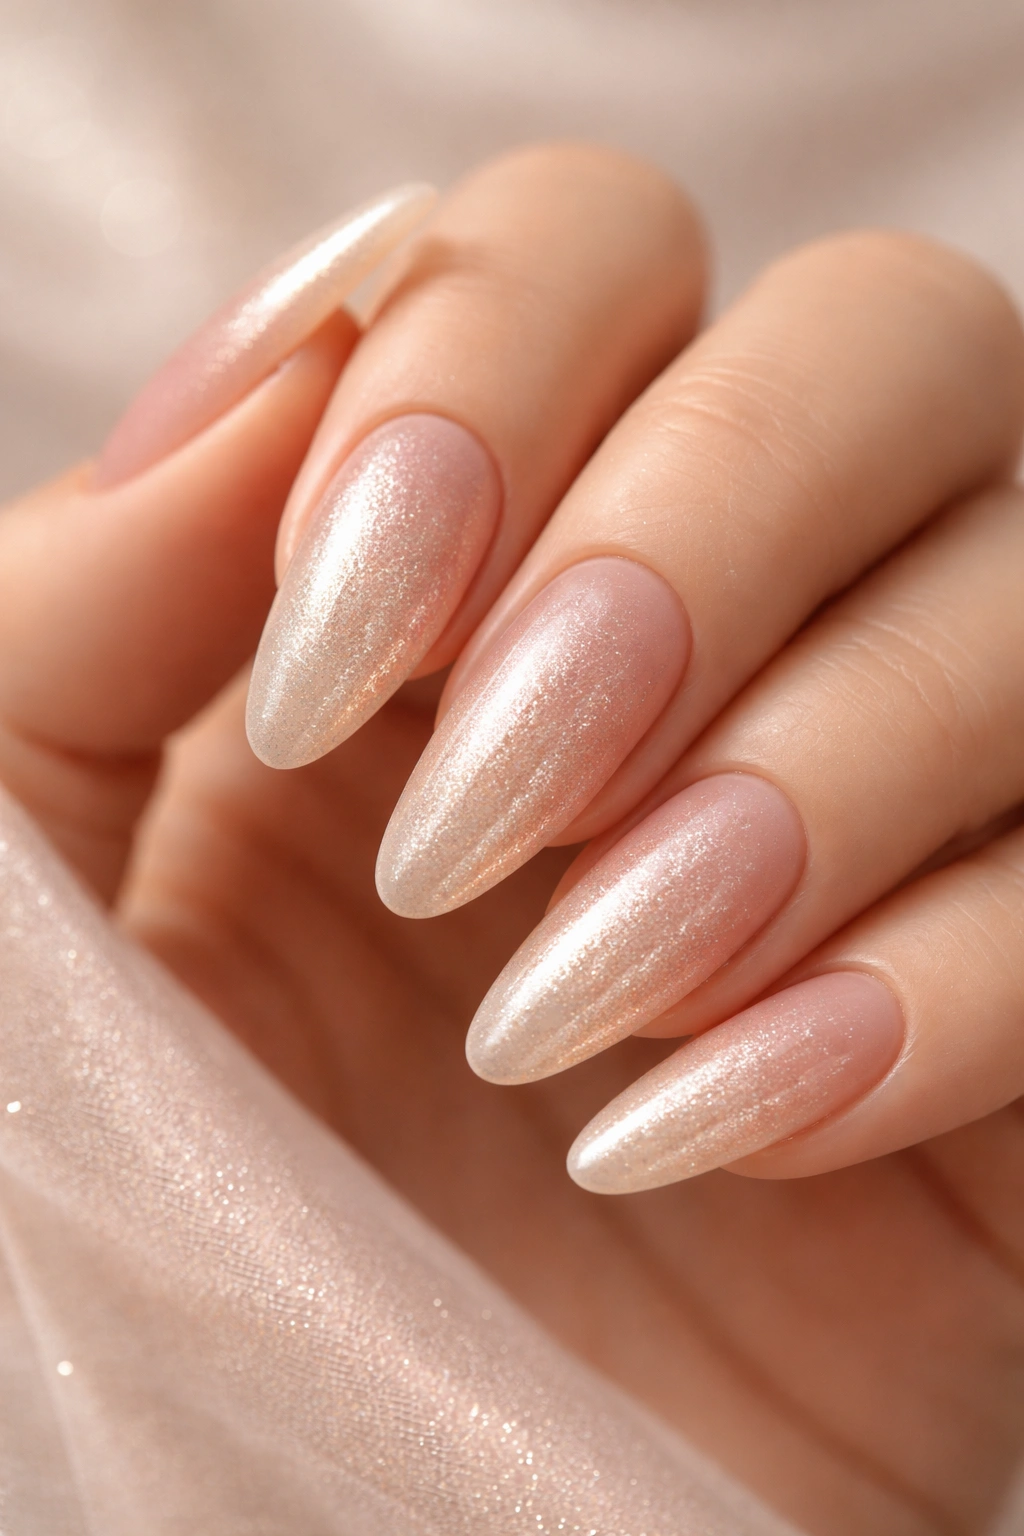
Champagne is the most flattering neutral on long oval nails because it’s warm, it has movement due to the shimmer, and it works with virtually every skin tone and dress color. A nude gradient (where champagne transitions to a warmer nude or beige) adds sophistication without being boring.
Building the Champagne-to-Nude Gradient
Start with a champagne base that has subtle shimmer throughout (not over-the-top sparkle). Using a makeup sponge or gradient tool, carefully blend a warmer nude shade (peachy or taupe) into the tips and sides of the nail. The blend should be soft and slightly blurred, not a harsh color block. The result is nails that look luminous and dimensional without being trendy or costume-y.
Why This Works for Prom
Champagne shimmer has been considered elegant for decades — it’s not a trend that will look dated in your photos five years from now. The subtle gradient adds visual interest without being distracting. This design reads as “polished and put-together” rather than “trying too hard.”
Application Tips
- Use a premium gel polish with mica shimmer (not loose glitter)
- Apply in thin layers to build the shimmer gradually — one thick layer looks cheap
- Use a soft-bristled brush for blending the gradient, not a sponge (gel polish behaves differently than regular polish)
- Seal with a glossy top coat to enhance the shimmer and create a luxurious finish
8. Soft Blush with Delicate White Lace
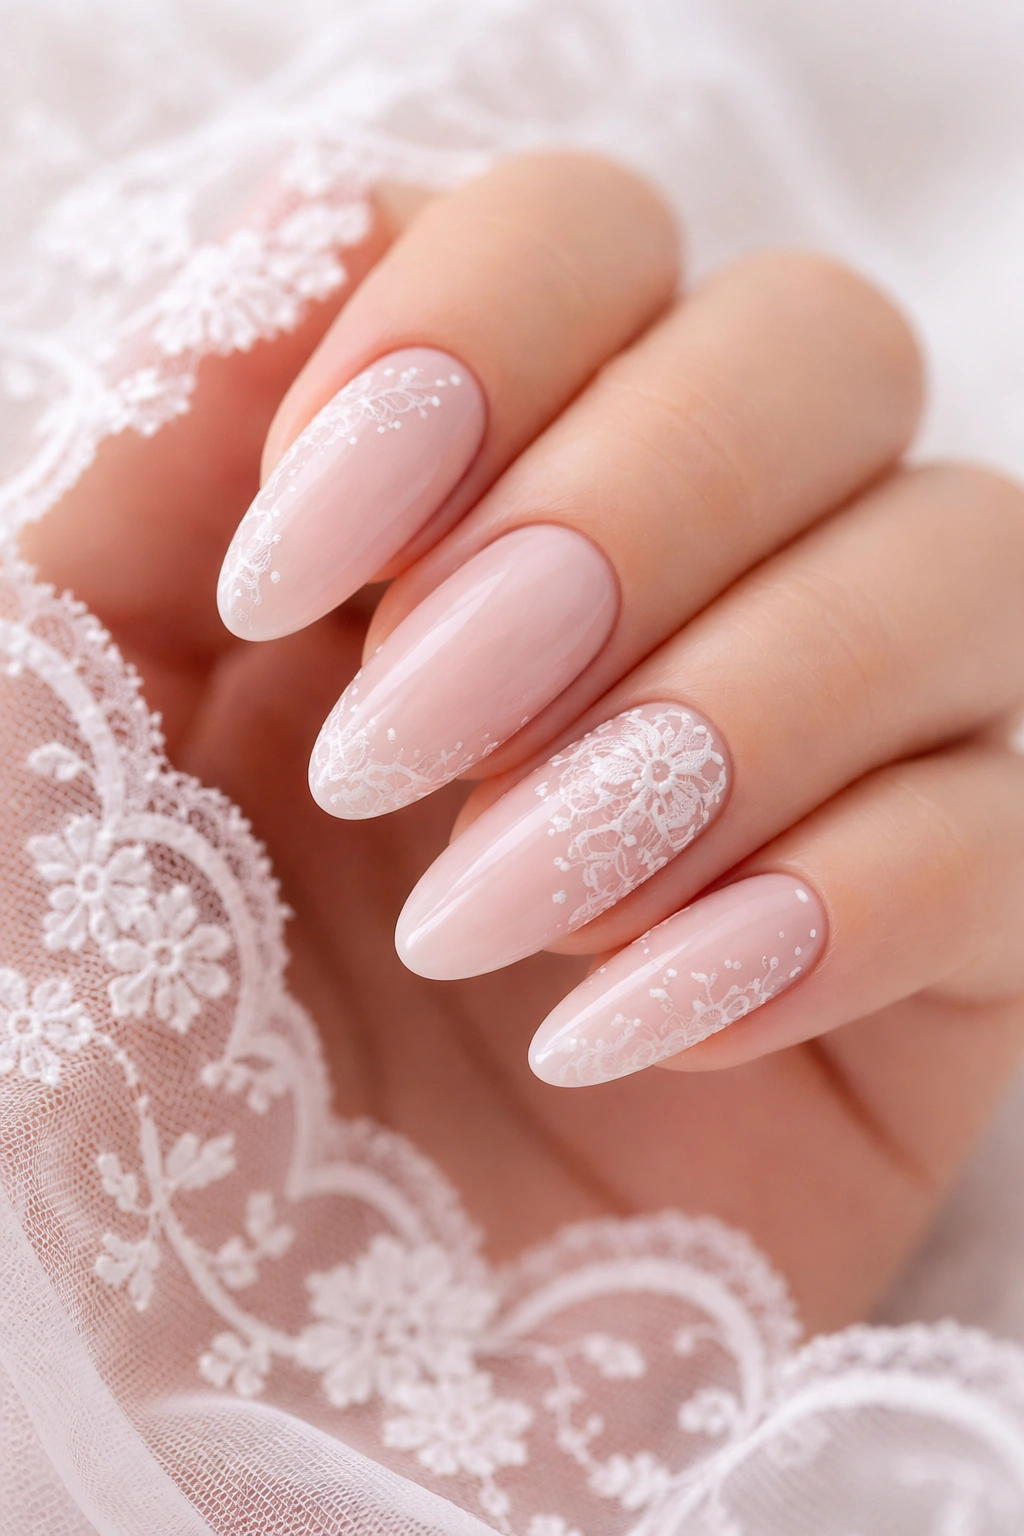
If you’re the romantic type or your prom dress has vintage, fairy-tale, or lace details, delicate white lace nail art on a soft blush base is absolutely dreamy. This design looks intricate but is surprisingly doable for a professional nail artist.
The Blush-and-Lace Design
Start with a pale blush or soft pink base. Using white polish and an ultra-thin nail art brush, paint delicate lace patterns directly onto the nail. The lace should be detailed but sparse — think dainty patterns along the edges or scattered across the surface rather than solid coverage. One accent nail with a more concentrated lace design (maybe a full reverse French with lace details) adds sophistication.
Lace Pattern Ideas
- Delicate scrolling vines and floral swirls
- Fine geometric lace patterns along the sides
- Lace concentration only at the tips (reverse French style)
- Lace concentrated at the cuticle with a gradient fade toward nude tips
- Full-nail intricate lace on just the accent nail, minimal lace on others
This design is romantic without being childish, and it photographs beautifully. The white-on-blush contrast is subtle but clear, especially in photos.
Finding the Right Nail Artist
This design requires actual hand-painting skill, so make sure you’re going to someone with proven nail art experience. Look at their portfolio to see if they’ve done similar detailed work. A good artist will be able to execute this design in 30-45 minutes.
9. Midnight Blue with Silver Stars
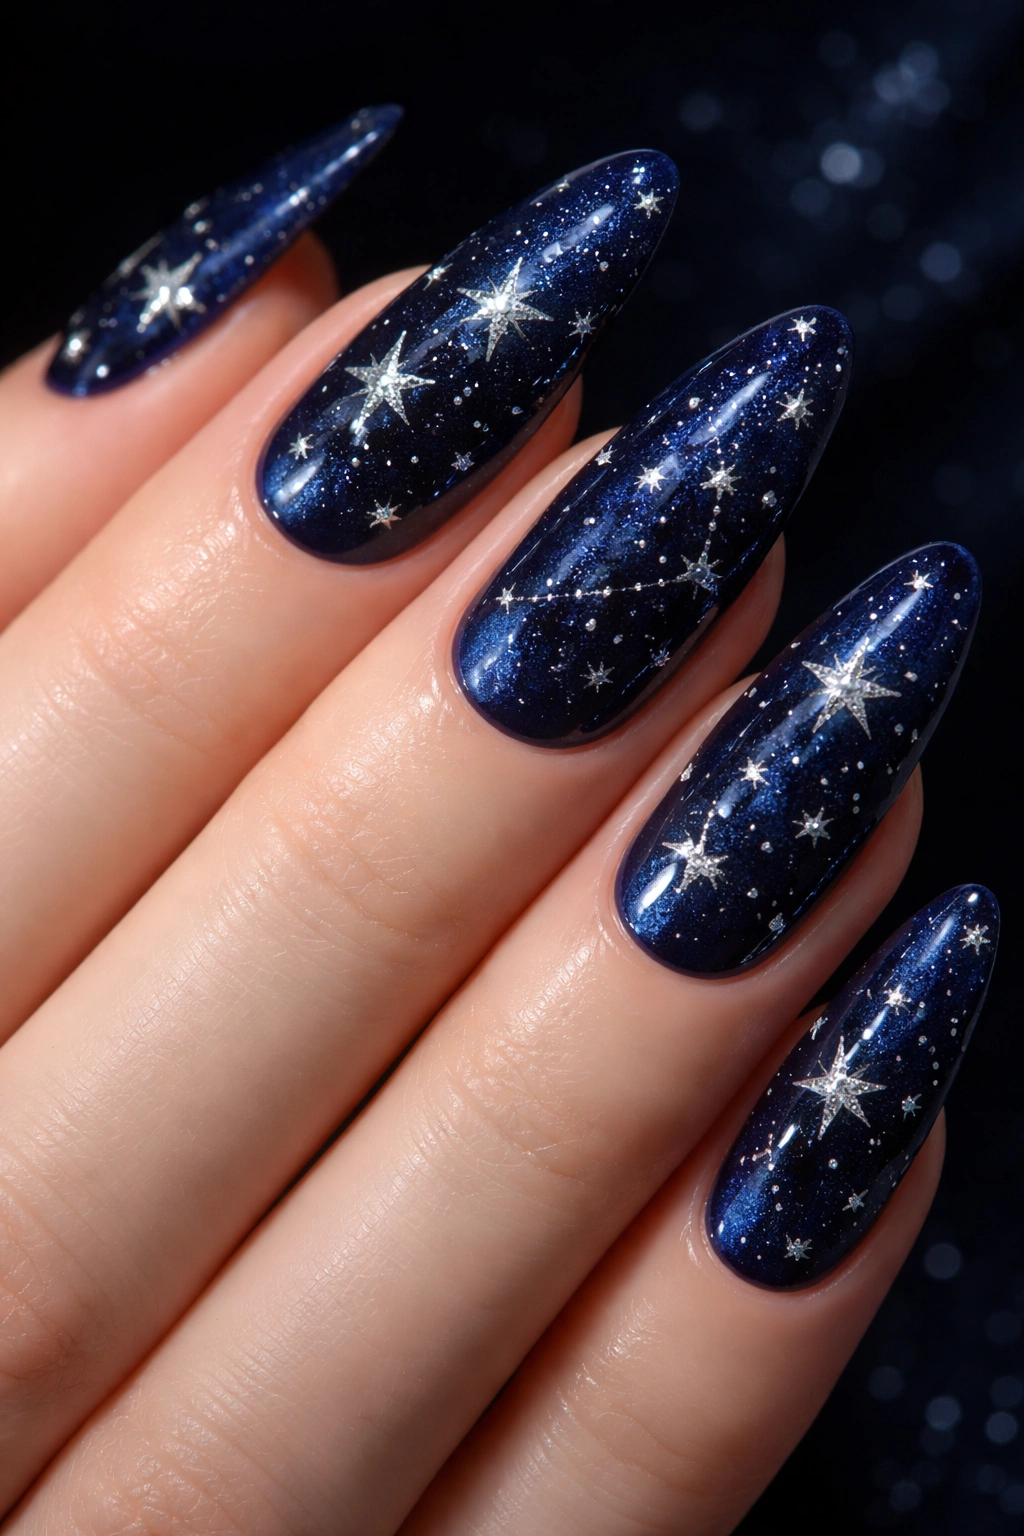
Deep midnight blue is prom-appropriate and goes with nearly every dress color. When you add silver stars scattered across the surface, you get a design that’s playful, magical, and absolutely stunning without being too cutesy.
Creating the Starfield Effect
Use a rich, deep blue (almost navy) as your base. Using a dotting tool or thin brush, place small silver stars randomly across each nail. The stars should vary in size slightly (some tiny pinpricks, some slightly larger) to look natural and organic. An accent nail with larger stars or a constellation pattern adds visual interest. Some stars can be solid silver, while others are outlined only for variation.
Why This Design Works
Blue is flattering on most skin tones, and the addition of stars makes it feel magical and prom-appropriate without being costume-y. The silver catches light and adds sparkle that shows up beautifully in photos. This design is also forgiving — exact placement doesn’t matter because it’s supposed to look scattered and natural.
Color Combinations to Consider
- Midnight blue with silver stars (the classic)
- Navy blue with pearl or white stars
- Blue-black with iridescent stars for extra shimmer
- Deep blue with gold stars for a warmer take
This is an excellent choice if you’re wearing a blue dress or if blue is incorporated into your prom look (shoes, jewelry, etc.).
10. Soft Ivory with Rose Gold Foil
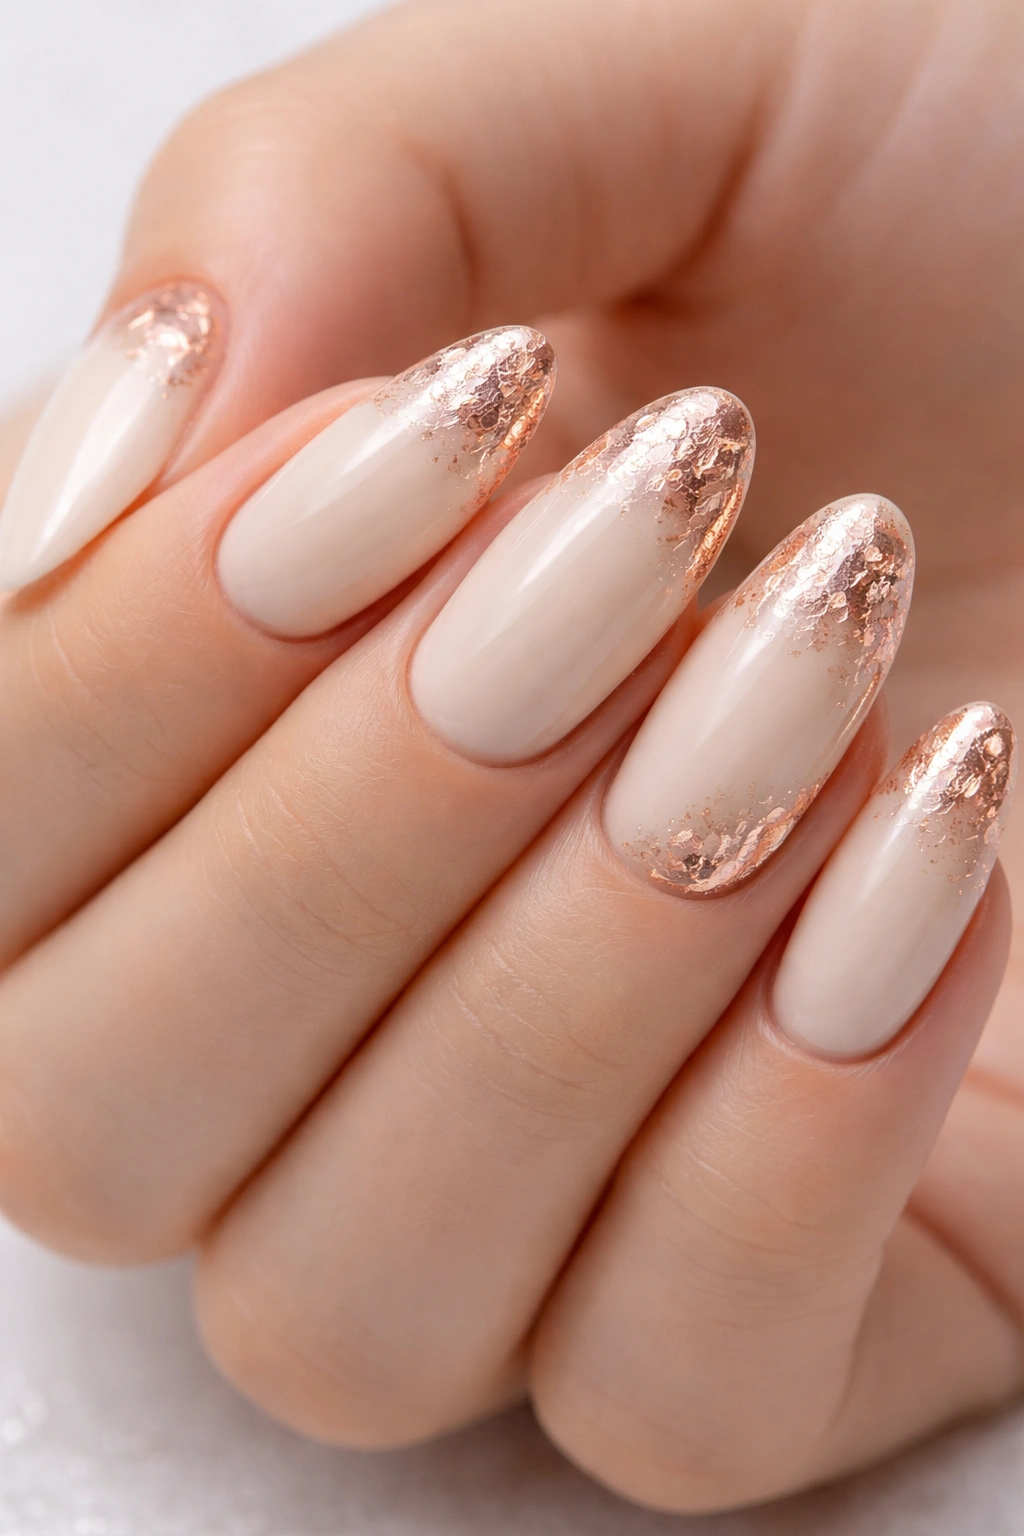
Ivory is arguably the most universally flattering nail color, and when paired with rose gold foil accents, it becomes absolutely elegant. This design feels expensive and sophisticated — the kind of nails you’d see in a high-end bridal magazine.
The Ivory-and-Rose-Gold Formula
Use a warm ivory or cream base (not pure white, which can look stark). Apply rose gold foil to select areas: perhaps the tips, or a thin line near the cuticle, or scattered geometric patterns across the surface. The foil catches light differently than shimmer, creating a metallic effect that’s refined and luxurious.
Foil Placement Strategies
- Full tips: Rose gold foil covers just the tip of the nail (like a reverse French)
- Scattered pieces: Small irregular pieces of foil scattered across the surface
- Cuticle accent: A thin line of rose gold foil near the cuticle
- One accent nail: All other nails ivory, one nail has more prominent rose gold design
- Geometric blocks: Foil in specific geometric shapes (triangles, lines, abstract shapes)
Rose gold is warm and flattering, and it photographs beautifully. The metallic quality catches light and adds dimension to your hands.
Professional Application
Foil nail art requires a professional technique called foil transfer, where foil is applied using a specialized adhesive. This isn’t a DIY-friendly design — make sure you’re going to a nail salon that offers foil services and has experience with the technique.
11. Gradient from Nude to Burgundy with Matte Finish
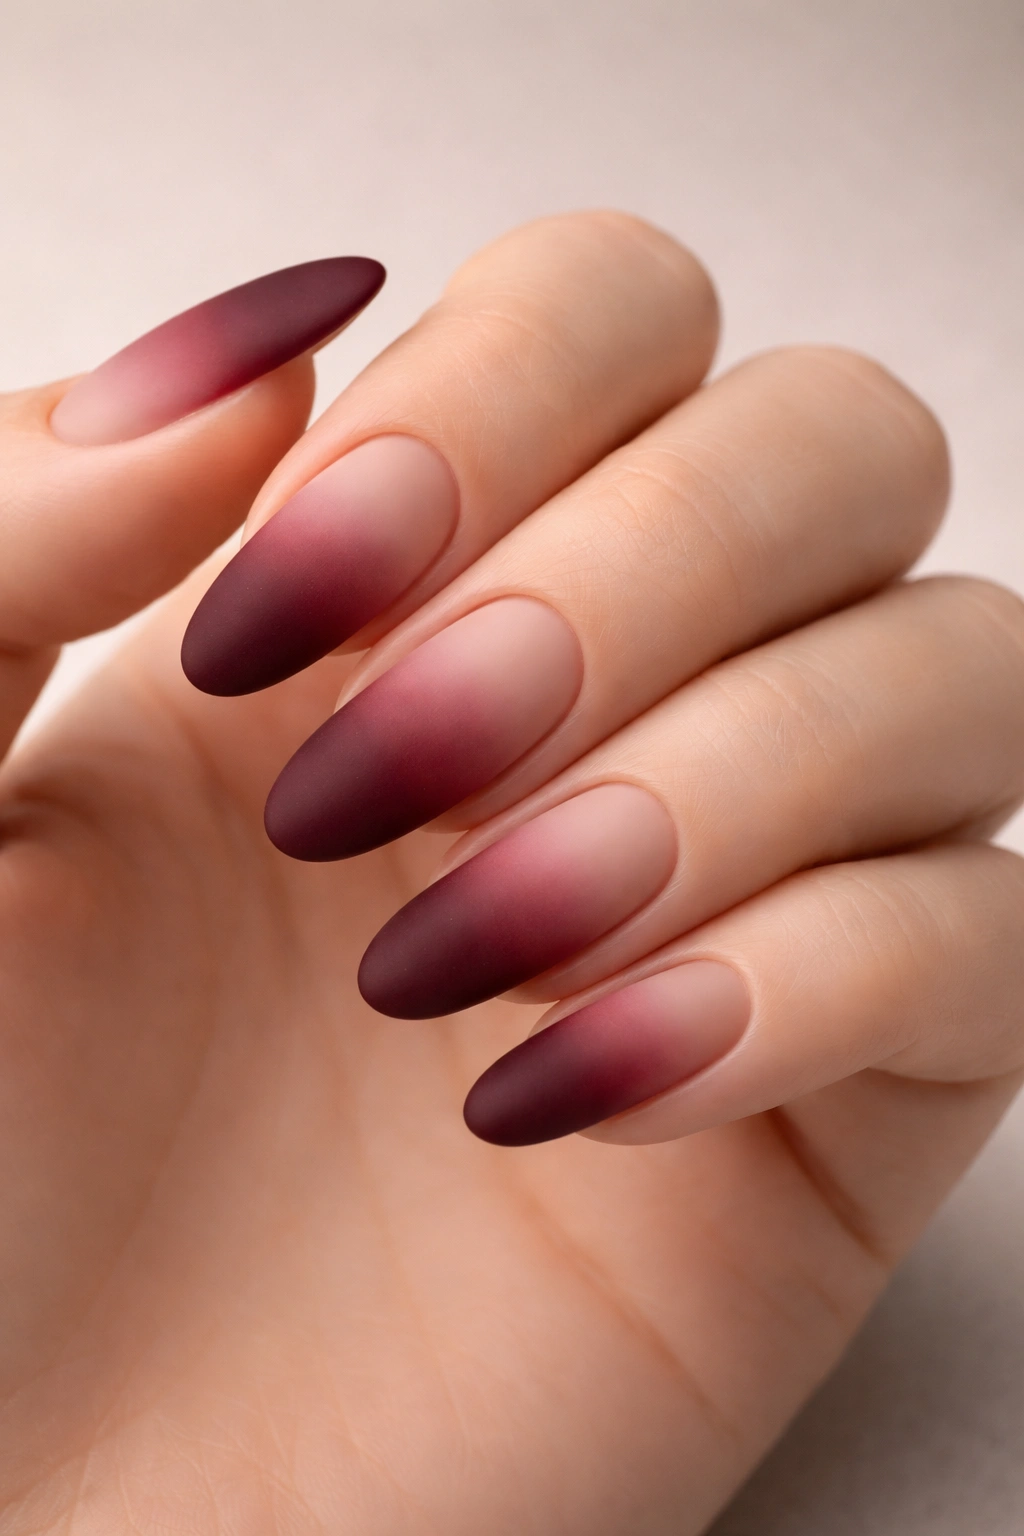
A gradient from nude to deep burgundy with a matte top coat is modern, sophisticated, and incredibly flattering. The gradient elongates the nail visually, and the matte finish adds an editorial, high-fashion quality.
Executing the Nude-to-Burgundy Gradient
Start with a nude or pale peachy base at the cuticle. Gradually blend deeper tones — rose, mauve, then deep burgundy — toward the tips. The transition should be smooth and gradual, taking up at least half the nail length. Finish with a matte top coat to remove shine and create a velvety texture.
Why Matte Matters
A matte finish changes the entire energy of the design. Glossy nails read as traditional and elegant; matte nails read as current and editorial. For prom, a matte finish says you have sophisticated taste and you’re not following the expected playbook.
Color Tone Considerations
- Cool undertones: Use rose, mauve, and burgundy (avoid peachy nudes)
- Warm undertones: Use peach, warm taupe, and warm burgundy (these are more forgiving)
- Neutral undertones: Either works, but cool tones tend to photograph better
The burgundy at the tips provides just enough color intensity to feel intentional and formal, while the nude base keeps the overall effect sophisticated rather than dramatic.
12. Pearl White with Subtle Rainbow Iridescence
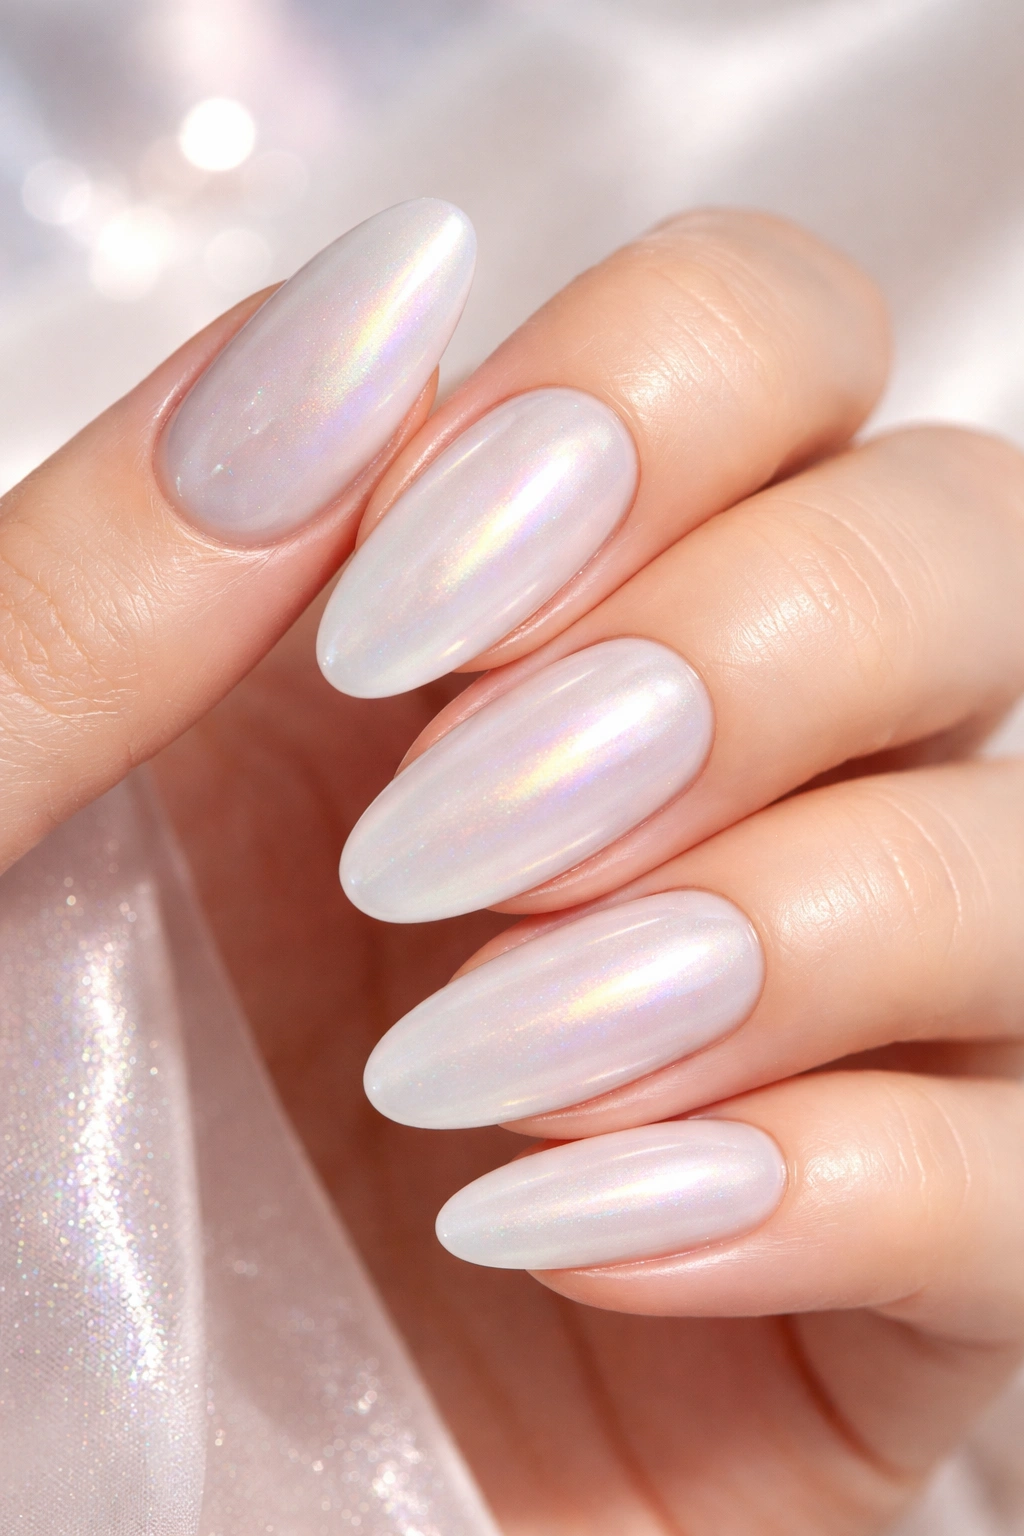
If you want something truly special and unique, pearl white with subtle rainbow iridescence is magical. The design looks almost holographic — different colors flash through depending on the angle and lighting.
Achieving the Rainbow Iridescence
Use a pearl white or opal base with built-in iridescence that shows hints of pink, purple, blue, and green depending on how light hits it. Some premium gel polishes are specifically formulated with iridescent properties. Apply thin, even layers to build the effect gradually. The iridescence should be subtle — present when you look closely or in certain lighting, but not overwhelming.
Why This Is Perfect for Prom
Iridescent nails photograph beautifully under flash and look magical in person. The rainbow effect is eye-catching without being loud or costume-y. This design pairs with any dress color because the rainbow adapts. It also feels special and memorable — people will remember your nails specifically because they caught the light so beautifully.
Application Tips
- Use a premium brand with genuine iridescent technology (not cheap cosmetic glitter)
- Apply 2-3 thin layers rather than one thick layer for the best iridescent effect
- Use a sheer or pearl base rather than a solid color to let the iridescence show through
- A glossy finish enhances the iridescence more than matte
- Consider adding a single crystal or tiny stud to the accent nail for extra sparkle
This design is stunning in photographs and looks even better in person when light reflects off the iridescence.
Final Thoughts
The right prom nail design does so much for your overall look and confidence. Long oval nails give you the perfect foundation for any of these designs — they’re elegant by default, they photograph beautifully, and they make your hands look graceful and refined.
When you’re choosing your nail design, think about your dress color, your overall vibe, and what will make you feel most like yourself on prom night. Whether you go for classic and understated or bold and sparkling, the best nail design is one that makes you smile when you look at your hands.
Make sure you schedule your appointment with enough time before prom to address any issues or touch-ups. A professional manicure typically lasts 2-4 weeks depending on the design and whether you go with gel or regular polish, so timing it about a week before prom is ideal. That way, if anything needs adjusting, you have time to fix it before the big night.
Your nails will be visible in every single photo, every dance, every moment of the night — so make them absolutely stunning. You’ve got this.
