

Blue and white nail designs have become a go-to choice for anyone looking to elevate their manicure with timeless elegance and versatility. There’s something about this color combination that just works—it’s crisp, sophisticated, and somehow manages to feel both classic and contemporary at the same time. Whether you’re drawn to the calming vibes of ocean-inspired aesthetics or the refined simplicity of minimalist patterns, blue and white nails offer endless possibilities for self-expression without requiring you to stick to one particular style or mood.
What makes this pairing so compelling is its universal appeal. Unlike some color combinations that work better on certain skin tones, blue and white flatters everyone. Deeper blues complement warmer skin tones beautifully, while lighter shades of blue create a dreamy elegance on cooler complexions. The white acts as a perfect neutral anchor, allowing the blue to shine without overwhelming the overall look. You can wear these nails to the office on Monday, to a beach vacation on Saturday, or to a formal dinner on Sunday—they adapt to any occasion with remarkable ease.
The beauty of blue and white designs also lies in how accessible they are. Whether you’re a seasoned nail artist or someone who’s just starting to explore nail art beyond basic polish application, you’ll find designs in this color palette that match your skill level. Some ideas require nothing more than a steady hand and basic supplies, while others offer room for creativity and experimentation with advanced techniques. The following eight nail ideas showcase the incredible range of what’s possible when you commit to this versatile color duo, from understated elegance to bold artistic statements.
1. Classic Blue and White French Tips
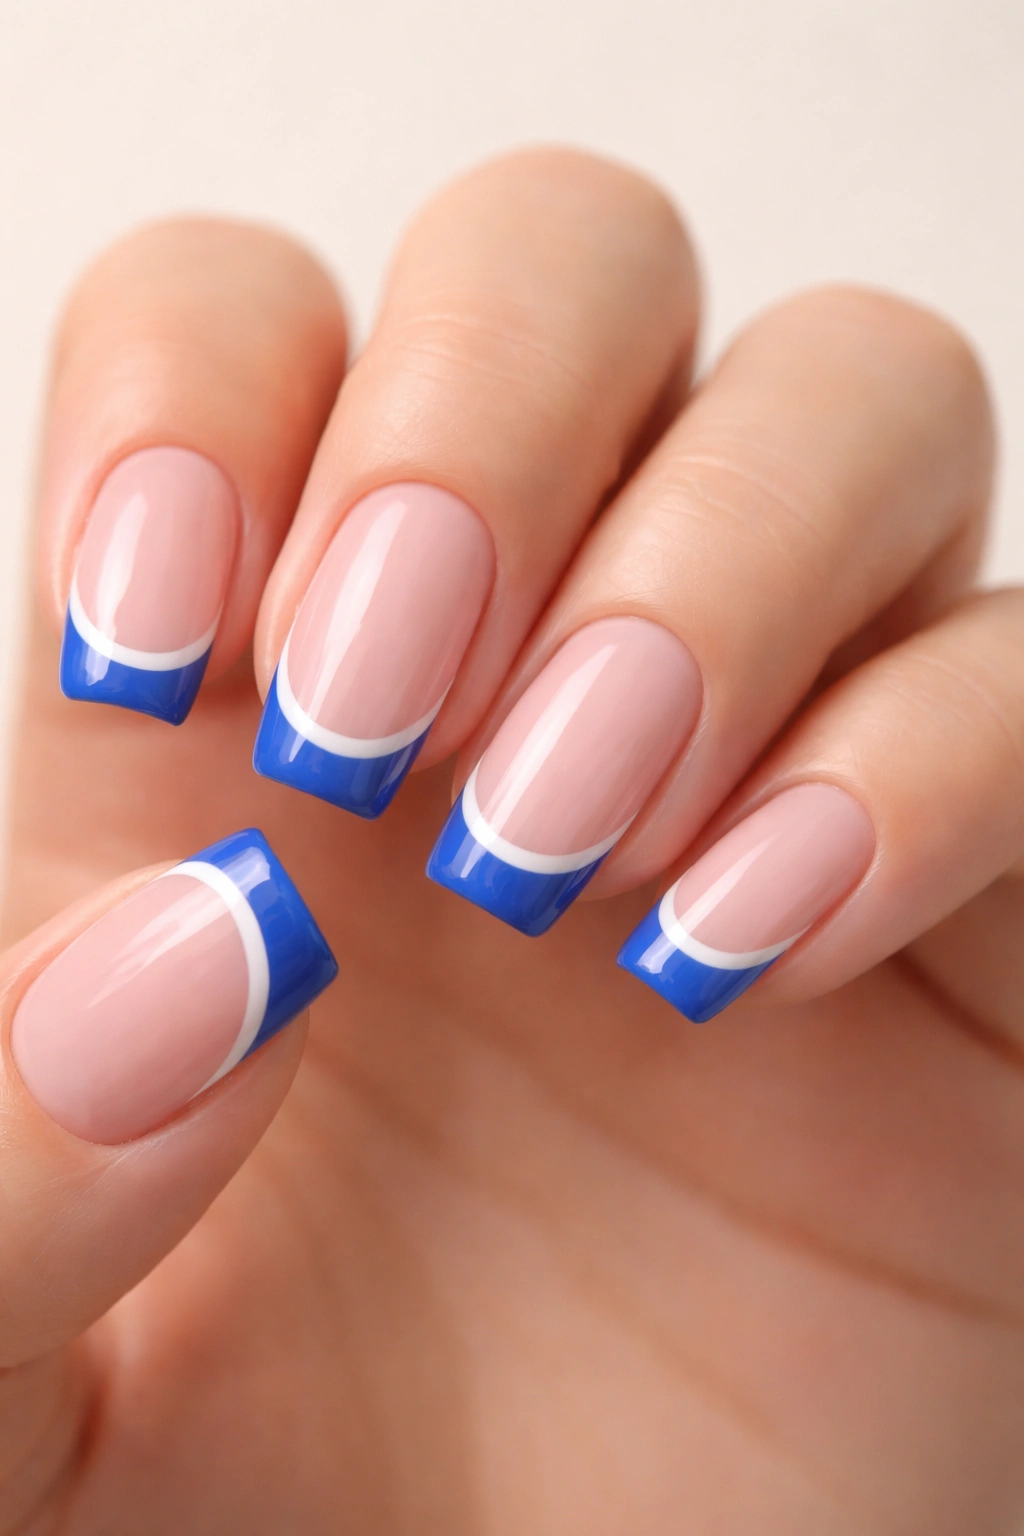
The French manicure has earned its status as a timeless classic for good reason—it’s elegant, versatile, and works for virtually every occasion. When you take this traditional style and swap the conventional pink undertone for a gorgeous shade of blue, you create something that feels both familiar and excitingly fresh.
Why This Design Works So Well
The beauty of blue French tips lies in how they elevate the traditional manicure without sacrificing its inherent sophistication. A neutral or nude base keeps the overall look polished and professional, while the blue tip adds a pop of personality and color. This design works equally well whether you prefer a soft baby blue that feels gentle and feminine, or a bold navy that commands attention. The contrast between the base and the blue tip creates dimension that photographs beautifully and catches light throughout your day.
How to Achieve the Perfect Look
Start with a clean, well-groomed nail base. Apply a neutral polish—anything from a natural nude to a soft cream—across the entire nail and let it dry completely. Once your base is set, carefully apply your chosen shade of blue to just the tip of each nail, maintaining a crisp smile line where the base color ends and the blue begins. For extra sophistication, consider adding a thin white line between your base color and blue tip, or try using a shimmering blue for added dimension. You can also add subtle embellishments like tiny white pearls along the smile line or minimal glitter for evening wear.
Pro Tips for Perfect Application
Keep your application precise by using nail guides or striping tape to define exactly where your blue tip should begin. The key to a professional-looking French manicure is the cleanliness of that smile line. If freehand application feels intimidating, no shame in using pre-made guides—they’re incredibly helpful tools. Let each layer dry completely before applying the next to avoid colors bleeding together and creating muddy transitions.
2. Marble Swirl Design
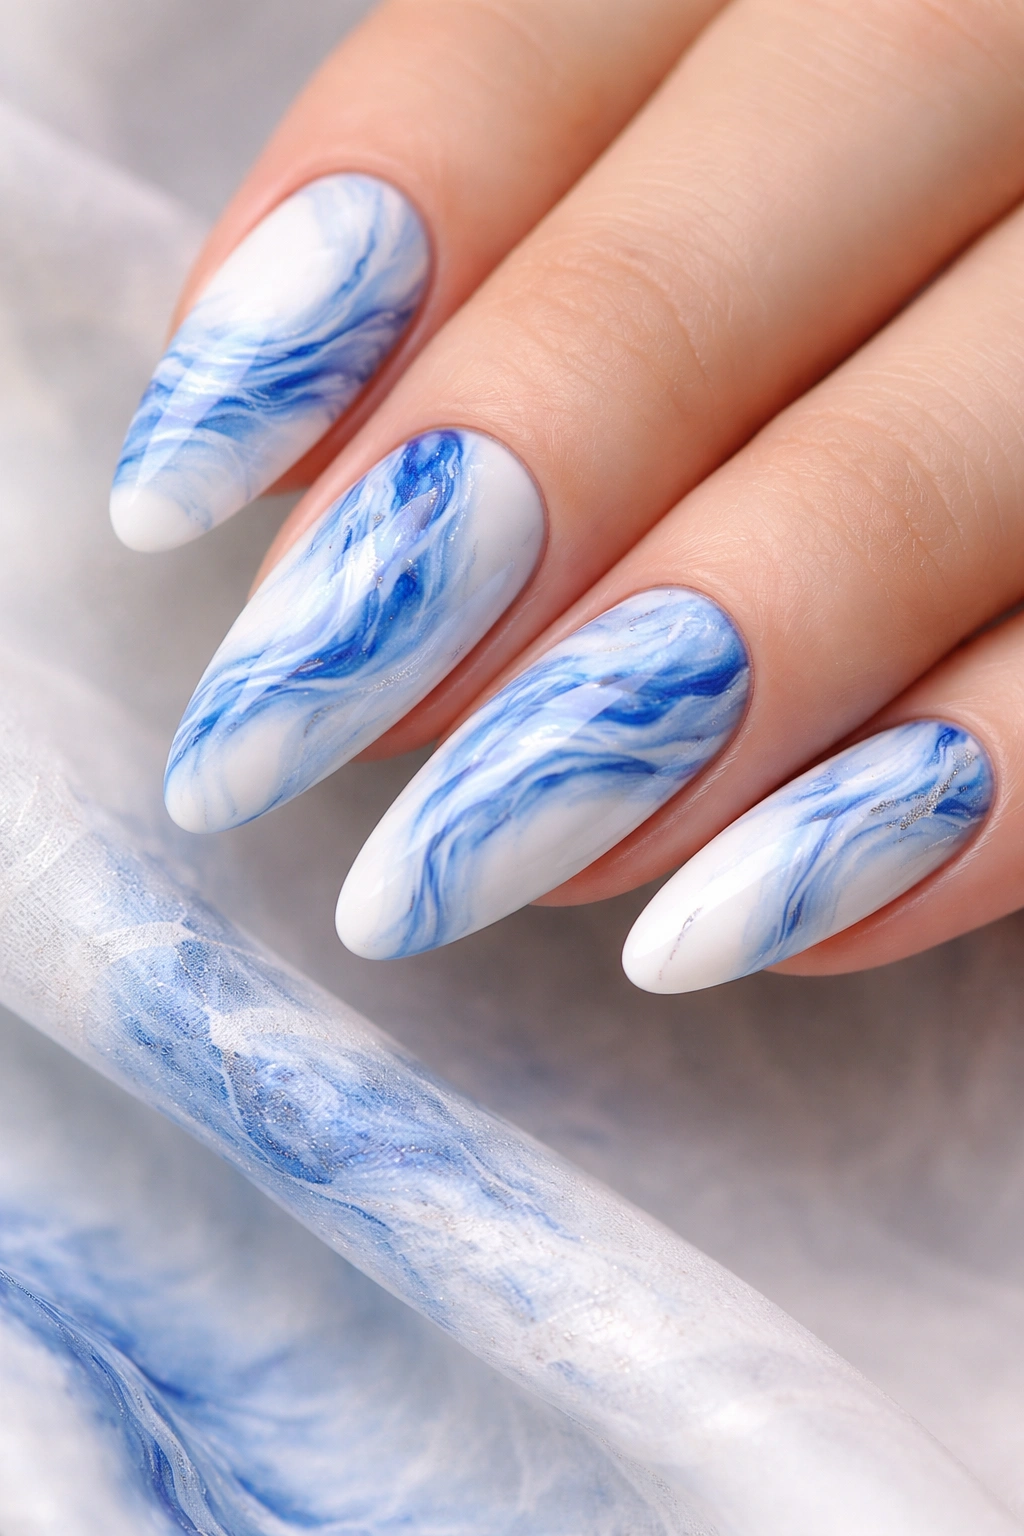
Marble nails create the illusion of natural stone patterns right on your fingertips, and when executed in blue and white, they look like precious porcelain or fine china. This design brings an element of artistic sophistication to your manicure while remaining surprisingly achievable for beginners willing to practice.
The Artistic Appeal of Marble
There’s something deeply satisfying about marble nail designs. Each nail becomes unique, featuring its own pattern of swirls and veining that can never be exactly replicated. The flowing nature of the marble pattern feels organic and natural, yet polished enough for formal occasions. Blue and white marble specifically evokes feelings of luxury and elegance—think of delicate porcelain dishware or high-end Italian tiles. The soft blending of colors creates a sophisticated look that transcends simple two-tone manicures.
Creating Your Marble Design at Home
You’ll need a white base coat, blue nail polish (navy, cobalt, or sky blue all work beautifully), and either a makeup sponge or thin nail art brush. Paint your entire nail with white polish first. Once it’s dry, you have two options: the water marbling technique or the sponge method. For water marbling, drop blue polish into a cup of room-temperature water and swirl it with a toothpick before dipping your nail into the design. For the sponge method, use a small piece of makeup sponge to dab and swirl blue polish onto your white base while it’s still slightly wet, creating flowing patterns. Seal everything with a clear glossy topcoat to protect your design and enhance the luxurious appearance.
Variations and Personal Touches
Try using multiple shades of blue—light blue, navy, and teal—on the same nail for added depth and complexity. You can also reverse the color scheme and start with a blue base, then marble in white for a completely different aesthetic. Some nail artists add thin gold or silver lines through their marble patterns to mimic the natural veining found in actual stone, creating an even more sophisticated finished look.
3. Delicate Floral Patterns
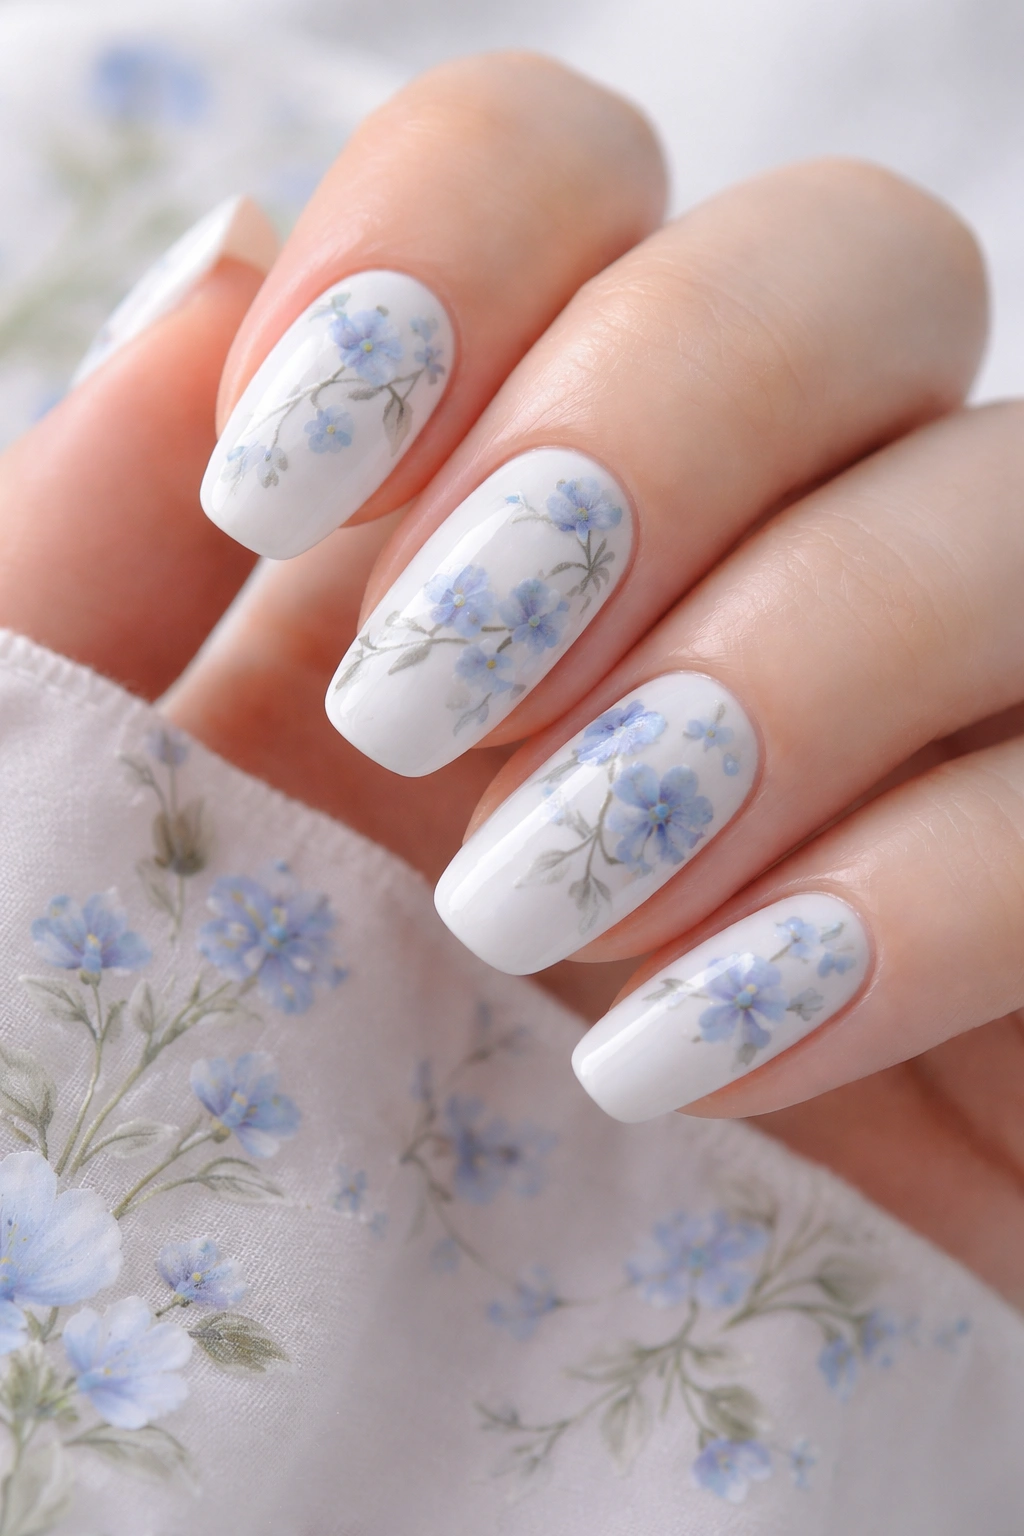
If you love feminine, romantic vibes, delicate blue flowers on a clean white background create a garden-inspired manicure that feels both artistic and wearable. This design celebrates nature while maintaining an elegant, refined aesthetic that works for weddings, brunch dates, or whenever you want your nails to feel special.
Bringing Nature to Your Nails
Floral designs offer incredible versatility in terms of what you can paint. You might choose realistic flowers like roses or peonies, or opt for simpler, more stylized florals like forget-me-nots or wildflowers. The blue and white color combination feels particularly natural for florals—blue flowers are abundant in nature, from delphiniums to cornflowers to bluebells. The white base allows these botanical elements to truly stand out, creating clear visual separation between the design and the background. Each flower becomes a focal point rather than blending into a busy overall pattern.
Different Techniques for Floral Application
Hand-painting florals requires a steady hand and fine detail work, but the results feel incredibly personal and artistic. If you’re not confident in your freehand painting abilities, nail stamping plates offer an excellent alternative, allowing you to transfer intricate floral designs onto your nails perfectly. Alternatively, nail decals and stickers provide instant access to detailed floral artwork without any artistic skill required. You can also combine techniques—use stamped flowers as your base and hand-paint additional details like stems, leaves, or tiny dots for extra dimension.
Making the Design Uniquely Yours
Consider where you place your floral elements. Some people prefer concentrating flowers on accent nails only while keeping others plain white, which creates visual balance. Others scatter small flowers across all nails for a more cohesive garden aesthetic. You might add tiny green leaves or incorporate complementary accent colors like gold dots at flower centers or silver glitter for sparkle. The size of your florals matters too—larger statement flowers create drama and elegance, while tiny micro-florals feel delicate and sophisticated.
4. Geometric Striped Nails
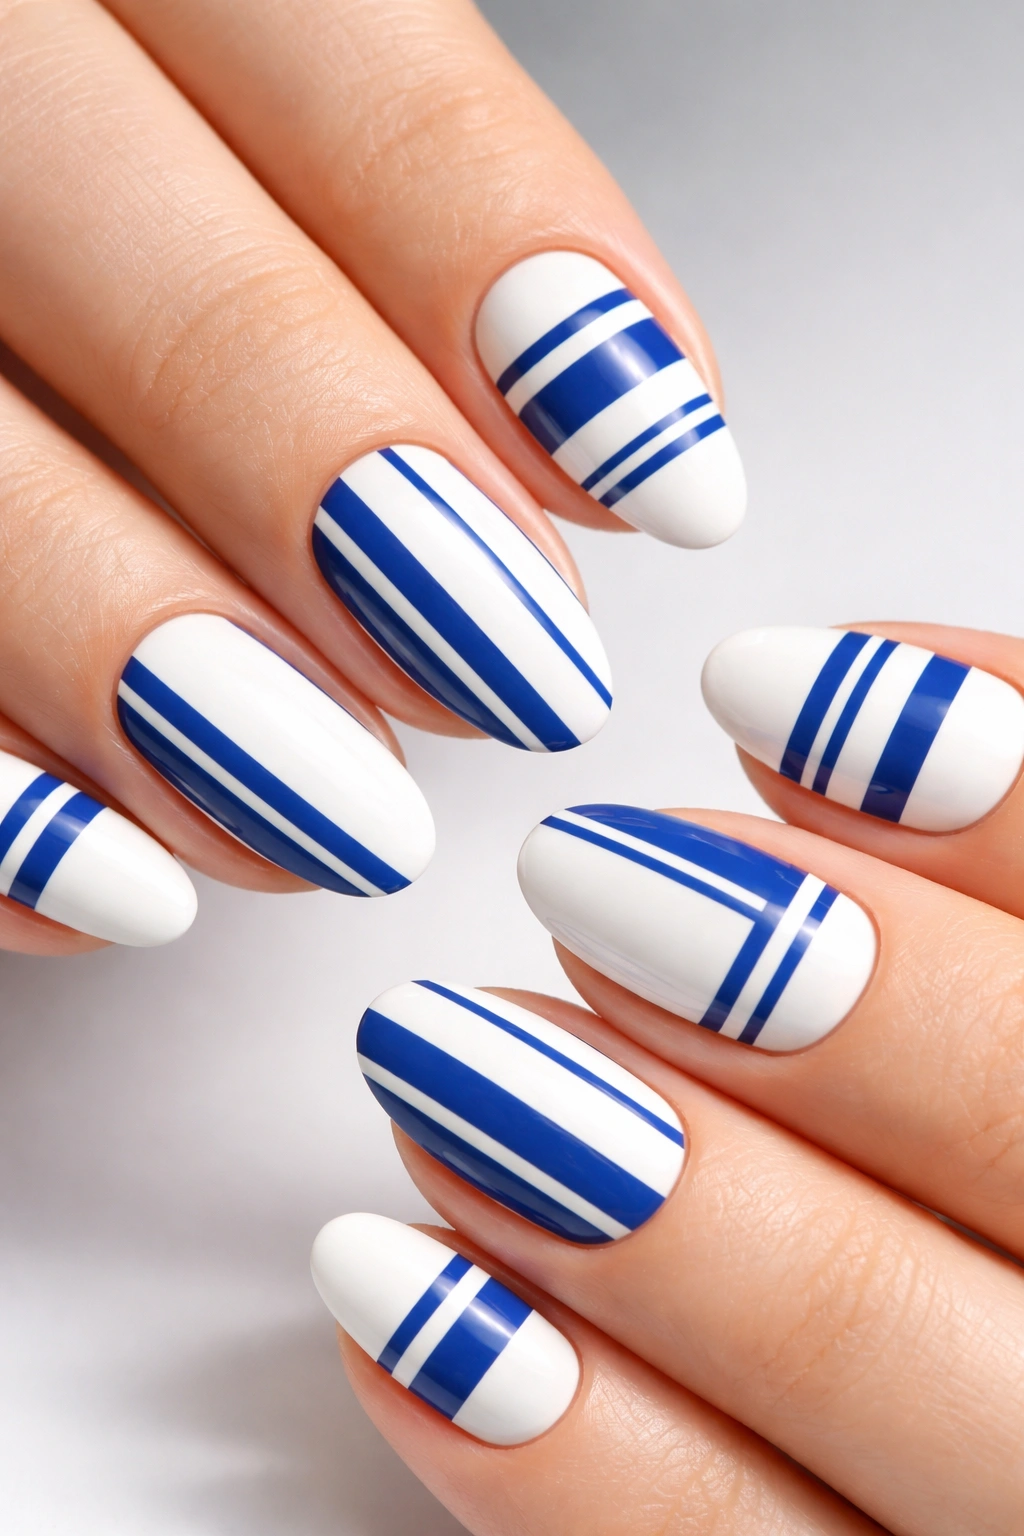
For those who appreciate clean lines and modern aesthetics, geometric striped designs in blue and white offer a contemporary approach that feels both bold and polished. Stripes create instant visual interest through sharp contrast and consistent repetition, making them perfect for anyone who loves structure and precision in their nail art.
The Modern Appeal of Geometric Patterns
Geometric designs tap into minimalist and contemporary aesthetic preferences. Stripes specifically offer the perfect balance between bold and subtle—they’re noticeable enough to make a statement, yet structured enough to feel professional and appropriate for any setting. Blue and white stripes evoke nautical themes, modern graphic design, and clean sophistication all at once. Whether you choose thick, bold stripes for maximum impact or delicate pinstripes for understated elegance, this design showcases that precision and intentionality you bring to your appearance.
Achieving Crisp, Clean Lines
The secret to perfect striped nails is using striping tape or nail guides to define exactly where each stripe begins and ends. Start with your white base coat and let it dry completely. Apply striping tape horizontally (or vertically, depending on your preference) across your nails, leaving gaps where you want the white to show. Paint blue polish over the exposed areas, let it dry, then carefully remove the tape to reveal crisp, clean lines. Alternatively, you can use a nail art pen or thin brush to hand-paint stripes if you’re feeling confident, though tape definitely makes the process easier and more precise.
Variations to Keep It Fresh
Try alternating the thickness of your stripes—thick, thin, thick, thin—for visual rhythm. You might paint thick stripes on some nails and thin ones on others for contrast. Consider using multiple shades of blue on the same nail, or try diagonal stripes instead of horizontal ones for a dynamic, energetic look. Some people even combine stripes with other design elements, like adding a solid blue accent nail to a set of white nails with blue stripes, creating an intriguing mix-and-match aesthetic.
5. Ombre Blue Fade to White
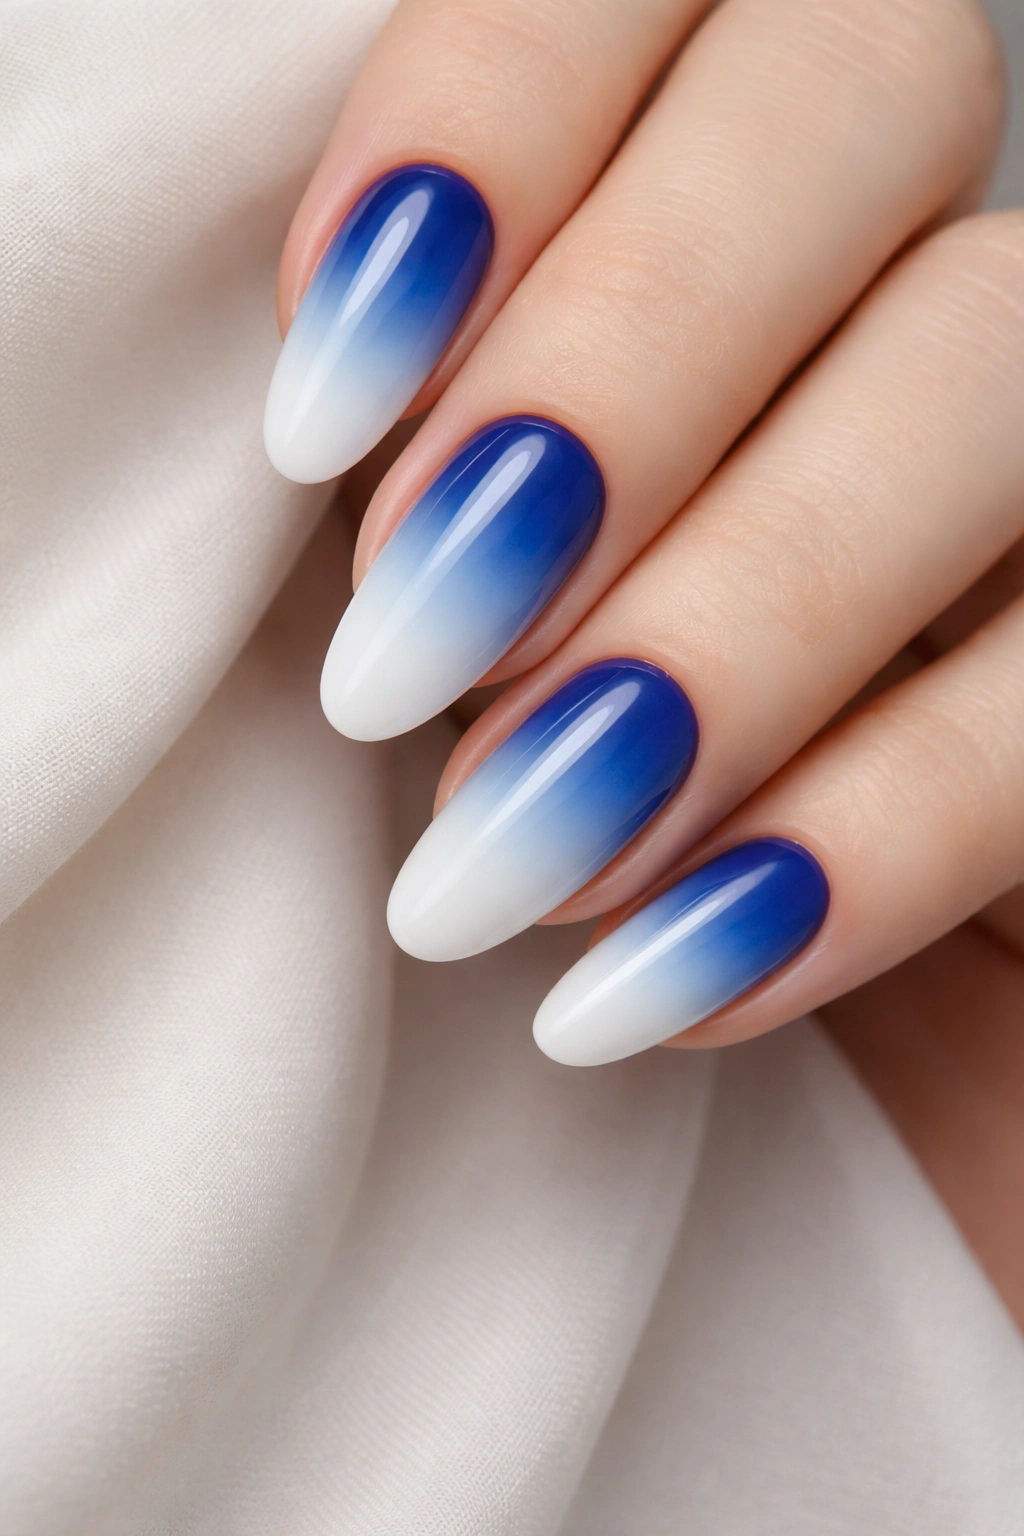
An ombre gradient that transitions from deep blue to crisp white creates one of the most visually striking and sophisticated nail designs available. This technique requires patience and practice, but the dreamy, multidimensional result is absolutely worth the effort you invest in mastering it.
Understanding the Ombre Technique
Ombre nails work by gradually blending one color into another, creating a seamless transition across the nail surface. When executed in blue and white, you’re essentially creating a visual representation of how the sky transitions from deep blue overhead to lighter shades near the horizon, or how ocean waters shift from deep blue in the distance to lighter tones in shallow areas. The key to successful ombre is using a makeup sponge to dab multiple layers of polish with slightly different opacity, allowing each layer to show through the next and creating that smooth, gradient effect.
Step-by-Step Ombre Application
Begin with a white base coat and allow it to dry completely. On a piece of plastic or a makeup sponge, create a gradient by dabbing white polish on one end and progressively darker shades of blue toward the other end. Use a clean section of sponge for each nail, gently pressing the gradient onto your nail surface. You might need to repeat this process multiple times, layering gradually darker blues, to achieve the depth you’re looking for. Once you’re satisfied with your gradient, seal everything with a high-shine topcoat to enhance the sophisticated, blended appearance and protect your design.
Customizing Your Ombre Design
You have flexibility in how you execute your ombre—start with white at the cuticle and fade to blue at the tips, or reverse it for a completely different look. Try starting with baby blue and fading to navy for subtle gradient, or use multiple shades of blue across your fingers for variety. Some nail artists add glitter or shimmer to their ombre designs, concentrating sparkle at the tip where the color is darkest for added glamour and dimension.
6. Polka Dot Design
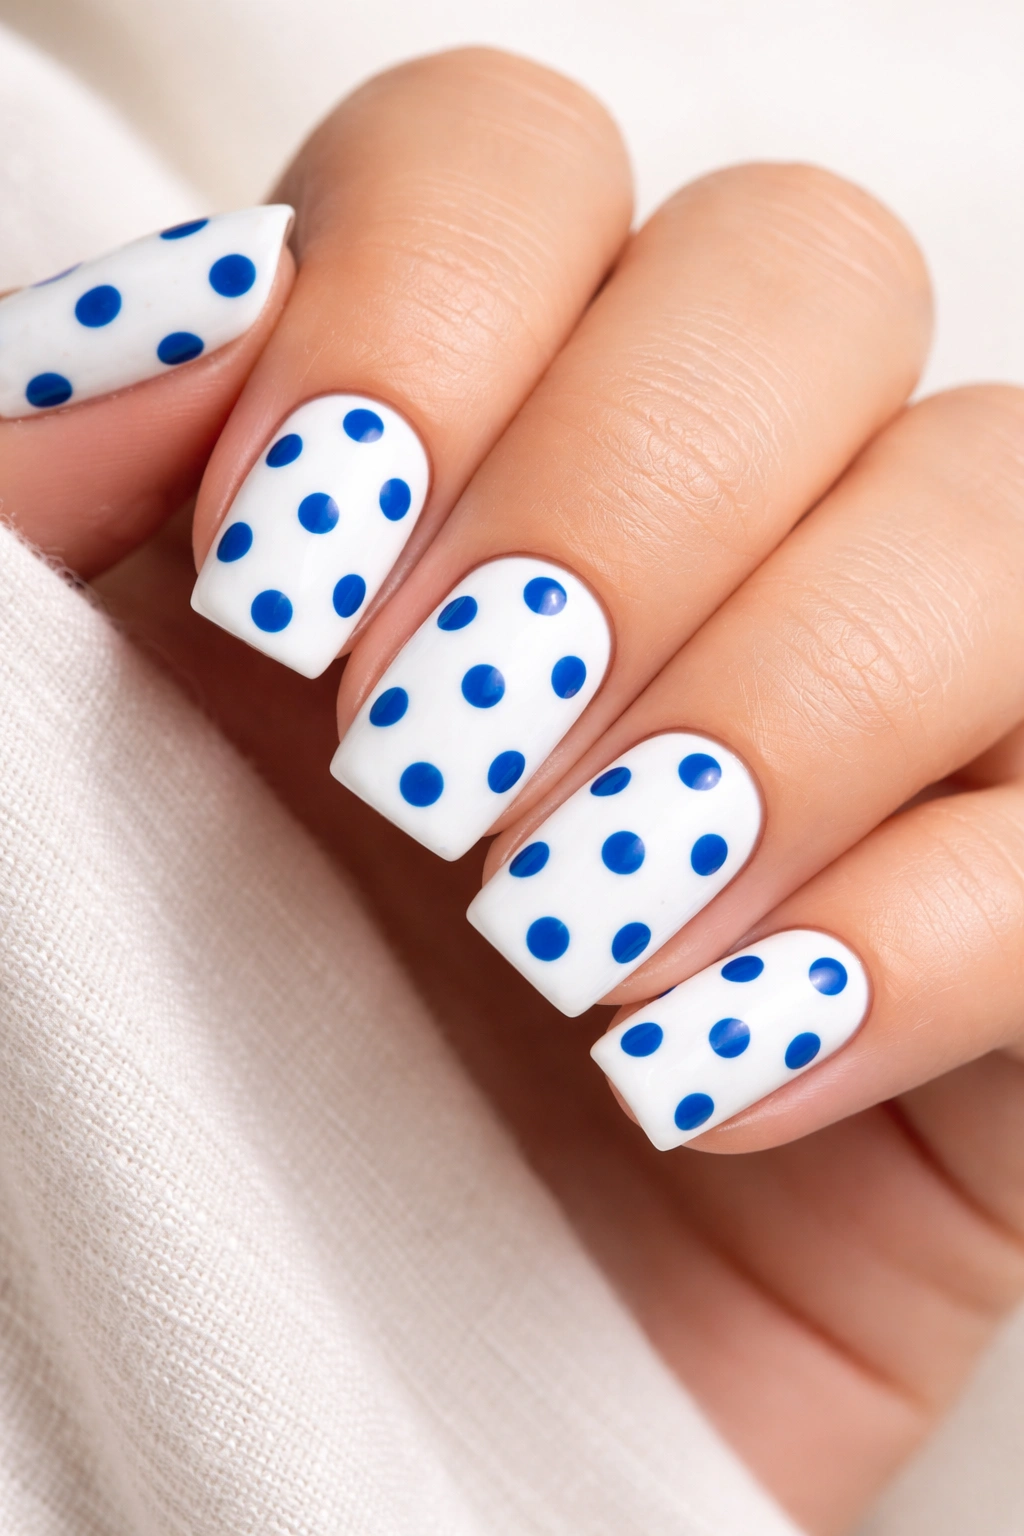
There’s something inherently playful and charming about polka dot nail designs, and when rendered in blue and white, they take on a retro-chic vintage aesthetic that feels both fun and sophisticated. Polka dots work beautifully because they’re simple enough for beginners yet endlessly customizable for experienced nail artists.
Why Polka Dots Never Go Out of Style
Polka dots have maintained their popularity across fashion and beauty for decades because they’re effortlessly cute without being childish. They photograph beautifully, work for casual and formal occasions alike, and allow you to express personality through color choice and dot size variation. Blue and white polka dots specifically evoke vintage Americana, seaside charm, and timeless elegance. The dots create visual rhythm across your nails while the contrasting background keeps everything feeling fresh and clean.
Creating Perfect Polka Dots
The easiest way to create polka dots is using a dotting tool—a small tool with a rounded end specifically designed for this purpose. If you don’t have a dotting tool, a toothpick, bobby pin, or the end of a thin brush will work just fine. Dip your chosen tool into your blue or white polish (depending on your base color) and press it gently onto your nail, allowing the polish to transfer and create a dot. The key is using the right amount of polish—too much creates bloopy dots that spread, while too little leaves barely-there marks. Practice on a piece of plastic first to get a feel for the perfect amount.
Making Your Polka Dots Uniquely Yours
Vary your dot sizes by using different tools or pressing with varying pressure. You might create gradient dots by using multiple shades of blue on white, or reverse the colors for alternating blue nails with white dots and white nails with blue dots. Some people arrange dots in perfect rows for a structured look, while others scatter them randomly for a more playful, organic aesthetic. Add tiny dots to just the tips, cover the entire nail in dots, or leave some nails completely plain while featuring dots on others—the possibilities are limitless.
7. Snowflake Winter Look
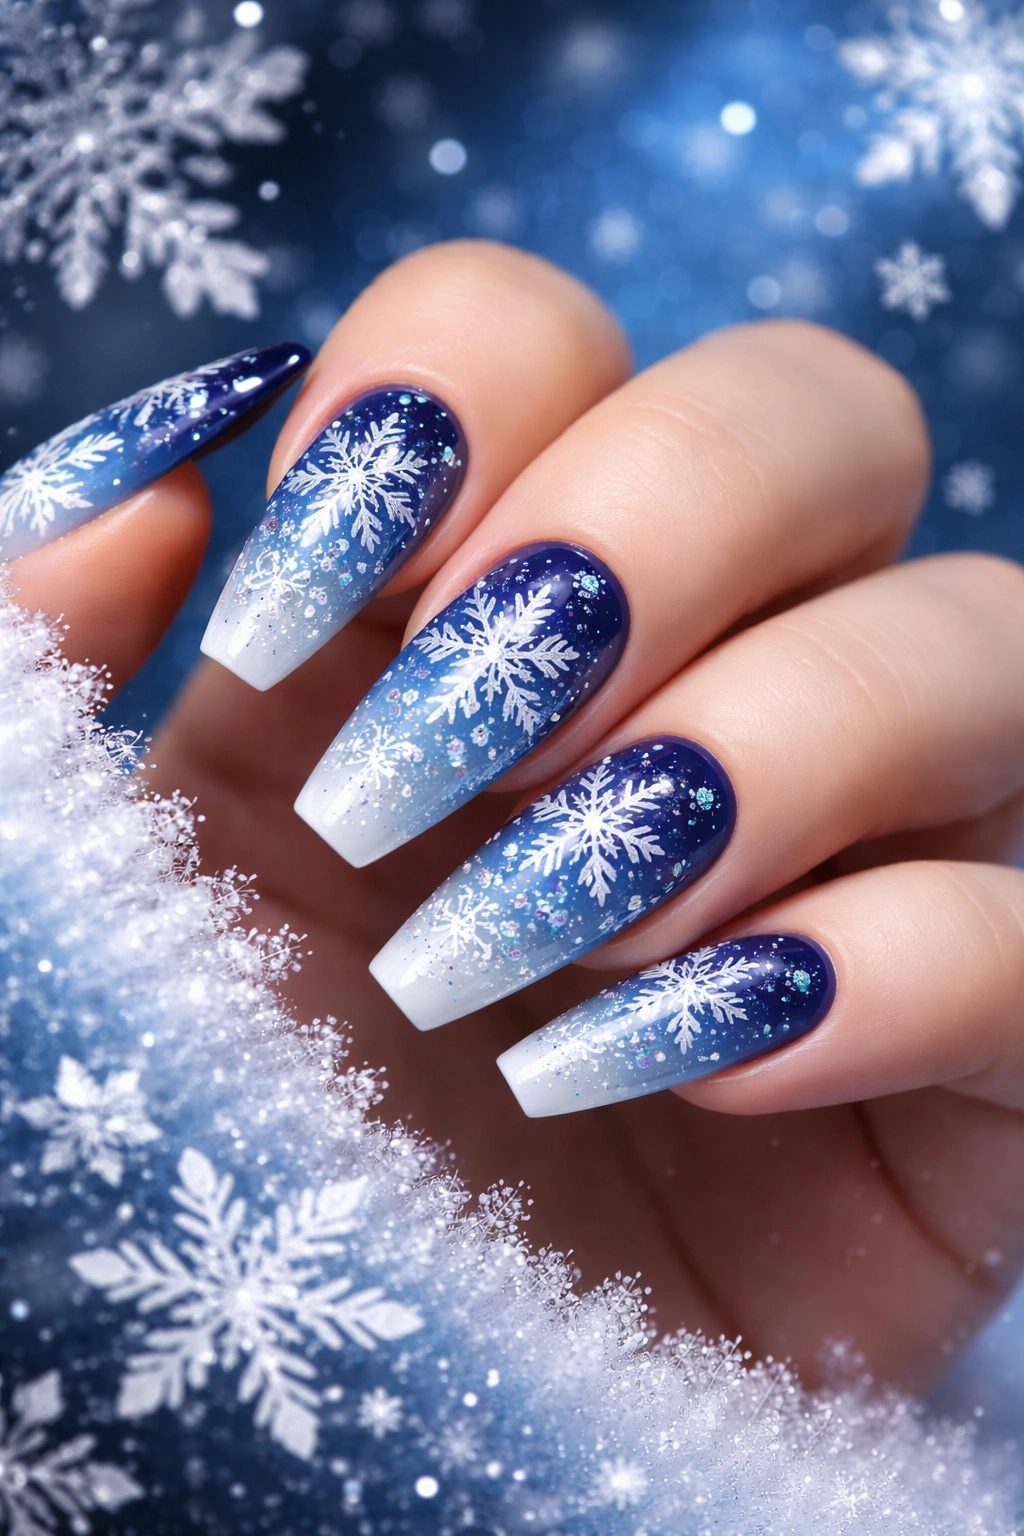
Delicate white snowflakes dancing across a deep blue background create an enchanting winter wonderland aesthetic that feels magical regardless of the season. This design captures the crystalline beauty of snowflakes while maintaining enough sophistication to wear year-round, making it perfect for anyone who loves winter aesthetics without wanting to limit their wear to just the cold months.
The Timeless Appeal of Snowflake Designs
Snowflakes represent transformation, individuality, and natural beauty—each one is completely unique, just like the designs you’ll create on your nails. The blue and white color combination perfectly evokes snowscapes and winter skies, while the delicate nature of snowflake designs feels refined and artistic. This design works particularly well on longer nails, where you have more surface area to showcase intricate snowflake patterns, though shorter nails can absolutely rock this look too.
Techniques for Creating Snowflakes
Stamping plates offer the easiest route to perfect snowflakes—simply choose a plate with the snowflake designs you love, apply polish, and transfer the pattern to your nails. For those comfortable with freehand painting, thin brushes allow you to create custom snowflake designs with unique patterns. You can also use nail decals featuring pre-made snowflakes if you prefer an even simpler application process. Some nail artists combine techniques, using stamped snowflakes as a base and hand-painting additional details for a personalized touch.
Enhancing Your Snowflake Design
Add sparkle by incorporating white glitter, silver glitter, or holographic sparkles into or around your snowflake designs—this mimics the way light reflects off real snow and adds instant glamour. You might add tiny rhinestones or crystal embellishments to snowflake centers for a more luxurious look. Consider varying snowflake sizes across your nails, or featuring a large statement snowflake on an accent nail while keeping others subtle. A glossy topcoat enhances the icy, crystalline appearance of this design.
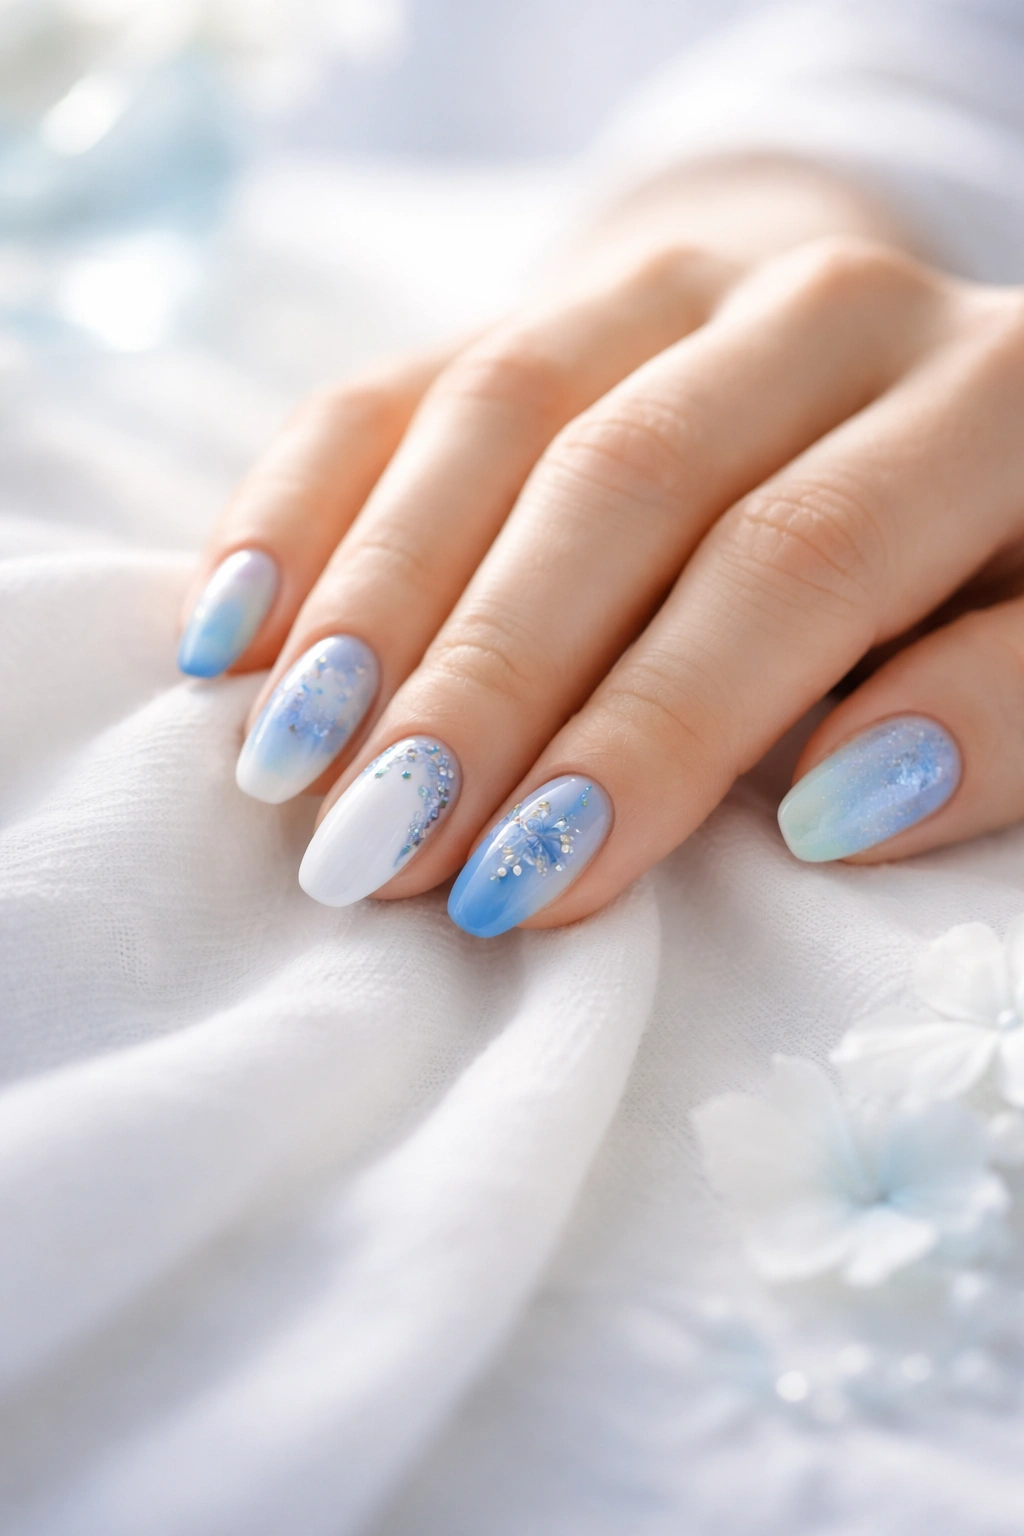
8. Abstract Watercolor Effect
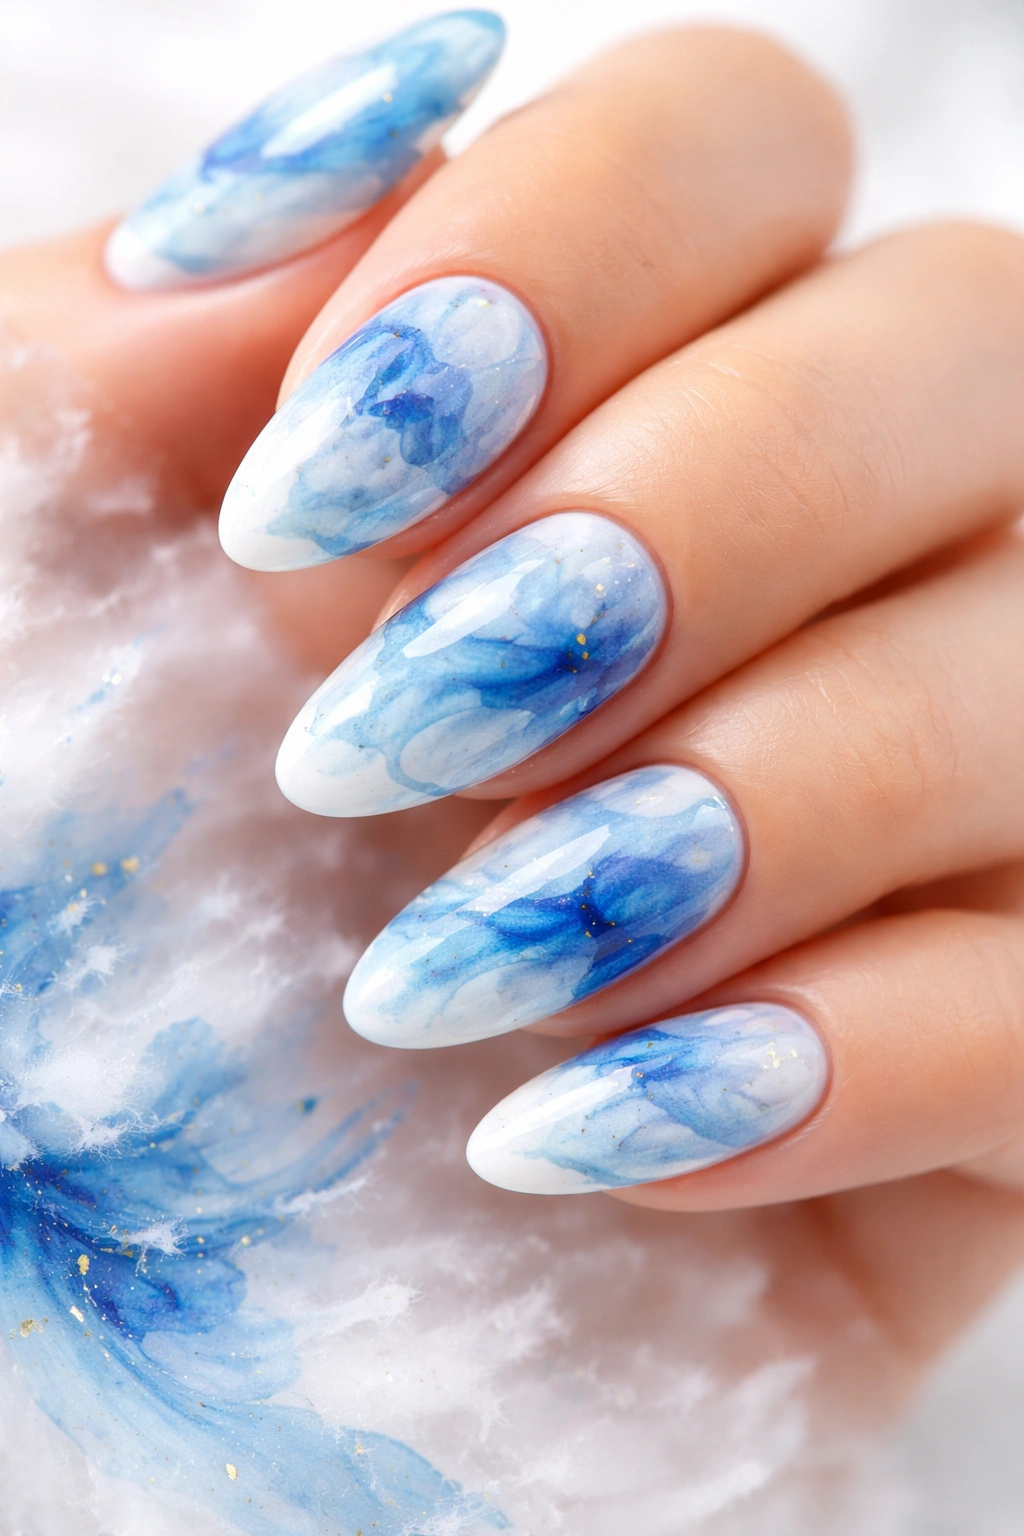
For the creatively adventurous, abstract watercolor nails in blue and white offer a completely unique artistic expression. This design celebrates imperfection and spontaneity, creating something that feels hand-painted and artistic while remaining surprisingly wearable and sophisticated for any occasion.
The Artistic Freedom of Abstract Design
Abstract watercolor designs break free from the rules of traditional nail art. There’s no “right” way to create them—splashes, swirls, gradients, and organic shapes all come together to create miniature masterpieces that feel completely personal and expressive. The blue and white color palette grounds abstract designs in sophistication despite their artistic, unconventional nature. No two nails will look exactly alike, which adds to the appeal and charm of this design choice.
Creating Your Watercolor Effect
The water marbling technique works beautifully for achieving authentic watercolor effects. Drop blue and white polish into room-temperature water, swirl with a toothpick to create paint-like patterns, then dip your nails into the design. For a different approach, apply blue and white polish to your nails while they’re still wet and blend them together using a clean, slightly damp brush or sponge, allowing colors to merge naturally. Some artists use acetone-dipped tools to drag colors across their nails, creating organic, flowing patterns that mimic actual watercolor paintings.
Embracing Imperfection as Beauty
The beauty of abstract watercolor nails is that perfection isn’t the goal—artistic expression is. Don’t stress if your design doesn’t turn out exactly as you envisioned. The spontaneity and slight imperfections are what make abstract designs feel alive and authentically artistic. You can always add tiny details like dots, lines, or small shapes once your base watercolor effect is dry, or seal everything with a glossy topcoat to enhance colors and create a finished look. This design works wonderfully for anyone who wants their nails to feel like they’re wearing wearable art.
Final Thoughts
Blue and white nail designs offer something truly special—they’re versatile enough to complement any personal style, accessible enough for any skill level, and sophisticated enough for any occasion. Whether you gravitate toward the timeless elegance of French tips, the artistic expression of watercolor effects, or the structured beauty of geometric patterns, this color combination provides the perfect palette for bringing your nail art vision to life.
The most important thing to remember is that these design ideas are starting points for your own creativity. Mix and match elements from different designs, adapt colors and patterns to suit your preferences, and don’t be afraid to experiment with techniques until you find what works for you. Blue and white nails aren’t about following rules—they’re about expressing yourself through a sophisticated, timeless color combination that never goes out of style.
Whether you’re planning a special occasion manicure or simply want to upgrade your everyday look, one of these eight ideas is sure to resonate with you. Take your time practicing new techniques, invest in quality products that make application easier, and remember that every manicure is an opportunity to celebrate your personal style. Your nails are a canvas waiting for your artistic touch, and blue and white are the perfect colors to get started.
