

White almond nail ideas can look polished or soft depending on how you handle the white. On almond nails, that taper gives you a lot of help; the shape already does some of the visual work, so the color doesn’t have to be loud to matter.
A thin liner brush, a makeup sponge, a dotting tool, and a decent top coat will carry most of these looks. That’s the part people miss. You do not need a drawer full of nail gear to get white almond nails that look expensive from arm’s length and tidy up close.
White polish can be tricky, though. Too thick, and it turns chalky. Too sheer, and it disappears. The sweet spot is usually one thin coat more than you think you need, plus a careful second pass only where the nail still looks streaky.
Start with the softest ideas first. Then pick up the sharper ones once your hand settles in.
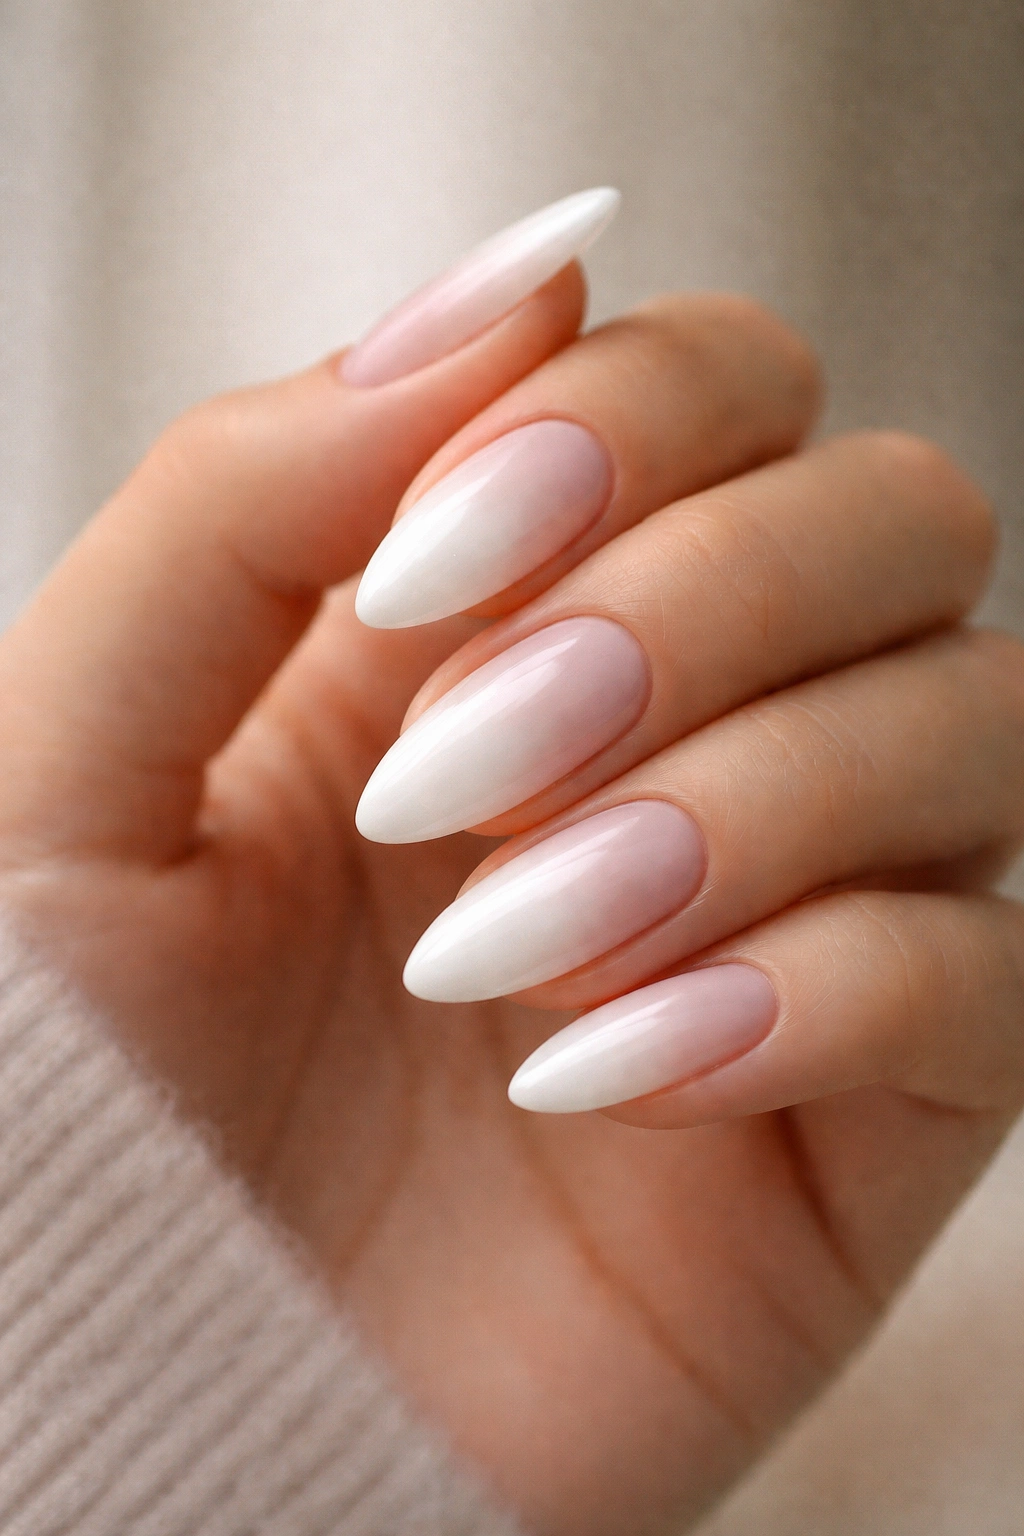
1. Milky White Almond Nails
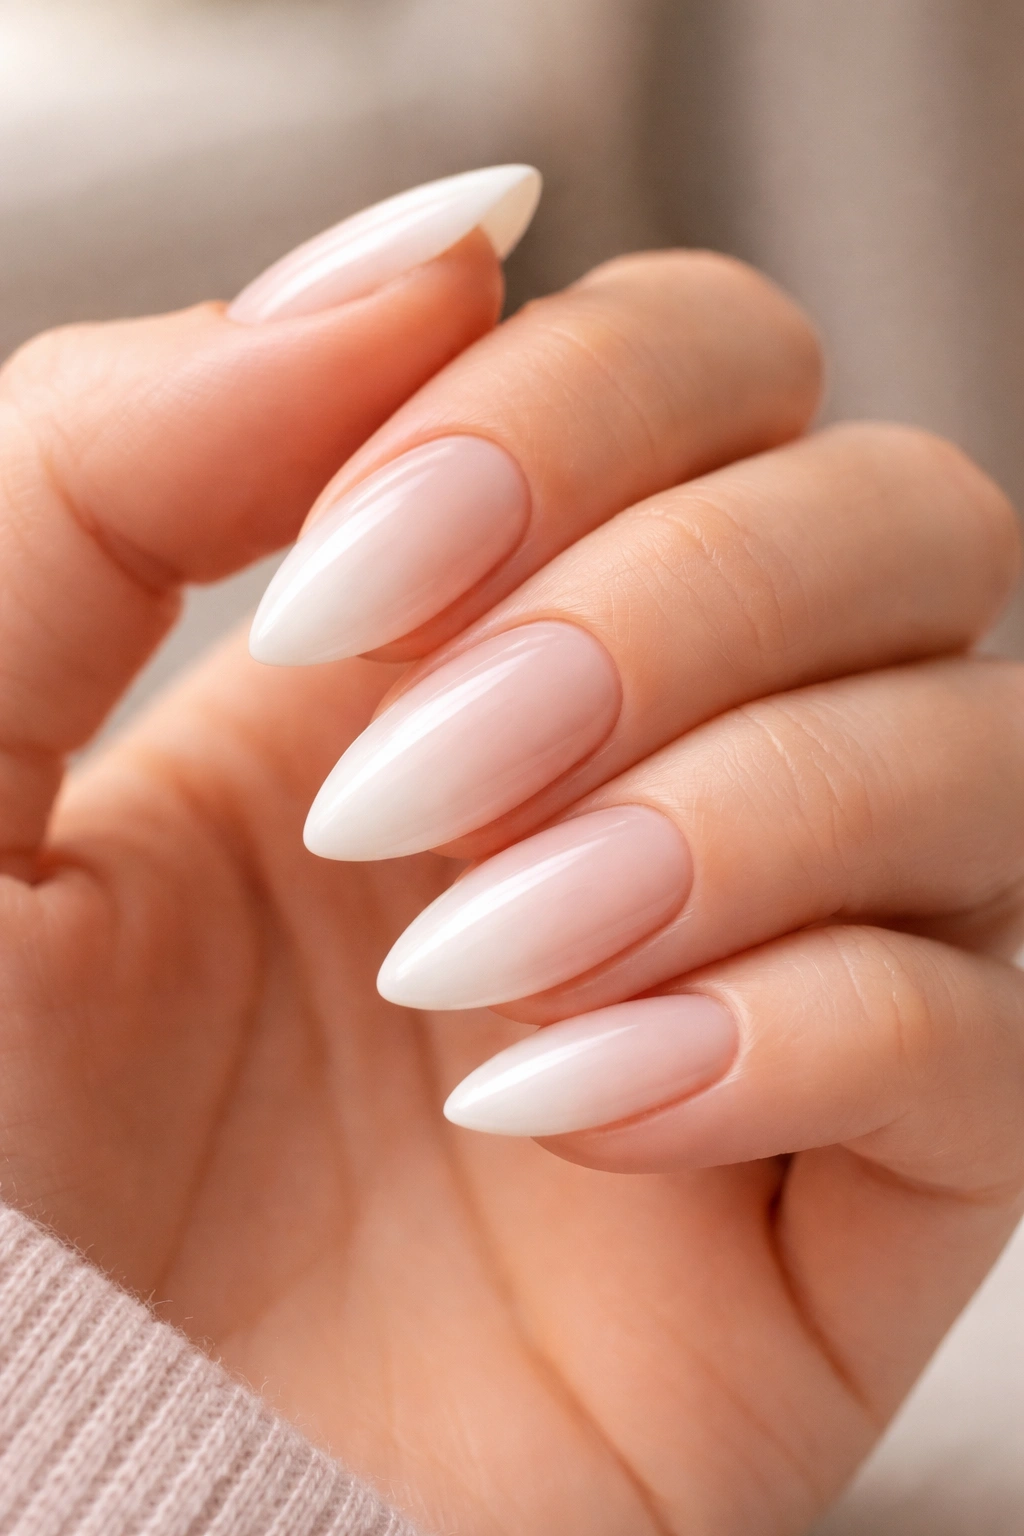
Milky white is the look I’d hand to anyone who wants white almond nails without the hard edge of a full opaque manicure. The color sits somewhere between cream and foggy white, so it softens the whole hand and makes the almond shape feel longer. It also hides tiny flaws better than a flat white, which is why I keep coming back to it.
A sheer nude or pink base helps the milky layer stay even. Two thin coats are usually enough; if you pile it on, the nails start to look cloudy instead of clean. I like this look most on medium-length almonds because the taper reads clearly, even with a softer color on top.
Skip the thick brush strokes. They leave ridge marks that show up the moment the light hits the nail. A glossy top coat finishes the job and gives the white a little depth, not the dry, paper-like look that cheaper polishes sometimes leave behind.
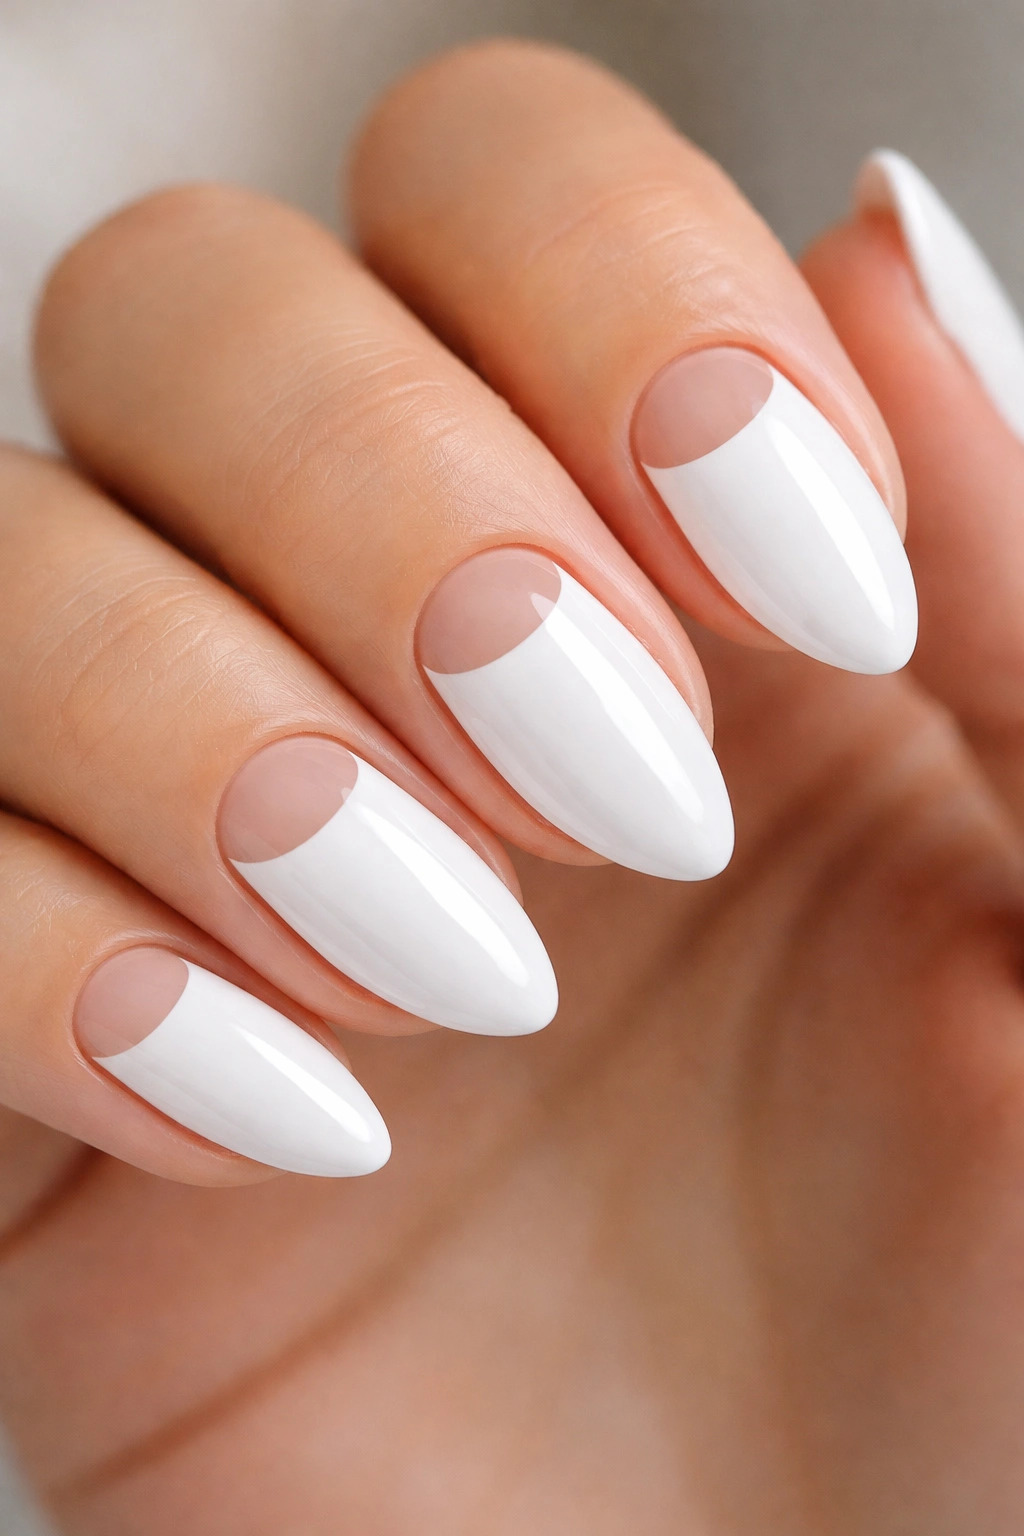
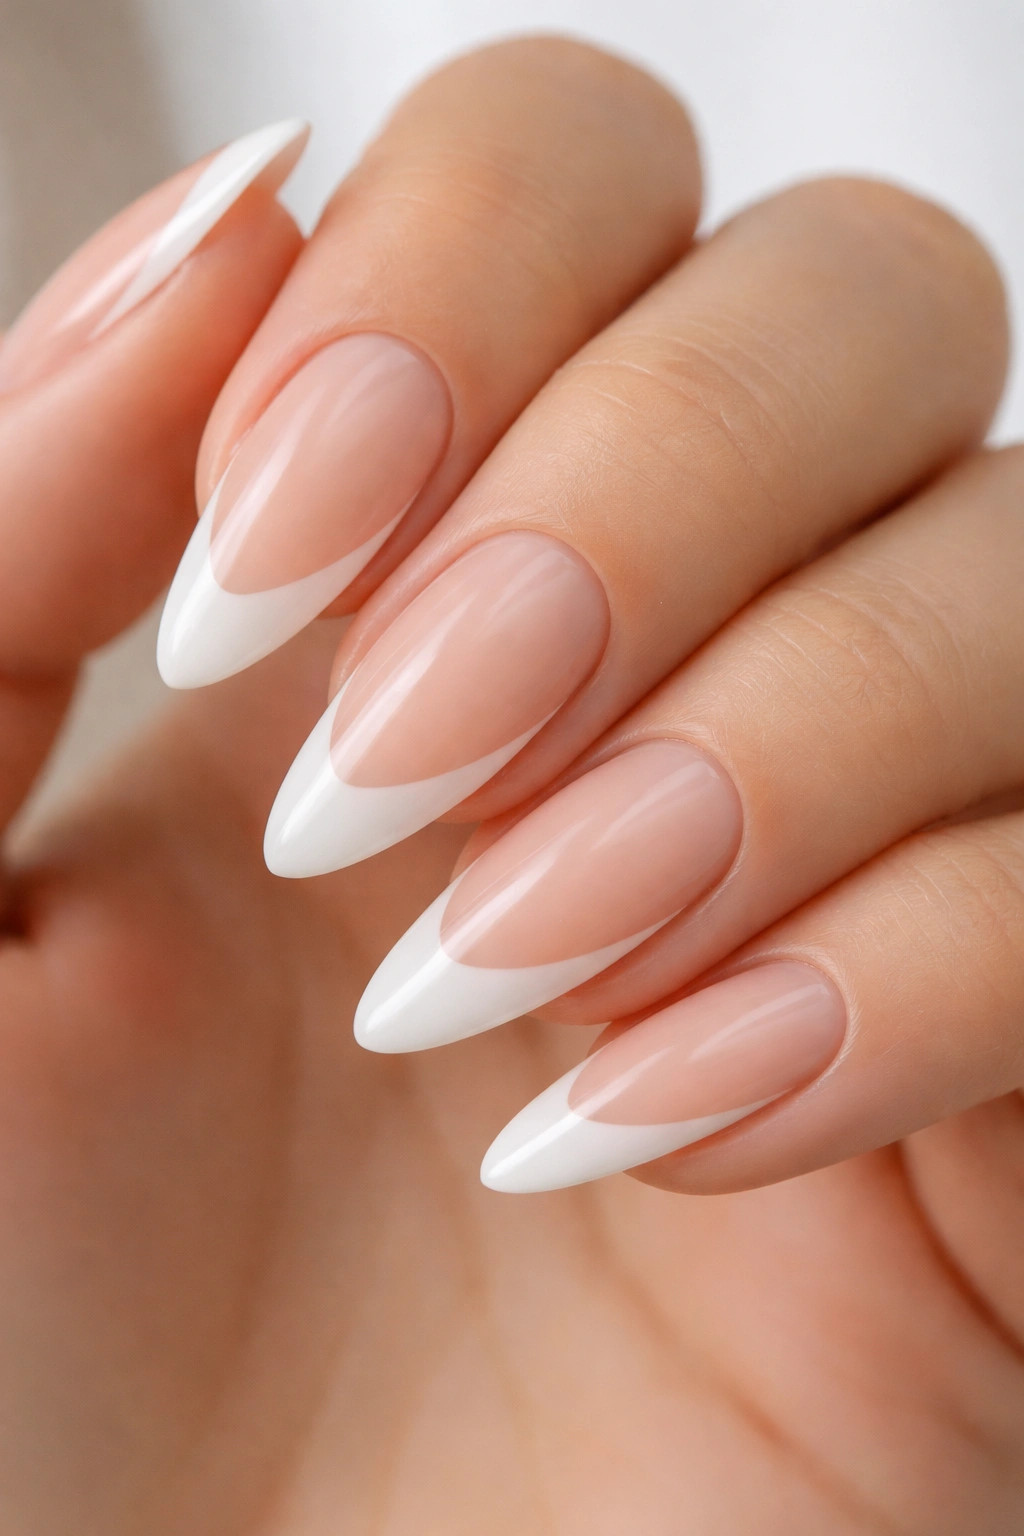
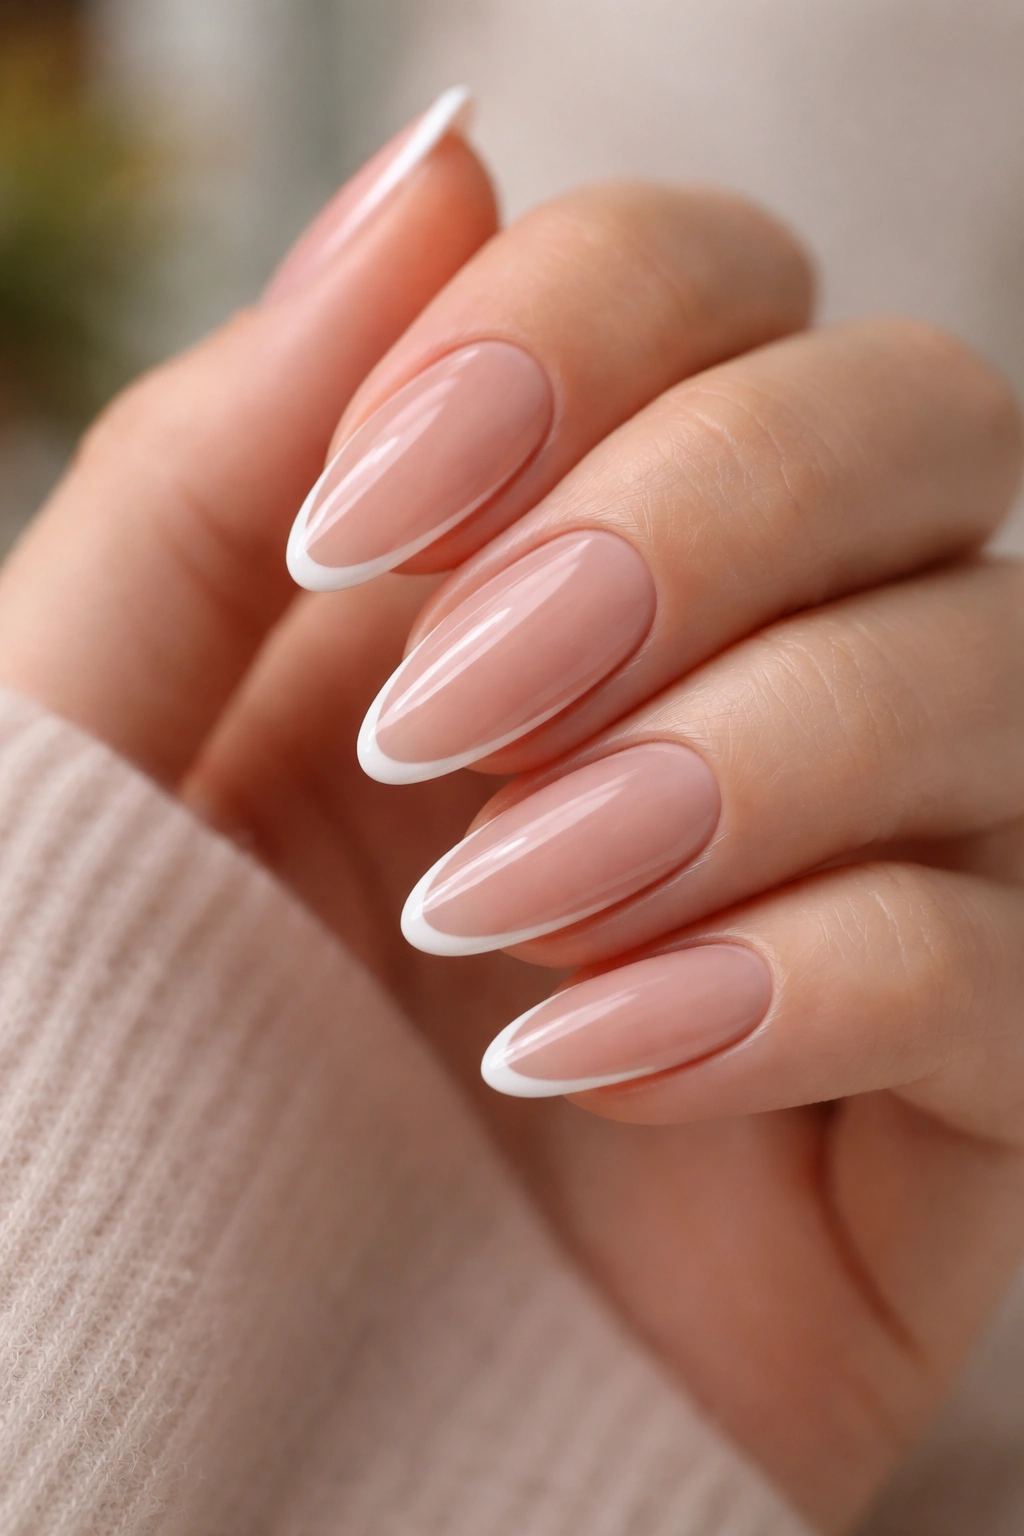
2. Micro French Tips
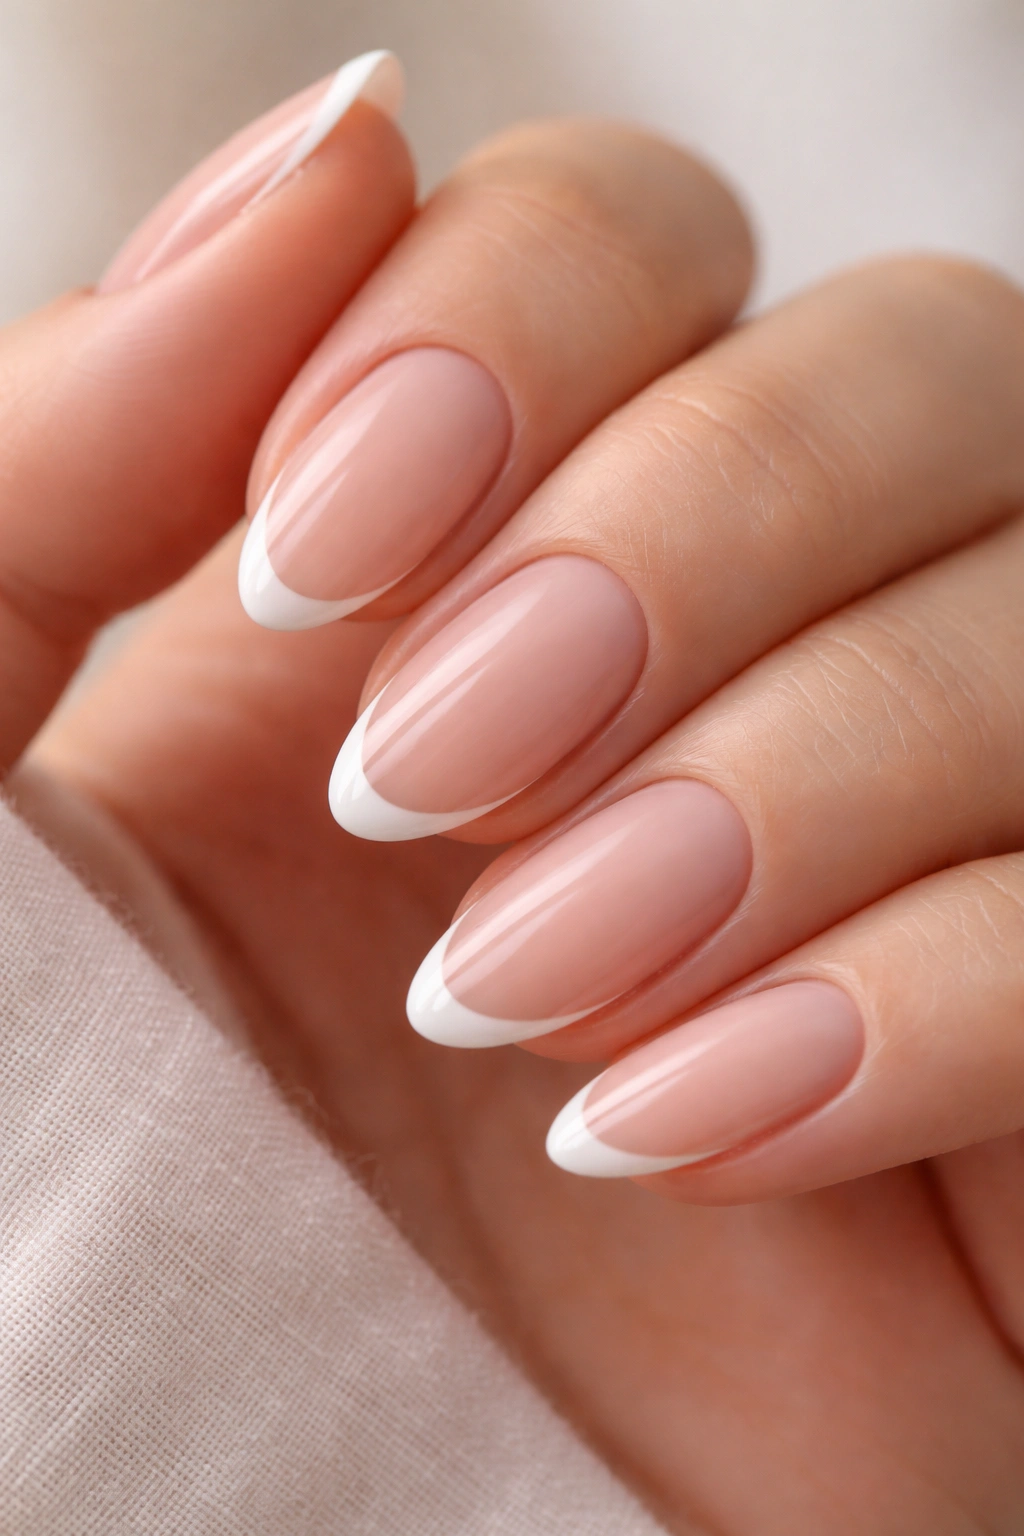
Want a white almond manicure that still looks neat a week later? Micro French tips are the answer. The white line is so thin that grow-out barely announces itself, and the almond shape keeps it from looking boxy.
Paint the base with sheer pink, nude, or clear builder gel. Then use a striping brush to draw a smile line that’s only about 1 to 2 millimeters thick at the very edge. The line should follow the curve of the almond tip, not sit straight across like a tiny rectangle glued on the end.
How to Keep the Line Clean
Work with a nearly dry brush. That sounds picky, but it matters.
- Load the brush with a small amount of white polish.
- Wipe one side off on the bottle neck.
- Trace the free edge in one slow pass.
- Clean the corners with a flat cleanup brush dipped in acetone.
Tip: If your hand shakes, do the tips on one hand first, let them dry, then mirror the shape on the other hand. It’s slower, but the line stays sharper.
3. Soft White Ombré Fade
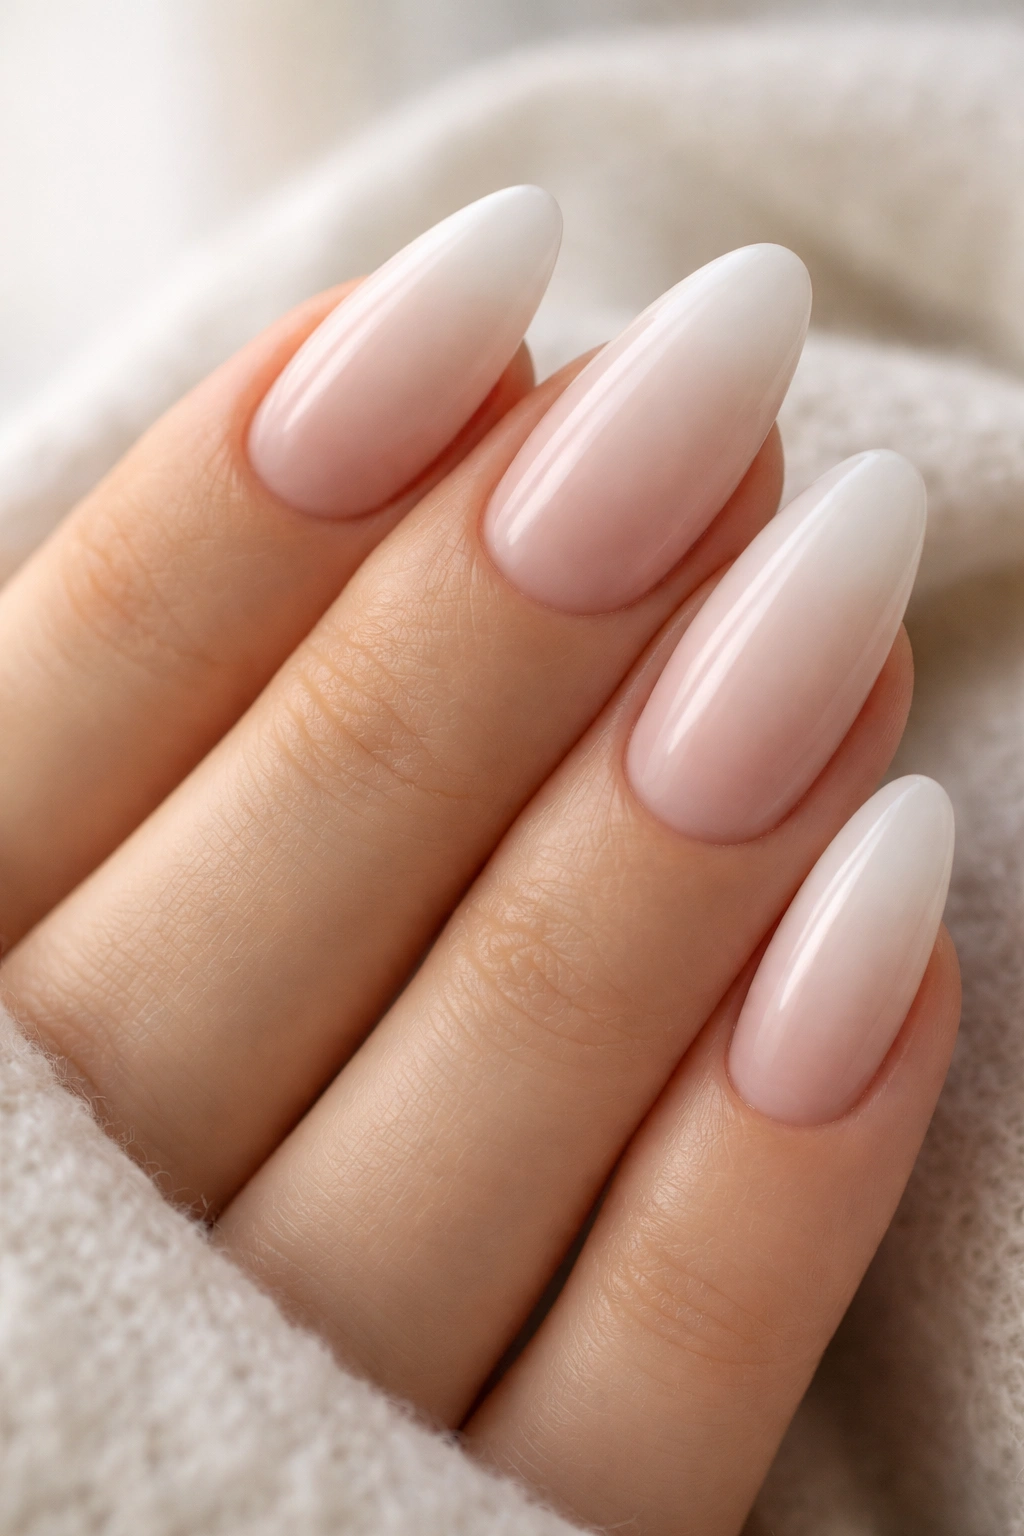
A white ombré fade looks delicate on almond nails because the taper already gives the nail a natural softness. The color can start bright at the tip and melt into a nude base without feeling harsh. I like this when I want something lighter than French tips but less plain than a single-color manicure.
Why the Fade Flatters the Shape
The almond tip gives the white room to blur. That’s the whole trick.
A makeup sponge works better than trying to brush the blend directly onto the nail. Paint the base with a sheer nude, then tap milky white onto the tip and feather it upward in two or three passes. Stop before the white climbs too high; if it reaches the cuticle, the nail loses the gradient and just looks washed out.
- Use a small makeup sponge cut into a triangle.
- Dab off most of the polish before touching the nail.
- Blend in short taps, not swipes.
- Seal it with a glossy top coat to smooth the texture.
The finish should look airy, not smoky. If the blend is too busy, wipe it off and start again. Ombré rewards patience and punishes haste.
4. White Chrome Glaze
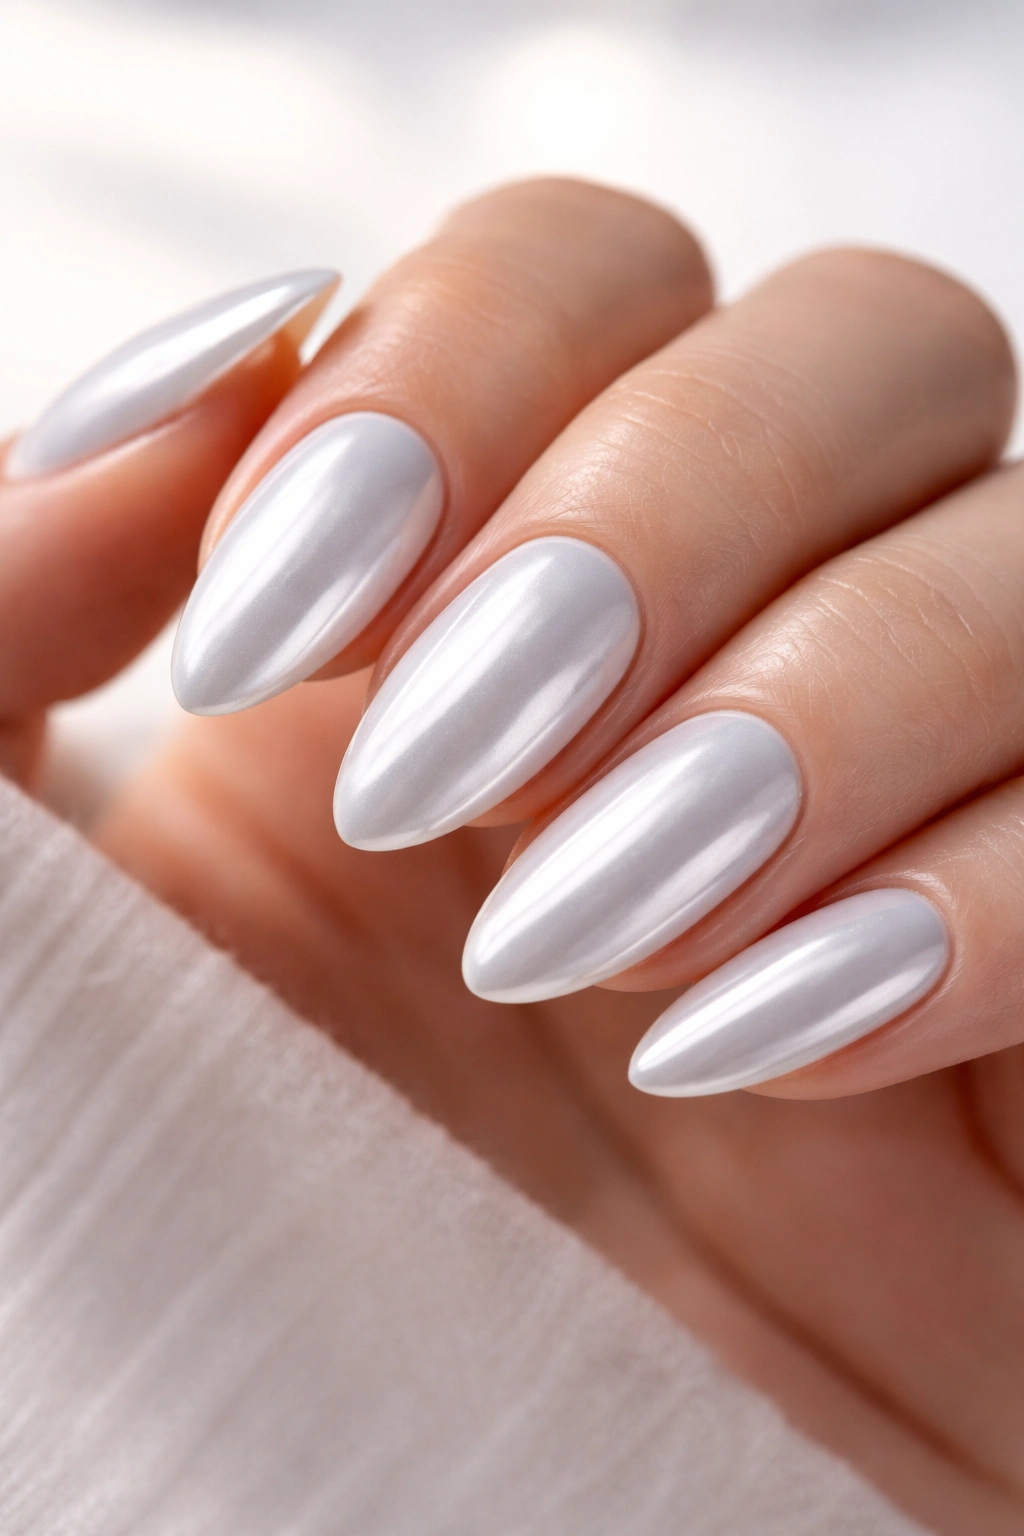
White chrome is one of those finishes that makes even a plain almond nail feel deliberate. The mirror sheen sits on top of a white or pearl base and throws back light in a soft, pearly way. It’s not loud. It just looks clean and expensive without asking for much effort.
Start with a white gel base or a sheer milky layer. Cure or dry it fully, then apply a no-wipe top coat and rub in chrome powder with a sponge applicator or your fingertip. The powder should look smooth and even, not dusty. If the base underneath is streaky, the chrome will show every flaw, which is annoying but useful in a rude sort of way.
Finish with another thin top coat to lock it down. I’d avoid piling on nail art here; the sheen is the whole point. One solid chrome almond set can carry the entire look on its own.
5. Half-Moon Negative Space
If you hate touching up grow-out, this one is a smart pick. Half-moon negative space keeps the cuticle area bare or lightly tinted, then places the white higher up the nail in a curved block. The almond shape makes the whole thing feel graceful instead of retro.
You can paint the crescent by hand with a thin brush, or use nail stickers as a guide if your lines wobble. Either way, keep the arc close to the natural cuticle curve. A crescent that sits too high makes the nail look shortened. A crescent that hugs the base just right makes the white look intentional.
This style works well with either glossy or matte white, but I prefer glossy because it gives the negative space a sharper contrast. If you want something a little smarter than a full white manicure and a little calmer than French tips, this is a solid middle ground.
6. Diagonal French Tips
Unlike a straight French tip, a diagonal French tip pushes the eye along the almond shape instead of cutting across it. That angled white band makes the nail look slimmer and longer, which is why I like it on shorter almonds as much as on longer ones.
Draw the line from one sidewall toward the opposite edge, then fill the tip above it. Keep the angle consistent from nail to nail, or the set will start to look accidental. A striping brush helps more than a thick French guide strip, because the almond shape rarely matches a rigid sticker perfectly.
I’d keep the white crisp and the base sheer. If both areas get heavy, the design loses its clean edge. This is one of those styles that looks fancy in photos but is easy enough to do after a little practice with the brush. The first nail may be messy. The fifth usually behaves.
7. Matte White Minimalist Nails
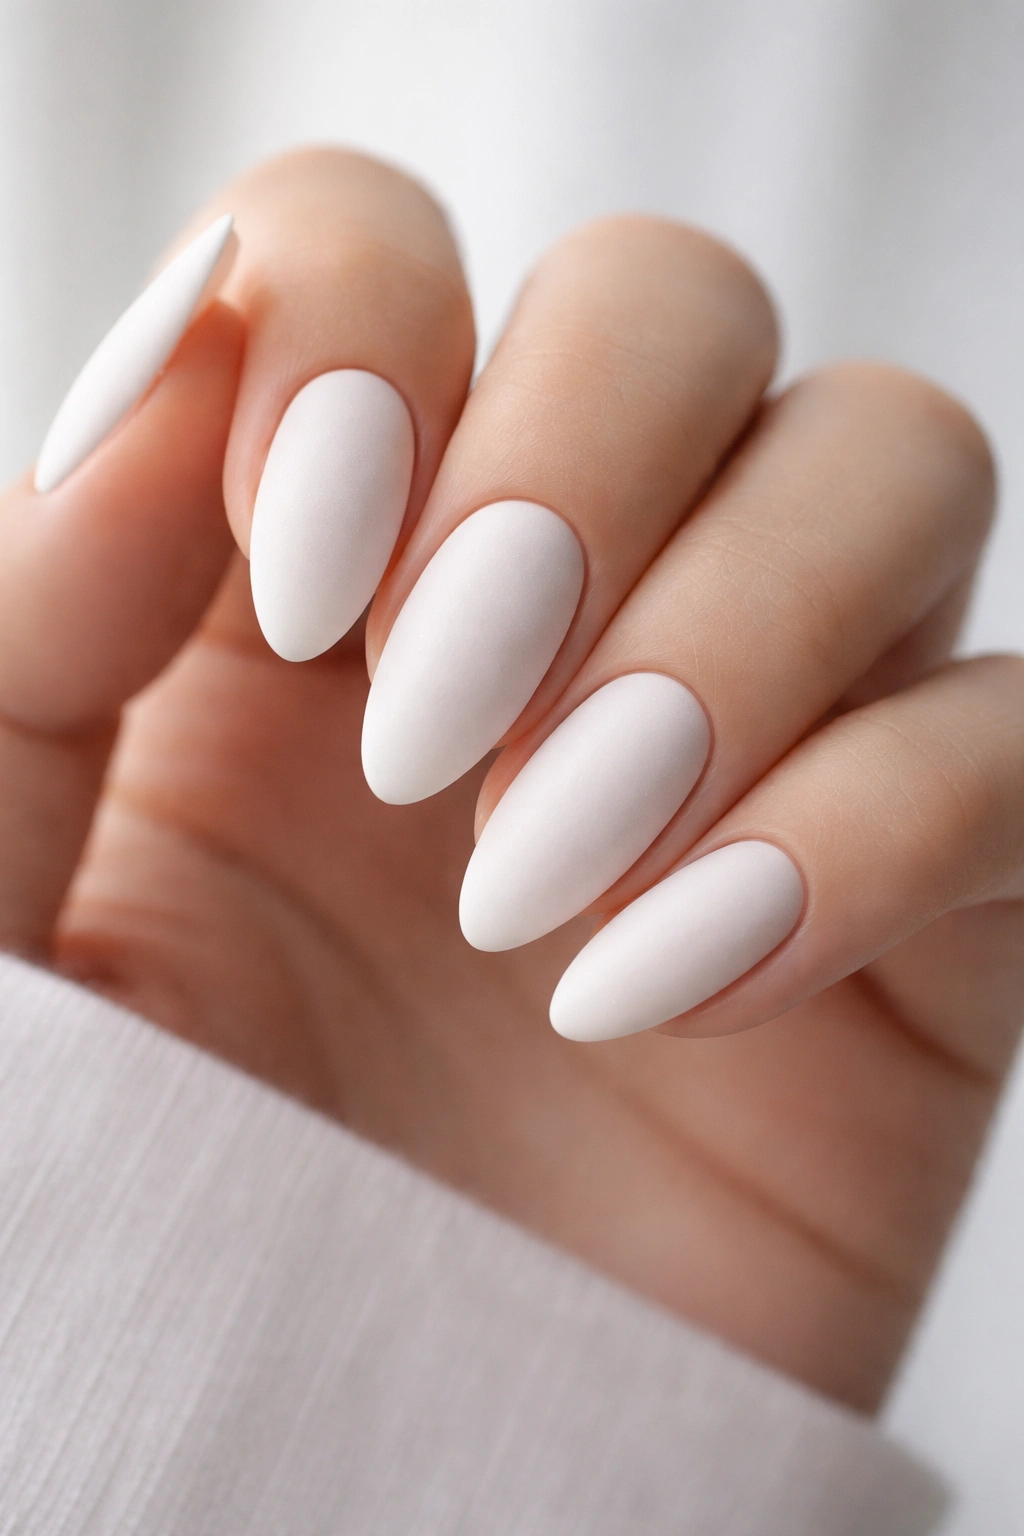
Matte white can be gorgeous on almond nails, but it’s picky. The finish turns chalky fast if the coat is too thick or the base underneath is uneven. When it works, though, it gives the nail a soft, powdery look that feels modern without trying too hard.
I’d use a smooth nude or milky base, then apply one or two thin coats of white. Let each layer dry fully before the matte top coat goes on. If you rush that part, the matte finish traps streaks and makes them more obvious than gloss ever would.
Keep lotions and cuticle oils away until the surface has set. Matte polish shows fingerprints more than glossy polish does, and that can be frustrating if you’re the sort of person who always reaches for hand cream. One small accent nail in gloss can break up the flatness, but the full matte set also stands on its own.
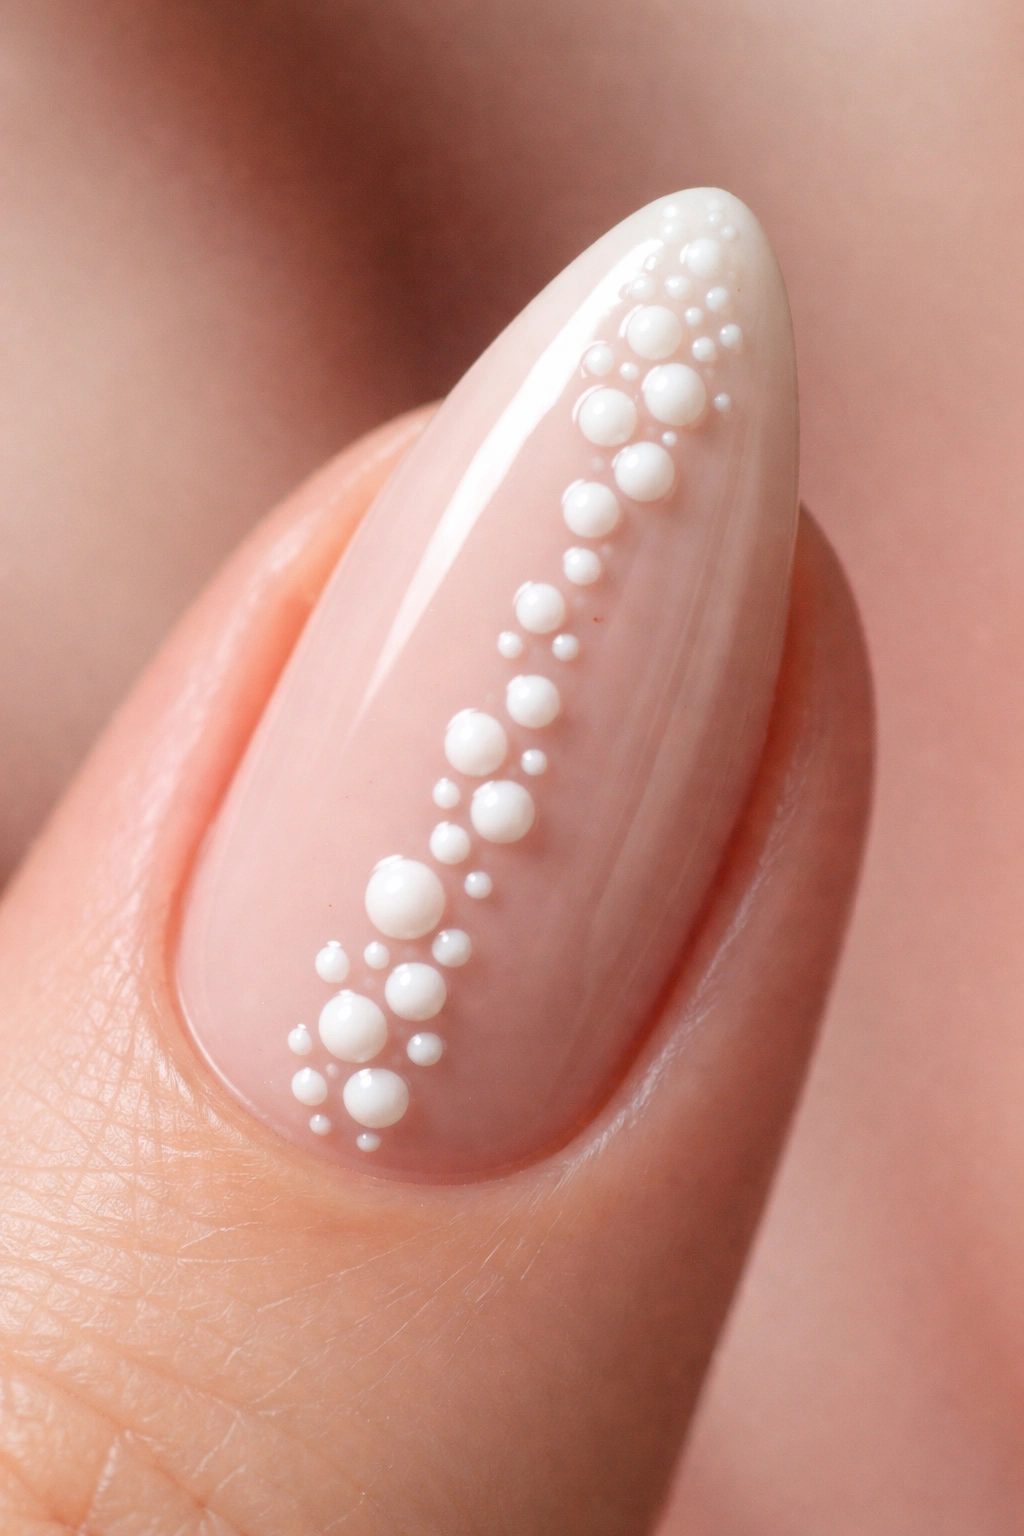
8. White Dot Trail Nails
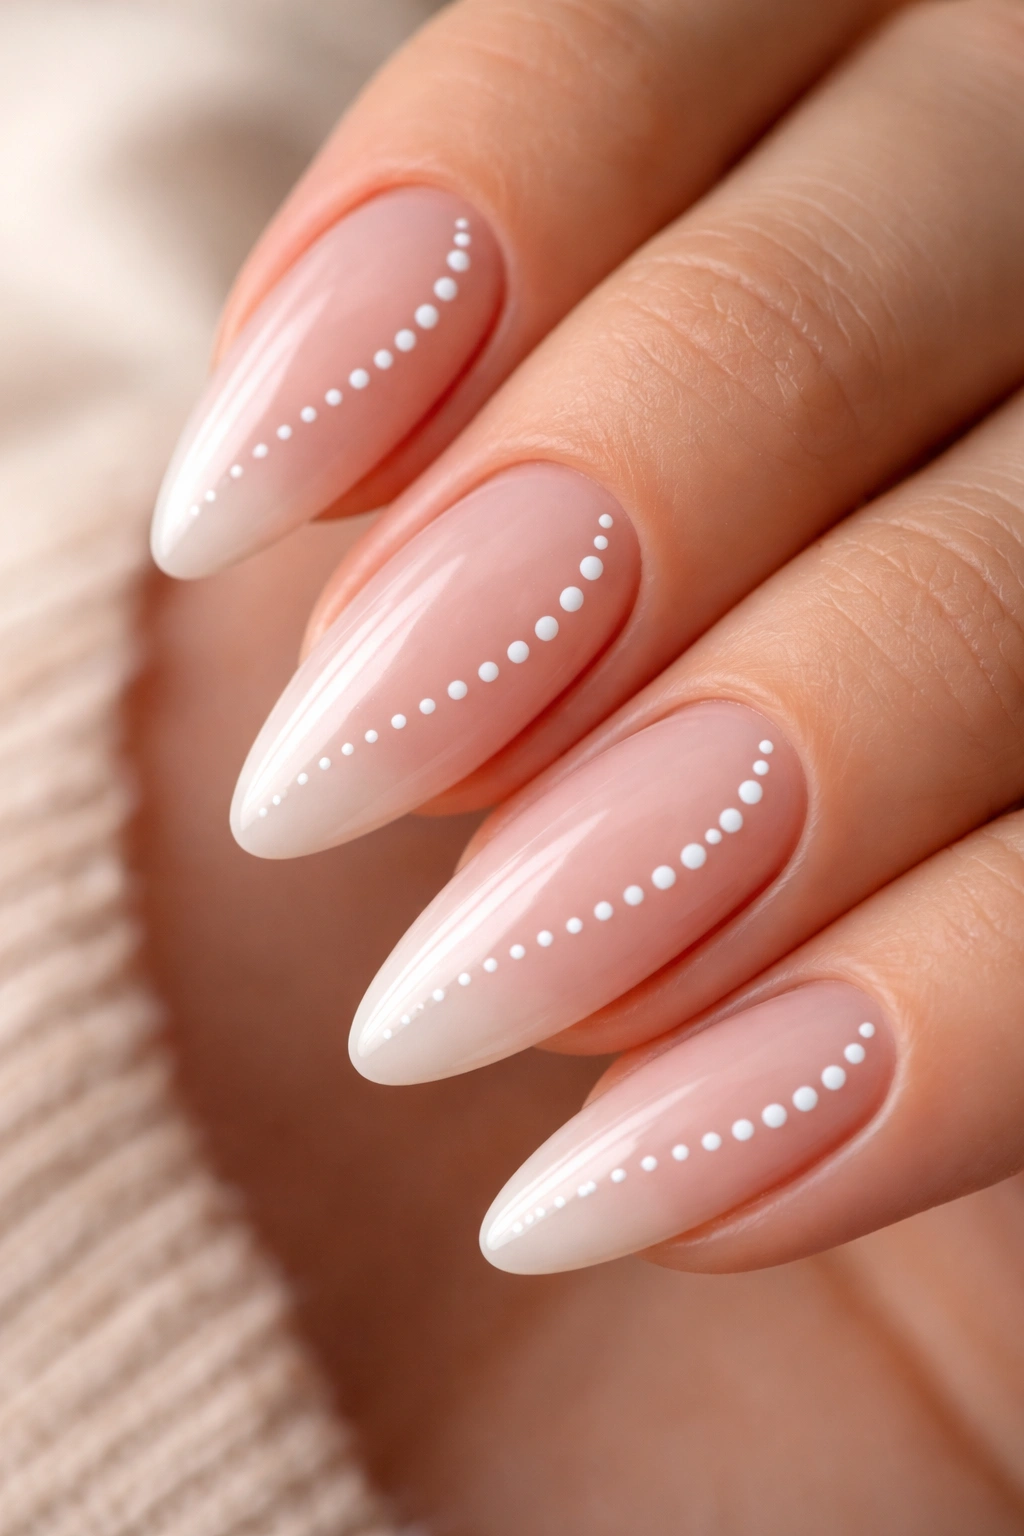
White dots can look plain on paper and oddly refined on almond nails. The secret is placement. A neat trail of dots that follows the curve of the nail turns into a little line of movement, and movement is what keeps a simple design from feeling flat.
How to Place the Dots
Use a dotting tool with two sizes if you have them. Start with one larger dot near the base or off to one side, then taper into smaller dots as you move toward the tip. That size shift matters. If every dot is the same size, the design reads blunt instead of fluid.
A nude or sheer pink base gives the white more breathing room.
- Put the first dot low on the nail.
- Leave a small gap between each dot.
- Keep the line slightly curved to match the almond shape.
- Finish with a glossy top coat after the dots dry fully.
This one is friendly for beginners because a dot can be cleaned up fast. A crooked French tip takes more work. A dot trail just needs spacing.
9. White Marble Veins
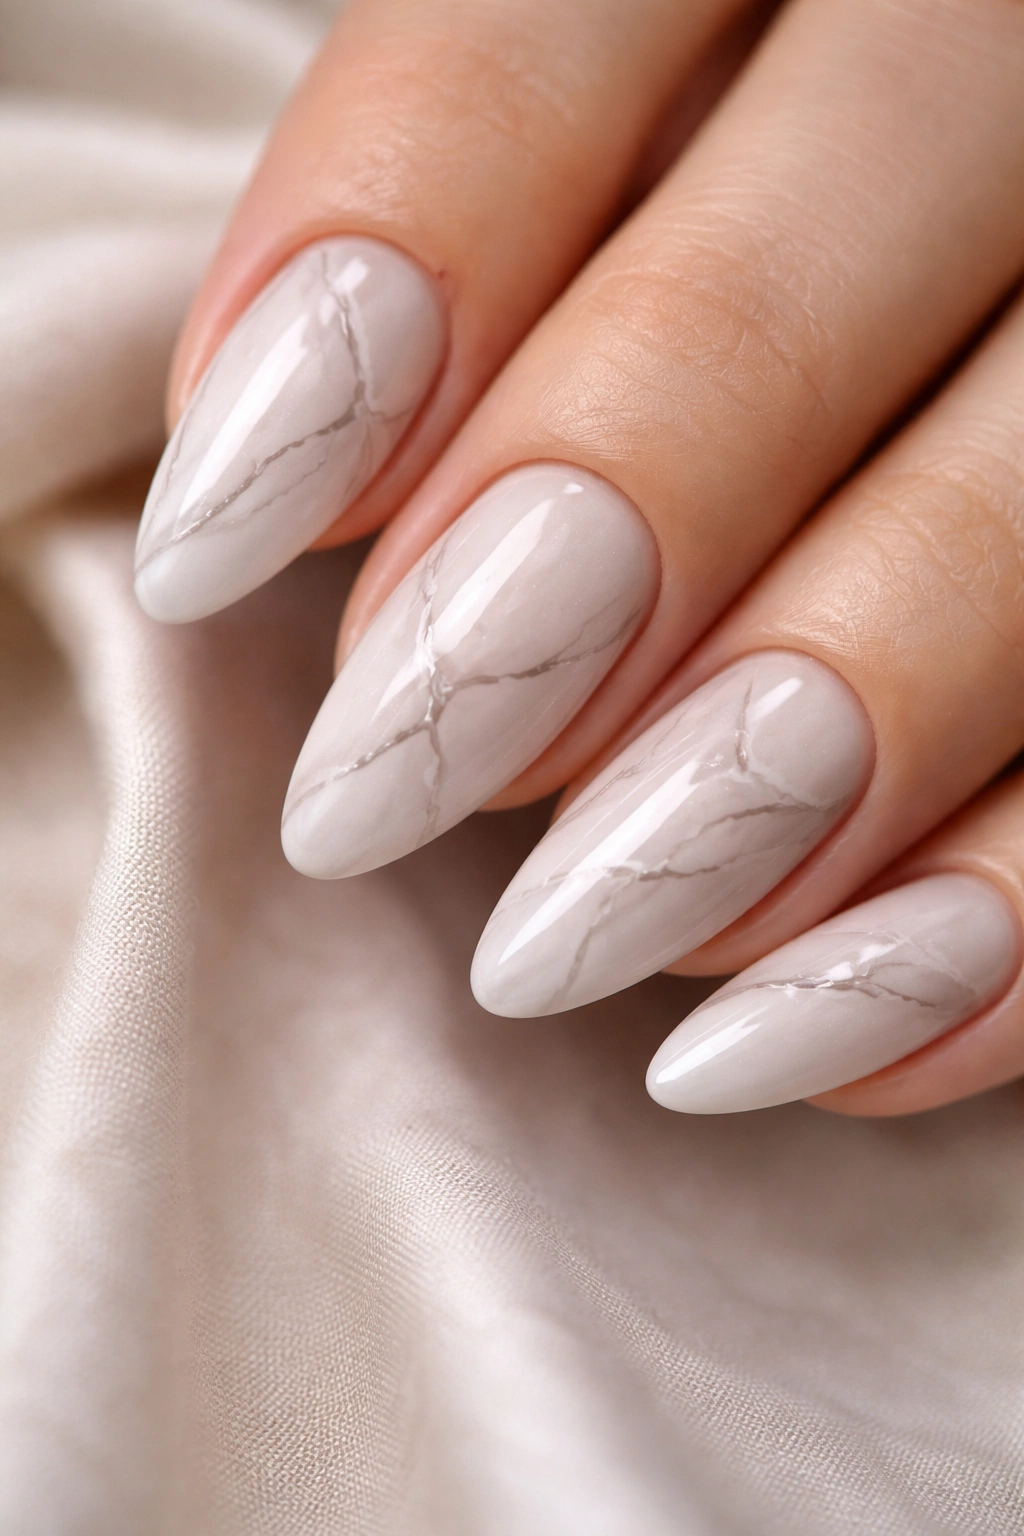
White marble veining looks far more complicated than it is. On almond nails, those thin veins follow the natural taper and make the nail feel elegant without going stiff. I prefer this over heavy marble swirls, which can swallow the shape if the lines get too thick.
The easiest version starts with a pale nude or sheer milky base. Then take a very thin brush and pull a few irregular white lines through the nail, keeping some of them broken instead of continuous. That broken line is what gives the marble its stone-like look. If every vein is identical, it starts to look printed.
A little translucent gray or taupe can sit beside the white if you want depth, but don’t overdo it. Three or four delicate veins per nail is enough. The best marble sets look like someone split open a polished stone and happened to paint it on a nail. Overworking it ruins that quiet look fast.
10. Tiny White Florals
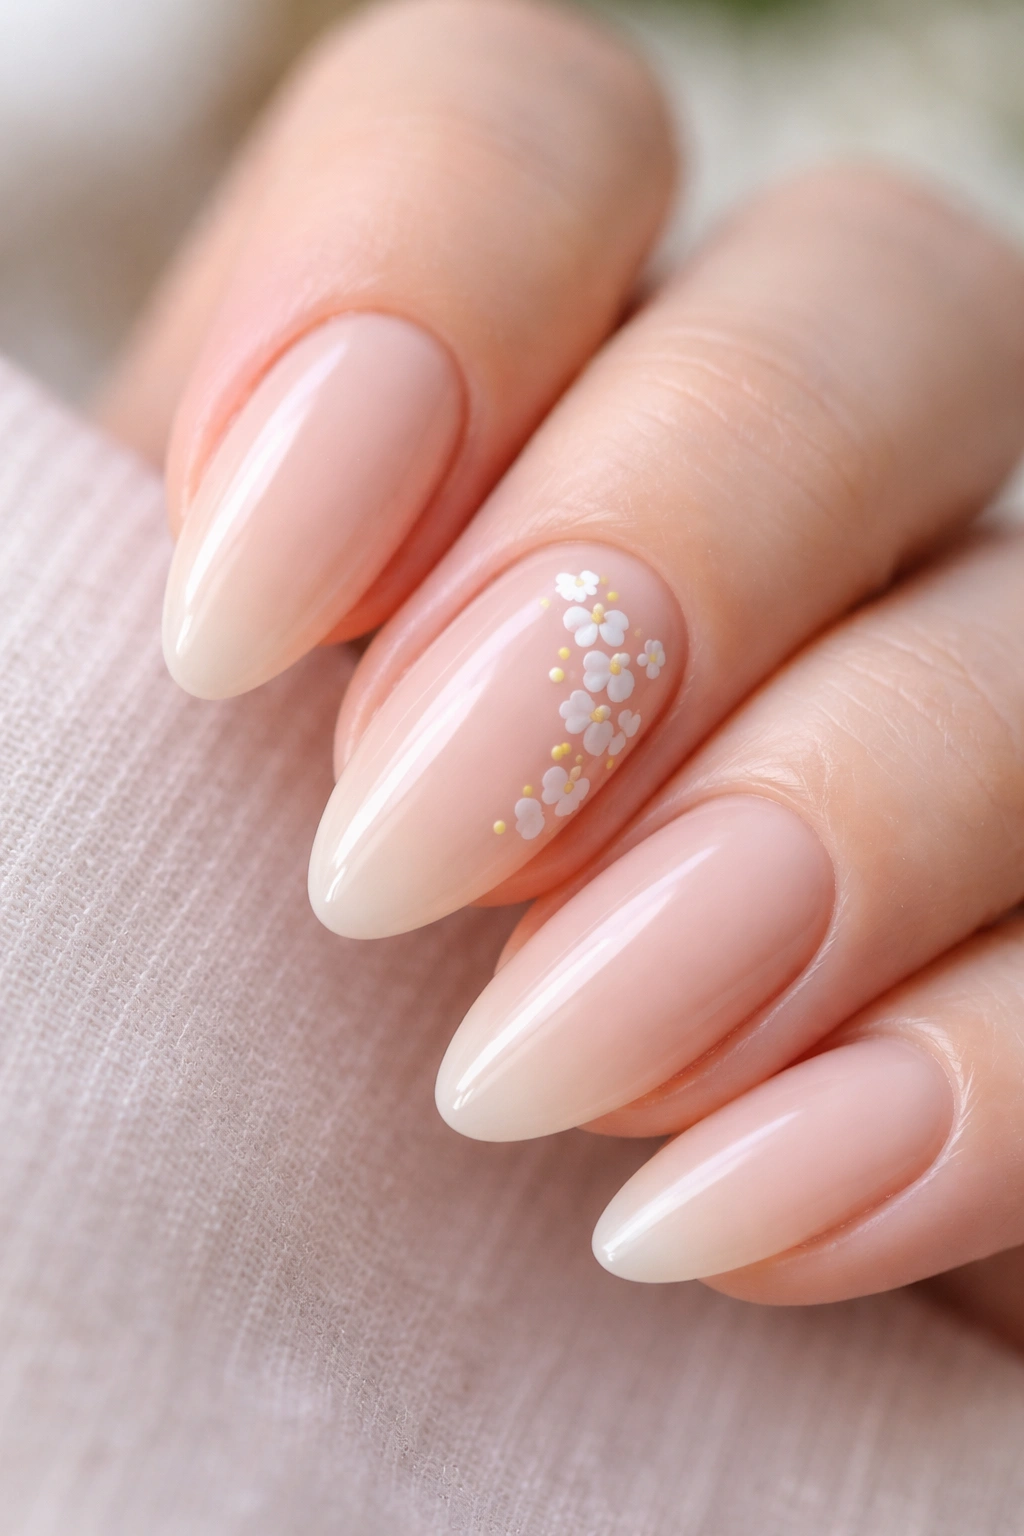
Tiny white flowers are one of my favorite ways to make almond nails feel softer without making them childish. A few five-petal blossoms on one or two accent nails give you enough detail to notice when you look closely, but not so much that the set turns busy.
I’d paint the rest of the nails in sheer nude, milky white, or a soft French base. Then use a dotting tool or the end of a bobby pin to place the petals. A small dot in the center keeps the flower from looking like a random cluster. If you want a cleaner finish, paint the petals with a thin liner brush rather than trying to dot them all.
Don’t scatter flowers on every nail unless you like a busier look. One accent nail per hand usually feels more balanced. The almond shape gives the blossoms a natural frame, almost like they’re climbing the curve of the nail instead of sitting on top of it.
11. Lace-Inspired Linework
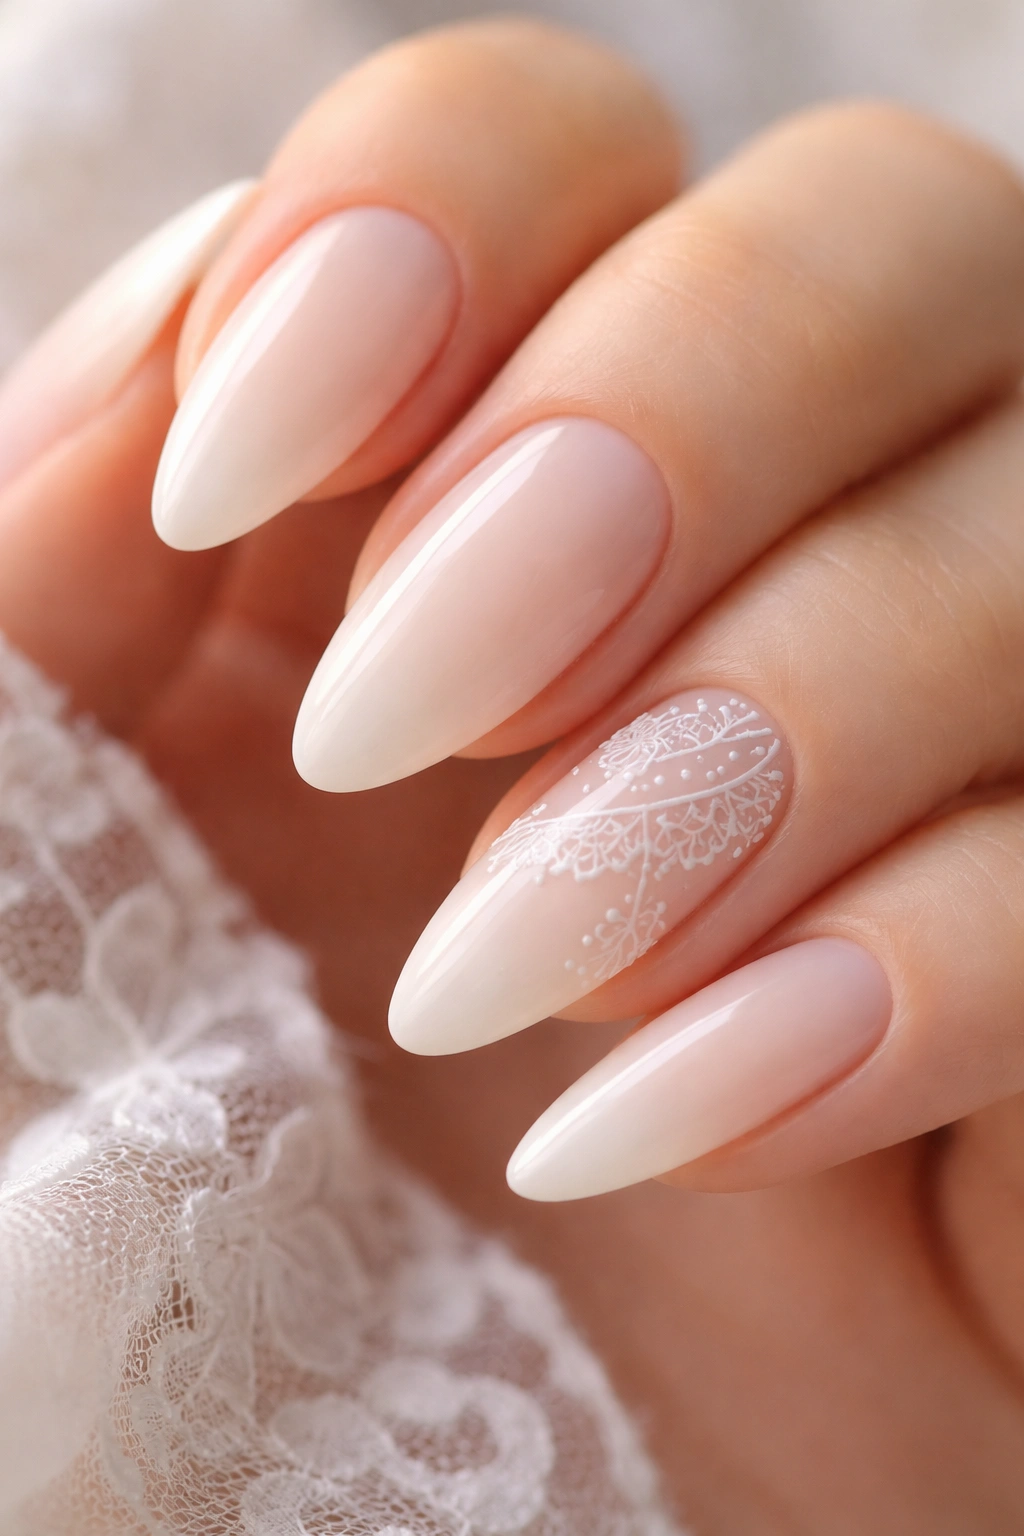
Lace-inspired white nail art looks fussy from a distance and surprisingly forgiving once you break it down. On almond nails, the tapered tip helps the lace pattern feel light instead of dense. That’s why I’d choose this shape over something square or blunt.
What Makes It Work
The trick is keeping the pattern small. Tiny scallops, dots, and thin crosshatch lines read as lace; oversized loops read as tangled line art.
Use a striping brush and paint the lace detail on one or two nails only. The rest can stay sheer or milky white. That contrast gives the design room to breathe. If you want the set to feel cleaner, keep the lace near the tips or along one side of the nail rather than covering the whole surface.
A glossy top coat sharpens the pattern, while a matte finish makes the lace look softer and a little vintage. I’d pick gloss first. It’s easier to read and easier to fix if one line wobbles.
12. White Outline Nails
Unlike a French manicure, which frames just the tip, a white outline traces the edge of the entire almond nail. That border gives the shape a graphic look and makes the taper obvious in the best way. It’s a neat style when you want structure without covering the nail in solid color.
Paint the base in nude, sheer pink, or even clear builder gel. Then use a fine liner brush to trace the outer perimeter with white, keeping the line thin and even. The part near the sidewalls needs the most care because that’s where the almond shape can start looking lopsided if your hand drifts.
This design works on short almonds too, which is handy. A lot of line art gets swallowed on shorter nails, but an outline stays visible because it follows the full silhouette. It’s minimal, yes, but not boring. There’s enough contrast to keep your eye moving.
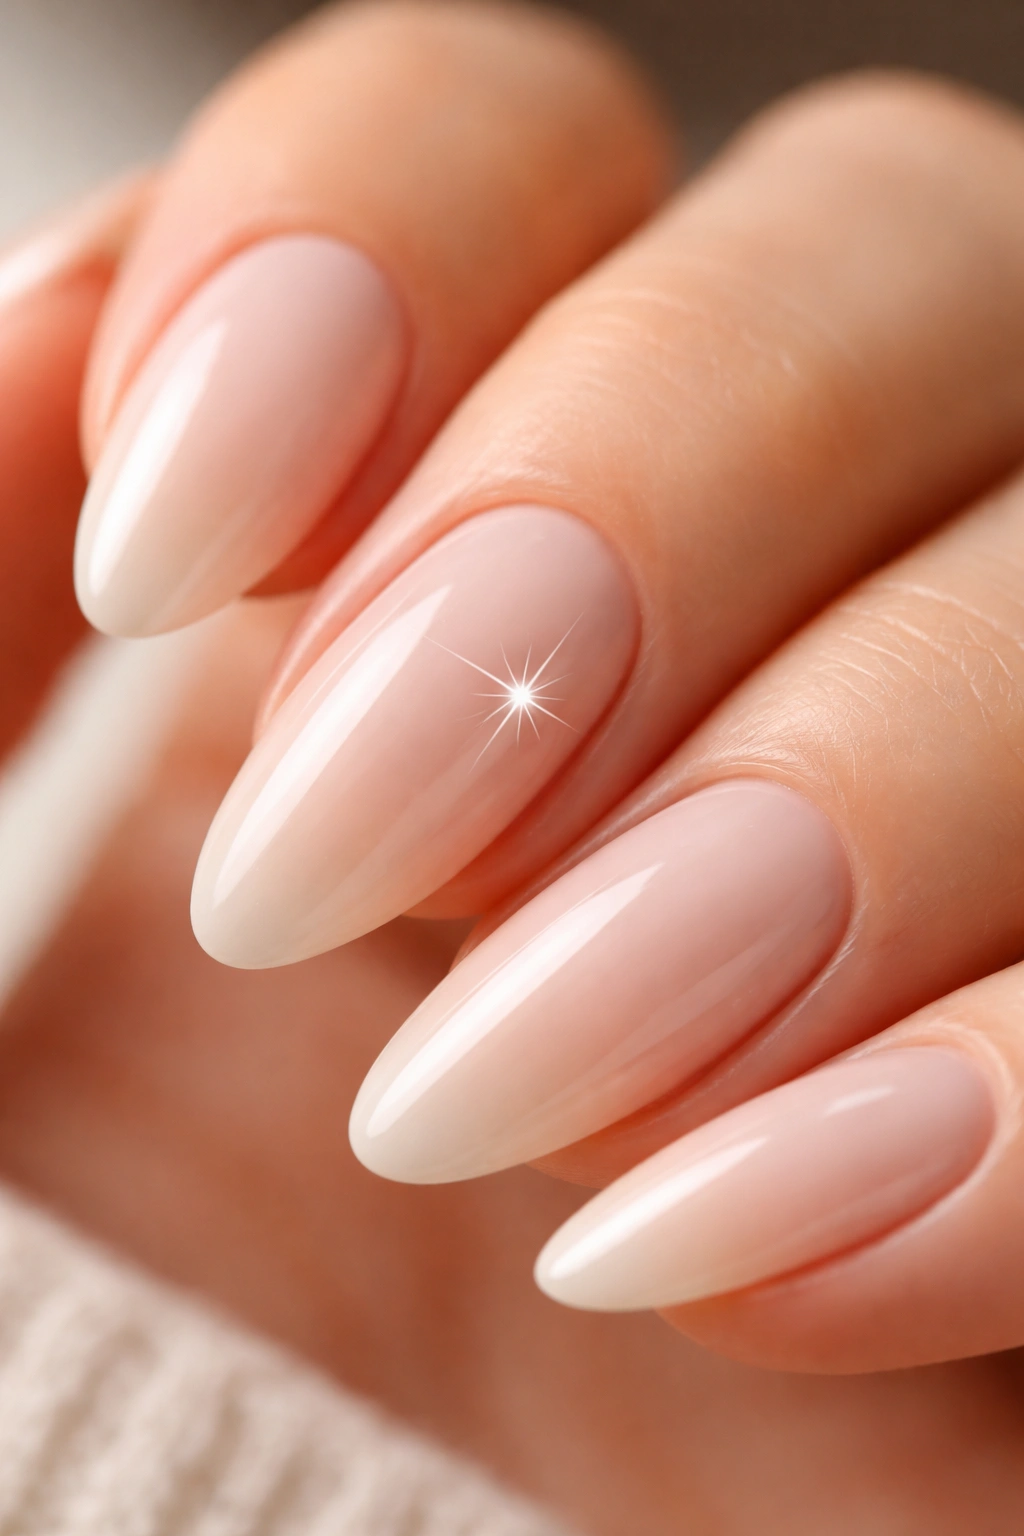
13. White Aura Nails
White aura nails have that soft glow in the center that makes the manicure look almost clouded. On almond nails, the effect feels gentle because the shape already narrows toward the tip. The white sits like a little halo instead of a flat spot.
What Gives Aura Nails That Soft Glow
You need a sponge or airbrush-style blending with a sheer base.
Start with a nude or pale pink background. Then dab the white into the middle of the nail and blend the edges outward until they fade. The center should be the brightest part, but the edge should not disappear entirely. That little blur is what makes the aura effect believable instead of patchy.
I like aura nails when I want a white design that feels softer than chrome and less strict than French tips. They also hide minor shape differences between nails, which is useful if one nail grows a little off-balance. Keep the white layer thin, though. Heavy aura nails turn cloudy and lose the glow.
14. Tiny White Hearts
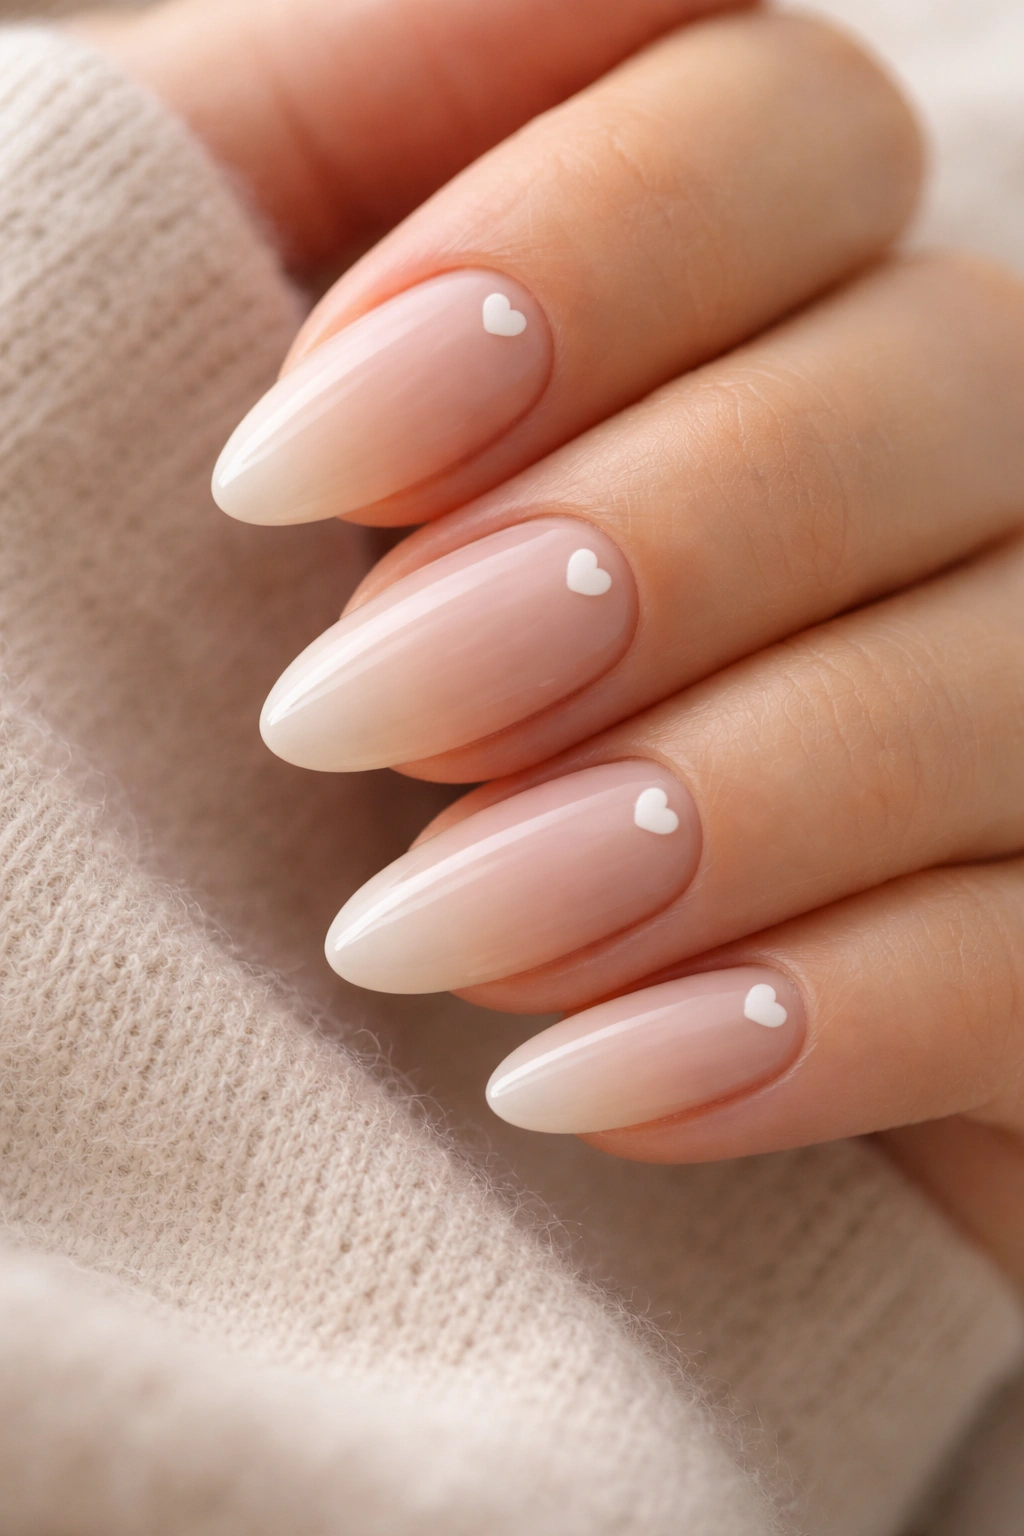
Tiny white hearts are sweet without being loud. On almond nails, they can sit near the tip, near the cuticle, or off to one side, and the shape of the nail keeps them from feeling too flat. I especially like them on a sheer nude base because the white gets to stand out without crowding the whole manicure.
A dotting tool makes the heart easy: two tiny dots, dragged into a point with a fine brush. That’s it. Keep the hearts small. Big ones start to look cartoonish fast, and almond nails don’t need much help to stay readable.
You can place one heart on each accent nail or scatter them across a few fingers. I’d avoid covering every nail unless you want a themed look. The charm of this idea is that it feels personal, not decorated. One small heart can say more than five oversized ones.
15. White Grid Nails
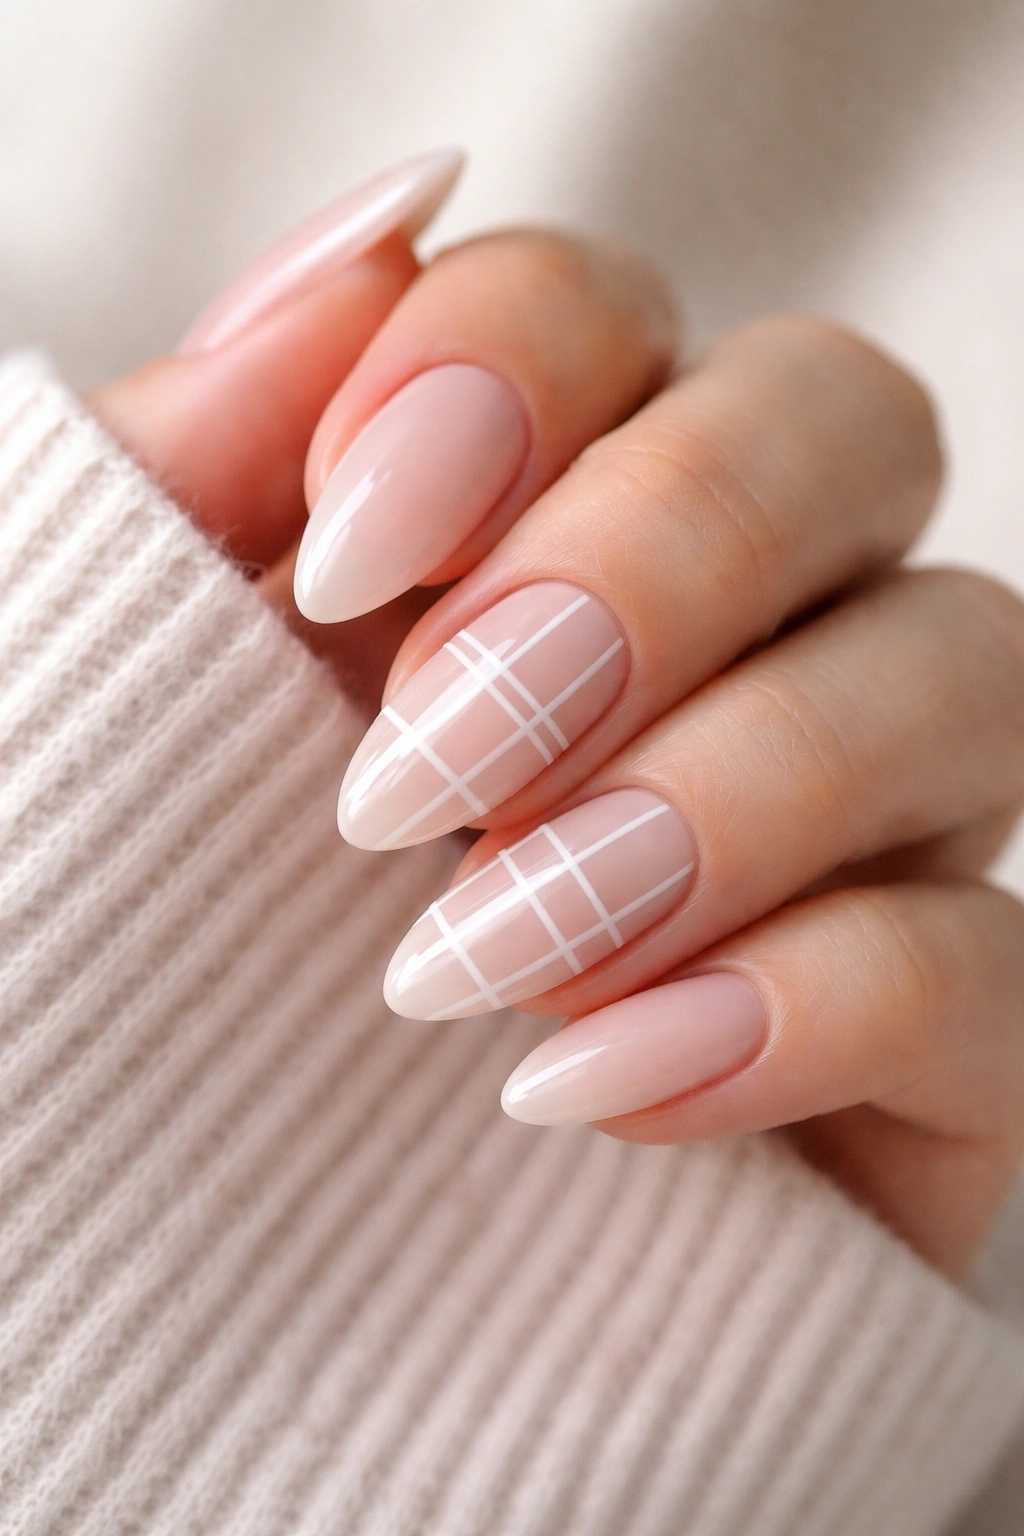
White grid nails feel sharper than swirls or florals, which is exactly why they work on almond shapes. The taper keeps the lines from looking too stiff, and the white grid gives the nail a neat, graphic edge. It’s a good pick when you want something clean with a little attitude.
Use striping tape if your hand is shaky, or draw the lines freehand with a long liner brush. Keep the grid loose. You do not need perfect chessboard spacing to make it work. Even a few vertical and horizontal lines over a nude base can give the design enough structure.
If you want the set to stay wearable, put the grid on just two nails and leave the rest plain white or sheer. A full grid set can start to feel busy. The almond shape already does enough on its own, and the lines should support it, not fight for attention.
16. Frosted Glitter Edge Nails
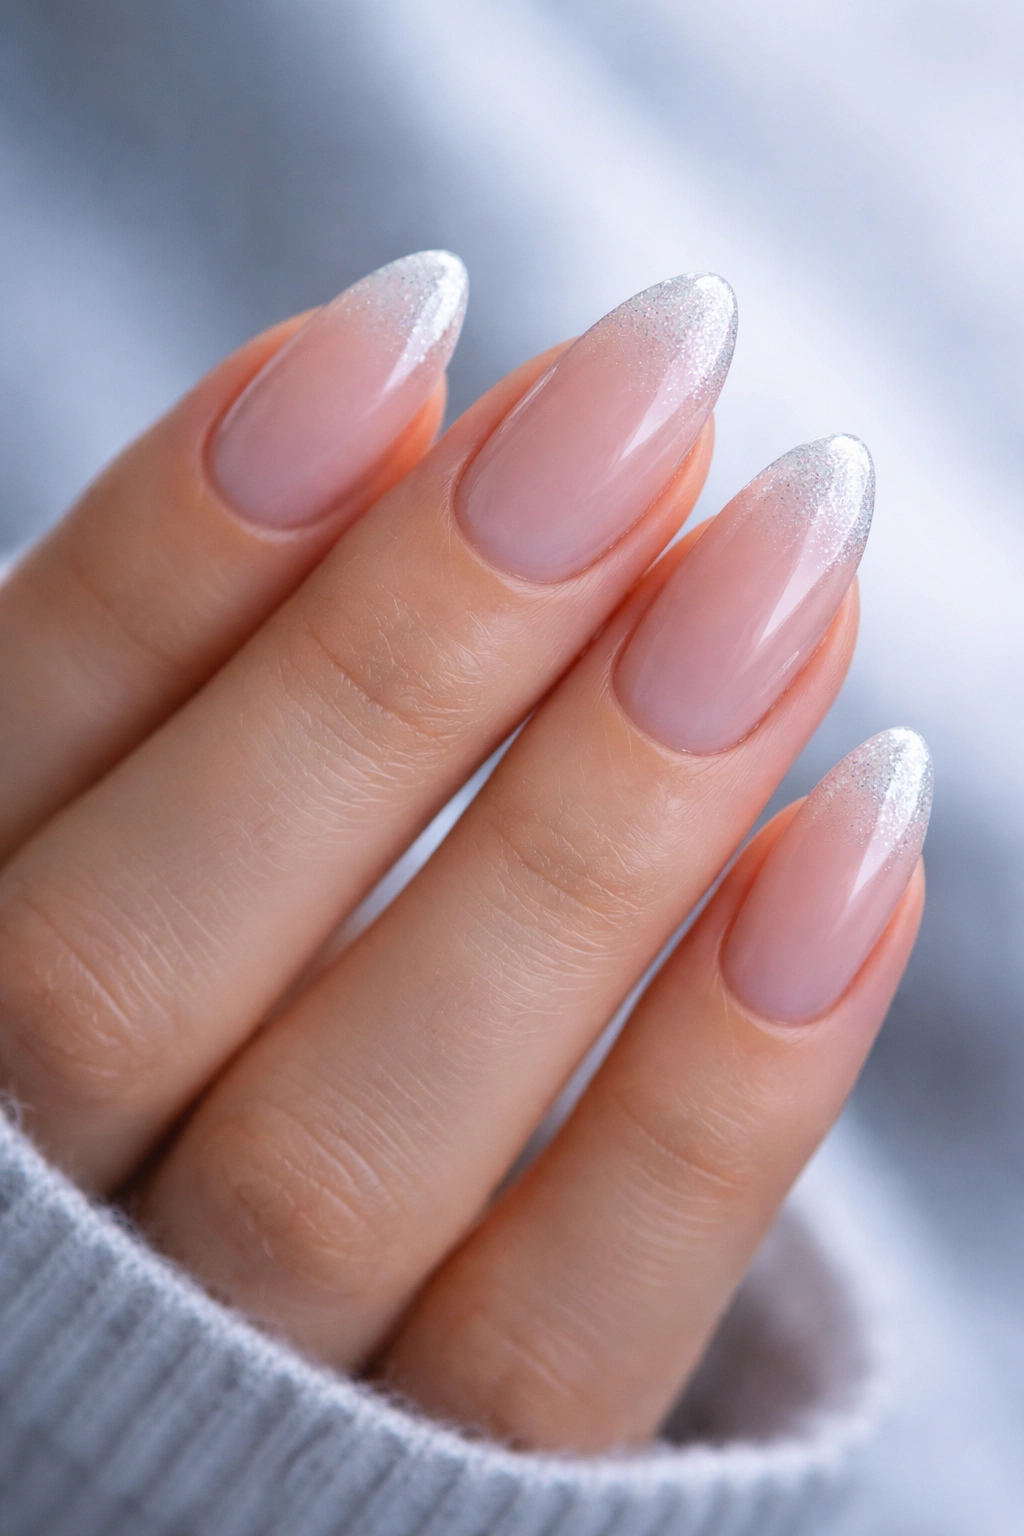
A dusting of fine white shimmer at the tip can save a plain manicure from looking flat. Frosted glitter edge nails sit somewhere between a French tip and a sparkle overlay, and they work because the almond shape gives the glitter a clean place to stop.
Use a sheer base first. Then paint or dab the glitter just along the free edge, keeping it thinner near the sides and a touch denser at the center if you want a soft gradient. I’d avoid chunky glitter here. The look needs to stay fine and icy, not textured in a way that catches on hair and sweaters.
A little shimmer goes a long way. Seriously. If you can see individual glitter pieces from across the room, you’ve probably used too much. Seal it with a smooth top coat so the edge feels polished rather than gritty.
17. Abstract White Blocks
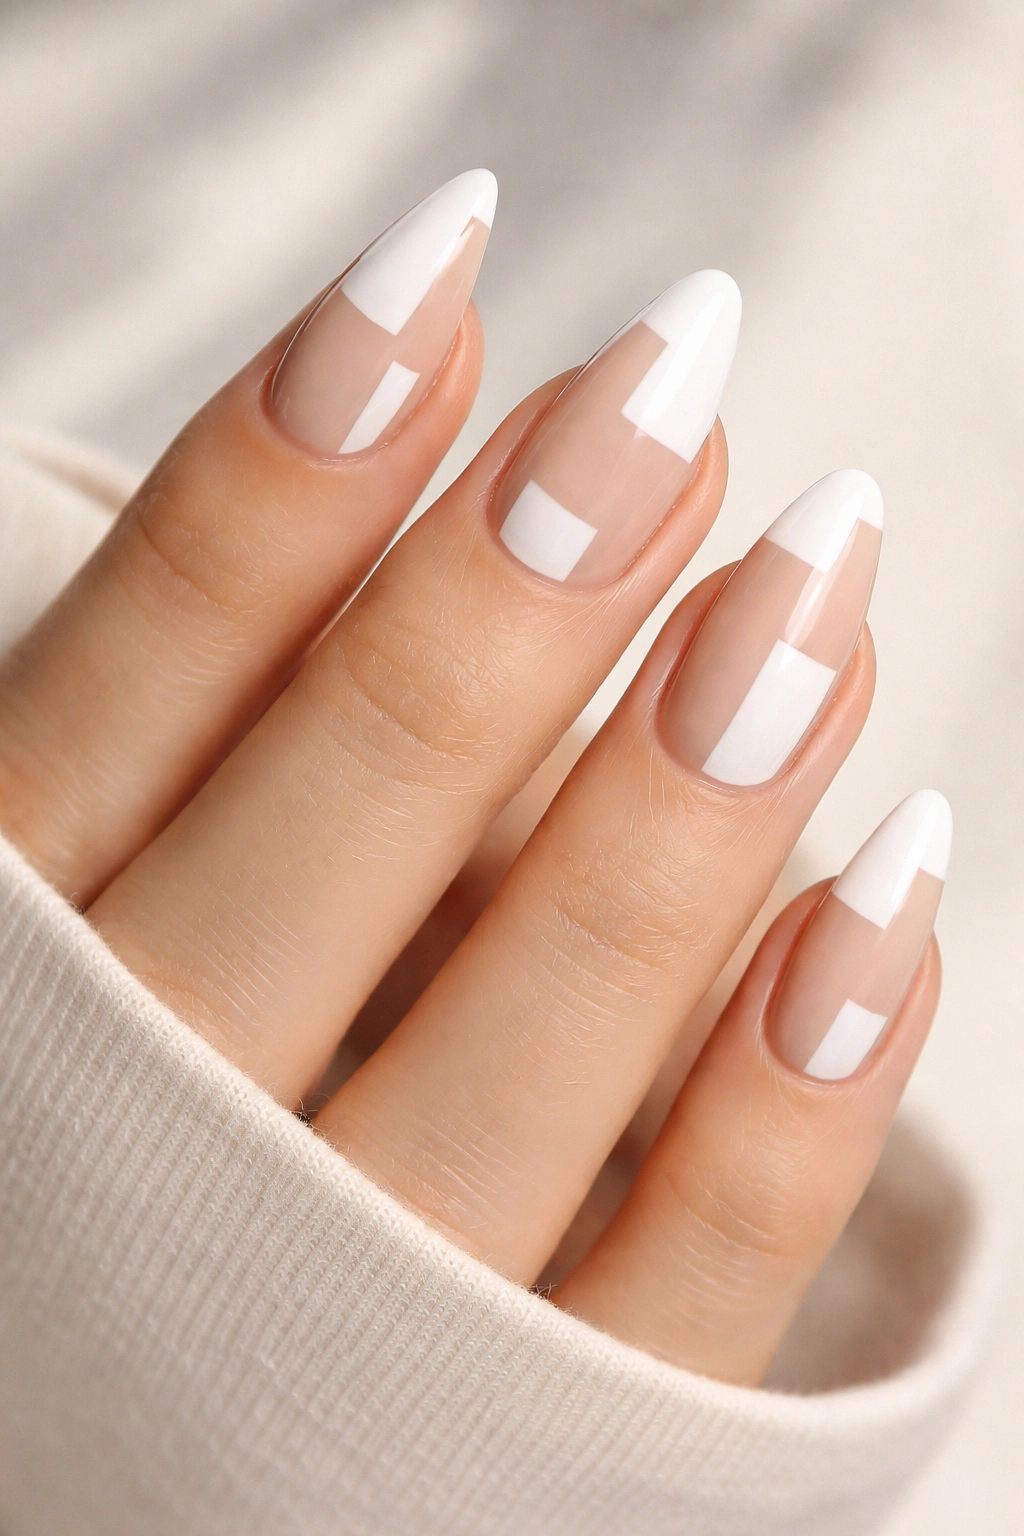
Abstract white blocks are one of the easiest ways to make almond nails look modern without leaning on tiny detail work. The shapes can be curved, squared, slashed, or split, and the negative space around them matters just as much as the white itself. That’s what keeps the set from feeling crowded.
I’d start with a nude base and paint one irregular white block near the tip, then maybe another smaller shape on the opposite side of the nail. The goal is imbalance, but controlled imbalance. If every block sits in the center, the design goes stiff. If they’re pushed around the nail, it feels more alive.
A cleanup brush dipped in acetone is your friend here. Abstract edges are easy to overpaint, and the fix is usually just one quick swipe. This look is forgiving because the shapes do not need to match. They only need to feel related.
18. Pearl Accent Nails
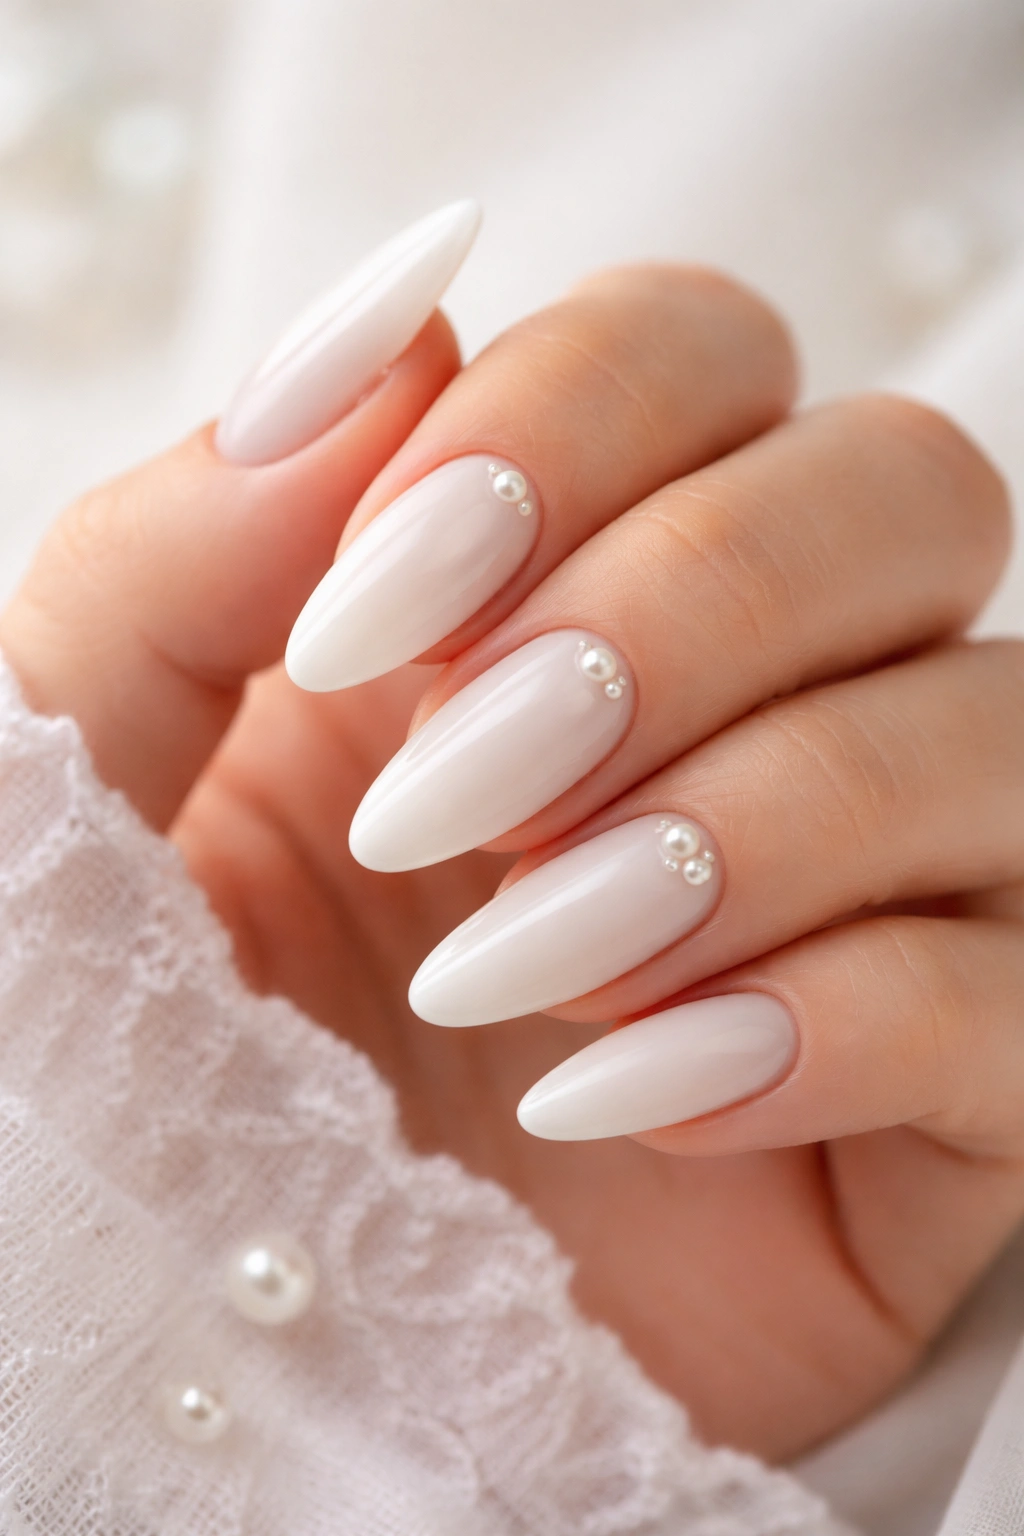
Pearl accents are one of those details that can make a white almond manicure feel finished without asking for much effort. A single pearl near the cuticle, or a tiny cluster on one accent nail, adds texture in a way flat polish cannot. The almond shape gives the pearl space to sit without looking stuck on by accident.
How to Keep Pearls Secure
Use a thick top coat, builder gel, or nail glue if the pearls are small. Bigger pearls need a stronger hold than tiny half-beads.
- Place the pearl with tweezers.
- Press it gently into the wet gel or glue.
- Cure or let it dry fully before touching the nail.
- Seal around the edges, not over the top, if you want the pearl to stay glossy.
I’d keep the base very simple: milky white, sheer nude, or a soft French tip. Pearls already bring texture, so the rest of the nail should stay calm. One or two pearls per hand are plenty unless you want a more ornate look.
19. Ribbon Bow Art
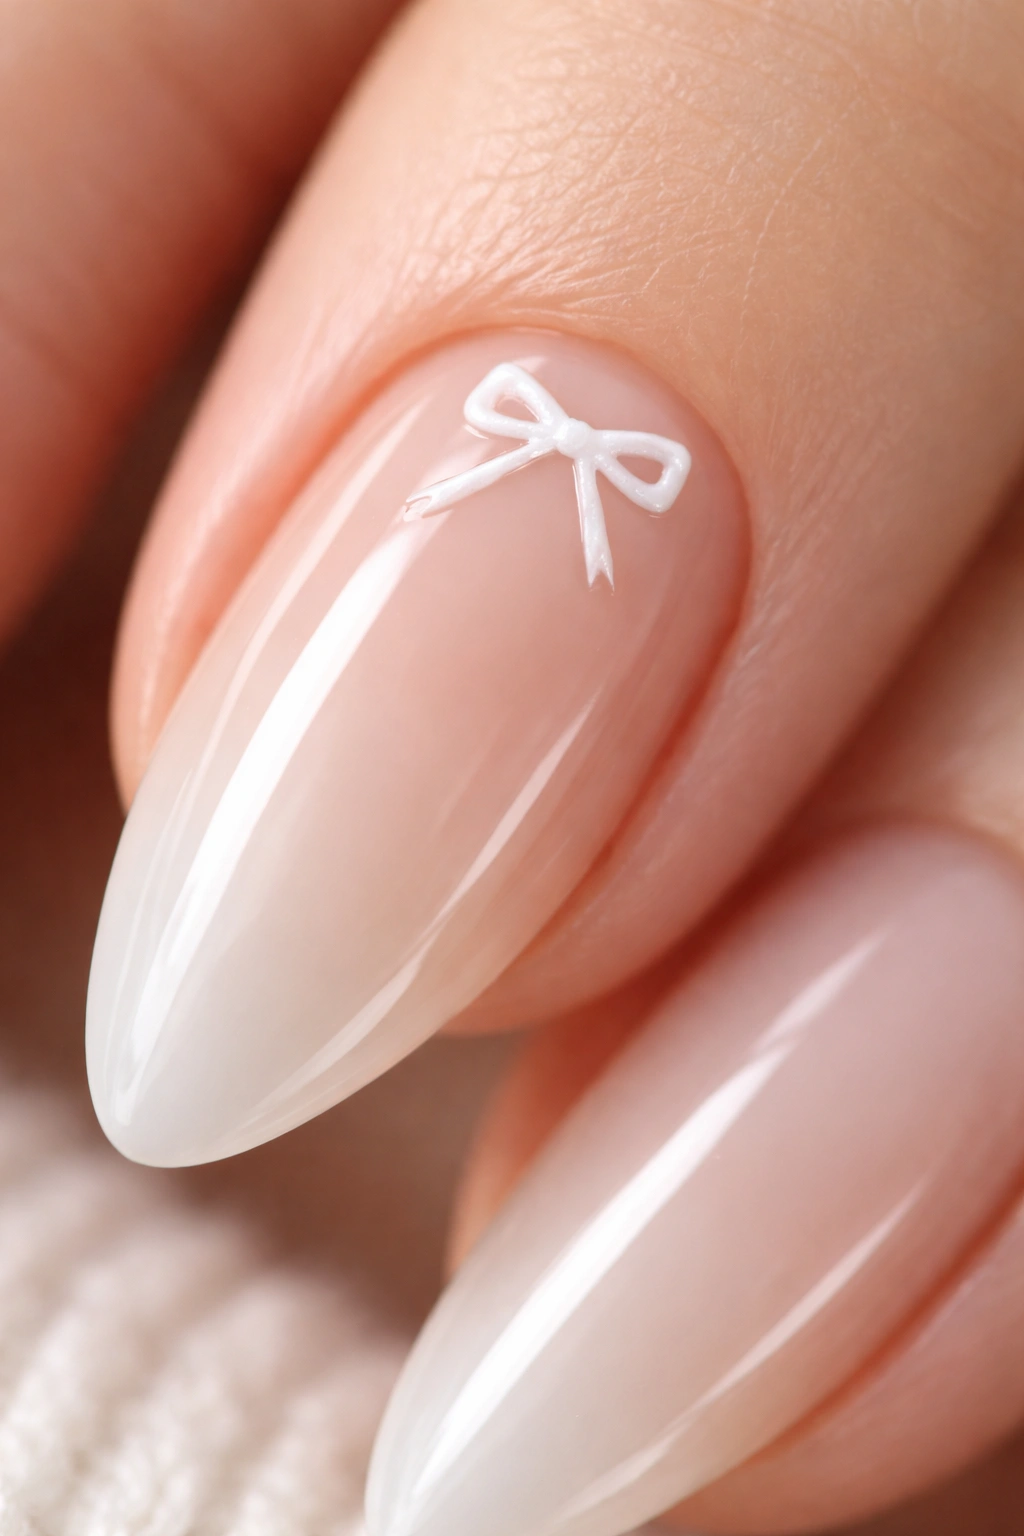
Ribbon bows can look cutesy if they get too big, but tiny white bows on almond nails feel crisp and wearable. The curved shape gives the bows a nice frame, especially when the bow sits near the cuticle or on one accent nail. Small matters here. Small is what keeps it from turning costume-like.
Draw two little loops and two tails with a fine liner brush. If the brush feels hard to control, use a white nail art pen or a gel paint with a slightly thicker consistency. That thicker paint helps the bow stay in place instead of spreading into blobs. A tiny center knot pulls the shape together.
I like this look with a sheer nude base and glossy finish. If you want a little more contrast, place the bow over a pale milky white nail instead. Just keep the bow delicate. The line between charming and cluttered is thin.
20. Double French Tips
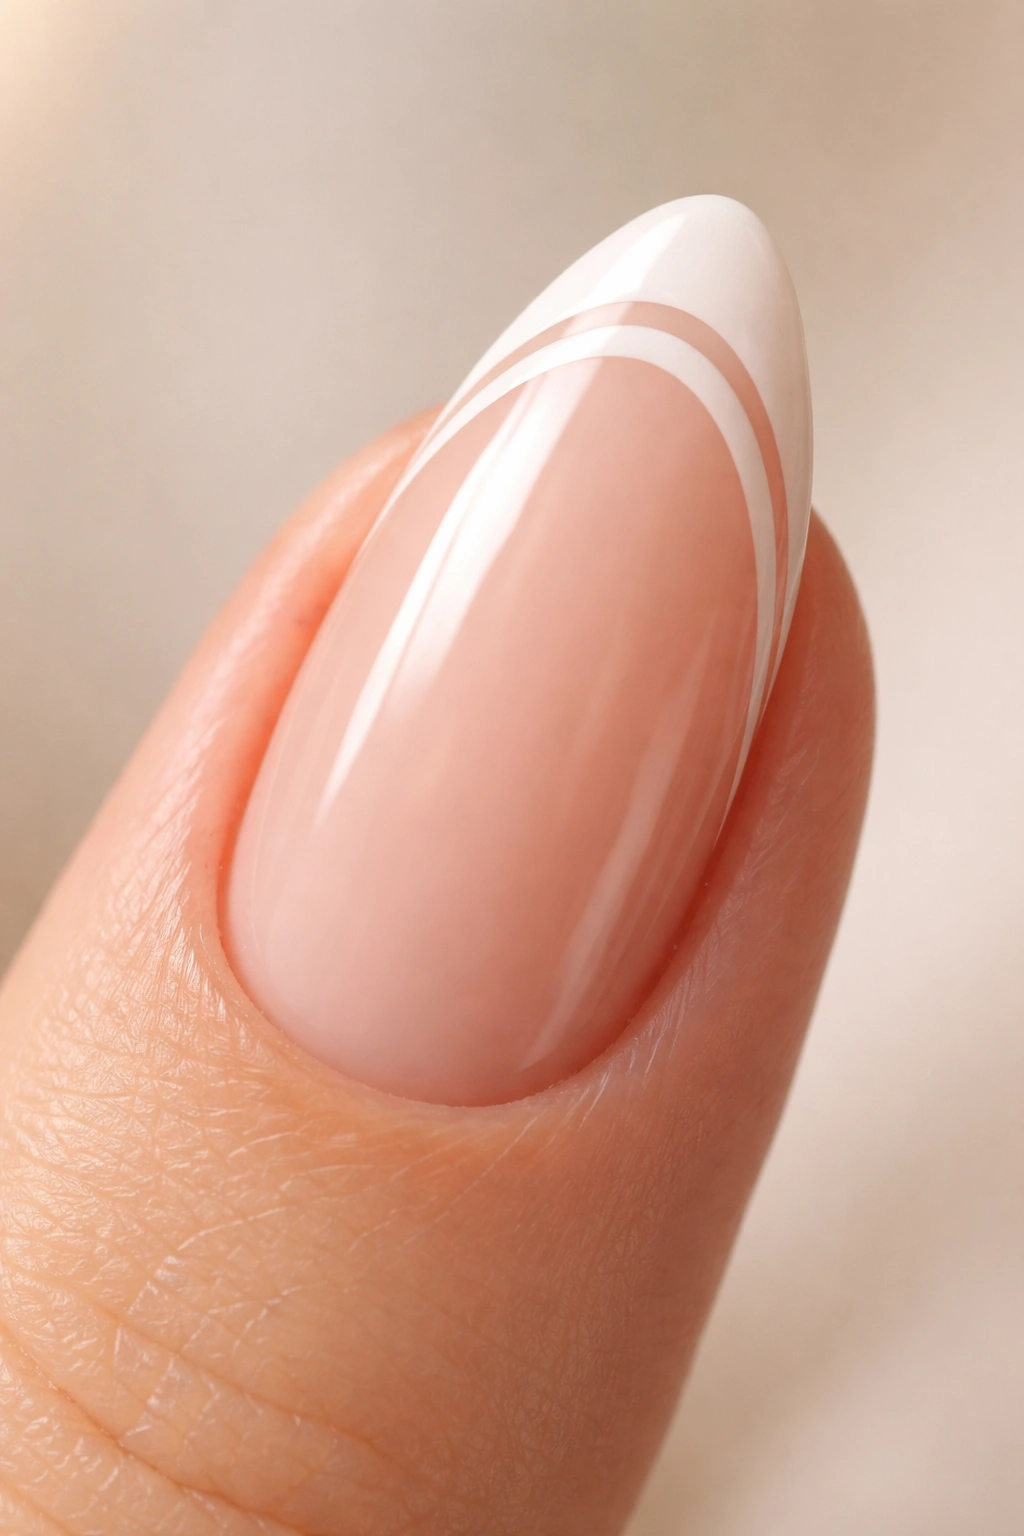
A double French is a nice fix when a single white tip feels too plain and a full white nail feels too heavy. You get two slim white lines near the free edge, usually separated by a thin strip of nude or clear space. On almond nails, that layered edge follows the taper nicely.
This is one of those looks that looks harder than it is. Paint the first line, let it dry, then add the second line just above or below it, depending on the spacing you want. A thin striping brush works better than a thick bottle brush because the lines need to stay light. If they crowd each other, the tip will look chunky.
I’d keep the rest of the nail sheer. The double line already does enough. If you add too much else, the whole design loses its clean shape and starts competing with itself.
21. White Leaf Branches
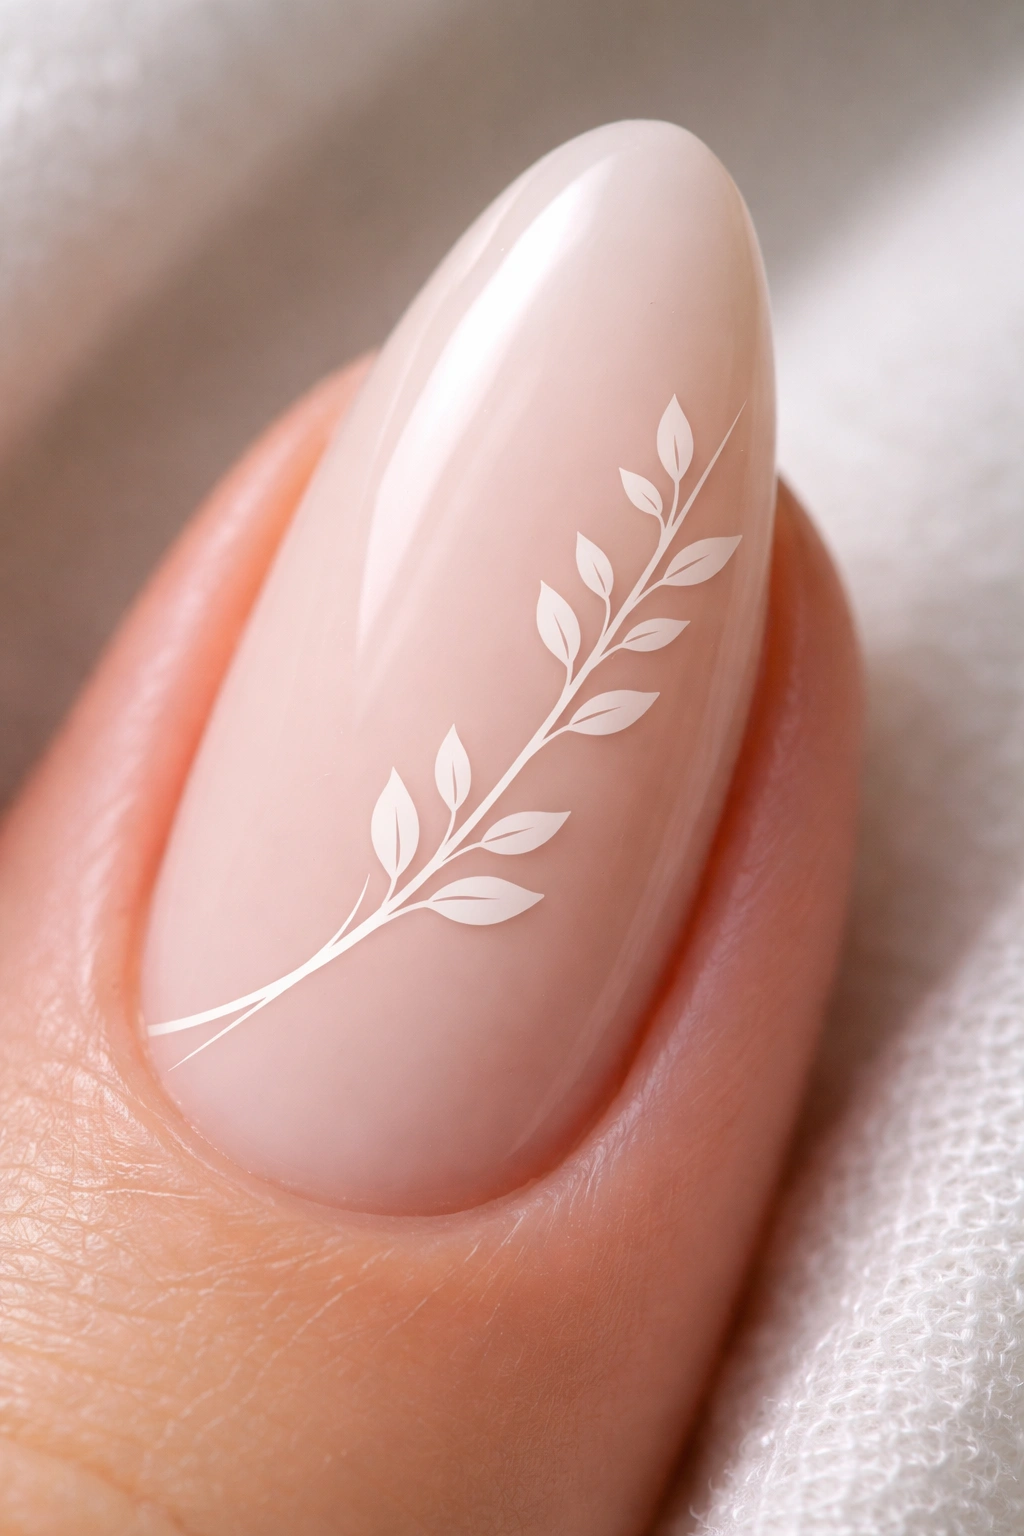
White leaf branch art is calm in a way that never feels dull. A fine branch curving across an almond nail follows the natural taper so well that it almost looks like it belongs there. One or two branches per hand is enough for the design to register.
Paint the branch with a thin liner brush over a nude or sheer pink base. Add tiny leaves along one side, keeping the spacing loose so the line can breathe. If every leaf is packed together, the design turns heavy. If they’re spread out, it feels airy and intentional.
This is a good place to use the side of the brush, not just the tip. That gives the leaves a softer edge. I’d keep the branch slightly off-center too; dead center can feel static, while a branch that leans to one side follows the almond shape better.
22. White 3D Gel Dots
3D gel dots bring texture to white almond nails without needing a full sculpted design. The little raised beads catch light in a way flat polish cannot, and they look especially good clustered near the cuticle or lined up along the center of the nail. The almond shape keeps the texture from feeling too heavy.
Use a thicker gel or builder gel and place the dots with a dotting tool. If you’re using gel, cure each round of dots before adding more height. That matters. If you try to build the texture all at once, the dots spread and lose their shape. A clean 3D dot should look rounded, not puddled.
I’d pair this with a glossy nude or milky base. White-on-white can work too, but the texture is easier to read when the base has a little contrast. Keep the dots small unless you want a bolder sculpted look.
23. White Starburst Accents
Starburst accents work because they feel crisp without needing much space. On almond nails, a tiny star or burst near the tip gives the eye a focal point, and the tapered shape makes the design feel even more pointed in a good way. A single starburst on each ring finger can carry the whole set.
Start with a small center dot, then pull four or six thin rays outward with a liner brush. Keep the rays uneven if you want a hand-painted feel. Perfectly equal lines can look stiff. A little irregularity makes the star feel drawn, not stamped.
This design plays well with a nude base, but it can also sit on milky white if you want a softer contrast. I’d avoid adding too many other details. The starburst is tiny, but it still needs room. Crowding it with dots, bows, or stripes just muddies the point.
24. White Flame Tips
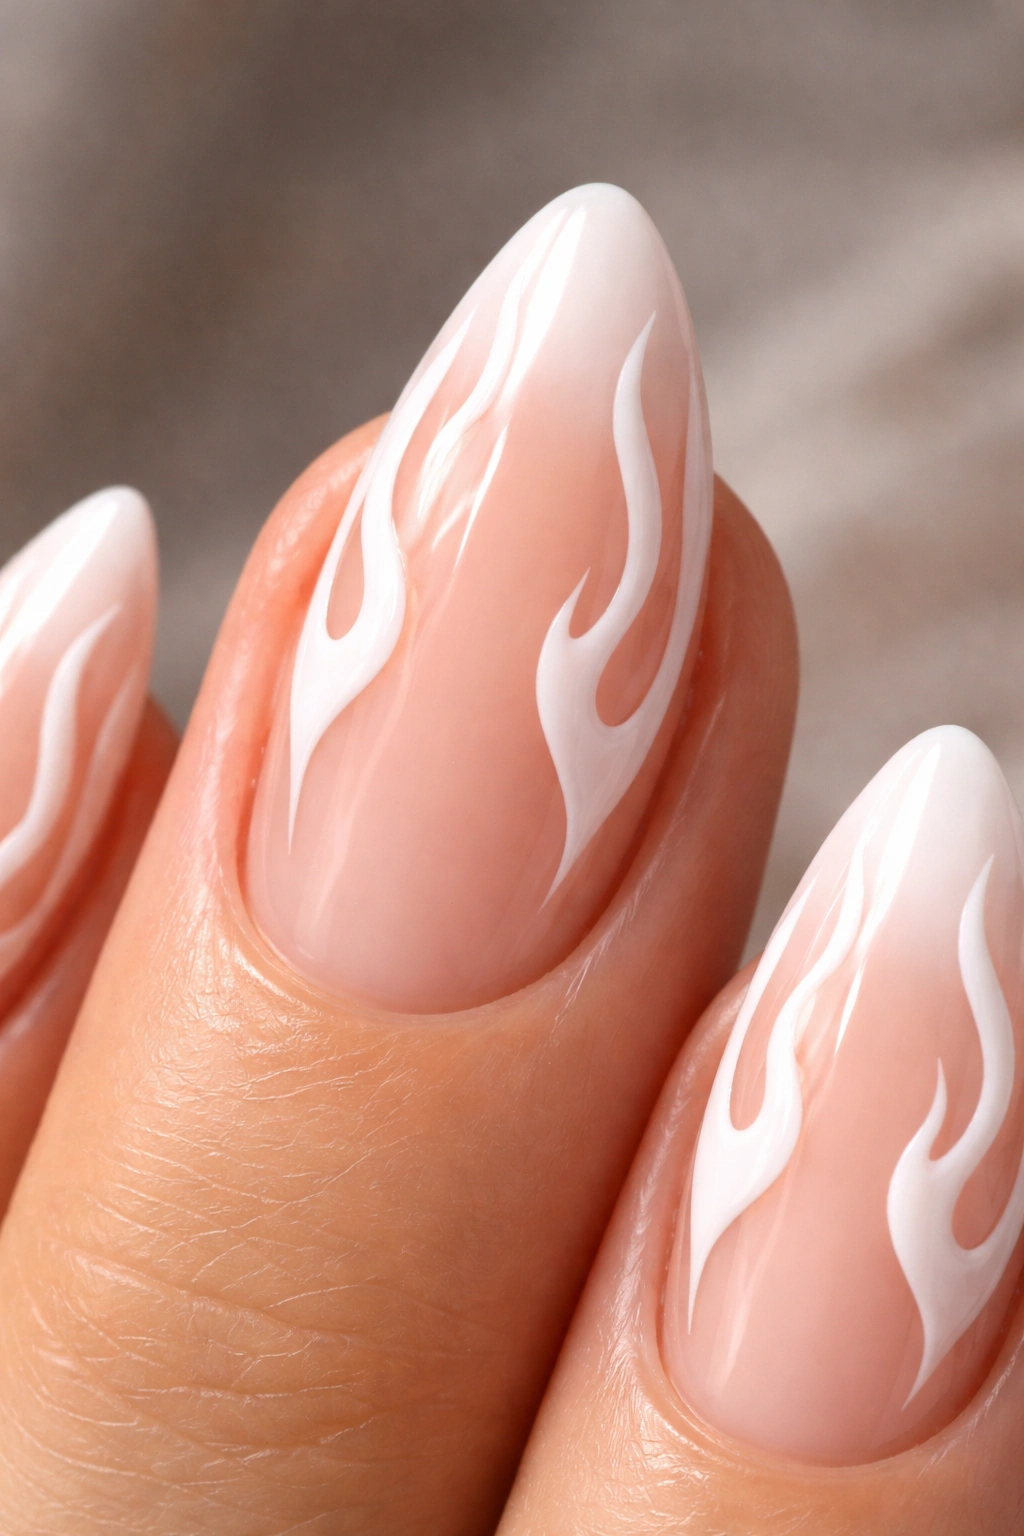
Why do flame tips work so well on almond nails? Because the shape already narrows, so the flame can stretch upward without looking awkward. The pointed ends of the flame echo the almond tip and make the whole manicure feel more dynamic than a standard French.
Use a fine brush to paint the flame shapes from the tip downward in curving tongues. Keep the base sheer or nude so the white stays readable. The flames do not need to be huge. In fact, smaller flames usually look better because they stay close to the curve of the nail instead of spilling across the whole surface.
How to Keep the Flame Shape Sharp
Paint one side of each flame first, then mirror it. That helps the shape stay balanced.
- Start with the center flame.
- Add two side flames on each side.
- Leave tiny gaps between the tongues.
- Clean the edges before the polish dries fully.
This is a stronger look than a micro French, but it still feels wearable if you keep the rest of the nail quiet.
25. White Checkerboard Accent Nails
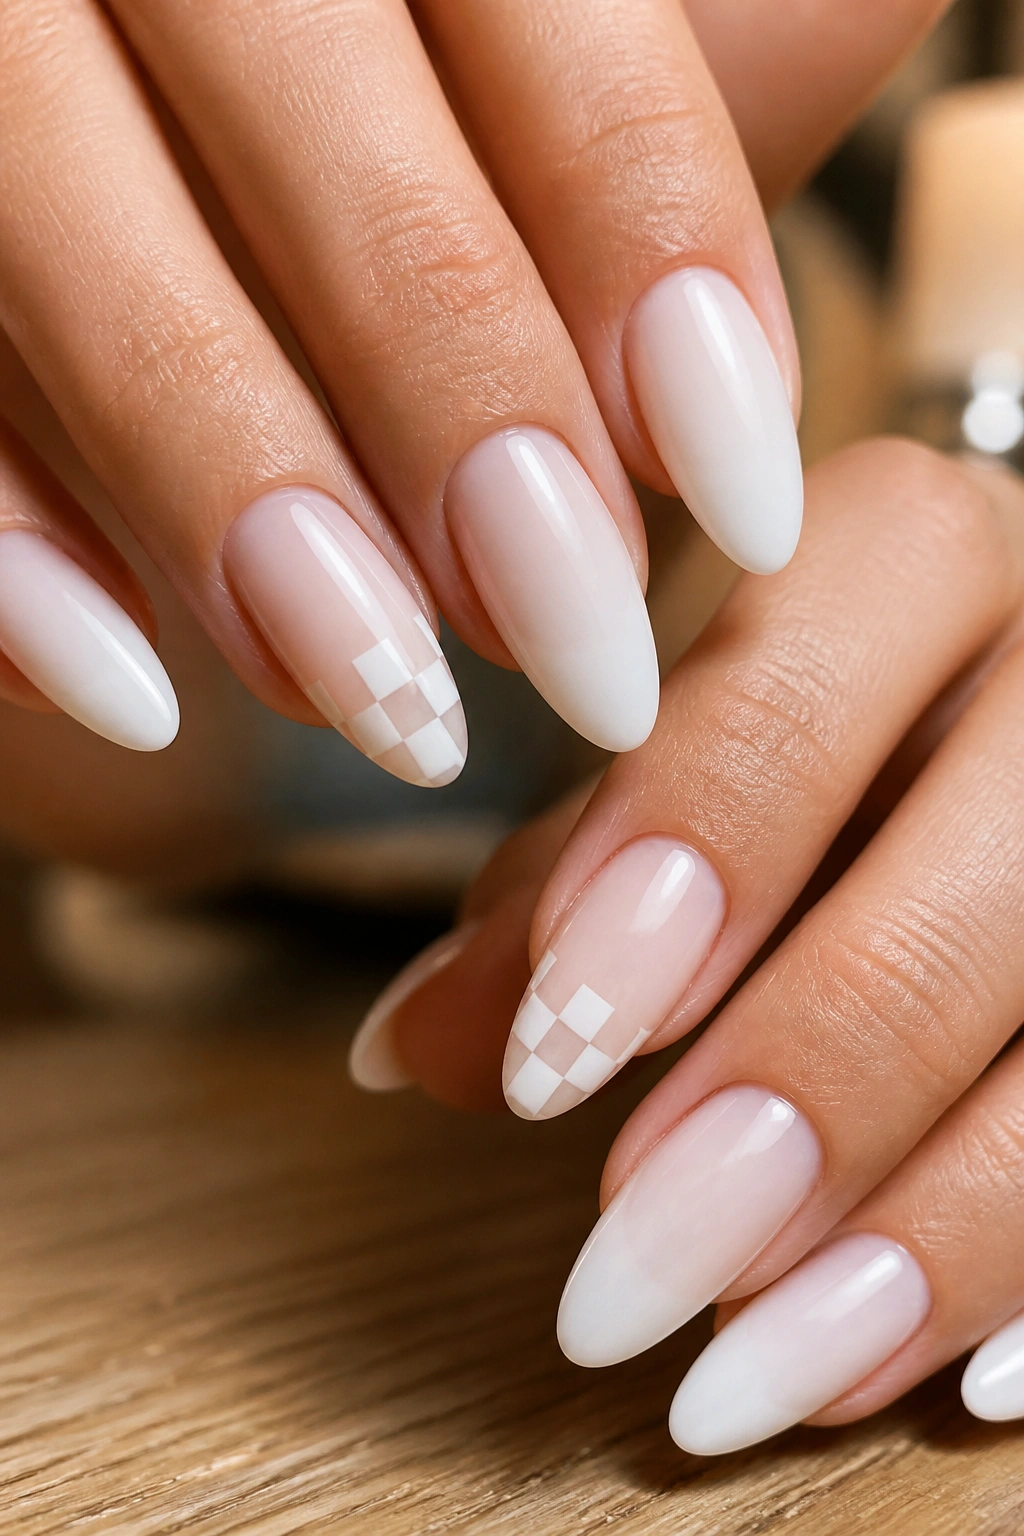
Checkerboard can feel bold, but on almond nails it gets a lot softer than people expect. The taper keeps the pattern from looking blocky, and white-on-nude checkerboard accents can sit nicely beside a plain milky set. I’d use it on one or two nails only. That keeps the pattern crisp instead of overwhelming.
Tape makes this much easier at home. Paint the base, let it dry completely, then mark off tiny squares with striping tape or a very steady brush. White polish needs to go on in thin layers here, because thick paint can bleed under the tape and ruin the edges. A small check pattern near the tip looks cleaner than trying to fill the whole nail.
The rest of the nails can stay simple: sheer white, milky white, or a tiny French. That mix keeps the checkerboard from taking over. If you like a manicure that feels neat but not quiet, this is a smart way to end the set.
A full white almond manicure can be soft, sharp, romantic, or graphic without changing the shape at all. That’s the fun part. The white is only half the story; the almond silhouette does the rest.
