

A little glitter can make almond nails look polished in a way plain polish sometimes misses. The shape does half the work for you: that tapered tip gives sparkle somewhere to go, so even a simple design reads intentional instead of crowded.
The catch is placement. Put glitter too thick near the cuticle and the nail starts to look clunky. Push it too far toward the tip and the whole design can feel top-heavy. Get the balance right, though, and you end up with nails that look clean, bright, and surprisingly easy to wear with jeans, a blazer, or a dress you pulled out ten minutes before leaving the house.
At home, the smartest glitter almond nail ideas are the ones that forgive a shaky hand. A sheer nude base hides a lot. A sponge helps glitter sit flatter. A thin liner brush saves you from flooding the sidewalls. And yes, a good top coat matters more than people like to admit, because rough glitter edges will snag if you leave them bare.
Some designs lean soft. Some go full drama. A few sit right in the middle, which is usually where the best manicure ideas live anyway. If you’ve ever stared at a bottle of glitter polish and wondered whether it was too much, start here. There’s a version for almost every mood.
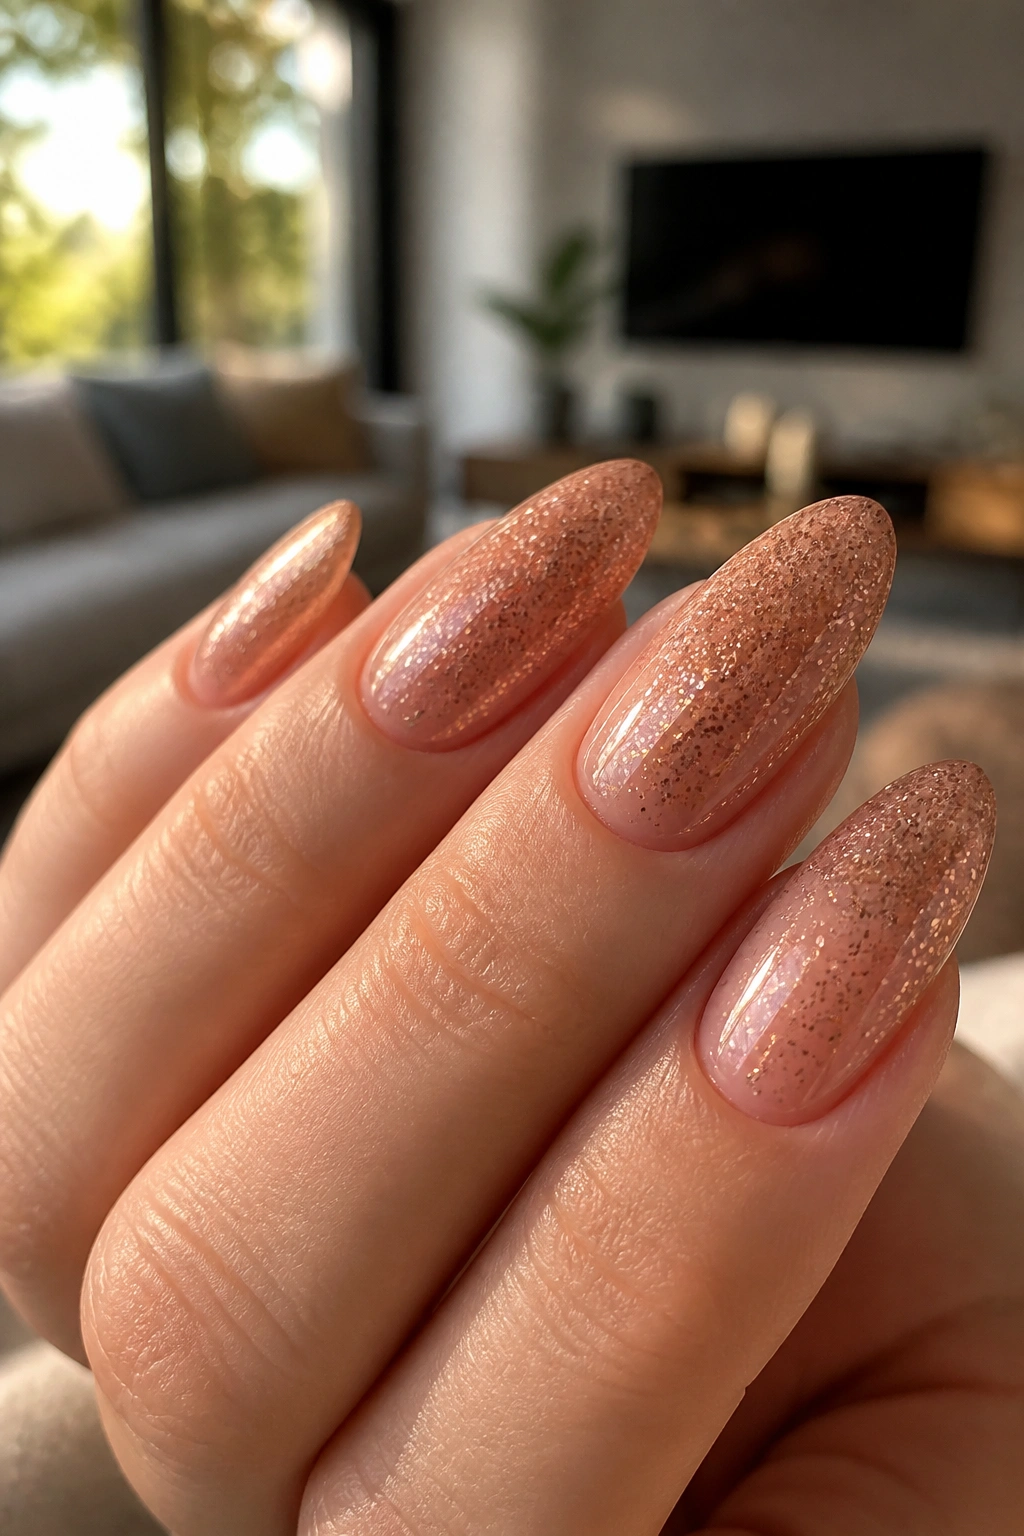
1. Champagne Glitter Tips
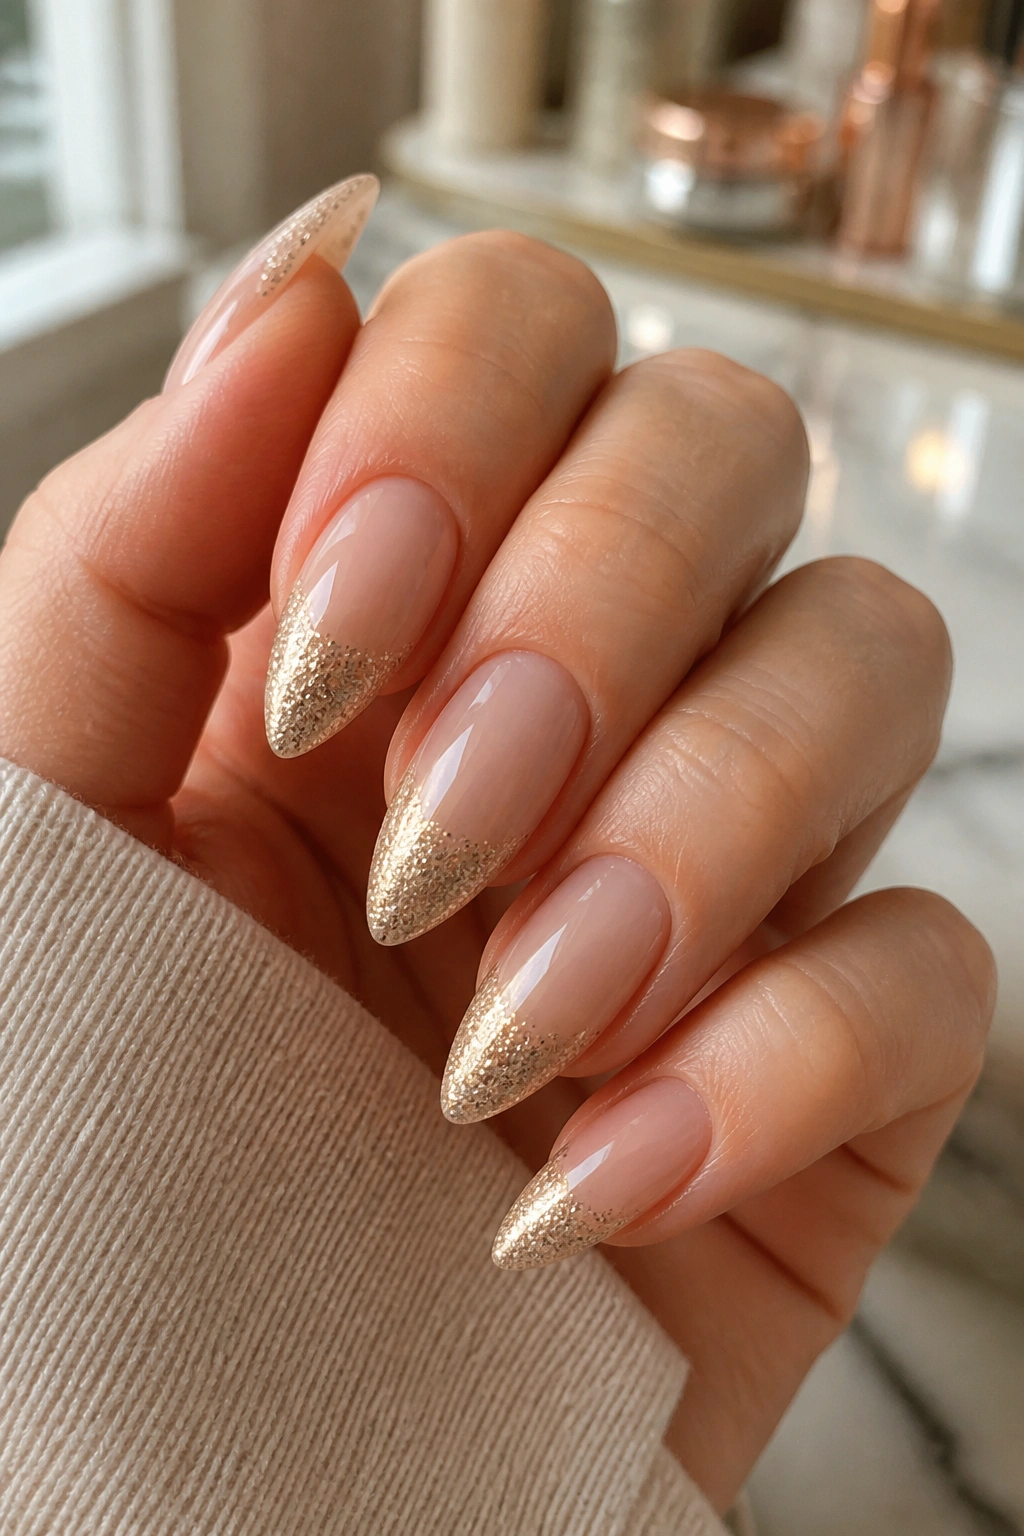
Champagne glitter tips are the easiest place to start if you want sparkle that still feels neat. A sheer beige, peach, or pink base keeps the nail calm, while the glitter lives mostly on the last third of the almond shape. That placement matters. The taper of an almond nail already pulls the eye upward, so glitter at the tip makes the whole nail look longer and cleaner.
Why it works on almond nails
The soft point of an almond nail gives a natural frame to the glitter. You do not need a hard French line here. A soft sweep looks better, and it’s far easier to do at home with a flat brush or a small sponge.
A thin coat of champagne glitter polish over a cured or dried nude base is enough. If the polish is patchy, tap on a second layer only where it looks thin. The result should read as shimmer first, glitter second. That’s the sweet spot.
- Use a sheer nude or blush base.
- Pick fine champagne glitter, not chunky flakes.
- Keep the densest sparkle on the last 1/3 of the nail.
- Clean up the sides with a small brush dipped in remover.
Best move: leave the sidewalls slightly softer than the center tip. It makes the whole manicure look slimmer.
2. Full Silver Sparkle
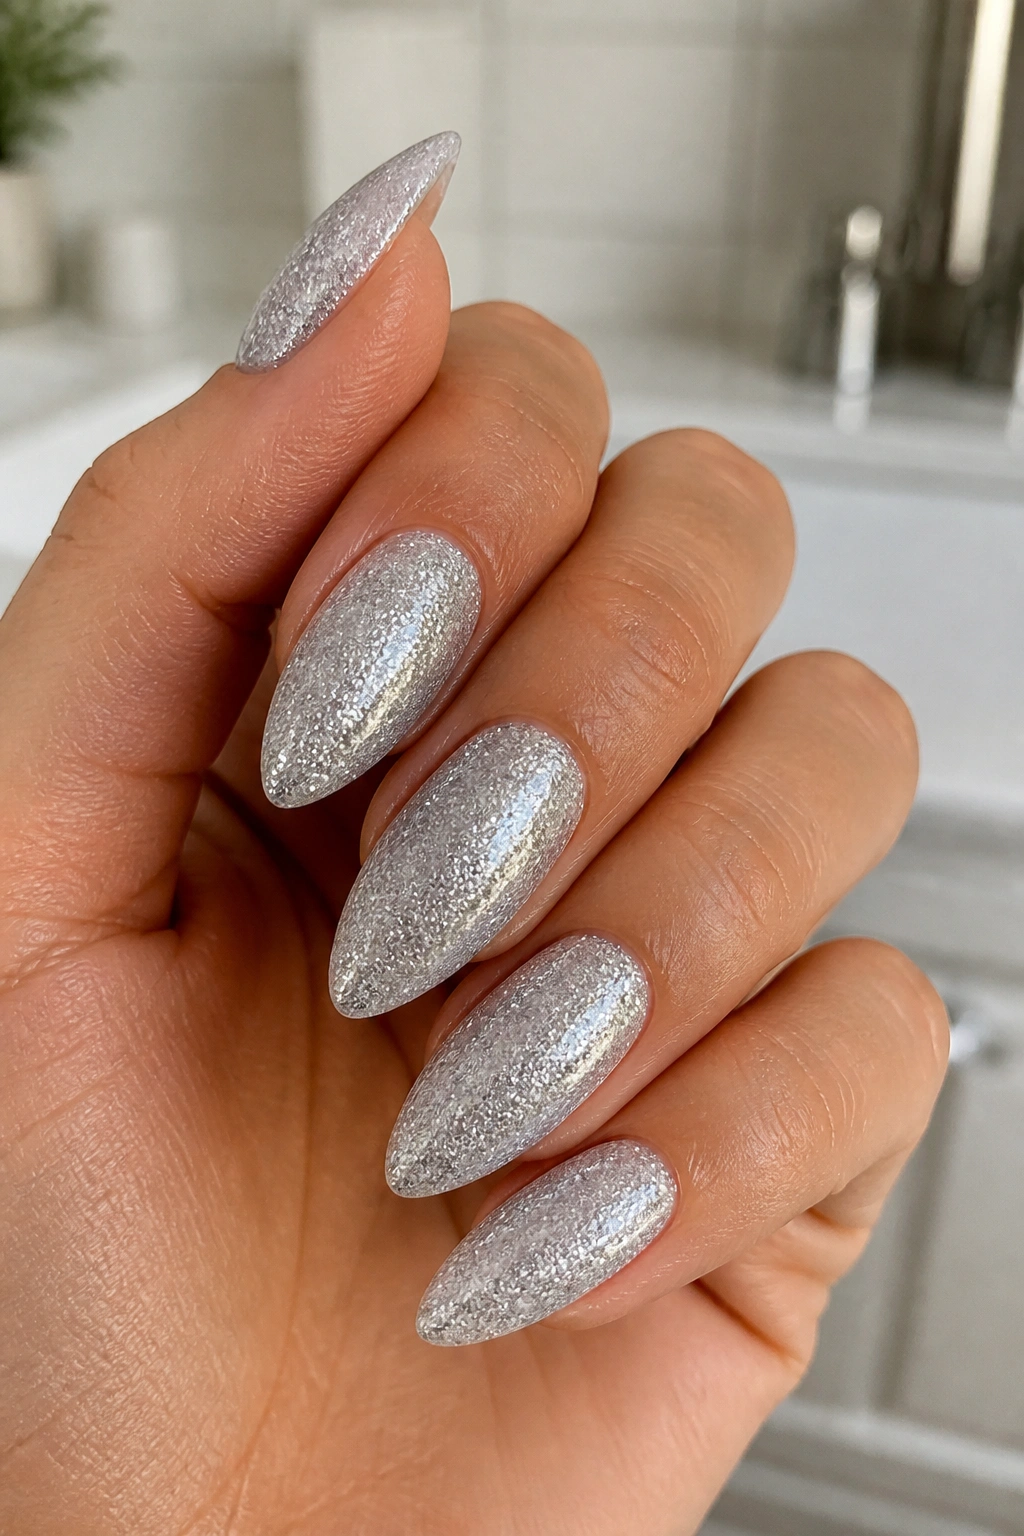
A full silver glitter nail sounds loud on paper. On almond nails, it can look surprisingly neat if the glitter is fine enough and the base underneath is opaque. I’d skip chunky silver confetti for this one. It tends to sit high and feel rough. Fine silver shimmer, though? That’s a different story.
The trick is to build opacity in thin layers. One thick coat will slide around and leave bald spots. Two thin coats give you a smoother finish, and a makeup sponge can help pack glitter onto the nail without dragging the first layer around. If you want the shine to look even more solid, put a silver glitter top coat over a matching cream base.
After that, seal everything with a glossy top coat and wrap the free edge. Seriously. Glitter chips at the tip fast if you leave that edge exposed, and almond nails show wear there first.
No, it does not need to be perfect. A little variation in sparkle makes it look hand-done in the best way.
3. Glitter Ombré Fade
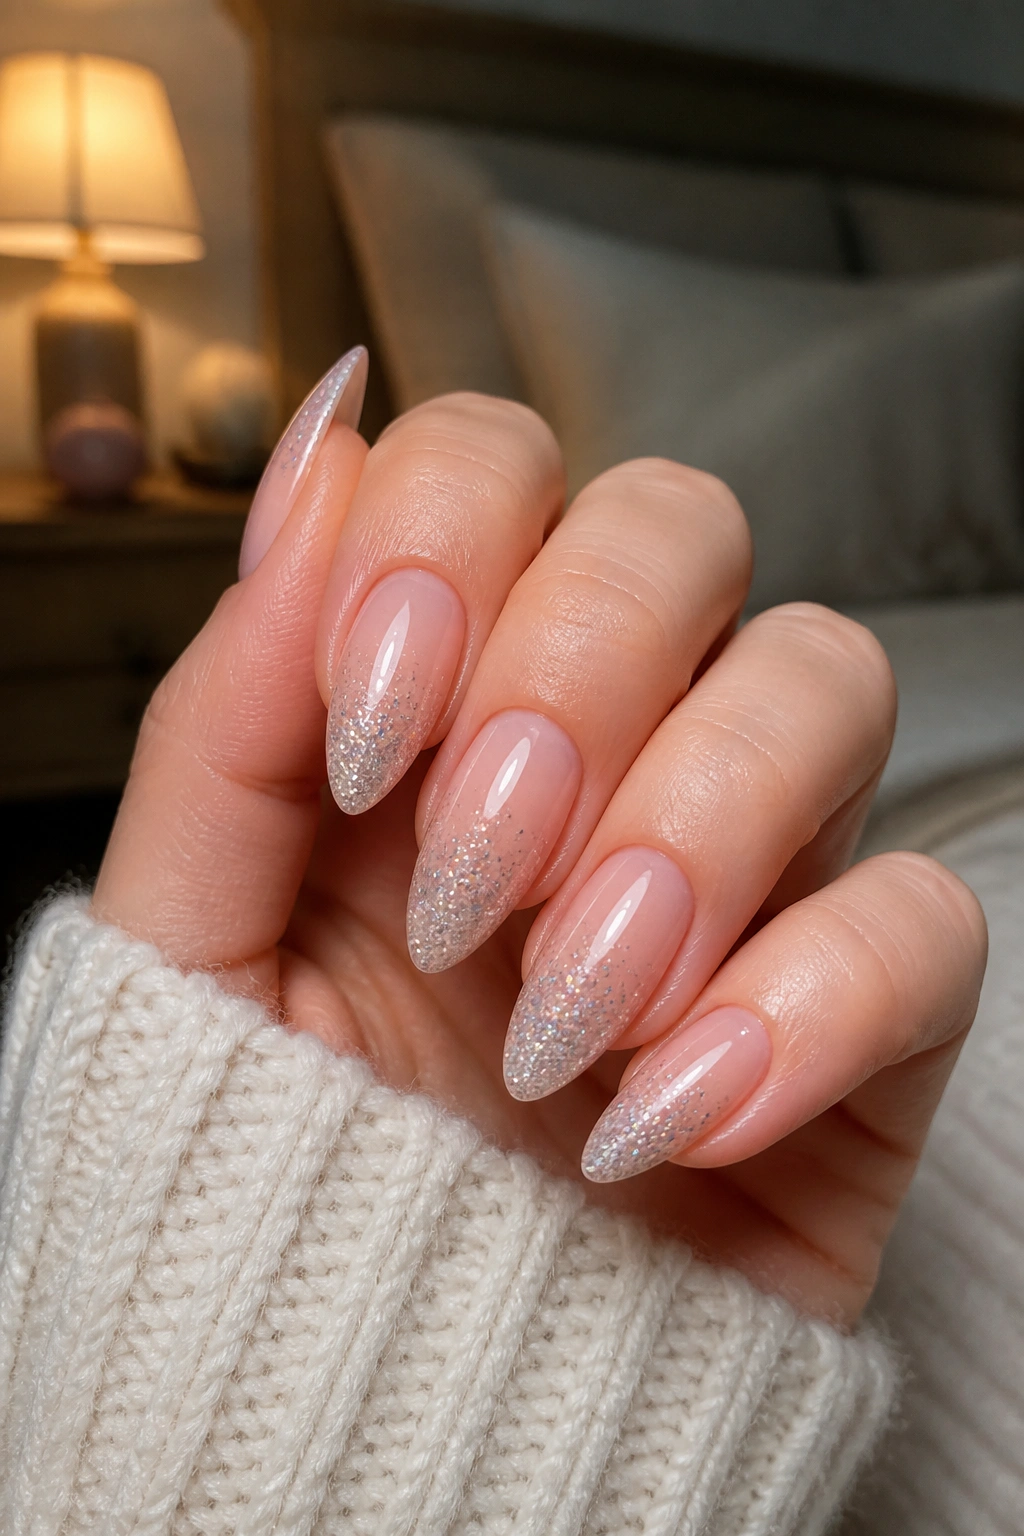
Why does a fade look so clean on almond nails? Because the shape already creates movement. The eye naturally follows the curve from the wider base into the narrower tip, so a glitter ombré feels built in rather than pasted on. It’s one of the most forgiving glitter almond nail ideas for home use, especially if your dominant hand never comes out as neat as your other one.
How to build the fade
Start with a sheer nude, milky pink, or soft taupe base. Then tap fine glitter onto a sponge and press it most heavily at the tip or the cuticle, depending on the direction you want the fade to go. A dense glitter load right at one end, then a lighter touch as you move across the nail, gives you that soft gradient.
The best part is how easy it is to hide mistakes. If one side gets a little heavier, you can soften it with another layer of clear top coat and a second sponge pass.
- Use microglitter for the smoothest fade.
- Press, don’t swipe.
- Keep the fade centered on the nail, not the whole hand.
- Add a second coat only where the sparkle looks thin.
If you want one design that still looks polished on day four, this is a safe bet.
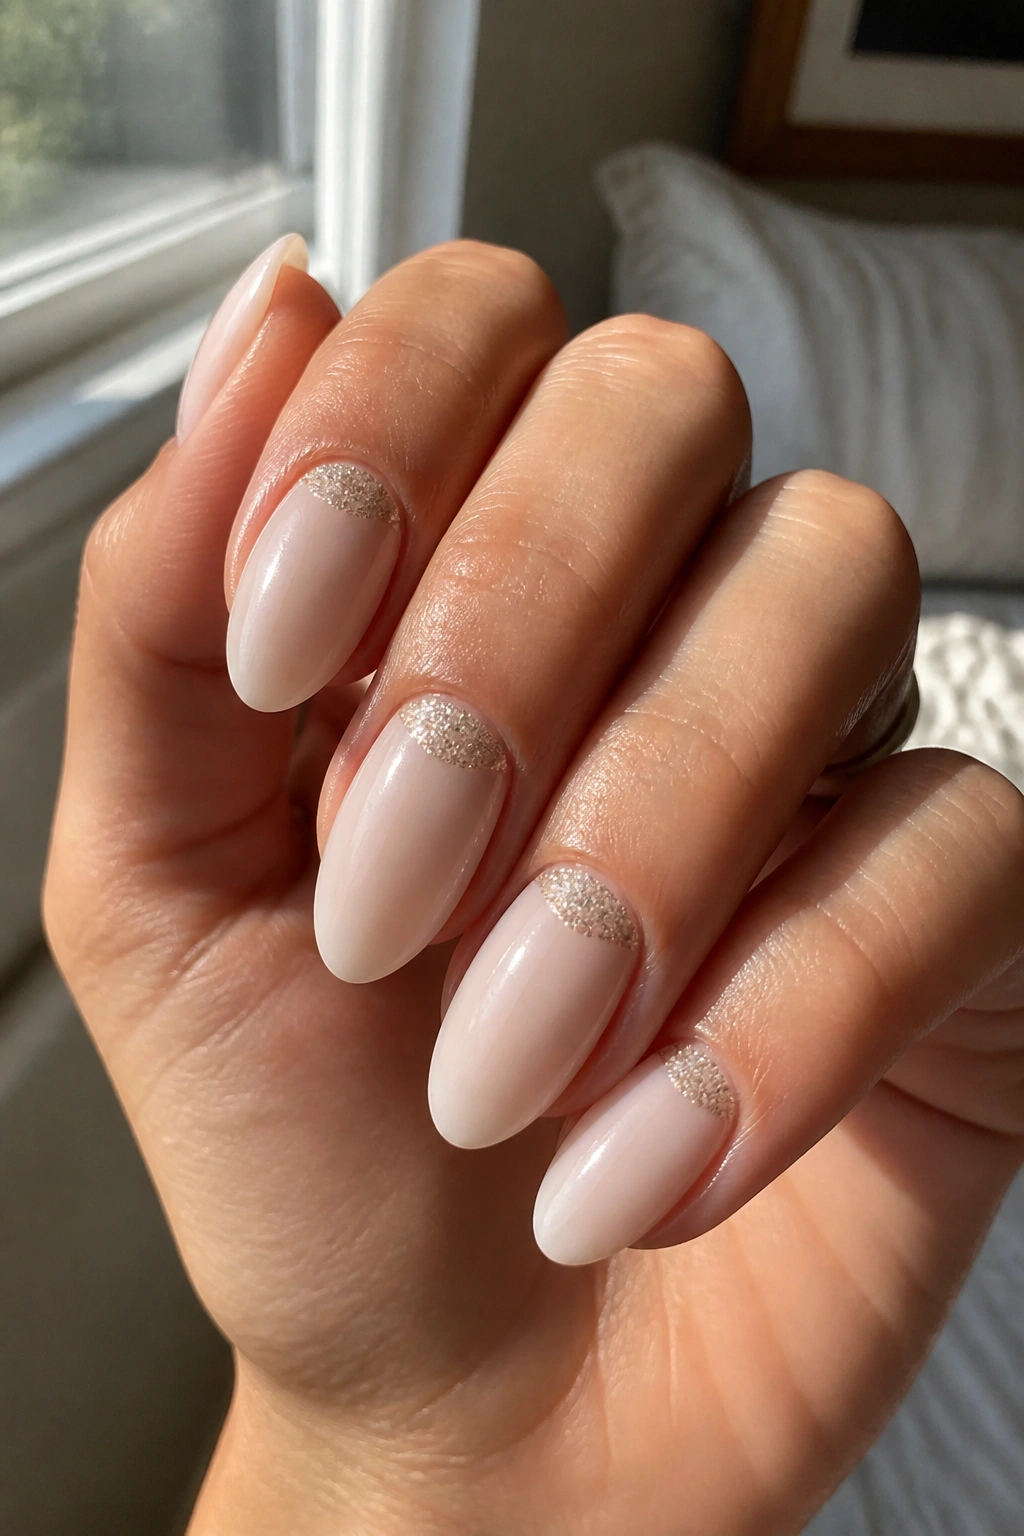
4. French Glitter Smile Line

If you like a classic French manicure but want it to feel less expected, glitter in the smile line is the move. Picture a soft nude base and a delicate arc of glitter right where the white tip would usually go. On almond nails, that curve echoes the nail shape instead of fighting it, which is why this version looks more natural than the square French many people remember.
A nail art brush makes this easier than it sounds. Draw the smile line in small strokes, not one heavy sweep. If the line wobbles, thicken it just a touch rather than trying to erase and start over. Glitter hides a little mess better than cream polish does.
Tiny details that matter
- Pick a nude base that is one shade deeper than your skin so the glitter pops.
- Use silver, gold, or rose gold depending on the jewelry you wear most.
- Keep the smile line thin on shorter almond nails.
- Finish with a glossy top coat to smooth the texture.
The nicest thing about this design is how tidy it grows out. The base stays calm even when the glitter starts to move with the nail.
5. Milky Nude with Glitter Cuticles
Milky nude with glitter at the cuticle looks soft in a way that never gets old. The glitter sits near the base of the nail in a thin halo or crescent, while the rest of the nail stays sheer and creamy. That empty space is what makes it elegant. You can see the almond shape, not just the polish.
This is one of those manicures that looks like it took more effort than it did. A milky nude base covers minor ridges and gives the whole nail a soft-focus finish. Then you use a dotting tool, toothpick, or tiny liner brush to place microglitter in a narrow arc near the cuticle line. Keep the arc thin. A thick band at the base can make the nail look shorter, which is the opposite of what almond nails do best.
The design also wears well because grow-out is less obvious. When the glitter sits at the base, a little extra space after a week does not ruin the whole look.
One small warning: leave a clean gap around the skin. Flooded glitter near the cuticle looks messy fast.
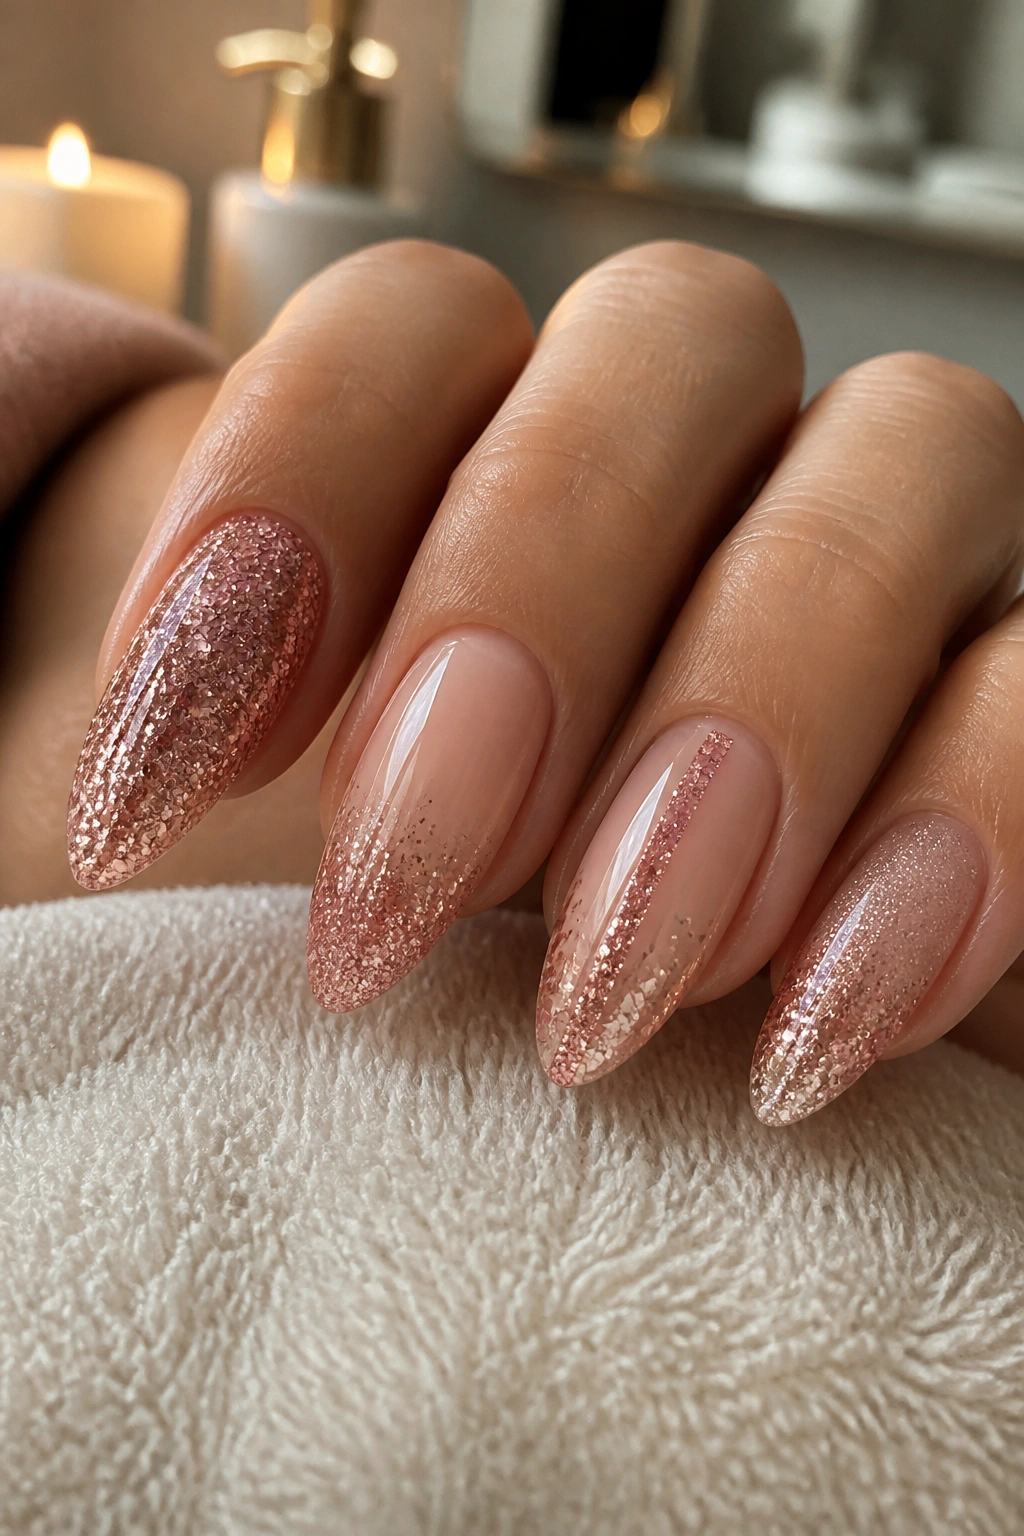
6. Rose Gold Microglitter
Rose gold microglitter is the friendliest glitter polish if you want shine with a softer edge. Unlike chunky glitter, which can feel a bit rough and busy, microglitter lays flatter and gives the nail a smoother surface. That matters on almond nails because the shape already brings enough style on its own. You do not need the polish screaming for attention.
I like this look over a peach nude, dusty pink, or beige base. It has warmth, but not the orange cast that some golds can bring. Two thin coats are usually enough if the formula is packed with sparkle. If it’s more sheer, a third thin coat looks better than trying to pile on one heavy layer.
This is the one I’d recommend for someone who wants glitter nails that still work at a desk, at dinner, and on a random Tuesday. It’s gentle, but not boring.
And yes, it also flatters longer almond extensions because the rose gold catches along the taper instead of bunching at the tip.
7. Black Base with Cosmic Glitter

Black polish changes everything. Put it under glitter and the whole manicure shifts from sweet to dramatic in about five minutes. On almond nails, that dark base makes the shape look sharper, and the glitter reads like tiny stars instead of craft-store sparkle. If you’ve ever wanted nails that feel a little moody without going full goth, this is the lane.
Why the contrast stays chic
The key is contrast. A deep black or ink navy base makes silver, blue, or multicolor glitter look brighter than it would over a pale polish. You can cover the whole nail, or keep the black on a few accent nails and leave the rest sheer.
I’d use a dense but fine glitter here. Huge flakes can make the surface look lumpy, especially if you’re working with regular polish and not gel. Two coats of black, one glitter coat, and a glossy top coat usually do the job.
- Use opaque black polish first.
- Tap glitter onto the center of the nail for a starry effect.
- Keep the glitter slightly denser near the tip.
- Seal the free edge so the dark polish does not chip early.
This one looks especially good if you like silver rings or a black outfit now and then. It has edge, but it still feels neat.
8. Ice Queen Chrome + Glitter
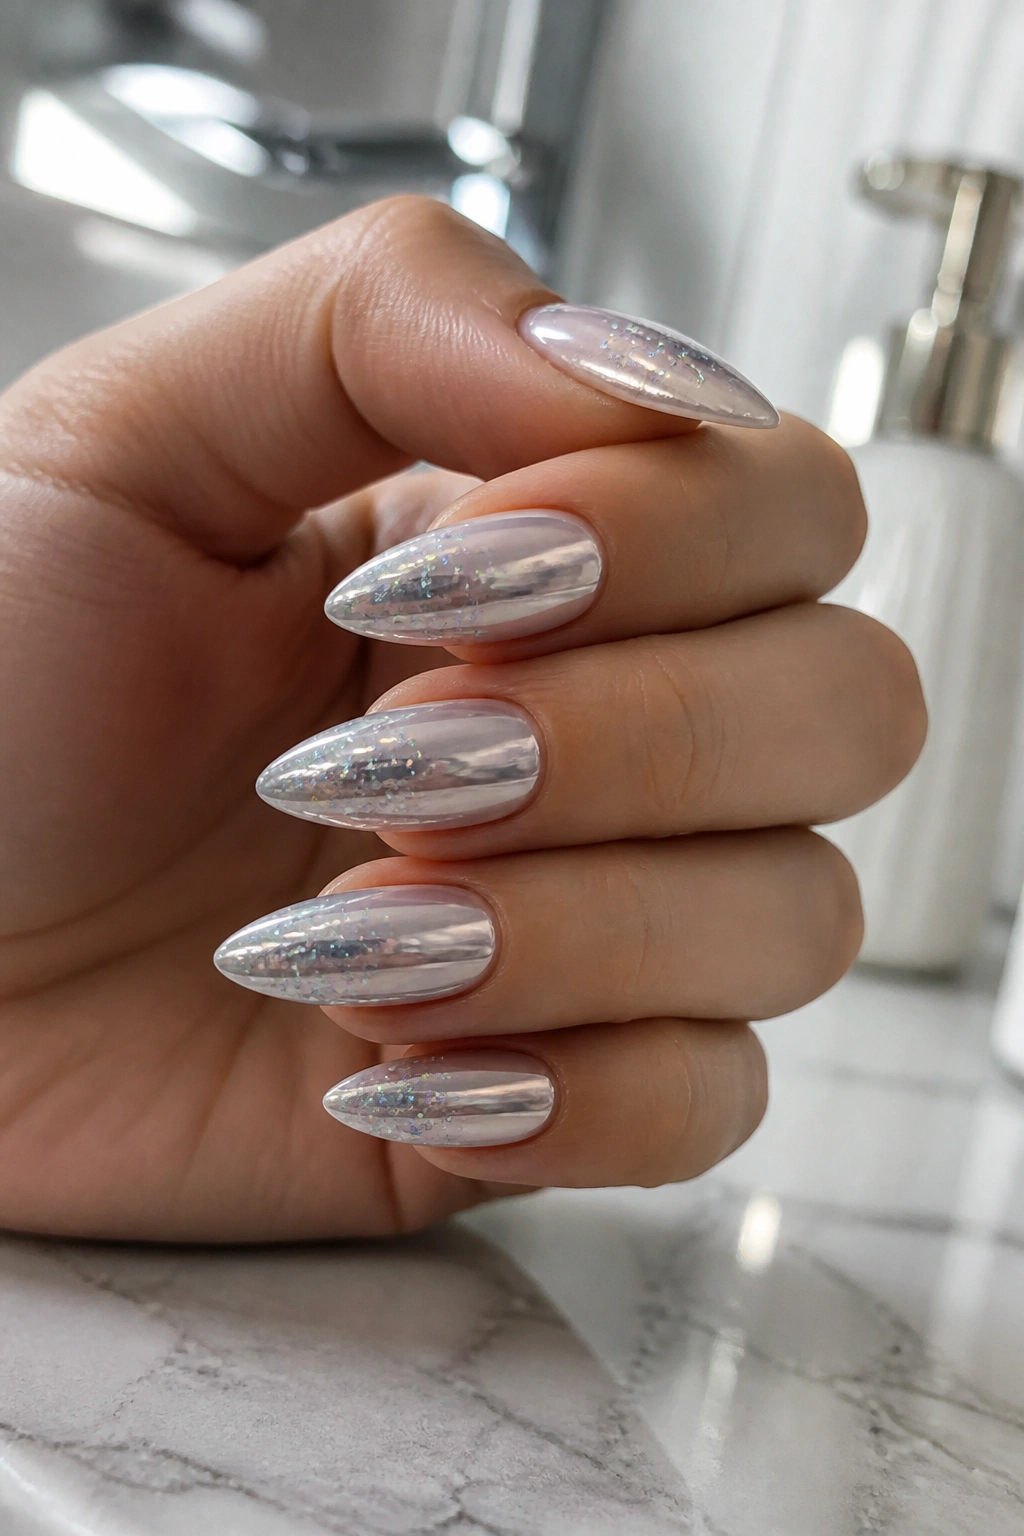
Chrome and glitter together can go wrong fast if you pile on too much of both. Keep them separate enough to breathe, and the result is icy instead of messy. A chrome base gives you that mirror flash, then a fine glitter top layer adds texture. On almond nails, the combination follows the curve nicely because the shine runs along the whole shape, not just across the top.
You’ll want a gel setup for this one if you can manage it. Chrome powder needs a cured no-wipe top coat, and that extra step matters. Apply the chrome first, burnish it until the surface looks smooth, then add a sparse layer of glitter over the top or just at the tips. The best version of this design is still a little restrained. Too much glitter and the chrome effect disappears.
A clean white, pale gray, or sheer nude base works under the chrome. Dark bases are an option too, but they make the look moodier than icy.
If you want nails that feel reflective without being flat, this is a good one. It catches movement in a way regular shimmer never quite does.
9. Jelly Pink with Confetti Sparkle
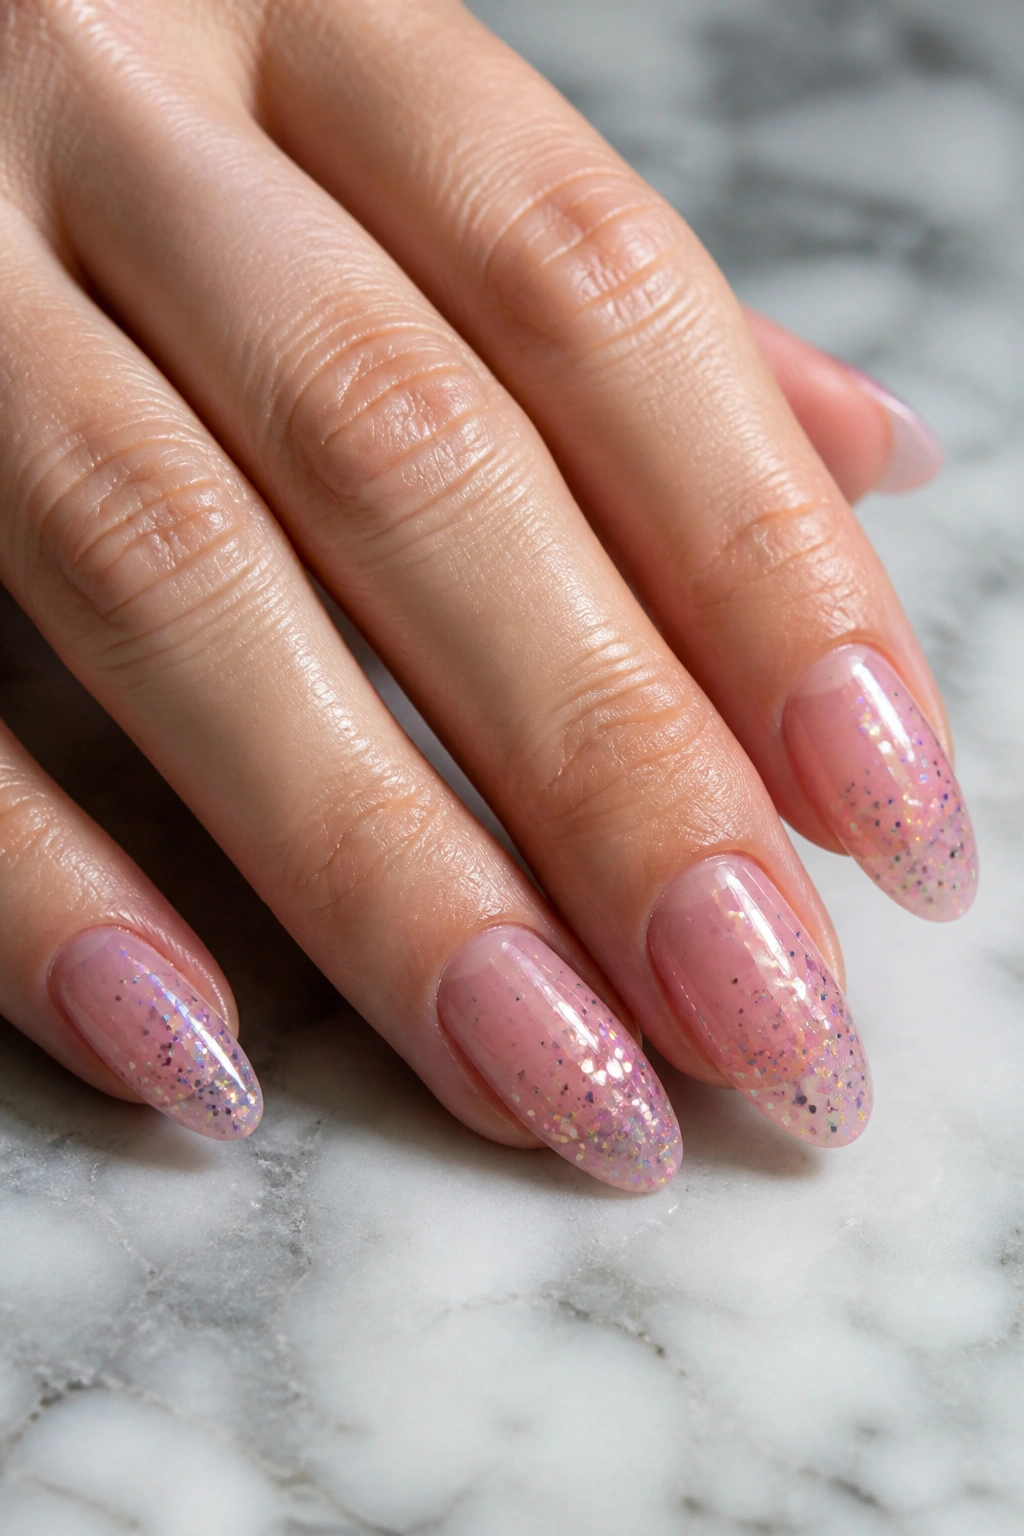
Jelly pink nails have a candy-like look that regular cream polish can’t copy. Add scattered glitter, and the manicure starts to feel playful in a polished way. The translucent base lets a hint of your natural nail show through, which is why almond shape looks so nice here. It keeps the whole design light.
This idea works best when the glitter is placed unevenly on purpose. A few tiny bits near the center, a little more toward the tip, and just enough shimmer near the cuticle make the nail look effortless. The color can stay in the pink family, or you can use tiny holographic bits for a more mixed effect.
You do not need a perfect jelly formula. A sheer pink polish layered twice gives a similar feel, especially if you finish with a glossy top coat that keeps the nail looking smooth. If the glitter is chunkier, press it in with tweezers rather than brushing it around, because the brush can drag the translucent base.
It’s cheerful without looking childish. That balance is harder to get than it sounds.
10. Emerald Glitter Almonds
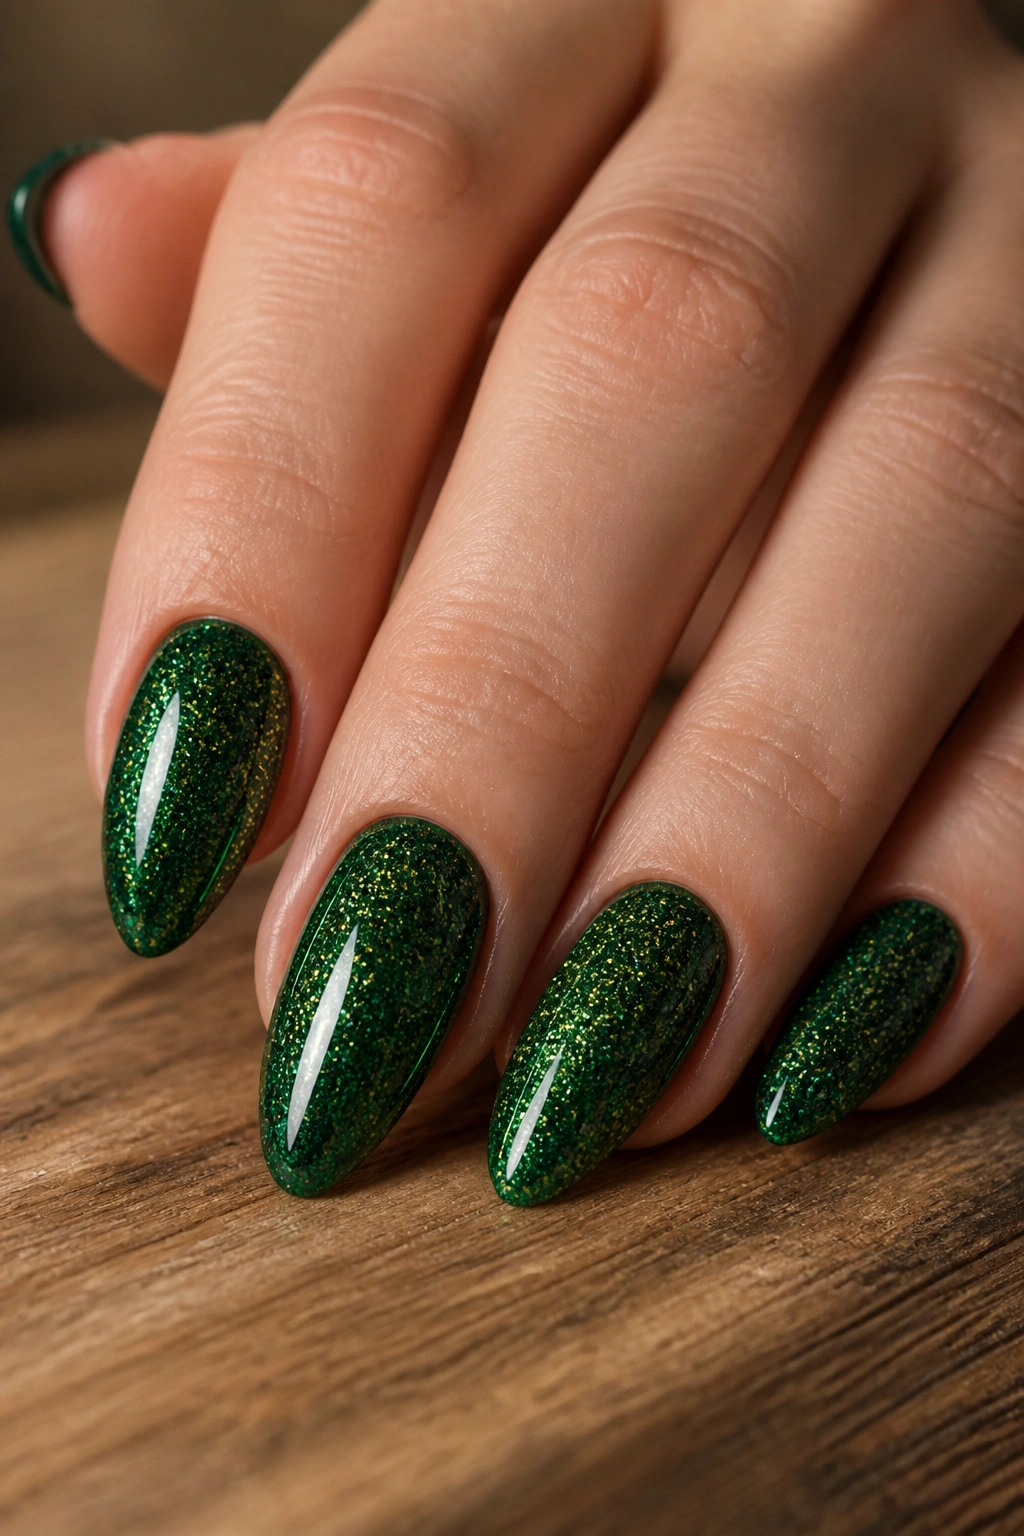
Green glitter is underrated. People go straight to silver, gold, or pink, and then miss how rich emerald can look on an almond nail. A deep green base with gold or matching green glitter has a jewel-box feel that works in any setting where you want the manicure to look intentional and a little bold.
The simplest version is a full emerald polish with a glitter top coat. If you want more dimension, try a forest green base on most nails and one or two accent nails with denser glitter. The almond shape helps here because the tapered end keeps the color from feeling too heavy.
I’d choose glitter that’s fine and reflective, not thick and chunky. Emerald already has enough depth. Extra-large pieces can make the design look patchy. If you want the manicure to read darker and more dramatic, pair the green with gold glitter. If you want it cooler, silver works too, though I prefer gold with green most of the time.
This one looks especially good under indoor light. The sparkle does a lot without needing flash or harsh sunlight.
11. Gold Leaf and Glitter Accent
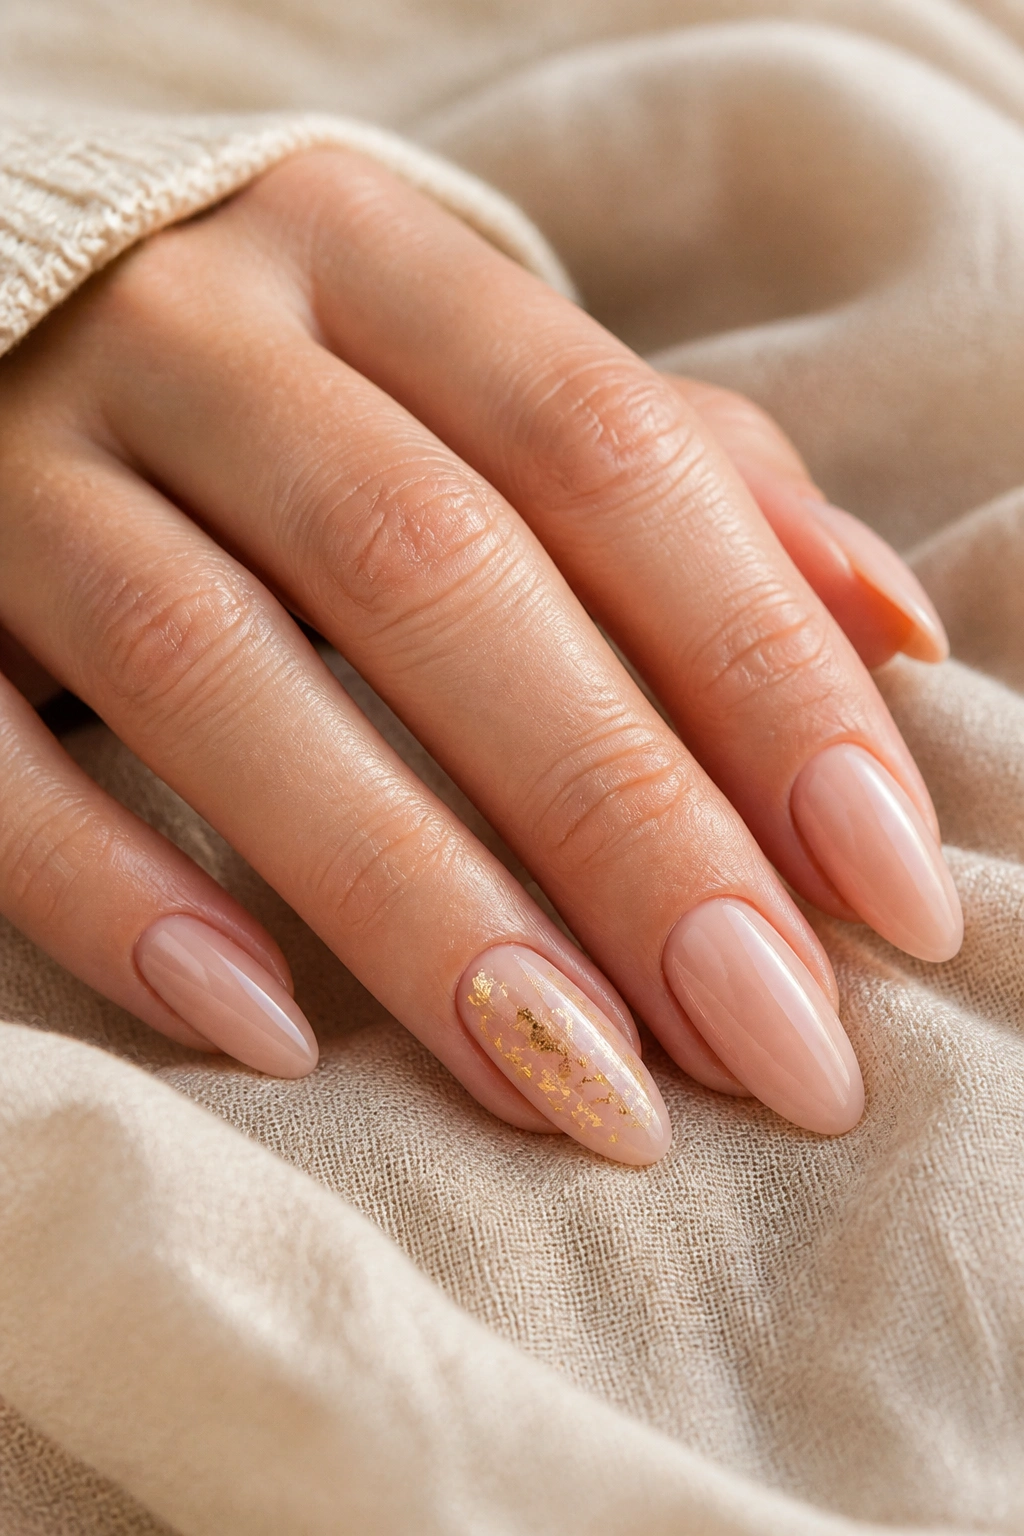
Gold leaf on almond nails has a very different mood from regular glitter. It looks a little broken up, a little irregular, and that is the charm. The flakes sit flatter than big glitter pieces, so the surface feels smoother, which makes this design easier to wear than it sounds.
A nude or soft beige base gives the gold something calm to sit on. Then you press tiny foil flakes or leaf-style glitter into the tacky layer with tweezers or the tip of a wooden stick. One accent nail can carry the whole set if you keep the rest sheer. Or you can scatter the flakes lightly across all ten nails and keep the density low.
I like this one most when the gold sits off-center rather than in a perfect line. It feels less formal that way. A narrow band near the tip, or a few flakes drifting up one side of the nail, gives the almond shape some movement.
If real gold leaf sounds fussy, skip it and use a flake-style gold glitter polish instead. The look is close enough for home use, and the cleanup is easier.
12. Sideways Glitter Swoop
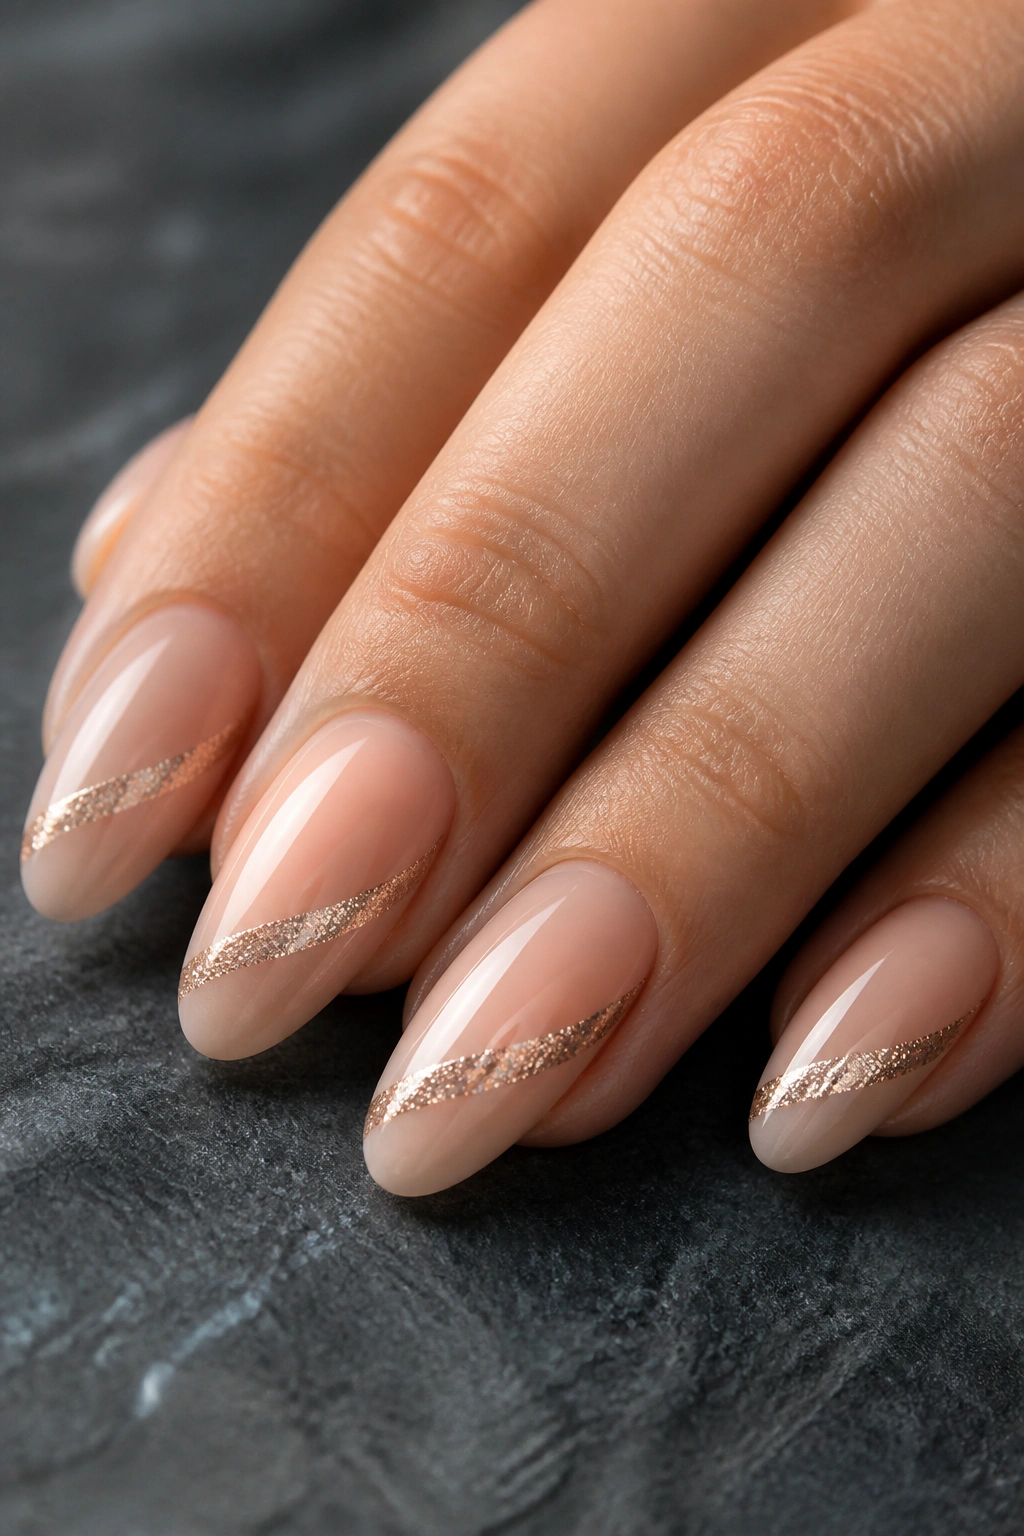
Why does a sideways swoop look so good on almond nails? Because the curve of the glitter echoes the curve of the nail instead of fighting it. The design feels deliberate, even if the brushwork is simple. It also gives you a nice way to use glitter without covering the whole nail, which is handy when you want sparkle but not a full disco effect.
How to place the curve
Start with a nude or sheer base. Then use a thin liner brush to draw a diagonal line of glitter from one side of the cuticle area toward the tip, or from the center toward the outer edge. Keep the line narrow at first. You can always thicken it. Cleaning up a line that got too wide is the annoying part.
A little asymmetry looks better here. If every nail swoops the exact same way, the manicure can feel stiff. Let the curve vary a touch from finger to finger.
- Choose a fine glitter polish or glitter gel.
- Anchor the swoop on the lower third of the nail.
- Leave one side mostly bare for contrast.
- Finish with a top coat that smooths the ridge.
This is a good pick if you like a graphic nail but do not want sharp angles on an almond shape.
13. Holographic Topcoat Over Nude
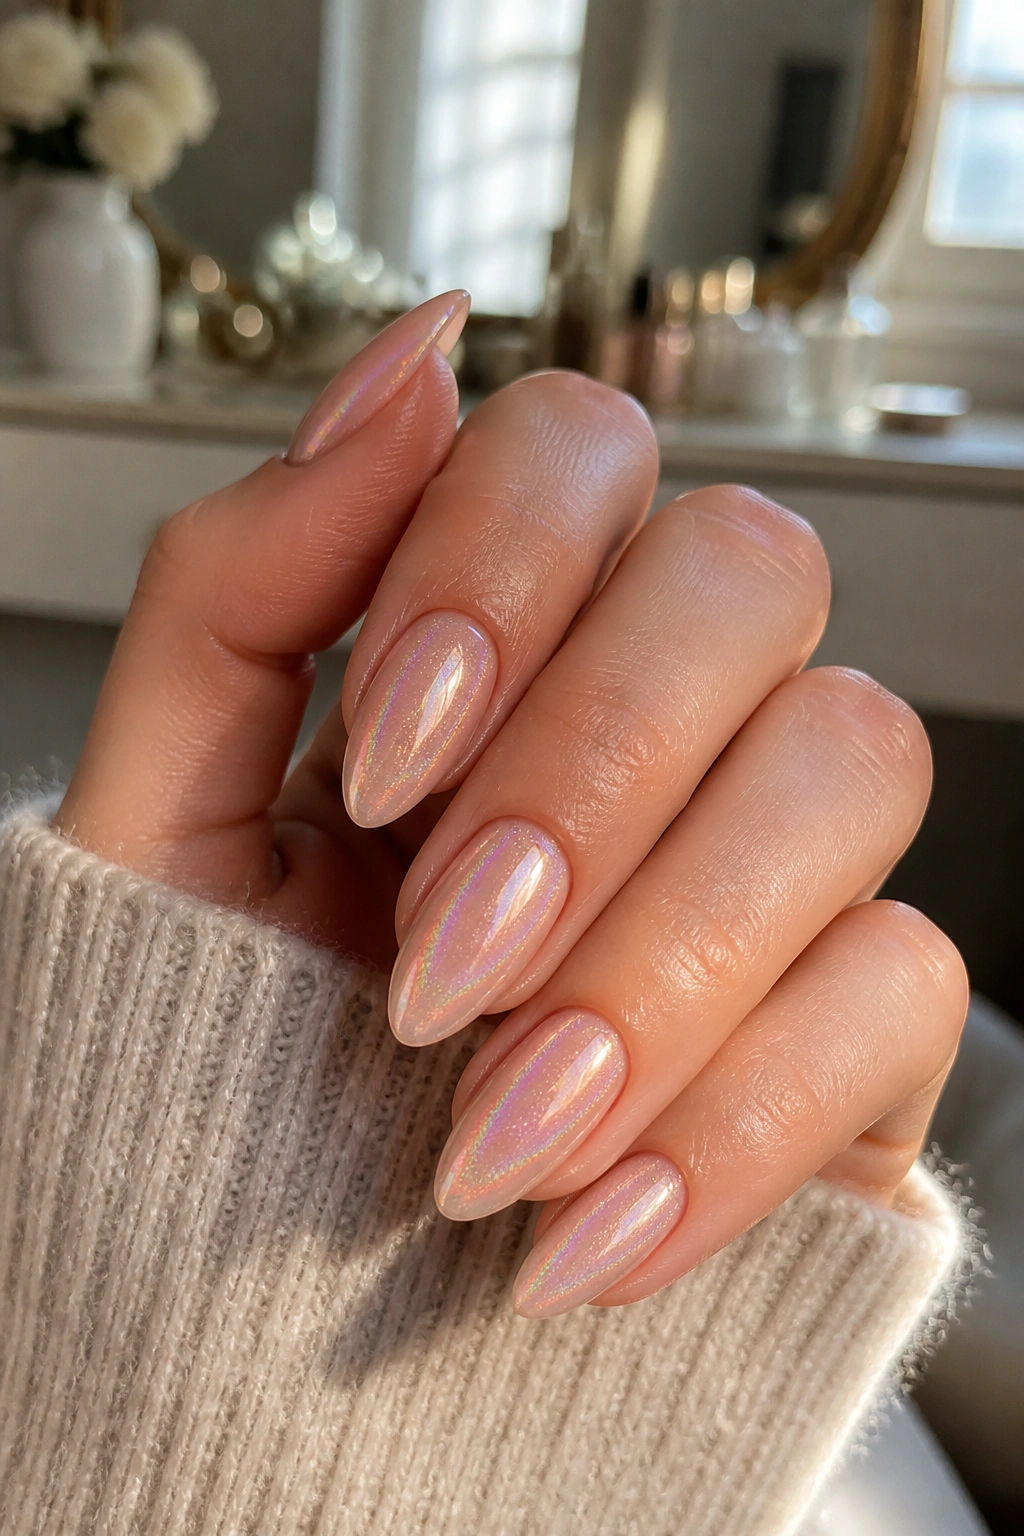
A holographic topcoat is the lazy person’s glitter manicure, and I mean that as a compliment. One coat over a nude base gives you tiny rainbow flashes without building a thick layer of sparkle. On almond nails, that matters. The shape already gives you elegance; the holo topcoat just adds movement when the light shifts.
Unlike chunky glitter, holographic polish does not fight the curve of the nail. It sits quietly until it catches light, then suddenly it looks much more expensive than the bottle price suggests. That’s why I like it over taupe, pale mauve, cool beige, or soft pink. The neutral base keeps the rainbow effect readable.
If you want more payoff, use two thin coats of holo topcoat instead of one heavy coat. A thick coat can streak, and streaks are especially obvious under flash or bright indoor lighting.
Best of all, this design is easy to refresh. If the shine starts fading, one extra topcoat layer brings it back fast. No complicated cleanup. No artistic drama. Just clean sparkle.
14. Mix-and-Match Glitter Gradients
A mixed set works when you cannot decide on one glitter look, which is most of us on a normal day. Keep the color family consistent, then vary the placement. One nail can be full glitter, another can fade from the tip, a third can stay nude with a tiny sparkle band, and so on. On almond nails, that variety looks playful rather than messy because the shape already gives the set a common line.
What to do on each finger
Try this:
- Thumb: full glitter.
- Index: glitter fade from the tip.
- Middle: nude with one thin glitter stripe.
- Ring: denser sparkle accent.
- Pinky: microglitter wash.
The key is to repeat one thing across the whole hand. That might be the same base color, the same glitter shade, or the same top coat finish. Without that anchor, the set can drift into looking random.
I like this idea for home manicures because it takes pressure off perfection. If one nail looks heavier than the others, it still fits the group. That freedom makes the design fun instead of fussy, which is usually how the best at-home nails happen anyway.
15. Tortoiseshell with Gold Glitter
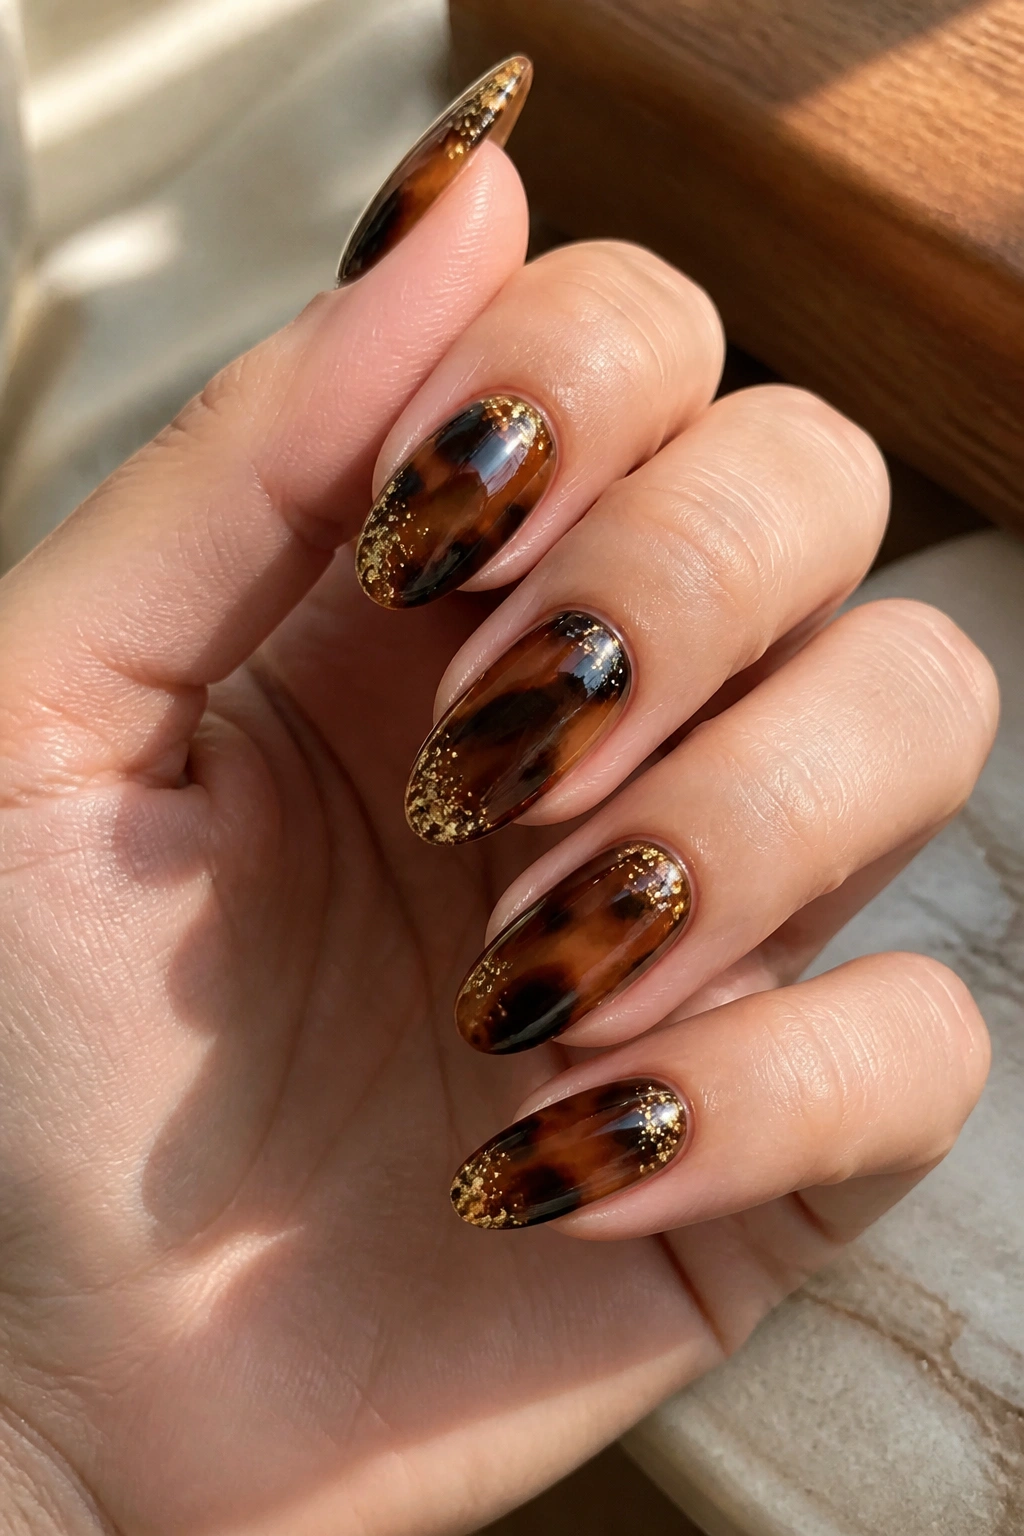
Tortoiseshell is already a little glamorous. Add gold glitter, and the pattern gets warmer and more dimensional. On almond nails, the elongated shape helps the mottled brown spots flow nicely from base to tip, so the print looks intentional instead of busy.
How to keep the pattern soft
Start with a sheer amber or caramel base. Then dot in soft brown and black patches with a small brush or the tip of a bobby pin. The goal is not crisp shapes. You want blurry little pools of color. Once the base looks balanced, tap fine gold glitter into a few open spaces or along one side of each nail.
The glitter should support the pattern, not cover it. That’s where a lot of home tortie nails go sideways. Too many layers, and the whole thing turns muddy. Too much glitter, and you lose the depth that makes tortoiseshell look rich in the first place.
A glossy top coat pulls the colors together. If the surface still feels too busy, one sheer coat of amber polish over the top can soften everything fast.
This is a little more involved than plain glitter, but the payoff is strong.
16. Deep Red Velvet Glitter
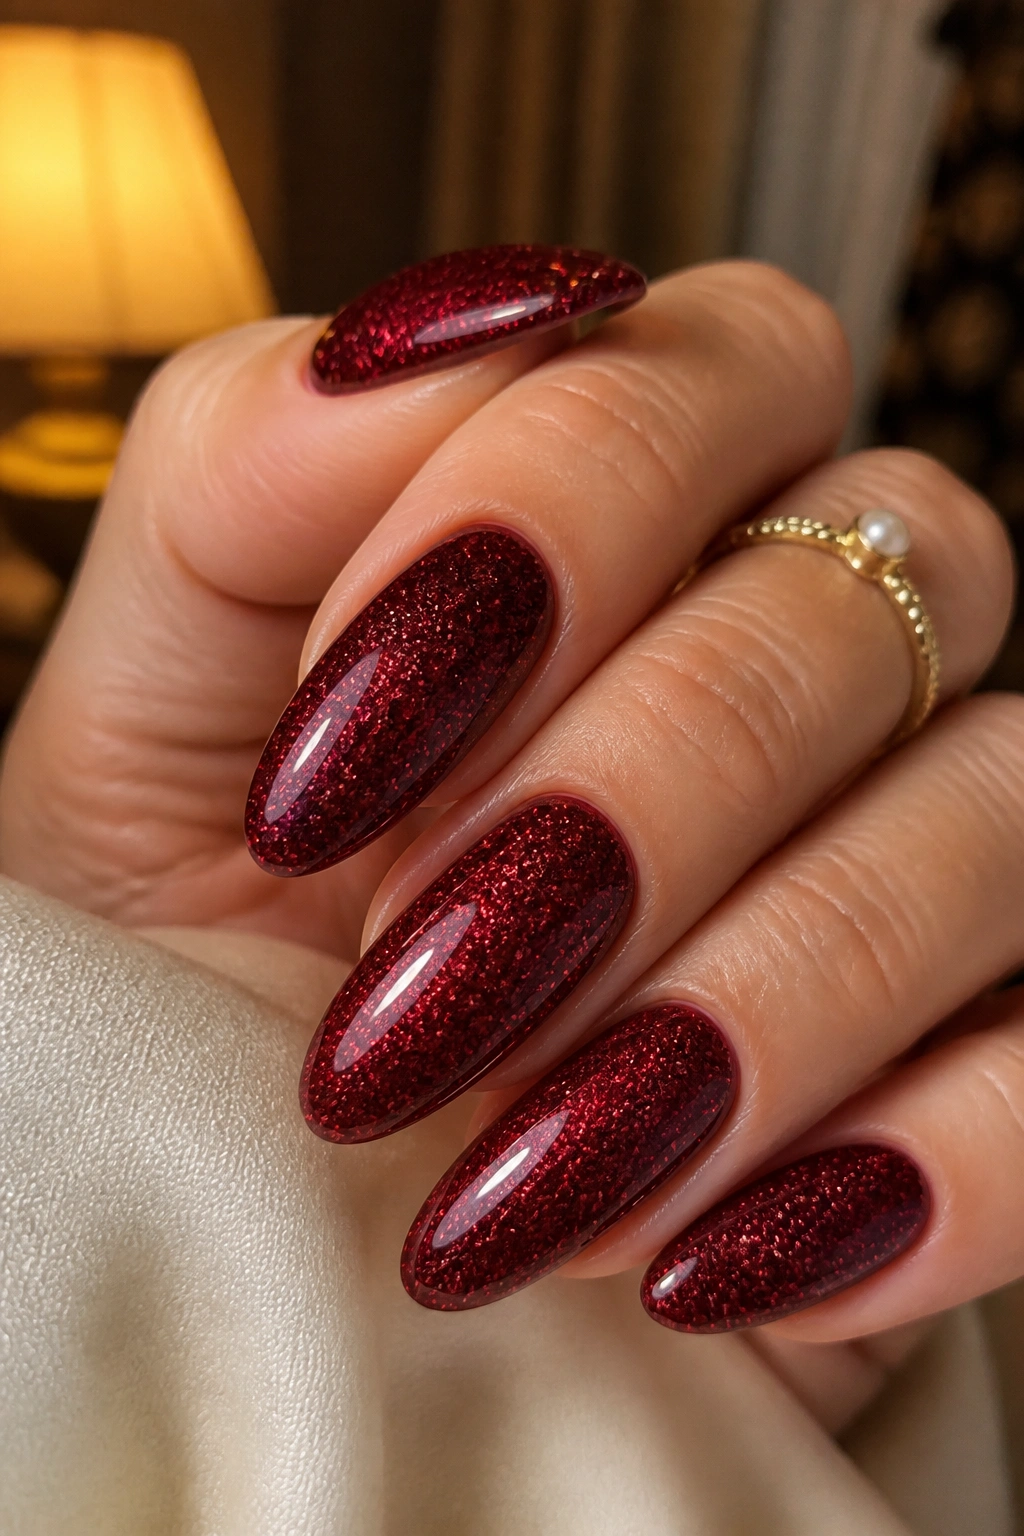
Deep red glitter nails have a rich, plush look that works especially well on almond shapes. The taper keeps the color from feeling heavy, and the glitter adds depth so the red does not go flat. Burgundy, wine, cherry, and ruby all work here, though I reach for burgundy most often because it looks smoother under indoor light.
The best version uses a dark cream base with a fine red glitter topcoat. That gives you the “velvet” effect people talk about without actually making the nail dull. You want shine, but not a harsh metallic glare. If the glitter is too chunky, the effect shifts from plush to gritty in a hurry.
One or two accent nails can carry the look if you don’t want every finger covered. A single glitter ring finger beside four glossy cream nails is enough. Or go full set if you like the drama. Either way, keep the top coat glossy. A matte finish can work, but it makes the glitter less lively.
This is one of those colors that looks good with almost no extra effort. The pigment does the heavy lifting.
17. White Pearl Glitter
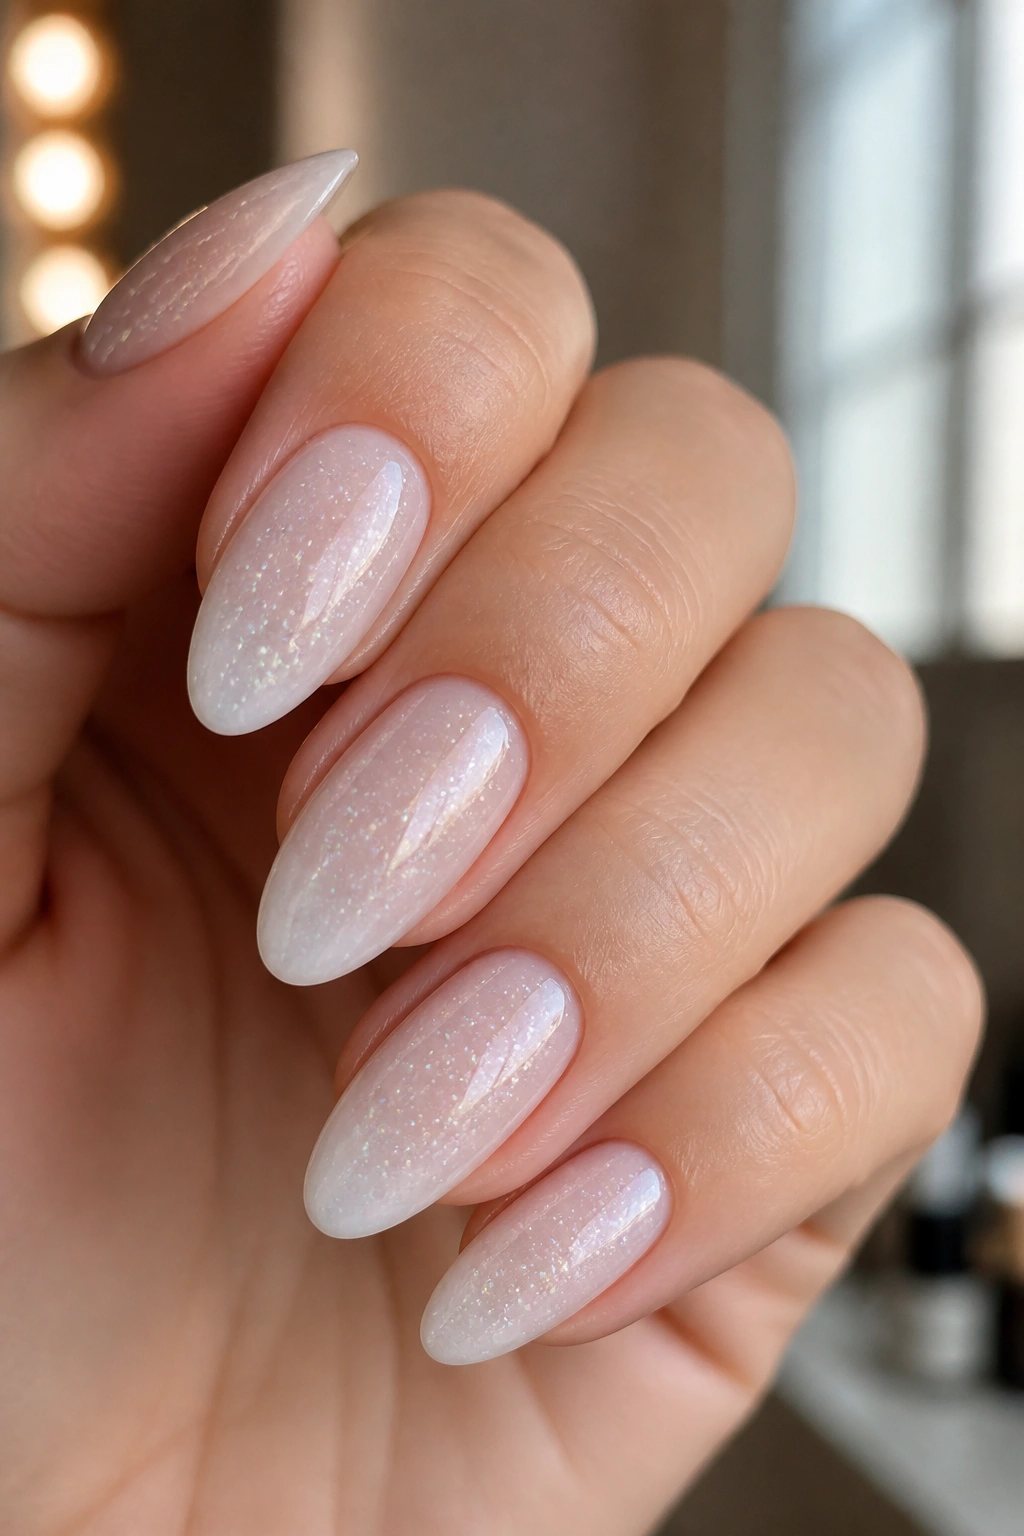
White pearl glitter has a soft, clean look that never feels out of place. It is not stark white, and that’s why it works. A creamy base with pearly sparkle feels gentler than a flat white manicure, especially on almond nails where the shape already has a little elegance built in.
I prefer this design with a sheer milky base rather than an opaque one. The translucence keeps it from looking chalky. Add a fine pearl glitter topcoat, then finish with a glossy layer that smooths the surface. If the glitter has a hint of silver or opal, even better. It gives the nail movement without turning it into chrome.
This design is also a smart fallback if you are unsure what to wear. It goes with gold rings, silver rings, denim, black, and softer colors. No drama. No fuss. Just a clean shine that reads as intentional.
The only real trap is going too opaque too fast. Two thin coats beat one heavy one every time.
18. Pastel Rainbow Glitter

Pastel rainbow glitter can go sweet in a hurry, so the trick is to keep the pieces tiny and the base sheer. That way the nails look airy instead of packed with color. On almond nails, the long shape gives each pastel sparkle room to show without turning the whole manicure into a candy overload.
How to keep it soft
Use a milky pink, sheer beige, or pale lavender base. Then layer in tiny flecks of pastel glitter — mint, lilac, peach, baby blue, pale yellow. You can keep the colors mixed in one polish or separate them across different nails. I like a restrained version better: one color family across the whole set, with just enough variation to feel playful.
A clear top coat is important here. It pulls the little pieces into one surface and stops the manicure from looking grainy. If the glitter polish is sparse, a second coat should go only where the sparkle is too thin.
- Stick to micro-sized glitter.
- Keep the base semi-sheer.
- Repeat at least one pastel on every nail.
- Use glossy top coat, not matte.
This is a happy design, but it needs editing. A little restraint keeps it pretty.
19. Negative Space Stripes with Glitter
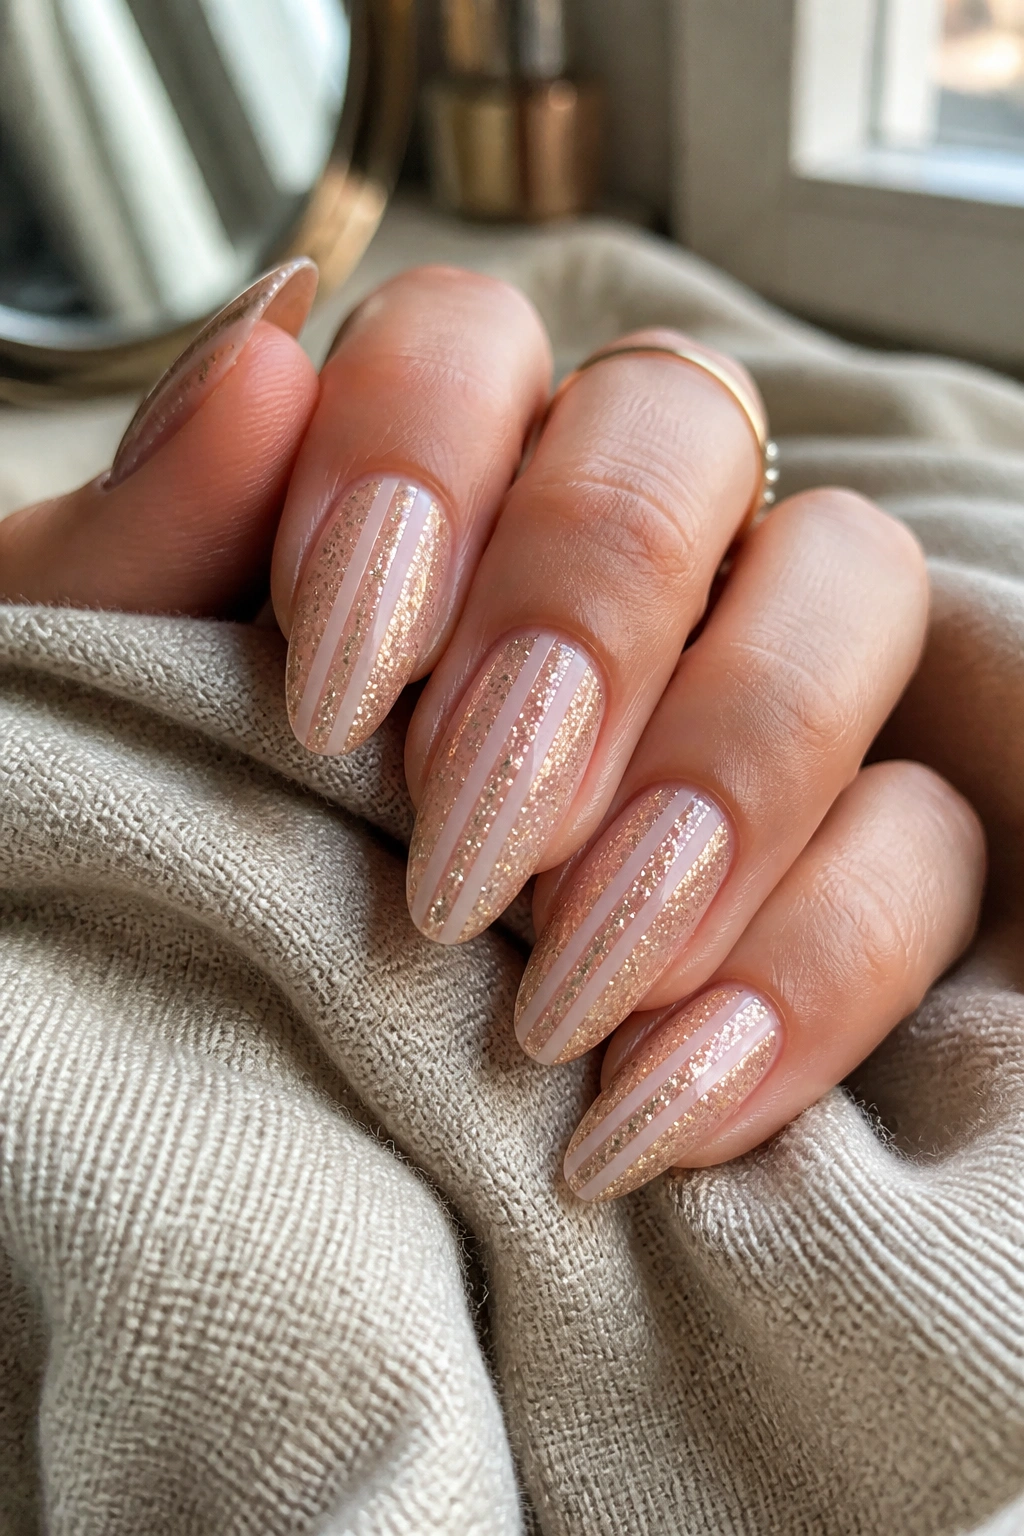
Negative space nails are great when you want glitter but do not want every inch of the nail covered. A few bare stripes or arcs give the manicure some breathing room, and almond nails handle that layout well because the shape already has movement. The bare areas make the glitter feel sharper, too.
A striping brush or thin tape can help here. Paint the nude base first, then create one or two clean channels that stay bare while the glitter fills the areas around them. If you use tape, press it down firmly so polish doesn’t seep underneath. Pull it off while the top layer is still slightly wet, not fully hardened, or you risk tearing the edge.
The design works especially well with gold or silver glitter because the metal tones stand out against the empty space. You can keep the stripes vertical for a longer look, or run one diagonal band across the nail for more shape.
This one is nice for grow-out, too. The bare sections make new nail growth feel like part of the design rather than a flaw.
20. Clear Glitter Glass Nails

Clear glitter glass nails are the easiest way to get sparkle without committing to a lot of color. Think of them as the cleanest glitter almond nail idea in the bunch: a transparent or sheer base, a scattering of tiny reflective bits, and a glossy finish that makes the surface look smooth. The effect is light, crisp, and forgiving.
I like this one for shorter almond nails because the clear base keeps the shape visible. On longer nails, it looks airy instead of heavy. A sheer clear builder gel or a regular clear polish both work, depending on what you have at home. Then add a sparse layer of glitter in silver, iridescent, or very pale gold. Keep the pieces small. Large flakies can make the nail look busy.
A single accent nail can be enough, but the design looks good across all ten fingers too. If your application is a little uneven, that is fine. The transparency hides a lot. That’s the charm here. You get shine, depth, and a soft glassy finish without needing a perfect hand.
If you want a first-attempt glitter manicure that still looks clean by day three, start here.
