

A good pink almond manicure has a sneaky advantage: it can look soft, clean, and expensive even when the supplies are basic. The almond shape does a lot of the heavy lifting. It lengthens the nail, smooths out wider nail beds, and gives pink polish a little more elegance than it gets on a blunt square tip.
The trick with pink almond nail ideas on a budget is not buying more stuff. It is choosing looks that rely on shape, shine, and one smart detail instead of a pile of extras. A sheer coat, a thin line, a tiny dot, a soft fade — those are the moves that make a manicure look thought-through rather than crowded.
A soft almond also hides grow-out better than a hard-edged shape, which matters if you are trying to stretch a manicure for as long as possible. That means you can lean into designs that still look tidy when they are not brand-new. Smart. Cheap. Useful.
And pink is forgiving in a way that other colors just aren’t. Milky pink, blush pink, dusty rose, jelly pink, chrome pink — each one changes the mood without demanding a full art kit. That is why these almond nail designs work so well when you want polish, not fuss.
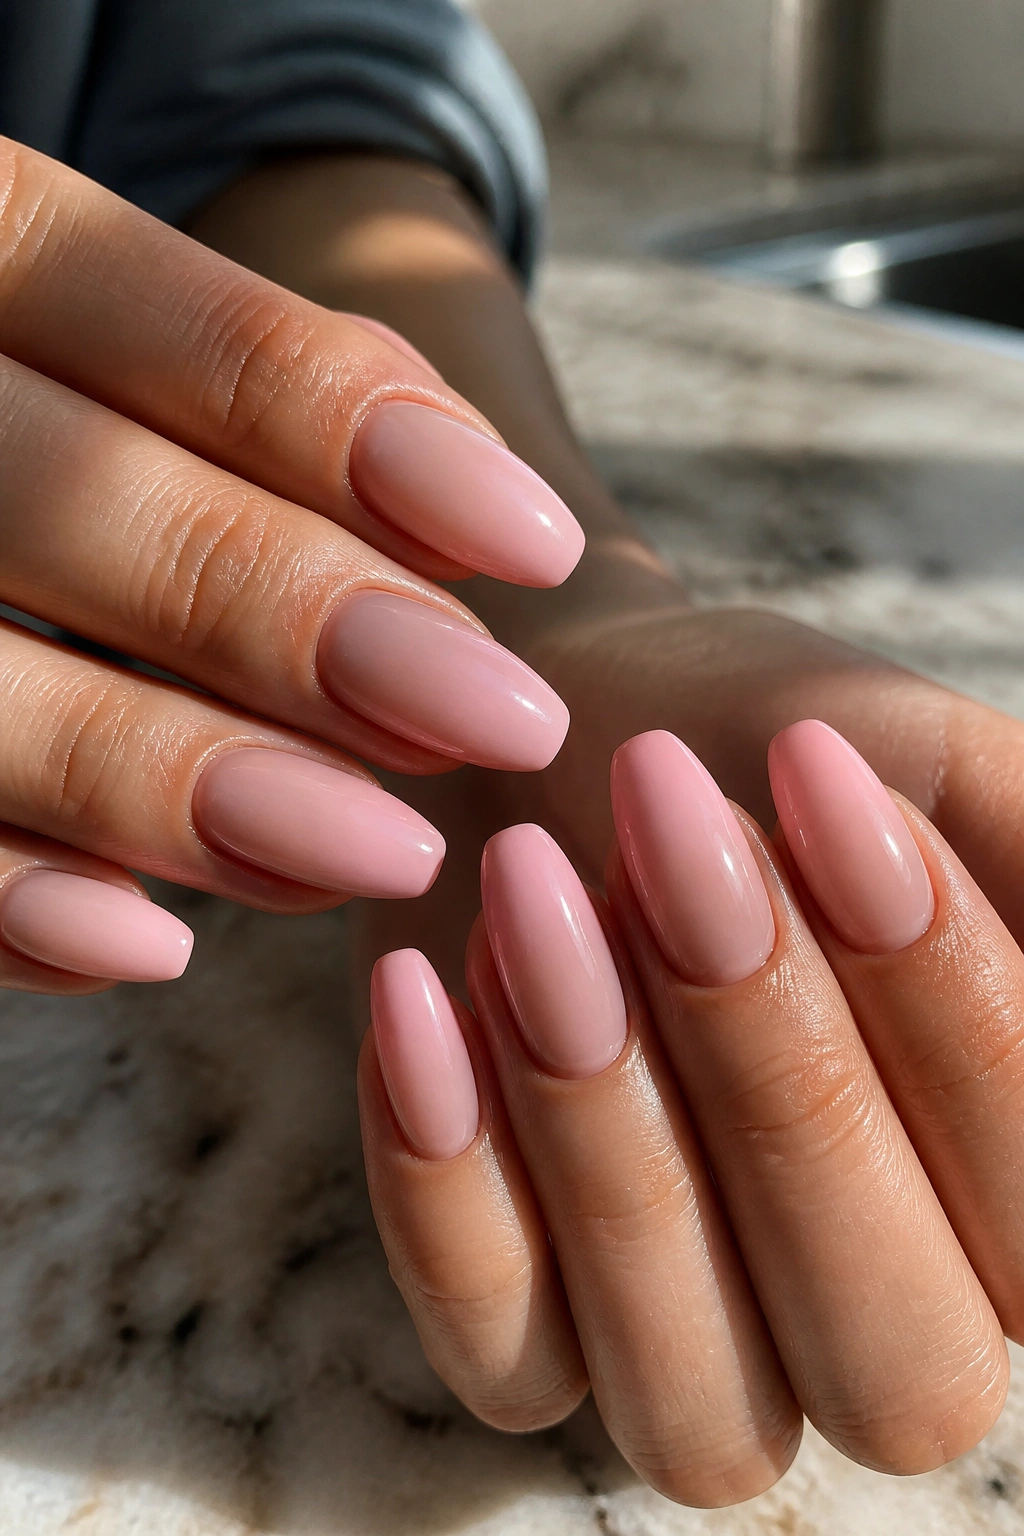
1. Milky Blush Almond Nails
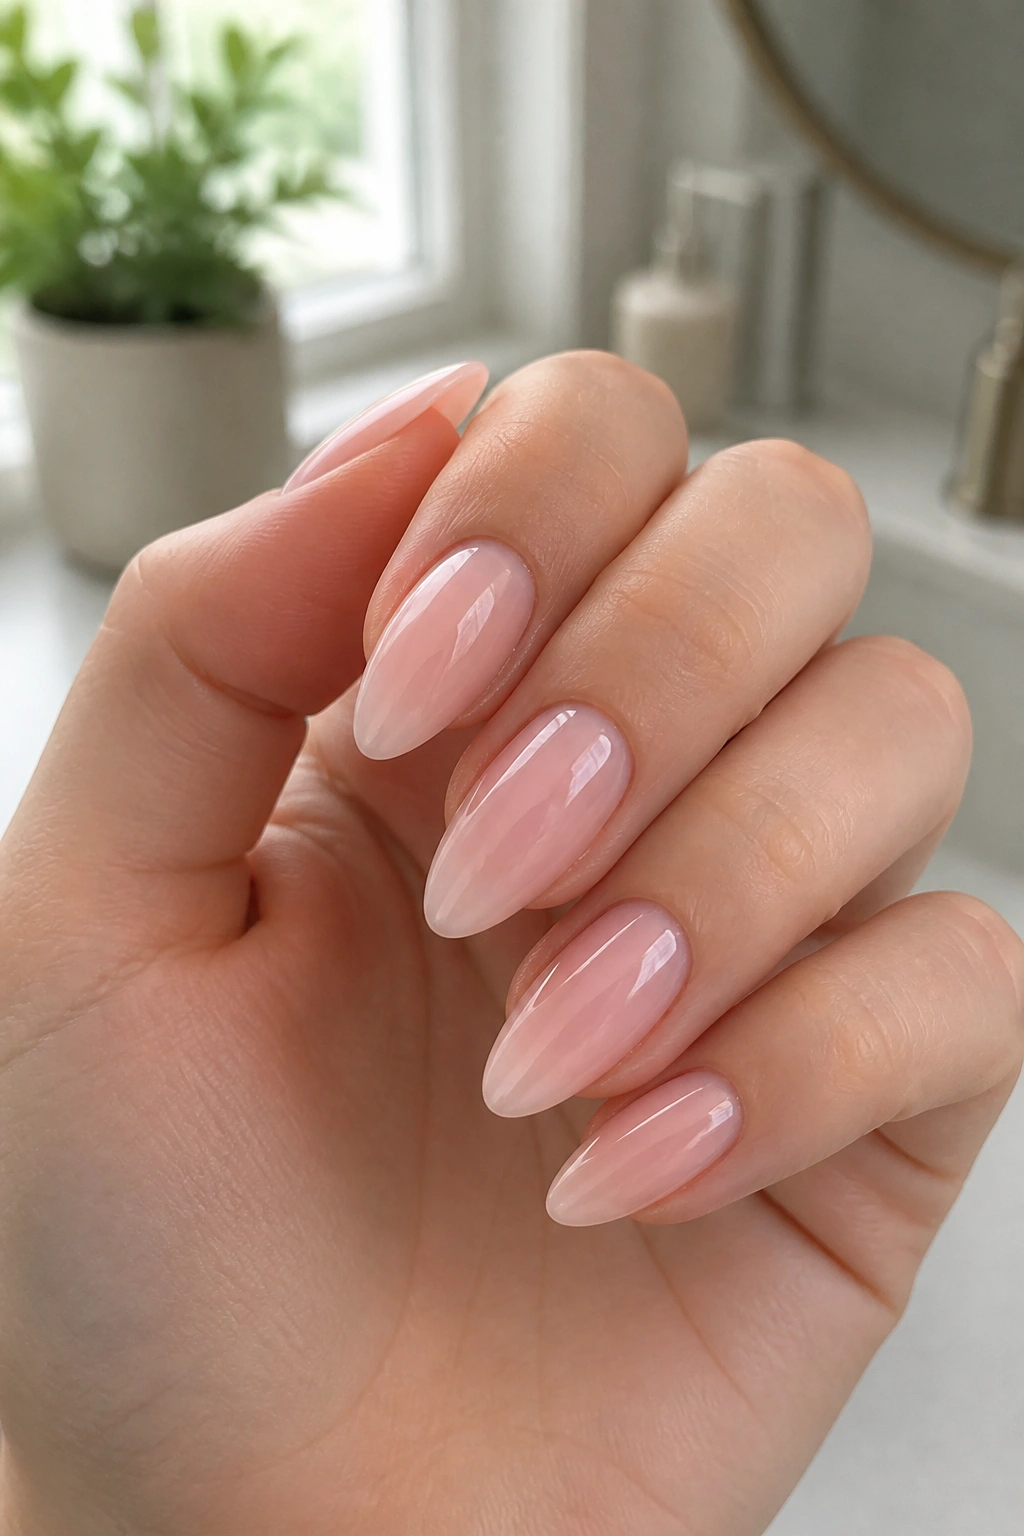
Milky blush is the easy one. It looks soft on every hand, and it covers up the little uneven spots that make DIY manicures feel harder than they are.
A sheer milky pink also gives you room to be imperfect. If your brush strokes are not flawless, the finish still reads as smooth once the top coat goes on. That is a big deal on a budget, because forgiving polish is worth more than a trendy shade that shows every line.
Keep the almond shape modest here. A medium length with a gentle taper looks cleaner than a sharp point, and it breaks less when you are doing your own nails at home.
One bottle can do a lot of work. Use a base coat, two thin layers of milky pink, and a glossy top coat, and the whole set looks more expensive than it was.
2. Micro-French Pink Tips
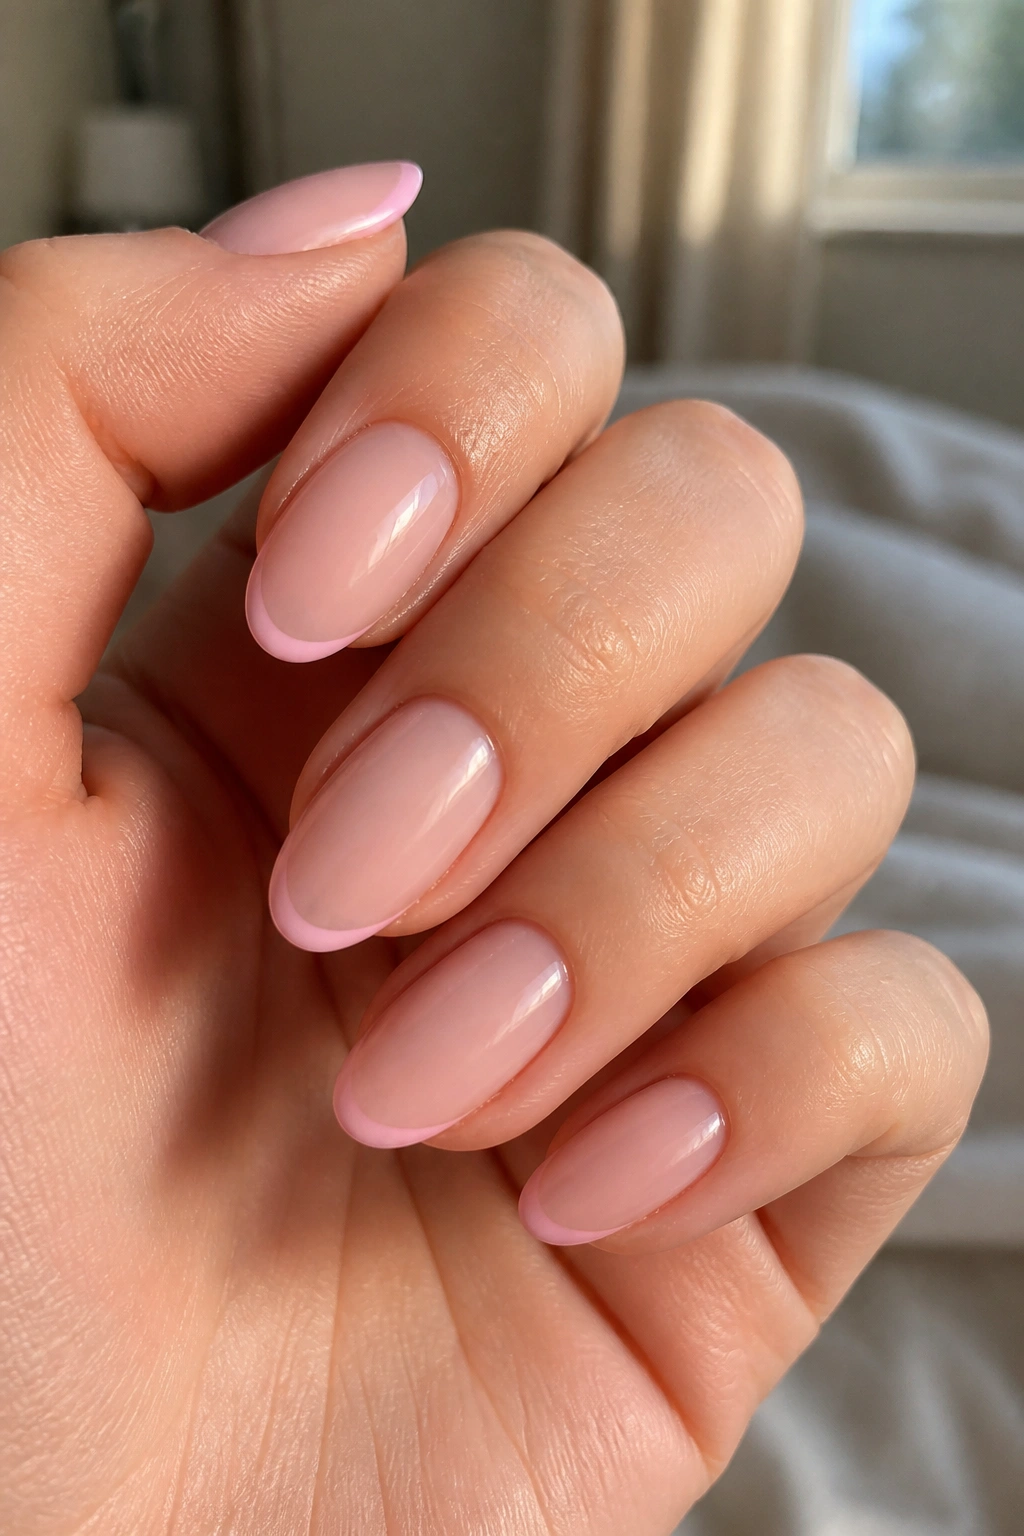
Why does a micro-French look so polished for so little effort? Because the line at the tip is tiny, and tiny details are cheaper to pull off than full nail art.
On almond nails, a thin tip follows the curve in a really flattering way. You do not need a perfect smile line either. A 1 to 2 millimeter band at the edge is enough to change the whole mood of the manicure.
How to keep the line neat
- Use a fine liner brush or a striping pen instead of a thick flat brush.
- Paint the pink base first, then wait until it is fully dry before adding the tip.
- Keep the tip very thin on the sidewalls so the almond shape still feels long.
- If your hand shakes, place a tiny piece of tape as a guide and remove it before the polish fully sets.
A soft white tip is classic, but a pale rose tip feels fresher. Either way, this design stays budget-friendly because you are using a tiny amount of color.
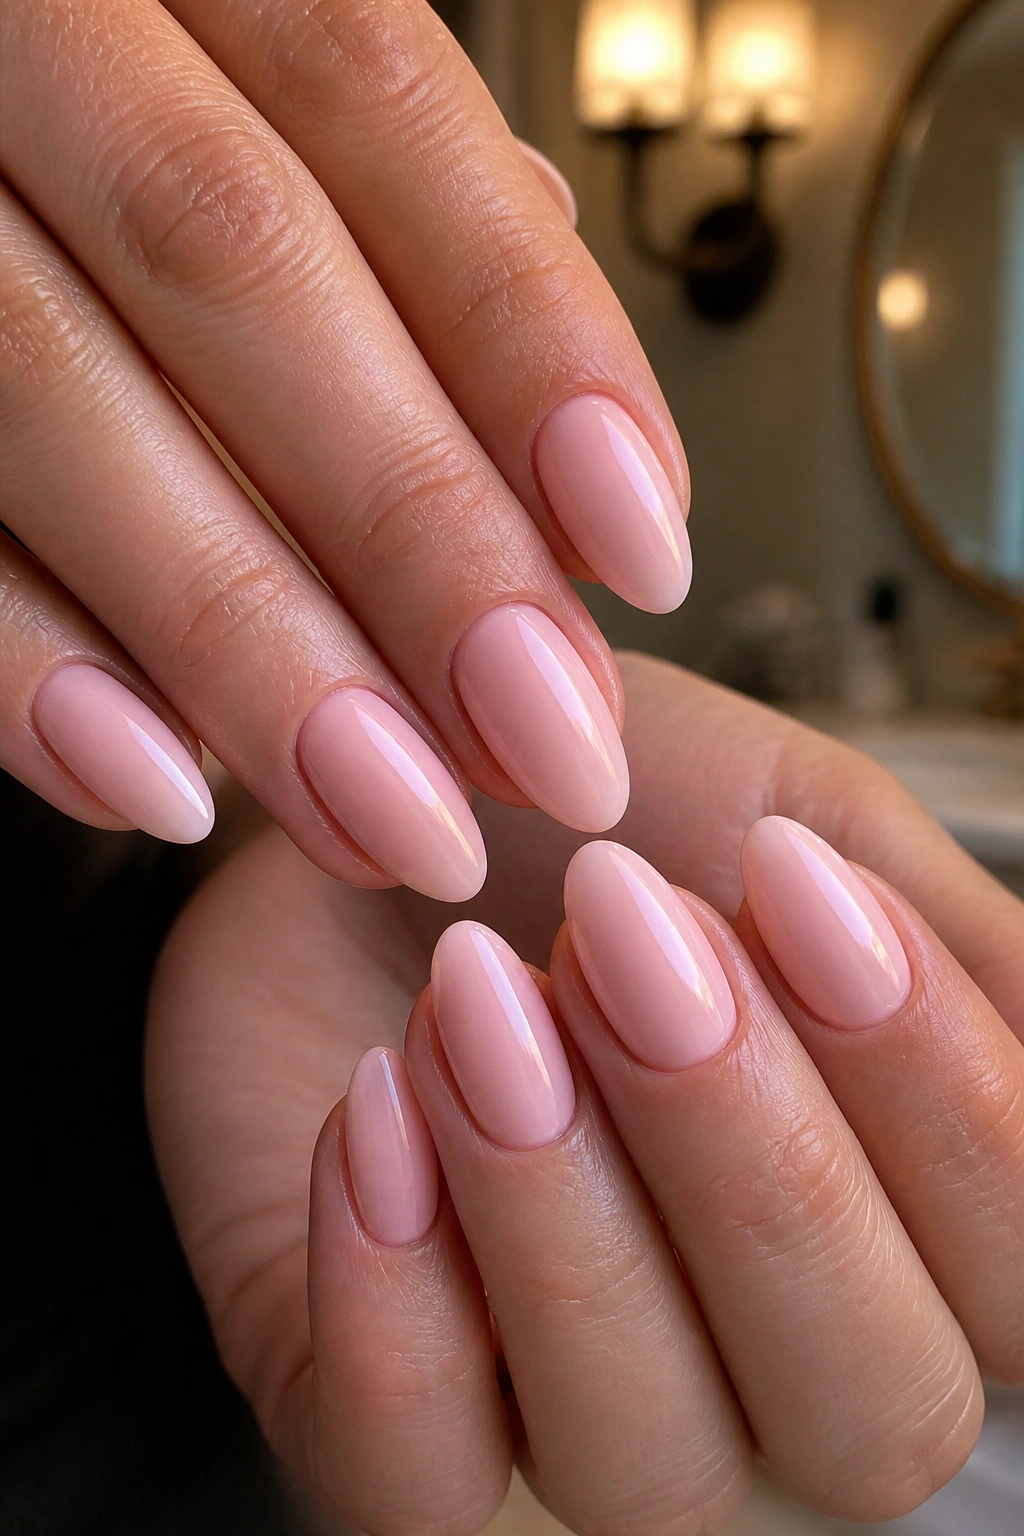
3. Sheer Jelly Rose
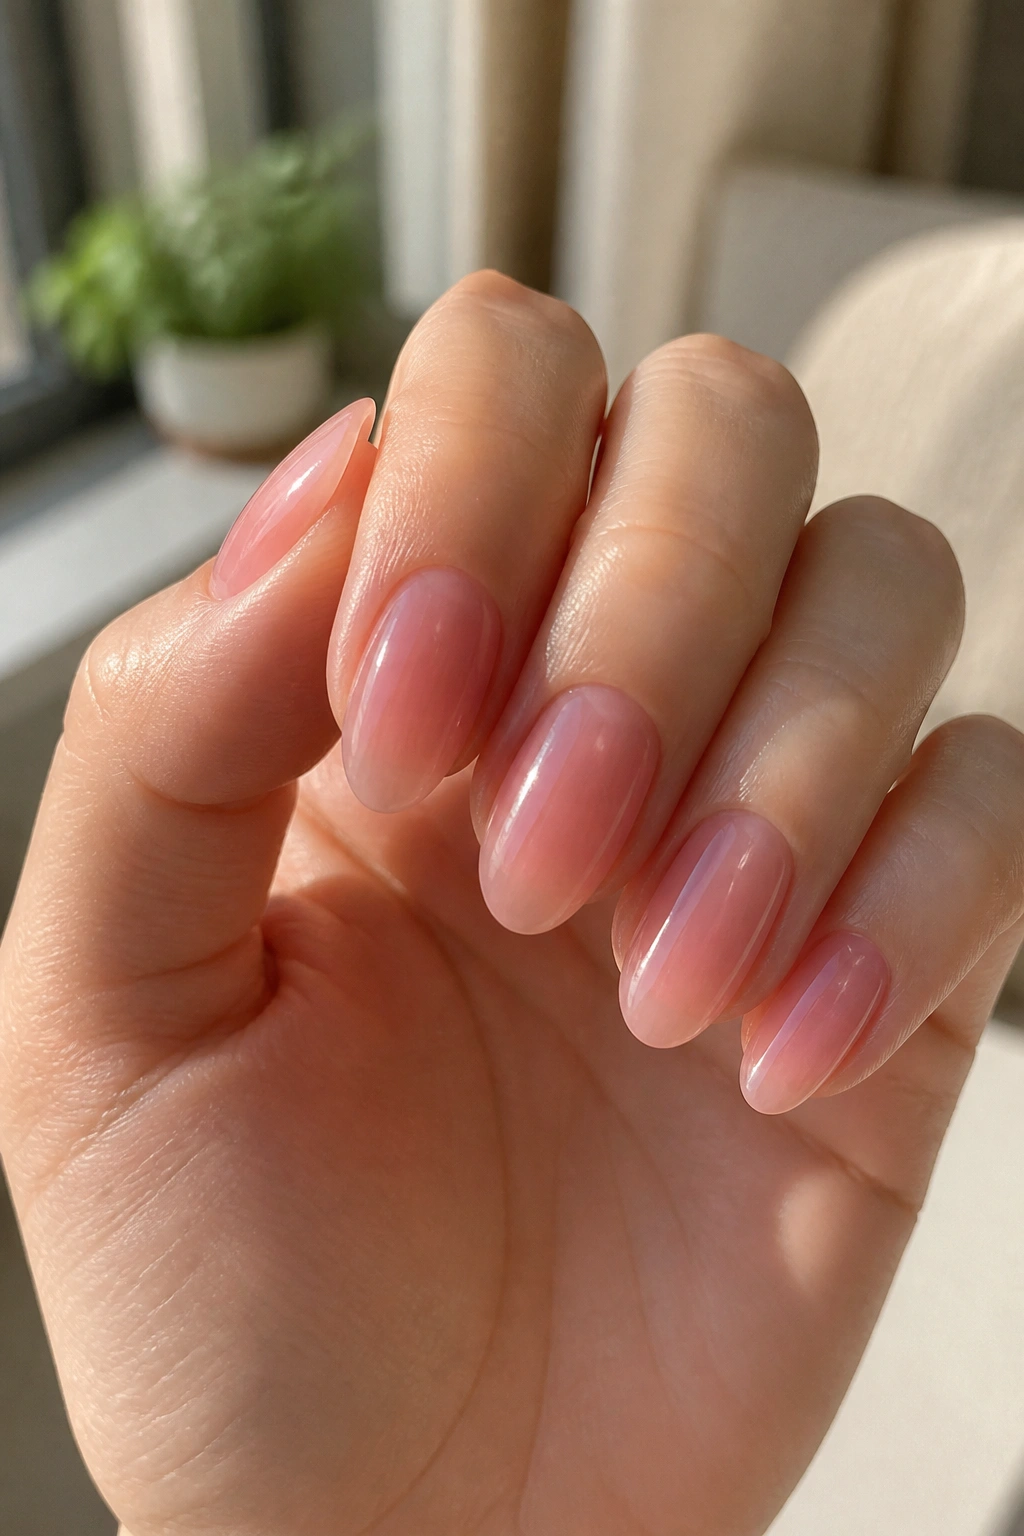
Sheer jelly pink is the manicure version of tinted gloss. It looks glossy, juicy, and a little bit playful without asking for extra art.
The best part is how little it needs. One translucent pink polish can carry the whole set if you keep the nails short to medium and shape the almond softly. No stickers. No chrome. No drawn-on details.
This is one of the cheapest looks that still reads as intentional. A jelly finish hides minor streaks better than an opaque cream, and that means fewer layers, less product, and less chance of the polish getting thick and clumsy.
Wear it on its own if you like a cleaner finish. Or stack it over a nude base to make the color slightly deeper. Either way, it gives that glassy, candy-like look that feels more expensive than the supply list suggests.
4. Pink Aura Nails
Picture a pale pink glow sitting in the center of the nail and fading outward into a softer edge. That is the aura look, and almond nails give it a nice long canvas.
The cheap version uses a makeup sponge, two pink shades, and patience. Start with a sheer base, then dab a deeper pink in the middle of the nail and blur the edges while it is still workable. The center should look a touch richer, not like a hard circle.
That softness matters. On almond nails, the rounded fade helps the shape look more delicate, especially if your nails are short or the free edge is not perfectly even.
Aura nails also hide grow-out in a smarter way than a solid block of color. The blurred center keeps the eye moving, so a tiny bit of regrowth near the cuticle does not scream for attention. Handy when you are stretching a manicure.
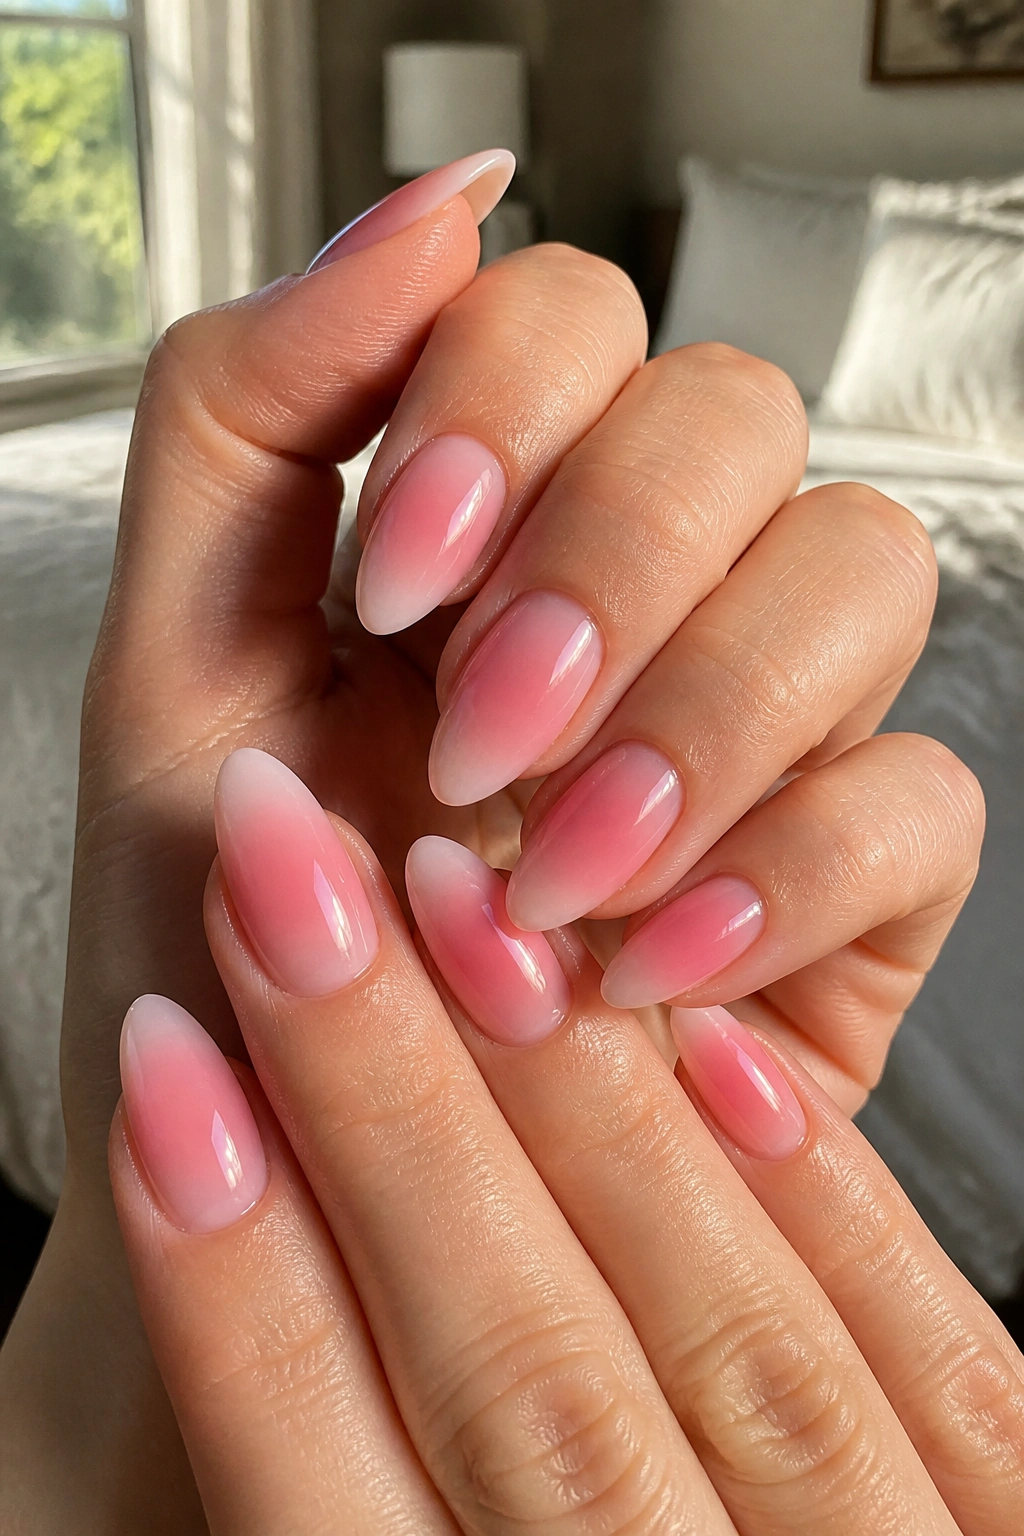
5. Baby Pink Ombré
Baby pink ombré is one of those looks that sounds fancy and behaves like a budget manicure. It needs fewer bold lines, fewer precise edges, and less stress when you are painting your non-dominant hand.
The fade can start with a nude or clear base and drift into a soft pink tip, or it can begin pink near the cuticle and melt into something sheerer at the edge. Either way, the gradient gives the nail depth without crowding it.
That is why I like it on almond nails. The tapered shape helps the fade look longer and smoother, which means you do not need extra decoration to make it interesting. A good gradient does the work.
If you are doing this at home, use a sponge with a tiny bit of polish on it and tap lightly. Do not smear. A few thin passes are better than one heavy one, because heavy ombré turns muddy fast.
6. Ballet Pink Cream
Ballet pink is what happens when you want pink, but you do not want pink to shout at people. It sits somewhere between nude and blush, and on almond nails it looks neat, clean, and calm.
Unlike hot pink, ballet pink does not fight with the shape. It lets the almond edge stay the main feature. That makes it a smart pick if your nails are a little shorter or if you like a tidy finish that survives a busy week.
Choose a creamy formula with a glossy top coat, not a glittery one. Shimmer can make pale pink look patchy if the polish is thin, while cream stays smooth and easy to repair when you need a touch-up.
This is also the set I’d pick for anyone who hates fussing with nail art. It looks put together with almost no effort, and that is the whole point of a good budget manicure.
7. Tiny Dots at the Cuticle
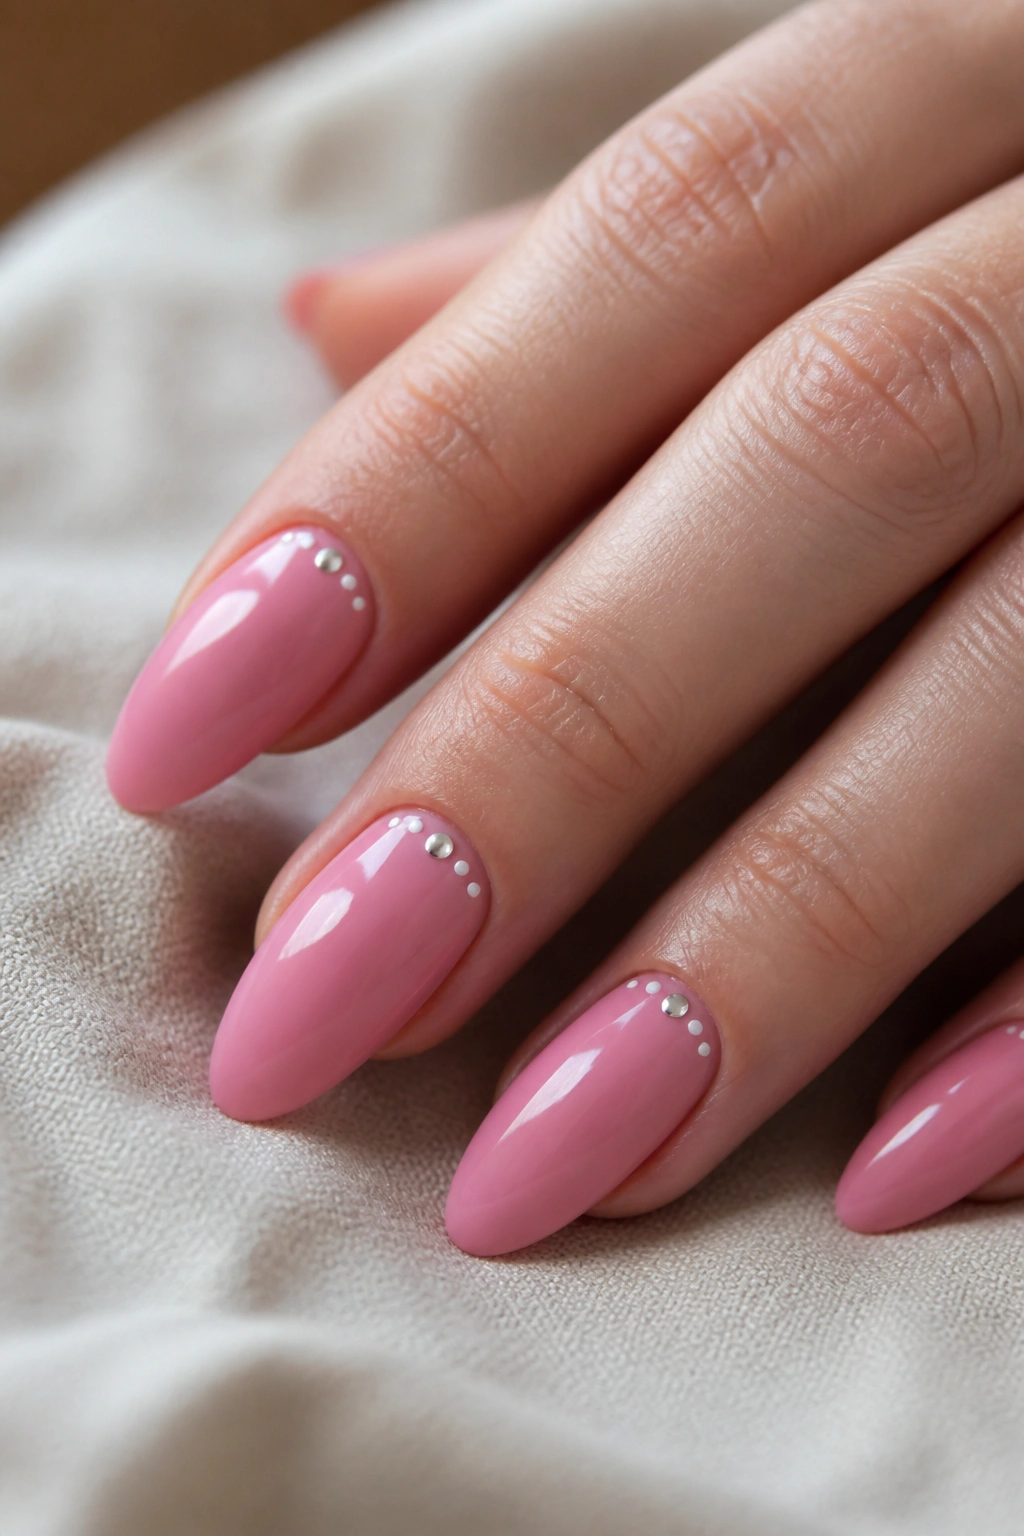
Can a few dots really count as nail art? Absolutely. On almond nails, a small cluster of dots near the cuticle line can change a plain pink manicure into something sharper without buying a bunch of supplies.
The trick is placement. Keep the dots small, about the size of a pinhead or slightly larger, and leave breathing room around them. If they get too big, the look turns clunky fast. If they stay tiny, the set feels clean.
Why this tiny detail works
A dotting tool is cheap, and so is the polish. You can use white, silver, gold, or a deeper pink for contrast. The manicure still reads as pink first, art second.
A toothpick works in a pinch. So does the end of a bobby pin, though the result is a little less precise.
The best version uses dots on one or two nails only. That keeps the set balanced and saves time, which is the whole budget-game anyway.
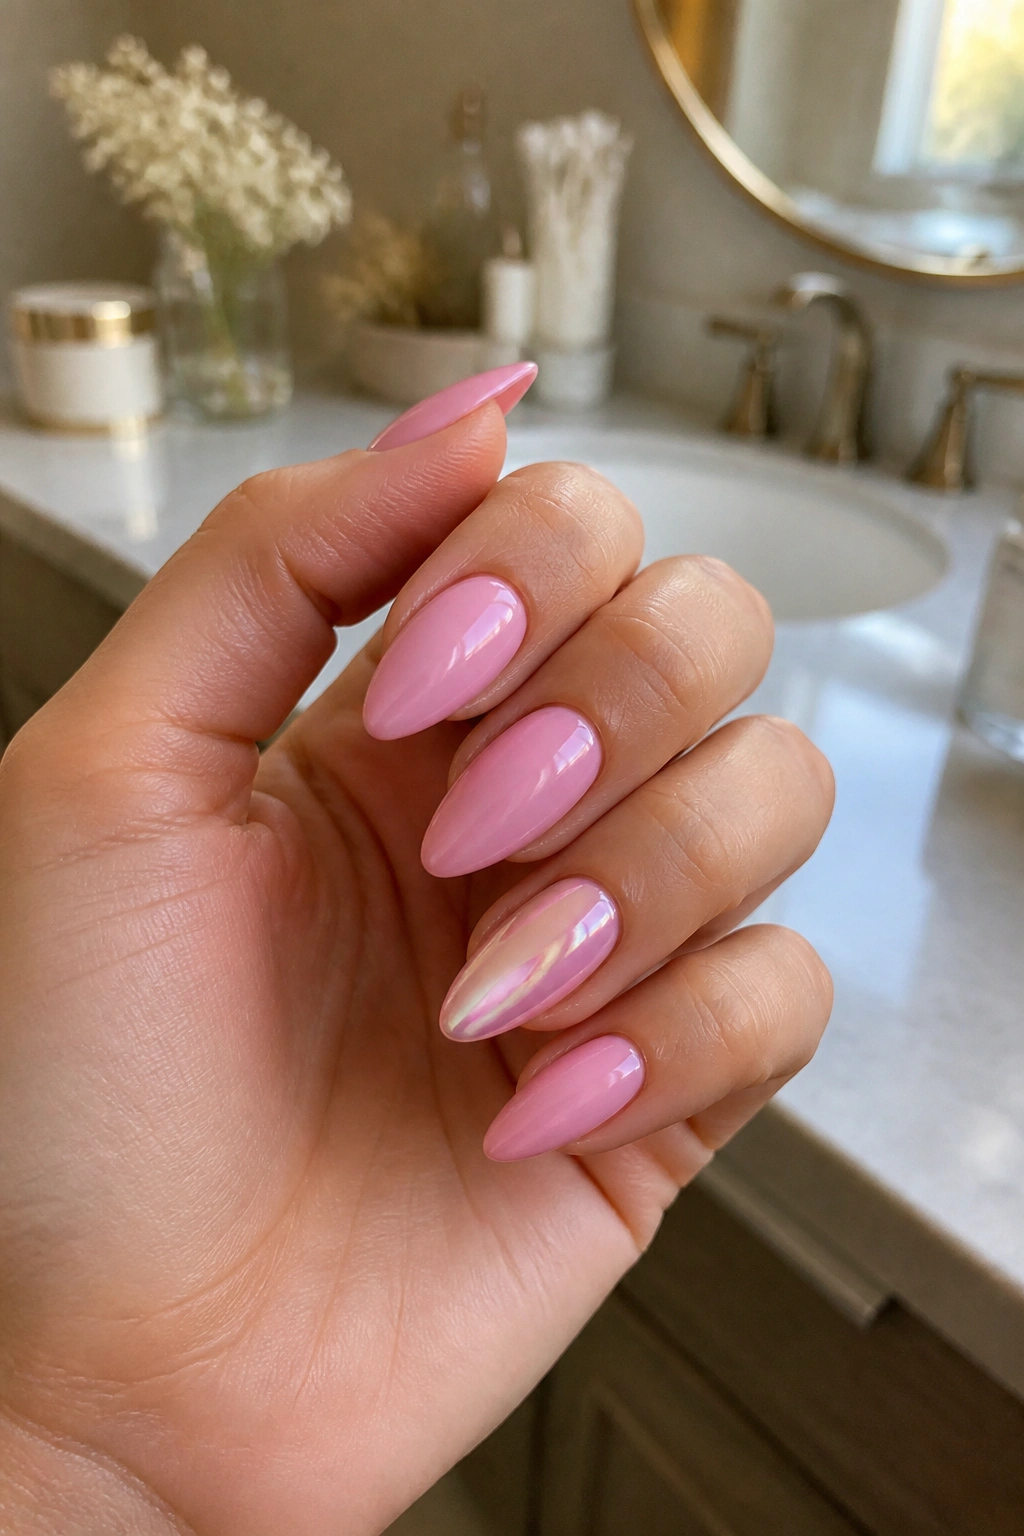
8. Pink Chrome Tips
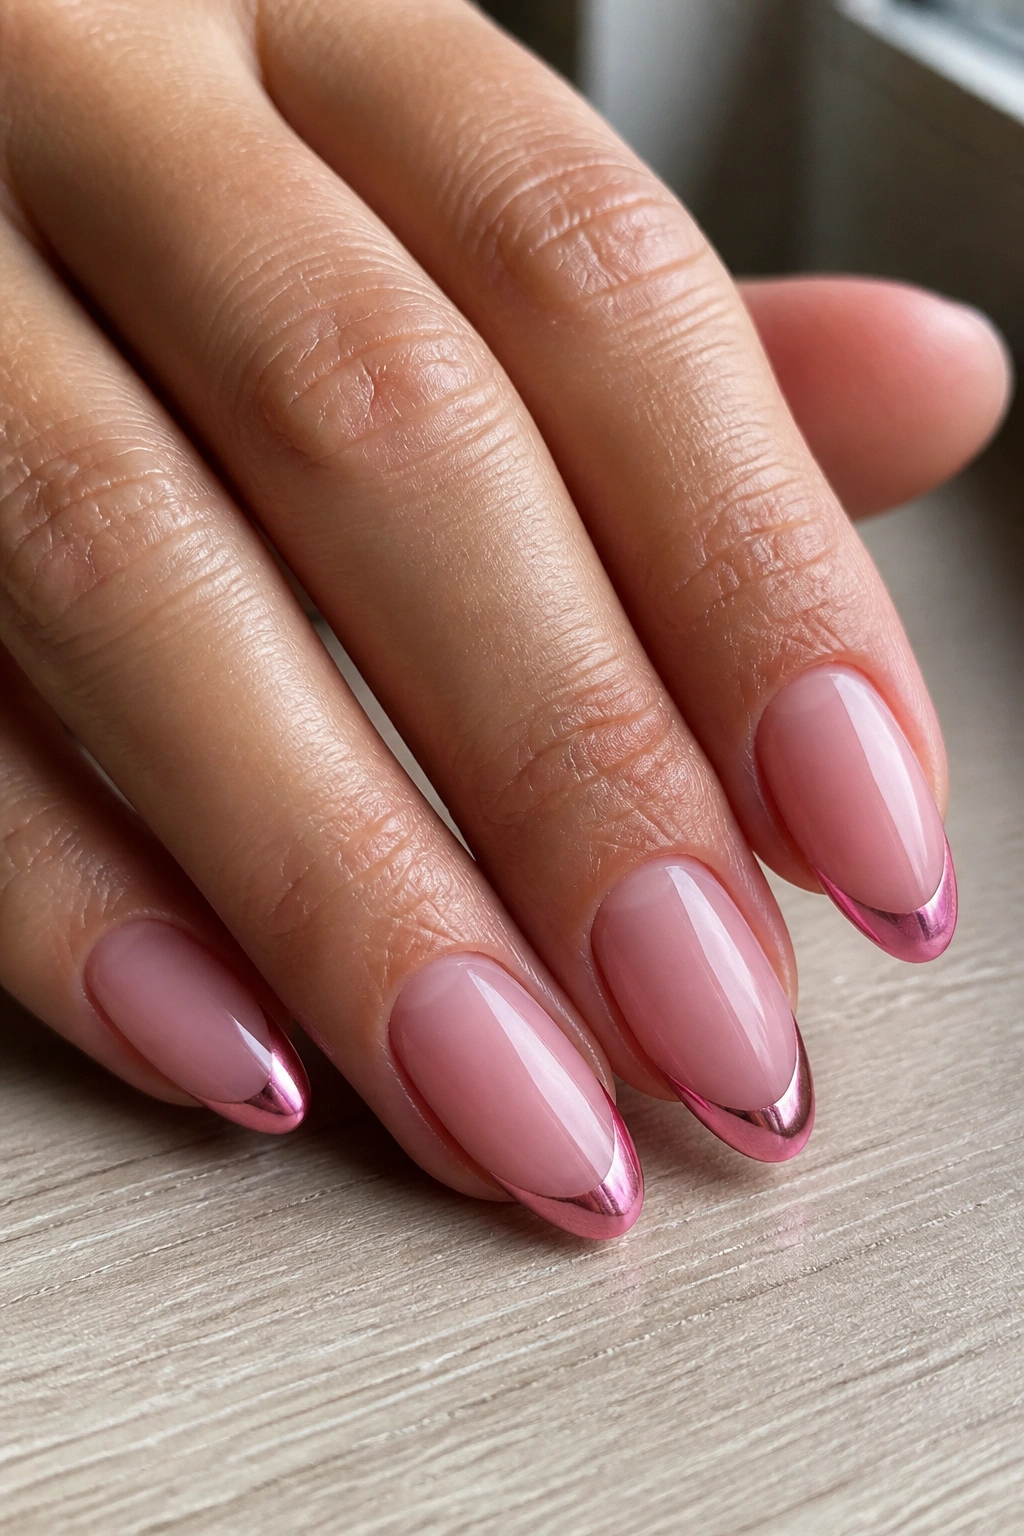
Pink chrome tips look expensive at first glance, which is funny because you can keep the rest of the nail extremely simple. That contrast is what makes the design work.
A sheer blush base with chrome just on the free edge gives you shine without covering the whole nail in special effects. A small pot of chrome powder goes a long way, especially if you use it on the tips only.
You do need a no-wipe top coat for the powder to stick well. But once you have that, the process is straightforward: paint, cure, rub the powder onto the tip, and seal it again. The finish should look smooth, not dusty.
This design is a good pick if you like a little edge in your manicure but do not want rhinestones or heavy art. It catches attention because the tip gleams while the rest stays soft. Clean. Controlled. Not fussy.
9. Side-Swoop French Pink
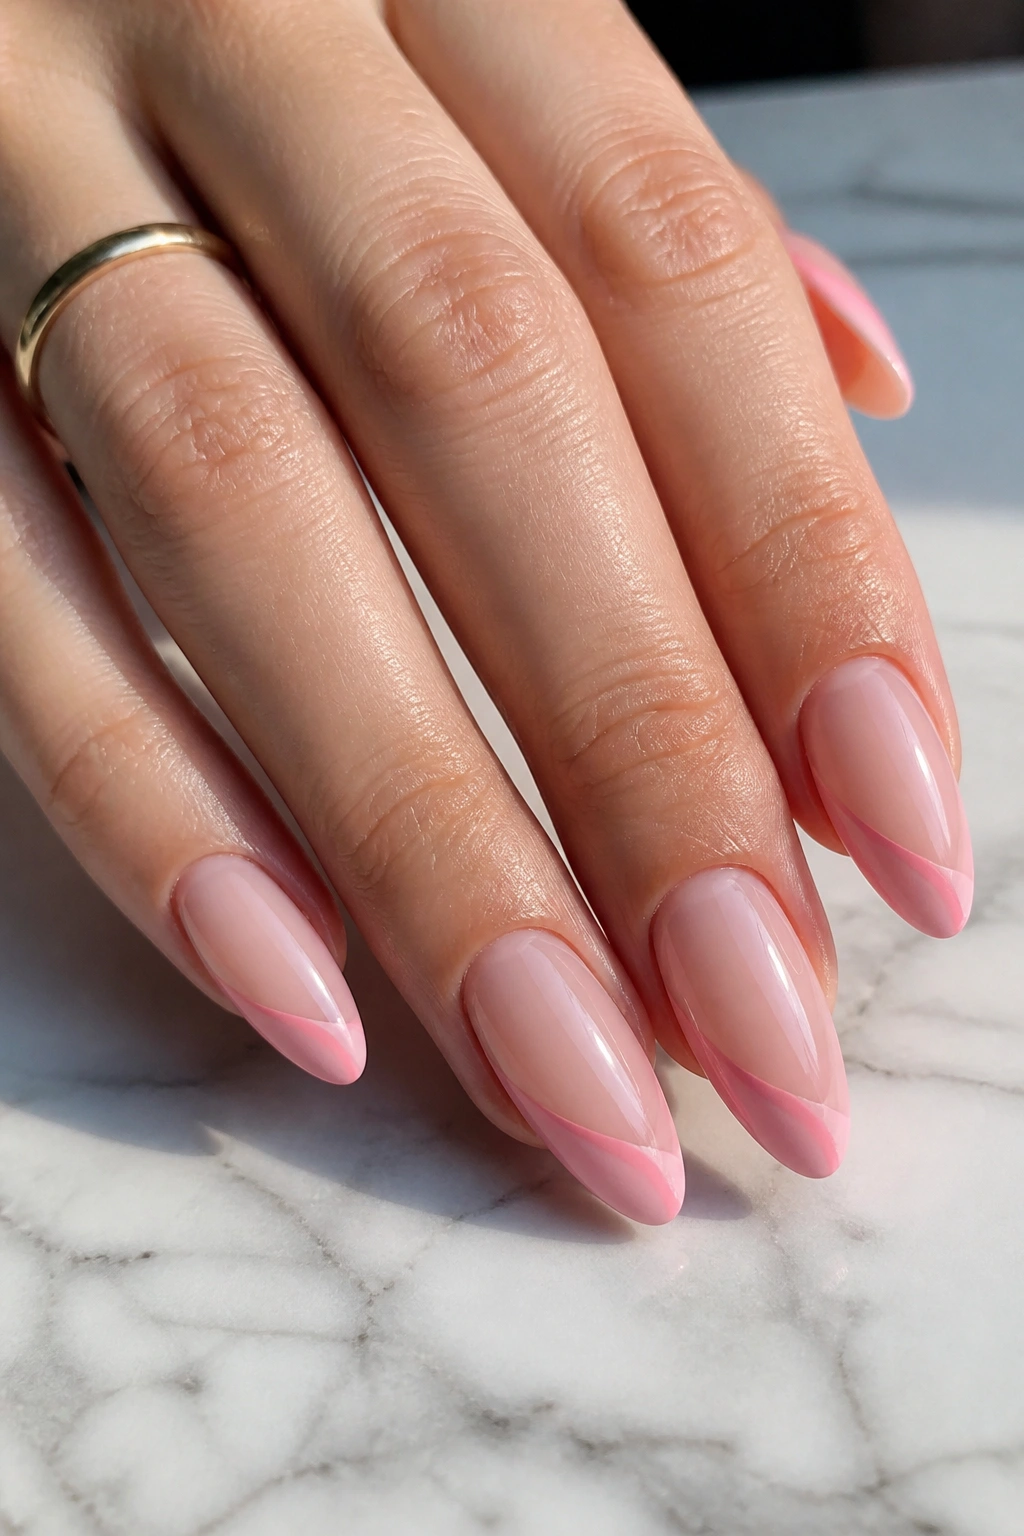
A side-swoop French is the sort of manicure that looks harder than it is. The pink line starts on one side of the tip and sweeps diagonally across the nail, which makes almond nails look even more tapered.
I like this one for people who have shaky hands, because the diagonal line does not have to be perfectly centered to look intentional. In fact, a slightly uneven swoop can still look nice as long as the curve stays slim.
Quick setup
- Paint a nude or sheer pink base first.
- Use a striping brush or thin liner brush for the swoop.
- Keep the line narrow near the center of the nail.
- Finish with a glossy top coat so the edge looks smooth instead of drawn-on.
The design saves money because it uses one accent color and it does not need full coverage art. It also grows out better than a full tip design, which means fewer ugly days between touch-ups.
10. Strawberry Milk Swirls
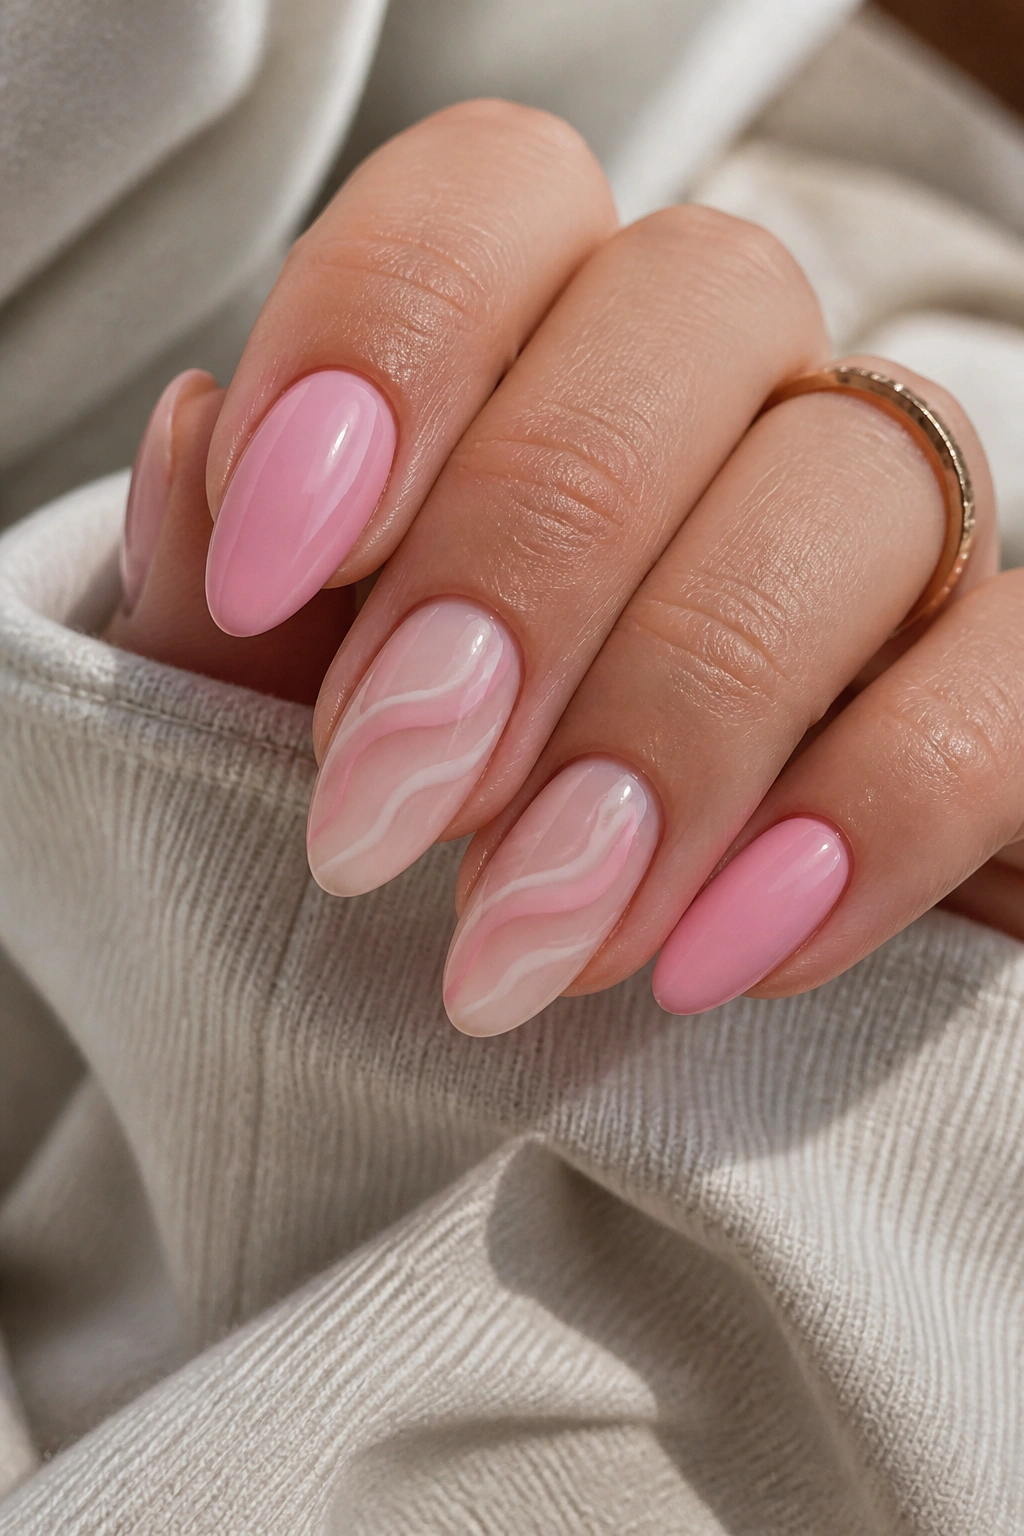
Strawberry milk swirls are soft, dreamy, and much easier than they sound. The look comes from thin white and pink ribbons moving across a milky base, almost like cream stirred through a drink.
The budget trick is restraint. Use the swirls on only two or three nails, then keep the rest solid pink or sheer nude. That gives you the swirly detail without needing extra polish on every finger.
A skinny liner brush is enough. If you do not have one, a cleaned eyeliner brush can work in a pinch, though I would still keep the lines loose and a little irregular. The goal is motion, not perfect symmetry.
This style looks especially good on almond nails because the curves echo the shape. It feels soft instead of busy. And that matters. Busy nail art often costs more time, more cleanup, and more patience than a budget manicure should ask for.
11. Matte Dusty Rose
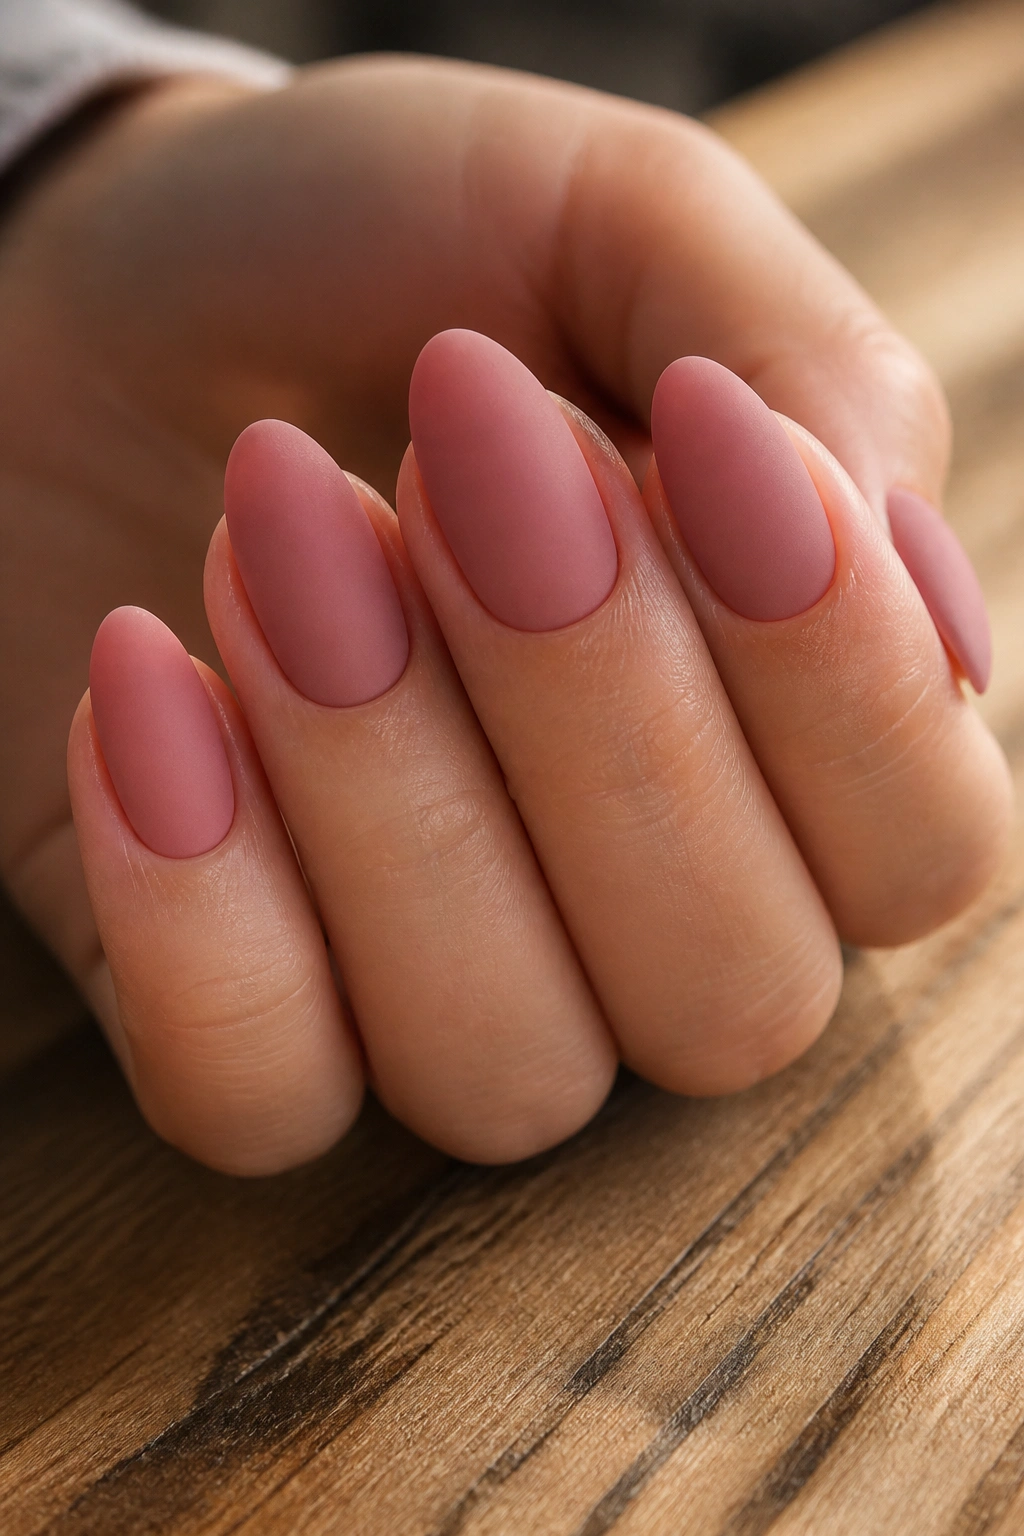
Matte dusty rose is the quiet cousin in the pink nail family, and sometimes that is exactly what you want. It looks grown-up, a little muted, and easy to wear with everything from jeans to a blazer.
A matte top coat can change a basic pink polish completely, so you do not need a new color to get the effect. That is the beauty of it. One bottle of matte top coat turns an old cream pink into something different enough to feel fresh again.
Unlike glossy pink, matte shows texture more. So clean prep matters here. Buff the nail lightly, smooth the surface, and keep the polish layers thin. Thick polish looks chalky under matte, and that is a fast way to lose the whole point.
This style suits people who do not want sparkle, stickers, or lines. It is pared back, but not boring. On almond nails, it reads as soft and deliberate, which is usually the sweet spot.
12. Tiny Heart Accent Nails
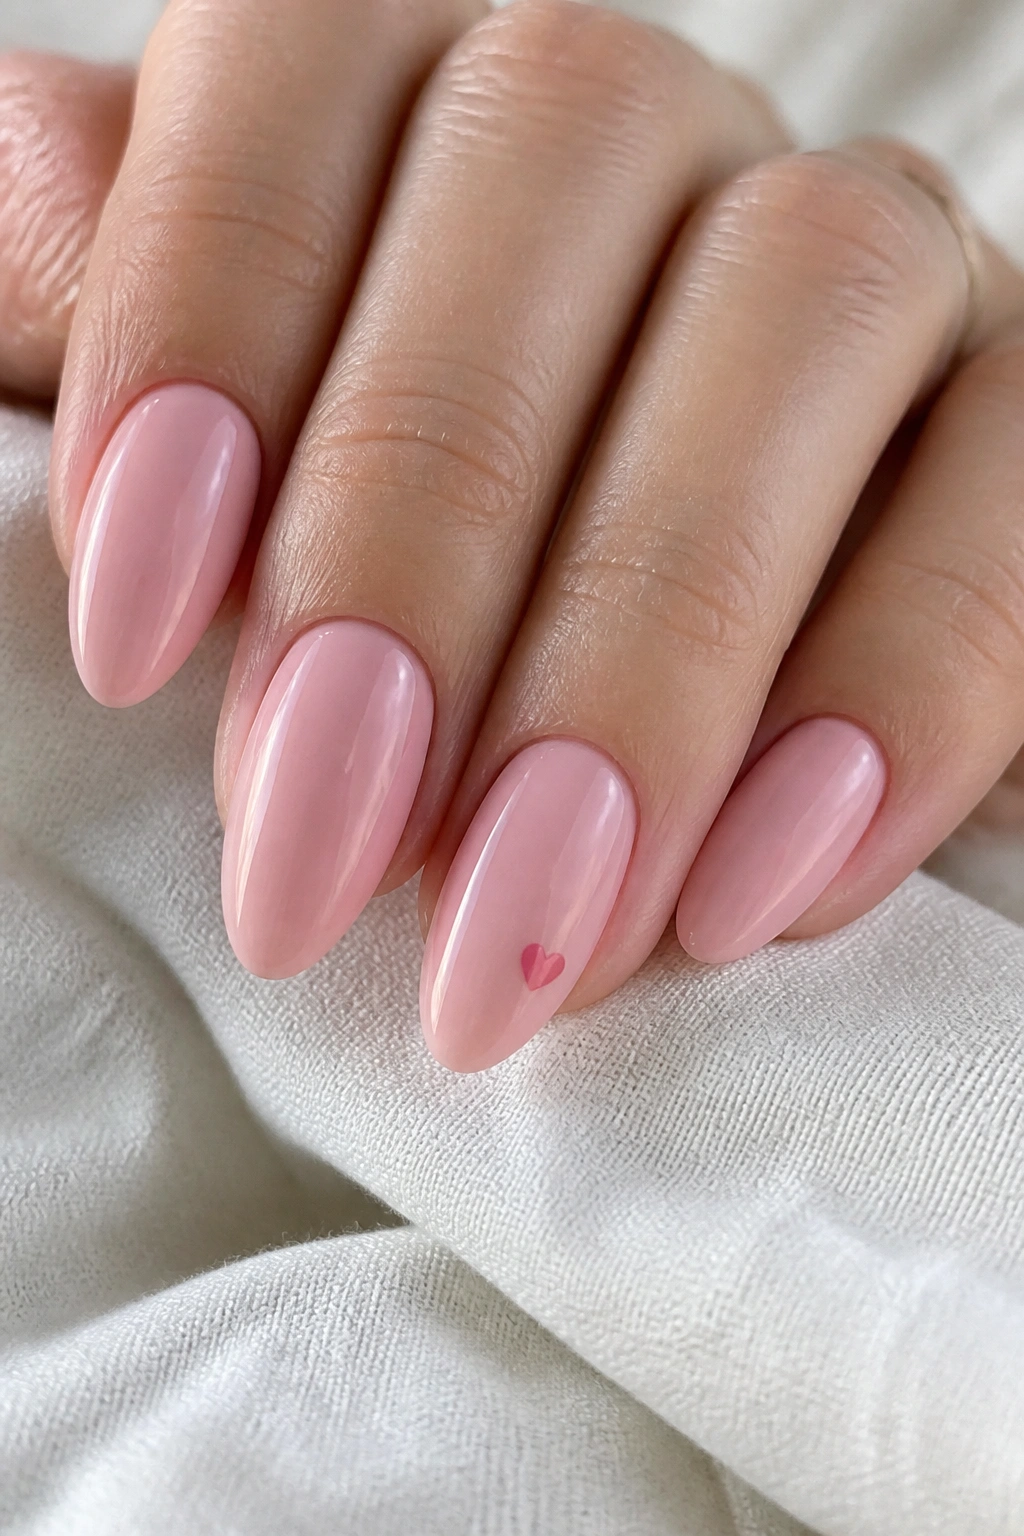
Tiny hearts work because they look sweet without turning the whole set into a theme party. One heart on a ring finger, maybe two if you are feeling generous, is enough.
The shape of an almond nail helps here. The slender tip gives the tiny heart room to breathe, and the pink base keeps the design from looking childish. That balance matters more than people think.
How to keep it cute, not cutesy
Use a dotting tool to place two small dots, then pull them together into a heart with a thin brush or a needle tip. That method is easier than trying to draw the whole shape freehand at once.
A sticker heart is fine too. I am not precious about that. If a sticker saves time and still looks neat, use the sticker.
Keep the rest of the nails simple. A plain blush or milky pink set around one or two hearts makes the accent feel intentional rather than crowded.
13. Pink Marble Accent
Pink marble nails are a good place to spend your energy on just one or two fingers. The swirls look fancy, but the budget version is mostly about being selective.
Start with a soft pink base, then drag in a little white with a thin brush while the layer is still tacky. Add one faint line of rose or taupe if you want more depth. The trick is to stop before the nail turns into a muddy mess. More paint is not better here.
A single accent nail can carry the whole idea. The other fingers can stay plain pink, which keeps the set cheap and keeps the style from getting noisy.
A marble look also hides tiny imperfections better than a solid color, especially if you are doing your own nails at home. That makes it a useful design, not just a pretty one. A little messy? Fine. Marble forgives.
14. Glitter Cuticle Line
A glitter cuticle line is one of my favorite budget moves because it gives shine without asking you to cover the entire nail in sparkle. That is how you keep the look refined and keep the cost down.
Paint a sheer pink or cream base first. Then run a thin stripe of fine glitter just above the cuticle, following the curve of the nail. The line should be narrow — think of it like jewelry, not confetti.
A fine glitter polish works, but loose glitter gives you more control if you already have it. Tap it onto a thin line of clear polish and seal it when it dries. The whole effect is surprisingly polished for how little product it uses.
This design is especially good when you want your nails to look dressed up for one event and still be wearable afterward. It does not dominate the manicure, which is half the appeal.
15. Double French Pink
A double French means two slim lines at the tip instead of one. It sounds extra, but done in pink tones it stays soft and elegant.
The budget angle is simple: two thin lines use far less polish than a full pattern, and thin lines are easier to repair if one side chips. You can even mix shades — a pale pink line with a white line on top, or two pinks that are close together in tone.
The almond shape helps the layered tip look long instead of cramped. That is the payoff. A wide square nail can make a double French feel busy, but almond nails keep it graceful.
Use a liner brush and keep the spacing narrow. The lines should feel like a frame at the edge of the nail, not a border that steals the show.
16. Half-Moon Pink Almonds
Half-moon nails are the budget-friendly design that quietly solves the grow-out problem. Leave a crescent near the cuticle bare, nude, or sheer, then paint the rest in pink.
That open space makes the manicure look deliberate for longer. As the nail grows, the edge does not look as harsh as a full-coverage color would. For people who hate touching up polish every few days, that is a real advantage.
I like this one in a soft rose or muted bubblegum shade. The contrast is enough to notice, but not so much that the naked crescent feels like a mistake. Clean separation is the goal.
A half-moon is also easy to do at home with nail guides or a small round sticker placed at the cuticle line. Cheap tools. Simple layout. Good payoff. That is the kind of manicure I respect.
17. Ribbon Bow Accents
A tiny ribbon bow can carry a whole pink almond set if you let it. One small bow on a ring finger or middle finger gives the manicure personality without turning it into full costume territory.
The nice thing about bows is that they can be done with stickers, stamps, or a thin brush. You do not need a tiny art kit built for professionals. If you can make two loops and a knot, you are close enough.
Where to place it
- Keep the bow on one accent nail if you want the rest of the set to stay clean.
- Put it near the center of the nail for a softer, more decorative look.
- Place it closer to the tip if you want the almond shape to stay the star.
- Use a pale pink or white bow over a deeper blush base for contrast.
The set stays budget-friendly because the bow is the detail, not the whole design. That is usually the smartest way to spend effort on nails.
18. Pink Velvet Cat-Eye
Pink velvet cat-eye polish looks richer than a regular pink cream because the magnetic shimmer shifts when the light moves. It gives that soft, brushed effect that people keep staring at for a second longer than they mean to.
You do need a magnetic polish and the little magnet tool, but one bottle can do an entire set. That makes it a fair budget splurge if you are choosing between one special-effect polish and a pile of tiny add-ons.
The almond shape makes the reflective band look even more elegant. The narrow center line follows the length of the nail, which gives the whole hand a longer look. That’s the part I like best.
Keep the base shade in the blush-to-rose range if you want the polish to feel wearable rather than loud. A hot pink cat-eye can be fun, but a soft pink cat-eye is the one you will reach for again.
19. Pink Plaid Accent Nails
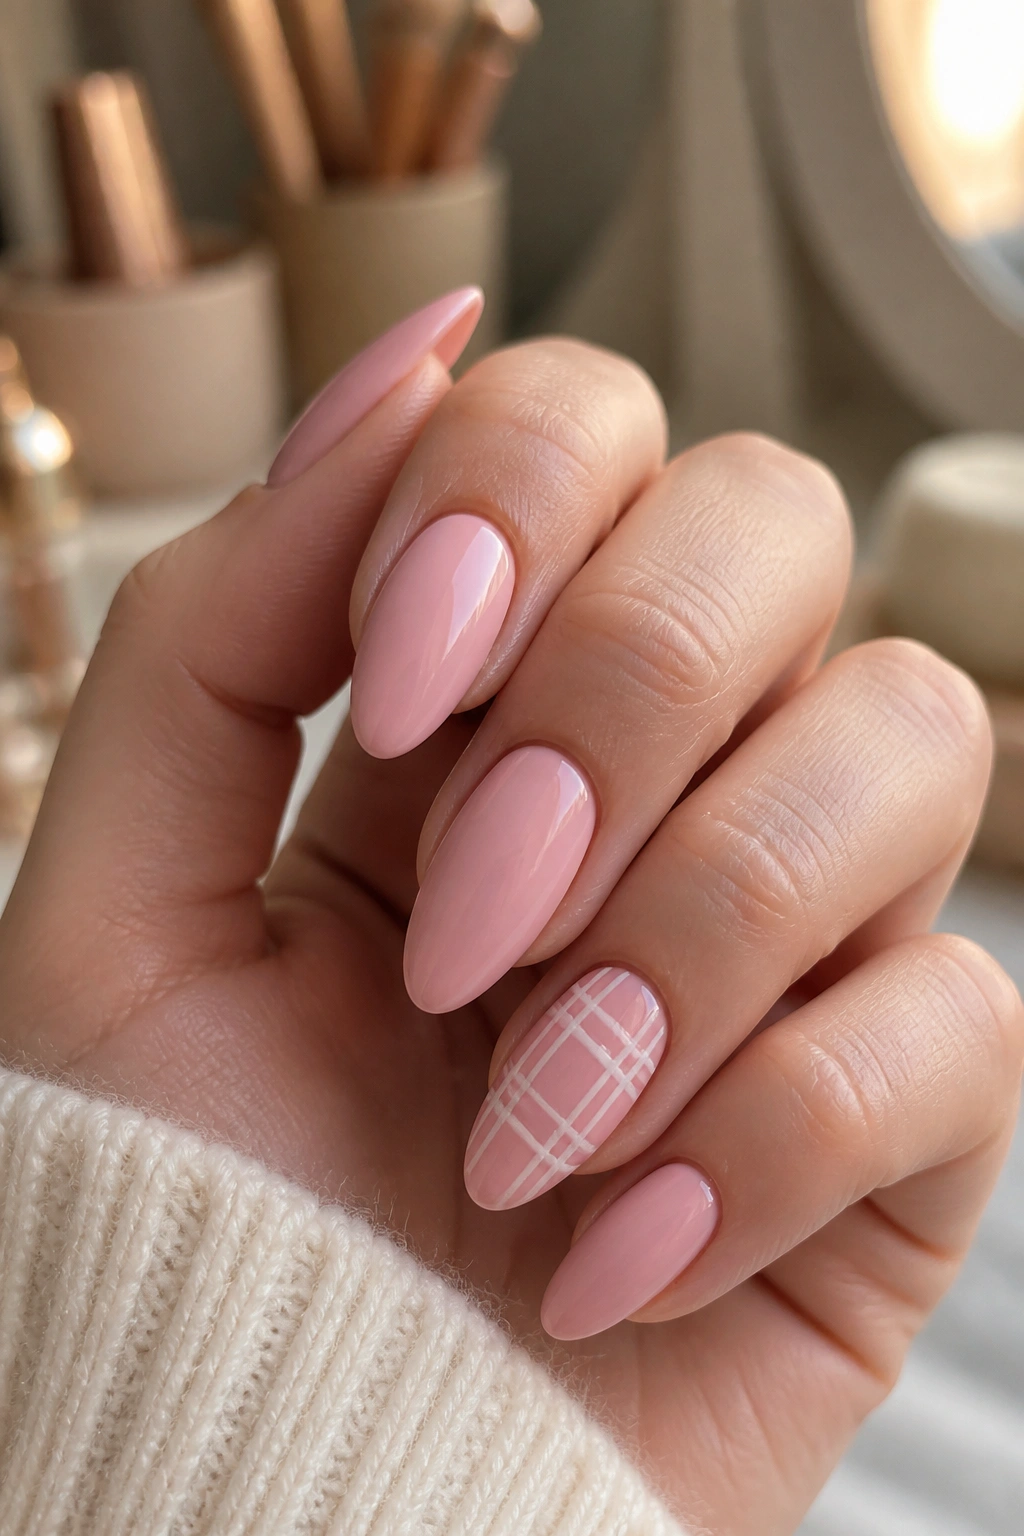
Plaid sounds like a lot until you break it down into thin crosses on one or two nails. On a pink almond set, that little bit of structure keeps the manicure from leaning too sweet.
Start with a plain pink or nude base, then add thin vertical and horizontal lines in white, deeper pink, or even silver. A striping brush helps, but so does a steady hand and a light touch. Heavy plaid looks bulky fast, and almond nails need the design to stay airy.
A single plaid accent nail is enough. Maybe two if the rest of the set is plain. That keeps the cost low and the look cleaner. No one needs five plaid nails unless they really want them.
What makes this worth doing is the contrast. Soft shape, soft pink, crisp lines. That tension gives the manicure some character without requiring a drawer full of supplies.
20. Reusable Press-On Pink Almonds
Reusable press-ons are the cheapest smart move on this whole list if you ask me. A good almond-shaped set can be worn more than once, and that alone changes the math.
Pick a plain pink base set, then customize it with one of the details above: a micro-French tip, a tiny heart, a glitter cuticle line, or a single chrome accent. That way you are not buying a brand-new set every time you want a different mood. You are just changing the finish.
Press-ons also solve a problem that gets ignored too often: breakage. If your natural nails are short, bendy, or peeling, a reusable set gives you the shape without all the damage you can get from over-filing and constant repainting.
Store them flat, keep the glue tabs or adhesive handy, and choose a shade that works across outfits. A soft pink almond press-on set can be boring in the best way. It goes on fast, costs less than a salon visit, and still looks like you made an effort.
