

French tip almond nail ideas are easier to wear than people think. The almond shape gives the tip a soft landing, so even a slightly wobbly white line can still look neat instead of fussy. That matters when you’re learning, because beginner nail art should forgive a shaky hand.
The shape does half the work for you. Almond nails already taper gently and flatter short or medium lengths, which means a French line can look polished without needing sharp angles, hard edges, or a perfect salon hand. A tip that’s only 1 to 2 millimeters wide often looks cleaner than a heavy block of color.
That’s the part I wish more people knew. You do not need a complicated design to get a clean result. A sheer base, a slim tip, and a glossy top coat can carry a manicure farther than a lot of extra details ever will.
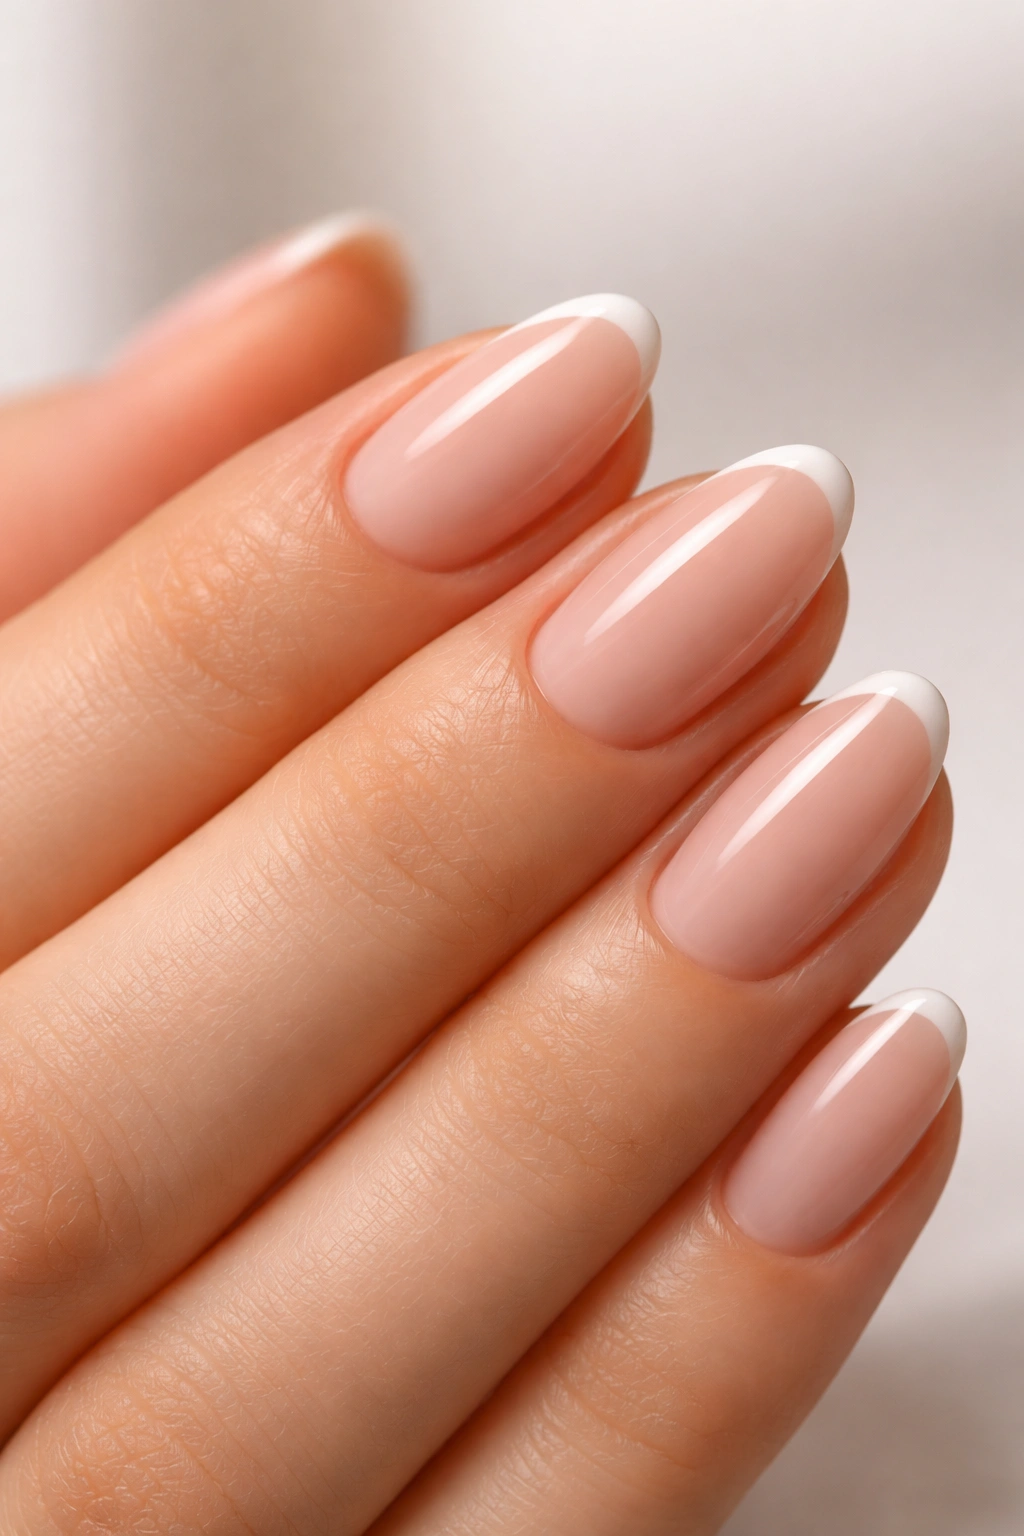
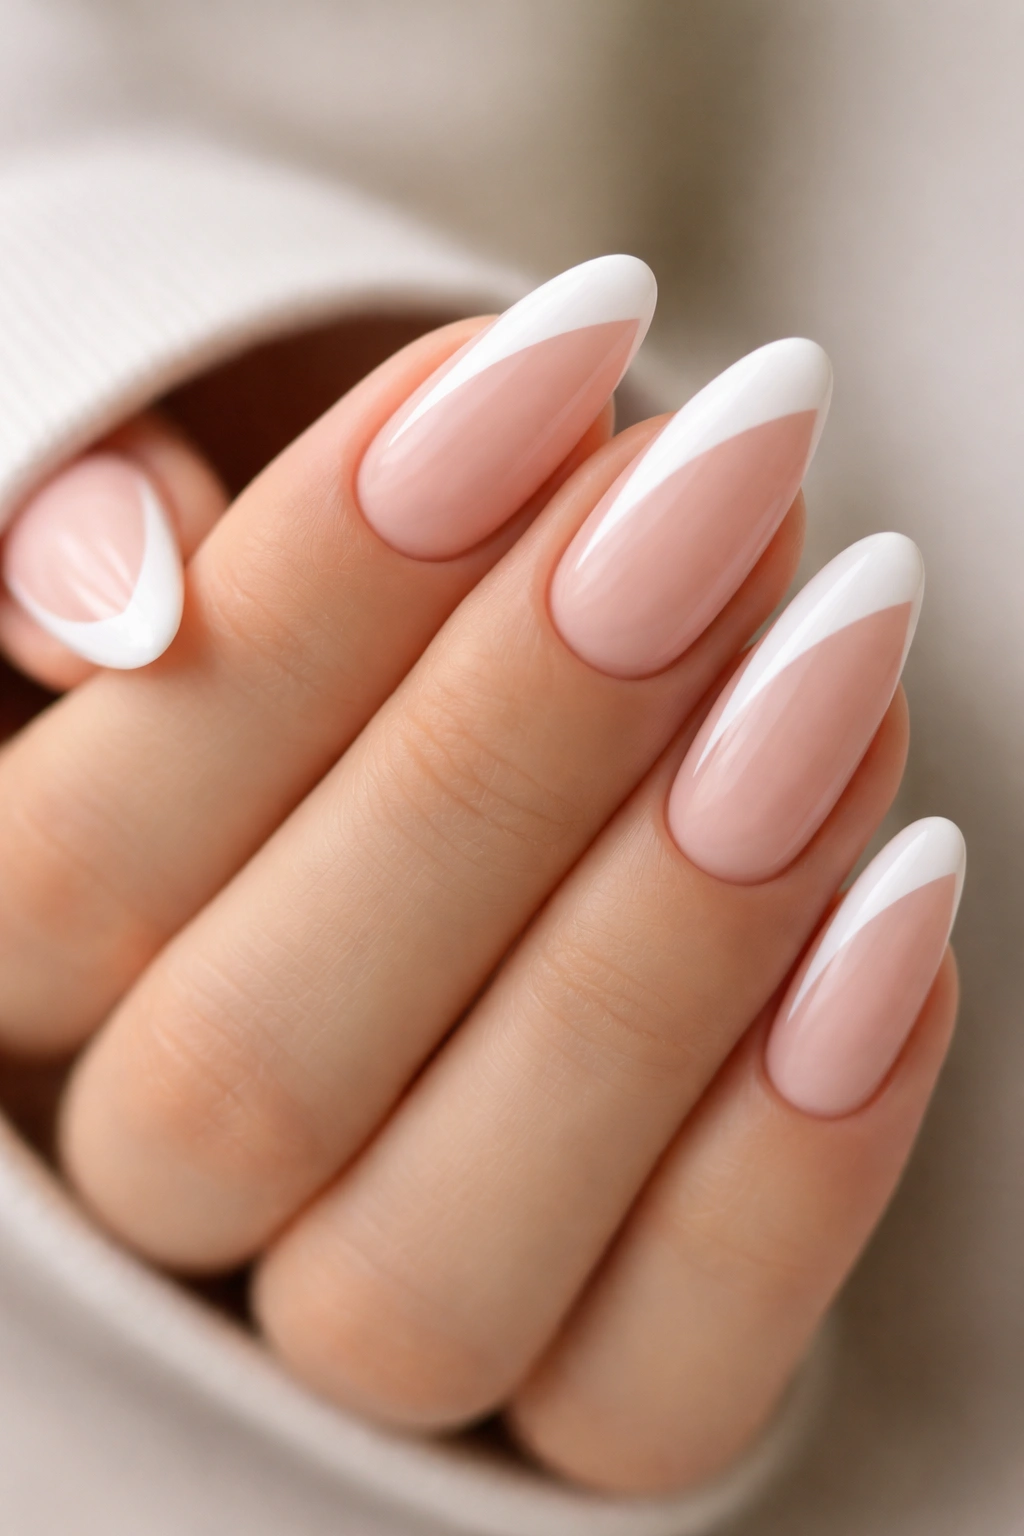
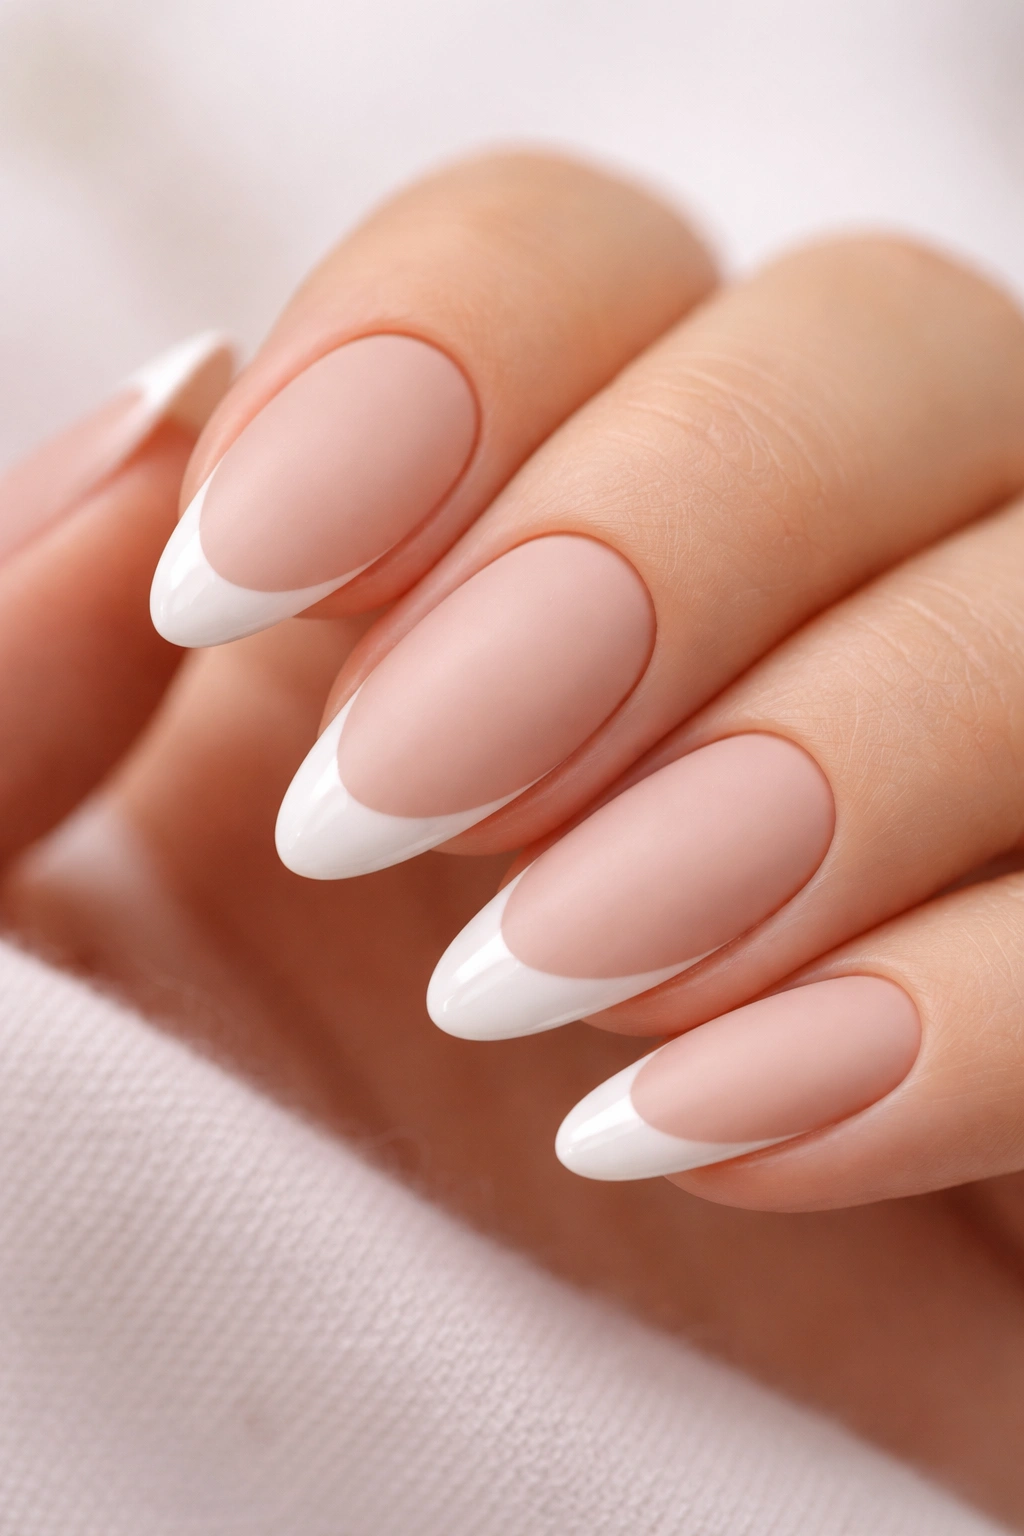
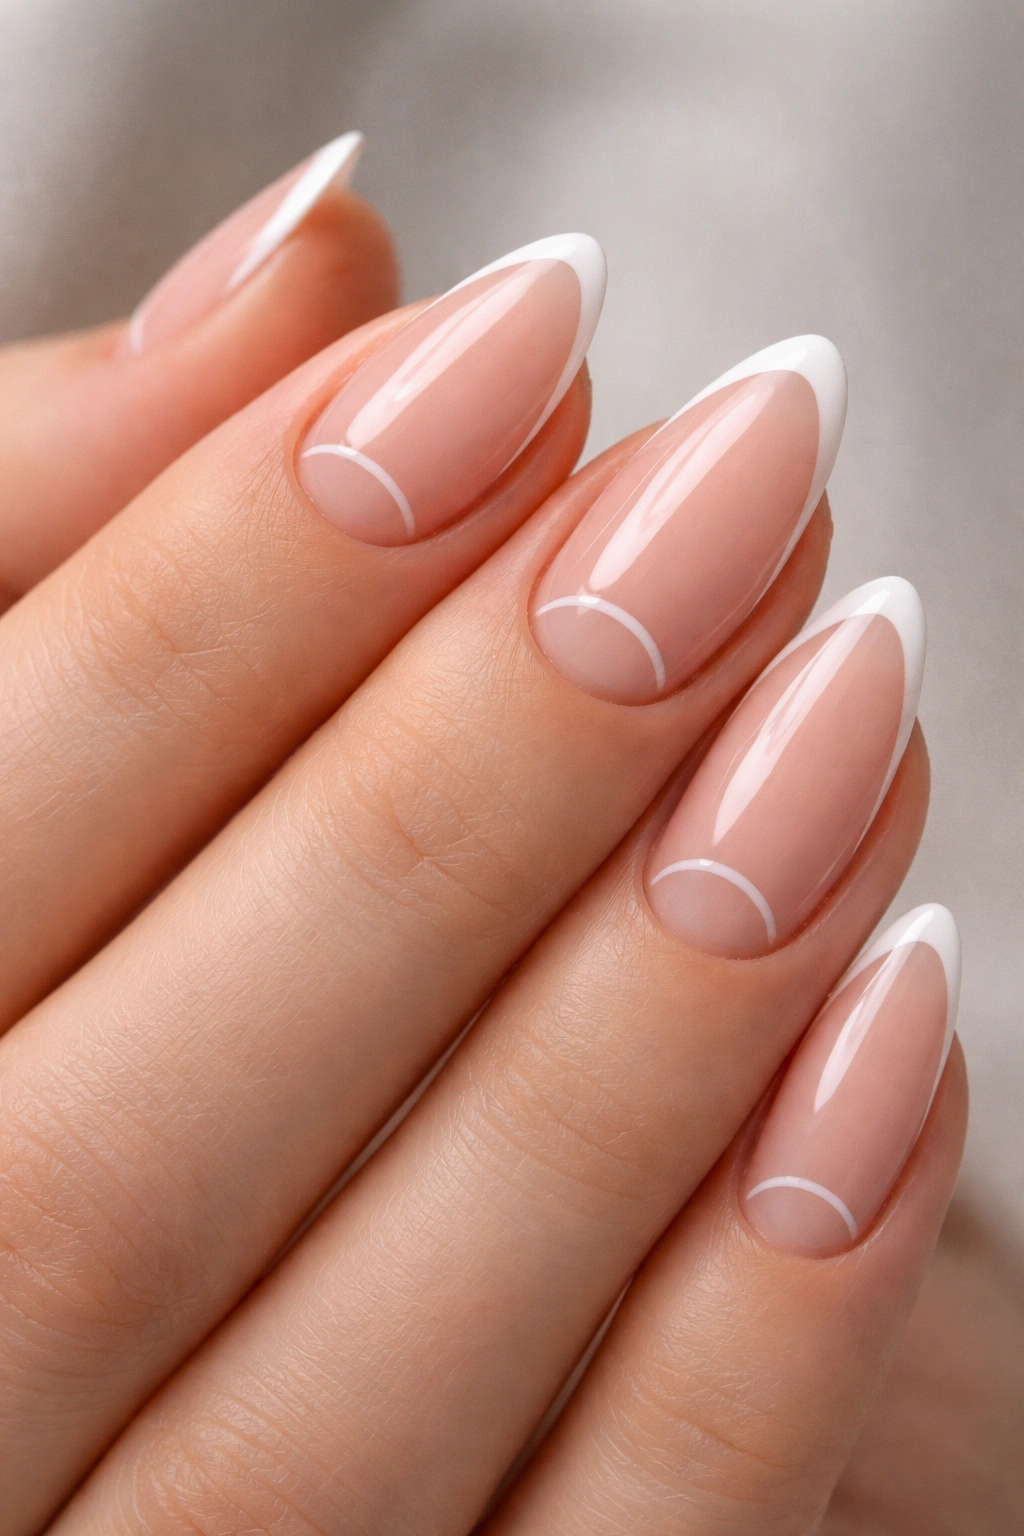
1. Classic Sheer Pink With Crisp White Tips

This is the starter manicure for a reason. A sheer pink base gives the nail bed a soft tint, and a thin white edge keeps the whole thing looking fresh without turning stiff or dated.
Why It Works
The contrast is gentle, not harsh. On almond nails, that matters because the curve of the tip already creates shape; you don’t need a loud line fighting for attention.
If you’re doing this at home, keep the white tip narrow and follow the natural curve of the free edge. A striping brush or a French guide sticker can help, but the real trick is not loading the brush with too much polish. Thick polish slides.
- Best tip width: 1 to 2 mm
- Best base: sheer pink or pink-beige
- Best finish: high-gloss top coat
- Easiest tools: French guides, liner brush, or press-ons
My blunt advice: if you only try one style first, make it this one.
2. Micro French On Short Almond Nails
Tiny tips are underrated. A micro French looks neat on short almond nails because the line stays close to the edge, which makes mistakes much less visible.
The smaller tip also dries faster and chips less at the edge, which is useful if you type, cook, or just use your hands all day. I’d keep the color clean and the brush almost dry when you paint it. Too much polish turns a skinny line into a blob.
Use a soft nude base and a white or ivory tip that barely peeks over the edge. If your free hand shakes a bit, this is the version I’d choose before trying anything with glitter or color.
It’s tidy. That’s the point.
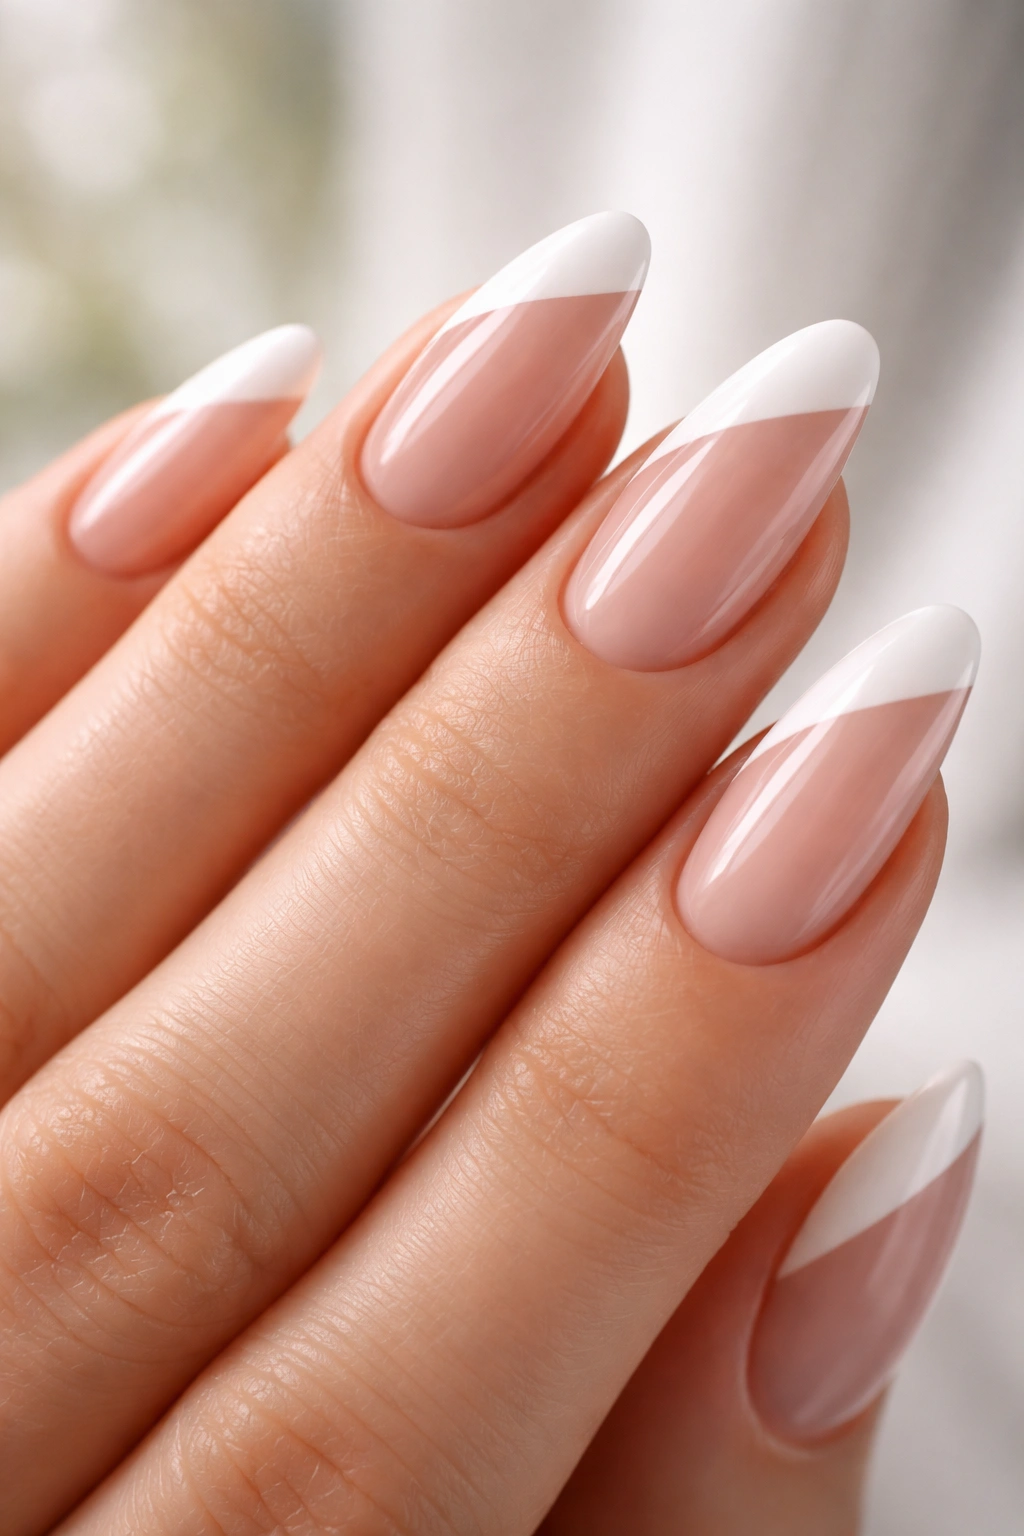
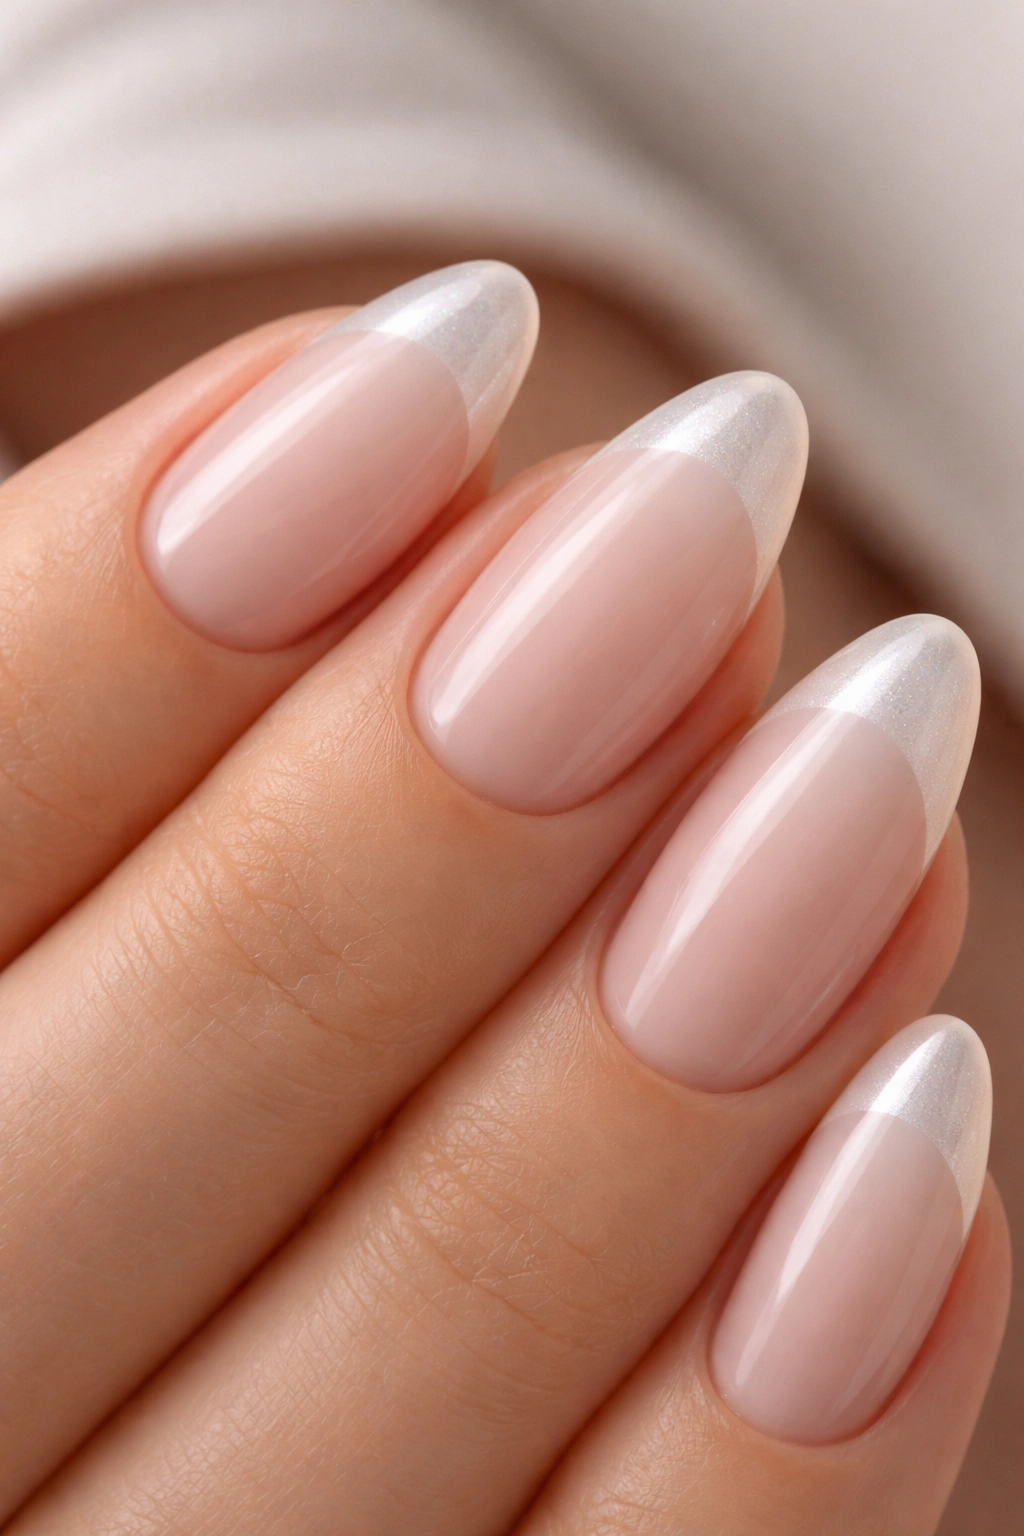
3. Milky Nude With Soft Ivory Tips
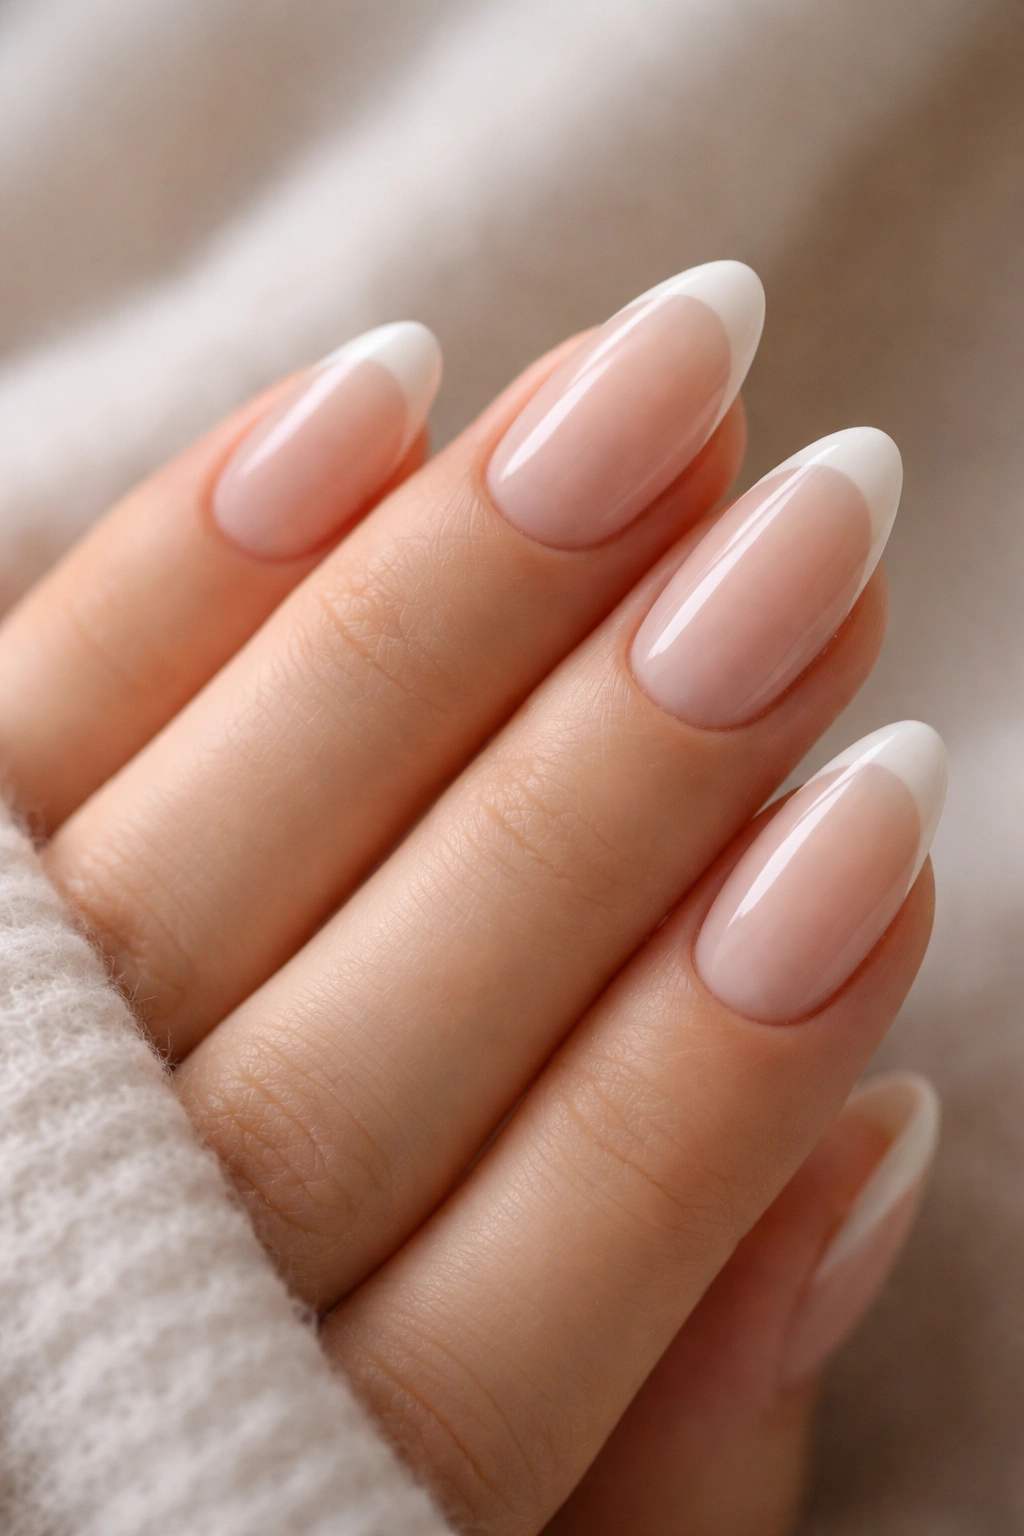
Why does this work so well? Because the tip looks finished without screaming for attention. A milky nude base softens the whole nail, and ivory tips give you a French manicure that feels quieter than bright white.
How To Ask For It
Ask for a “sheer milky nude base with soft ivory tips and a thin smile line.” That wording matters, because pure white can look sharp against some skin tones, while ivory blends in a little better and hides tiny brush marks.
This style is one of my favorites for beginners who want a safer version of the classic French. The edge can be slightly blurred, and honestly, that looks better than a hard, drawn-on line on a first try.
What To Watch For
- Choose ivory, not chalk white
- Keep the base semi-sheer
- Use two thin coats, not one thick coat
- Seal the edge well so the ivory doesn’t chip first
4. Baby Boomer Ombre French
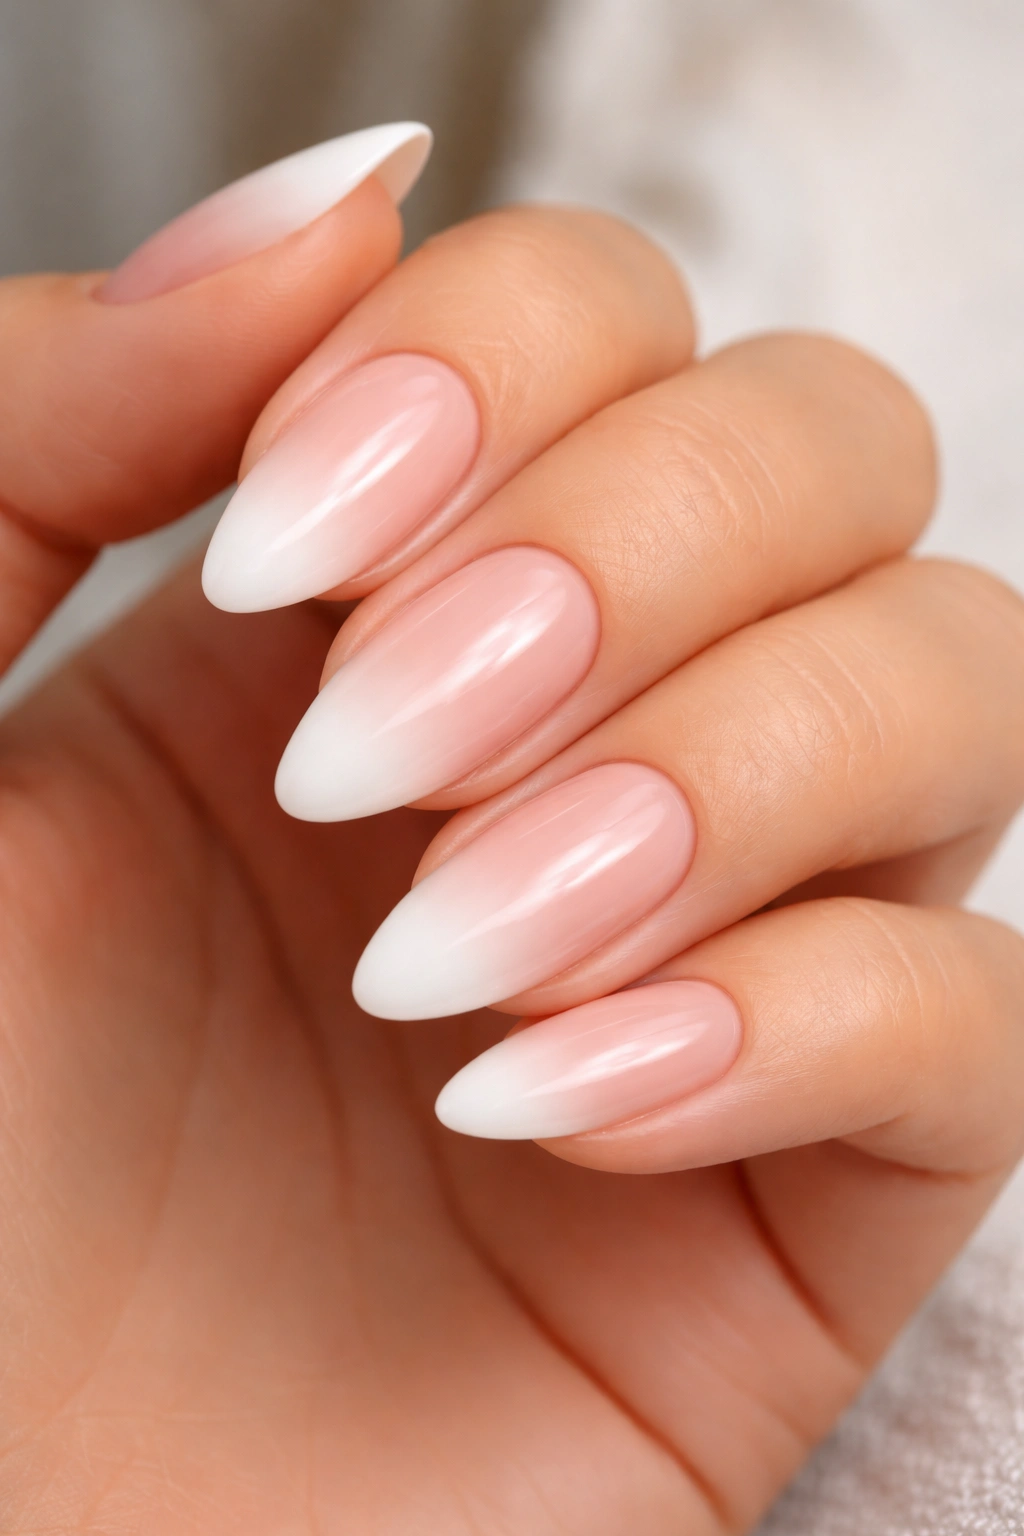
A lot of people think ombré is advanced. It doesn’t have to be.
Baby boomer French nails fade from pink or nude into white, which means the transition is softer than a sharp tip. On almond nails, that blur makes the whole hand look longer and the manicure look less exacting. If you’re nervous about clean lines, this is a very forgiving direction.
The easiest way to get there is with a sponge or a soft builder-gel blend. If you’re working at home and you don’t want a mess, press-on almond nails with this fade already built in are the sane option. Some techniques sound glamorous until you’re cleaning white dust off your table.
The best part is growth is less obvious. That alone makes it useful.
5. Beige Base With Gold Glitter Tips
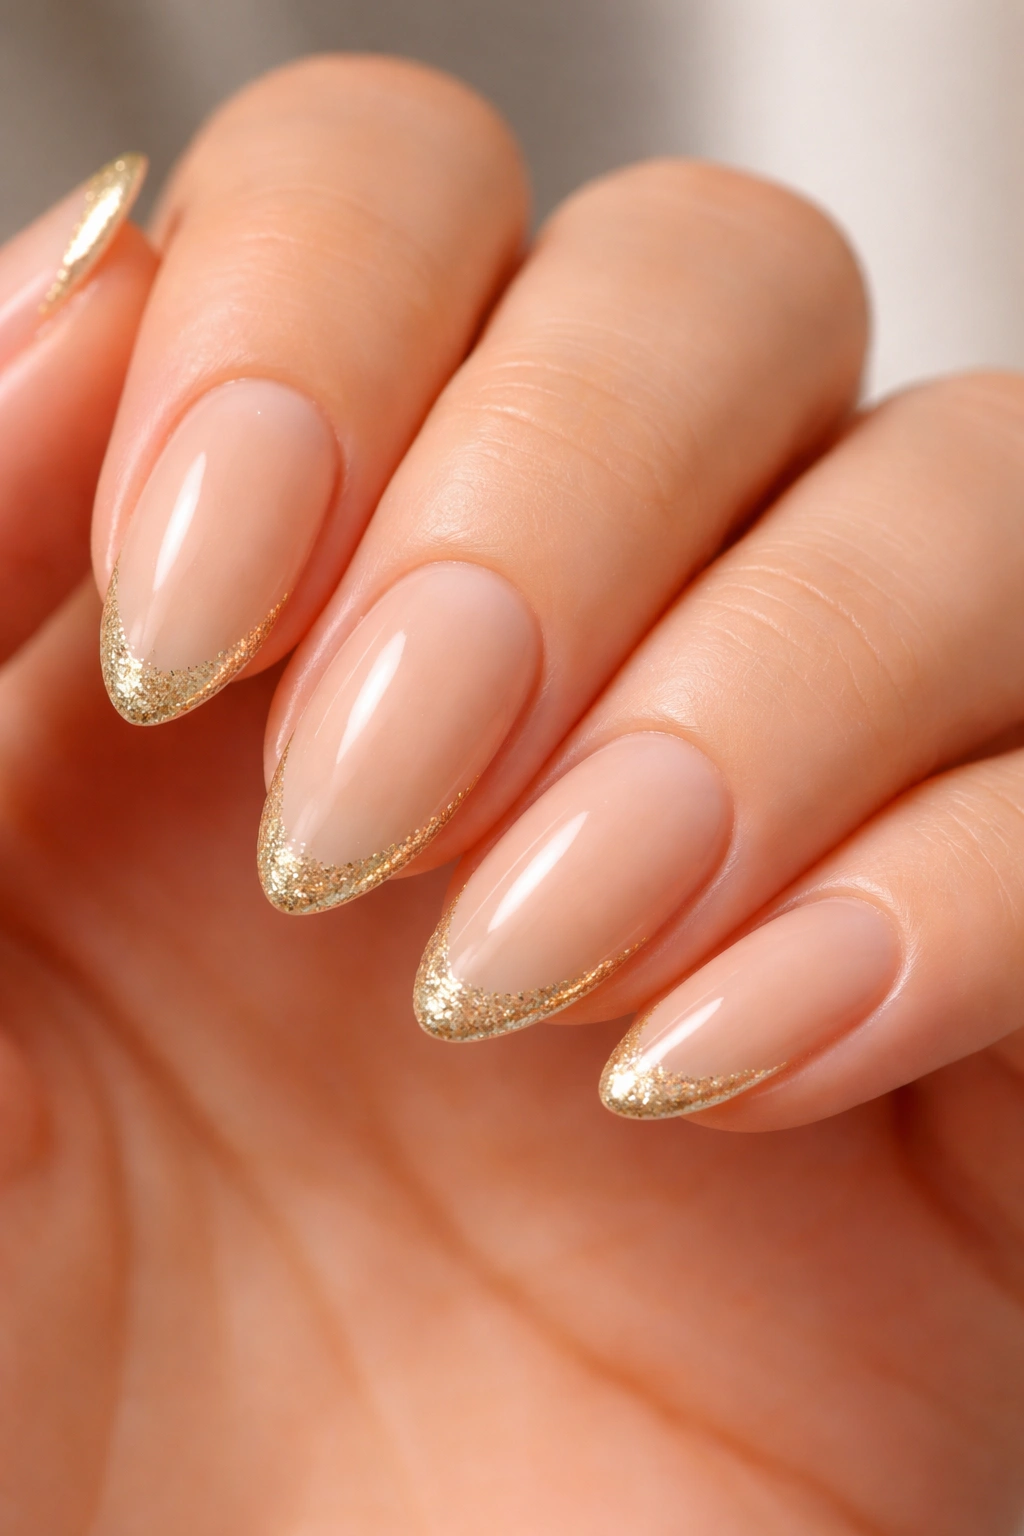
Glitter tips are a cheat code for beginners. If your line wobbles a little, fine glitter disguises it better than a solid cream polish ever will.
A warm beige base keeps the manicure calm, while a thin band of gold glitter at the edge gives the nail enough shine to feel intentional. I like this one because it doesn’t need a perfect smile line. The sparkle does the heavy lifting, and the almond shape keeps it from looking too party-only.
Quick Setup
- Start with a warm beige or light caramel base
- Paint the tip with fine gold glitter polish
- Keep the glitter band thin and even
- Finish with two layers of top coat so the edge feels smooth
If you want a beginner-friendly design that still looks dressed up, this is one of the easiest bets.
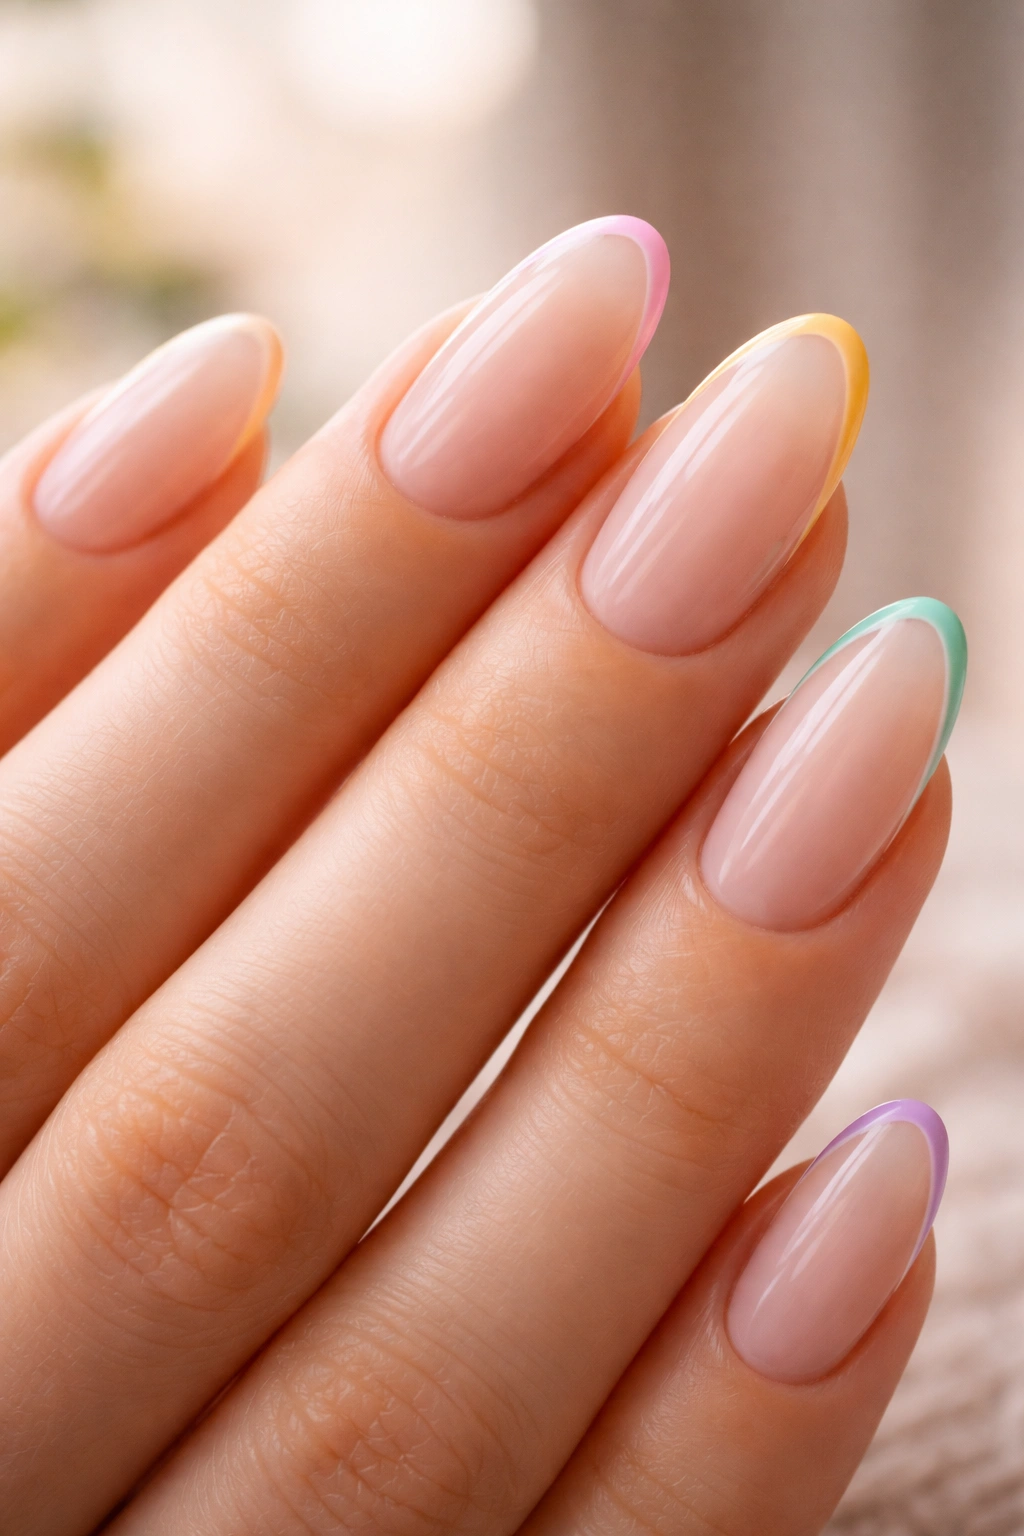
6. Pastel French Tips
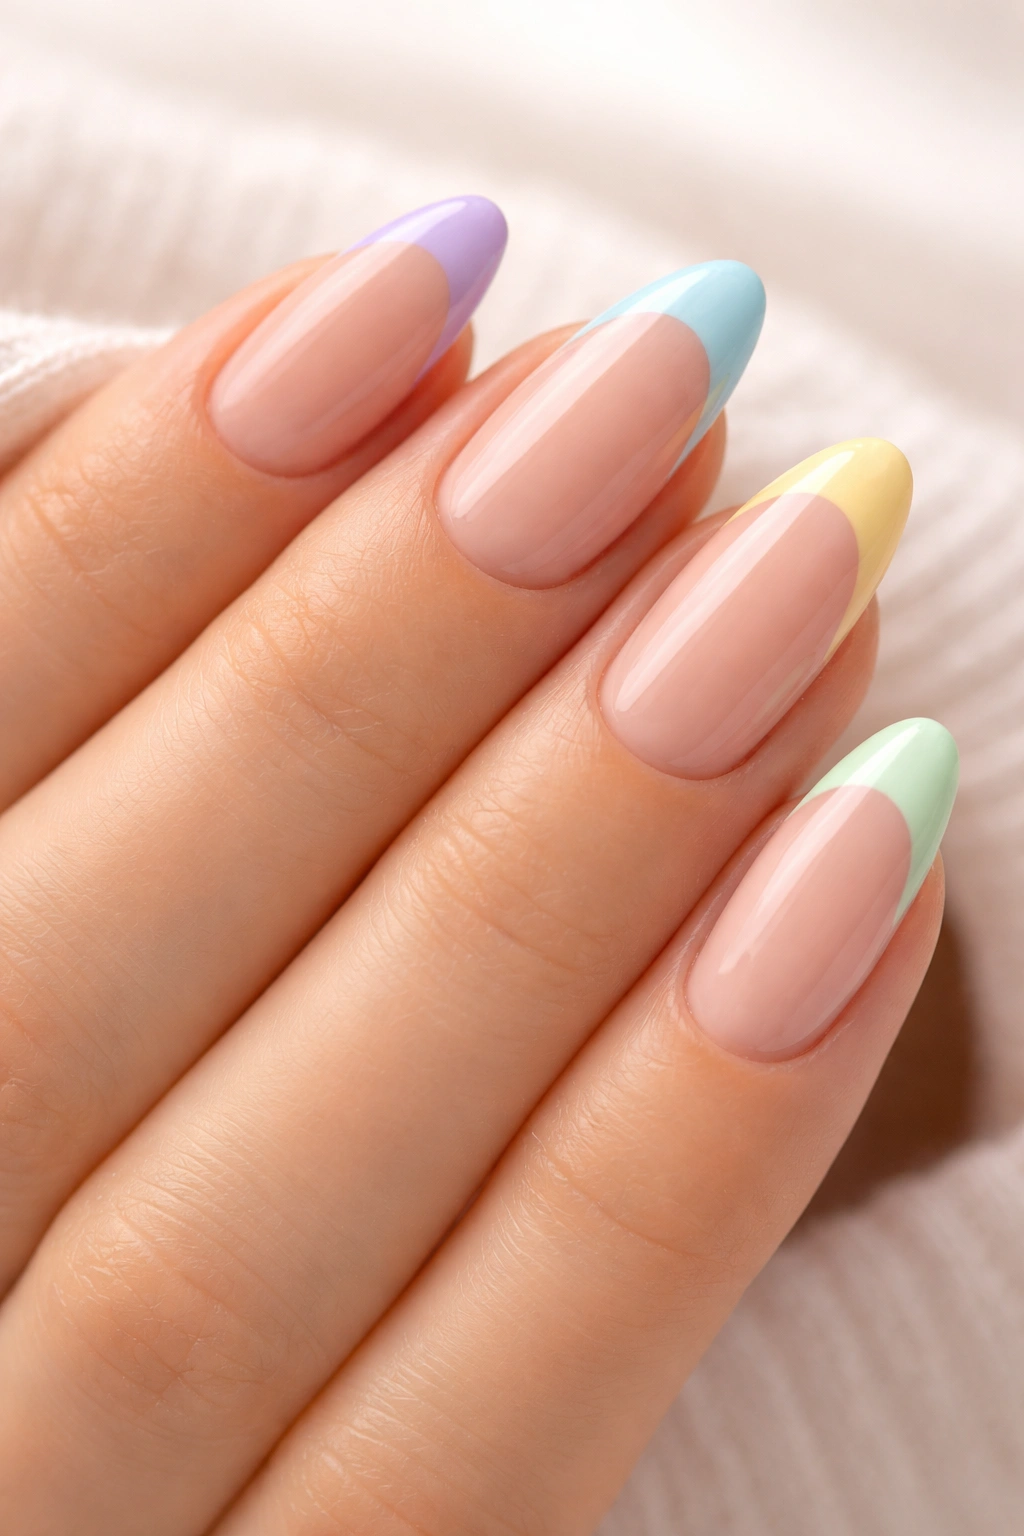
Pastels make the French manicure feel lighter. Lilac, mint, butter yellow, and baby blue all work because the almond shape keeps the color from looking boxy.
Unlike bright neons, pastels don’t need a lot of precision to look decent. A slightly soft edge can even help them. On a sheer nude base, the colored tip reads as playful instead of loud, and that’s a nice place to start if you’re new to color.
I’d keep the base neutral and let the tip carry the mood. One pastel shade across all ten nails looks cleaner than a rainbow if you’re just getting comfortable with the brush. If you want something less polished and more casual, alternate two shades on opposite hands.
Use a thin liner brush. Pastels show streaks fast.
7. Black French Tips
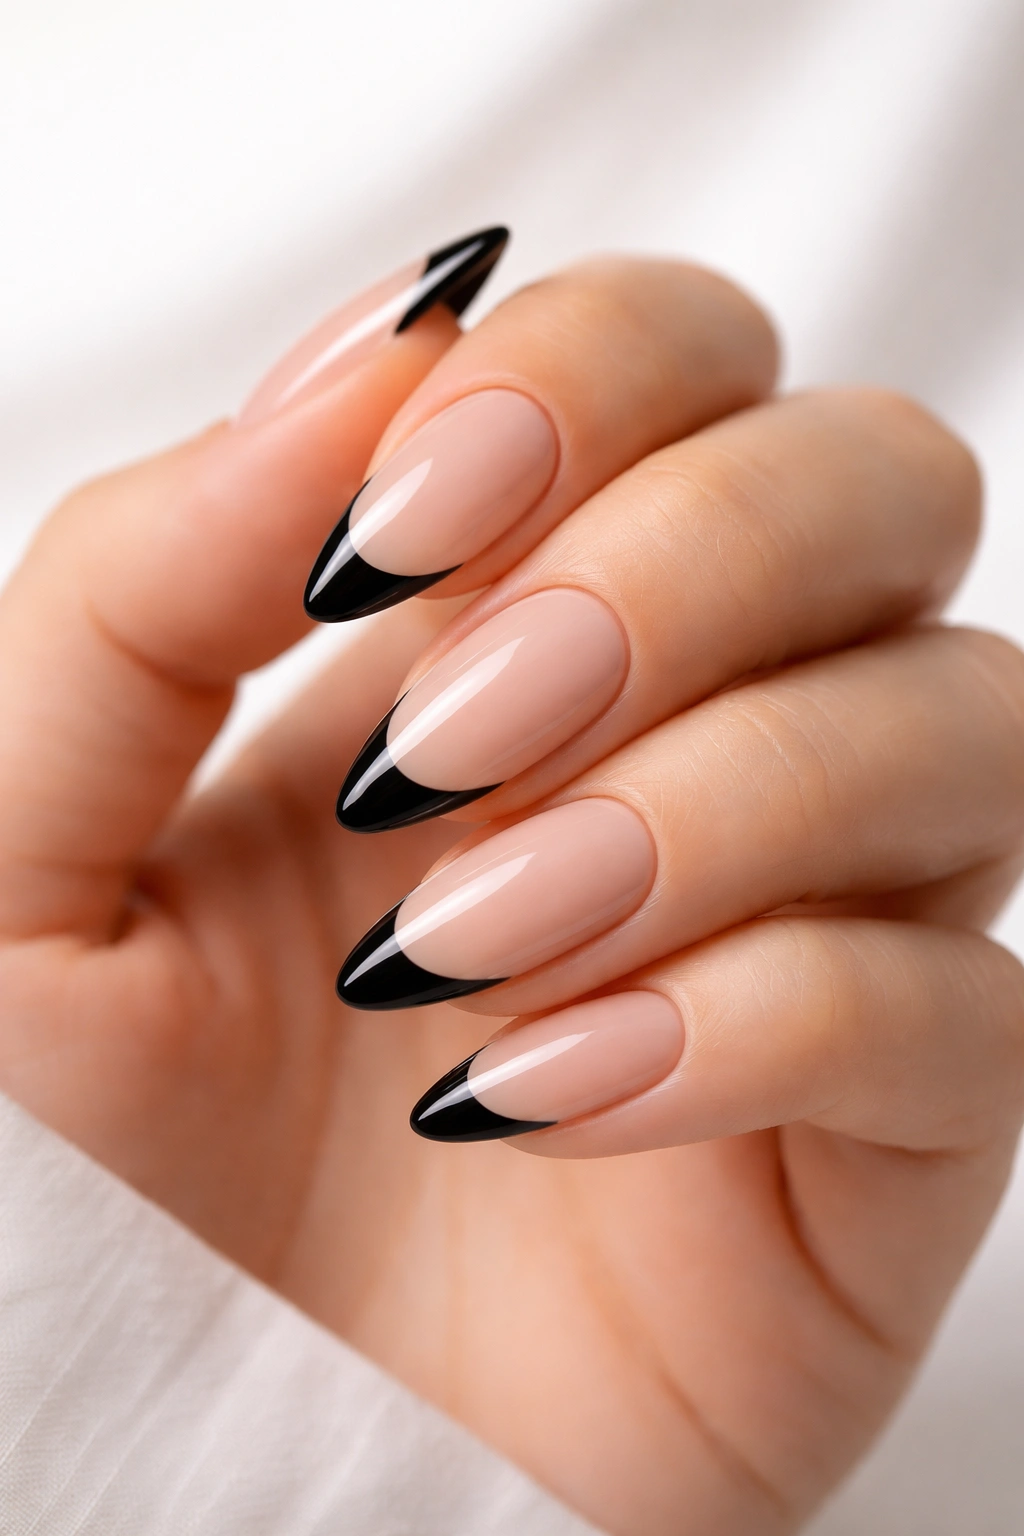
Black tips look sharper than white, and somehow that makes them easier to wear with a nude base. The contrast is clear, but the color itself is simple.
Why Beginners Like It
A glossy black line can hide small flaws better than bright white because it doesn’t reflect every uneven stroke. On almond nails, the shape keeps the black from feeling heavy. It reads as clean and a little moody, not harsh.
For the best result, keep the tip narrow and the base sheer pink, beige, or pale nude. If the tip gets too thick, the whole nail starts to feel blunt, and that defeats the almond shape.
How To Keep It Neat
- Use a thin brush
- Paint two light coats of black, not one thick one
- Clean the sidewalls before curing or drying
- Finish with a shiny top coat so the black looks crisp
8. Chocolate Brown French
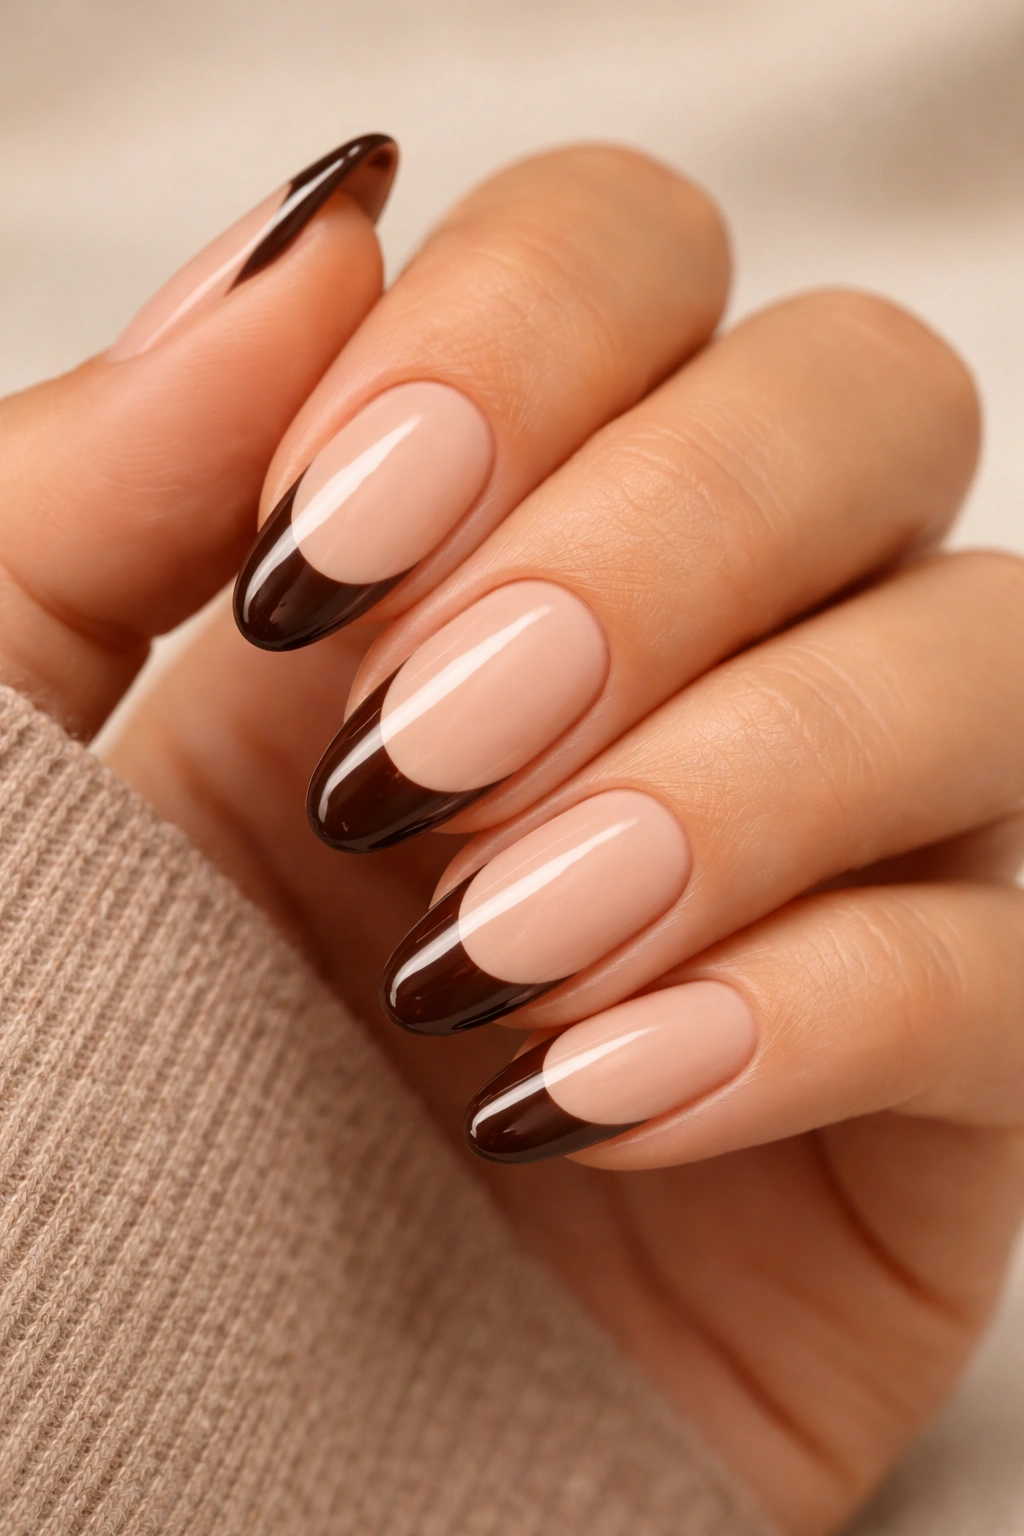
Brown is quietly good. It looks softer than black, warmer than gray, and much less predictable than white.
A chocolate French tip on almond nails works especially well if you like deeper neutrals. Think mocha, espresso, or milk-chocolate brown rather than muddy taupe. The color has enough depth to stand on its own, but it still looks calm on a sheer base.
This is a nice option if you wear gold jewelry or like warm-toned clothes, because the manicure doesn’t fight those colors. I also like it on medium-length almond nails, where the curve has enough room to show off the shape.
If you’re learning, choose a creamy brown polish instead of a sheer one. Cream formulas cover in fewer strokes, and that makes the edge easier to control.
9. Cherry Red French
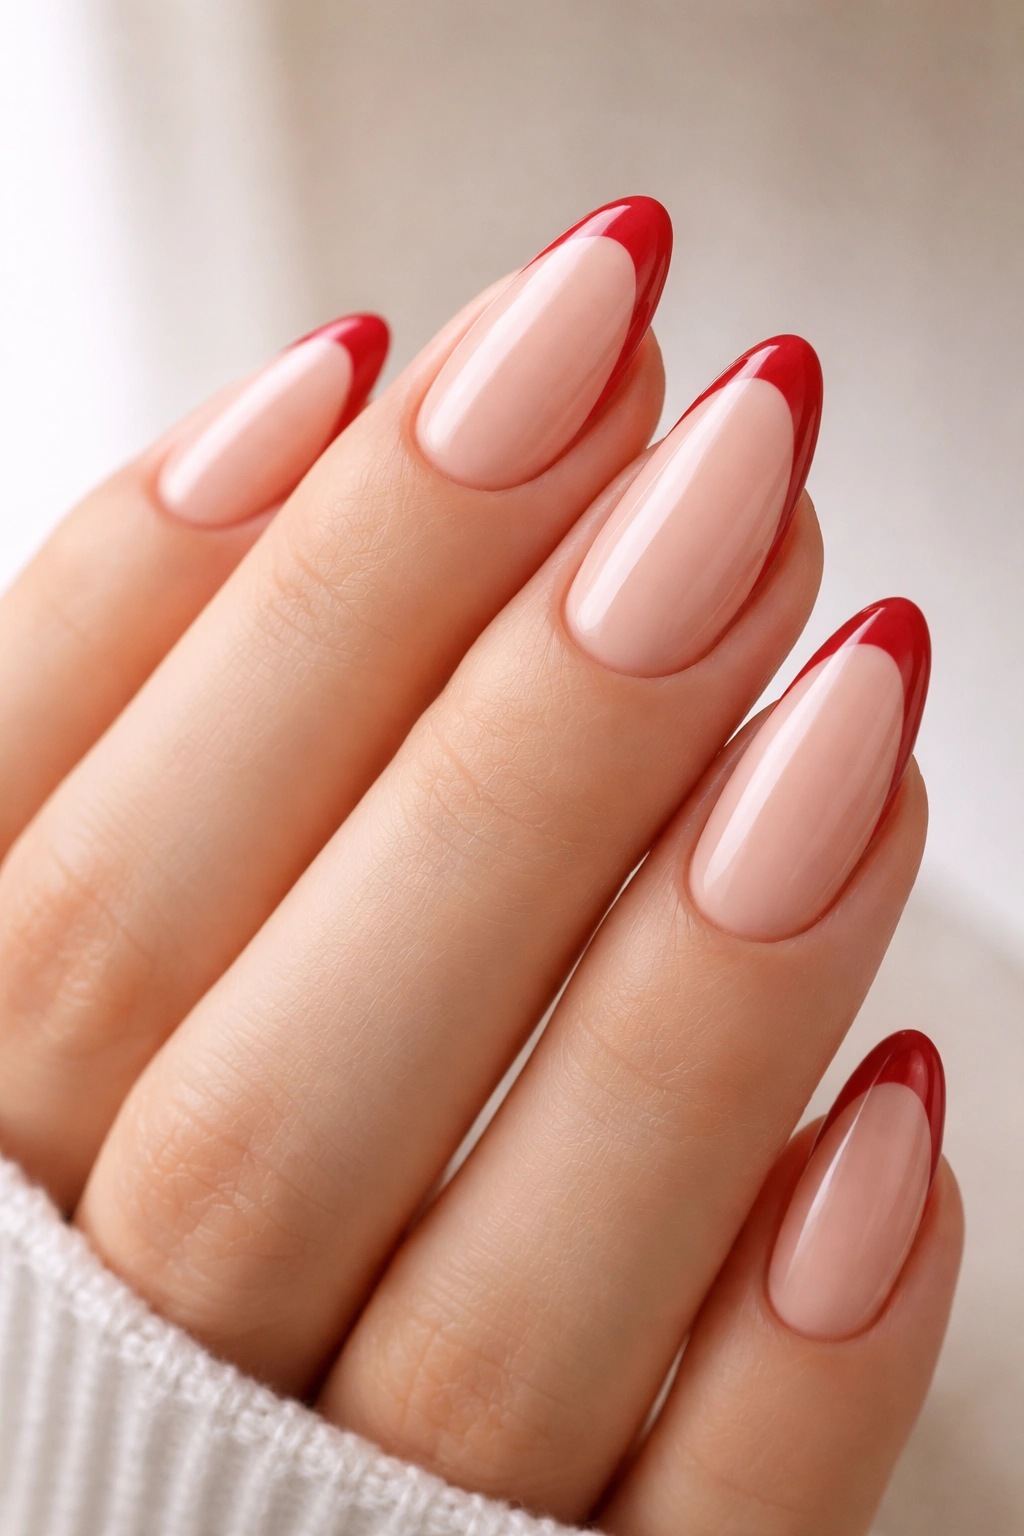
A red French tip sounds bolder than it is. On almond nails, a thin cherry-red edge looks classic, not flashy.
That little line of red gives the manicure a cleaner finish than a full red nail sometimes does. It’s also useful if you want color but don’t want the whole nail to feel saturated. A bright blue-red gives the most traditional result, while a deeper cherry or brick red looks softer.
I’d keep the tip slim here. Red gets heavy fast if you make it too wide. A narrow band gives the nail room to breathe and keeps the almond point from disappearing under the color.
Best pairing: sheer nude base, glossy top coat, and short to medium almond length. Red does not need help.
10. Double-Line French

If you can paint one line, you can paint two. That’s why this design is so friendly for beginners.
The classic version uses a white tip and a second thin line in silver, black, or nude just beneath it. The second line doesn’t need to be perfect. In fact, the small gap between the two lines is part of what makes it look intentional. On almond nails, that stacked edge follows the curve nicely and adds detail without turning into nail art homework.
Best Ways To Wear It
- White tip + thin metallic line
- Nude tip + slim white stripe
- Black tip + tiny silver accent
- Same color family for a softer look
If you want more interest than a plain French but still want to keep things controlled, this is one of the smartest choices.
11. Side-Swept French
A side-swept French tip starts higher on one side of the nail and slopes lower on the other. It sounds fancy. It isn’t as hard as it looks.
The asymmetry gives you wiggle room, because the tip doesn’t need to mirror itself perfectly across the whole nail. That makes it a useful beginner design when your hand is steadier on one side than the other. On almond nails, the sweep works with the natural taper and makes the nail look longer.
A pale pink base and a white or pale beige sweep keep it clean. If you want to cheat a little, use a guide sticker placed at a slant. No one is grading the geometry under a bright desk lamp.
This is one of those styles that looks more complicated than it is. I enjoy that.
12. Diagonal French
Diagonal tips are one of the most forgiving ways to try French nail art. The line travels across the nail instead of sitting straight across the top, so a tiny wobble is easier to hide.
You can do a diagonal French in white, black, soft pink, or even taupe. The angle gives the manicure movement, which looks nice on almond nails because the shape already has a graceful bend. I’d keep the diagonal shallow if you’re a beginner. A huge slanted block can swallow the nail and make it look shorter.
Use tape or a sticker guide if you want a clean edge. Or freehand it with a liner brush and stop stressing about symmetry. The slight difference from nail to nail is part of the charm.
13. V-Shaped French
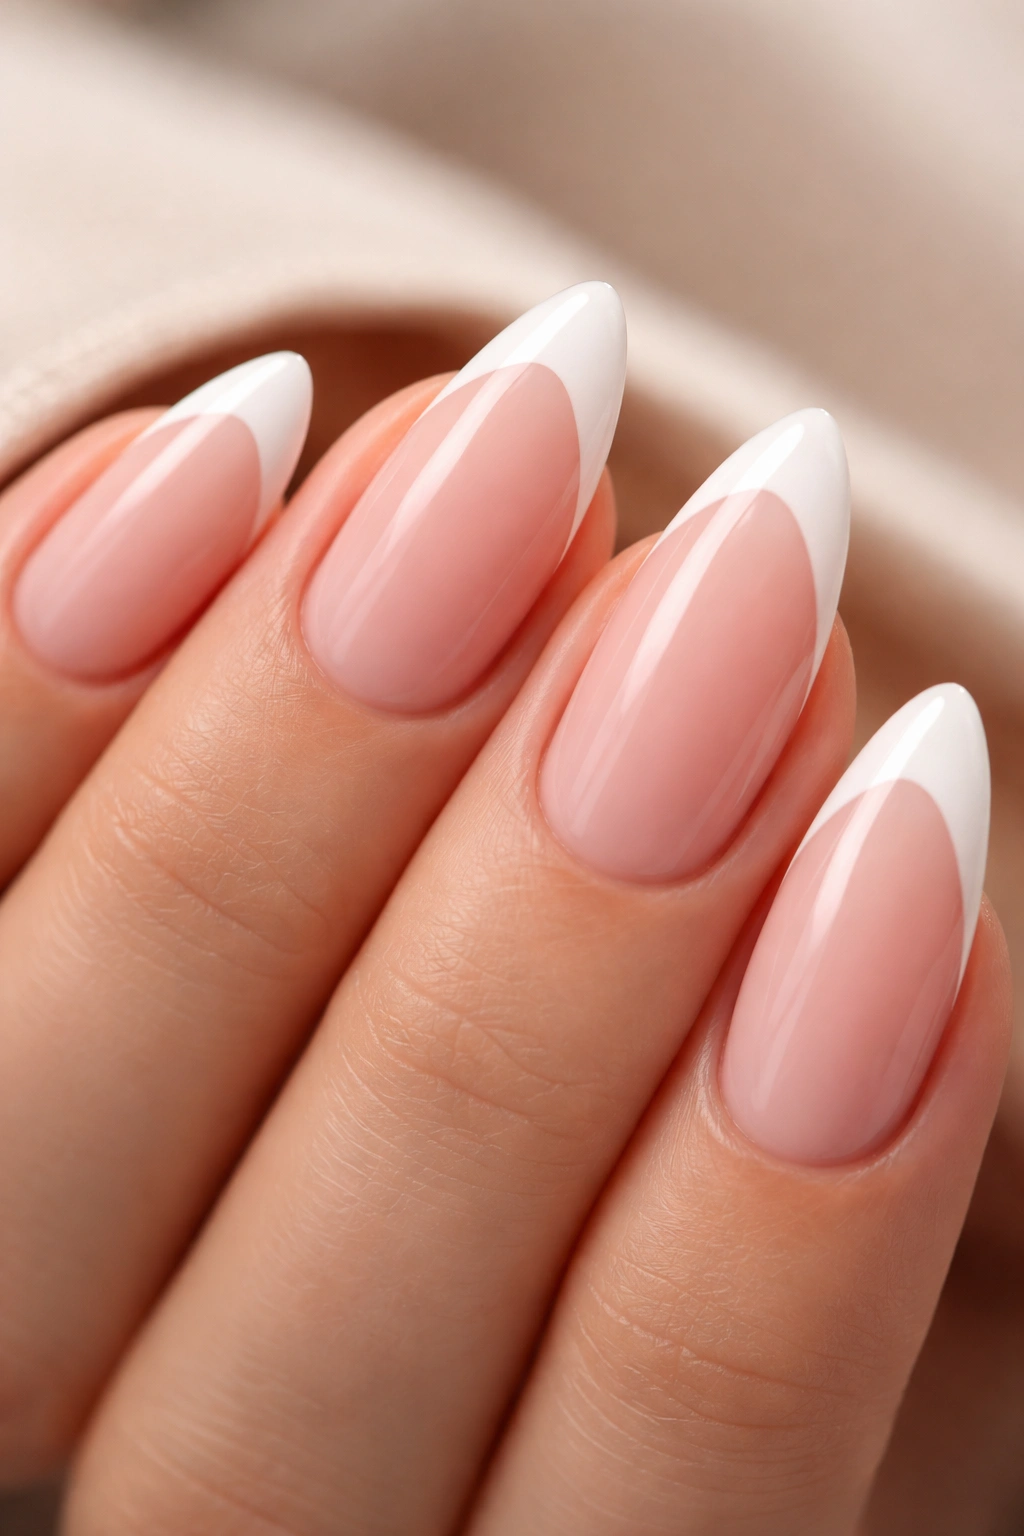
A V-shaped French tip makes the almond point look even sharper. That’s the whole appeal.
The style is a little more demanding than a classic rounded tip, but beginners can still handle it if they keep the V shallow and the center point soft. Don’t carve a spear. Just create a clean angle that follows the center of the nail. On a sheer pink base, the white or colored V reads as crisp and modern.
How To Get It Right
Start by marking the center line with a tiny dot of polish. From there, pull each side outward to create the angle. If one side ends up a touch higher, you can balance it with the top coat and a careful cleanup brush.
A thin V also works better than a thick one. Heavy angles can make almond nails look too pointy, and that’s not the vibe.
14. Reverse French Half-Moon
A reverse French sits at the cuticle instead of the tip. It sounds like a twist, but it’s actually beginner-friendly because the shape near the cuticle naturally gives you a guide.
The half-moon can be white, nude, red, or even metallic. On almond nails, it mirrors the curve at the base and keeps the manicure looking balanced from top to bottom. Another nice thing: regrowth is less obvious here than with a traditional tip, so the manicure can look neat for longer.
If you’re doing it yourself, work with a small brush and keep the arc shallow. The shape should echo the nail bed, not sit like a sticker. A sheer base with a neat moon of color near the cuticle looks polished even when the rest of the design stays simple.
This is a good one if you’re bored of the usual edge.
15. Chrome Silver French
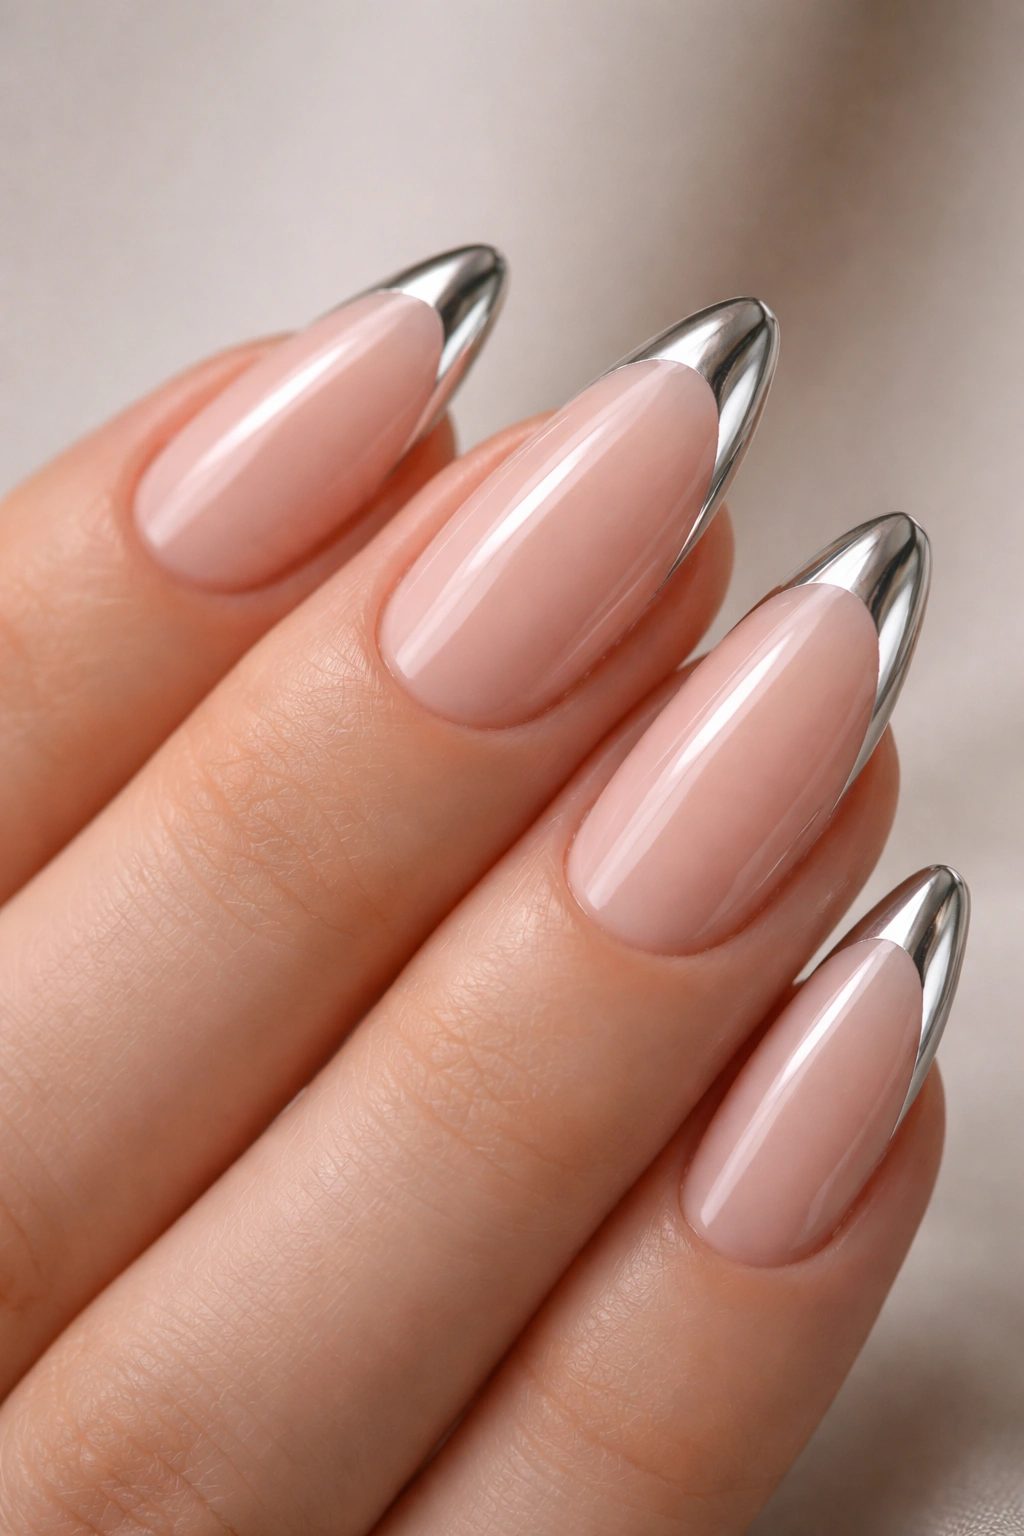
Chrome tips have a lot of payoff for not much extra effort. That shiny edge catches the eye fast, which means the line can be thin and still feel finished.
For beginners, the trick is to keep the chrome band narrow. A full chrome tip can start to feel heavy on almond nails, while a slim silver edge keeps the look light. If you’re using chrome powder, it works best over a cured gel layer. Regular polish won’t give you the same mirror finish.
What To Remember
- Use gel polish or a gel top coat
- Apply chrome powder only on the tip area
- Seal the edge well, or the shine will wear off fast
- Keep the base sheer pink or nude
This one looks more technical than it is. It just needs a careful hand.
16. Pearl Glazed French
Pearl glaze is softer than chrome, and I think that helps beginners. If your line is a little imperfect, the pearly finish blurs the edge just enough to keep it pretty.
A milky pink or beige base works best here. Then the tip gets a pearly top coat, or the whole nail gets glazed with the French edge left slightly brighter. The result is glossy, smooth, and low-contrast. You can wear it with nearly anything because it doesn’t lock you into one color story.
It’s also a nice option if you don’t want your manicure to shout for attention. Some people like shine with a hard edge. I prefer shine with a little softness, and pearl does that job well.
A quick note: use thin coats. Thick pearl polish gets streaky in a way that’s not charming.
17. Matte Nude With Glossy Tips
Finish contrast does a lot of the work here. The base is matte, the tip is glossy, and that difference makes even a simple French manicure feel intentional.
This is a clever beginner option because it doesn’t rely on complex painting. You can keep the shape plain and let the texture carry the design. On almond nails, matte nude makes the tip look even cleaner because the nail bed doesn’t compete with the shine.
A warm nude base with a glossy white, brown, or soft pink tip is the safest version. If you want a stronger effect, try matte taupe with a deep burgundy edge. That contrast is neat without being loud.
Easy Rule
Paint and cure or dry the tip first, then matte the base. If you matte everything, the design loses its point. A little shine goes a long way here.
18. Sage Green French
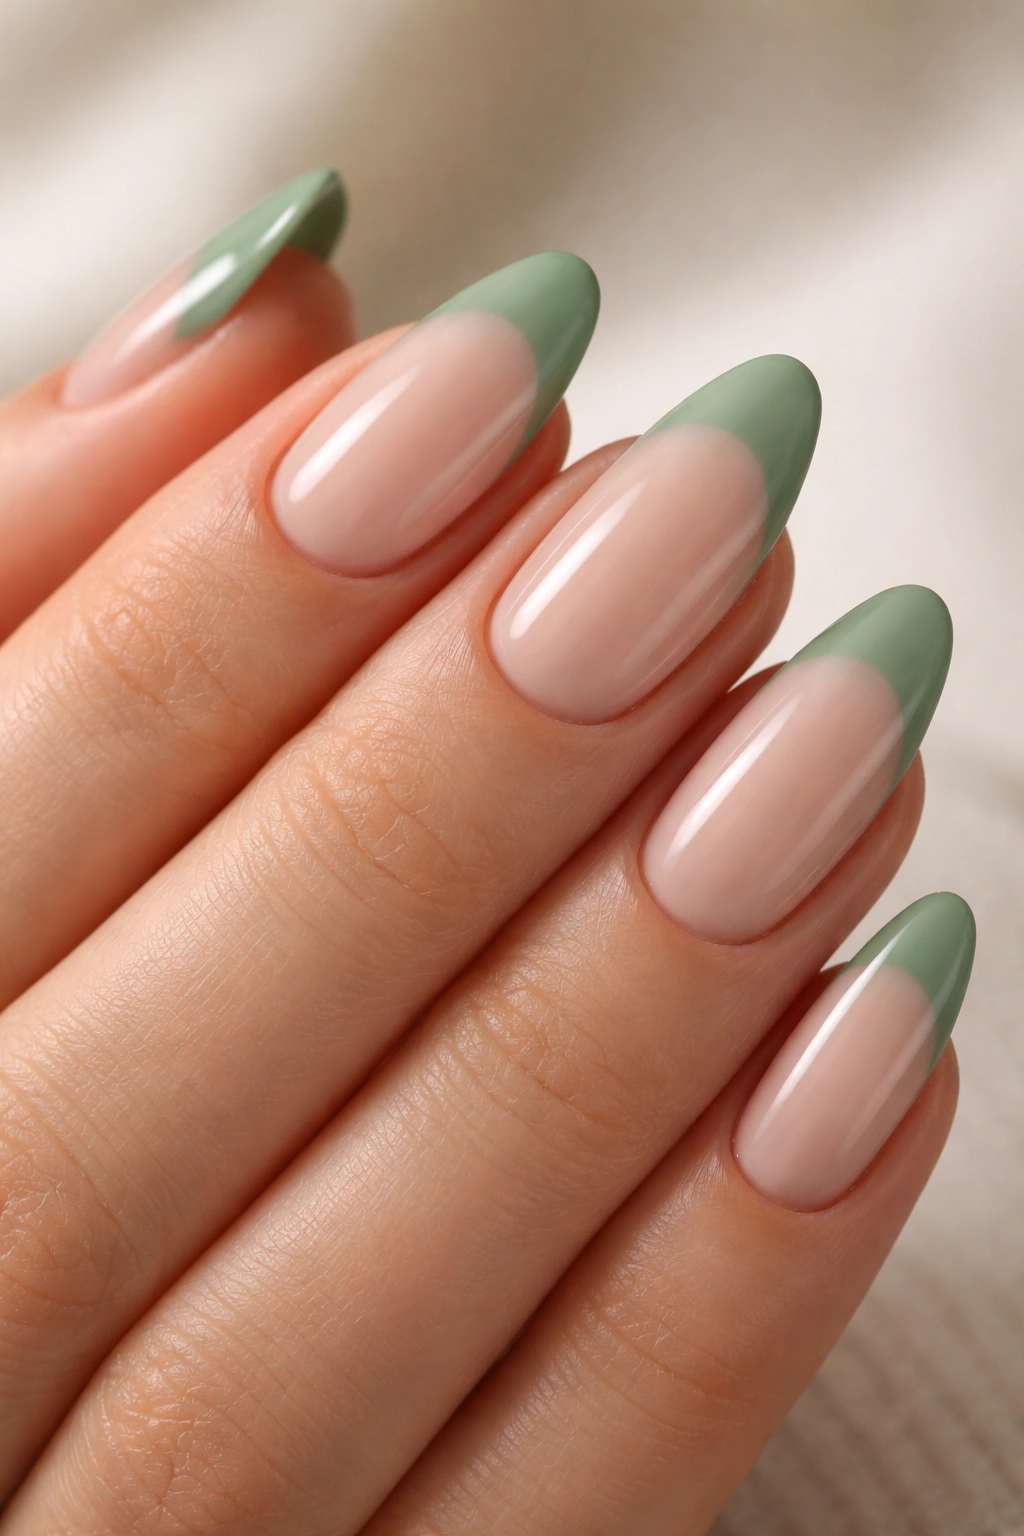
Sage green is the kind of color that looks calm even when it’s not neutral. It has enough personality to be interesting, but it still sits quietly on the nail.
That makes it a strong beginner choice. A muted green tip on a nude base is less stark than black and less expected than white, so small brush marks don’t jump out as much. On almond nails, the curve softens the green further and keeps it from feeling too sporty or harsh.
If you want to keep it simple, choose a dusty sage rather than a bright mint. The muted shade looks more natural against skin and works better with a thin tip. I’d pair it with a glossy top coat so the color stays crisp.
This is one of those shades that gets compliments from people who “don’t usually notice nails.” That’s telling.
19. Peach Coral French
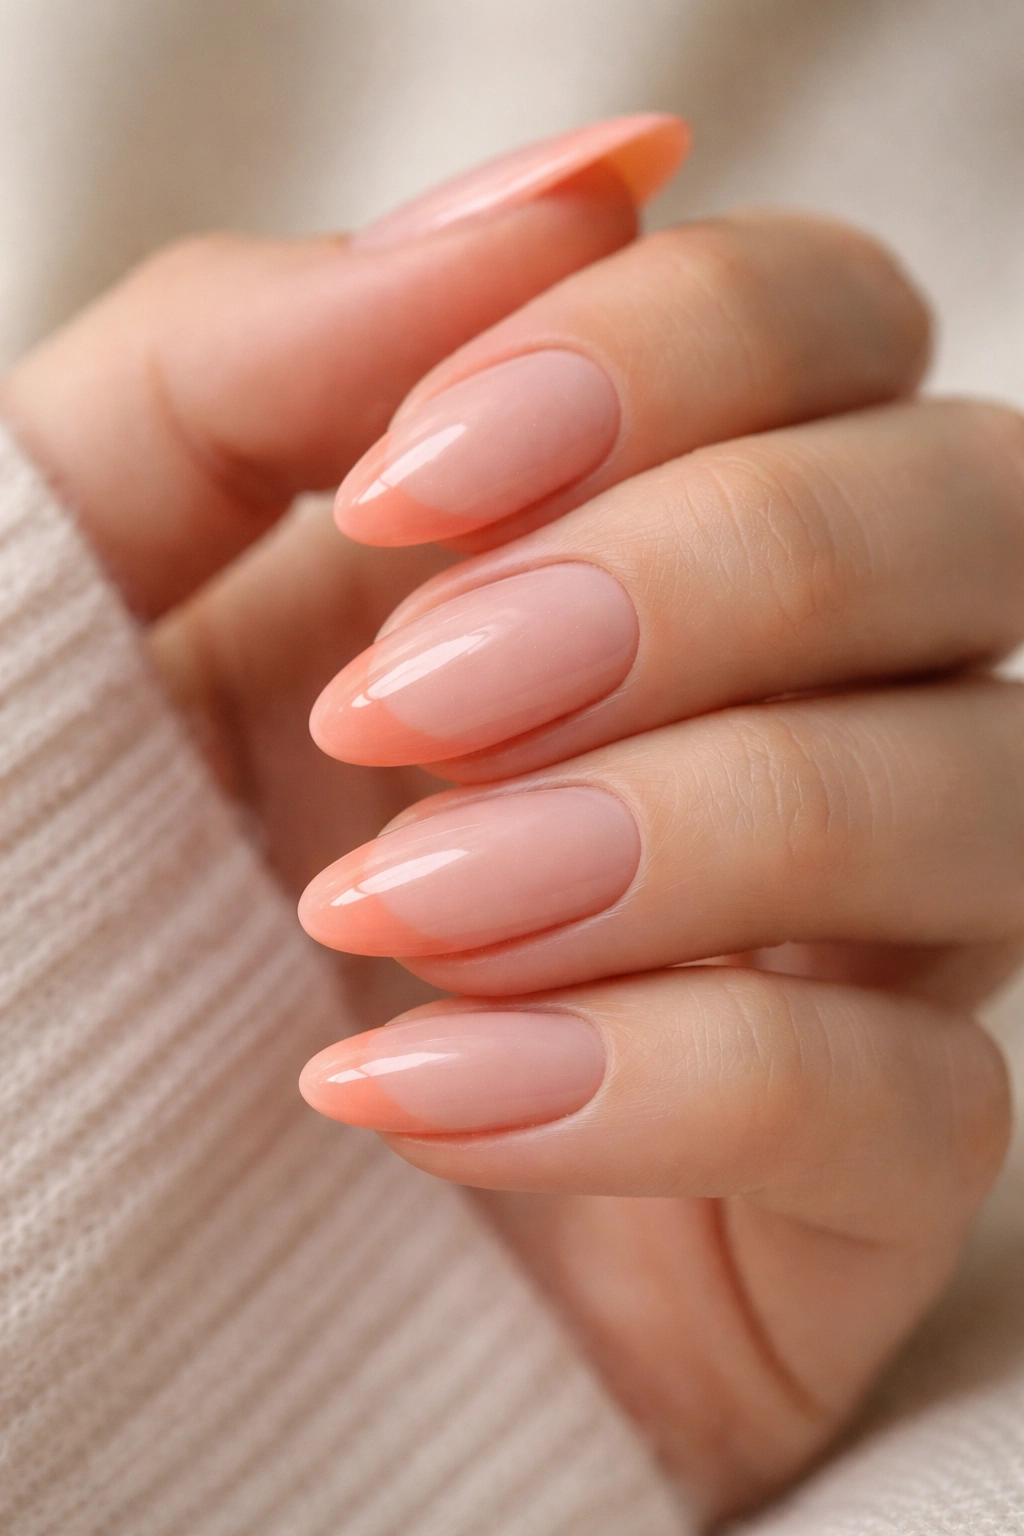
Peach-coral tips look warm, soft, and easy to wear. They have that slightly flushed look that makes nails seem healthy without pretending to be plain.
The color works especially well with sheer pink or beige bases because the contrast stays gentle. For beginners, that matters. If the tip line isn’t razor sharp, the softness of the shade helps hide it. Almond nails make the look feel even smoother, since the taper keeps the color from feeling blocky.
How To Wear It
- Use a sheer pink base
- Paint a thin peach-coral tip
- Keep the tip rounded, not square
- Finish with gloss, not matte
If you want a friendly color that still feels more playful than nude, this is a solid pick.
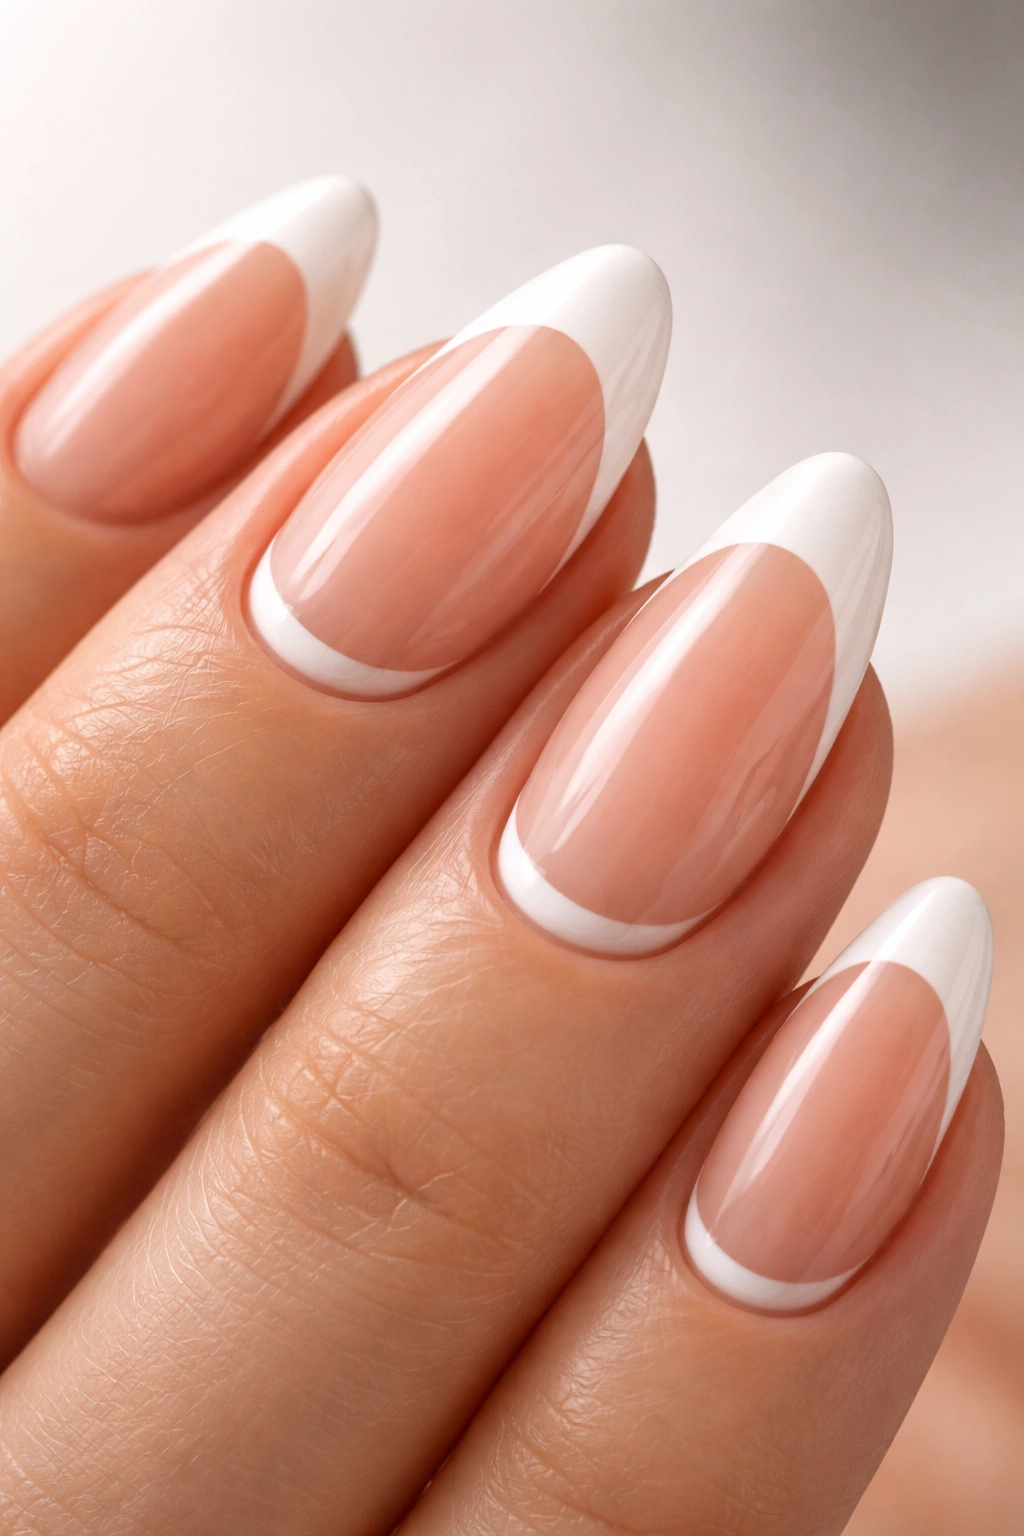
20. Warm Taupe With Ivory Tips
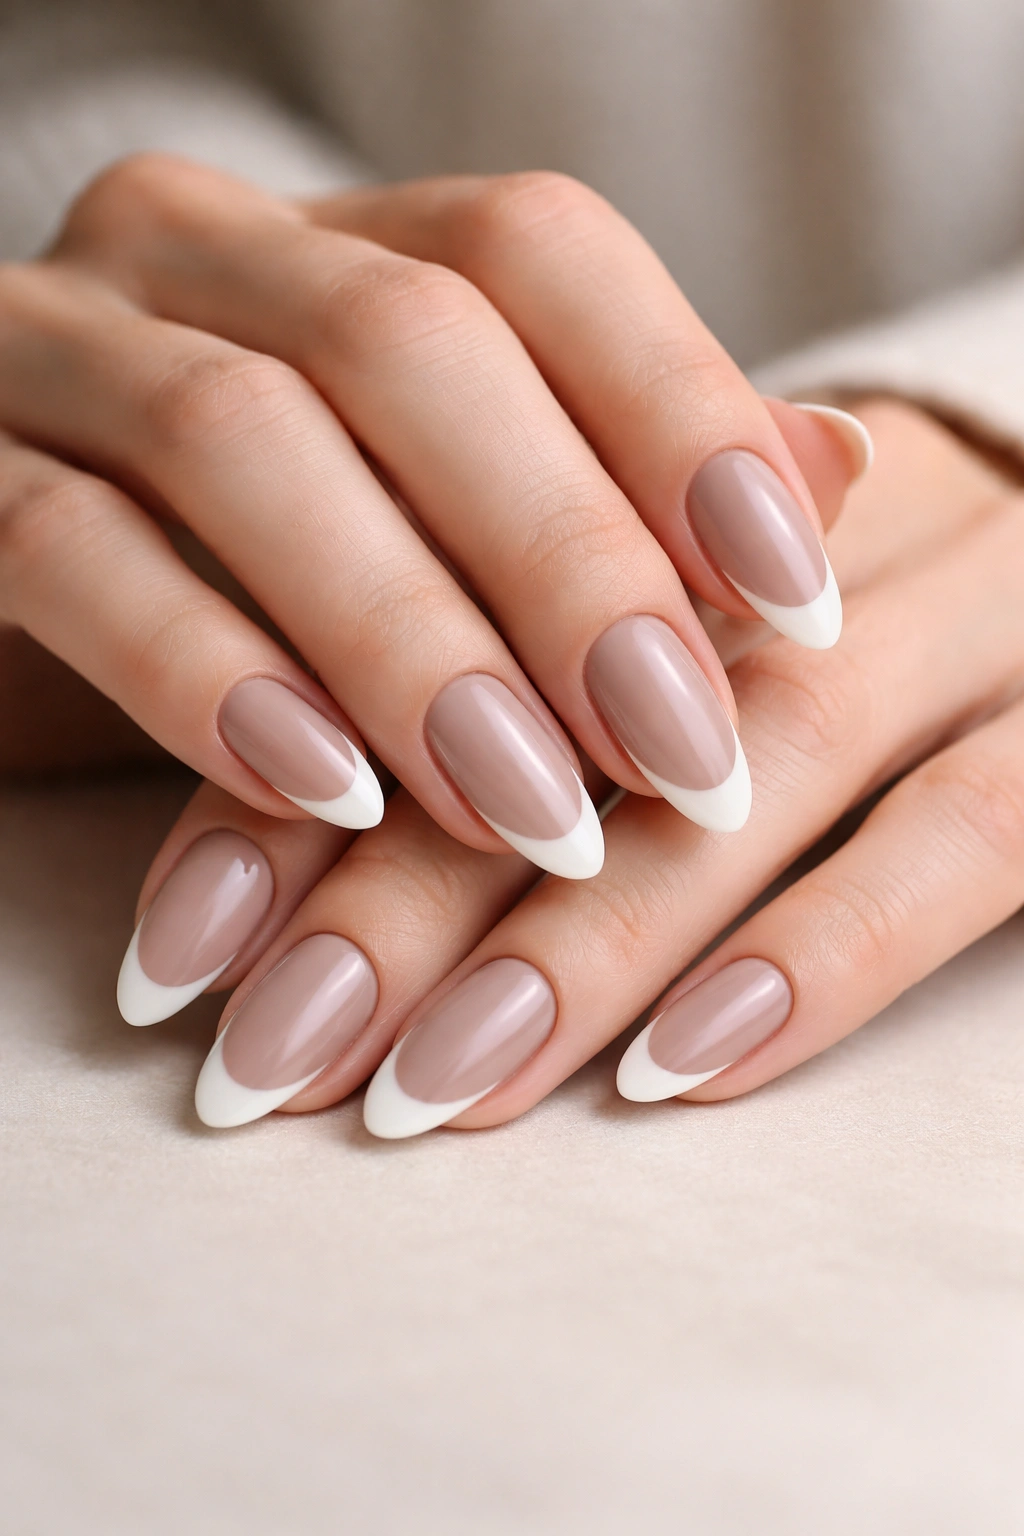
Taupe is the quiet hero of French manicures. It’s softer than white, a little warmer than gray, and far easier to wear if pure contrast feels too sharp.
A taupe base with ivory tips gives almond nails a smooth, tailored look. It’s especially good if you want something office-friendly or you just prefer neutrals that don’t feel severe. The ivory edge keeps the manicure classic, while the taupe base makes it look more relaxed than a bright pink-and-white set.
This version also hides tiny flaws better than a stark French. The colors sit closer together, so a small slip of the brush doesn’t shout at you. That’s useful when you’re still getting comfortable painting your own lines.
If I had to hand someone one neutral French idea and tell them not to overthink it, this would be near the top of the list.
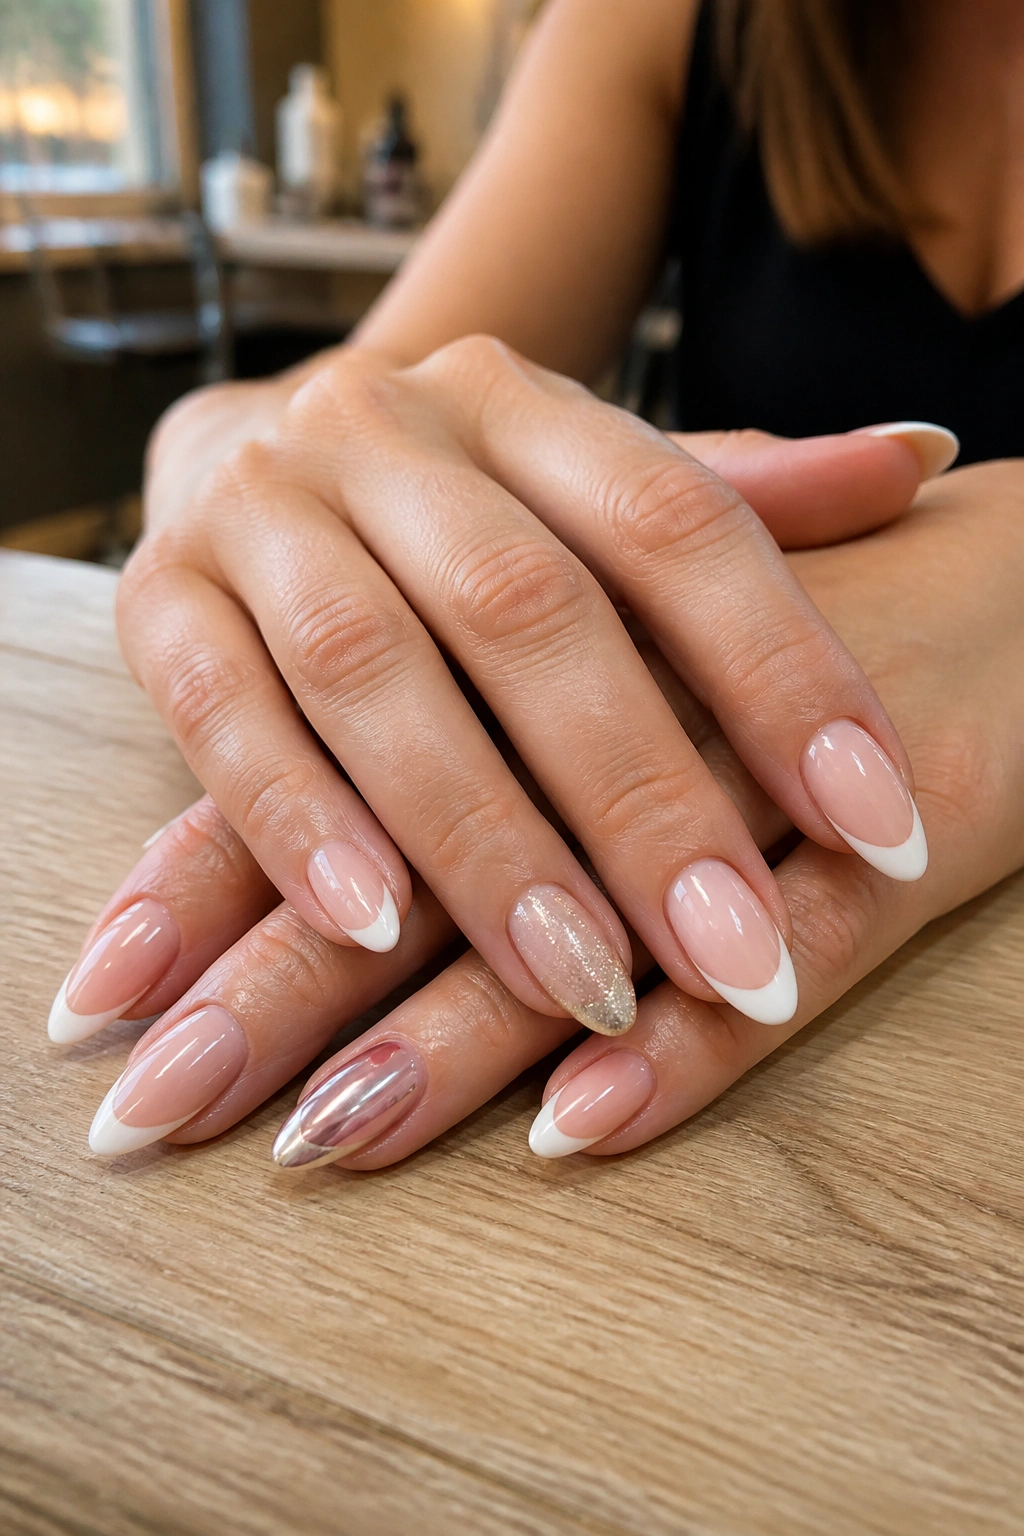
21. Nude Base With One Accent Nail
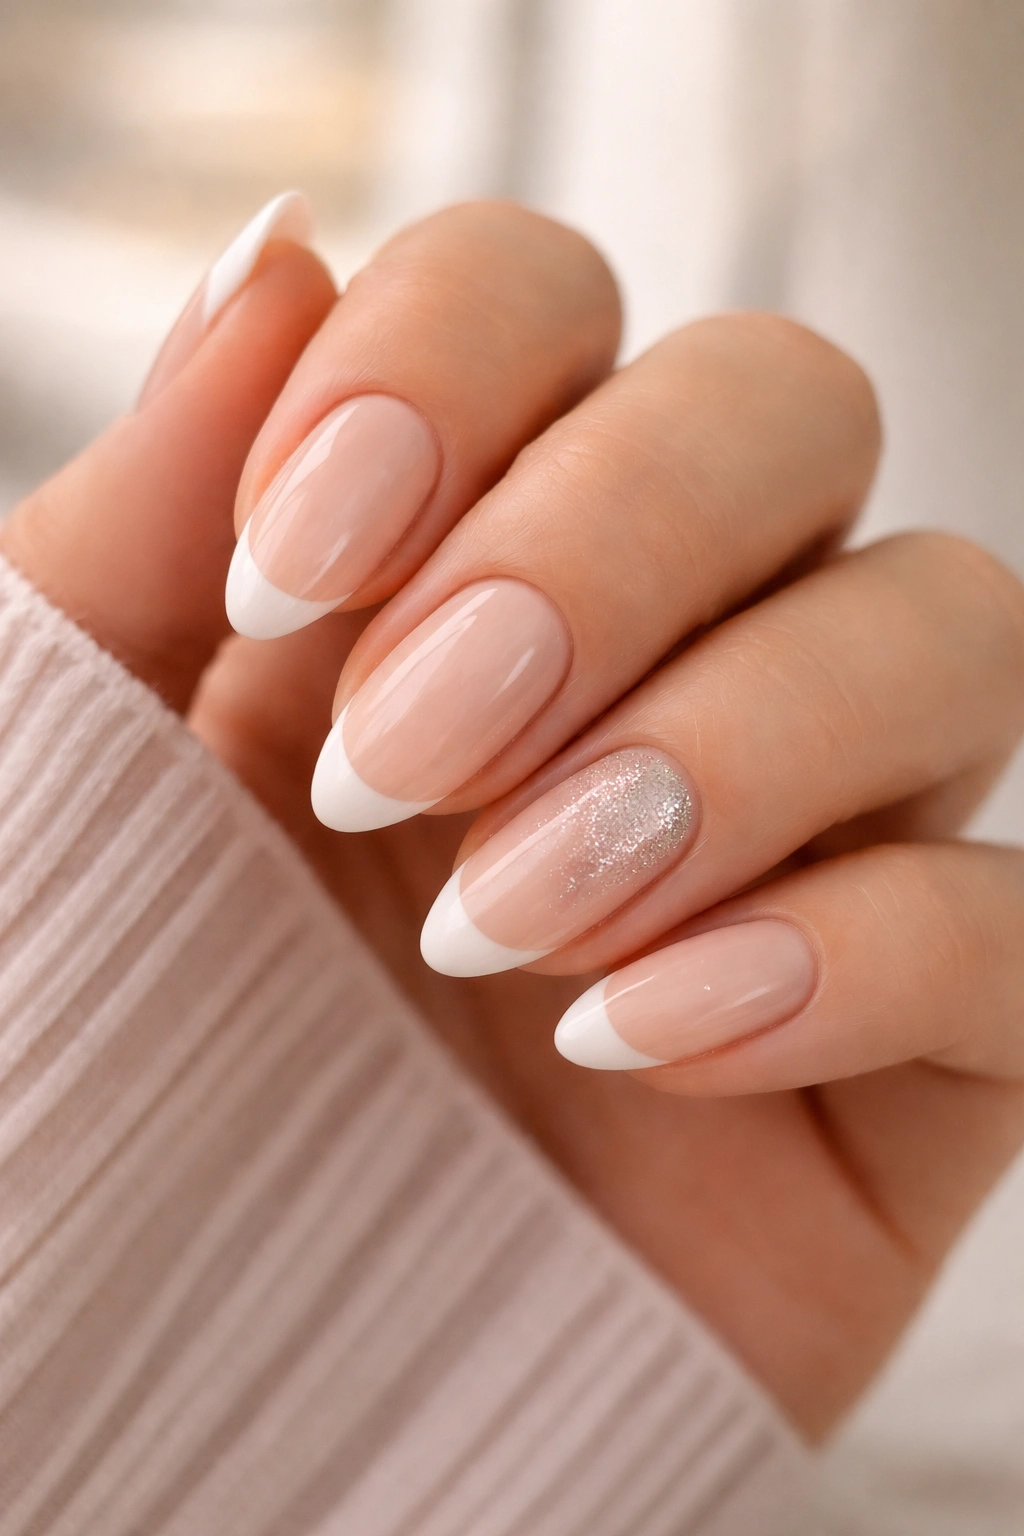
Sometimes the smartest beginner move is not doing ten identical nails. One accent nail can carry the whole set.
Keep most of the hand classic with a thin French tip, then let the ring finger or middle finger wear a tiny twist: a glitter tip, a chrome edge, or a slightly thicker line. That gives you visual interest without asking you to be perfect on every finger. On almond nails, the accent nail still feels balanced because the overall shape stays consistent.
This is also a nice way to test what you actually like. A lot of people think they want glitter until they see it on one nail and realize that’s enough. Same with chrome. Same with black. A single accent removes the pressure.
Best part: you can do this with regular polish and skip the drama.
22. Negative-Space French Cutout
Negative space gives the nail room to breathe. Instead of painting the entire tip, you leave a slim bare crescent or cutout near the edge and frame it with color.
That can sound advanced, but the bare space is part of why it works for beginners. A tiny gap hides uneven brushwork better than a full block of polish. On almond nails, the natural curve gives the cutout shape something graceful to follow, so the manicure feels intentional even when it stays minimal.
Use striping tape if your hand shakes. That’s not cheating; that’s using a tool. A nude base with a white, black, or muted-color outline around the cutout keeps the look modern without demanding perfect symmetry.
I like this one for people who want something a little different without stepping into full nail art territory.
23. Rainbow Fine-Line French
A rainbow French sounds bold, but the fine-line version is surprisingly easy to wear. The trick is not to paint giant arcs of color. Keep each tip narrow and let the shades stay soft.
Blush, lilac, mint, butter yellow, and sky blue make a sweet set because they still feel light on almond nails. The small tips don’t overwhelm the shape, and the variety keeps the manicure from feeling overly matched. If you’re nervous about doing every nail differently, start with two or three colors and repeat them across both hands.
A Simple Way To Do It
- Choose 5 pastel shades
- Keep each tip thin and rounded
- Use the same base color on every nail
- Seal with a glossy top coat so the colors look even
This is a good one if you want color without losing the easy feel of a French manicure.
24. Deep Burgundy French
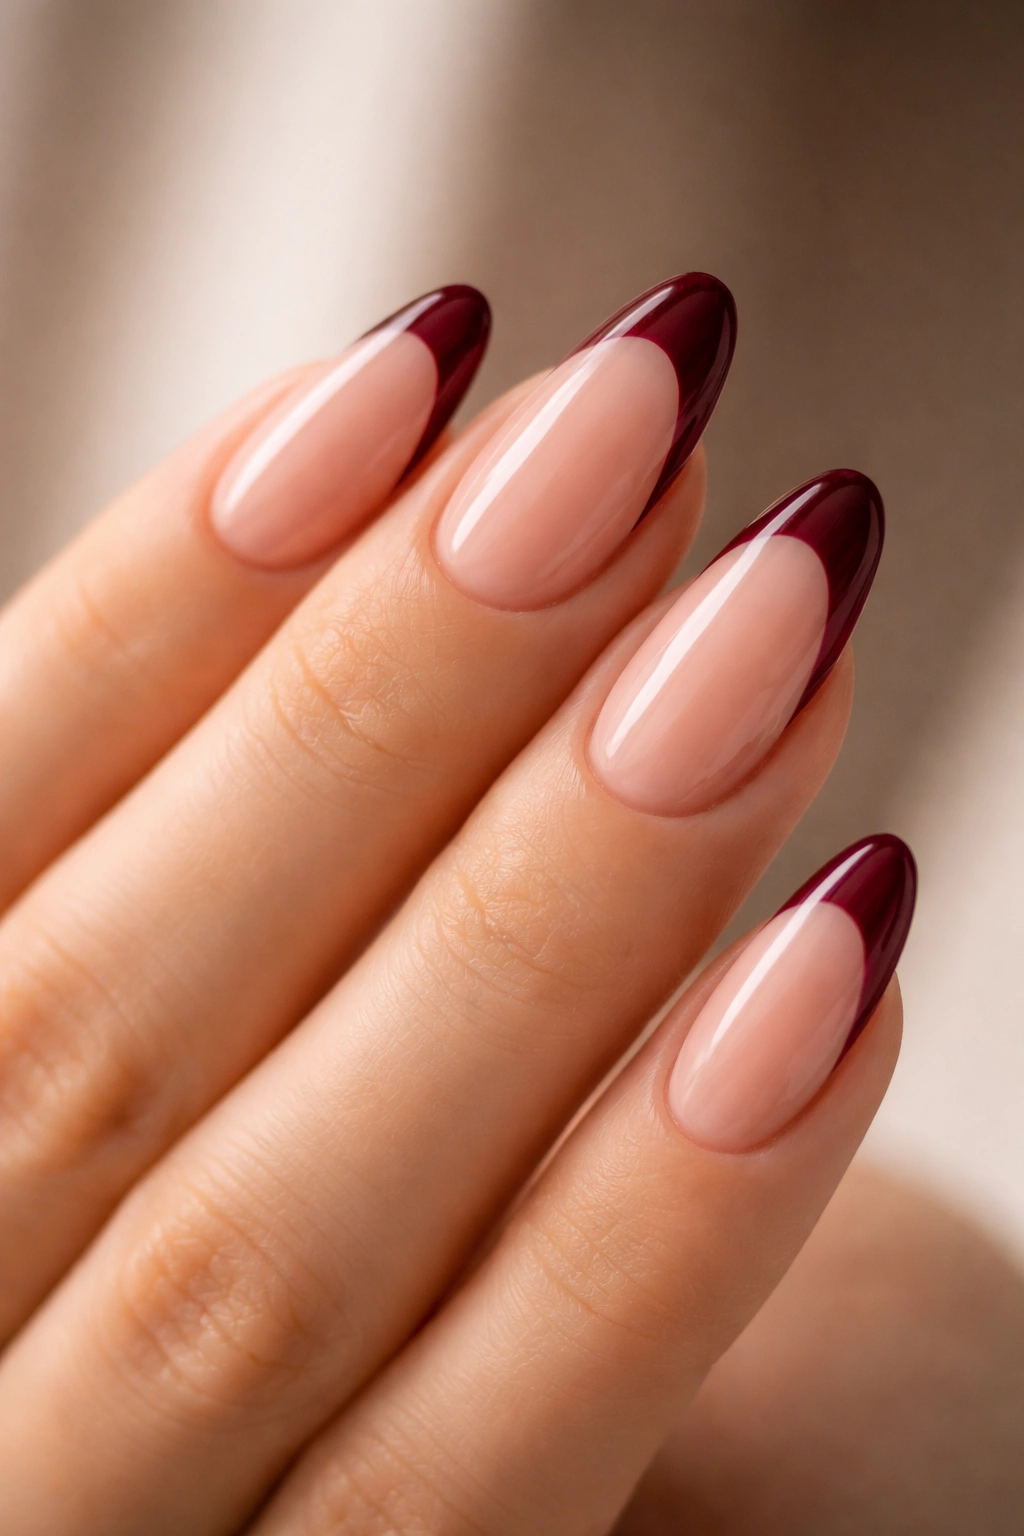
Burgundy tips have a little drama, but they’re still easy to wear. The color is dark enough to hide small line mistakes, which is useful if you’re learning.
On almond nails, a deep wine shade looks rich without needing a big design. A thin burgundy tip over a sheer nude base feels polished, and the almond curve stops the color from looking heavy. If you want something a bit moodier than red but not as severe as black, this is the sweet spot.
I’d keep the line narrow and the finish glossy. Burgundy gets especially nice when the light hits it, and the shine helps the tip look smooth even if your brush work isn’t perfect. This is one of those styles that looks better with restraint.
Simple design. Strong result.
25. Mix-And-Match French Starter Set
If picking one idea makes you stall, mix three or four that already feel easy. That’s the most practical beginner route, and it’s how a lot of good manicure habits start.
Try a set with four classic white tips, three micro French nails, one glitter tip, and one accent nail in chrome or burgundy. Keep the base color the same on every finger so the set still feels connected. On almond nails, that consistency matters more than matching every tip exactly.
A Sane Way To Build It
- Start with a sheer nude or pink base
- Pick two tip widths only
- Repeat the same finish across at least 6 nails
- Let 1 or 2 nails carry the twist
This is the version I’d recommend if you like options but hate overthinking. It gives you room to practice without turning the manicure into a test you have to pass.
