

Burgundy almond nail ideas have a way of looking polished even when the rest of your look is plain. The shape softens the color, and the color gives the shape some bite. Put them together and you get a manicure that can feel glossy and clean, dark and dramatic, or quietly elegant without trying too hard.
A burgundy that leans oxblood, merlot, or black cherry usually flatters almond tips better than a bright red. There’s depth in it. That matters, because the tapered almond silhouette already has a little movement built in, and a flat, loud red can fight with that curve instead of working with it.
One shade can do a lot. A glossy finish makes burgundy look glassy and sharp. Matte turns it into something softer and moodier. Chrome, foil, French tips, ombré, and tiny linework all change the feel fast, which is exactly why this color keeps coming back.
The best part is how forgiving the shape is. Medium-length almond nails can make burgundy look longer and cleaner, while shorter almonds still keep the color from feeling heavy. Start with the classic version, because once that’s right, every other twist makes more sense.
1. High-Gloss Burgundy Almond Nails
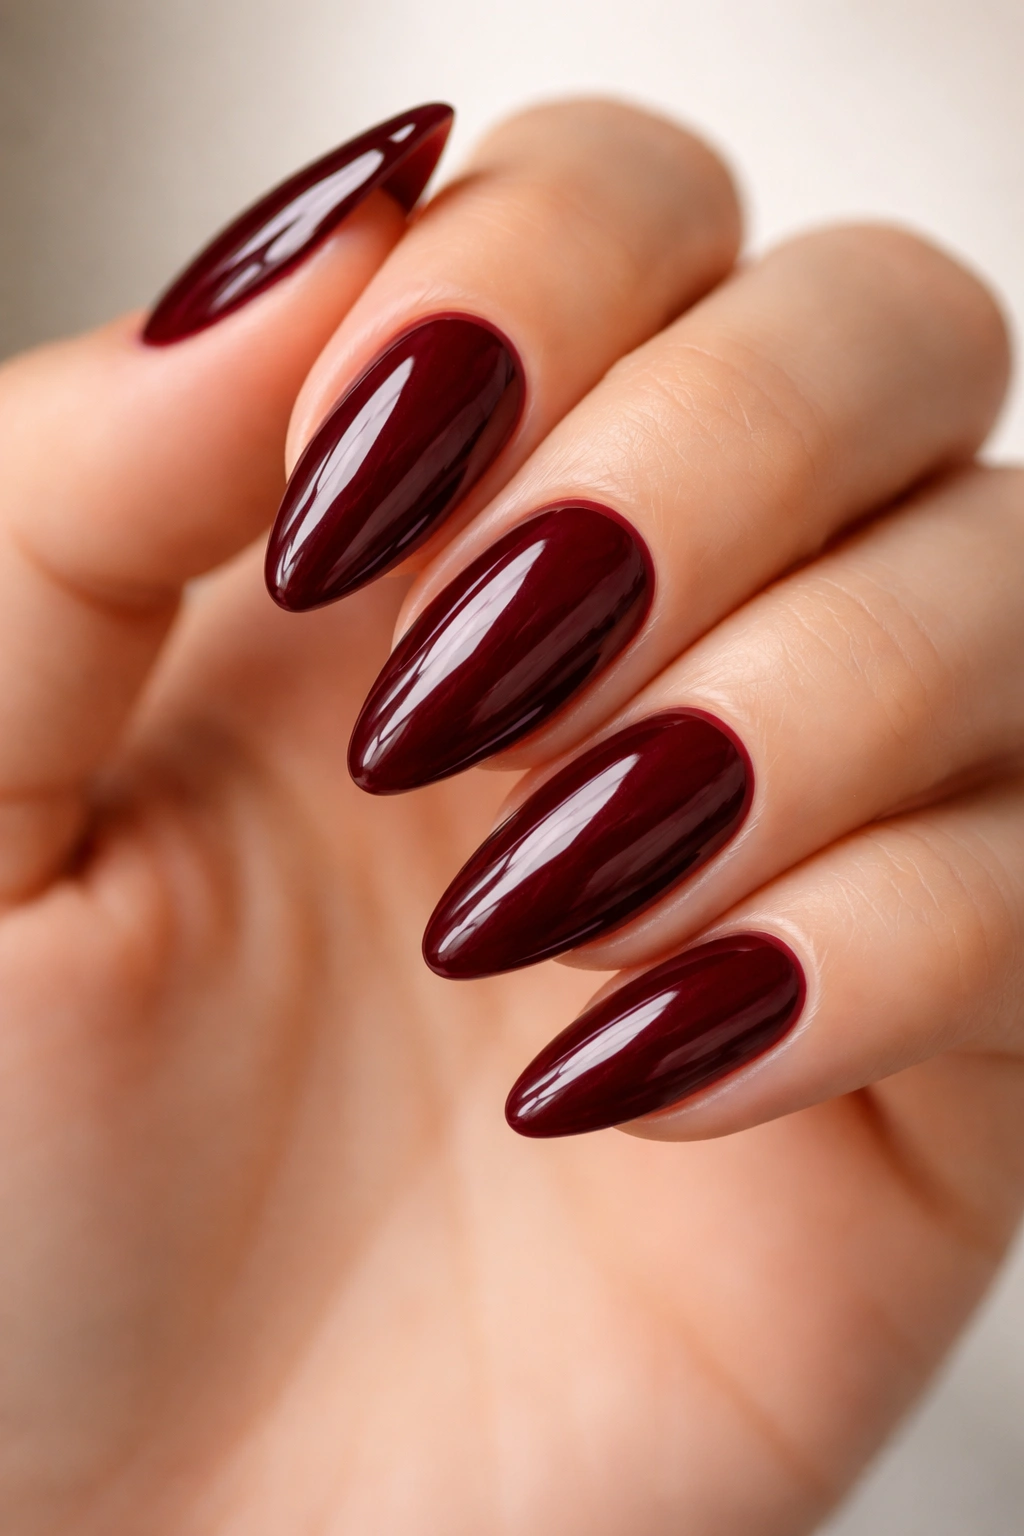
The cleanest burgundy almond manicure is still the one I reach for first. There’s no art, no extra sparkle, no visual noise — just a deep wine shade, a neat almond tip, and a top coat with a wet-looking shine. It reads polished from across the room and close up, which is harder to pull off than people think.
Why It Works So Well
The gloss does a lot of the work here. It bounces light across the curve of the nail, so the almond shape looks longer and smoother. A burgundy with a brown base tends to feel richer than a blue-red version, especially if your nails are medium length and you want the color to feel settled instead of loud.
- Ask for two thin color coats, not one thick one.
- Keep the almond point soft, not sharp.
- Seal the free edge so the tip wears evenly.
- Choose a brown-based burgundy if you want a softer finish.
- Choose a black-cherry burgundy if you want more depth.
Best tip: wipe excess polish from the sidewalls before curing or drying. That small cleanup step makes the whole manicure look more expensive than any nail art ever could.
2. Soft Matte Burgundy Almond Nails
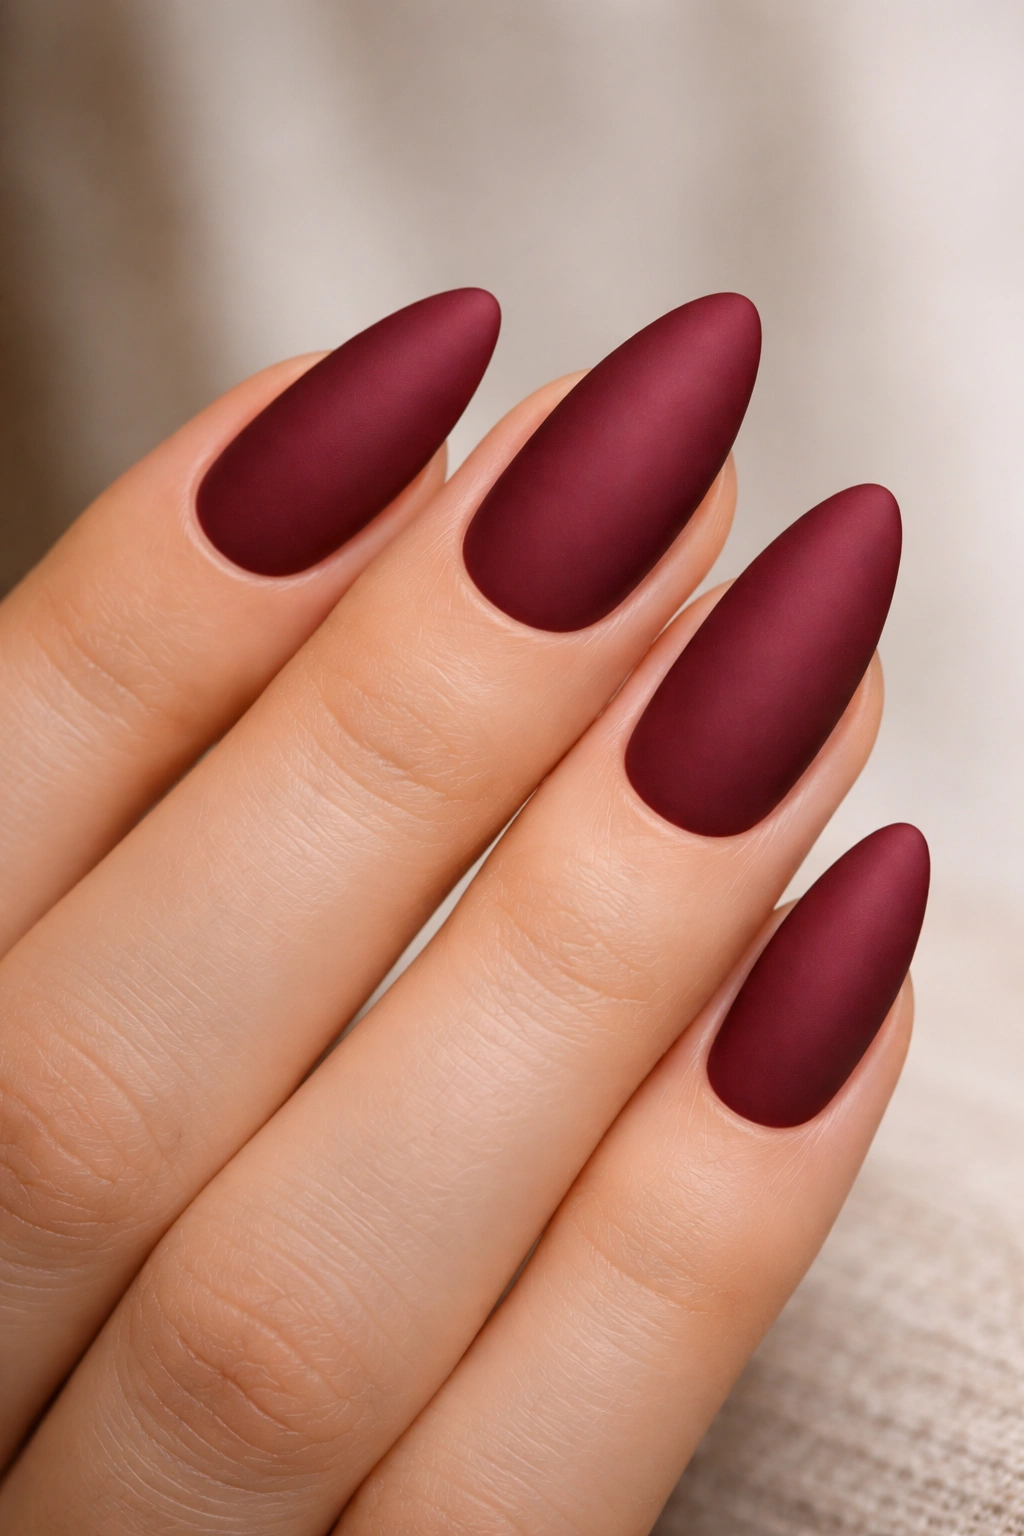
Matte burgundy is quieter, but it has more attitude than gloss. That sounds backwards, maybe, yet it’s true. The flat finish turns the color into something velvety and serious, and on almond nails it looks tailored rather than flashy.
The catch is that matte shows every flaw in your prep. Ridges, dust, and uneven application show up fast because there’s no shine to hide them. If you want this look to hold up, use a smooth base coat, paint in thin layers, and wait until the color is fully dry or cured before adding the matte top coat.
I like this version most on slightly shorter almonds. The shape stays elegant, but the matte finish keeps the manicure from looking too glossy or too long. It’s also a good choice if you wear a lot of knitwear, suede, or textured fabrics — the whole look feels cohesive without being matchy.
One warning. Matte top coats can get oily at the tips and around the cuticle line. A tiny bit of hand cream is fine. Smearing lotion all over a fresh matte manicure is not.
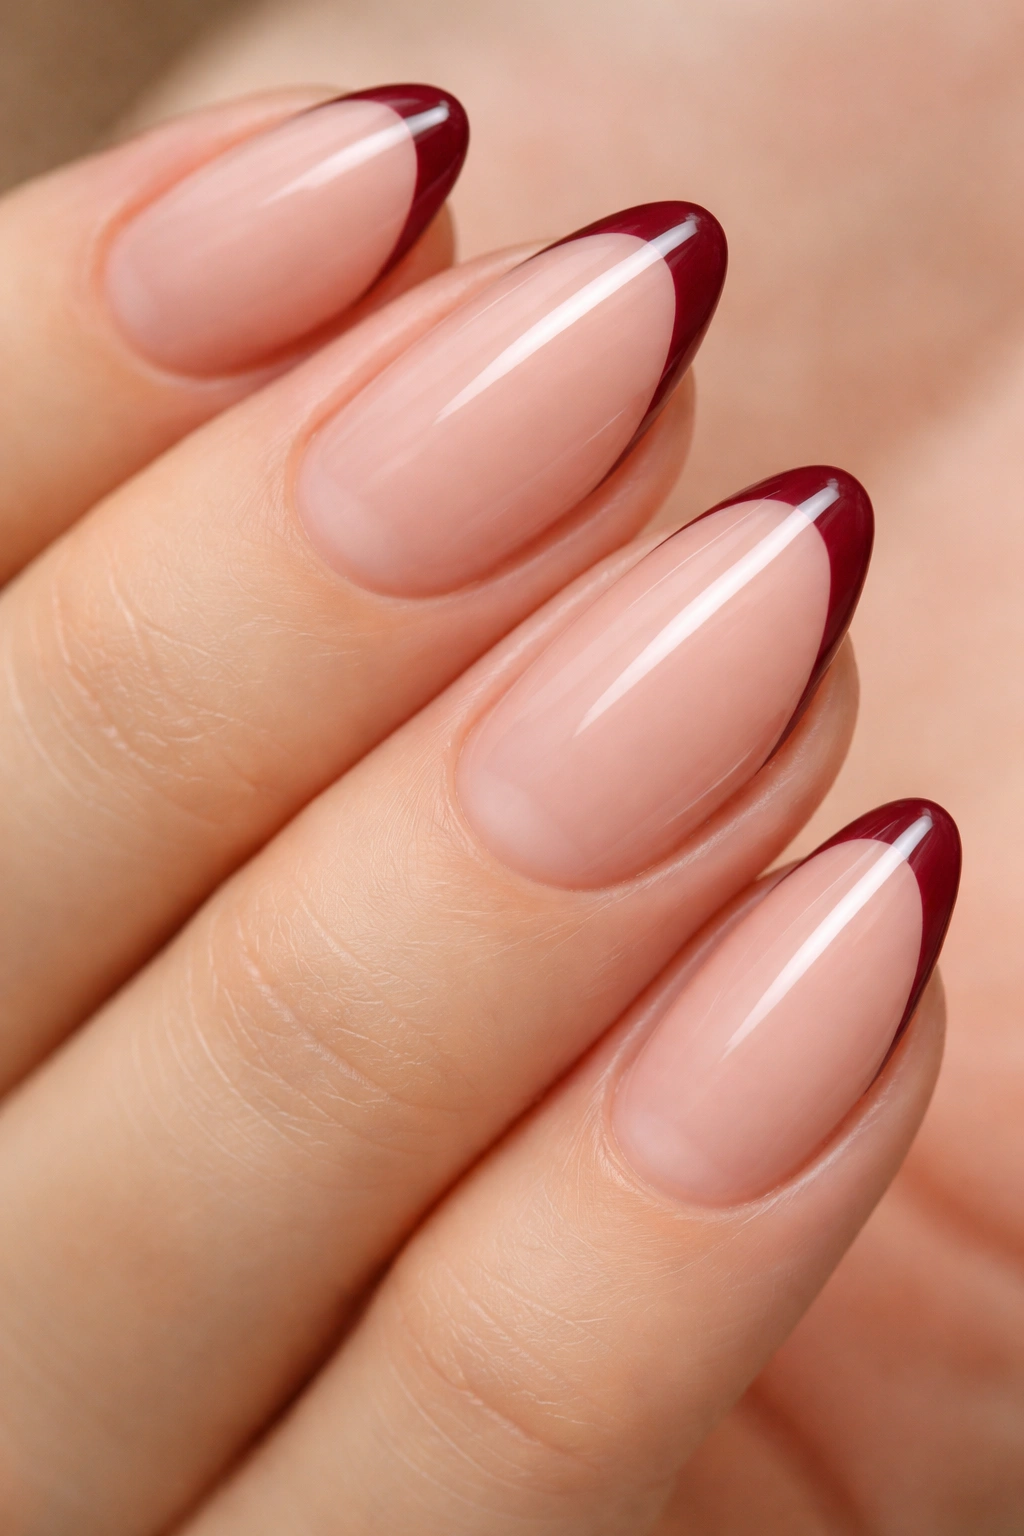
3. Burgundy French Tips on a Sheer Nude Base
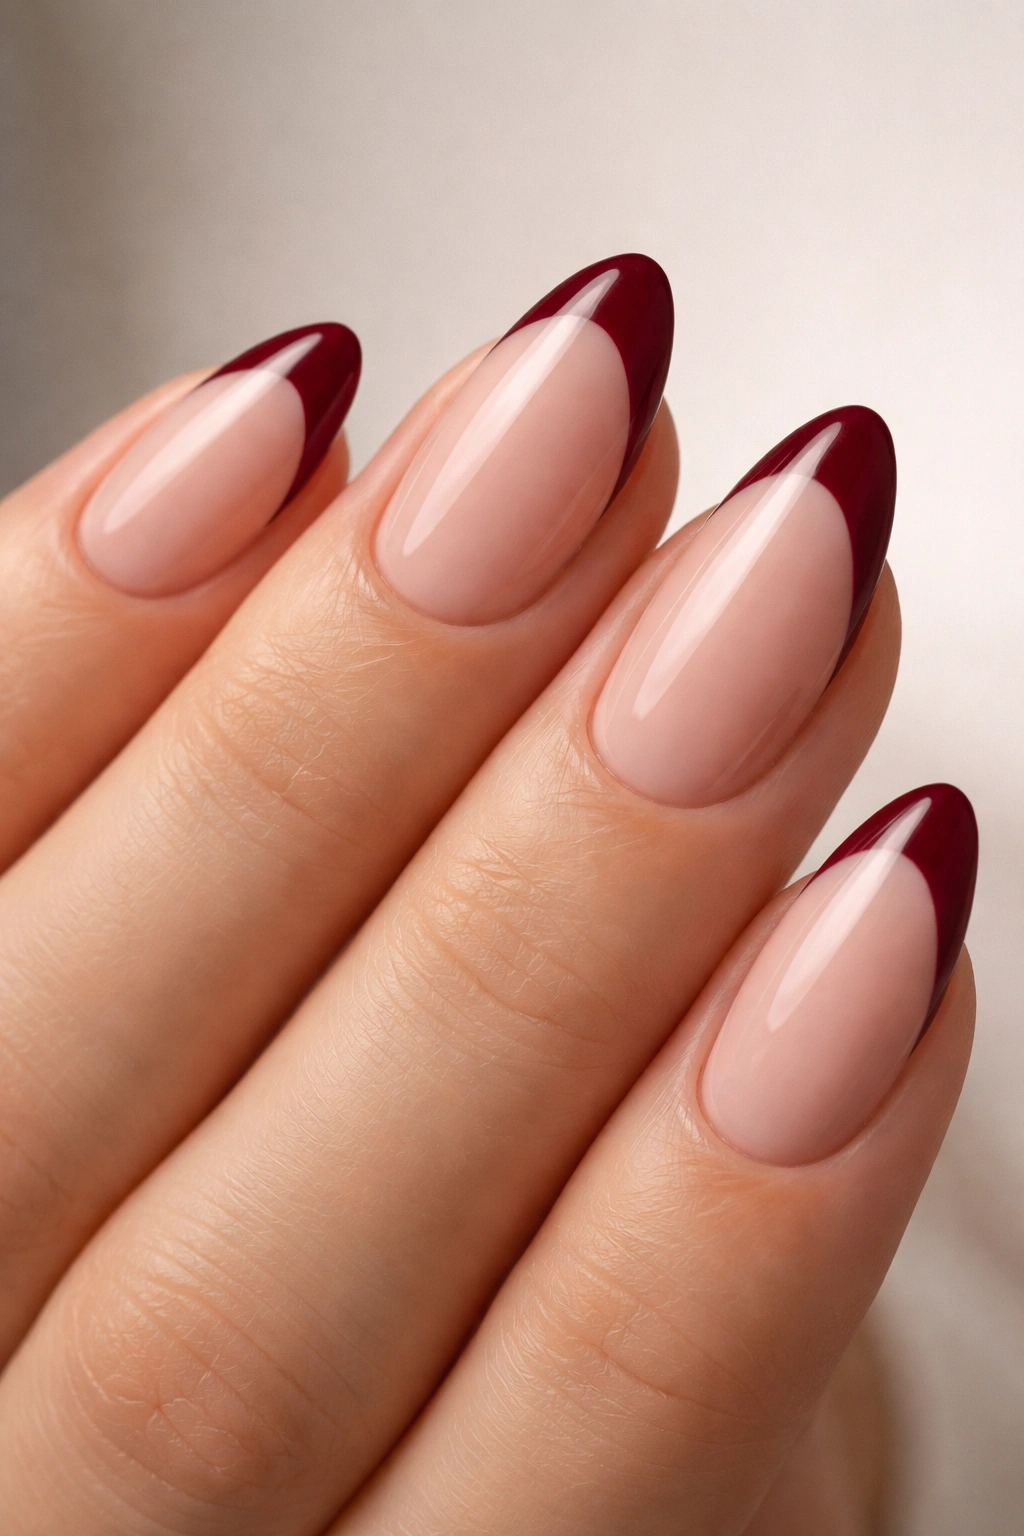
Why does a burgundy French manicure look so fresh on almond nails? Because the negative space keeps the nail light while the dark tip gives the shape a clean arc. The result feels sharper than a standard French but less heavy than a full burgundy set.
A thin tip, usually around 1 to 3 millimeters, works best if you want the nails to stay airy. Wider tips can look bold and modern on long almonds, but they can swallow short nails if the smile line sits too low. The base should be sheer pink, beige, or milky nude — not opaque, because the whole point is letting the natural nail show through.
How to Wear It
- Keep the burgundy tip narrow for a clean finish.
- Use a nude shade that matches your nail bed, not your skin tone.
- Try a soft square-curve smile line if you want a softer edge.
- Ask for a glossy top coat to keep the contrast crisp.
This is one of those designs that looks more expensive than it is. Maybe that’s why people keep saving it. It never feels busy.
4. Mirror-Shine Burgundy Chrome Almond Nails
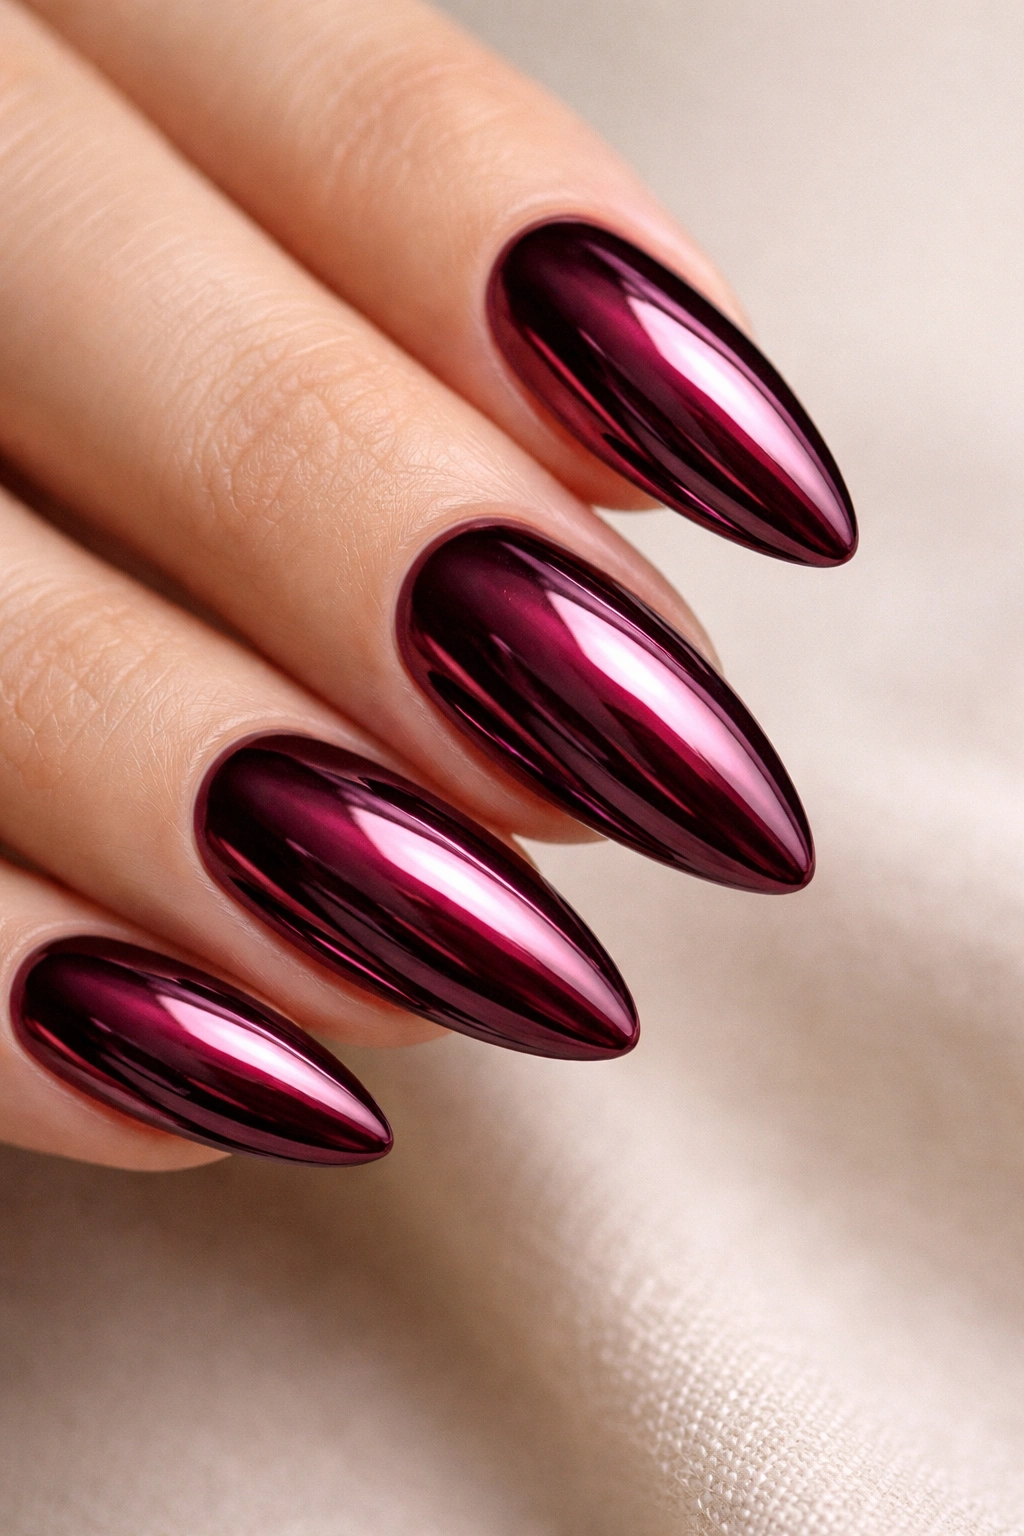
If you’ve ever caught your nails in a mirror under hard indoor light, you already know why chrome works here. Burgundy chrome turns the color into something almost liquid, and the almond curve makes the reflection travel smoothly from base to point. It’s dramatic, yes, but in a controlled way.
Chrome needs a clean base. Usually that means a burgundy gel color underneath, then chrome powder brushed over a no-wipe top coat while the surface is still tacky enough to grip it. After that, the edges need to be sealed well or the finish chips faster than you’d like. That part matters more than people think.
- A black base gives the chrome a darker, mirror-like depth.
- A burgundy base gives it a warmer, wine-metal look.
- Medium-length almonds work better than extra-long points.
- One accent chrome nail can be enough if you want less shine.
The texture is smooth, almost glassy. And that’s the whole appeal. It feels sleek without needing any extra art layered on top.
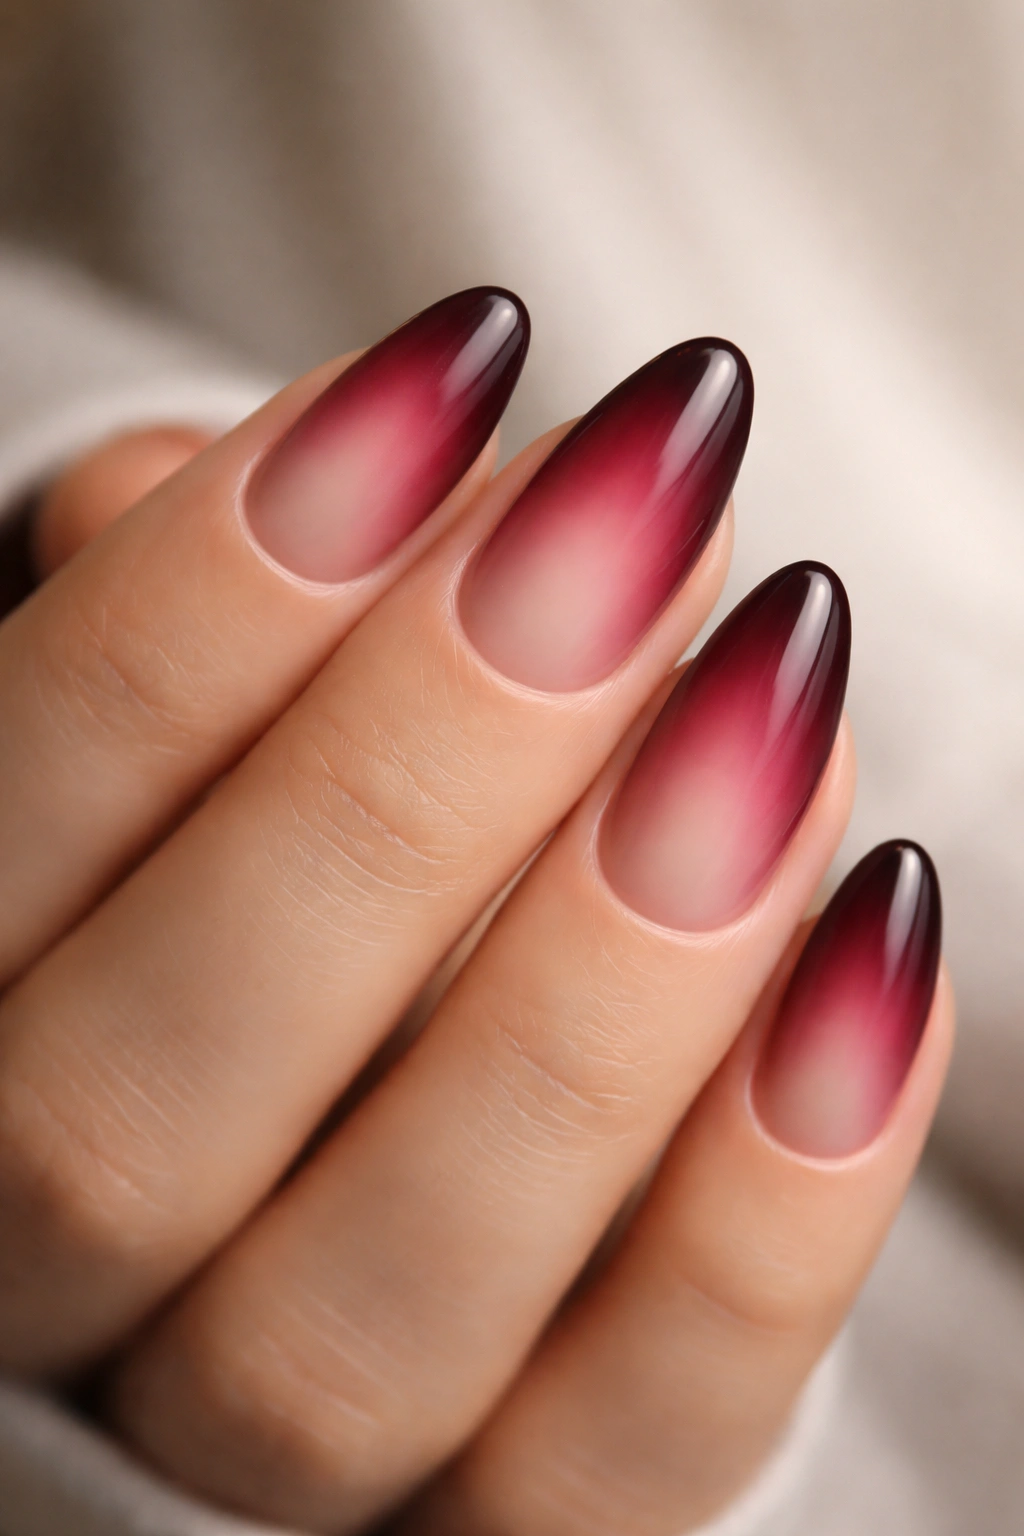
5. Burgundy Ombré That Fades Into Blush
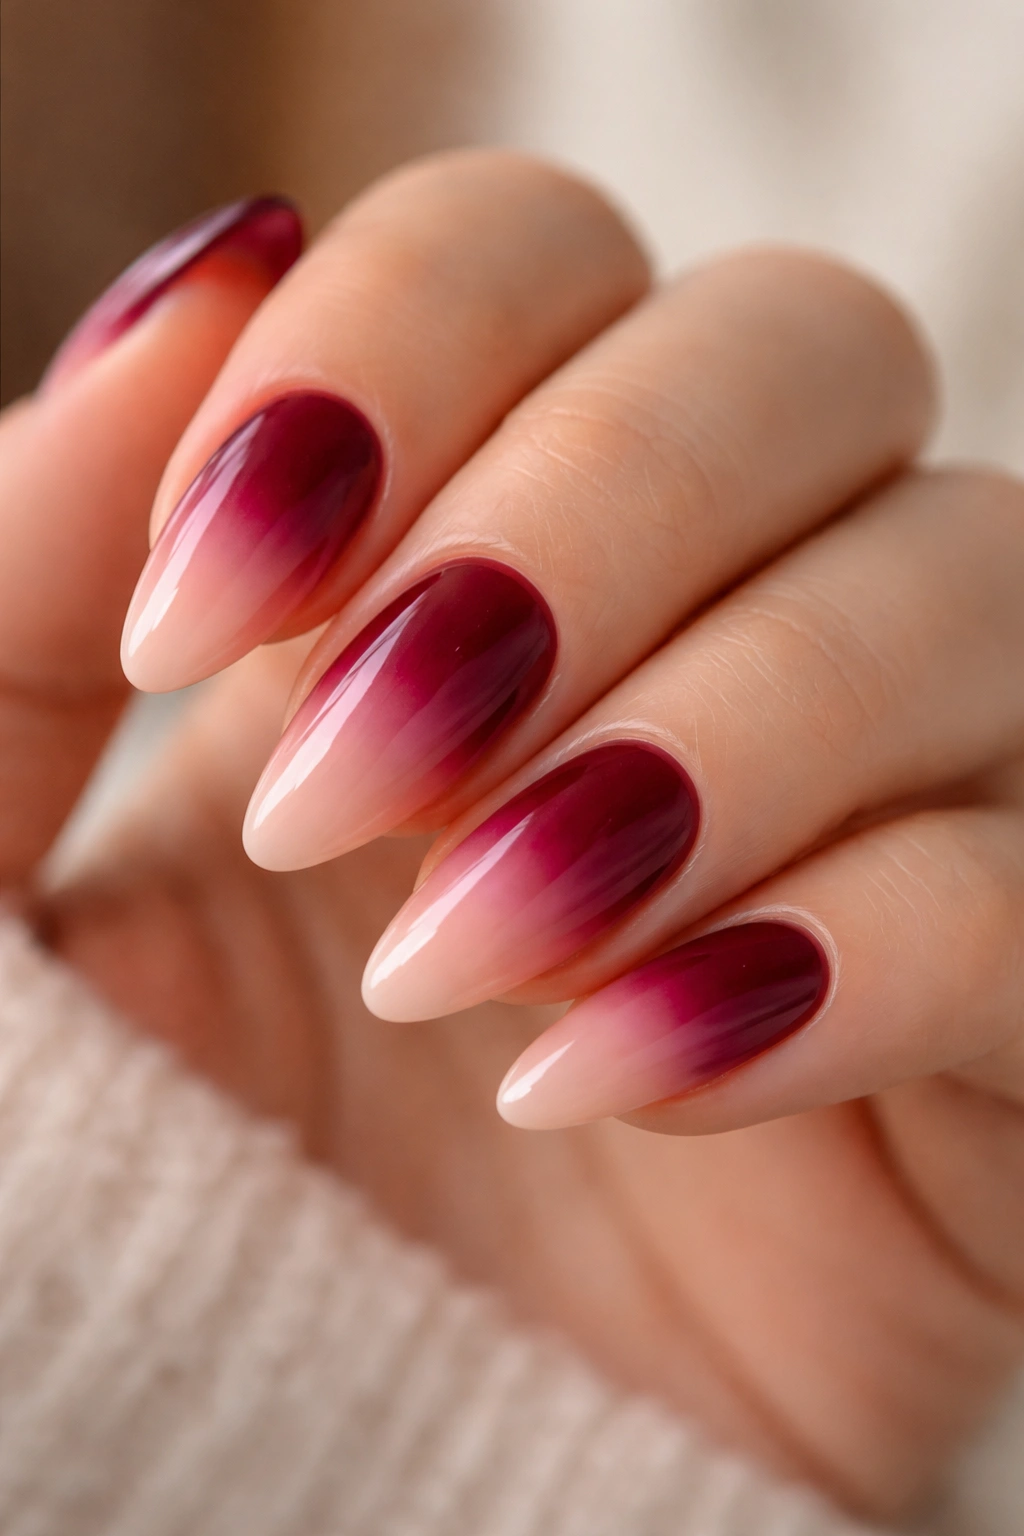
A burgundy ombré manicure is a good answer if you want the color but not the wall-to-wall intensity of a solid set. The fade softens the look at the cuticle or the tip, which gives the nail a little breathing room and keeps the almond shape from feeling dense.
I prefer burgundy fading into blush or milky pink because the shift feels natural. Darker at the free edge gives the nails a grounded look, while darker near the cuticle makes the color read a little more dramatic. Either way works. What matters is keeping the blend smooth, not stripey. A sponge fade can work well, but only if you use thin layers and dab lightly instead of dragging polish around.
Unlike a full burgundy manicure, ombré gives you some flexibility with grow-out. The softer base area means the new nail doesn’t scream at you after a week or two. That’s useful if you wear color nonstop and hate constant touch-ups.
If you want the cleanest result, keep the fade on the middle three nails and use solid burgundy on the pinky and thumb. It breaks the set up just enough.
6. Burgundy Nails with Gold Foil Flecks

Gold foil changes burgundy fast. A few irregular flecks scattered across a deep wine base make the whole manicure look richer, not louder, because the gold flashes only when the light hits it. That little bit of movement is what makes this design feel alive.
I like foil best when it’s used sparingly. One or two accent nails can carry the whole look, and the rest of the hand can stay solid burgundy. If you cover every nail in foil, the design starts to look busier than it needs to be. The trick is spacing — tiny shards near the cuticle, a few around the side, maybe one heavier cluster on the ring finger.
The foil should sit on a tacky layer so it grips cleanly. Then it needs a smooth top coat, usually a slightly thicker one than usual, because foil edges can poke through if the seal is too thin. That’s the annoying part, but it’s worth it.
This version looks especially good with simple jewelry. A plain gold band and burgundy foil feel like they were meant to be in the same room.
7. Velvet Cat-Eye Burgundy Almond Nails
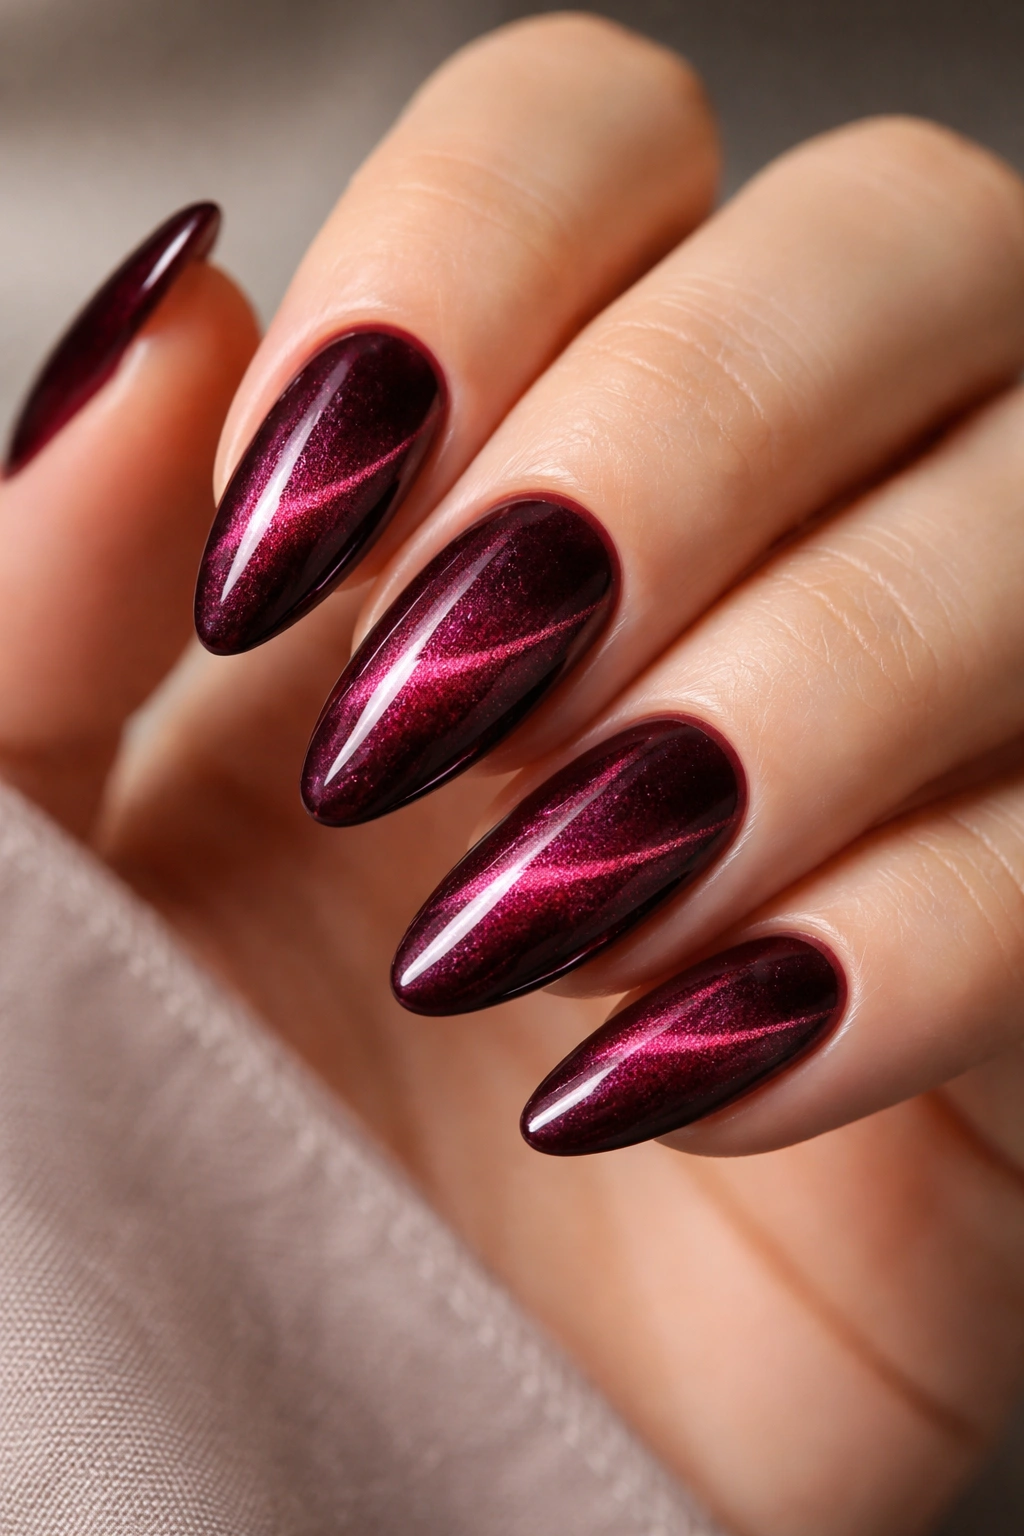
Velvet cat-eye burgundy is one of those finishes that looks simple in a flat photo and much better in motion. The magnetic pigment pulls a soft, light-catching stripe through the color, so the nail seems to shift when you turn your hand. On almond nails, that streak follows the taper in a way that feels almost built in.
Why It Moves
The magnet is doing the shaping. Hold it a few millimeters above the nail after applying the magnetic polish, and keep it steady for several seconds until the shimmer band locks where you want it. A center stripe elongates the nail. A diagonal stripe makes the curve look slimmer. Both work, but they give off different moods.
How to Ask for It
- Ask for a burgundy magnetic gel polish.
- Keep the effect centered if you want a classic look.
- Tilt the stripe toward the outer edge for a sharper finish.
- Use one accent nail first if you’ve never worn cat-eye polish.
The finish can look plush, almost like crushed velvet. That’s the draw. It has texture without actual texture, which is a nice trick when you want depth but not nail art clutter.
8. Burgundy Half-Moon Nails with Negative Space
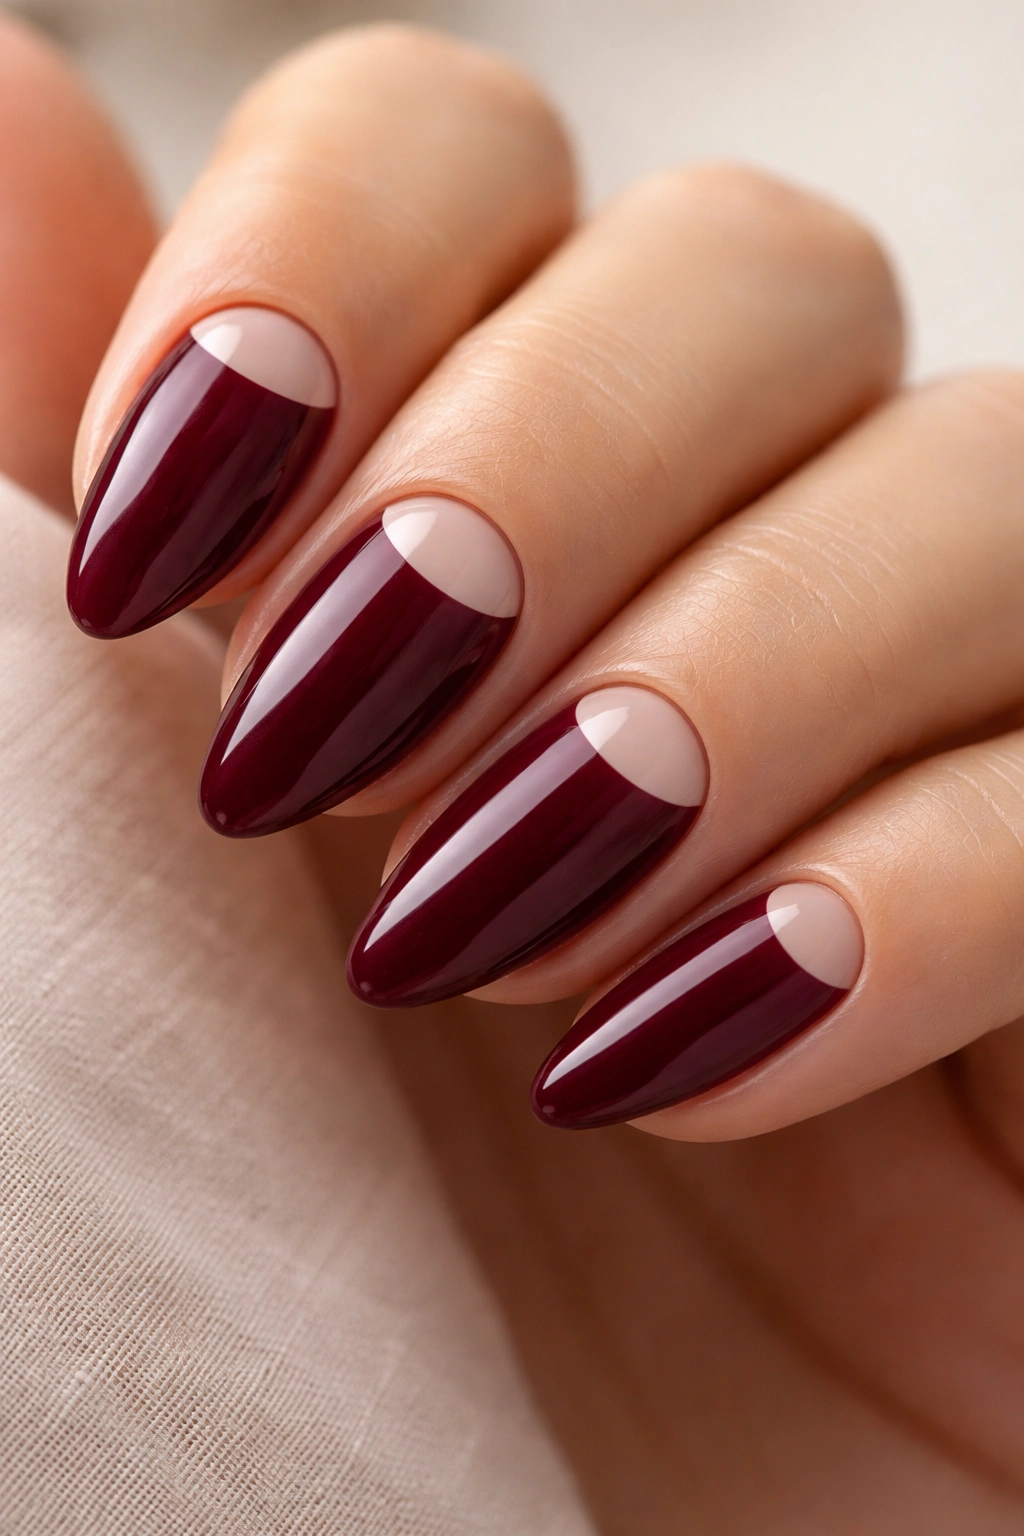
Burgundy half-moon nails are the easiest way to make the color feel modern. Leaving a clear crescent at the cuticle gives the design air, and that bare space keeps the dark polish from swallowing the whole nail. On almond shapes, it looks neat and a little architectural.
The cuticle moon does not need to be huge. A crescent about 4 to 5 millimeters deep is enough to read clearly. Too wide, and the design starts looking like an unfinished manicure rather than a deliberate one. Too small, and you lose the point. The balance matters more than the polish shade here.
- Keep the crescent identical on both hands.
- Use a fine brush or a stencil guide if your line work shakes.
- Let the burgundy cover the rest of the nail in a smooth arc.
- Finish with gloss so the cutout doesn’t look dusty.
This design works on short and medium almonds alike. It feels sharp, but not fussy. That’s a nice place to be.
9. Burgundy Marble Nails with White Veining
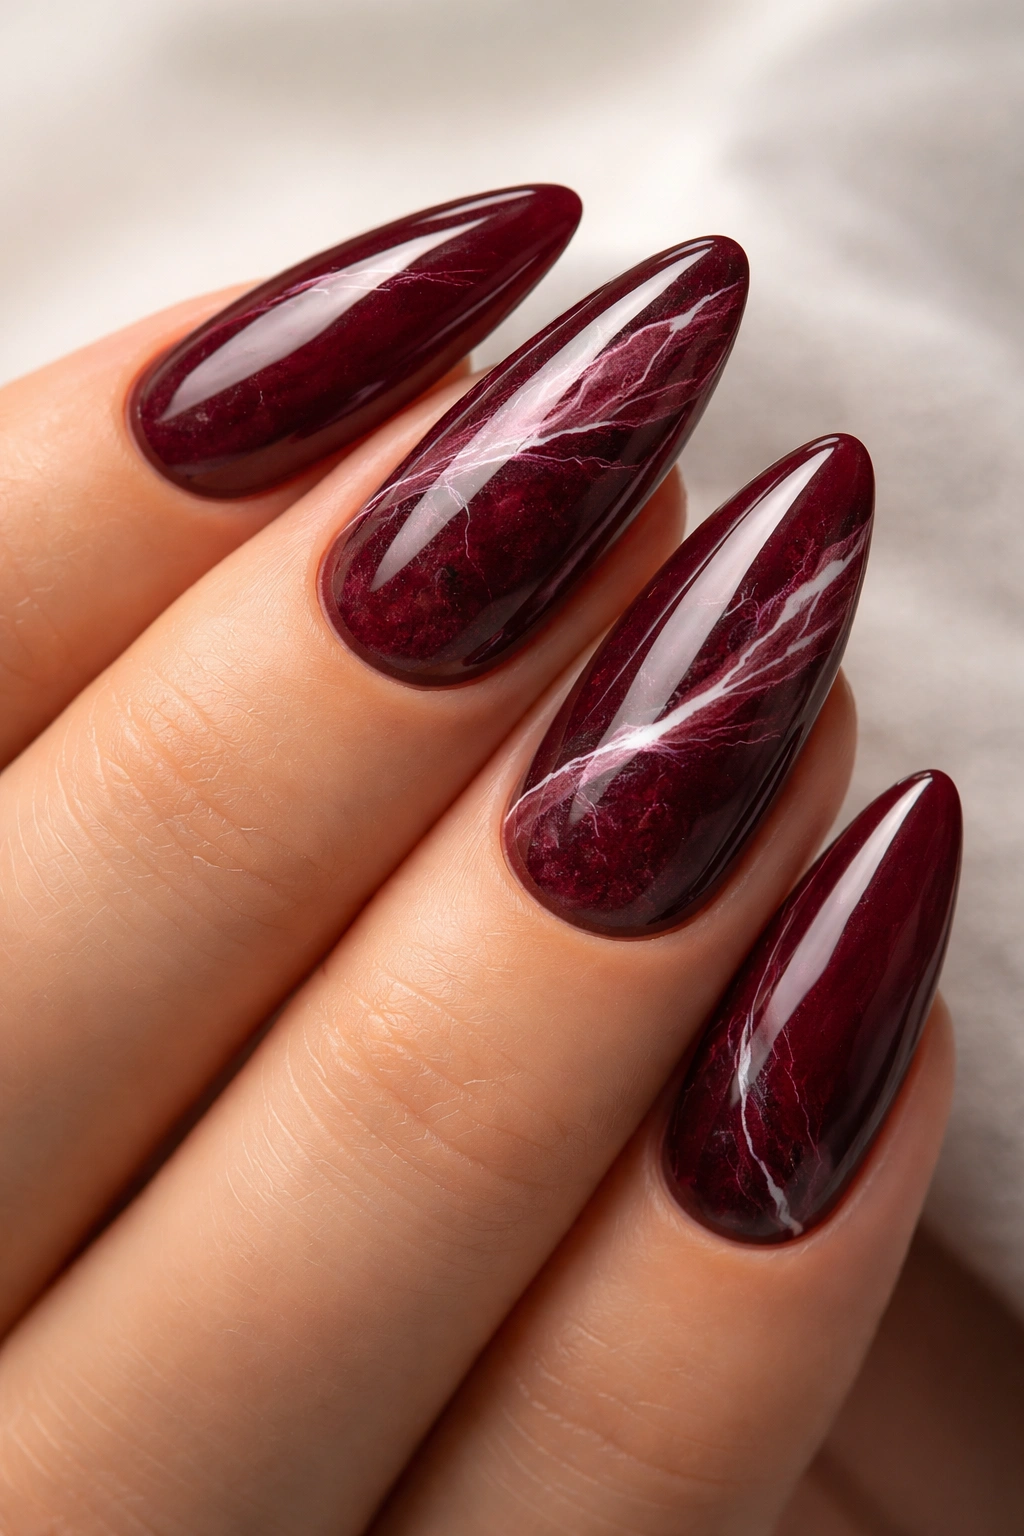
Why does marble look so good in burgundy? Because the white veining breaks up the weight of the color. A full burgundy nail can feel rich and solid, but once you thread a few pale veins through it, the whole thing gets movement and depth.
The key is restraint. Marble should look like it drifted across the nail, not like someone scribbled through wet polish. A thin liner brush helps, and so does using a milky white that isn’t too bright. Some nail techs add a touch of burgundy into the white veining so the marble feels more blended. That works, but only if the lines stay soft. Muddy marble is a real thing, and it happens fast when you overmix.
Where to Place It
- Keep marble on one or two accent nails.
- Use solid burgundy on the rest for contrast.
- Let the veining run lengthwise on almond nails.
- Leave a little open space so the design can breathe.
I like this look when it’s barely controlled. The small imperfections are what make it interesting.
10. Burgundy Tortoiseshell Accent Nails

Burgundy tortoiseshell nails sound busier than they look. Done well, they feel layered and warm, almost like stained amber under wine glass. The trick is keeping the tortoiseshell detail to one or two accent nails while the rest of the set stays solid burgundy.
Start with a sheer amber or caramel base, then float in darker cocoa spots and a few burgundy patches before sealing it all under gloss. The layers should stay translucent. If the colors go opaque, you lose the tortoiseshell effect and end up with a muddy brown nail. That’s the mistake people make most.
This design plays nicely with almond nails because the shape keeps the eye moving. The pattern doesn’t sit still; it follows the curve. That makes it feel more expensive than a flat stamped print.
One good approach: put tortoiseshell on the ring fingers and maybe the thumbs, then keep the other eight nails in a deep burgundy. It gives the set texture without turning every finger into a statement.
11. Burgundy Micro-French Almond Nails
A micro-French is basically the neatest way to wear burgundy if you want polish without much visual weight. The tip is only 1 to 2 millimeters thick, so the nail still looks light and clean. On almond shapes, that tiny line hugs the curve and makes the hand look longer.
Unlike a full burgundy French, the micro version leaves the base almost untouched. That means the nail bed stays bright and the dark color lands only where the shape tapers. It’s a small detail, but it changes the whole feel of the manicure. The look reads precise, not loud.
This is the one I’d pick if you have short-to-medium almonds or if your nails grow out fast and you want the design to stay neat. The smaller the tip, the less obvious the grow-out line. It also works well when you want burgundy in a work setting but don’t want a heavy manicure.
A clean cuticle line matters here. Every tiny slip shows. That’s the tradeoff, and it’s worth it if you love tidy nails.
12. Burgundy and Nude Color-Block Nails
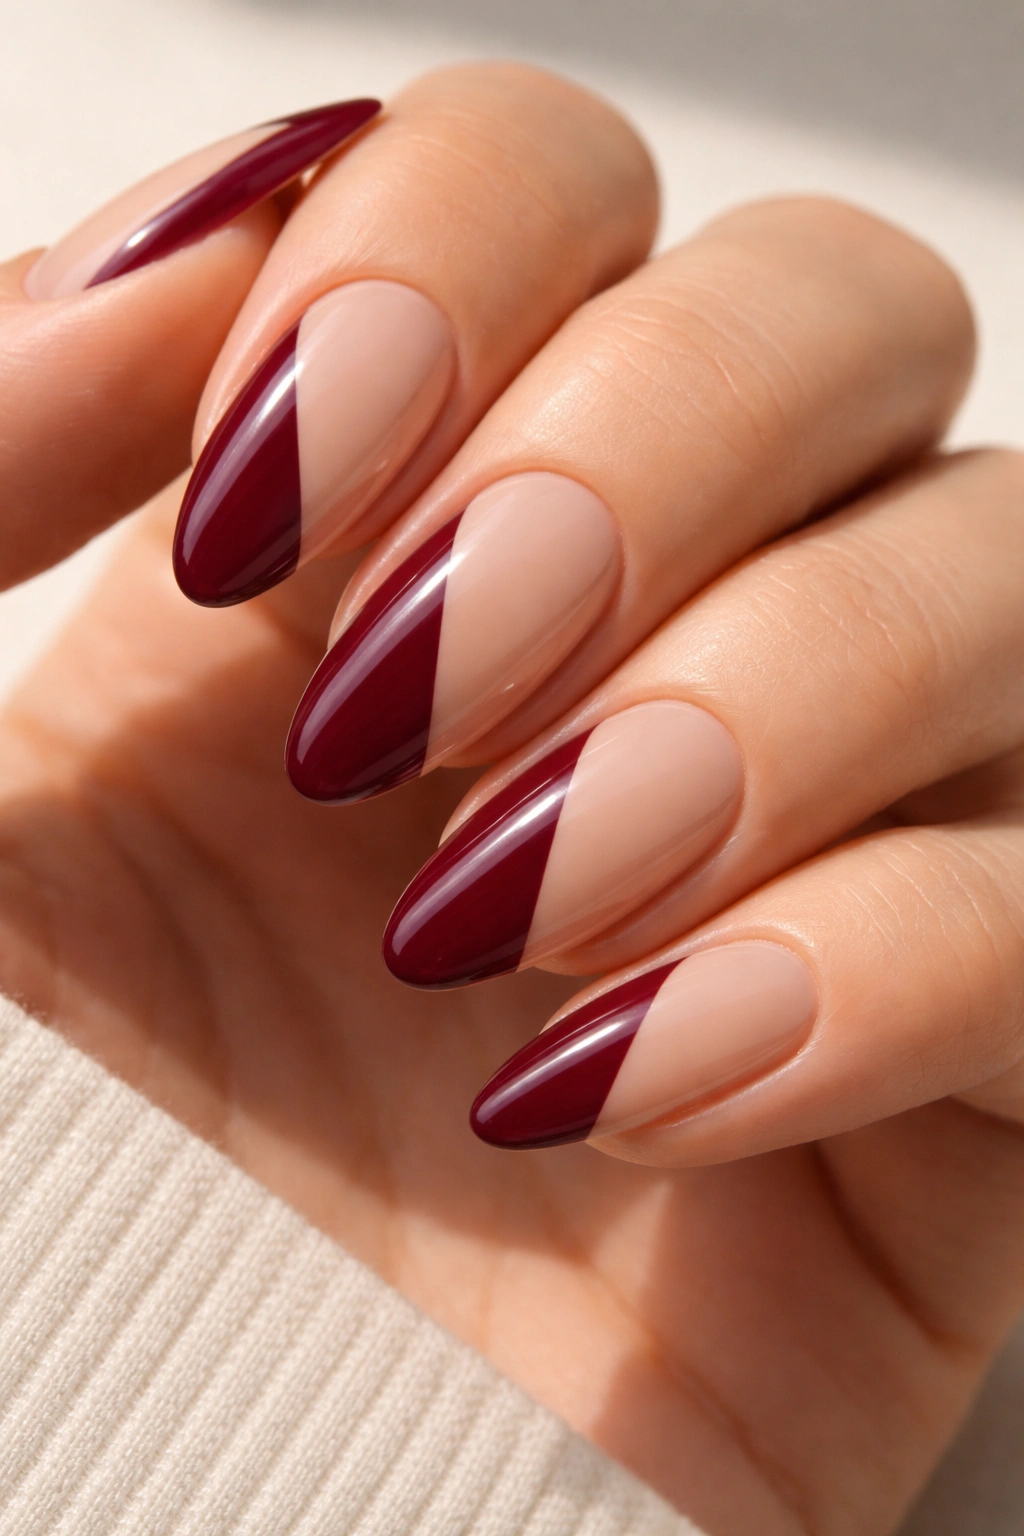
Color-blocking is the fastest way to make burgundy feel graphic. Instead of letting the shade cover the whole nail, you split the surface into sections — a diagonal wedge, a side panel, a half-and-half divide. The result is sharper and more deliberate than a standard solid manicure.
A diagonal split is my favorite because it follows the almond shape naturally. A straight vertical block can look harsh unless the lines are perfect. Diagonals move with the nail. If you want more contrast, pair glossy burgundy with a satin or matte nude base. Texture contrast does a lot of the heavy lifting here, more than people expect.
Use striping tape if your hands are shaky, or a very fine brush if you want softer edges. Either way, the line between colors needs to stay crisp. Fuzzy edges make the whole design look accidental, and this style should look intentional.
This is a good choice if you like a little edge but not full nail art. It has geometry. It has restraint. That combination works.
13. Burgundy Aura Nails with a Soft Glow
Want burgundy without a solid wall of color? Aura nails are the answer. They keep the edges darker and let the center fade into a softer tone, usually rose, mauve, or sheer blush. On almond nails, that halo effect makes the taper look longer and slimmer.
The effect can be done with an airbrush or a sponge, depending on what you have. The important part is keeping the center diffused. You do not want a hard circle. You want a soft bloom of color that sits inside the darker burgundy border. If you overblend, the design turns flat. If you underblend, the glow looks like a blob. Annoying, yes. Also fixable.
Aura nails are a good fit when a solid burgundy feels too intense for your taste. They soften the mood without losing the color’s depth. One or two accent aura nails can be enough if you want the set to stay understated.
I’d keep the rest of the nails in a plain burgundy or sheer nude. Too many aura nails at once can start feeling cloudy.
14. Burgundy Glitter Fade from Base to Tip
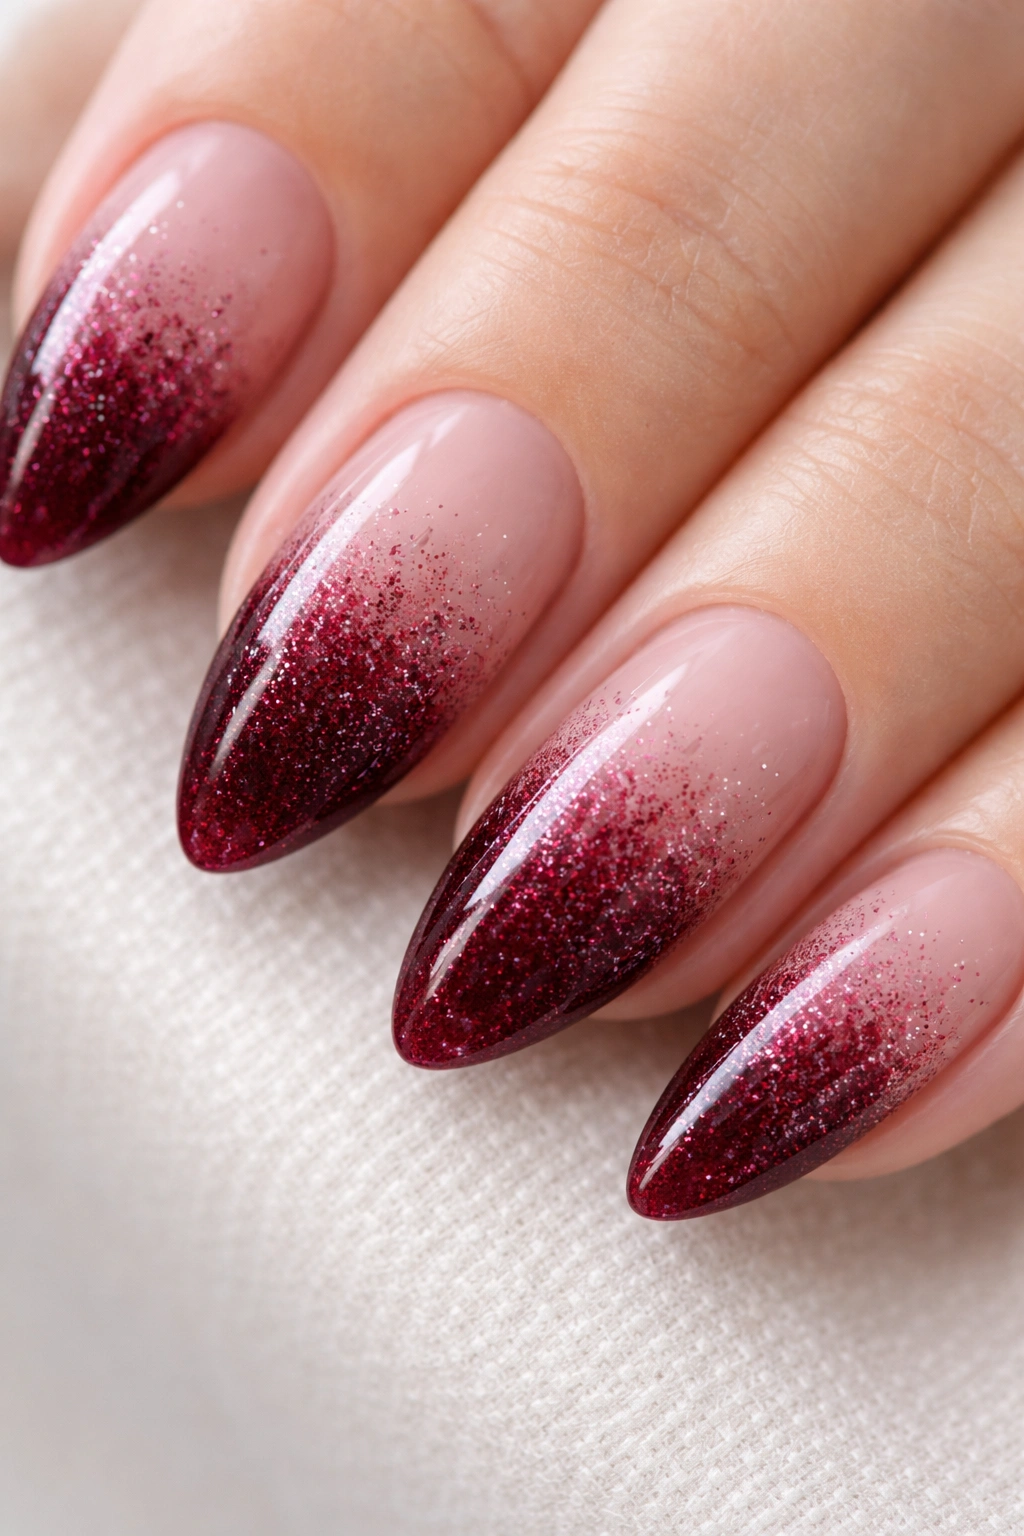
A burgundy glitter fade works because the sparkle is controlled. Instead of burying the nail in chunky glitter, you let fine shimmer collect at the tip or near the cuticle and fade out as it moves across the nail. That gives you movement without a heavy, rough surface.
Fine glitter is the key. Micro shimmer looks rich because it catches light in tiny flashes, while bigger glitter pieces can make the manicure feel scratchy and overbuilt. If you want a night-out look, a gold or copper fade over burgundy is especially nice. If you want something cooler, a wine-toned shimmer keeps everything more monochrome.
This is also a useful way to add interest to a set that would otherwise be solid color. Put the fade on two nails and keep the others plain. Or run it across all ten if you want more sparkle, just keep the fade narrow and low on the nail so the almond shape stays clean.
The one thing I would skip is a thick glitter layer at the free edge. It chips badly and ruins the smooth silhouette.
15. Burgundy Floral Line Art on Sheer Base
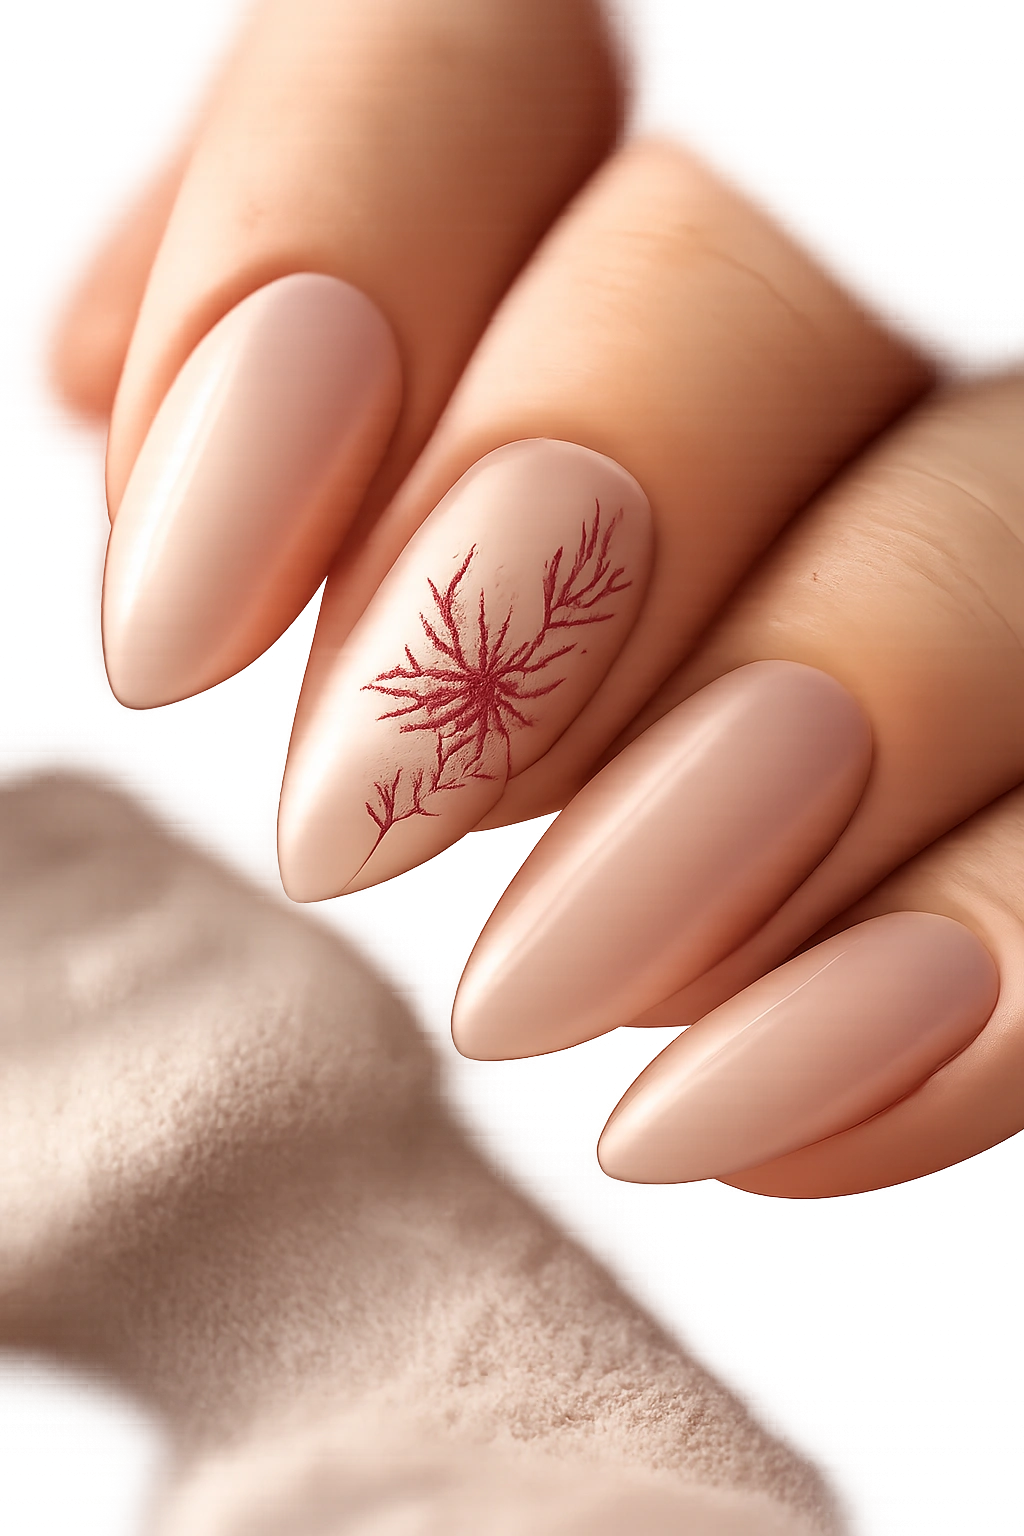
Floral linework can look delicate, but burgundy keeps it from turning too sweet. A sheer pink or milky nude base lets the hand show through, and a few burgundy petals or vine lines add just enough contrast to keep the design grown-up.
The best version uses restraint. One flower on the ring finger, maybe a half-bloom on the middle finger, and simple burgundy dots or leaves on the rest. You do not need a garden on every nail. In fact, that’s how the design starts to feel crowded. Let a lot of bare space stay bare.
A thin liner brush is your friend here. Five-stroke flowers work well because they stay loose and quick, and tiny gold or cream dots can sit in the center if you want a little lift. Keep the petals soft, not cartoonish. The almond shape already adds elegance; the linework should support that, not fight it.
This is one of the prettier burgundy almond nail ideas if you like something feminine without being sugary. It feels airy, but not empty.
16. Burgundy and Brown Tonal Nails
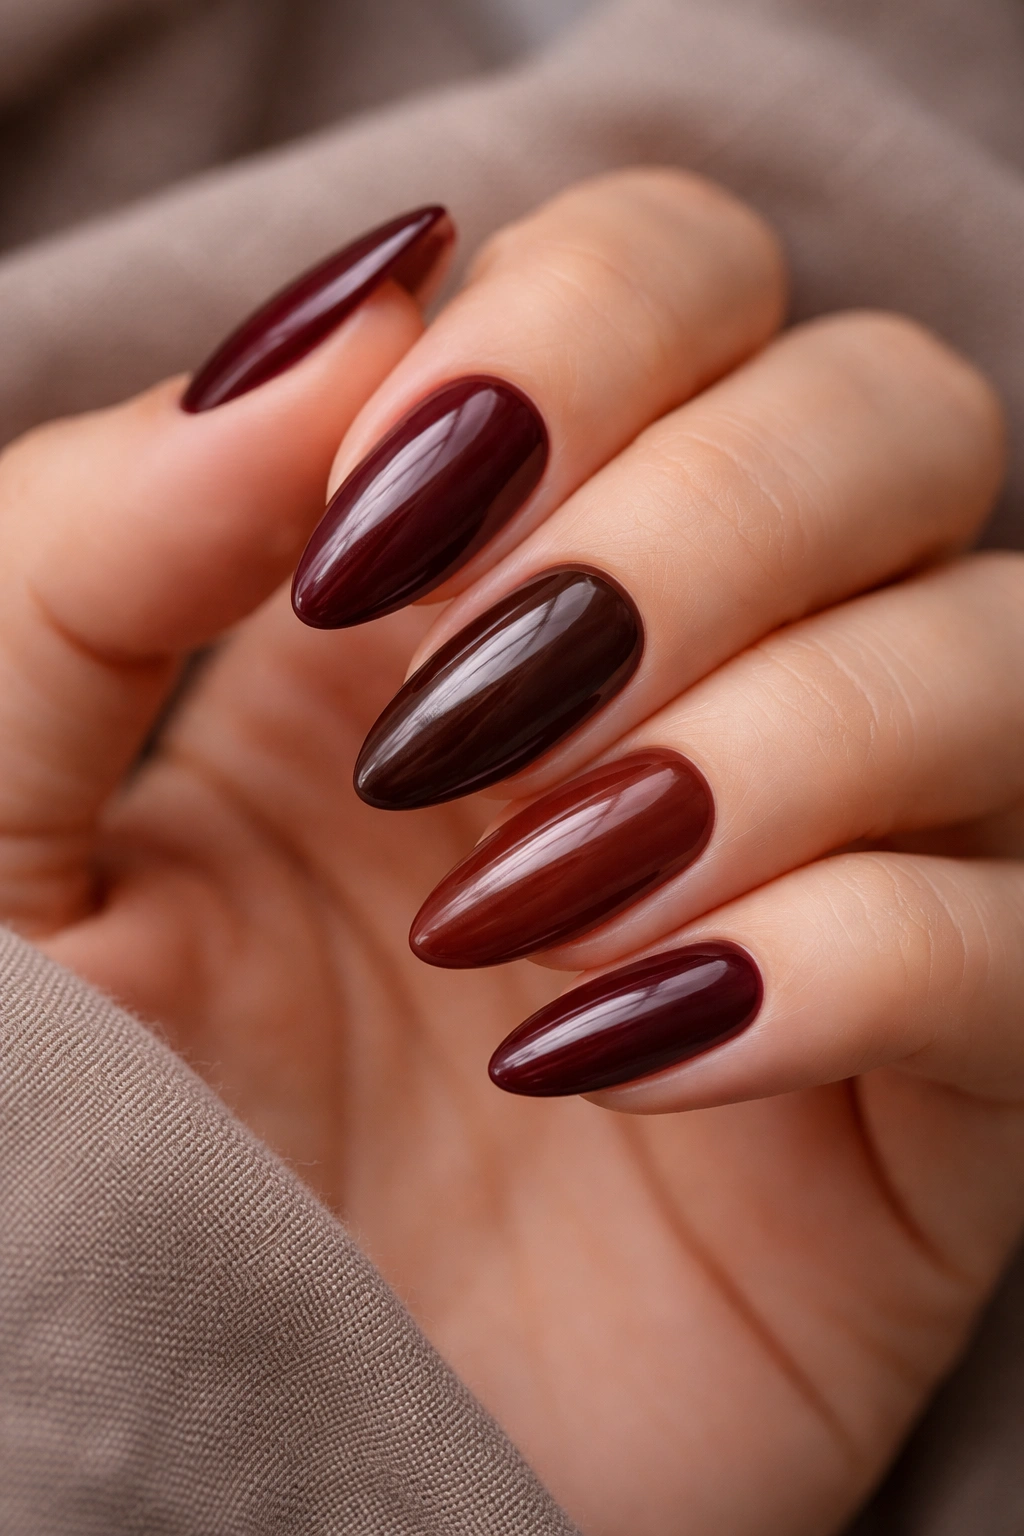
Tonal nails are underrated. Instead of choosing one burgundy and calling it done, you move through a family of shades — cabernet, cocoa, espresso, oxblood, maybe one muted plum-brown if you want more range. The manicure ends up looking layered and deliberate without any actual nail art.
Why the Tones Work
The shades stay in the same temperature zone, so the hand reads cohesive even when every finger is a little different. That’s the charm. You get variation without clash. If you want the set to feel balanced, keep the warm browns on the thumb and pinky, then place the deepest burgundy on the ring finger or middle finger where the eye naturally lands.
A Simple Formula
- Pick 3 to 5 shades from the same color family.
- Keep the finish consistent — all glossy or all satin.
- Avoid mixing warm browns with blue-based berries.
- Let one nail be the darkest anchor.
This is a strong choice if you like moody nails but don’t want art. It looks collected. It also grows out well, which I always appreciate.
17. Burgundy Swirl Nails with Cream Ribbon Lines
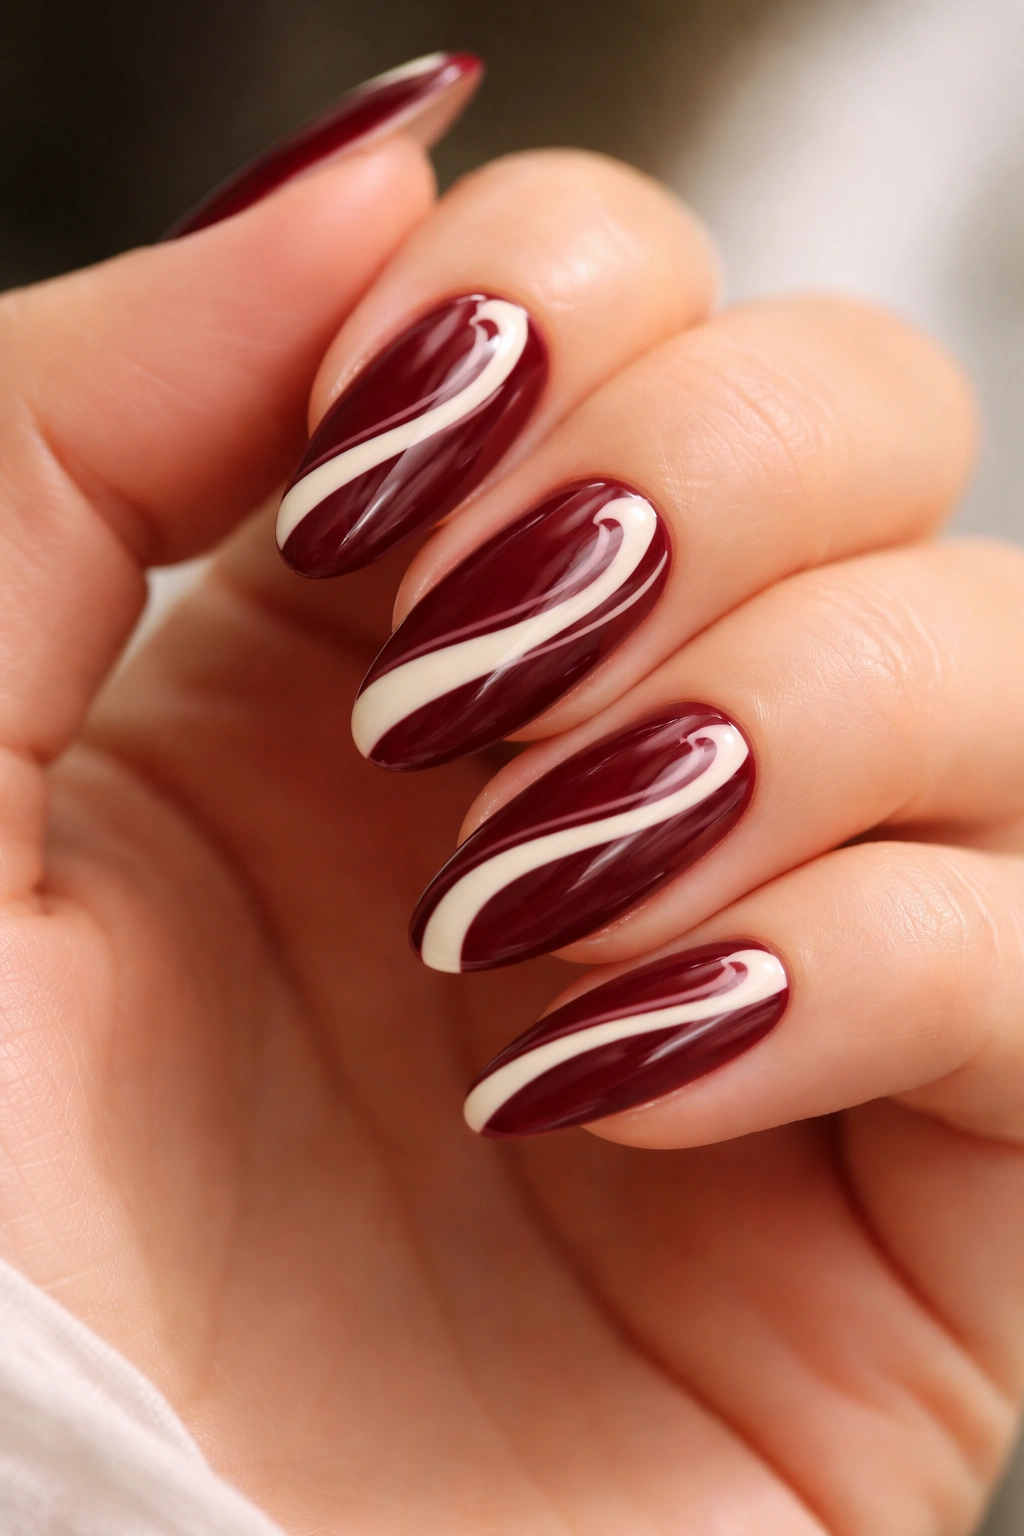
Swirls are one of the easiest nail-art choices to wear because they don’t feel as rigid as geometric designs. On burgundy almond nails, cream ribbon lines soften the darkness and give the whole set a little motion. The key is to keep the swirls flowing with the shape of the nail instead of fighting it.
I’d keep the swirls wide and simple. One or two larger curves per nail is enough. Thin lines can look fussy if you crowd them, and a lot of tiny loops will make the design read busy from a distance. Burgundy plus cream already has enough contrast on its own. You don’t need to overbuild it.
A sheer base works well here, but a solid burgundy background with cream swirls can look bolder if you want more drama. Either way, the lines should sweep diagonally or in a soft S-curve. That motion helps the almond tip look elongated.
This design is a nice middle ground. It has personality, but it doesn’t demand attention every second.
18. Burgundy Stained-Glass Nails
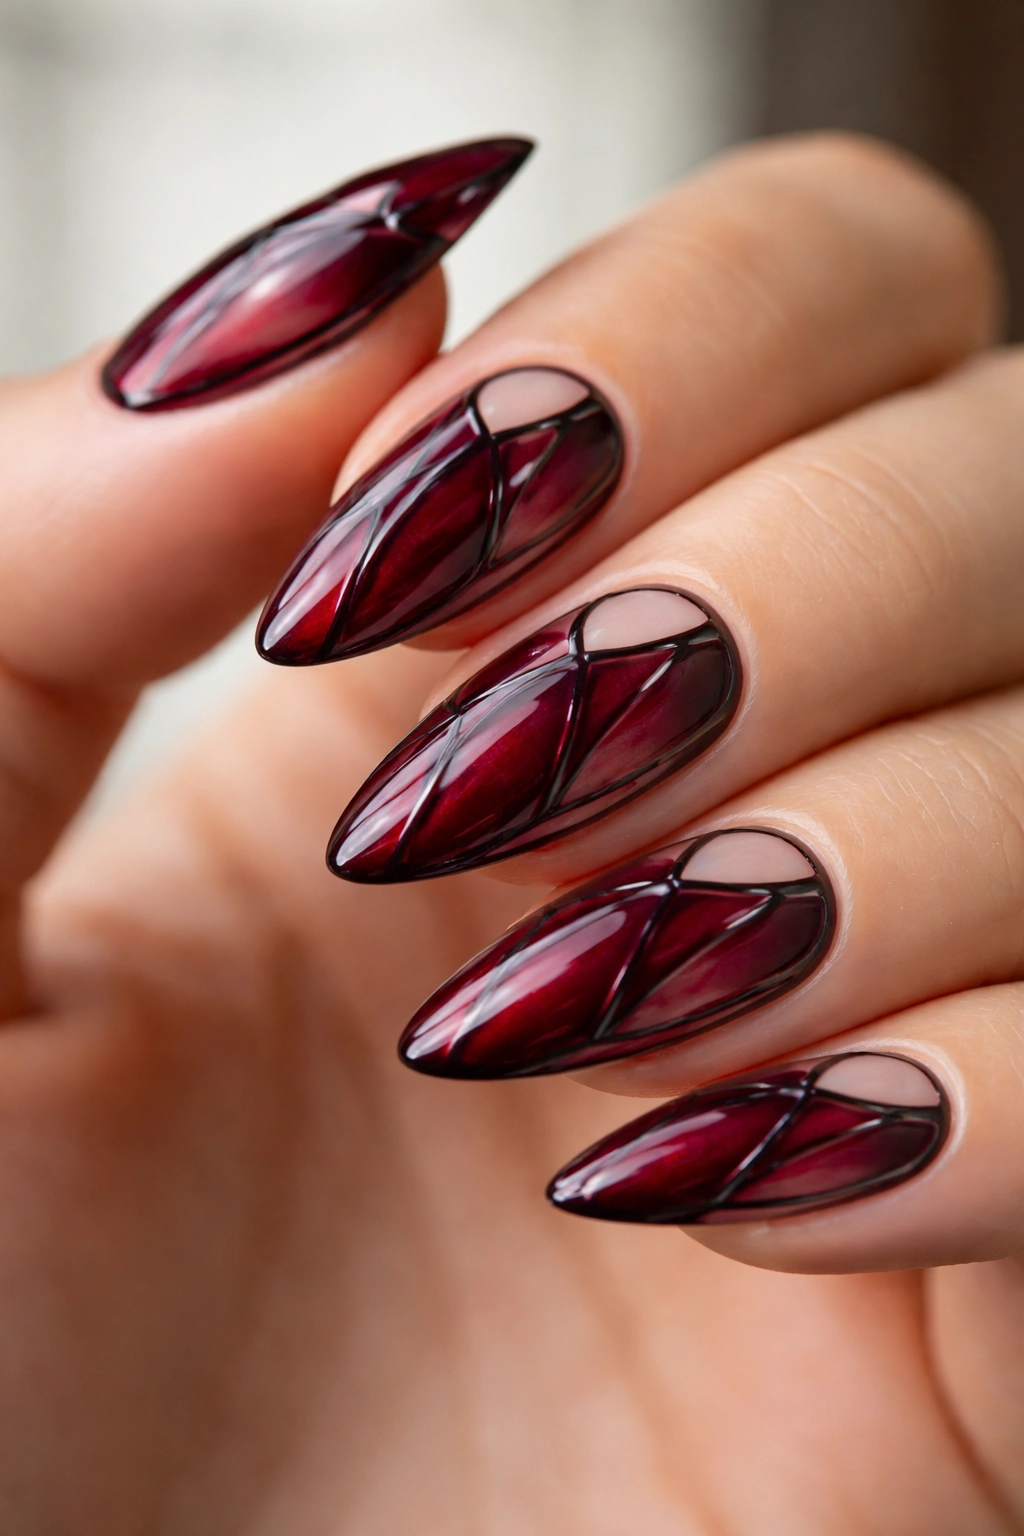
Stained-glass nails give burgundy a little edge without turning the manicure into chaos. Tiny translucent panels outlined in black, deep plum, or dark brown create the look of broken glass, and the burgundy color inside the shapes gives the design depth. It’s graphic, but not harsh.
The trick is leaving space between the panels. Those thin clear gaps are what make the design readable. If the shapes run together, the whole thing turns muddy. Use a fine liner brush and keep the outlines slender. Thick borders swallow the delicacy of the effect.
How to Keep It from Looking Muddy
- Use translucent burgundy layers, not fully opaque polish.
- Keep the outlines thin and even.
- Put the design on two accent nails if you want it to stay clean.
- Leave some clear or sheer space between the “panes.”
This design shines on medium almond nails because the shape gives the panels a natural vertical flow. It has more personality than marble and more structure than swirl art. A nice in-between.
19. Burgundy Quilted Texture Nails
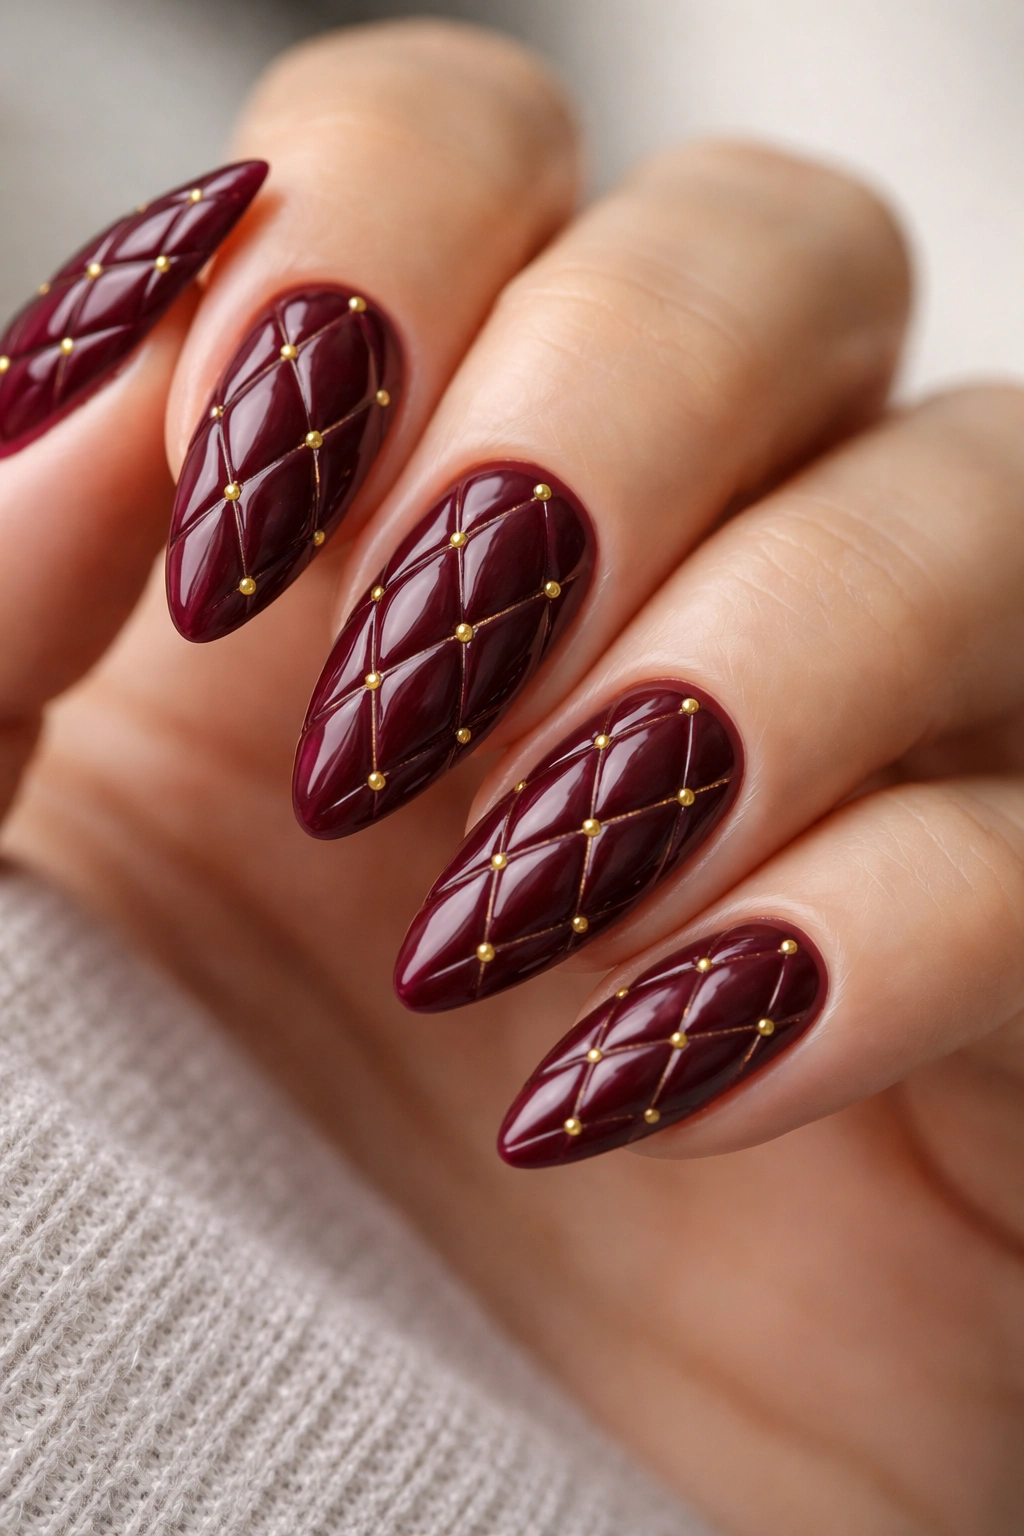
Quilted burgundy nails are for people who like a manicure with a bit of structure. The raised diamond pattern gives the surface a padded, tailored feel, and the rich color makes the texture show up even more. It’s not subtle. That’s the point.
This look is usually done with gel and a fine detail brush, building the crosshatch line by line and curing each layer so the texture keeps its shape. Tiny gold beads or dots can sit at the intersections if you want a little extra detail, but they’re optional. The base color should be deep enough that the raised lines stand out, not a washed-out burgundy that loses the pattern.
The downside is practicality. Raised texture can snag hair, catch on sweaters, and chip sooner if the edges are not sealed well. It’s also better on medium-length almond nails than on very short ones, because the pattern needs room to breathe.
Still, when it works, it looks tailored in a way flat polish never will. That’s a real payoff.
20. Minimal Burgundy Almond Nails with a Gold Stripe
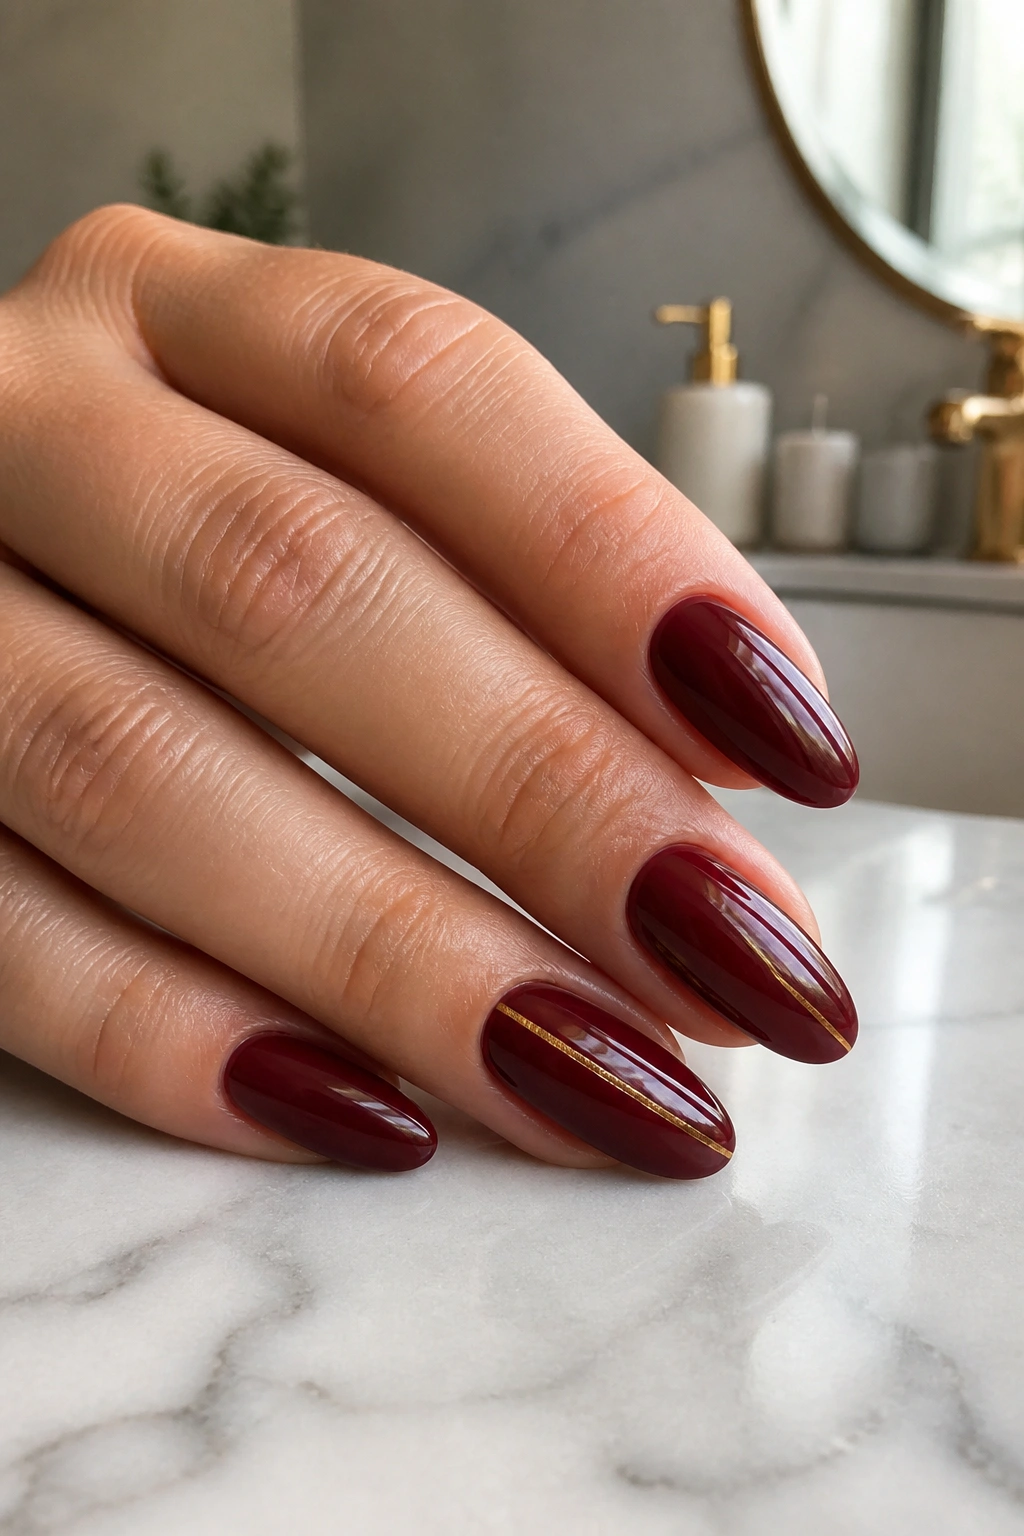
If you want one burgundy almond manicure that can move from a plain day look to something dressier without changing a thing, this is the one. Solid burgundy on most nails, then a single slim gold stripe on one or two accent nails. That’s enough. The clean line gives the set a point of focus without piling on extra decoration.
Keep the stripe thin — under 1 millimeter if you want it to stay crisp. Place it in the center for a classic read, or shift it slightly off center if you want a more modern feel. A stripe that runs lengthwise works especially well on almond nails because it echoes the taper. You can also add one tiny gold dot near the cuticle, but only if the rest of the set stays spare.
This is the version I’d hand to someone who wants burgundy but hates fussy nail art. It feels neat, grown-up, and a little sharp. A tiny line can carry more style than a pile of extras ever does.
