

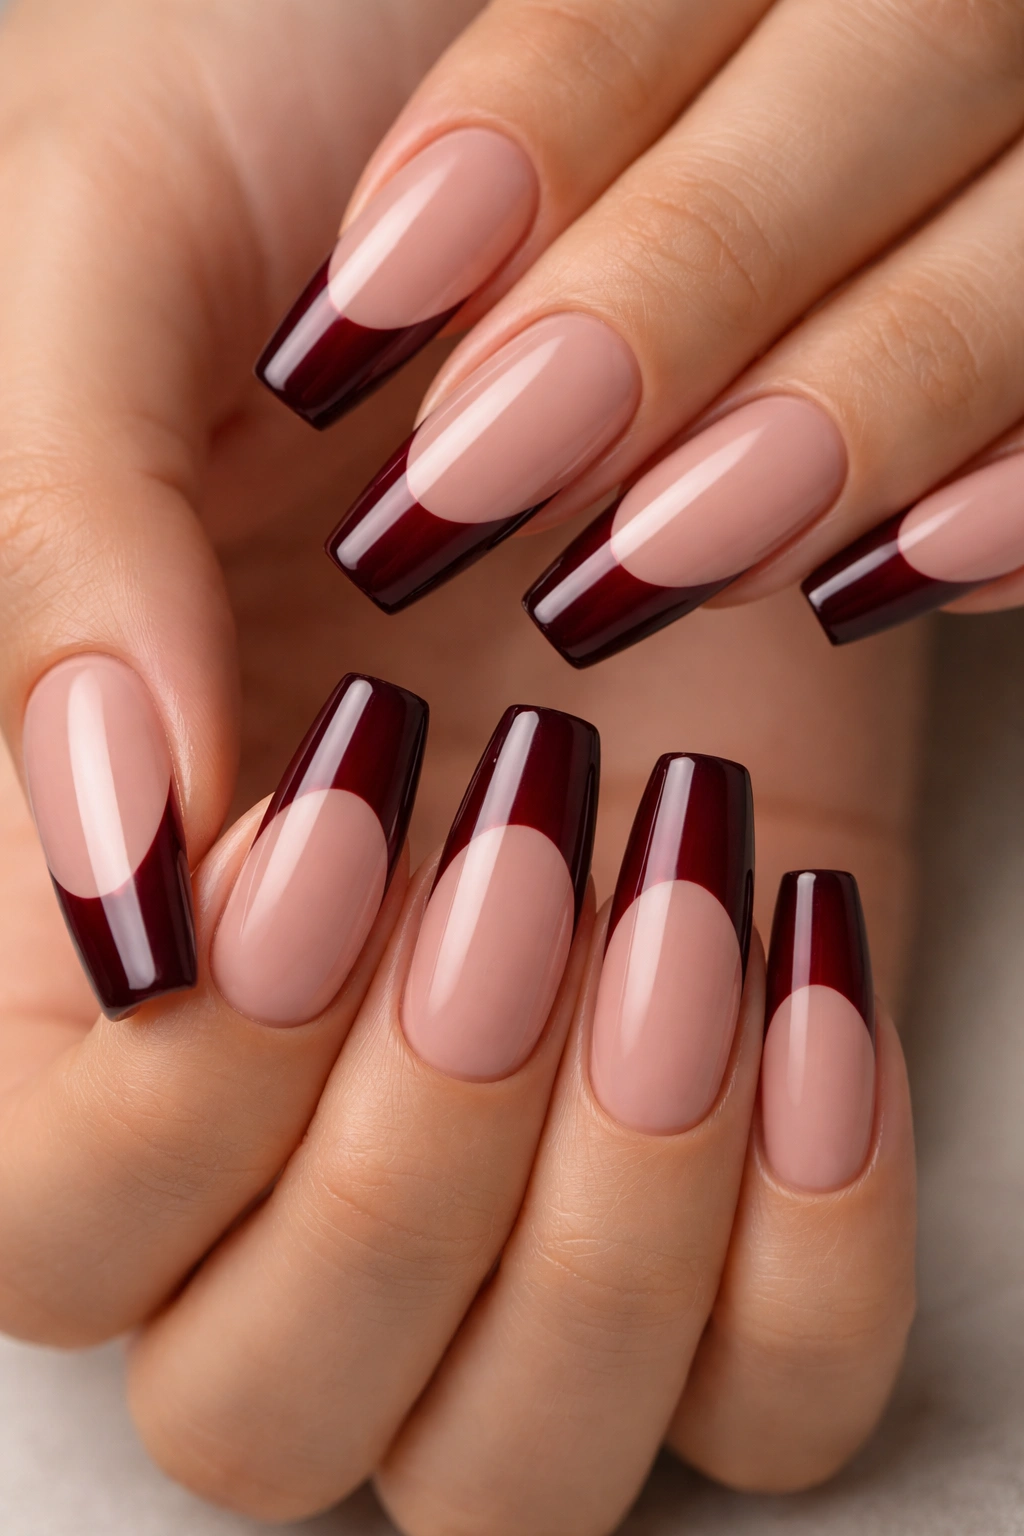
Dark red French tip coffin nails are having a major moment, and for good reason. This combination brings together three of the most flattering nail trends: the sophisticated elegance of French tips, the dramatic depth of dark red, and the elongated, edgy shape of coffin nails. What makes this particular pairing so compelling is the way it walks the line between classic and contemporary—you get the timeless polish of a French manicure with the modern edge of the coffin shape and the richness of a dark burgundy or oxblood tone instead of traditional white.
Coffin nails, with their flat, wide top and tapered sides, have become the go-to shape for anyone wanting nails that feel both powerful and elegant. When you add the dark red French tip variation to that base, you’re creating something that photographs beautifully, photographs well under different lighting conditions, and works equally well at a board meeting or a night out. The dark red replaces the white tip entirely, which gives the whole look more sophistication and depth than a standard French tip would provide.
The best part? There are seemingly endless ways to interpret this design. You can go minimal and clean, add intricate details and embellishments, layer in metallics, incorporate negative space, or play with ombré and gradient effects. Whether you prefer a subtle nude base with a delicate dark red tip or a bold statement with glitter, gems, and dimension, this style adapts to your personal aesthetic beautifully. Let’s explore 25 distinct ways to wear this look, from understated elegance to full dramatic impact.
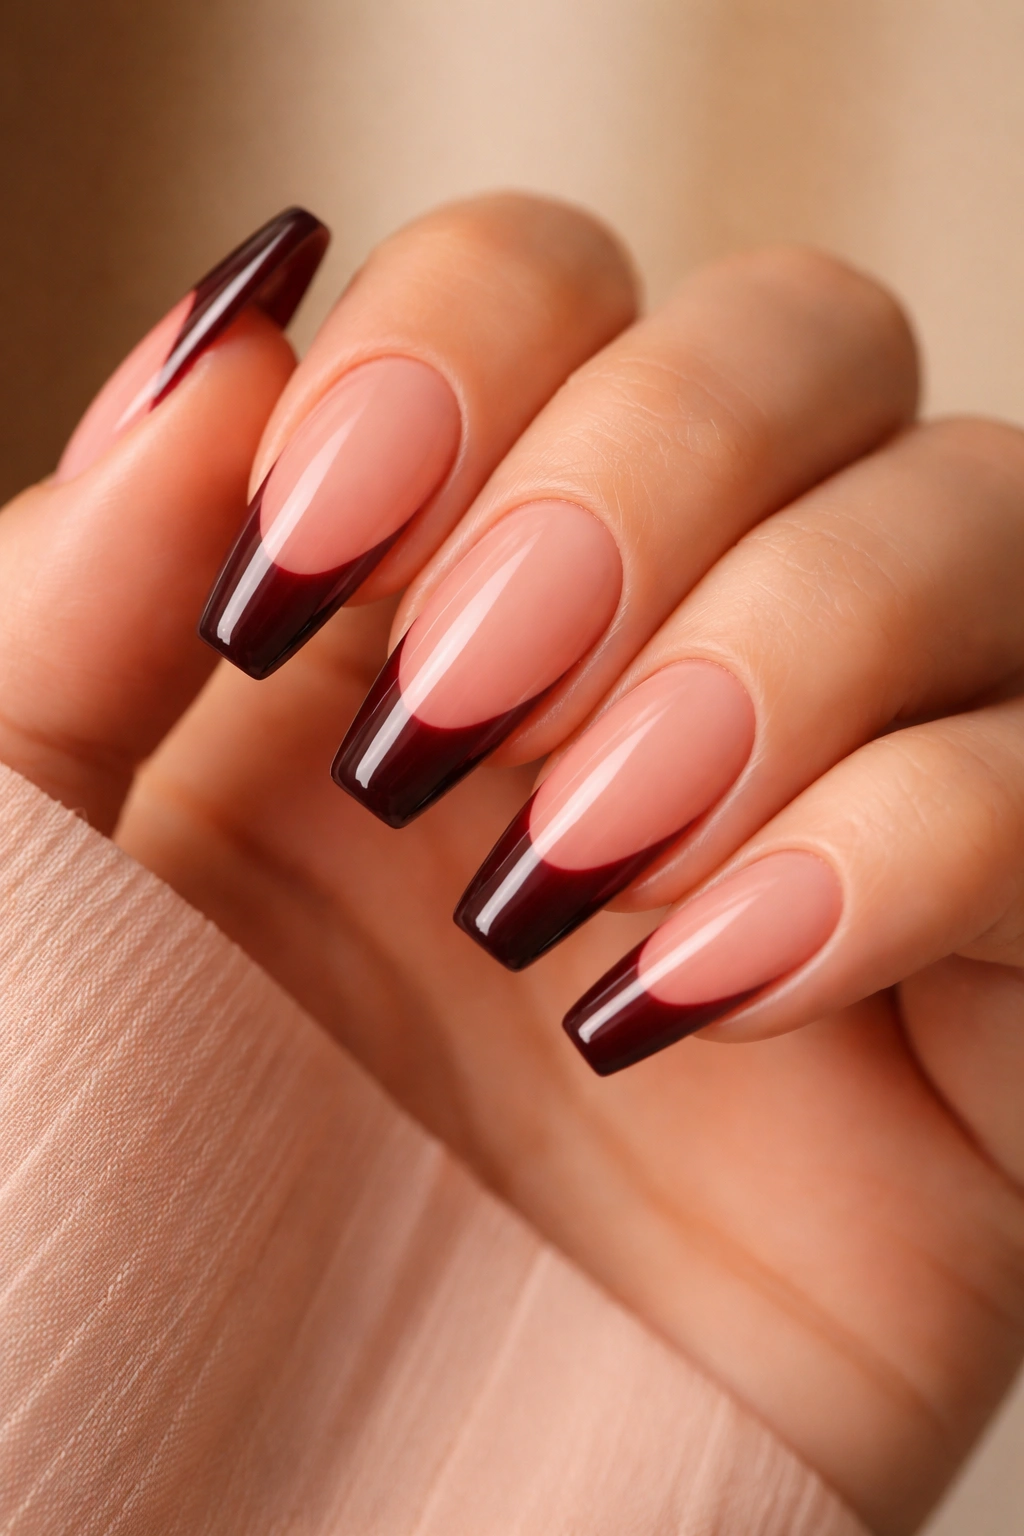
1. Classic Burgundy French Tip with Glossy Finish
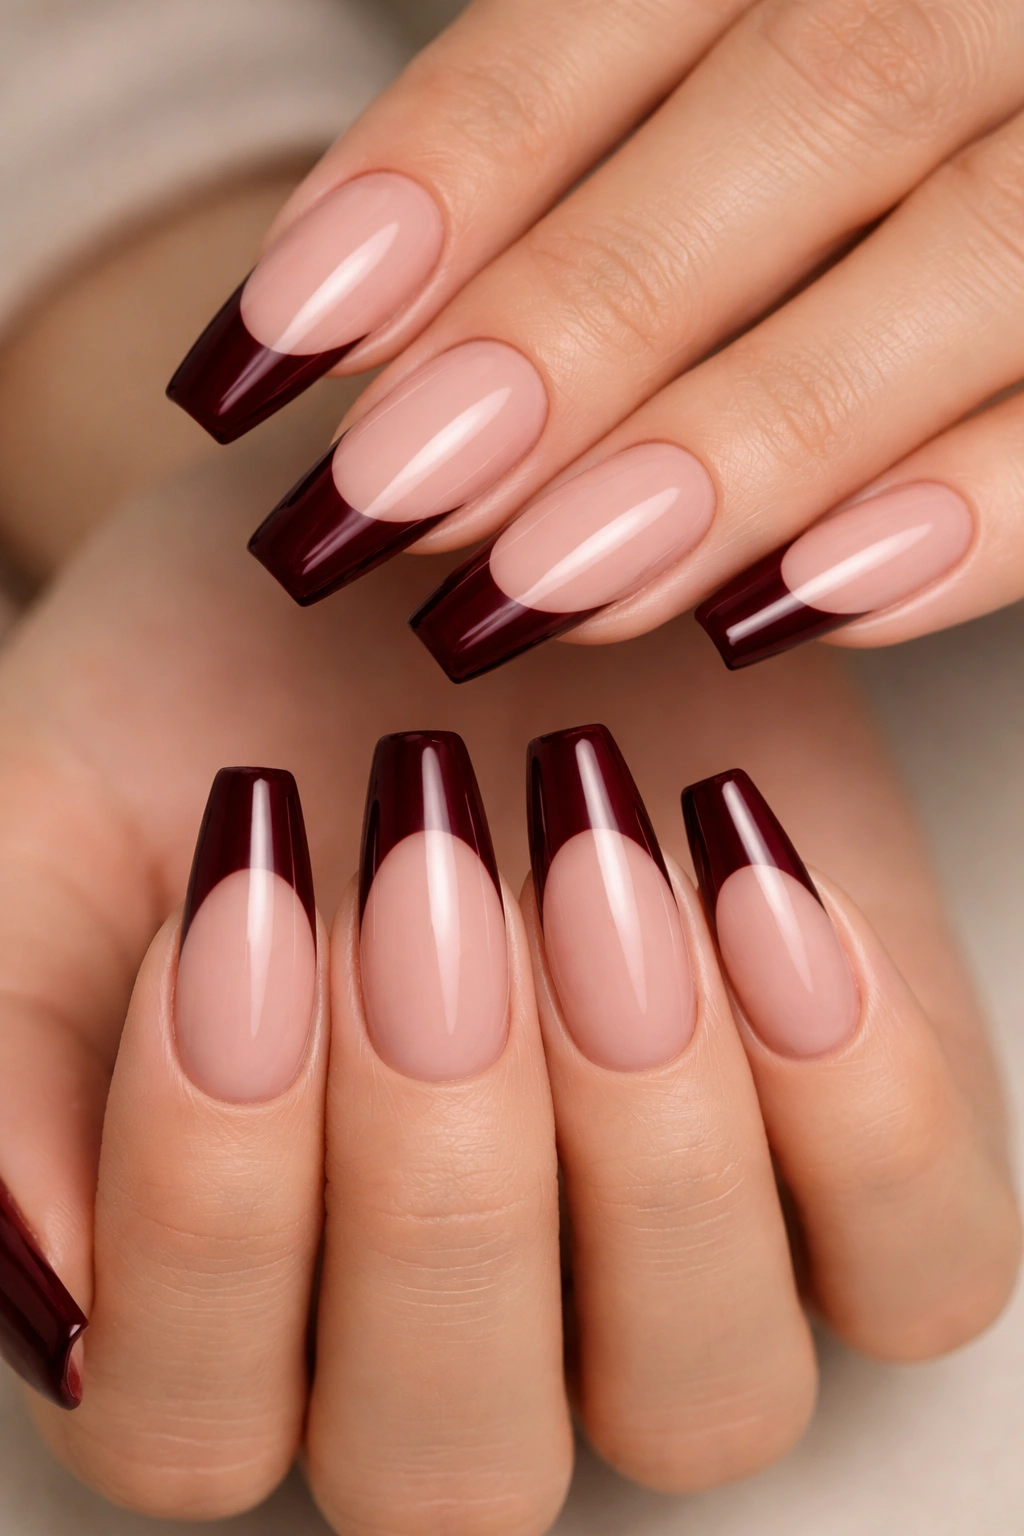
The most refined version starts with a clean, neutral nude or pale pink base coat, then adds a precise dark burgundy tip that takes up roughly the upper third of the nail. This is pure elegance—no embellishment, no texture change, just clean lines and a high-shine glossy topcoat that makes the color depth really pop. The key to nailing this look is using a thin, steady hand or a nail stamper to create that perfectly straight line where the nude meets the burgundy.
Why This Works
This design works because it’s the most wearable of all the variations. The neutral base elongates your fingers while the dark burgundy tip adds just enough color and drama to feel modern and intentional, not basic. It reads as intentionally sophisticated rather than accidentally minimal.
How to Achieve It
Start with a quality base coat, then apply two thin coats of a nude shade that closely matches your skin tone—something like a soft beige, champagne, or pale rose. Once that’s completely dry, use a thin nail art brush or striping brush to paint the dark burgundy line across the tip. Going slowly and using a lighter hand gives you more control than trying to do it quickly.
Pro Tip
If straight lines stress you out, consider using a thin striping tape to create a clean edge, paint the burgundy over the tape, then peel away the tape before the polish fully sets—you’ll get a perfect line every single time.
2. Dark Red with Rose Gold Foil Accents
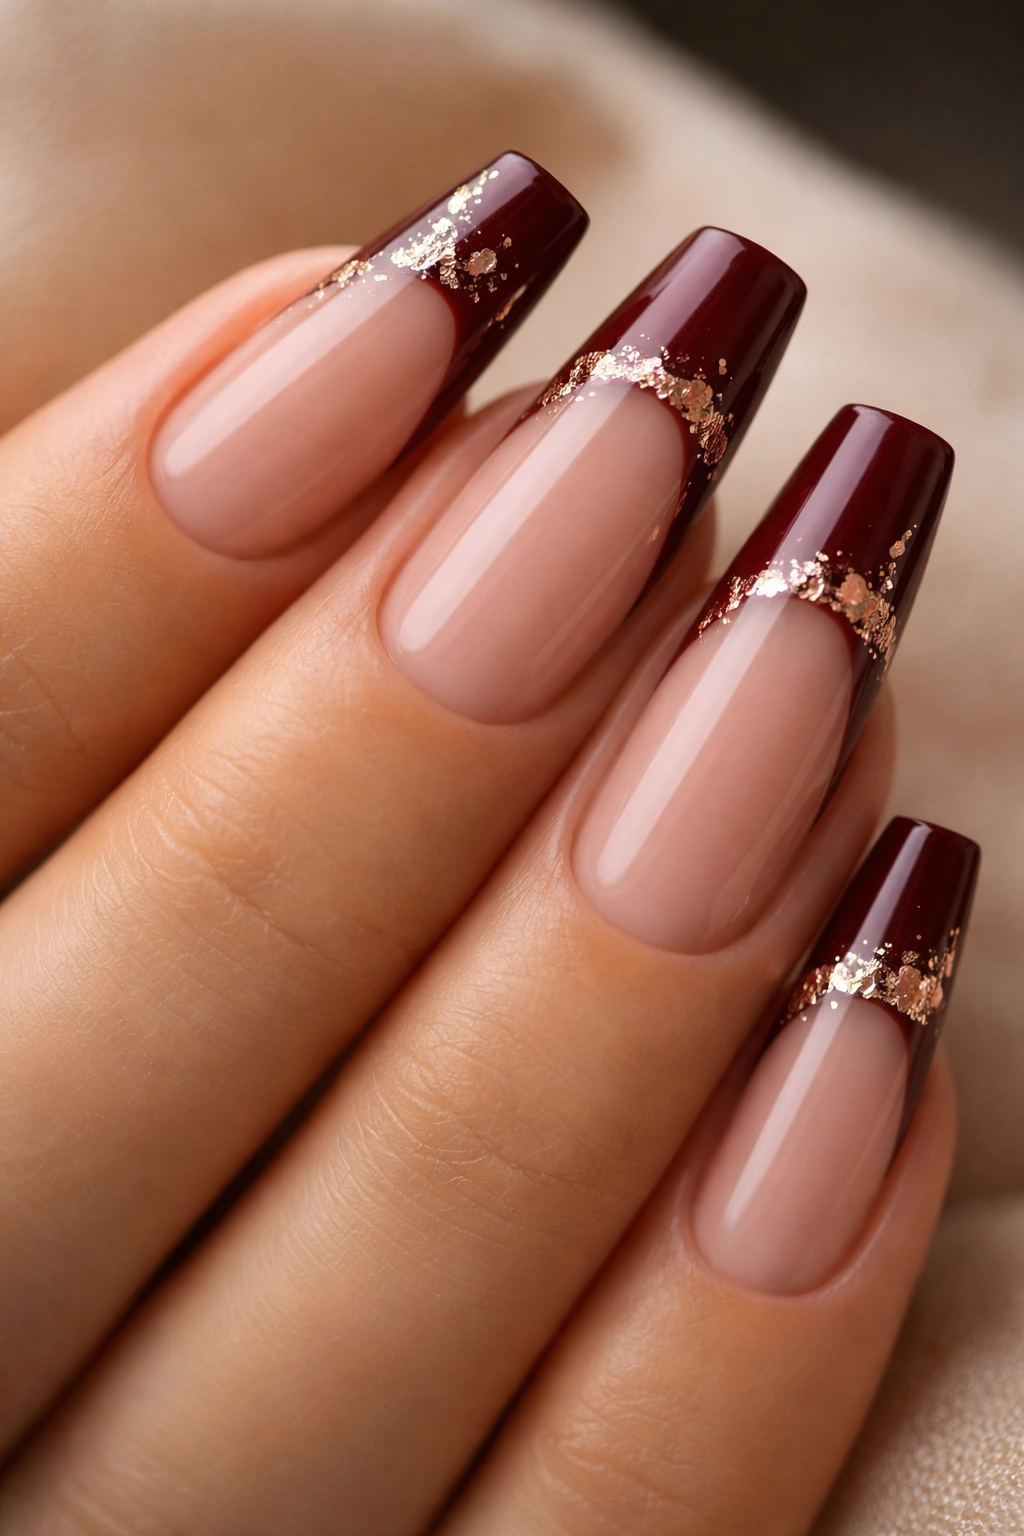
Layer sophisticated neutrality with dark burgundy tips, then add delicate rose gold foil pieces along the tip edge or scattered across the burgundy section for subtle luxury. The foil catches light beautifully and adds dimension without overwhelming the design. You’re keeping the classic French tip structure but introducing a precious metal element that feels dressy and special.
Why This Design Stands Out
Foil accents elevate a simple French tip into something that feels more polished and intentional. The rose gold tone complements both the dark red and neutral base beautifully, creating warmth throughout the entire nail.
Applying Foil Like a Pro
After your dark red tip is set, apply a thin layer of foil adhesive or a sticky topcoat to the areas where you want the foil to stick. Press small foil pieces into place, then seal with a glossy topcoat. The foil stays put and won’t chip when sealed properly.
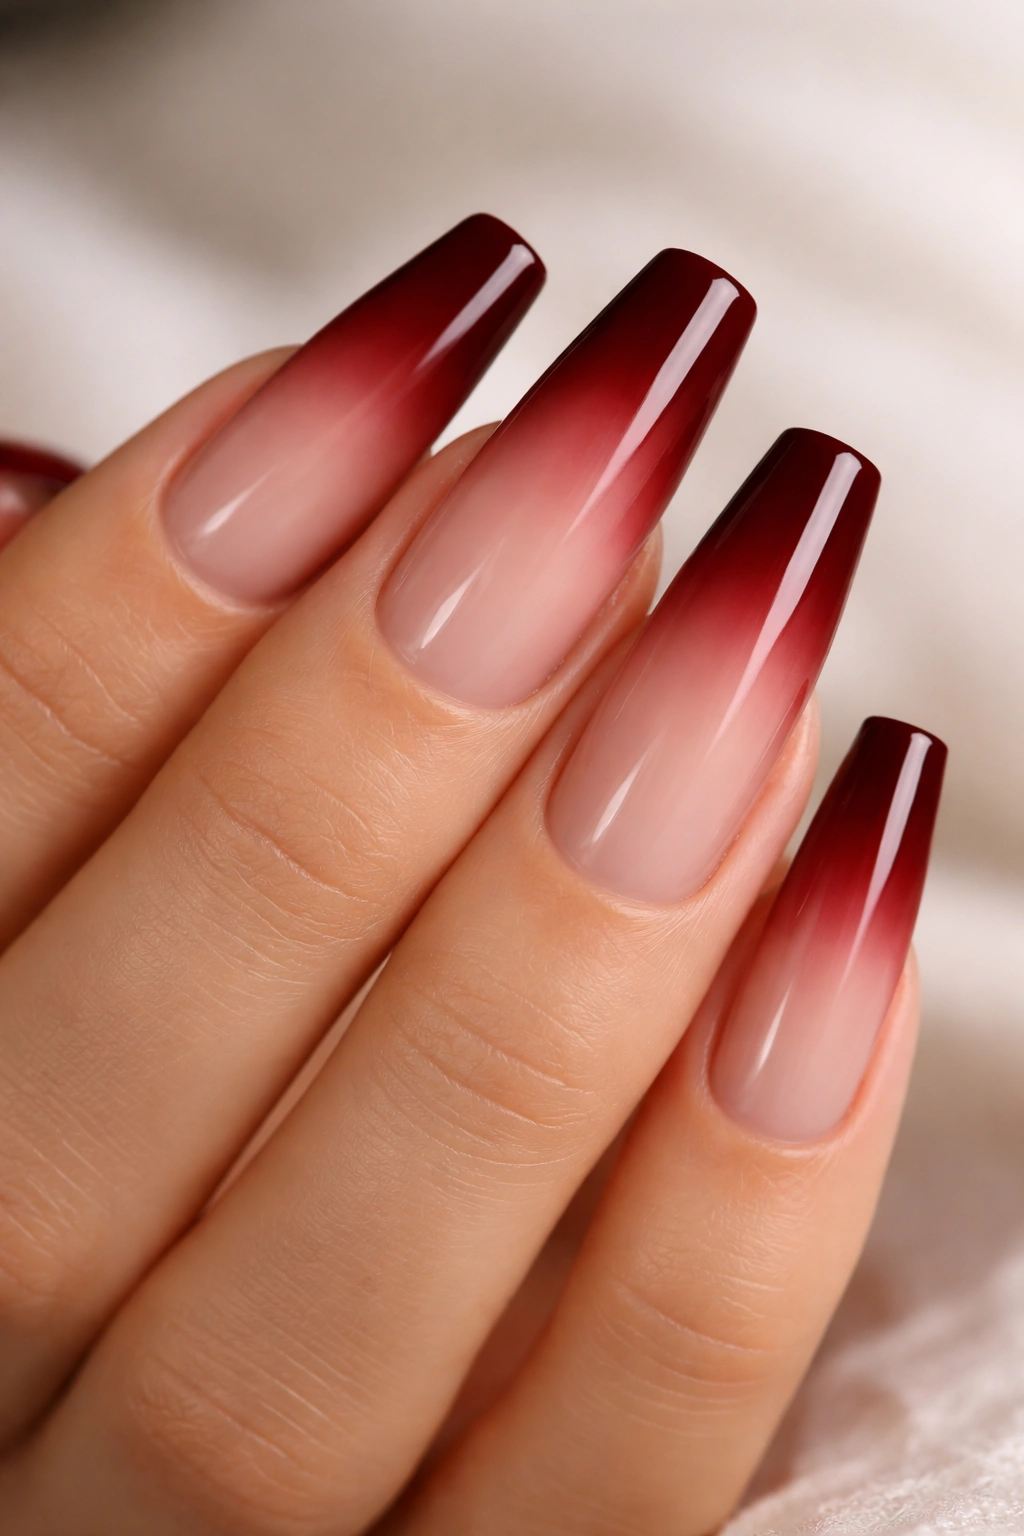
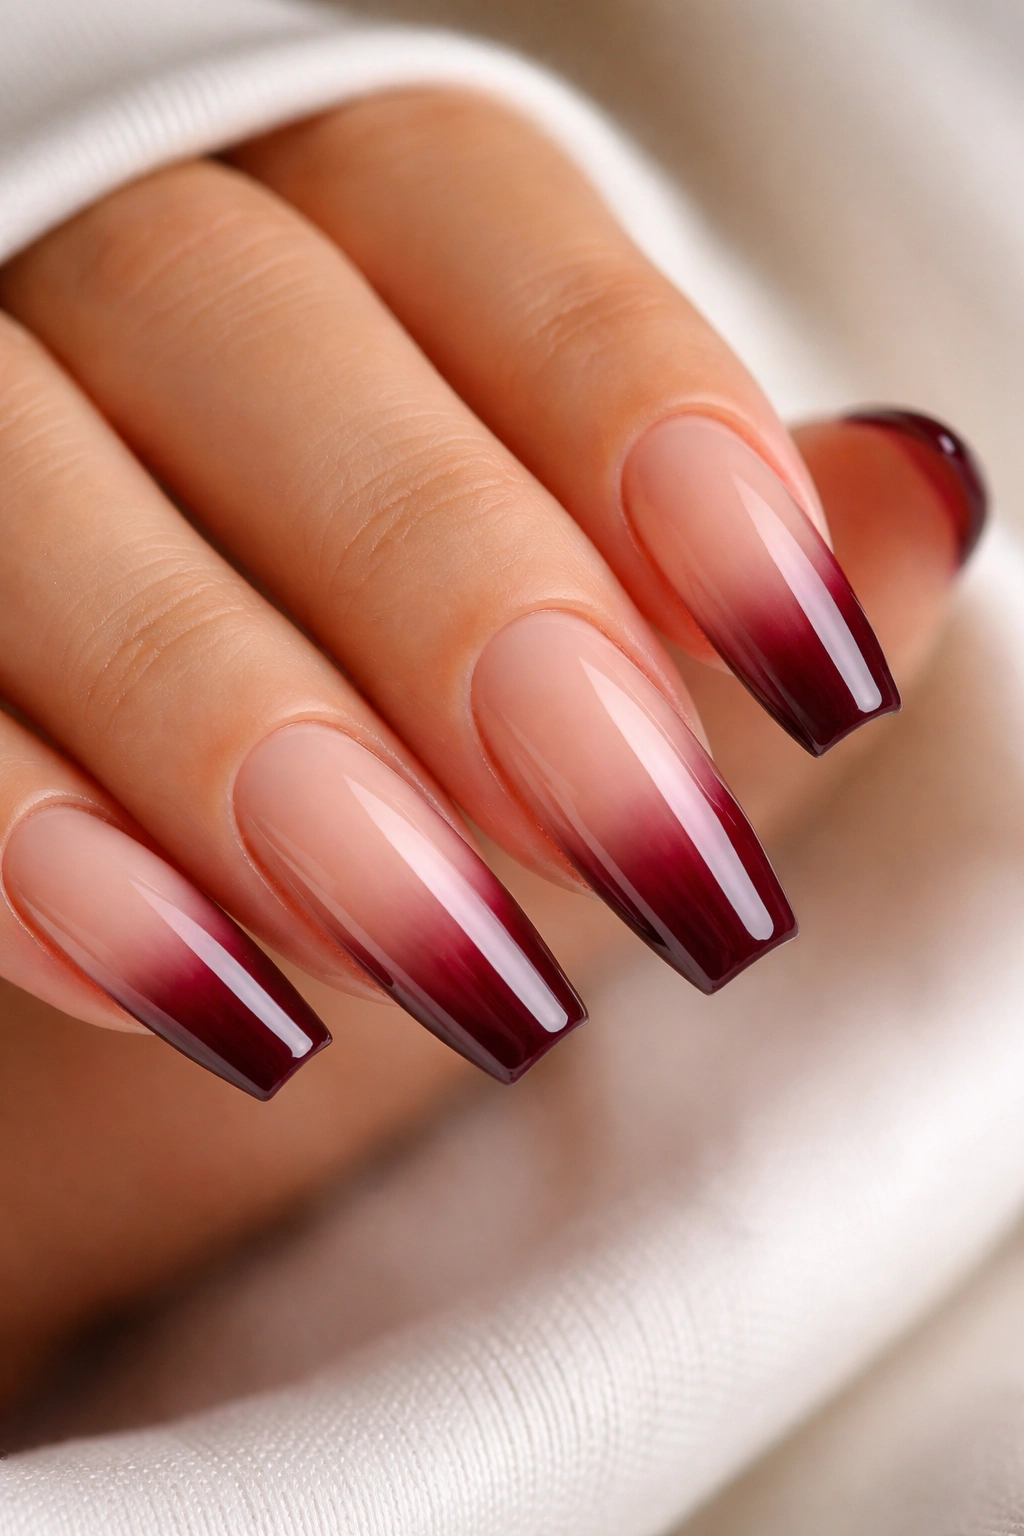
3. Gradient Dark Red Ombré French Tip
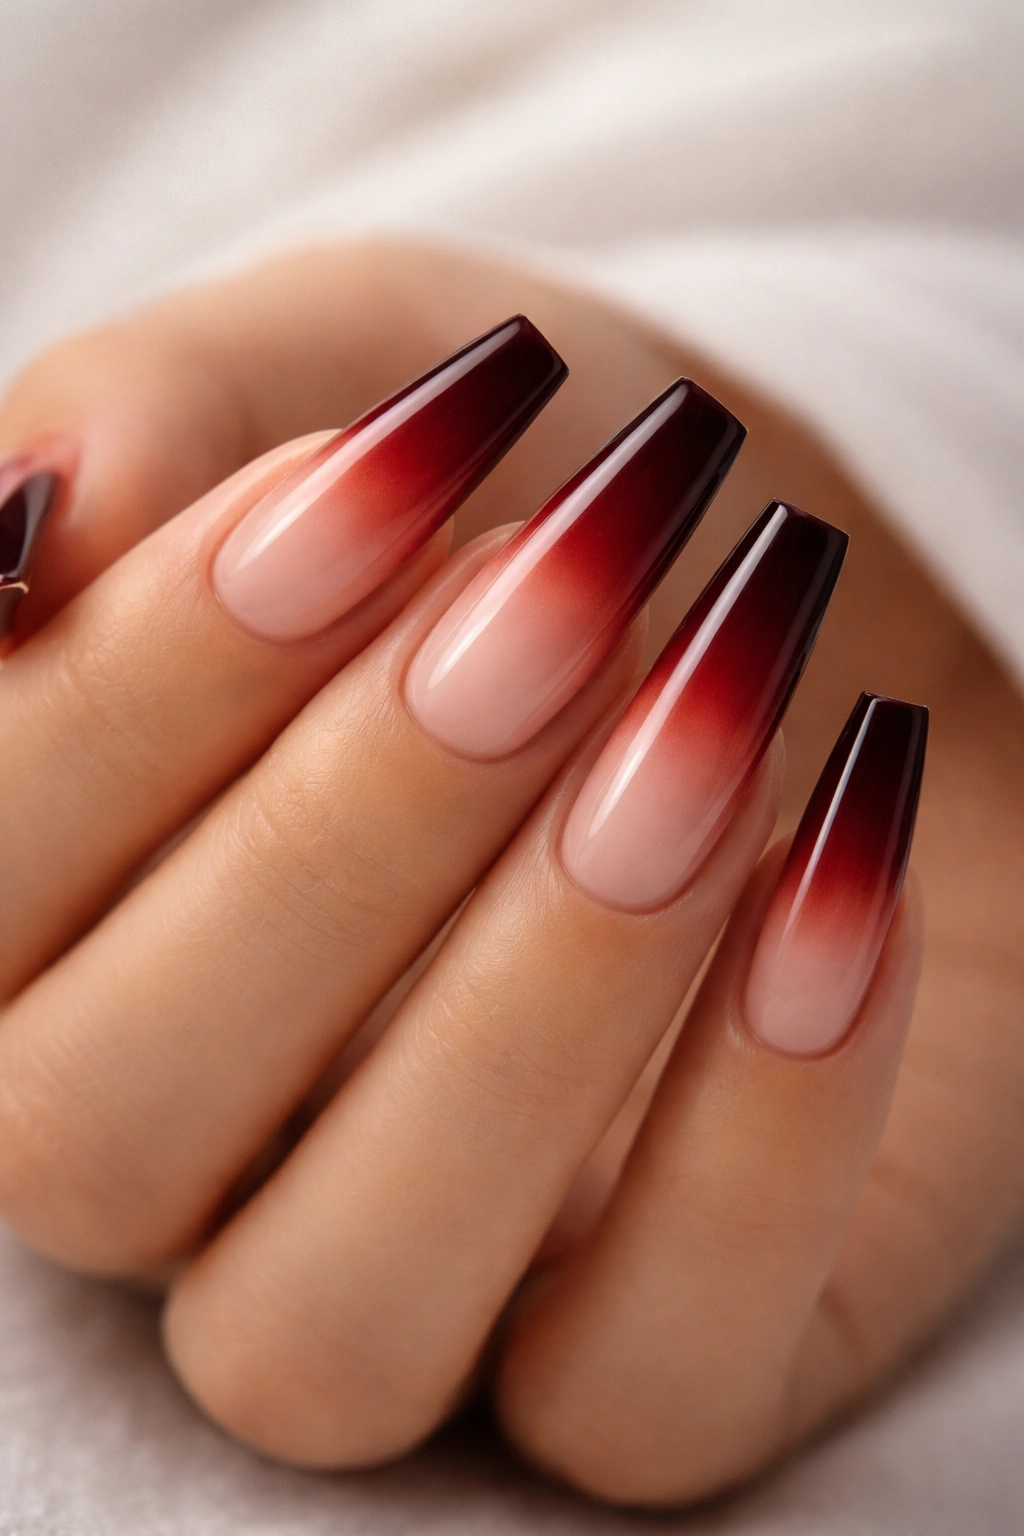
Instead of a stark line between base and tip, create a gradient that slowly transitions from your pale base into deep burgundy over the upper half of the nail. This softer approach feels more modern than a traditional French tip and photographs incredibly well because of the way the color shifts in different light.
What Makes the Gradient Special
The ombré approach eliminates harsh lines, which creates a more organic, wearable look. It’s essentially a French tip that’s been softened and made more contemporary through color blending.
The Blending Technique
Apply your pale base coat first, then use a makeup sponge to dab and blend dark burgundy from the tip upward, creating an overlap zone where the colors merge. You might need several layers of dabbing and blending to get a smooth transition, but the effort is worth it.
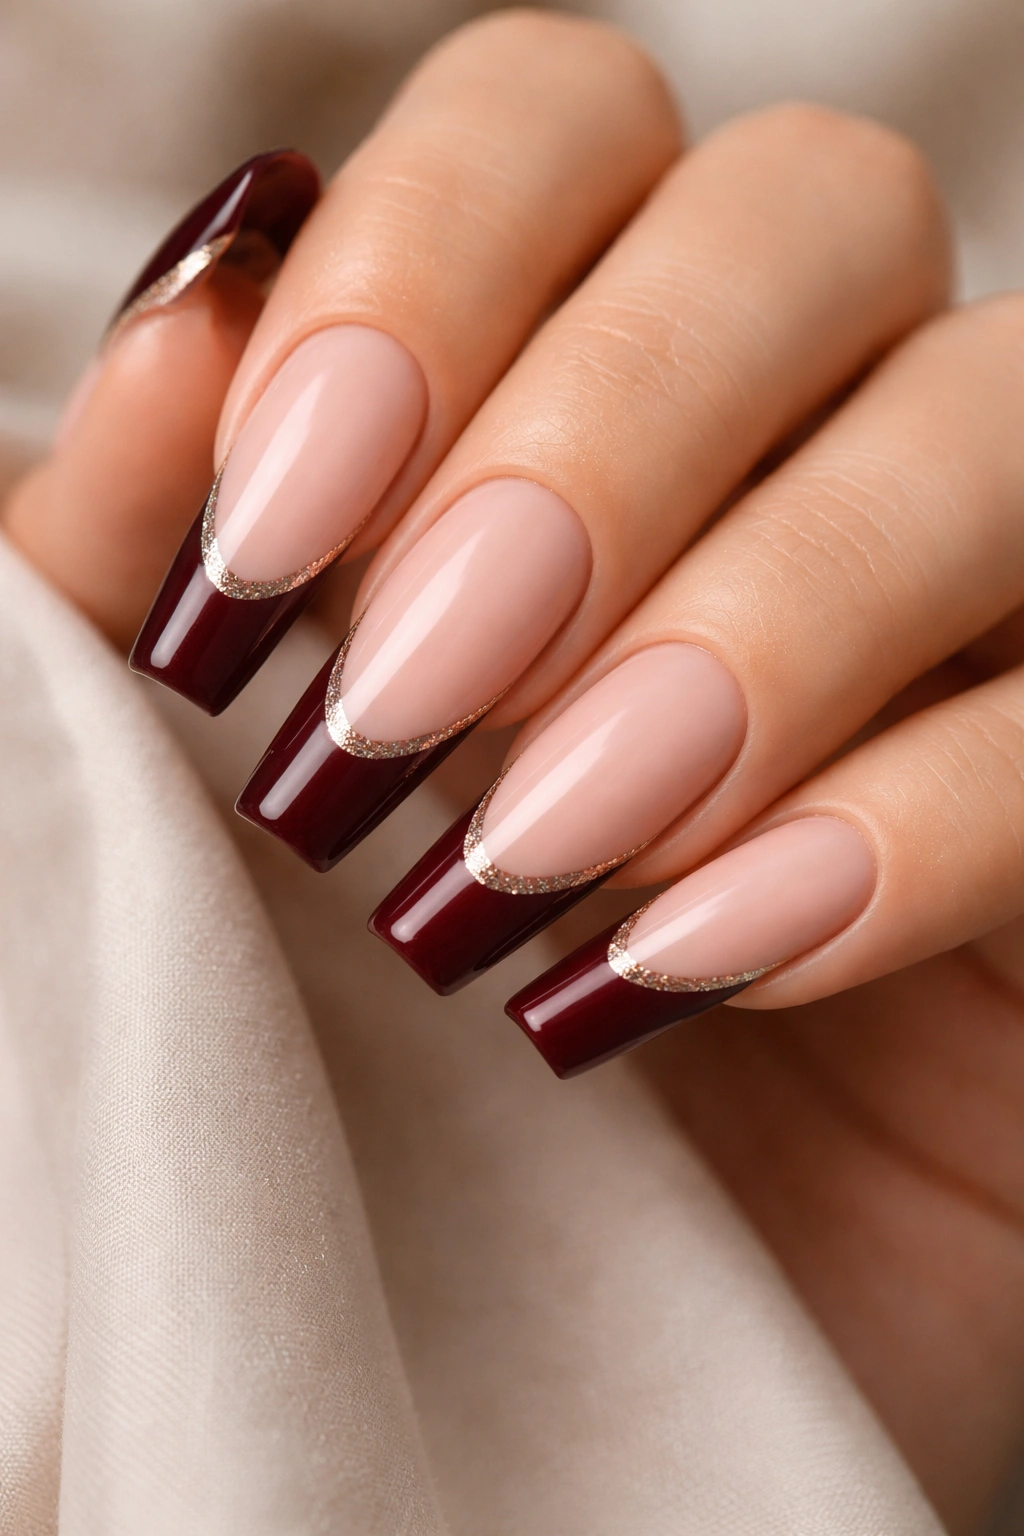
4. Burgundy French Tip with Minimalist Gold Line
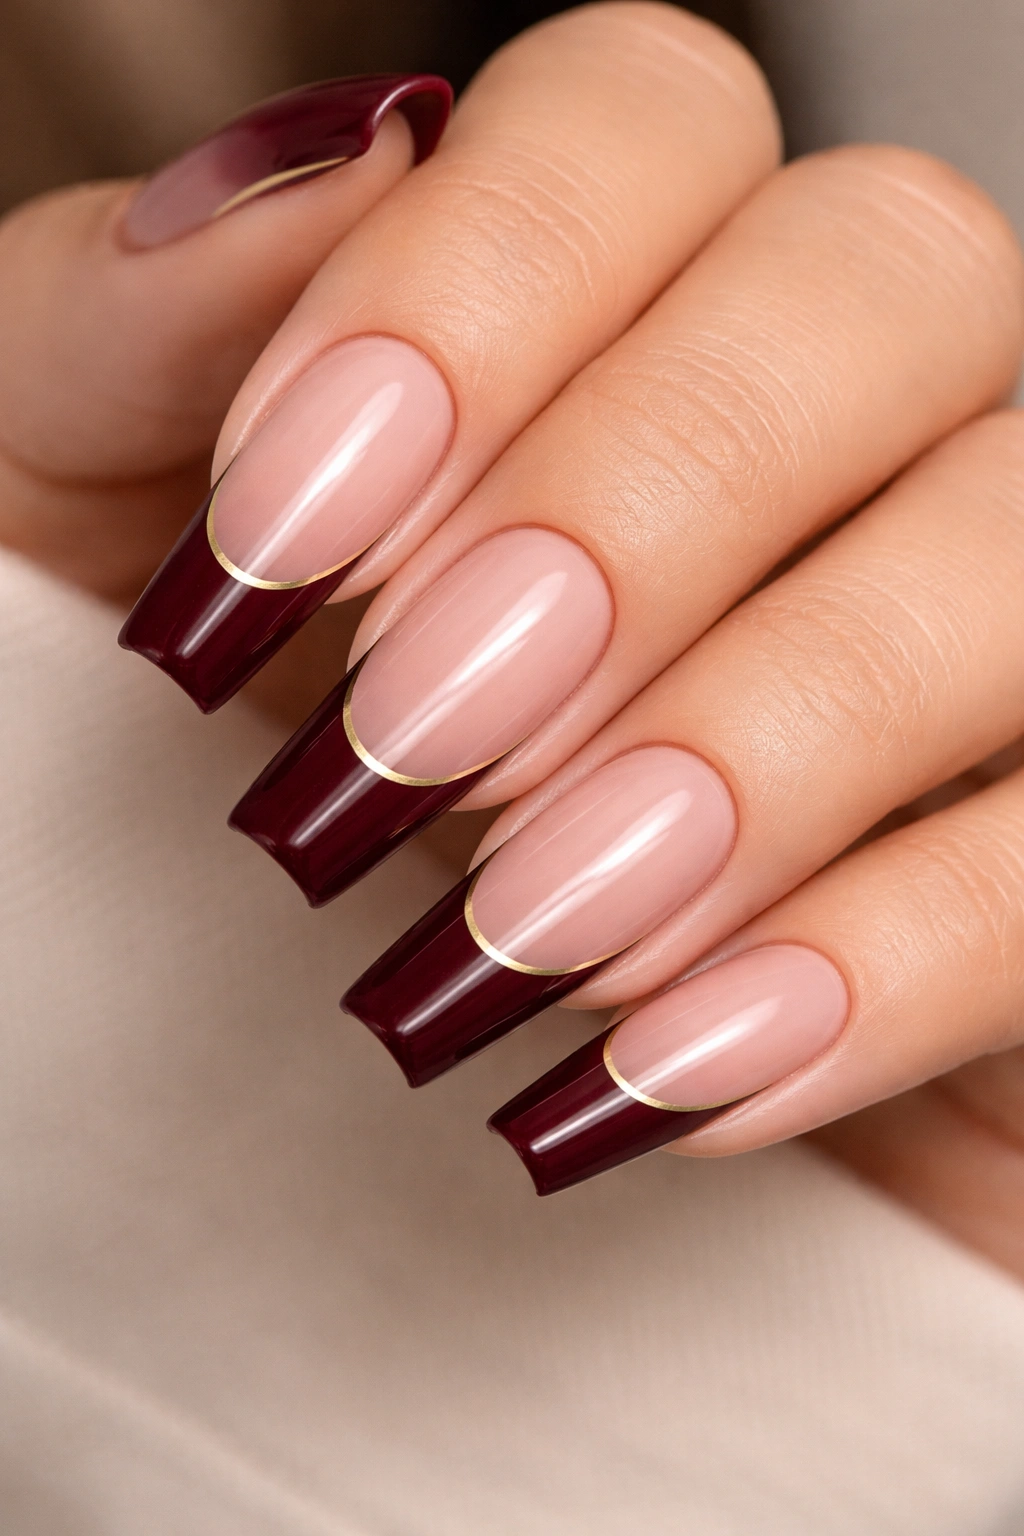
Keep the classic coffin shape with a simple dark red tip, then add one ultra-thin gold line running horizontally just above where the tip begins—like an accent line that separates the base from the color. This geometric detail adds sophistication without clutter and works beautifully on longer coffin nails where you have room for the detail to read clearly.
Why Thin Accent Lines Work
A single accent line draws the eye without being visually busy. It’s the kind of detail that makes people notice your nails and ask, “How did you do that?”
Getting the Line Straight
Use a striping brush and gold gel or metallic polish. Rest your pinky finger on the table for stability, position the brush at your starting point, then pull steadily toward your other hand. Practice on a few practice nails first if you’re new to this technique.
5. Dark Red French Tip with Subtle Pearl Finish
Choose a dark burgundy that has a subtle pearl or shimmer built into the polish itself, so the tip has depth and light-catching dimension without being glittery. The base stays matte or neutral, letting the pearlescent tip do all the talking. This creates a sophisticated look with understated glamour.
What Pearl Finishes Add
A pearl finish in dark red creates sophistication without loudness. The shimmer catches light in professional settings and under indoor lighting, but it never looks overdone because the base remains neutral and clean.
Finding the Right Pearl Polish
Look for dark red polishes specifically labeled as “pearl,” “shimmer,” or “duochrome.” Test on a nail wheel before committing to a full manicure so you know exactly how the finish will read on your nails.
6. Burgundy Tip with Delicate White Lace Detail

Paint your coffin nails with a pale nude base and a precise dark burgundy tip, then add intricate white lace patterns over just the burgundy section. Use a fine nail art brush or a dotting tool to create lace-like designs—think delicate florals, geometric lace, or romantic swirls. This design is feminine, detailed, and shows serious nail artistry.
Why Lace Works on Burgundy
White pops beautifully against dark burgundy, and lace feels romantic and elegant. The contrast creates visual interest while staying classy and not trendy or temporary-feeling.
Creating Lace Patterns
Practice on paper first, then use white gel or acrylic paint with a very fine brush. Steady your hand by resting your pinky on the table. If you’re new to nail art, start with simple dotted patterns, then graduate to more complex designs as your hand steadiness improves.
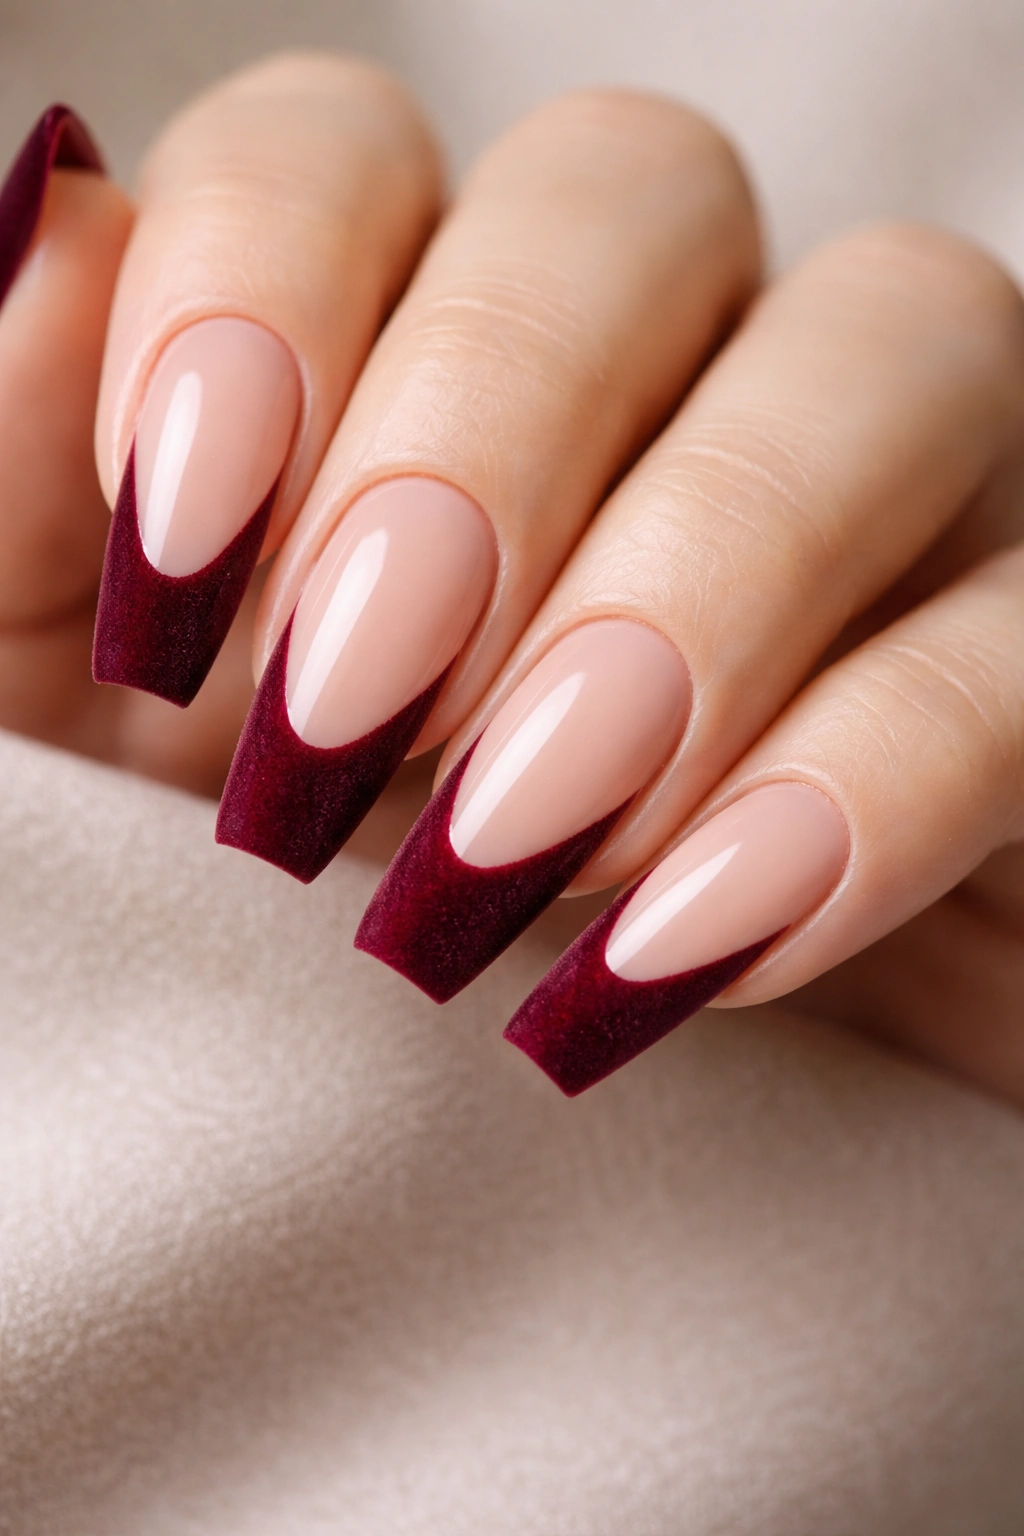
7. Dark Red French Tip with Negative Space Geometry
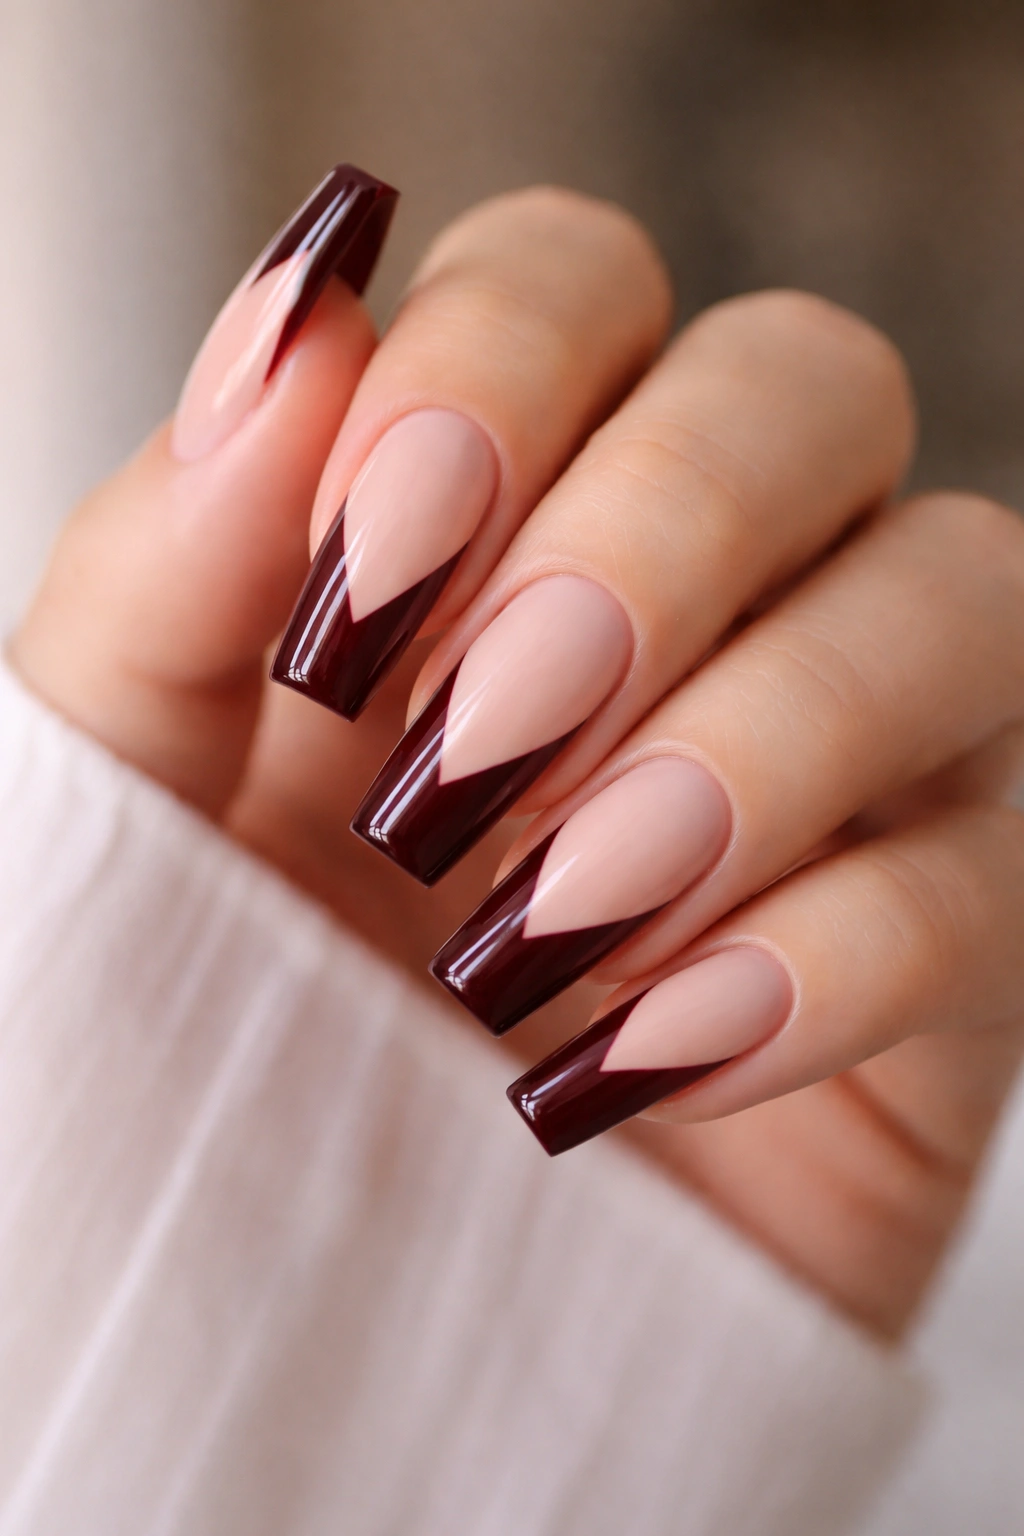
Use the coffin shape to your advantage by creating geometric patterns with negative space—areas where you can see the natural nail or base color between sections of dark burgundy and nude. For example, create a triangular or linear pattern where burgundy, nude, and empty space alternate down the tip.
Why Negative Space Feels Modern
Negative space design is one of the most contemporary approaches to nail art. It feels intentionally artistic rather than decorative, and it’s less likely to feel dated as trends shift.
Masking for Negative Space
Use thin striping tape to mark out your desired pattern, then paint your burgundy and base colors around the tape. Once the polish is completely set, peel away the tape to reveal the negative space underneath. This gives you precise, clean lines.
8. Burgundy French Tip with Champagne Sparkle Accent
Start with a nude or blush base, add your dark burgundy tip, then apply a champagne sparkle or champagne glitter polish to just the very edge of the tip (the final millimeter or so). This creates a luminous border that catches light and adds dimension without overwhelming the design.
Why Edge Accents Work
An accent on just the outer edge creates a frame for your French tip, drawing attention to the shape and making the whole design more intentional. It also catches light beautifully from certain angles.
Application Technique
Once your burgundy is completely set and dry, use a small detail brush to apply your champagne sparkle in a thin line along the very tip edge. You might need 2-3 thin coats to get full coverage of the sparkle without it looking patchy.
9. Matte Dark Red Tip with Glossy Nude Base

Create maximum contrast by using a matte finish on your dark burgundy tips while keeping the nude base coat glossy and shiny. The textural difference between matte and glossy adds visual complexity and makes the design feel more intentional and curated. It’s a subtle detail that photographers and people who really look at nails will absolutely notice.
Textural Contrast Impact
Mixing matte and glossy finishes elevates a simple design because it adds an extra dimension of intentionality. It shows that you didn’t just paint your nails—you made a deliberate choice about finish.
Getting the Matte Right
Use a matte topcoat only on the burgundy section, applying it carefully without getting it on the nude base. Let it dry completely before handling to avoid smudging. A matte topcoat is essential here—matte nail polish without a topcoat can be prone to chipping.
10. Dark Red French Tip with Black Outline
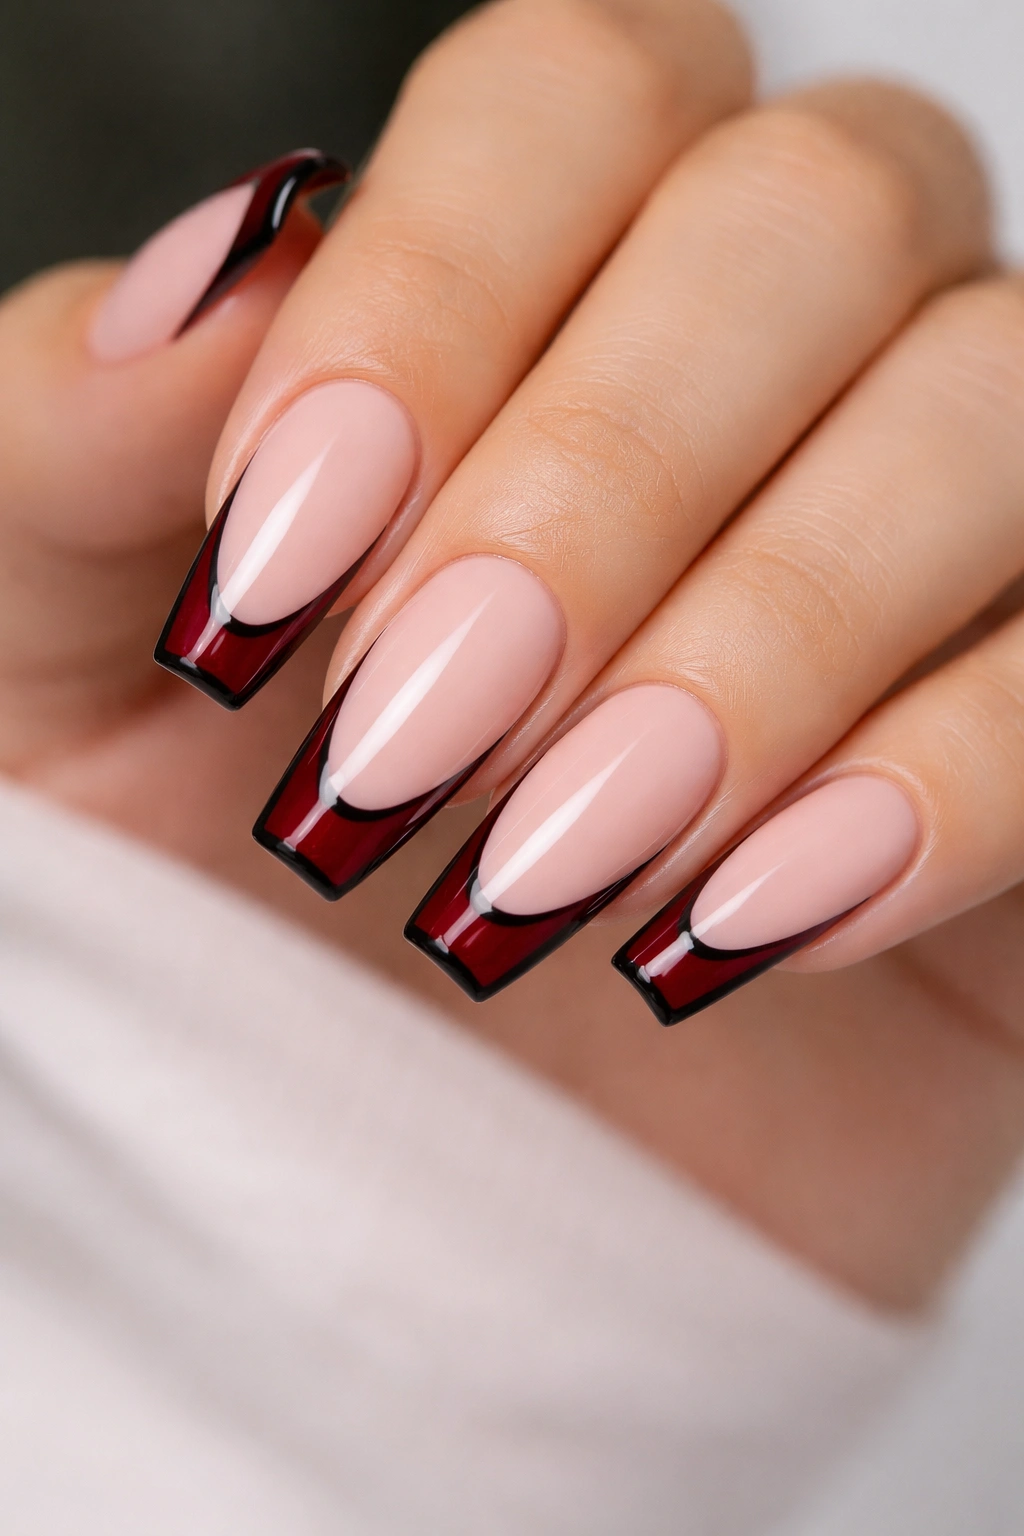
Paint your coffin nails with a pale nude base and burgundy tips, then use black gel or polish to outline the entire tip section—essentially drawing a thin black line where the nude meets the burgundy. This graphic approach feels bold and artistic, almost like a stained glass effect.
Why Black Outlines Pop
Black creates a sharp boundary between colors, which makes both the burgundy and nude appear more vibrant and intentional. It’s a graphic design approach to nails that feels very current.
Creating Clean Black Outlines
Use a thin striping brush and black gel or acrylic. Rest your hand firmly on the table for stability. Start at one corner and move slowly along the line you want to create. If you make a mistake, you can clean it up with a small brush dipped in acetone before it fully cures.
11. Burgundy Tip with Embedded Tiny Pearls
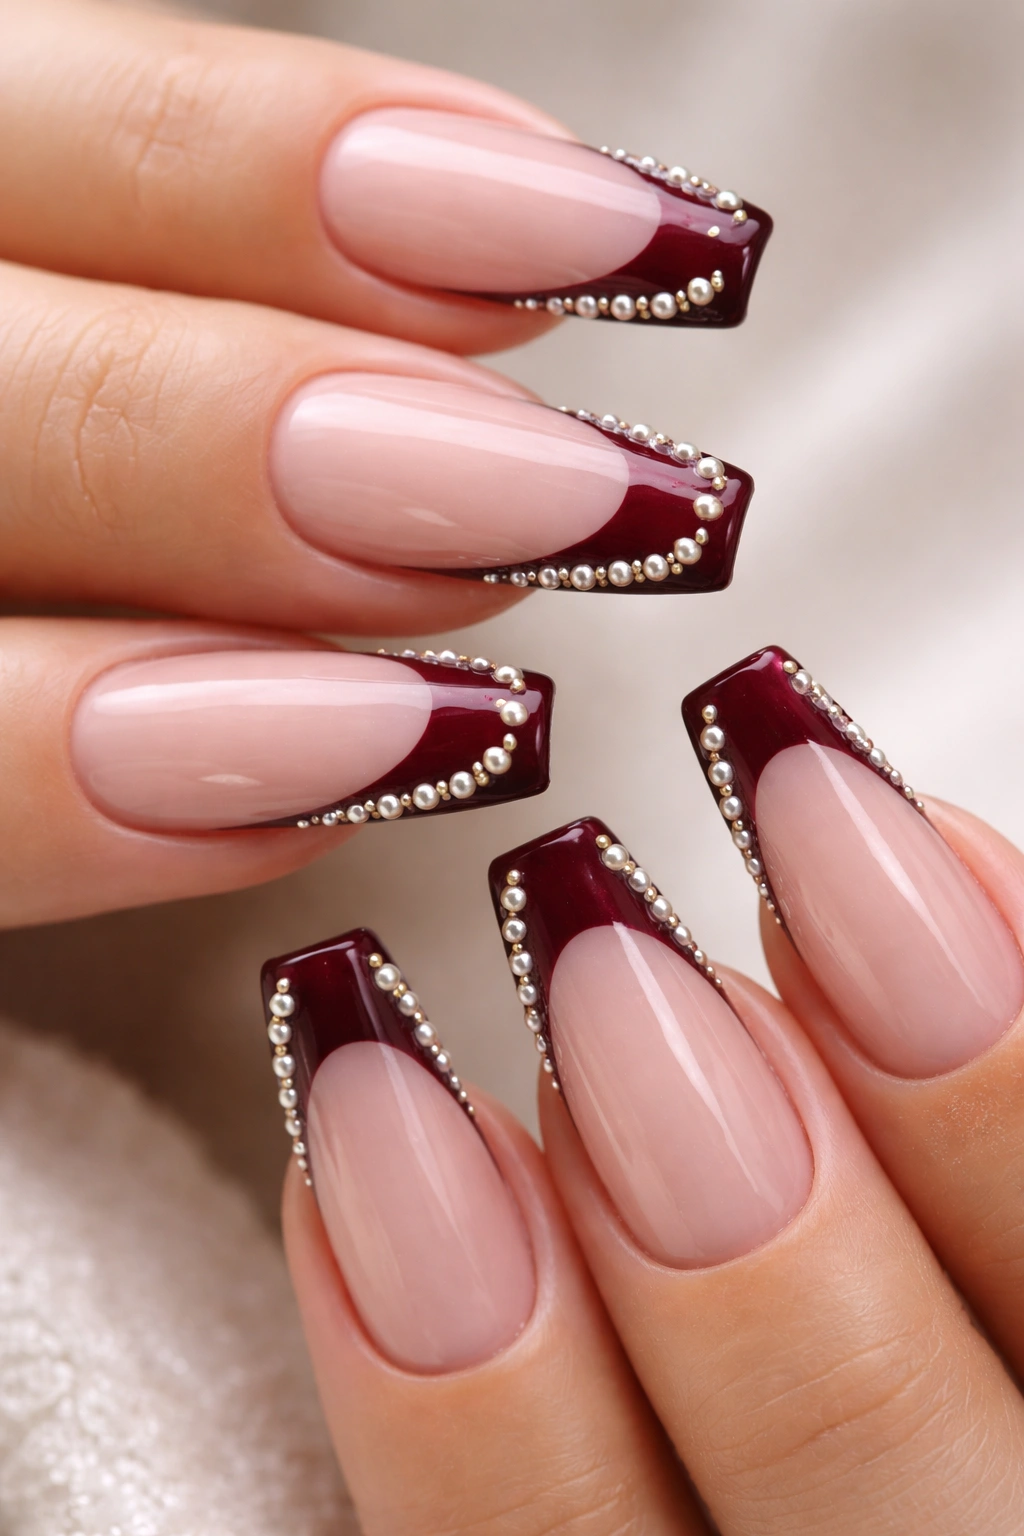
Apply your dark red French tip as usual, then while the polish is still slightly wet, use a dotting tool or tweezers to carefully place tiny white or champagne pearls along the tip edge or scattered across the burgundy section. This creates a luxury, high-jewelry effect that’s perfect for special occasions or anyone who loves glamorous details.
Why Pearls Feel Luxe
Pearls have an inherent elegance and luxury quality. When embedded in nail polish, they catch light and create a three-dimensional effect that reads as intentionally special and expensive-looking.
Securing Pearls Permanently
You need to apply a thick topcoat—specifically a gel topcoat or builder gel—over the pearls to lock them in place. Without a secure topcoat, they’ll pop off quickly. Make sure the topcoat is completely cured before using your nails.
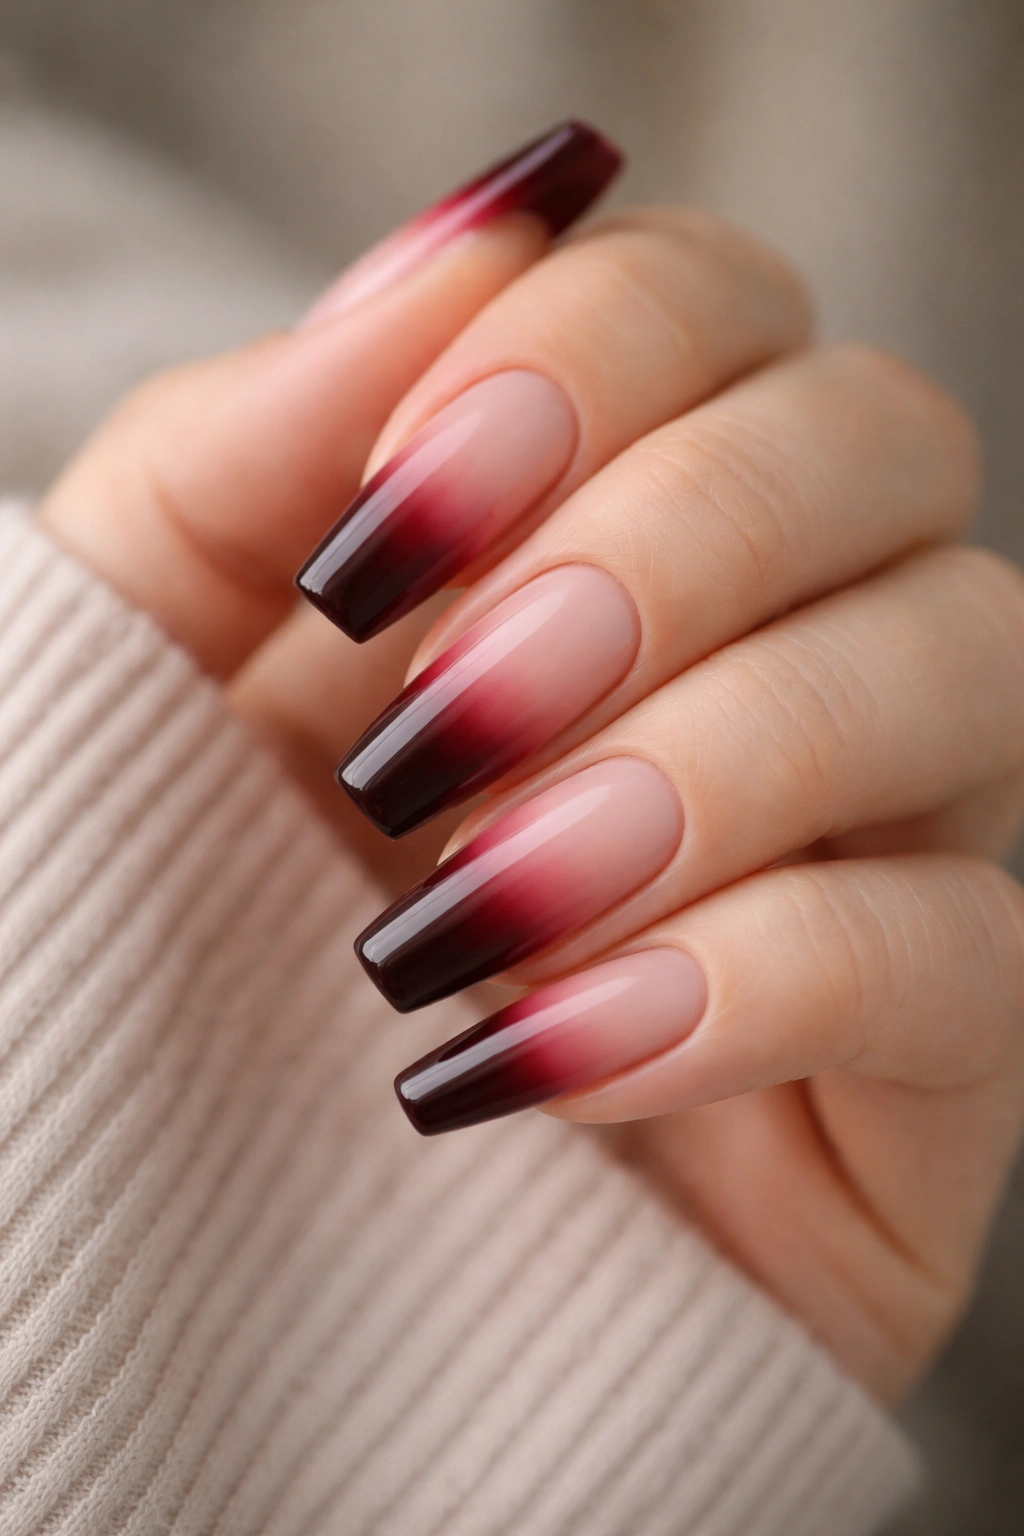
12. Dark Burgundy Ombre from White Tips
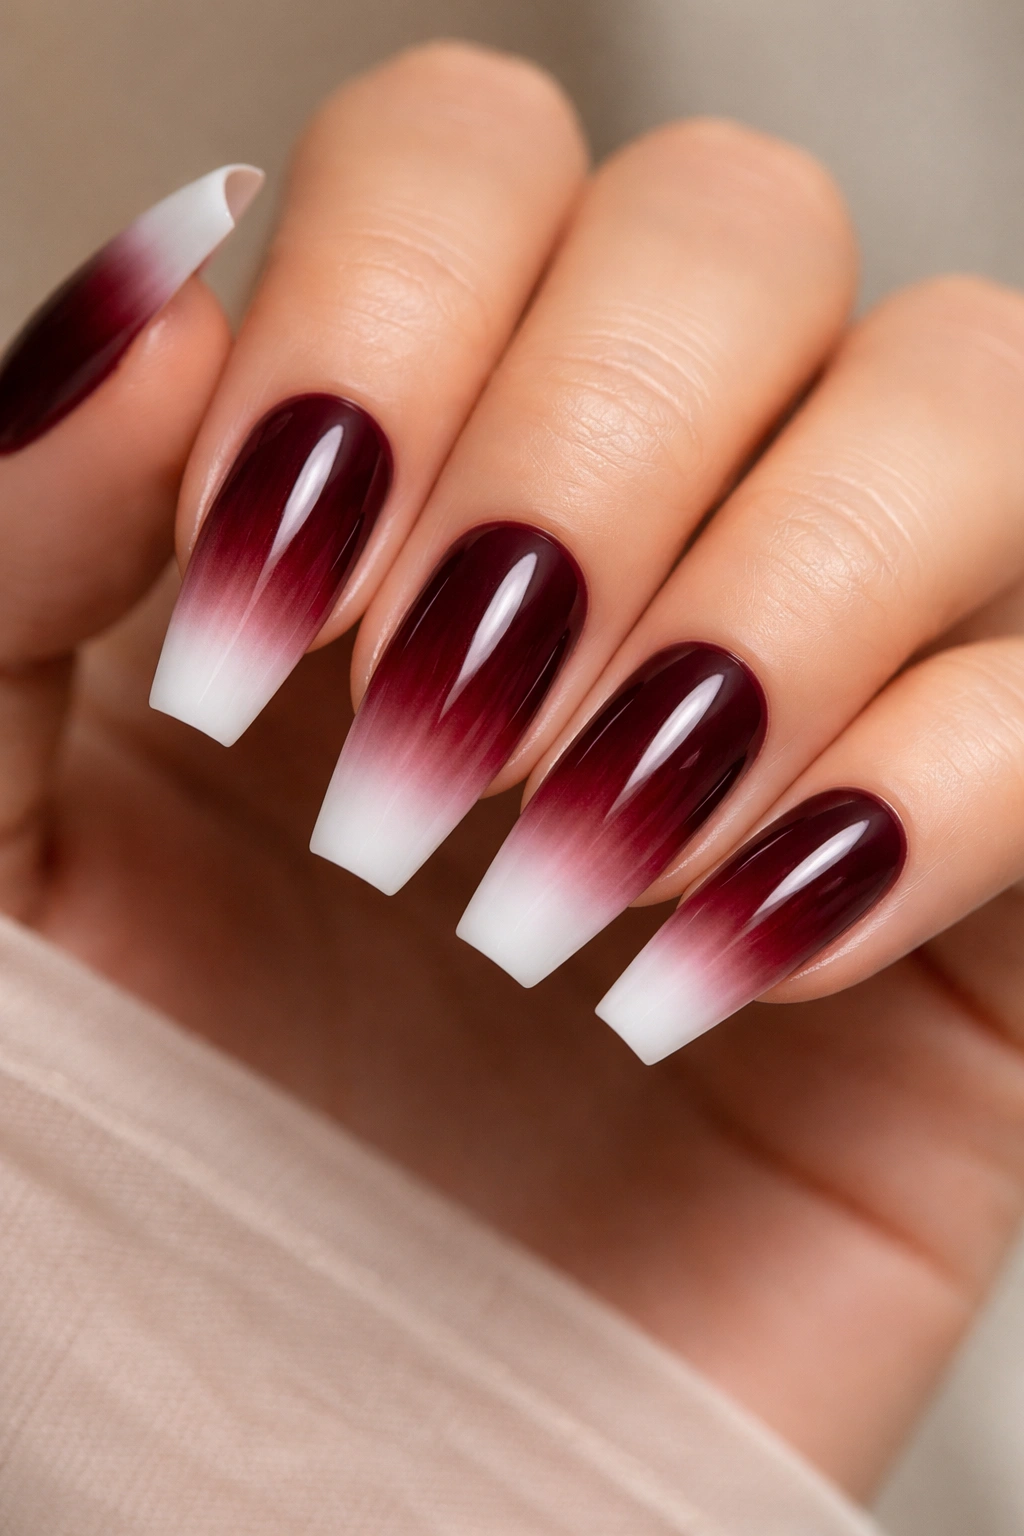
Reverse the traditional French tip by starting with a dark nude base, then gradually blending into a dark burgundy at the very tip, with a whisper of white showing at the absolute edge. This creates a modern take on the French tip where the white isn’t dominant but rather a subtle highlight.
Why This Reversal Works
This design maintains all the elegance of a French tip but feels more contemporary because the white is de-emphasized. The dark burgundy becomes the star rather than a supporting player.
Creating the Three-Layer Blend
Start with your white highlight at the very tip edge, then layer dark burgundy over most of the tip area, then blend your base color upward with a sponge. You’re working with three colors, so patience and multiple thin layers are essential.
13. Coffin Nails with Dark Red Tips and Holographic Dust
Apply your dark red French tips with perfect lines, then dust a fine holographic powder over just the burgundy section while the topcoat is still slightly tacky. This creates a multidimensional effect that shifts colors depending on the angle and lighting—it’s subtle in indoor light but absolutely glorious in natural sunlight.
The Magic of Holographic Details
Holographic powder is one of the most eye-catching finishes available for nails. It transforms a simple design into something that feels futuristic and special without being over-the-top.
Application Without Overdoing It
Use a small, fluffy brush to gently press the holographic powder into the topcoat. You want an even coverage without so much that it looks chunky. One coat of powder applied to a slightly tacky topcoat usually gives perfect results.
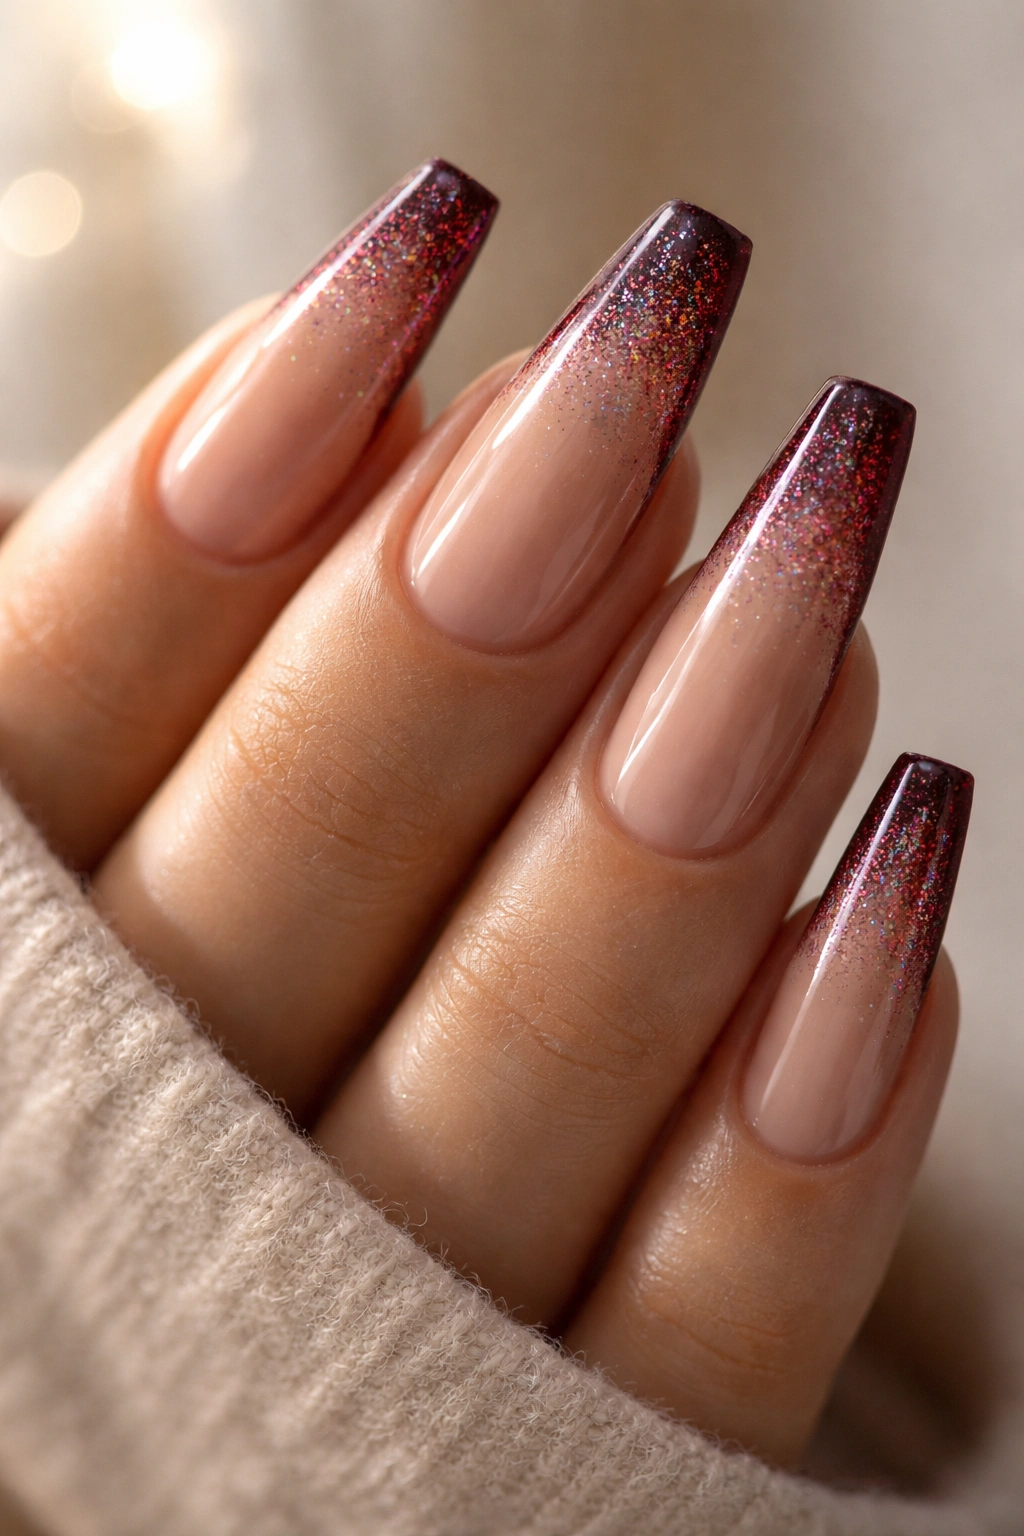
14. Burgundy French Tip with Burgundy Glitter Gradient
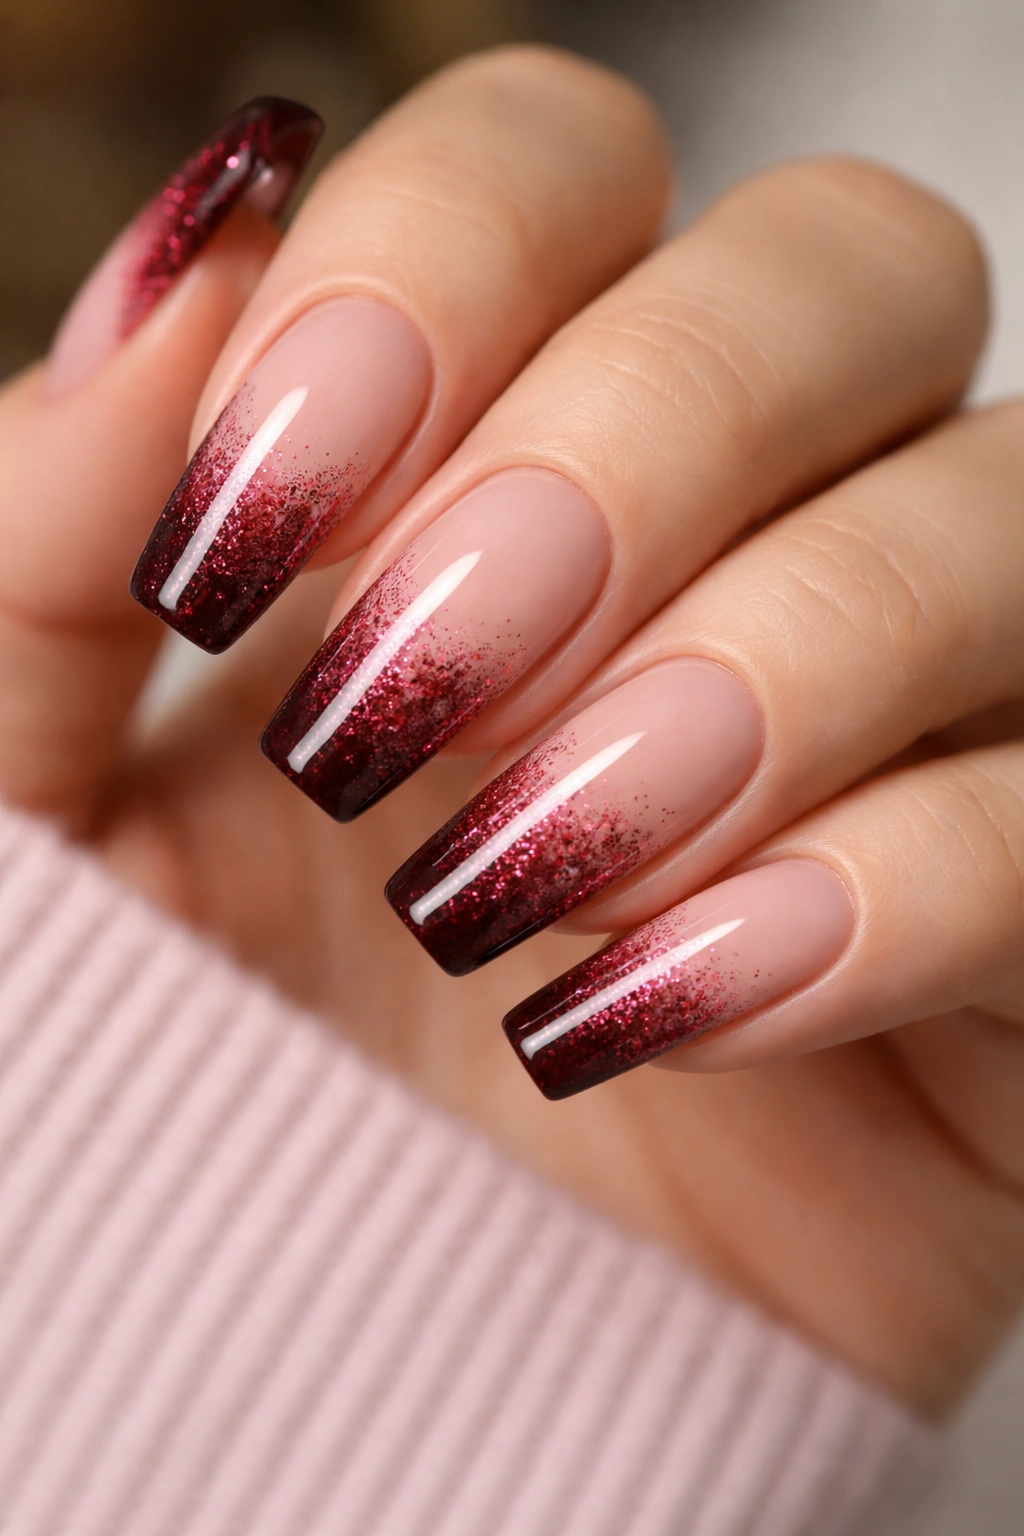
Start with a light nude base and your dark red tips, then add a glitter gradient that starts at the tip edge and fades outward—using burgundy-toned glitter that matches the tip color. This creates dimension and draws all the eye toward the tip area while feeling cohesive and intentional.
Why Matching Glitter Tones Work
Using glitter that matches your tip color creates harmony rather than contrast. The glitter feels like it belongs as part of the design rather than a separate addition.
Building a Gradient with Glitter
Start by applying a glitter topcoat or using a thin coat of clear gel with loose glitter suspended in it. Apply it most heavily at the tip, then use a sponge to gently dab it outward, spreading the glitter in a gradient toward the middle of the nail. Seal with a glossy topcoat.
15. Dark Red Tips with Thin Metallic Striping Pattern
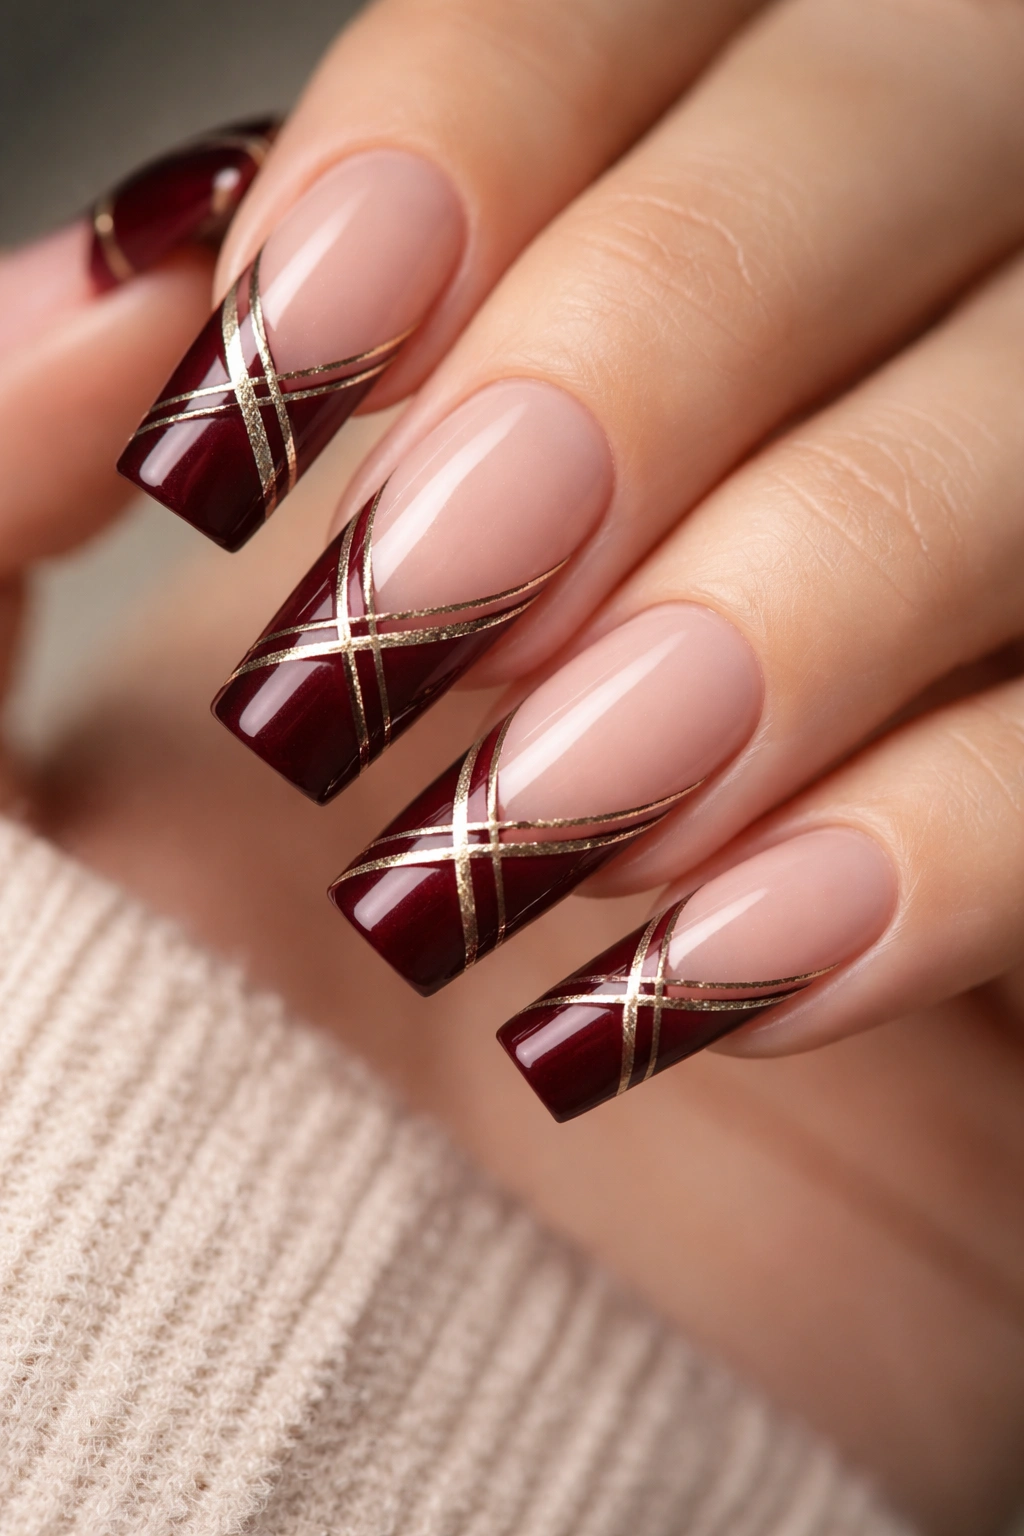
Paint your burgundy tips as usual, then add thin vertical or diagonal stripes of gold, silver, or rose gold metallic polish across just the burgundy section. These metallic lines create movement and visual interest while maintaining the elegance of a French tip.
Why Linear Details Feel Sophisticated
Stripes are geometric and intentional—they read as a deliberate design choice rather than random decoration. Thin stripes maintain sophistication while adding visual complexity.
Creating Evenly Spaced Stripes
Use striping tape to mark your stripe locations, or use a thin striping brush and practice your hand position before committing. Thin stripes require a steady hand, so don’t rush. Rest your pinky finger on the table and move slowly and deliberately.
16. Burgundy French Tip with Velvet Texture Finish
Combine your dark red French tip with a velvet texture topcoat applied only to the tip section, while the base remains glossy. Velvet finishes feel tactile and luxurious, and the contrast between the smooth, shiny base and the soft, velvety tip creates visual interest.
The Velvet Trend
Velvet finishes have become increasingly popular in high-end nail artistry because they photograph beautifully and feel unique in person. The textural element makes people want to touch your nails (which is not ideal, so prepare for that).
Applying Velvet Without Getting It on the Base
You need a steady hand or excellent tape-work to keep the velvet finish only on the burgundy section. Apply your velvet topcoat carefully with a thin brush, staying within the burgundy area. Once dry, you can clean up any overflow with a brush dipped in acetone.
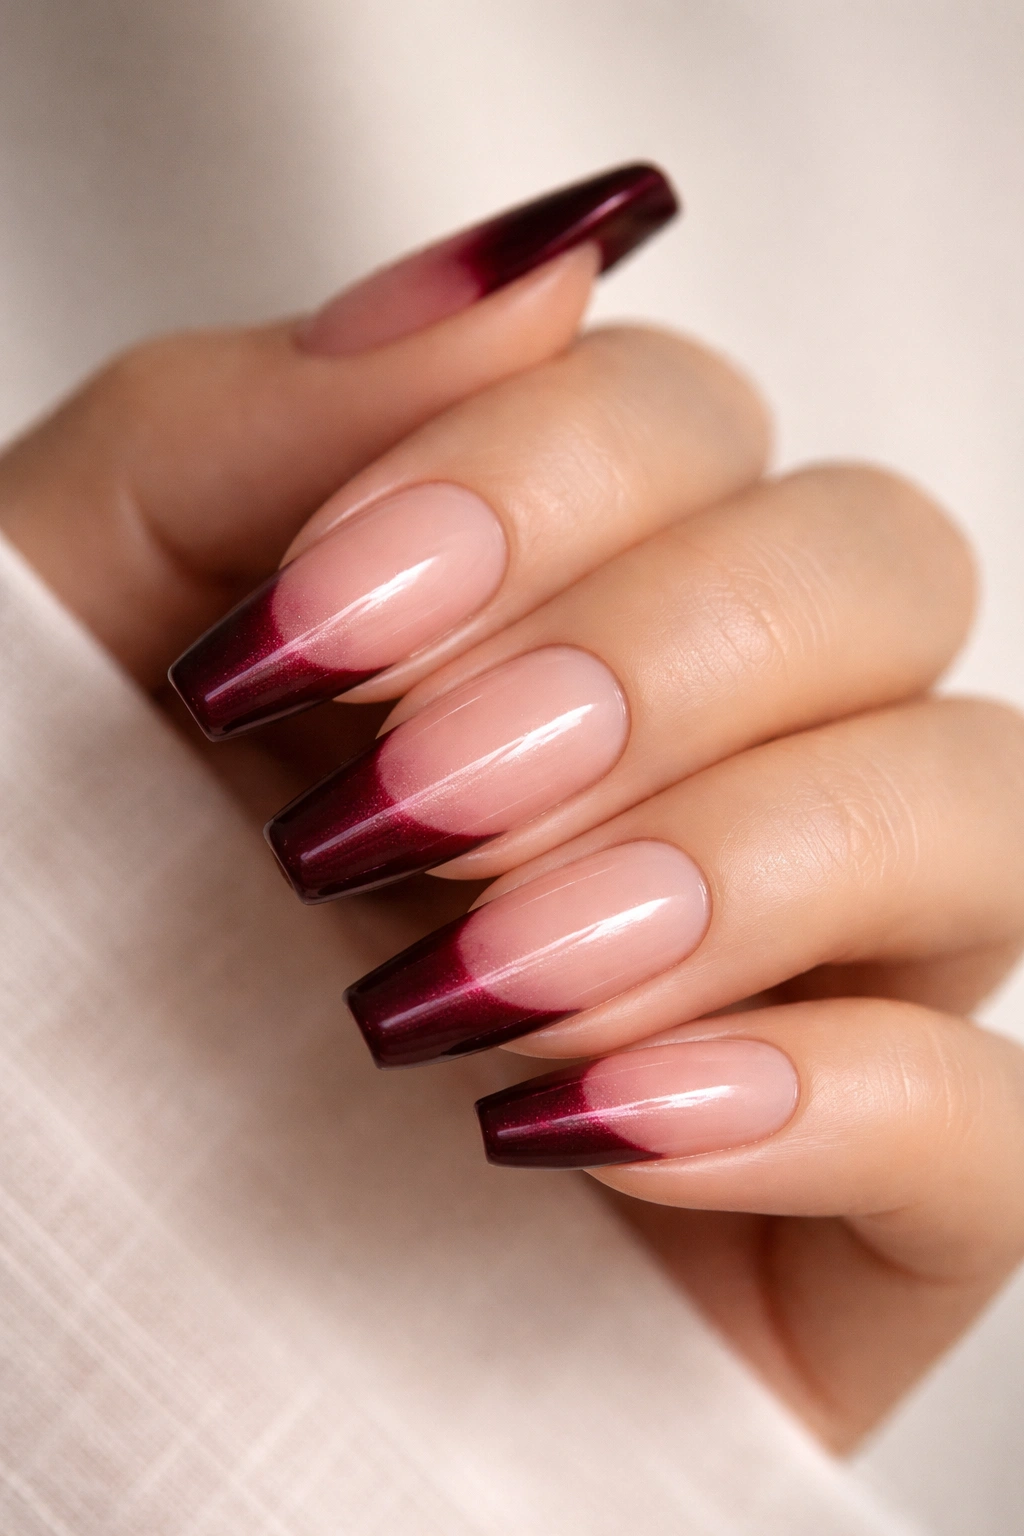
17. Dark Red Tip with Nude-to-Clear Fade
Create a French tip where the dark burgundy transitions not into a solid nude, but into a gradient that fades from burgundy to the base color to completely clear (natural nail). This creates an ombré effect that’s dimensional and modern while maintaining the French tip shape.
Why Fading to Clear Feels Fresh
Fading to clear is more contemporary than fading to a solid color. It feels organic and modern, like the color is naturally dissolving rather than being painted on.
The Three-Layer Fade
Apply your dark burgundy at the very tip, then blend your nude base color over the middle section, then apply clear gel or topcoat with no color in the area closest to the cuticle. You’re creating a three-color fade, so sponge-blending is your best friend here.
18. Burgundy French Tip with Delicate Gold Leaf Details
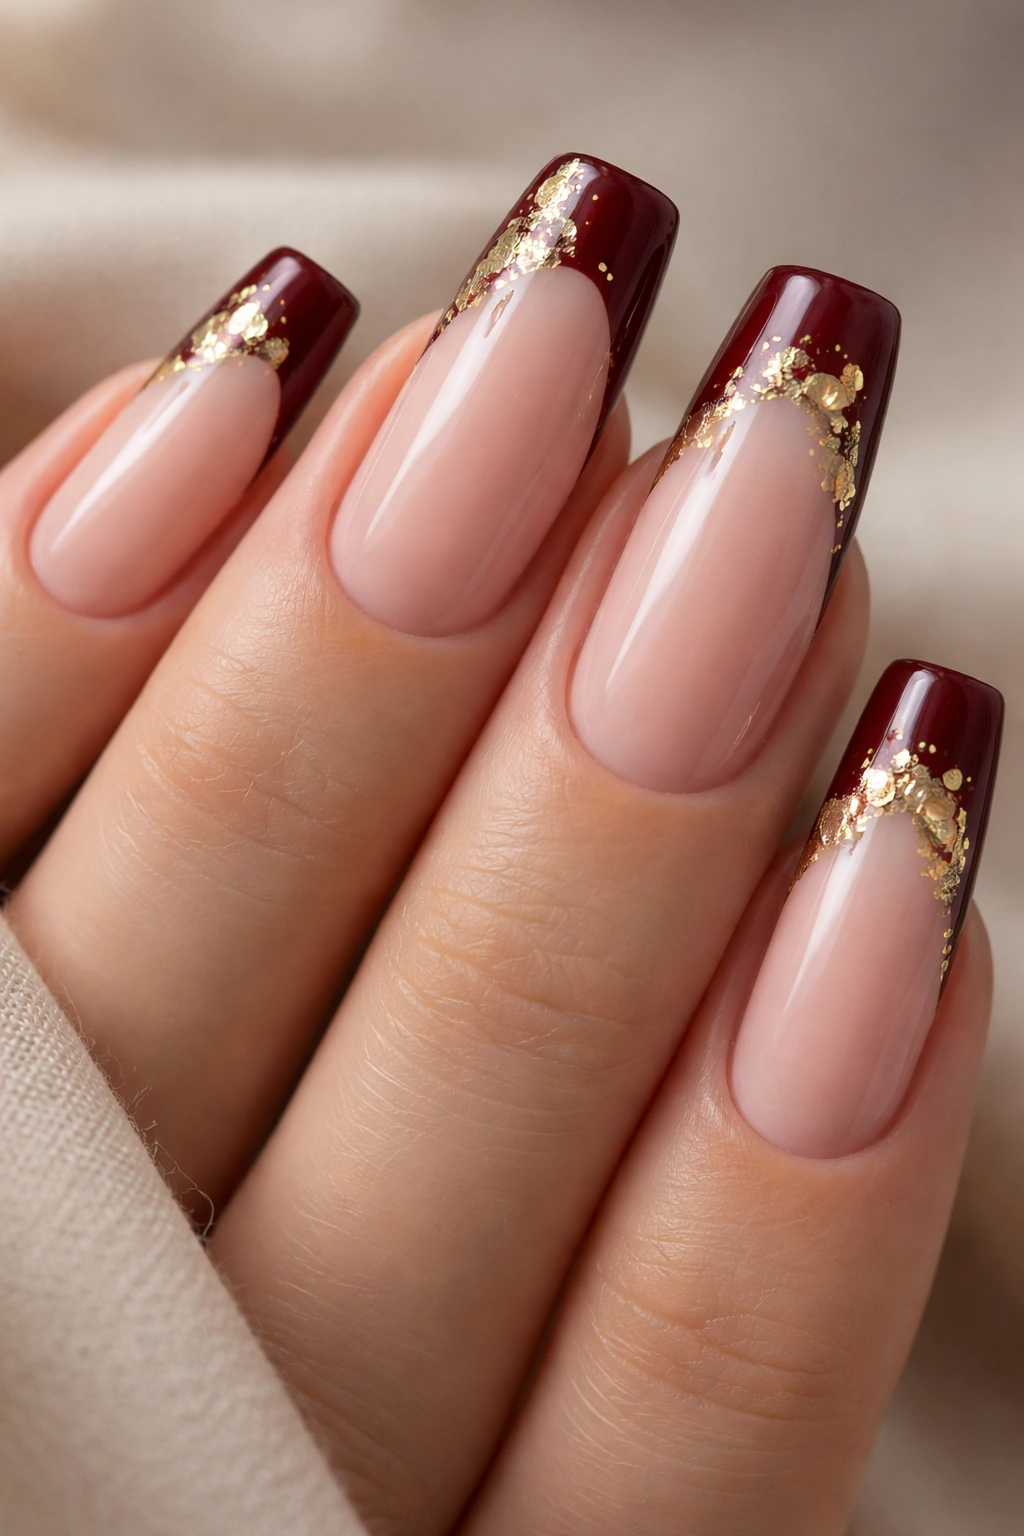
Apply your dark burgundy tips and pale base, then add actual gold leaf pieces scattered across the burgundy section or along the tip edge. Gold leaf creates a luxurious, almost art gallery effect—it’s texture you can see and feel, making the nails feel special and intentional.
Why Real Leaf Elevates Design
Gold leaf isn’t just pretty—it has weight and dimension that glitter or foil can’t quite replicate. It feels crafted and artistic in a way that photographs beautifully.
Working with Gold Leaf
Apply a thin layer of topcoat or foil adhesive to where you want the leaf to go, then carefully place small pieces of gold leaf using tweezers or a small brush. Once in place, seal with a thick layer of builder gel or topcoat, making sure the leaf is completely covered and won’t lift.
19. Dark Red Burgundy Tip with Reverse Ombre Base
Instead of a solid pale base, create a reverse ombre where the base gradually deepens in color toward the tip—starting very pale at the cuticle and gradually intensifying until it meets your dark burgundy tip. This creates a cohesive color story where everything flows together seamlessly.
Why Reverse Ombre Works
When the base color deepens toward the tip, it creates visual continuity. The whole nail feels planned and coordinated rather than two separate elements.
Creating Smooth Color Transitions
Use a makeup sponge and work with thin layers of progressively darker nude/pink shades. Apply each shade in the area it will occupy, then blend the overlap zones by gently dabbing with the sponge. This takes more time than a solid base, but the result is significantly more sophisticated.
20. Burgundy Tip with Micro Crystal Embellishments

Apply your dark red French tips, then apply small genuine crystals or rhinestones in a specific pattern across just the tip area—perhaps scattered randomly, arranged in a line, or clustered near the tip edge. This is the go-to design for anyone who loves sparkle and wants something that catches light from every angle.
Crystals vs. Rhinestones vs. Gems
All three options work, but they create slightly different effects. Genuine crystals have the most light-refraction property. Rhinestones are the most affordable and readily available. Larger gems make a bolder statement than tiny crystals.
Securing Crystals for Durability
Apply crystals or gems into a thick builder gel or gel topcoat while it’s still tacky but not wet. Let the gel cure, then apply another coat of topcoat over the stones to lock them in place. Without this sealing step, stones will pop off within days.
21. Dark Burgundy French Tip with Subtle Pink Undertone
Use a dark burgundy polish that has a pink undertone (rather than a brown or orange undertone), which creates warmth and flatters most skin tones beautifully. Pair it with a warm peachy-pink base instead of a traditional nude. This color combination feels less dramatic than true burgundy but still rich and sophisticated.
How Undertones Change Everything
The undertone of your burgundy dramatically impacts how warm or cool the overall look feels. A pink-undertone burgundy paired with a warm base creates cohesion and warmth that feels flattering and intentional.
Testing Undertones Before Committing
Swatch different dark red polishes on a practice nail or nail wheel to see which undertone resonates with your skin tone and personal aesthetic. The right undertone can make all the difference.
22. Burgundy French Tip with Sheer Base and Nude Gradient Edge
Create a design where the base is a sheer nude or pink gel (so you can still see a bit of the natural nail), the tip is dark burgundy, and there’s a gradient edge where the base gradually intensifies in opacity toward the tip. This creates subtle dimension and a less-is-more aesthetic.
Why Sheer Bases Feel Modern
Sheer bases are trending because they maintain a natural, almost barely-there quality while still providing polish color. Combined with a bold tip, this creates nice contrast.
Working with Sheer Polish
Sheer polishes often require more coats than opaque ones. Build the color gradually with thin coats, allowing each coat to cure completely if using gel. The sheer quality means you’ll see the base color through the burgundy tip, creating a blended effect at the transition.
23. Dark Red Tip with Brushstroke Accent Design
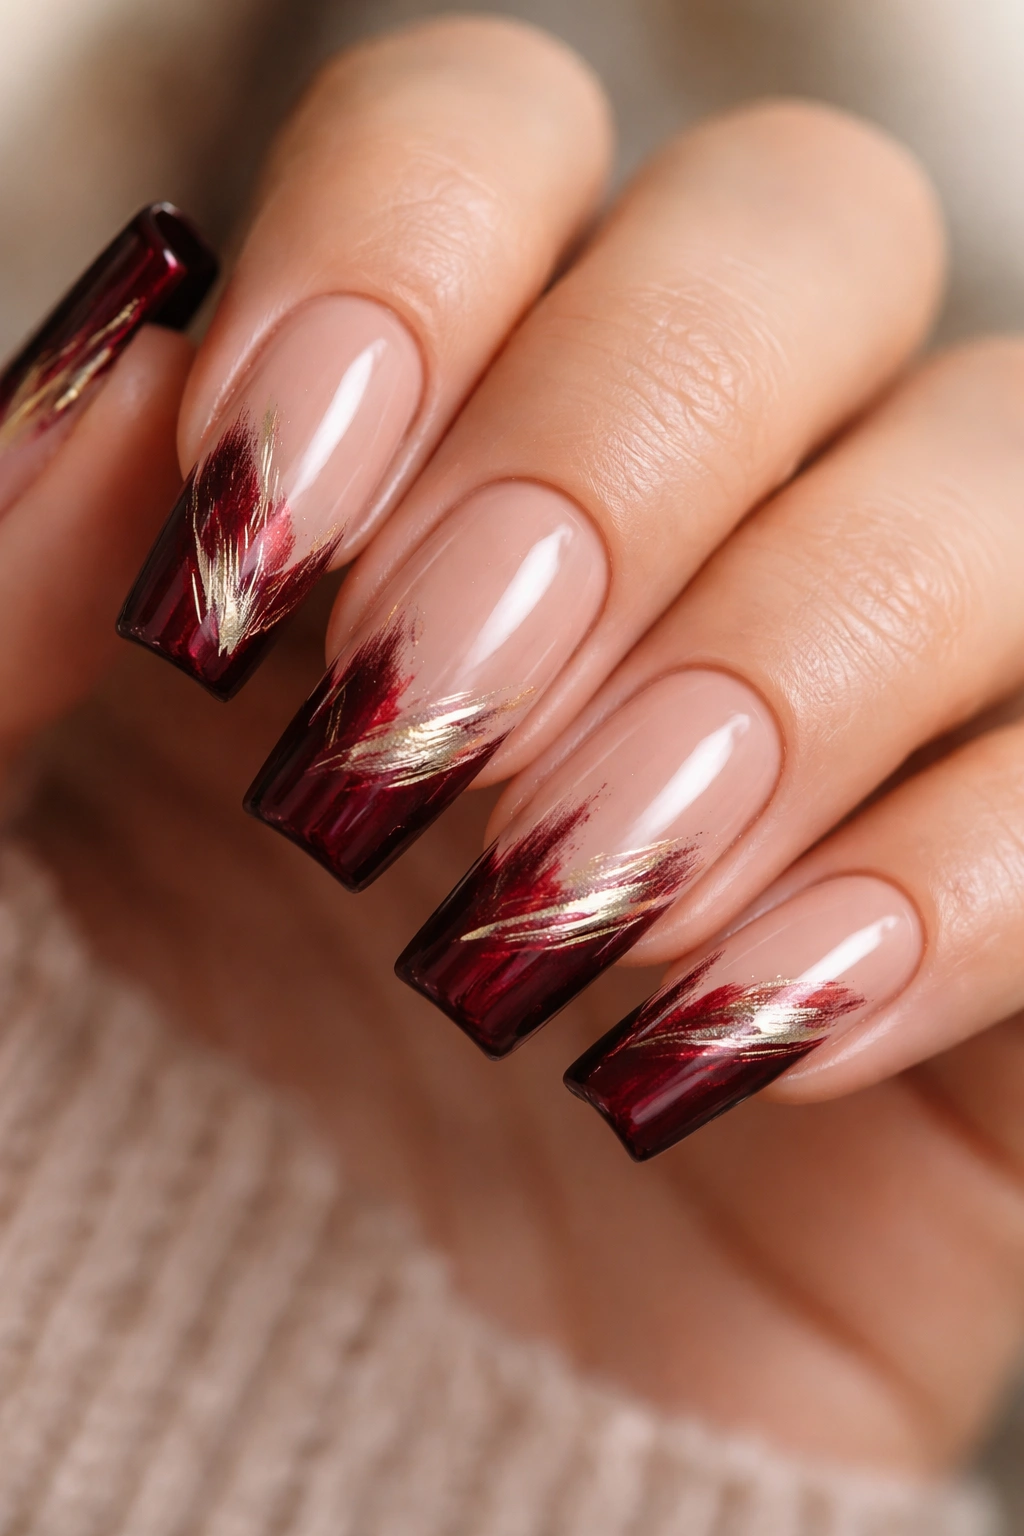
Apply your burgundy tips and neutral base, then add painterly brushstroke details across the tip area using gold, silver, or a contrasting burgundy shade. These aren’t precise lines but rather artistic, hand-painted marks that feel organic and artistic.
Why Brushstrokes Feel Artist
Intentionally imperfect brushstrokes read as artistic and intentional rather than sloppy. They’re on-trend with the maximalist, artistic nail moment happening right now.
Creating Intentionally Imperfect Details
Use a thin nail art brush and move quickly and confidently. Don’t try to make brushstrokes perfect—the slight irregularity is what makes them beautiful. Practice the movement a few times on paper to build confidence before applying to nails.
24. Burgundy French Tip with Glossy and Matte Two-Tone Effect
Create a coffin nail where the tip is split vertically—one side is glossy dark burgundy and the other side is matte dark burgundy. This geometric, two-tone approach creates visual interest and the textural contrast makes the design feel high-fashion and editorial.
Why Two-Tone Finishes Photograph Well
The contrast between matte and glossy creates shadow and depth in photographs, making the design read even more impressively than in person.
Creating a Clean Vertical Split
Use striping tape placed vertically down the middle of the tip to create your dividing line. Apply glossy burgundy to one side, then apply matte topcoat only to the other side. Once completely dry, remove the tape to reveal the clean division between finishes.
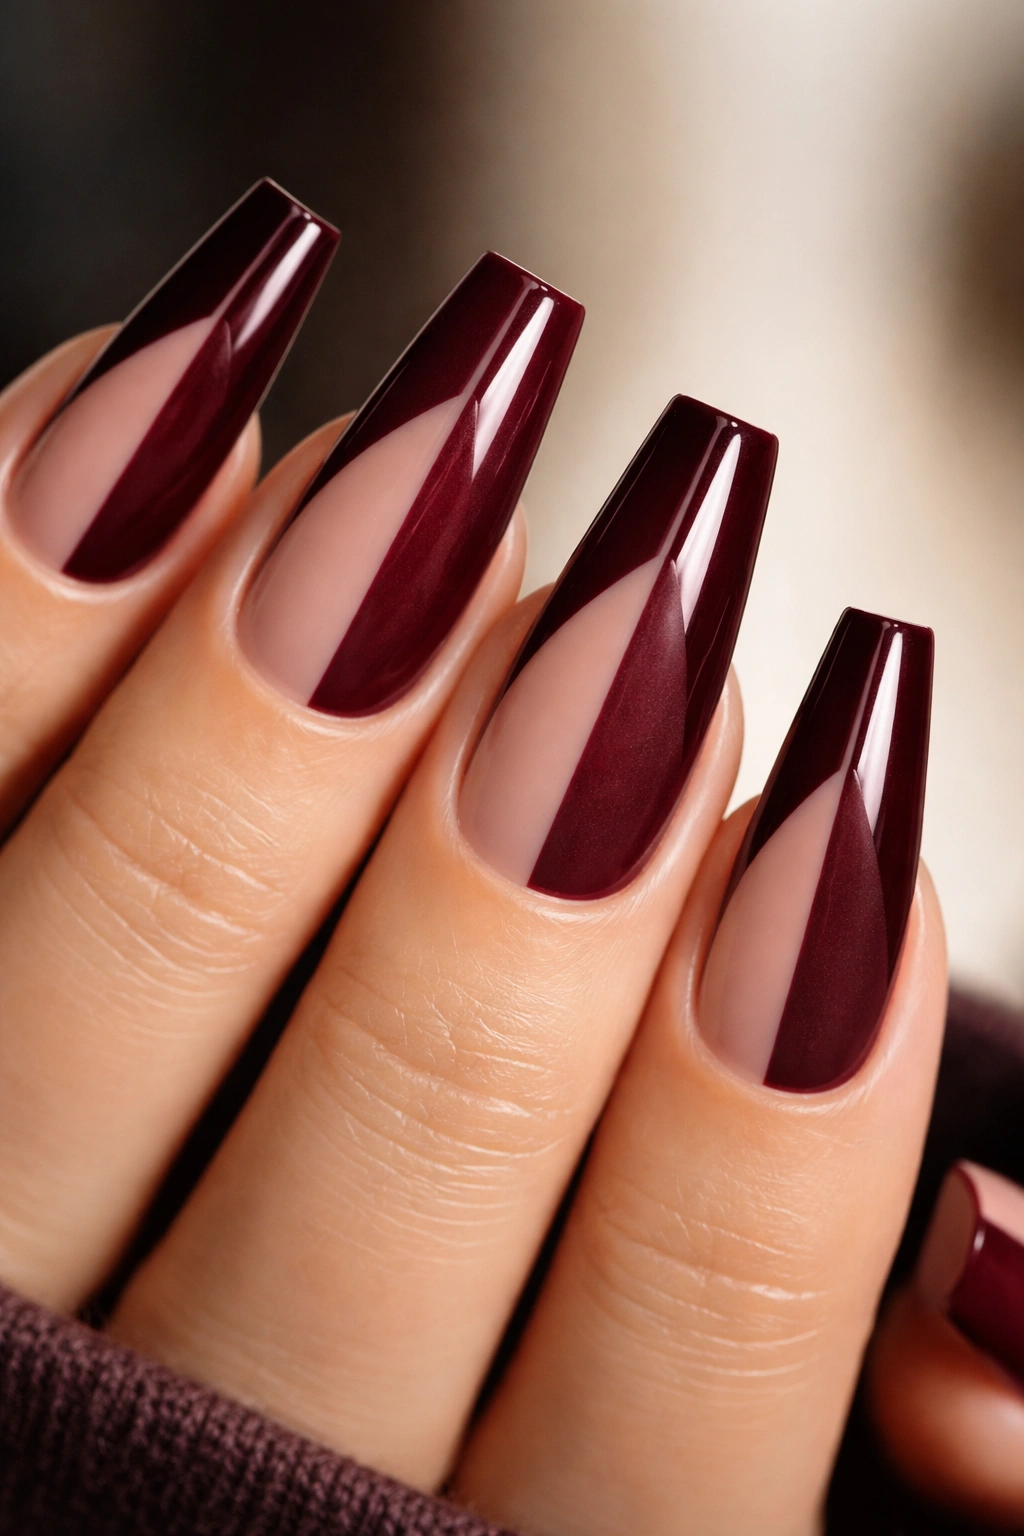
25. Dark Red Burgundy Tip with Sophisticated Simplicity
Go back to basics with a perfectly executed dark red French tip that needs no additional embellishment—just a flawless nude base, a precise dark burgundy tip with a clean line, and a high-shine glossy topcoat that makes both colors look their absolute best. This design works because of its execution perfection rather than complexity.
Why Simplicity Is Always Elegant
When you nail the fundamentals—perfect shape, flawless application, clean lines—no additional details are needed. This is the design that works for any occasion and never feels dated or trendy.
Achieving Flawless Application
Invest time in prepping your nails (filing, buffing, pushing back cuticles). Use a quality base coat and apply thin, even layers of both your base color and burgundy tip. The key to this design’s success is precision and care in application rather than decoration.
Final Thoughts
Dark red French tip coffin nails represent the perfect intersection of classic elegance and modern edge. Whether you prefer the minimalist perfection of a simple burgundy tip or you want to layer on glitter, gems, and artistic details, this foundational design adapts to your personal style beautifully. The coffin shape provides a substantial canvas for both subtle refinements and statement-making embellishments, while the dark burgundy keeps everything feeling sophisticated rather than playful or trendy.
What makes this combination so appealing is its versatility across contexts. You can wear dark red French tip coffins to a corporate meeting where they read as polished and intentional, then transition into evening wear where they look glamorous without being costume-y. The dark red is rich enough to feel special but neutral enough to work with any outfit, skin tone, or personal aesthetic.
Start with whichever design resonates most with your style—whether that’s the classic glossy version, a glittered variation, or something with artistic brushstrokes and negative space. Once you’ve mastered one approach, you can layer in techniques and embellishments to create designs that feel completely personal to you. The beauty of this particular style is that it rewards both precision and creativity, and it looks stunning at every stage of skill development.
