

Coffin nails have become one of the most sought-after nail shapes in recent years, and when you extend them with nail extensions, the possibilities for creativity and drama become nearly limitless. The elongated, tapered silhouette creates a sophisticated canvas that’s perfect for bold designs, intricate art, and statement-making colors that simply wouldn’t have the same impact on shorter nails. Whether you’re drawn to minimalist elegance, eye-catching nail art, or glamorous embellishments, coffin nails with extensions give you the length and structure to pull off virtually any aesthetic you’re imagining.
The beauty of coffin nails lies in their versatility. They’re edgy enough to feel modern and fashion-forward, but refined enough to work in professional settings when styled appropriately. With extensions, you can achieve a perfectly symmetrical shape and consistent length that might be difficult to maintain with natural nails alone. Extensions also provide a sturdy base for detailed nail art, allowing artists to create intricate designs that would be impractical on shorter nails. The added strength and stability mean your manicure will last longer and resist chipping better than natural nails alone could manage.
If you’re considering getting coffin nails with extensions, you’re probably wondering what designs actually work best with this shape. The coffin shape’s unique geometry opens up design possibilities that other nail shapes simply can’t deliver—the wider center area is perfect for focal point designs, while the tapered sides create natural lines for geometric patterns and gradients. Here are fifteen stunning coffin nail designs that showcase exactly why extensions make these nails so captivating.
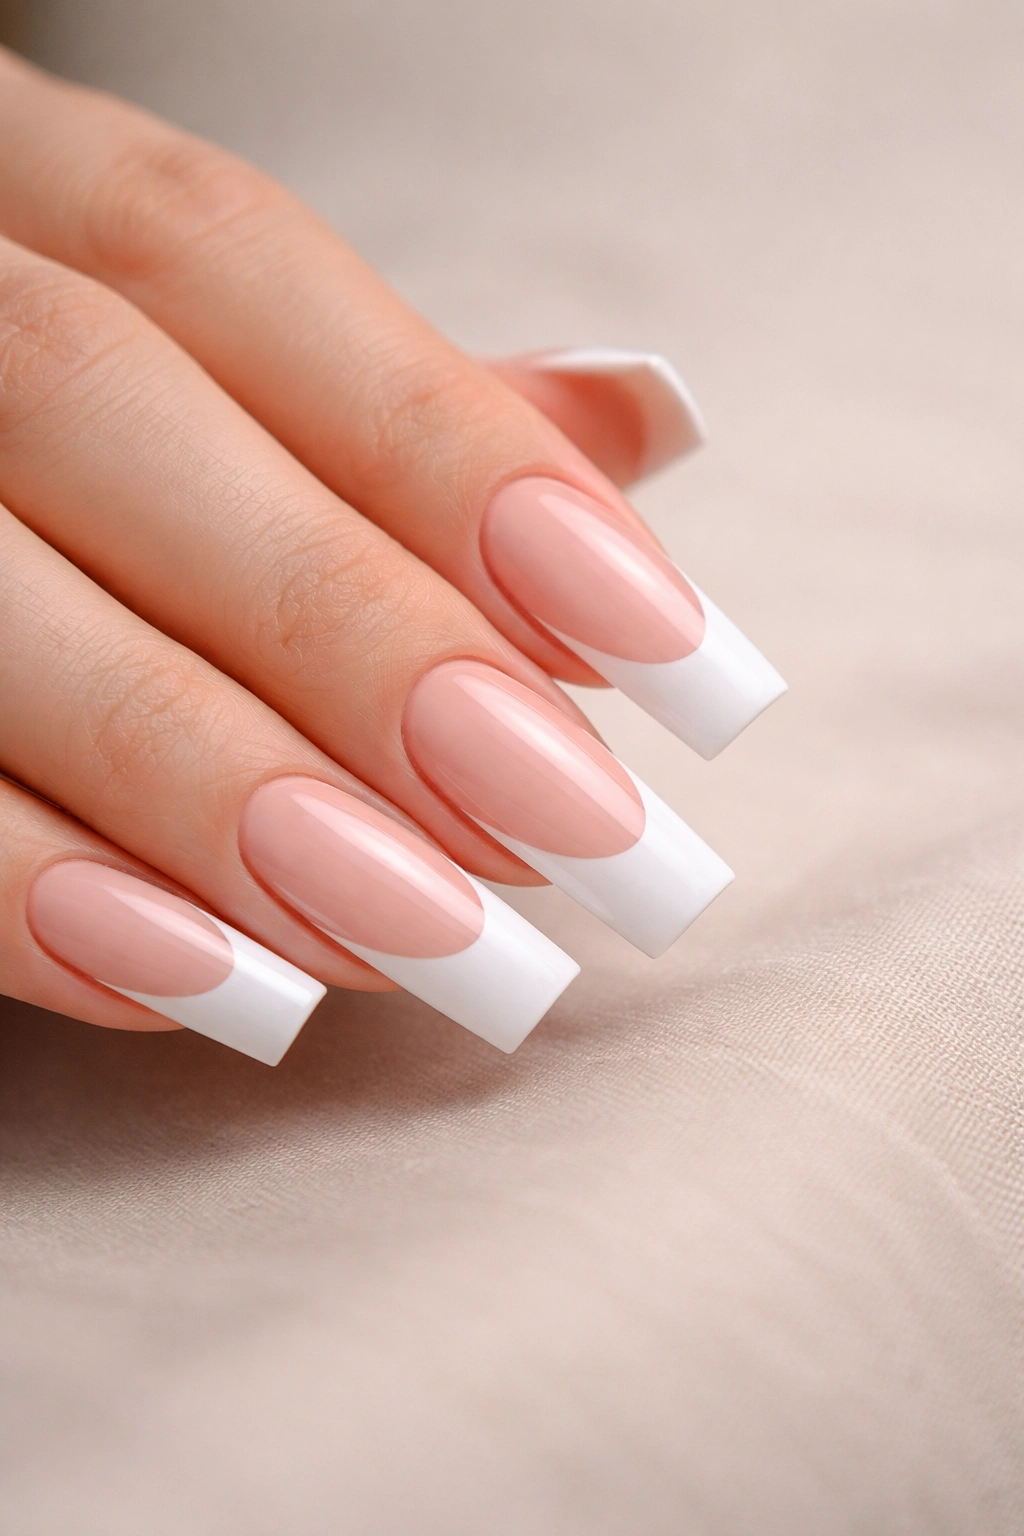
1. Classic French Tips With Squared Edges
The French tip is timeless for a reason, and when you apply it to coffin nails with extensions, you get a look that’s both elegant and modern. Rather than the traditional rounded shape, squared-off French tips on coffin nails create clean, geometric lines that feel intentional and polished. The contrast between the nude or pale base and the white tip draws attention to the shape itself, making the coffin silhouette the star of the show.
Why This Design Works
French tips work beautifully on coffin nails because the tapered sides naturally guide the eye toward the tip, emphasizing the nail’s length and shape. The simplicity of the design lets the nail shape itself be the statement rather than competing with complicated artwork. This is actually the perfect gateway look if you’re new to long coffin nails—it looks expensive and intentional without being overwhelming.
Application Tips
- Use a steady hand or thin guide tape to create a clean, straight line where the white meets the nude base
- Square off the very tip rather than using a curved French line to emphasize the coffin shape’s geometry
- Seal everything with a glossy topcoat to make the contrast pop without any ambiguity about where one color ends and another begins
- Consider a slightly thicker tip line (about 3-4mm) on coffin nails rather than the ultra-thin tips you might use on shorter nails
Care and Maintenance
French tips on coffin nails show wear pretty quickly—chips in the white tip become obvious fast. You’ll likely need touch-ups every 10-14 days depending on your daily activities. Keep your tips sealed and avoid rough work with your hands to extend the look as long as possible.
2. Ombré Gradient From Nude to Deep Black
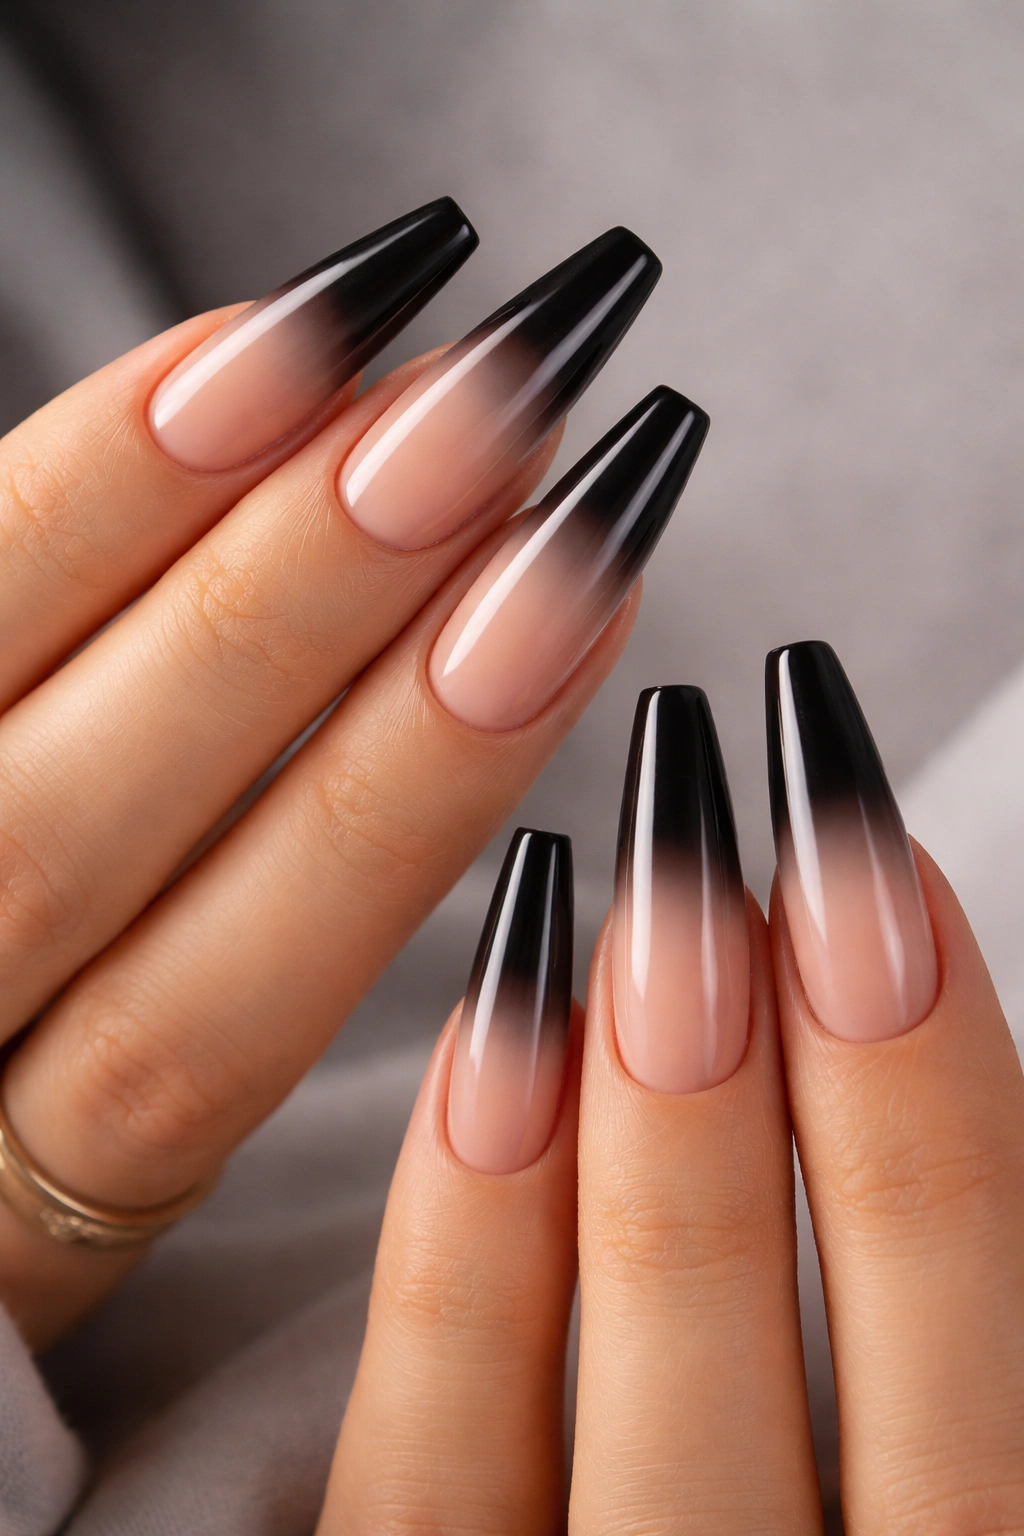
An ombré gradient that transitions from a soft nude base into a deep, smoky black is pure sophistication on coffin nails. The length of the coffin shape gives you plenty of real estate to create a smooth, beautiful gradient rather than an abrupt color change. This design works especially well for evening occasions, but it’s neutral enough to feel office-appropriate too.
Why This Design Works
The ombré technique takes advantage of the coffin nail’s length by creating a visual journey across the nail surface. The gradient naturally follows the shape of the coffin from the wider center to the tapered tip, which creates a visual illusion of even greater length. The deep color at the tip frames the finger beautifully without being as stark as a solid dark color would feel.
Application Tips
- Use a makeup sponge to dab and blend two to three shades of polish gradually across the nail surface
- Start with your lightest shade at the base and layer progressively darker shades toward the tip
- Seal with a matte topcoat for a modern, understated look, or a glossy topcoat for more drama
- Consider adding a tiny shimmer or chrome accent to the very tip for subtle dimension
Care and Maintenance
Gradient designs can show dust and debris easily, so keep your nails wiped clean regularly. The matte finish (if you choose it) will need occasional re-sealing to maintain its perfect appearance. Touch-ups aren’t usually necessary with a good topcoat, but the gradient may fade slightly after three weeks of wear.
3. Geometric Pattern With Negative Space
Geometric designs—think triangles, hexagons, or abstract angular shapes—create a modern, artistic look when combined with negative space on coffin nails. Leaving portions of the nail bare (showing either the nail extension color or your nail bed) mixed with bold lines and shapes creates a design that’s visually interesting and doesn’t feel overly decorated.
Why This Design Works
Coffin nails have natural angular qualities that complement geometric artwork perfectly. The shape’s symmetry means geometric designs look intentional and balanced. Negative space keeps the design from feeling too busy while making the actual artwork more striking by contrast. This look says you have genuine design sensibility, not just “lots of nail art.”
Application Tips
- Use thin nail art brushes or detail pens to create sharp, clean lines
- Light colors or white work best for geometric designs against darker bases
- Consider starting with a matte base color, then adding glossy geometric shapes for contrast
- Mark guidelines lightly with a pencil first if you’re worried about placement
Care and Maintenance
Geometric designs with sharp lines can show wear if the edges chip. Keep a small nail art brush handy for quick touch-ups on chipped lines. The design itself holds up well, but the cleanliness of your lines is what gives it impact, so maintenance matters more than it would for a gradient.
4. Metallic Chrome or Mirror Finish
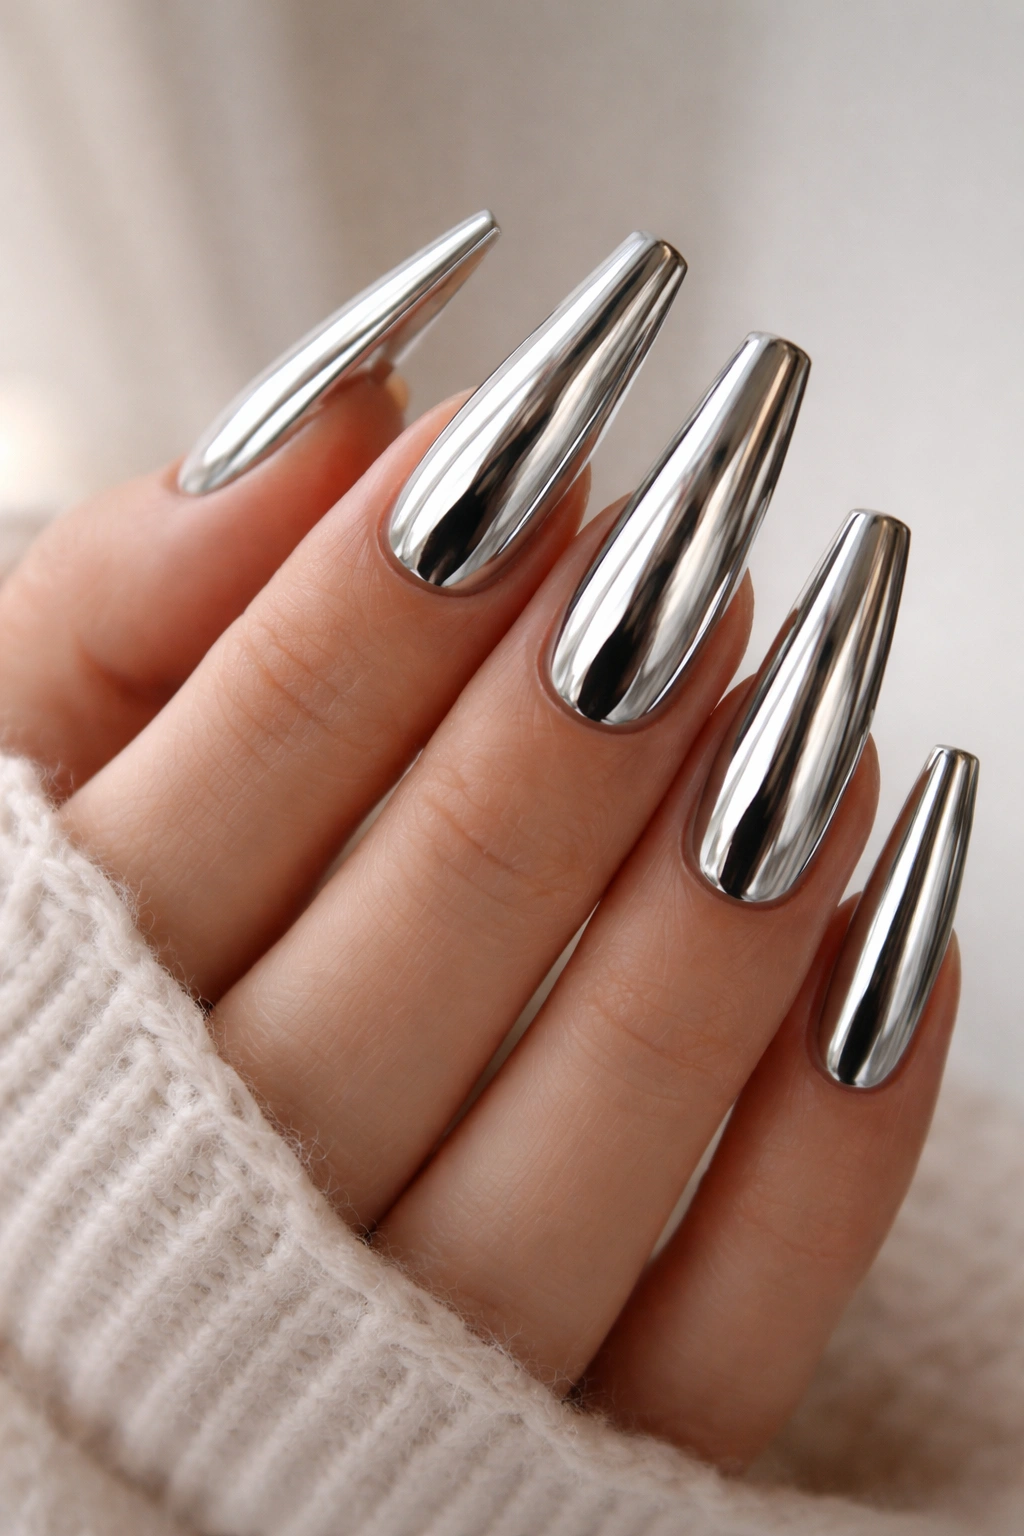
A full metallic chrome or mirror finish on coffin nails is pure glamour. These specialized mirror powders and polishes create a reflective, almost liquid-metal appearance that catches light from every angle. On the elongated surface of coffin nails, the chrome effect is absolutely stunning—it makes your nails look almost like tiny works of abstract art.
Why This Design Works
The reflective quality of chrome finishes emphasizes the length and shape of coffin nails by creating movement and light play across the entire surface. The finish draws so much attention that the coffin shape is immediately obvious and striking. This is the kind of design that gets genuine compliments—people are fascinated by how the light reflects differently depending on the angle they’re viewing from.
Application Tips
- Chrome powders require a special tacky base coat—don’t skip this step or the powder won’t adhere
- Apply the base coat, then dust the chrome powder over it using a soft brush with gentle, circular motions
- Seal everything with a clear topcoat to lock the chrome powder in place
- If you want pattern rather than solid chrome, you can apply chrome to portions of the nail for an ombré chrome effect
Care and Maintenance
Chrome finishes are surprisingly durable once sealed properly. However, they can become dull if scratched or if the topcoat wears away. Avoid aggressive scrubbing; use your nails gently to prevent dulling the finish. Expect the chrome to look best for about two weeks before it starts to show signs of wear.
5. Matte Black With Gold Geometric Accents
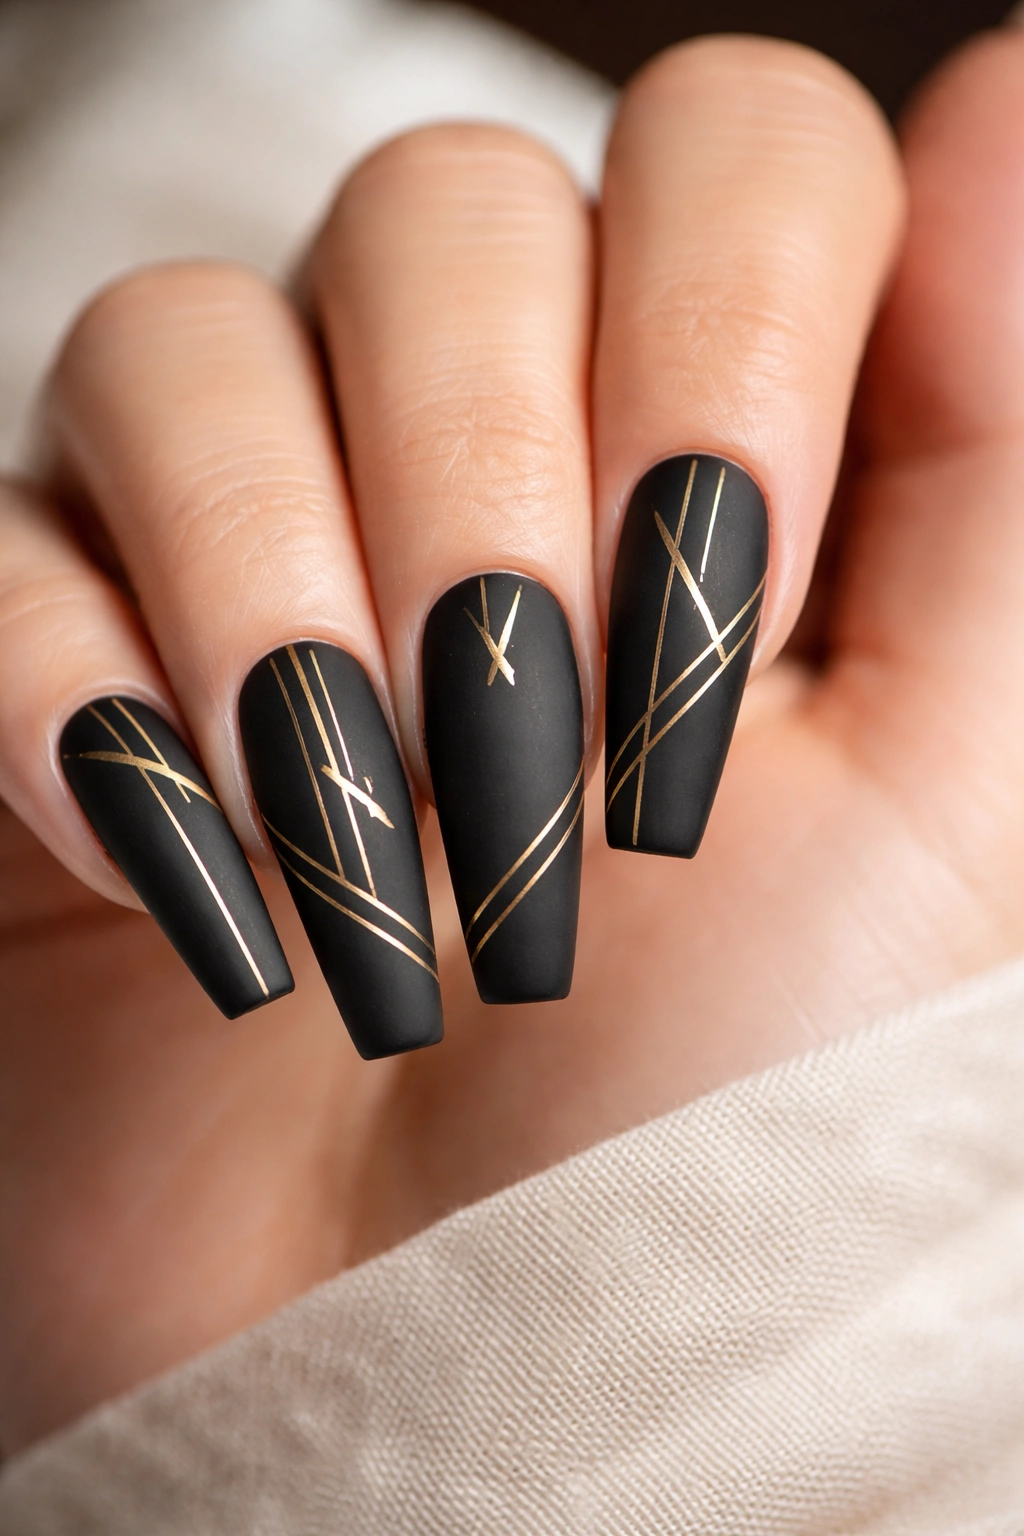
Black matte is the sophisticated, understated cousin of shiny black polish. When you pair it with thin gold geometric lines or art deco-inspired shapes, you get a design that feels both elegant and edgy. On coffin nails, this combination is genuinely fashion-forward without being over the top.
Why This Design Works
The matte finish creates a velvety, refined base that makes gold accents truly pop. The contrast between matte and glossy (if you seal the gold lines with gloss) adds visual dimension. The geometric gold elements reference art deco and luxury design, which elevates the whole look beyond basic black nails. Coffin nails give you enough surface area for these accents to be meaningful rather than tiny afterthoughts.
Application Tips
- Start with a quality matte black base coat
- Use a detail brush or nail art pen with gold polish or gold metallic paint to create your geometric design
- You can seal just the gold accents with gloss, leaving the rest matte for dramatic contrast
- Consider thin gold lines along the sides of the coffin shape following its natural geometry
Care and Maintenance
Matte finishes require a bit more care than glossy ones—they show dust more easily and benefit from gentle cleaning. The gold accents will maintain their shine better if sealed. Plan for touch-ups around the 3-week mark, especially if you’re rough on your nails. Matte polish can look dull if your topcoat wears away, so reapplication may be necessary sooner than with glossy finishes.
6. Soft Pastel Gradient With Glitter Fade
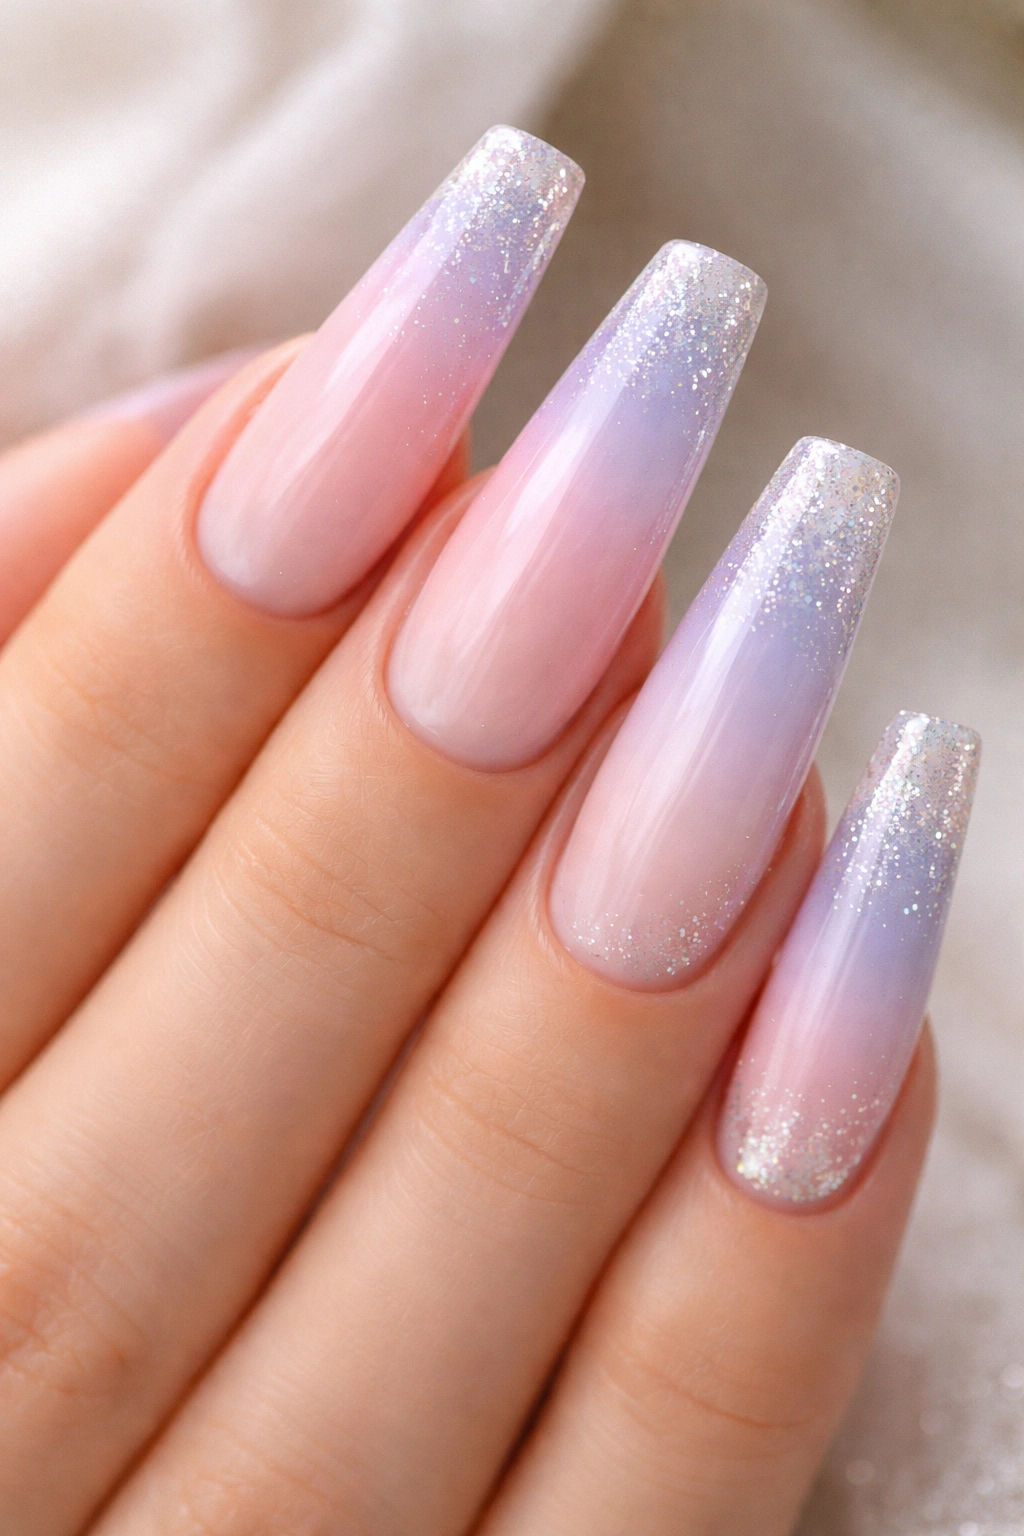
A gradient that moves from a soft pastel shade (think baby pink, lavender, or pale blue) and fades into sparkly glitter at the tips combines delicate femininity with a hint of glam. On coffin nails, this creates a look that’s romantic and ethereal but still eye-catching. It’s the perfect balance between understated and statement-making.
Why This Design Works
Pastel colors are inherently soft and calming, while glitter adds just enough sparkle to prevent the design from feeling boring. The gradient creates visual movement and follows the natural contours of the coffin shape beautifully. The combination works across all seasons and occasions—it can be casual or dressed up depending on your overall styling.
Application Tips
- Choose a pastel base color and apply it to the entire nail first
- Apply glitter to the tips, then use a sponge to blend and fade it upward for a gradient effect
- Use a loose, chunky glitter for more impact than fine dust
- Seal with a glossy topcoat to make both the pastel and glitter shine
Care and Maintenance
Glitter elements can shed if your topcoat wears away, so keep everything sealed. The gradient will maintain its beauty for several weeks, but the glitter fade may become less defined over time. Plan for touch-ups around two to three weeks in. Gentle handling of the tips prevents glitter loss.
7. Marble Effect With Veining In Contrasting Colors

Marble nail art creates an organic, sophisticated look that mimics real stone. Using two to three colors with fine veining lines creates depth and movement. On coffin nails, marble designs are genuinely stunning—the length allows for beautiful, complex veining patterns that would be cramped on shorter nails.
Why This Design Works
Marble effects are elegant because they feel natural and artistic rather than cutesy or overly trendy. The organic nature of veining means it doesn’t have to be perfectly symmetrical, which takes pressure off creating perfection. On coffin nails, the marble pattern is visible and impressive from every angle because of the extended surface area. This is the kind of design that looks expensive and professionally done, even if you’re doing it yourself.
Application Tips
- Choose your base color (usually a light neutral like cream, pale gray, or white)
- Apply a secondary color, then use a thin brush or toothpick to drag fine lines through it before it dries completely
- Add a third color for complexity, creating veining that intersects naturally
- Consider using a matte topcoat on marble designs to enhance the stone-like appearance
Care and Maintenance
Marble designs age beautifully—slight fading or blurring of the lines actually enhances the natural stone effect. The design remains attractive for three to four weeks of wear. Touch-ups are rarely necessary; the natural variation in marble means imperfections actually add authenticity.
8. Nude Base With Delicate Floral Nail Art
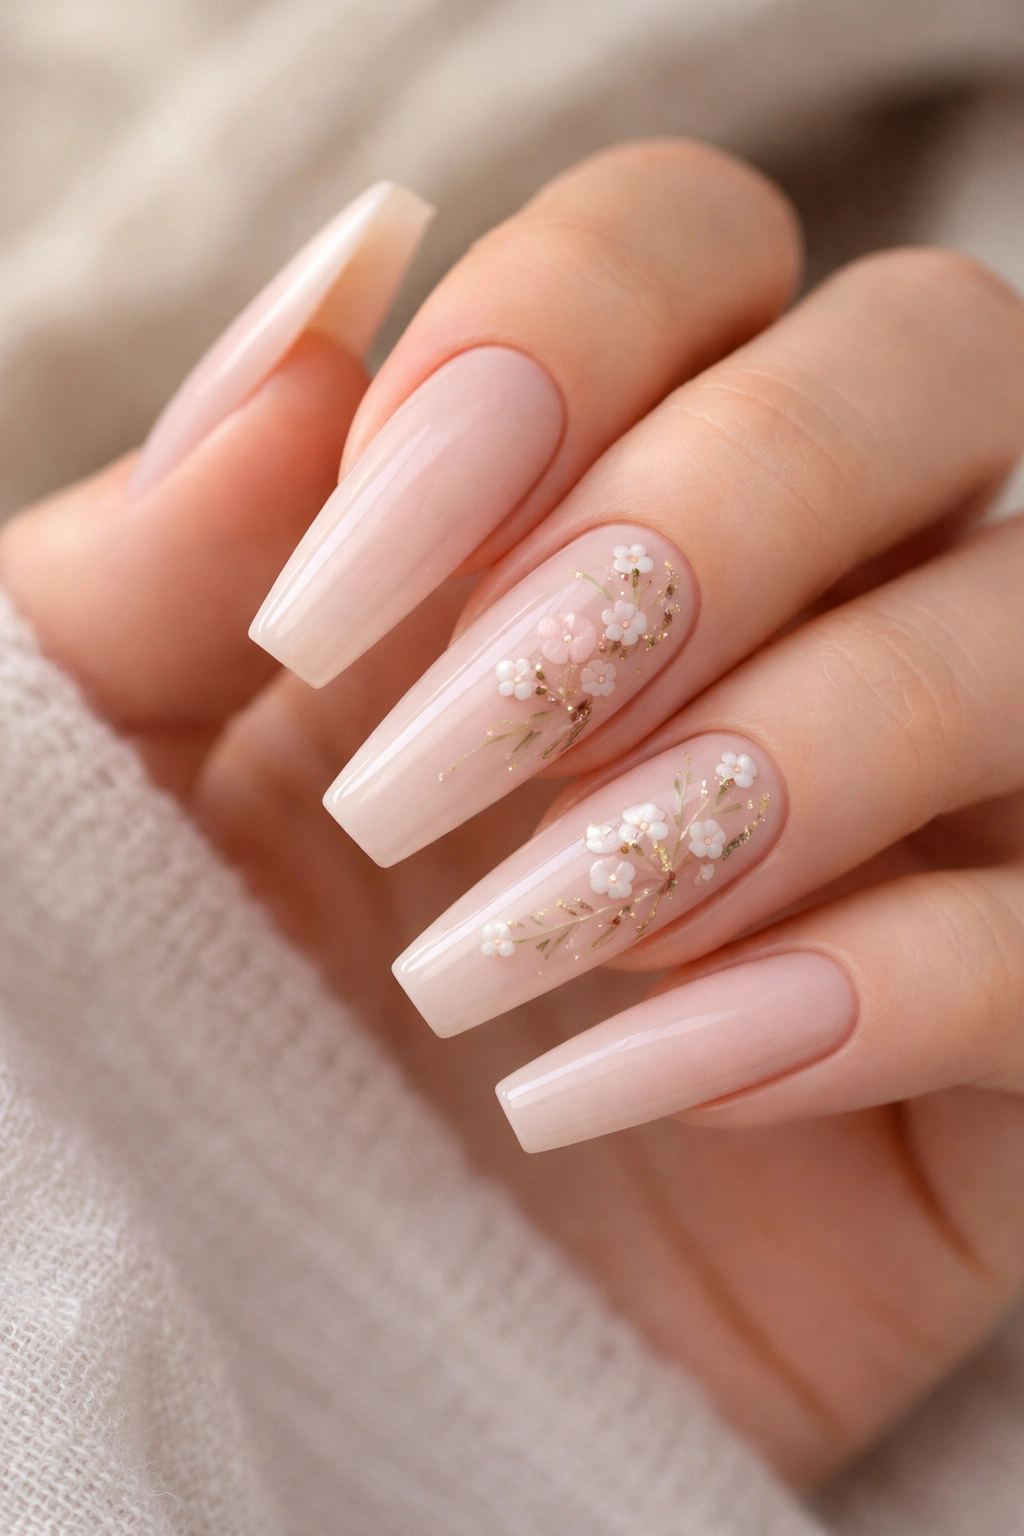
A nude or pale pink base paired with delicate floral designs offers endless possibilities. You could go for small wildflower clusters near the tips, trailing vines along the sides, or a concentrated bouquet on an accent nail. The neutrality of the base lets the flowers be the focal point without the design feeling overly complicated.
Why This Design Works
Floral designs on coffin nails feel romantic and artistic, especially when paired with neutral bases. The length of coffin nails gives flowers plenty of room to be detailed and recognizable rather than abstract blobs. This is a design that works beautifully for weddings, garden parties, spring occasions, or just when you want your nails to feel refined and gentle.
Application Tips
- Start with your nude or pale base applied to all nails
- Use a fine detail brush to paint small flowers—dots for centers and petals around them
- Add thin stems and leaves using a thin striping brush
- Consider doing a full floral design on one or two nails and simple accents on the others for balance
Care and Maintenance
Floral designs on a nude base look sophisticated for several weeks. Touch-ups aren’t usually necessary, but you might want to freshen up the topcoat around the 3-week mark if wear becomes visible. The design remains attractive even if the flowers become slightly less crisp over time.
9. Deep Jewel Tones With Holographic Shine
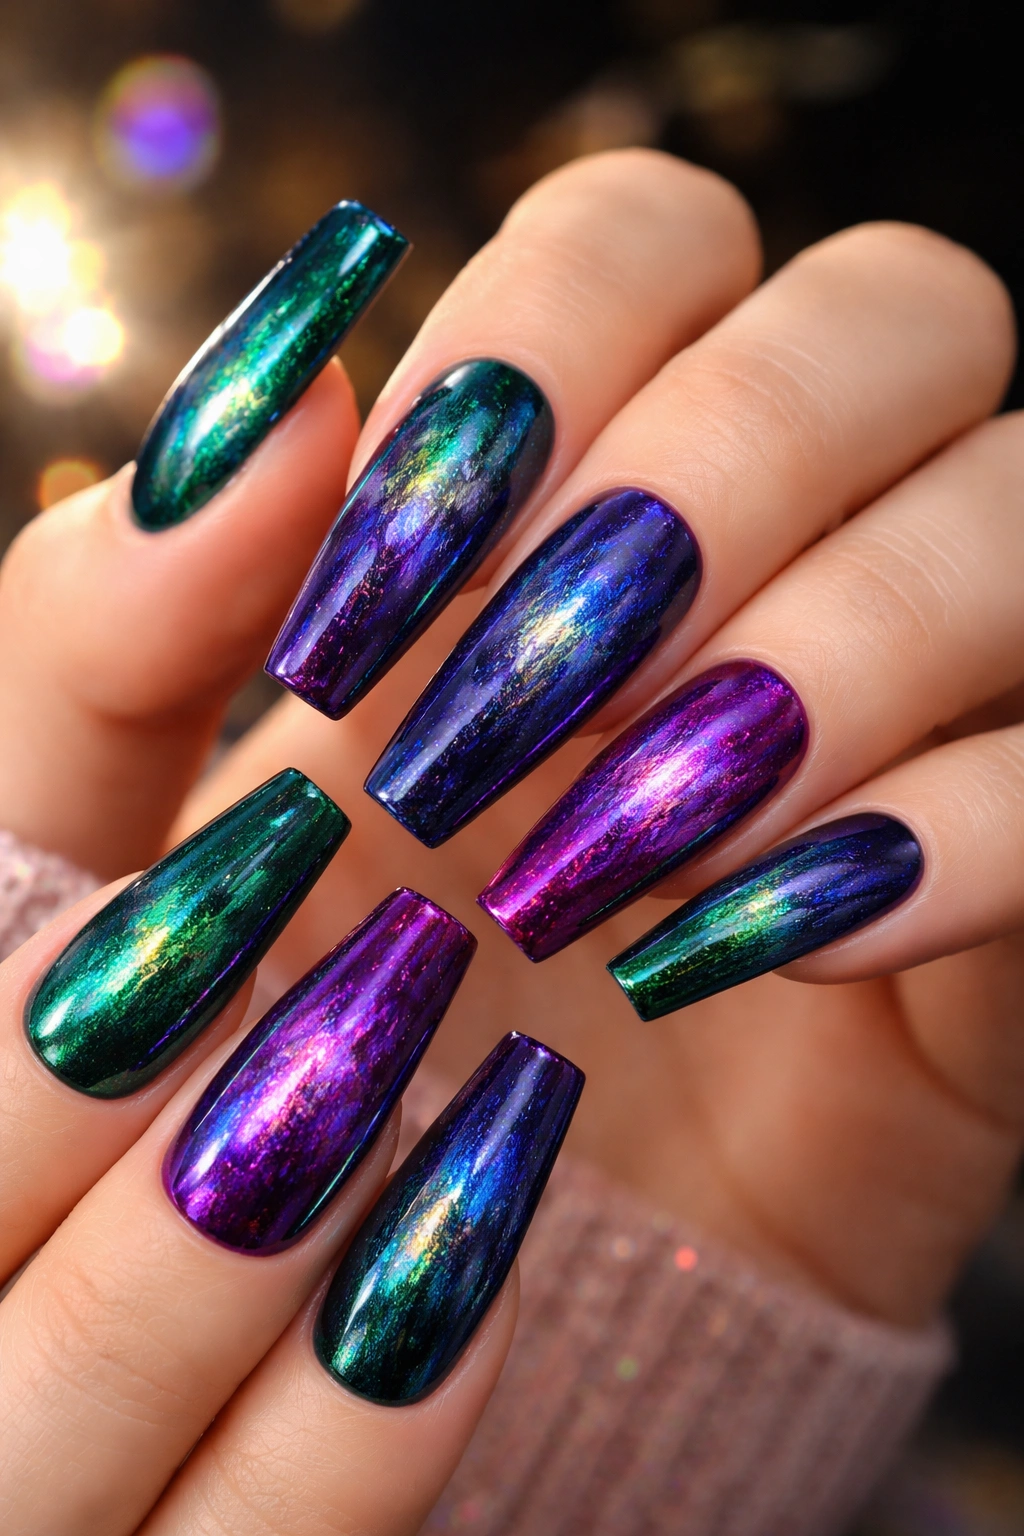
Rich jewel-tone colors—emerald, sapphire, amethyst—are inherently luxurious, and when you pair them with a holographic topcoat, you get something truly magical. The holographic effect creates rainbow shimmer that moves and changes depending on light and angle. On coffin nails, this design is absolutely show-stopping.
Why This Design Works
Jewel tones are universally flattering and feel expensive. The holographic overlay adds movement and catches light in ways that make people stop and ask about your nails. The deep color base means the holographic shimmer is subtle enough to feel sophisticated rather than costume-like. On coffin nails, the larger surface area means you get maximum impact from the holographic effect.
Application Tips
- Apply a quality jewel-tone base color in two coats for solid coverage
- Use a holographic topcoat or seal the base color with a holographic overlay coat
- The shimmer will be most obvious in bright light, so if you’re applying this for a specific occasion, consider the lighting where you’ll be
- Consider pairing with simple metal accents (gold or silver) for added glamour
Care and Maintenance
The deep color base hides chips and wear well, making this a low-maintenance design aesthetically. The holographic topcoat maintains its shimmer for about two to three weeks before fading slightly. The design still looks beautiful even as the holographic effect subtly diminishes over time.
10. Ombre From Nude to Burgundy With Matte Finish
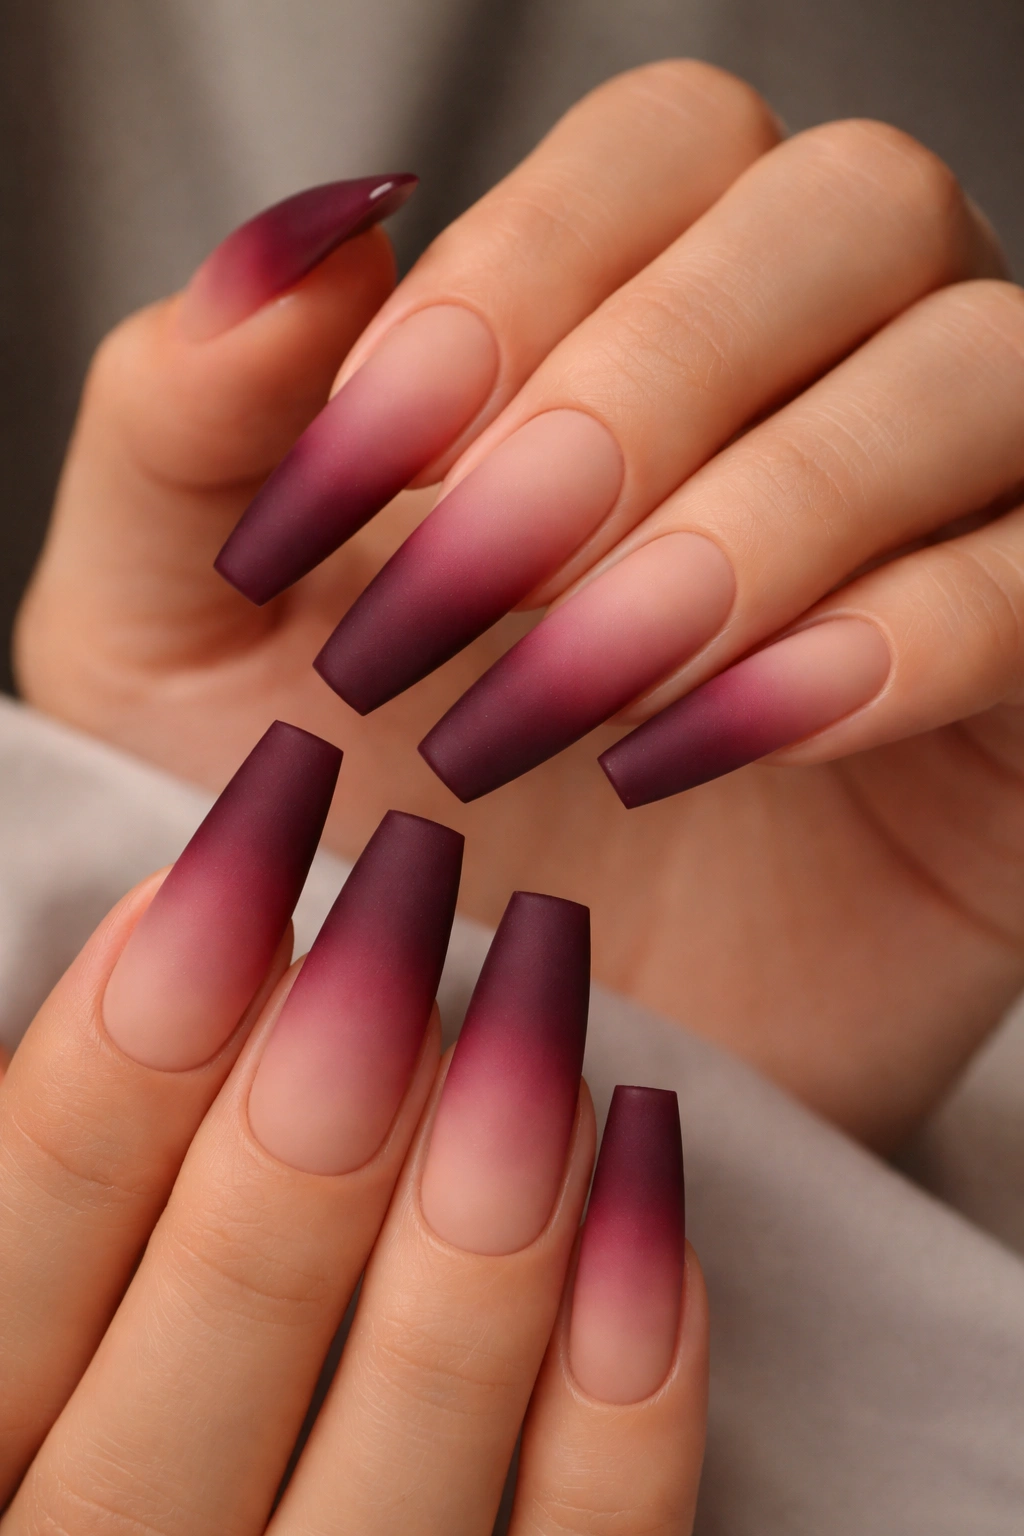
A gradient that flows from soft nude at the base to deep burgundy at the tips creates a warm, elegant look that’s perfect year-round. The matte finish gives it a sophisticated, almost velvety quality that feels refined. On coffin nails, this creates a look that’s dramatic without being costume-like.
Why This Design Works
Burgundy is inherently elegant and works with virtually every skin tone. The gradient creates visual interest and makes the nails look even longer than they actually are. The matte finish adds luxury and sophistication—it’s the difference between “wearing polish” and “wearing a nail design.” This is a look that feels expensive and intentional.
Application Tips
- Use a nude or pale pink base as your starting point
- Gradually layer deeper shades moving toward the tip using a sponge-dabbing technique
- Seal with a matte topcoat for the velvety finish
- Consider adding a thin gold or rose-gold line at the very edge of the coffin for subtle dimension
Care and Maintenance
This design looks good as it ages—the matte finish doesn’t show every little imperfection. You’ll get excellent wear for three to four weeks before needing touch-ups. The matte finish may need occasional re-sealing if you’re rough on your nails, but the design itself holds up beautifully.
11. Clear Base With Dried Flowers or Botanicals Embedded
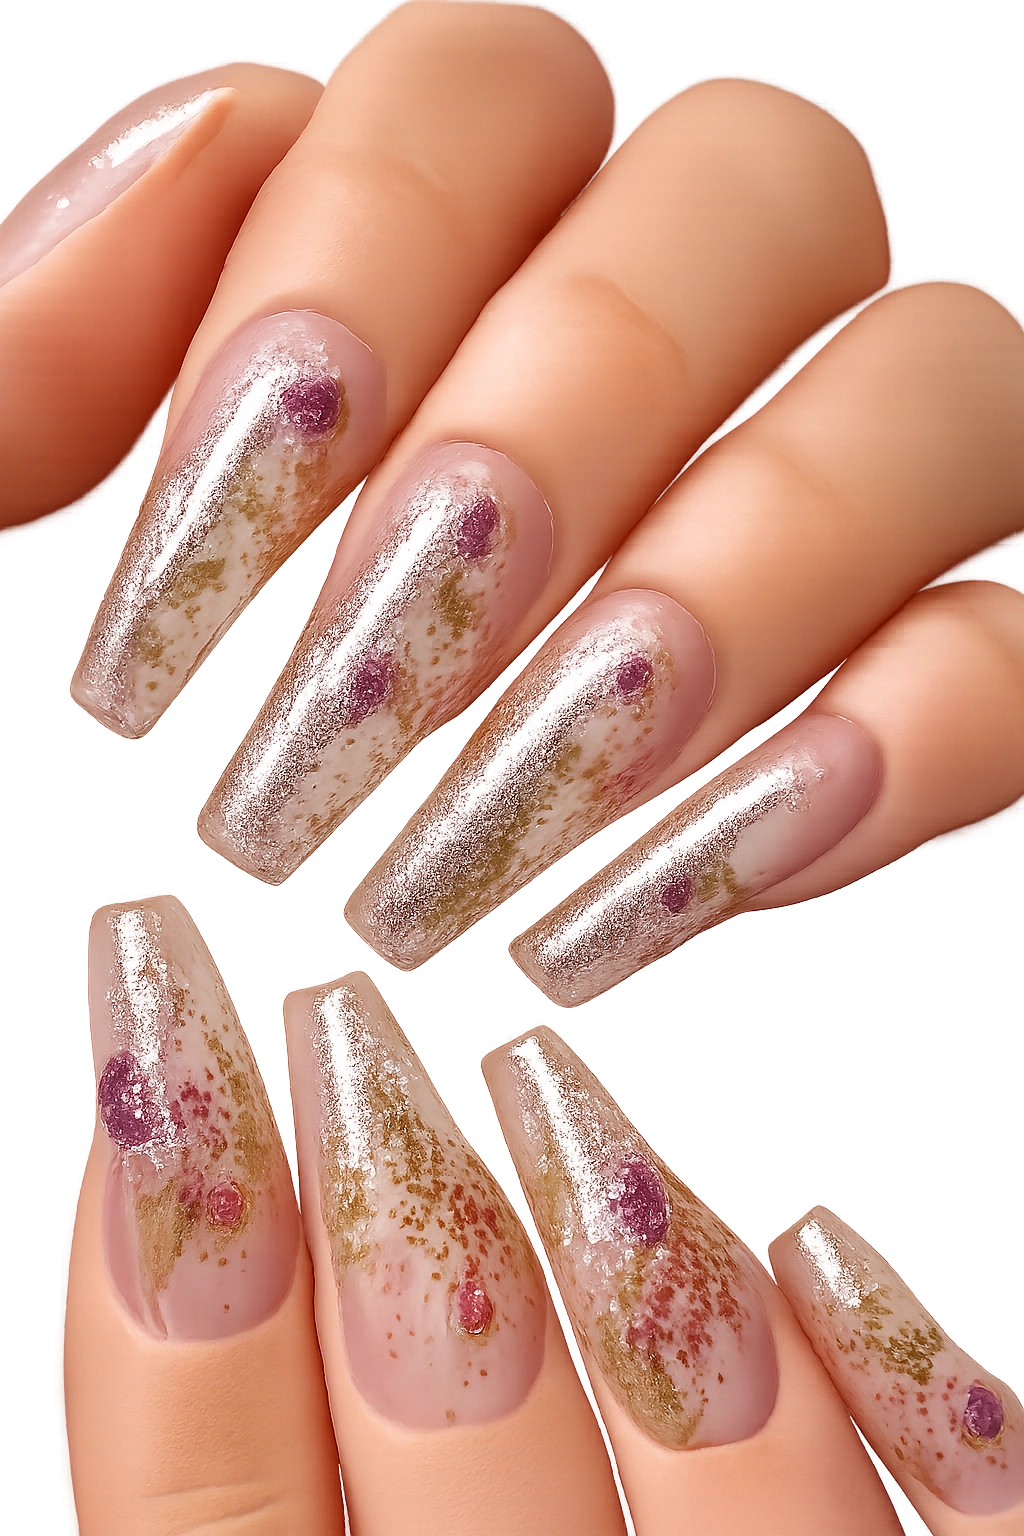
For a truly unique look, use clear extensions that allow you to embed actual dried flowers, leaves, or botanicals into the acrylic or gel. This creates a nature-inspired design that’s both artistic and literal. The clear base showcases whatever you’ve embedded beautifully, creating a look that’s completely one-of-a-kind.
Why This Design Works
This design is conversation-starting because it’s unusual and beautiful in a way that other nail art can’t quite match. The clear base combined with natural elements creates an organic, artistic aesthetic. On coffin nails, you have enough space to embed multiple elements or larger pieces that would overwhelm shorter nails. This is genuinely statement-making while still feeling elegant.
Application Tips
- Work with a professional for this design unless you’re experienced with extensions—embedding requires precise timing
- Choose dried botanicals that are flat and thin so they don’t create bulk
- Consider embedding the botanicals in one accent nail rather than all ten
- Seal everything completely to protect the botanical elements
Care and Maintenance
This design is more delicate than others because the botanical elements can shift slightly if not sealed properly. Once sealed correctly, it’s actually quite durable. The clear base will yellow slightly over time, which is normal. The design remains unique and beautiful for three to four weeks.
12. French Tips With Gradient Color Fade
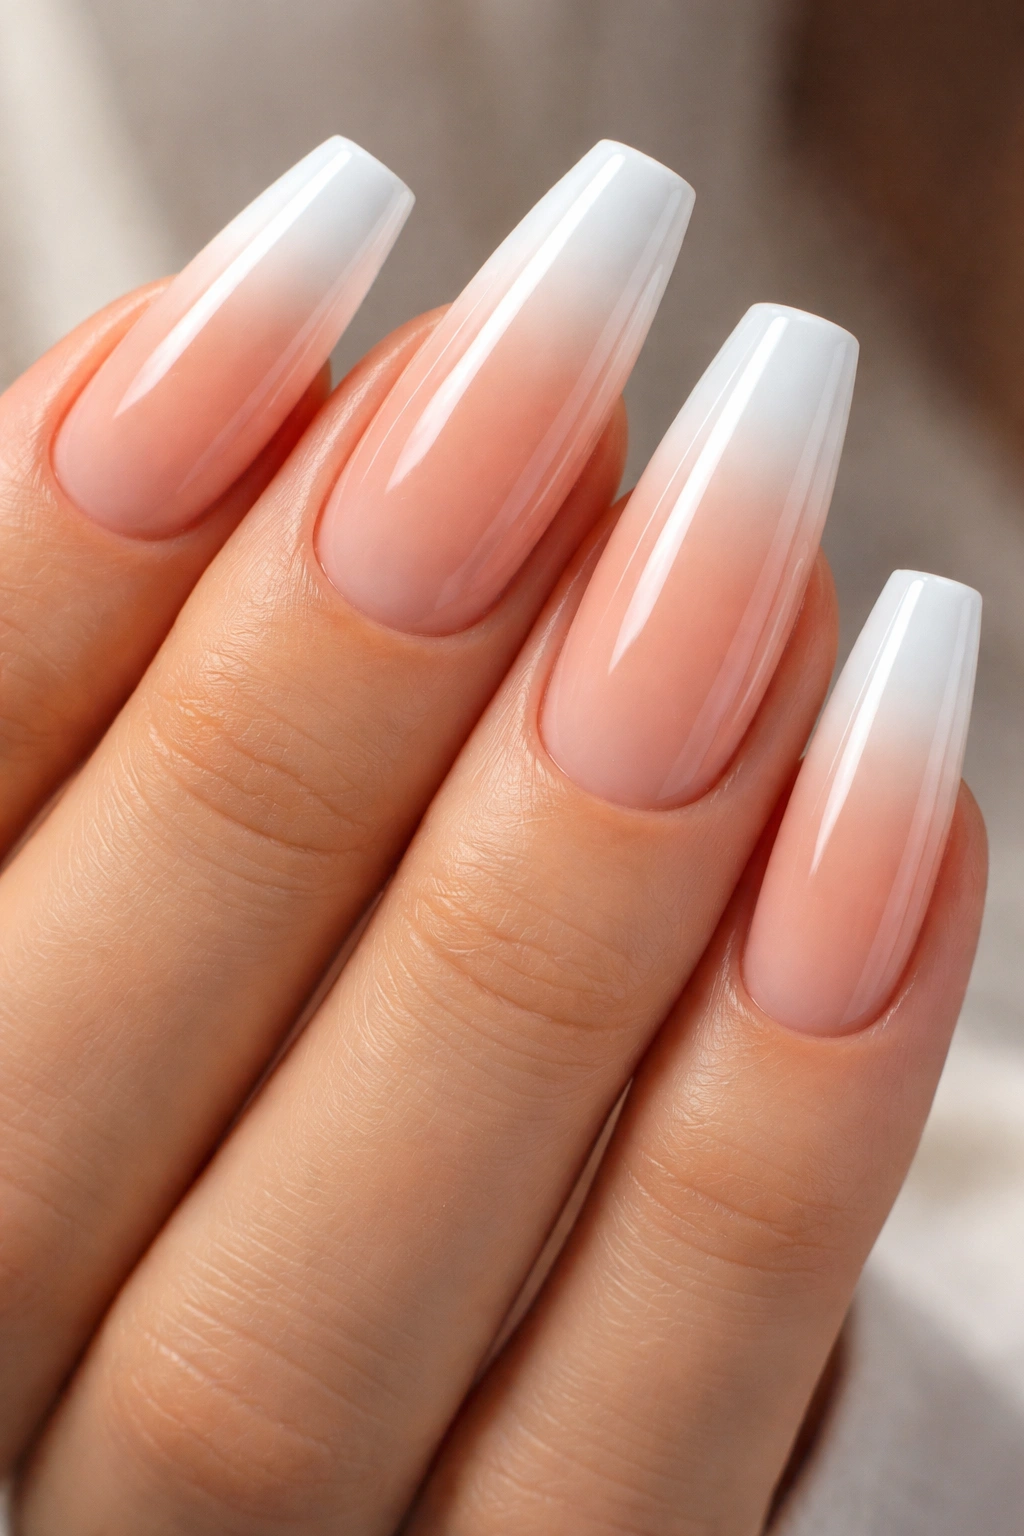
A twist on the classic French tip, this design has the white tip but the base gradually fades through color rather than stopping at one shade. For example, the base might fade from soft blush to peach to cream before meeting the white tip. This creates visual interest while maintaining the elegance of French tips.
Why This Design Works
This design takes the proven elegance of French tips and adds modern complexity without making it look overdone. The gradient adds movement and interest while the classic French tip keeps it refined. On coffin nails, the color fade is subtle and beautiful when viewed at distance, but reveals intricate detail when examined closely. It’s the kind of design that photographers love.
Application Tips
- Create your gradient base first using a sponge to blend colors
- Apply the white tip carefully over the gradient
- Consider making the gradient vertical (from base to tip) rather than horizontal for more impact on coffin nails
- Seal with a glossy topcoat to make the gradient subtle but visible
Care and Maintenance
The white tips will show wear and chipping, so be prepared for touch-ups around 10-14 days. The gradient base underneath lasts longer, so even when the tips need refreshing, the overall design remains intact. This is a mid-level maintenance design but worth the effort.
13. Negative Space Design With Stripes and Shapes
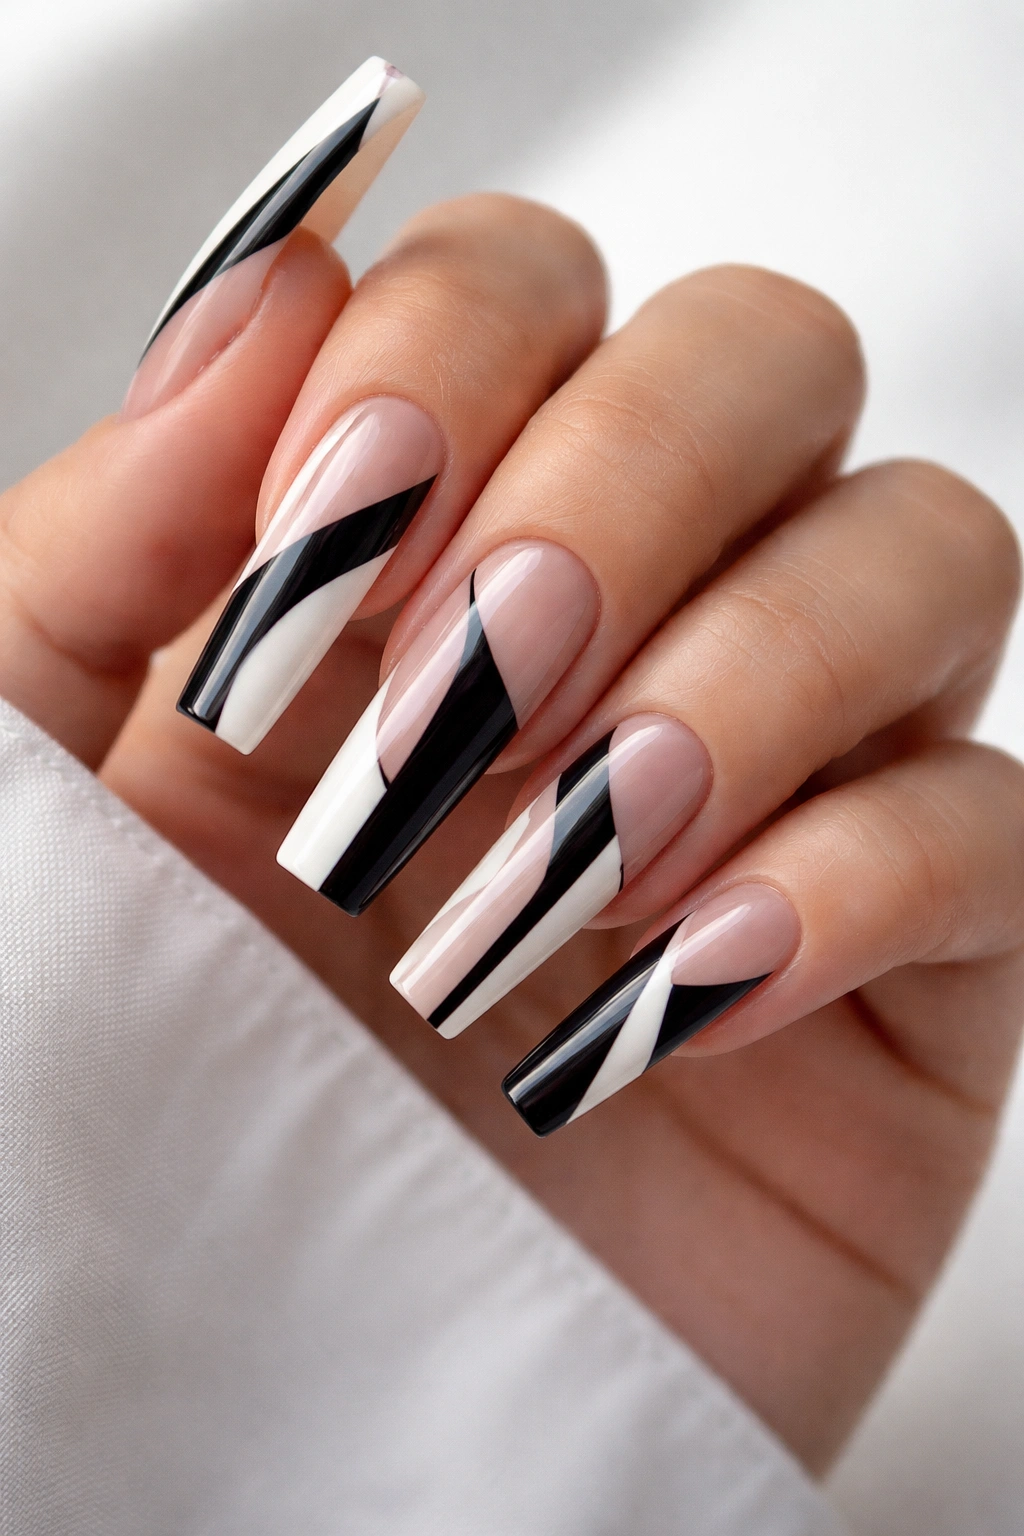
Create a design where portions of the coffin nail are left bare, showing the extension base color, alternating with solid stripes or geometric shapes. For example, you might do alternating solid and clear stripes, or geometric shapes with negative space between them. This creates a design that’s visually interesting and modern.
Why This Design Works
Negative space designs feel contemporary and fashion-forward. The coffin shape lends itself beautifully to this approach because the geometric nature of the shape complements geometric negative space art. The design feels intentional rather than incomplete because the negative space is clearly part of the design. This is a look that’s eye-catching without being busy.
Application Tips
- Plan your design roughly before you start painting—sketch it out on paper first
- Use tape to create clean lines between negative and positive space
- Consider using a bold color for the solid elements and a subtle tone for the negative space
- The contrast between elements is what makes this design work, so don’t use similar colors
Care and Maintenance
This design is quite durable because there’s less polish coverage overall, meaning less to chip. The clean lines may become less defined after two to three weeks, but the overall design remains visible and attractive. Touch-ups are minimal with this style.
14. Encapsulated Glitter With Structured Pattern
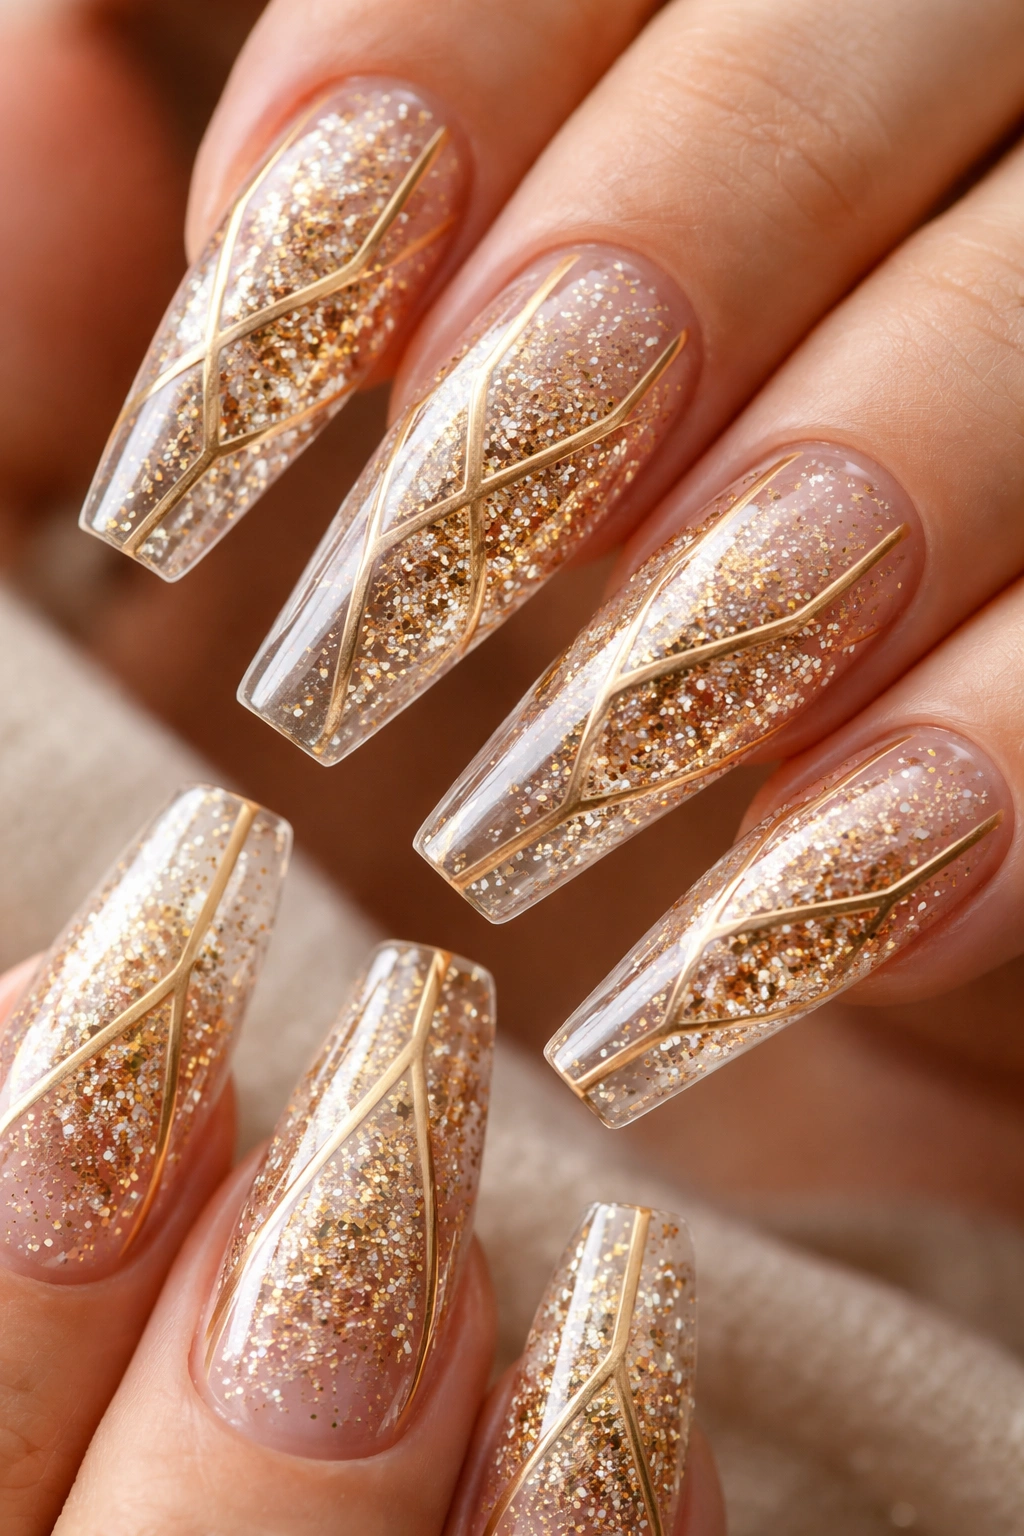
Rather than loose glitter that sits on top of the nail, encapsulated glitter is sealed within the polish layers, creating a contained, precise look. You can create structured patterns with encapsulated glitter—maybe gold glitter in geometric sections, or a glitter ombre that’s perfectly controlled. This creates maximum glamour with zero risk of shedding.
Why This Design Works
Encapsulated glitter is the sophisticated version of loose glitter—it’s glamorous without being messy or trashy. The structured patterns mean the glitter isn’t just floating randomly but is part of a cohesive design. On coffin nails, encapsulated glitter patterns are stunning because you have enough space to create meaningful designs. This is the kind of look that photographs beautifully.
Application Tips
- Apply your base color, then carefully apply glitter to specific areas or patterns you’ve planned
- Seal the glitter with a clear coat immediately while it’s still wet
- Consider using different sizes of glitter for depth and interest
- Plan patterns that follow the coffin nail shape’s natural lines
Care and Maintenance
Encapsulated glitter is one of the most durable nail designs available. Once sealed, the glitter won’t shed, chip, or move. The design remains pristine for four to five weeks of wear, making this an excellent choice if you want low-maintenance glamour.
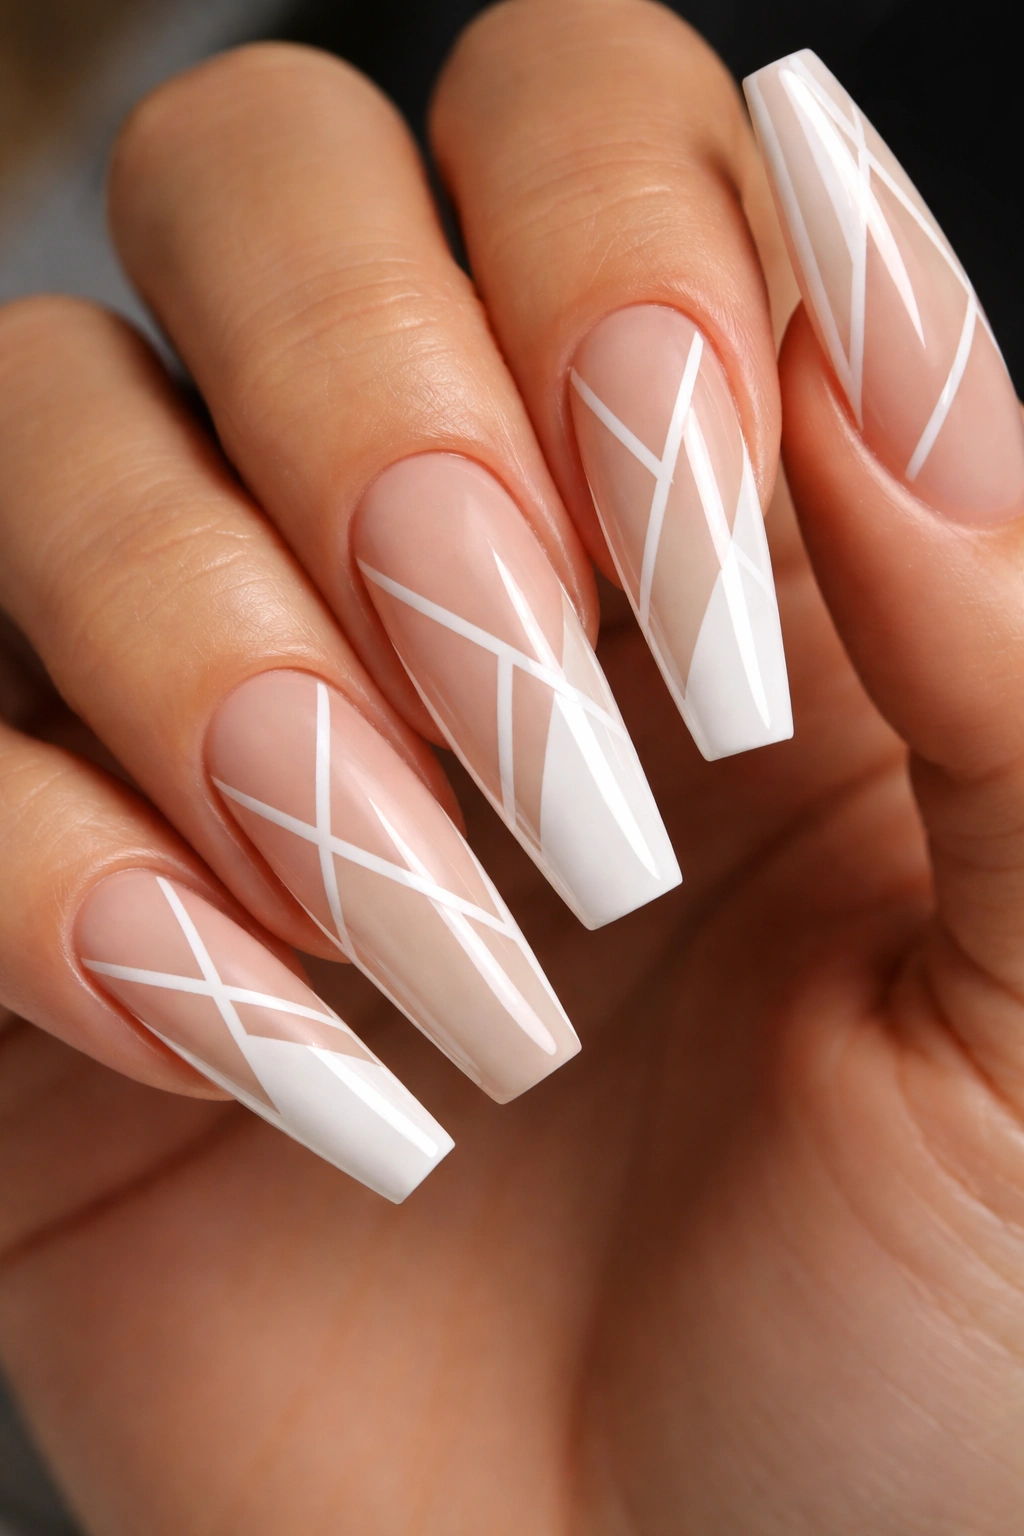
15. Soft Nude With Minimalist Gold Line Design

For the minimalist aesthetic, apply a soft neutral base and then add extremely thin, precise gold lines that either frame the coffin shape or create minimal geometric elements. Maybe just a single gold line along each side of the nail, or a thin frame around the edge of the coffin shape. This is sophistication at its absolute peak.
Why This Design Works
Minimalism is timeless because it never goes out of style and never looks overdone. On coffin nails, minimalist designs showcase the shape itself as the real statement rather than competing artwork. The delicate gold lines add just enough interest to prevent the nails from feeling plain, without compromising the elegant simplicity. This design works in literally every setting—professional, casual, formal, everyday.
Application Tips
- Use an extremely fine detail brush or nail art pen for the gold lines—precision matters
- Consider seal only the gold lines with gloss while keeping the base matte for subtle contrast
- Thin is better than thick with this design—less is more
- Let the shape of the coffin guide your line placement for maximum impact
Care and Maintenance
This is the lowest-maintenance design of all the options. The soft base hides small imperfections, and the minimal gold lines are just accents. This design looks fresh and beautiful for four to five weeks with minimal touch-ups needed. It’s essentially a haircut-and-go situation for your nails.
Final Thoughts
Coffin nails with extensions offer an incredible range of possibilities, from ultra-minimalist elegance to full-on glam. The shape’s natural geometry and elongated surface make it the perfect canvas for detailed nail art, bold colors, and statement-making designs. Whether you’re drawn to classic French tips, trendy marble effects, or encapsulated glitter, there’s a coffin nail design that matches your personal style.
The key to loving your coffin nails long-term is choosing a design that aligns with your lifestyle and maintenance comfort level. If you’re active and rough on your hands, minimalist designs and solid colors will keep you happier than intricate nail art that requires constant touch-ups. If you love the statement-making quality of bold designs, commit to the maintenance schedule and enjoy the compliments—people genuinely love seeing impressive nail art.
Consider your skin tone, your daily environment, and your style when choosing from these designs. The same design will look completely different depending on who’s wearing it and what context they’re in. What matters most is that your nails make you feel confident, polished, and authentically you. With extensions giving you the length and durability to wear virtually any design, your coffin nails can become a daily work of art that reflects exactly who you want to be.
