

A clear manicure is ruthless. It shows every air bubble, every crooked sidewall, every bit of cloudy top coat, and every place where a nail tech rushed the prep. That is exactly why clear coffin nails can look so polished when they’re done well. There’s nowhere to hide, which means the clean look comes from shape, balance, and smart detail—not heavy color.
That’s also why this style has so much staying power. A transparent coffin set can feel bare, glossy, icy, soft, or dressy depending on what you layer into it. A thin white line changes the whole mood. So does a frosted finish. So does a tiny crystal placed a few millimeters too high or too low. Small choices matter more here than they do on a full-color set.
I like clear coffin nails best when they keep some restraint. You don’t need five design ideas competing on one hand. You need a crisp taper, a smooth apex, and enough visual interest that the nails look intentional instead of unfinished. There’s a difference, and once you notice it, you can’t unsee it.
The styles below keep that balance: clean first, decorative second, with enough detail to make the manicure feel considered.
Why Clear Coffin Nails Look So Sharp With Minimal Nail Art

The appeal starts with contrast. Coffin nails have a tapered sidewall and a squared-off tip, so the shape already gives you structure. When the base stays transparent, your eye goes straight to the silhouette. That’s why even a bare clear set can look more dressed than a short neutral manicure.
A clean-looking transparent set usually depends on four things:
- Straight sidewalls that taper evenly from the stress area to the tip
- A balanced apex placed slightly above the midpoint so the nail looks smooth instead of bulky
- Thin, even product layers with no trapped dust or milky patches
- Neat cuticle work with no flooding, lifting, or ragged skin around the nail fold
Miss one of those, and the whole set loses that crisp finish.
There’s also something practical going on. Clear nails work with everything in your closet, and they don’t clash with rings, watches, or stacked bracelets. If you wear a lot of silver one week and yellow gold the next, transparent nails are the easiest bridge between the two.
My take: the cleanest clear set is usually the one with the least decoration on it. A single thoughtful detail reads stronger than five random accents spread across ten nails.
Medium Length Gives the Coffin Shape Room to Taper
Short coffin nails can work, but there’s a catch. If the free edge only extends 4 to 6 millimeters past your fingertip, the shape often reads more like a soft square than a true coffin. You need enough length for that inward taper to show up.
Medium length tends to be the sweet spot. On most hands, that means a finished extension that sits around 8 to 12 millimeters beyond the fingertip. At that length, the nail still feels wearable for typing, opening cans, and dealing with zippers, but the silhouette has room to sharpen.
Natural nails can carry a clear coffin shape if they’re strong and already somewhat long. A lot of people, though, get the cleaner result from soft gel tips, hard gel, or acrylic because those systems let the tech build a smooth apex and a crisp square tip. Transparent sets expose weak shaping right away.
One more thing. Thickness matters.
If the extension is too thin, the tip can flex and crack. Too thick, and the manicure loses that glass-like feel. A good clear set should look sturdy from the side but not chunky from the front.
How to Keep Clear Coffin Nails From Turning Cloudy
Cloudiness is the fastest way to ruin this look. Sometimes it starts in the salon—dust under the top coat, a rough buffing job, bubbles in builder gel. Sometimes it happens later from scratches, harsh cleaners, self-tanner, makeup pigments, hair dye, or cooking with strong spices like turmeric.
A few habits make a big difference:
- Wear gloves when cleaning with bleach, ammonia, or degreasers
- Brush the underside of the free edge with a soft nail brush every day or two
- Use cuticle oil once or twice daily so the skin around the nail stays neat
- Book fills on time, usually every 2 to 3 weeks depending on growth
- Ask for a stain-resistant top coat if you cook often or wear dark denim and heavy makeup
The American Academy of Dermatology advises keeping nails clean and dry, and that advice matters here more than people think. Clear product shows trapped grime fast, especially under longer extensions.
Scratches are another issue. A glossy transparent set can pick up surface wear that dark polish would hide. If your nails start looking dull after a week and a half, a thin layer of fresh top coat can bring back the shine—as long as the structure underneath is still solid.
And if you ever notice itching, redness, or peeling around the nail folds after a gel or acrylic appointment, do not shrug that off. Reactions to nail products can build over time.
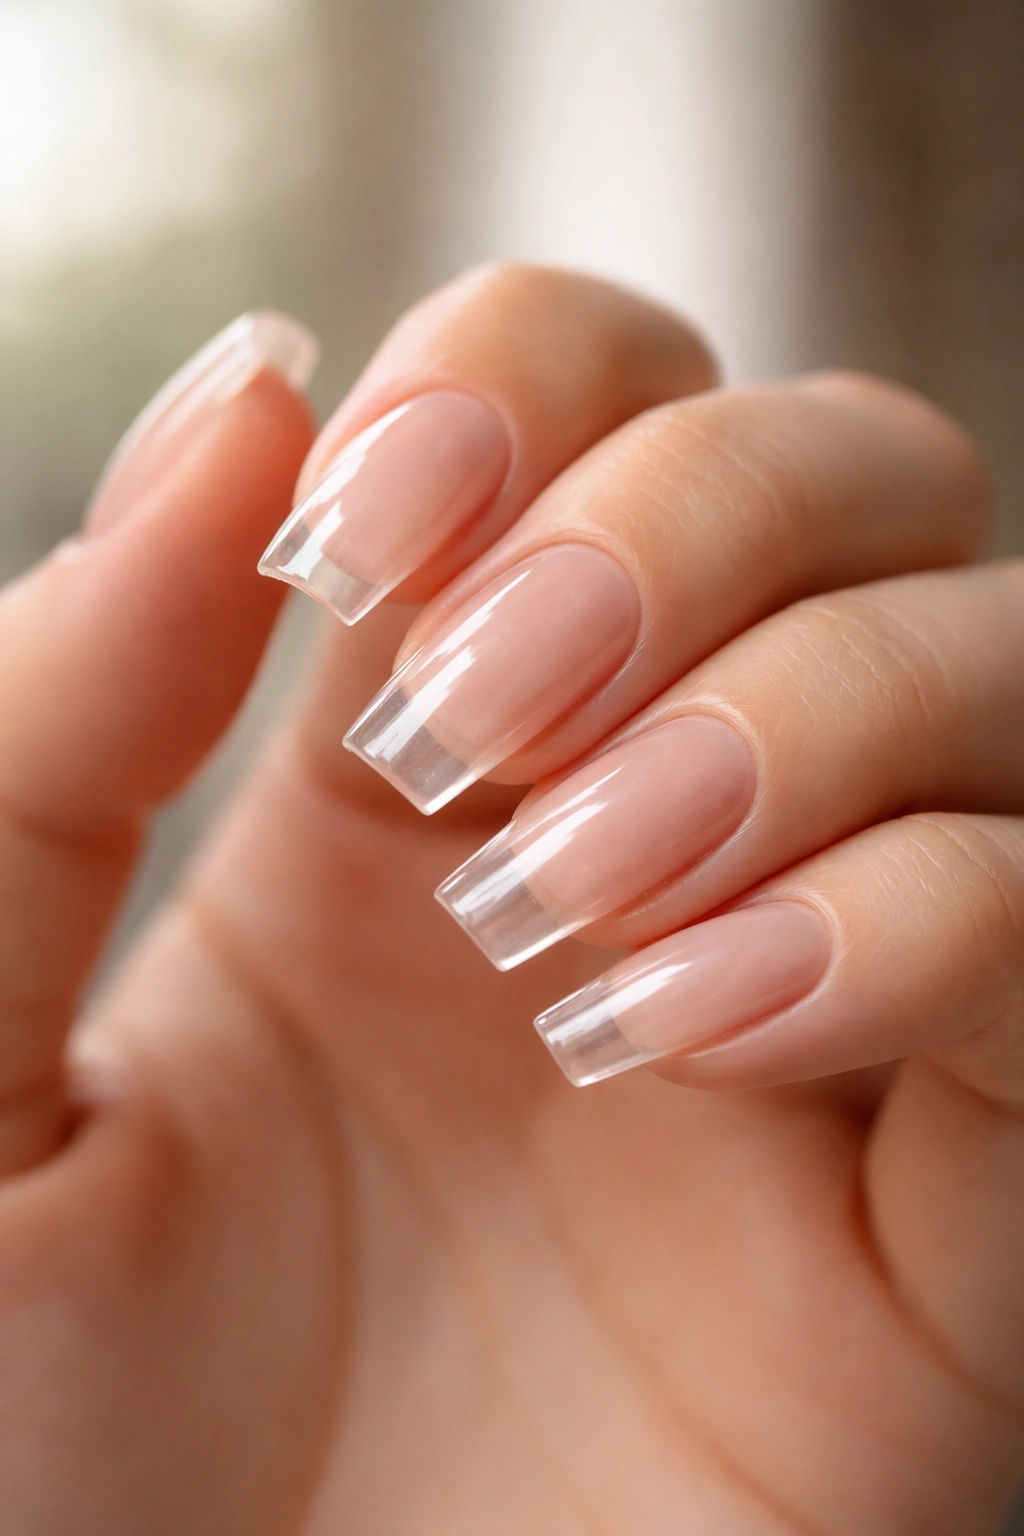
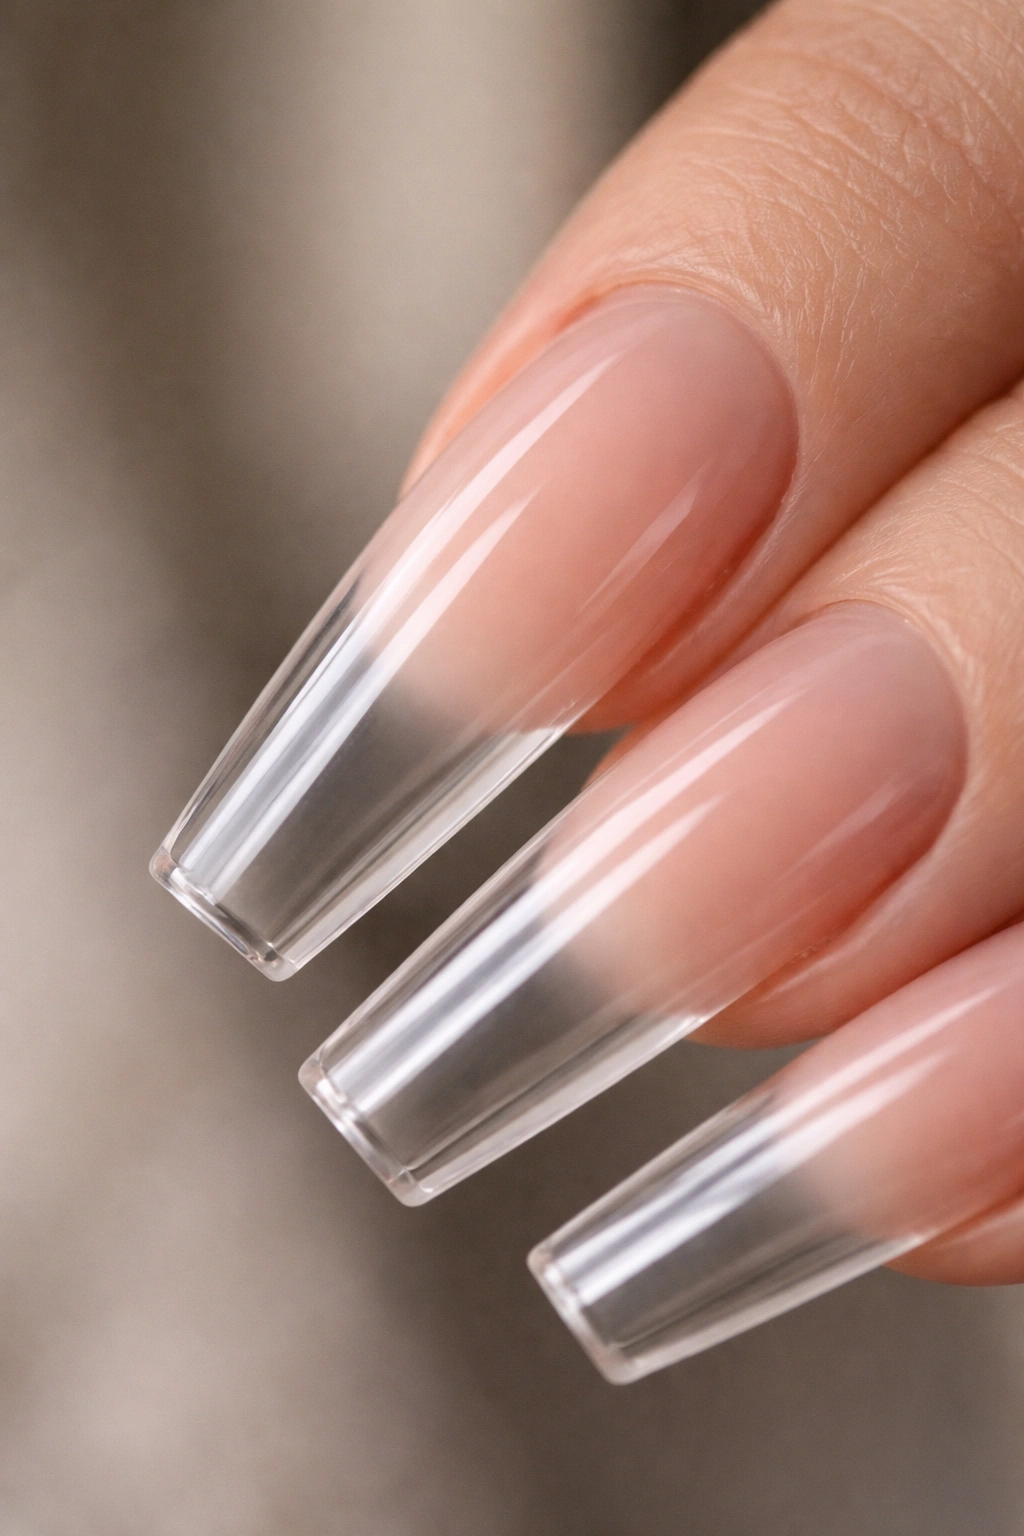
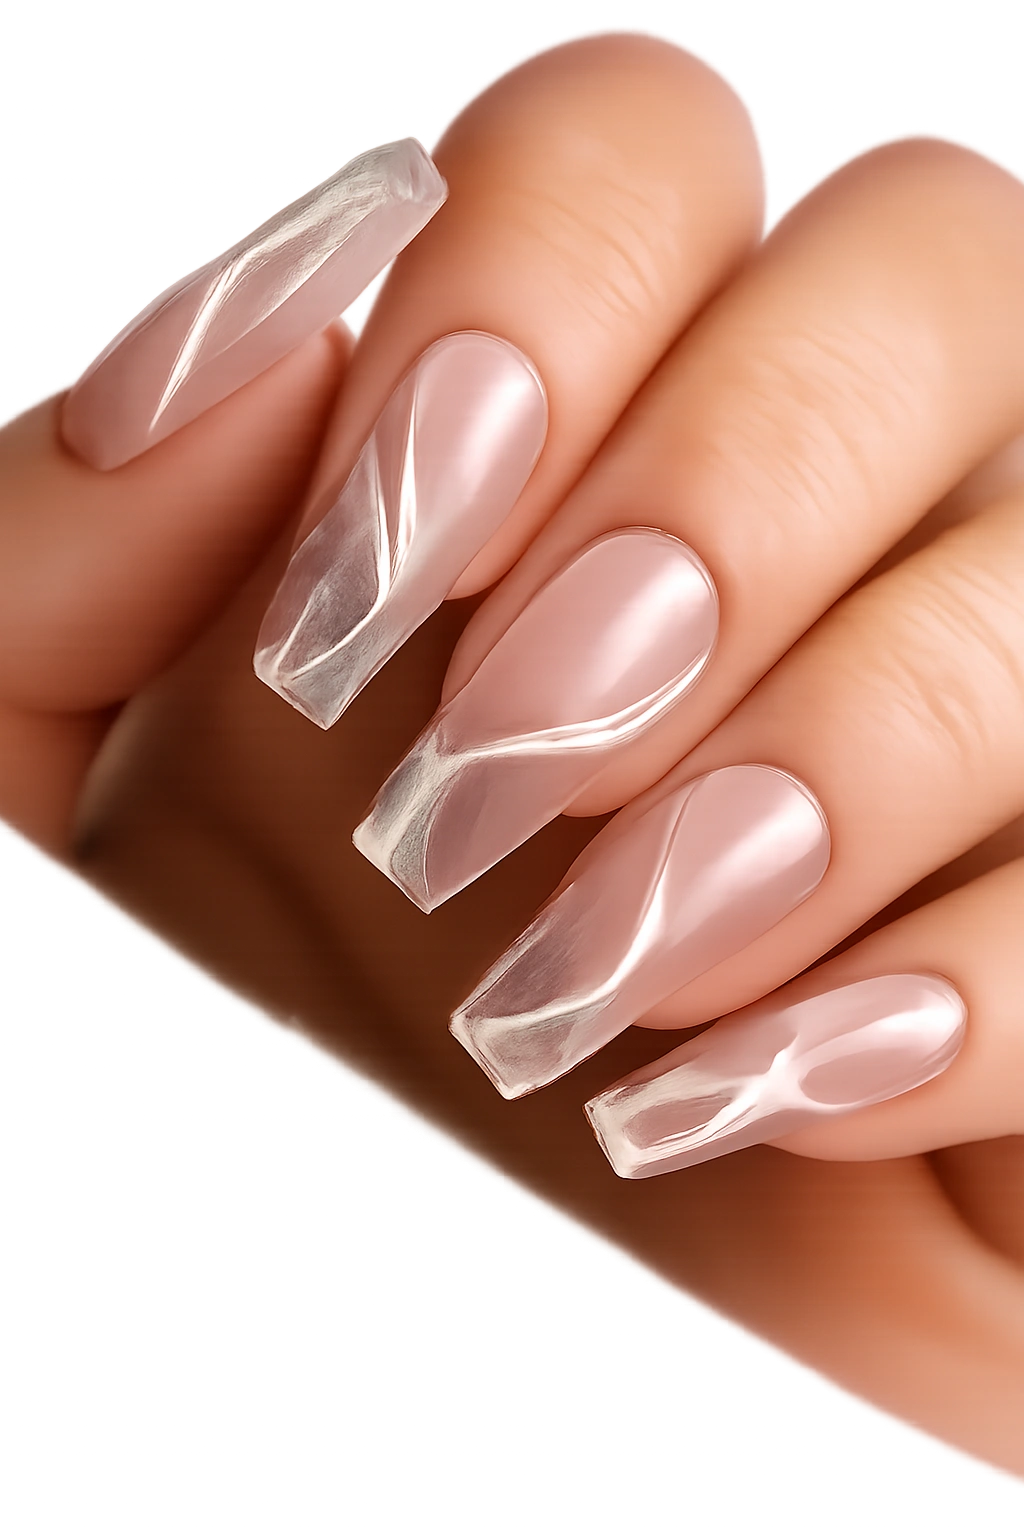
1. Bare Clear Coffin Nails With a High-Gloss Finish
This is the purest version of the trend, and it’s harder to pull off than people expect. No glitter. No white tip. No nude base to blur mistakes. Bare clear coffin nails live or die on the quality of the shape.
The appeal is that clean, glassy finish that makes the nail look almost like a polished pane. On medium or long length, the squared tip keeps it from looking plain. You’re leaning on architecture here.
What makes this one work
A strong bare clear set needs smooth product from cuticle to tip. The apex should rise gently, then drop off without a hump. From above, both sidewalls should mirror each other. If one nail flares out even a little, you’ll notice it.
Quick details that matter
- Ask for medium coffin if you want the shape to read clearly without getting dramatic
- Choose high-gloss top coat, not a soft satin finish
- Keep the underside of the nail clean; transparent tips show buildup fast
- Skip heavy rings on every finger if you want the manicure to stay crisp and airy
Best move: pair this set with short, tidy cuticles and no extra accent nails. That restraint is what gives it bite.
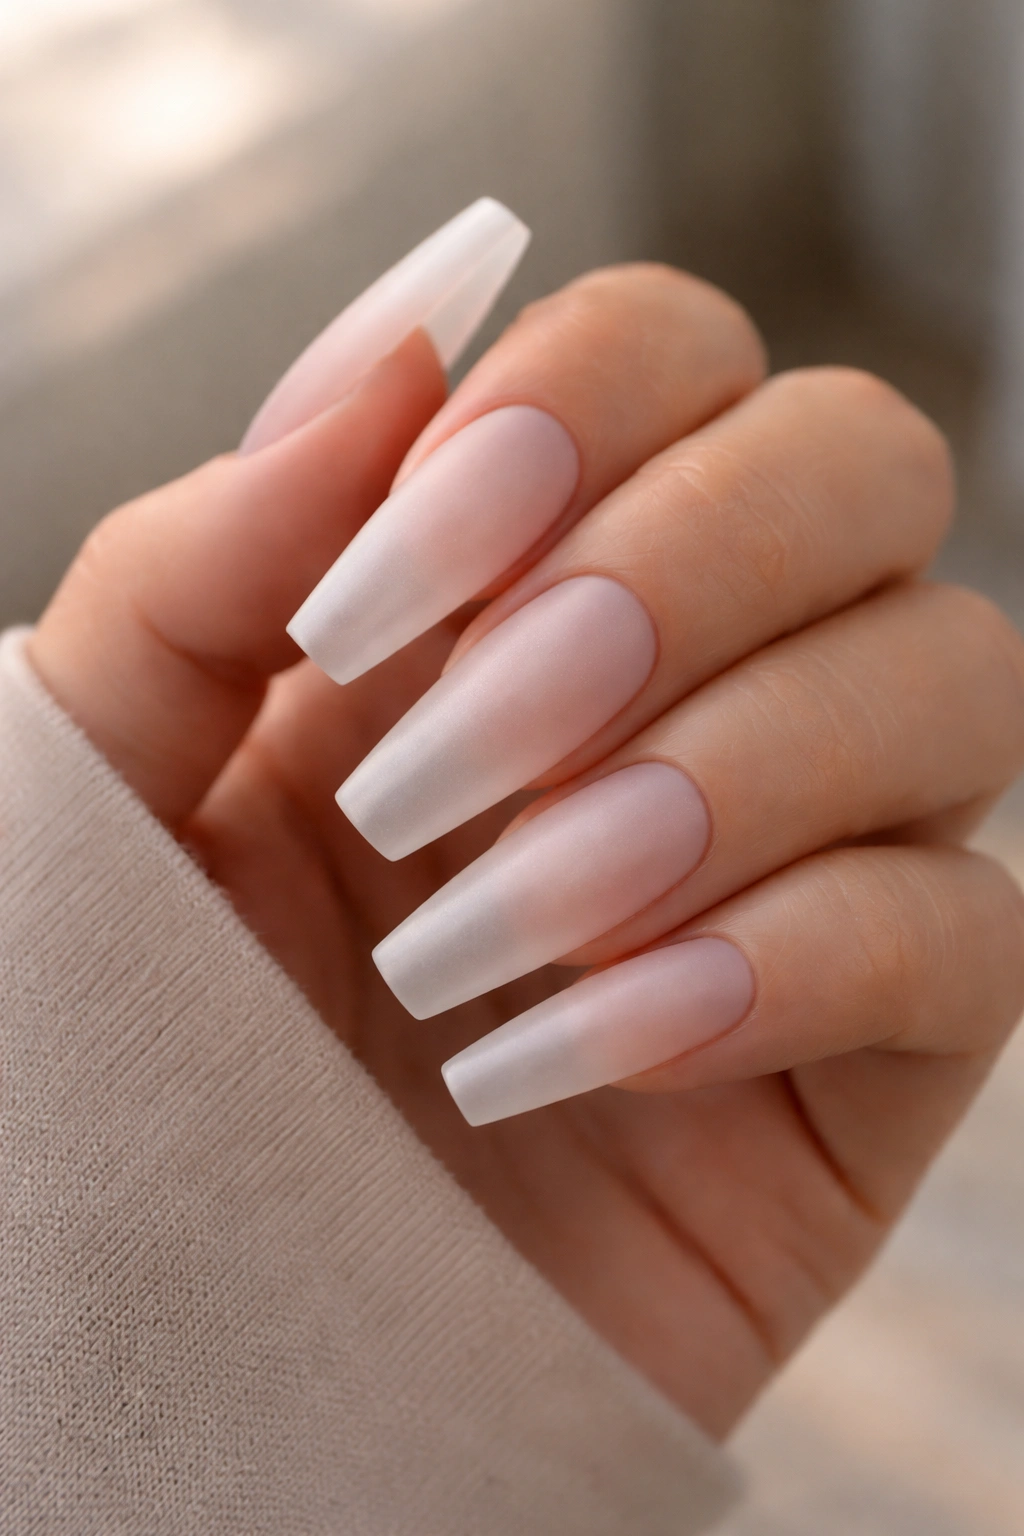
2. Milky-Clear Fade From Cuticle to Tip
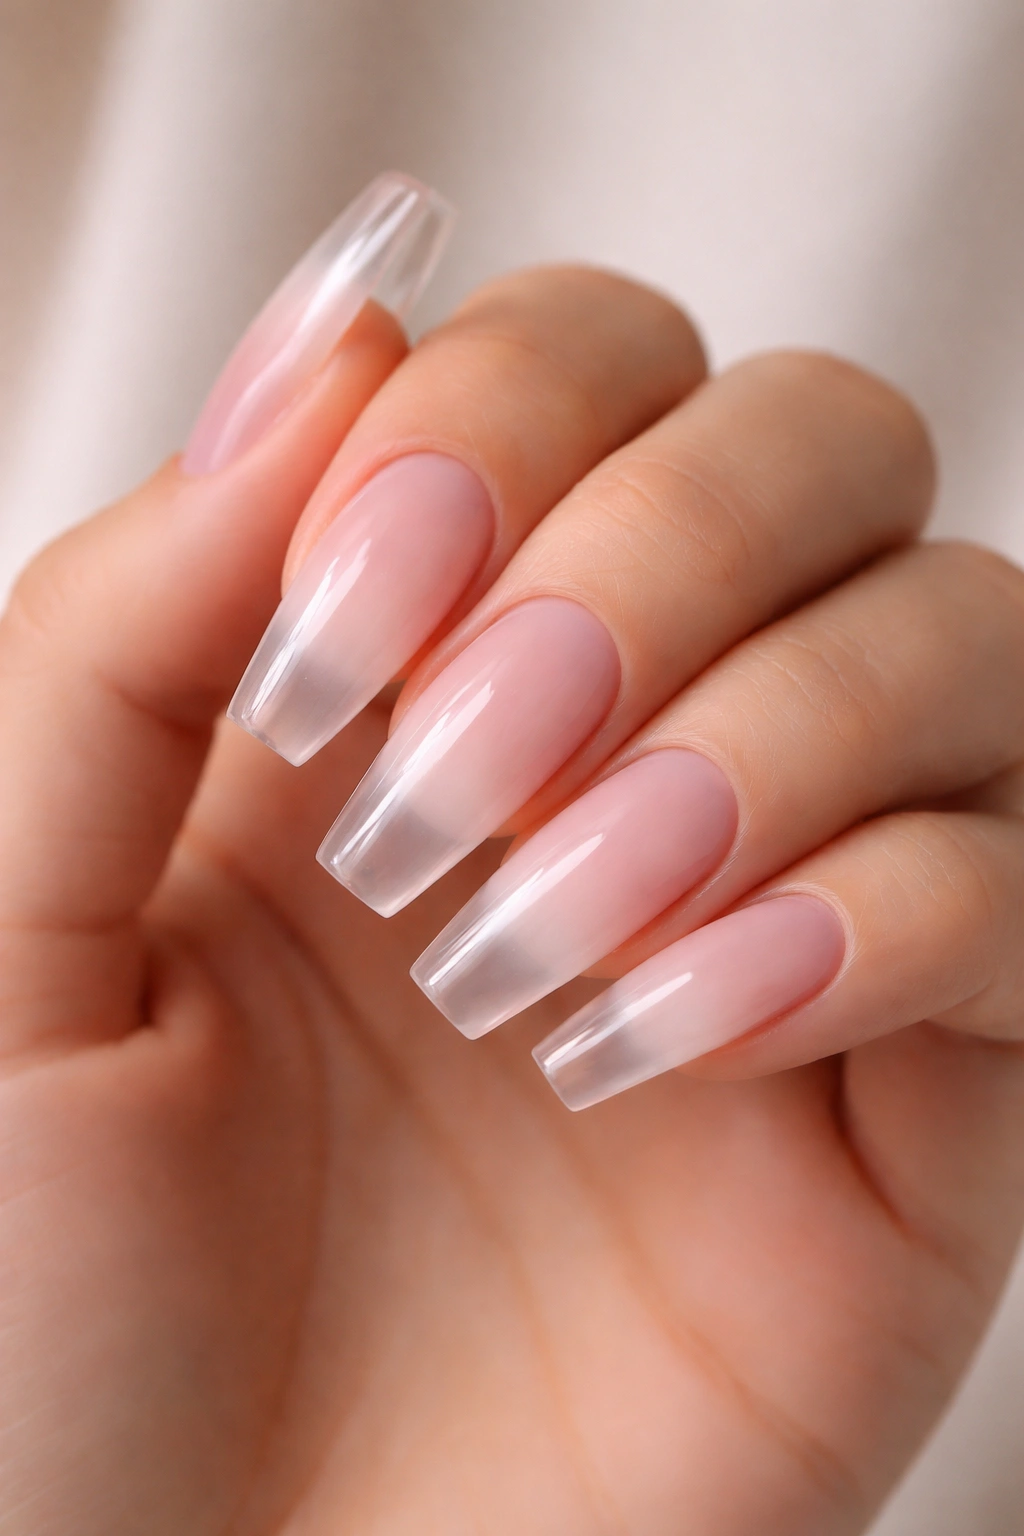
A soft milky fade is the easiest way to make clear nails look expensive. It blurs the natural nail line near the cuticle, leaves light passing through the tip, and softens the whole set without losing that transparent feel.
Think of it as a whisper of white or translucent nude diffused through the lower half of the nail. Not opaque. Not bridal in the old-school sense either. More like fog on glass. The coffin shape keeps it modern because the tip stays sharp while the color stays soft.
This design is also forgiving. If your natural nail bed is uneven in tone, or you have a little staining from past polish, the milkiness masks that better than a fully bare clear set. That makes grow-out look neater too, especially during the second week.
Ask for the fade to stop around halfway to two-thirds up the nail, with the last third left mostly clear. If the milky color runs all the way through, the manicure loses the airy look that makes this version special.
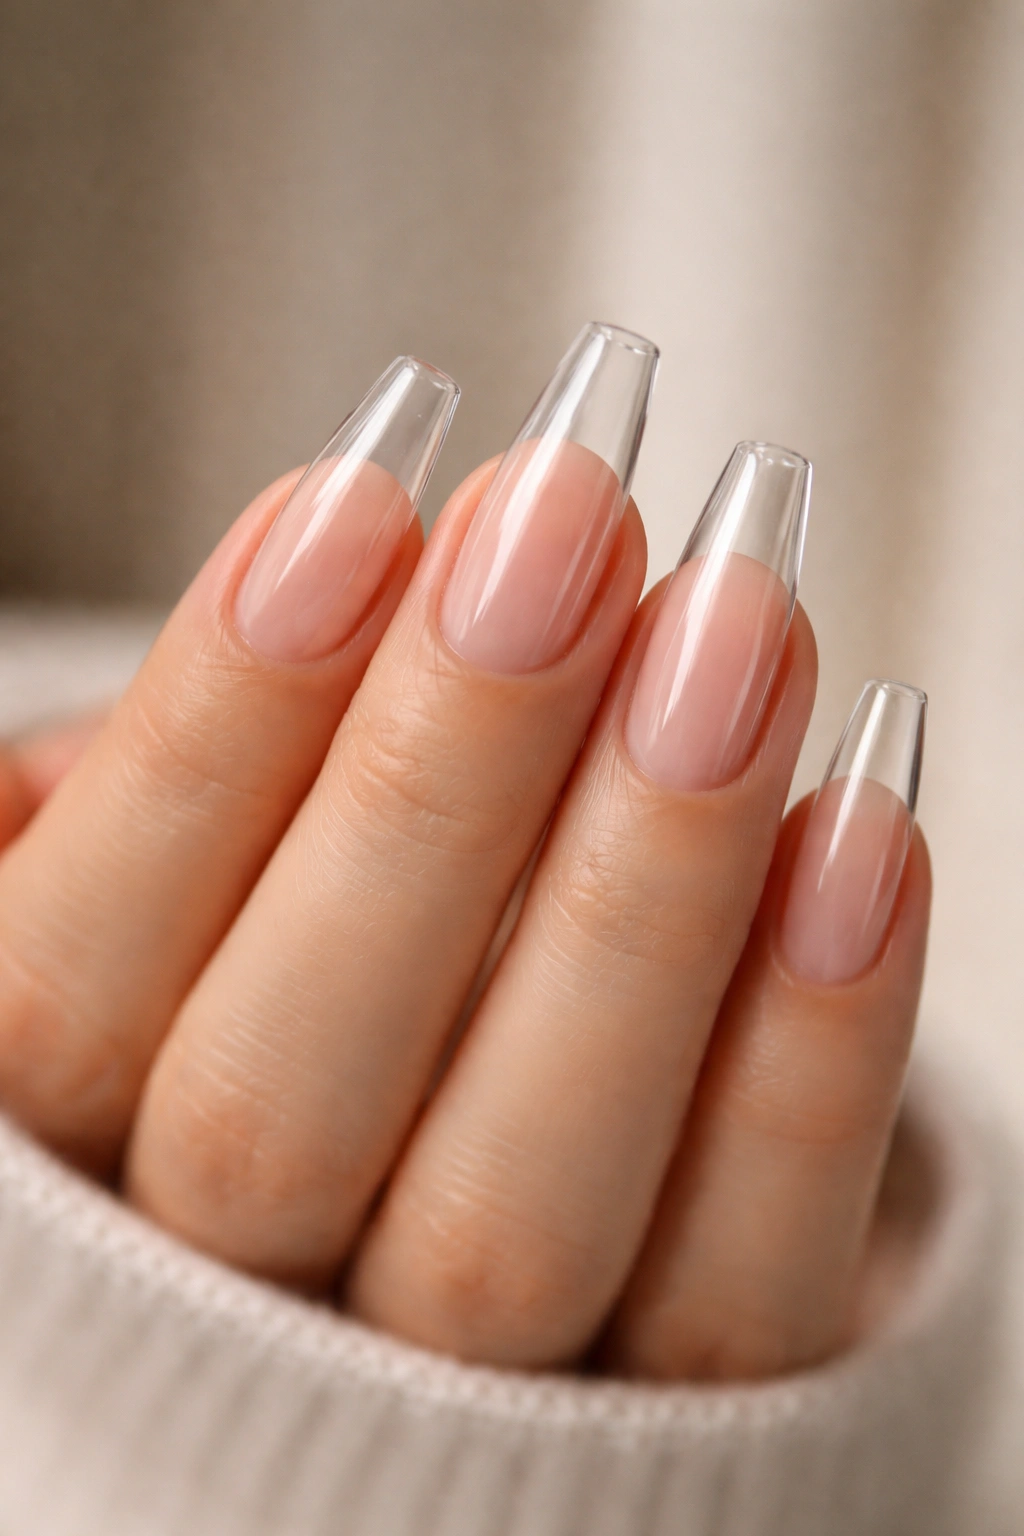
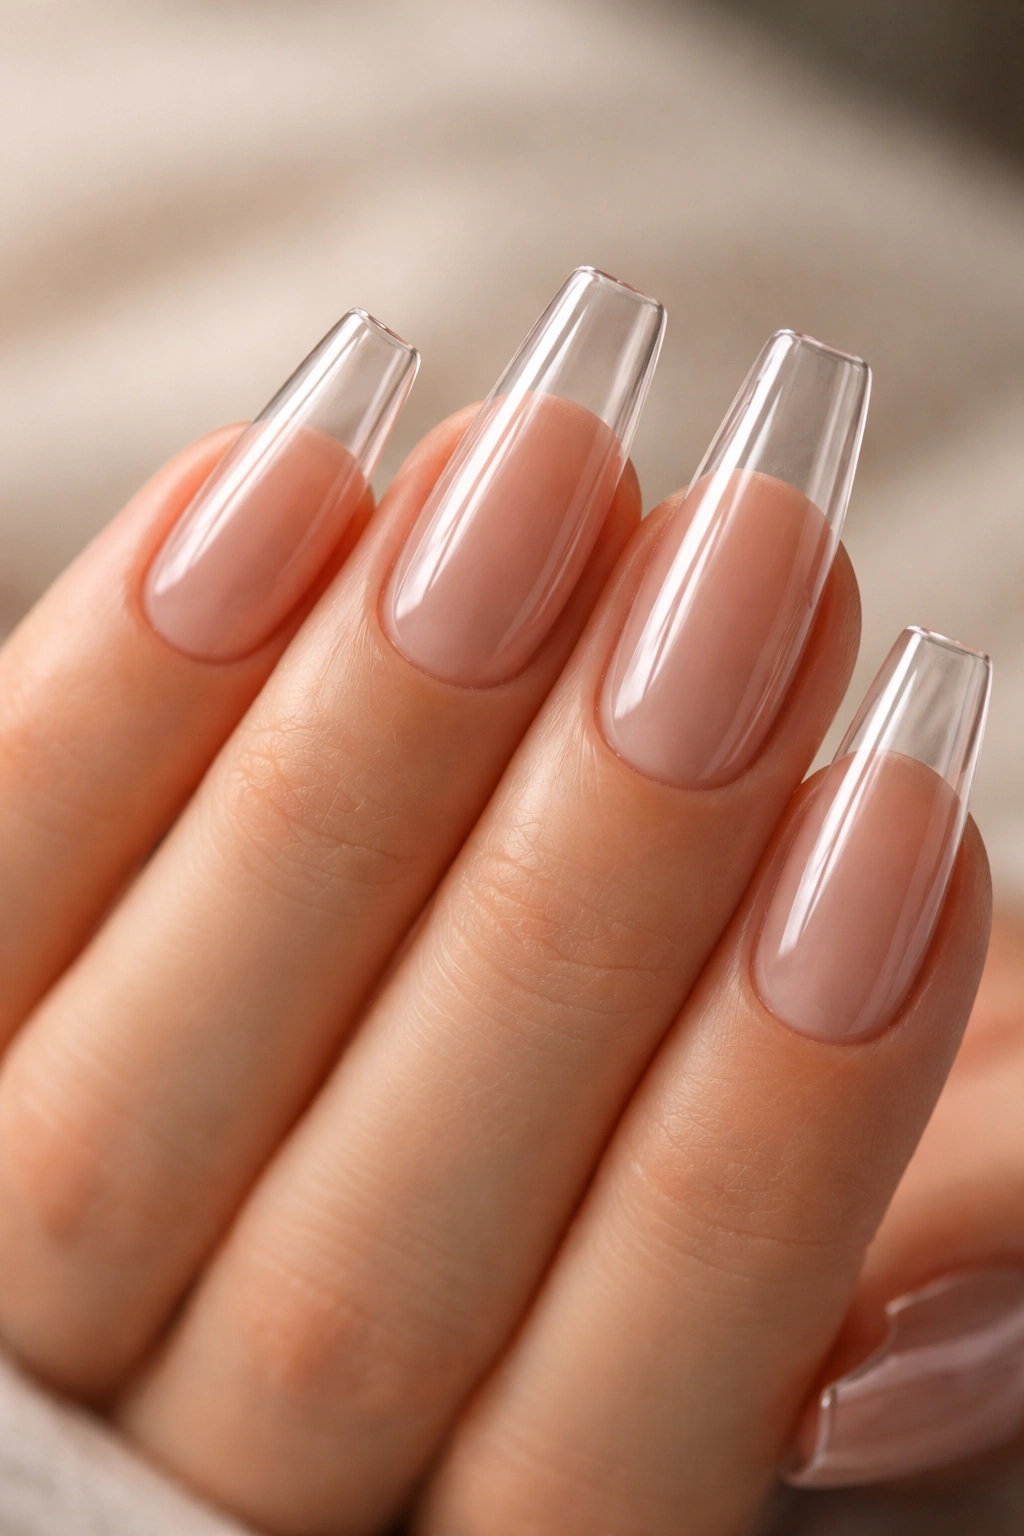
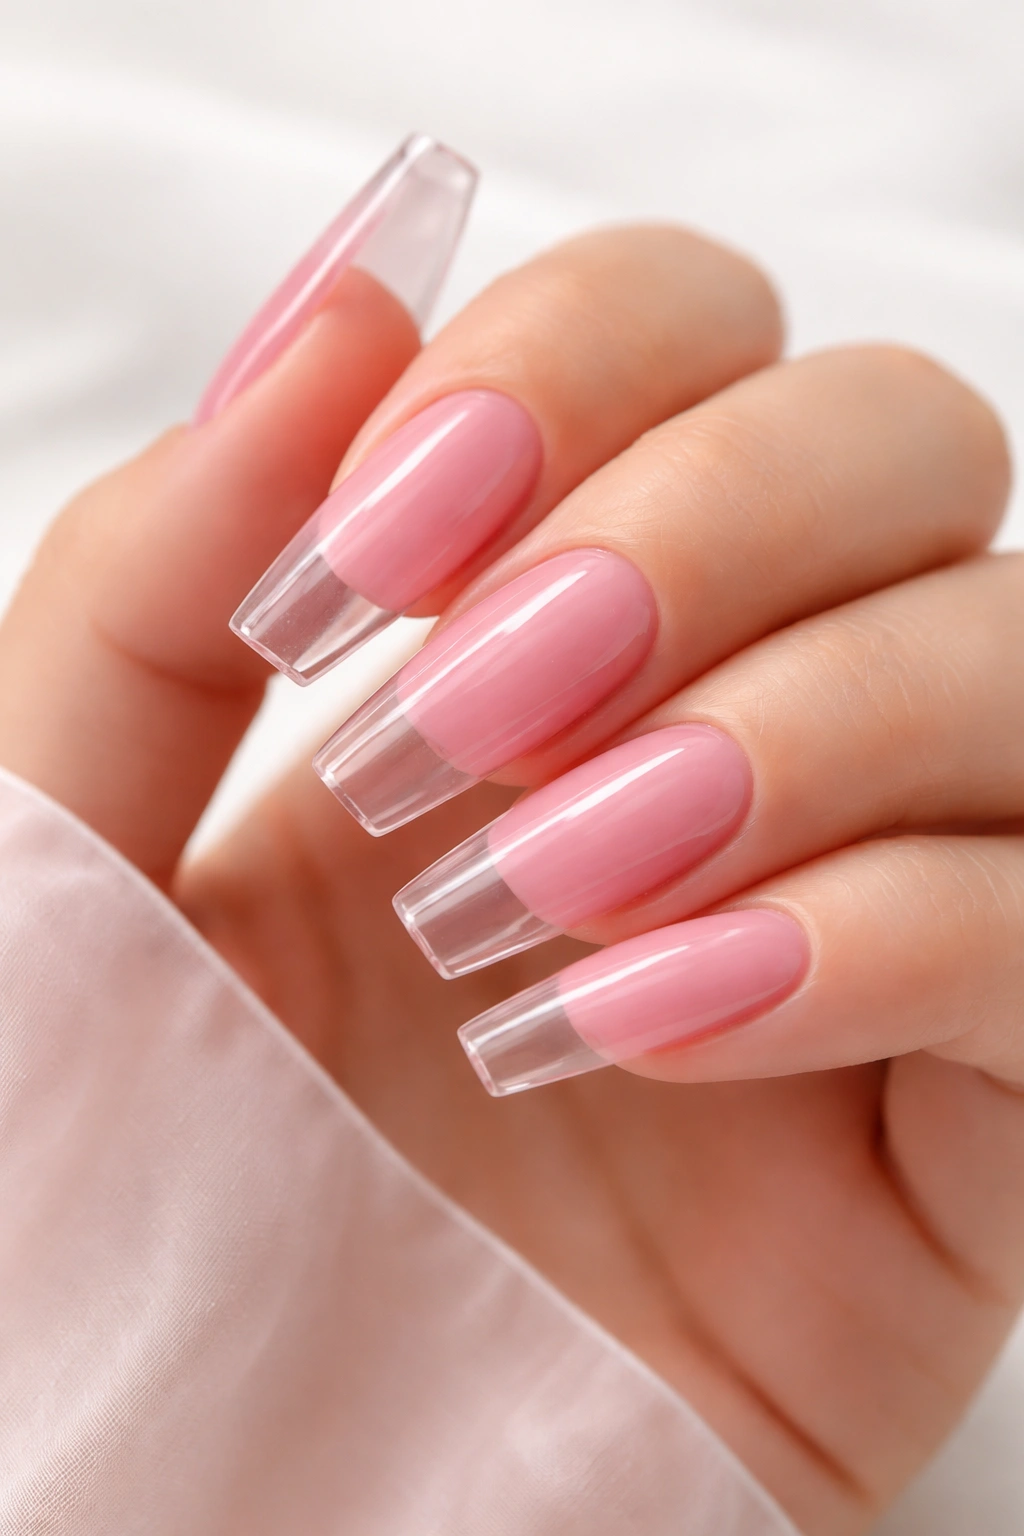
3. Glass-Tip Clear Coffin Nails With Nude Nail Beds
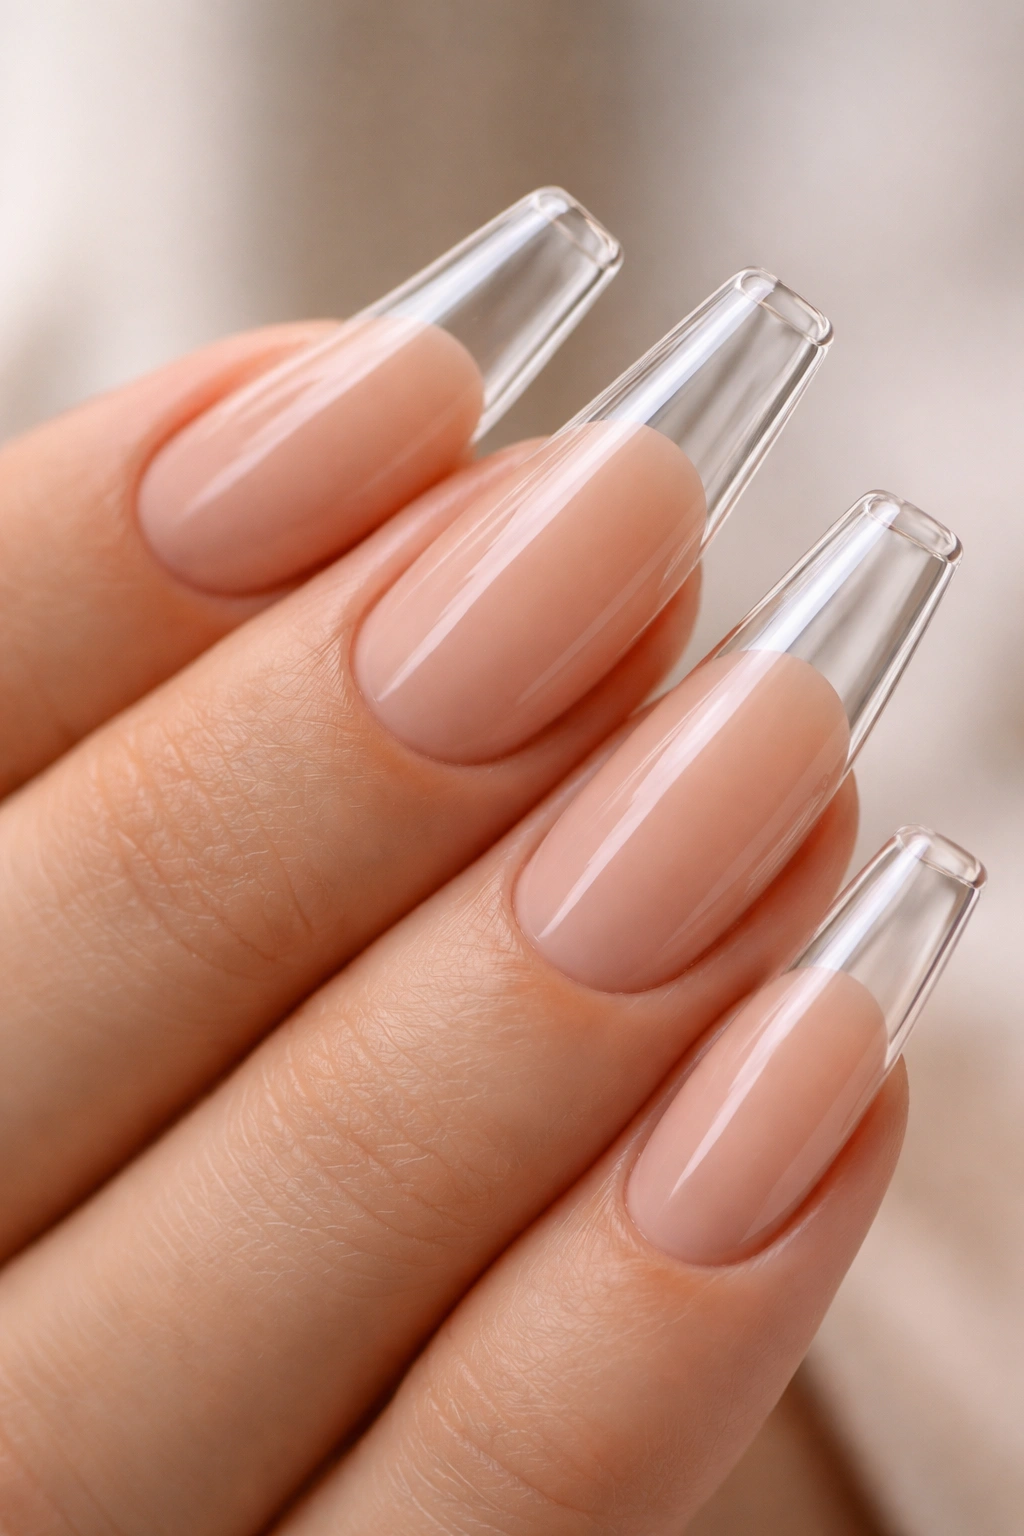
Why does this style look so polished on almost everyone? Because it copies the natural nail in a cleaner, more edited way. A sheer nude or beige sits over the nail bed, while the extension stays transparent from the smile line forward. You get shape and length without the whole nail reading as plastic.
The effect is close to a French set, but softer and less busy.
How to ask for it
Tell your nail tech you want a nude blend over the nail bed and a fully clear tip, with no thick white line separating the two. The transition should be hazy, not hard-edged. If your skin tone runs cool, lean pink-beige. If it runs warm, peach-beige usually looks better.
Longer lengths show this design off best because the clear tip gets more space. On shorter nails, keep the nude sheer so the manicure still feels light.
One caution: the nude layer has to suit your hands. A beige that’s too gray can make the fingers look dull, and a pink that’s too bright can fight the clean mood. This is one of those times when undertone matters more than color name.
4. Fine Silver Foil Encapsulated Near the Free Edge
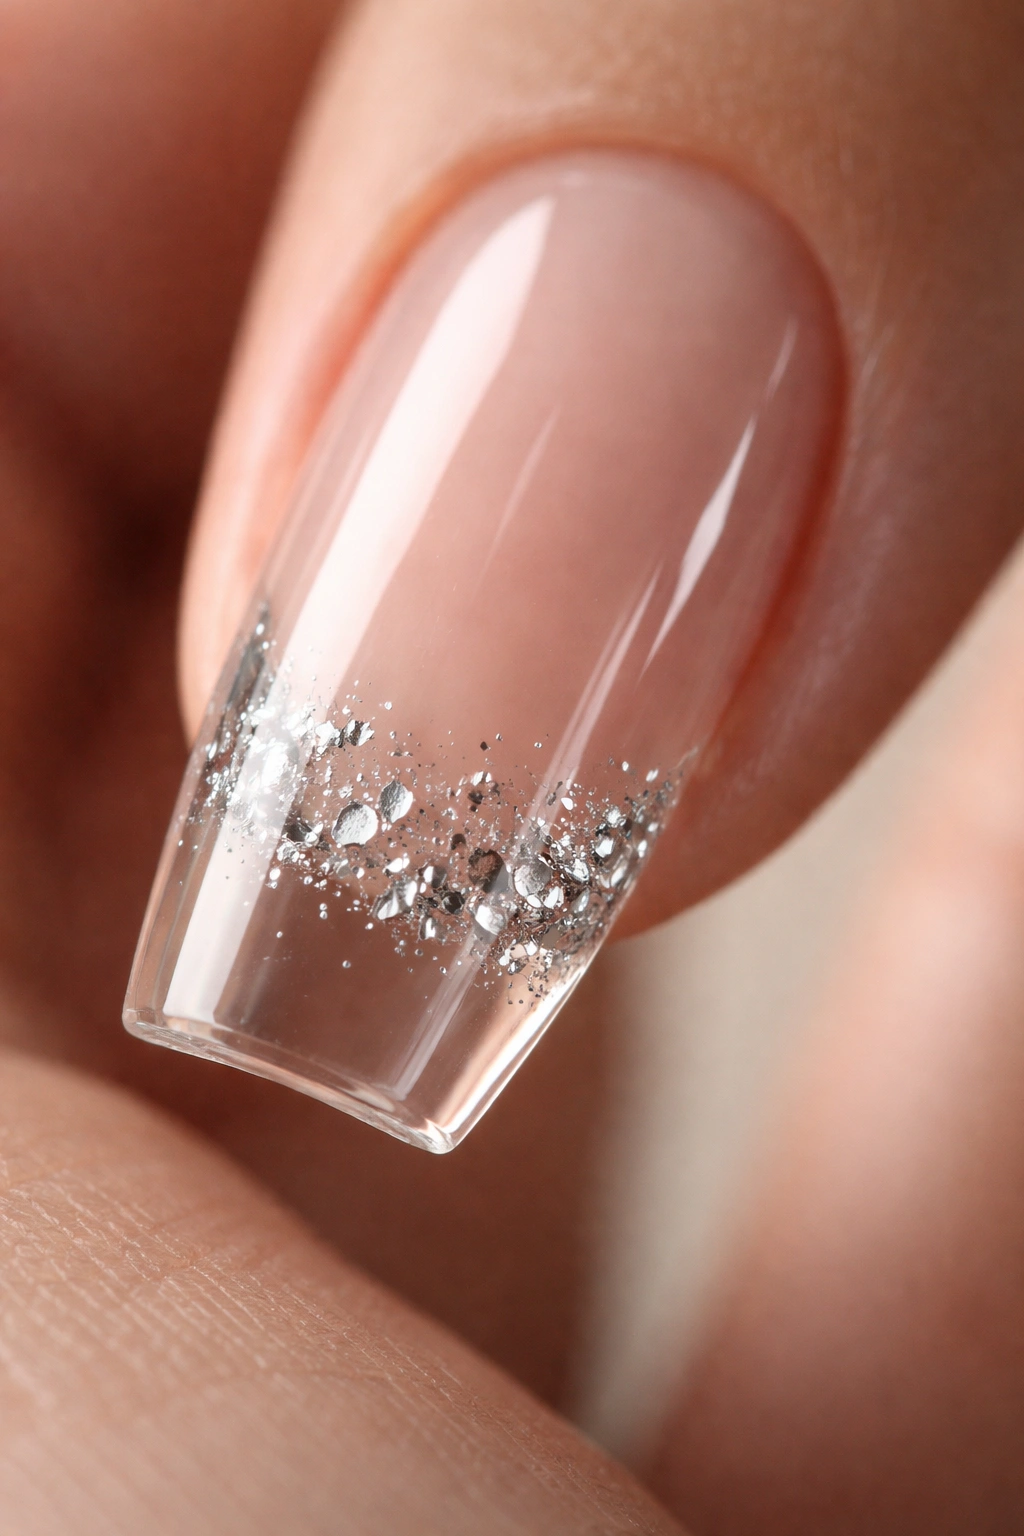
Picture a plain clear set, then add three or four tiny flecks of silver foil toward the last quarter of each nail. That’s enough. More than that, and the manicure drifts away from clean into party territory.
This placement matters. Keeping the foil near the free edge leaves the nail bed open and airy, which is what keeps the look light.
A good tech will encapsulate the foil under clear builder gel rather than sticking loose pieces on top. That way the surface stays smooth, the shine stays uninterrupted, and the foil looks suspended inside the nail instead of pasted on it.
A few placement notes help:
- Use micro flakes, not chunky torn sheets
- Keep the foil away from the cuticle area
- Scatter the pieces, don’t stack them in one blob
- Silver suits a glassy set better than thick yellow gold if you want a colder, cleaner finish
What I like here is the little flash you get when your hand turns. You still read the nail as clear first. The foil just catches you a second later.
5. Micro French Line on a Transparent Base
A micro French on clear coffin nails feels sharp in a way full white tips sometimes do not. The line is thin—about 1 to 2 millimeters—and it sits right on the edge of the squared tip. That small scale changes the mood. Instead of looking classic-pretty, it looks precise.
White is the obvious choice, and it works. Soft beige, cool gray, and chrome silver can look even cleaner if you want something less expected. The trick is discipline. The line has to stay narrow and even across all ten nails, especially at the corners where sloppy work shows first.
This design also flatters shorter coffin lengths. A chunky French can swallow a short nail. A micro line lets the transparent base stay visible, which makes the manicure look longer and lighter.
I would skip extra gems or glitter with this one. You already have structure from the shape and contrast from the tip. Adding more usually muddies the point.
If your nail tech hand-paints French lines, ask them to file and top coat after checking each hand from a distance. The curve can look balanced up close and off-center from two feet away. That little check catches a lot.
6. Soft Nude Blend at the Cuticle With Clear Length
Unlike a full nude manicure, this design keeps the lower third softly toned and lets the rest of the nail turn transparent. It almost looks as if the nude melts into clear product. The result is tidy and flattering, especially on grown-out nail beds or hands with visible ridges.
What makes it different from the glass-tip version is placement. Here, the nude starts at the cuticle and fades upward without trying to mimic a French smile line. There’s no obvious boundary. It’s more of a wash than a constructed tip.
This style earns its keep during grow-out. Because the tone is sheer and concentrated near the base, a fill line is harder to spot than it would be on a solid nude or opaque pink set. If you stretch appointments to 2½ or 3 weeks, that matters.
Pick a nude that’s close to your skin but a touch cleaner—slightly brighter, slightly smoother. Too dark and the manicure starts looking heavy. Too pale and the fingers can look chalky. You want a gentle correction, not a mask.
7. Tiny Crystal Cluster at the Cuticle
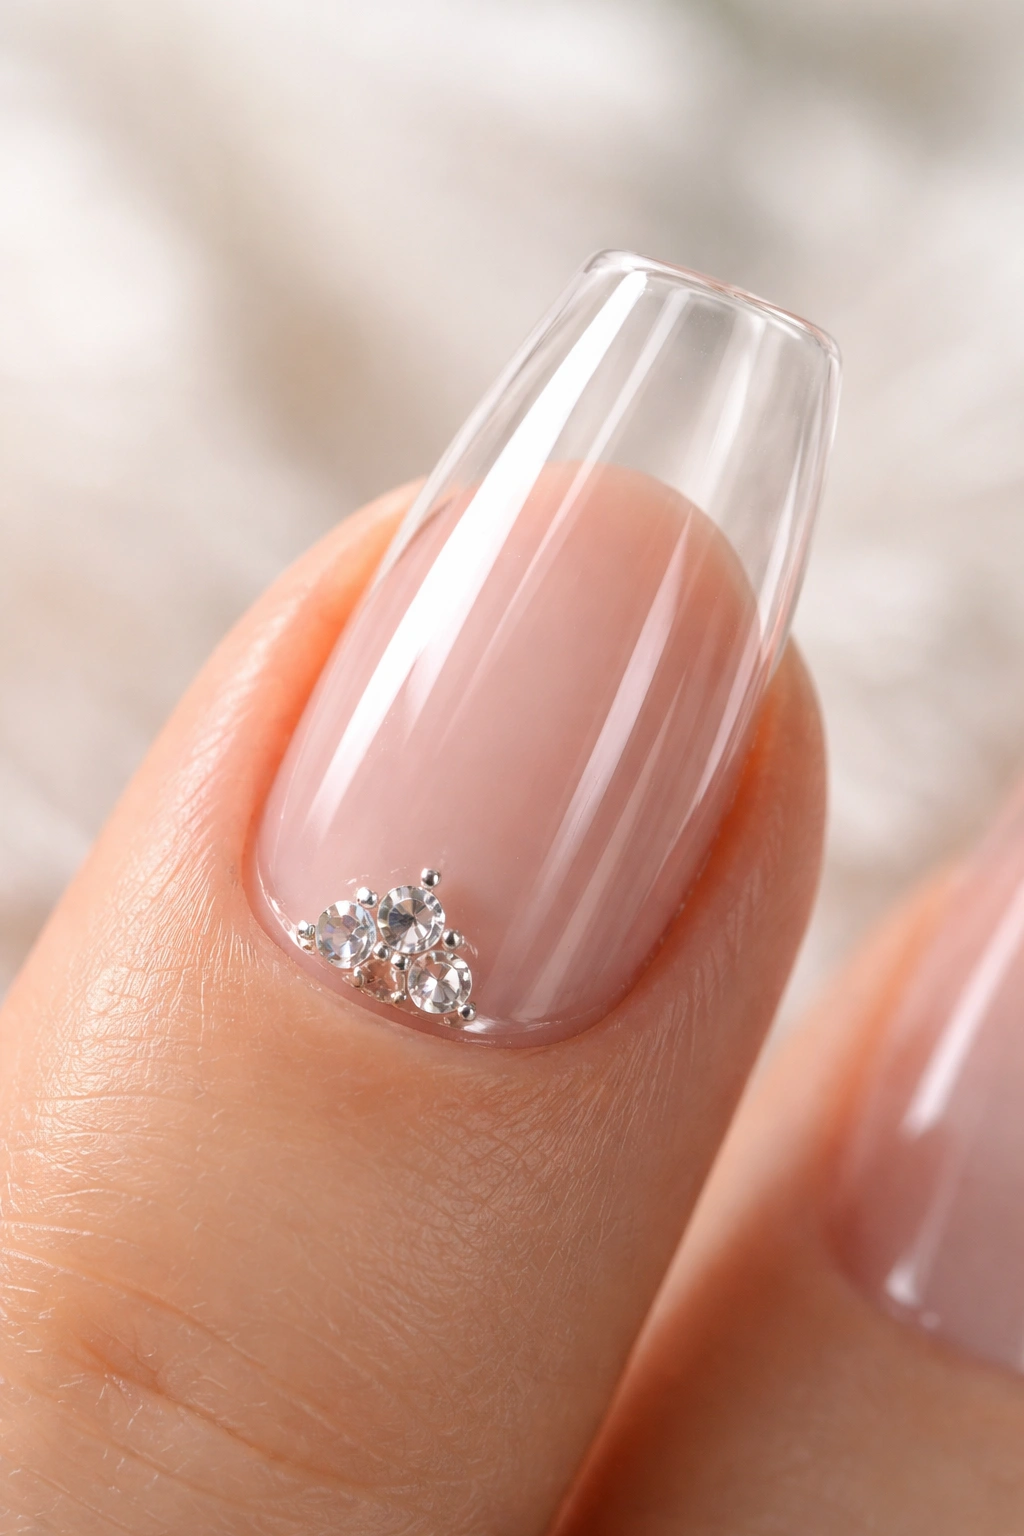
One small crystal detail can make a clear set feel dressed without making it fussy. One small detail. I’m stressing that on purpose.
A two- or three-stone cluster placed near the cuticle—usually on one nail per hand, sometimes two—gives the manicure a focal point while leaving the rest of the surface untouched. On a transparent base, that little cluster looks crisp because there isn’t any color underneath competing with it.
Where this goes wrong
The fast way to ruin the look is oversized stones. Big rhinestones pull the eye away from the clean line of the nail and make the set feel heavier than it is. Uneven placement does the same thing. If the cluster sits too close to the sidewall, the nail can look crooked.
Better placement
Keep the stones centered or slightly offset by 1 to 2 millimeters, tucked above the cuticle line rather than sitting on top of it. Silver-backed crystals tend to suit a glassy manicure better than rainbow stones when you want a tidy finish.
Skip this design if you wear gloves all day for work or if you know you pick at raised texture. Tiny crystals still catch.
8. White Swirl Lines on Clear Coffin Nails
This one can go wrong fast, and when it does, it looks messy instead of clean. The fix is restraint. Use one or two thin white lines per nail, let them curve with purpose, and leave empty space around them.
Those white ribbons should look airy, not tangled. Think single loops, gentle S-curves, or one clean arc crossing the nail diagonally. Thick marbling and packed scribbles defeat the whole point of a transparent set.
The coffin shape helps a lot here because the straight sidewalls give the swirl somewhere to travel. On almond nails, the same line work can feel softer. On coffin, it has more edge.
I like this design best on medium-long lengths with a glossy finish. Matte can make the white lines look flatter. Gloss gives them a little lift and keeps the base looking clear rather than frosted.
Ask for the artist to keep at least 40 to 50 percent of each nail untouched. That empty space is doing the heavy lifting. Without it, you no longer have a clean clear nail design—you have abstract white nail art with a transparent background.
9. Pressed Dried Flowers Suspended in Clear Gel
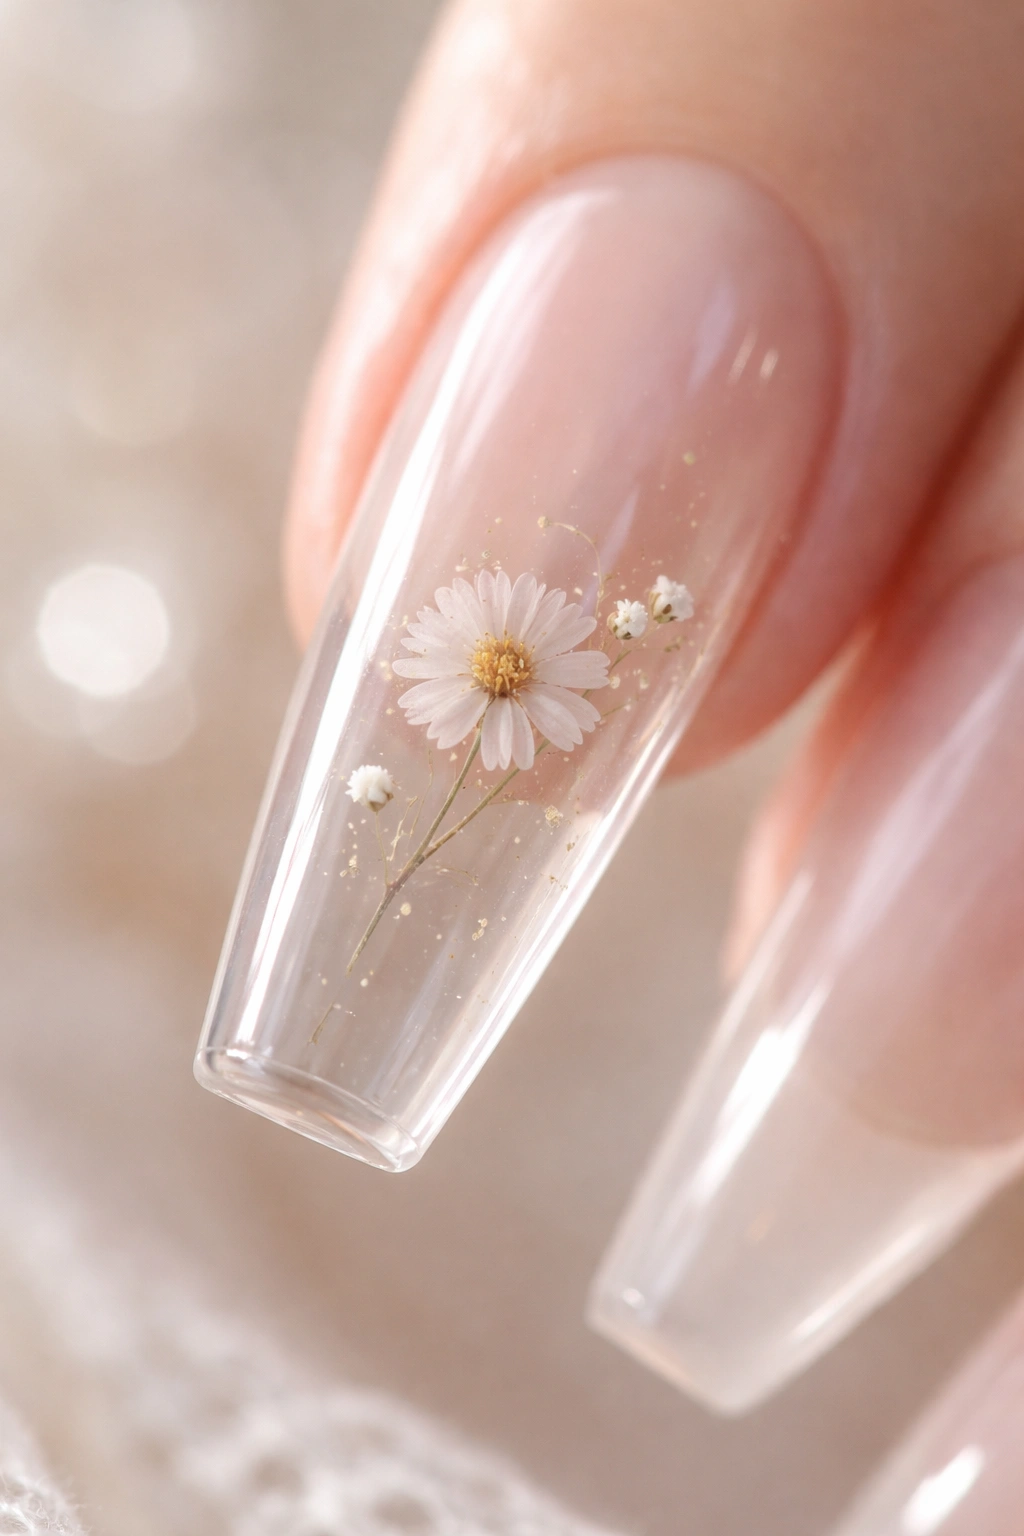
A lot of floral nails look sweet in photos and busy in person. Pressed flowers are different when they’re done on a clear coffin base with a light hand. You’re not trying to build a botanical collage. You want one small bloom, maybe a half bloom, or a petal cluster that looks tucked inside the nail.
Because the flowers sit under clear gel, the manicure has depth without needing loud color. Pale lavender, off-white, muted yellow, and dusty pink work better here than bright primary shades.
How to keep it clean
Use flowers on two accent nails per hand at most. Place them toward one side or the tip rather than centered on every nail. A little asymmetry helps the set feel lighter.
Tiny flowers also hold up better than large flat blooms. Bigger pieces can create bumps if the encapsulation isn’t thick enough, and then you lose that smooth, glassy surface you came for in the first place.
This style leans soft, no question, but the coffin shape stops it from turning sugary.
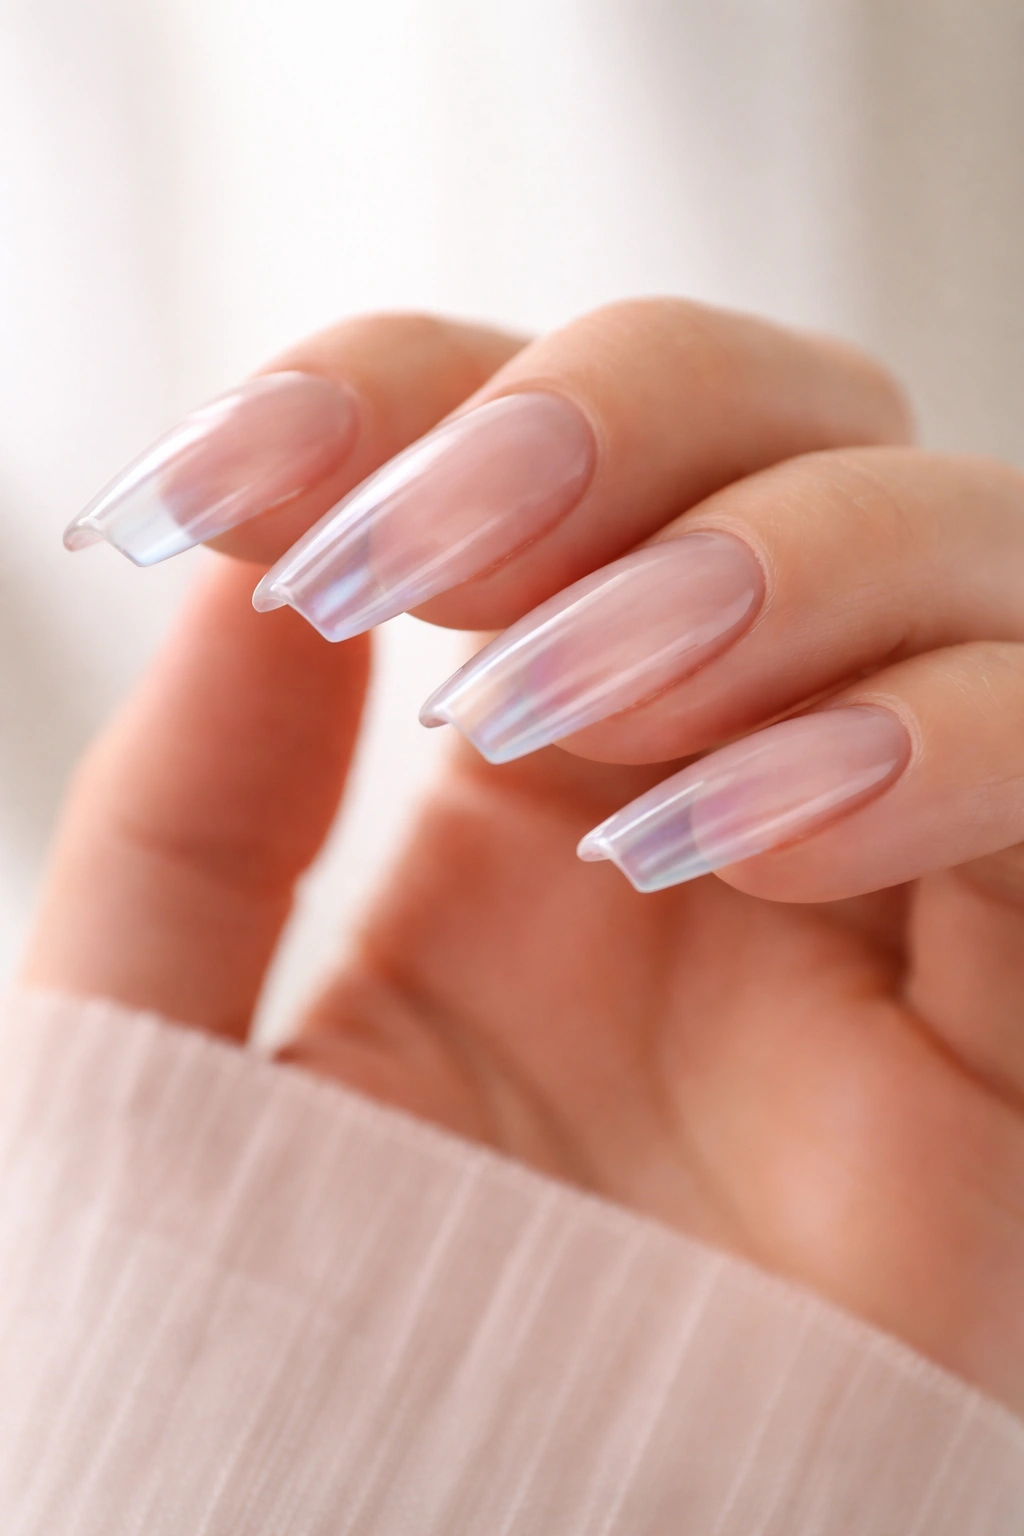
10. Iridescent Clear Coffin Nails With a Soft Chrome Veil
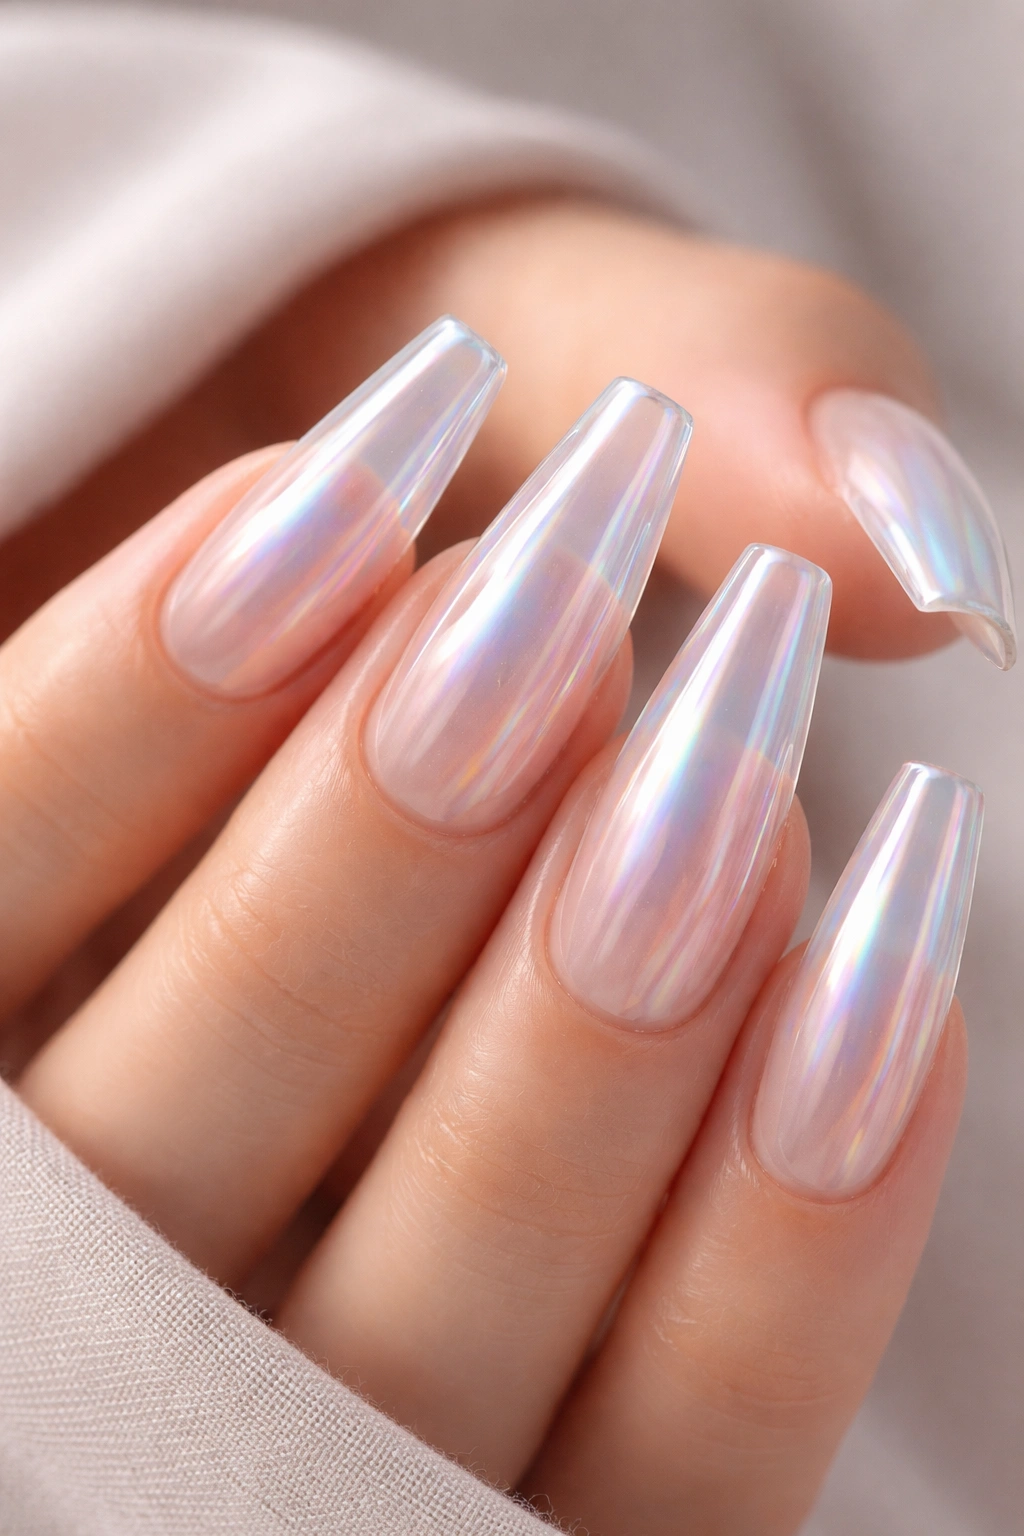
If you want sparkle without glitter, this is the one I’d point to first. A soft iridescent chrome over a transparent base gives the nail a slick, cold sheen that shifts between pearl, ice blue, and pale pink depending on the light. You still see through the nail. You just get a tint of reflection on top.
The word soft matters. A dense mirror chrome wipes out the clarity and turns the manicure metallic. What you want is a sheer rub-on powder sealed under top coat so the nail still reads as clear.
This design suits longer coffin nails because the flat tip catches more light. It also looks good with silver jewelry and cool-toned makeup, though it can work with warm skin if the chrome leans pearl rather than blue.
A warning, though: chrome highlights scratches. If you’re rough on your hands, book a refresh sooner or choose a plain glossy clear set instead. When this finish starts to wear, you notice it.
Done fresh, it looks sleek—almost wet.
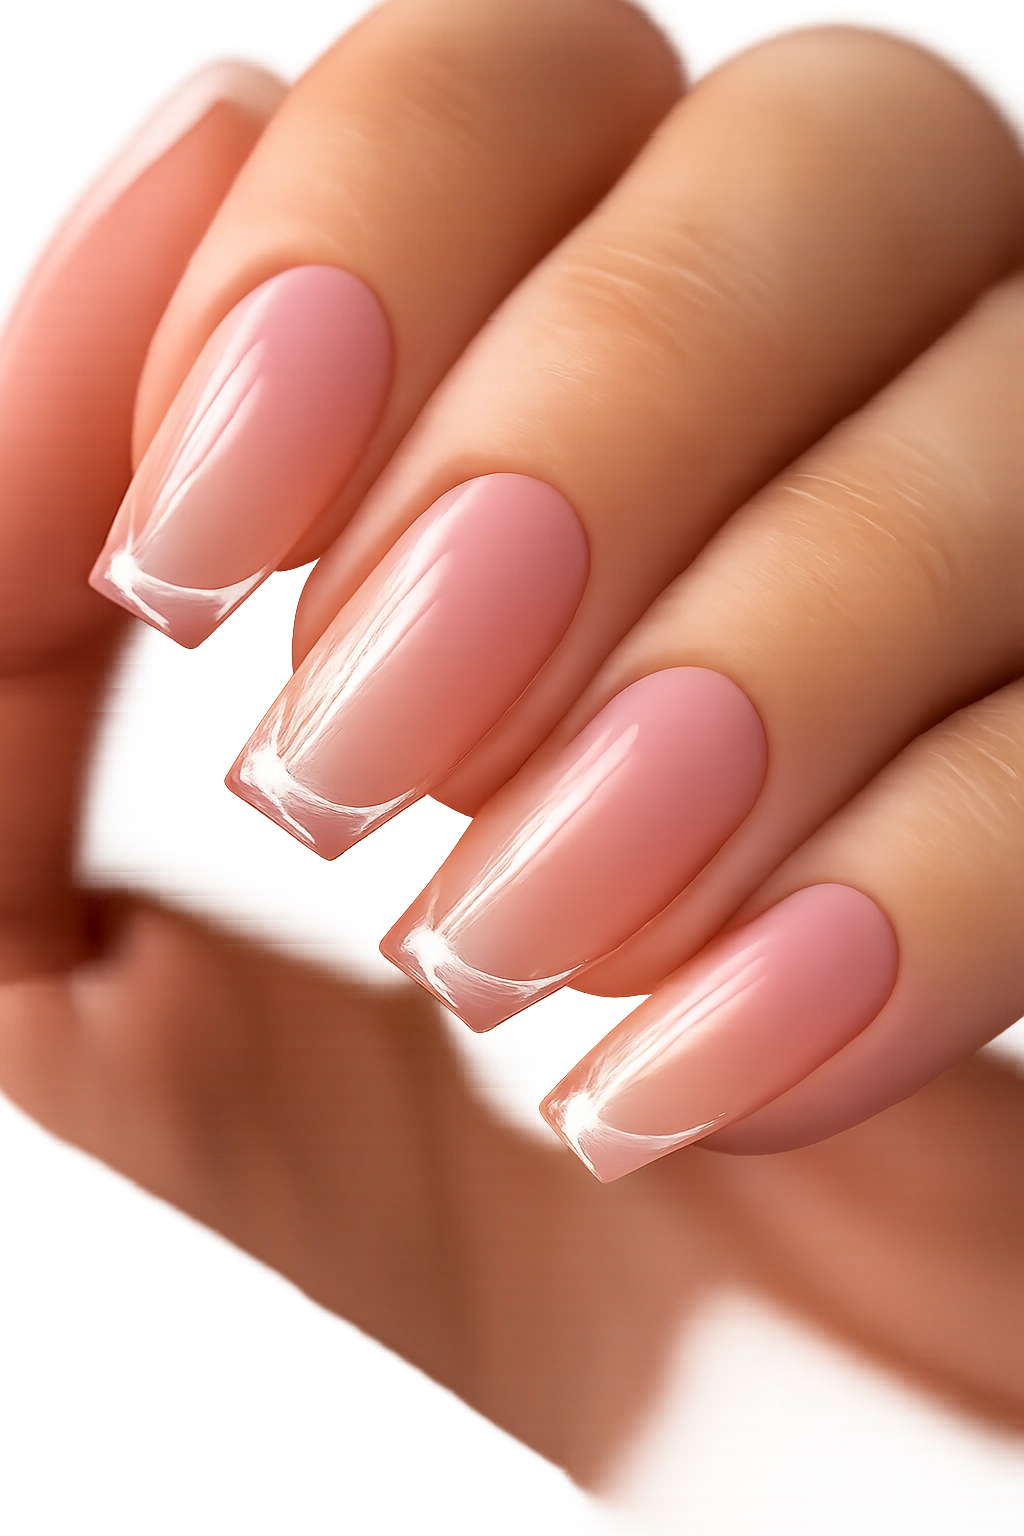
11. Sheer Pink Jelly Coat Over a Clear Extension
What if you want clear nails, but full transparency feels a little stark? A jelly pink wash is the fix. It gives the extension a candy-like tint while keeping the free edge translucent, and it softens the look of the nail bed without hiding it.
This is not the same as opaque baby pink.
A jelly coat should still let light through. You want one to two thin coats of syrupy color, not a builder gel that turns the whole nail creamy. The color can sit over the full nail or only over the lower half if you want more glassiness at the tip.
A few shade notes help here:
- Cool pink makes the manicure look crisp and slightly icy
- Peach-pink feels warmer and can flatter olive or golden skin
- Deeper rose jelly can look rich, though it starts to move away from the cleanest version of the trend
This style is one of the easiest to wear day to day. It hides minor staining better than a fully bare clear set and looks a little softer when the weather is dry and your hands need extra lotion.
12. Clear Glitter Fade Kept to the Last Third of the Nail
Glitter can stay clean-looking if you treat it like seasoning instead of the main ingredient. Keep it fine, sparse, and pushed toward the tip. A fade that starts around the last third of the nail lets the transparent base do most of the talking.
Unlike foil, glitter gives you a more even sparkle. Unlike all-over shimmer, it keeps the nail bed quiet. That separation is what saves it.
Use micro glitter, not hex chunks. Silver, champagne, and iridescent clear pieces are the safest choices if you want the set to feel polished rather than loud. A dense gold gradient can get heavy on coffin nails fast, especially on long lengths.
This design is strong for events because it still catches under low light. Yet it doesn’t lock you into a full glam manicure. You can wear it with a blazer, a black knit dress, or a plain white T-shirt and it still makes sense.
If you’re doing a DIY version, stop the fade before it reaches the midpoint. Most home manicures go too far.
13. Side-Frame Negative Space on Clear Coffin Nails
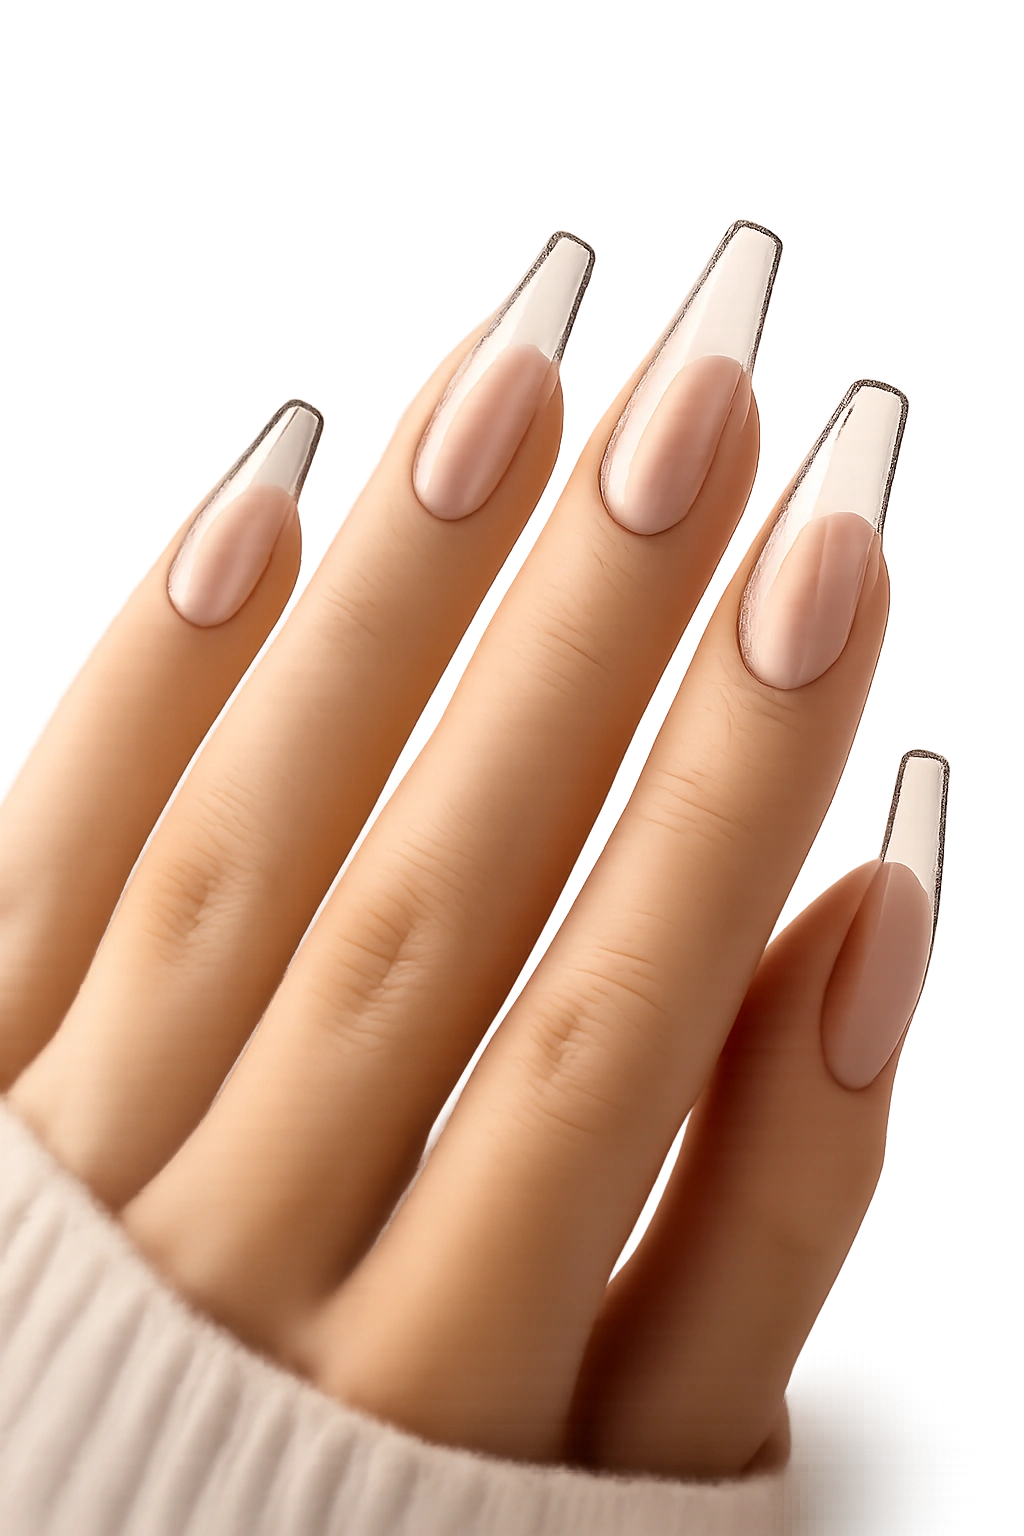
This is one of the smartest ways to add structure without adding bulk. A side-frame design uses a thin line along one edge of the nail, sometimes wrapping the tip, while leaving the center transparent. It sharpens the coffin shape because the outline echoes the sidewall.
Black can look graphic. White feels cleaner. Metallic silver gives it a little edge without turning harsh. I’d keep the line hair-thin and use it on a few nails rather than every single one if you want the manicure to stay airy.
The reason this works is simple: it directs the eye. Instead of covering the whole nail, it traces the architecture that was already there. You get more definition, but you still see the clarity of the extension.
Precision matters here more than with swirls or glitter. A line that wobbles by even a millimeter looks wrong, especially near the tip where coffin nails are meant to look crisp. Hand-painted detail beats chunky striping tape almost every time because tape can lift at the corners.
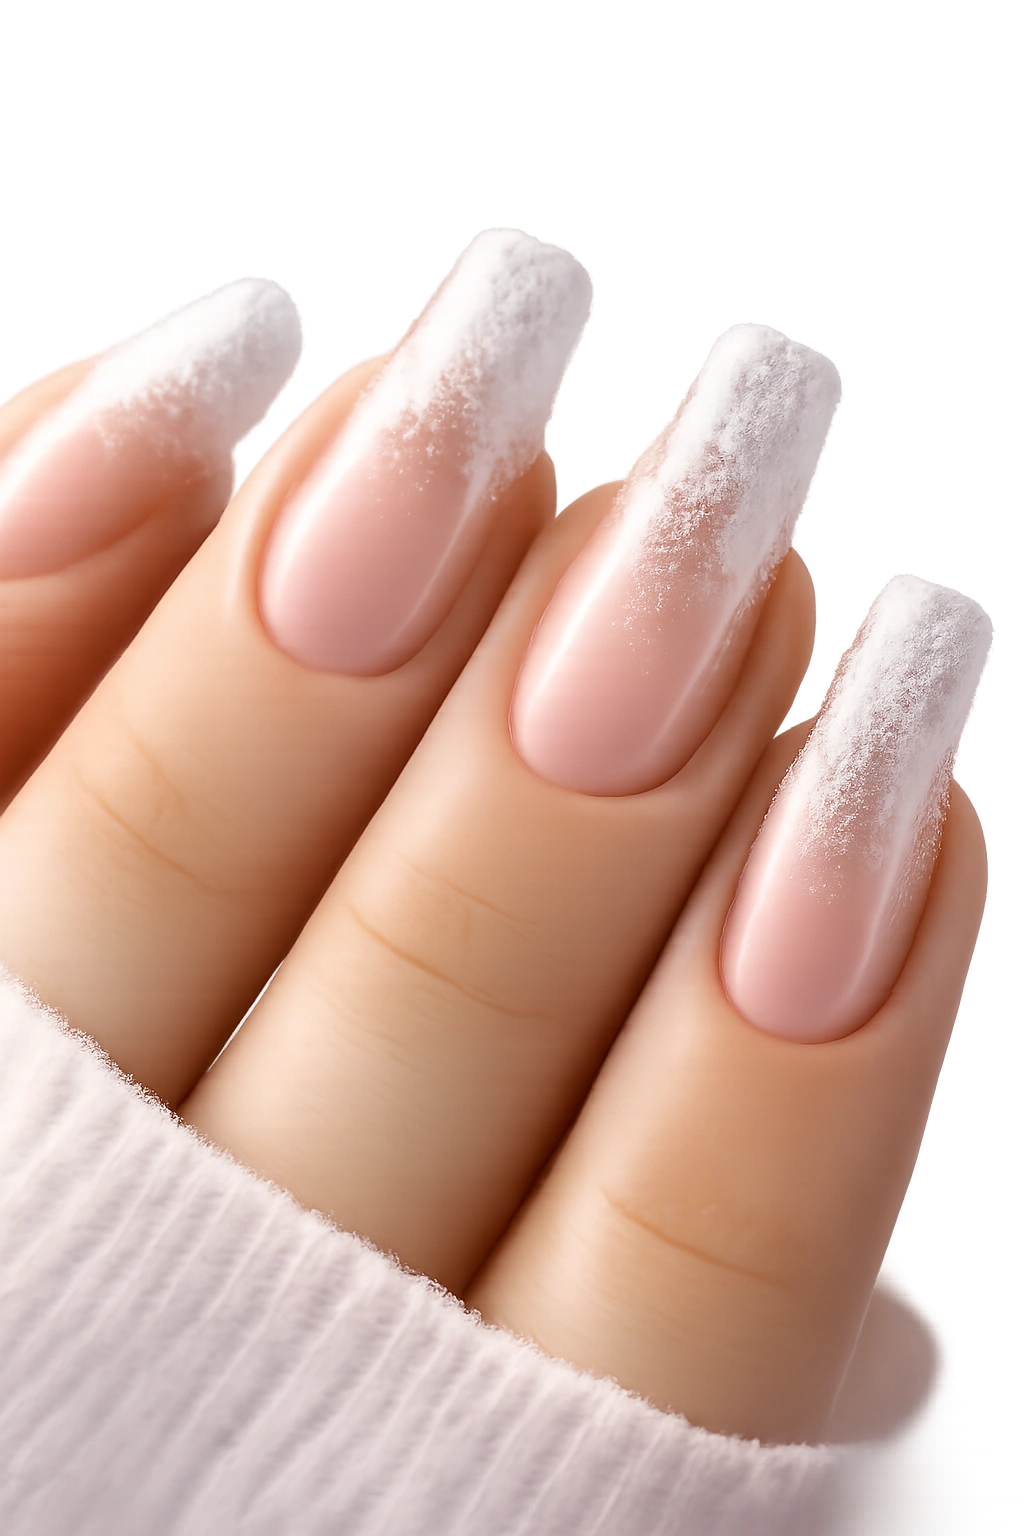
14. Frosted Matte Clear Coffin Nails
Gloss is the usual choice, which is why matte clear nails feel fresh when they’re done right. The finish looks like frosted glass or sea glass—softly blurred, smooth to the eye, and less reflective than a standard top coat. On a coffin shape, that velvety haze gives the nails a slightly architectural feel.
When matte works best
This finish shines on medium or long length where the shape has room to show. Short matte clear nails can sometimes look unfinished, especially if the natural nail line is strong underneath.
What to watch for
- The surface has to be filed smoothly before top coat; matte reveals scratches in a different way than gloss
- Hand cream and cuticle oil can leave temporary marks, so wipe the nails with alcohol if they start looking patchy
- Frosted clear reads better with minimal art than with glitter or foil piled on top
I would not pair this with heavy rhinestones. The texture contrast fights itself. Keep it plain, or add one tiny linear detail if you need something extra.
15. Sheer Underside Tint for a Hidden Accent
This is the quietest “fun” option on the list, and I have a soft spot for it. From the top, the nails look mostly clear. Flip your hand, though, and there’s a whisper of color painted on the underside of the free edge—sheer blue, pale lilac, smoke gray, even soft tea rose.
Because the tint sits underneath, the top surface stays clean. That matters.
Longer coffin nails show this off best because there’s enough underside to notice when you gesture, hold a mug, or reach for your keys. It’s a private little detail more than a statement manicure, which is probably why it feels so chic when it’s done well.
Keep the color sheer and stop it before the natural nail bed. A dense underside shade can cast too much tone through the extension and muddy the transparency from above. Soft washes work better than solid paint.
This one also lets you match a bag lining, shoe detail, or lipstick undertone without shouting about it. Not every nail design needs to announce itself from across the room.
The Salon Details That Make or Break the Finished Set
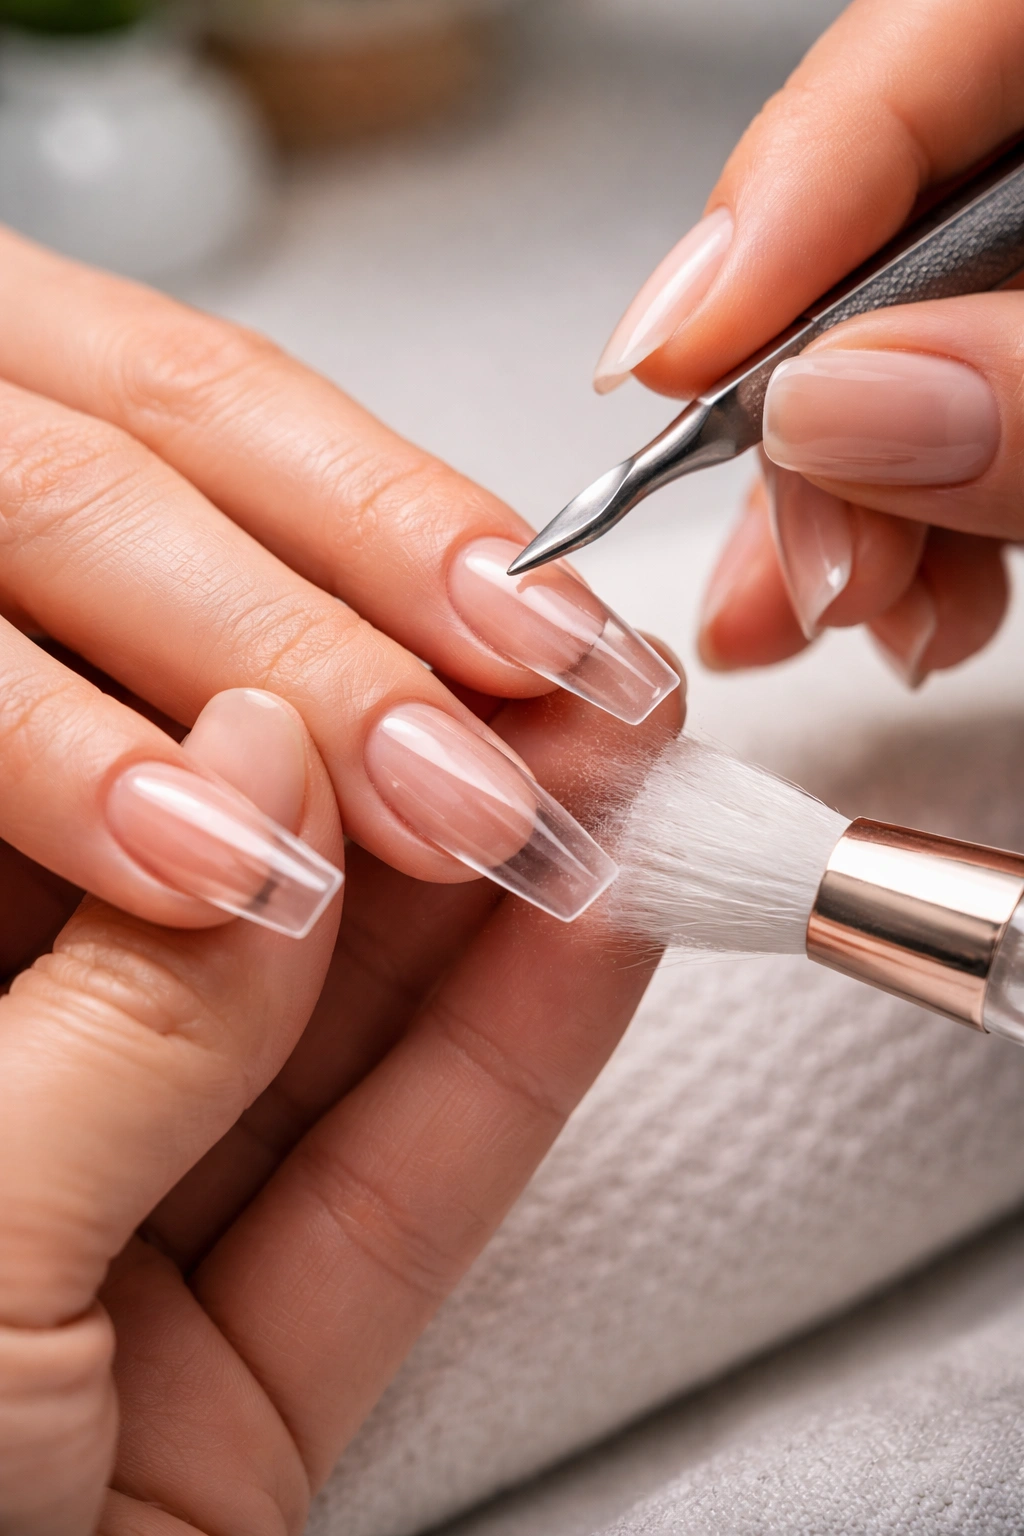
You can choose the right design and still end up with a weak result if the prep is sloppy. Transparent nails expose technical mistakes faster than opaque polish does, so the appointment itself matters a lot.
A few things are worth asking for—or watching for—during the service:
- Clean prep around the cuticle without aggressive cutting that leaves the skin red and ragged
- Dust removal before top coat, especially near the sidewalls and under the free edge
- A smooth underside if you’re getting longer tips; lumpy undersides make clear nails look cheap fast
- No visible glue pockets or trapped bubbles inside full-cover tips
- A final shape check with both hands flat on the table, since coffin tips can lean left or right if nobody pauses to compare them
One point people skip: make sure the nail tech checks the manicure from the side. Clear coffin nails need a balanced apex, and you can only judge that from profile. From straight above, a bulky nail can still look fine until light hits it.
Skip rushed appointments if you can. This is one of those styles where an extra ten minutes of filing and finishing shows.
Final Thoughts
If you want a manicure that looks neat, cool, and a little expensive without relying on bold color, clear coffin nails are hard to beat. The shape gives you structure. The transparency keeps things light. Then it comes down to detail—thin lines, tiny accents, smooth product, clean cuticles.
The best sets on this list aren’t the busiest ones. They’re the ones that leave space. A bare glossy clear nail, a micro French, a soft jelly tint, a frosted matte finish—those choices tend to hold up because they let the shape do its job.
Pick one detail, not five. Keep the sidewalls crisp. And if a set looks cloudy in the salon chair, it will not look better three days later.
