

Emerald green coffin nails have a way of making even a plain white T-shirt and jeans look pulled together. The color sits in that sweet spot between dark and vivid: richer than forest green, deeper than mint, and more interesting than black when you catch it under a lamp or in late-afternoon sun. On a coffin shape, that jewel tone gets even sharper because the straight sidewalls and tapered tip give the color room to look smooth, crisp, and expensive.
I keep coming back to emerald for one simple reason: it changes personality depending on the finish. Glossy emerald looks sleek and polished. Matte emerald feels softer and moodier. Add chrome, cat-eye shimmer, gold foil, or a sheer nude base, and suddenly the same color starts reading bold, glam, clean, or artsy. Few shades give you that much range without drifting into costume territory.
Coffin nails matter here too. A squoval or short round shape can make dark green feel sweet. Coffin makes it feel deliberate. The shape stretches the color, gives nail art more space, and turns even a plain single-color manicure into something with presence. If you’ve ever looked at a dark green manicure in the bottle and thought, nice, but maybe too heavy, the coffin silhouette is often what fixes that.
One more thing before the ideas start: deep green polish shows mistakes fast. Uneven sidewalls, thick top coat, flooded cuticles—dark shades expose all of it. So the best emerald sets are not only about color choice. They’re about finish, shape, and the small design details that keep the manicure looking clean from every angle.
Why Emerald Green Coffin Nails Look So Good on a Tapered Shape
The color does half the work. The shape does the rest.
Emerald has a natural depth that lighter shades don’t. On a coffin nail, that depth stretches from cuticle to tip in a straight visual line, which makes the manicure look longer and more tailored. You get that little bit of drama without needing extra length that makes daily life annoying—opening cans, typing, pulling out a credit card, all the glamorous stuff.
There’s also a contrast thing happening. Coffin nails are geometric. Emerald is lush, almost velvet-like in the way it reads to the eye. Put those together and you get a manicure that feels balanced: hard edges, rich color, clean outline. That mix is what makes the design land.
Skin tone matters, but not in the fussy way some nail guides make it sound. If your skin has warmer undertones, emerald with a whisper of yellow or olive tends to look softer. Cooler skin often pairs well with bluer emerald shades that lean jade or bottle green. And if you wear a lot of gold jewelry, a greener, warmer emerald usually ties everything together faster than a blue-green one.
Length changes the mood too. Medium coffin nails—usually about 1/4 to 1/2 inch past the fingertip—keep emerald wearable for work and errands. Long coffin nails give you more room for fades, marble lines, crystals, or negative space. Short coffin can still work, though I’d skip packed designs on a short nail because the green can start to look crowded.
Nail Prep That Keeps Deep Green Polish From Chipping Fast
Dark polish is unforgiving. A tiny chip at the tip shows up on emerald green the same way a coffee stain shows up on a white shirt.
Start with the nail itself. If your natural nails flex a lot, ask for a builder gel overlay under gel color or use an acrylic base if you like extra structure. Deep shades crack and chip faster on soft nails because the pigment layer bends every time the nail bends. That’s one of those boring details salon photos never mention, even though it makes a huge difference.
Then there’s cuticle care. The American Academy of Dermatology advises against cutting the cuticle away completely, and I think that’s one of the few nail-care warnings worth repeating. Pushed back and tidy is enough. When the cuticle is hacked at, polish often floods into irritated skin, and dark colors make that mess impossible to ignore.
A few salon notes help, especially if you’re trying to match a reference photo:
- Ask for thin color coats, not one thick one. Thick emerald polish wrinkles more easily under top coat.
- Request a capped free edge so the color wraps over the tip by about 1 millimeter.
- If you want chrome or cat-eye, ask what base color they use underneath. Black under emerald gives more depth than a pale green base.
- Choose a shape with straight sidewalls before tapering. Too much inward filing makes dark polish look pinched.
Cuticle oil helps more than people think. One drop per hand, twice a day, keeps the skin around the manicure from turning ashy and makes the whole set look fresher longer. Small step. Big payoff.
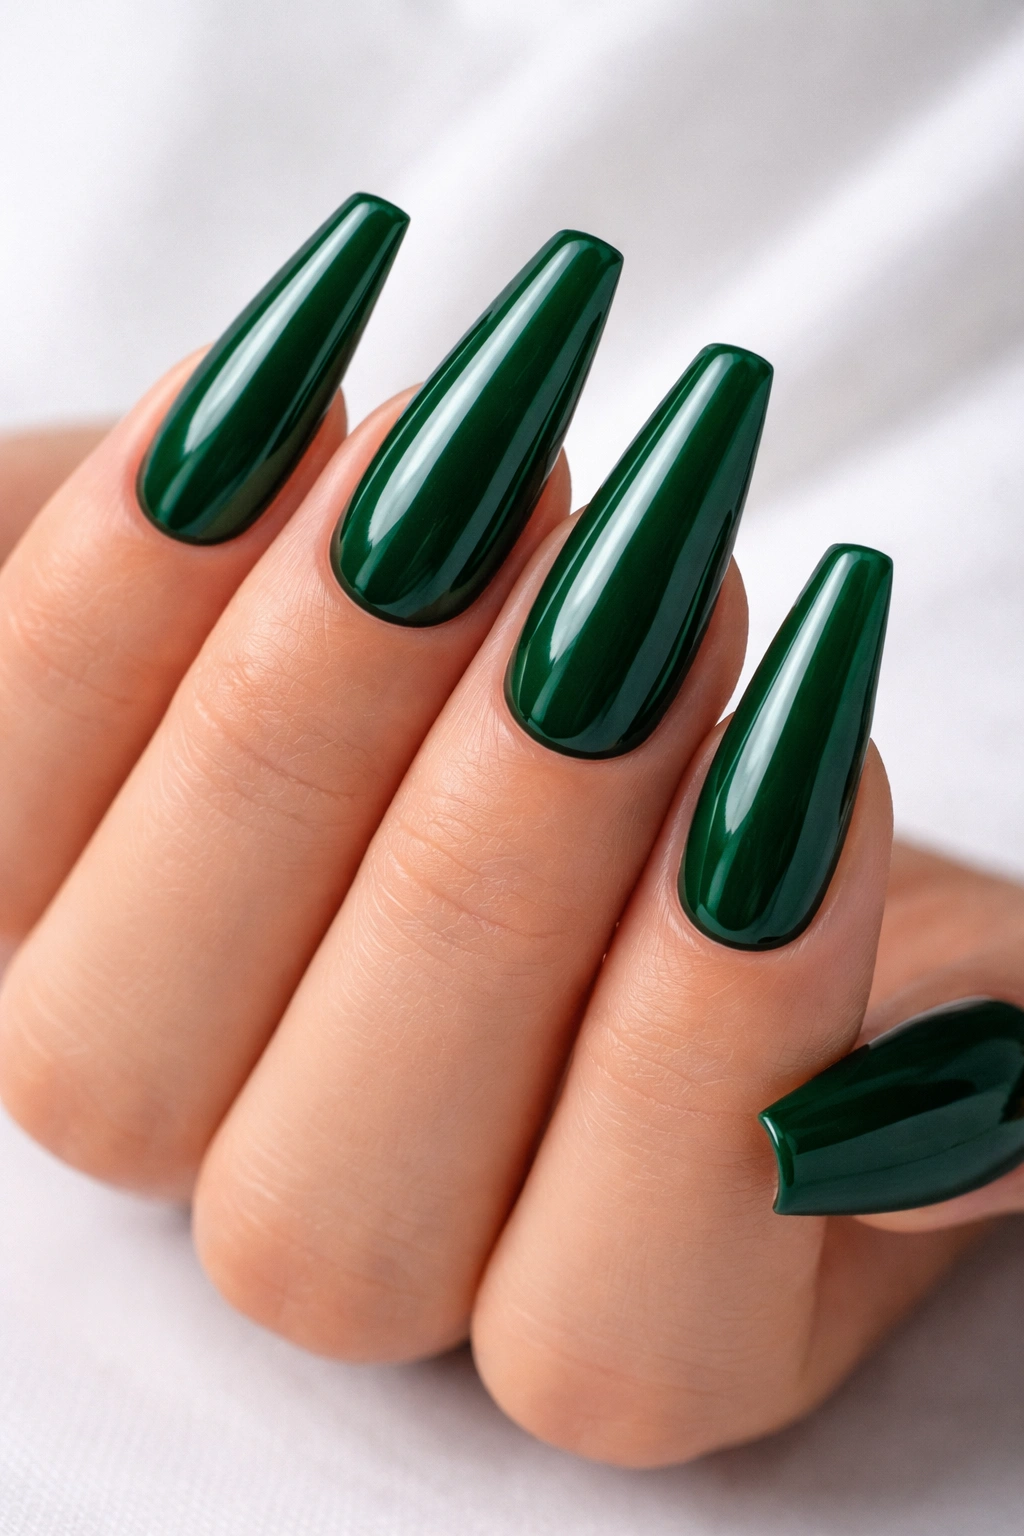
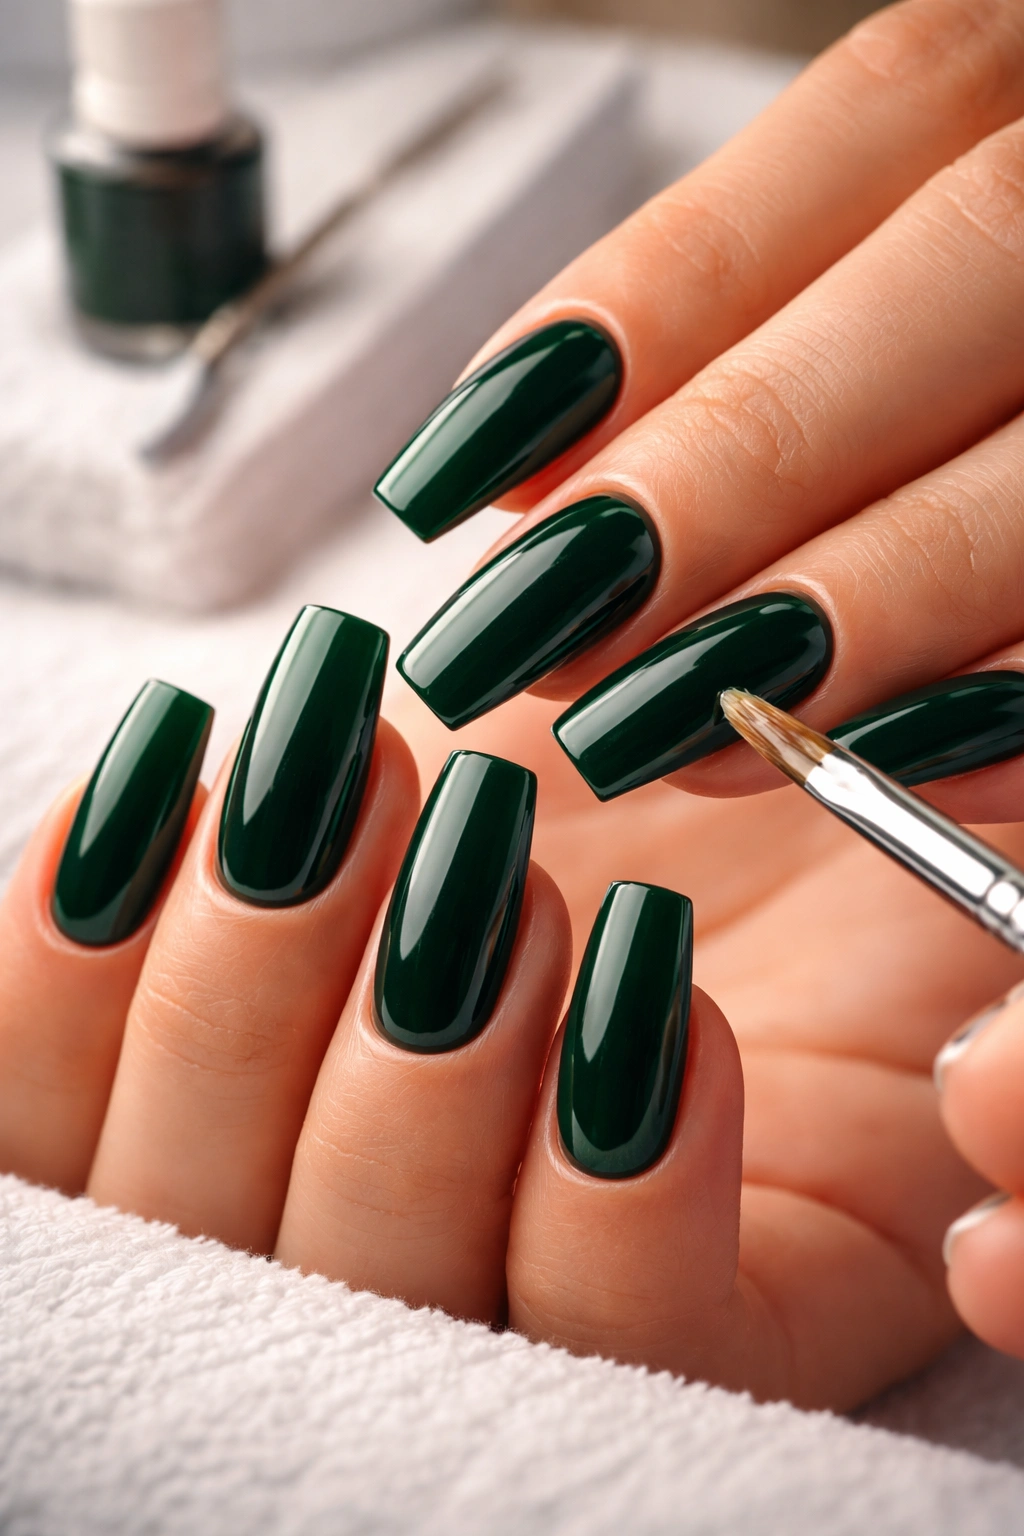
1. Classic Emerald Green Coffin Nails With Glassy Shine
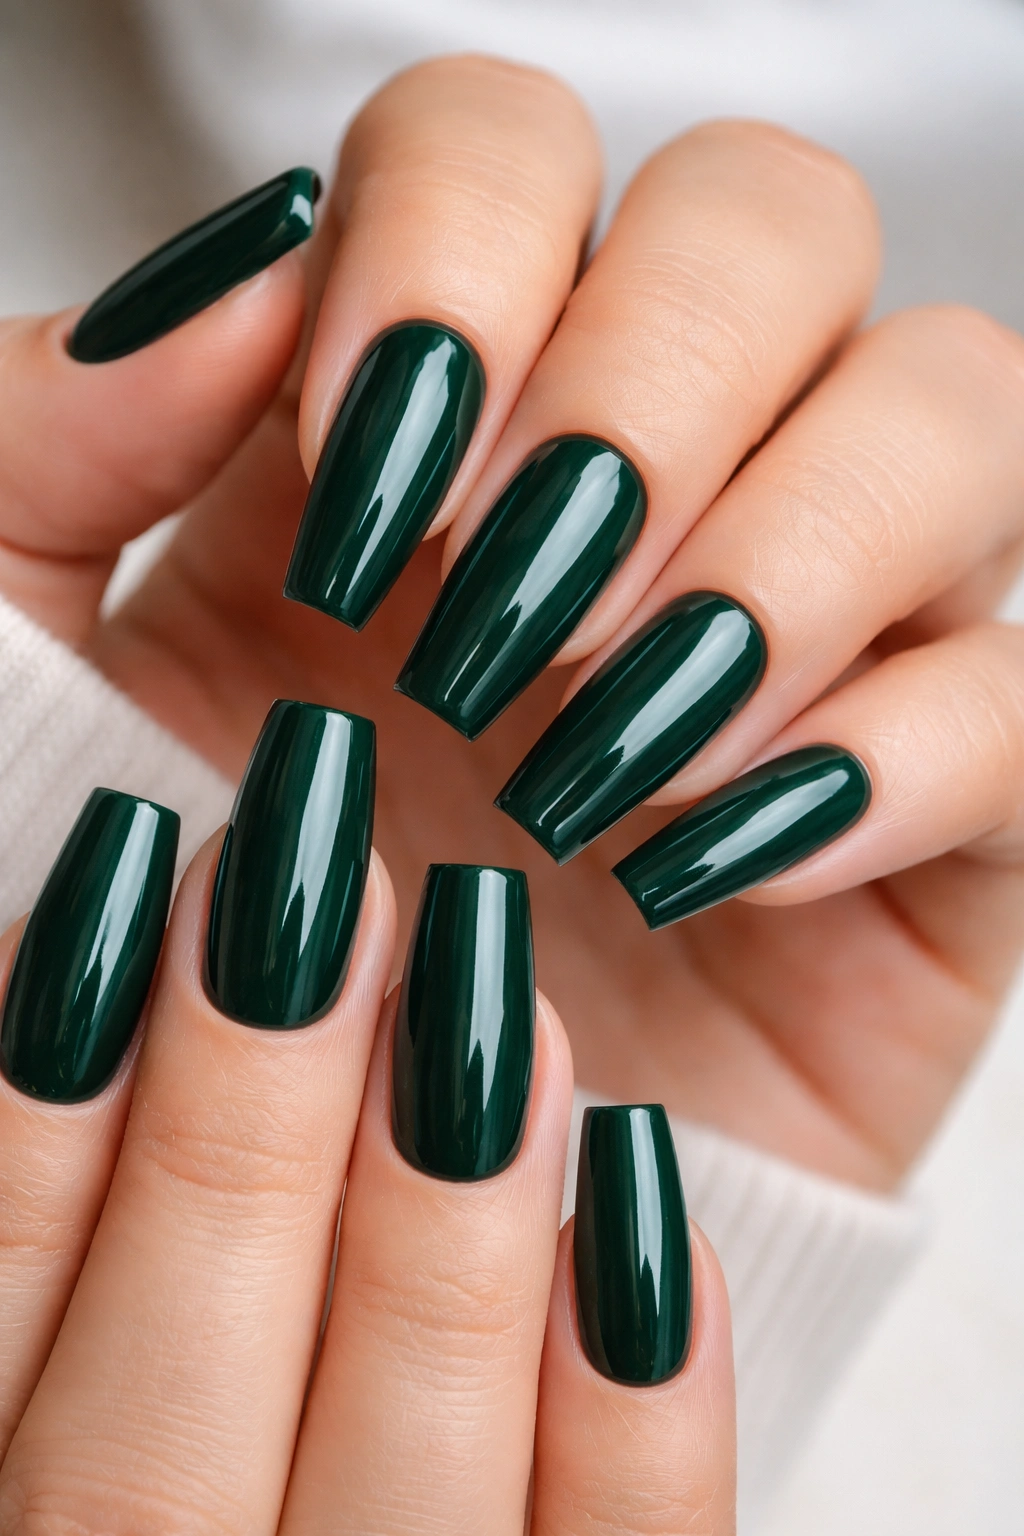
If you only try one emerald manicure, make it this one. A full set of glossy, single-tone emerald green coffin nails has zero filler. No glitter. No decals. No crystal clusters trying to save a weak color choice. When the shape is clean and the polish is rich, that’s enough.
The trick is picking the right green. You want a shade that looks jewel-toned indoors and deeper at the edges, not a flat grassy green that can read chalky under cool lighting. Gel polish usually wins here because it gives that glass-like surface that dark shades need.
What makes this set work
A plain emerald manicure lives or dies on prep and symmetry. The sidewalls need to match, the apex needs to be smooth, and the top coat should sit flat—not domed like a candy shell. On medium or long coffin nails, the result feels sleek instead of plain.
Quick details to ask for
- A medium-deep emerald gel with no visible shimmer
- Medium coffin length if you want the look to feel polished for daily wear
- A high-gloss top coat applied in two thin layers rather than one thick layer
- Clean cuticle work with no polish touching skin
Best move: pair this set with gold rings if you want the green to read warmer, or silver if you want it to look sharper and a bit colder.
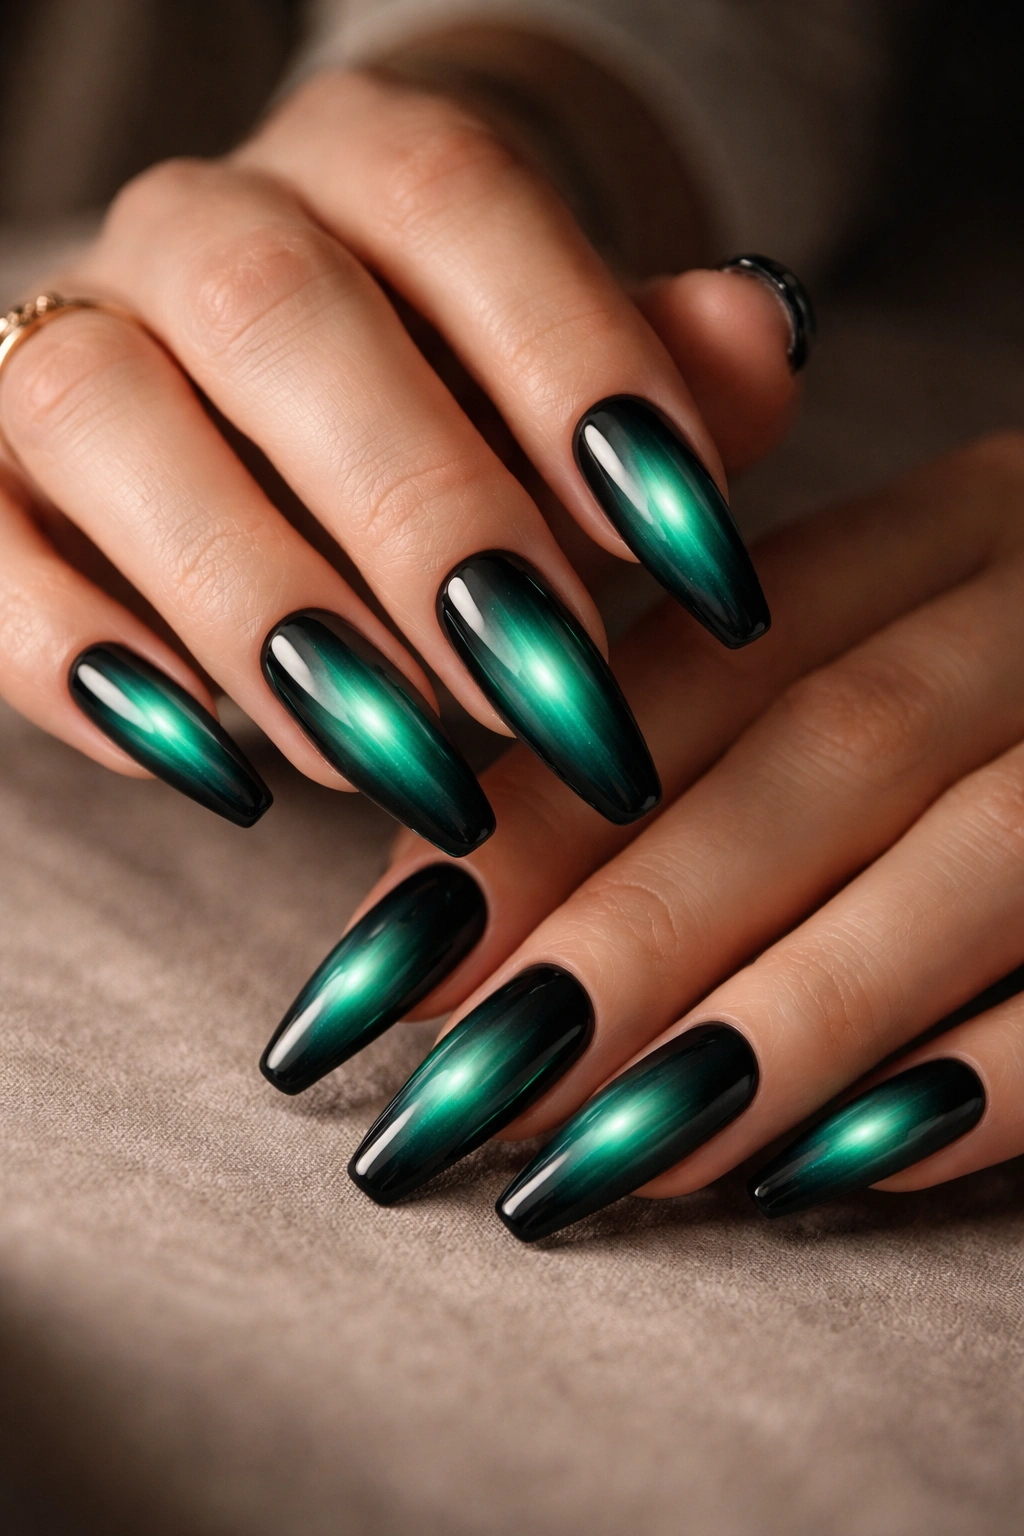
2. Velvet Cat-Eye Emerald Nails With a Moving Light Stripe
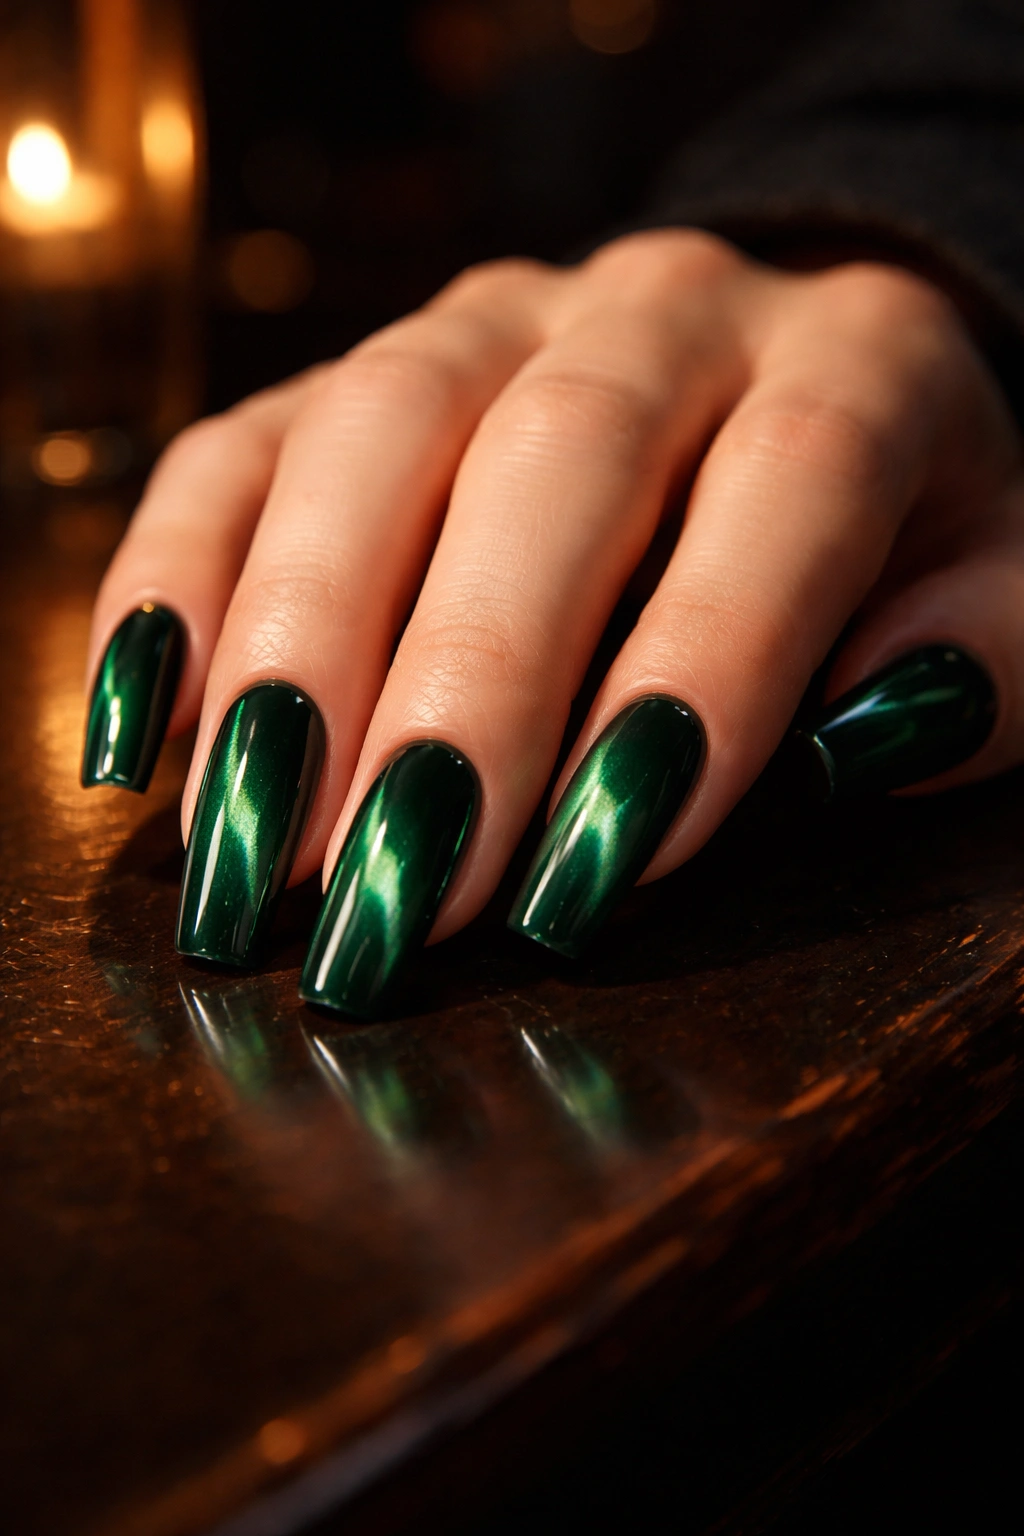
Want emerald nails that shift every time you turn your hand? Cat-eye polish is the answer. The magnetic shimmer creates a narrow beam across the center or side of the nail, which makes the green look deeper and more alive than standard metallic polish.
What I like about this version is that it gives you motion without needing extra art. A plain cat-eye emerald on coffin nails already has enough visual pull. Under dim restaurant lighting it looks moody and almost smoky; near a window, the shimmer line pops and the green gets brighter. That contrast is the whole point.
Placement matters more than people think. A centered stripe feels classic. A diagonal stripe feels sleeker. A side-pulled magnetic effect can even make the nail look narrower, which is handy if you like a long coffin shape but do not want it to look wide or heavy.
Salon note: ask your tech to use a black or dark green base under the magnetic gel. That base gives the shimmer more depth. Skip a pale base unless you want the finish to look softer and less dramatic.
I’d keep the rest of the set simple here. No chunky stones. No foil. Cat-eye already gives you movement, and piling on extra details usually muddies the look.
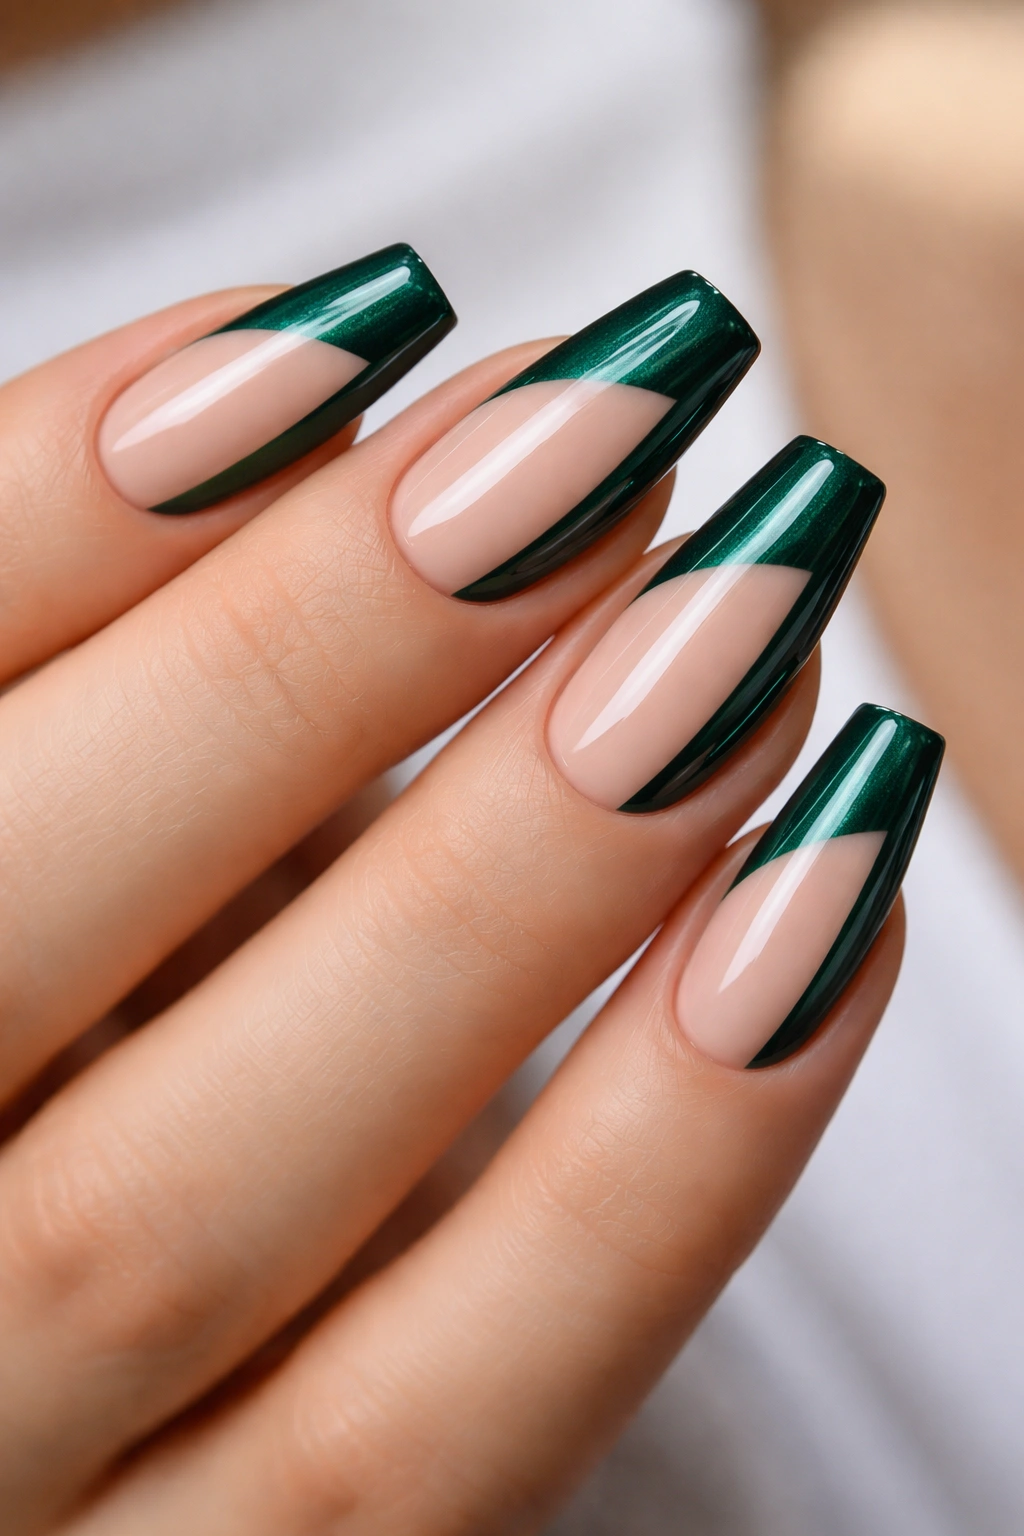
3. Emerald V-French Tips on a Milky Nude Base
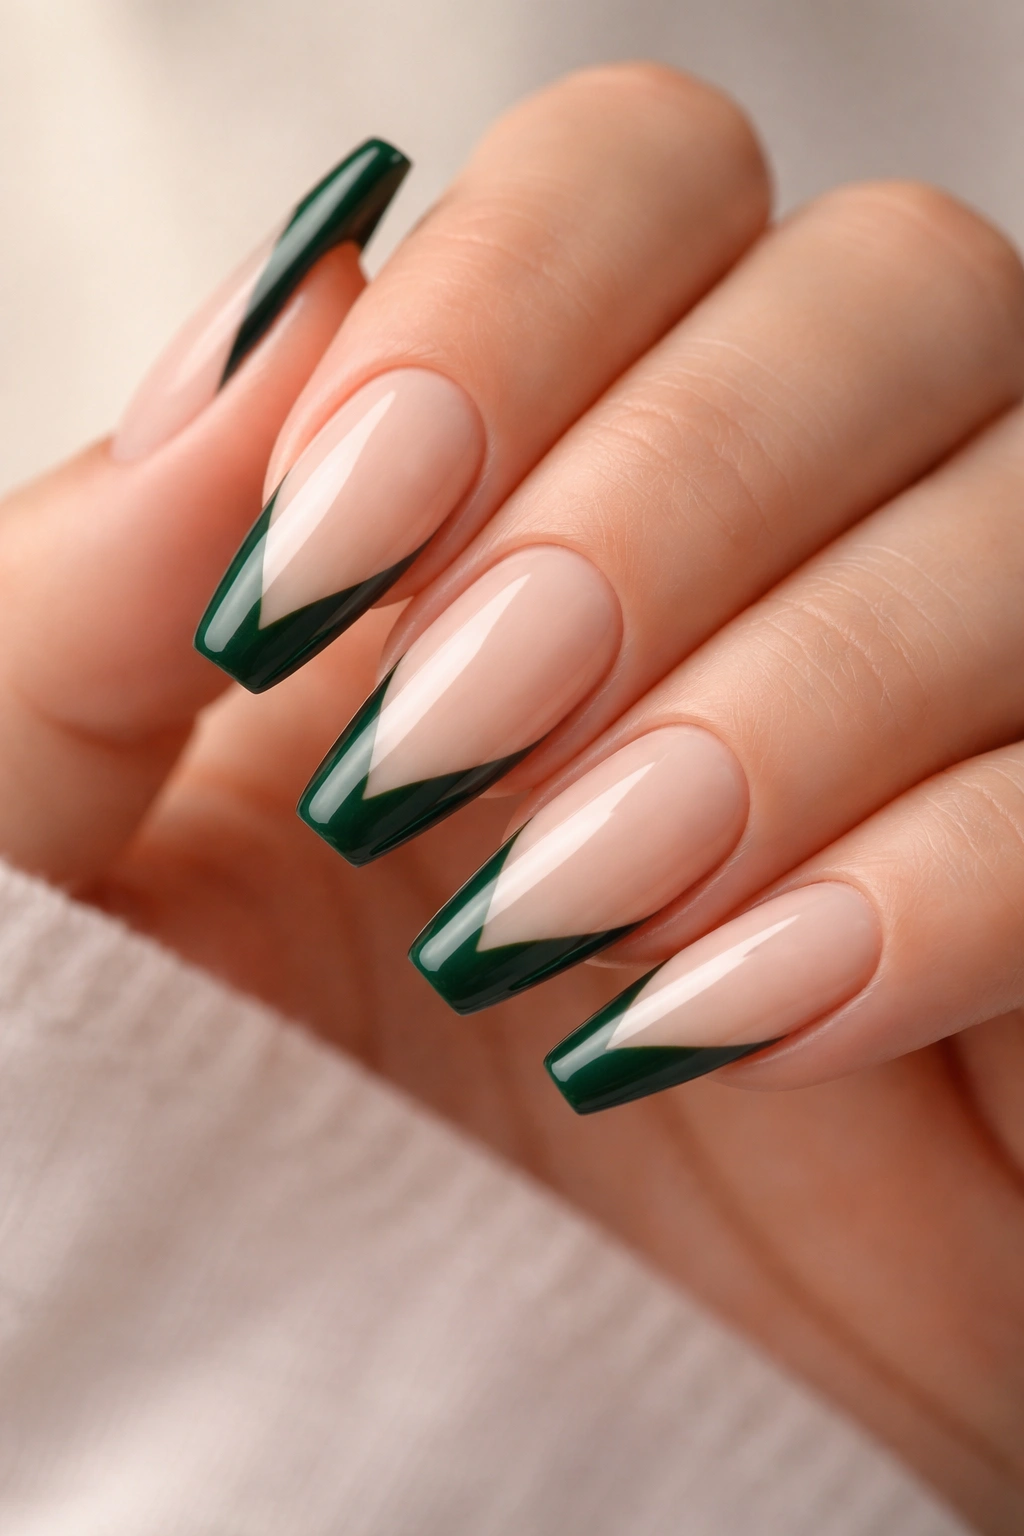
A full green nail can feel like a commitment. A sharp V-French gives you the same color hit with more air around it.
Why does this one work so well on coffin nails? Because the shape and the V tip are speaking the same language. Both are angular. Both pull the eye forward. When the nude base is sheer and slightly milky, the emerald line looks even cleaner.
You can wear this set at medium length and still get the full effect. In fact, I think V-French tips often look better than solid color on medium coffin nails because the design keeps the manicure from feeling visually heavy. That matters if you type all day, wear softer clothes, or like a manicure that feels crisp instead of loud.
How to get the line right
Ask for a nude base that matches your nail bed within one shade lighter or darker, not a chalky beige. Then have the emerald tip painted into a deep V that lands around the center of the free edge. Too shallow, and it looks like a regular French that lost confidence halfway through. Too deep, and you shorten the nude space too much.
A thin metallic striping line—gold or silver—can sit where the nude and green meet. Nice detail. Small, but it changes the whole manicure.
4. Gold Foil Emerald Marble for a Richer, Dressier Set
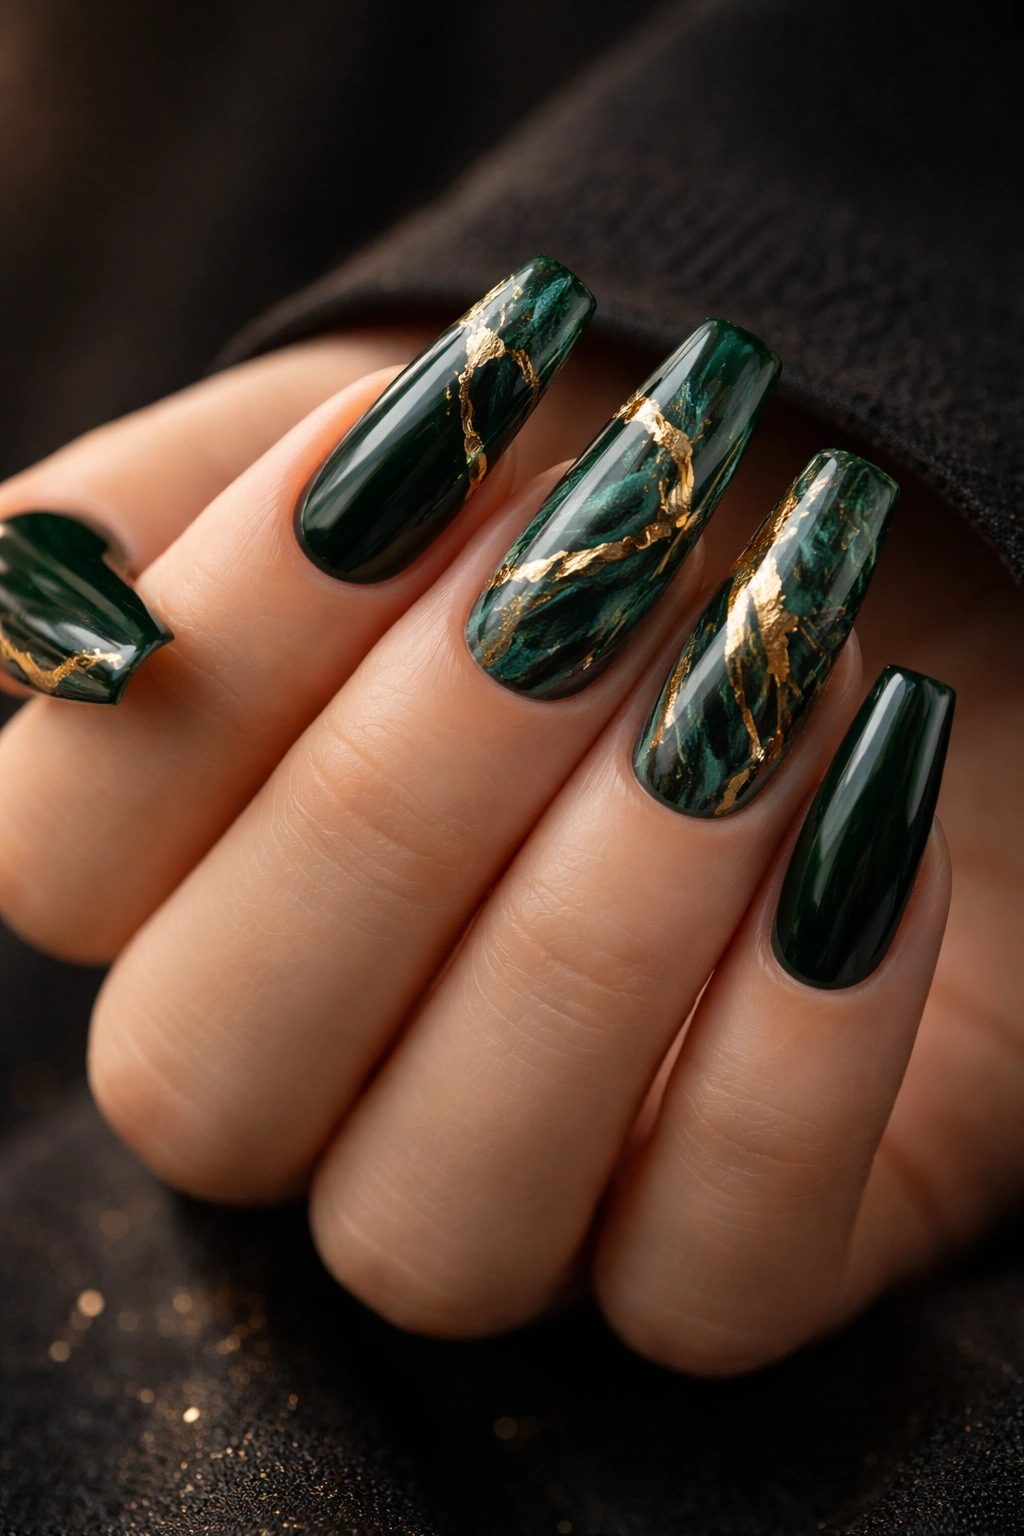
Picture a dark emerald base with soft veins of lighter green and irregular flakes of gold pressed into the surface. That’s this set. It looks a little like polished stone, a little like old jewelry, and it has more texture than a plain solid manicure without tipping into clutter.
Marble designs live and die on restraint. You want two or three tones of green, not six. You want gold foil in broken pieces, not a full metallic patch. And the lines should wander, not repeat from nail to nail like wallpaper.
A salon version usually starts with a deep green base, then uses a fine brush and acetone or blooming gel to feather in lighter streaks. The gold gets pressed into tacky gel and sealed under top coat. When the artist keeps a light hand, the nail still reads emerald first and art second.
A few details worth asking for:
- Put the marble on 2 to 4 nails, not all 10, if you want the set to stay clean
- Use champagne gold foil for a softer finish or yellow gold foil for more contrast
- Keep the veins thin and uneven, almost like cracks in polished stone
- Choose a gloss top coat so the foil sits under a smooth surface
This set leans dressier than the others. Weddings, holiday dinners, date nights, black outfits, satin shirts—it fits that lane with no struggle at all.
5. Matte Emerald Nails With Glossy French Tips
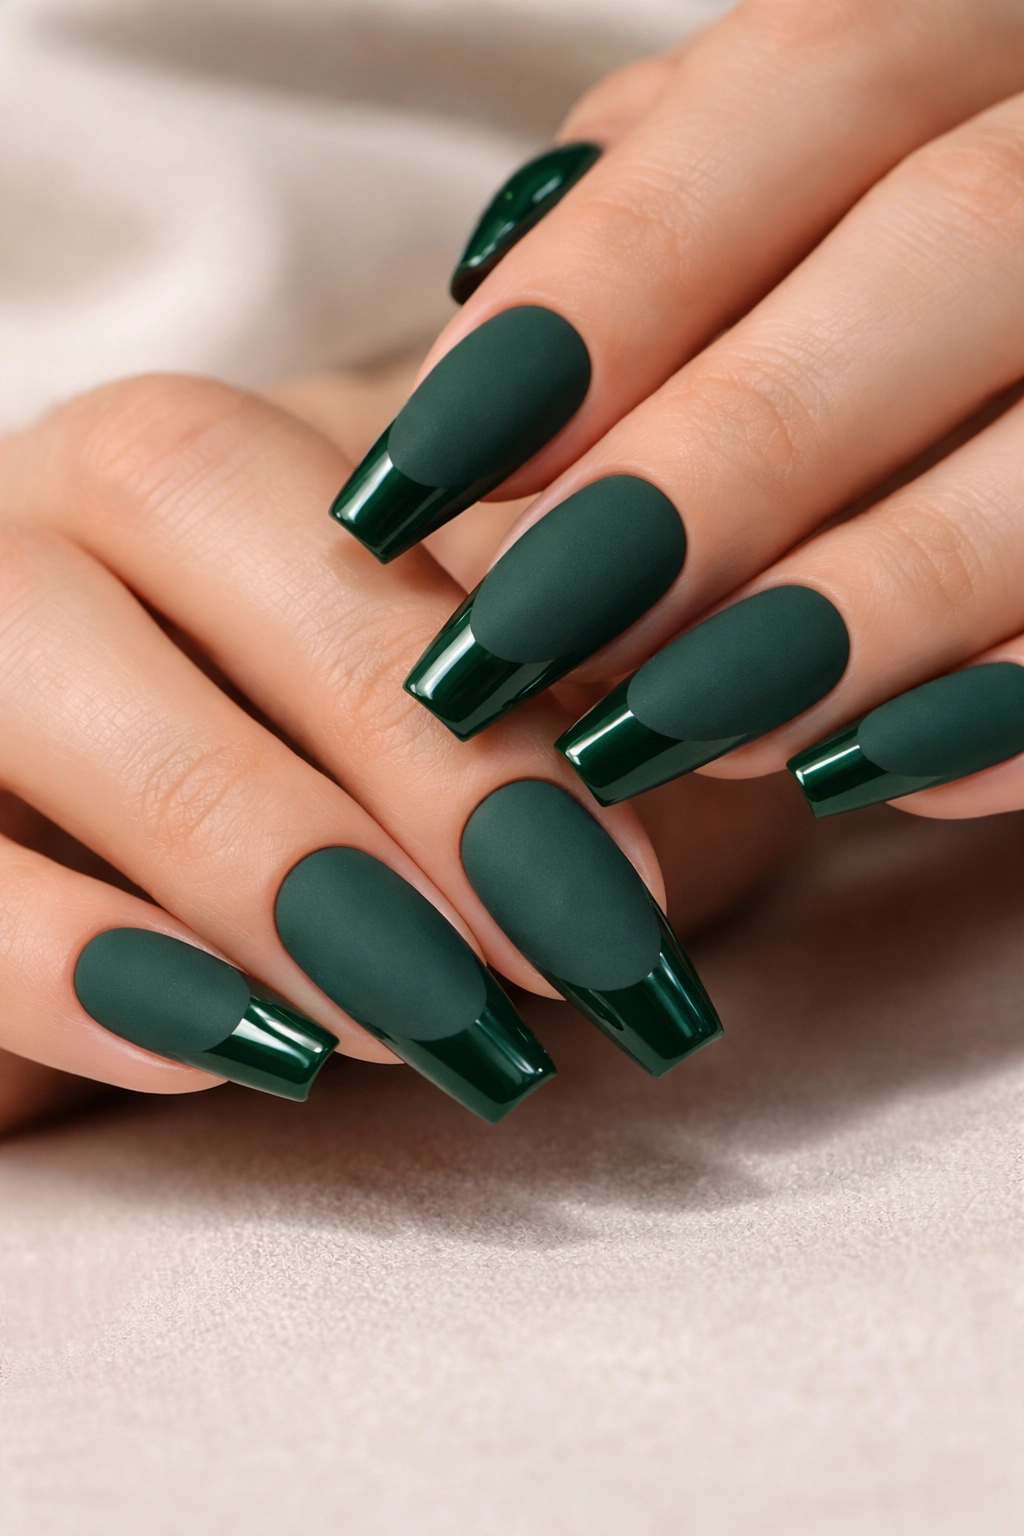
Matte and gloss on the same color sounds like a small twist. It doesn’t wear small.
A full emerald matte base already changes the mood of the shade. The color looks softer, more velvety, and a little darker because there’s no light bounce from the surface. Add a glossy French tip in the same emerald, though, and the contrast starts doing quiet work. You notice the shape first. Then the finish difference hits a second later.
This is one of my favorite designs for people who like dark nails but hate glitter. It gives detail without sparkle. It also wears well on medium coffin nails because the glossy tip sharpens the edge and keeps the matte surface from looking flat. On long nails, the effect is even stronger, especially if the French line is kept thin—around 2 to 3 millimeters.
The caution here is top coat choice. Some matte top coats go cloudy over dark polish, which kills the richness of emerald. A good matte finish should look soft and even, not dusty. And the glossy tip needs a crisp smile line or V line; any wobble shows up fast against a matte base.
No stones needed. No decals either. This set is about texture and line, and that’s enough.
6. Chrome Emerald Green Coffin Nails With a Mirror Finish
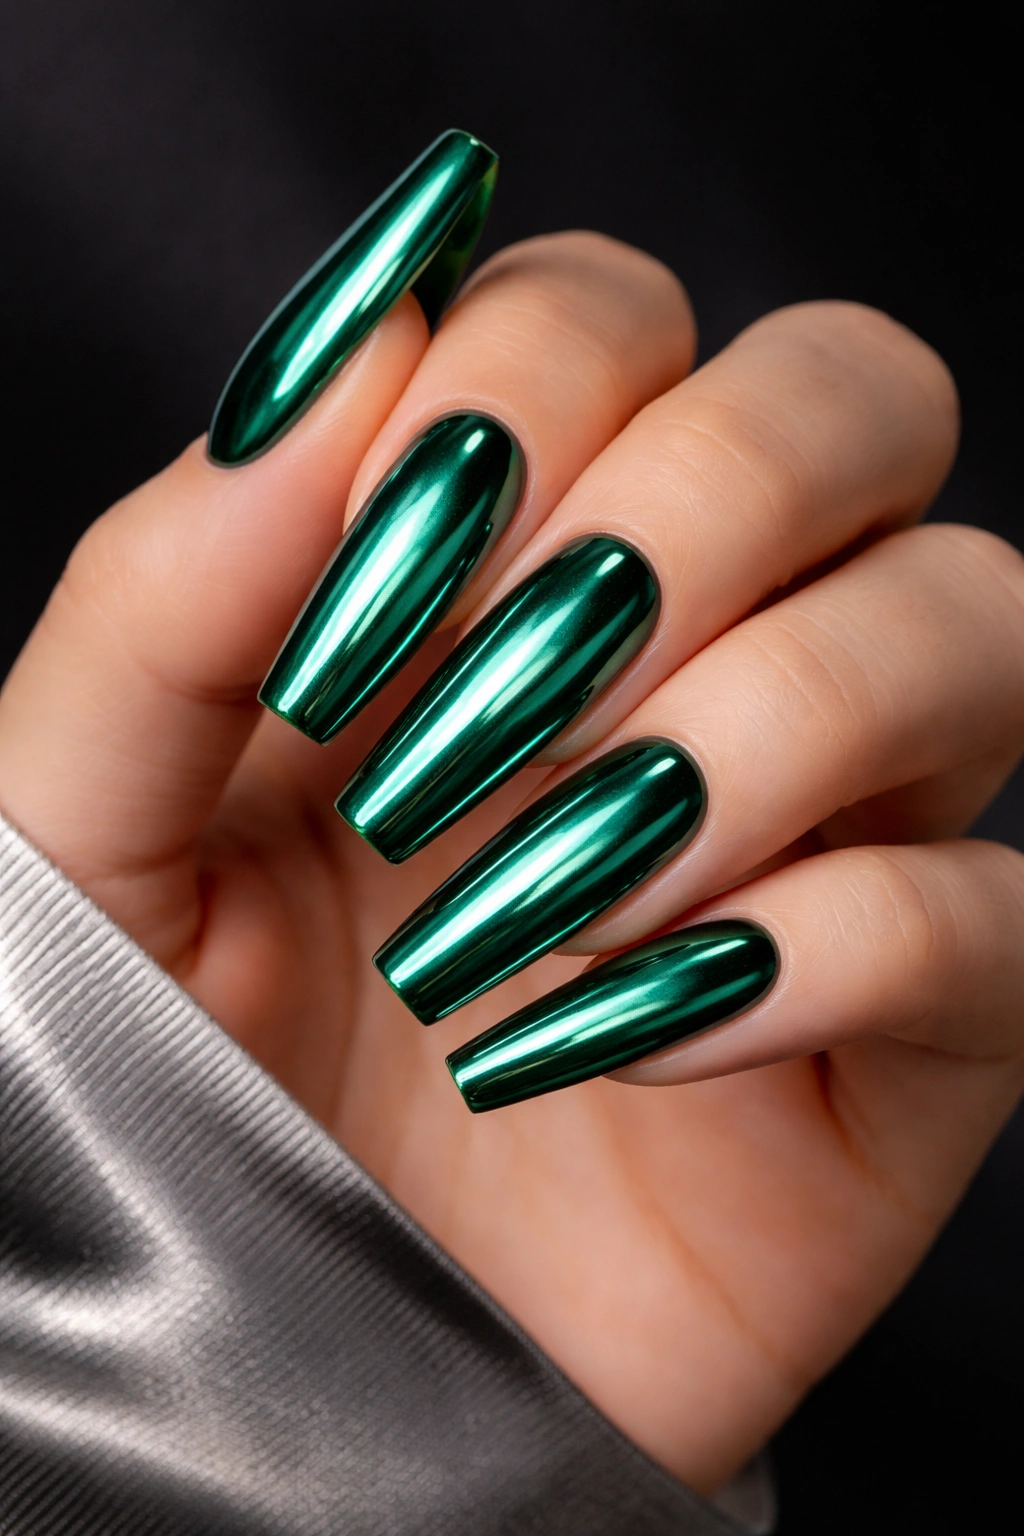
Unlike plain metallic polish, chrome gives emerald a liquid-metal look. It reflects harder, looks smoother, and catches every angle of the coffin shape. If your goal is a manicure that feels sharp and fashion-forward, this one earns its spot.
Chrome powder over dark green gel usually gives the best result. If the powder goes over black, the finish can turn gunmetal green, which is moodier. Over a true emerald base, you keep more of the jewel tone. Ask what your nail tech plans to use, because the base changes everything.
Who is this best for? People who like a long coffin set, wear simple clothes, and want the manicure to do the talking. Chrome can look too busy if you pair it with heavy rings, stacked bracelets, giant logos, and loud prints all at once. On clean styling, though, it sings.
I also think chrome works best when the nail surface is flawless. Any bump, dip, or dent shows through the mirrored finish. That means proper filing, a smooth builder layer, and careful buffing before the powder goes on. No shortcuts.
If you want one extra detail, keep it minimal: maybe one accent nail with a tiny crystal near the cuticle, or one nail with a green-to-black chrome fade. More than that and the design starts competing with itself.
7. Emerald-to-Black Ombré With a Smoky Fade
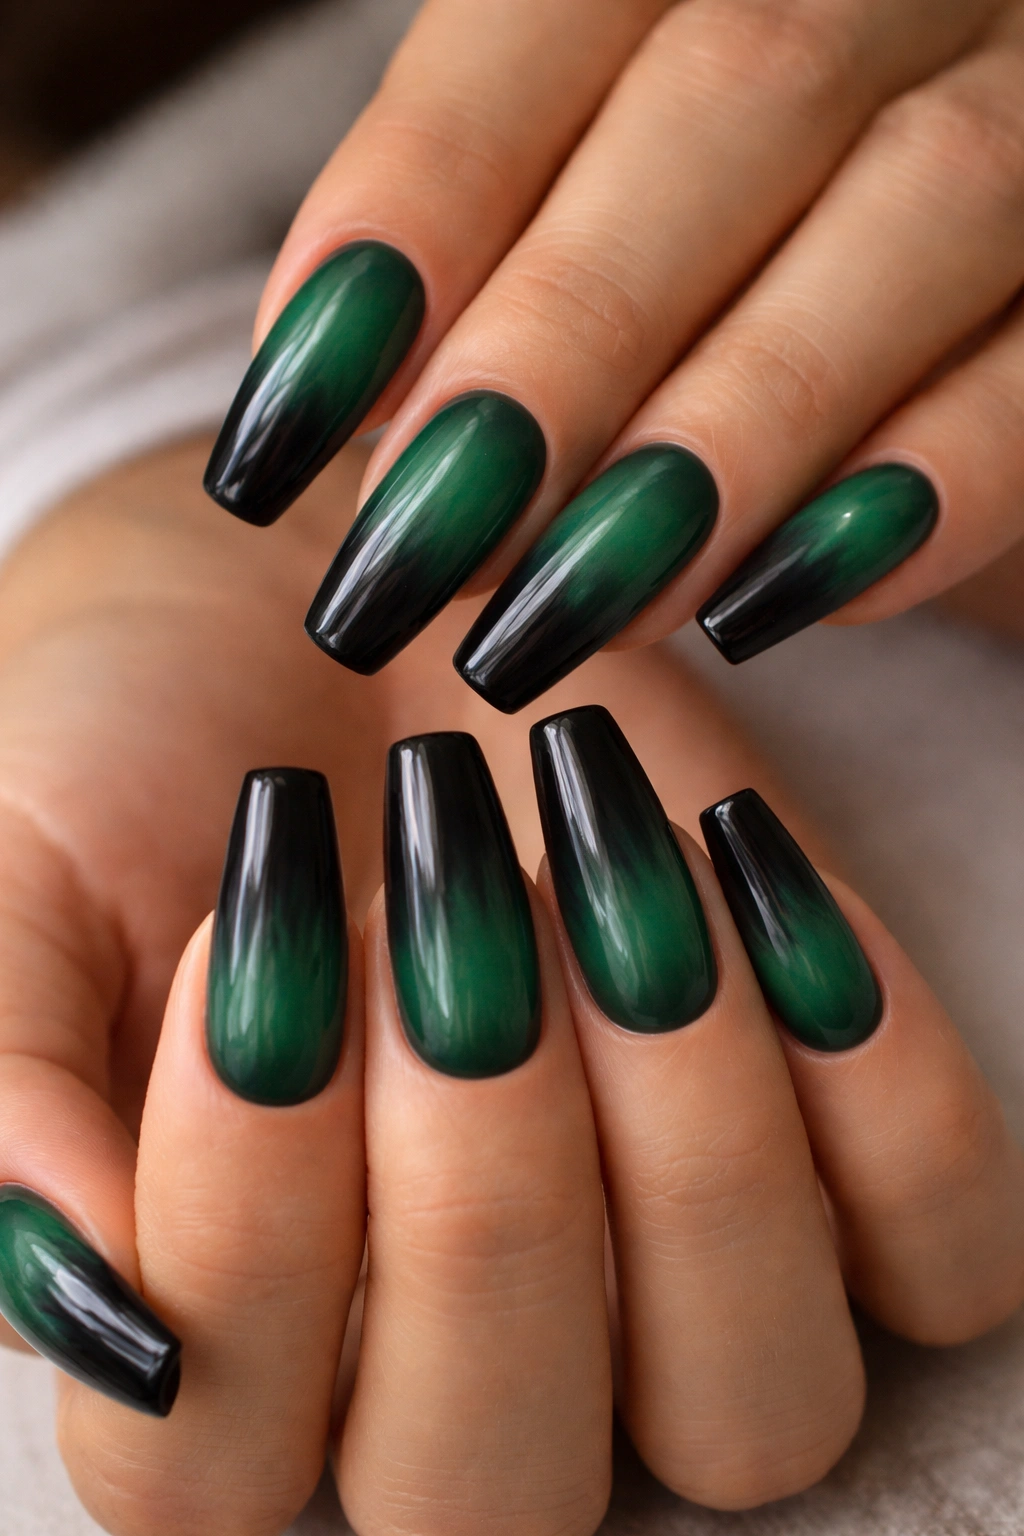
Some gradients look sweet. This one does not. Emerald fading into black feels moodier, leaner, and a bit sharper than a standard green ombré.
The blend usually looks best when the emerald starts near the cuticle and melts into black at the tip. That layout keeps growth less obvious and makes the nails look longer. Flip it the other way—black at the cuticle, emerald at the tip—and the set feels heavier. Still nice, just not as flattering on most hands.
Why this fade works on coffin nails
Coffin shape gives the ombré enough straight surface area to blur cleanly. On a narrow almond, the fade can look compressed. On a square, it can seem abrupt. Coffin sits in the middle and gives the color room to move.
Details that matter
- Ask for an airbrushed or sponge-blended fade with no hard line in the center
- Use a high-gloss top coat if you want the black to deepen the green
- Add a fine glitter dusting only if you want the fade to look softer
- Keep the nails at least medium length so the gradient has space
I like this set with black sweaters, leather jackets, or plain denim. It has edge, but it still feels polished enough for everyday wear.
8. Emerald and Tortoiseshell Accent Nails
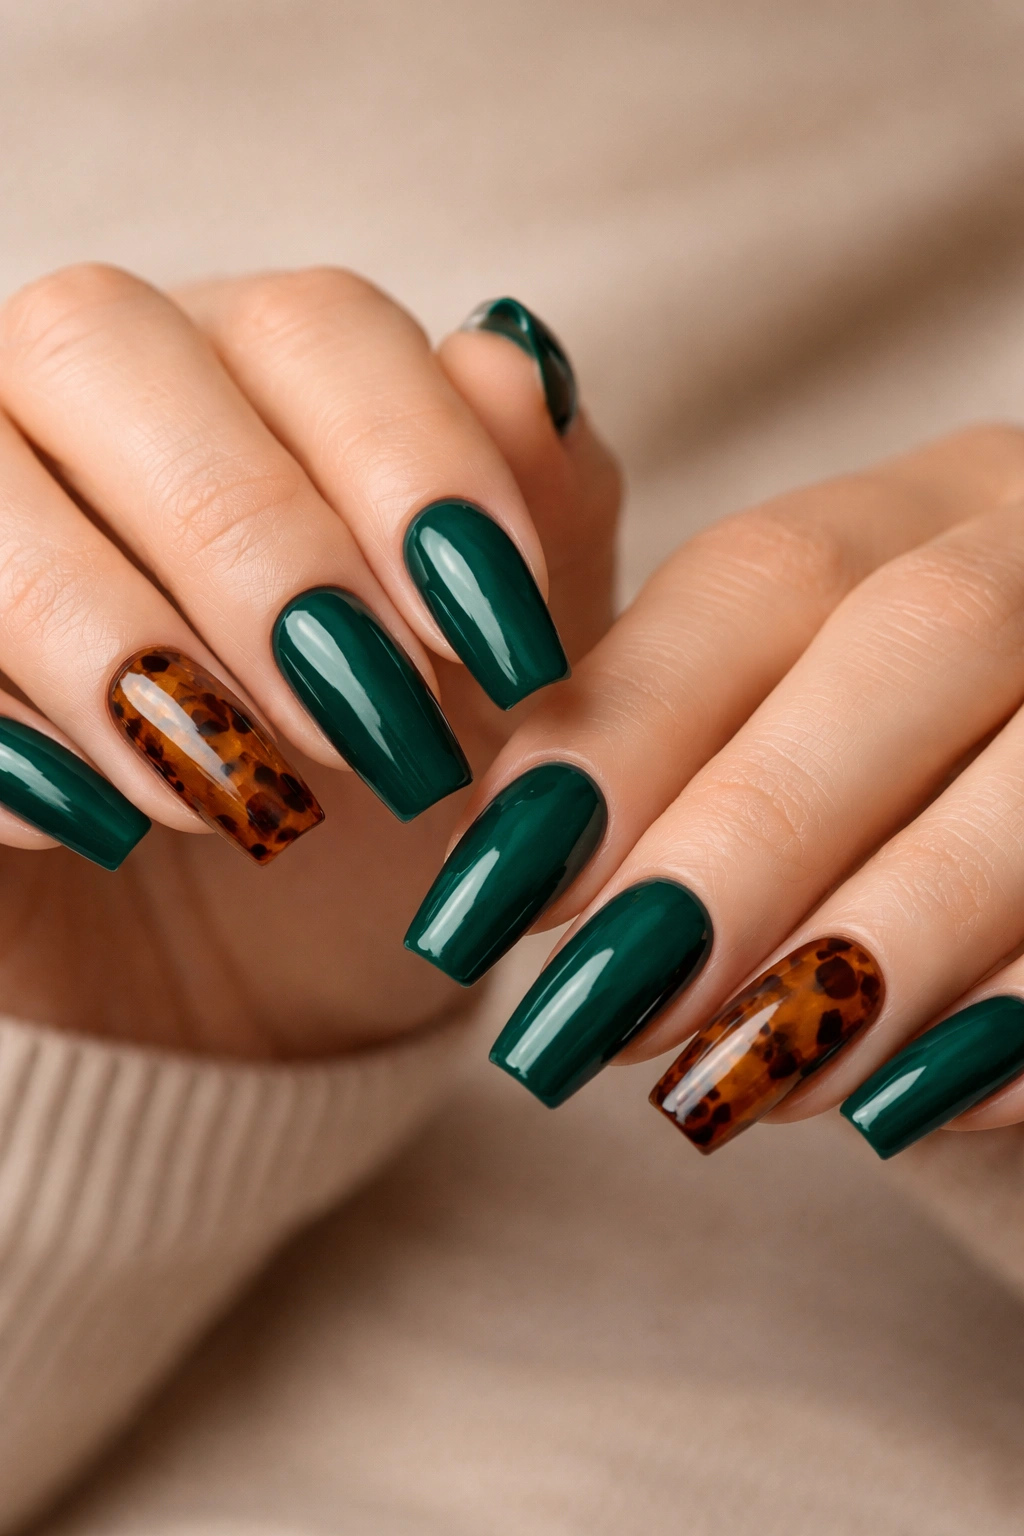
This combination sounds odd until you see it on a hand. Then it clicks. The warm amber-brown tones in tortoiseshell pull out the richness in emerald green, and the contrast keeps the manicure from feeling one-note.
The first time I saw this done well, the artist used emerald on six nails and tortoiseshell on the ring fingers and thumbs. Smart choice. Too much tortoiseshell and the set starts looking busy. A couple of accent nails is the sweet spot because the green still leads.
Tortoiseshell nail art should not look like random brown blobs. The best versions layer honey, caramel, and espresso tones in translucent patches so the color has depth. On a coffin shape, that depth pairs nicely with a glossy emerald because both finishes look sleek, even though the colors are doing different jobs.
Gold jewelry ties this set together fast. So does a warm nude lip, camel coat, or brown leather bag. And yes, I know that sounds like a style detour, but nails do not live on a floating hand in a vacuum. They sit next to your rings, sleeves, phone case, and coffee cup.
Keep the emerald solid and the tortoiseshell glossy. Mixing a matte tortoiseshell accent with glossy green can get muddy.
9. Negative Space Side-Swipe Emerald Nails
If you want green coffin nails that look lighter on the hand, try a side-swipe design with bare or sheer negative space. The emerald runs diagonally along one side of the nail, leaving part of the base exposed. You still get the color, but the manicure breathes more.
Why does this work? Because dark shades can look dense when they cover the whole nail plate. Negative space breaks that block of color and adds shape without extra stones, line art, or glitter. It’s a good choice if you love emerald but your usual style leans clean and minimal.
How to make it look intentional
Use a sheer pink, beige, or milky base under the design. Then sweep emerald from one side of the cuticle area toward the opposite tip, almost like a sash across the nail. A thin metallic line along the edge can sharpen it, though I’d skip that if you already wear stacked rings daily.
This design needs precision. The diagonal edge has to look smooth, not wobbly, and the negative space should be balanced from nail to nail. One messy side-swipe can ruin the whole set faster than a chipped solid color.
Medium coffin length is enough here. You do not need extra-long nails for this one to read well.
10. Emerald Aura Nails With a Glowing Center
Soft center glow. Darker edge. Aura nails turn emerald into something almost smoky.
The look usually starts with a black, dark green, or deep nude base, then a diffused emerald haze gets airbrushed or sponge-blended into the middle. On coffin nails, that glowing center sits like a spotlight down the length of the nail, which makes the set feel dimensional without using chrome or cat-eye polish.
What I like about aura nails is that they can lean ethereal or moody depending on the base. Put emerald over a nude base and the manicure feels softer. Put it over black and you get more contrast, more depth, more attitude. Same technique. Different mood.
This is also one of the few green designs that can handle one or two tiny crystals near the cuticle without looking overloaded. The glow stays soft, and the crystal gives a point of light. Keep the stones small—think 1.5 to 2 millimeters—not giant gems that drag the whole look into pageant territory.
If your nail tech airbrushes, ask to see how saturated the emerald center will be before they seal it. A pale aura can disappear under top coat, especially on darker skin tones or in dim lighting.
11. Dark Jade Emerald Nails With Tiny Crystal Cuticles
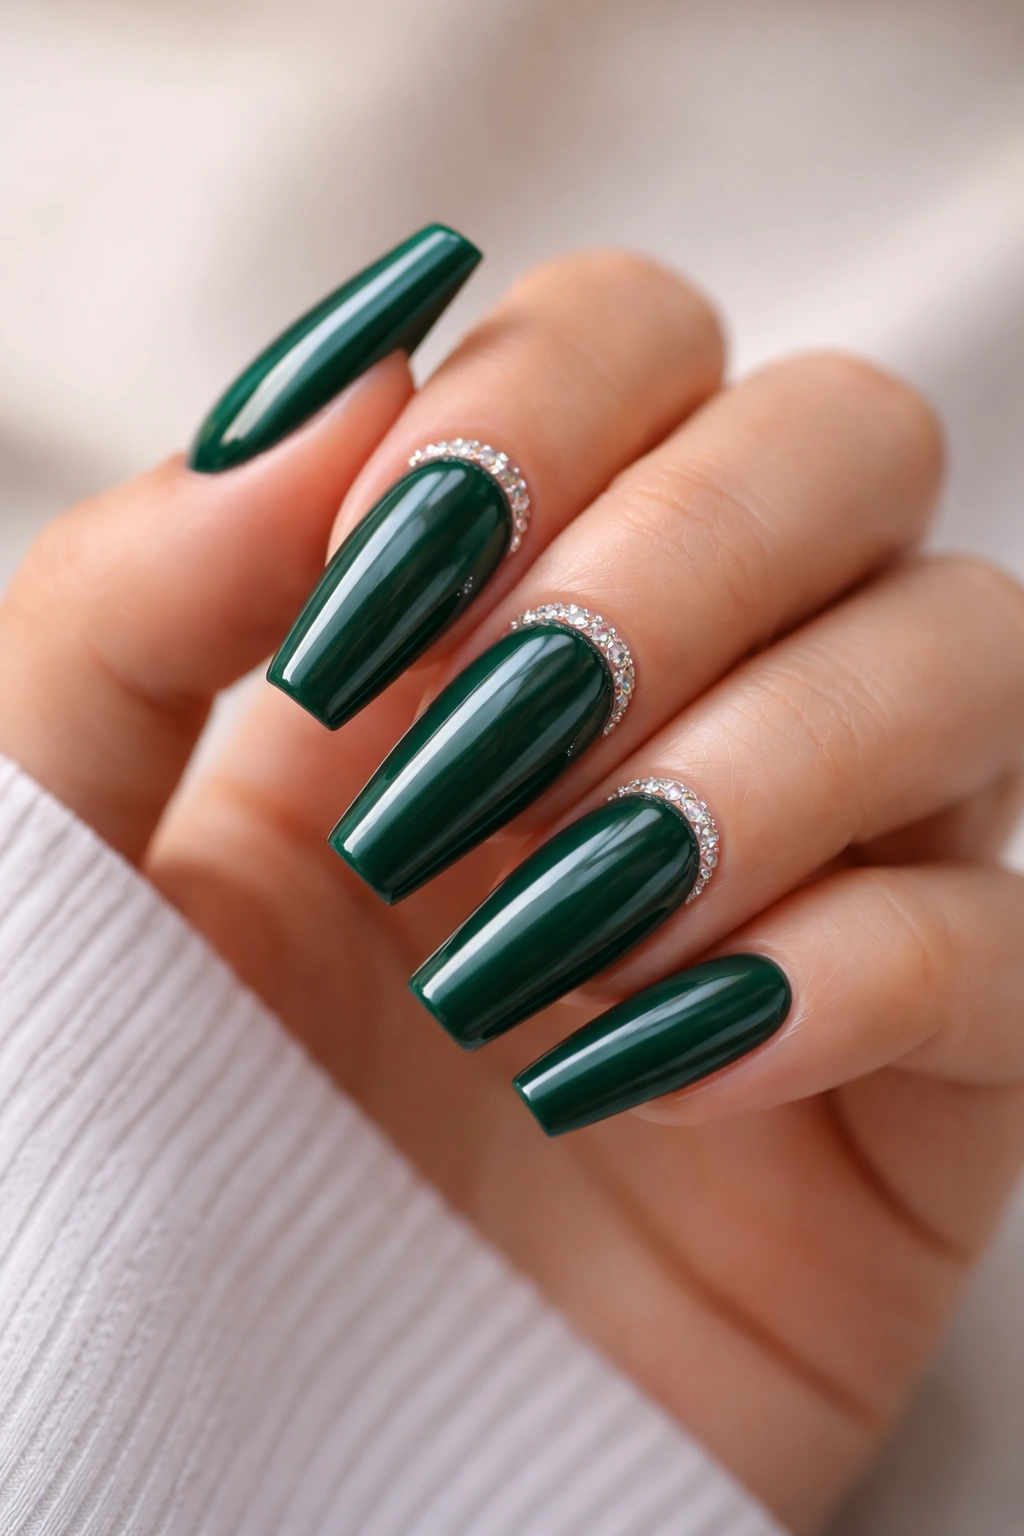
Let me say this plainly: crystals are easy to overdo on green nails. One curved line of tiny stones at the cuticle can look polished. A full rhinestone cluster on three nails can start looking heavy fast, especially on a dark base.
That’s why I like this version. The color leans dark jade—still in the emerald family, but with a cooler, slightly inkier cast. Then each accent nail gets a slim crescent of micro-crystals pressed close to the cuticle. The stones catch enough light to break up the dark polish without turning the manicure into costume jewelry.
This design also solves a small problem dark manicures sometimes have: they can read flat in low light. Tiny crystals give the eye a point to land on. Not much. Enough.
A few practical notes matter here. Use flat-back crystals in ss3 to ss5 size if you want the set to stay wearable. Bigger stones snag hair, pockets, knit sleeves, and, annoyingly, towels. Ask your tech to anchor them in builder gel rather than only top coat if you want them to hold.
I’d keep the crystal placement limited to 2 nails per hand. More than that and the manicure starts losing its clean shape.
12. Milky Nude and Emerald Green Coffin Nails With Swirled Marble
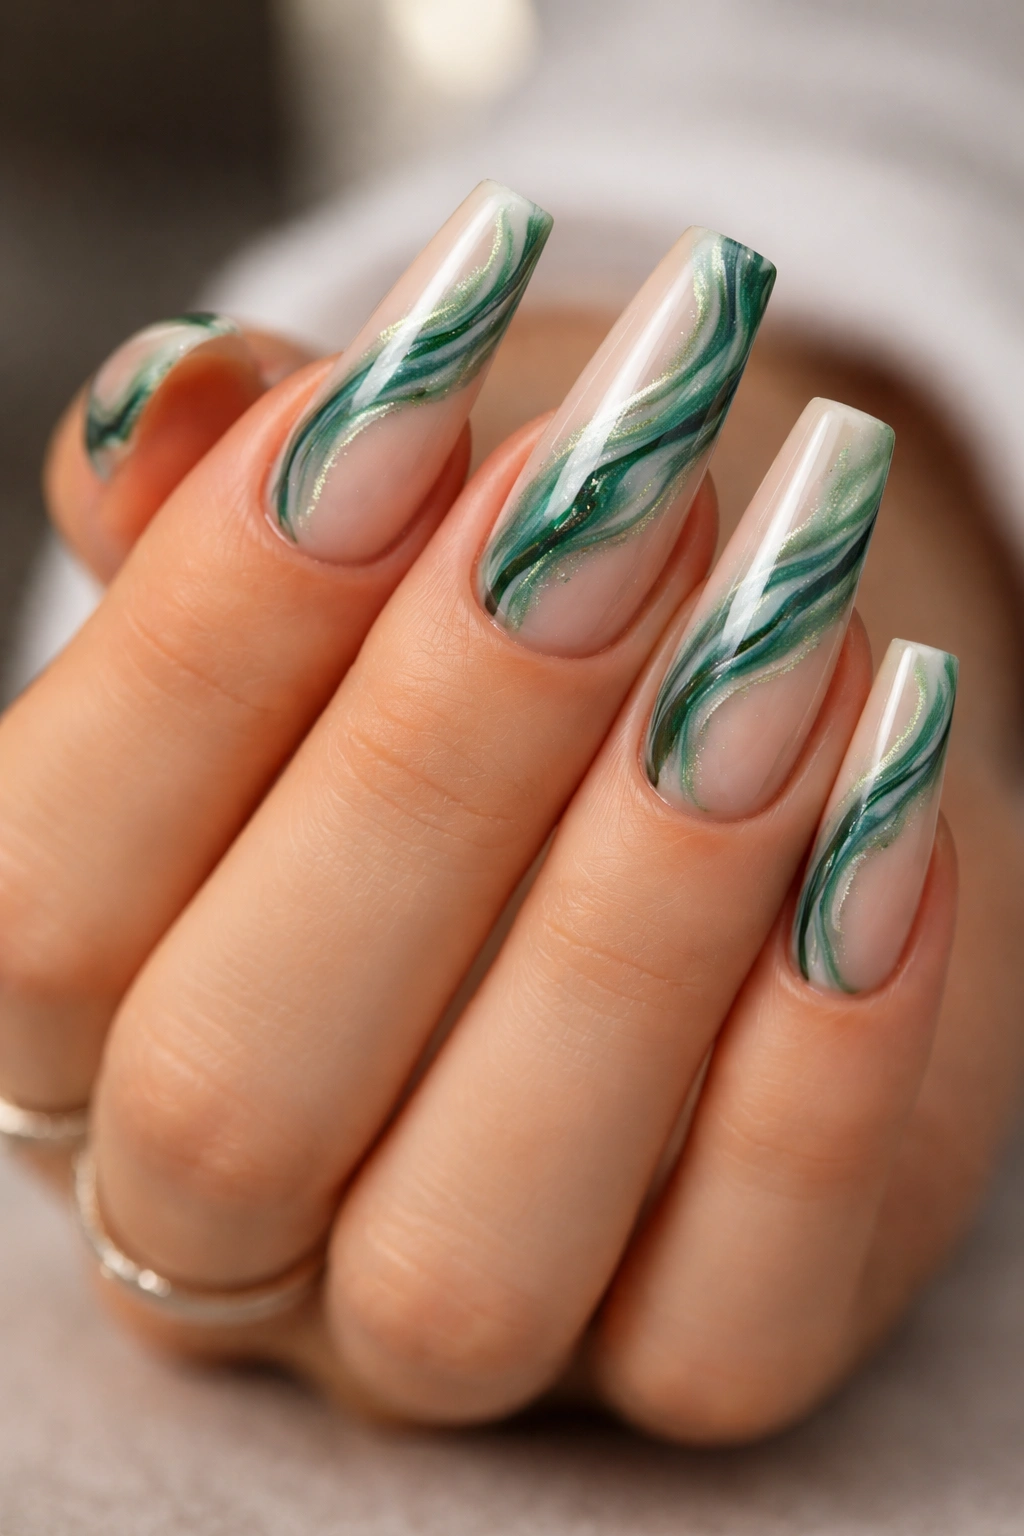
Compared with a full opaque emerald set, a milky nude base softens the whole manicure. Add green marble swirls on top, and you get a design that feels lighter, more detailed, and a little more artistic without becoming hard to wear.
This style works well when you want emerald nails but do not want every finger coated in dark color. The milky base leaves room for contrast, and the green swirls can vary from thin smoke-like lines to thicker ribbons. I prefer a mix. All thin lines can disappear from a distance. All thick lines look clunky.
Who should try this one? Anyone who likes neutral manicures but wants one element with more depth. It bridges those two moods nicely. A set like this also grows out more gracefully because the base is already close to a natural nail tone.
If you’re sitting in the salon chair, ask for 2 shades of green in the marble—one deep emerald, one lighter green with more transparency. That layering makes the swirls look less flat. Add a little white ink or gel only if the artist has a light hand, because too much white can dull the richness of the green.
Gloss top coat is the move here. Matte kills the “stone and glass” feel that makes this design worth doing.
13. Sweater-Texture Emerald Nails for Colder Months
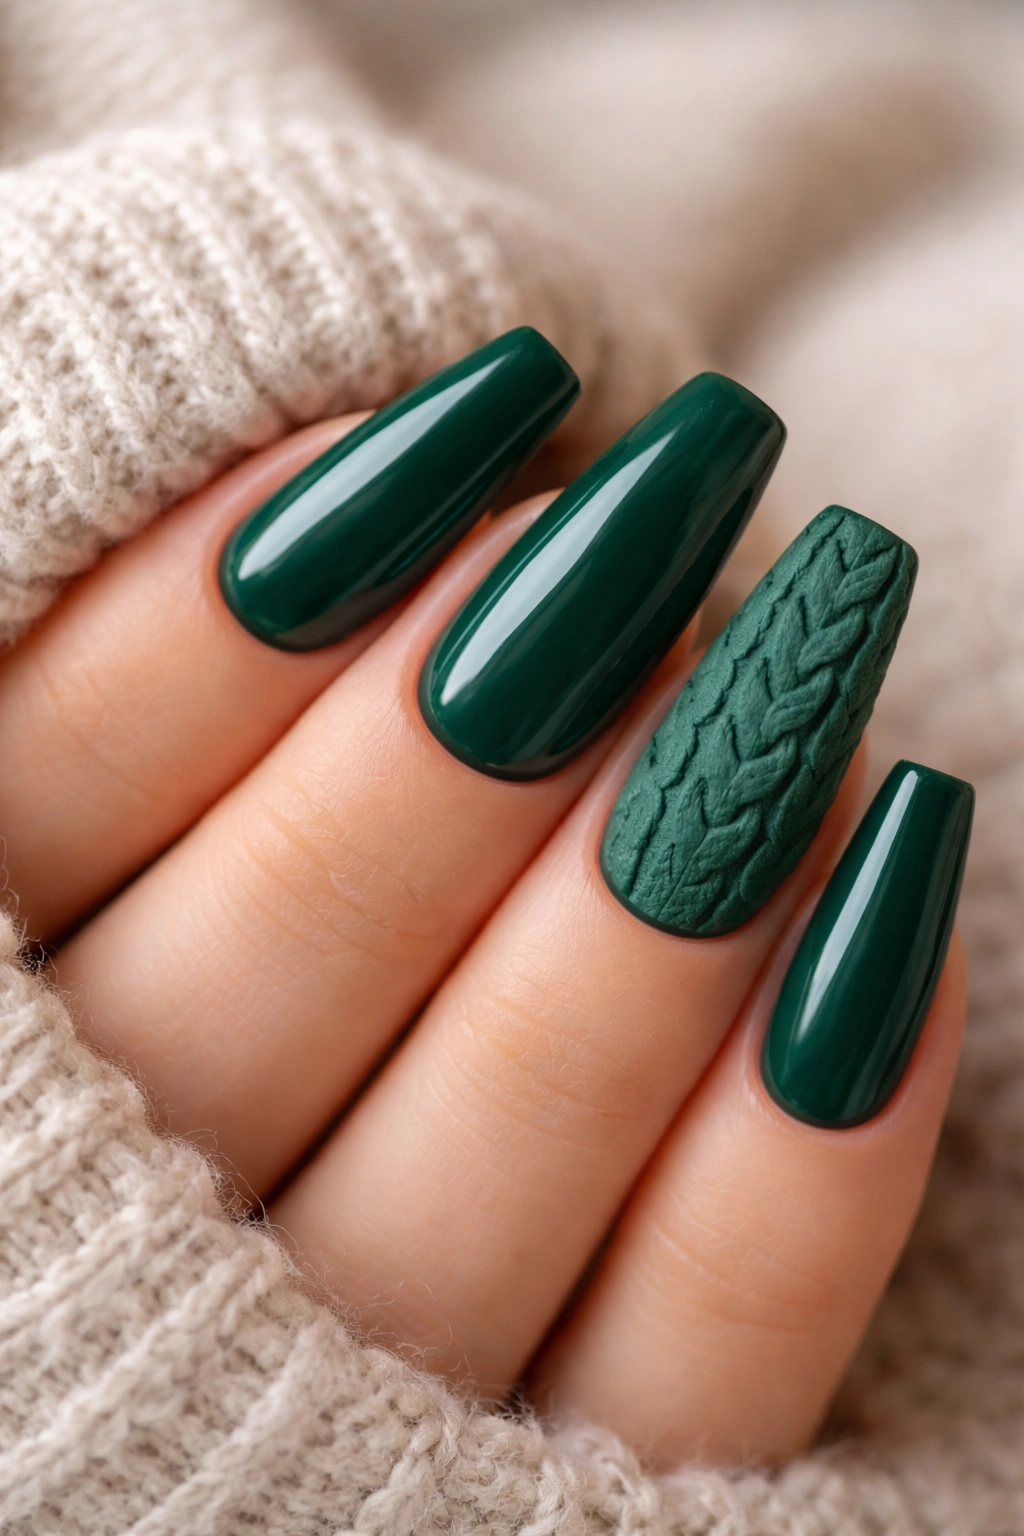
Not every emerald set needs shine. A raised sweater pattern in matte emerald has a cozy, almost knitwear feel that works especially well when you’re living in oversized cardigans, wool coats, and hot coffee cups.
The effect comes from building lines, braids, or cable-knit shapes with thick gel on top of color, then finishing with a matte coat—or, in some salon methods, curing the raised gel with acrylic powder for extra texture. You can actually feel the pattern with your fingertip, which is half the charm.
Where this design looks best
I would not put sweater texture on all 10 nails unless you want a very themed manicure. One or two textured accent nails paired with solid emerald nails looks cleaner and lasts better because raised gel can wear down faster at high-contact spots.
Good ways to style it
- Pair one cable-knit accent nail with 4 solid glossy emerald nails
- Use a darker matte green so the raised pattern still shows under indoor light
- Keep the texture on middle or ring fingers, where it gets shown off but takes less direct impact
- Ask for a sealed edge around the texture so it does not peel early
This one has personality. It does not pretend to be sleek, and that’s why it works.
14. Emerald Flame Coffin Nails With Black Detailing
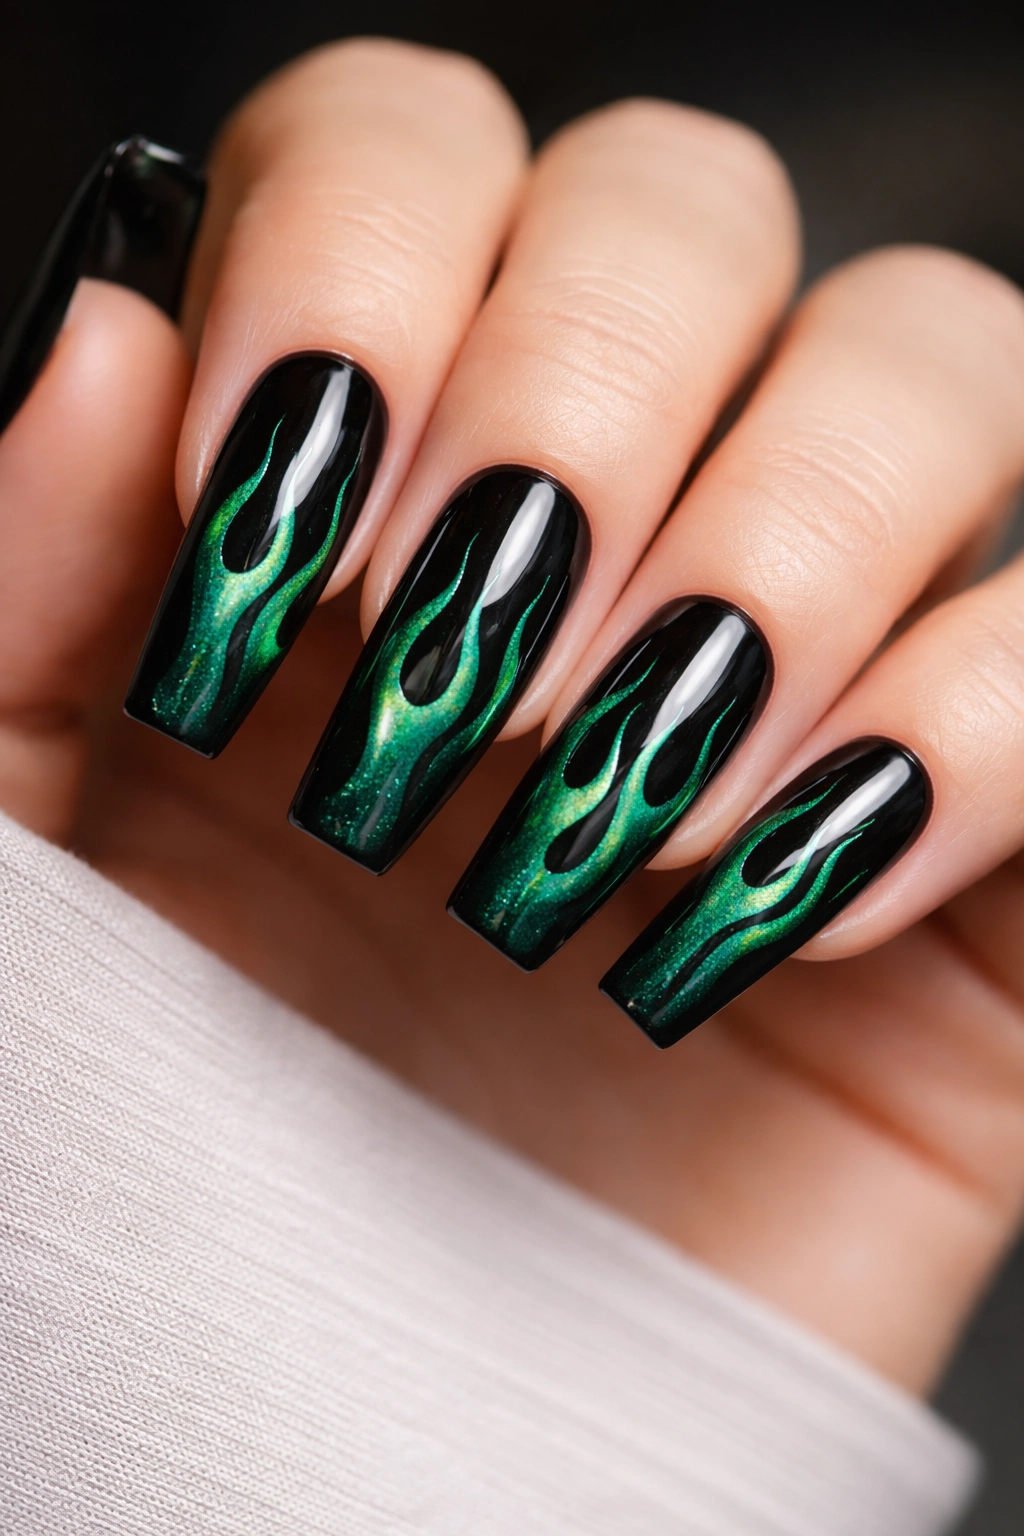
If you like nail art that leans sharper, flame designs are hard to ignore. Emerald flames over a black, nude, or sheer smoky base turn coffin nails into long, pointed strokes of color, even though the tips stay flat.
The key is proportion. Flames should stretch upward in thin, uneven tongues, not squat little blobs at the tip. On coffin nails, the lines can climb half to two-thirds of the nail length and still look balanced. Shorter flames often read cartoonish. Longer flames look more deliberate.
Black detailing changes the mood. A thin black outline around emerald flames adds contrast and makes the design punchier. Skip the outline and the flames look softer, especially over a nude base. Both versions work; they just say different things.
I’d keep the rest of the hand clean here. No crystals. No extra foil. Maybe one plain emerald nail or one sheer smoky nail to give the eye a break. Flame art already gives you enough movement and shape.
Also worth saying: this design needs a steady hand. If your tech struggles with line work, pick another style. Flames are one of those looks that fall apart fast when the spacing is off.
15. Emerald Glitter Fade Over a Sheer Pink Base
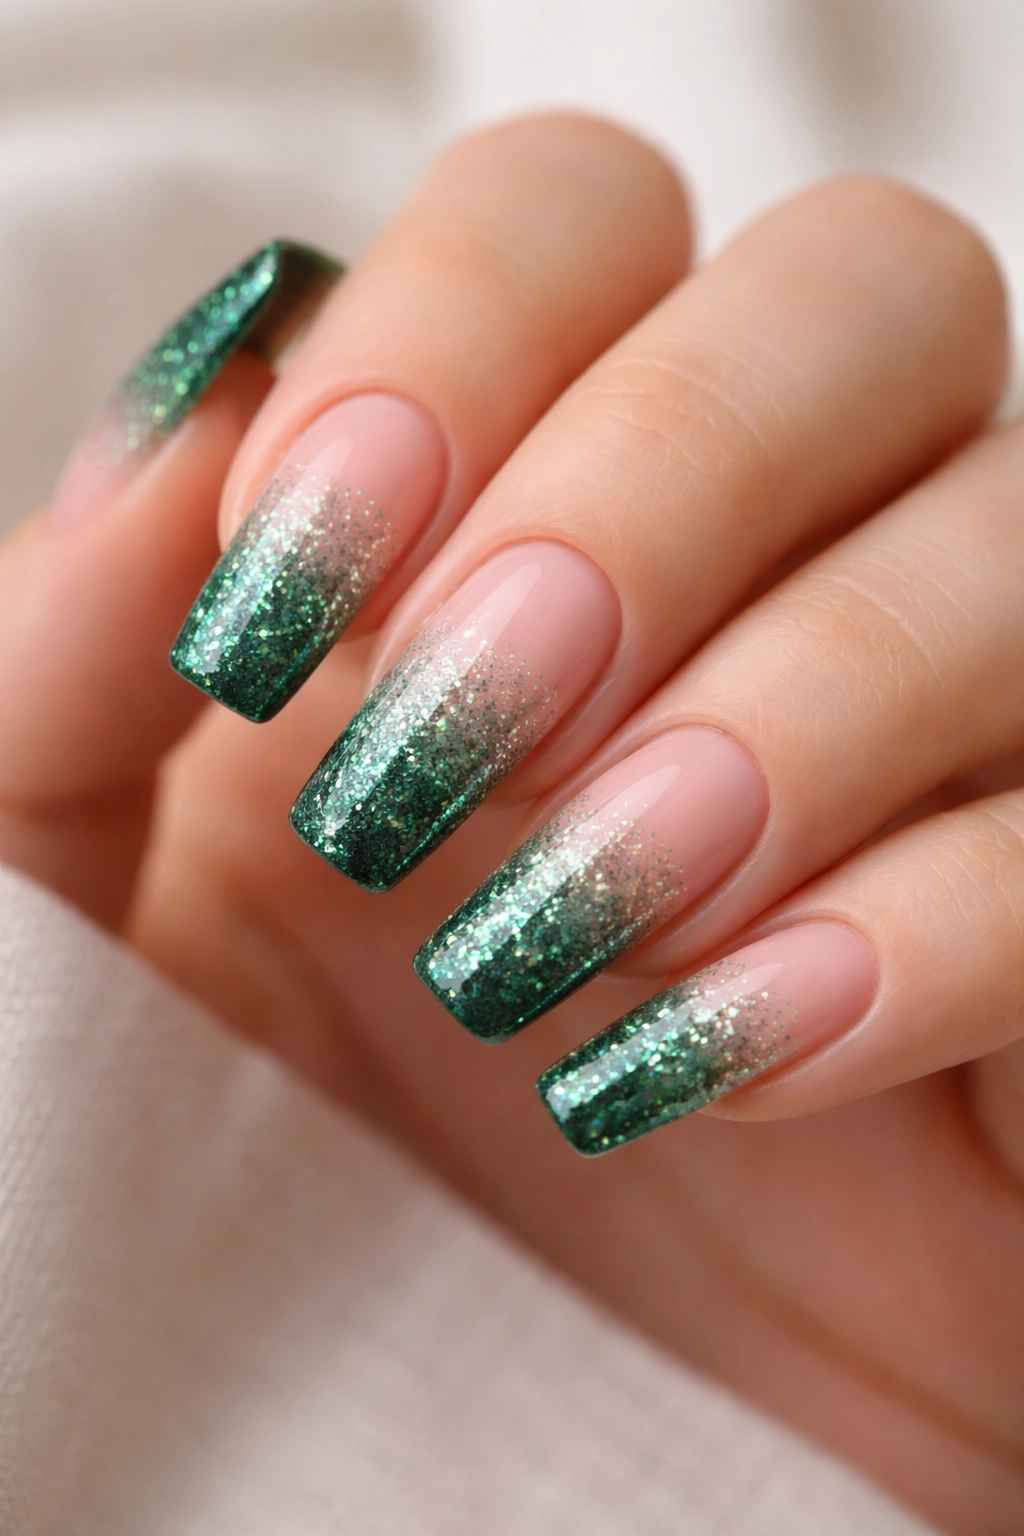
Some glitter manicures look chunky and cheap by day three. This one doesn’t have to. A fine emerald glitter fade over a sheer pink or nude base gives you sparkle without the bulky texture that big glitter mixes leave behind.
Why does the fade work? Because the glitter builds from dense at the tip to lighter toward the middle or cuticle, so the nail still has depth and shape. Full-coverage green glitter can flatten the nail and make it look thick. A fade keeps the surface cleaner and the coffin outline sharper.
How to keep the sparkle refined
Use fine-cut glitter, not large hex pieces. Fine glitter gives a denser, smoother finish once top-coated. Start the fade at the tip if you want more durability—the sparkle hides tip wear better there. Starting at the cuticle can look soft and pretty, but grow-out shows sooner.
A good salon version usually layers glitter in two thin passes, then seals it under a self-leveling top coat so the nail feels smooth. If you can feel rough edges after the top coat cures, it needs another thin seal.
This set is a strong pick when you want emerald green coffin nails that feel festive without locking you into heavy art. It catches light, sure, but it still reads polished from a normal conversation distance.
Final Thoughts
Emerald works because it isn’t a one-note color. Put it under gloss and it looks sleek. Turn it matte and it goes softer. Add chrome, marble, aura shading, or a clean V tip, and the same green starts telling a different story on each hand.
If I had to narrow these down to the sets that give you the most mileage, I’d start with glossy solid emerald, cat-eye velvet emerald, and milky nude with green swirls. Those three cover the clean, moody, and artsy ends of the spectrum without asking you to baby the manicure every second of the day.
One last practical note: bring two or three reference photos to the salon, not ten. Pick one for the shape, one for the color depth, and one for the finish or art detail. Nail techs can work with that. And when emerald is the star, a little clarity goes a long way.
