

A polka dot manicure can go sloppy in under 30 seconds. One dot blooms too wide, another lands crooked near the sidewall, and the whole set starts looking more craft table than clean nail art. Done with a steady hand and the right spacing, though, polka dot coffin nails land in a sweet spot I never get tired of: playful, graphic, and still sharp enough to feel intentional.
That balance is why the coffin shape matters so much here. The straight sidewalls and squared-off tip give dots a clear frame, which sounds like a tiny detail until you try the same pattern on a short round nail and watch it lose half its punch. On a medium or long coffin, each dot has room to sit where it belongs instead of crowding the edges.
Most dot manicures fail for one reason, and I keep coming back to it because it matters: people try to make every nail identical. That usually reads stiff. The sets that look best have a little rhythm to them—maybe one accent nail with tighter spacing, maybe larger dots on the thumb and ring finger, maybe a single color shift that breaks up the repetition.
And yes, dots are playful. They do not have to look childish.
Why Polka Dot Coffin Nails Work So Well on a Tapered Shape
Coffin nails give dots room to breathe. That is the whole story, more or less, but the shape does a few extra favors too. Because the sides taper in before the free edge squares off, dots look framed rather than scattered, and even a busy pattern still has some structure.
Length changes the mood
A short coffin with 5 to 7 mm past the fingertip feels neat and low-key. The same dot pattern on a long coffin extension reads louder, sharper, and more fashion-forward. Neither is better, though medium coffin is the easiest length for most people because you get enough space for clean placement without turning every household task into a small negotiation.
Scale matters.
Small dots—about 1 mm to 1.5 mm—look crisp on shorter coffin nails. Once your nails get longer, you can step up to 2 mm or even 3 mm dots on accent fingers without the design looking cramped. If you ignore that and use oversized dots on a short nail bed, the dots flatten the shape and crowd the cuticle line.
The squared tip helps the pattern read cleanly
Round or almond nails soften dot patterns. Coffin nails do the opposite. The blunt tip gives the eye a stopping point, which makes neat rows, half-moons, and French-edge dots look more deliberate. If you like nail art that has a little retro energy but still feels tidy, coffin is hard to beat.
One more thing. Dots look best when the nail shape itself is sharp. If the sidewalls are uneven or the tip leans left, the pattern will spotlight that flaw fast.
How to Keep Polka Dot Coffin Nails Crisp Instead of Messy
What makes one dot manicure look salon-clean and another look rushed? Usually, it comes down to tool size, polish thickness, and how much product is sitting on the tip. Too much polish on your dotting tool and the dot spreads before you even decide where it should go.
I have done dot nail art with a bobby pin in a hotel bathroom. It worked. A proper dotting tool still makes life easier.
The small toolkit that pulls the whole look together
You do not need a drawer full of nail gear, but these help:
- A fine dotting tool around 1 mm for micro dots and tight spacing near the cuticle
- A medium dotting tool around 2 mm to 3 mm for standard polka dots on the center of the nail
- A thin cleanup brush dipped in acetone for regular polish or alcohol for gel
- A smooth, self-leveling base color that is fully dry before you dot over it
- A quick-dry or floating top coat so the brush glides over the design instead of dragging it
Placement rules that save you from regret
Start in the center if you want symmetry. Work outward if you want the dots to feel balanced on both sides. Leave at least 1 mm of space between small dots and closer to 2 mm between larger dots, or the top coat can make them merge into blobs.
Gel and regular polish behave differently too. With gel, cure each dotted layer before it has time to spread, often 30 to 60 seconds under an LED lamp depending on the system you use. With lacquer, wait until the base is dry to the touch and no longer tacky, then dot lightly and leave it alone. Poking back into a half-dry dot is how you get those ragged little tails that ruin the whole manicure.
Floating the top coat matters more than people think—load the brush, lay the bead down, and skim over the surface without pressing. Pressing smears dots. Every time.
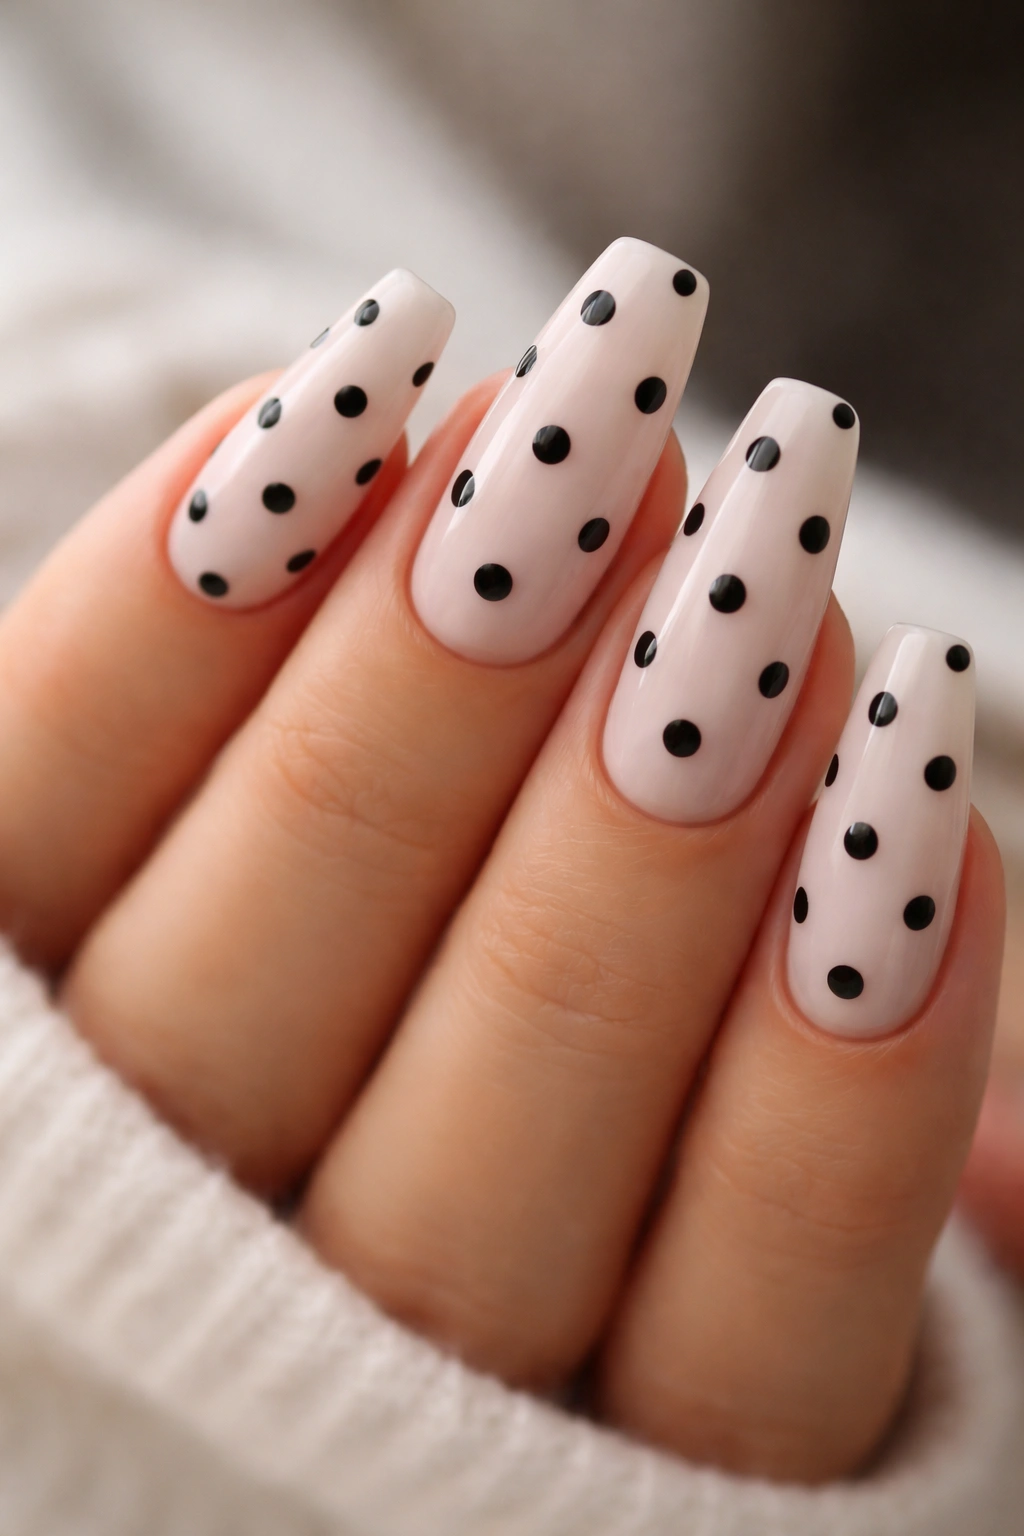
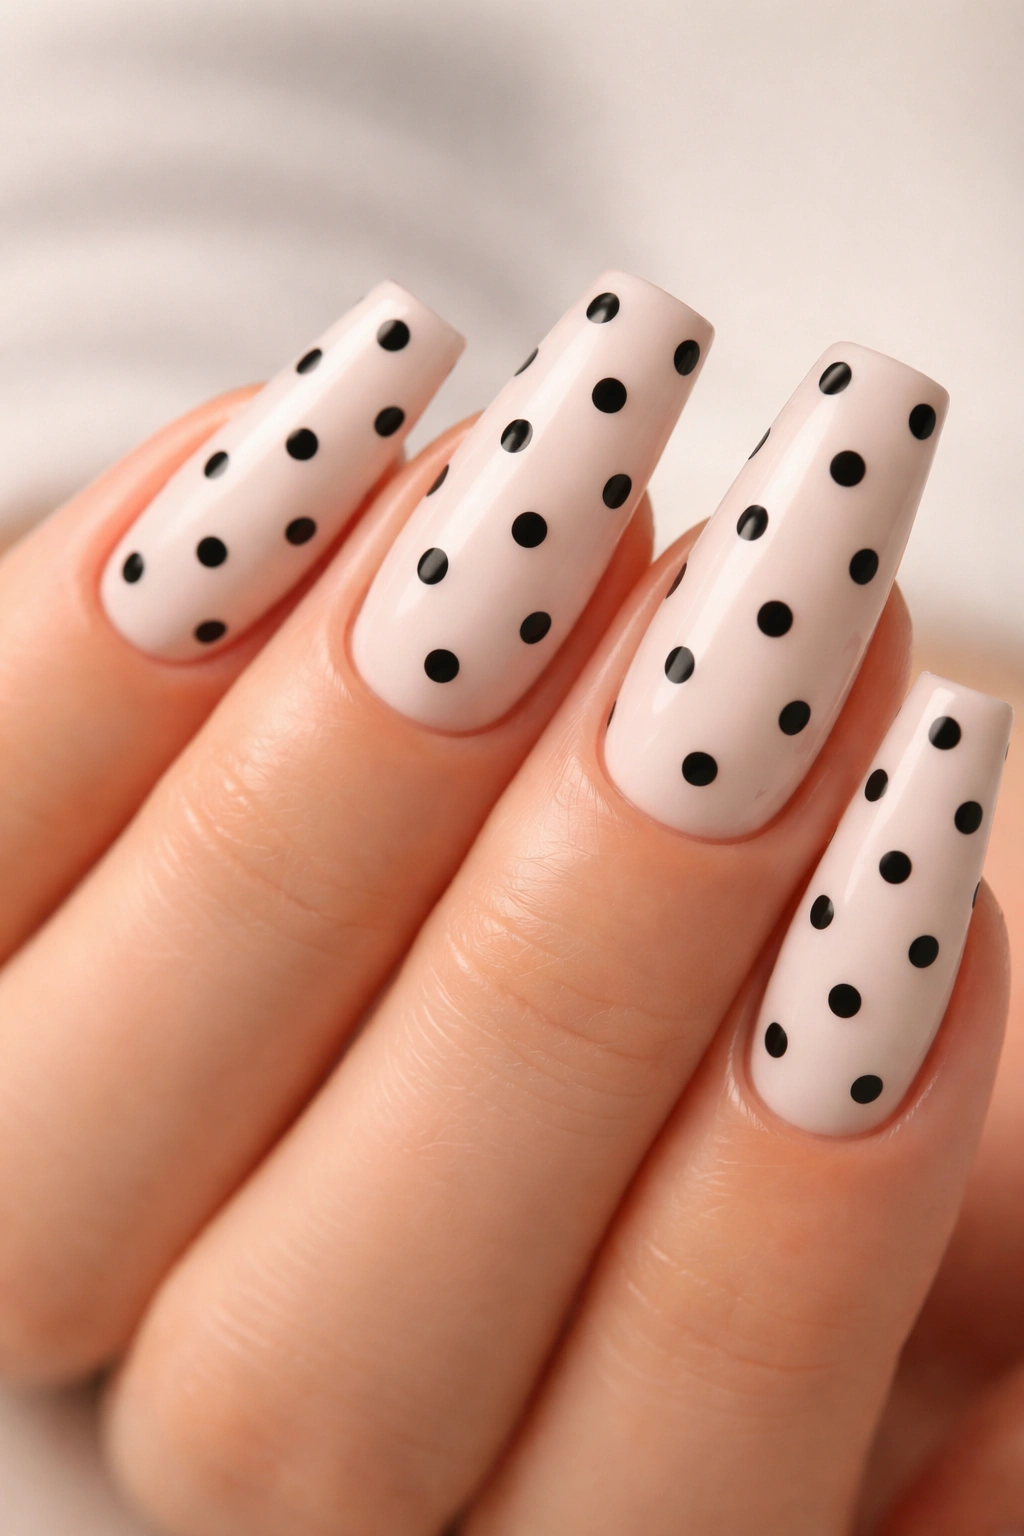
1. Black Dots on a Milky White Base
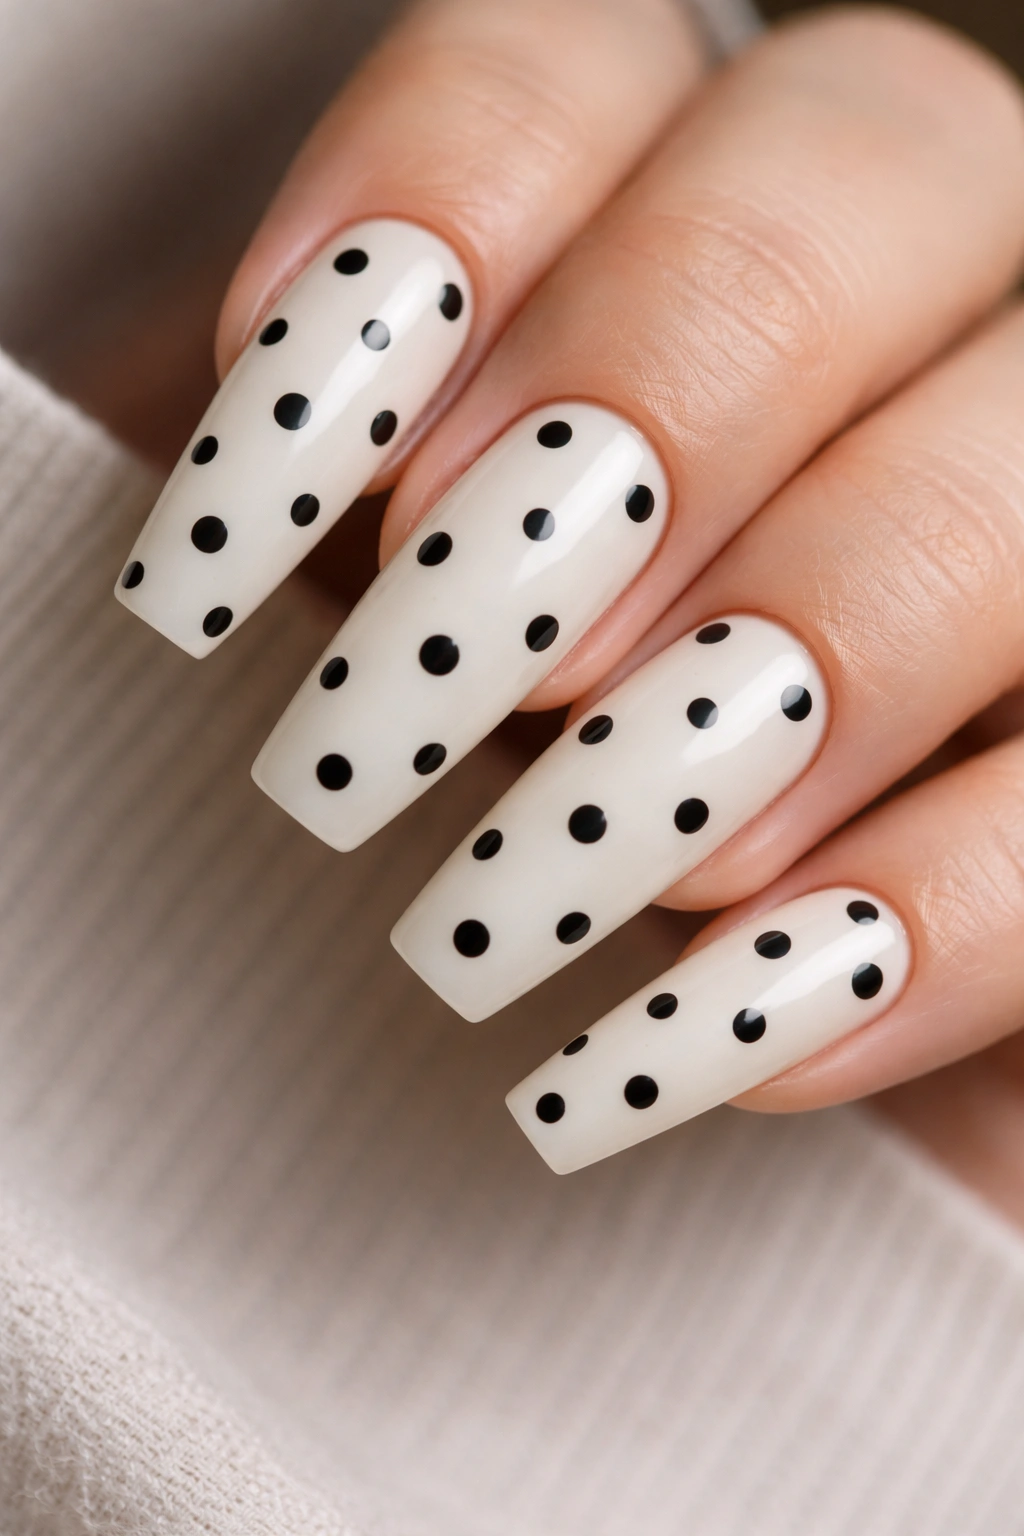
If you only try one polka dot look on coffin nails, make it this one. Black dots over a milky white base have that old-school graphic charm that never gets stale, and the contrast is strong enough to show the pattern from across the room without feeling loud.
The milky base is the part people rush, which is a mistake. You want a soft white that still lets a whisper of the nail bed come through, not correction-fluid white. Two thin coats usually do it. Once that base dries, a medium dotting tool gives you bold dots that stay round instead of turning into sharp little coins.
Why this one works so well
Black and white nails can skew harsh on coffin shapes if every line is strict. Dots soften that. The shape still looks sharp, the pattern still has edge, but there is a little humor in it. That contrast is the whole appeal.
You can lay the dots in neat rows for a mod look, or stagger them for something looser. On medium coffin nails, I like five to seven dots per nail, with the ring finger getting the cleanest spacing and the pinky staying simpler.
Quick design notes
- Use a sheer milky white, not an opaque chalk white, or the manicure can look flat.
- Keep the black dots around 2 mm wide on the middle three fingers.
- Leave the thumbs slightly bolder; they handle larger dots well.
- Finish with a glossy top coat so the black looks ink-like.
Best move: Put the first dot just above the center of the nail, then build around it instead of starting near the edges.
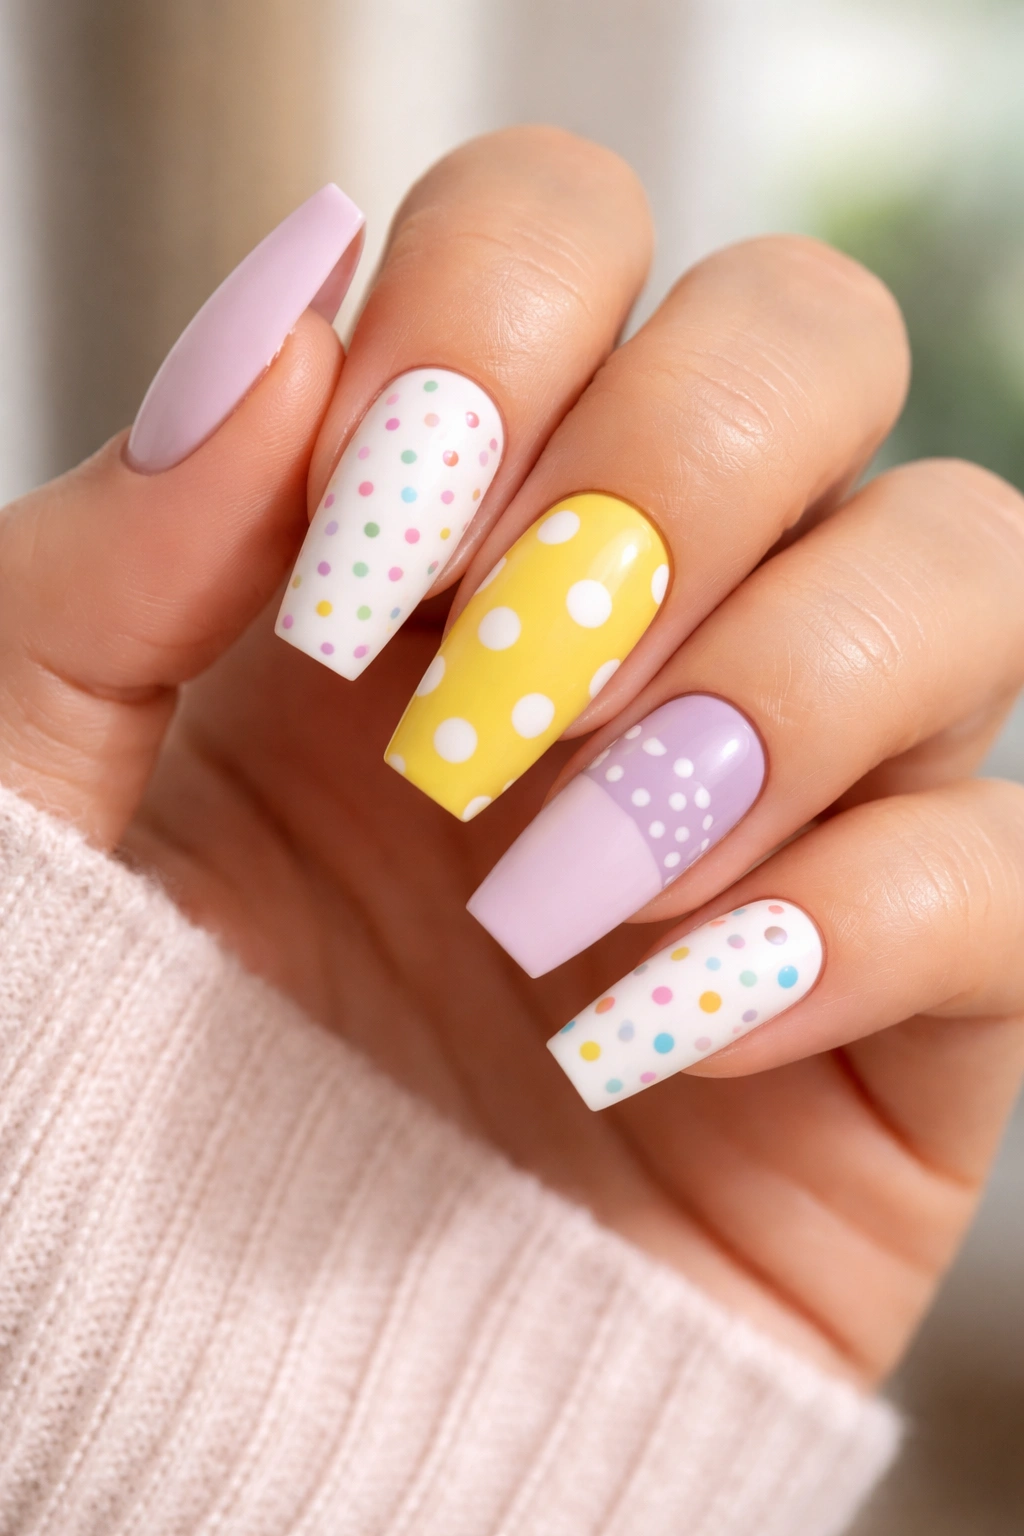
2. Pastel Rainbow Dots Over a Sheer Nude
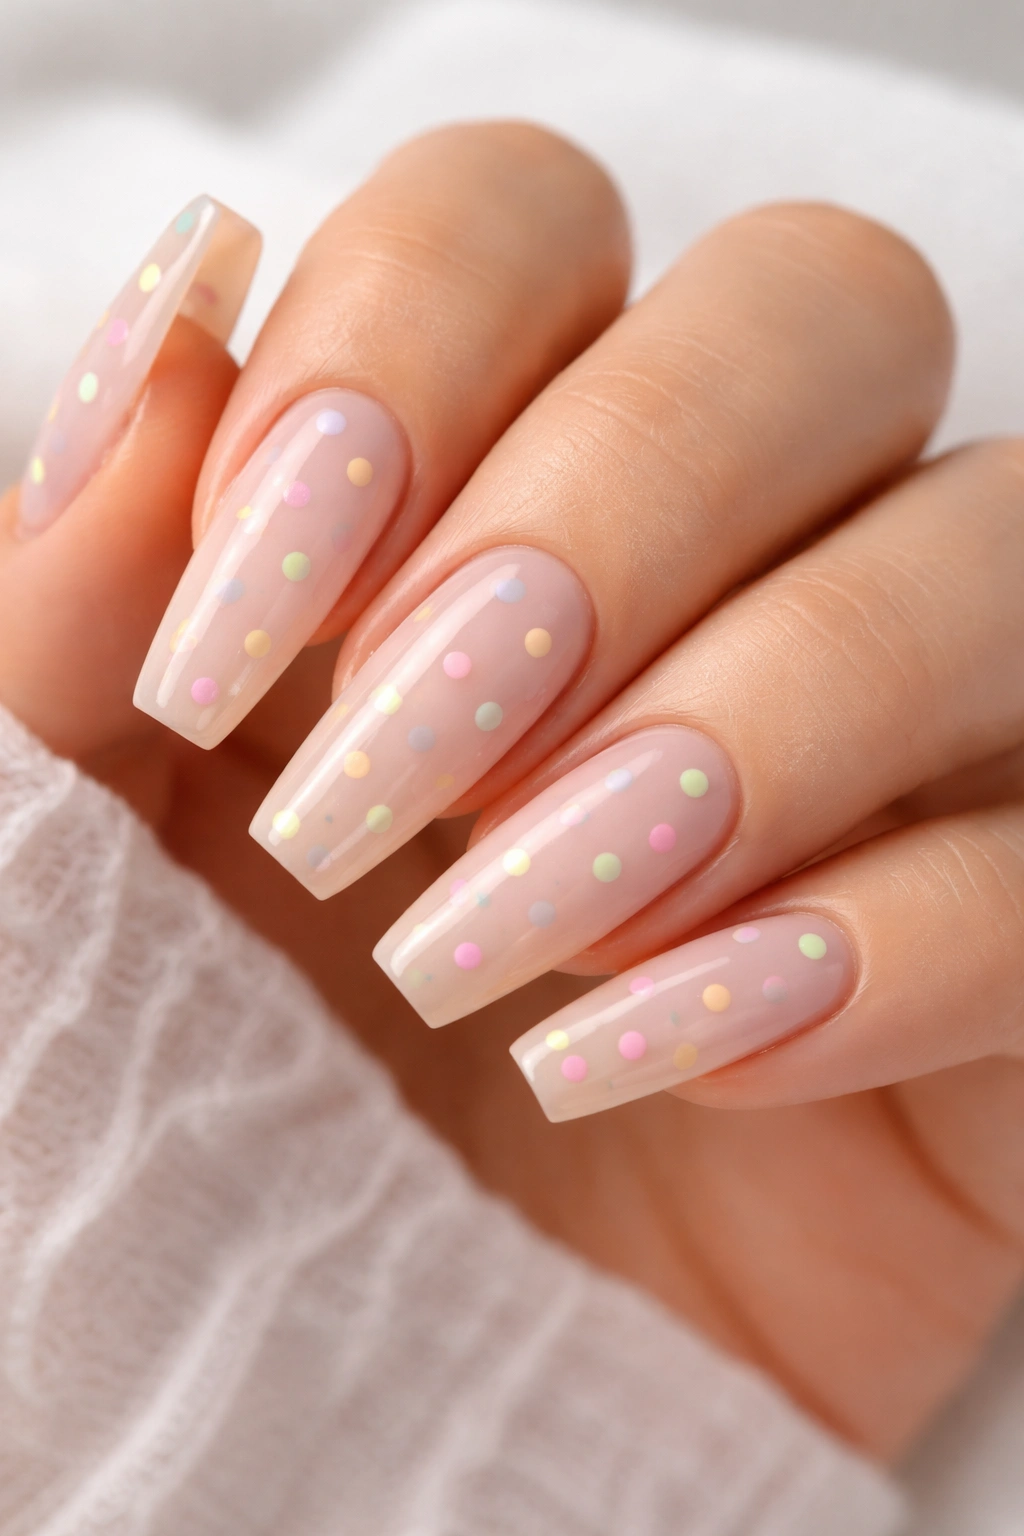
This is the easiest way to make polka dots feel light instead of costume-y. A sheer nude base keeps the set grounded, and small dots in mint, butter yellow, lilac, soft blue, and peach add color without turning the manicure into a cartoon.
What I like here is the restraint. The dots should be small—closer to 1 mm than 3 mm—and they should not cover every inch of the nail. Scatter them with a little breathing room, then repeat two or three shades on each hand so the palette feels tied together. If every finger gets five brand-new colors, the look starts to fight with itself.
This design also hides grow-out better than sharper nail art. Because the nude base sits close to the natural nail, the cuticle area stays forgiving for longer, which matters if you do not want to be back at your nail table every five days fixing regrowth.
A satin-gloss finish works best here. Full matte can make pastel dots look dusty, while an ultra-wet gloss can push the manicure into candy territory. If your skin tone has warm undertones, lean into peach, butter, and sage. Cooler undertones do better with lilac, powder blue, and mint.
I would wear this on medium coffin nails with a short free edge—enough length for the tapered shape, not so much that the softness of the palette gets swallowed by dramatic length.
3. Oversized White Dots on a Glossy Red Coffin
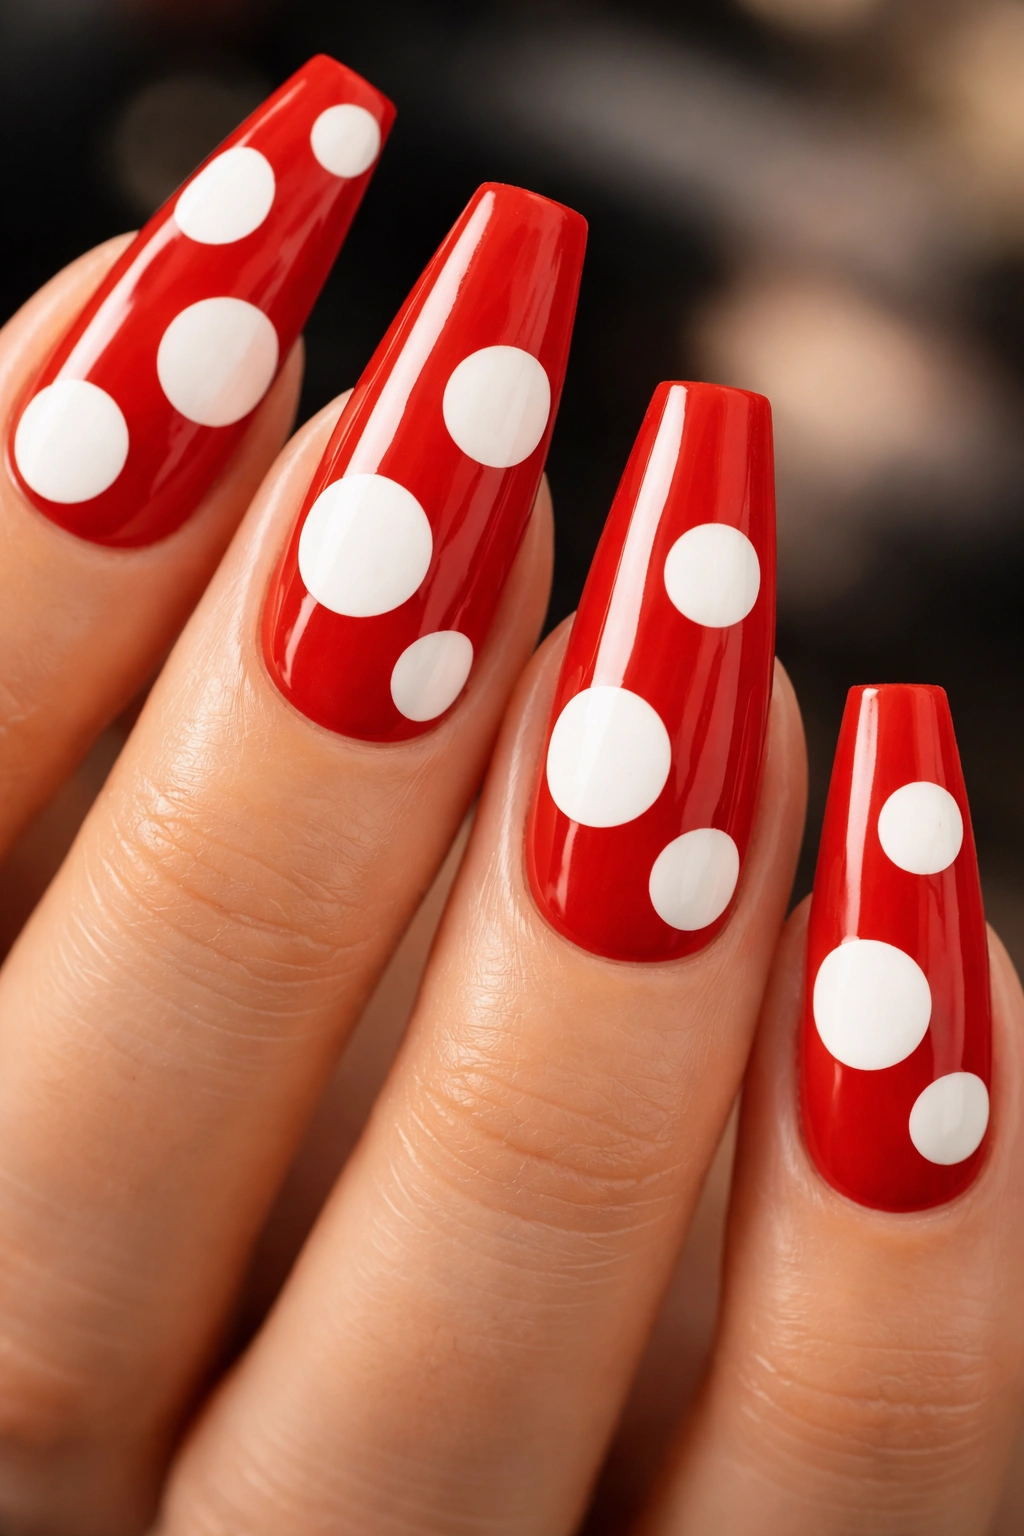
Why do big white dots on red work when big dots on most colors can look clumsy? Red has enough visual weight to carry them. A rich cherry or candy-apple base can handle bold, widely spaced dots without making the nail look crowded.
This design does not need many dots. Three or four large white circles on each nail are enough, and I would rather see fewer, cleaner dots than eight uneven ones trying to fill every gap. On coffin nails, oversized dots look strongest when they sit slightly off-center. A perfect grid can look stiff.
The finish should be glassy. Matte kills the old-school punch that makes this look fun in the first place. And choose a red with some depth to it; watery tomato shades can make the white dots look cheap.
How to place the dots so they stay balanced
Start with one large dot near the upper third of the nail, not right at the free edge. Add a second lower and off to one side. If the nail is long, a third dot near the opposite side usually finishes the layout. You want motion, not a checkerboard.
Red polish also shows every lump. If your white dot sits raised, let it dry fully and float on a thicker top coat rather than trying to smooth it with more white. Once you fuss with a half-dry raised dot, the edges get ragged fast.
This one has attitude. Not every polka dot manicure needs to act sweet.
4. Micro Dots Along a French Tip Edge
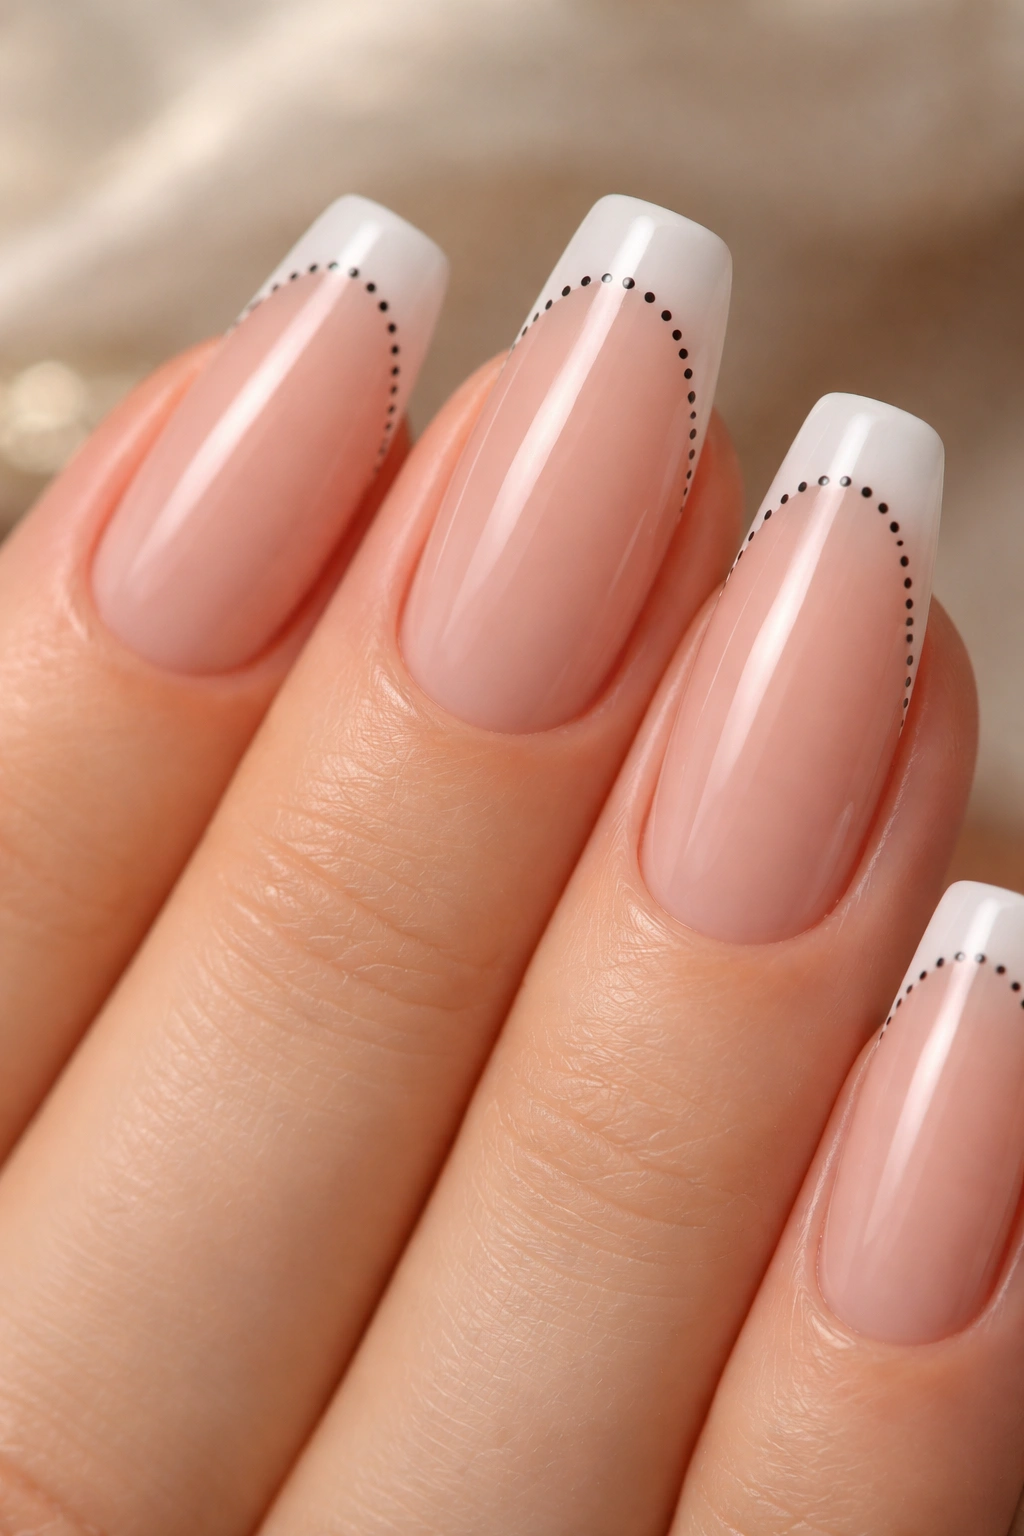
Picture a nude or sheer pink coffin manicure from a few feet away. It looks like a clean French. Get closer and the smile line is traced with tiny dots no bigger than a pinhead, and suddenly the whole set has more personality.
This is one of my favorite dot looks for people who want nail art that still feels quiet. Instead of filling the entire nail, you keep the pattern focused along the tip line. The coffin shape helps because the straight edge gives that dotted French border a clean finish.
The trick is using the right scale. These should be micro dots—about 0.5 mm to 1 mm—and they need a fine tool. A toothpick can work in a pinch, though it tends to pull more polish than you expect.
What makes it look expensive instead of fussy
- Keep the base sheer pink, beige nude, or milky nude.
- Choose one dot color only: black, white, navy, or metallic silver.
- Follow the French curve instead of drawing a straight dotted band.
- Leave the rest of the nail empty.
You can even alternate fingers, with dotted French tips on the index and ring finger and solid color or plain nude on the others. That little break helps the design breathe.
I would skip oversized coffin length for this one. Medium is better. Long nails can handle the look, but the micro dots need a lot of discipline to avoid getting lost on too much empty space.
5. Matte Lavender Nails With Glossy Black Dots
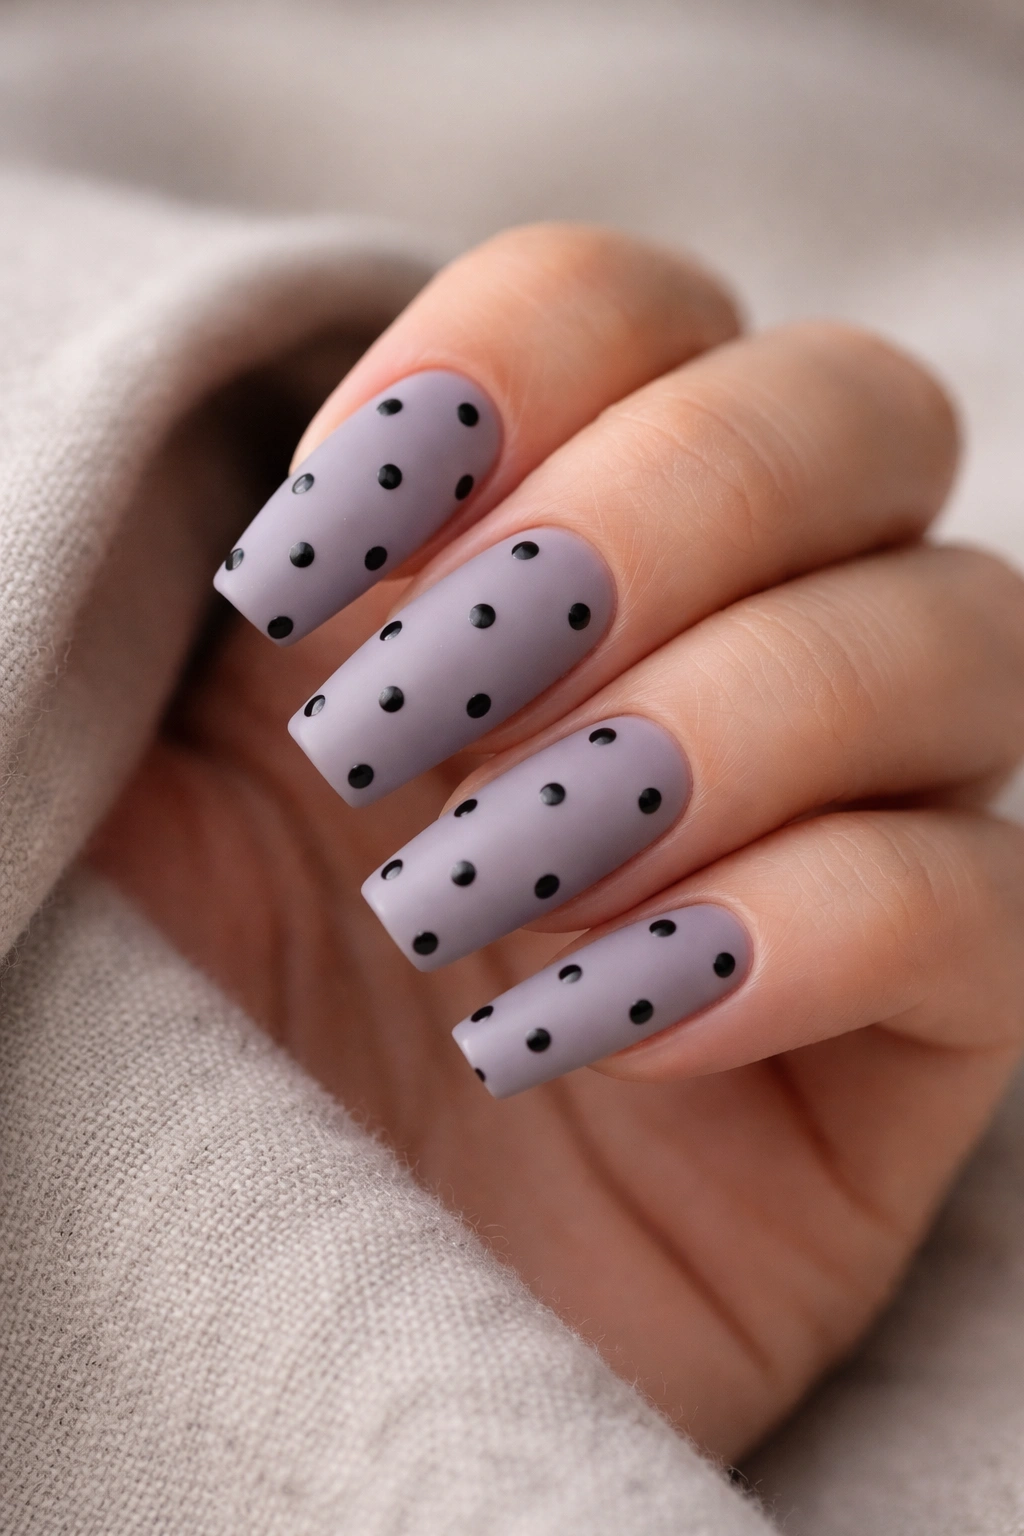
Soft lavender with shiny black dots should not work as well as it does. One finish is chalky and muted, the other looks wet. On paper, that sounds like a mismatch. On actual coffin nails, it gives the manicure a depth you do not get from color contrast alone.
The base color matters here more than people think. Pick a lavender with a gray lean to it rather than sugary purple. Once it dries, apply a matte top coat and let it settle fully. Then dot the nail with glossy black polish and leave those dots un-matted. That shift in finish is the whole point. When the light hits, the dots sit on the nail like tiny beads of ink.
Spacing should stay a little loose. If the black dots are too close together, the manicure starts to look heavy and the lavender disappears. I like four or five medium dots on the thumb and middle finger, then fewer on the pinky. Asymmetry helps here. Matching every nail dot-for-dot drains the life out of the design.
One downside: matte finishes show wear faster at the tip, especially if you type all day or handle cardboard boxes, which scuff nail surfaces like sandpaper. Seal the free edge well. If you do not, the tip goes shiny before the rest of the nail and the effect falls apart.
Still, when you want something playful that does not lean sugary, this one earns its keep.
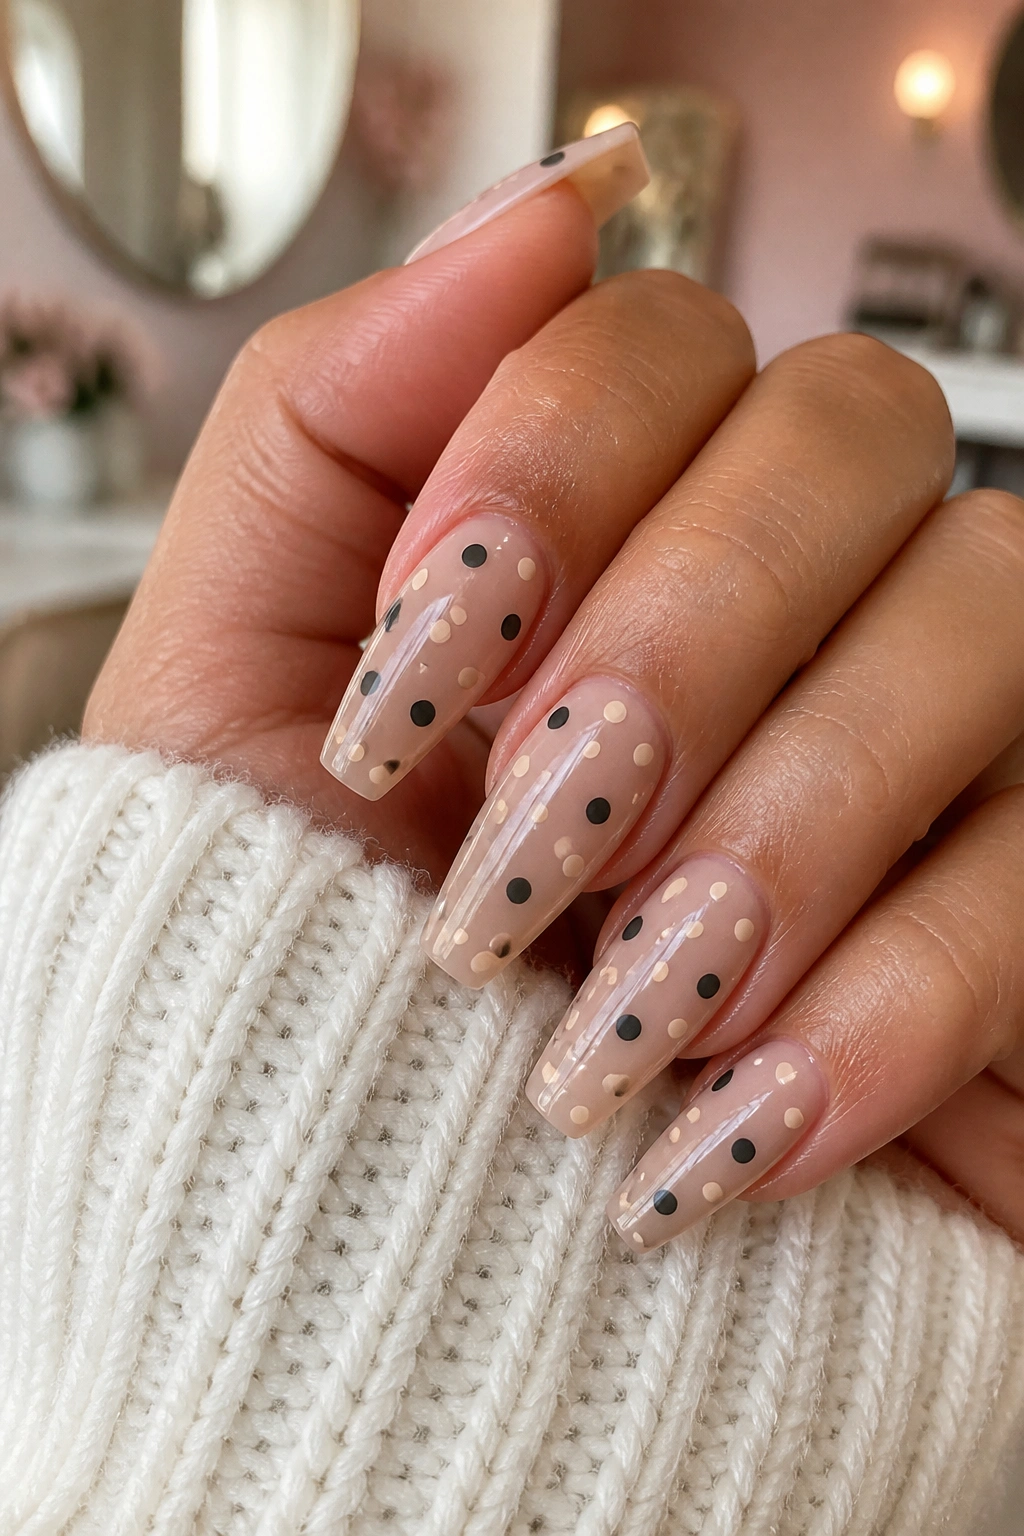
6. Nude Base With Mixed Neutral Dots and One Accent Nail
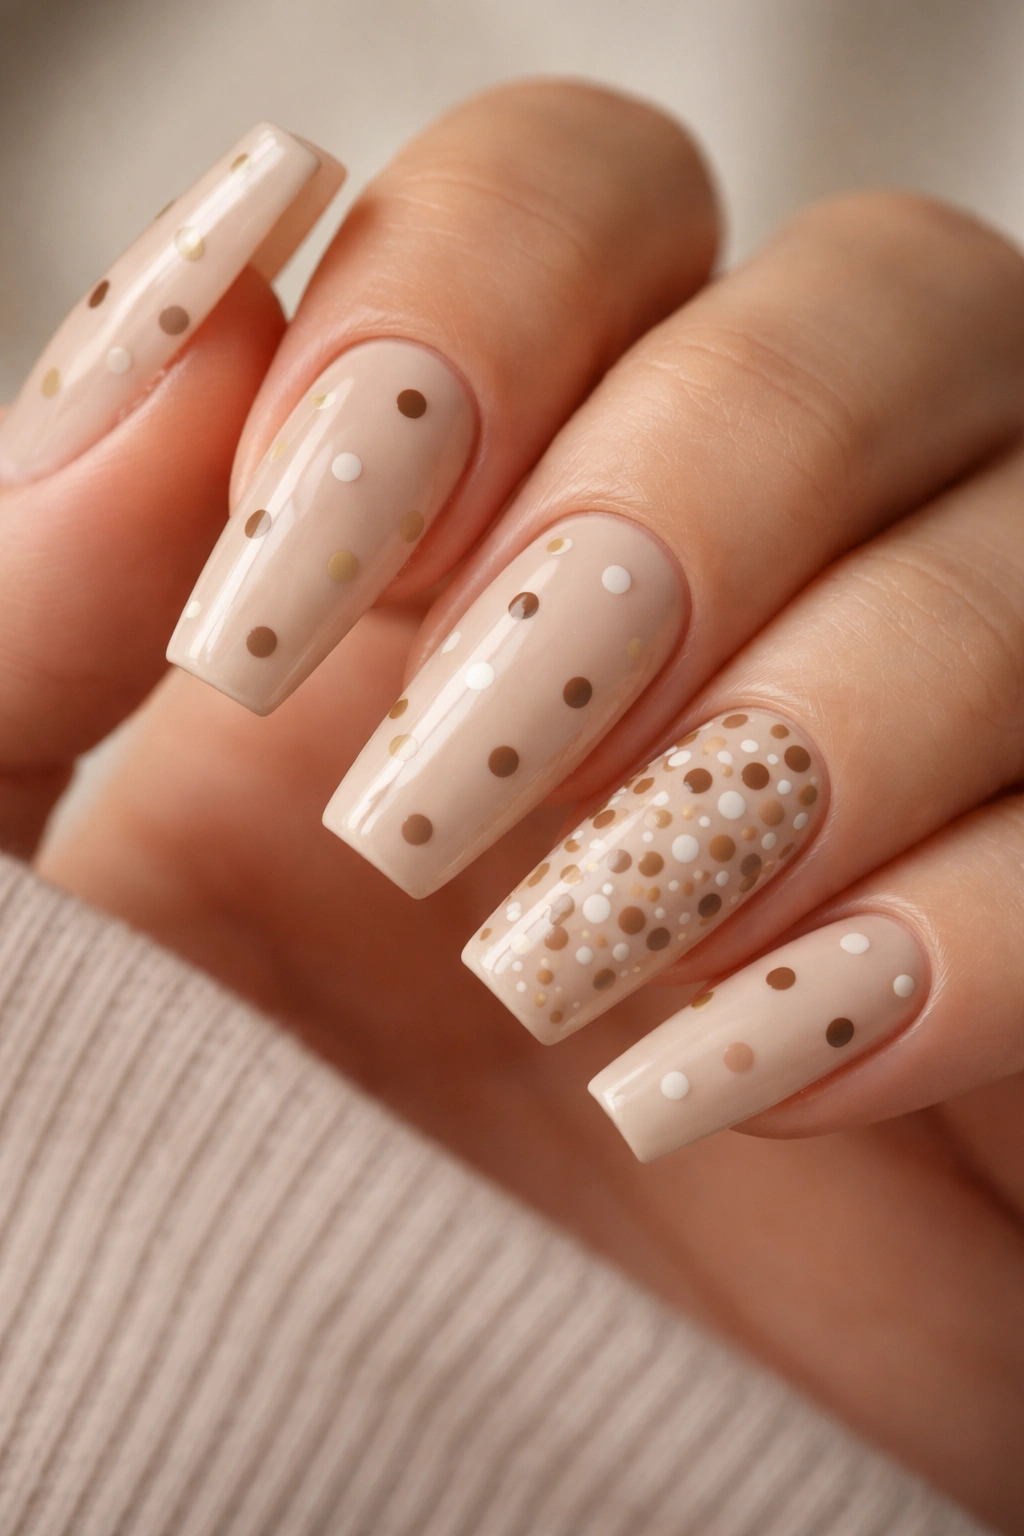
Unlike high-contrast black-and-white sets, mixed neutral dots rely on texture, spacing, and tone. Think oat, mocha, cream, caramel, and soft taupe on a beige nude base. From a distance, the look reads polished. Up close, you see the pattern.
That subtlety is the reason to wear it. If you like coffin nails but your style leans clean, minimal, and maybe a little tailored, a neutral dot manicure gives you pattern without the sharp graphic hit of darker colors.
The accent nail does the heavy lifting. Keep four nails sparse—small dots with breathing room—then load one nail, usually the ring finger, with a tighter dot cluster or a mix of dot sizes. That single dense nail stops the design from fading into the background.
Who is this best for? People who want a playful manicure that still sits nicely with gold jewelry, cream sweaters, brown leather bags, camel coats, and all the quiet wardrobe pieces that do not love loud nail art. It is also forgiving on shorter coffin lengths because tonal contrast does not chop up the nail visually.
My one firm opinion here: do not add glitter. The charm of this look is that it whispers. Glitter makes it start shouting.
7. Baby Pink Nails With Irregular Confetti Dots
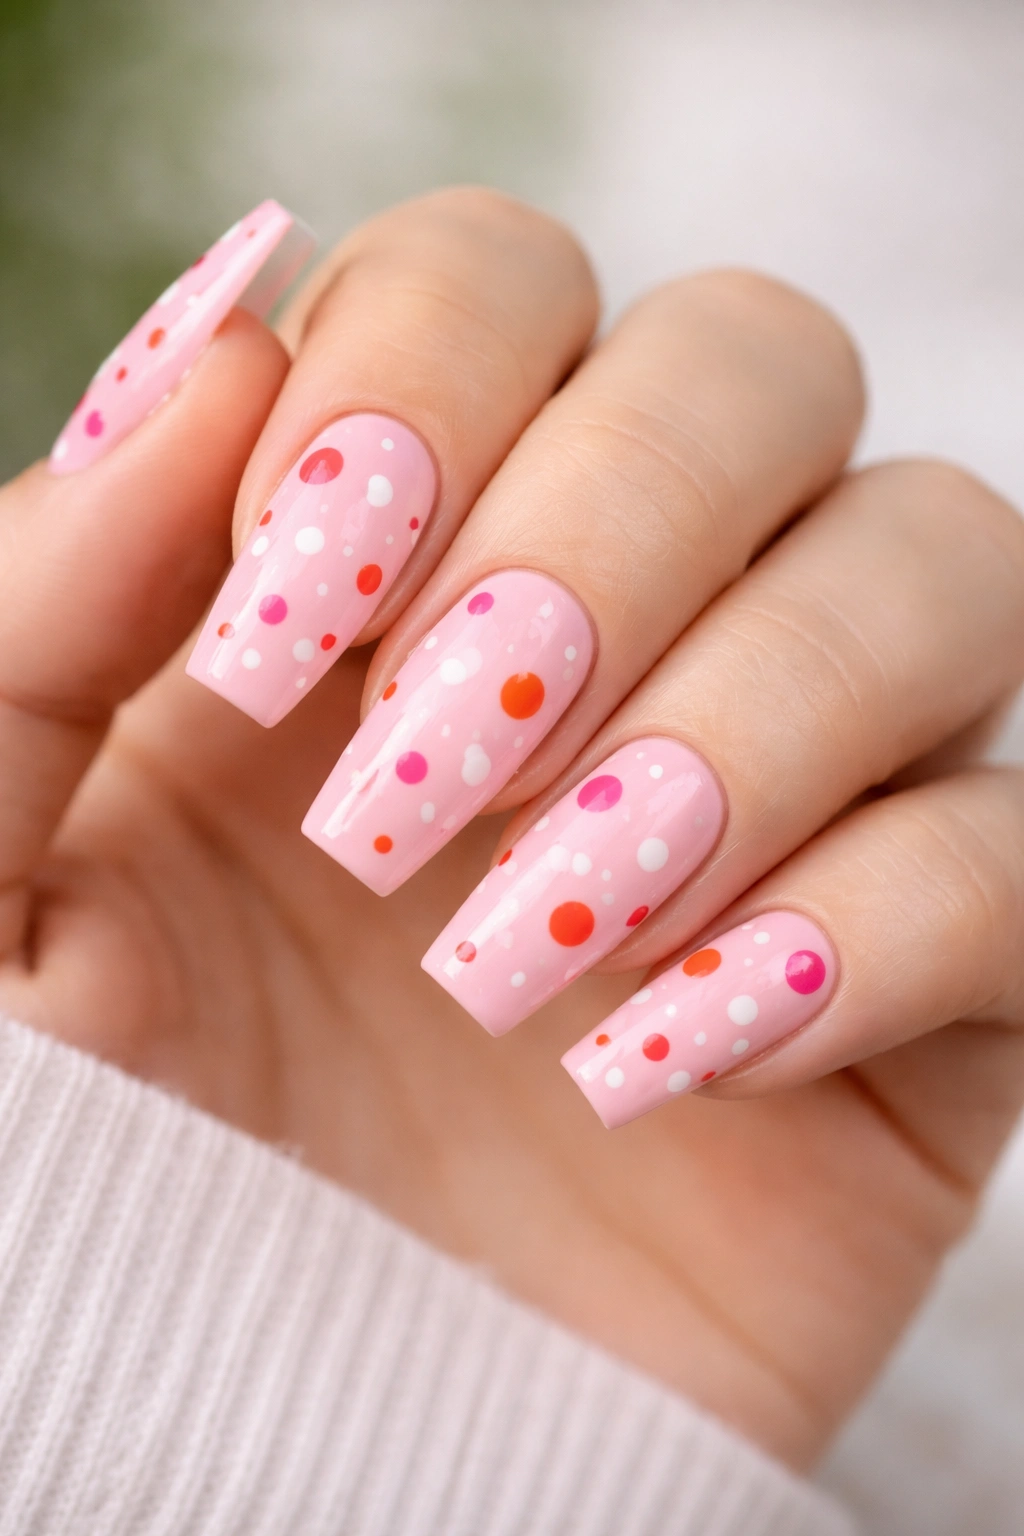
There is a fine line between irregular and messy. This design sits right on it, which is why I like it. A baby pink base with scattered confetti-style dots feels lighter and looser than classic polka dots, but it still needs some control or it falls apart fast.
Use three dot sizes if you want that tossed-around effect: one tiny, one medium, one slightly larger. Keep the color story tight—maybe white, fuchsia, and orange-red, or white, cherry, and lilac—so the shape does not turn into visual noise. Too many colors and the manicure starts looking like birthday wrapping paper.
The trick that keeps “random” from looking accidental
Place the largest dots first. Then add medium dots in the open spaces. Tiny dots come last, and only in a few spots. If you start with the tiny ones, you will crowd the nail before the design has a focal point.
Quick pointers
- A sheer baby pink base looks fresher than an opaque bubblegum pink.
- Keep at least 40 percent of the nail visible so the dots feel scattered, not packed.
- Repeat one color on every finger to hold the set together.
- Use glossy top coat; matte makes confetti lose its bounce.
This is the set I would choose for a weekend, a short trip, or any stretch when you want your nails to look cheerful without demanding a full outfit around them.
8. Black Base With Tiny White Crescent Dots
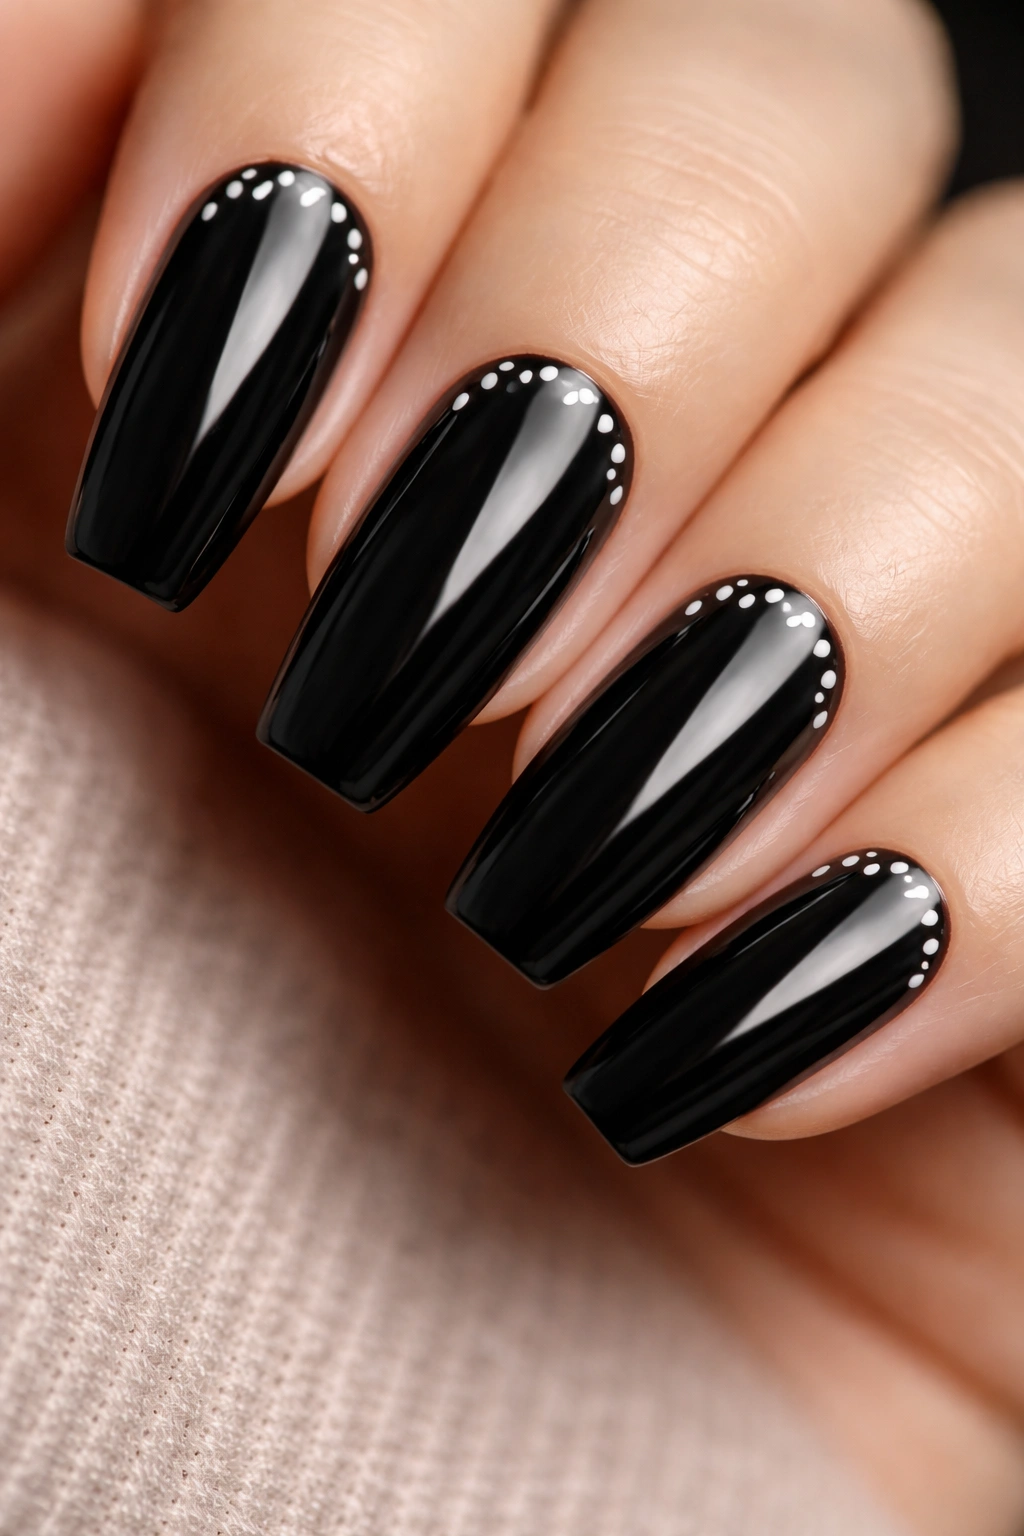
Dark nails can handle tiny detail better than people expect. A glossy black coffin with white micro dots arranged in crescent arcs near the cuticle or sidewall looks crisp, almost celestial, without drifting into stars-and-moons territory.
What makes this design stand out is the restraint. You are not covering the whole nail. You are using dots to draw a shape—usually a half-moon near the cuticle line or a curved band along one side. The empty black space does the rest.
That negative space matters because black polish already carries a lot of weight. If you fill the entire nail with white dots, the look turns heavy. Keep each crescent to five to eight micro dots, all placed with a fine tool, and let the rest of the nail stay plain and glossy.
There is also a practical upside. Small crescent dots hide minor tip wear better than full-coverage dot patterns because the design sits away from the free edge. If you tend to rough up your manicure after four or five days, that helps.
I would file the coffin tip a touch softer for this one—not square-square, more of a softened coffin edge—because the contrast between black and white already gives plenty of structure. The shape does not need to shout too.
9. Clear Jelly Coffin Nails With Floating Color Dots
Can a dot manicure still look airy on long coffin nails? Yes, if the base has some transparency. Clear jelly nails with floating dots let the shape stay light, which is useful when you like longer extensions but do not want the design to feel dense.
Use a tinted jelly base rather than a fully clear one if you can. A soft blush jelly, smoky nude jelly, or pale apricot jelly gives the dots something to sit over while still keeping that see-through look. Then place small colored dots in loose clusters, almost as if they are suspended inside the nail.
This is one of those designs that looks easier than it is. Jelly finishes spotlight streaks, air bubbles, lint, and uneven top coat. Work in thin layers. If you use gel, cure each layer cleanly and cap the free edge so the transparency stays crisp instead of cloudy.
How to keep the jelly effect from turning murky
Choose two or three dot colors, not five. Space the dots farther apart than you think you need. If the dots overlap too much, the whole reason for choosing a jelly base disappears. Peach, white, coral, and soft blue work well; neon can be fun too, though I would keep it to a single accent nail rather than all ten.
This one is playful in a lighter, breezier way. It does not hit as hard as black-and-white dots, and that is exactly why some people will love it.
10. Cream Nails With Tonal Brown Dots
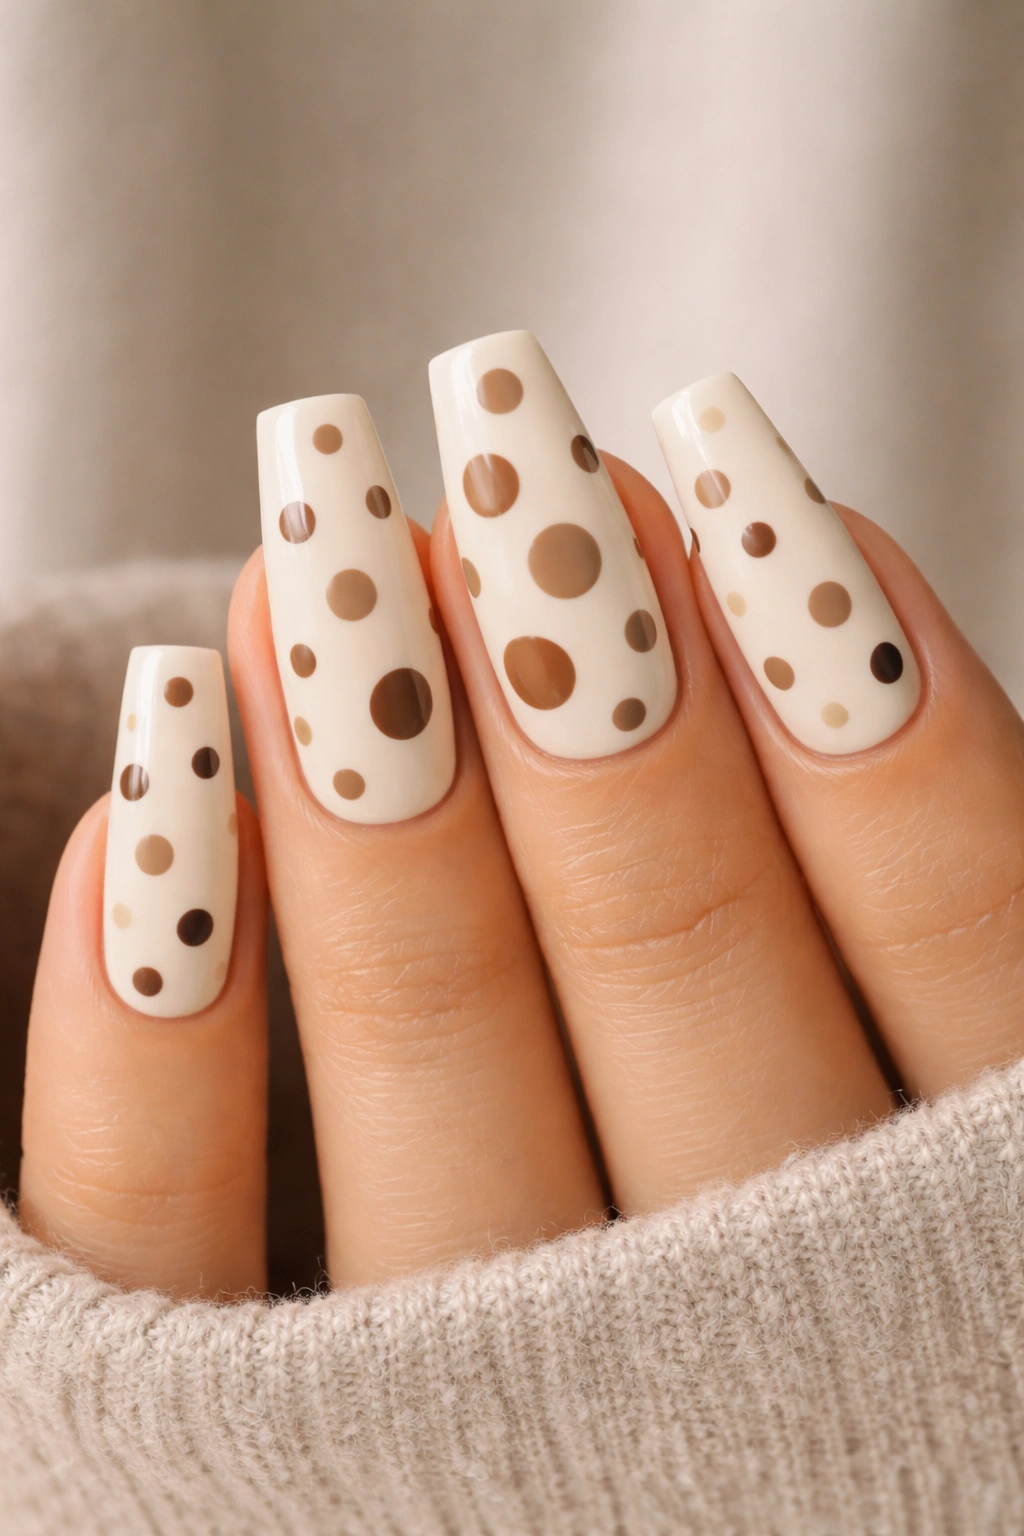
I first fell for this look because it reminded me of old café tile floors and speckled stoneware mugs. Cream nails with brown tonal dots have warmth. They feel grounded. And on coffin nails, that earthy palette takes the edge off the shape without making it dull.
The base should be creamy, not stark. Then layer in caramel, cocoa, espresso, and taupe dots, keeping the darkest shade as the smallest accent rather than the main event. That one choice changes the whole manicure. If the deep brown takes over, the set gets heavier than it needs to be.
A mixed-dot layout works best here:
- Use larger caramel or taupe dots toward the center of the nail.
- Add smaller cocoa dots near the sides.
- Save espresso for two or three tiny accents.
- Keep one or two nails sparse so the hand does not look overloaded.
This palette also looks good in matte, though I still lean glossy because cream shades can pick up dirt or makeup transfer at the edges, and gloss is easier to wipe clean. If you wear a lot of beige, brown, ivory, or denim, this manicure slips right into the rest of your clothes without needing a second thought.
There is nothing flashy about it. That is its charm.
11. Skittle Polka Dot Coffin Nails With a Different Pattern on Each Finger
If choosing one dot layout feels boring, do not choose one. A skittle polka dot coffin nails set lets each finger carry a different version of the theme—tight micro dots on the index, oversized dots on the middle, a half-moon dot pattern on the ring finger, scattered confetti on the pinky, maybe a dotted French on the thumb.
This is the one design in the bunch where more variety actually helps. The catch is that the color palette must stay disciplined. Pick one base tone family and one dot family, or flip that idea and keep the dots the same color while the bases shift across the hand. If both change too much, the set starts feeling random in the wrong way.
I like this look best when one finger acts as a reset button. A plain solid nail—no dots at all—can sit between busier patterns and keep the manicure from looking overworked. Yes, that “missing” design counts as design. Editing matters.
Skittle sets also solve a problem people do not talk about enough: sometimes one pattern looks good on the thumb and awkward on the pinky. Breaking the design up finger by finger lets you match the pattern to the nail width. Bigger dots on wider nails, tighter detail on narrow ones. That is how a playful manicure starts looking thoughtful.
If you try this at home, paint swatches on a plastic tip or even paper first. I know, boring step. It saves you from that mid-manicure moment when you realize three fingers look the same and two look like strangers.
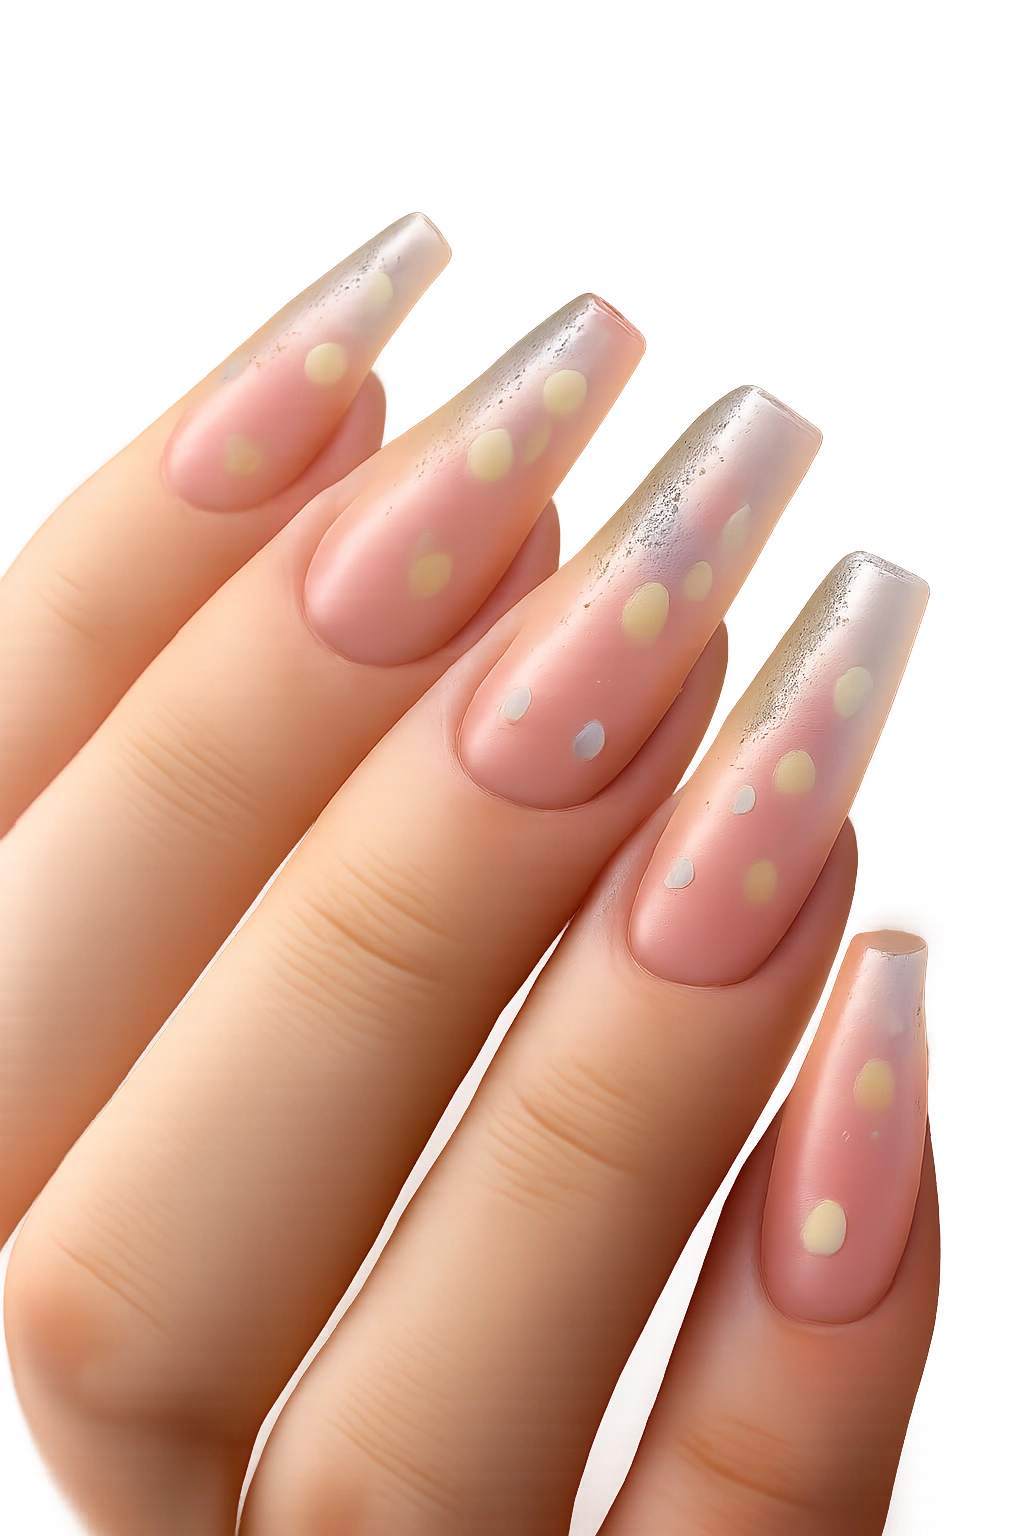
12. Soft Blue Nails With Daisy-Style Dot Clusters
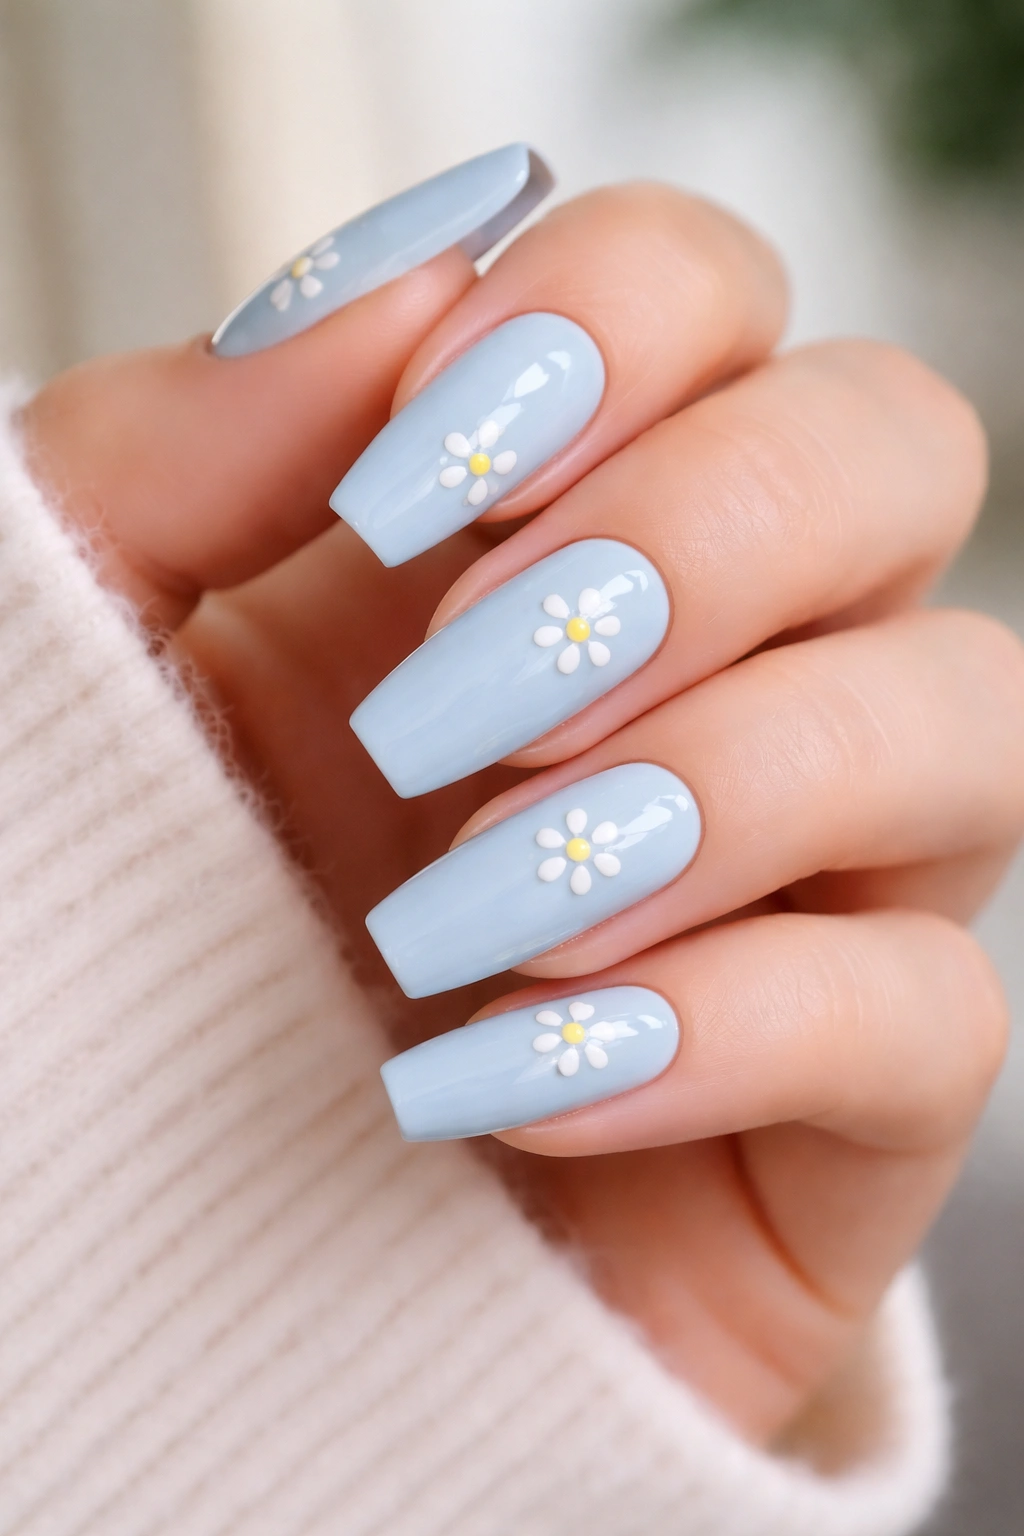
Unlike full hand-painted florals, daisy-style dot clusters are still just dots at heart, which makes them much easier to pull off on your own. A soft sky-blue or dusty blue base with white petal dots and a yellow center gives you a floral nod without needing a detail brush or artist-level patience.
Placement matters more than painting skill here. Keep the flowers small and off-center. One daisy near the cuticle on the ring finger, two tiny daisies near the sidewall on the thumb, a single flower on the middle finger—enough to suggest a pattern, not enough to cover the whole nail. The empty blue space keeps it fresh.
This look works best on medium coffin nails with a softer taper. Extreme long coffin can make small daisies feel lost unless you add extra dot scatter around them, and that can push the design past the point of charm.
A few details make a big difference:
- Use five white petal dots max per flower.
- Make the yellow center slightly smaller than you think.
- Add one or two plain white dots nearby so the florals blend into the polka dot theme.
- Choose a glossy finish so the blue stays clean and bright.
I have a soft spot for this one. It feels cheerful without trying too hard, and that is not easy to pull off.
Wear the Dots
The best polka dot coffin nails are not the busiest ones. They are the ones with clear spacing, the right dot scale, and a color story that knows when to stop. You can get a playful manicure from black and white, soft neutrals, jelly colors, red retro dots, or tiny dotted French tips—the pattern is flexible, but the editing is what makes it sing.
If you are stuck between two designs, choose the one you can picture wearing with your own clothes and your own week. That sounds obvious, maybe, though it is where people go wrong. A manicure lives on your hands while you text, work, cook, hold coffee, pay for groceries, and absentmindedly stare at your nails in traffic.
Start with one idea, one base color, and two dot sizes. That is enough to make a coffin manicure feel playful without tipping into chaos.
