

Chrome coffin nails have become the ultimate statement for anyone looking to elevate their manicure beyond basic polish. There’s something undeniably striking about the mirror-like, metallic finish that catches light and transforms your nails into tiny reflective surfaces—it’s bold, sophisticated, and instantly photo-worthy. If you’ve ever scrolled through nail art inspiration and felt drawn to that futuristic, high-shine look, you’re not alone. Chrome effects have exploded across the nail world because they work on virtually any base design and immediately make your nails look like you just stepped out of a professional salon.
The beauty of chrome coffin nails lies in their versatility. You can take a simple nude base and add chrome accents for an understated luxury look, or go full mirror-effect for maximum drama. The coffin shape—that trendy elongated style with a tapered, squared-off tip—provides the perfect canvas for showcasing chrome polish. Long nails let the chrome effect shine (literally), giving you more surface area to play with and more room for creative dimension and layering.
What makes these designs special isn’t just the chrome itself, but how it combines with different color combinations, textures, and complementary techniques. Some designs layer chrome with glitter, others pair it with matte finishes for striking contrast, and still others use chrome as an accent element that ties the whole look together. Whether you’re attending a formal event, heading to work, or simply want to feel confident and polished day-to-day, there’s a chrome coffin nail design here that’ll speak to your style.
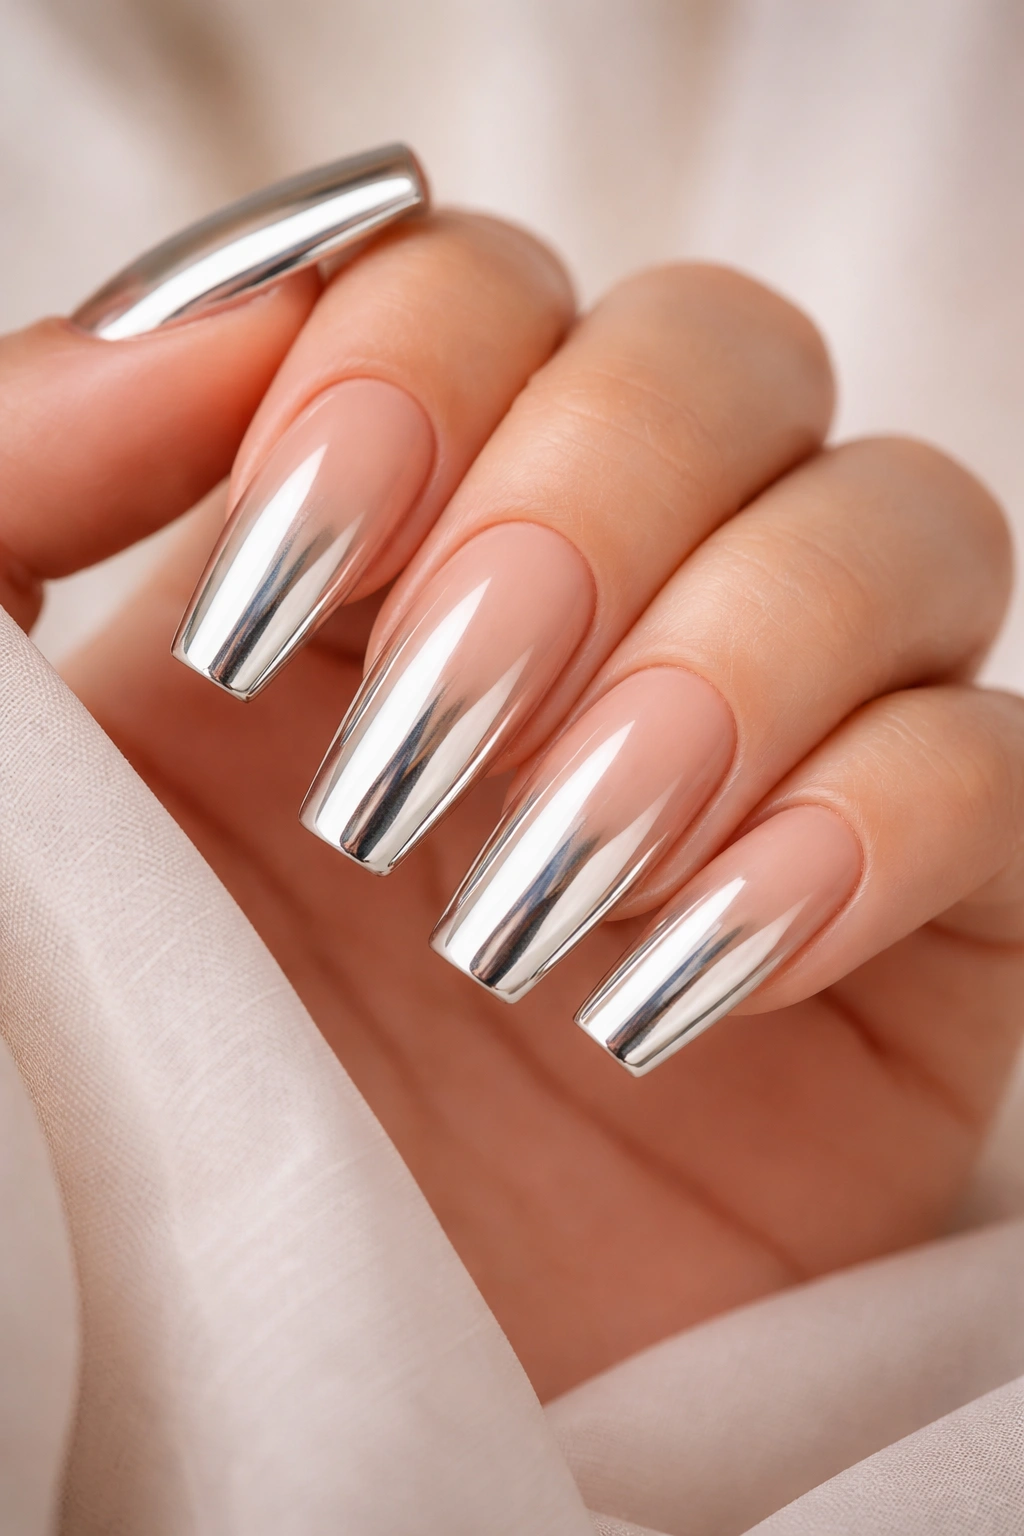
1. Full Chrome Mirror Nails with Nude Base
A true classic that never feels overdone, this design starts with a sheer nude or beige base coat that creates warmth and wearability, then covers the entire nail with a high-quality chrome powder to create that flawless mirror finish. The nude undertone keeps the chrome looking refined rather than clinical, making it appropriate for both casual and professional settings. The key to nailing this look is using a sticky base coat and applying the chrome powder with gentle, buffing motions rather than pressing hard—too much pressure can damage the mirror effect.
Why It Works for Every Occasion
The nude base prevents the chrome from feeling too trendy or temporary, giving it a timeless elegance that lasts through seasons and through changing style preferences. Nude chrome coffin nails read as intentional and sophisticated rather than experimental. Your hands look elongated and graceful, and the mirror effect draws attention to your nail shape without overwhelming your overall look.
Pro Application Technique
Use a velvet chrome powder in a silvery-champagne tone rather than pure silver—it photographs better and catches light at multiple angles. Apply a thin layer of tacky base, dip or buff the powder on gradually in small sections, then seal with a quality top coat designed specifically for chrome (regular top coats can dull the effect). The magic happens in the final buffing—gentle, circular motions bring out the full mirror shine.
2. Ombre Chrome Gradient from Pink to Silver
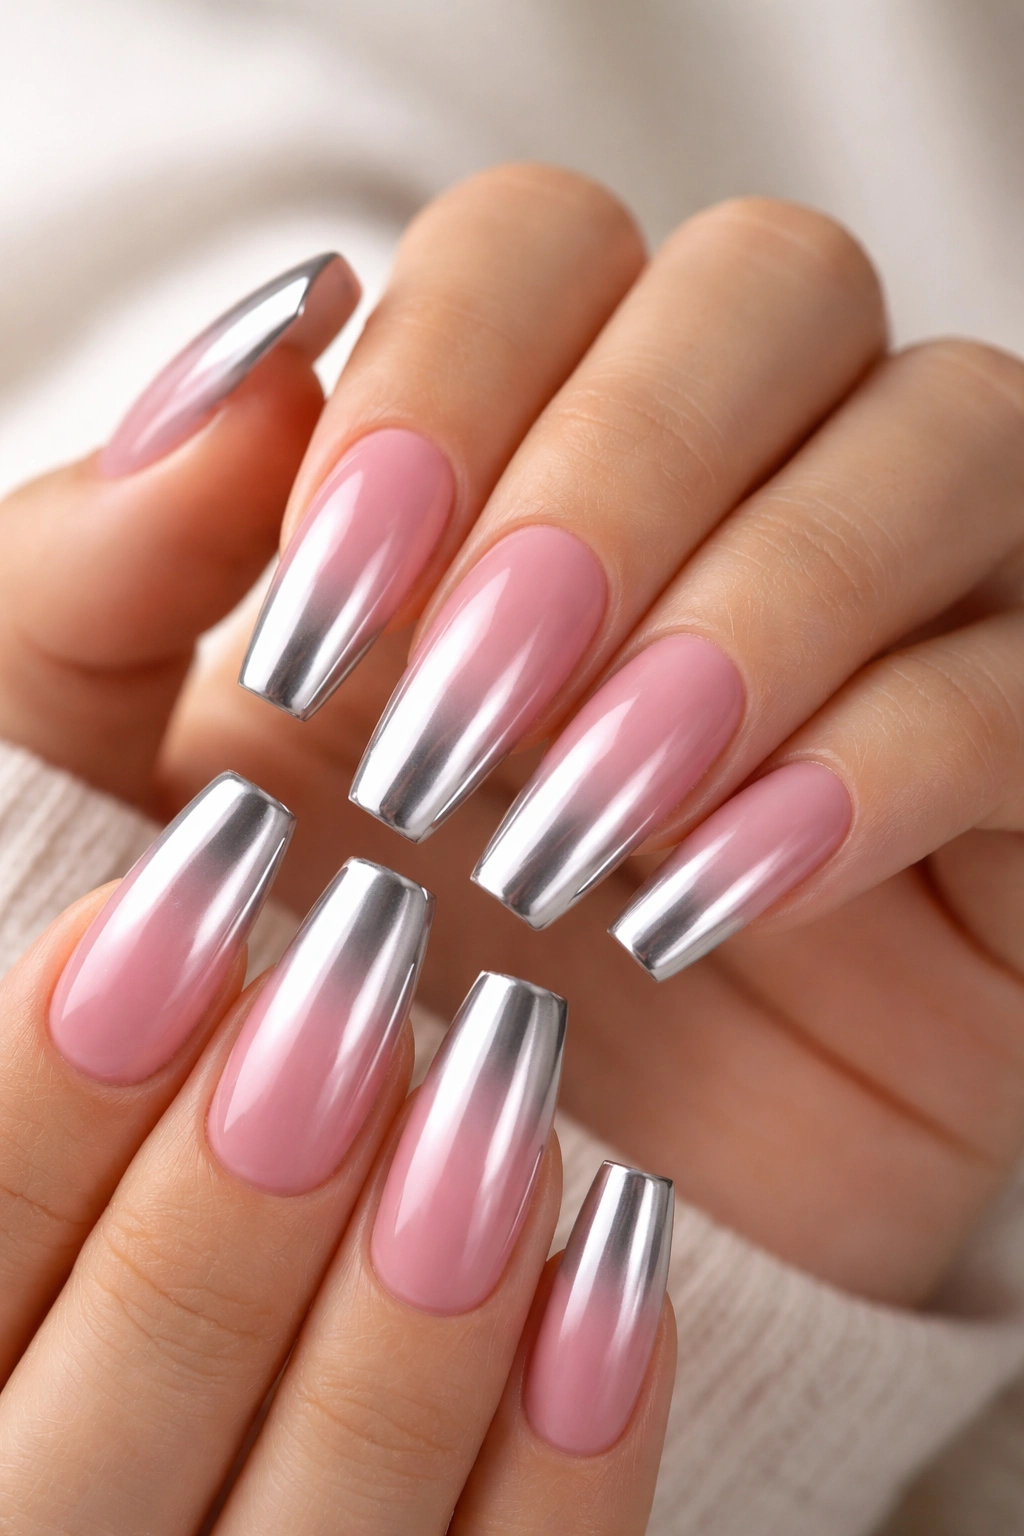
This design transitions smoothly from a soft pink at the cuticle to a silvery chrome at the tip, creating depth and dimension that makes your nails look longer than they are. The gradient pulls together two nail trends simultaneously—soft romantic pink and futuristic chrome—proving these aesthetics can coexist beautifully. Creating the blend requires either sponging technique with multiple polish shades or using a pre-made gradient base, then sealing everything with the chrome powder applied to the tip section.
The Color Combination Magic
Pink-to-chrome ombré works because the warmth of pink grounds the cool metallics, preventing the overall look from feeling cold or harsh. This combination flatters most skin tones and suits both minimalist and maximalist styles. The gradient creates visual interest that keeps the design from feeling flat, even though it’s technically a simple color transition.
How to Create the Blend
Sponge your gradient using at least three shades: a pale pink, a medium mauve, and a taupe before applying chrome to the tips. Blend each transition zone by dabbing lightly with a clean, slightly damp sponge. Once the gradient is set and matte, apply your tacky base coat to just the tip area and buff on the chrome powder carefully, using a smaller brush to keep the line where chrome meets gradient sharp and intentional.
3. Chrome with Black Matte Accent Nails
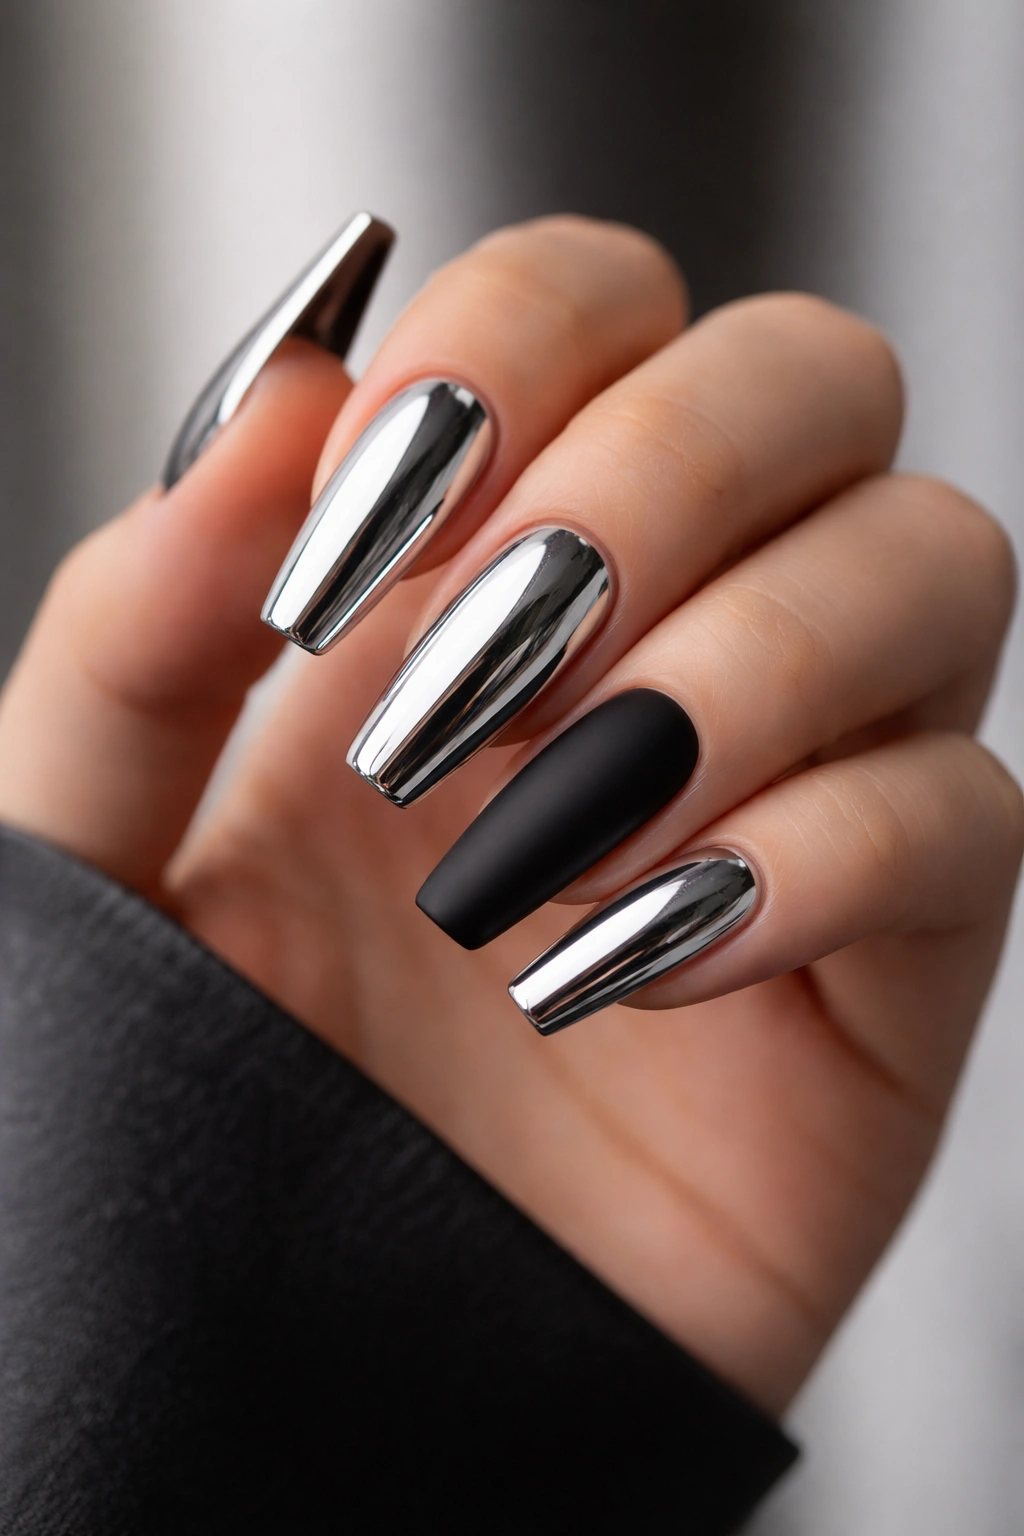
Combine full chrome on most nails with one or two accent nails in matte black, creating a striking contrast that’s equal parts edgy and elegant. The matte finish recesses visually while the chrome pops forward, creating a three-dimensional effect that photographs gorgeously. This design works especially well on coffin nails because the elongated shape can accommodate the dramatic contrast without feeling chaotic. Choose one accent nail per hand (typically the ring finger or middle finger) for balance, or alternate them for asymmetry that feels intentional.
Why the Matte Contrast Works
Matte surfaces absorb light while chrome reflects it, creating visual drama without adding any extra embellishment. The black grounds the look and prevents it from feeling overly feminine or delicate. This combination suits anyone who wants their nails to make a statement while maintaining an air of cool confidence.
Placement and Application Strategy
Apply black matte polish to your accent nails first, allowing it to cure completely before working on the chrome nails. This prevents accidental chrome powder transfer. When you’re ready to apply chrome, tape off the matte nails with precision painter’s tape or use liquid latex barrier to keep them protected. The sharp line between matte and chrome becomes a design element itself—keep it clean and intentional.
4. Chrome Coffin Nails with Glitter Embedded Design
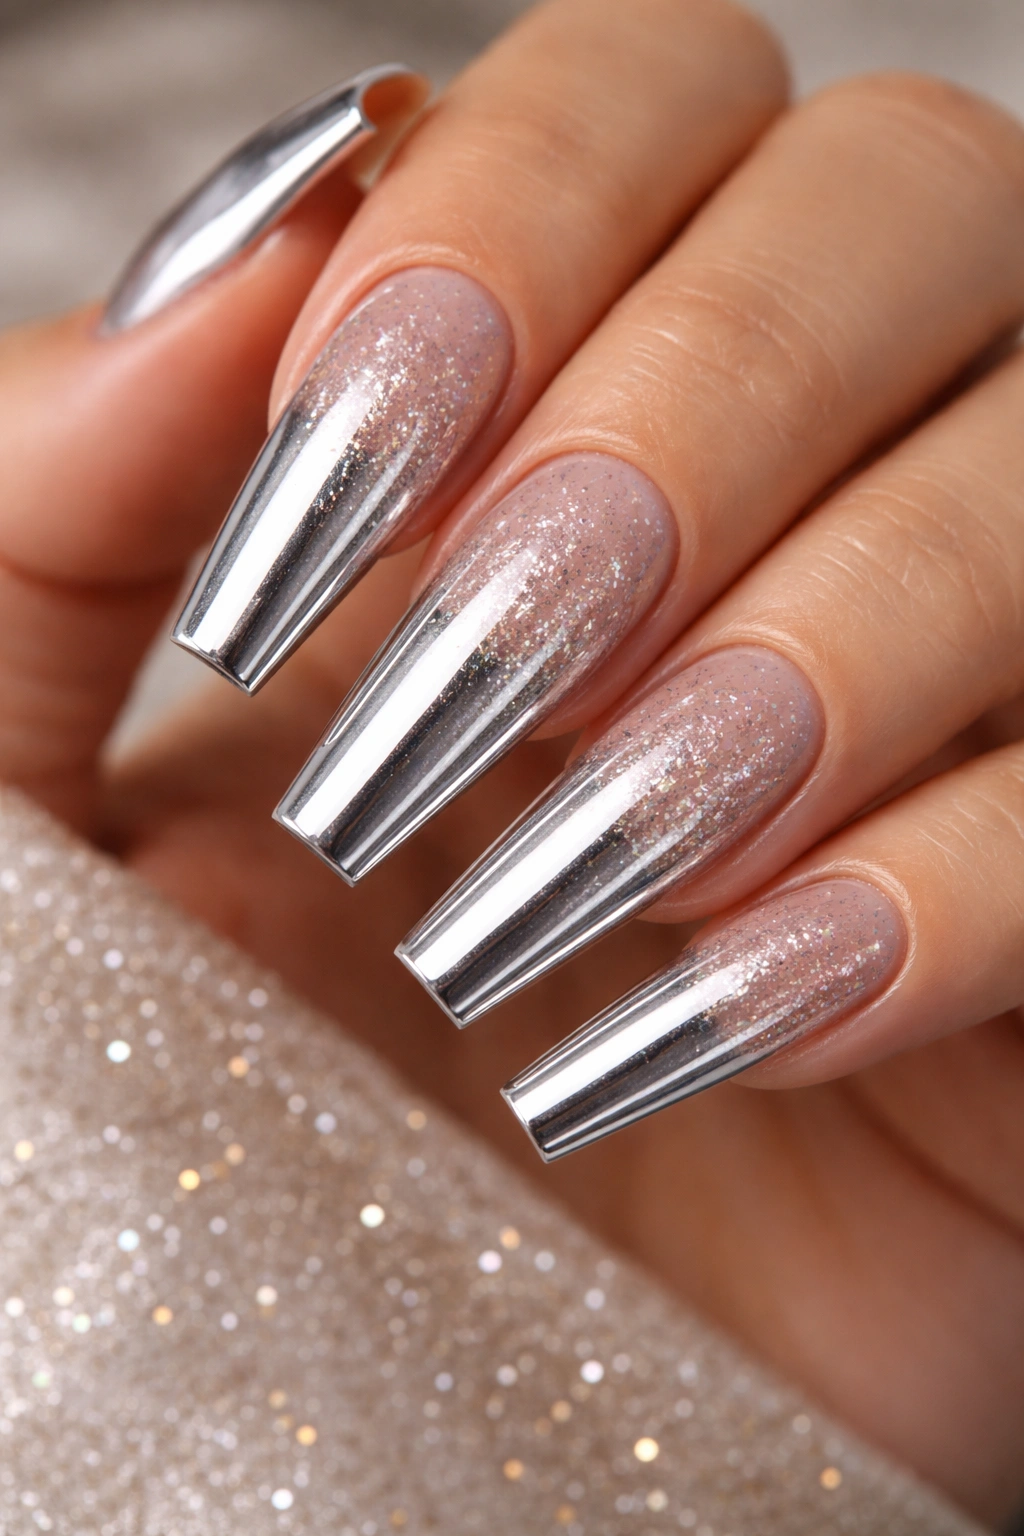
Layer chrome powder over a clear or nude base, then embed small glitter flecks or sequins into the still-tacky base before sealing, creating a textured chrome look with embedded sparkle. This design bridges the gap between ultra-shiny and multidimensional, catching light in multiple ways. The glitter doesn’t interfere with the chrome effect—instead, it adds micro-sparkles that make the mirror finish feel even more luxurious and three-dimensional.
The Texture Element That Changes Everything
Textured chrome nails break up the smooth monotony of a pure mirror finish while maintaining that coveted metallic quality. The addition of glitter makes the design photograph better and feel more dynamic in person. This approach works particularly well for special occasions where you want nails that are clearly intentional and carefully crafted.
Embedding Technique for Best Results
Use body-safe glitter or proper nail art sequins (never craft glitter, which contains harmful substances). After applying your base and while the tacky layer is still sticky, place individual pieces with a dotting tool or tweezers rather than sprinkling—this gives you control and prevents overloading. Once you’ve positioned your glitter, seal everything with gel top coat rather than traditional polish top coat, which provides a clearer finish that showcases the embedded pieces.
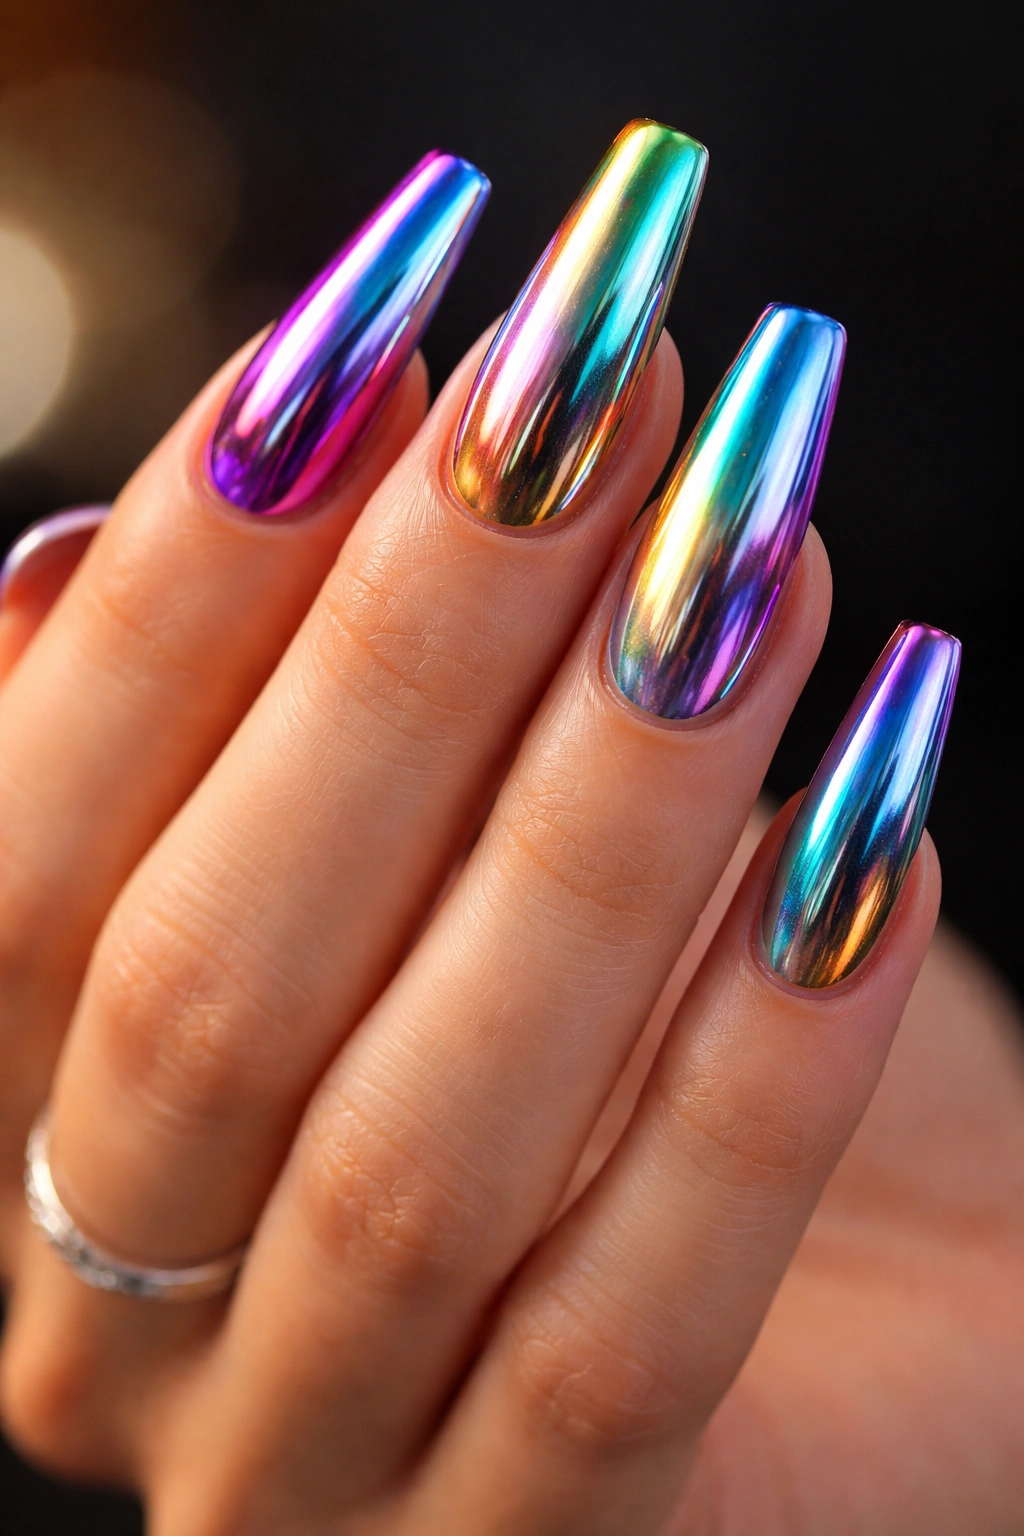
5. Holographic Chrome with Rainbow Shift
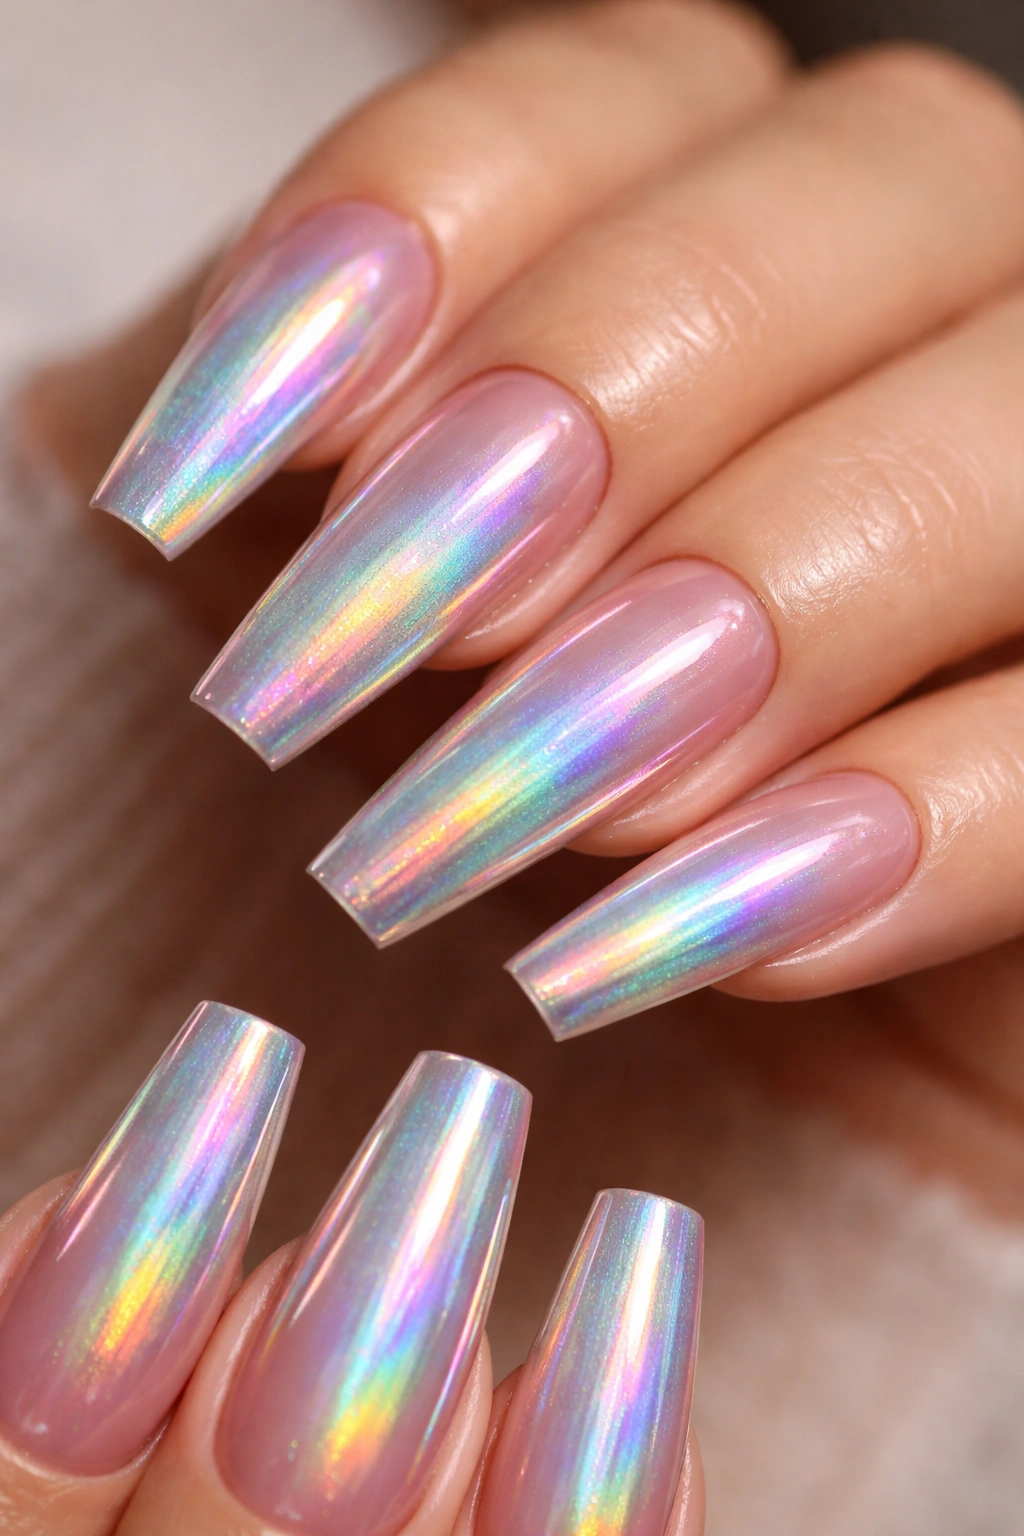
Choose a holographic chrome powder that shifts between rainbow colors as light angles change, creating a design that looks different throughout the day and in different lighting conditions. This advanced chrome technique goes beyond the standard mirror finish by adding color-shifting properties that create pure magic on camera. Coffin nails provide plenty of surface area for the holographic effect to fully display, and the length means the color shift is visible across the entire nail.
What Makes Holographic Different
While standard chrome reflects light as silver, holographic chrome separates that light into spectrum colors, creating the optical illusion of rainbow shifting without actual glitter or sparkle. It’s a subtle effect that becomes obvious under certain lighting, making your nails feel like they’re moving even when your hands are still. This design reads as modern, experimental, and intentional—it signals that you’re current on nail trends and willing to try something different.
Application and Visibility
Apply holographic chrome over a sheer or nude base for the most dramatic color-shifting effect. Thick base colors can mute the holographic properties. Use a high-quality holographic powder (this is not a place to economize—cheaper versions often look muddy rather than iridescent). The effect is most visible in natural light and under cool-toned artificial light. Test how it looks in your regular environment—work lighting, home lighting, and outdoor light—to make sure you love it everywhere.
6. Chrome Metallic Ombre with Gold Accents
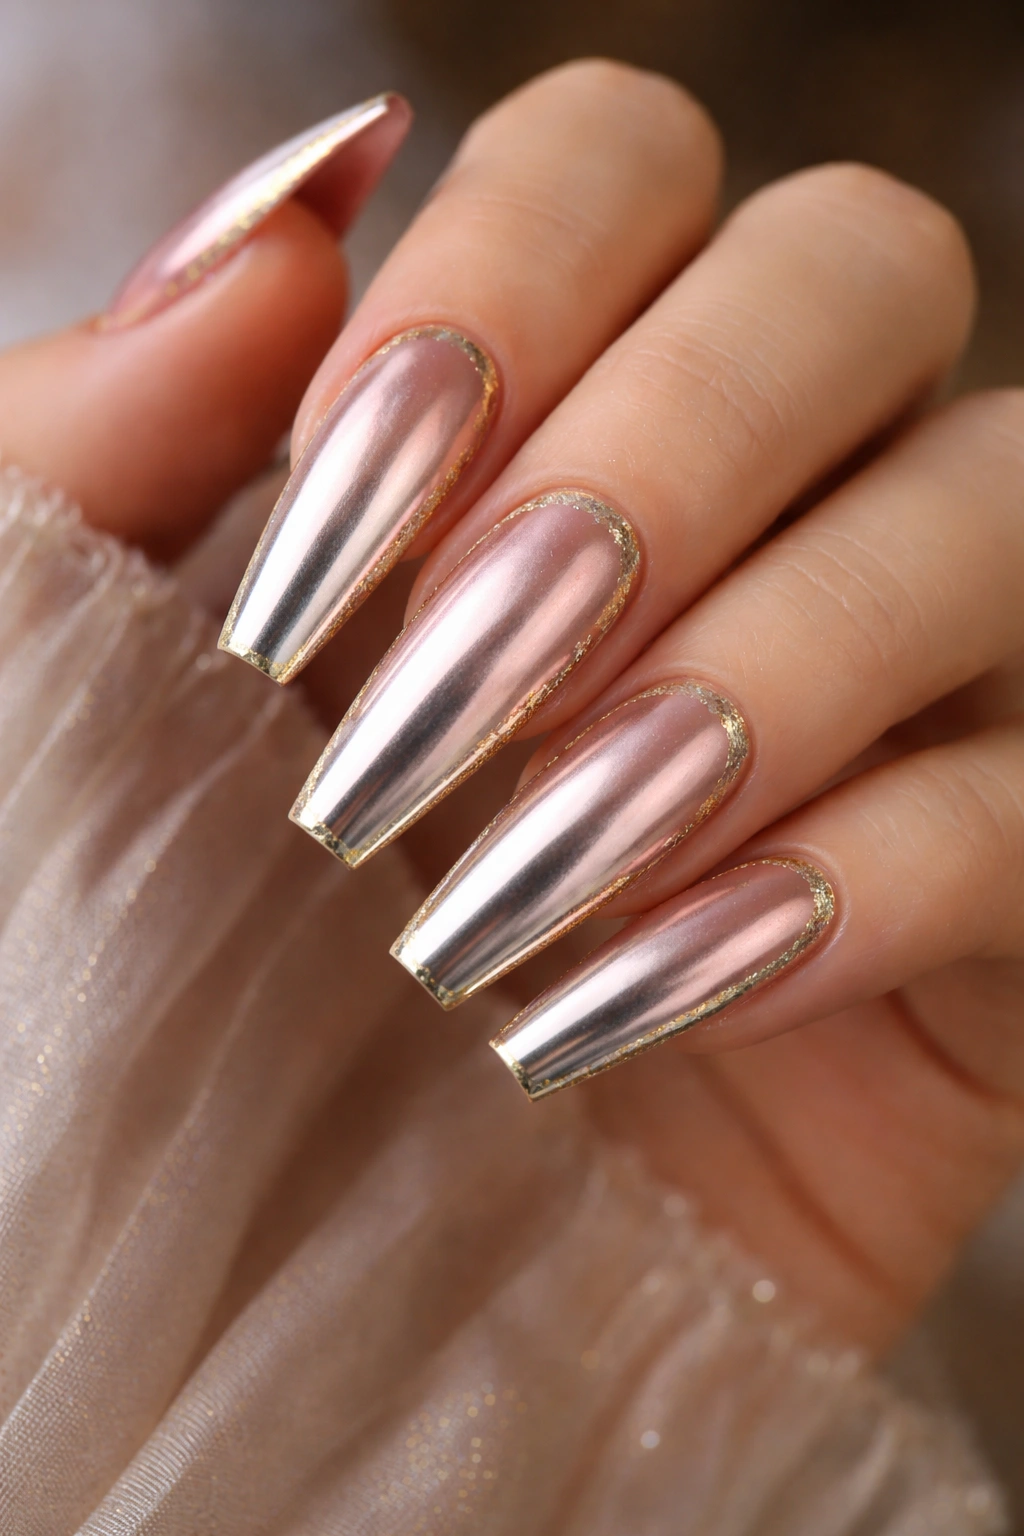
Blend a rose gold chrome shade at the cuticle into a cool silver chrome at the tips, creating warmth and dimension while staying entirely in the metallic spectrum. This design demonstrates how different chrome tones can work together, creating depth through color temperature rather than contrasting finishes. The warmth of rose gold acts as a bridge, preventing the cooler silver from feeling jarring. Add delicate gold foil strips along the side of each nail for an extra luxury element.
The Warmth and Cool Temperature Play
Rose gold and silver together create visual interest because they’re different enough to register as distinct but similar enough that they feel intentional rather than random. The gradient from warm to cool subtly guides the eye across your nail from base to tip. This design feels expensive and carefully considered, elevating a simple chrome manicure into something that reads as more luxurious.
Creating the Seamless Transition
Use a sponging technique with three chrome shades: rose gold, champagne, and cool silver. Blend each layer by dabbing with a damp, clean sponge between applications. Once your gradient is complete and sealed, you can add ultra-thin gold foil strips along one side by placing them with tweezers before sealing with top coat. This adds dimension without overwhelming the clean gradient effect.
7. Reverse Chrome Ombre with Tips Reversed

Flip the typical ombre by keeping your base color opaque (such as a rich burgundy or deep navy), then transitioning to chrome only at the tips, creating a reverse gradient that feels unexpected and sophisticated. This approach lets you wear color while still showcasing chrome, solving the problem of wanting both without sacrificing either. The reverse technique works beautifully on coffin nails where the extended tips provide plenty of room for the chrome gradient to be visible.
Why Reverse Is More Elegant Than Standard
A standard ombre fades color, but reverse ombre creates contrast—your deep color appears richer against the light chrome tips, and the chrome feels even more luminous against the darker base. This design reads as more intentional and modern than a simple gradient. It’s perfect for anyone who loves color but also wants the mirror-effect chrome element.
Execution Step by Step
Paint your full base color and allow it to cure completely. Using a sponge or brush technique, blend a nude or clear base over about one-third of the tip area, creating a transition zone. Once this is set, apply your tacky base coat to that transition area and the actual tip, then buff on the chrome powder. The darker color receding toward the cuticle creates visual balance and prevents the design from feeling top-heavy.
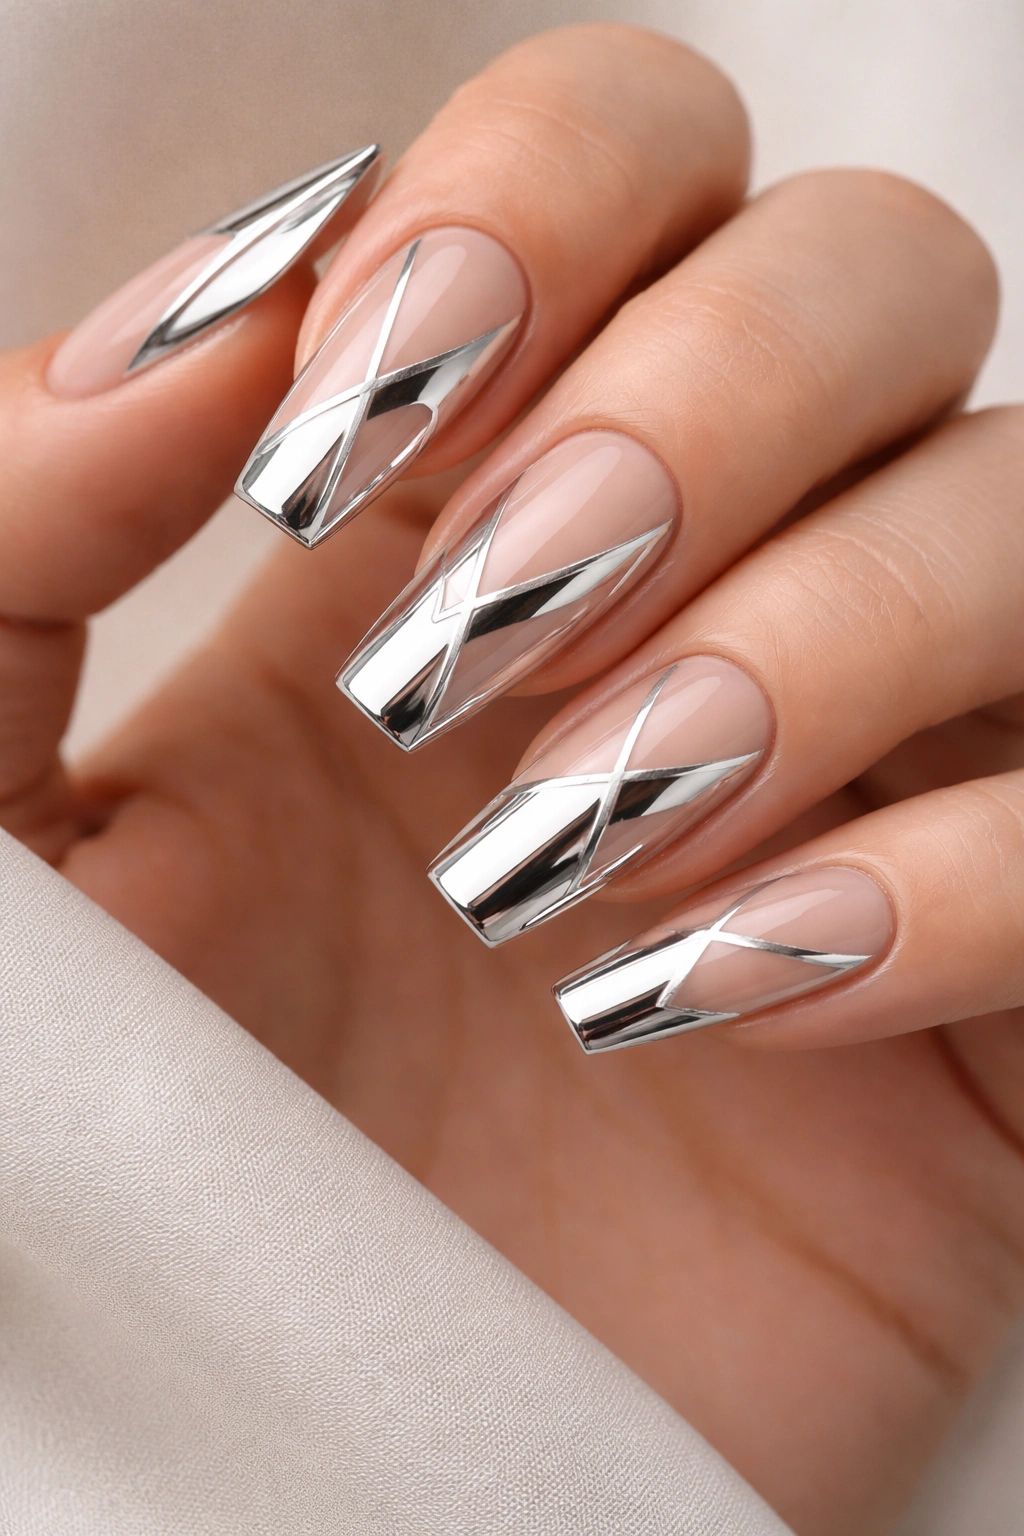
8. Chrome with Thin Black Linear Accents
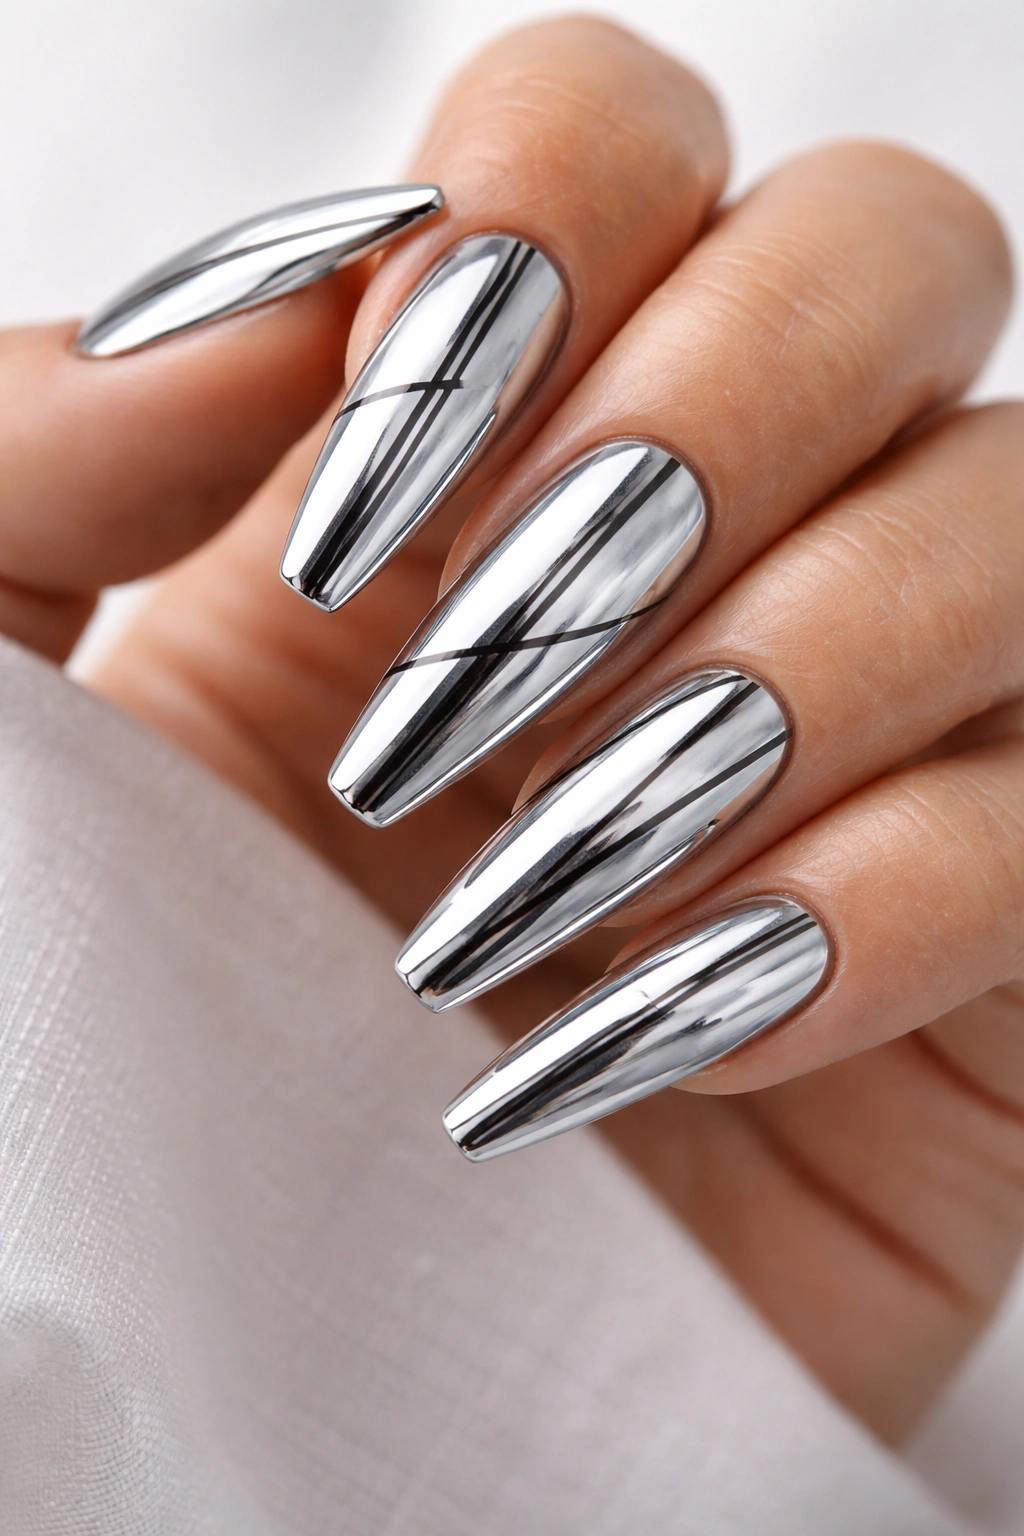
Cover your entire nail with chrome, then add precise thin black lines—either stripes, geometric patterns, or delicate line work—on top of the chrome finish for a design that combines mirror shine with graphic detail. The black lines create visual breaks in the reflective surface, directing the eye and adding intentional design elements. This technique works best when the black lines are thin and precise rather than chunky, keeping the design feeling elegant rather than busy.
The Contrast of Details Against Shine
Black line work against chrome creates striking contrast without adding bulk or texture to your nails. The lines appear to float on top of the mirror surface, creating depth and visual interest. This design suits anyone who loves minimalist details and graphic design elements. It’s simple enough to create at home if you have a steady hand, but professional enough to look salon-executed.
Application and Line Precision
After your chrome finish is completely sealed, use a ultra-fine line brush and black gel or polish to add your design elements. Work slowly and let each line dry completely before moving to the next nail, preventing smudging or running. If you’re worried about precision, sketch your design lightly with a pencil first (yes, on the actual nail), then paint over the pencil marks. The graphite will disappear once sealed. Add a final clear top coat over everything to protect your line work and maintain the chrome shine.
9. Chrome Coffin Nails with Subtle Diamond Pattern
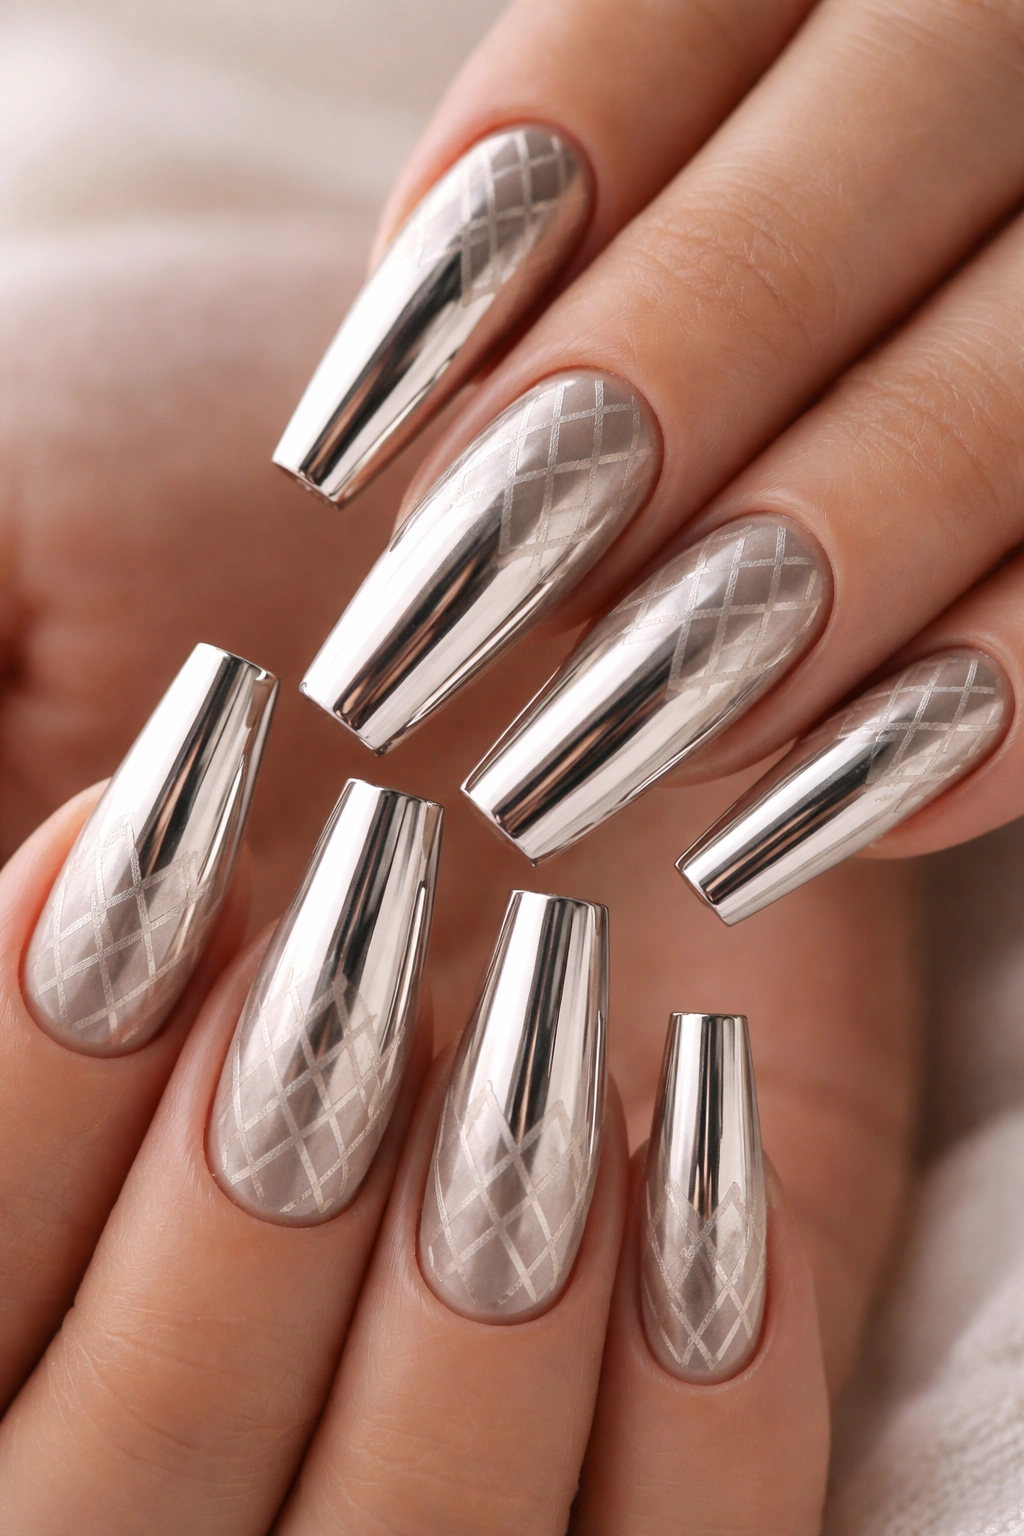
Overlay a delicate diamond or geometric pattern in matte beige or soft taupe over your chrome base, creating a design that’s detailed without being visually overwhelming. The geometric pattern adds sophistication and breaks up the monotony of a solid chrome finish while the matte overlay against shiny chrome creates subtle dimension. This design reads as intentional and carefully crafted, perfect for someone who loves detail work and precision.
Subtle Pattern Work That Doesn’t Compete
Patterned overlays over chrome work best when the pattern color is only slightly darker or different in tone from the chrome. If you go too contrasting, the pattern overwhelms the chrome. Keep the pattern spacing consistent and the lines clean for a professional feel. The pattern should enhance the chrome rather than covering it.
Creating Geometric Precision
Use a thin detail brush and matte finish polish in a neutral tone. Start with a reference pattern—you can find diamond patterns online or create one on paper first. Work one nail at a time, allowing each to dry completely before moving to the next. A few misses is fine and actually adds to the handmade, artisan quality. If the pattern feels too busy, step back and let it be your final layer. Sometimes less detail than you think reads better overall.
10. Full Chrome with Negative Space Accent Nails
Create chrome coffin nails but leave two accent nails completely unpainted or with just a clear base, allowing natural nail to show through as intentional negative space. This design plays with the principle that what you don’t paint is as important as what you do. The bare nails (or nearly-bare nails) create breathing room that prevents the overall look from feeling heavy, and the contrast between chrome and natural nail adds modern, editorial polish. This technique suits anyone with very healthy natural nails who want to showcase them.
The Power of Intentional Blank Space
Negative space design reads as intentional and modern rather than unfinished. By deliberately choosing to leave some nails bare, you’re demonstrating design knowledge and confidence. The chrome nails actually appear more striking when adjacent to bare nails. This approach also gives your nails a visual rest between the intense shine of the chrome.
Choosing Which Nails to Leave Bare
Typically, you’d leave accent nails bare (ring finger and pinky, or middle and pinky), creating balance. The negative space shouldn’t feel random—it should be intentional enough that an observer realizes it’s deliberate rather than thinking you missed a few nails. Keep bare nails perfectly groomed and consider a very light buff or natural top coat to make them appear intentional and polished rather than just nude.
11. Chrome with Embedded Gold Foil Accents
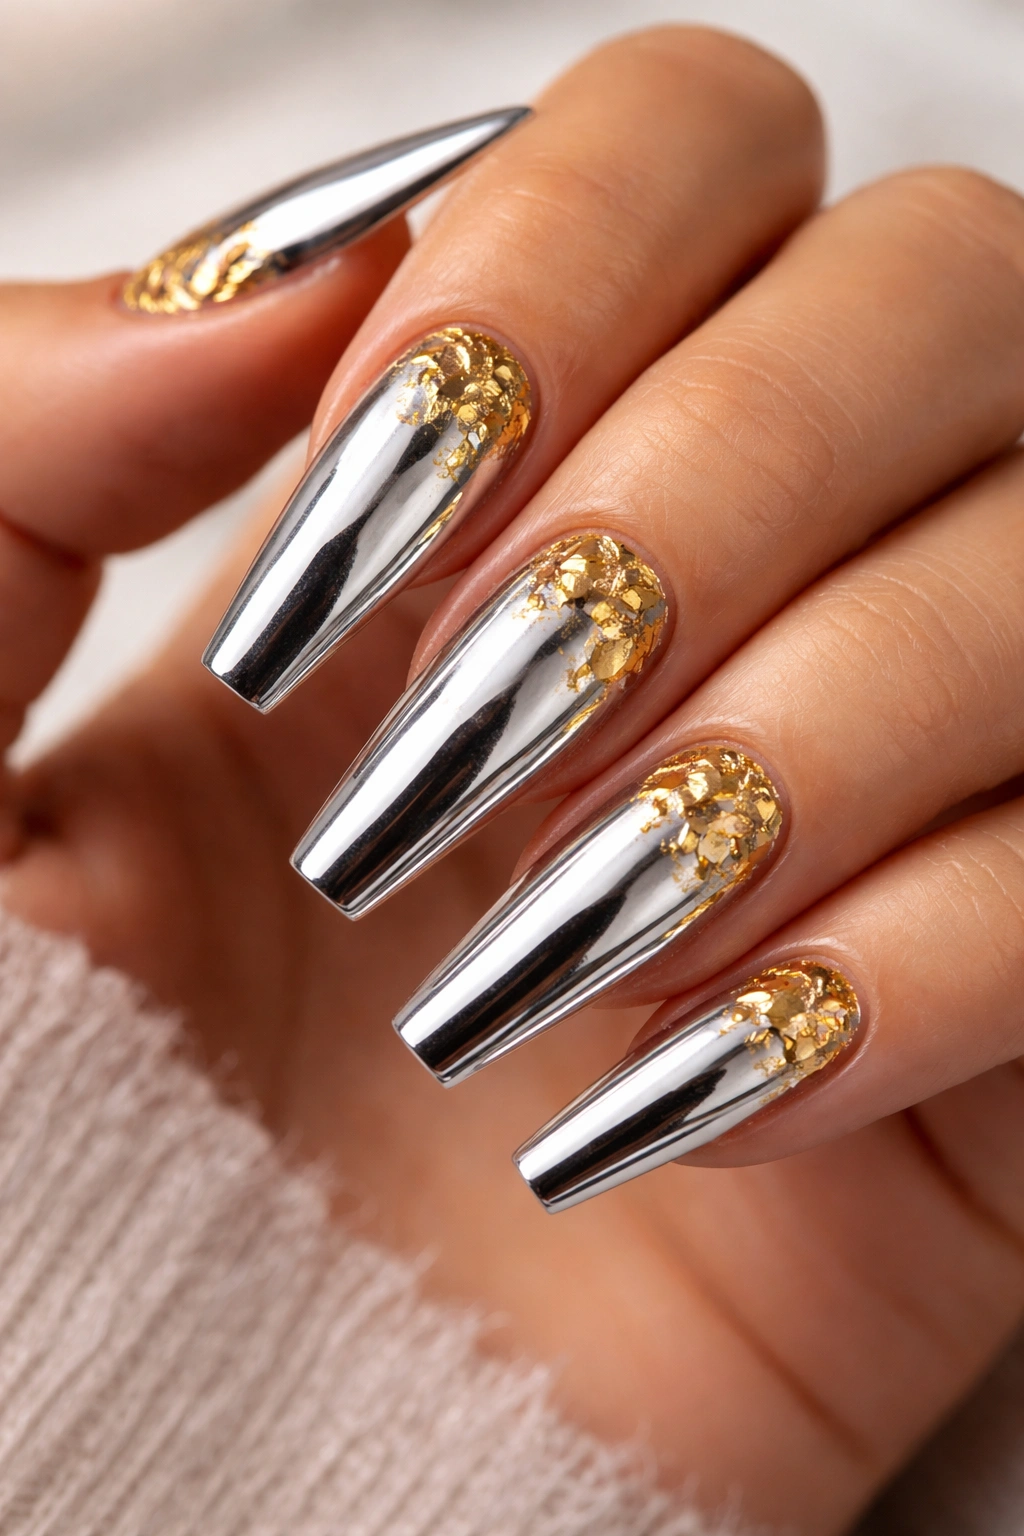
Apply chrome as your base, then add strips or scattered pieces of gold foil while the chrome layer is still tacky, creating a design where metallic gold peeks through or sits on top of silver chrome. This combines two metallic finishes—chrome and gold—creating opulent, luxurious-feeling nails that catch light at different angles. The combination of cool silver and warm gold creates unexpected harmony, with each metal making the other more beautiful through contrast.
Why Two Metallics Work Together
Silver and gold are traditionally considered competing metallics, but on nails they create visual richness and depth. The contrast between them is dynamic without being jarring. The eye travels between the cool chrome and warm gold foil, keeping nails interesting and engaging. This design feels expensive and jewelry-quality.
Foil Application and Placement
After applying chrome and while it’s still in its tacky, unsealed state, use tweezers to place small pieces of gold foil. You can go for scattered placement (randomly distributed across the nail) or linear placement (one or two strips down the side or center). Once positioned, gently press the foil with a soft brush to ensure it adheres, then seal everything with a quality top coat. The foil should feel embedded rather than floating on top.
12. Duochrome Chrome That Changes With Angle
Apply a duochrome chrome powder that appears one color from one angle and transforms completely when viewed from a different angle, creating nails that surprise and delight. Duochrome chrome powders genuinely shift color based on light angle and perspective, creating magic that photographs beautifully. This advanced technique feels high-fashion and experimental, perfect for anyone who loves having nails that are conversation starters.
The Science of Color Shifting
Duochrome powders contain particles that reflect different wavelengths of light depending on the angle of view. The effect isn’t glitter or holographic scatter—it’s a genuine color transformation that seems almost impossible when you first see it. These products are worth the investment because the effect is truly stunning and unlike anything achievable with regular polish.
Showcasing the Shift Effect
For duochrome chrome to truly shine, you need good lighting and the ability to angle your nails to show off the shift. Photograph your nails under different lighting conditions—natural light, warm indoor light, and cool artificial light—to see the full range of the color transformation. Apply duochrome chrome over a sheer base for maximum vibrancy. The effect is most dramatic on longer nails where more surface area showcases the color shift.
13. Chrome Base with Pressed Flower Inclusions
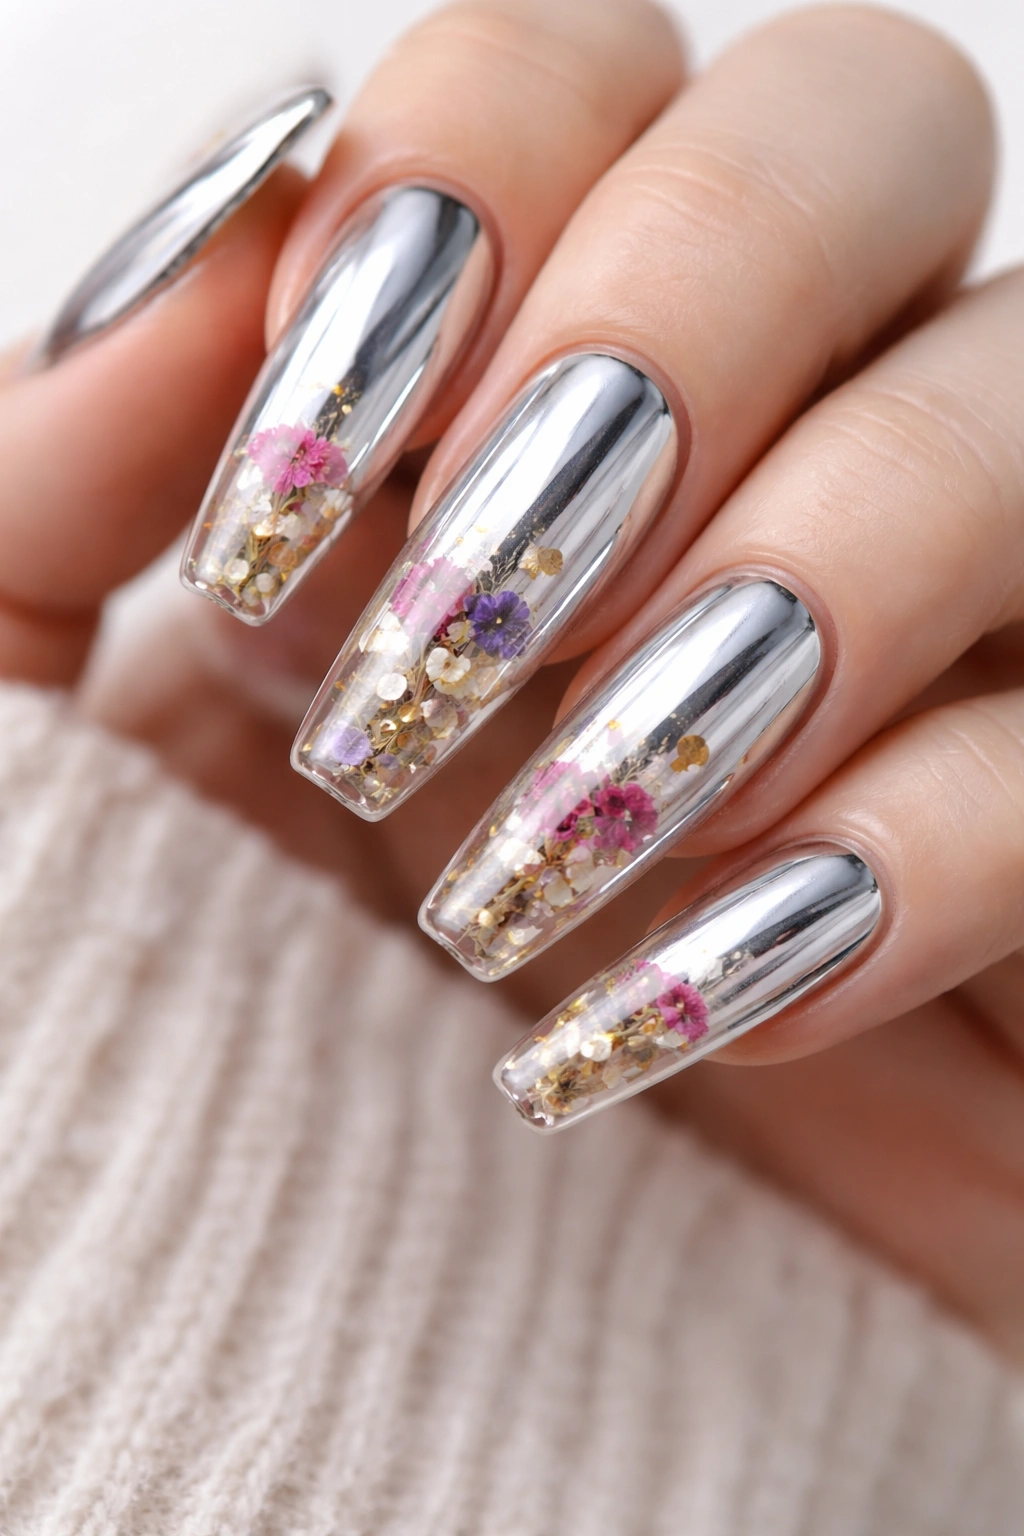
Seal delicate pressed flowers or botanicals between a clear or nude base and a chrome top layer, creating a design that combines natural beauty with futuristic chrome. This technique requires careful sealing to keep the flowers in place and protected, but the result is genuinely stunning—organic elements suspended in a mirror-like surface. This design works beautifully on coffin nails because the flat nail surface provides plenty of room to showcase the flowers without crowding.
Nature Meets Technology Aesthetic
Pressed flowers against chrome create a compelling visual juxtaposition—something organic and delicate floating in something ultra-modern and reflective. The flowers must be completely flat and thin (baby’s breath, small petals, fern leaves) to fit properly under the chrome without creating bumps. The design reads as romantic yet edgy, natural yet intentional.
Layering and Sealing for Protection
Apply your base color, then while it’s still slightly tacky, carefully place your pressed flower(s) with tweezers. Allow the base to cure completely, then apply a thin layer of clear top coat before applying the chrome layer. Once the chrome is on, seal everything with a quality protective top coat. The double-sealing ensures the flowers stay in place and the chrome maintains its mirror finish without chipping or dulling.
14. Chrome with Gradient Glitter Fade
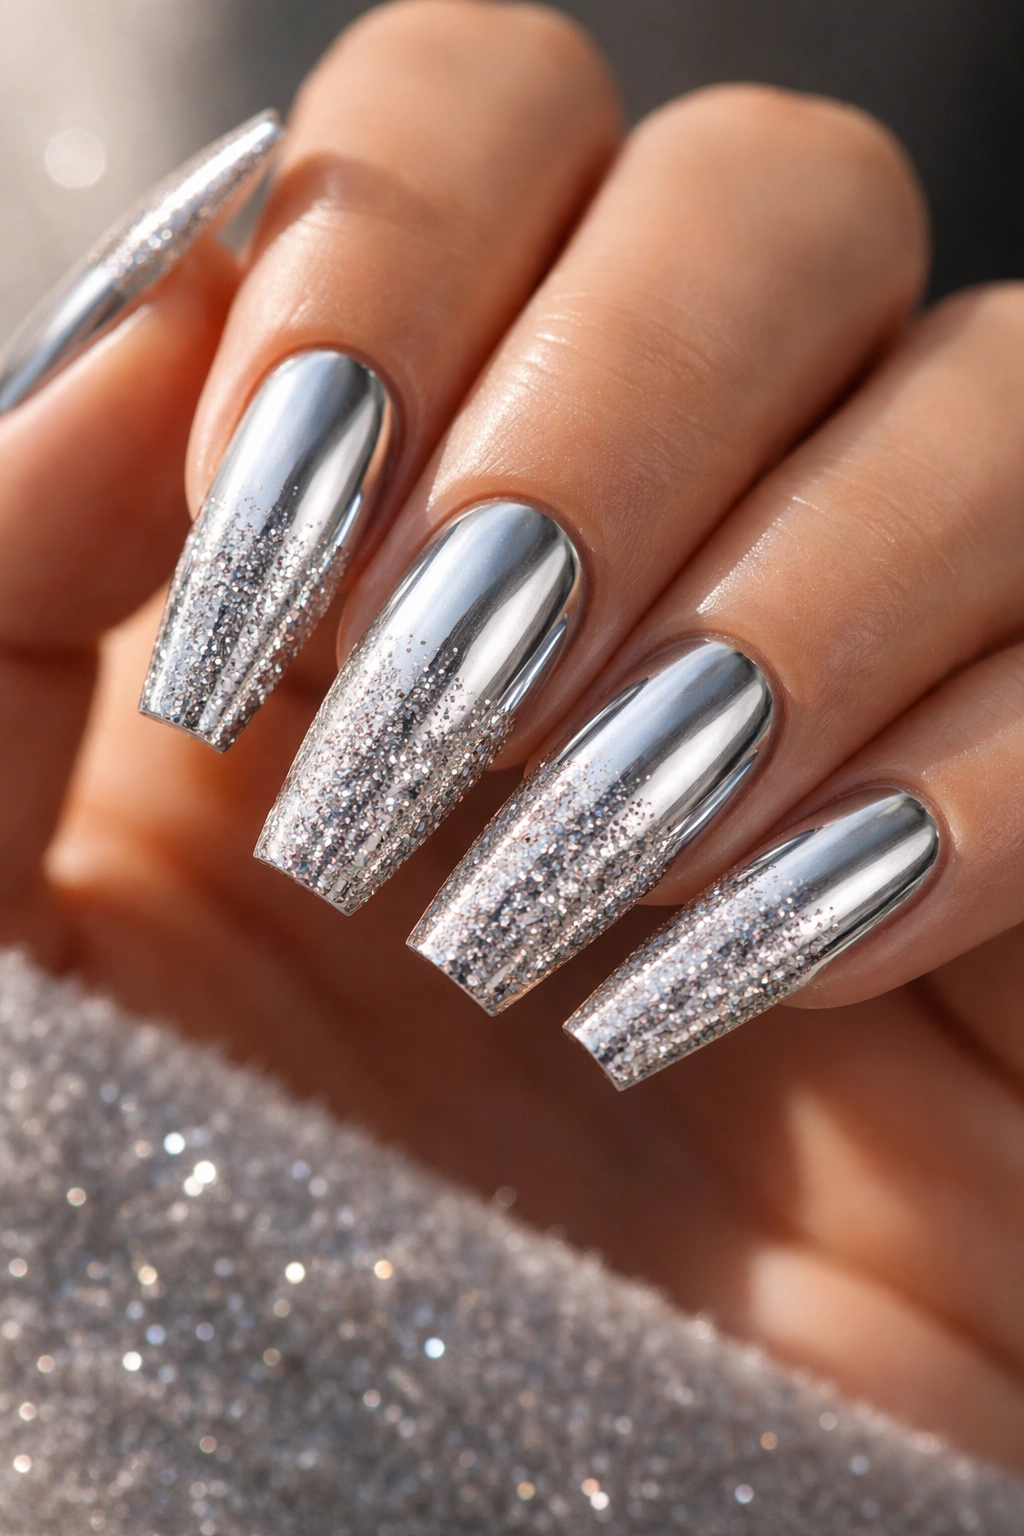
Blend pure chrome at the base into a gradually increasing concentration of fine glitter toward the tips, creating a design where the mirror shine progressively sparkles. This technique combines two distinct shine properties—the smooth reflection of chrome and the scattered sparkle of glitter—creating visual richness and movement. The gradient from pure chrome to glitter-heavy creates dimension and makes the design feel dynamic and multidimensional.
Layering Shine for Maximum Impact
The chrome grounds the design and prevents it from feeling overly sparkly or party-ready. The gradual addition of glitter toward the tips maintains elegance while adding festive shimmer. This design works for both everyday wear (when the glitter concentration stays light) and special occasions (when you load more glitter toward the tips). The combination catches light in multiple ways, making your nails shimmer from every angle.
Glitter Application Technique
After applying chrome to your entire nail, switch to a clear or slightly tinted base on the upper third of the nail. While this layer is tacky, sprinkle or brush fine glitter starting at the tip and working partway down, gradually reducing concentration as you move toward the cuticle. Each application should cure before the next layer to prevent the glitter from moving around. The result is a seamless fade from pure mirror shine to sparkly chromatic effects.
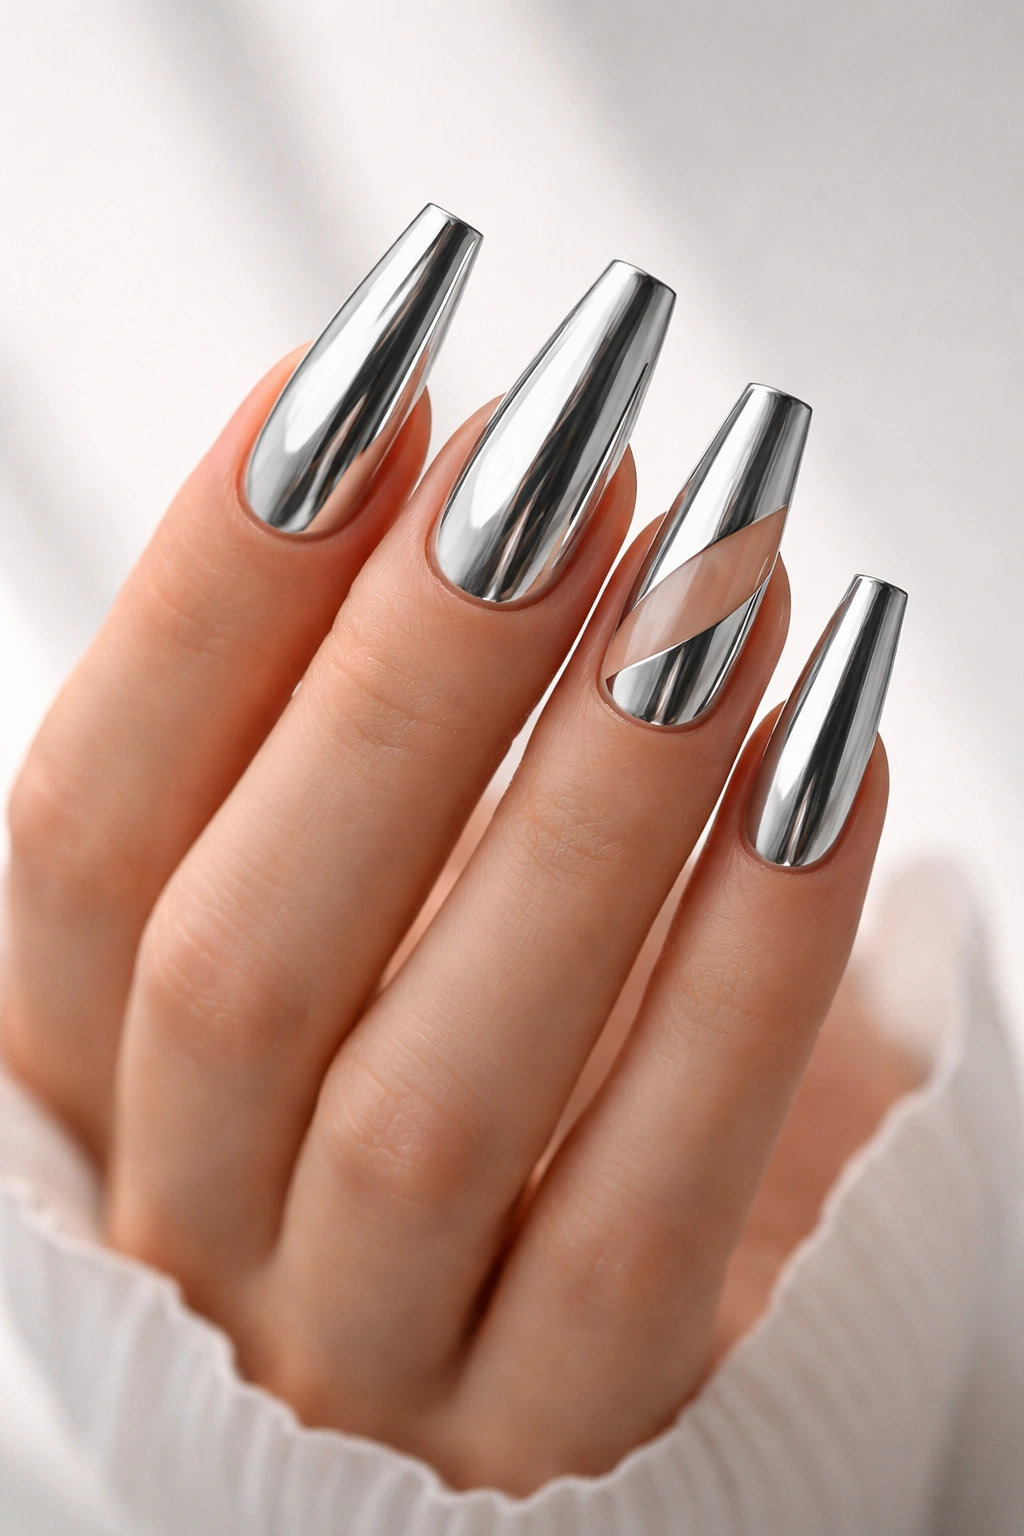
15. Negative Space Geometric Chrome Design
Create geometric shapes (triangles, stripes, half-moon designs, or abstract patterns) using negative space where the coffin nail base color shows through, with the remaining areas covered in chrome. This approach creates graphic, editorial-quality designs that feel intentionally artistic. The geometric shapes appear to float on or recede from the chrome surface depending on your perspective. This technique requires precision but creates genuinely stunning results that look professional and gallery-worthy.
Design as Negative Space
Rather than painting a design on top of chrome, you’re using the lack of chrome to create the design. This inverted approach feels modern and sophisticated. The negative space shapes create visual flow and guide the eye across your nails. The contrast between matte (natural nail base) and chrome (shiny areas) creates inherent dimension without any additional texture.
Precision Execution
This technique works best with a solid base color (nude, blush, or a soft neutral) where the negative space will show clearly. Use painter’s tape to create clean geometric lines—apply tape in your desired pattern, paint chrome over everything, then remove the tape to reveal perfect negative space shapes. For organic shapes (half-moons or curved designs), use a liquid latex barrier to mask the areas where you want the base color to show, apply chrome around it, then peel away the barrier.
16. Chrome Marble Swirl Design
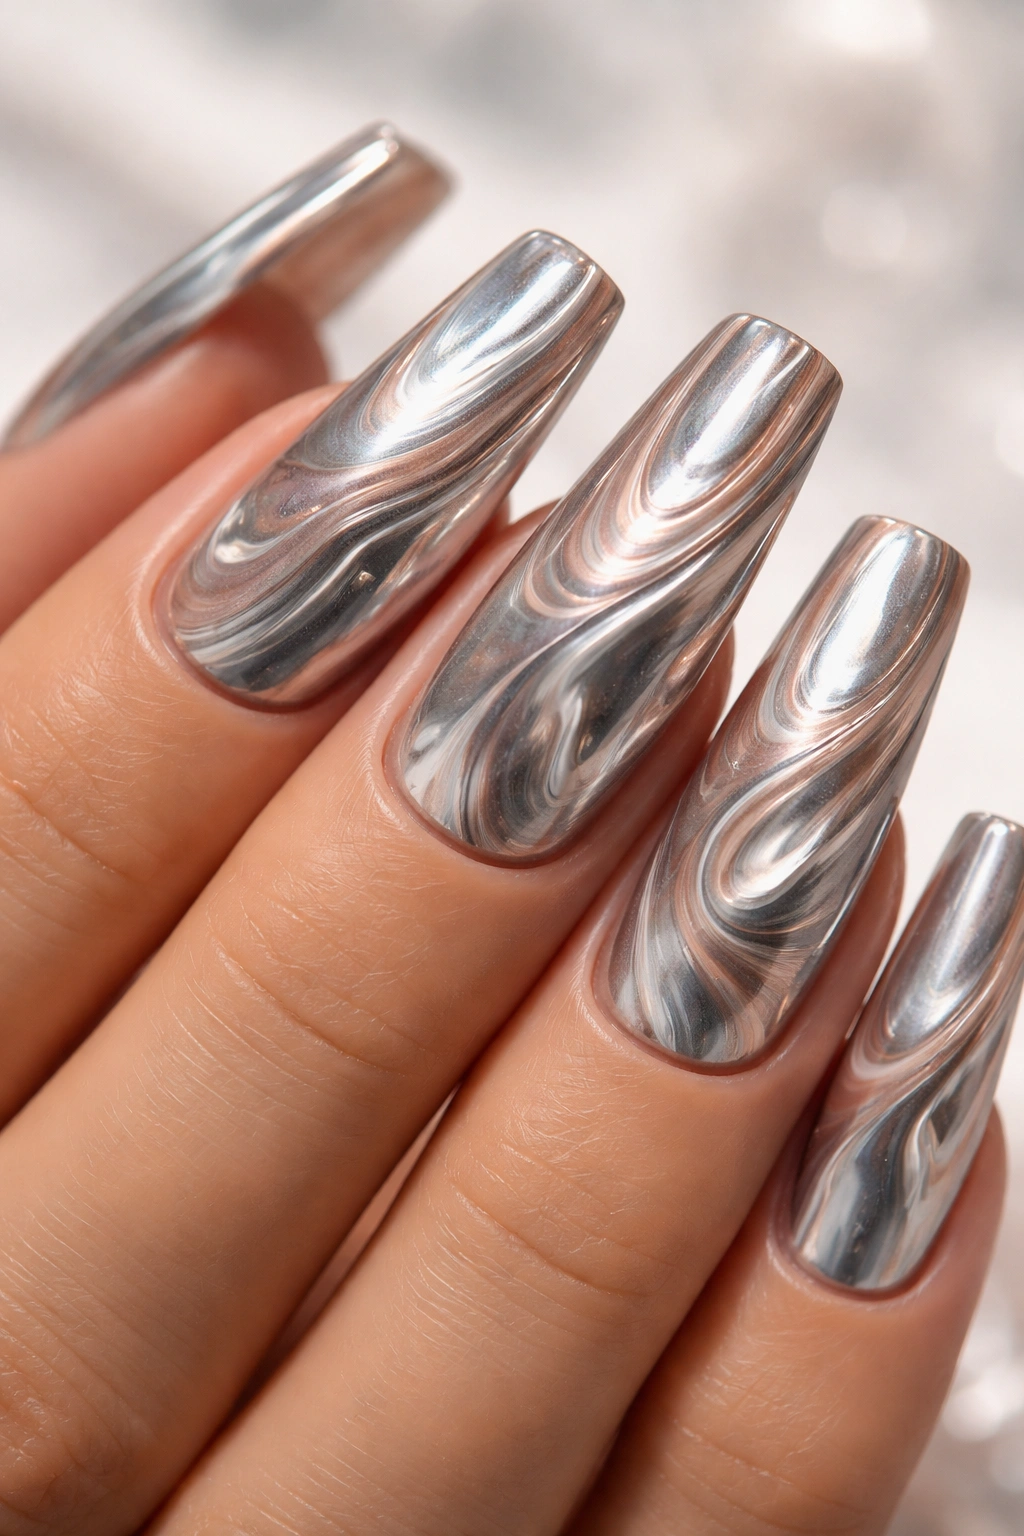
Blend multiple chrome shades together while they’re wet, creating natural-looking marble swirls where colors blend and intersect. This organic approach to chrome design looks less structured than other techniques, creating a more artistic, fluid aesthetic. You might swirl rose gold chrome with silver chrome and champagne chrome, allowing them to blend naturally. The result is a design that’s both shiny and unpredictable, with slight variations between each nail that make them feel handmade and artisan.
The Organic Beauty of Swirled Chrome
Marble swirl designs read as more artistic and less corporate than solid chrome. The unpredictability means no two nails are identical, which adds character and prevents the look from feeling too polished or artificial. This technique is more forgiving than geometric designs—slight imperfections actually enhance the organic aesthetic rather than detracting from it.
Creating Intentional Swirls
Apply a clear or nude base, then mix different chrome powders together gently (not completely—you want visible swirls, not a uniform blend). Using a soft-bristled brush, apply the mixed chrome to your nail, allowing the different shades to show individually. Seal with top coat immediately. Alternatively, apply different chrome shades in separate sections of the nail and blend the edges with a soft brush while the powders are still on the sticky base. The blending happens organically as you work.
17. Chrome with Thin Metallic Outline
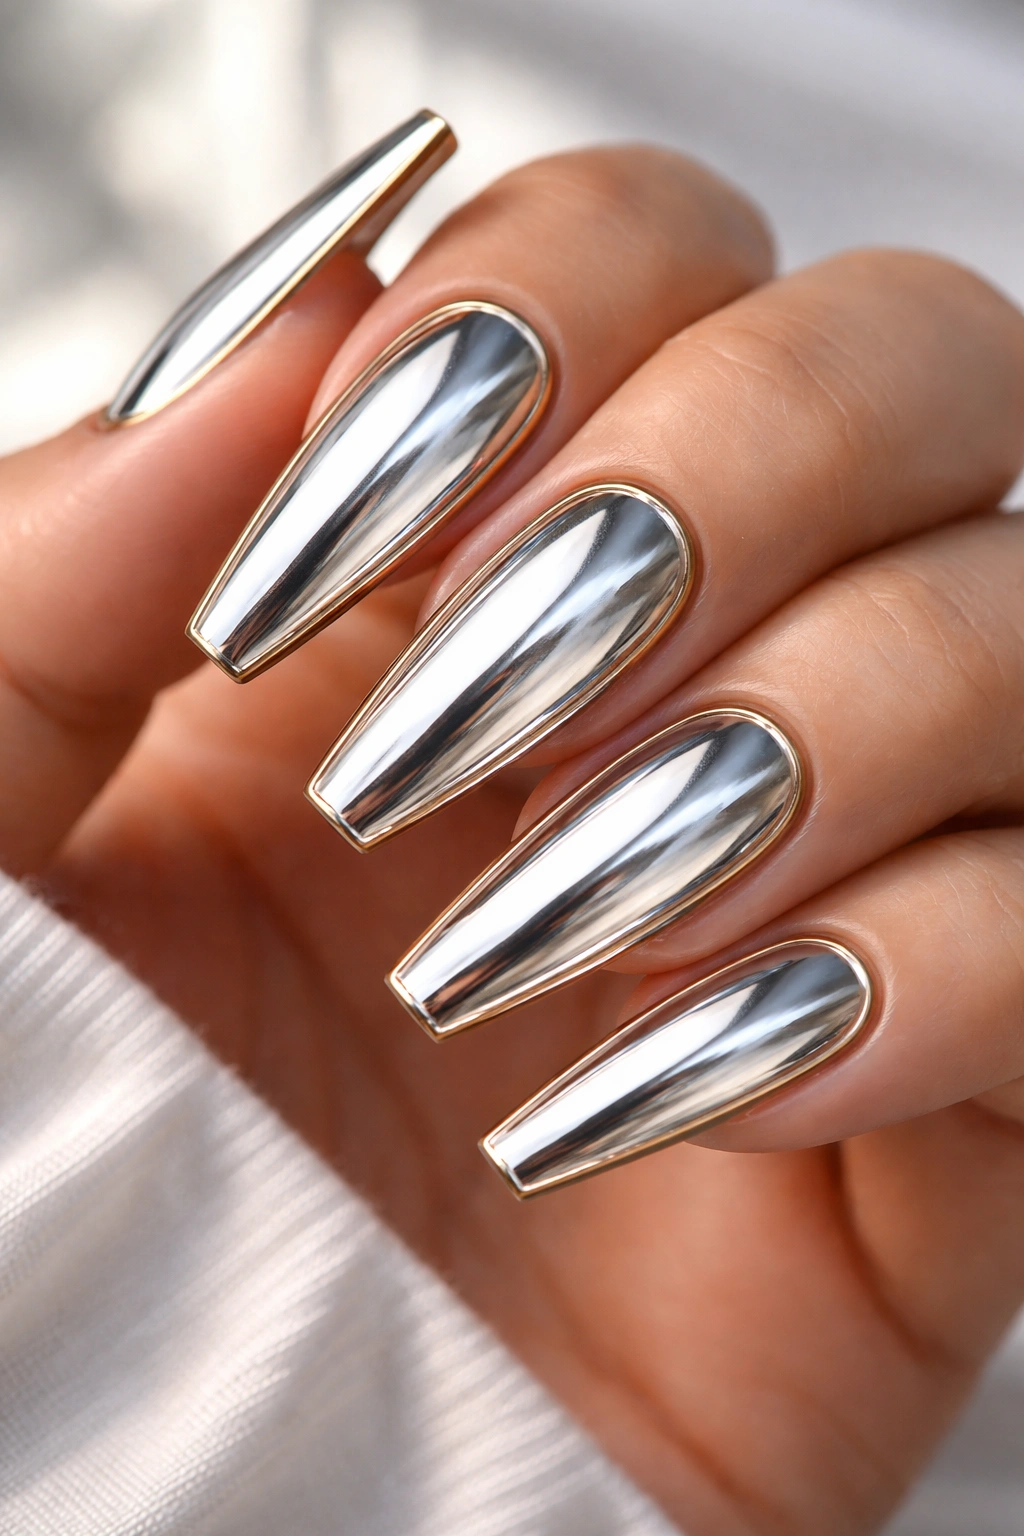
Apply chrome to the majority of your coffin nail, then outline the edge of the nail (or create an inner frame) using a contrasting metallic color like gold, rose gold, or holographic chrome. This framing technique creates definition and makes the chrome appear more luminous by providing a subtle border that emphasizes the nail shape. The outline acts like a frame around a piece of art, drawing attention to the chrome in the center. This sophisticated technique works especially well on coffin nails where the defined shape benefits from emphasis.
The Psychology of Framing
A metallic outline creates visual clarity and intentionality. The frame draws the eye, makes the nails appear larger, and adds an unexpected detail that elevates the entire design. The outline can be razor-thin or about 1-2mm wide—both approaches work, just create different visual effects. A thin outline feels minimalist and elegant, while a slightly wider outline makes a stronger statement.
Outline Execution
After your chrome is completely sealed, use an extremely fine brush with a contrasting metallic polish to carefully outline the edge of your nail, following the natural nail shape. Work slowly, allowing each stroke to dry before the next. The outline should be perfectly even—if it’s wonky, it reads as unintentional rather than artistic. For a more casual take, use a metallic striping tape to create the outline, pressing it on carefully and sealing it with top coat.
18. Layered Chrome with Matte Top Coat Accents
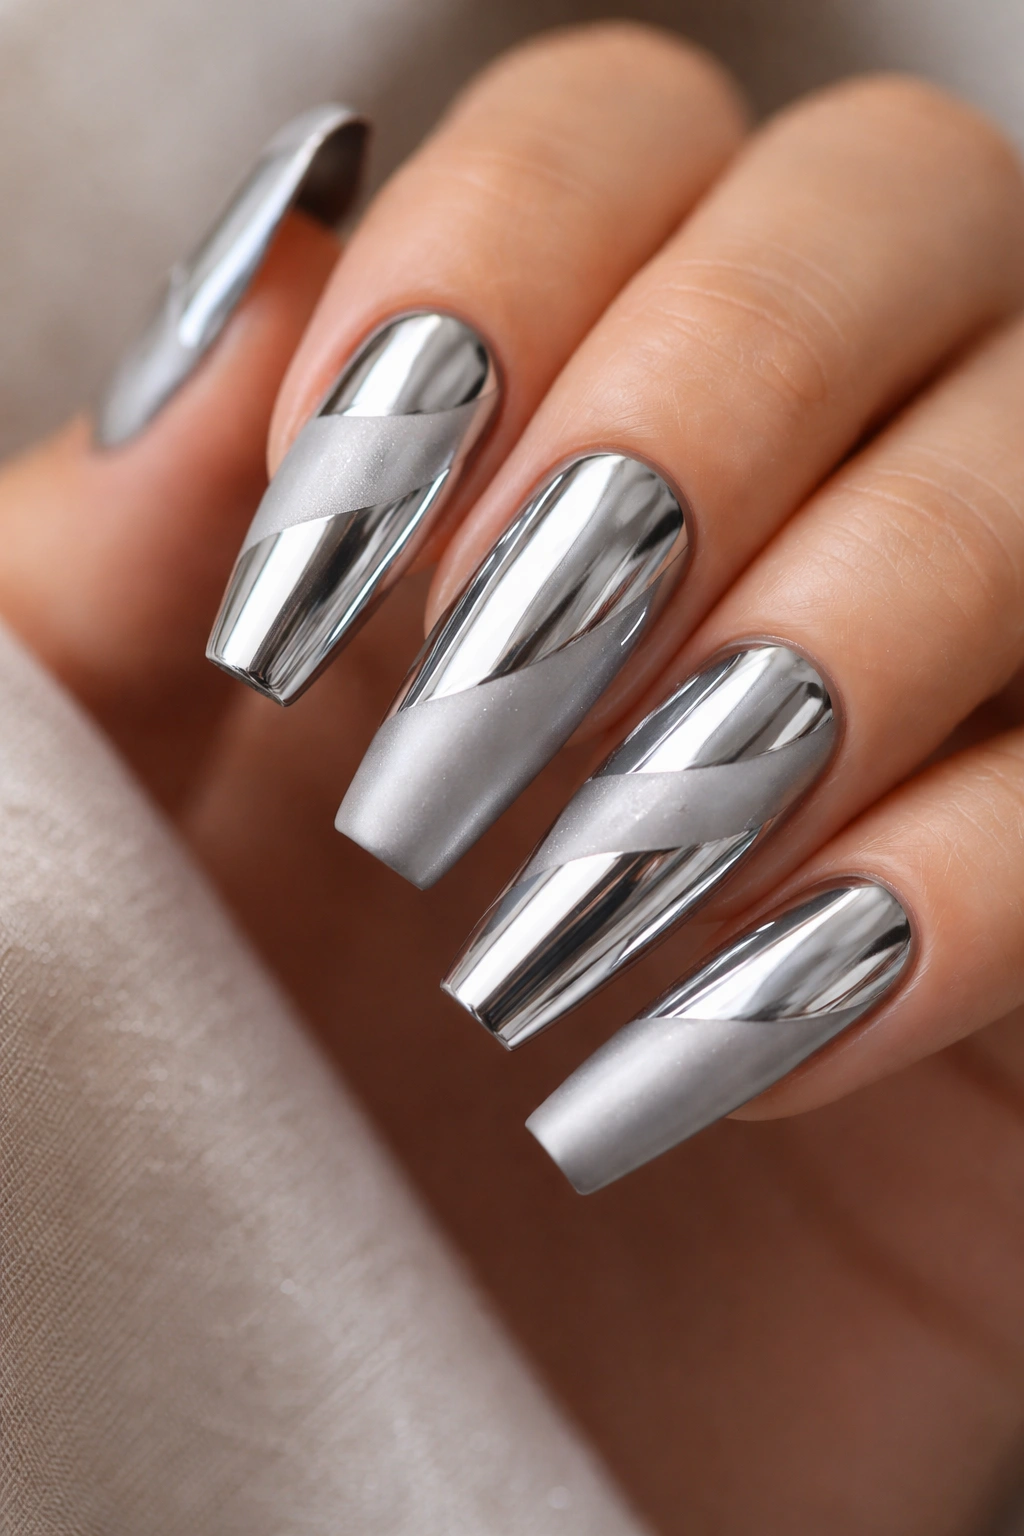
Create full chrome nails, then apply a matte top coat to portions of each nail (perhaps the tip, the cuticle area, or random sections), creating a mixed-finish design where shiny and matte portions alternate. This technique exploits the dramatic contrast between reflective and light-absorbing finishes, creating visual interest and dimension. The matte areas appear to recede while the chrome areas pop forward, creating an optical effect that makes nails look three-dimensional and sculptural.
Strategic Finish Mixing
Rather than choosing all-shiny or all-matte, this design embraces both, proving they work together beautifully. The proportion of matte to shiny should be intentional—perhaps 60% chrome and 40% matte, or alternating sections. The contrast prevents the design from feeling monotonous while maintaining sophistication. This approach works especially well if you’re torn between wanting matte and glossy nails and finally gives you a way to have both simultaneously.
Creating Sharp Matte-to-Shiny Lines
After your chrome is fully sealed and cured, use painter’s tape to mask the sections where you want matte finish to appear. Apply a matte top coat to the exposed areas, remove the tape carefully, and you’ll have perfectly sharp lines between finishes. Alternatively, use a liquid matte finish product that you can apply to specific areas while keeping the chrome portions shiny. The contrast between the two finishes becomes a design element itself—keep the edge line clean and intentional.
Final Thoughts
Chrome coffin nails offer endless design possibilities because the reflective quality elevates even the simplest ideas into something that feels luxurious and intentional. Whether you’re drawn to pure mirror chrome, chrome blended with complementary colors, or chrome layered with texture and detail, there’s an approach here that matches your aesthetic and skill level. The key to nailing any of these designs is investing in quality chrome powder and taking time with the application—rushed chrome applications look muddy and dull, while careful, patient application creates that flawless, professional finish.
The designs that resonate most are the ones that feel authentic to your personal style. Some of you will love the bold statement of full mirror chrome with nothing else, while others will prefer chrome as an accent element or combined with texture and detail work. Experiment with these designs, mix and match ideas, and remember that your own fingers are the perfect practice surface. The beautiful thing about chrome is that even if your first attempt isn’t perfect, the shine-factor usually makes it look intentional rather than flawed. Your coffin nails are a tiny canvas for creativity—make them reflect exactly who you are.
