

Light pink nail designs have become a staple in modern nail art, offering that perfect balance between elegant sophistication and playful femininity that works for literally every occasion. Whether you’re heading to a professional meeting, a casual coffee date, or a special event, light pink coffin nails deliver a polished look that flatters virtually every skin tone and never feels overdone. The coffin shape itself—with its tapered sides and flat, squared-off tip—elongates the fingers beautifully while maintaining enough structural width to showcase intricate nail art designs, color blends, and textured finishes.
Medium-length nails are genuinely the sweet spot for coffin nail designs. They’re long enough to display the signature shape’s elegant proportions without requiring the constant maintenance of extra-long extensions, and they remain practical for daily life while still making a statement. Light pink in particular offers incredible versatility; it can be edgy and modern with metallic accents, soft and romantic with floral elements, or minimalist and chic with simple line work. The pale pink tone sits right at that intersection where it photographs beautifully, complements both warm and cool undertones, and works equally well for minimalist designs and elaborate nail art.
The 20 styles below represent the full spectrum of what’s possible with light pink coffin nails—from subtle texture variations to bold graphic designs, from delicate embellishments to statement-making finishes. Each design is achievable with medium-length coffins and works across different aesthetics, seasons, and personal styles.
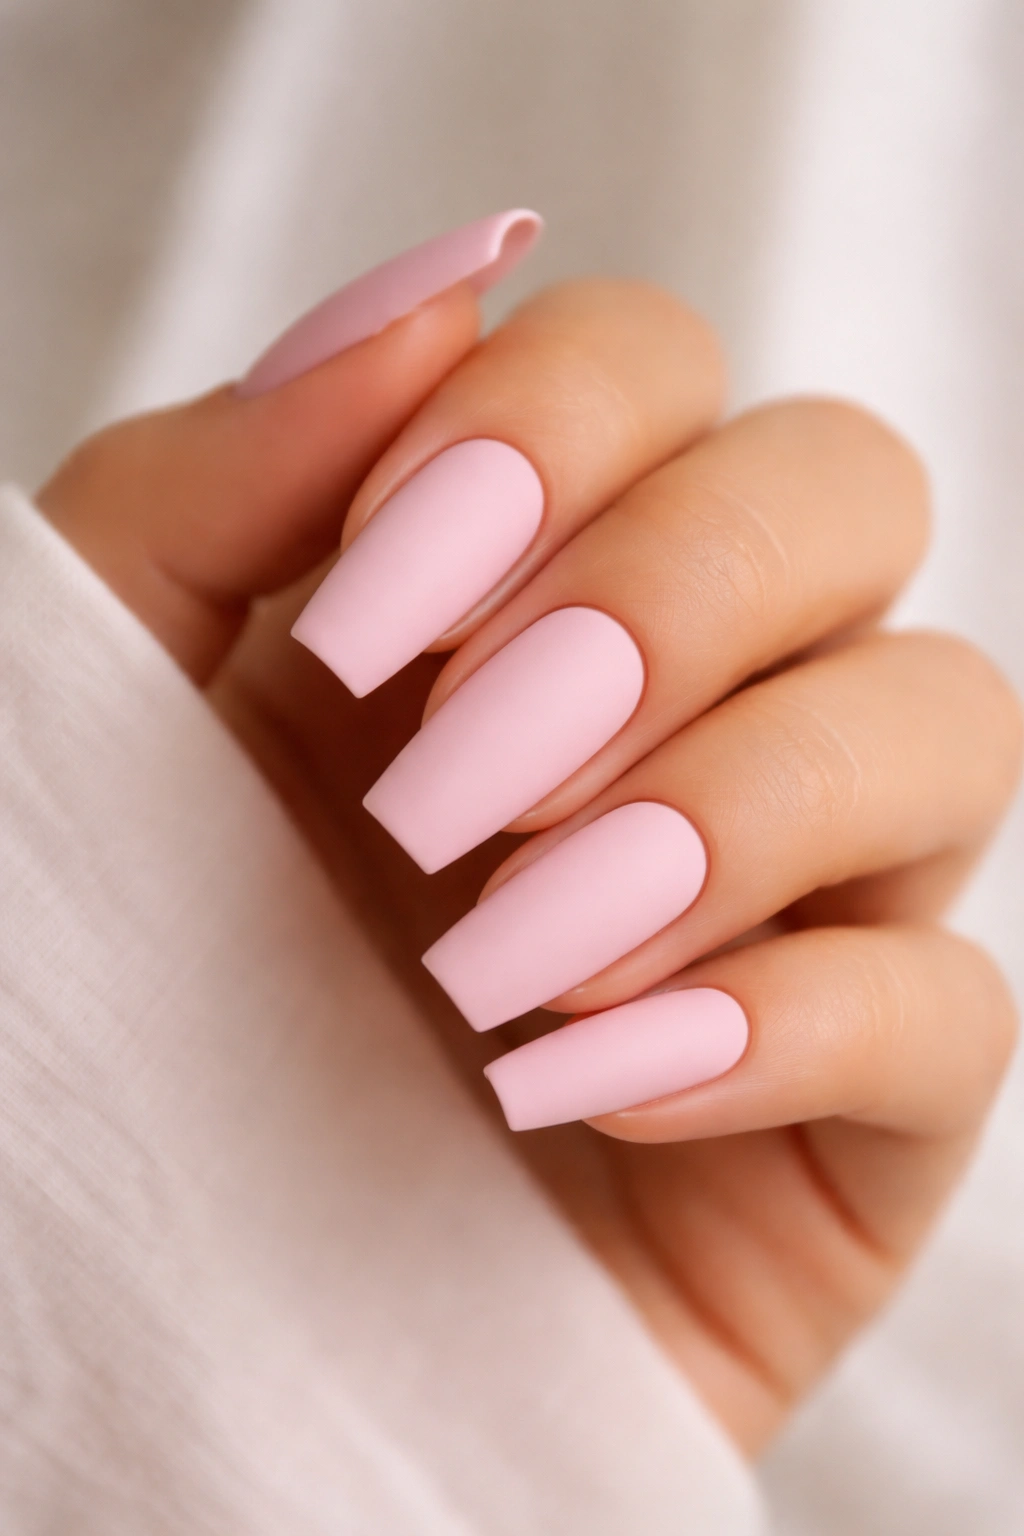
1. Classic Matte Light Pink
A matte finish transforms light pink into something unexpectedly modern and sophisticated. Where glossy light pink feels more traditional and romantic, matte creates a velvety, almost powdered appearance that reads as intentionally contemporary. This is the foundation nail design that works with absolutely any outfit and any occasion—it’s nearly impossible to go wrong with this approach.
Why This Works for Medium Coffins
The matte texture actually makes medium-length coffins appear slightly more elongated because the flat finish doesn’t reflect light in the way gloss does. This creates a subtle visual effect that enhances the shape’s already flattering proportions. The simplicity of matte also means your medium nails don’t look “trying too hard,” which keeps the design feeling accessible and wearable.
Application Details
- Apply a quality matte top coat over your light pink base polish—don’t skip the base coat, as it prevents staining and creates even color
- Build the color in two thin coats rather than one thick coat for a smoother, more professional finish
- The matte finish works best when your coffin shape is well-defined; slightly rounded or uneven edges look less polished with matte texture
Pro tip: A matte finish is more prone to showing dust and fingerprints than gloss, so keep your nails clean throughout the day for maximum impact.
2. High-Gloss Light Pink

Sometimes the simplest approach is the most powerful. A glossy light pink with a pristine shine communicates polish and attention to detail without any additional embellishment. This finish catches light beautifully and makes the nail color appear richer and more dimensional than matte alternatives.
The Appeal of High Shine
Gloss finishes reflect light in ways that actually make your nails appear healthier and better-hydrated, even if you’re working with gel polish or standard polish. On medium coffins, that reflection enhances the shape’s definition and makes the tip appear cleaner and more defined. It’s a genuinely timeless approach that never looks dated or wrong.
How to Achieve the Shine
- Use a quality gel top coat if you want longevity and maximum shine
- If using traditional polish, invest in a premium top coat—not all top coats deliver the same level of gloss
- Two thin coats of light pink base color will provide better coverage than one thick coat
- Allow each layer to cure or dry completely before applying the next layer
Worth knowing: High-gloss finishes show brush strokes more noticeably than matte, so technique matters when applying the base color.
3. Light Pink With Subtle Sparkle
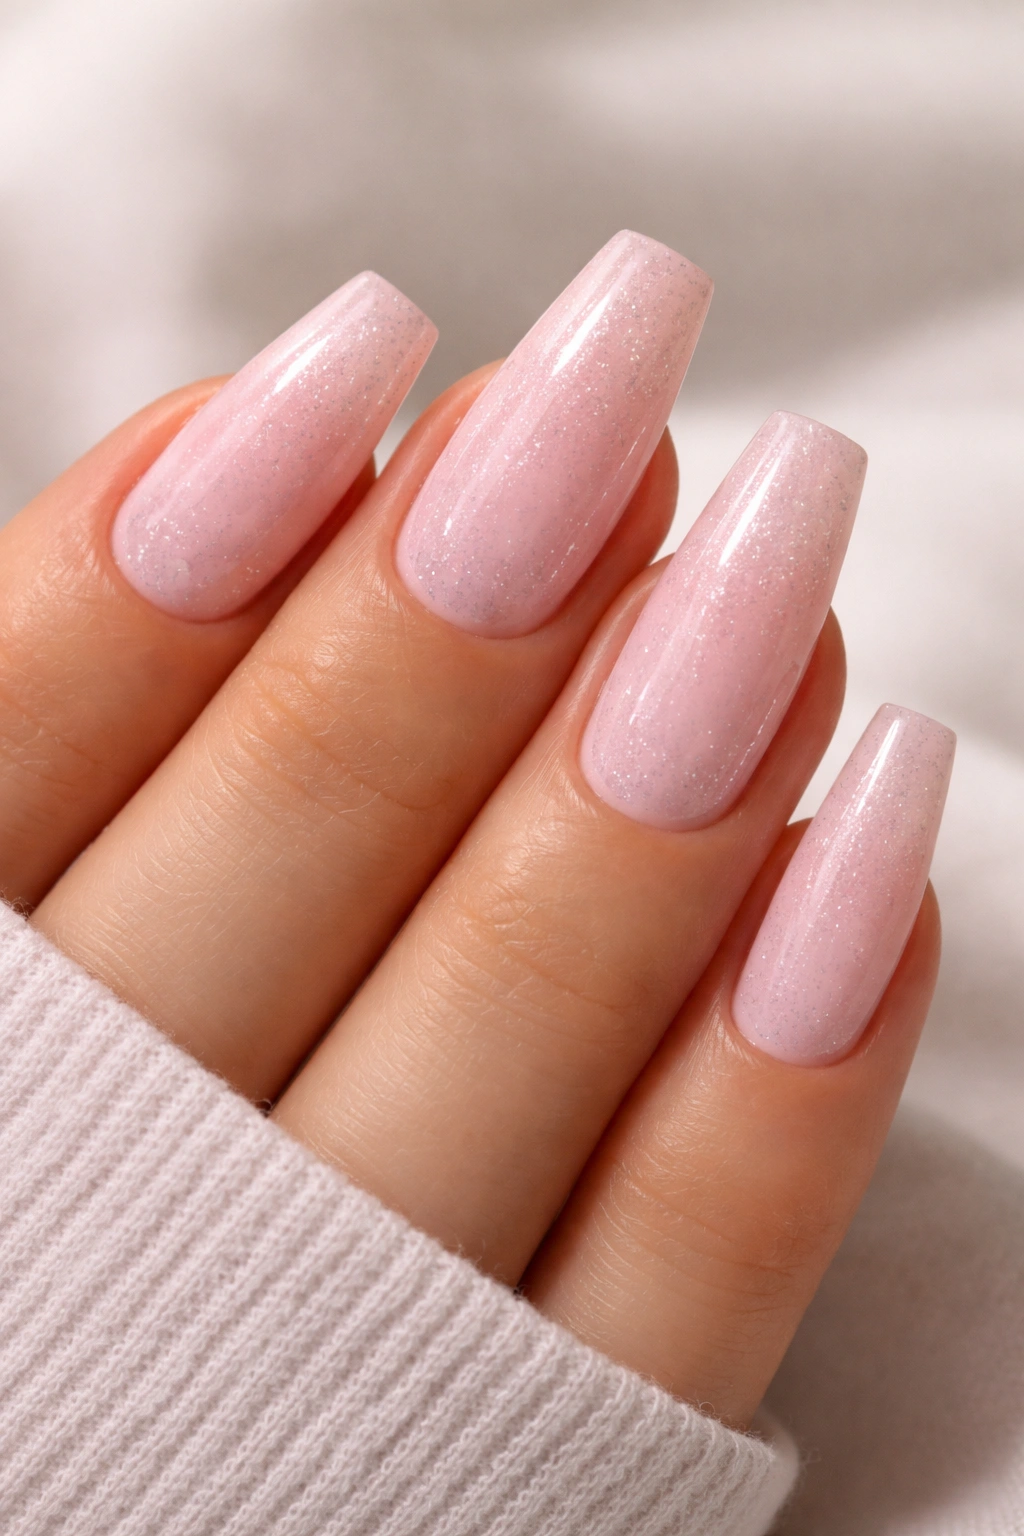
Adding shimmer to light pink creates immediate visual interest without crossing into “overly decorative” territory. Subtle sparkle works for professional settings and casual situations alike, offering just enough dimension to catch light while maintaining a fundamentally soft, approachable aesthetic.
The Technique for Subtle Sparkle
You can achieve this effect several ways—through a slightly shimmery light pink base color, by layering a fine glitter over a matte light pink base, or by mixing a tiny amount of cosmetic-grade mica or pearl dust into clear top coat and applying it as a final layer. The goal is that someone notices something’s special about your nails only once they’re looking closely.
Application Methods
- If using pre-made shimmer polish: two coats will provide even sparkle distribution
- If adding glitter to matte: apply the matte light pink base, then use a top coat or clear base to layer fine glitter across the entire nail
- If mixing powder into top coat: combine just enough to create visibility without making the top coat cloudy
Insider note: Very fine, cosmetic-grade sparkle reads as more sophisticated than chunky glitter—the smaller the sparkle, the more “grown-up” the overall effect feels.
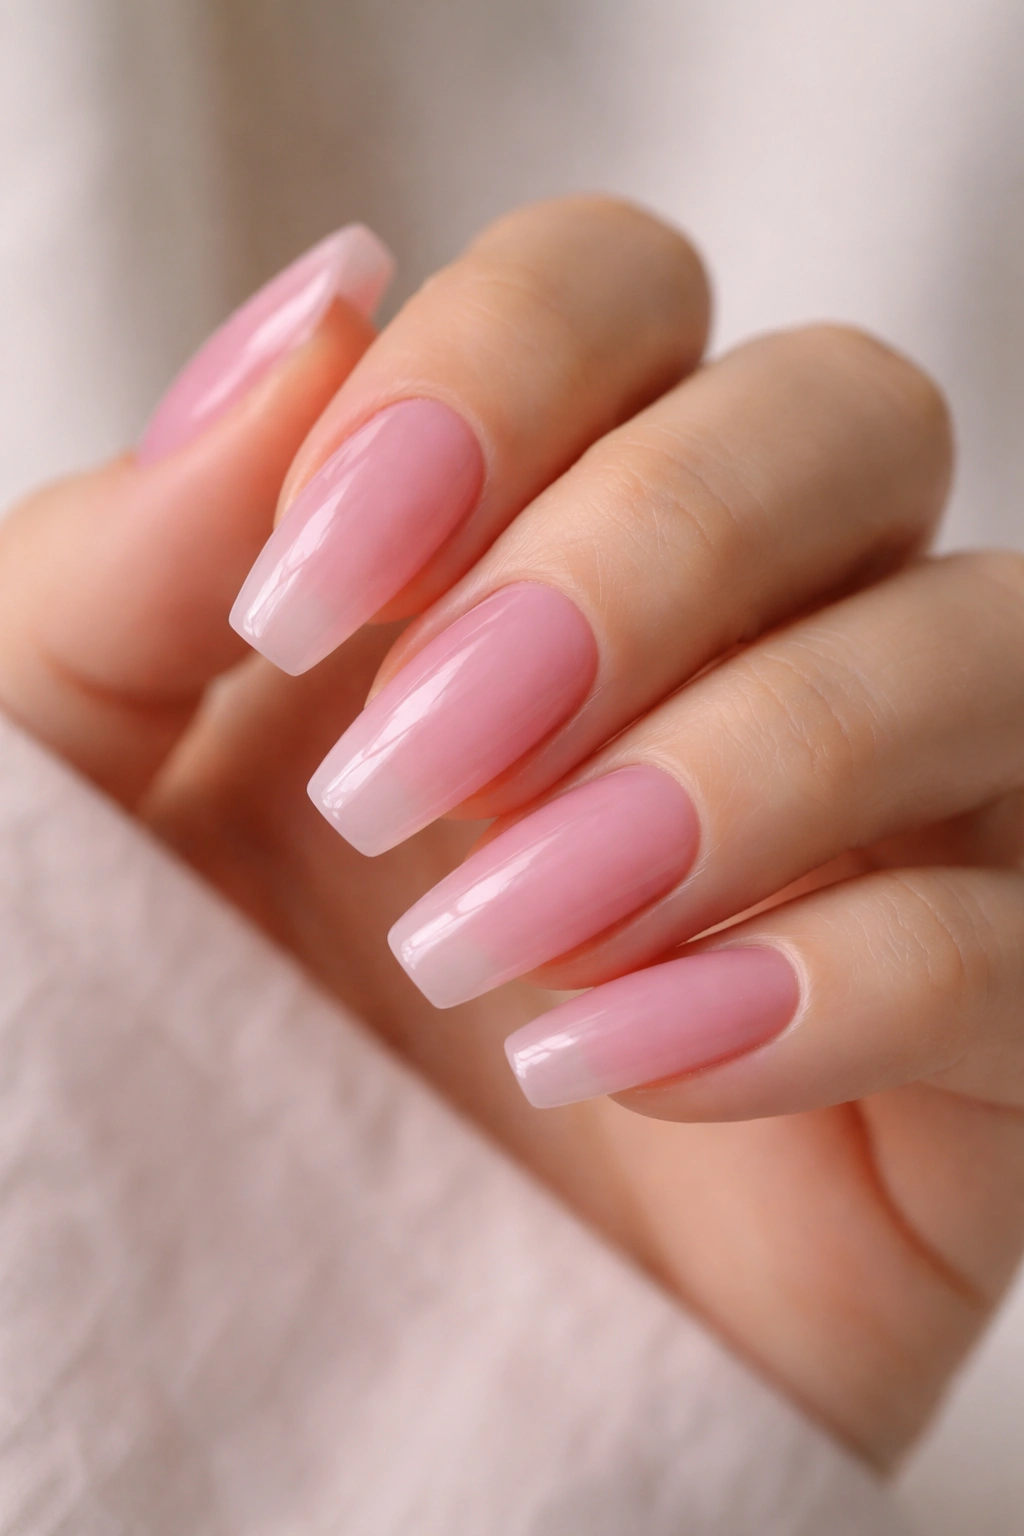
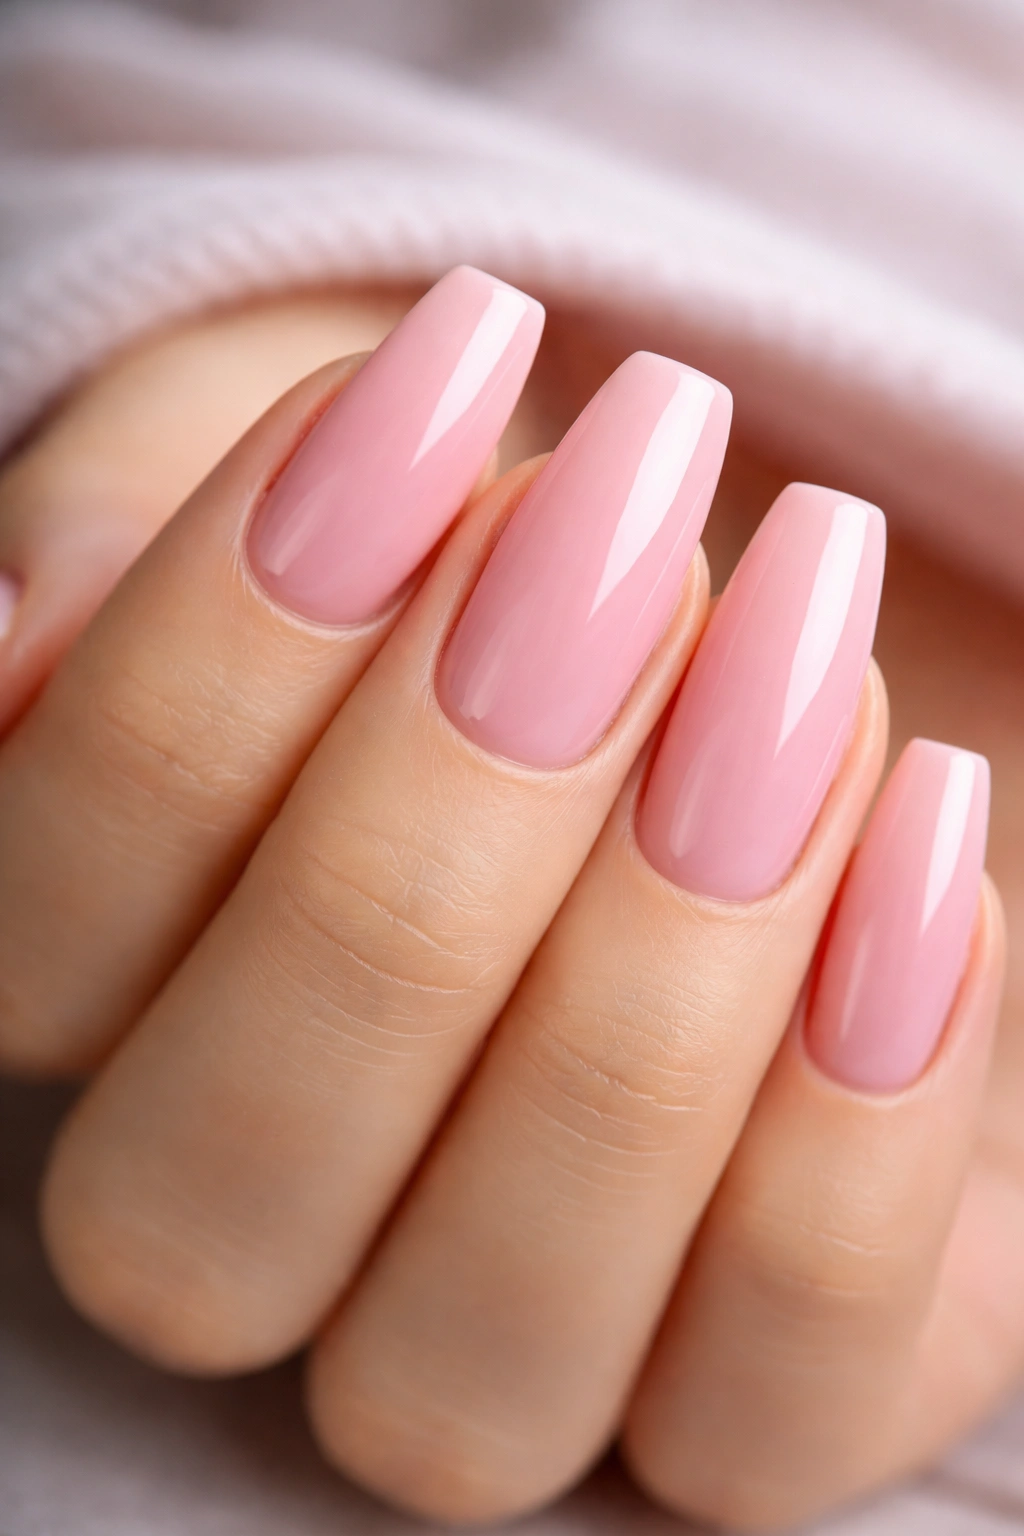
4. Light Pink Ombre Effect
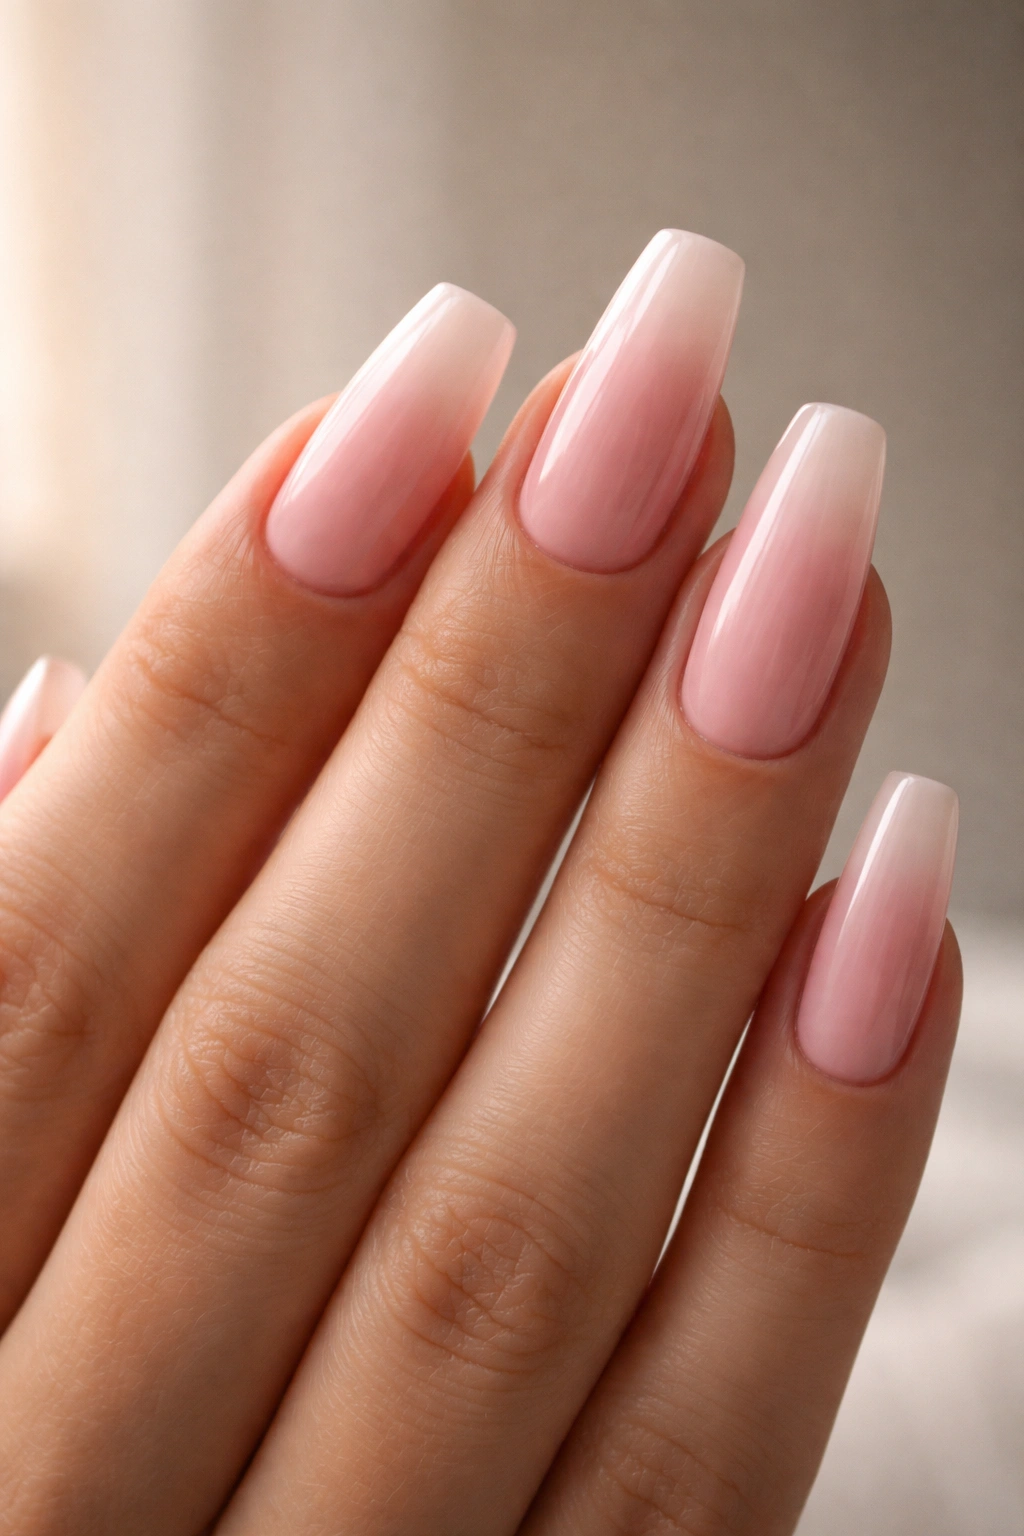
An ombre design on coffin nails creates the illusion of depth and dimension. Light pink blended toward white at the tips or fading to nude at the base gives your medium coffins an instantly more interesting appearance than a flat color alone.
Creating Smooth Ombre Transitions
The coffin shape is actually ideal for ombre because the tip provides enough space to show the color transition clearly. Start with your darker light pink shade at the base and gradually blend toward the lighter shade at the tips using a sponge, a soft brush, or by layering semi-transparent coats.
Methods for Building Ombre
- Wet sponge method: dab colors onto a makeup sponge, then press it gently onto the nail for a gradient effect
- Soft brush blending: apply colors and use a clean, damp brush to blend the lines together
- Layering method: apply one color, then layer a semi-transparent lighter shade over parts of it and let the colors naturally merge
The beauty of ombre is that it doesn’t need to be perfectly smooth—slight color variation actually looks more organic and intentional than a mathematically perfect gradient.
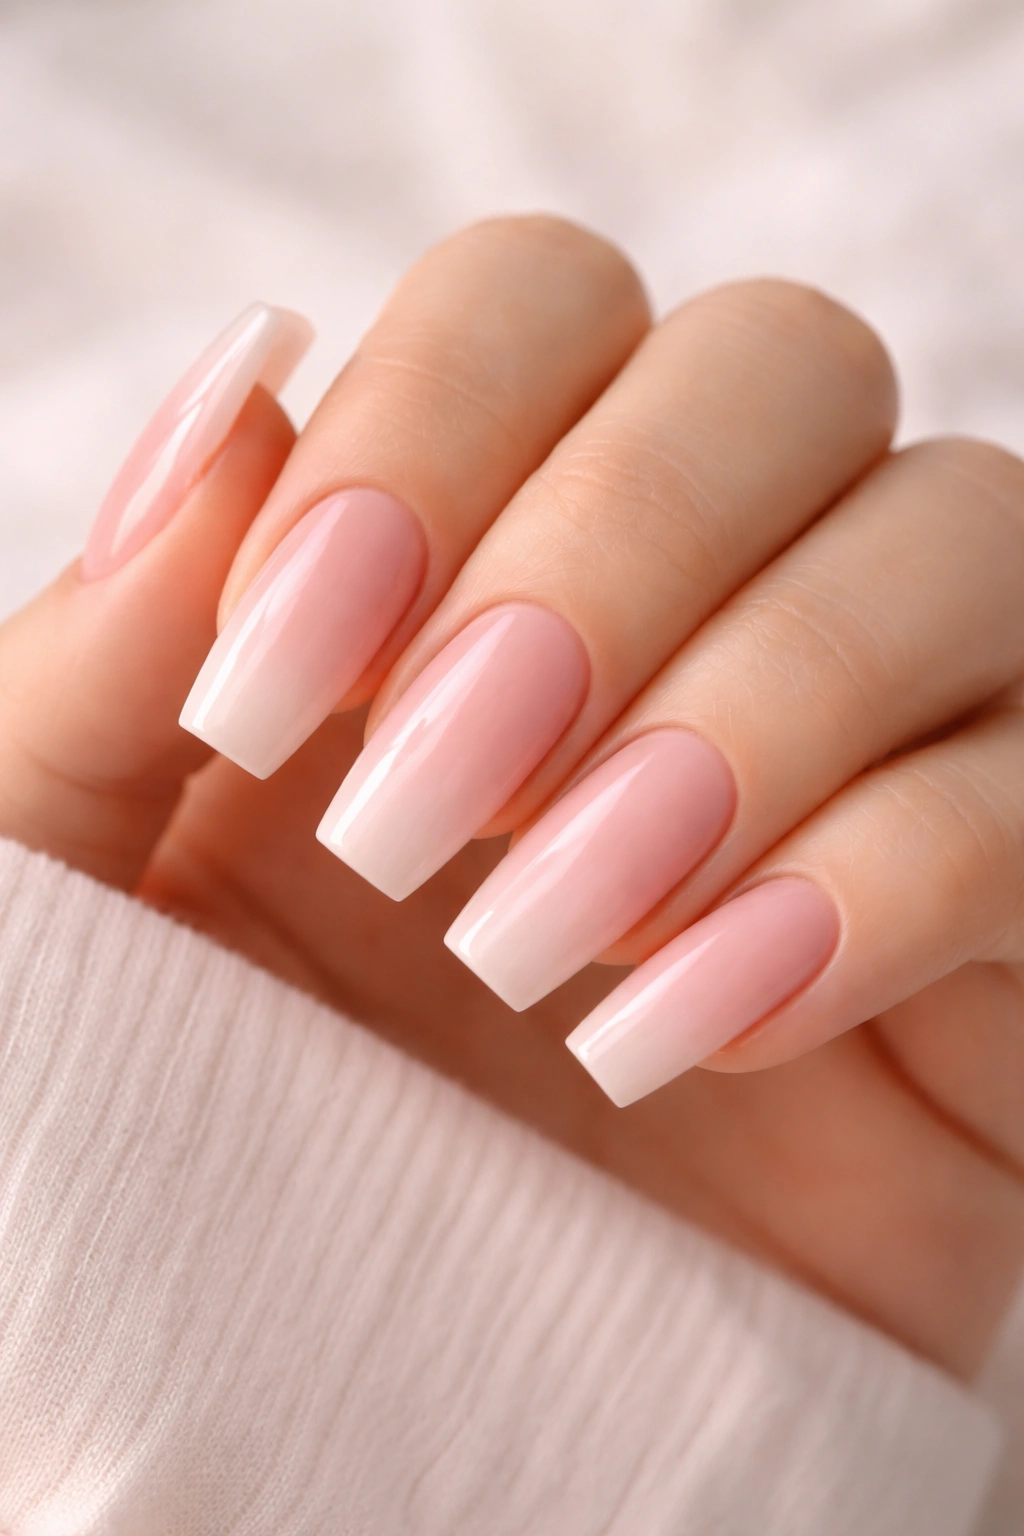
5. Light Pink With White Tip Gradient
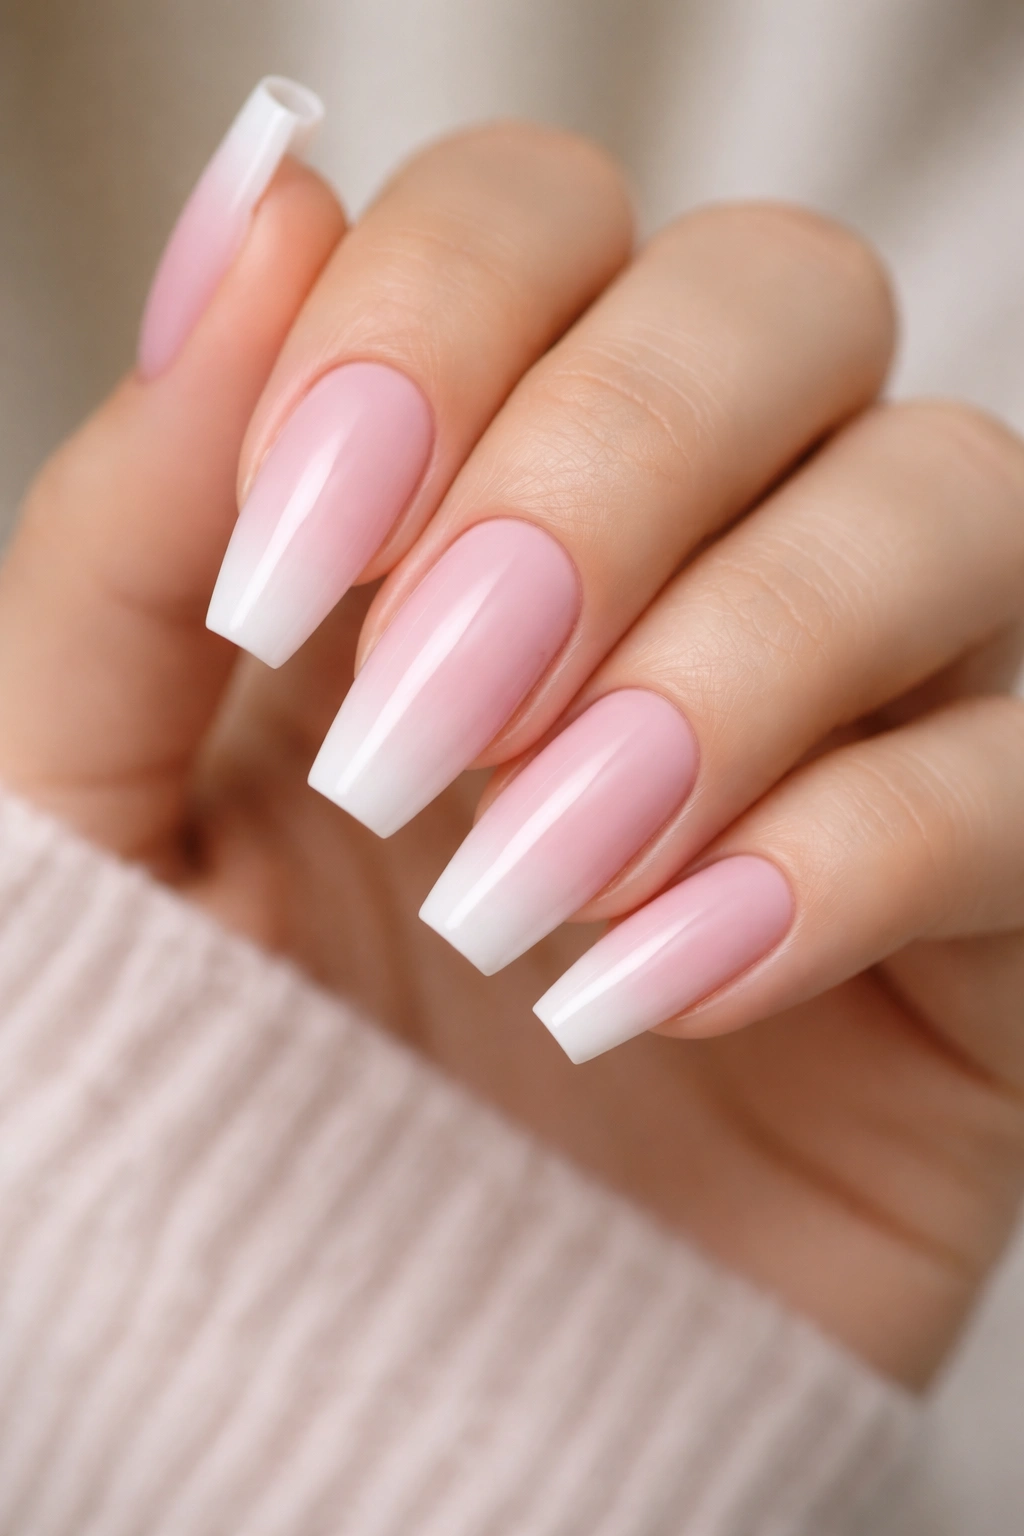
This variation on the French manicure classic uses a gradual color transition from light pink at the base to white at the tip. It’s more modern than a traditional sharp-line French manicure while maintaining that professional, universally flattering aesthetic.
Why This Works on Medium Coffins
The coffin shape’s structured tip makes this gradient particularly effective. The white focuses attention on the tip shape and elongates the fingers slightly. On medium length, the transition has enough space to be clearly visible without appearing overdone or dramatic.
Creating the Gradient
- Apply light pink as your base
- Using either a sponge, brush, or layering technique, gradually introduce white polish toward the tip
- The transition should be subtle and smooth, not a harsh line
6. Light Pink Chrome Nails
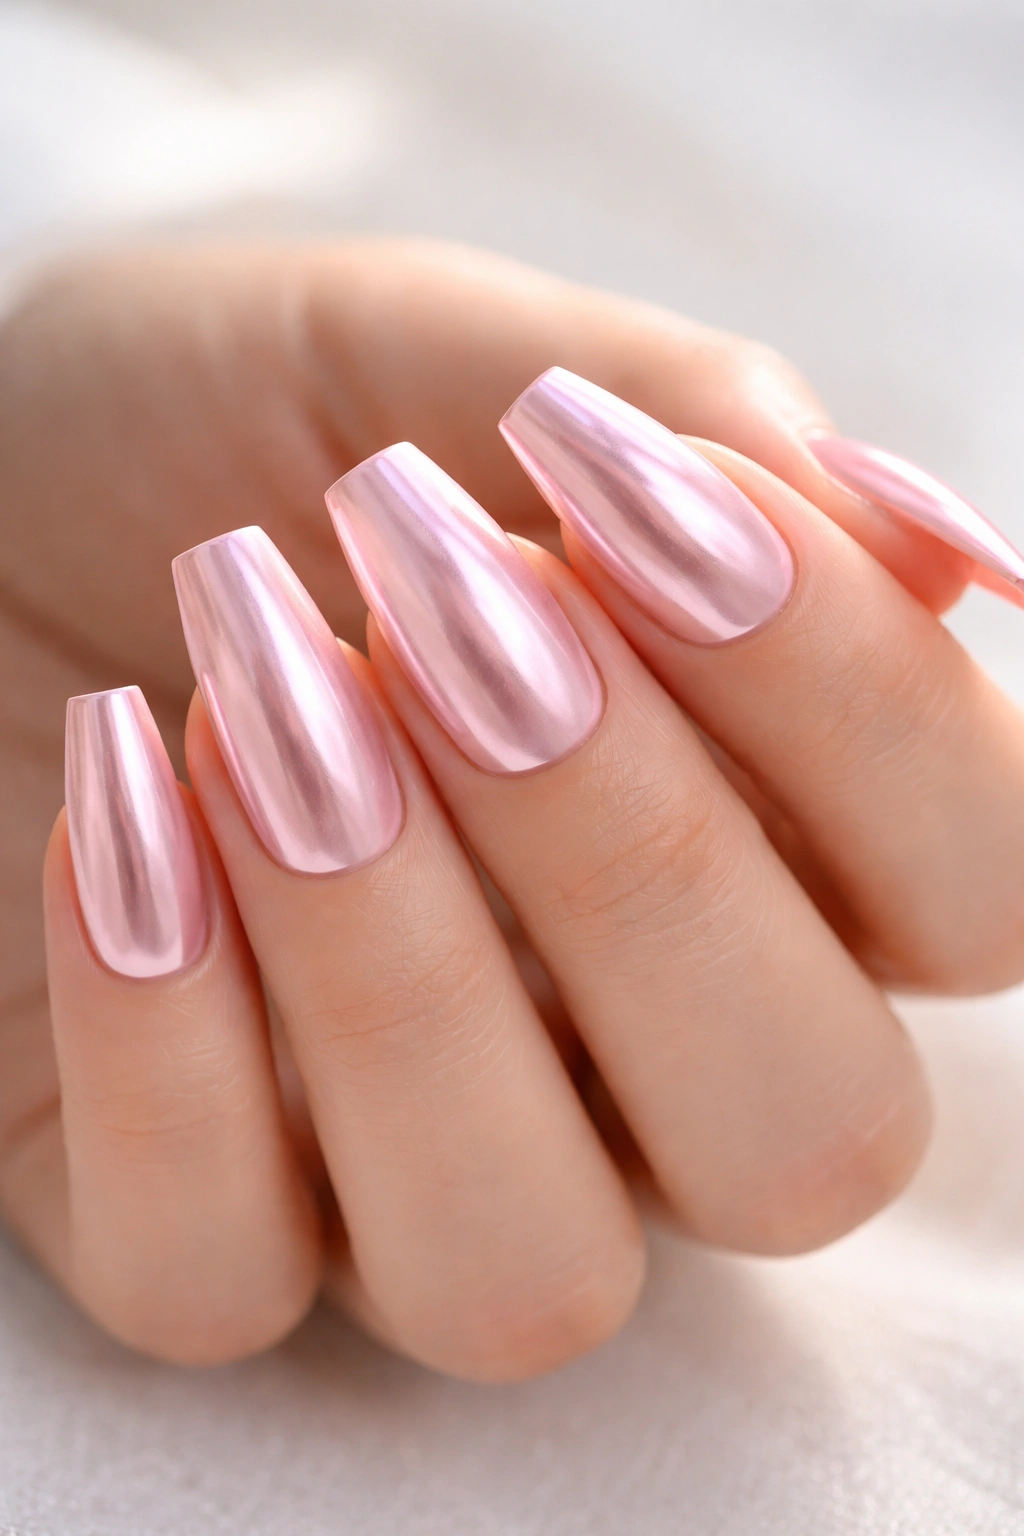
Chrome powder creates a mirror-like, metallic finish that transforms light pink into something genuinely striking. The effect is sophisticated rather than costume-like, especially when you use it on a light pink base rather than a bright pink.
The Chrome Technique
Chrome powder requires a sticky base—either a special chrome prep coat or a gel top coat. Apply the powder with a soft brush, buffing it gently across the nail until the effect is even. The result is a smooth, reflective surface that looks impossibly sleek on medium coffin nails.
Application Steps
- Apply and cure your light pink gel base
- While the sticky layer is still tacky, apply chrome powder with a soft, flat brush
- Buff gently to distribute the powder evenly
- Seal with a non-wipe top coat
- Avoid touching the nails until fully cured
Real talk: Chrome is high-maintenance between manicures because it shows everything—dust, fingerprints, water spots. Budget extra time for upkeep if you choose this finish.
7. Light Pink Jelly Nails
Jelly nails have a semi-translucent quality that makes them look glossy, dimensional, and somehow organic all at once. With light pink, the effect is playful and modern without being juvenile. The transparency means light actually passes through the polish, creating visual depth that flat colors can’t achieve.
What Makes Jelly Polish Special
Jelly polishes contain much less pigment than traditional polishes, creating that signature translucent quality. When applied to medium coffins, this creates a multidimensional effect—you can almost see through the color, which creates an illusion of depth and polish.
How to Apply Jelly Nails
- Jelly polishes typically need 3-4 thin coats to build up opacity gradually
- Each coat should be thin enough to see through
- The final result should be semi-transparent—you can see your nail bed slightly through the color
- Finish with a glossy top coat for maximum shine
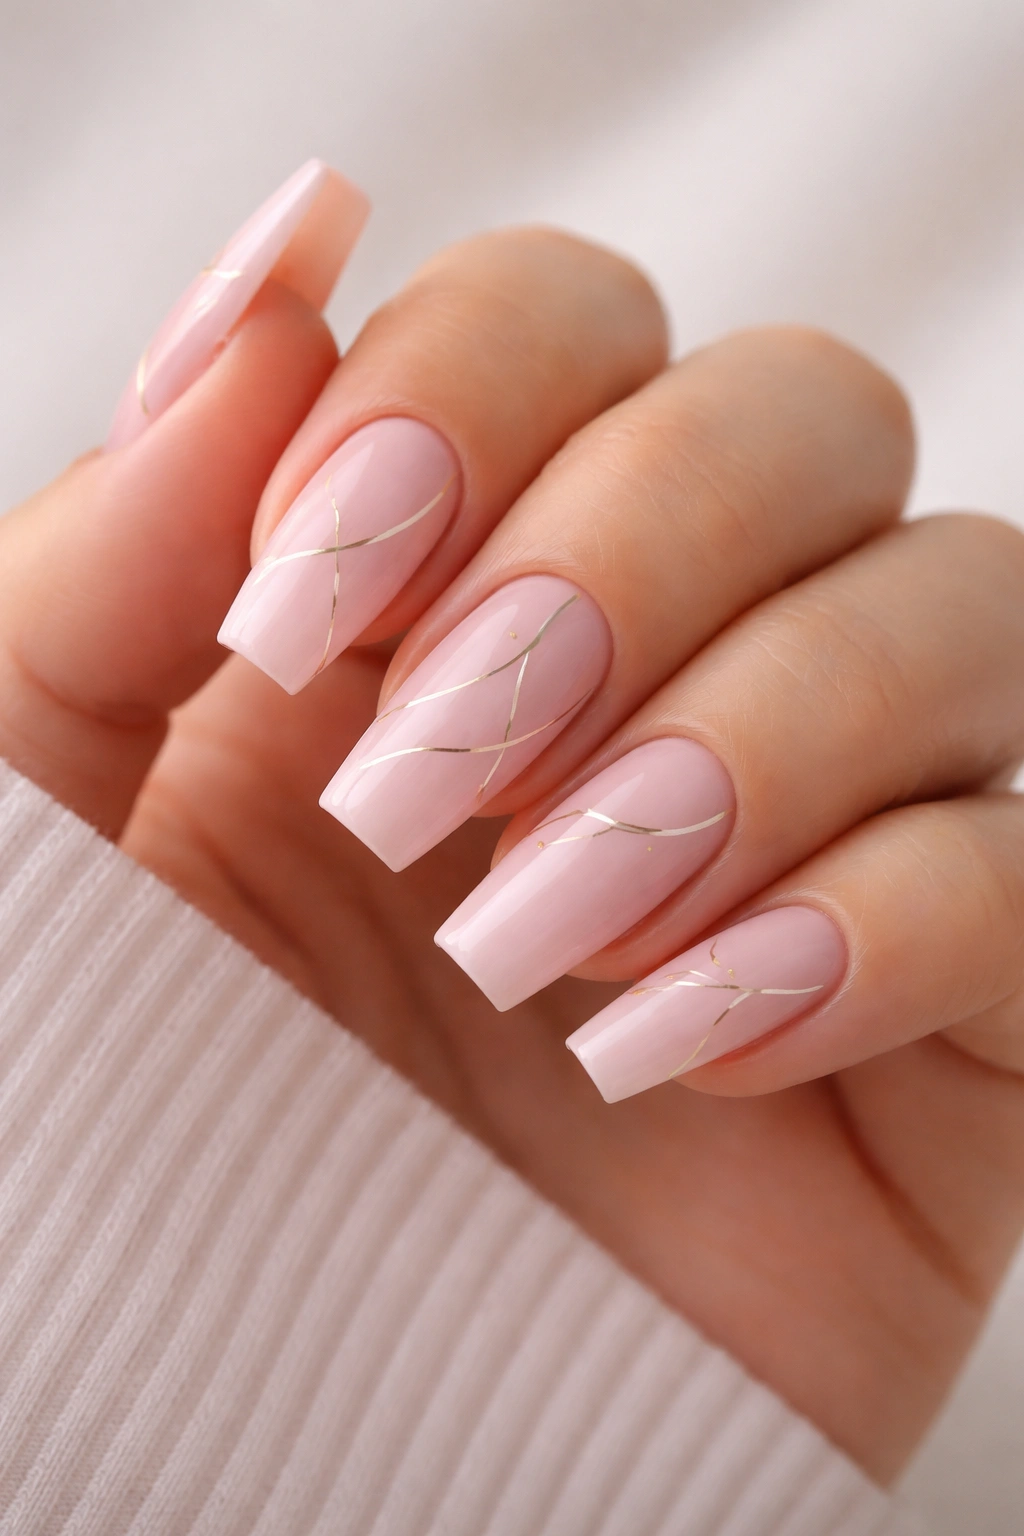
8. Light Pink With Gold Accents
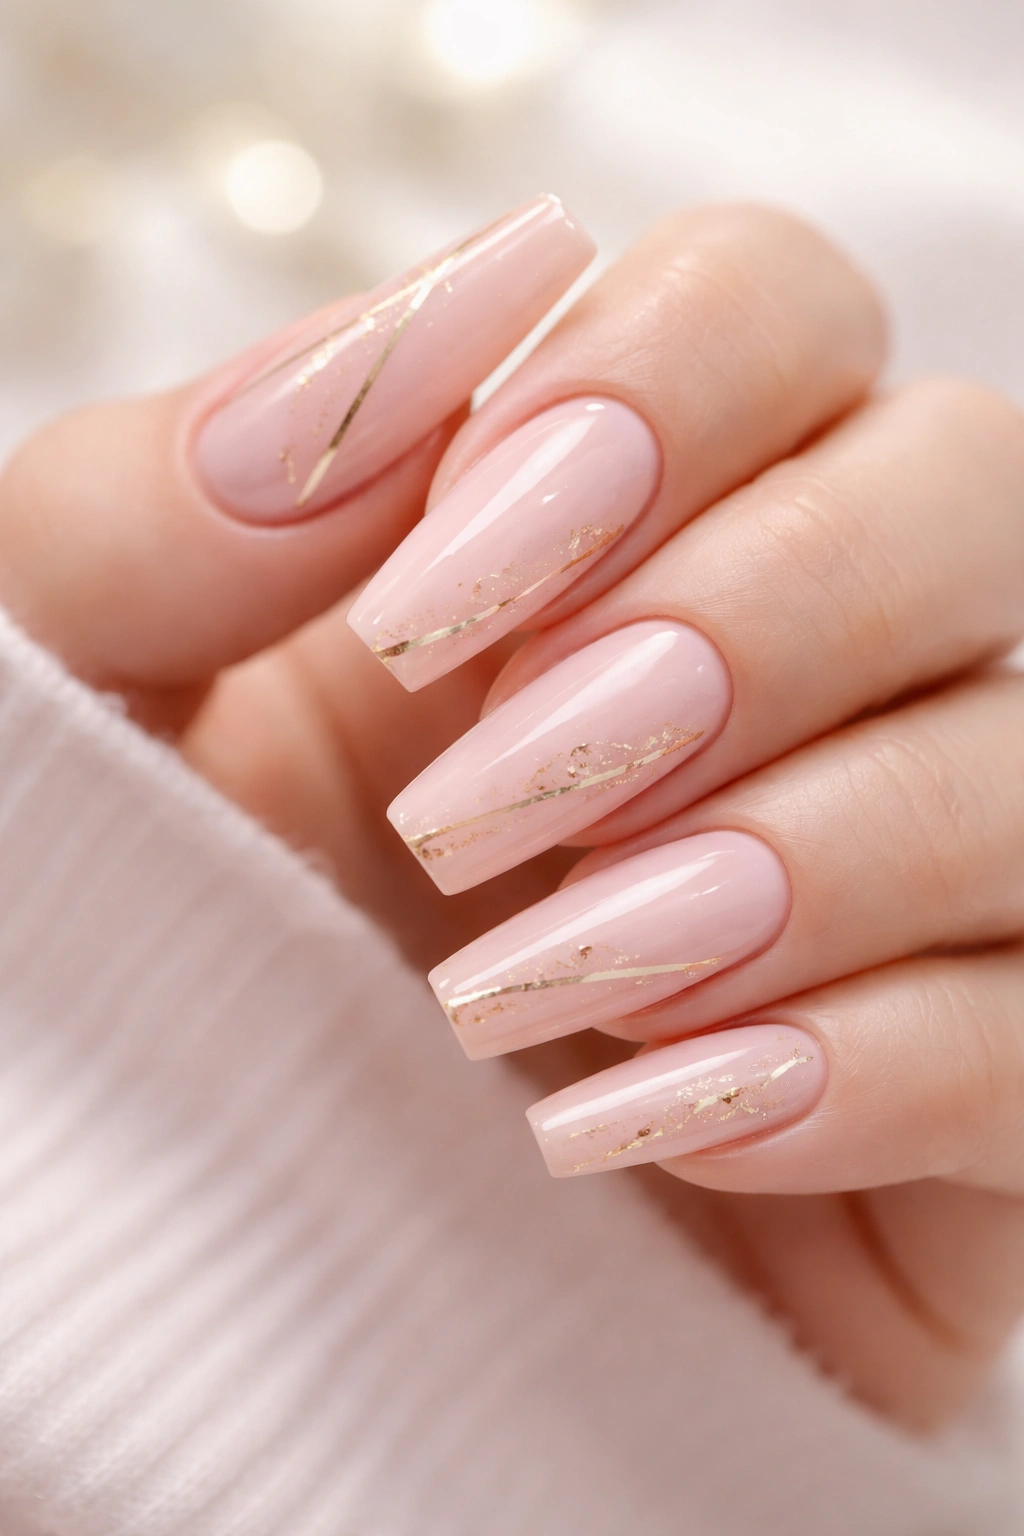
Gold detailing—whether stripes, foil flakes, or geometric designs—adds warmth and luxury to light pink. This combination works particularly well on warm skin tones and creates an elegant, slightly elevated aesthetic without being overly formal.
Ways to Incorporate Gold
You can add gold through gold leaf (carefully applied to a sticky top coat), gold striping tape (removed carefully after base coat hardens), gold gel accents, or foil flakes mixed into a clear top coat. The key is restraint—gold should accent and enhance, not dominate.
Gold Application Ideas
- Thin gold stripes down the center of each nail
- Gold accents only on the tips
- Geometric gold lines creating a pattern
- Gold leaf details pressed into a sticky base coat
- Subtle gold shimmer blended into the light pink base
Pro tip: Gold shows every smudge and fingerprint, so plan for frequent cleaning if you want the gold to remain pristine.
9. Light Pink With Nude Gradient
This sophisticated design blends light pink smoothly into nude, creating a seamless color progression that’s both subtle and intentional. It’s perfect for anyone who wants nail art that’s interesting but not visually loud.
The Appeal of Pink-to-Nude Gradient
This gradient works because pink and nude are close enough in the color spectrum that they blend beautifully without creating jarring contrast. The result feels almost like an ombre that happens to shift colors—very natural and very wearable. On medium coffins, this provides visual interest without calling excessive attention to your nails.
Creating This Specific Gradient
- Start with light pink at the base or sides
- Gradually introduce nude (or a flesh-toned pink) toward the other end
- Use a sponge, brush, or layering technique to ensure smooth transitions
- Consider applying to the entire nail for an all-over gradient, or just the tips for an ombre effect
10. Light Pink Marble Effect
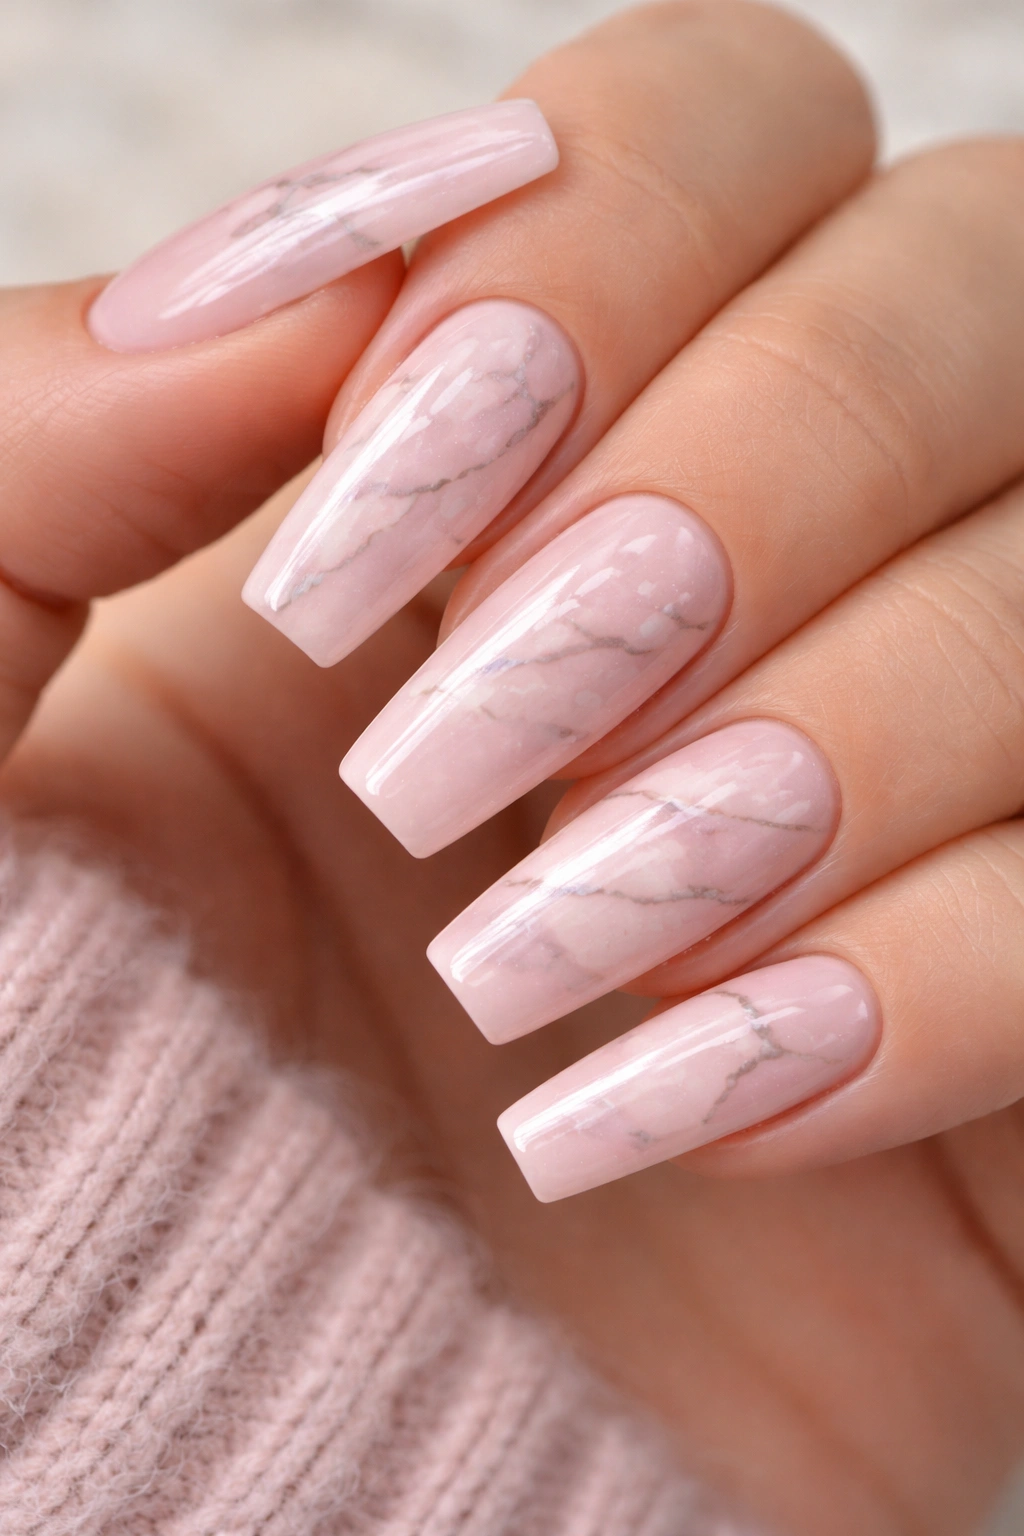
Marble designs create the illusion of natural stone texture, and light pink marble is particularly elegant. The wavy, organic lines of a marble pattern add sophistication and visual complexity without feeling chaotic or busy.
Creating Marble on Coffin Nails
The marble effect traditionally uses a water-marble technique or is hand-painted using thin brushes and gel products. On medium coffins, the larger surface area allows the marble pattern to be visible and beautiful without appearing cramped.
Marble Technique Options
- Water marble method: drop colors into room-temperature water, swirl them, then dip your nail in to capture the pattern
- Hand-painted method: use thin gel brushes to create organic veining and patterns with darker pink or gray shades
- Pre-made marble polish: some brands offer polish specifically designed to create marble effects
The key to elegant marble is using colors that actually belong together—light pink with white and gray veining, for example, rather than jarring contrast colors.
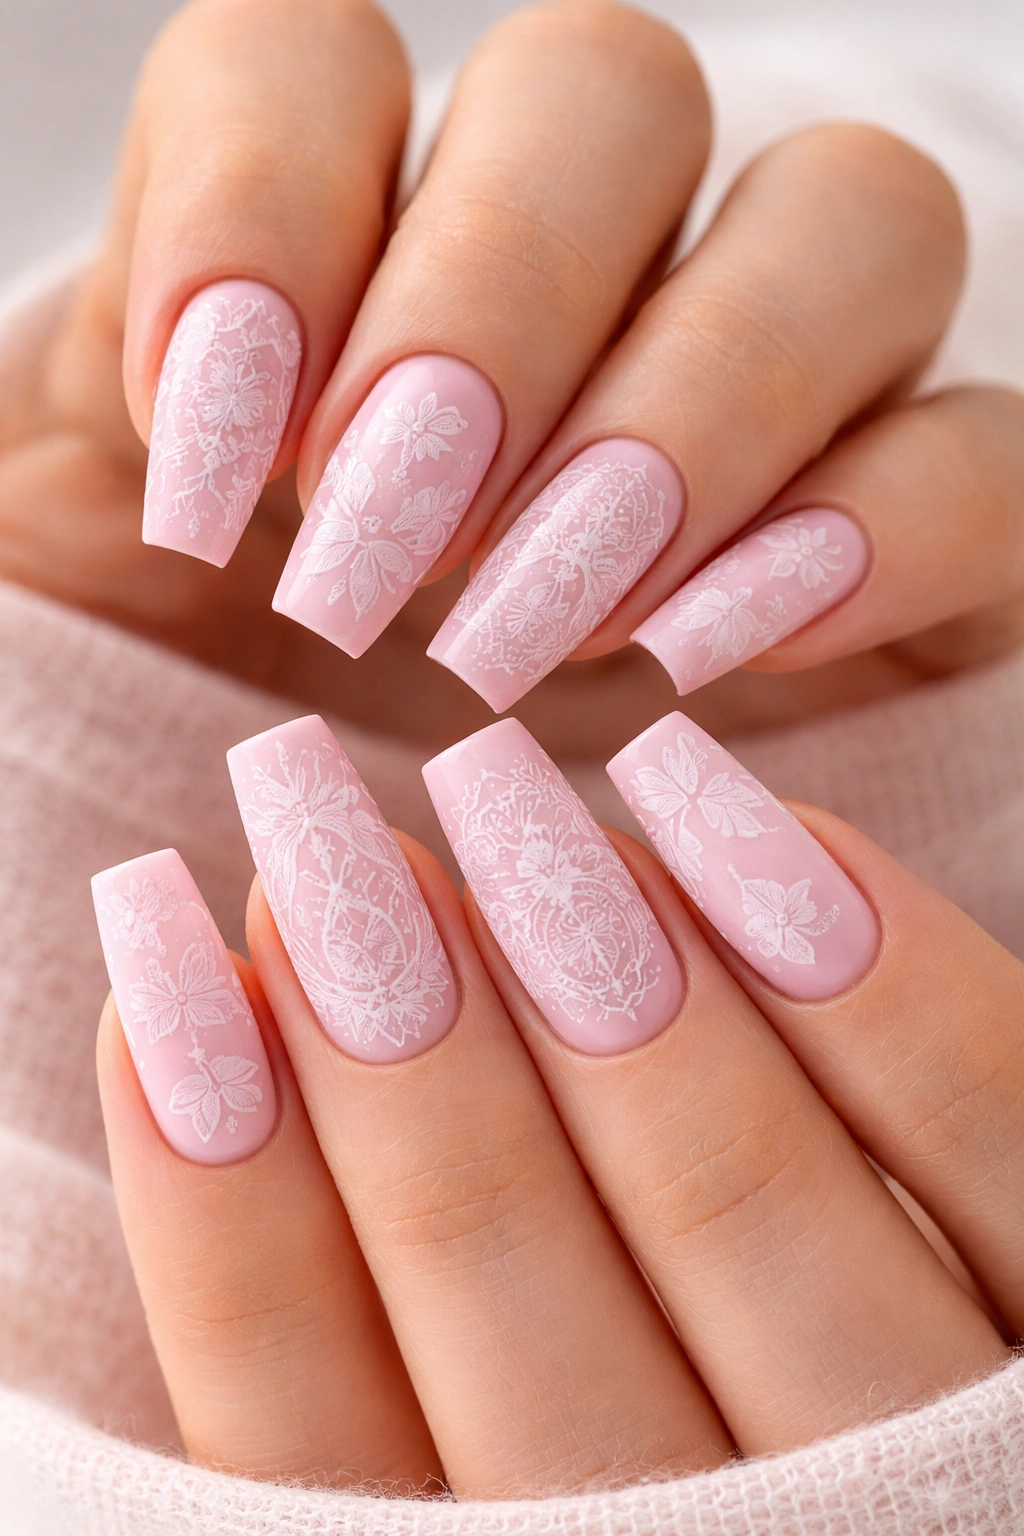
11. Light Pink With Floral Designs
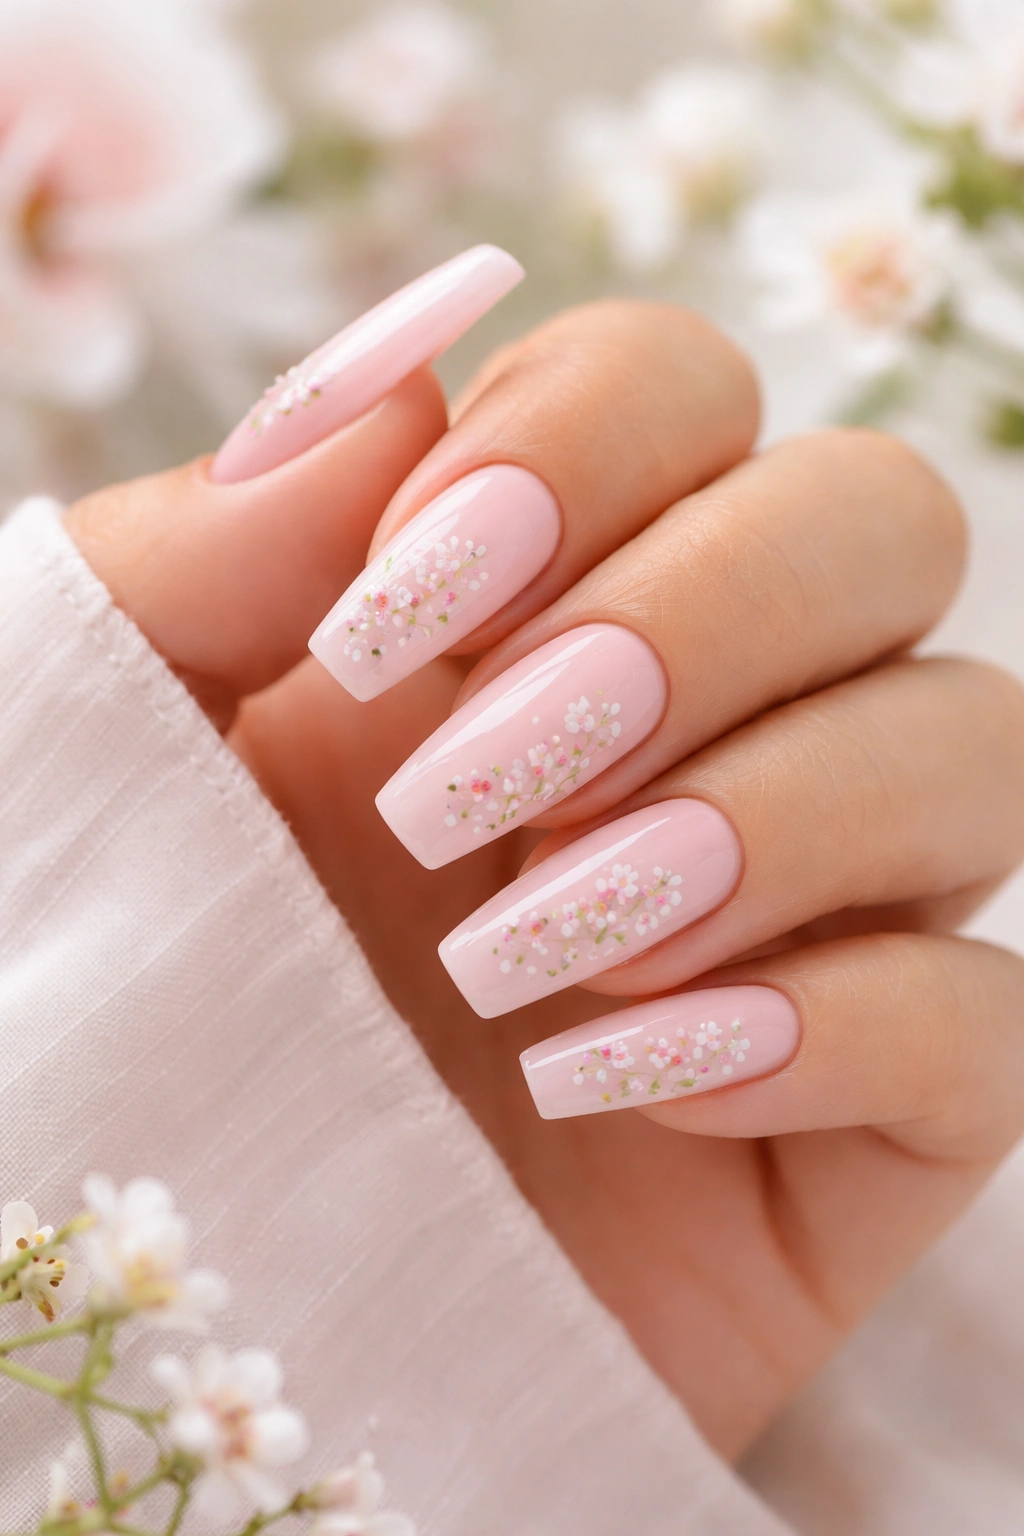
Floral nail art elevates light pink beyond its basic color into genuine art. Small delicate flowers—whether hand-painted, stamped, or applied through nail stickers—add femininity and visual interest without requiring extreme skill to execute.
Floral Design Options for Medium Coffins
Medium-length coffins provide enough space for flowers to be visible and detailed, but not so much space that they look sparse. A few strategically placed flowers work better than covering the entire nail. Consider one accent flower per nail, or a single floral element on the ring finger with solid light pink on the others.
How to Add Florals
- Stamping plate method: use flower-design stamping plates with gel or special stamping polish
- Hand-painted approach: use extremely thin brushes and steady hands, or practice beforehand
- Nail stickers: pre-made floral stickers provide designer-quality florals with zero artistic skill required
- Decals: apply adhesive floral designs and seal with top coat
Worth knowing: Delicate florals look more sophisticated than cartoonish flowers—look for botanical-style designs rather than stylized or cute interpretations.
12. Light Pink Nude Blend
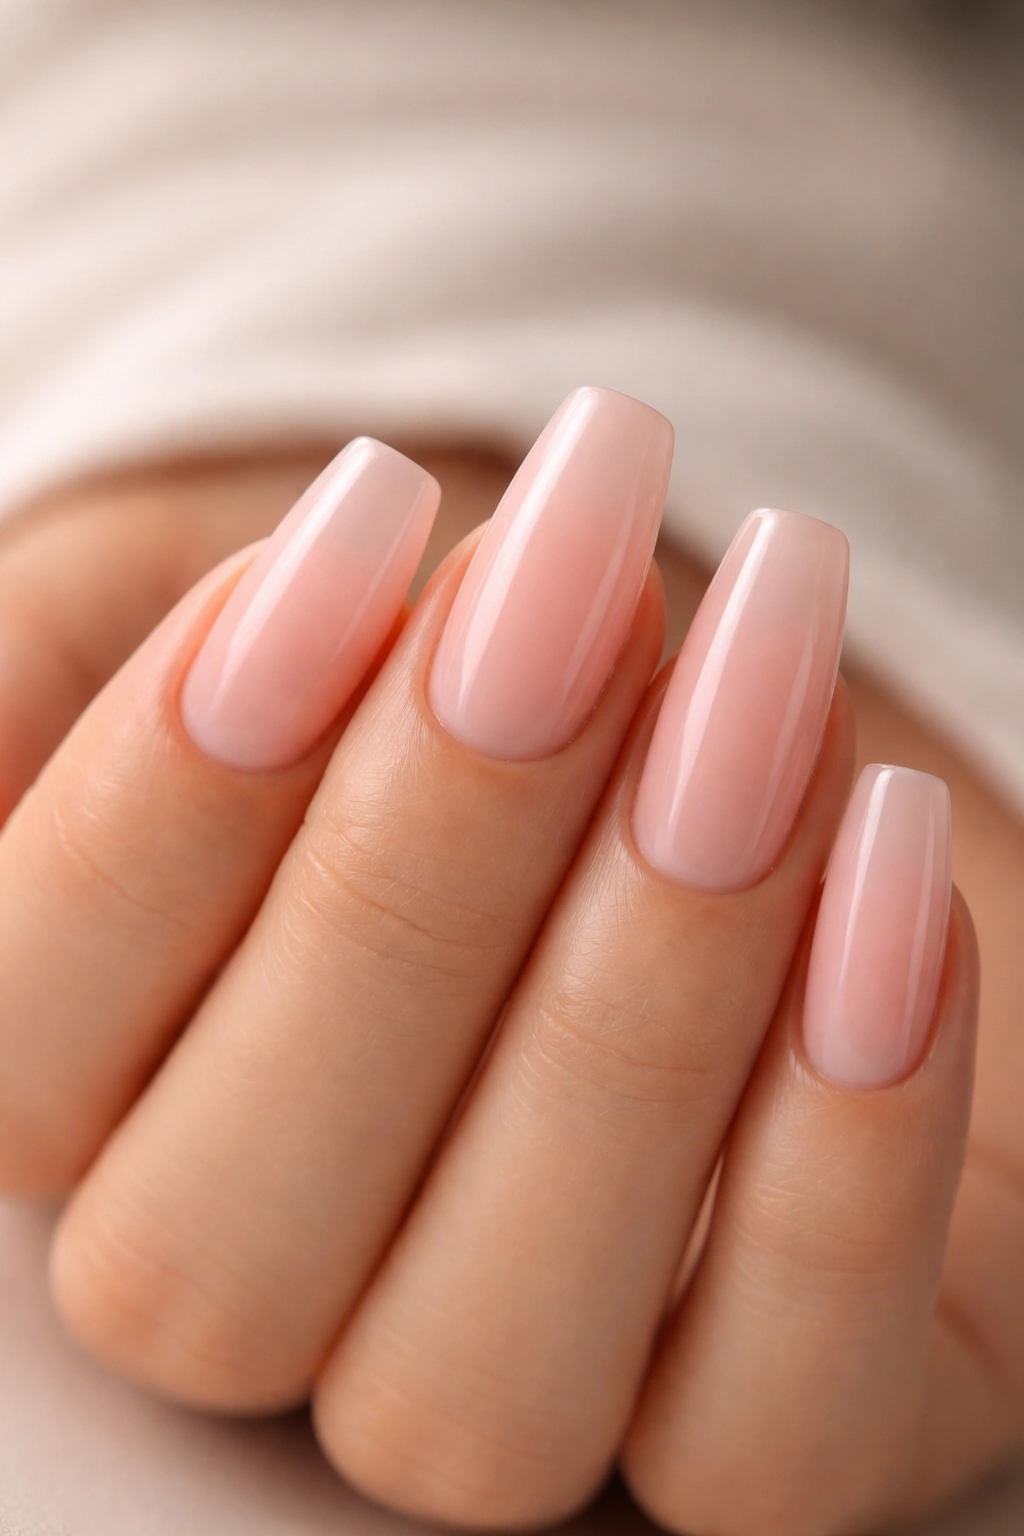
A blend between light pink and nude creates a color that’s barely there—almost invisible, but with enough tint to create subtle dimension. This is the ultimate “natural but intentional” nail design, perfect for someone who wants to appear well-groomed without obviously wearing nail color.
Why Blend Pink and Nude
When you blend light pink and nude, you get a color that’s nearly the same as your natural nail bed, but with enough tint to feel deliberate. The effect is that your nails look naturally healthy and slightly flushed, rather than plain or unpolished.
Creating the Blend
- Use a sponge or brush to layer light pink and nude together
- The ratio matters—try 60% nude to 40% light pink for maximum subtlety
- You can also use pre-made blended polishes designed for this exact effect
- Finish with a glossy top coat to enhance the natural appearance
13. Light Pink Milky Translucent
Milky translucent nails combine the semi-opaque quality of jelly polish with a slightly milky, creamy appearance. The result is sophisticated, modern, and somehow both bold and subtle simultaneously.
The Milky Effect
This look requires a milky gel or polish—essentially a jelly formula with white pigment added to create opacity without full coverage. The slight opacity means you can barely see your nail bed through the color, but the semi-transparent quality still creates dimension.
Application Method
- A quality milky light pink gel typically requires 2-3 coats for optimal appearance
- The color should be opaque but still slightly translucent—you might see a very slight shadow of your fingertip underneath
- Cure each coat completely if using gel
- Finish with a glossy top coat
Insider note: Milky polishes show ridges and imperfections in your nail bed, so a smooth nail bed or a base coat that evens the surface is especially important.
14. Light Pink With Geometric Patterns

Geometric designs—clean lines, triangles, dots, stripes—add modern artistic flair to light pink nails. Geometric patterns work on medium coffins because the shape’s structure naturally complements angular designs.
Geometric Design Ideas
Consider vertical stripes in a darker shade, a gradient of dots that increases in size, geometric triangles at the tips, or abstract angular lines. The key is using complementary colors—darker pinks, grays, or whites work better than high-contrast colors on light pink.
Executing Geometric Designs
- Striping tape creates clean lines without requiring steady hands
- Stamping plates offer pre-made geometric patterns
- Hand-painting with gel and thin brushes allows complete customization
- Even simple dots using a dotting tool create sophisticated patterns
15. Light Pink With Pearl Finish

Pearl finishes create a soft, luminous quality that’s particularly beautiful on light pink. Rather than reflective like chrome, pearl has a gentle, multidimensional glow that appears to come from within the nail.
Pearl Powder Application
Pearl powder works similarly to chrome powder—it requires a sticky base and must be applied with a soft brush, then sealed with top coat. The result is a finish that shifts slightly depending on the angle and light, creating an almost opalescent effect.
Getting Pearl Right
- Apply a sticky gel base in light pink
- While the surface is still tacky, apply pearl powder with a soft brush
- Buff gently to distribute evenly
- Seal with a non-wipe top coat
Pearl is less high-maintenance than chrome but still requires regular cleaning to keep the luminous finish visible.
16. Light Pink Gel Shine
Gel polish inherently provides a glossy, highly dimensional finish that’s difficult to achieve with traditional polish alone. The thick, gel-like formula creates genuine depth and light reflection that reads as more expensive and professional than standard polish.
Why Gel Creates Superior Shine
Gel polish contains larger resin molecules that refract light differently than traditional polish. This creates a deeper, more lustrous shine that appears almost three-dimensional. On light pink, this shine makes the color appear richer and more intentional.
Gel Polish Application
- Apply a gel base coat
- Apply 2-3 thin coats of light pink gel polish, curing between each
- Apply a glossy gel top coat and cure
- Finish with an alcohol wipe to remove the sticky residue
17. Light Pink With Minimalist Line Art
Minimalist nail art uses thin lines, dots, and negative space to create sophisticated designs. On light pink, minimal line art in dark pink, gray, or black creates elegant, artistic nails that feel very current and curated.
Minimalist Design Examples
Consider a single thin line down the center of each nail, a small abstract shape on one accent nail, simple connected dots, or barely-there geometric shapes. The point of minimalism is that less is more—every element should have purpose.
Creating Minimal Line Art
- Hand-painting requires a steady hand and very thin brushes, or practice first
- Thin striping tape can create perfect lines
- Some nail stickers offer minimalist designs
- Stamping plates increasingly offer minimal, artistic patterns
18. Light Pink With Subtle Glitter Placement
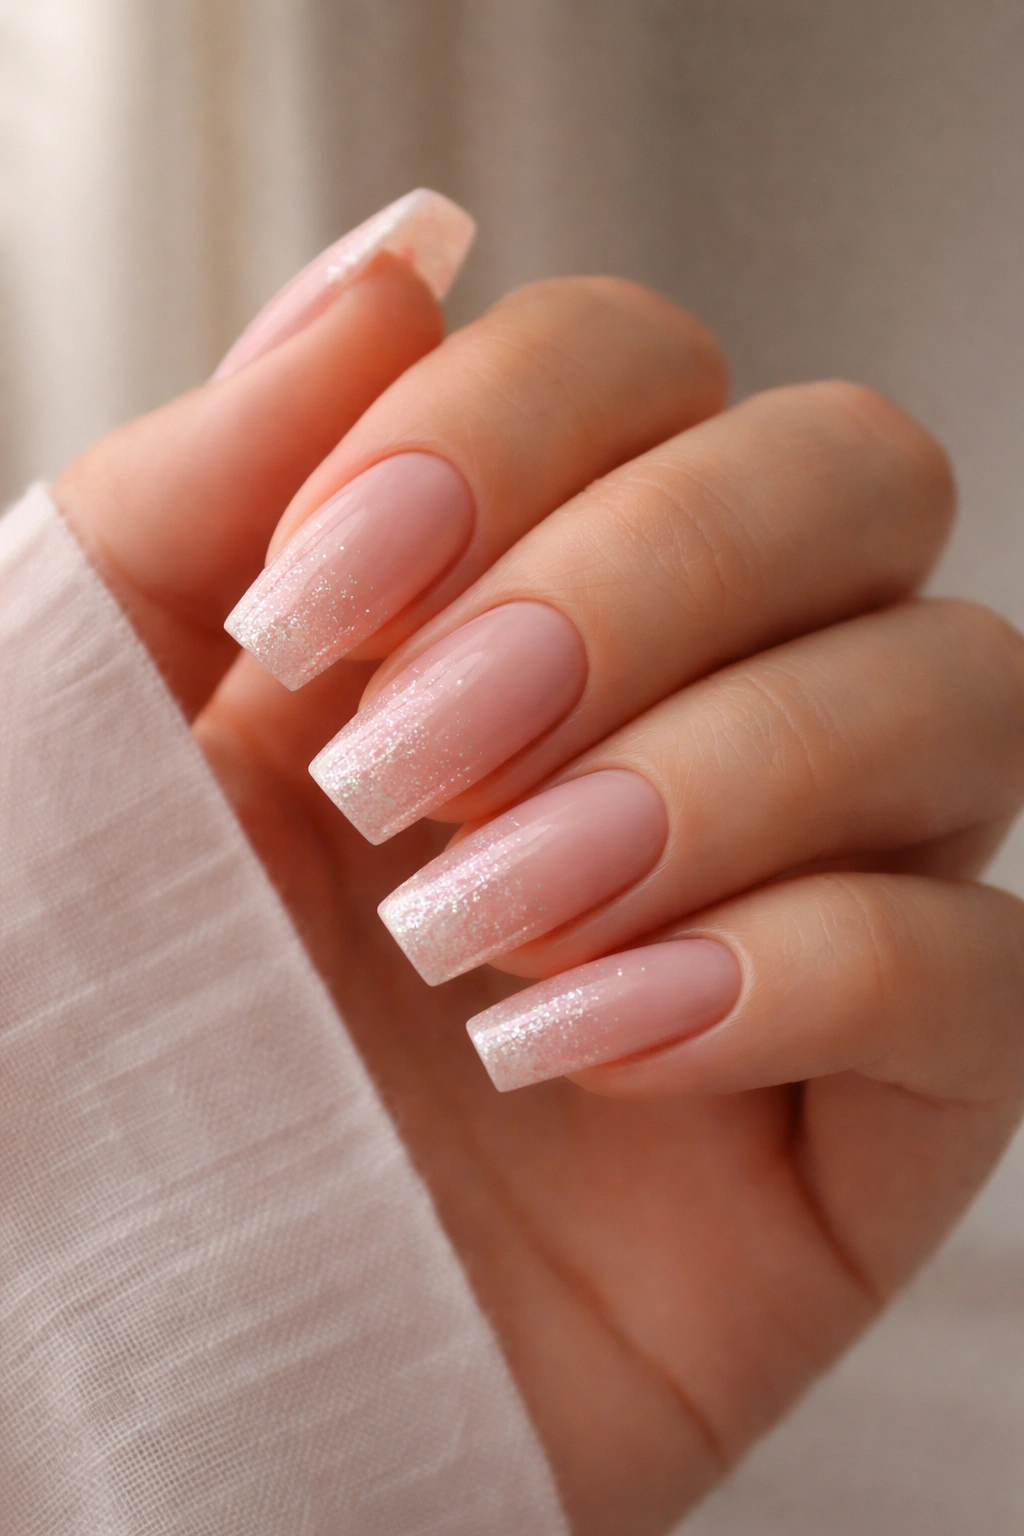
Rather than full glitter coverage, placing glitter strategically on light pink creates visual interest and sparkle exactly where you want it. A glitter gradient toward the tips, glitter only on the tips, or glitter in specific geometric shapes provides dimensionality without excessive shine.
Glitter Application Techniques
Fine glitter looks more sophisticated than chunky varieties. Apply glitter to a sticky base using a brush, dab it on with a sponge, or layer it over the wet base coat and let gravity position it naturally. Seal glitter completely with a thick top coat to prevent pieces from lifting or catching on things.
Glitter Placement Ideas
- Full coverage on the tips only, with light pink on the base
- Scattered glitter across the entire nail in no particular pattern
- Glitter concentrated at the cuticle area
- Glitter in geometric sections or shapes
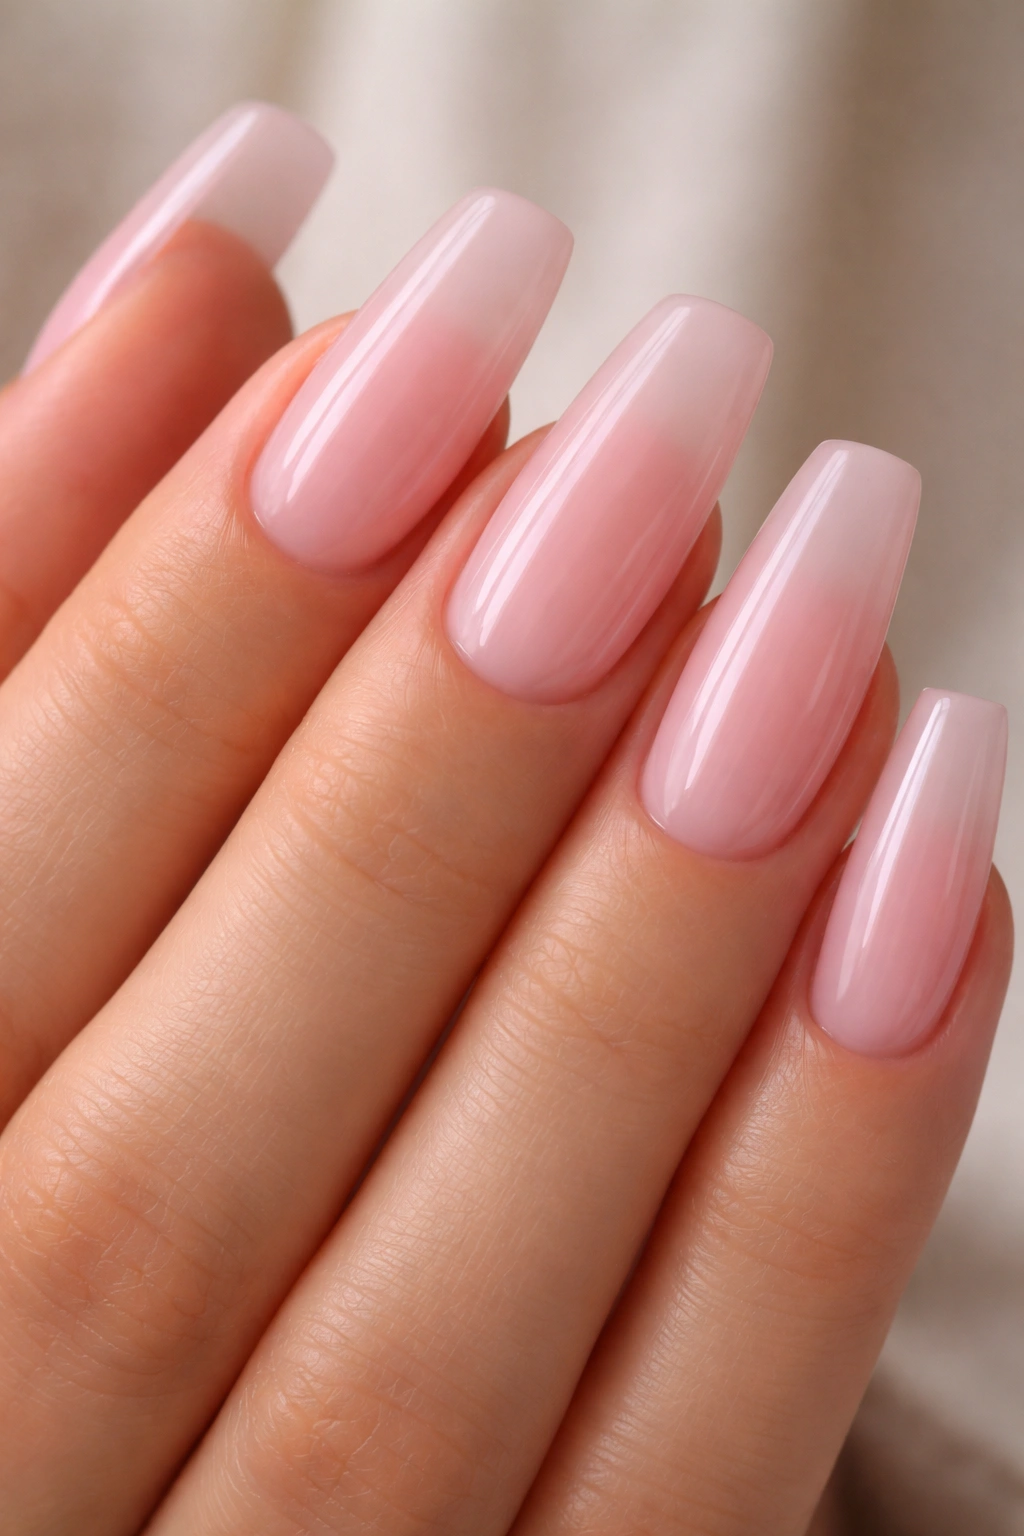
19. Light Pink Nude Ombre

This variation reverses a traditional ombre by starting with light pink and fading to nude or flesh tone. The effect is subtle but sophisticated, and the gradual fade toward nude creates the illusion of length on your medium coffin nails.
Ombre Direction Matters
Starting light at the base and moving toward flesh tone at the tips creates a direction that leads the eye toward your fingertips, emphasizing length. This directional quality adds to the elongating effect that coffin shapes already provide.
Creating Pink-to-Nude Ombre
- Apply light pink as your base
- Using a sponge or soft brush, layer nude toward the tips
- Blend the transition area carefully
- The final result should transition smoothly without visible color breaks
20. Light Pink With Stamped Designs
Stamped nail art uses pre-made patterns transferred from a stamper plate to your nails. Light pink creates an excellent canvas for stamped designs because the pale color doesn’t compete with the stamped pattern.
Stamping Basics
A stamping plate contains recessed designs filled with special stamping polish. You scrape the excess polish away, then use a stamper to pick up the design and transfer it to your nail. The results are crisp, detailed, and consistent across all ten nails.
Why Stamping Works on Coffins
The flat surface area of medium coffin nails provides enough space for stamped designs to be visible and beautiful. Intricate patterns, floral designs, geometric shapes, and detailed images all transfer cleanly onto this smooth surface.
Stamping Equipment and Process
- A quality stamping plate with designs you love
- Special stamping polish or gel (regular polish often doesn’t transfer cleanly)
- A metal stamper and scraper
- An alcohol wipe to prevent pooling between stamps
- A clear top coat to seal and protect the stamped design
Pro tip: Stamping takes practice—test your technique on practice nails or have it done at a salon first if you’ve never stamped before.
Final Thoughts
Light pink coffin nails on medium-length nails represent the perfect intersection of wearability and intentionality. Whether you choose a simple matte finish, an elaborate stamped design, or anything in between, light pink delivers elegance that works across contexts and personal styles. Medium length keeps the coffin shape practical and proportional while still giving you enough canvas for interesting finishes and nail art.
The beauty of light pink is that it pairs with virtually every aesthetic, season, and occasion. It photographs beautifully, complements warm and cool skin tones equally well, and reads as put-together without being overtly dramatic. Start with whichever design resonates most with your current style, then branch out—the options for light pink coffin nails are genuinely infinite.
