

Black and white coffin nails represent one of the most timeless and sophisticated nail art combinations available to anyone wearing long nail shapes. The contrast between these two opposing colors creates dramatic visual impact, yet the simplicity of the color palette itself remains versatile enough to work with virtually any outfit, occasion, or personal style. Whether you’re drawn to minimalist elegance, bold geometric patterns, or intricate nail art designs, the black and white combination offers endless possibilities for creating stunning looks that photograph beautifully and photograph well under any lighting.
The coffin nail shape itself — characterized by its tapered sides and flat, squared-off tip — has become the go-to silhouette for anyone wanting to make a bold statement with their nails. The elongated length and defined edges of coffin nails create the perfect canvas for detailed artwork, allowing you to showcase intricate designs that might get lost on shorter nail shapes. When you combine this distinctive shape with black and white, you’re working with colors that have been considered the ultimate expression of sophistication for generations. The beauty of this combination is that it works whether you’re going for edgy and modern, classic and refined, or anything in between.
Let’s explore twenty distinct black and white coffin nail designs that demonstrate the incredible range of possibilities within this elegant color story.
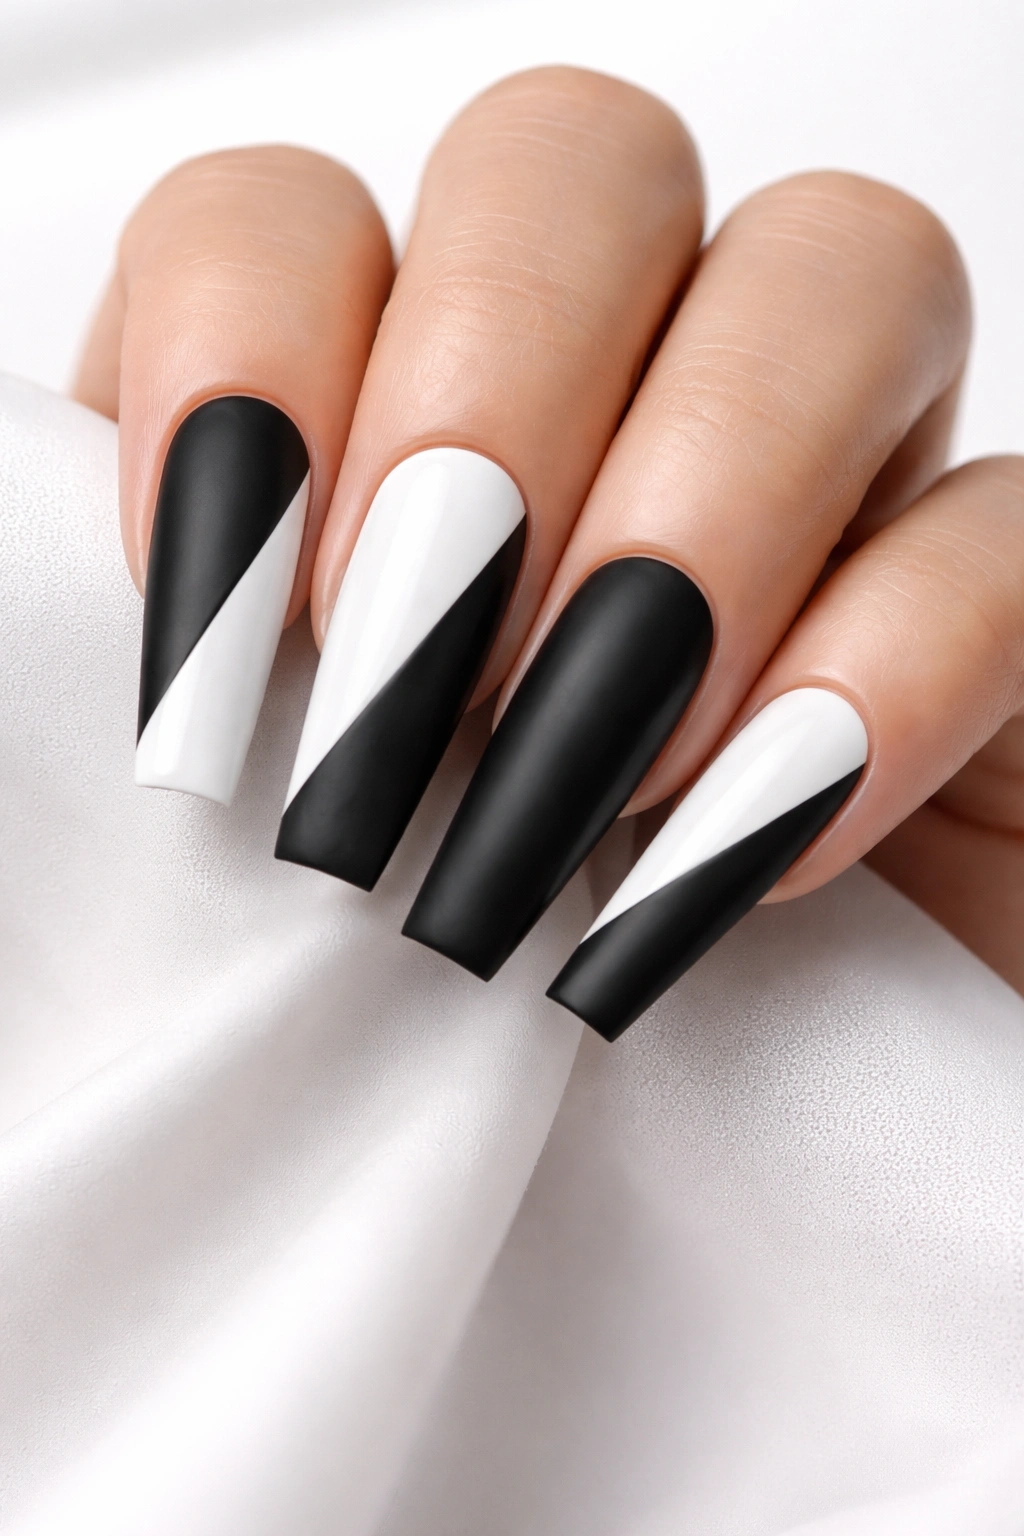
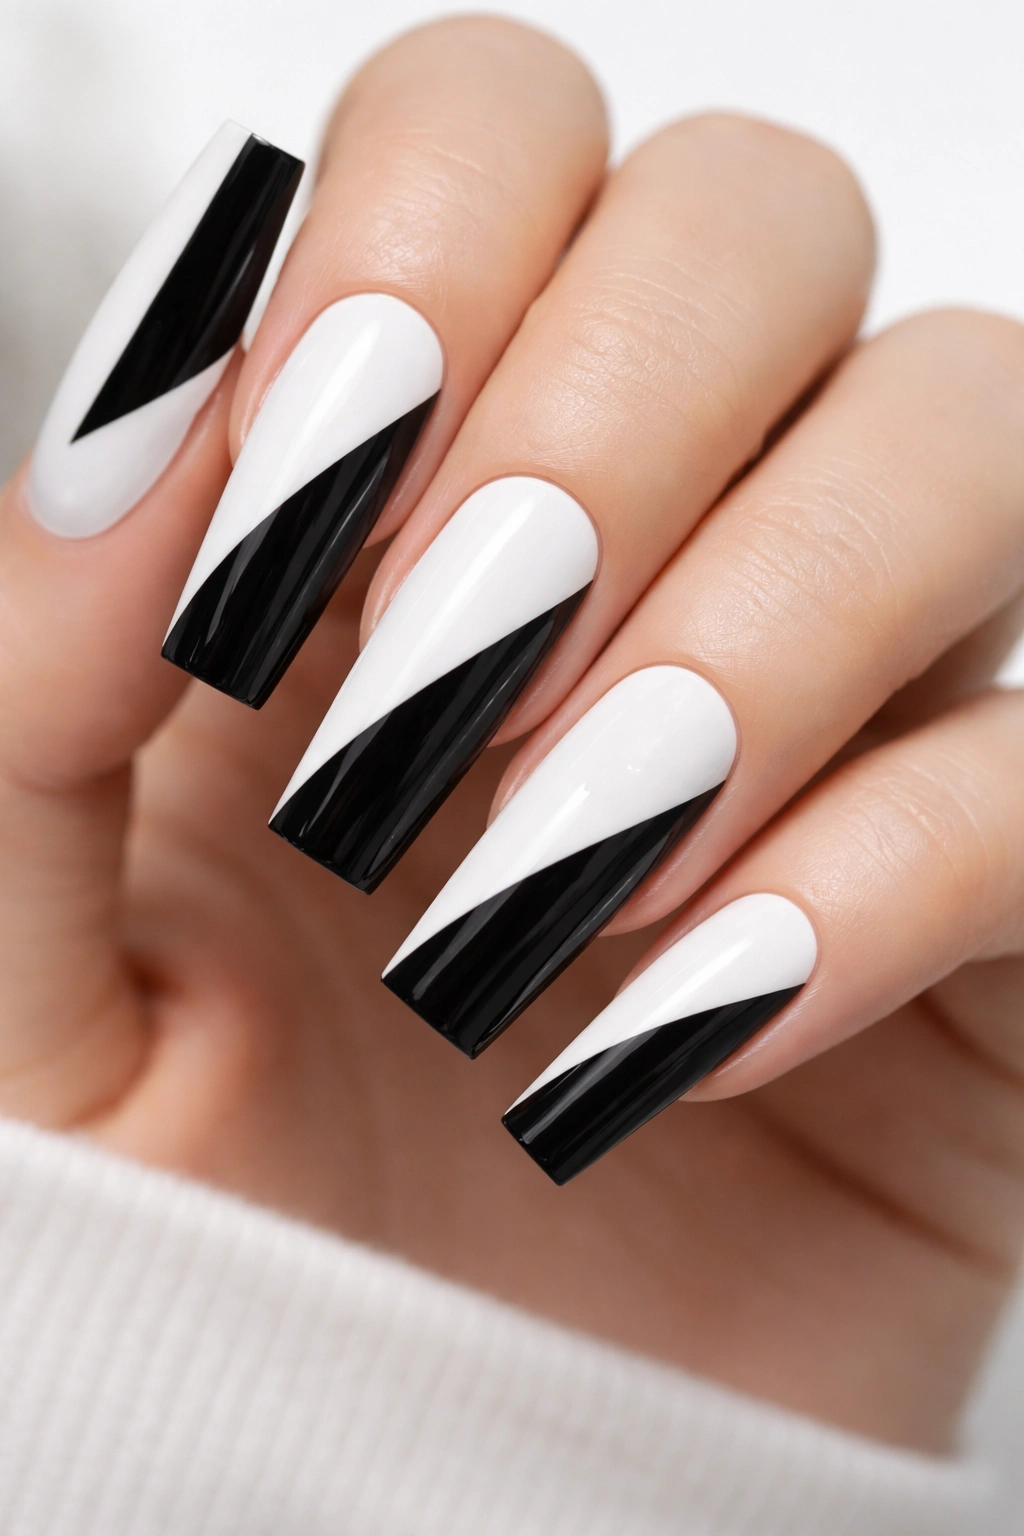
1. Bold Half-Moon Monochrome
This striking design splits your nail diagonally, with the entire bottom half in deep jet black and the top half in crisp white, creating a clean, modern division right across the center of each nail. The contrast is especially dramatic on coffin nails because the larger canvas makes the color block feel bold and intentional rather than accidental.
Why This Design Works
The half-moon split is deceptively simple to execute, yet it creates an instantly polished appearance that photographs beautifully. The geometric nature of the design means even tiny imperfections in the line between colors often go unnoticed because our eyes perceive it as a deliberate artistic choice.
Application Tips
- Use painter’s tape angled diagonally across the nail to create a perfectly straight line
- Apply your base color (let’s say white) first, let it fully cure, then tape and apply black to the bottom section
- The line doesn’t have to be perfectly centered — offset versions feel even more contemporary
Pro tip: This design looks especially striking when paired with a glossy top coat on one half and a matte finish on the other, creating textural contrast alongside the color contrast.
2. Marble Swirl Black and White
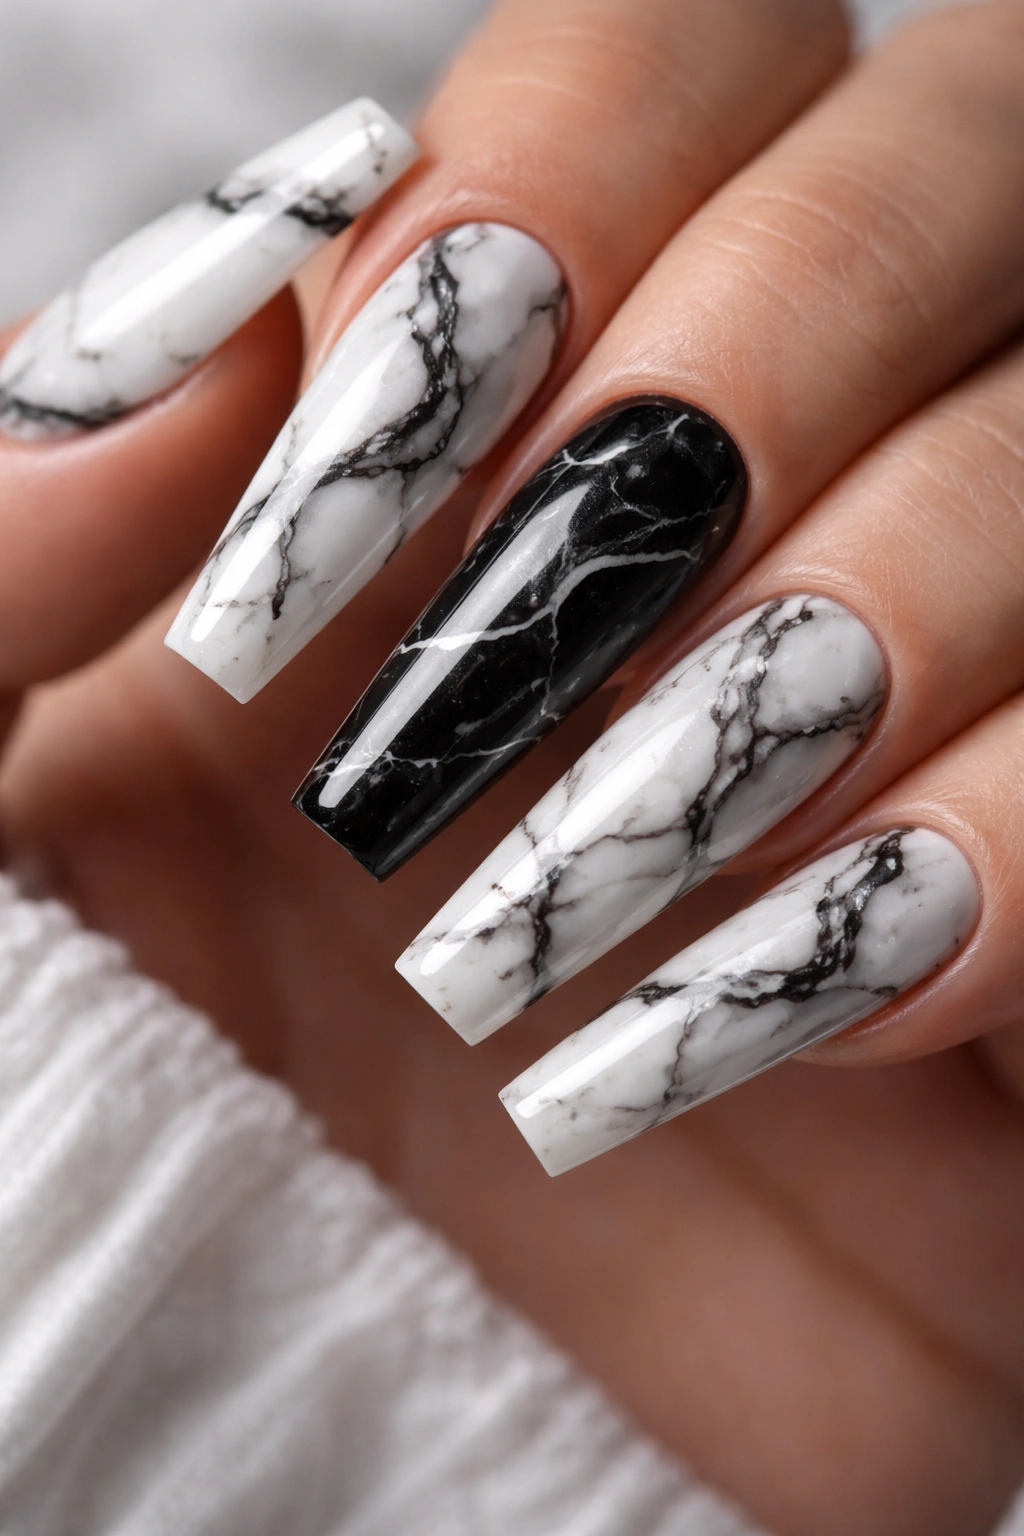
Marble effects on coffin nails create a luxurious, organic aesthetic that suggests high-end sophistication without requiring you to be a nail art master. This design uses irregular black swirls and veins across a white base, or vice versa, mimicking the appearance of real marble stone.
Achieving Realistic Veining
The key to believable marble nails is understanding that the “veins” in real marble don’t follow a predictable pattern — they meander, sometimes thicken and thin, and occasionally split into smaller branches. Using a thin brush or a striping tool, apply your black lines with intentional randomness, leaving plenty of white space visible.
Design Variations
- Web-like veining that spreads from one corner across the entire nail
- Clustered veins in one area with empty space elsewhere
- Heavy black base with delicate white veins instead of the reverse
- Geometric marble using straight lines instead of organic curves
This design pairs beautifully with a high-gloss top coat that creates depth and luminosity, making the marble appear three-dimensional and especially luxurious against the elongated canvas of coffin nails.
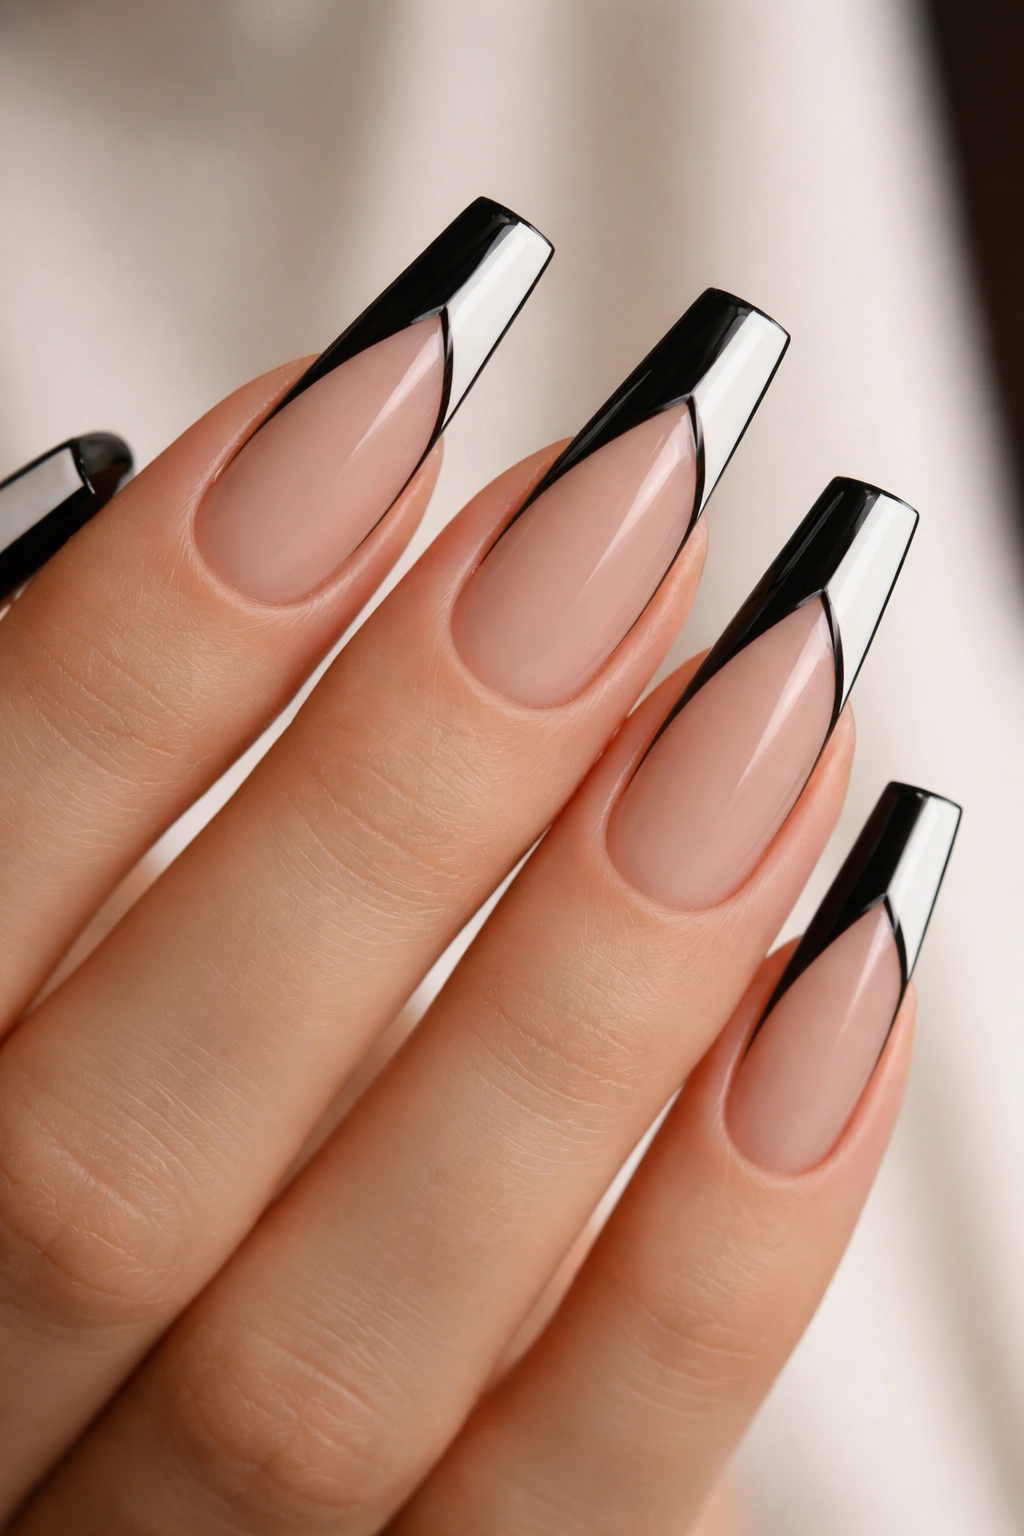
3. Classic French Ombre Tip
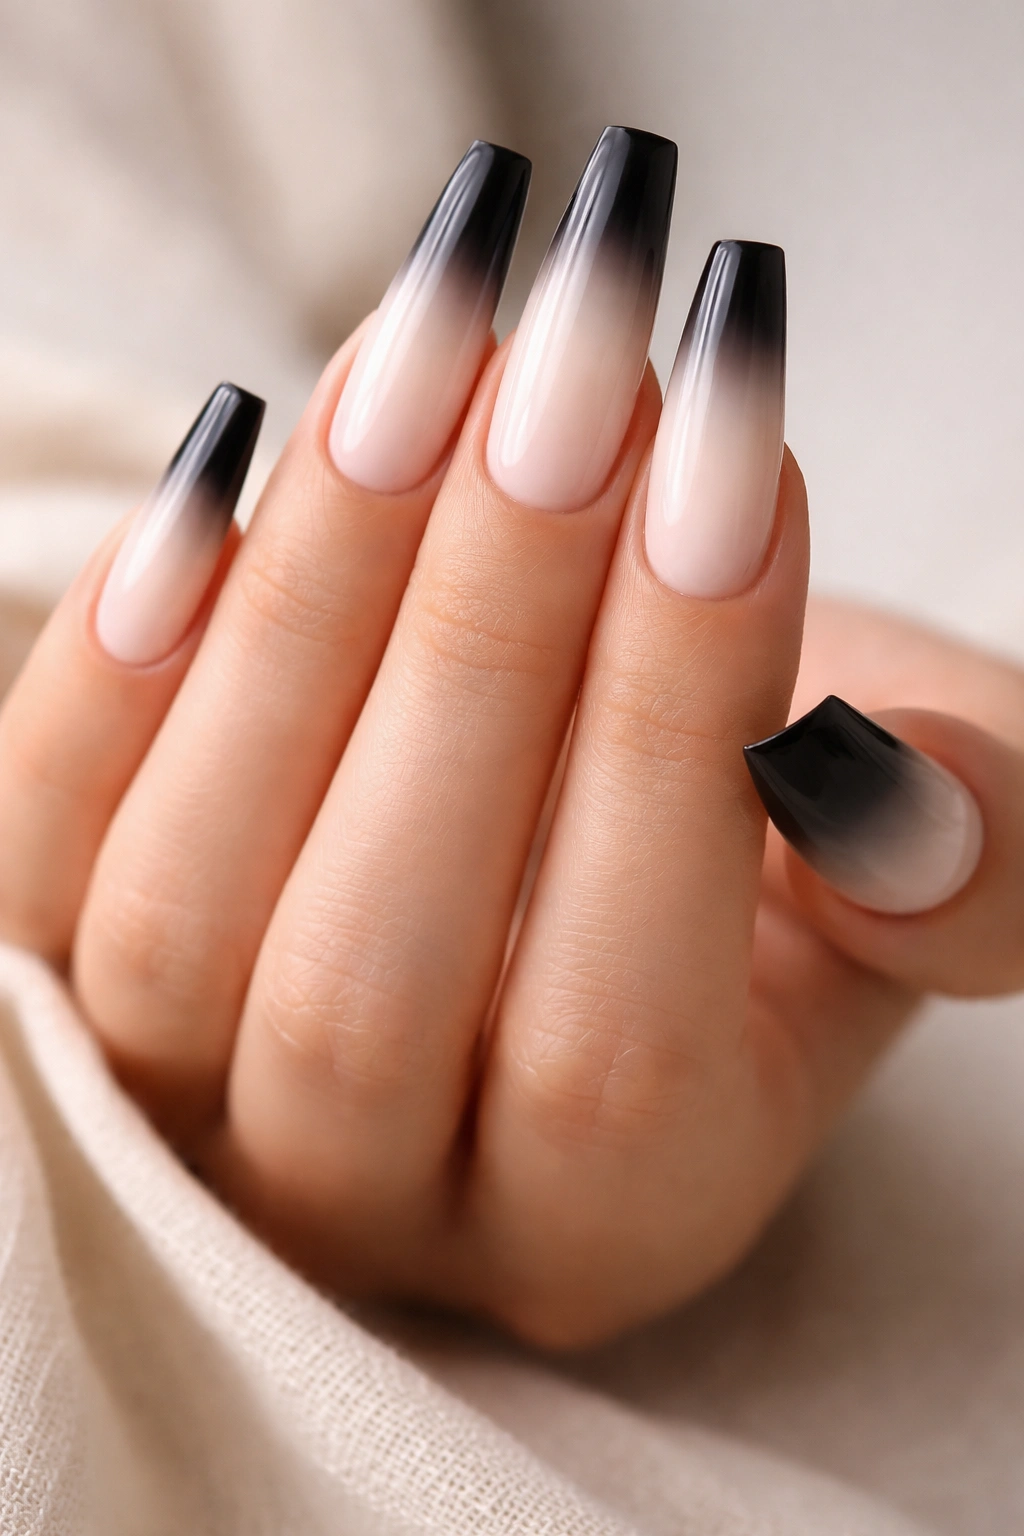
The French ombre updates the traditional French manicure by creating a gradient effect rather than a stark line, blending black into white or white into black as it moves toward the tip. On coffin nails, this creates an elegant, slightly edgy take on a timeless style.
Creating the Gradient
Apply your base white color across the entire nail, then use a makeup sponge to dab on black polish at the very tip, working it inward with dabbing motions to create a soft transition zone. The gradient should take up roughly the final third of the nail, fading from pure black at the very tip to the white base color.
Styling Considerations
- Works beautifully with glossy finishes that enhance the gradient’s smoothness
- Matte finishes create a more modern, edgy appearance
- This design elongates the finger optically, making it perfect if you want to emphasize length
The beauty of this classic variation is that it never looks dated, and it works equally well for professional settings and evening occasions.
4. Geometric Black and White Blocks
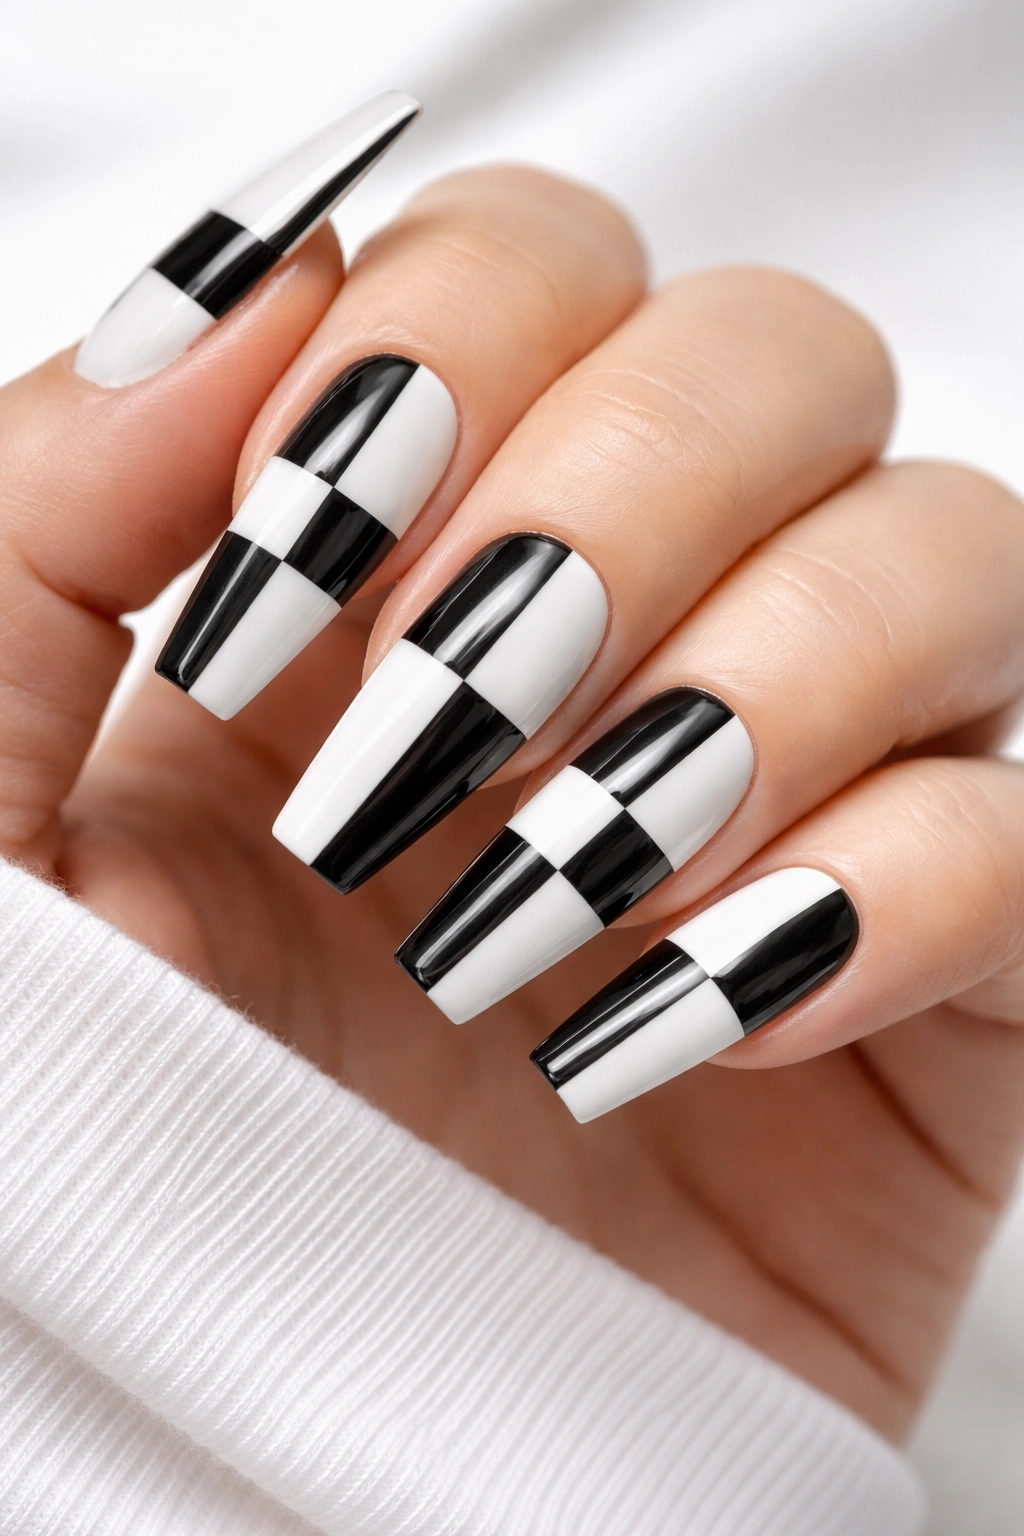
Create a modern, eye-catching design by dividing each coffin nail into distinct geometric sections — squares, rectangles, or triangles — alternating between black and white. This design feels intentional and artistic without being overly complicated to execute.
Planning Your Pattern
Sketch out your pattern lightly on paper first, visualizing how it will look on the elongated coffin shape. Most geometric patterns work best when they have some symmetry, though asymmetrical designs can work beautifully too if they’re intentional rather than accidental.
Pattern Ideas
- Vertical stripes of varying widths alternating black and white
- Triangular sections creating a chevron or arrow effect
- Large squares positioned diagonally across the nail
- A checkerboard pattern that wraps around the sides of the nail
Use painter’s tape to create clean, precise edges between sections, and allow each color to fully cure before removing tape and applying the next section.
5. Negative Space Minimalist Design
Negative space designs leave portions of your natural nail (or base coat) visible, creating contrast through what’s not colored as much as through the colors that are applied. With black and white coffin nails, negative space becomes an additional design element.
Execution Methods
You could paint the entire nail white, then apply black only to the outer edges and corners, leaving a clean white space in the center. Alternatively, paint black as your base, then apply white only in specific geometric shapes or lines, allowing the black to frame negative space around those white elements.
Visual Impact
- Creates an optical illusion of complexity despite minimal polish application
- Feels modern, gallery-like, and intentionally artistic
- Works particularly well with matte finishes that emphasize the contrast
This design appeals to anyone who loves the “less is more” philosophy and wants nails that feel refined rather than heavily decorated.
6. Splatter and Drip Abstract
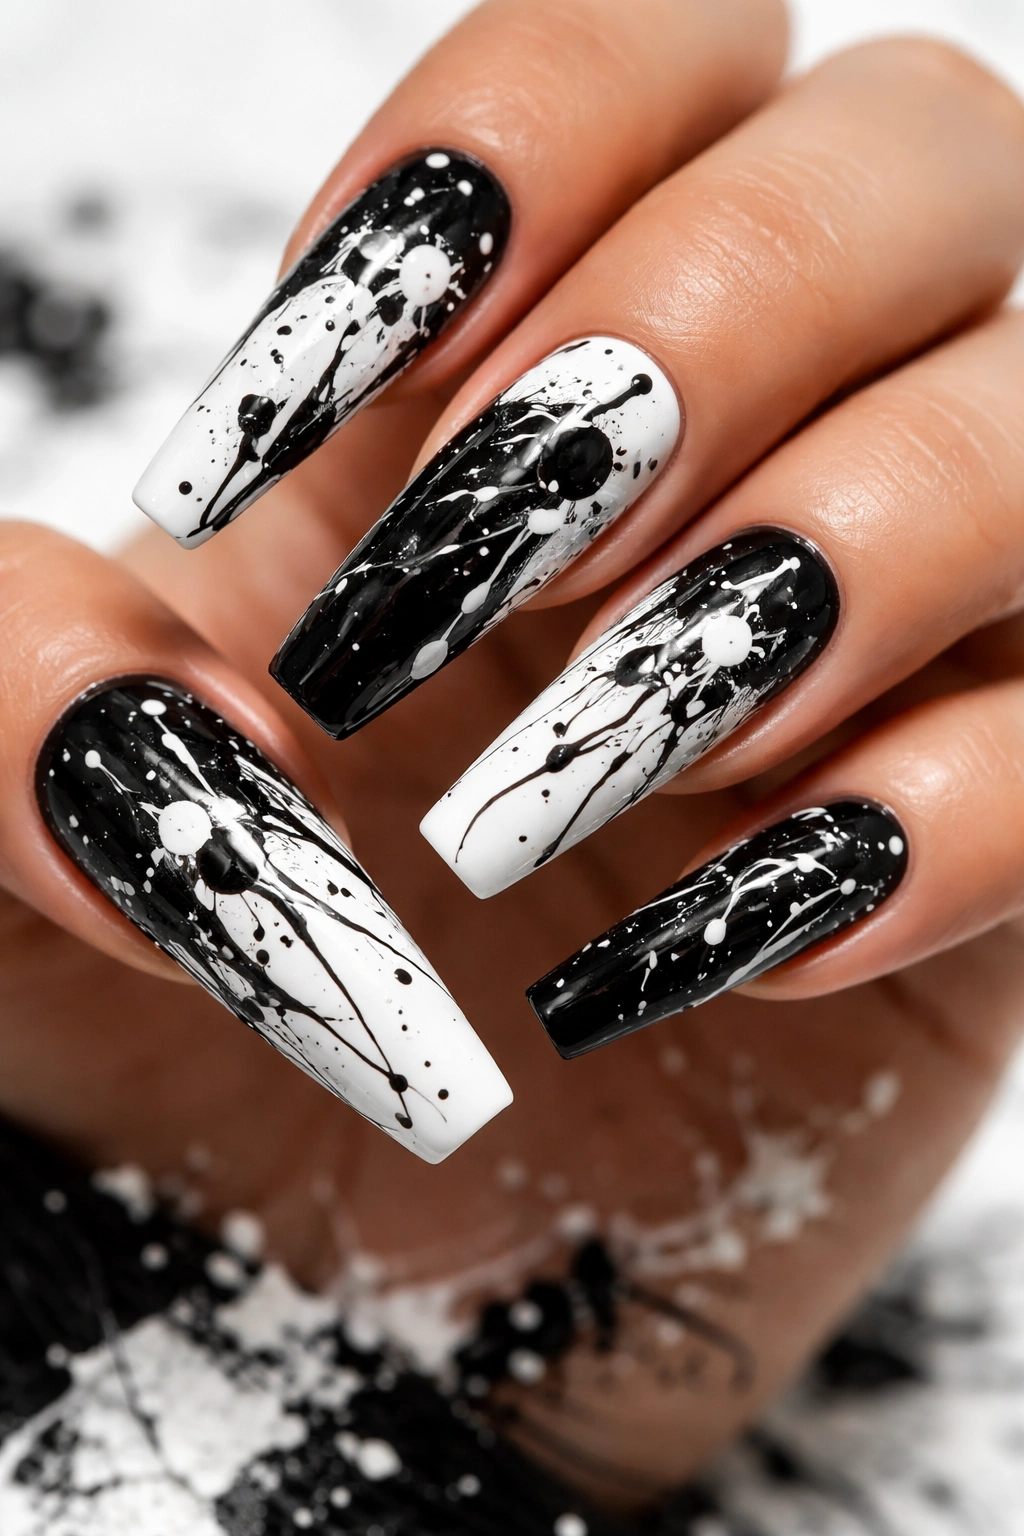
An abstract splatter design uses both black and white polish in loose, energetic application for a creative, artistic nail look. This design embraces imperfection as a feature rather than trying to achieve precise control.
Creating Splatter Effects
Use a toothbrush or thin brush to flick polish across the nail in rapid motions, creating irregular splatters. You can build layers — splatter black onto white, let it dry, then splatter white onto the black areas for added dimension and movement.
Design Control
- Work over a base color (white or black) so the splatter has a cohesive background
- Apply splatters more densely near the tip and more sparsely toward the cuticle for intentional gradation
- A matte top coat emphasizes the texture and artistic quality of splatters
This design works beautifully on coffin nails because the length allows the splatter pattern to tell a complete visual story rather than feeling cramped or chaotic.
7. Elegant Line Art Detail
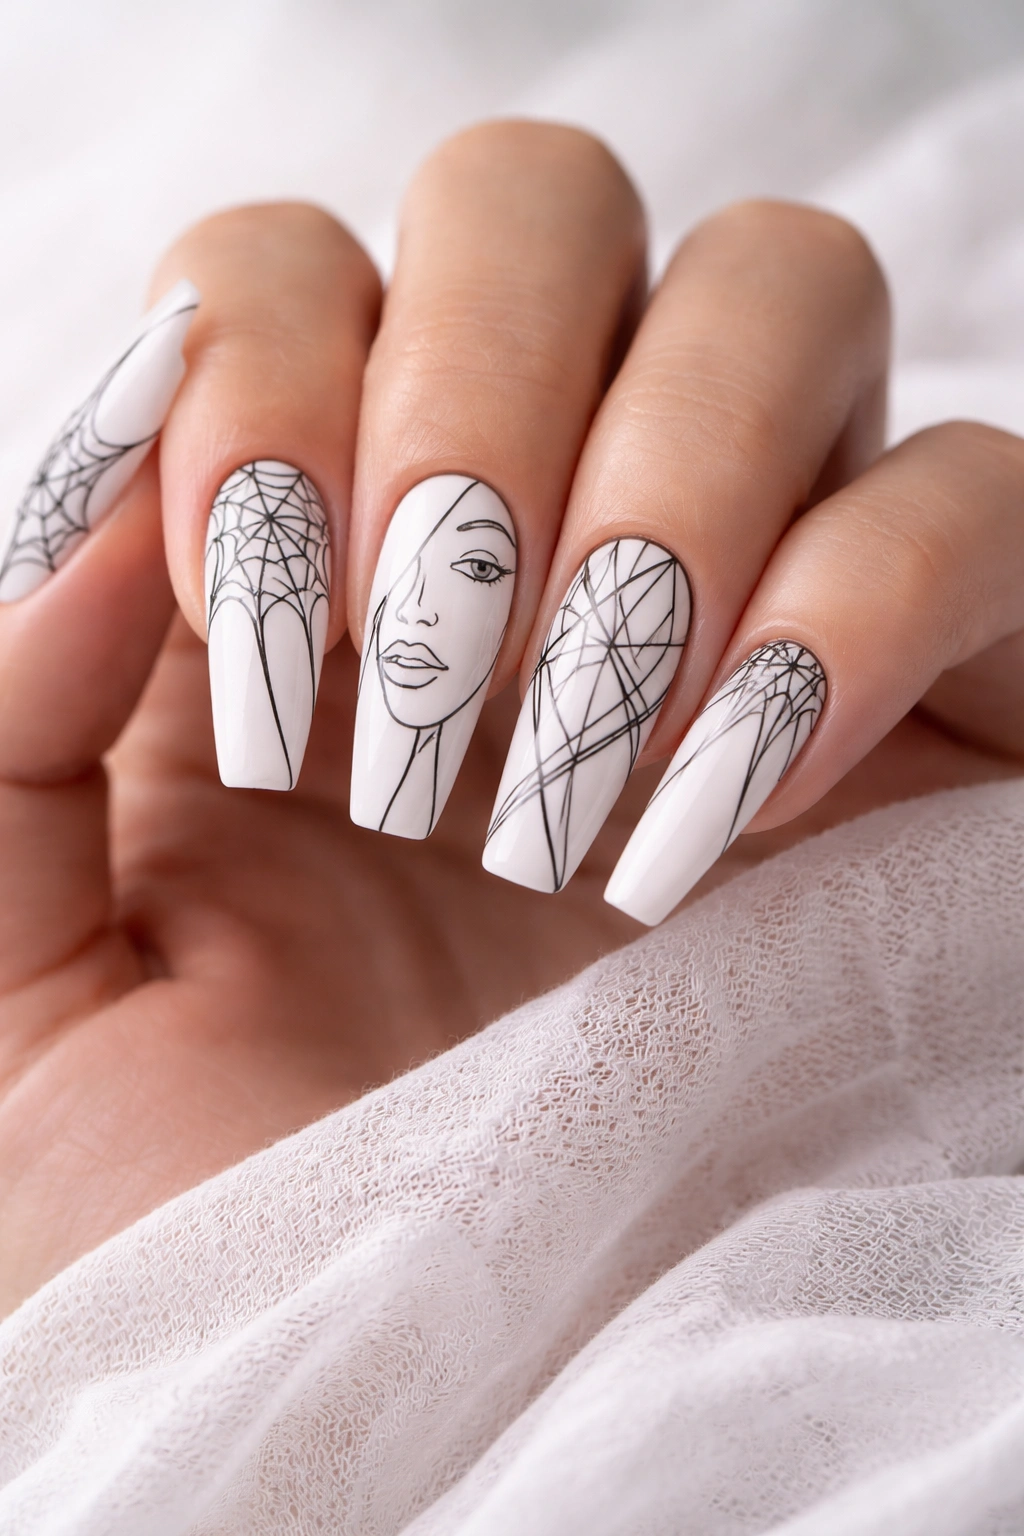
Fine black line work against a white base (or white lines on black) creates an incredibly sophisticated, almost tattoo-like aesthetic. This could be delicate line drawings, intricate patterns, or detailed botanical elements rendered in thin, precise lines.
Line Art Inspiration
Consider creating intricate spider web patterns, minimalist face outlines, geometric line mazes, or delicate floral line drawings. The key is using a very thin brush or a professional liner pen designed for nail art to keep the lines crisp and intentional.
Design Ideas
- Spiderweb pattern with tiny spider details
- Geometric line patterns that flow from one nail to the next
- Minimalist face or figure line art
- Intricate mandala or geometric patterns
This design reads as highly intentional and artistic, perfect for someone who wants nails that feel like wearable art rather than just a color application.
8. Yin-Yang Symbol Design
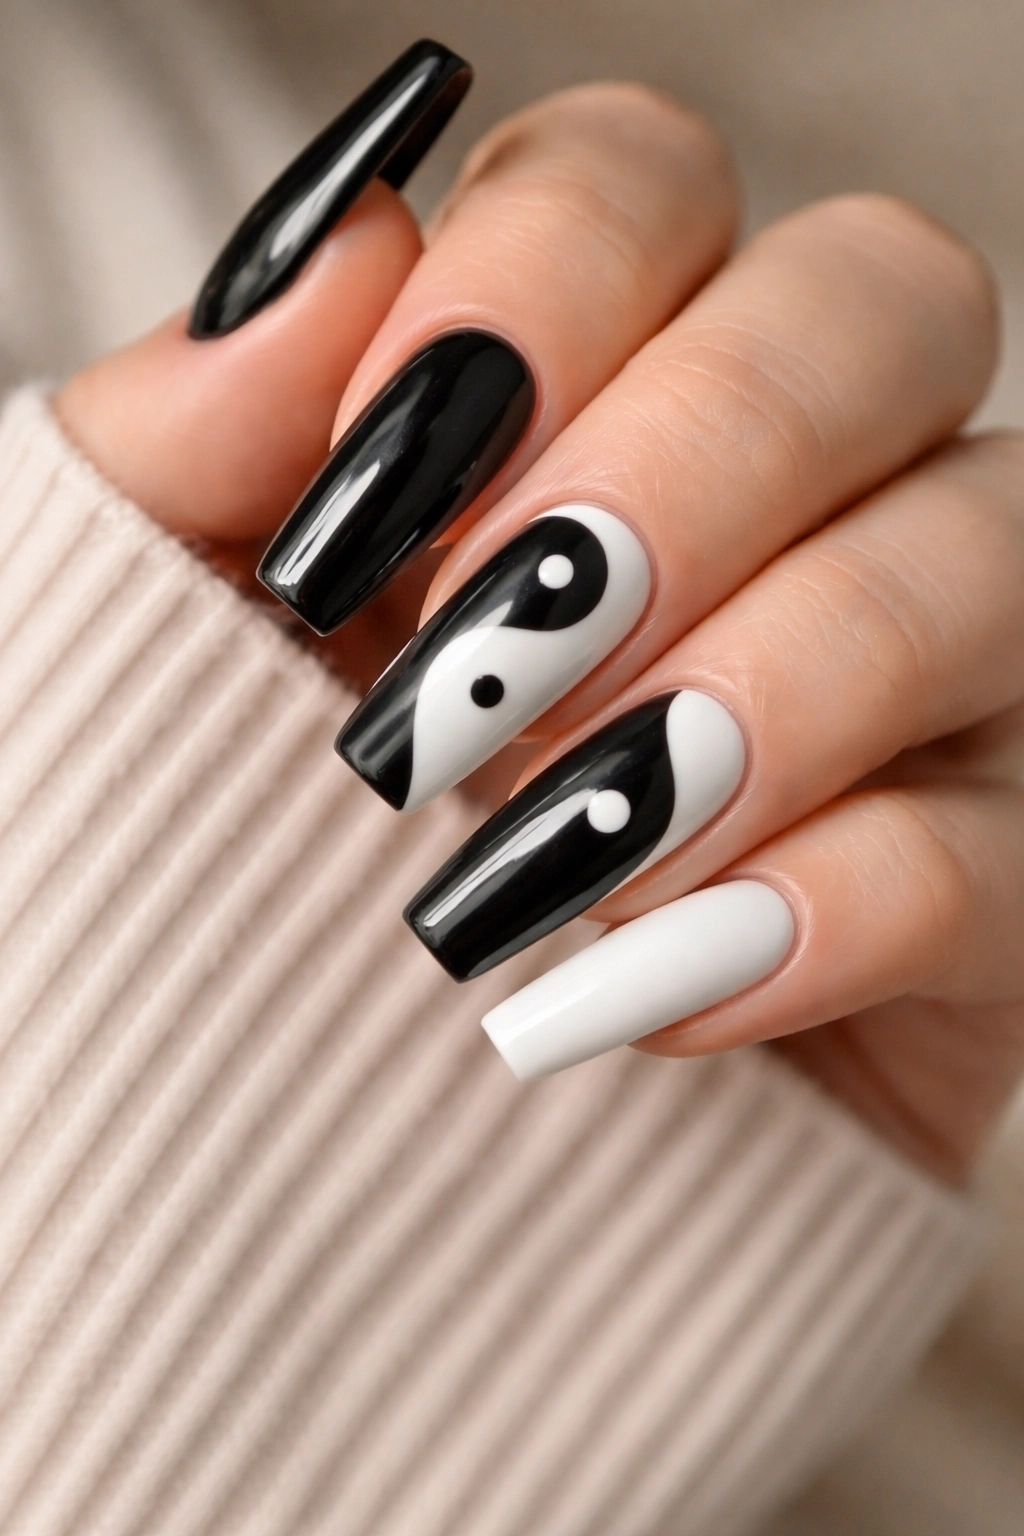
The classic yin-yang symbol translates beautifully onto coffin nails, with one half in black and one in white, often with tiny accent dots in the opposite color. This design carries meaning and symbolism while remaining visually striking.
Placement Options
You could paint the yin-yang across both the nail and the side of the finger in a wraparound design, create a single yin-yang on one accent nail, or place small yin-yang symbols on multiple nails in varying sizes for a cohesive theme.
Balance and Symmetry
The yin-yang’s power comes from its perfect balance and symmetry. Take time to ensure the curved dividing line is smooth and intentional, and that your accent dots are appropriately sized and positioned in the center of each color section.
This design appeals to anyone drawn to eastern philosophy, balance, and designs that carry meaning alongside aesthetic beauty.
9. French Tip Chevron Combination
Combine the elegance of a French tip with the modernity of a chevron pattern — paint white as your base and black French tips, then add a thin black chevron or arrow stripe pattern running horizontally or diagonally across the white base.
Creating the Chevron
Use painter’s tape to create clean chevron angles, or freehand the pattern using a thin striping brush. The chevron should complement rather than overwhelm the elegant French tip, so keep the lines relatively thin and the pattern spaced generously.
Visual Effect
- Creates movement and directionality across the nail
- The combination of classic (French tip) and modern (chevron) feels balanced
- Works beautifully in professional settings while still feeling current and artistic
The coffin shape elongates these horizontal and diagonal line patterns, making them feel more pronounced and impactful than they would on shorter nails.
10. Monochromatic Texture Mix
Rather than relying only on color contrast, this design combines glossy black and matte white (or vice versa) on the same nail, creating contrast through finish texture as much as through color. You could create sections of each finish or create patterns in each, with the texture difference being the real star.
Texture Application Methods
Apply your base color (white) as a glossy finish, then add your black elements in a matte finish. The visual difference between shiny and non-shiny creates depth even though the pattern itself might be relatively simple. Alternatively, use textured topcoats or add fine glitter to one section for even more tactile variety.
Impact and Styling
This design particularly impresses in person, where people can see and feel the texture contrast. Photographs work better in natural lighting that captures the matte and glossy differences clearly.
This approach appeals to anyone who loves subtle sophistication and multi-dimensional design that looks different depending on the angle and lighting.
11. Bold Color Block with Gold Accent
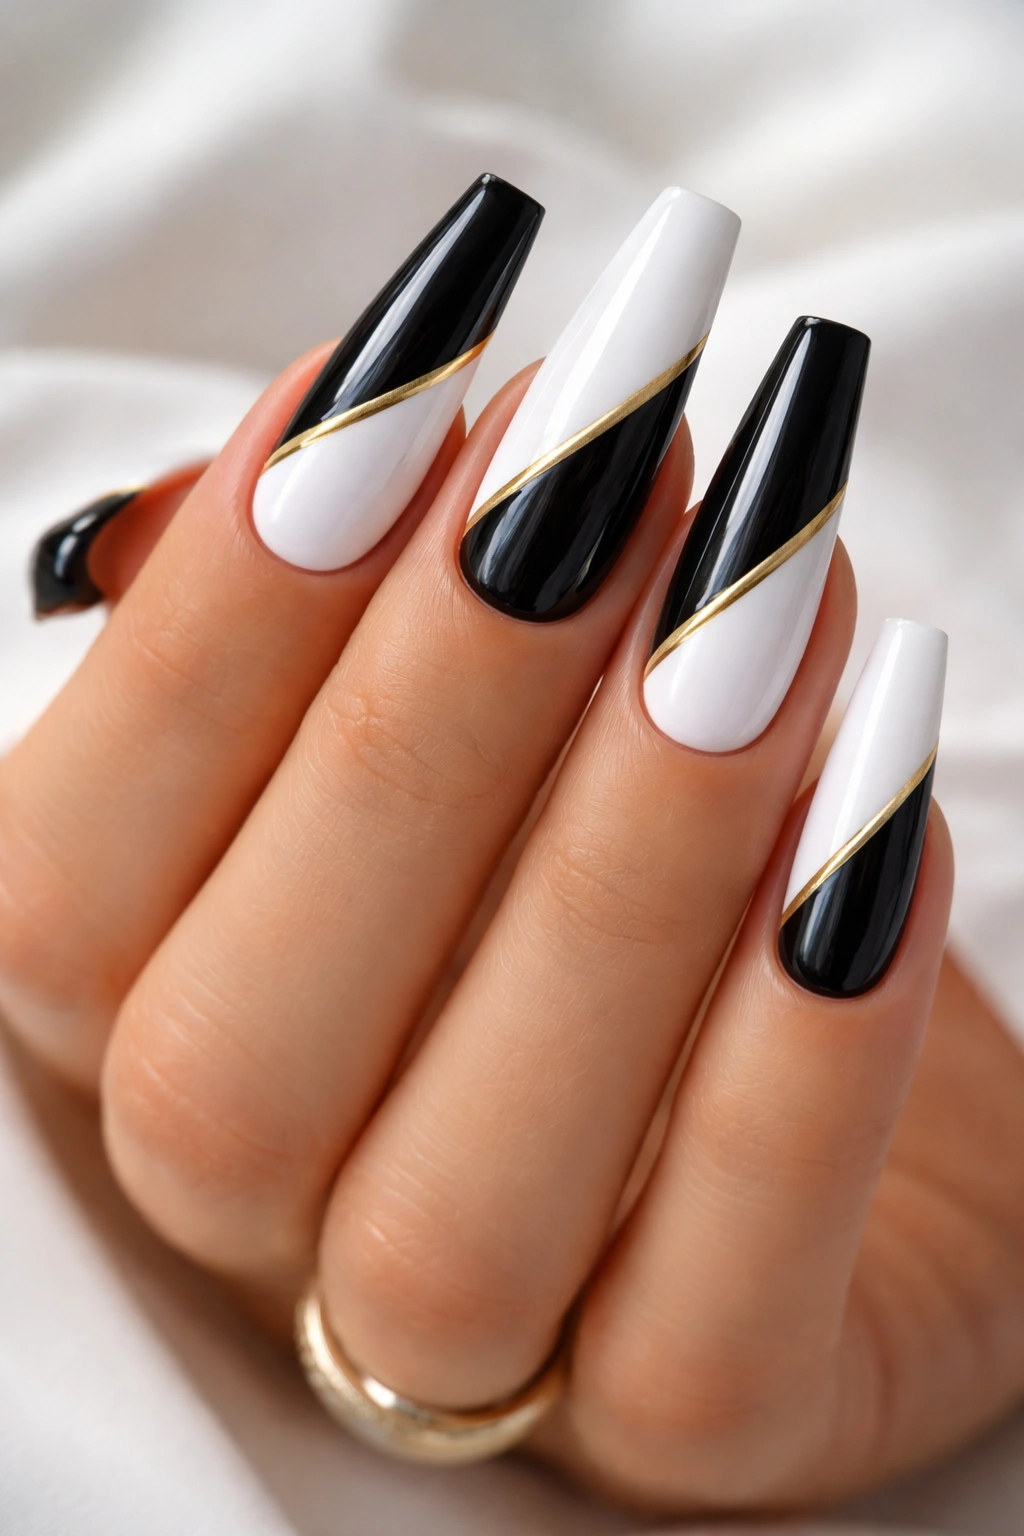
While the primary design is black and white, adding a single thin gold stripe between the color blocks creates unexpected luxury without overcomplicating the design. This thin metallic element elevates the entire look.
Placement Strategy
Paint your nail with a clear black and white color block design, then use a very thin gold striping brush or a gold striping tape to create a clean line between the black and white sections. The gold acts as a visual separator that feels intentional and luxe.
Gold Proportions
- Keep the gold stripe extremely thin — ideally 1-2mm wide
- Position it precisely along the color division for maximum impact
- A glossy gold provides more luminosity; matte gold feels more modern
The addition of a single metallic accent line transforms the design from simple to sophisticated without sacrificing the clean, minimalist aesthetic.
12. Polka Dot Elegance
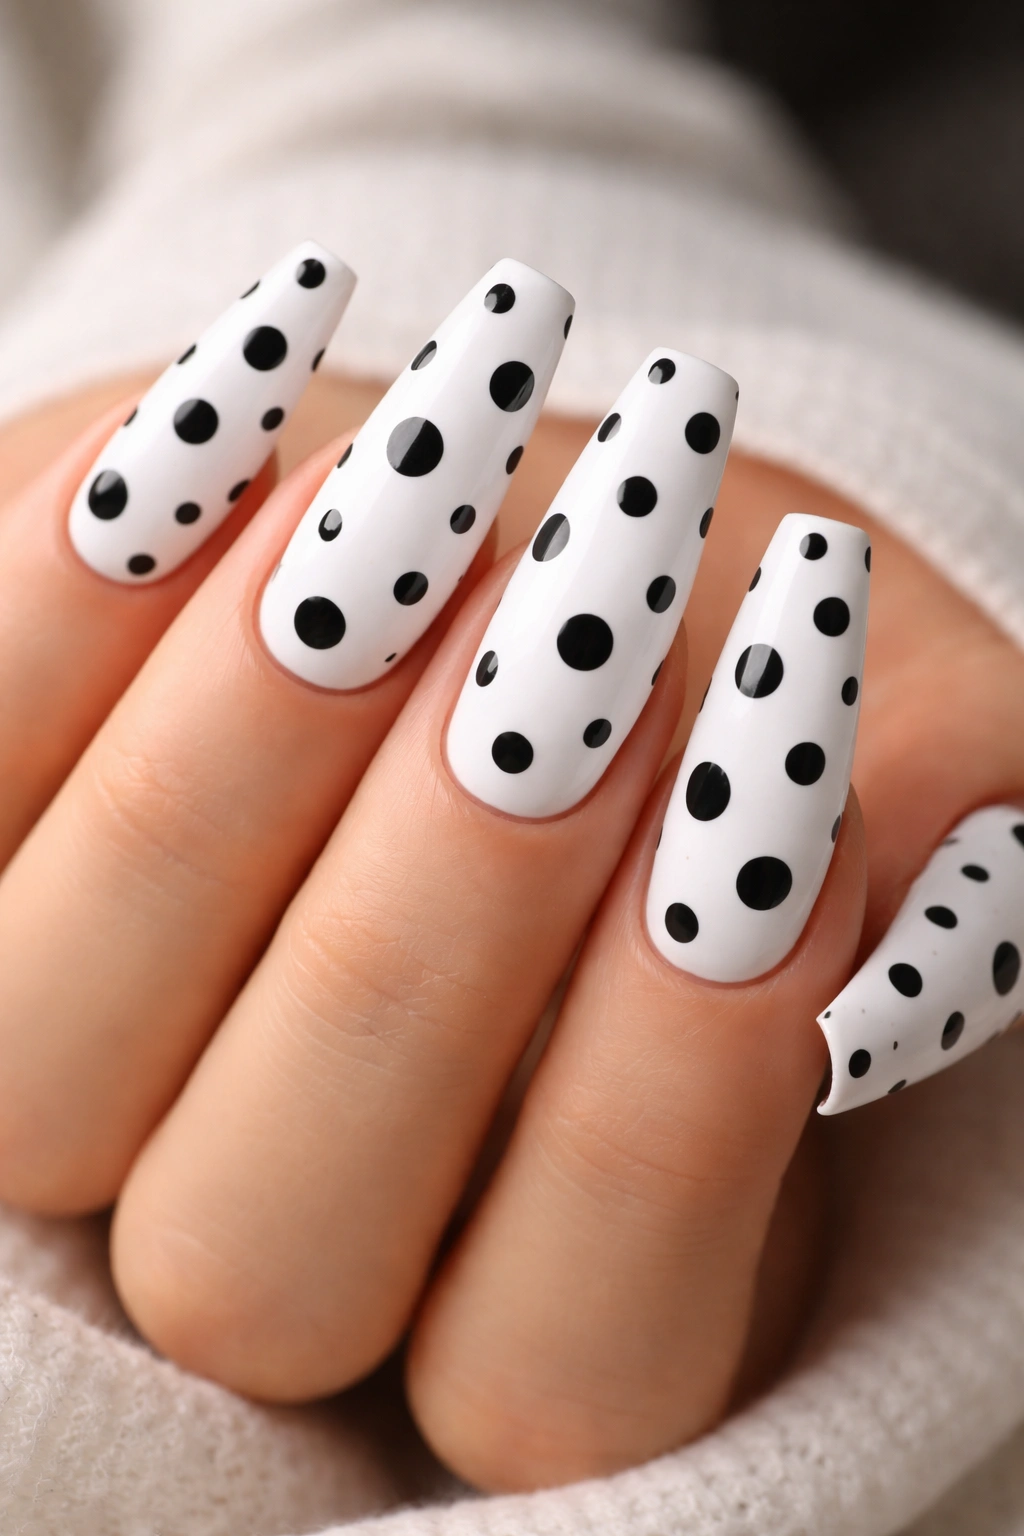
Create a playful yet refined design by painting your base color (white) and then adding perfectly spaced black polka dots across the nail surface in varying sizes. This classic pattern feels both vintage and contemporary.
Dot Placement
Use dotting tools in multiple sizes to create dots of varying proportions — some large (3-4mm), some medium (2mm), and some tiny (1mm). Distribute them across the nail with intentional spacing, avoiding the appearance of randomness unless that’s your goal.
Pattern Variations
- Gradient dots that are larger at the tip and smaller toward the cuticle
- Concentrated dots near the tip with empty space toward the cuticle
- Completely random scattered dots for a playful look
- Organized geometric arrangement of dots
This design works beautifully on coffin nails because the length allows enough space for multiple dots without feeling overcrowded or cluttered.
13. Gradient Fade with Solid Accent
Create a gradient effect from black to white across most nails, then dedicate one accent nail to a bold, completely solid black with white details or vice versa. This creates cohesion across the manicure while allowing one nail to stand out as a focal point.
Creating the Gradient
Use a makeup sponge to blend black and white polishes at their meeting point, creating a smooth transition across roughly half of the nail’s surface. The gradient should move from one color at the base to the other at the tip.
Accent Nail Ideas
- Solid black with white line art details
- Solid white with black geometric shapes
- Solid black with a small white negative space element
This mixed approach gives you the visual interest of complexity while keeping the overall design feeling balanced and intentional.
14. Minimalist Line and Dot Combination
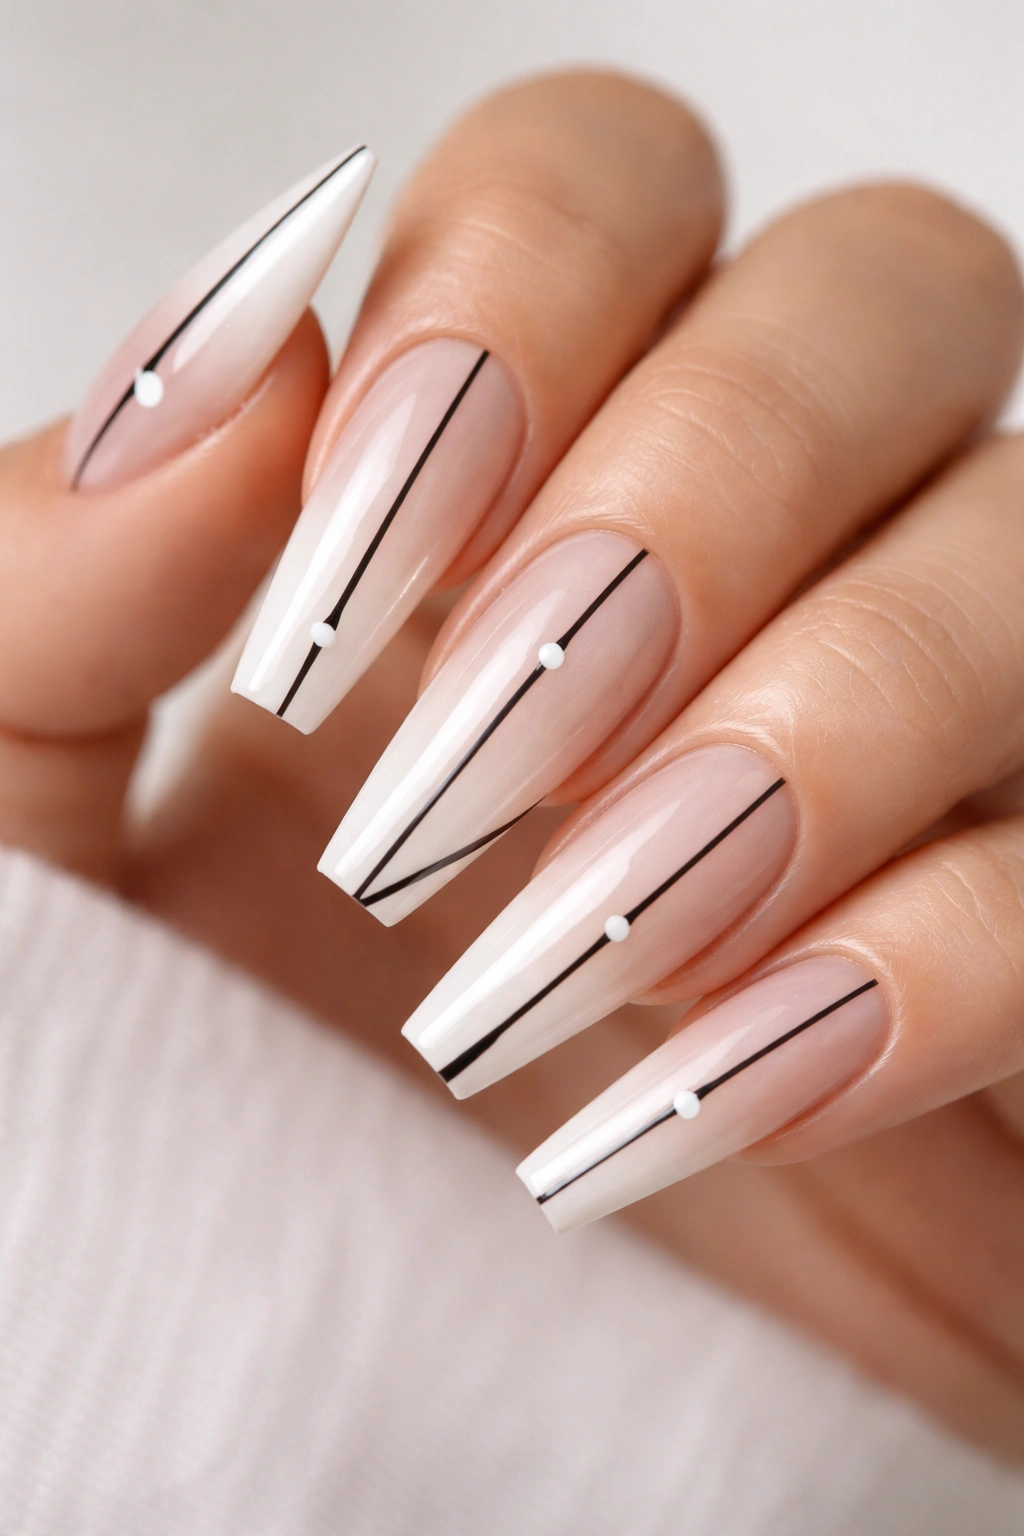
Combine thin black lines with white polka dots, creating an artistic composition that feels more like jewelry than nail polish. This design works beautifully when the elements complement each other’s placement.
Design Composition
Create a few thin curved or straight black lines using a striping brush, then add white dots positioned to interact with the lines — dots might sit at the ends of lines, cluster near them, or create their own secondary pattern.
Visual Balance
- Ensure equal visual weight across the nail rather than clustering elements in one area
- Use the length of coffin nails to create flowing designs that move from cuticle to tip
- Keep the overall design relatively minimal so the two-element combination doesn’t feel busy
This design appeals to anyone who loves subtlety and appreciates nail art that invites closer inspection to fully appreciate the composition.
15. Negative Space Geometric
This design uses both black and white polish strategically, creating geometric shapes in negative space by leaving the base (natural nail or nude base coat) visible. The arrangement of black and white sections frames the negative space.
Design Strategy
Paint black and white sections around the edges and corners of the nail, leaving clean geometric shapes of unpainted space in the center. Common shapes include diamonds, circles, triangles, or irregular polygons.
Creating Precision
Use painter’s tape to create clean edges around your negative space, ensuring the black and white sections have defined, sharp boundaries. The contrast between painted and unpainted areas is what makes this design work.
This design appeals to modern minimalists and anyone who loves the optical illusion quality of negative space design. It’s also practical — it requires less product and takes less time than fully painted designs.
16. Houndstooth Pattern Classic
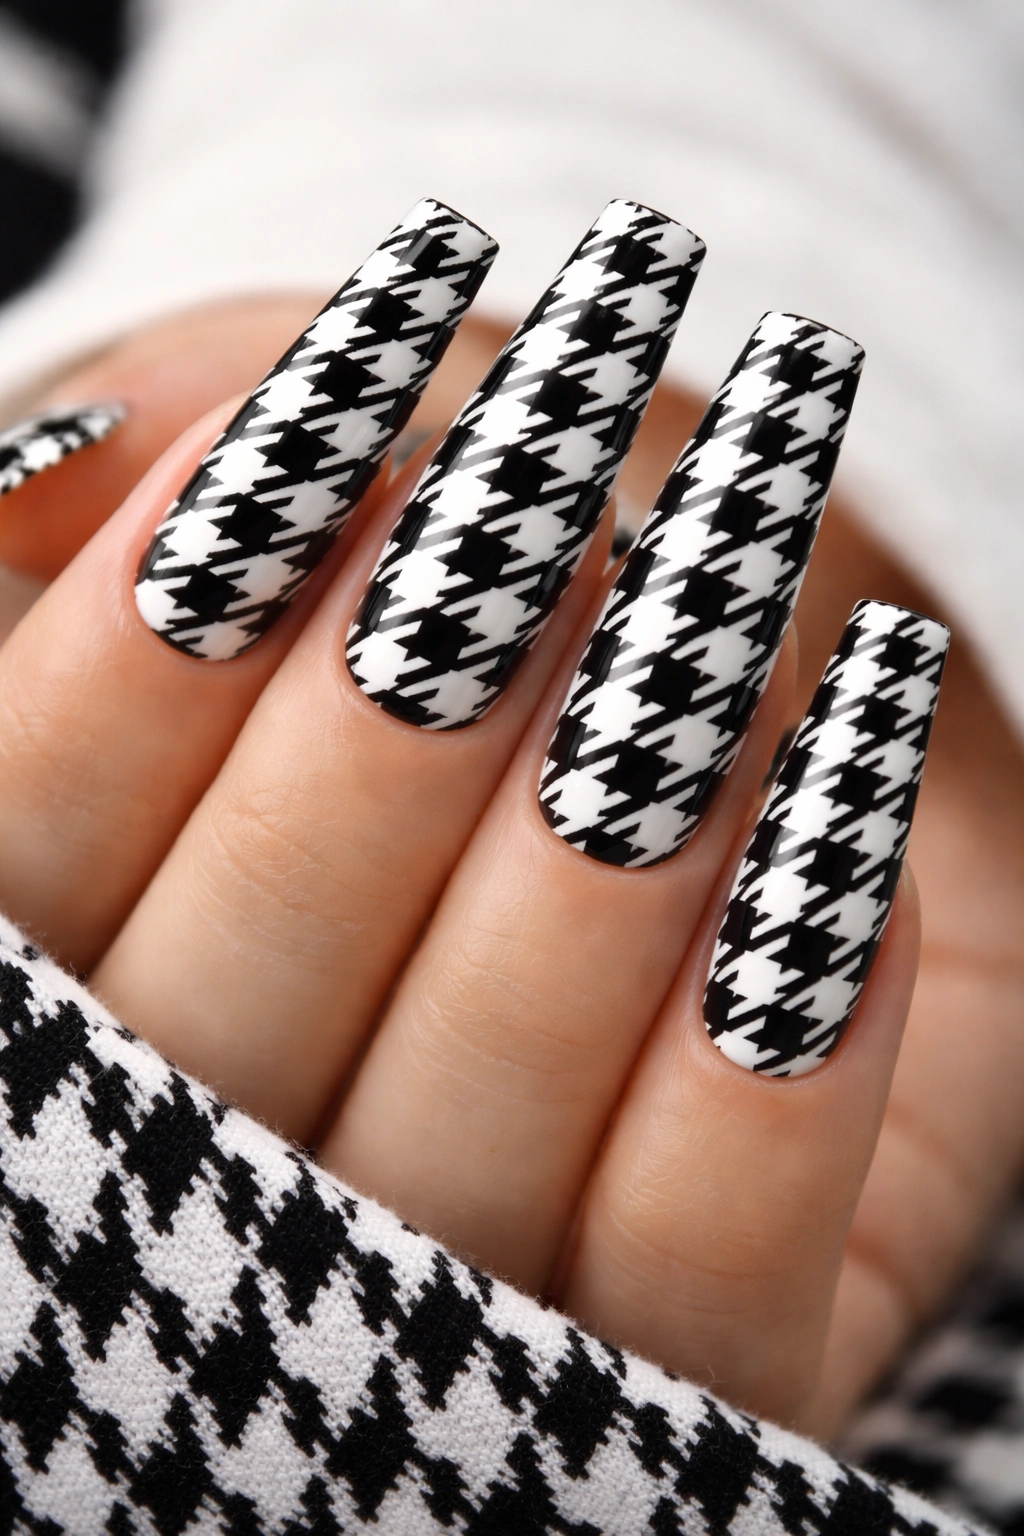
The houndstooth pattern creates a sophisticated, textured appearance using alternating black and white squares arranged in an interlocking pattern. This design feels especially elegant on coffin nails because the length allows the pattern to fully develop across the nail surface.
Creating Houndstooth
Use painter’s tape and small geometric pieces to create the distinct alternating pattern, or freehand using a thin brush. The pattern should be consistent in size across each nail — premeasuring or lightly sketching helps maintain uniformity.
Pattern Variations
- Traditional houndstooth with small squares
- Enlarged houndstooth with bigger shapes
- Reverse houndstooth where colors flip halfway down the nail
- Diagonal or angled houndstooth instead of the standard pattern
The coffin shape provides ample space for the houndstooth pattern to feel intentional and fully realized rather than cramped or incomplete.
17. Sunset Silhouette Design

Create a black silhouette of a landscape, skyline, or nature scene against a white base, mimicking the appearance of a sunset or moonlit scene. This design is visually striking and adds narrative quality to your nails.
Silhouette Ideas
- Mountain range silhouette
- Cityscape or skyline outline
- Trees or forest treeline
- Bird or animal silhouettes
- Abstract mountain or wave formations
Use a thin brush or pen designed for nail art to carefully paint the black silhouette, keeping the outlines clean and the details minimal. The silhouette should be recognizable but not overly detailed.
This design appeals to nature lovers and anyone who appreciates nails that tell a visual story or evoke a mood or feeling.
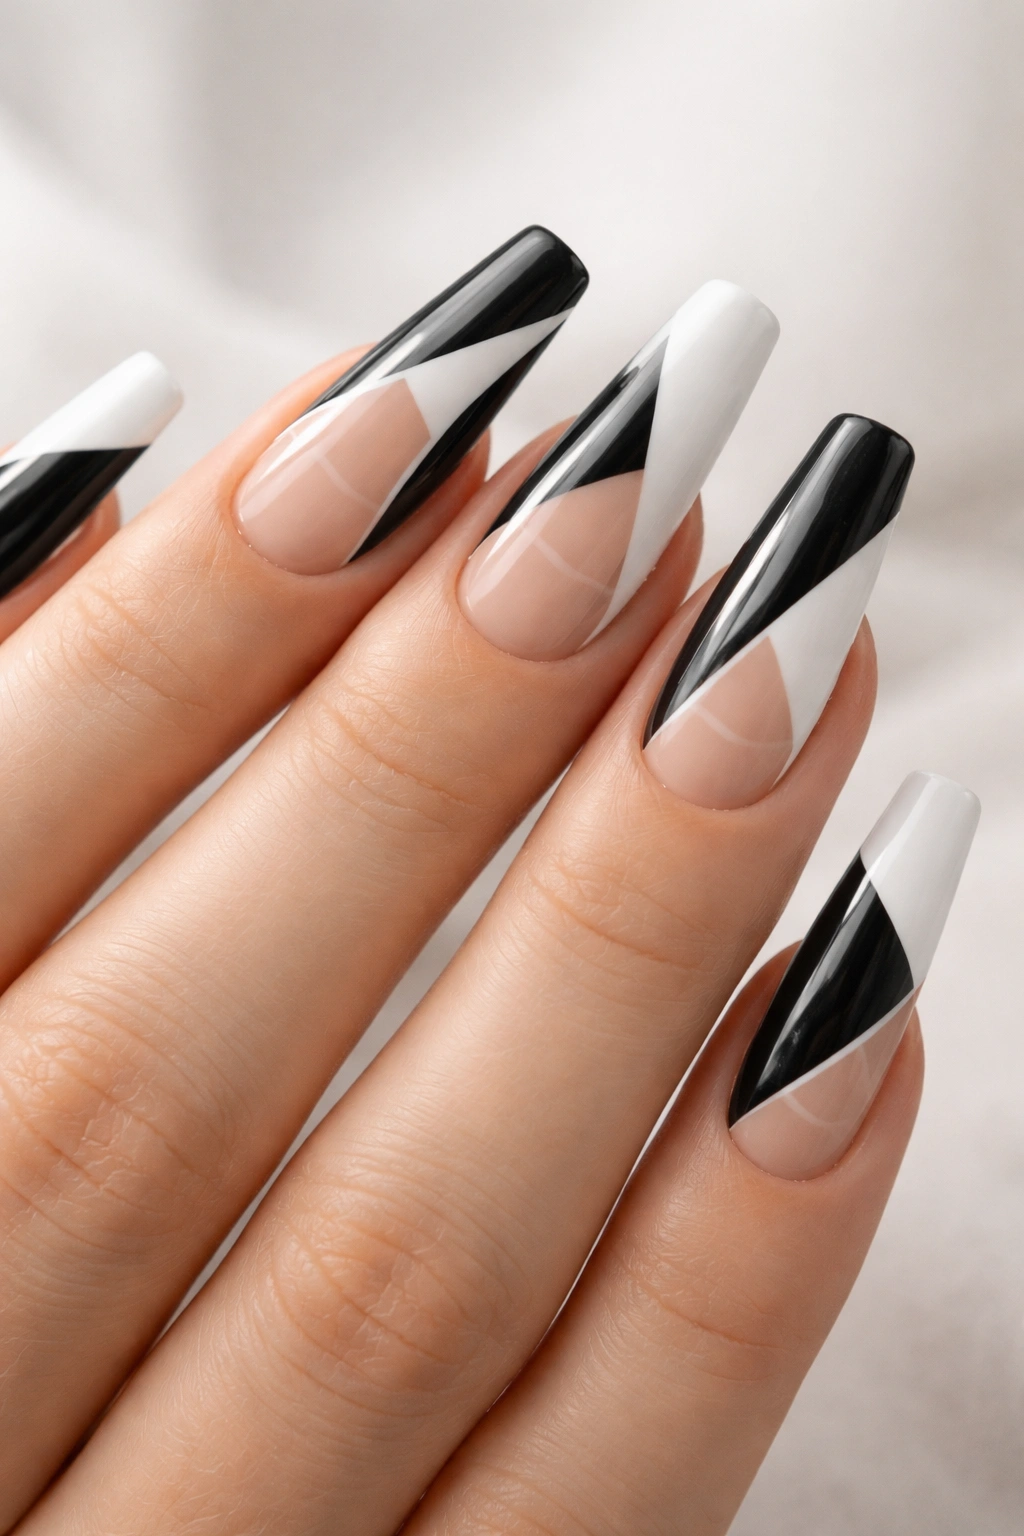
18. Oversized Geometric Shape Focus
Instead of creating multiple small elements, focus on one or two oversized geometric shapes — perhaps a large black triangle pointing toward the tip of a white nail, or a massive black circle positioned off-center on a white base.
Shape Placement
Use the coffin shape to your advantage by allowing geometric shapes to extend from cuticle to tip or from one side to the other. The large scale makes the design feel bold and intentional.
Shape Ideas
- Large triangle occupying roughly a third of the nail
- Oversized circle positioned off-center
- Bold rectangular block that transitions from black to white
- Large diamond shape oriented vertically
This design works beautifully because it’s striking at a distance while still feeling elegant rather than chaotic.
19. Lace and Intricate Pattern Detail
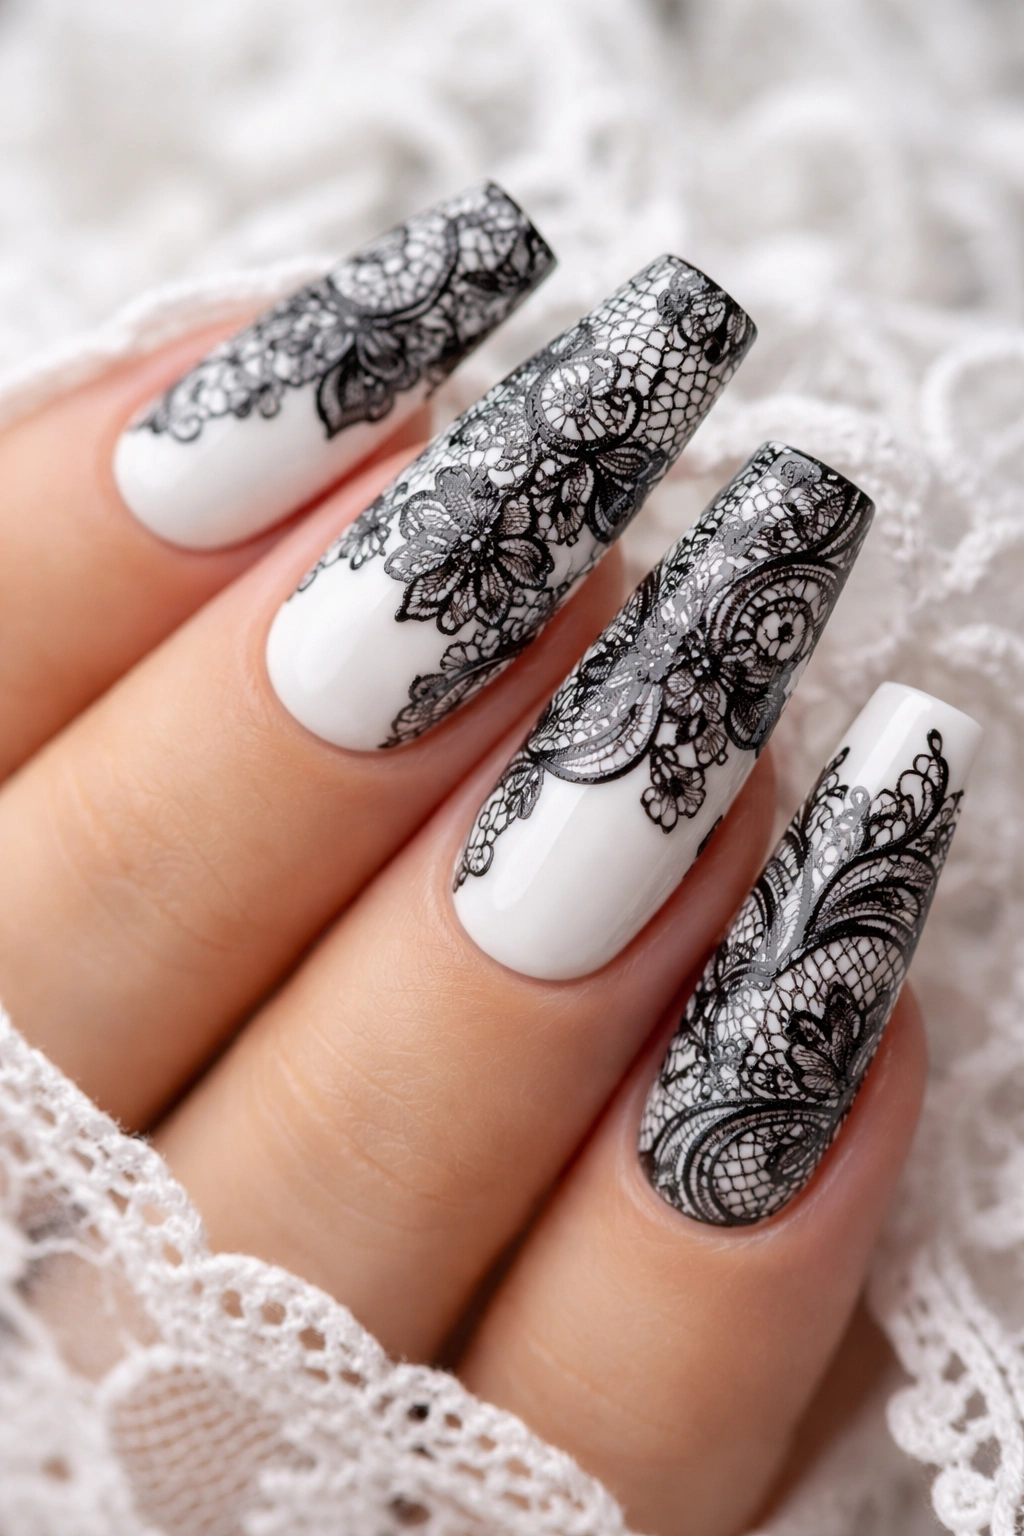
Black lace patterns against a white background (or white delicate patterns against black) create an incredibly feminine, romantic aesthetic while maintaining sophistication. This is perfect for anyone who loves detailed nail art.
Creating Lace Patterns
You can freehand delicate lace patterns using a thin brush, use nail art stickers designed to look like lace, or use a stamping plate specifically made for lace designs. Each method produces beautiful results with different levels of ease and precision.
Lace Placement Options
- Full lace coverage across the entire nail
- Lace concentrated near the tip with clear space toward the cuticle
- Lace wrapping around the sides of the coffin nail
- Delicate lace accent on one focal nail only
The intricate nature of lace design particularly benefits from the longer coffin nail canvas, where details are visible and the pattern has room to fully develop.
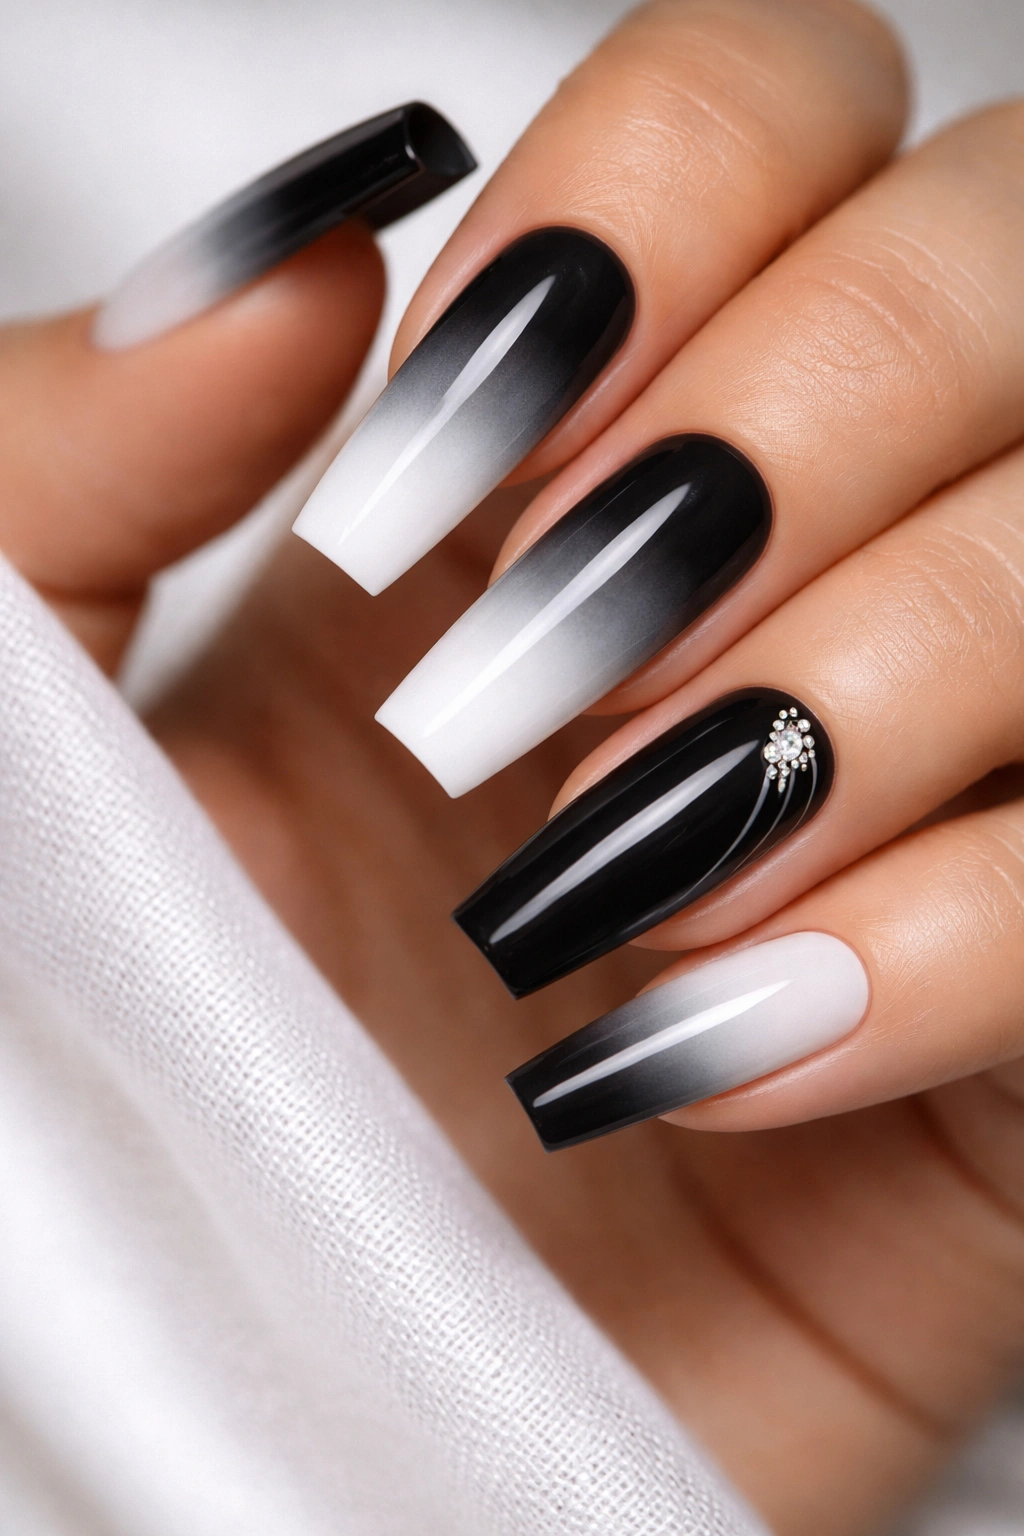
20. Ombré Black to White Gradient

A full gradient that transitions smoothly from solid black at the base to pure white at the tip creates an incredibly polished, refined look. This design is sophisticated enough for any occasion while remaining visually interesting.
Creating a Smooth Gradient
Use a makeup sponge to blend the transition zone where black meets white, dabbing and blending multiple times to create a smooth gradation without distinct stripes. The blending sponge should move from tip to base repeatedly, picking up color and smoothing the transition zone.
Gradient Variations
- Gradient moves from cuticle to tip (traditional direction)
- Reverse gradient moving from tip to cuticle
- Gradient concentrated in the middle with darker colors on both ends
- Off-center gradient that spans diagonally across the nail
This design photographs beautifully and works in any setting, from professional environments to evening events. The gradient effect also makes the nail appear longer and more elegant.
Final Thoughts

Black and white coffin nails offer endless creative possibilities that range from minimalist elegance to intricate, detailed artwork. The beauty of working within this classic color combination is that your design choices remain both timeless and contemporary, working beautifully regardless of current trends or seasonal changes. Whether you prefer bold geometric patterns, delicate line art, textured finishes, or negative space designs, the black and white palette provides the perfect foundation for expressing your personal style through your nails.
The elongated coffin shape itself makes every design feel more pronounced and intentional than it would on shorter nails — patterns that might look cramped on round or oval nails have room to breathe and fully develop on the coffin canvas. This extended length transforms even simple designs into statement-making nail art that draws attention and compliments.
The versatility of black and white means you can wear these designs to professional environments, casual outings, special occasions, or everyday situations without worrying about whether the design feels appropriate or out of place. The sophistication of the color combination itself elevates even the simplest designs, making them feel polished and intentional. Whether you’re drawn to the elegance of minimalism or the impact of bold patterns, black and white coffin nails deliver results that look expensive, feel luxurious, and express your individual aesthetic perfectly. Start with whichever design speaks to you most strongly, and don’t hesitate to experiment with combinations, textures, and variations once you’ve mastered the basics.
