

Medium coffin nails have become the sweet spot for anyone who wants dramatic flair without the maintenance headaches that come with ultra-long acrylics. The coffin shape—squared off at the tip with tapered sides—flatters every hand type and works beautifully as a canvas for creative designs. Whether you’re drawn to minimalist elegance, bold color blocking, intricate nail art, or shimmering finishes, there’s a coffin nail design that speaks to your personal style.
What makes medium coffin nails so versatile is their balance. They’re long enough to showcase detailed artwork and eye-catching patterns, yet practical enough for daily life without constantly snagging on things. The shape itself is architectural and modern, which means both understated designs and statement-making art look equally sophisticated on this nail form.
The designs below represent a mix of classic techniques, contemporary trends, and timeless styles that work across seasons and occasions. Each one can be customized with your favorite colors, finishes, or personal touches—these are starting points for your own nail inspiration, not rigid rules to follow exactly. The key is finding the design that makes you excited to see your nails every time you look at your hands.
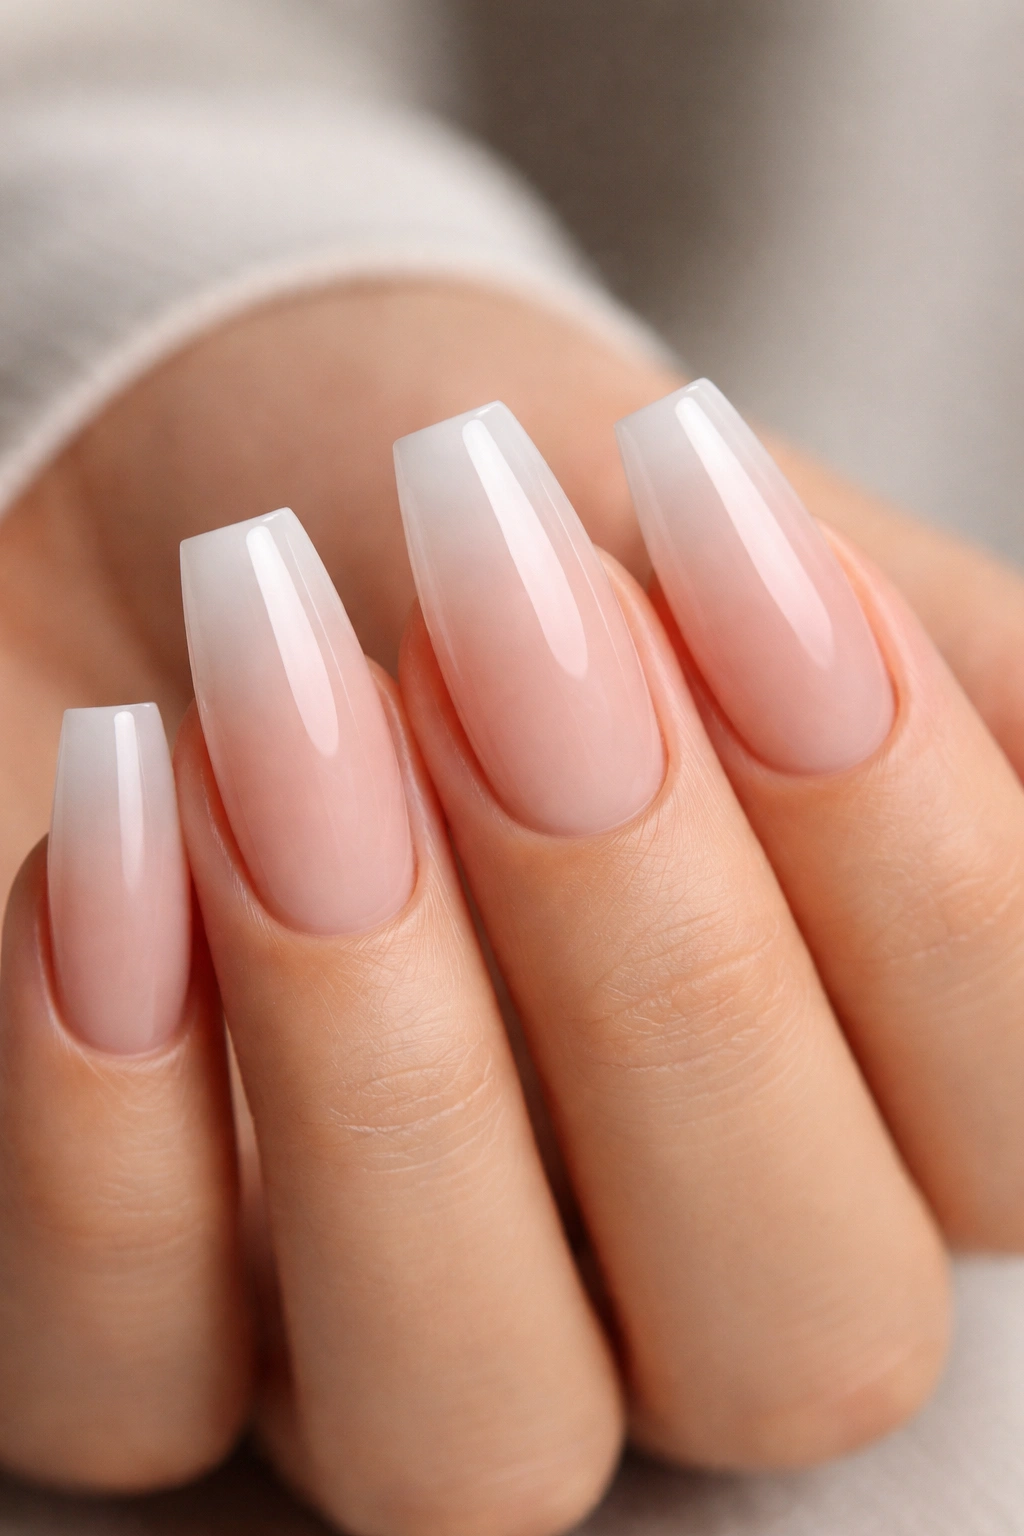
1. Soft Ombre French Tips
The modern twist on the classic French manicure brings a gradient flow from nude or light pink at the base to white or cream at the coffin tip. This design works because it’s elegant enough for professional settings but still feels current and intentional. The ombre effect creates depth without requiring complicated nail art skills, making it achievable at most salons or at home with a sponge and patience.
Why It’s Timeless Yet Fresh
The soft ombre French tip respects the original French manicure’s clean aesthetic while adding movement and dimension through color blending. Rather than a sharp line between the base and tip, the gradient creates a flowing transition that feels softer and more organic. This design bridges classic and contemporary beautifully—it satisfies anyone who loves traditional nail looks while appealing to people who want something with a modern edge.
What Makes It Work
- The gradient can be achieved with any complementary color pair: nude-to-white, blush-to-ivory, champagne-to-cream, or even peachy-to-white
- Works on all skin tones because you can adjust the base shade to match your undertones
- Maintains a professional appearance while still feeling polished and intentional
- Low maintenance once applied—no intricate details that chip first
Pro tip: Request this design with a matte topcoat on the tip instead of glossy for a more modern, velvety finish that photographs beautifully.
2. Deep Burgundy With Gold Leaf Accents
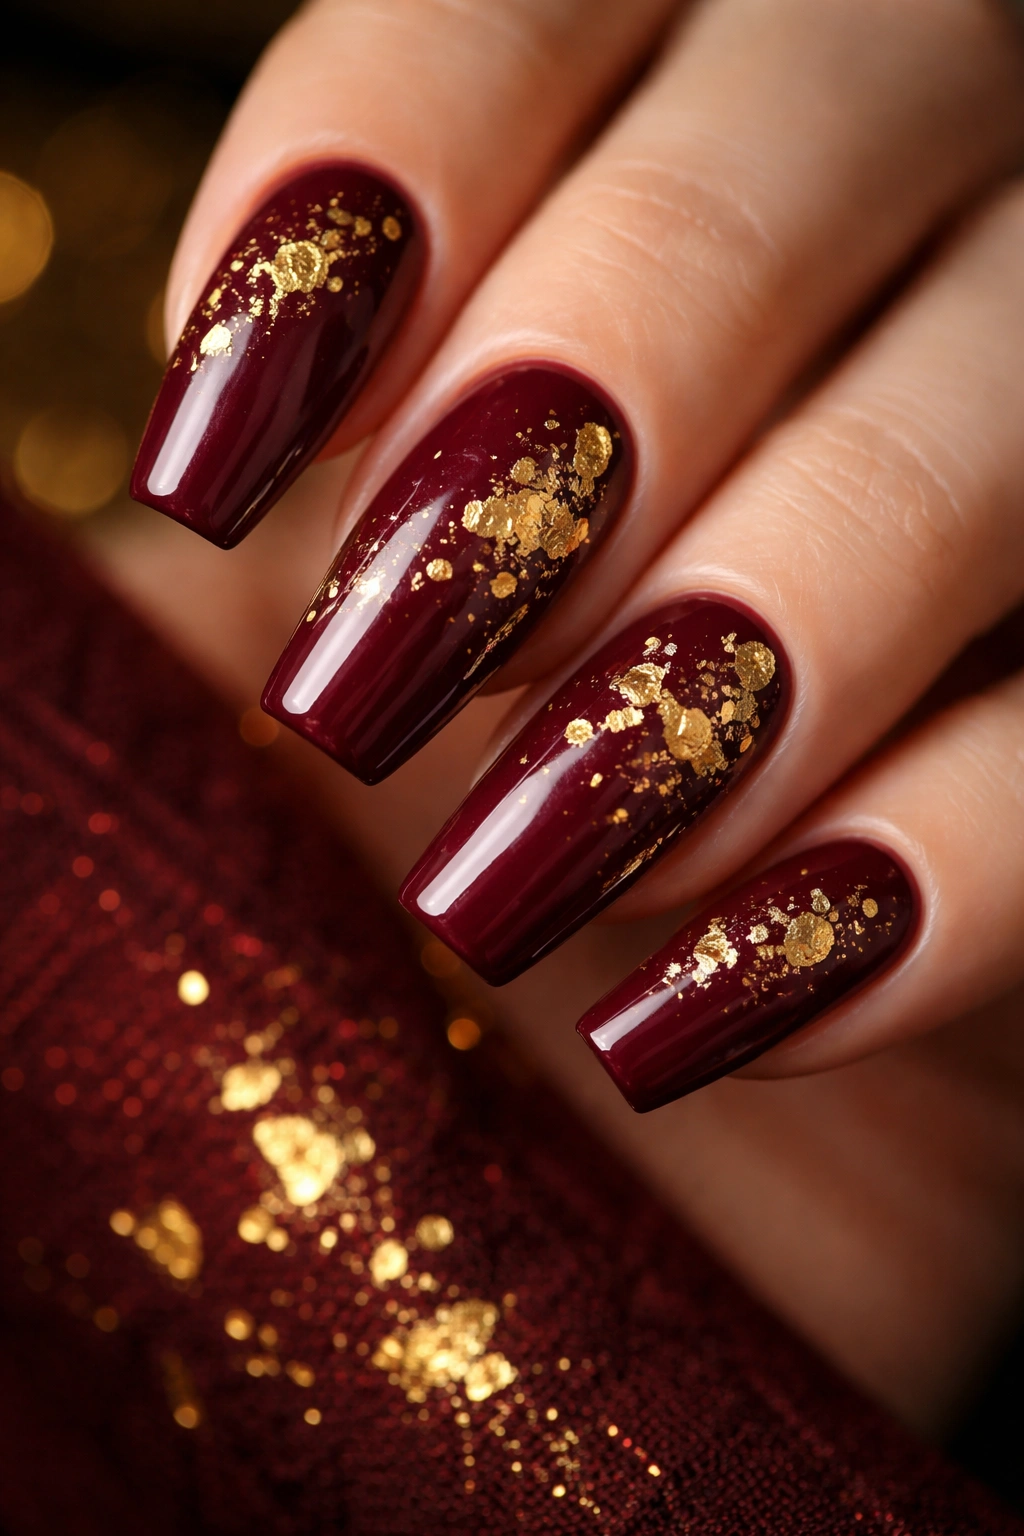
Rich burgundy paired with delicate gold leaf scattered across the surface creates an instantly luxurious look that reads both moody and elegant. This combination works year-round and pairs well with virtually any outfit or occasion. The deep wine tone is sophisticated enough for formal events but wearable enough for everyday styling when you want to feel a little extra.
The Visual Impact
Gold leaf accents break up the solid burgundy in a way that feels artistic rather than busy. The metallic catches light beautifully, drawing attention to your hands in the best way. This design hits the sweet spot between bold color statement and refined restraint—the burgundy commands attention while the gold adds a touch of glamour without veering into costume territory.
Key Details to Request
- Deep burgundy shade (not bright red—the depth is what makes this work)
- Gold leaf applied randomly across the nail surface, not in a uniform pattern
- Glossy topcoat to make the burgundy rich and the gold shimmer
- Some nail techs will add a single gold outline around the coffin tip for extra definition
Insider note: This design pairs perfectly with gold jewelry and warm-toned makeup, so consider your usual accessories when deciding if this is the right choice for you.
3. Minimalist Black Outline With Negative Space
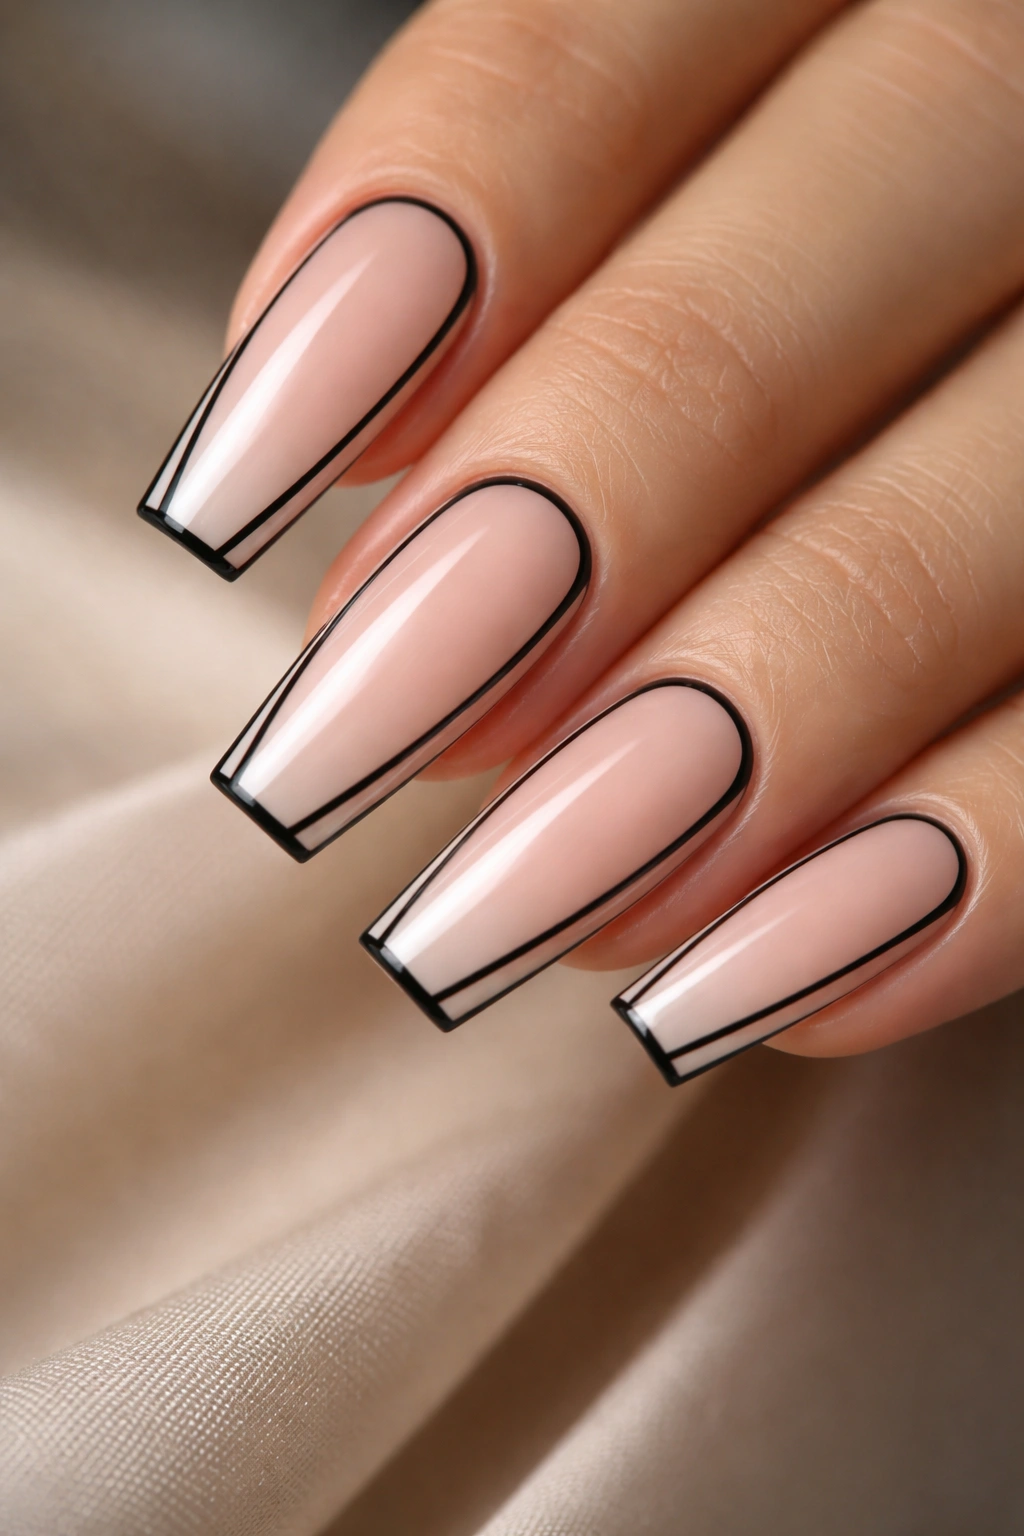
A thin black outline forms a geometric frame around negative space (your natural nail or a light nude base showing through), creating a graphic, editorial quality that’s impossibly chic. This design is architectural without being fussy—it’s about clean lines and intentional simplicity. The negative space makes the coffin shape itself become part of the design.
Why Minimalism Works
When you strip away color and detail, every line matters. A well-executed minimalist design demonstrates confidence and refined taste. On medium coffin nails, this approach emphasizes the actual shape of your nail, which is part of the whole appeal of choosing coffins in the first place. The stark contrast between the thin black outline and the light interior creates visual interest through restraint rather than decoration.
Design Variations to Explore
- Simple frame outline with a nude or white interior
- Geometric divisions (split the nail into sections with black lines)
- Outline only the tip in black, leaving the base bare
- Add a single dot of gold or a tiny symbol within the outlined frame
Worth knowing: This design photographs exceptionally well and looks amazing in professional settings, business casual environments, and literally anywhere you need to look put-together.
4. Nude Marble Effect
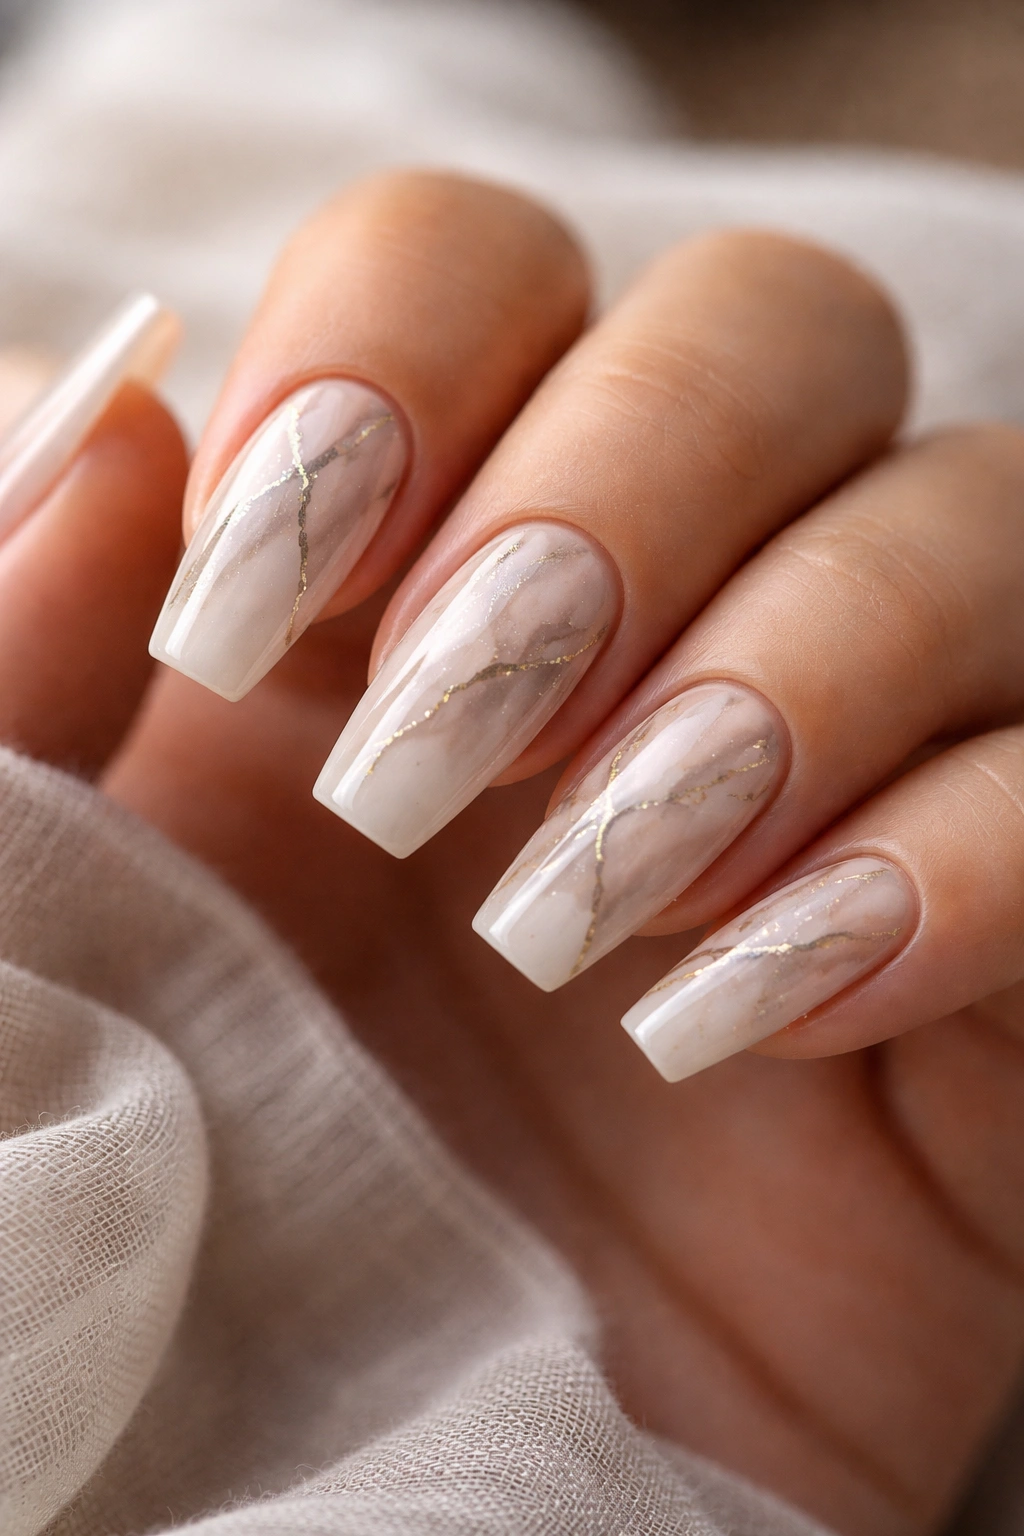
Swirled veining in gray, taupe, and white against a warm nude base creates a sophisticated marble stone effect that feels organic and high-end. Unlike busy patterns, marble looks purposeful and artistic—as if nature designed your nails. This technique can be applied to the entire nail or as an accent on specific nails, and it’s surprisingly forgiving because the organic nature of marble means slight imperfections actually add to the authenticity.
How the Effect Elevates Your Look
Marble suggests luxury—think marble countertops, marble sculptures, marble architecture. When that aesthetic appears on your nails, it creates an impression of thoughtfulness and style. The neutral palette means this design works with virtually any clothing color, skin tone, or personal aesthetic. It reads as both artistic and understated.
Application Methods
- Water marble technique using nail polish (achievable at home with practice)
- Hand-painted veining (what most professional nail artists do for better control)
- Nail stamping plates designed for marble effect (budget-friendly option)
- Gel-based marble effect for longer lasting wear
Pro tip: Ask your nail tech to keep the veining subtle rather than bold—understated marble looks more luxurious and wearable than high-contrast versions.
5. Shimmering Rose Gold All Over
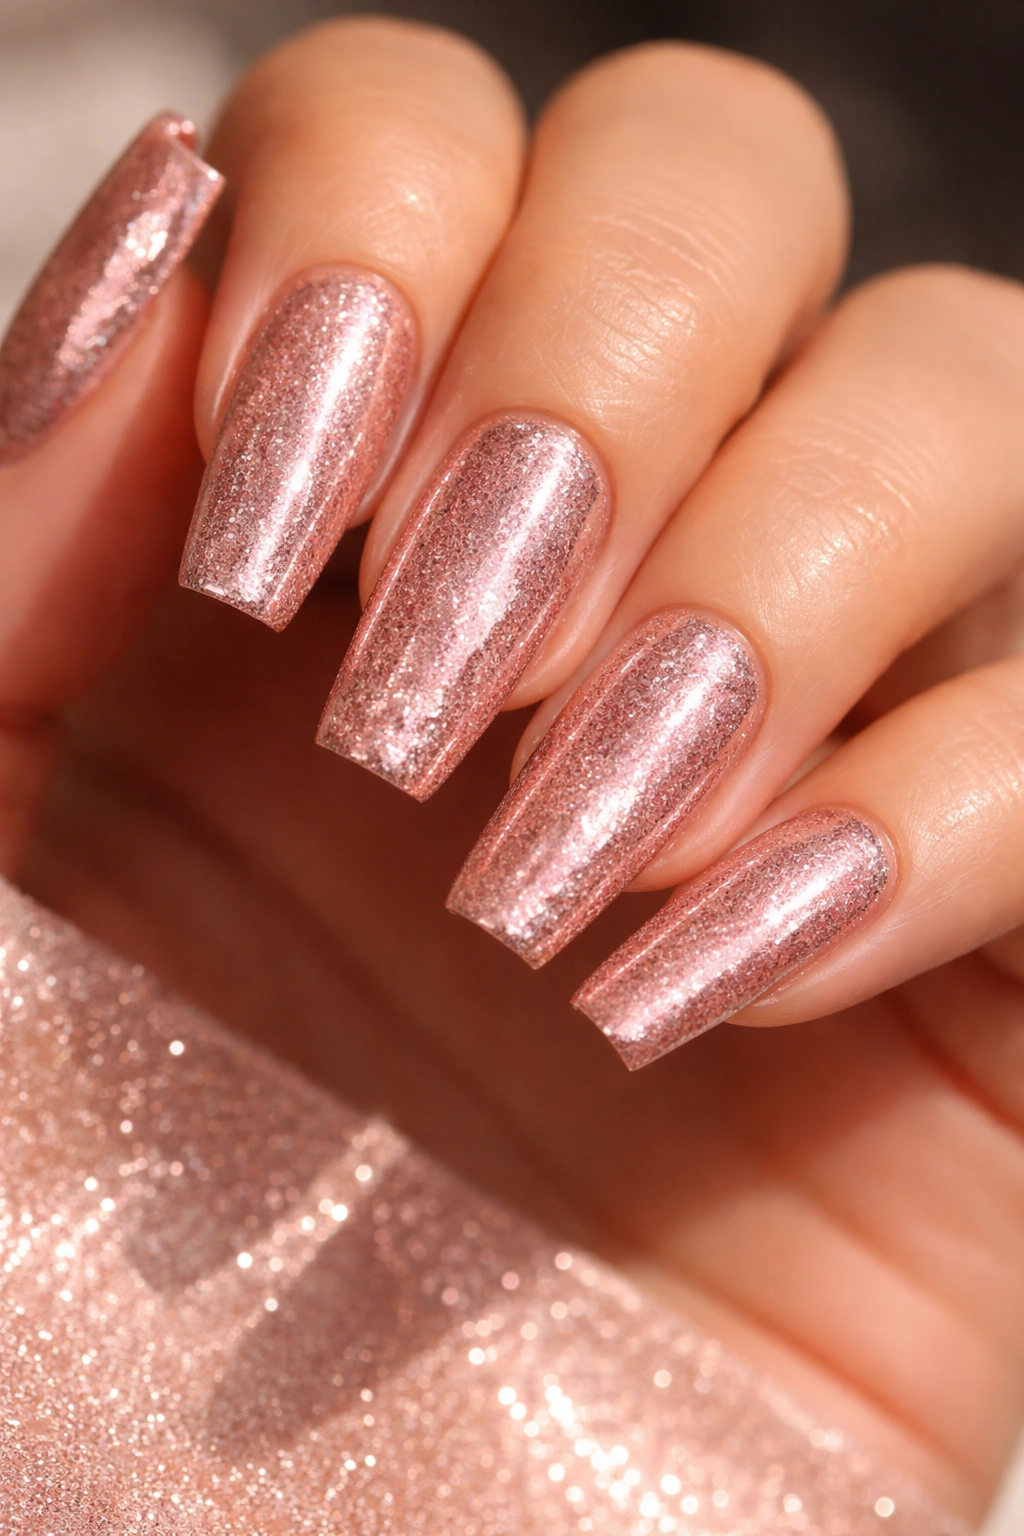
A full coverage rose gold shimmer or glitter finish is pure glamour without requiring any artistic skill. The warmth of rose gold flatters most skin tones and works from casual to formal settings. Medium coffin nails give you enough surface area for the shimmer to really shine and catch light, but not so much that it feels overwhelming.
The Appeal of Rose Gold Shimmer
Rose gold exists in that magical middle ground between warm and cool tones, which is why it’s universally flattering. Unlike pure gold (which can read as dated or overly warm) or silver (which can feel cold), rose gold feels modern and has genuine staying power. On coffin nails, the shimmer creates dimension and makes your hands look more interesting even though there’s no intricate art involved.
Texture and Finish Options
- Fine shimmer for a subtle sparkle
- Chunky glitter for maximum impact
- Chrome rose gold for a mirror-like finish
- Ombre rose gold (darker at the base, brighter at the tip)
Worth considering: Rose gold shimmer does show fingerprints and dust more noticeably than solid colors, so you’ll want to keep a lint-free cloth handy for touch-ups throughout the day.
6. Cream With Thin Burgundy Stripes
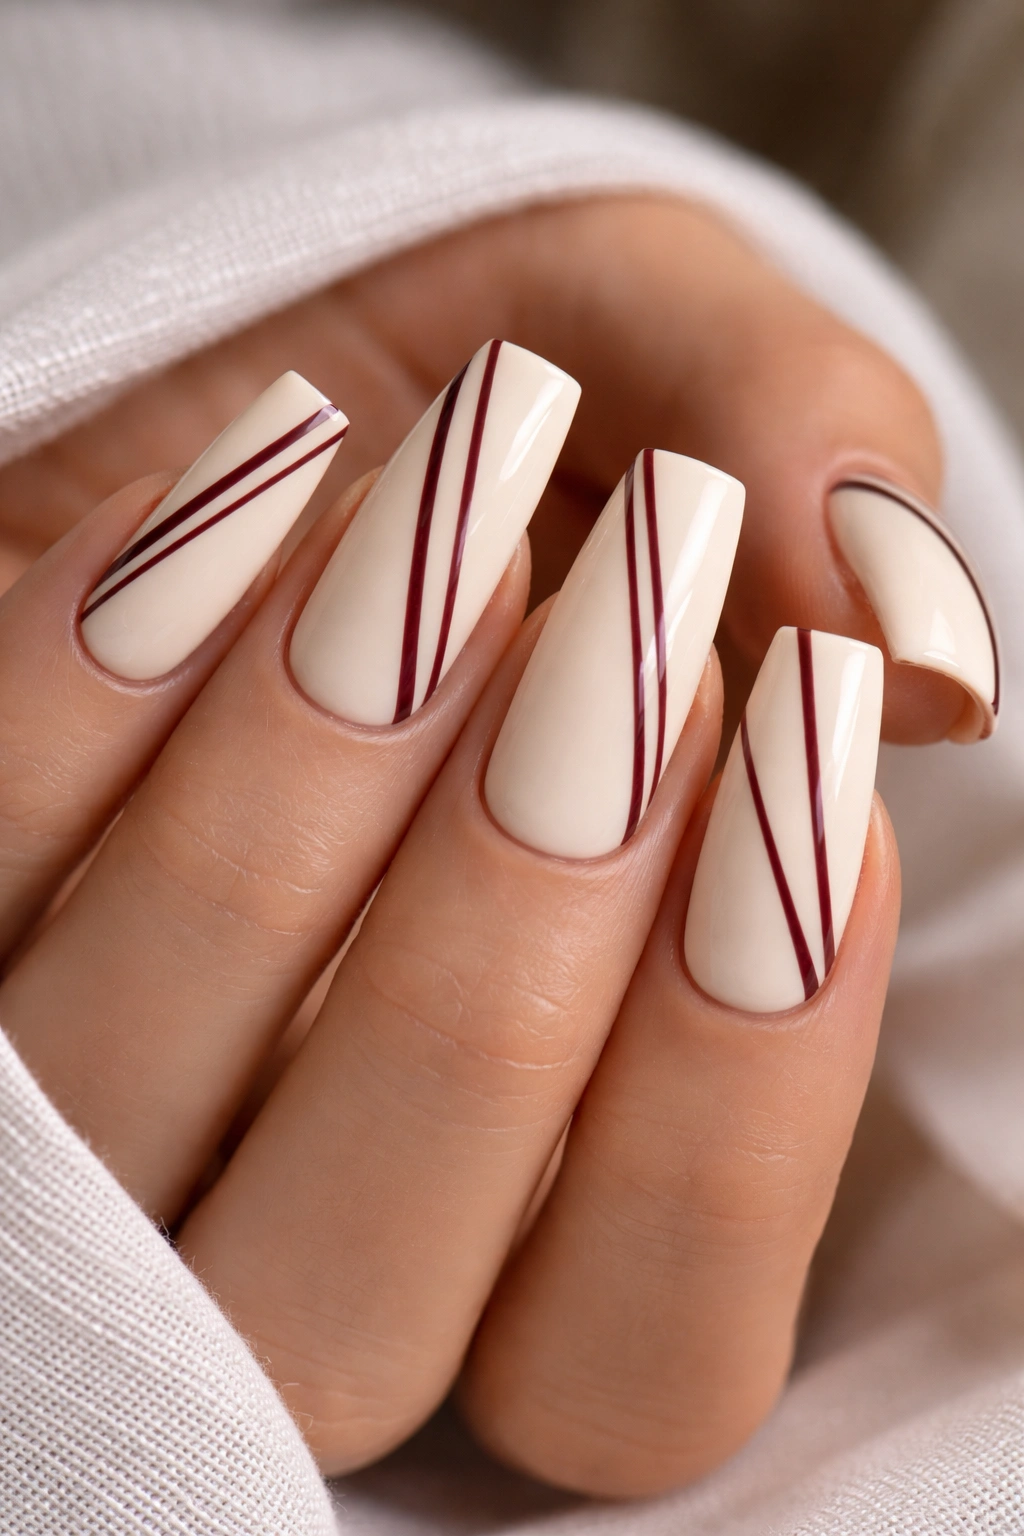
Vertical or diagonal thin burgundy stripes over a creamy white or ivory base create a preppy-elegant aesthetic that feels both timeless and current. The stripes add visual interest without overwhelming the nail—each stripe is intentional rather than decorative. This design is easier to achieve than you might think and translates beautifully across different stripe widths and angles.
Why Stripes Work on Coffin Nails
The coffin shape’s straight sides make stripes look intentional and geometric rather than random. Vertical stripes elongate the nail visually, while diagonal stripes add movement and playfulness. The contrast between the cream base and burgundy lines creates clear visual definition. This design feels graphic and modern without being trendy or date-specific.
Customization Ideas
- Thin stripes (nail art brush width) for delicate sophistication
- Thicker stripes (tape-width) for bolder impact
- Alternating stripe colors instead of just burgundy
- Add a stripe only to every other nail for visual rhythm
- Diagonal stripes angling from lower left to upper right
Insider note: If you’re doing this at home, nail art tape makes this design much easier to execute with clean, straight edges.
7. Matte Sage Green Solid
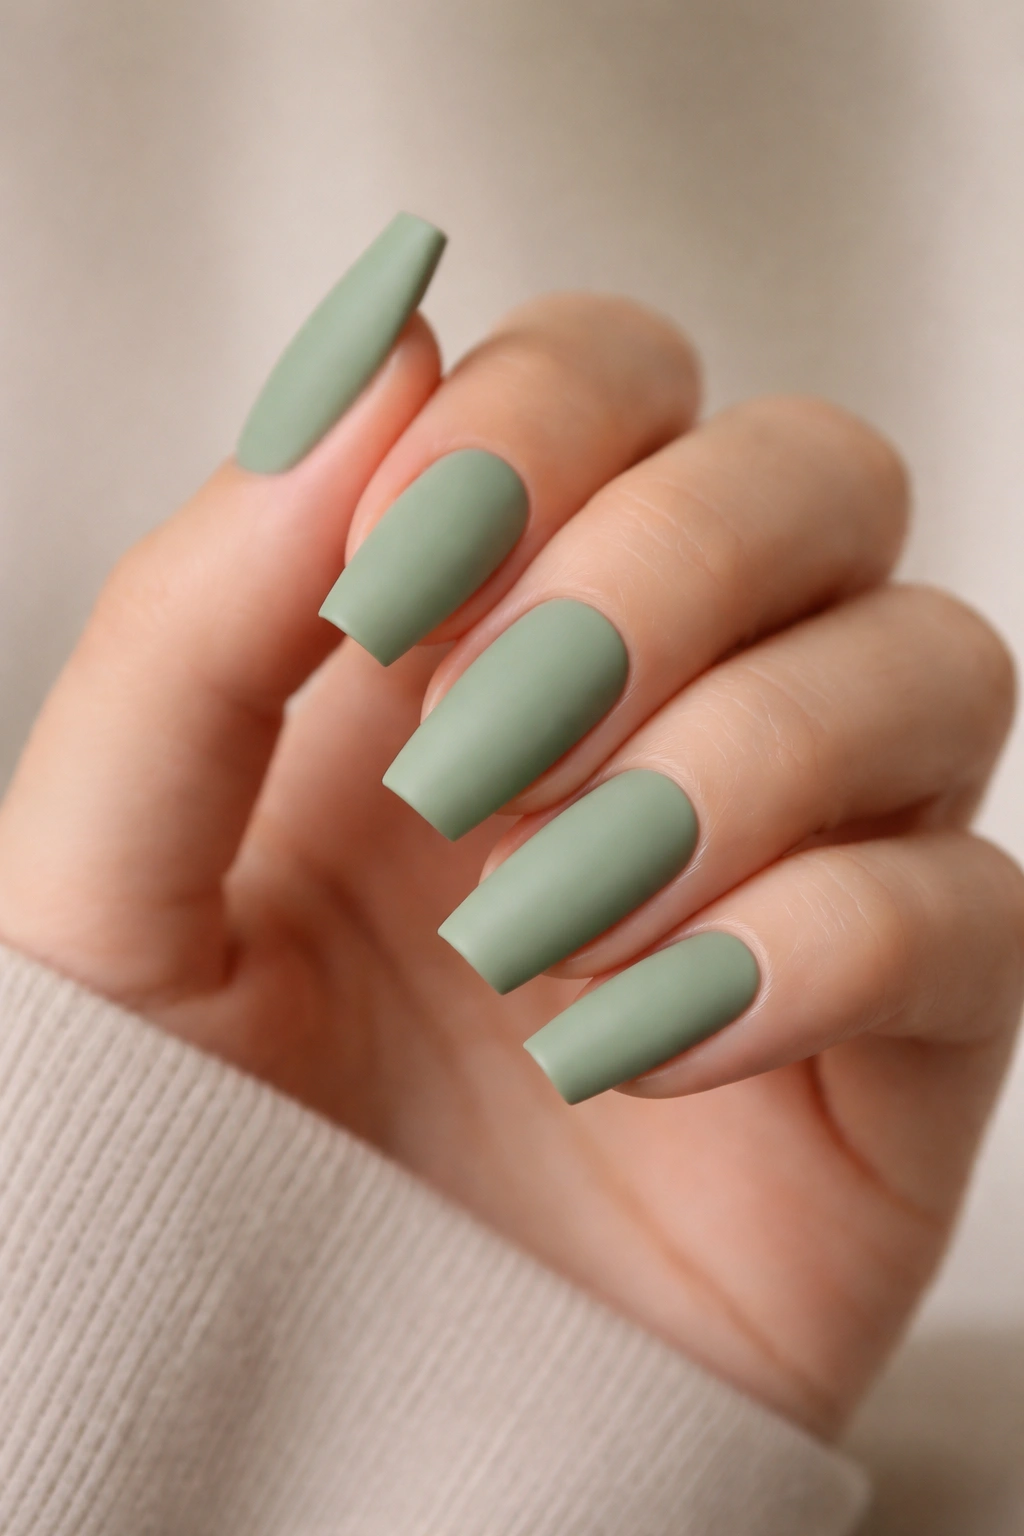
A soft, muted sage green in matte finish is understated, calming, and surprisingly wearable. This earthy tone works beautifully on medium coffin nails and looks equally good in office settings or casual everyday wear. Matte finishes give sage green a velvety quality that feels more refined than glossy, and the desaturated tone prevents it from looking costume-y.
The Psychology of Sage Green
Sage is the ultimate balanced color—it has enough green to feel natural and earthy, but enough gray undertones to feel sophisticated and restrained. Unlike bright greens (which can feel overwhelming) or true forest greens (which can read as heavy), sage feels gentle and approachable. When paired with the coffin nail shape, it reads as intentional rather than safe.
Pairing Sage With Your Personal Style
- Works beautifully with warm gold accessories
- Complements cool-toned silver jewelry
- Pairs perfectly with olive, cream, taupe, and forest green clothing
- Looks especially striking against peachy or coral skin tones
- Creates a cohesive look with greenery or botanical home décor
Pro tip: Choose a matte topcoat that doesn’t add shine back in—true matte finishes look more luxe, whereas a shiny topcoat over sage can start to look cheap.
8. Nude Base With Scattered Rhinestones
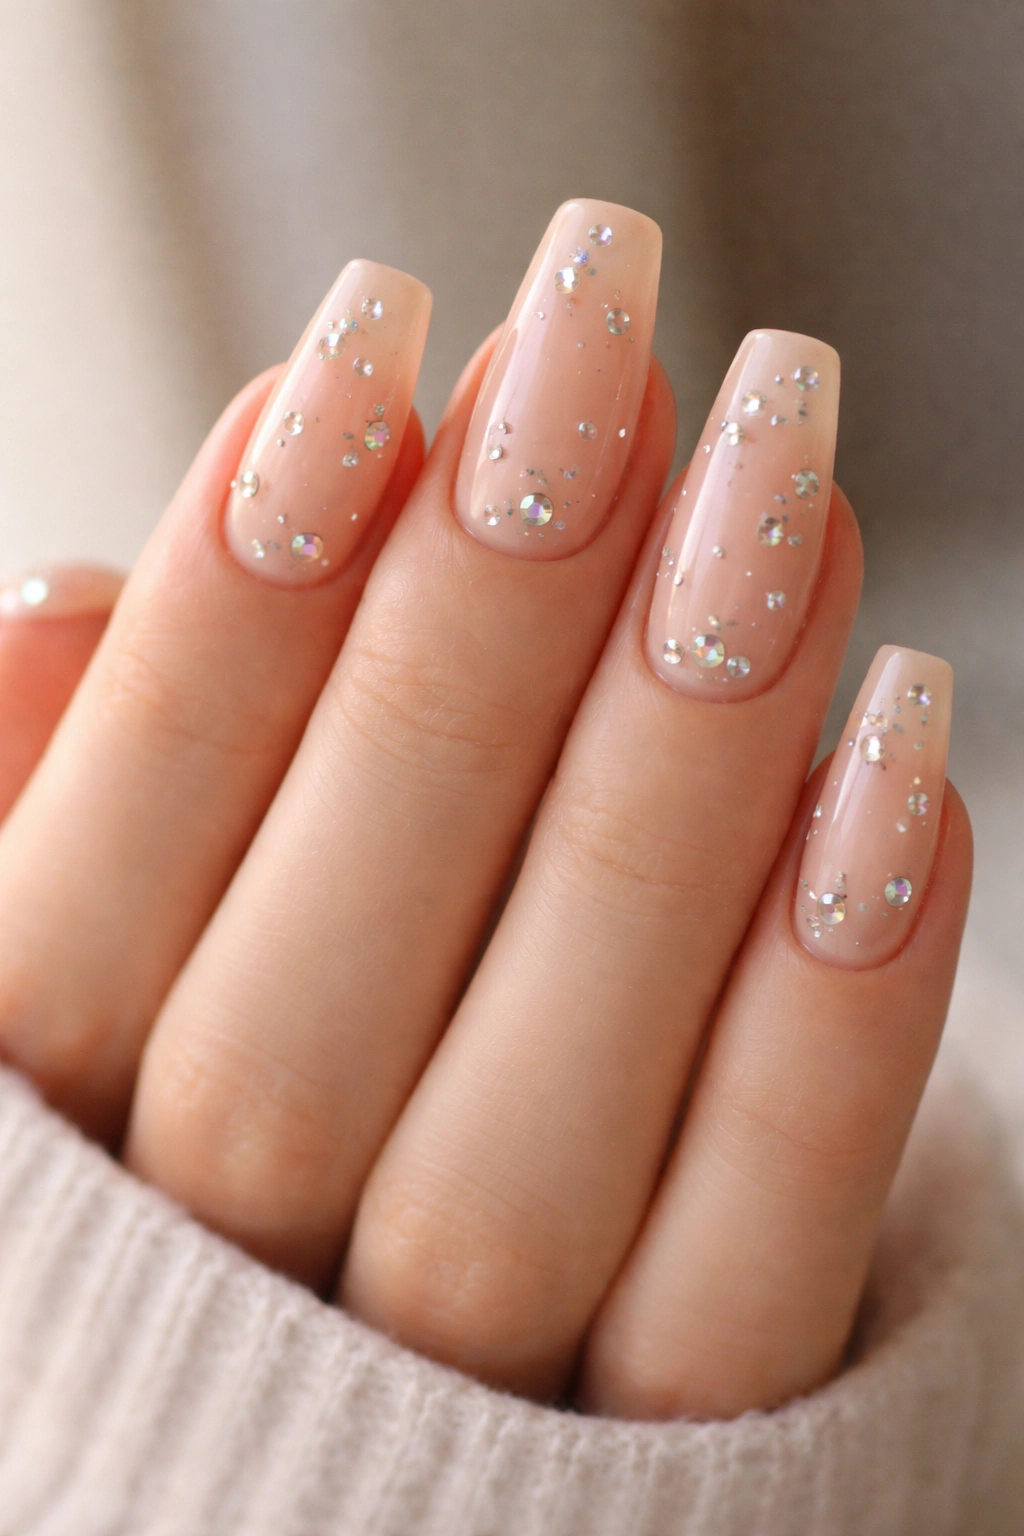
A warm nude or peachy base dotted with scattered rhinestones (not in a pattern, but organically placed) creates understated glamour. The rhinestones catch light and draw attention without making a big statement—they feel intentional and placed rather than randomly stuck on. This design works beautifully for special occasions but also translates to everyday wear if you prefer a little sparkle.
Why Scattered Rhinestones Trump Patterns
Instead of following a geometric layout or specific design pattern, scattered rhinestones feel more organic and artful. They draw the eye without overwhelming the nail. The randomness means you can customize placement based on what feels right for your hand shape and personal preference.
Rhinestone Application Tips
- Use high-quality rhinestones that don’t fall off (cheap ones are a constant frustration)
- Apply rhinestones before the topcoat so they’re sealed in and protected
- Mix rhinestone sizes for more visual interest
- Concentrate slightly more rhinestones on the outer edges of the nail
- Some nail techs will add a tiny rhinestone at the very tip of the coffin point for emphasis
Worth knowing: Good-quality rhinestones sealed under topcoat will last the full life of your manicure without lifting or shifting.
9. Blush Pink With White Geometric Shapes

Soft blush pink as your base color with clean white geometric shapes—triangles, rectangles, or abstract lines—creates a modern, design-forward look. The shapes can be placed in the center, along the sides, or covering the entire nail in a pattern. This design appeals to anyone who loves art and graphic design, and it works across different aesthetic preferences.
The Geometry Advantage
Geometric shapes feel contemporary and intentional in a way that freehand patterns sometimes don’t. They’re easier to execute (especially with nail art tape or stencils) and read as more polished and professional. White against blush pink creates strong contrast that makes the design immediately visible while still reading as feminine and refined.
Pattern Ideas to Explore
- Scattered white triangles pointing in different directions
- Clean white lines dividing the nail into sections
- White chevron or angular stripe pattern
- Gradient white shapes that decrease in size from base to tip
- Solid white tip with pink base (inverse French manicure)
Pro tip: Blush pink with geometric white designs photographs beautifully and works perfectly for nail photography content if you enjoy sharing your manicure on social media.
10. Deep Plum With Holographic Shimmer
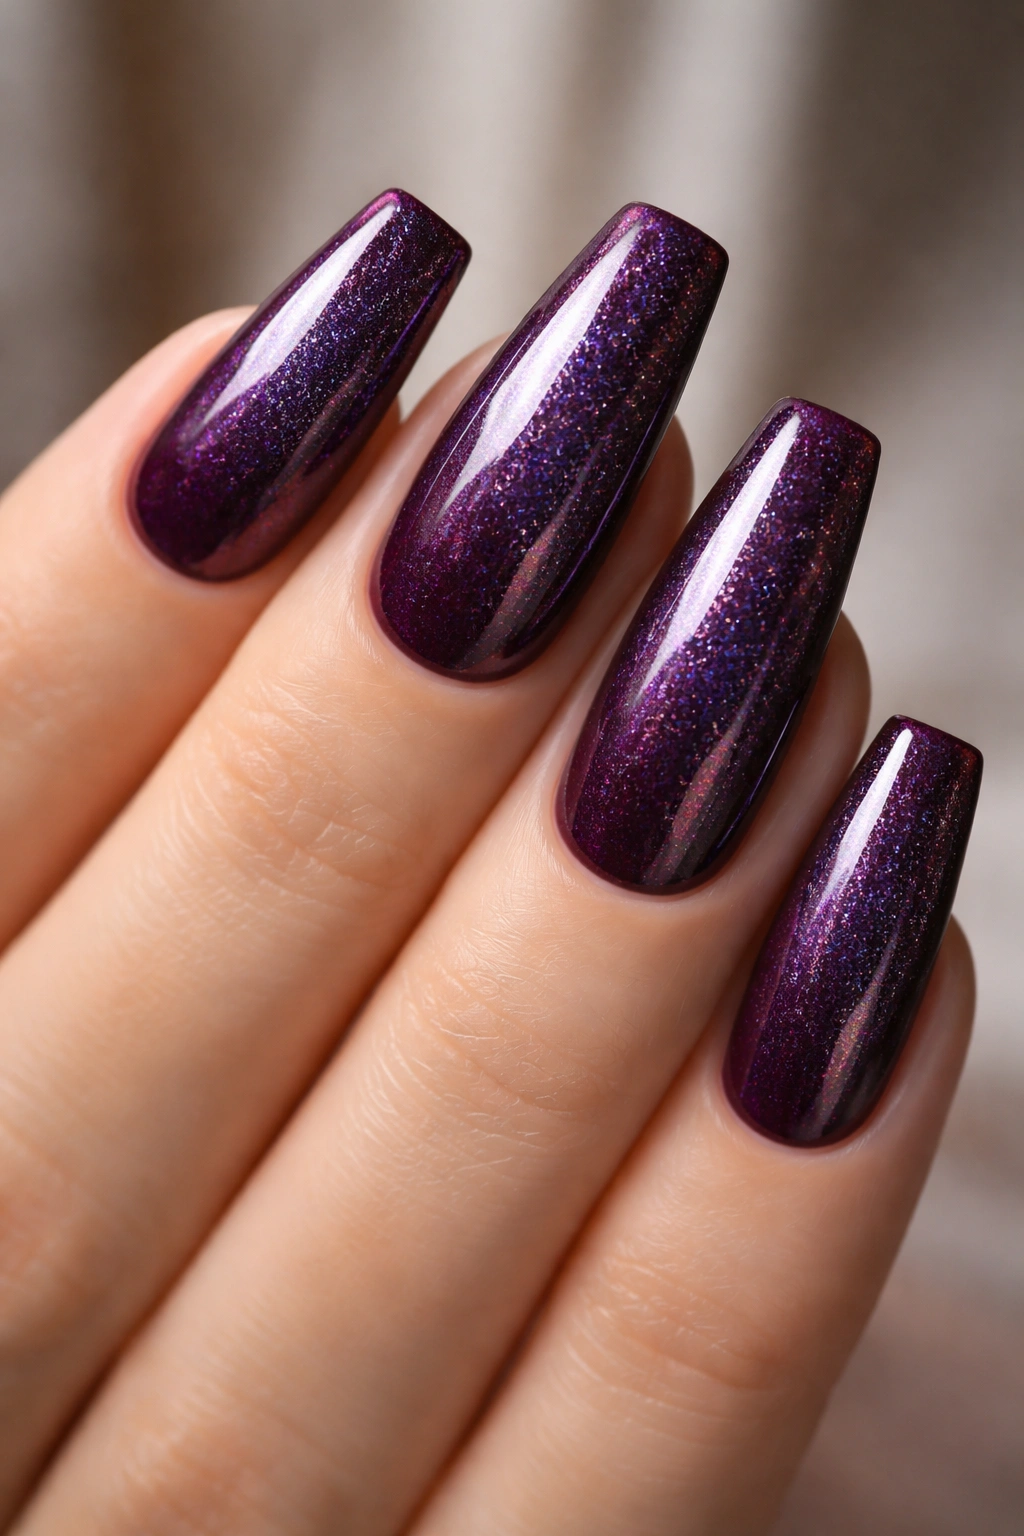
A luxurious deep plum base covered with a subtle holographic shimmer creates visual depth and dimension. As light hits your nails from different angles, the holographic finish reveals subtle rainbow shimmer without being overtly colorful. This design bridges the gap between rich, moody colors and futuristic, sparkly finishes.
Why Holographic Works on Medium Nails
The coffin shape provides enough surface area for the holographic effect to really shine and show its color-shifting properties. Holographic shimmer on a smaller nail might look too busy, but on medium length, it’s just right. The deep plum prevents the shimmer from reading as overly young or trendy—instead, it feels sophisticated and intentional.
Holographic Application
- Some nail techs use holographic nail polish (easiest option)
- Others layer holographic flakes or powder over plum polish
- Gel formulas often have better holographic effects than regular polish
- The effect shows best under natural light and on nails with good shine
Insider note: Holographic nails are conversation starters—people often ask if your nails are real or comment on how they change color in different light. Have a confident response ready if you enjoy the attention.
11. Powder Blue With Delicate White Clouds
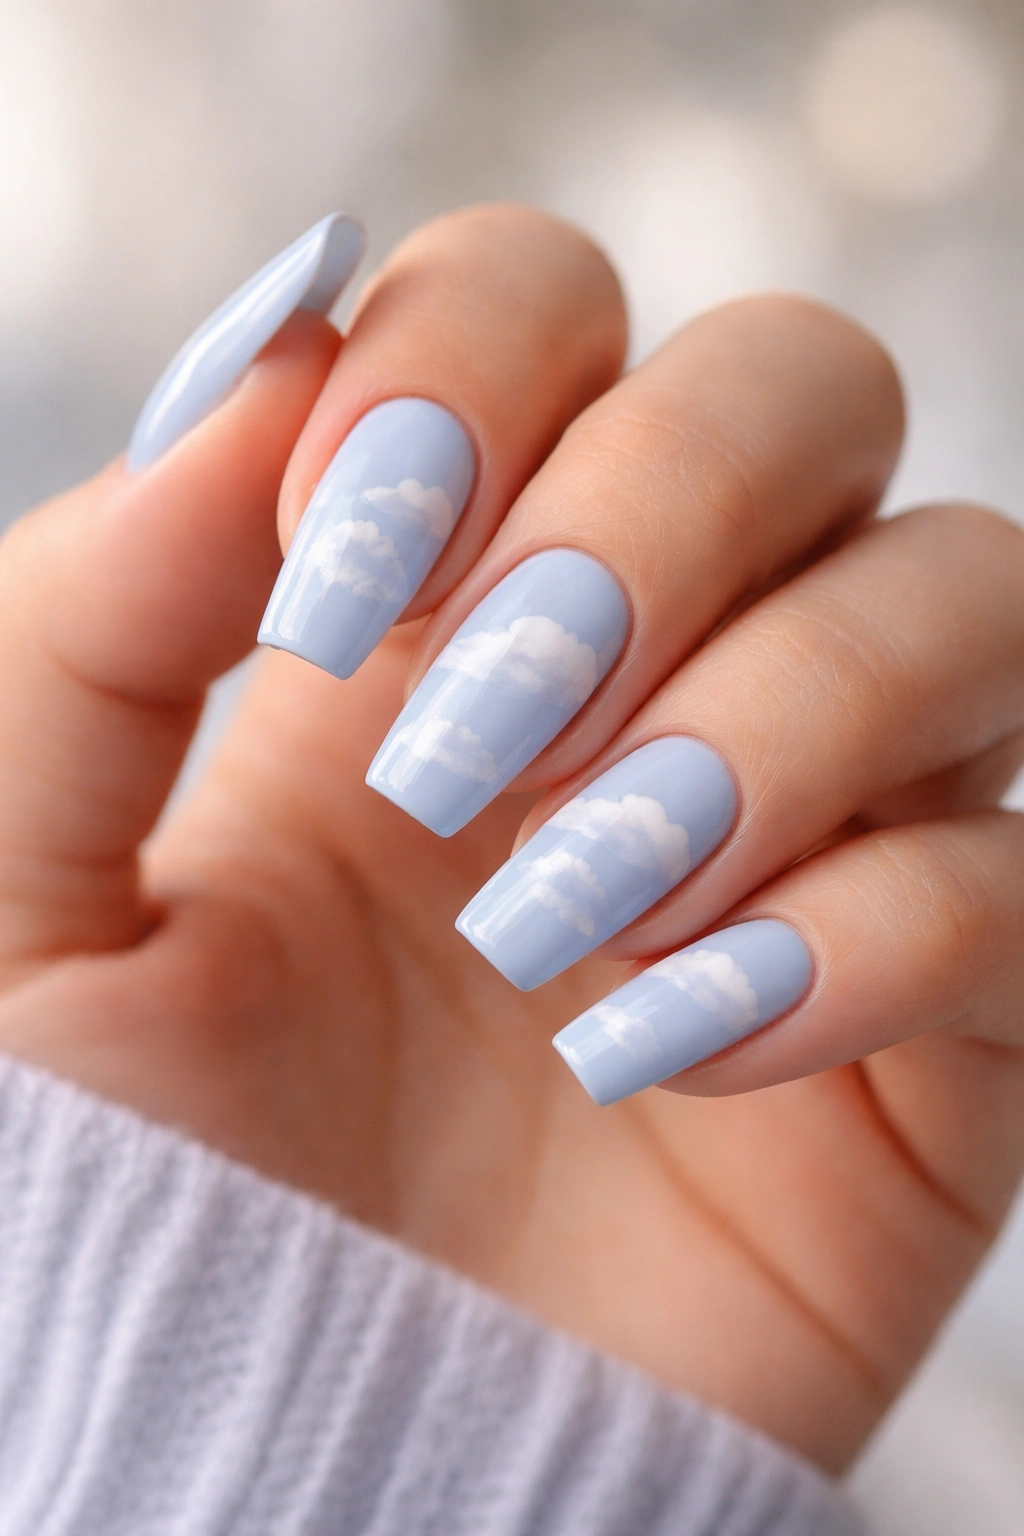
A soft powder blue base with hand-painted white clouds scattered across the nails creates a dreamy, whimsical aesthetic that’s still sophisticated. Unlike bold nail art, clouds feel organic and artistic. This design works especially well on medium coffin nails because there’s enough space for the cloud imagery to be recognizable without feeling cramped.
The Charm of Cloud Designs
Clouds tap into something peaceful and calming in the human brain. They’re also incredibly forgiving to paint because clouds don’t require precision—slight imperfections actually make them look more realistic and artistic. This design appeals to people who love sky-inspired aesthetics and want something with personality but not maximum boldness.
Painting Cloud Techniques
- Use a small, soft brush and white polish to hand-paint clouds
- Sponge technique for a softer, more diffused cloud effect
- Some nail artists use a specialized cloud brush or sponge
- Clouds can be painted on every nail or as an accent on select nails
- Add a light blue topcoat after painting clouds to seal and slightly blur the edges for a softer appearance
Pro tip: Clouds look especially beautiful when the blue base has slight shimmer or holographic properties, which makes the sky effect more convincing.
12. Glossy Black With Gold Cuticle Detail
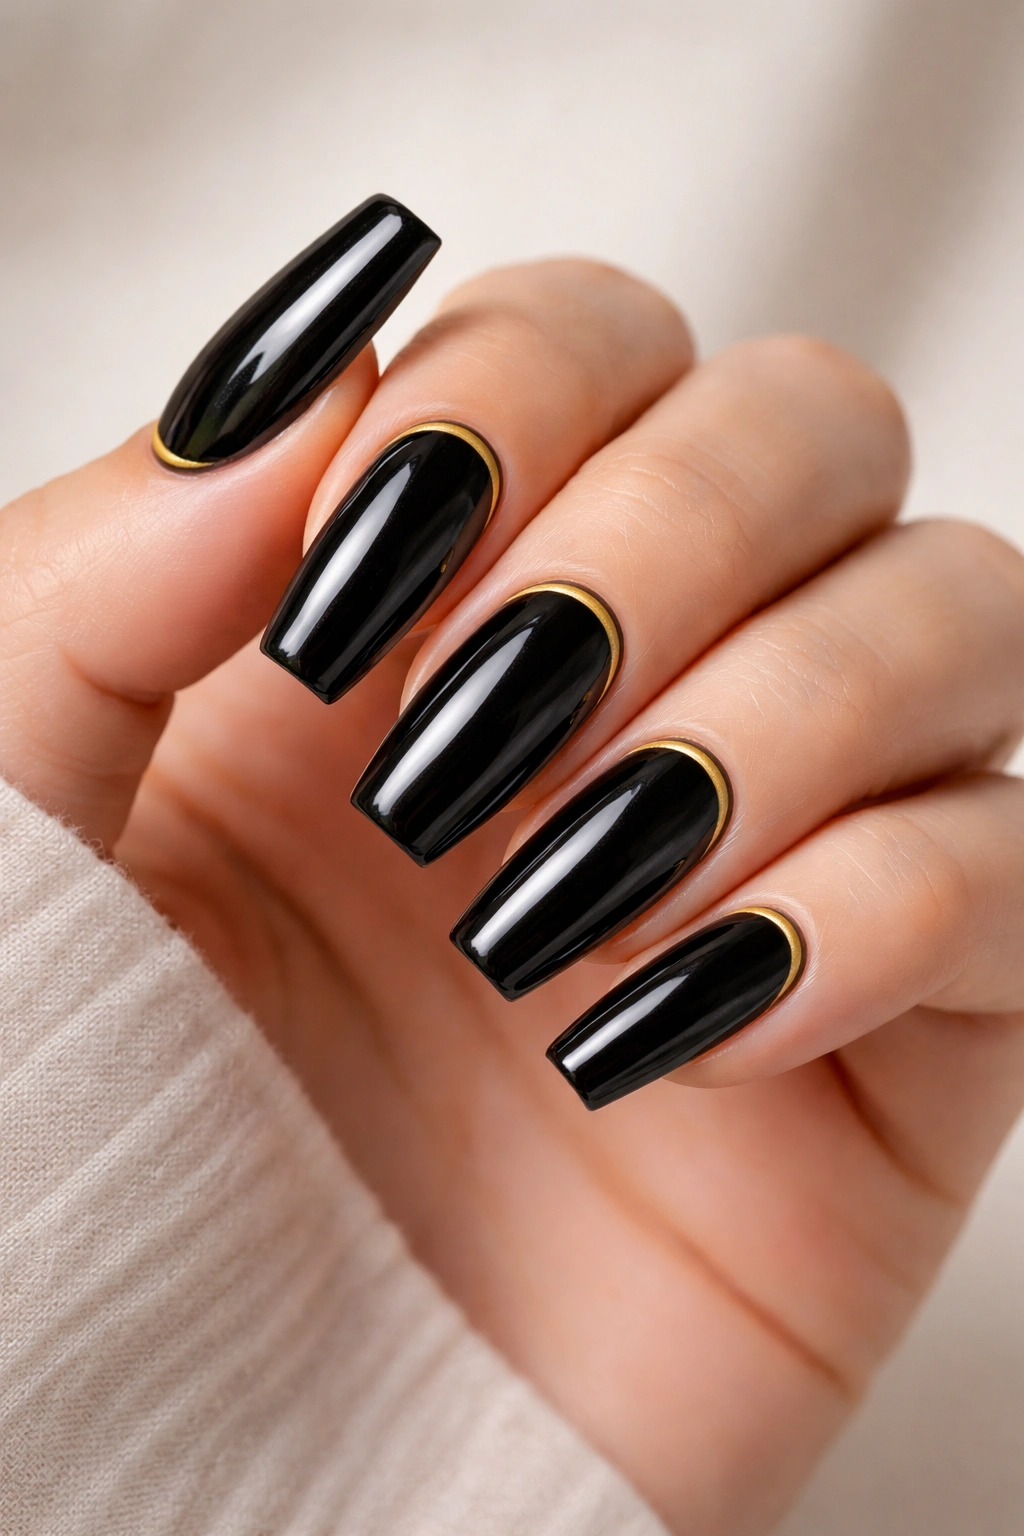
Sleek black polish on the entire nail with a carefully executed gold stripe or geometric accent right at the cuticle line creates sophisticated contrast. This design positions the gold strategically so it frames the nail base, drawing attention to where your nail meets your skin. The glossy black background makes any metallic accent pop.
Why Gold at the Cuticle Works
Instead of the traditional French tip, moving the accent to the cuticle base flips the script and creates a fresh look. The gold stripe or design at the base is unexpected and feels intentional. Glossy black reads as timeless, powerful, and elegant—perfect for anyone who loves a bold statement color.
Cuticle Accent Design Options
- Thin gold line just above the cuticle
- Gold geometric shapes filling the cuticle area
- Gold metallic gradient from cuticle upward
- Tiny gold dots or details arranged at the cuticle line
- Gold outline framing the cuticle area
Worth considering: This design requires precise application, so it’s worth investing in a professional nail appointment rather than attempting it at home unless you have serious nail art skills.
13. Peachy Nude With Thin Glitter Gradient
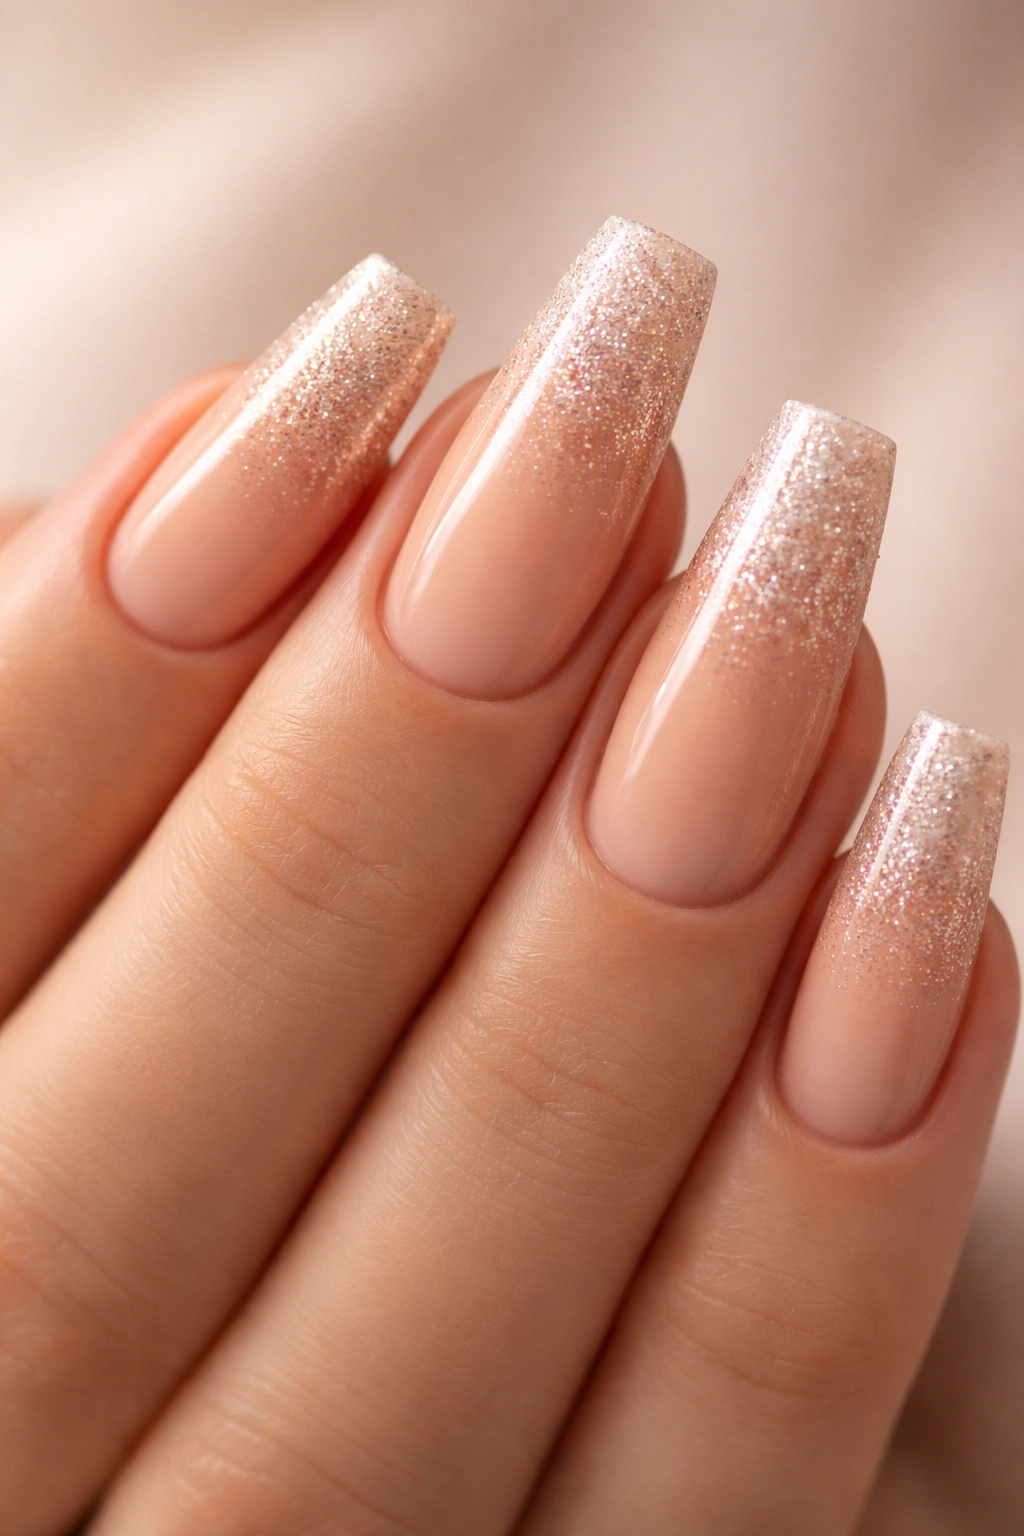
A warm peachy nude base that transitions into a glitter gradient (light at the base, denser glitter toward the tip) creates soft sparkle with movement. The gradient effect is more interesting than all-over glitter while still maintaining the elegance of the peachy nude base. This design works for both everyday and special occasion wear.
The Beauty of Glitter Gradients
Gradients naturally draw the eye from base to tip, which elongates the nail visually and emphasizes the coffin point. Glitter density gradually increasing toward the tip feels artistic and intentional rather than random. The combination of warm peachy nude (which flatters every skin tone) with subtle sparkle is feminine without being overly trendy.
Glitter Gradient Application
- Start with sparse glitter placement near the cuticle
- Gradually increase glitter density as you move toward the tip
- The tip can be nearly covered in glitter or just slightly denser than the middle
- Thin glitter for a delicate effect, chunky glitter for bolder impact
- Some techs use sponging technique to blend the gradient smoothly
Pro tip: Glitter gradients look especially beautiful with a high-shine topcoat that makes the glitter reflect light dramatically.
14. Cream Base With Burgundy Geometric Lines and Dot Details
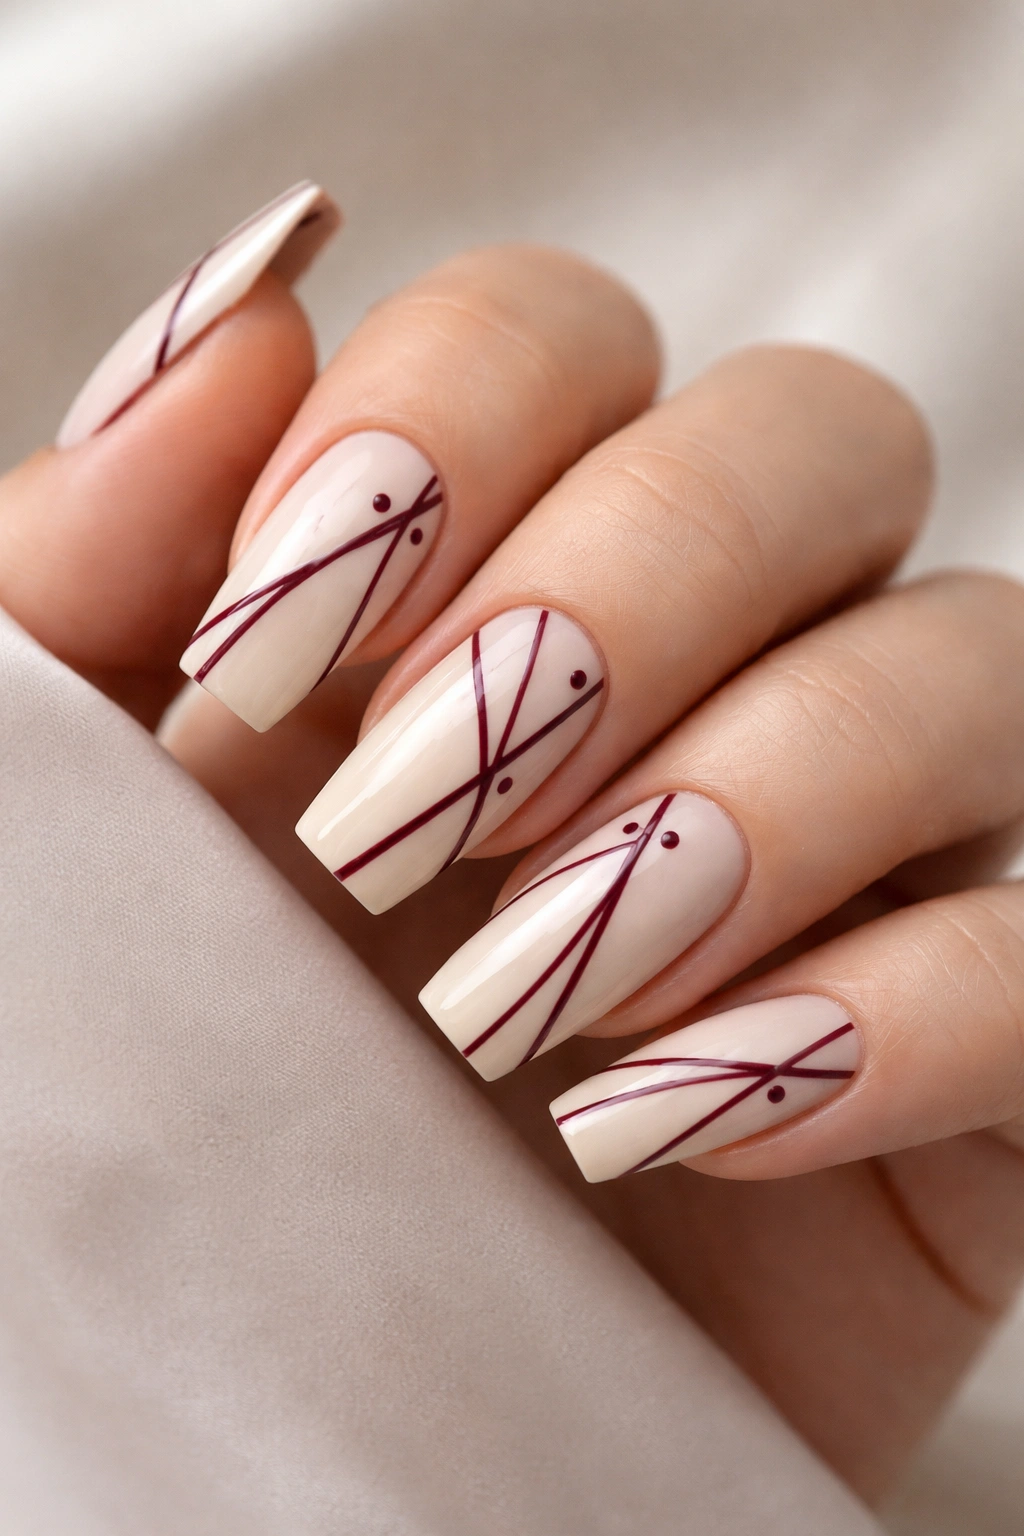
A soft cream base with burgundy lines creating geometric patterns and small burgundy dots scattered throughout creates a design-forward look that’s both artistic and wearable. The combination of linear patterns with organic dot placements makes this design feel intentional and custom, though it’s quite achievable at a professional salon.
The Design Strategy
Combining two elements (lines and dots) in complementary colors creates visual interest without overwhelming the nail. The geometric lines provide structure and modernity, while the dots add an organic, artistic quality. Burgundy against cream reads as sophisticated and timeless—not trendy, not dated.
Creating the Pattern
- Plan out burgundy lines with a nail art brush (thin lines show the most control)
- Add burgundy dots of varying sizes between and around the lines
- Some dots could sit on the lines, others separate them
- The pattern can be symmetrical or purposefully asymmetrical
- Concentrate the most detail toward the center of the nail, with sparser detail near edges
Insider note: This design works beautifully if you have access to a talented nail artist, but it’s also achievable at home if you’re patient and have fine motor control.
15. Milky White With Rose Gold Chrome Effect
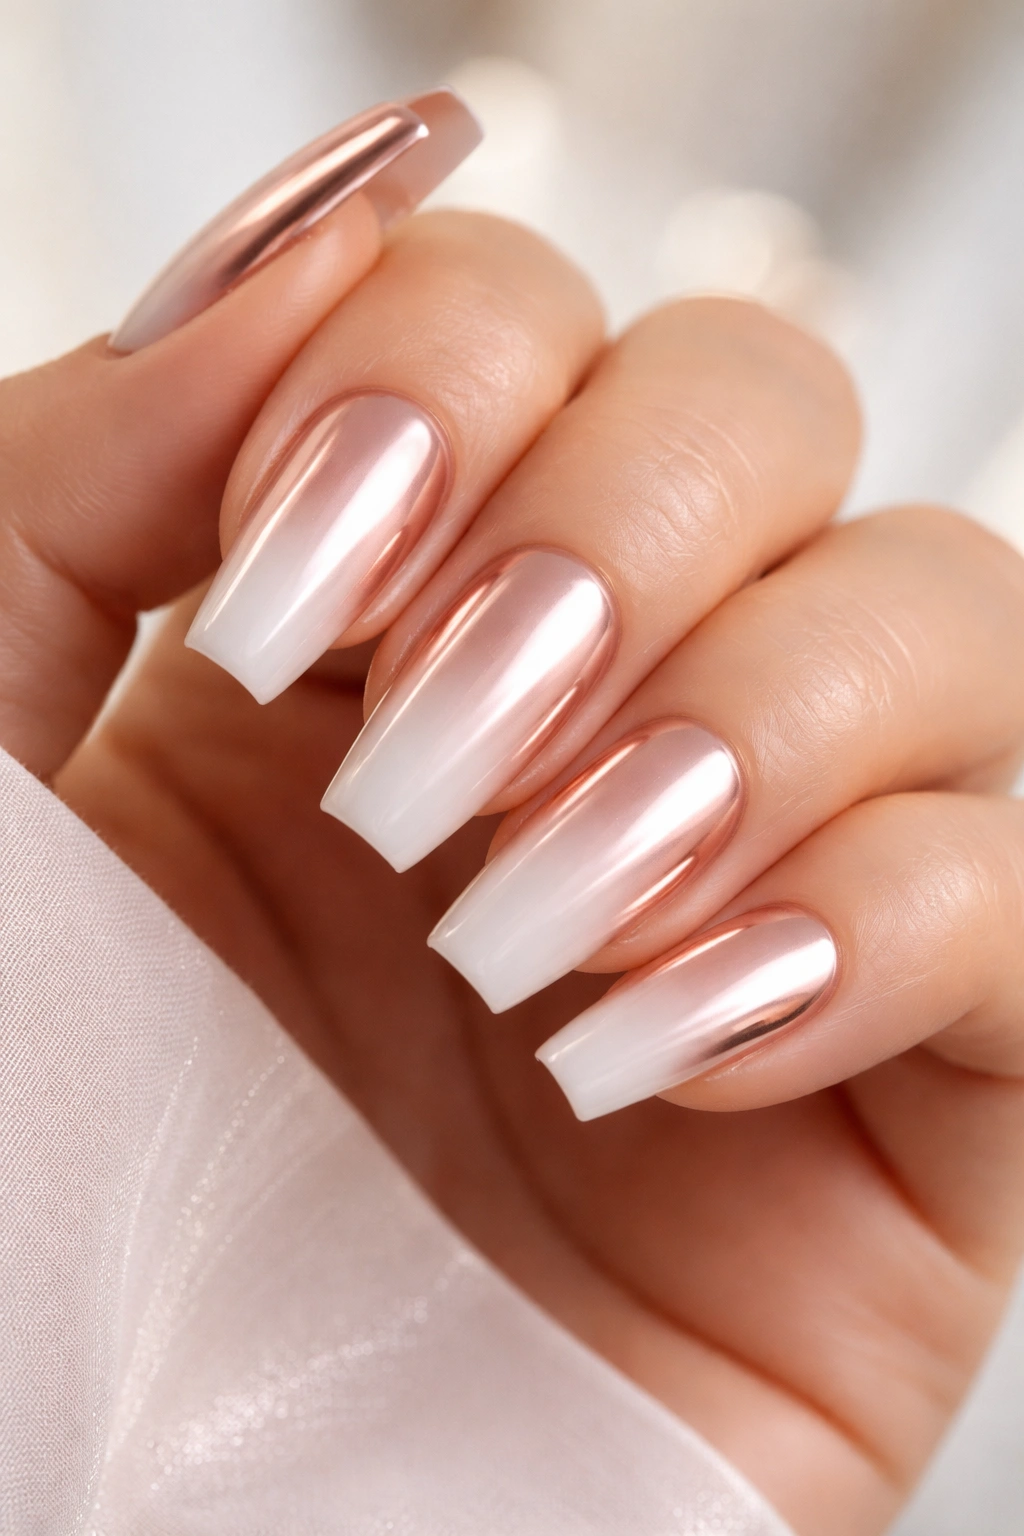
A soft milky white base combined with rose gold chrome effect creates a luxurious, almost ethereal appearance. Chrome finishes have that mirror-like quality that’s instantly eye-catching, and rose gold chrome is more wearable than silver or gold alone. The milky white base keeps it from feeling too futuristic or high-tech.
Why Chrome Finishes Captivate
Chrome creates a three-dimensional effect that photographs beautifully and catches light in mesmerizing ways. Rose gold chrome specifically feels warm and luxurious without being overly sparkly or glittery. The combination with milky white creates a sophisticated, expensive-looking manicure that makes a statement without being loud.
Chrome Application Essentials
- Chrome requires special powder or nail product (not standard polish)
- Application is typically done by professional nail techs
- The surface needs to be perfectly smooth and polished before chrome application
- Chrome finishes typically last through the full manicure cycle with proper topcoat
- The effect is most striking under natural light and in photographs
Worth knowing: Chrome nails are statement makers—prepare for compliments and questions about how they’re made.
16. Dusty Mauve With Dainty Gold Line Work
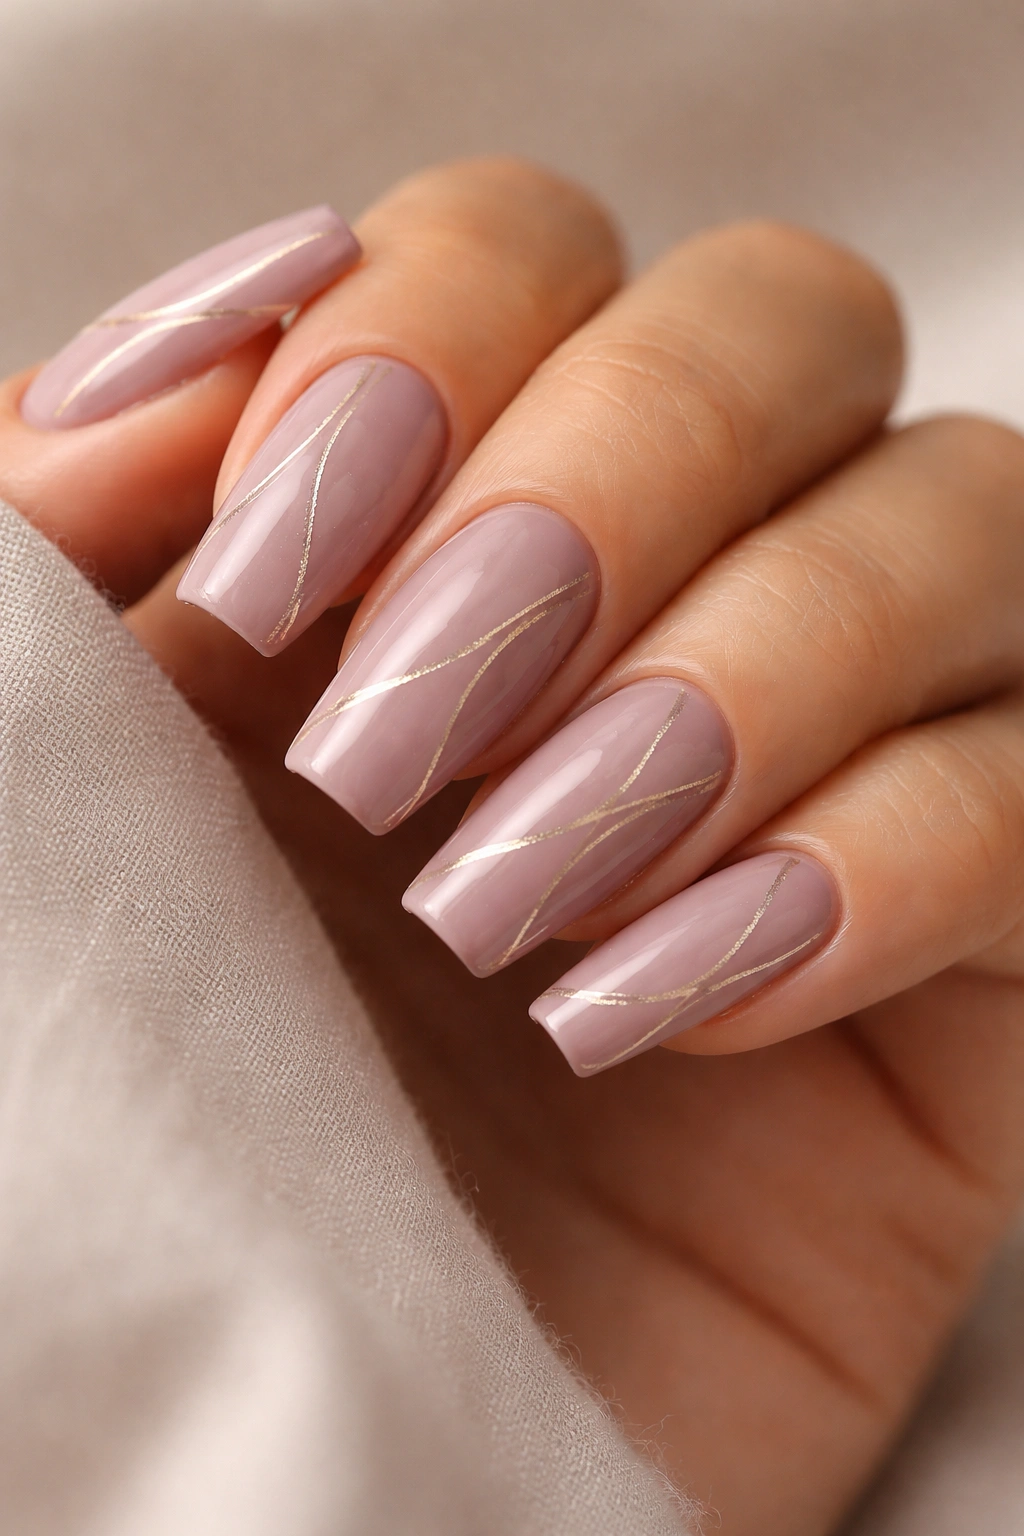
Soft dusty mauve as your base color with delicate gold line work creating subtle designs (thin lines, small shapes, minimal details) creates an elegant, understated look. The mauve is neutral enough to work with any color palette, while the gold adds just enough sparkle to keep it interesting. This design feels refined and thoughtful rather than bold or trendy.
The Elegance of Minimalist Line Work
When gold details are kept to thin lines and small shapes rather than big statements, the overall effect is more sophisticated. Each line is intentional, and the spacing between lines matters as much as the lines themselves. On medium coffin nails, minimalist gold line work creates visual interest without overwhelming the nail surface.
Line Work Ideas
- Thin gold lines creating geometric divisions
- Delicate gold script or abstract shapes
- Tiny gold details (dots, dashes) arranged with intention
- Gold outline only around the coffin tip
- Minimal gold accents just on the outer edge of the nail
Pro tip: This design works beautifully with minimalist hand jewelry and creates a cohesive aesthetic for people who prefer understated elegance.
17. Deep Forest Green With White Reverse French Tip
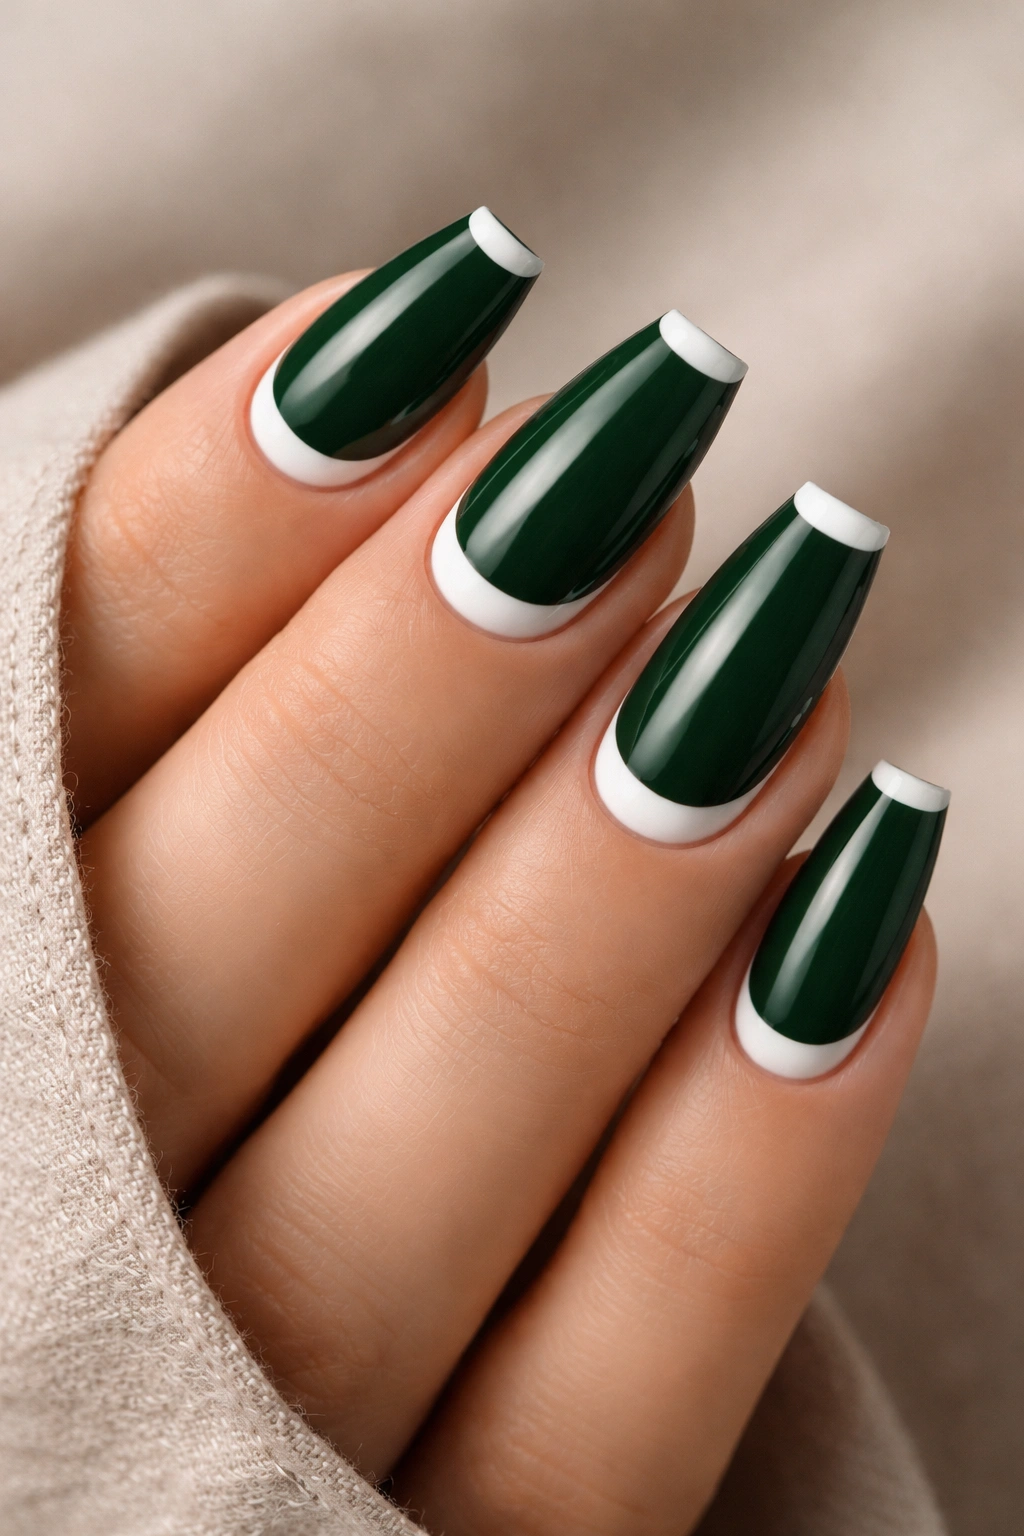
Deep forest green with white covering just the bottom base area (reverse of a standard French tip) creates a nature-inspired, modern look. The dark green reads as rich and sophisticated, while the white reverse French removes some of the heaviness. This design appeals to anyone who loves green but worries that all-over green might feel too bold or limited in wearability.
Why Reverse French Breaks the Rules
Standard French tips are overdone. A reverse French tip on forest green feels creative and unexpected while still being elegant and professional. The white base draws attention upward toward your fingertips, and the color-blocking creates clear visual definition. This design modernizes the French tip concept entirely.
White Reverse French Variations
- Thick white band covering about one-quarter of the nail from the base
- Thin white line just barely visible at the cuticle area
- Gradient white that fades from distinct at the base to barely visible toward the middle
- White reverse French with a geometric line creating separation between colors
Insider note: Forest green with white reverse French is striking enough that it typically doesn’t require additional embellishment—the color contrast does all the heavy lifting.
18. Soft Pink With Ombré Glitter to Nude
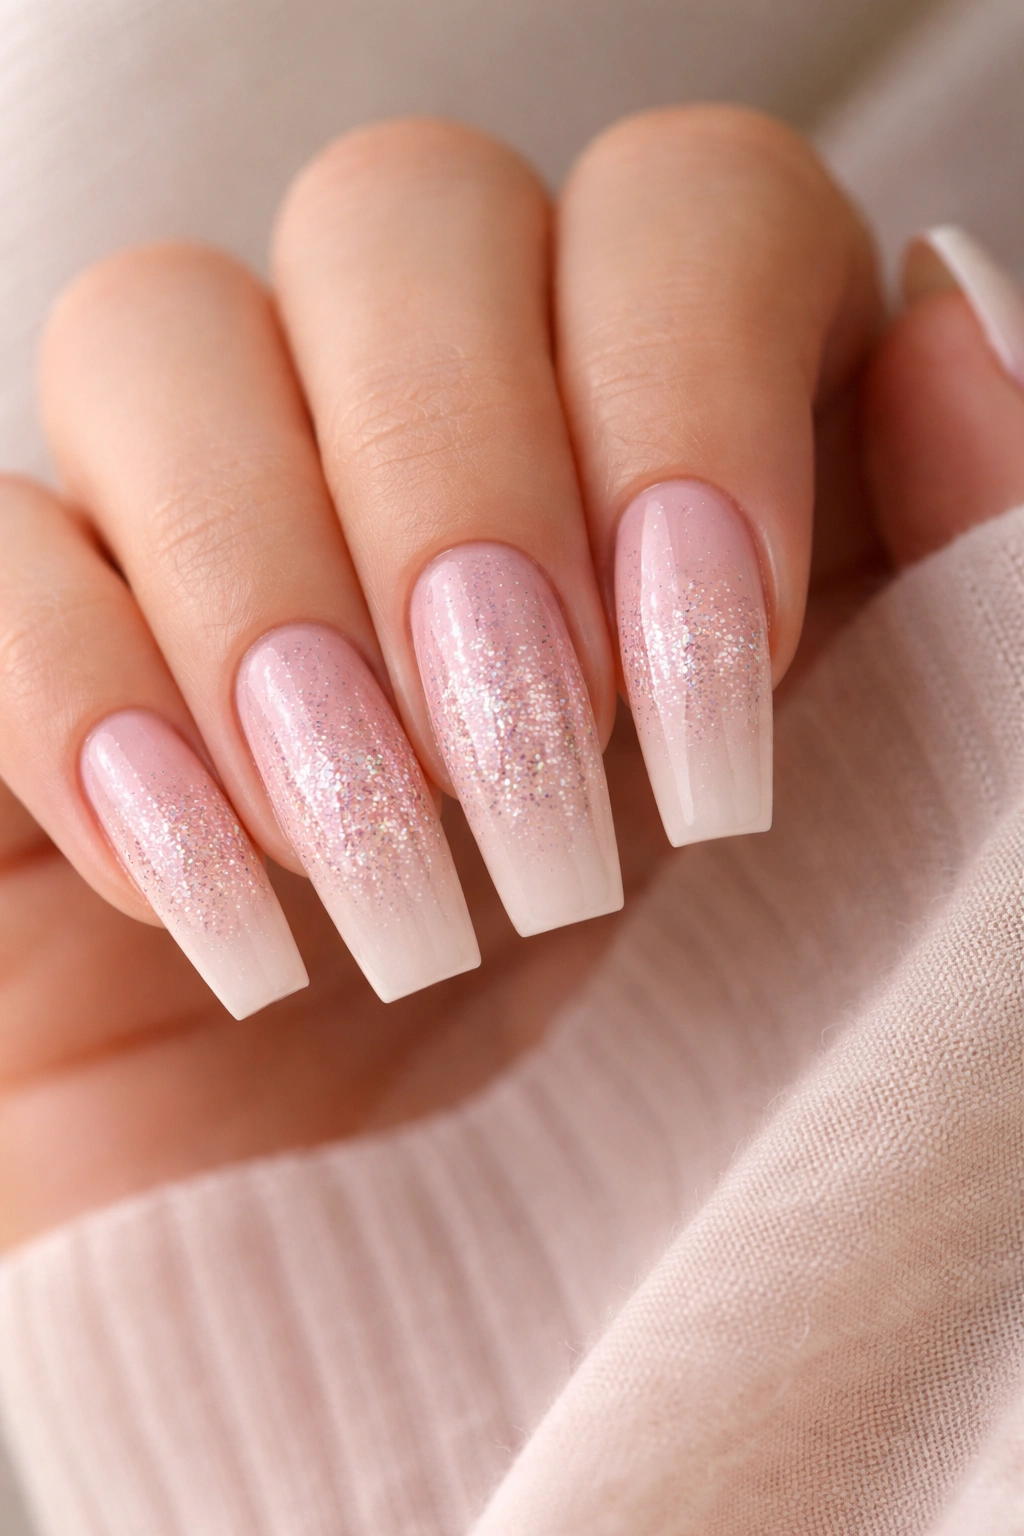
A soft pink base that gradually transitions through a glitter-dense middle section to nude at the tip creates movement and dimension. This triple-color gradient is more interesting than a standard two-color ombre and works beautifully on medium coffin nails. The progression from pink to glitter to nude creates a multi-dimensional effect that’s visually complex but harmonious.
The Complexity of Triple-Tone Gradients
Instead of moving from one color to another, this design introduces a middle element (glitter) that adds texture and sparkle. The progression feels intentional and artistic, and it works for both everyday wear and special occasions depending on the glitter density you choose. Pink to glitter to nude is universally flattering and never feels trendy or dated.
Ombré Application Steps
- Base coat of soft pink
- Sponge on glitter starting midway down the nail
- Gradually increase glitter density toward the upper-middle area
- Transition from glitter-dense area to light nude shade
- Final topcoat seals everything and smooths the transitions
Pro tip: This design looks especially beautiful photographed in natural light where the glitter sparkle and color transitions are most visible.
19. Classic Red With Black Cat-Eye Design

A sophisticated classic red base with a sleek black cat-eye design down the center of the nail creates bold contrast and visual movement. The cat-eye design gives the red something to focus on beyond just solid color, making it feel more intentional. This design reads as timeless rather than trendy because both red and cat-eye designs never go out of style.
Why Red Never Fails
Red is the ultimate power color—it reads as confident, bold, and put-together. When paired with black cat-eye design (a nod to graphic eyeliner), it creates a cohesive aesthetic that feels editorial and intentional. On medium coffin nails, red with cat-eye design is an absolute statement without requiring intricate artwork.
Cat-Eye Design Elements
- Thin black line flowing down the center of the nail
- Creates a subtle eye shape or pointed cat-eye at the center
- Can be perfectly straight or have a slight curve for more movement
- Negative space on either side of the line emphasizes the red
- Some designs include the cat-eye extending to the tip for emphasis
Worth knowing: Red polish requires strategic wear-time planning since red is more visible on hands and makes chips or imperfections more noticeable than lighter shades.
20. Beige Base With Subtle Brown Crescent Moon Details
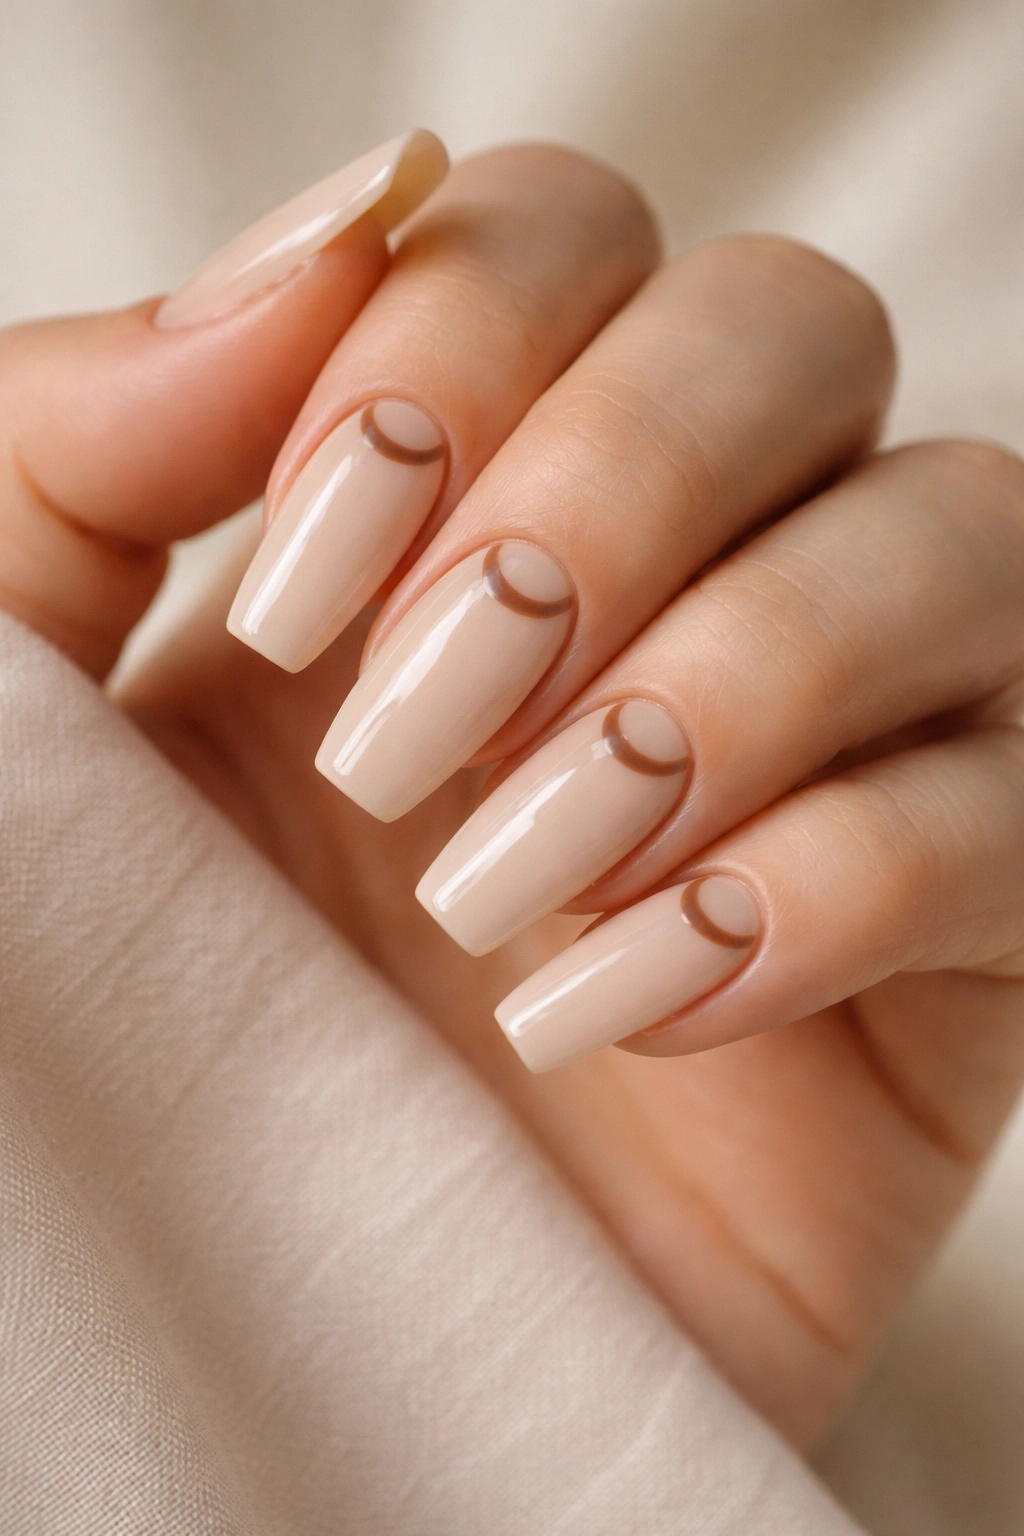
A warm beige base with soft brown crescent moon shapes at the cuticle area of each nail creates a celestial-inspired, sophisticated design. The crescent moons are minimalist enough to feel understated but distinctive enough to be noticed. This design works beautifully for anyone who loves celestial themes but prefers subtle expression.
The Appeal of Celestial Minimalism
Celestial imagery is inherently romantic and meaningful, yet when expressed through subtle crescent moons rather than stars or galaxies, it remains sophisticated and wearable. The moon has a calming, meditative quality that appeals to many people. Brown crescents on beige read as elegant and thoughtful rather than trendy or juvenile.
Crescent Moon Application
- Paint soft brown crescent shapes at the very base of each nail (where a cuticle French tip would sit)
- Each crescent should be a similar size and shape for intentionality
- The crescents can be solid or have an outline-only style
- Some designs include tiny details like stars inside or around the crescents
- The rest of the nail stays clean beige for maximum impact from minimal detail
Pro tip: This design is perfect for someone who appreciates subtle, meaningful details that others might have to look closely to notice—it’s an intimate design rather than an obvious statement.
Final Thoughts
Medium coffin nails give you an incredible range of design possibilities—from minimalist and understated to bold and artistic. The key to finding your perfect design is choosing something that reflects your personal style and makes you feel confident every time you look at your hands.
Some designs in this collection are easier to achieve at home with basic nail art supplies, while others benefit from a professional nail technician’s expertise and tools. Consider your skill level, the amount of time you’re willing to invest in application, and how much maintenance you’re comfortable with when deciding between them.
The most important thing isn’t finding the “perfect” design—it’s choosing one that makes you happy and makes you feel like yourself. Whether you prefer the understated elegance of soft ombre French tips or the bold statement of classic red with cat-eye design, there’s a medium coffin nail design here that’s waiting for you to try it. The beauty of nail art is that it’s temporary; if you try a design and don’t love it, you simply remove it and start fresh in a few weeks. That freedom means you can experiment without commitment and discover designs that become your signature looks.
