

Coffin nails have become the go-to shape for anyone who wants to make a bold statement with their manicure, and when you pair that elongated elegance with soft, versatile pink shades, you’ve got a combination that works for virtually every occasion. The beauty of pink coffin nails lies in their incredible range — they can be understated and professional, romantic and whimsical, or glamorous and eye-catching depending on which shade and embellishment you choose. Long coffin nails give you the perfect canvas to play with intricate designs, layered colors, and decorative elements that simply wouldn’t have room to breathe on shorter nail beds. Whether you’re drawn to minimalist aesthetics, bold geometric patterns, delicate florals, or sparkly accents, pink offers a sophisticated foundation that elevates any design from ordinary to extraordinary.
The coffin nail shape itself has a tapered, squared-off appearance that instantly elongates your fingers and creates an undeniably chic silhouette. When you choose pink as your base color, you’re working with a shade that’s inherently flattering to virtually every skin tone and complements an endless range of outfits and moods. The real artistry comes in knowing which pink undertone suits you best, which designs will photograph beautifully, and how to maintain these gorgeous nails so they stay stunning for weeks. Let’s dive into fifteen stunning pink coffin nail ideas that showcase just how versatile and captivating this combination truly is.
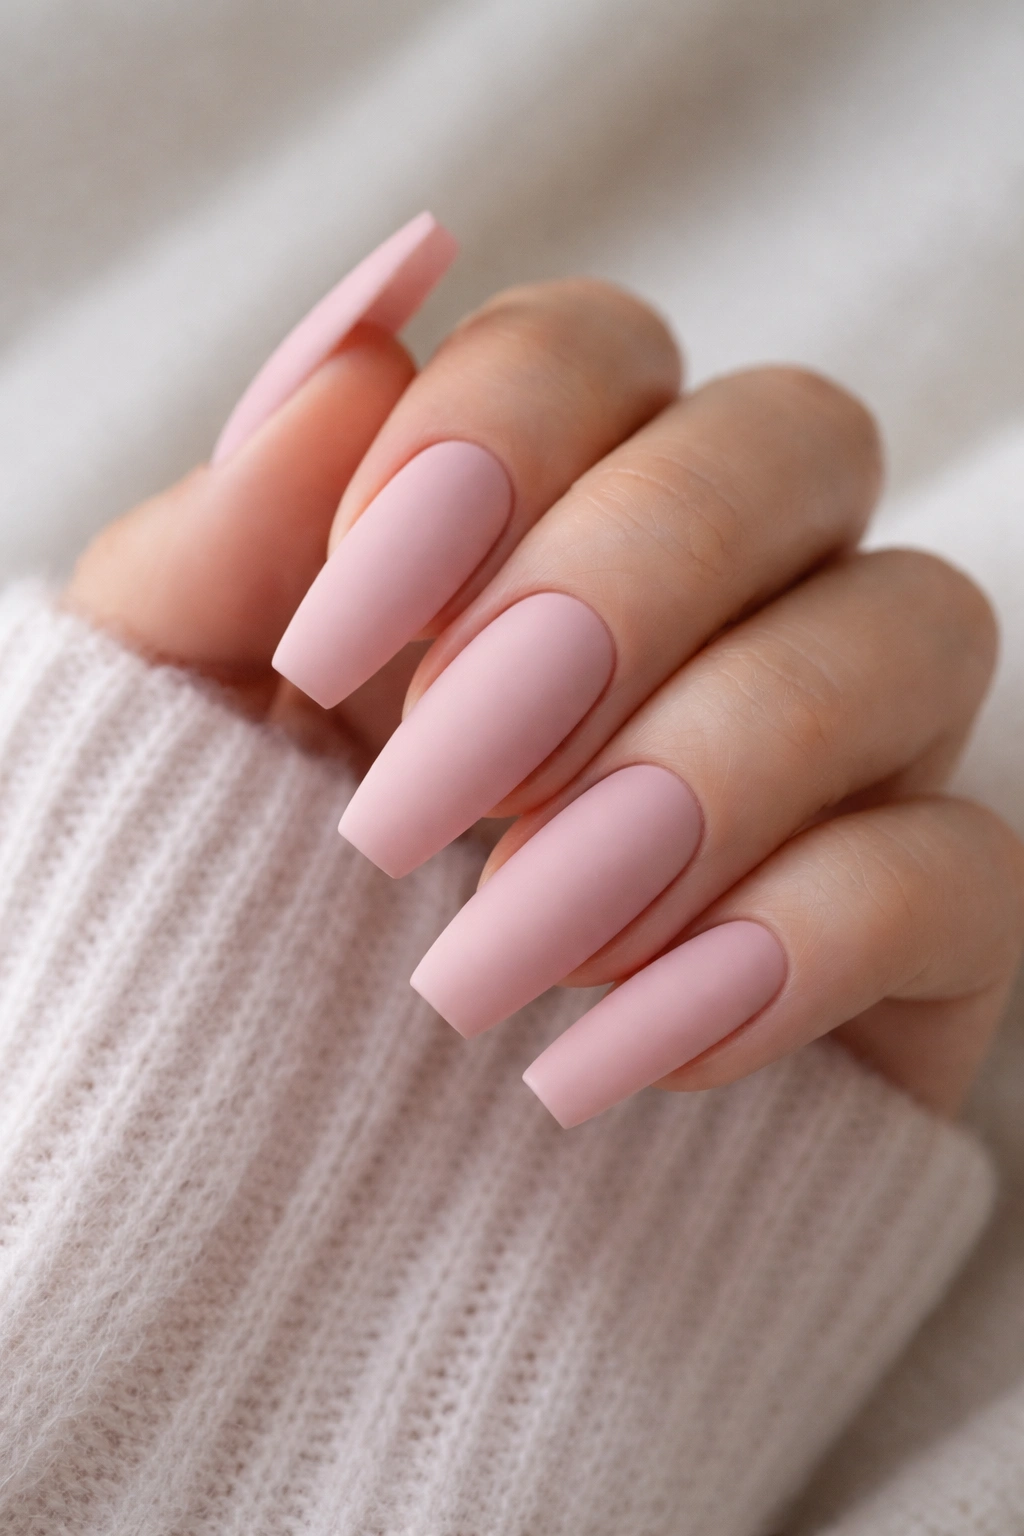
1. Soft Millennial Pink with Matte Finish
Millennial pink became iconic for a reason — it’s that perfect warm, dusty rose shade that somehow manages to be both calming and trendy at the same time. A matte finish on coffin nails in this shade creates a velvety, almost velour-like texture that feels incredibly luxurious and modern without any additional embellishment needed. The soft tone pairs beautifully with everything from casual weekend outfits to professional workplace settings, making it one of the most versatile choices you can make.
Why Matte Millennial Pink Is So Effective
The beauty of this design lies in its understated elegance and the way the matte finish completely changes the perception of the color. Matte polish tends to make colors appear slightly deeper and more sophisticated than their glossy counterparts, which means millennial pink takes on a refined, editorial quality. The lack of shine actually draws attention to the shape of your nails rather than the reflective properties of the polish, highlighting that gorgeous coffin silhouette even more dramatically.
How to Achieve This Look
- Choose a dusty rose pink with warm undertones — it should fall somewhere between coral and mauve on the color spectrum
- Apply a high-quality base coat to protect your nails from staining
- Apply two thin coats of millennial pink polish, allowing each coat to dry completely before applying the next
- Once fully dry, apply a matte top coat evenly across all nail surfaces
- If you want to add shine back to just your cuticles for extra dimension, use a glossy top coat on the lower third of each nail
Pro tip: Millennial pink can stain your nails if left on for too long without a base coat, so always protect your nail bed before applying any pink shade.
2. Ombre Pink to White Gradient
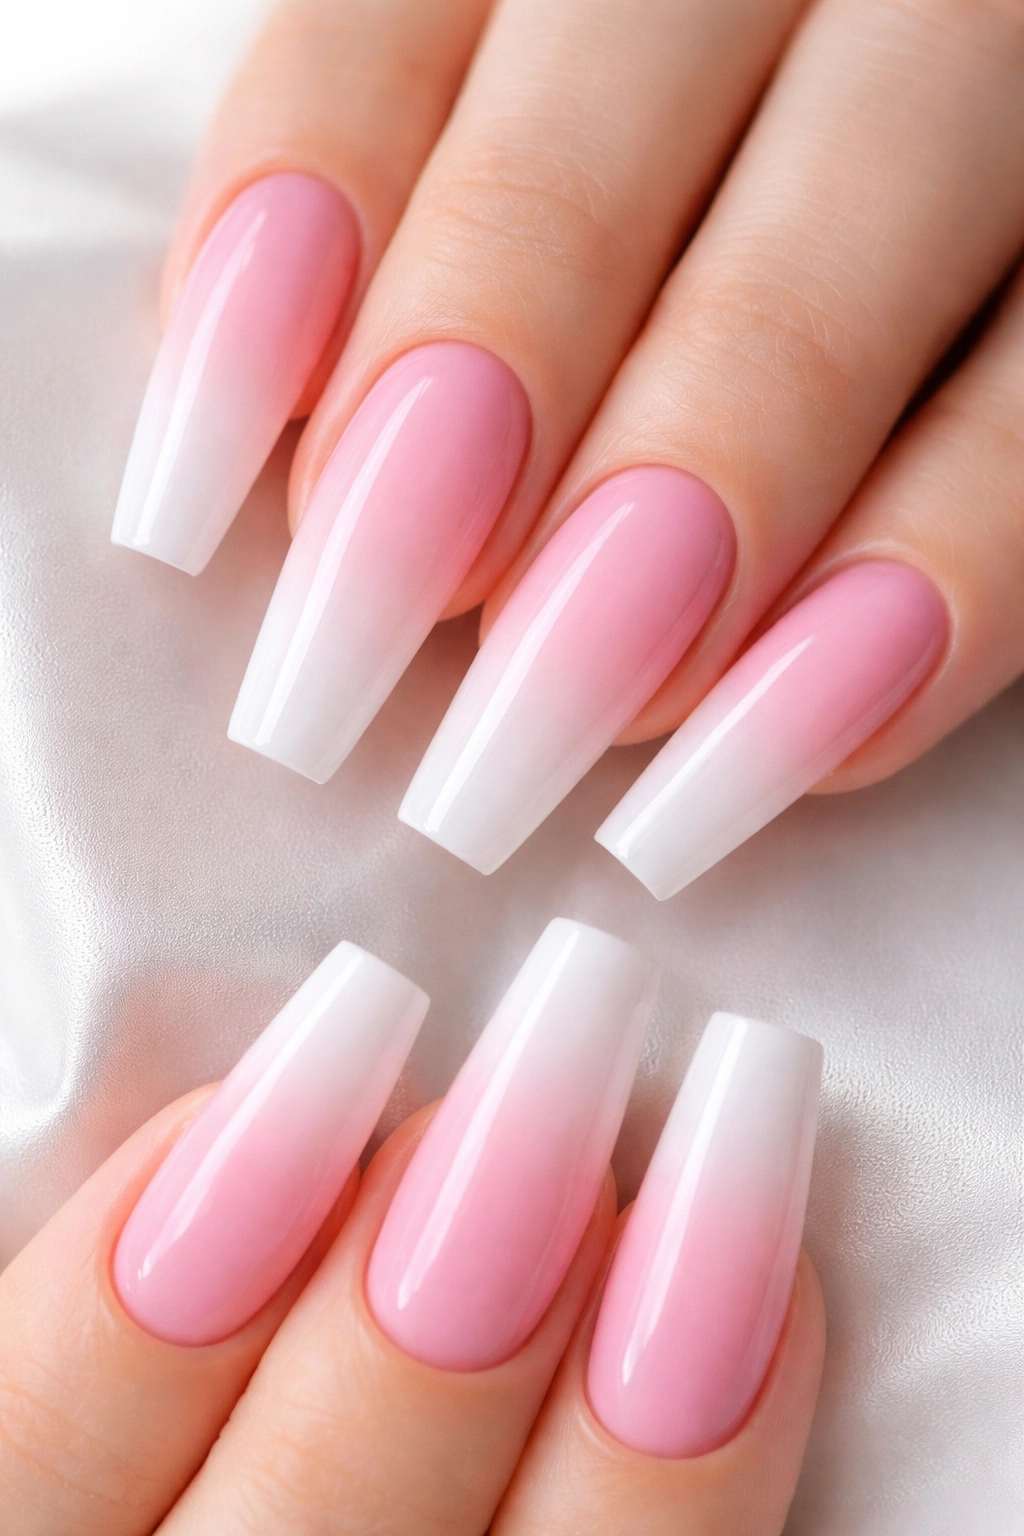
An ombre effect that transitions from a deeper pink at the nail bed to pure white or pale pink at the tips creates depth and visual interest while maintaining that cohesive pink theme. This gradient effect photographs absolutely beautifully and works particularly well on long coffin nails because you have enough surface area to show the color transition clearly. The design feels contemporary and artistic without requiring nail art skills beyond basic color blending.
The Visual Impact of Pink-to-White Ombre
This gradient works because it naturally mimics the look of nail growth with a fresh polish application, but intentionally and artistically done. The darker shade at the base grounds the nail while the lighter tips create an airy, ethereal feeling. On coffin nails, the tapered shape means the gradient becomes narrower as it approaches the tip, creating a subtle point of focus.
Techniques for Creating an Ombre Effect
- Use a makeup sponge or a specialized sponge applicator for the ombre technique
- Apply your darker pink and white polish separately onto the sponge, slightly overlapping where they meet
- Gently press and roll the sponge onto your nail rather than dragging it, which helps blend the colors smoothly
- You may need 2-3 applications to build up the color intensity and gradient smoothness
- Seal the entire design with a glossy top coat to give it a polished, finished appearance
- For added dimension, consider adding a thin stripe of glitter along the gradient line
3. Rose Gold Coffin Nails with Metallic Accents
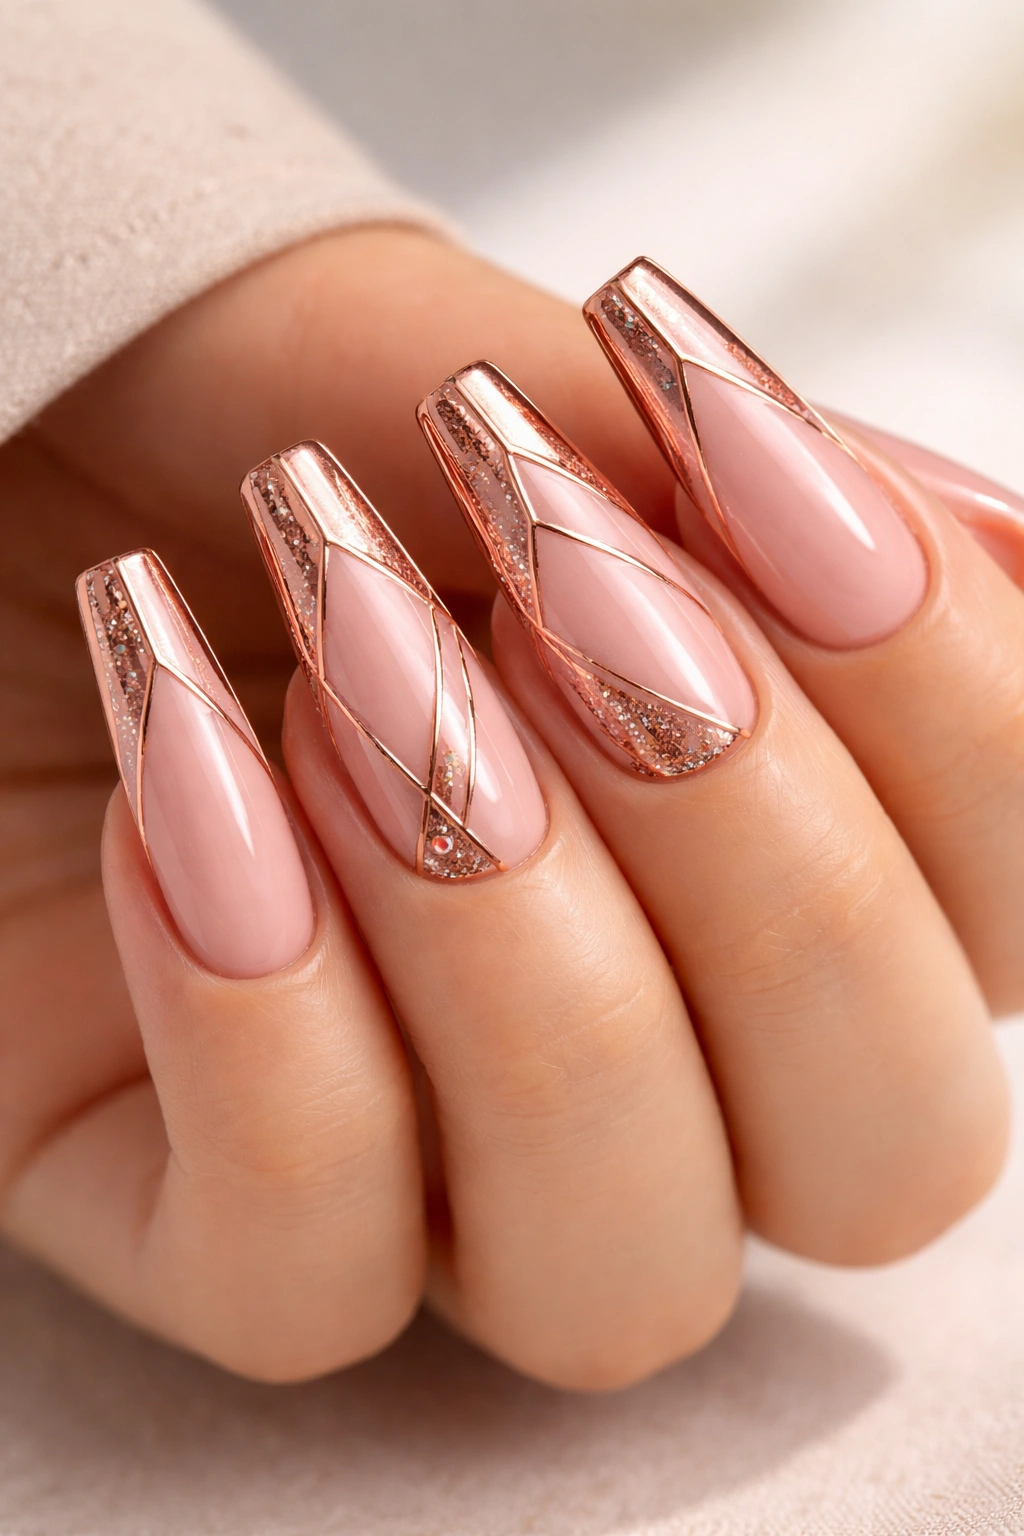
Rose gold has become a timeless metallic choice that pairs perfectly with virtually any shade of pink, and combining the two creates a luxurious, sophisticated look that feels both modern and slightly glamorous. Metallic accents in rose gold can frame the edges of your nails, create geometric patterns, or simply add subtle shimmer to a solid pink base. This combination is especially stunning on long coffin nails because the metallic elements have plenty of space to sparkle and catch light.
Why Rose Gold Complements Pink So Beautifully
Rose gold naturally contains warm, peachy undertones that echo and complement the warmth in pink polish, creating a harmonious color story. Unlike yellowy gold, rose gold feels sophisticated rather than garish, and it works across multiple skin tones. The metallic quality adds luxury and dimension to what might otherwise be a simple solid pink manicure.
Application Methods for Metallic Accents
- Apply a solid pink base as your foundation, using two coats for full opacity
- Use thin metallic striping tape or a thin detail brush to apply rose gold along the edges of each nail
- Alternatively, create a geometric triangle or chevron pattern using rose gold and the pink base
- For a more subtle effect, mix a tiny amount of rose gold metallic powder into clear top coat and apply over your pink polish
- Ensure all metallic products are sealed with a quality glossy top coat to prevent tarnishing
Worth knowing: Metallic finishes tend to show dust and fingerprints more readily than standard polish, so expect to see them more obviously between manicure touch-ups.
4. Ballet Pink with Nude Ombre Tips
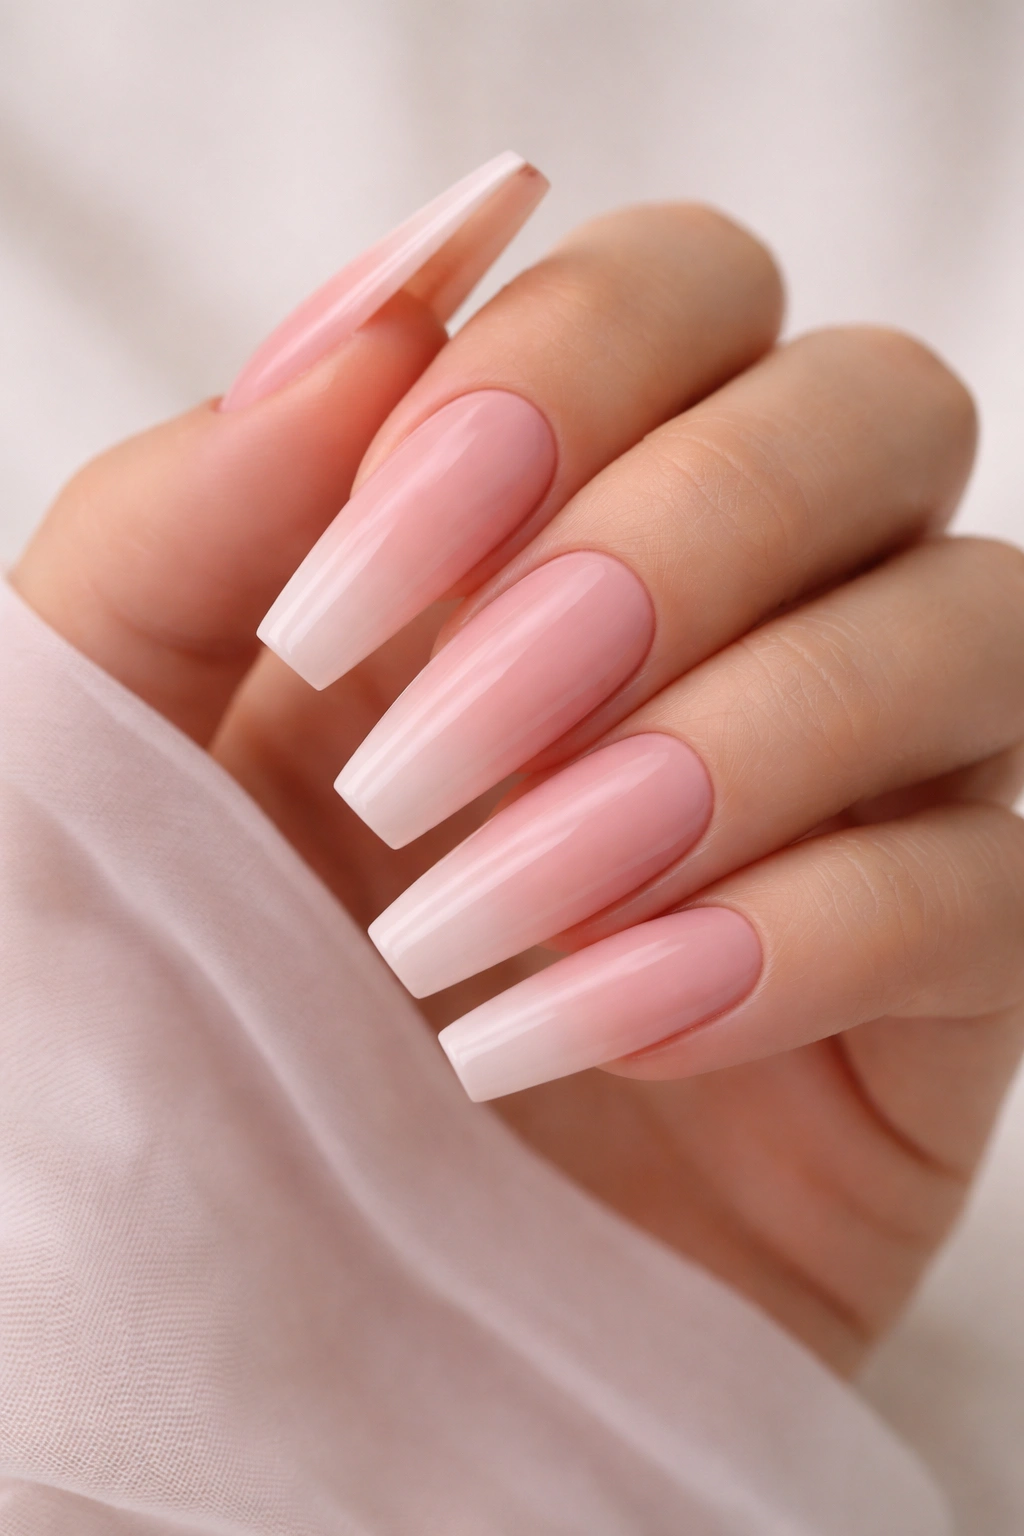
This design takes inspiration from classic ballet pointe shoes and creates a romantic, elongated look by using a delicate ballet pink base that gradually fades into a nude or skin-tone tip. Ballet pink is slightly more neutral and less saturated than typical pinks, giving it a sophisticated, understated quality. On long coffin nails, this creates an incredibly elegant look that somehow manages to make your nails appear even longer than they actually are.
The Elegant Psychology of Ballet Pink
Ballet pink references classical beauty and refinement, which is partly why it’s been used in the beauty world for decades. The color sits in that sweet spot between white and pink, meaning it’s subtle enough for professional environments yet clearly intentional. When paired with a nude ombre fade, it creates a cohesive look that your eye reads as one continuous, seamless color story.
Building the Ballet Pink Ombre
- Start with a light, peachy-pink polish as your base — ballet pink typically has warm undertones
- Apply two full coats, ensuring even coverage across the entire nail surface
- Create the ombre by blending a nude or skin-tone shade on a makeup sponge with the ballet pink
- Work from the tip of the nail upward, building the ombre gradually so the transition is smooth and unbroken
- Use a thin, pointed nail brush to blend the colors where they meet, softening any harsh lines
- Finish with a glossy top coat that will help the ombre appear seamless
5. Hot Pink Glossy with Rhinestone Half-Moons

Hot pink commands attention in the best possible way, and when you pair this vibrant shade with a geometric rhinestone design, you create a look that’s bold, glamorous, and impossible to ignore. A half-moon pattern of rhinestones at the base of each nail adds sparkle and sophistication while the bright pink keeps things fun and youthful. This design works beautifully for special events, nights out, or anytime you want your nails to be a statement piece.
Making Hot Pink Work in Professional and Fun Settings
Hot pink is traditionally thought of as playful, but the right shade and finish can actually feel quite chic and modern. Pairing it with geometric rhinestone placement keeps the overall aesthetic from feeling childish — instead, it reads as intentional and fashion-forward. The key is using quality rhinestones and precise placement rather than scattering them randomly.
Creating the Rhinestone Half-Moon Design
- Apply two coats of a true hot pink polish that’s opaque and vibrant
- Allow the polish to dry completely
- Use a thin rhinestone applicator or tweezers to place rhinestones in a perfect half-moon shape at the base of each nail
- Apply rhinestones using a clear rhinestone adhesive or a small amount of nail glue, placing them one at a time
- Space the rhinestones evenly and ensure they’re pressed firmly into place
- Once the adhesive is completely dry, seal everything with a glossy top coat
- Avoid washing your hands for at least 24 hours to ensure the rhinestones are fully set
6. Dusty Rose with Minimalist Line Art
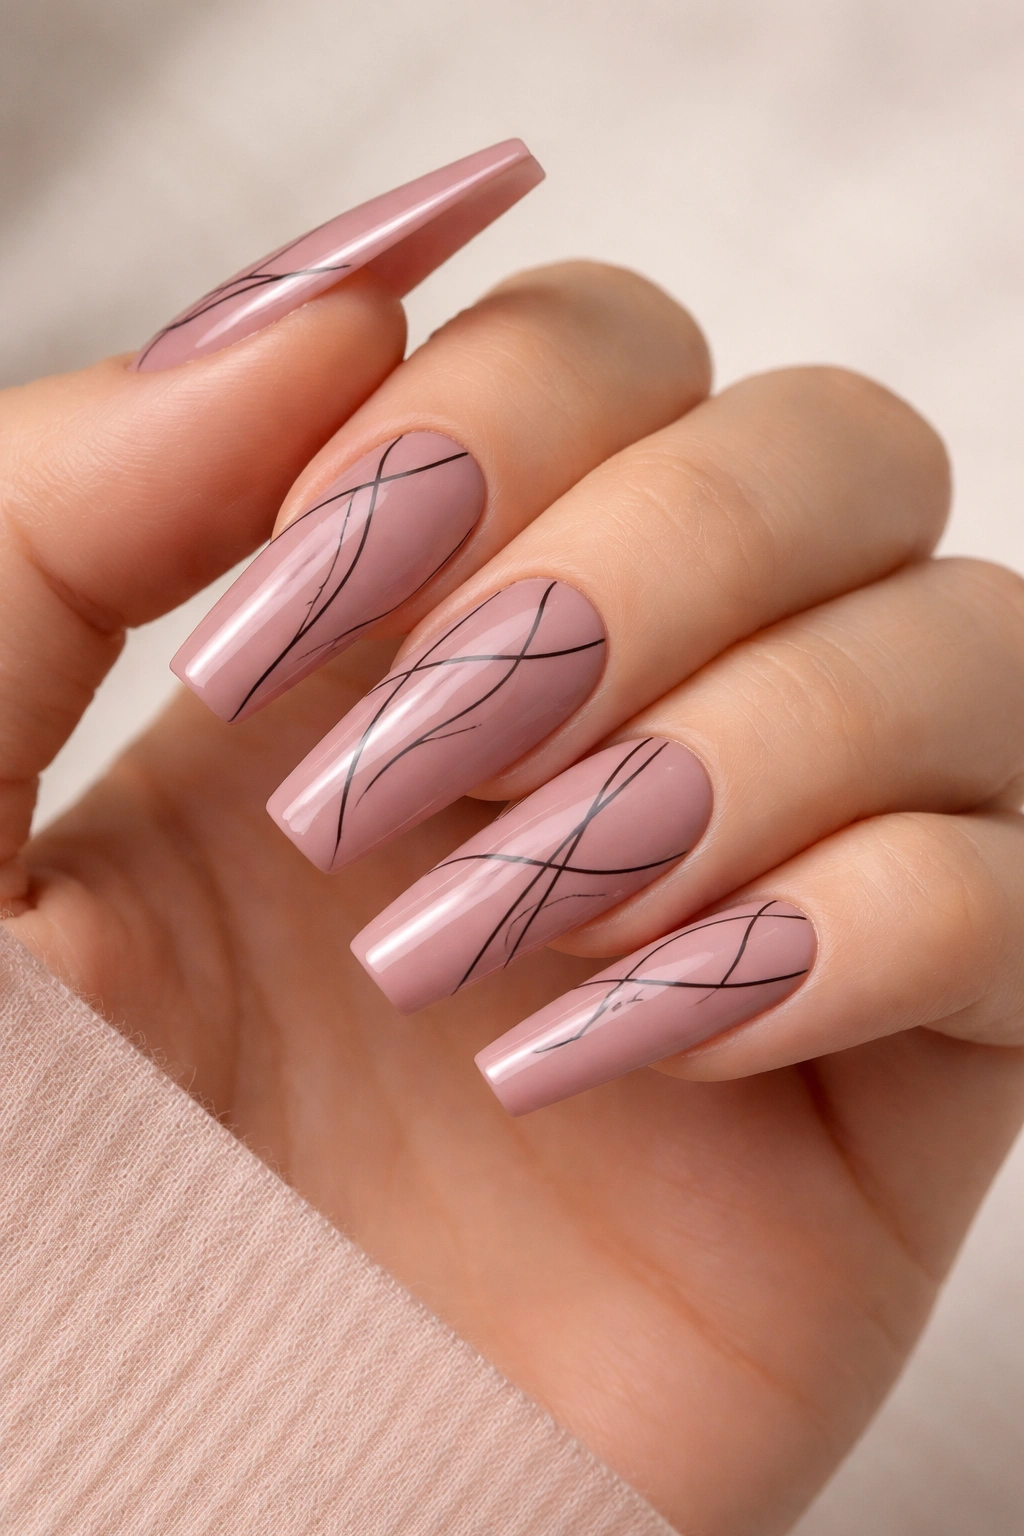
Dusty rose is that beautiful muted, slightly greyish-pink that feels sophisticated and artistic, and when you add minimalist line art in contrasting colors, you create something that feels intentionally curated and modern. Think thin black lines forming abstract designs, geometric shapes, or subtle botanical elements across your pink base. The coffin nail shape gives you plenty of room for these delicate details without the design feeling cramped or overwhelming.
Why Minimalist Line Art Complements Pink
Line art is trending in nail design because it bridges the gap between artistic and wearable — it feels creative without being costume-like. Dusty rose provides a neutral backdrop that lets the line work shine, and the combination reads as creative but still professional. The contrast between the muted pink and crisp black lines creates visual interest through subtlety rather than brightness or sparkle.
Executing Minimalist Line Art Designs
- Apply two coats of dusty rose polish as your smooth, even base
- Use an ultra-thin detail brush or a fine-tipped nail art pen in black to create your line design
- Draw freehand if you’re confident, or lightly pencil the design in white first as a guide
- Consider designs like: single vertical or diagonal lines across the nail, abstract geometric shapes, small botanical branches, or minimalist faces
- Allow the line art to dry completely, then seal with a top coat
- If the lines aren’t as crisp as you’d like, a second thin line over the first will deepen the definition
Pro tip: Practice your line art design on paper first to build confidence before attempting it on your actual nails.
7. Bubble Gum Pink with Pearl Finish
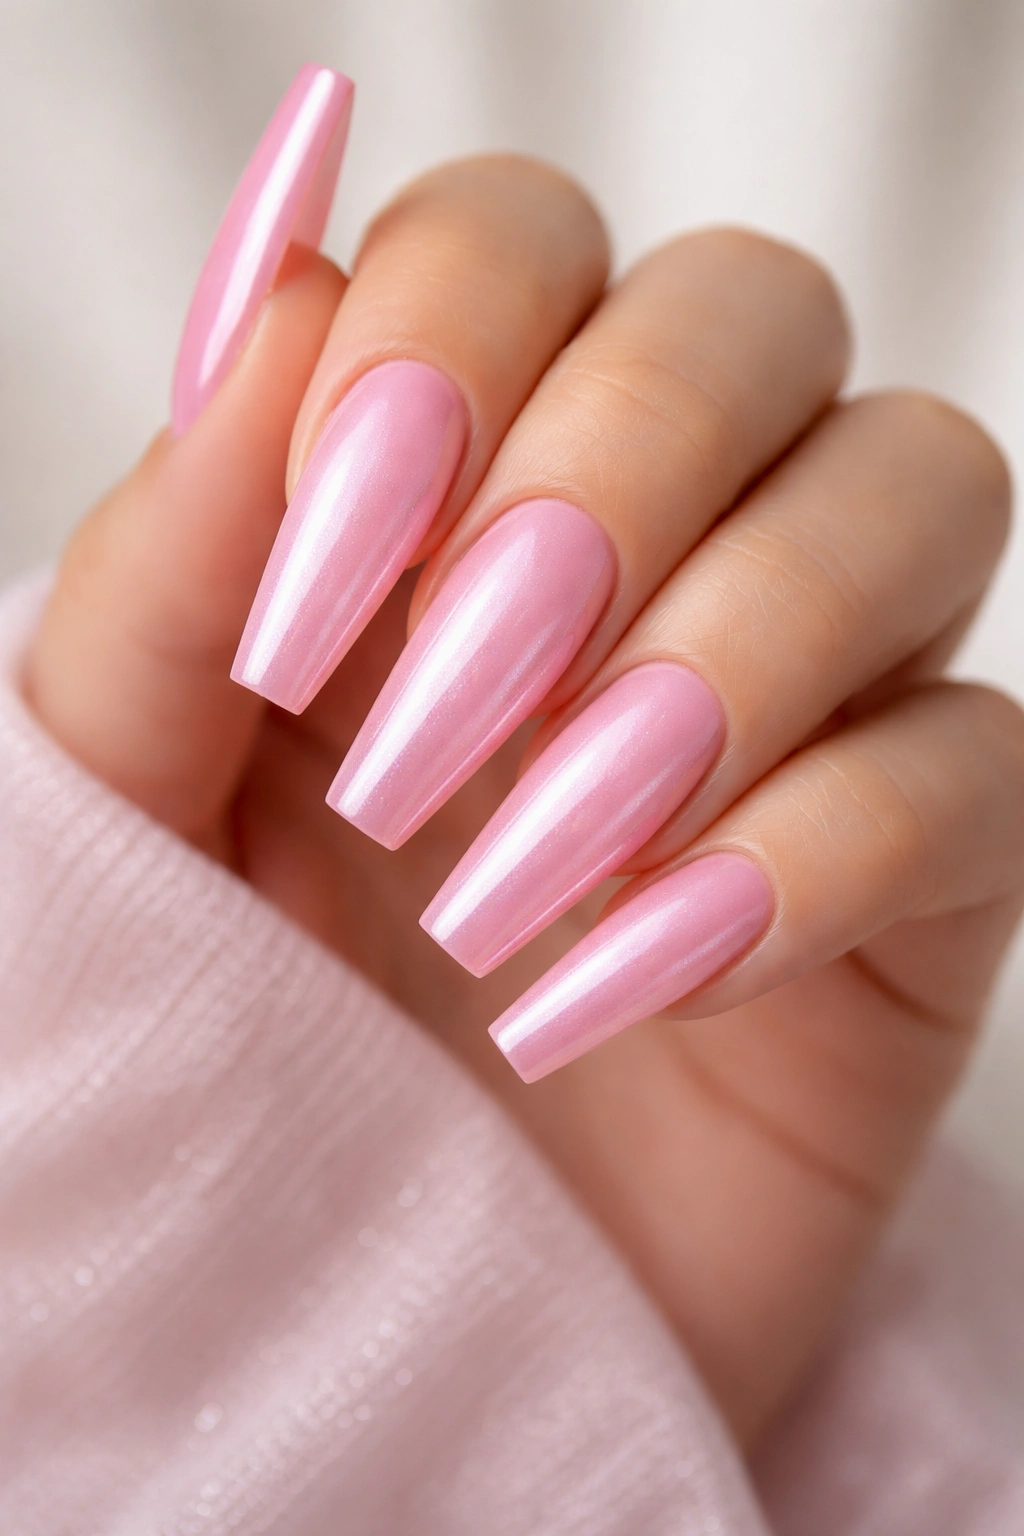
Bubble gum pink is that fun, bright, almost candy-colored shade that instantly boosts your mood, and when you use a pearl or iridescent finish, you add depth and dimension that makes the color shift slightly depending on how the light hits your nails. This look is perfect if you want something that feels playful and youthful without being overly complicated or requiring extensive nail art. The pearl finish does most of the visual heavy lifting for you.
The Magic of Pearl and Iridescent Finishes
Pearl finishes work by including tiny reflective particles in the polish that catch light at different angles, creating subtle color shifts and shimmer. This makes bubble gum pink feel more dynamic and interesting than a simple solid color, and the nail shape is highlighted beautifully by the way light plays across it. Pearl finishes are sophisticated enough for everyday wear but playful enough for special occasions.
Applying Pearl and Iridescent Polishes
- Start with a smooth base coat to ensure your nails are properly prepared
- Apply the pearl polish in thin, even coats — typically two to three coats are needed for full color and pearl effect visibility
- Work in the direction of your nail growth for smoothest application
- Allow each coat to dry completely between applications
- Apply a high-quality top coat to seal and enhance the pearl finish
- The pearl effect will become more visible and pronounced as you add additional coats
8. Blush Pink with Gold Foil Details
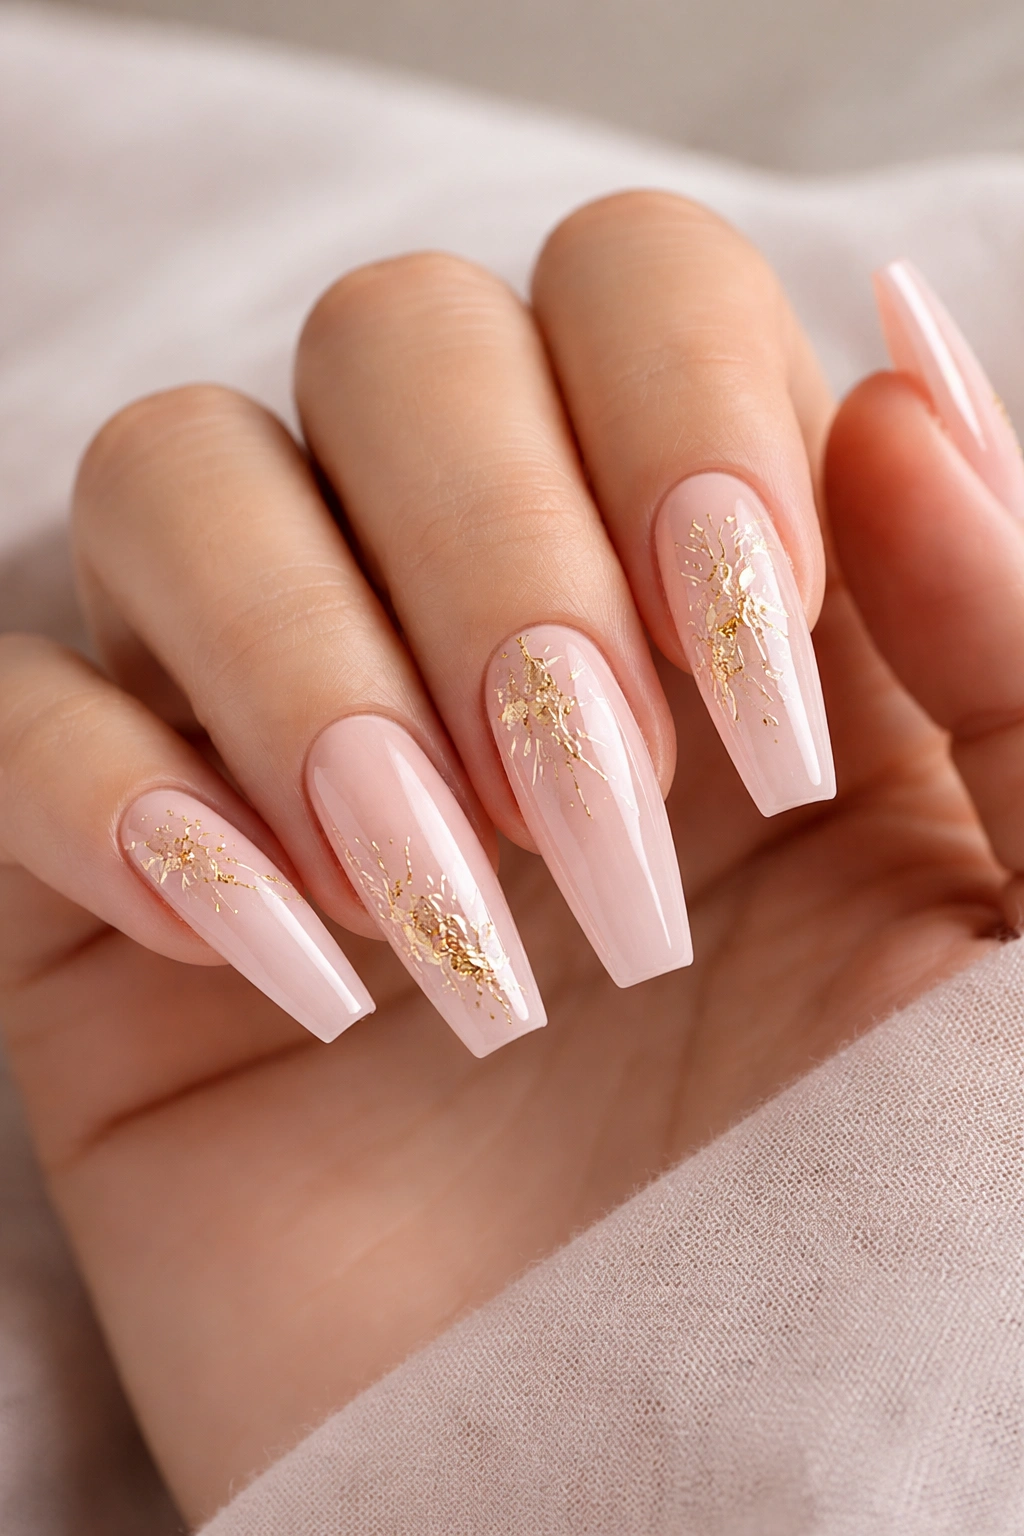
Blush pink is that romantic, soft shade that’s been beloved for years, and when you add delicate gold foil accents, you create a look that’s both timeless and trendy. Gold foil can be applied in strips, geometric shapes, or even as a scattered confetti effect across your nails. This combination is particularly stunning on long coffin nails because the foil catches light beautifully and creates multiple focal points across the larger nail surface.
The Romantic Appeal of Blush and Gold
Blush pink and gold is a classic color pairing that shows up everywhere from wedding trends to interior design for good reason — it simply works. The soft pink feels romantic and feminine while the gold adds warmth and luxury. Together, they create an elevated look that feels special without being overdone.
Applying Gold Foil to Your Pink Base
- Apply two coats of blush pink as your smooth foundation
- Cut gold foil into desired shapes or strips — diagonal lines, triangles, or random placement all work beautifully
- Apply a thin layer of adhesive foil (specialized foil adhesive, not regular glue) across the area where you want to place the foil
- Gently press the gold foil onto the adhesive, using a soft brush to ensure complete contact
- Peel away the backing carefully, revealing the foil design underneath
- Seal everything with a top coat to protect the foil and extend the life of your design
- Alternatively, use gold foil flakes mixed into clear polish for a subtler effect
9. Mauve Pink with Negative Space Design
Negative space nail designs work beautifully on long coffin nails because the shape itself already has such dramatic presence, and when you strategically leave areas unpainted, you create an artistic, modern look that’s both bold and sophisticated. A mauve pink base with geometric negative space sections — perhaps along the center of the nail or in triangular shapes at the tips — creates a contemporary aesthetic that works for trendy occasions and creative professionals alike.
The Modern Appeal of Negative Space
Negative space designs are experiencing a resurgence in nail artistry because they feel intentional, artistic, and completely different from traditional manicures. Leaving areas of your nail unpainted (or painting them with only clear polish) creates visual interest through absence. On coffin nails, negative space becomes even more impactful because the shape’s natural drama is enhanced by the intentional empty space.
Creating Clean Negative Space Designs
- Start with a clean, bare nail or a very light clear base coat
- Apply mauve pink polish carefully around your planned negative space areas
- Use painter’s tape to create clean, straight lines if you’re doing geometric designs
- Remove the tape while the polish is still slightly wet for the cleanest possible edge
- Alternatively, use a thin detail brush to carefully paint around your negative space areas
- You can paint the negative space area with clear coat for subtle dimension, or leave it completely bare
- Seal the entire nail with a top coat, including over the negative space areas
10. Coral Pink with Ombre Confetti
Coral pink sits at the intersection of pink and orange, giving it a warm, tropical energy that feels fresh and modern, and when you add confetti-style elements that ombre from bright to subtle, you create movement and playfulness. This design works particularly well on long coffin nails because you have enough surface area to show the confetti pattern clearly without it looking cluttered. It’s the perfect balance between bold and wearable.
Why Coral Pink Is Having a Moment
Coral pink is flattering to nearly every skin tone, photographs beautifully, and sits in a sweet spot between neutral pink and statement-making. It has enough warmth to feel tropical and summery while still reading as a legitimate neutral shade. The coral undertones make it feel more energetic than dusty pinks while remaining appropriate for professional environments.
Building the Ombre Confetti Effect
- Apply two coats of coral pink as your smooth base
- Create an ombre confetti effect by using two additional shades of pink or a pink-to-clear gradient
- Use a makeup sponge with various shades of pink polish to create the confetti appearance
- Start with bright pink confetti at the tips of your nails
- Gradually transition to lighter, more muted shades as you move toward the base
- The confetti pieces should appear random and organic, not perfectly lined up
- Seal with a glossy top coat to blend all the elements cohesively
11. Candy Pink with 3D Nail Art Elements
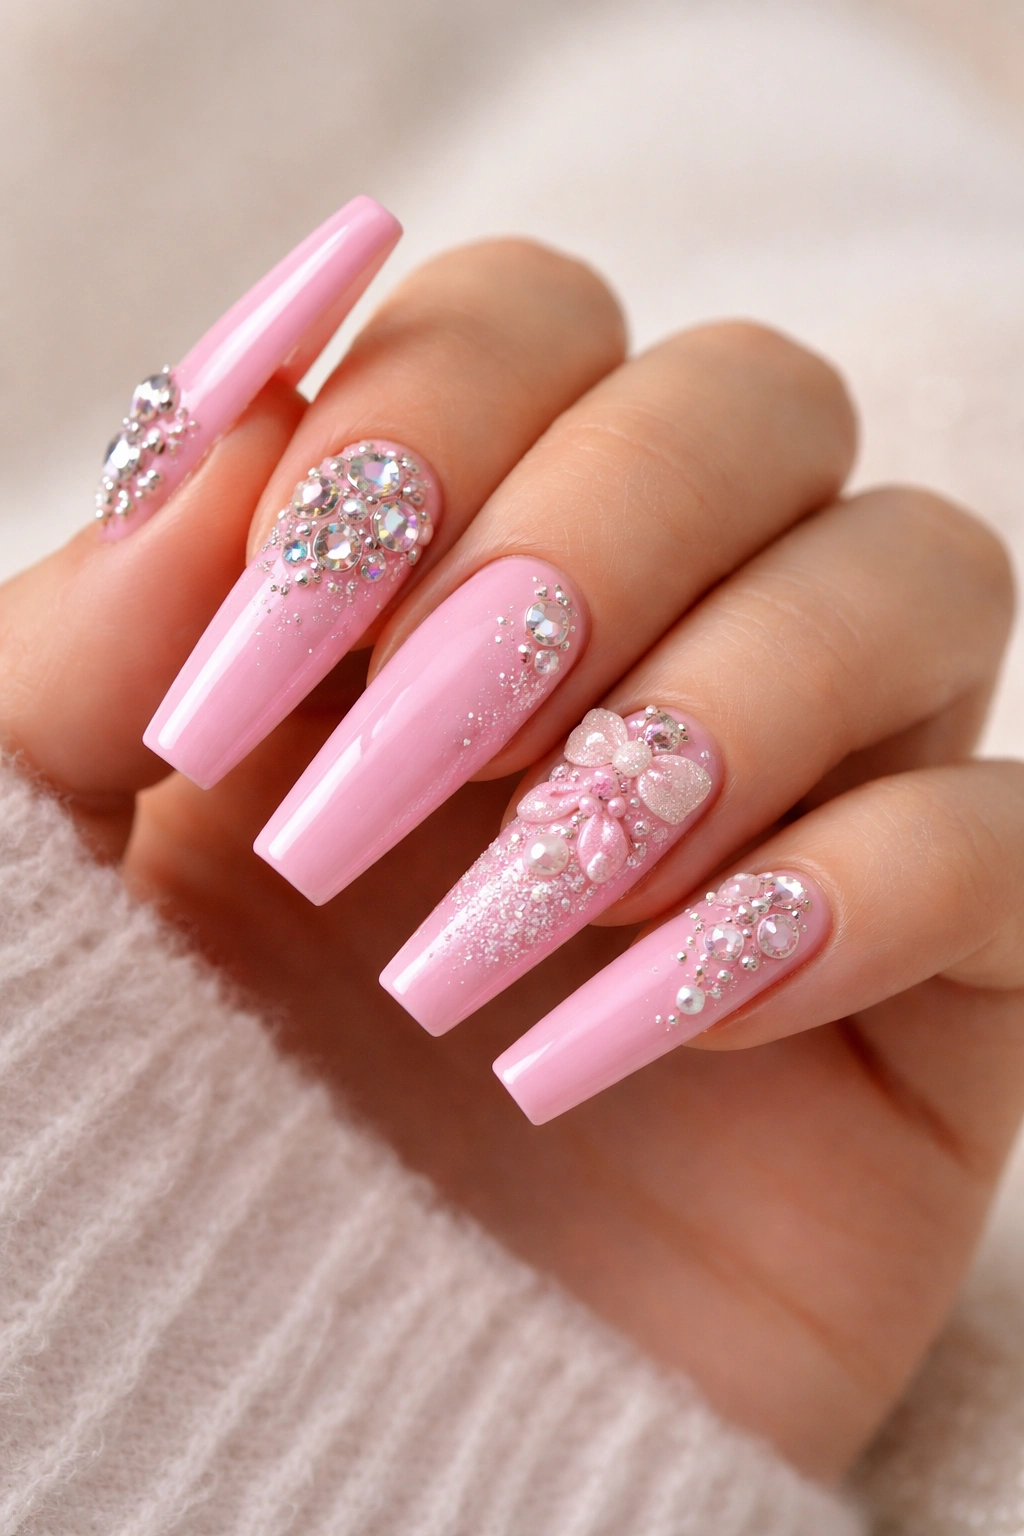
Candy pink is bright, unapologetically fun, and when paired with 3D nail art elements like tiny rhinestone clusters, dimensional charms, or textured embellishments, you create nails that are genuinely conversation starters. 3D elements sit on top of your nail rather than being painted flat, so they create actual texture and dimension that you can feel when you touch your nails. Long coffin nails provide the perfect platform for these decorative additions because they’re prominent enough to showcase the details.
Embracing Bold Candy Pink
Candy pink is for people who aren’t afraid to make a statement with their nails. It’s the shade that commands attention, feels youthful and playful, and absolutely works for special events, date nights, or anytime you want to elevate your confidence. The brightness of candy pink actually showcases 3D embellishments beautifully by providing strong contrast.
Adding 3D Elements Safely
- Start with a strong base of candy pink polish, applied in two coats
- Choose your 3D elements — rhinestone clusters, flat-back gemstones, tiny charms, or texture elements
- Apply a clear adhesive specifically designed for nail art (nail glue works but quick-dry liquid adhesive gives you more positioning time)
- Place each 3D element carefully, pressing it firmly into place for several seconds
- Allow the adhesive to cure completely before touching or washing your hands — typically 24 hours for maximum security
- You don’t need a top coat over 3D elements, but you can use one carefully around them if desired
- Be aware that 3D elements may catch on fabric or hair, so handle them gently
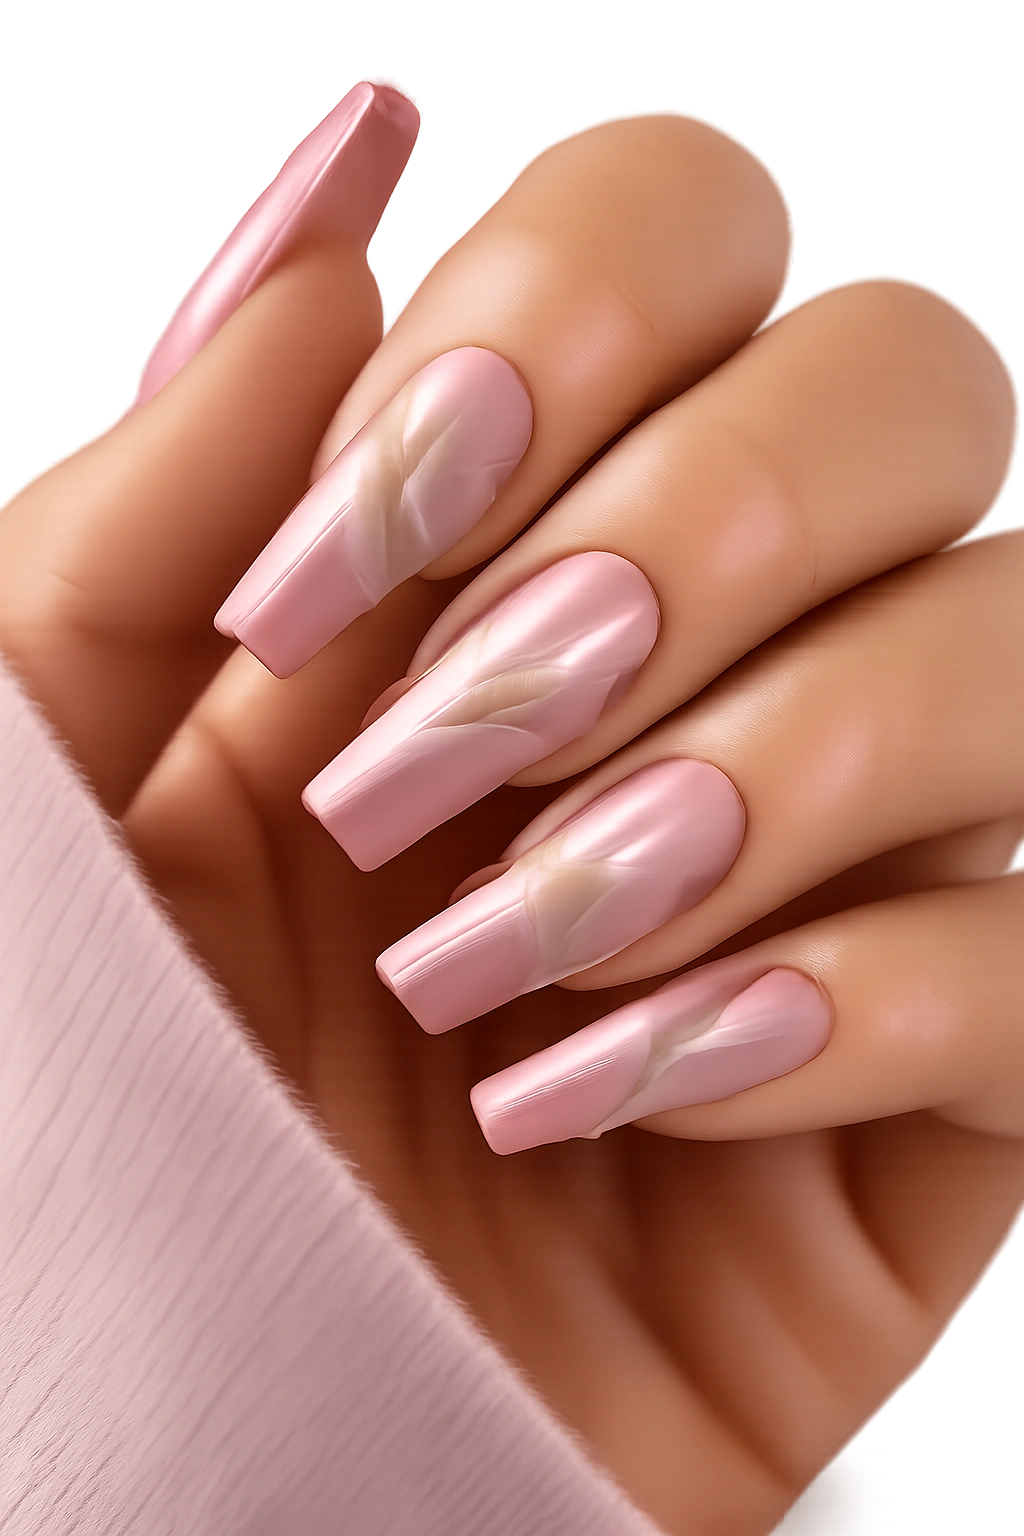
12. Pink with White Marble Pattern
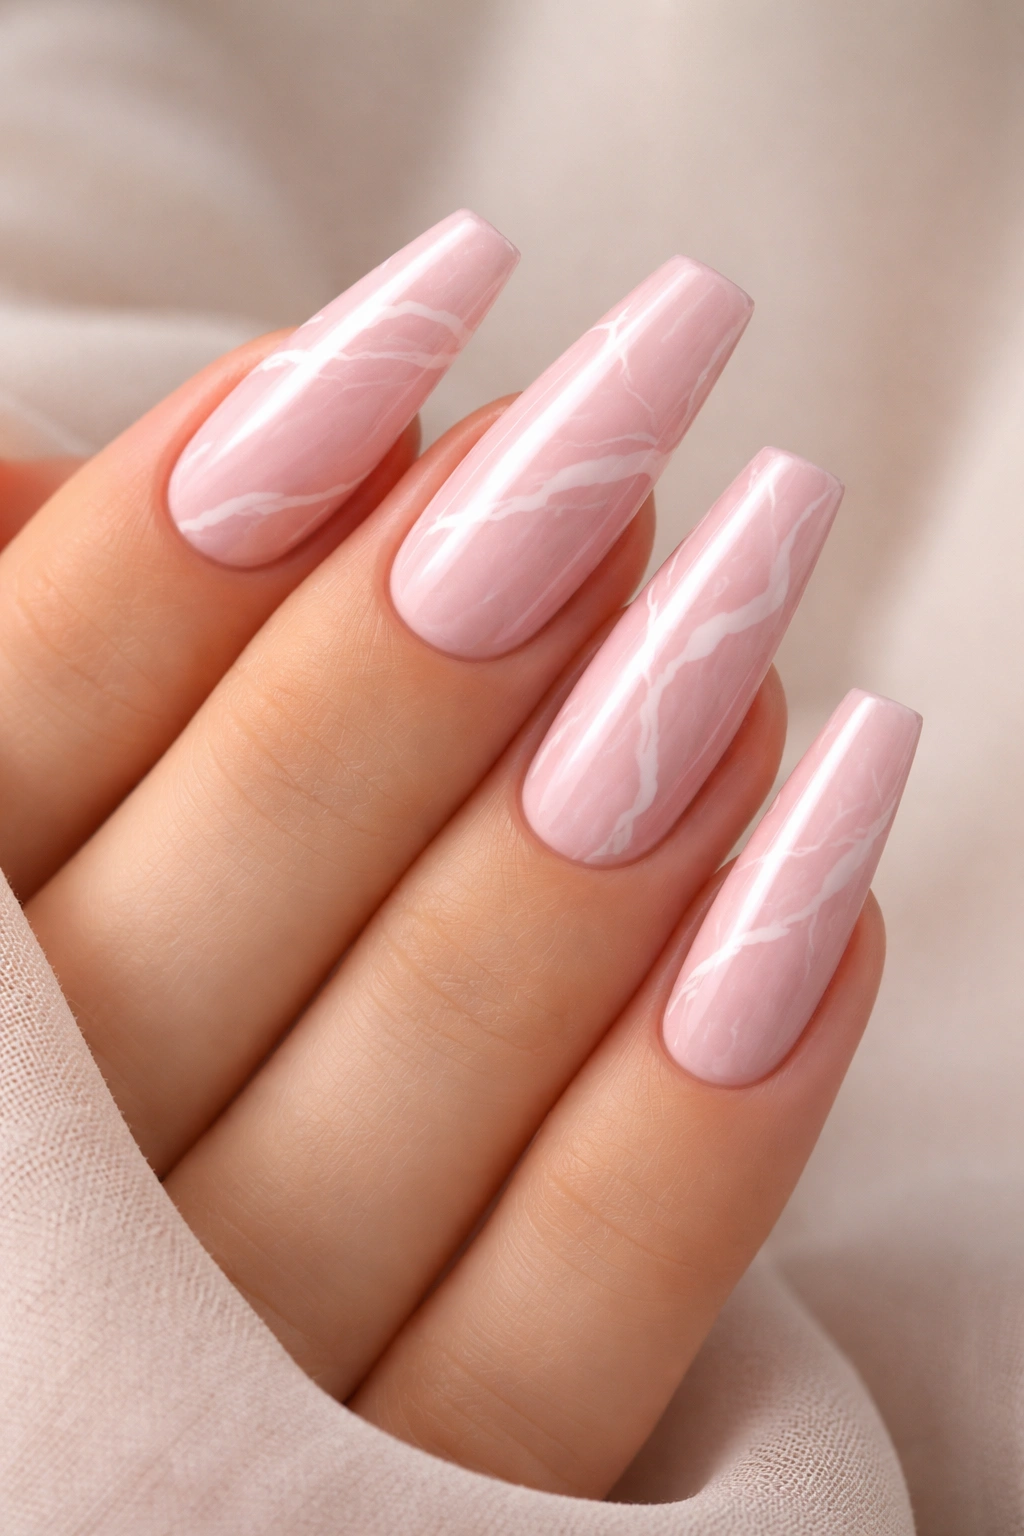
Marble nail designs have become a classic that works with virtually any color, and pink with white marble creates a sophisticated, slightly luxurious look that’s timeless. The irregular veining of marble patterns feels organic and artistic, and on long coffin nails, the pattern has room to display beautifully across the larger nail surface. This design is achievable even for people without advanced nail art skills because marble is forgiving of imperfection — that’s part of what makes it beautiful.
The Timeless Appeal of Marble
Marble patterns reference luxury and natural stone in a way that feels refined and intentional. Pink marble specifically hits a sweet spot between playful and professional, making it appropriate for virtually any setting. The randomness of the marble pattern means there’s no “wrong” way to create it — imperfections actually add to the authentic appearance.
Creating a Pink and White Marble Effect
- Apply a smooth pink base coat in two coats, using any shade from pale to hot pink
- Dip a thin detail brush in white polish mixed with a small amount of water to create a more fluid consistency
- Drag irregular, organic lines across your nail to mimic marble veining
- Use a dry brush or the edge of a makeup sponge to soften and blend the white lines into the pink
- Create connected but irregular lines rather than perfect geometric shapes
- Add thinner white lines branching off the main lines for authentic marble appearance
- Seal with a glossy top coat to enhance the marble effect and protect the design
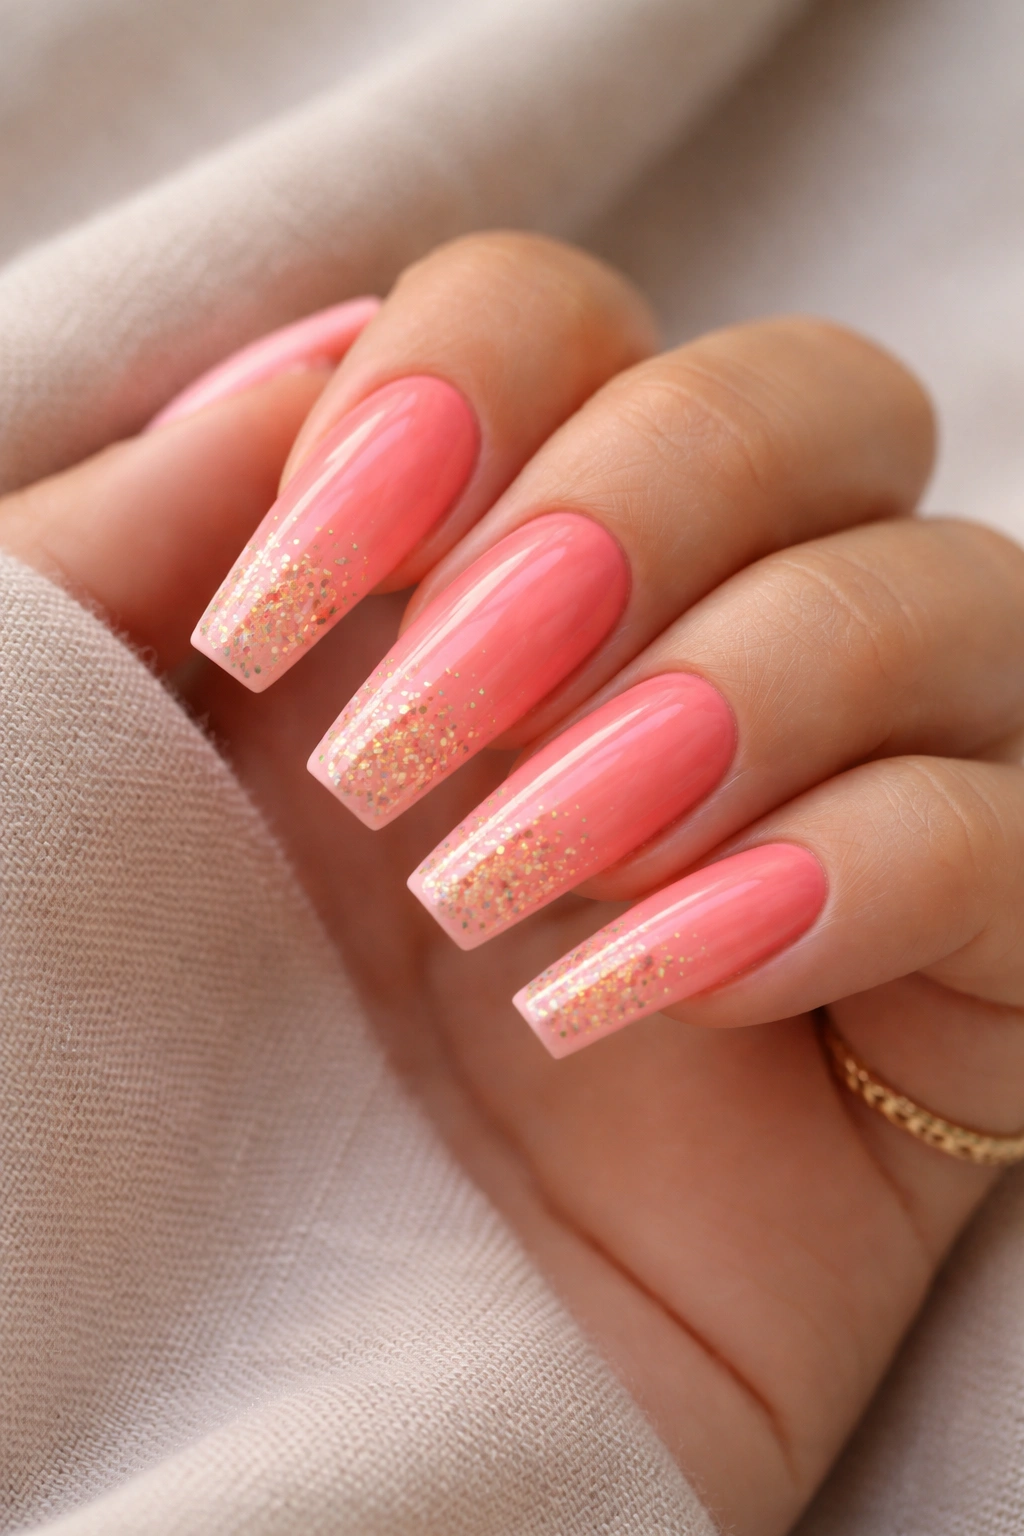
13. Dusty Mauve Pink with Glitter Gradient
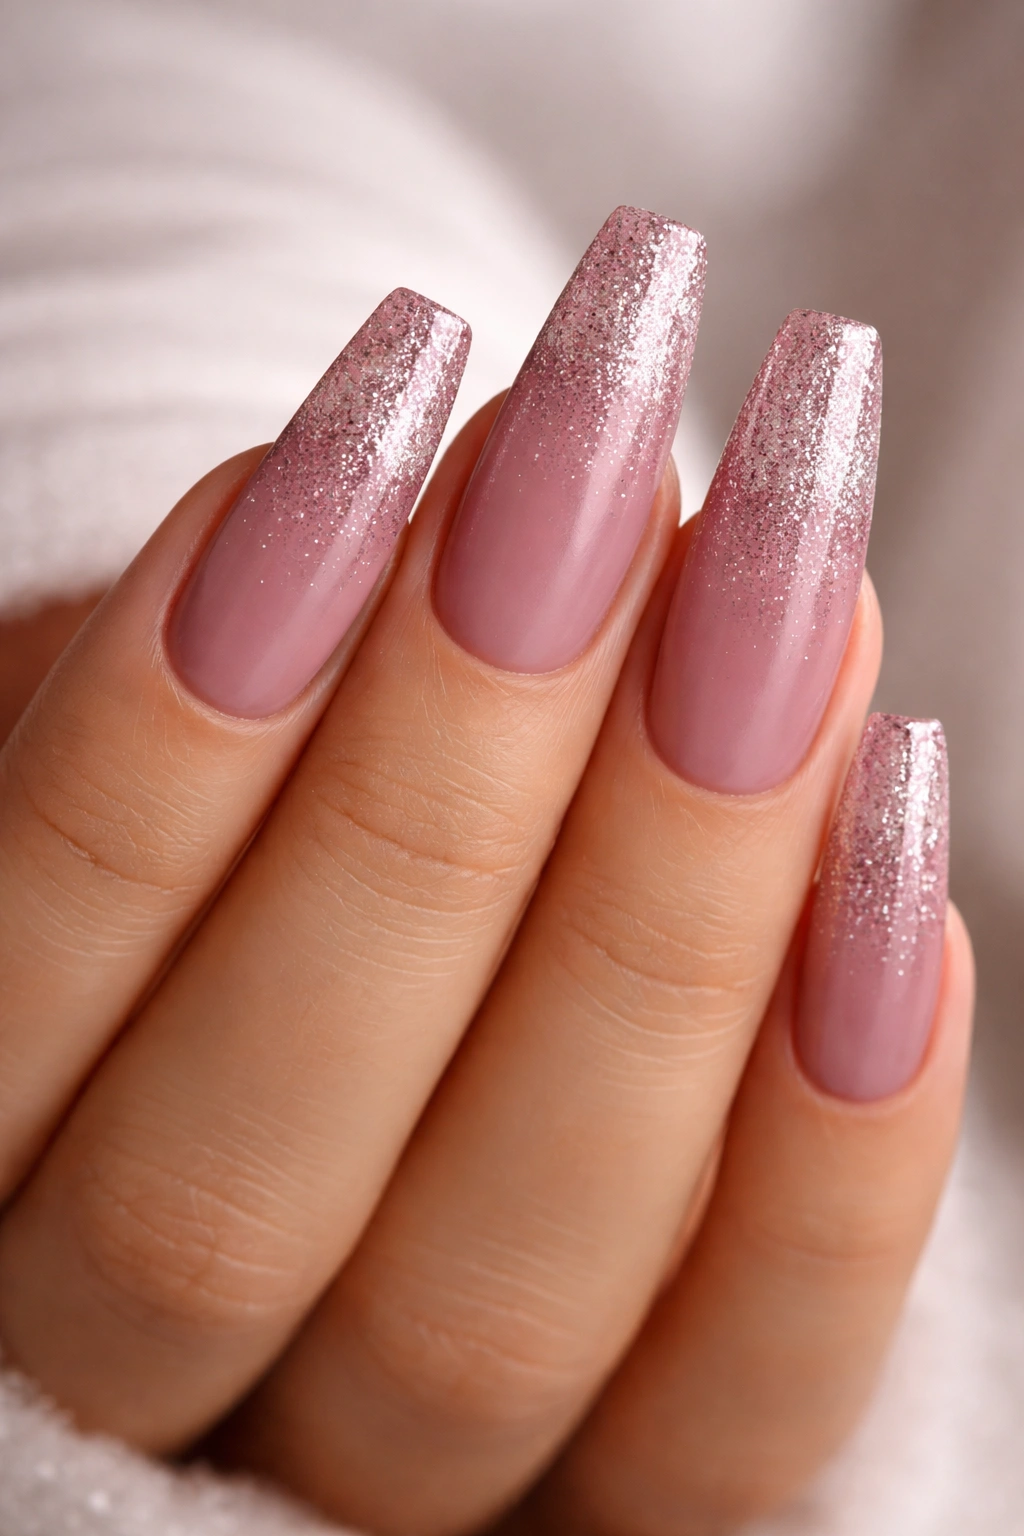
Dusty mauve pink is sophisticated and slightly moody, and when you add a gradient of fine glitter that fades from heavy at the tips to nearly nonexistent at the base, you create nails that are elegant but still feel special and celebratory. The glitter gradient is less intense than a full glitter ombre but more interesting than simply sprinkling glitter on solid polish. This design works beautifully on long coffin nails because the gradient has room to transition gradually.
The Sophisticated Drama of Glitter Gradients
Glitter gradients feel elevated compared to full glitter manicures because the concentration gradually decreases, creating a visual journey from sparkly tips to smooth base. Dusty mauve pink provides the perfect backdrop — it’s colorful enough to be interesting but subdued enough that the glitter becomes the star of the show. This combination works for everything from date nights to professional settings where you want a touch of glamour.
Creating a Glitter Gradient
- Apply two coats of dusty mauve pink, ensuring completely even coverage
- Mix fine glitter into clear polish or use a pre-made glitter polish
- Apply glitter mixture heavily at the tips of your nails using a brush
- With the same glitter mixture on your brush, make one application at the mid-point of each nail
- Lightly brush glitter mixture near the base so there’s minimal glitter there
- Allow the glitter to dry, then seal with a clear top coat
- The top coat helps distribute any loose glitter slightly while sealing in your design
14. Ballet Slipper Pink with Delicate Flower Design

Ballet slipper pink is that ethereal, almost-nude shade that feels romantic and timeless, and when you add a delicate hand-painted flower design in soft complementary shades, you create nails that are utterly elegant and feminine. Tiny flowers scattered across your nails or a bouquet clustered on one accent nail adds artistic detail without being overwhelming. On long coffin nails, this creates a look that’s distinctly feminine but also modern and sophisticated.
The Romantic Artistry of Floral Designs
Floral nail designs have remained popular for years because they’re romantic, nature-inspired, and universally flattering. Ballet slipper pink is the perfect canvas for florals because it’s soft and neutral enough that the flowers become the focal point without competing colors. Hand-painted florals are more unique than floral decals and create a custom, curated feeling.
Painting Delicate Flower Designs
- Start with two coats of ballet slipper pink as your smooth base
- Use a thin detail brush and various pastel shades (soft peach, pale yellow, lavender, light green) to paint small flowers
- Begin with a simple shape — tiny petals arranged in a circle for a basic flower
- Add a small colored center dot to each flower
- Paint delicate green stems and leaves connecting your flowers
- Space flowers artistically across your nails rather than in rigid rows
- Allow each layer of paint to dry before adding details on top
- Seal with a top coat to protect your hand-painted artwork
15. Deep Rose Pink with Metallic Striping and Geometric Patterns
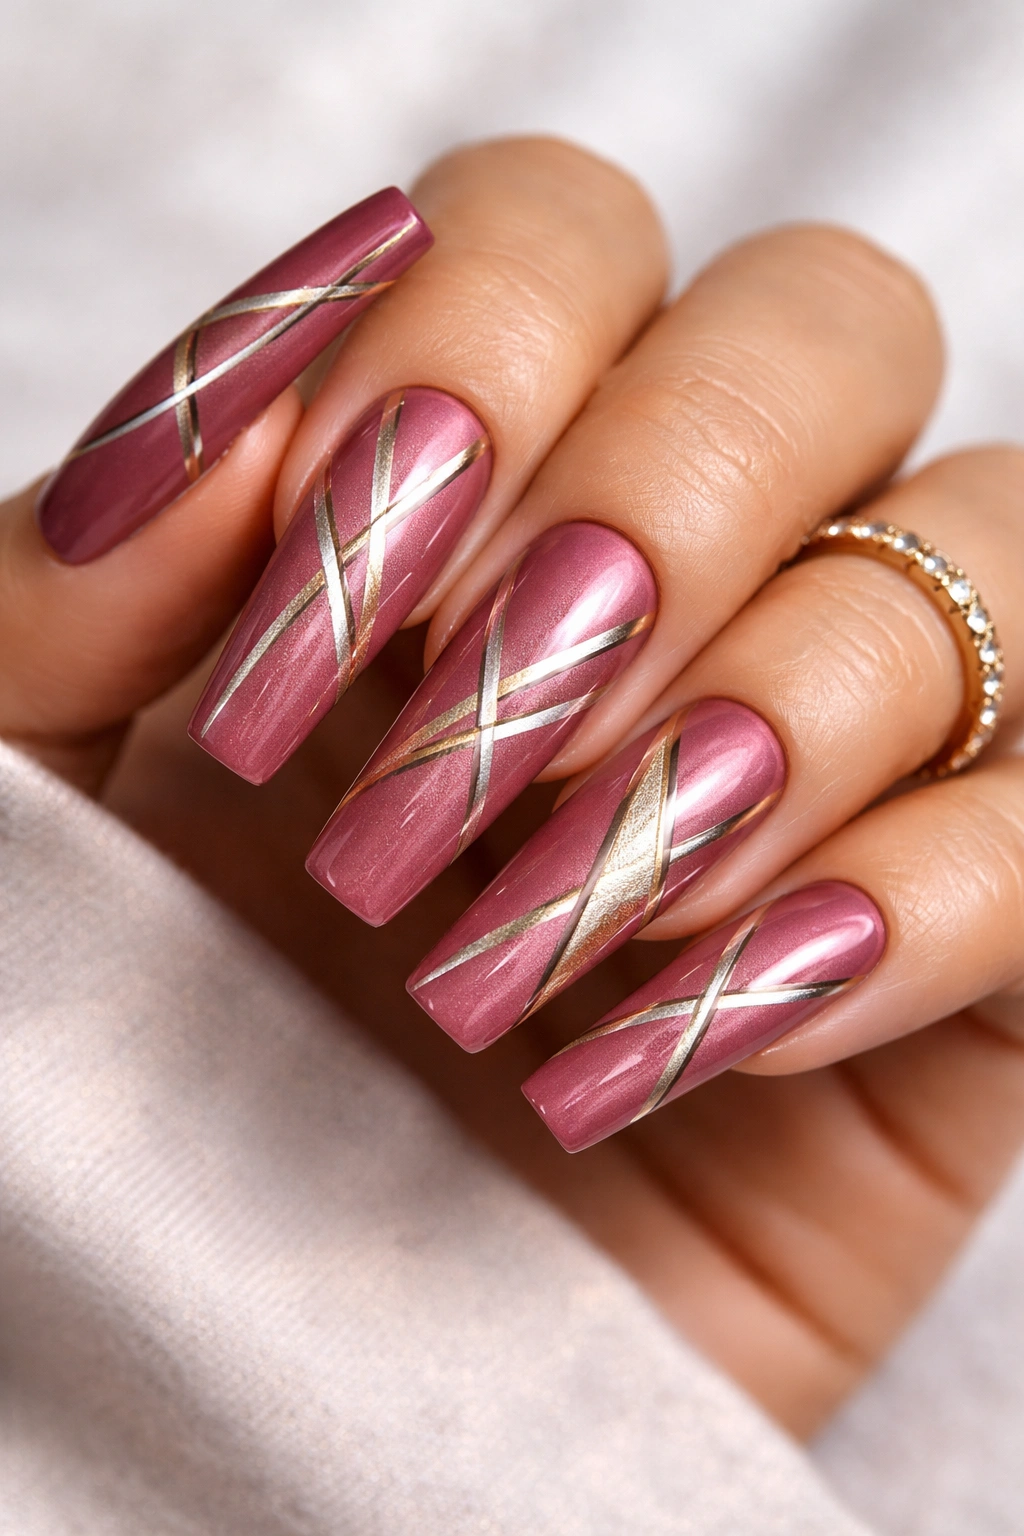
Deep rose pink is richer and more dramatic than lighter pinks, and when you layer metallic stripes and geometric patterns over it, you create a sophisticated, almost art deco-inspired look that feels both modern and timeless. Geometric patterns in gold, silver, or copper metallic colors create visual interest and complexity while the deep pink base keeps everything feeling cohesive and elegant. This is the ultimate statement manicure for someone who loves nails as a form of self-expression.
The Drama and Sophistication of Deep Rose Pink
Deep rose pink is still unmistakably pink, but it has more depth and richness than lighter shades, making it feel more dramatic and evening-appropriate. It photographs beautifully and works for formal events as well as creative professional settings. The addition of geometric metallic elements elevates it further, creating a look that feels intentional and artistic.
Building Geometric Patterns with Metallics
- Apply two coats of deep rose pink as your strong base
- Use metallic striping tape to create geometric patterns — diagonal lines, triangles, or chevrons
- Press the tape firmly into place and paint metallic polish over it
- Remove the tape while the polish is still slightly wet for the cleanest edges
- Alternatively, use a thin brush and metallic polish to hand-paint geometric patterns freehand
- Consider creating a small accent nail with the metallic pattern reversed (metallic base with rose pink geometric elements)
- Seal all your geometric work with a glossy top coat to enhance the metallic shimmer and protect your design
Final Thoughts
Pink coffin nails offer an incredible range of possibilities, from soft, barely-there shades that feel professional and wearable to bold, statement-making hues that announce your confidence from across the room. The key to choosing the right design for you is understanding which pink undertones complement your skin tone, which embellishments and patterns align with your personal style, and which designs fit the occasions where you’ll be wearing them most often. Whether you’re drawn to minimalist elegance, playful glamour, artistic detail, or shimmering sparkle, there’s a pink coffin nail design that perfectly captures your vision and makes you feel like the best version of yourself.
The beauty of coffin nails is that they’re inherently eye-catching thanks to their dramatic tapered shape, which means you can achieve impact even with simple designs and solid colors. However, if you love creative nail art, this nail shape also provides plenty of space for intricate patterns, detailed designs, and dimensional embellishments that smaller nails simply can’t accommodate. Take your time selecting your design, invest in quality products and professional application when possible, and don’t hesitate to customize any of these ideas to better suit your personal preferences and lifestyle. Your nails are an extension of your style and personality — make them unmistakably you.
